
Dot’s Tahoe Quilt
Hello Friends,
I hope you’re having a great week! I have a fun southwest quilt to share with you.
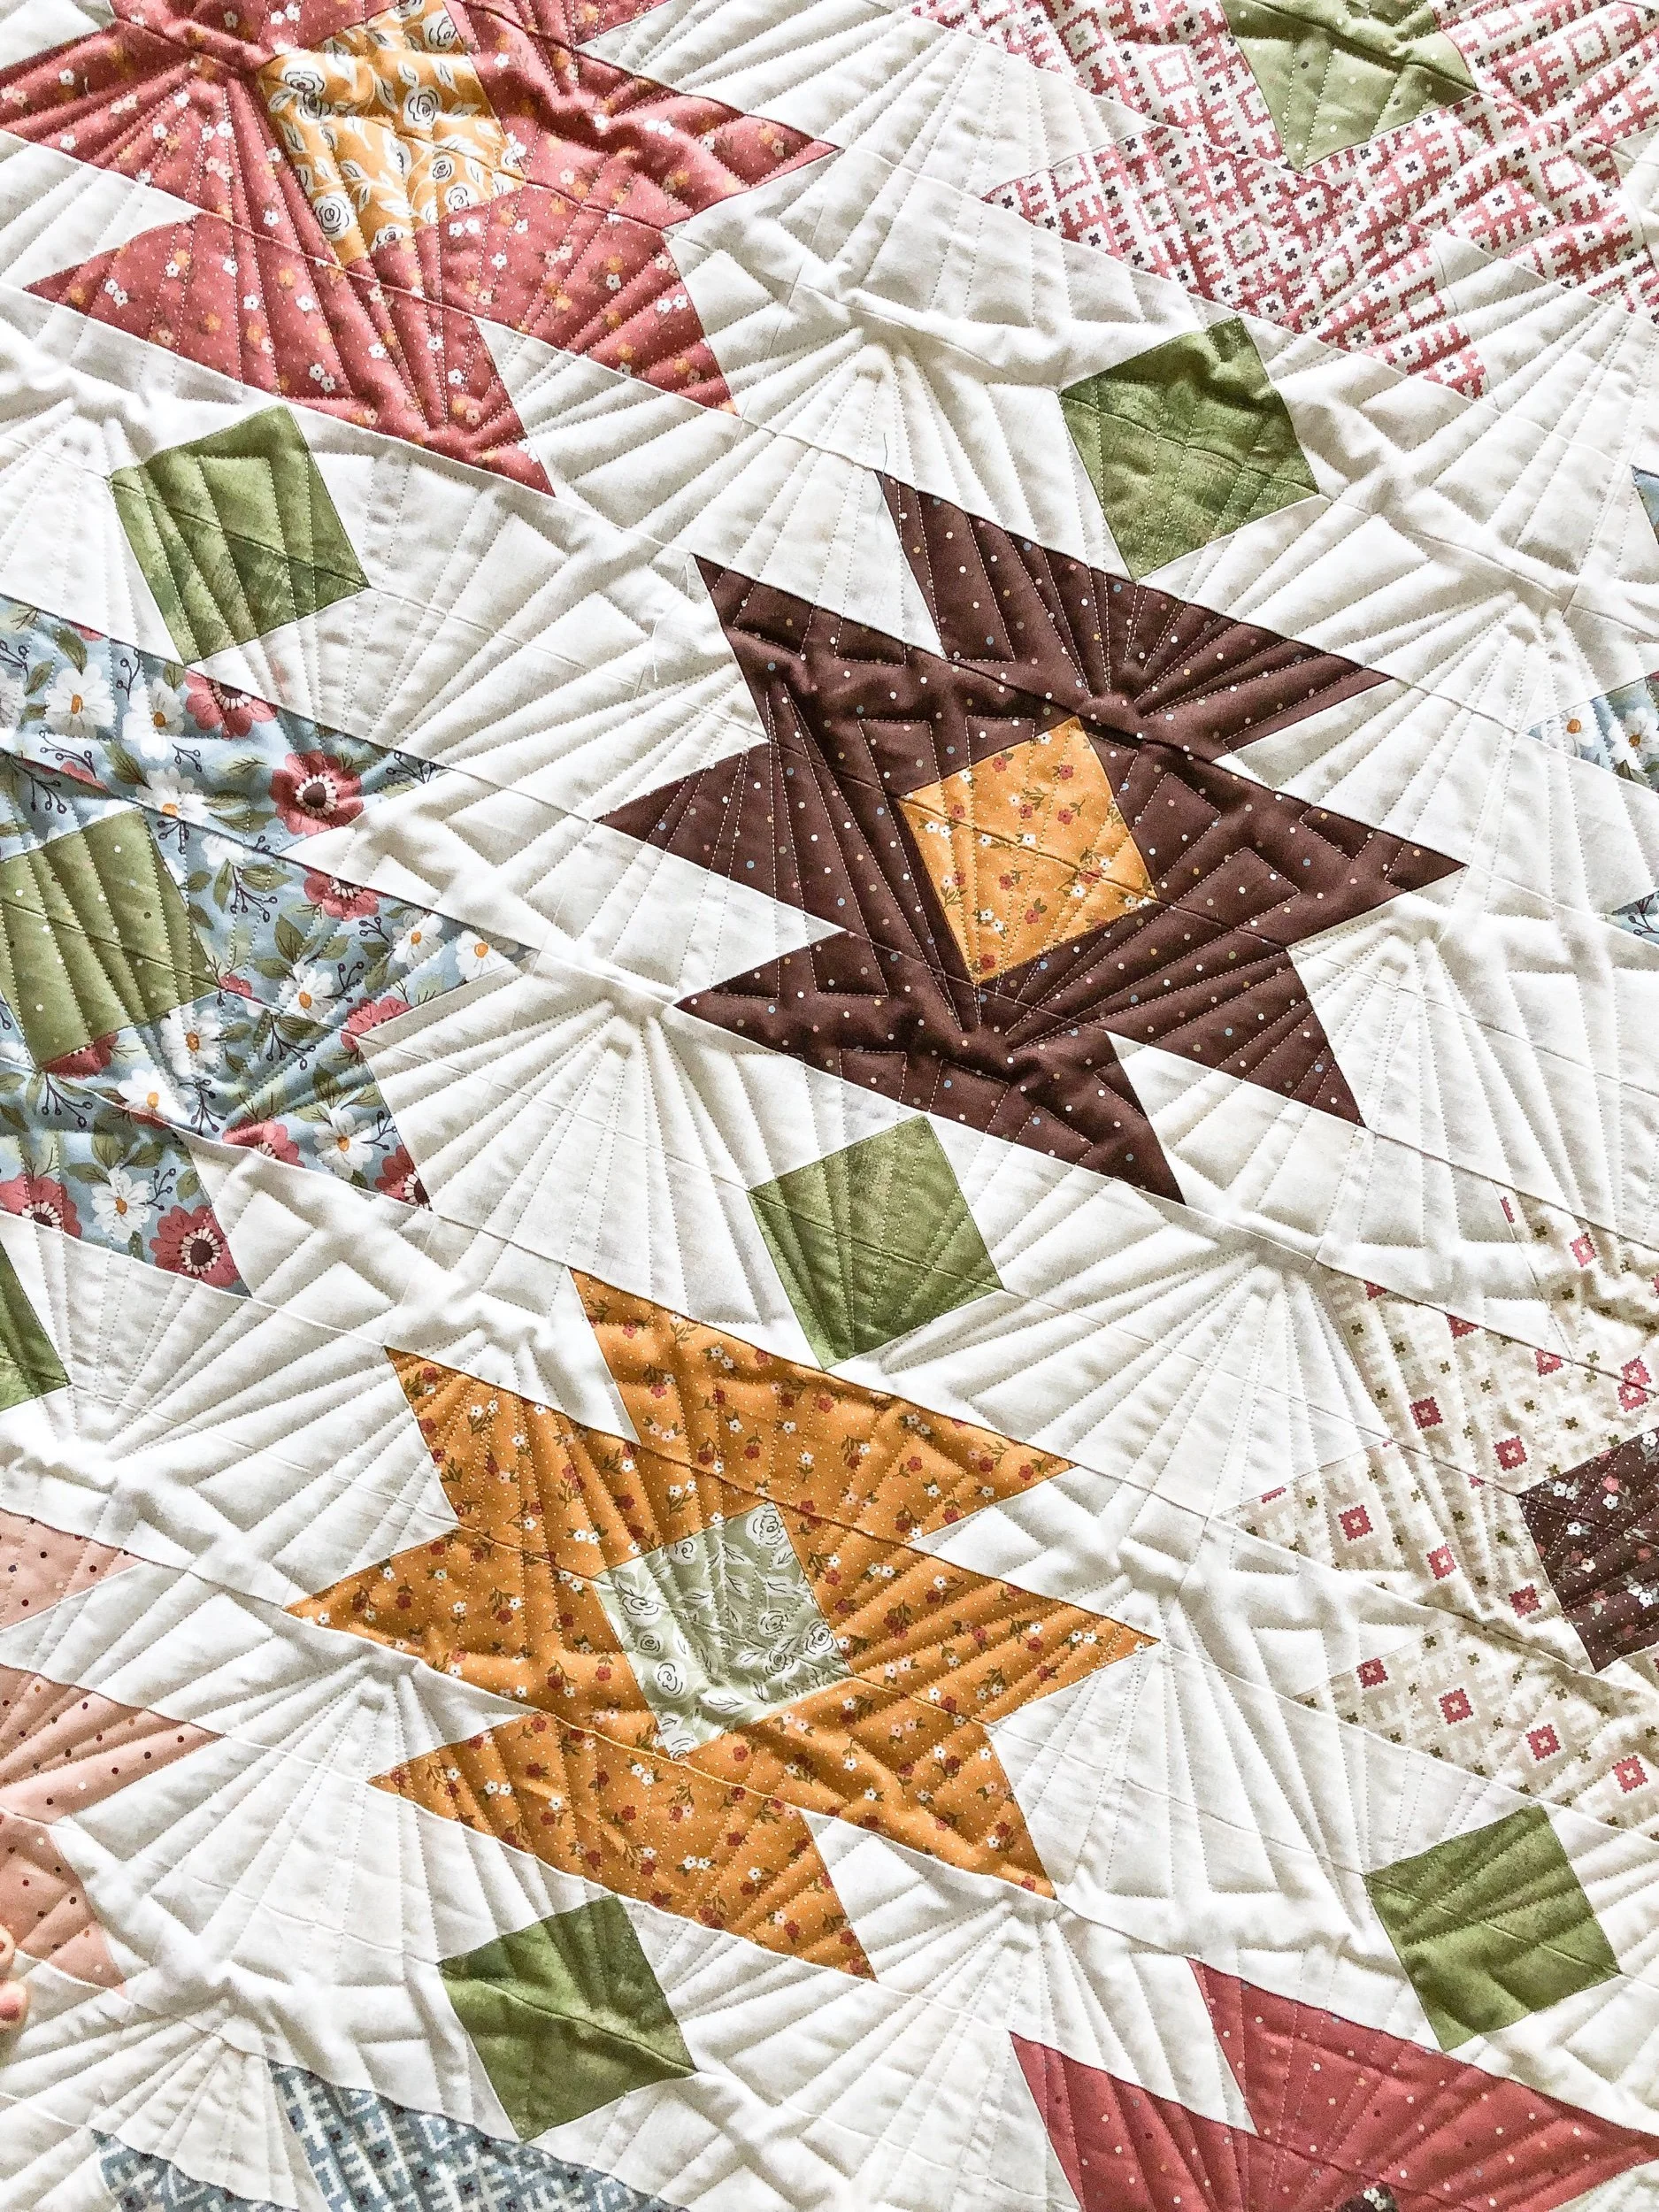
Dot made this beautiful Tahoe quilt and the pattern is by Cluck Cluck Sew.

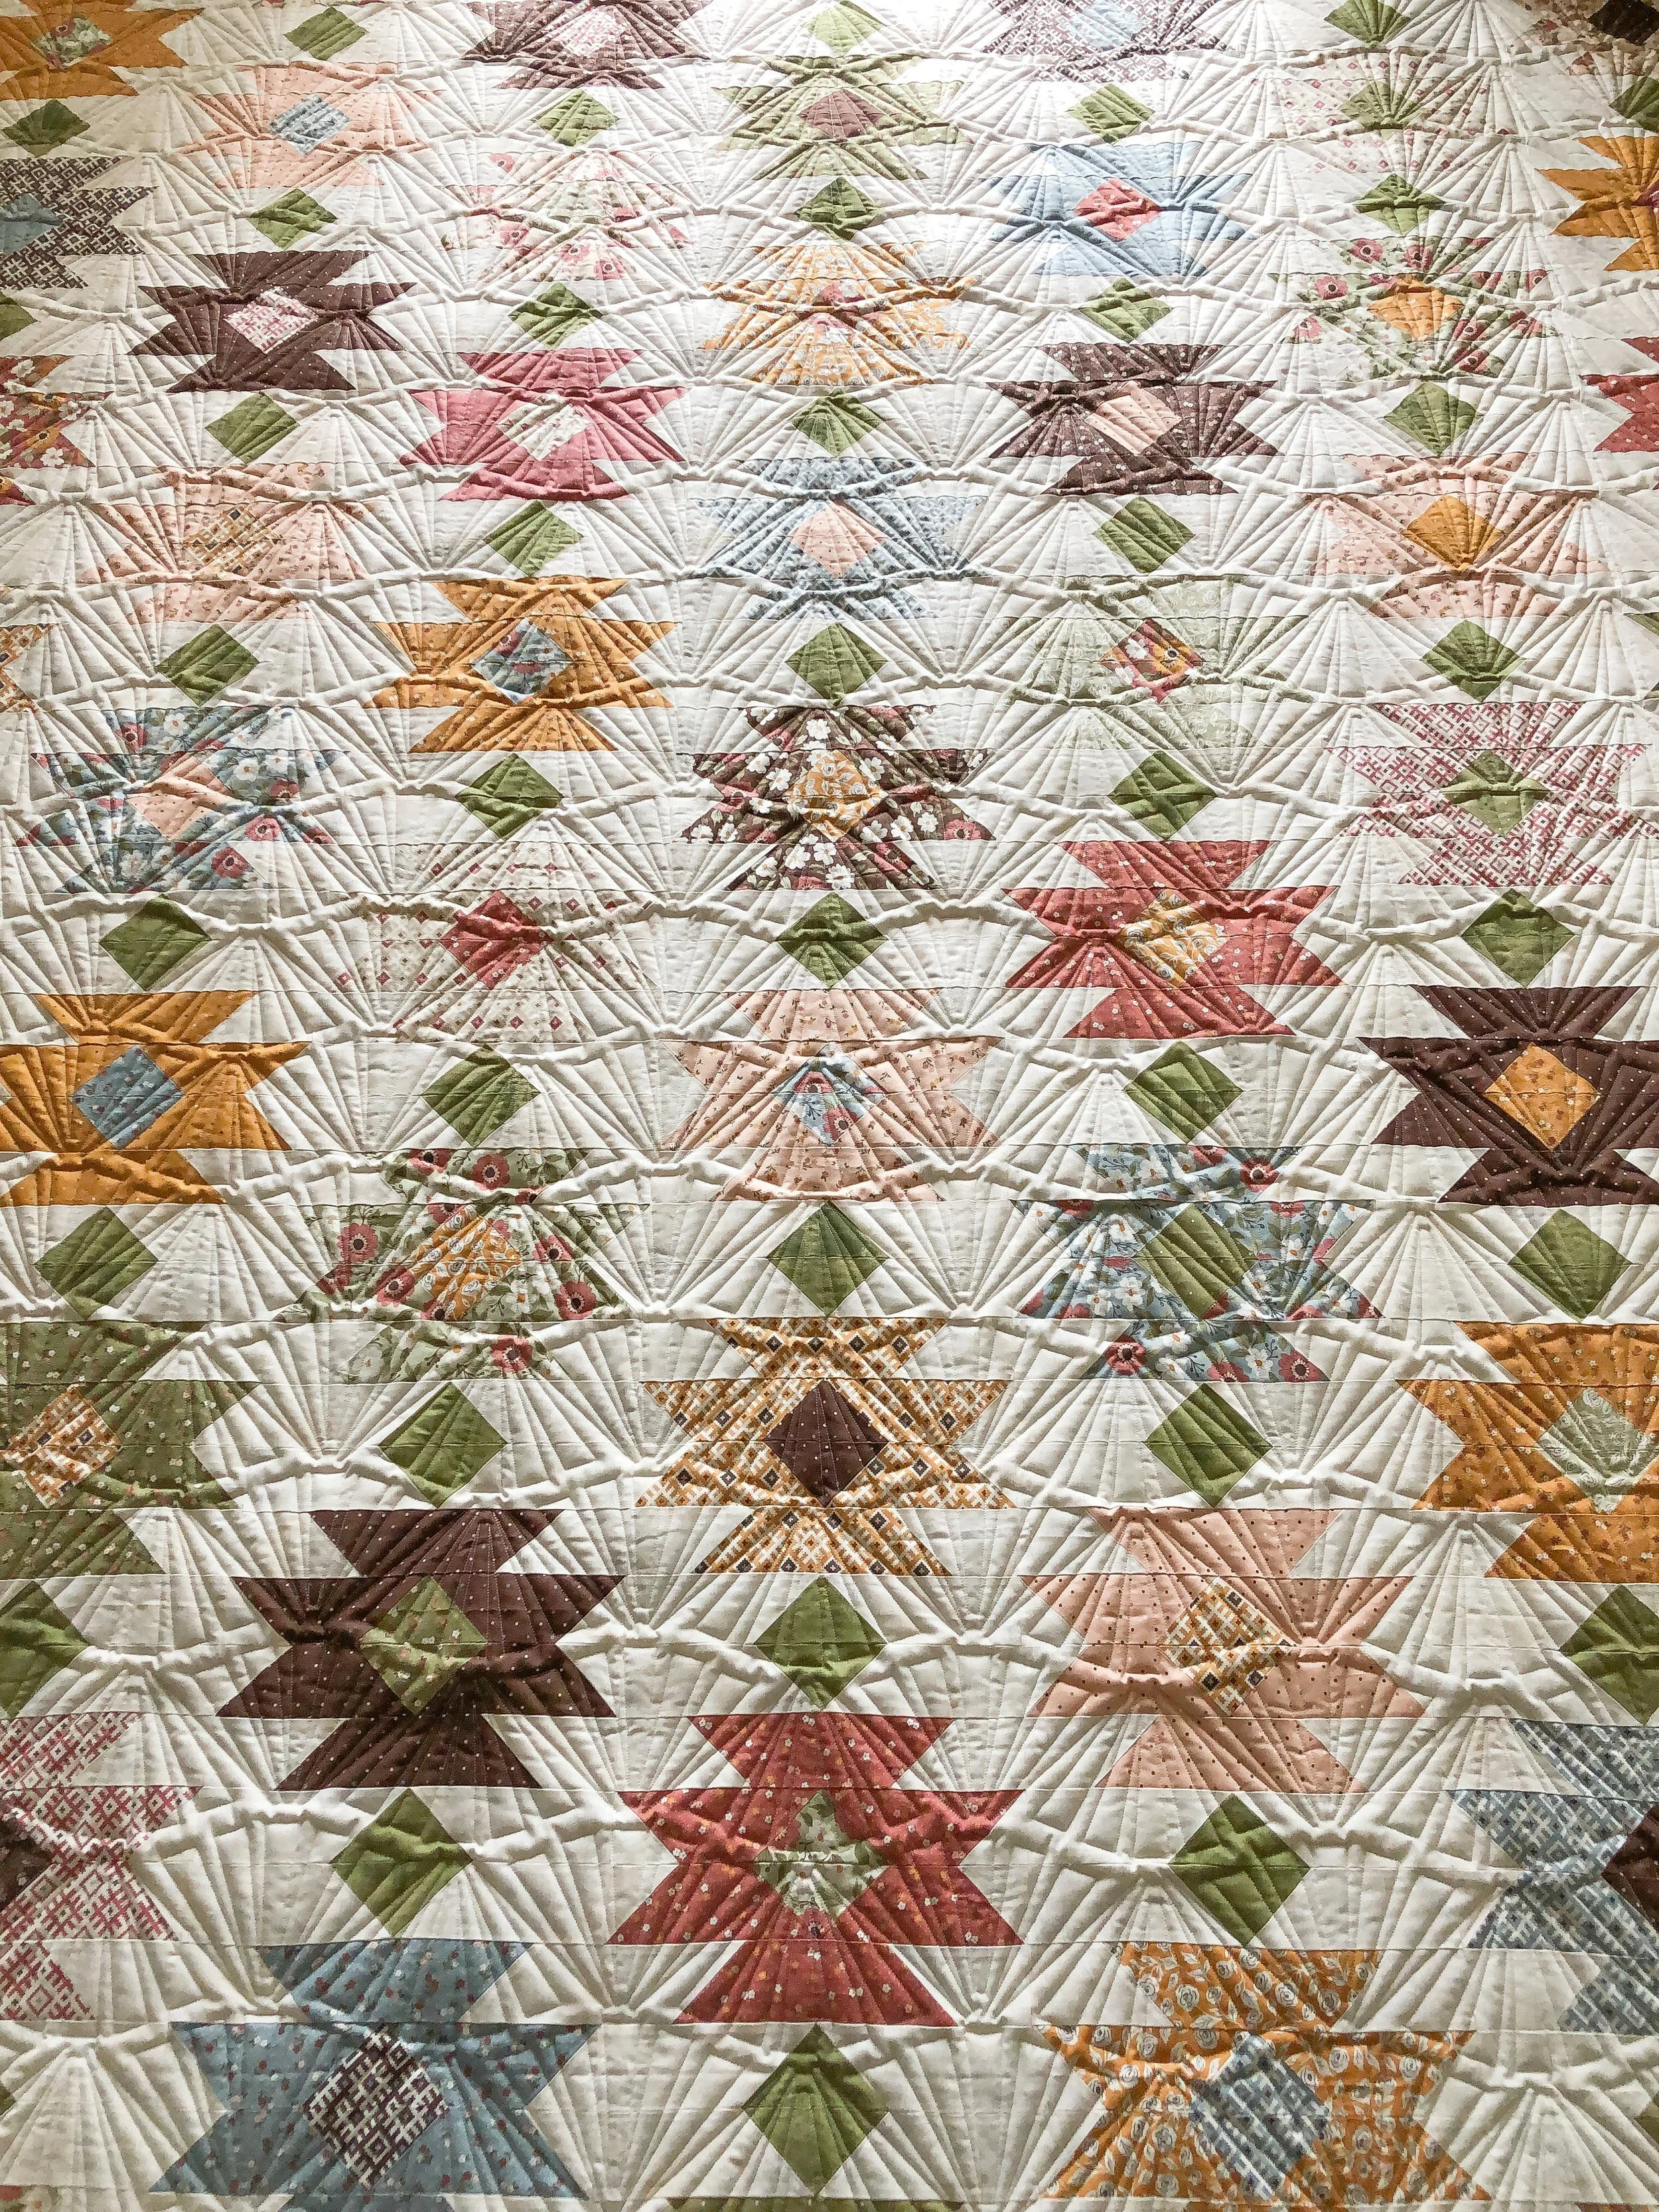
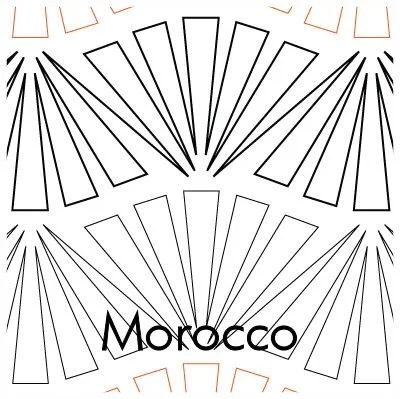
We talked about several designs, and even the possibility of quilting it custom. More on that in a minute. I quilted Patricia Ritter and my Morocco design on it, and I love the texture it created for this quilt!! Morocco is available at Urban Elementz.

Custom quilting vs. edge to edge quilting…I’m sure I could have figured out some fun geometric design to quilt in the quilt block itself, however quilting the background in a block that’s offset like this is difficult. The angles just make it tricky. Some quilts are better quilted edge to edge. Edge to edge quilting can enhance the quilt, and still give it fun texture and personality.
If I remember right, I used Hobbs wool batting on this, and my favorite Natural White Omni thread from Superior Threads.
A couple more close ups of this fun quilting texture!!
Hope you have a great week!! Happy quilting… • Leisha
PS…I would love to quilt for you. Email me at quiltingit@gmail.com or contact me here. Thank you!!
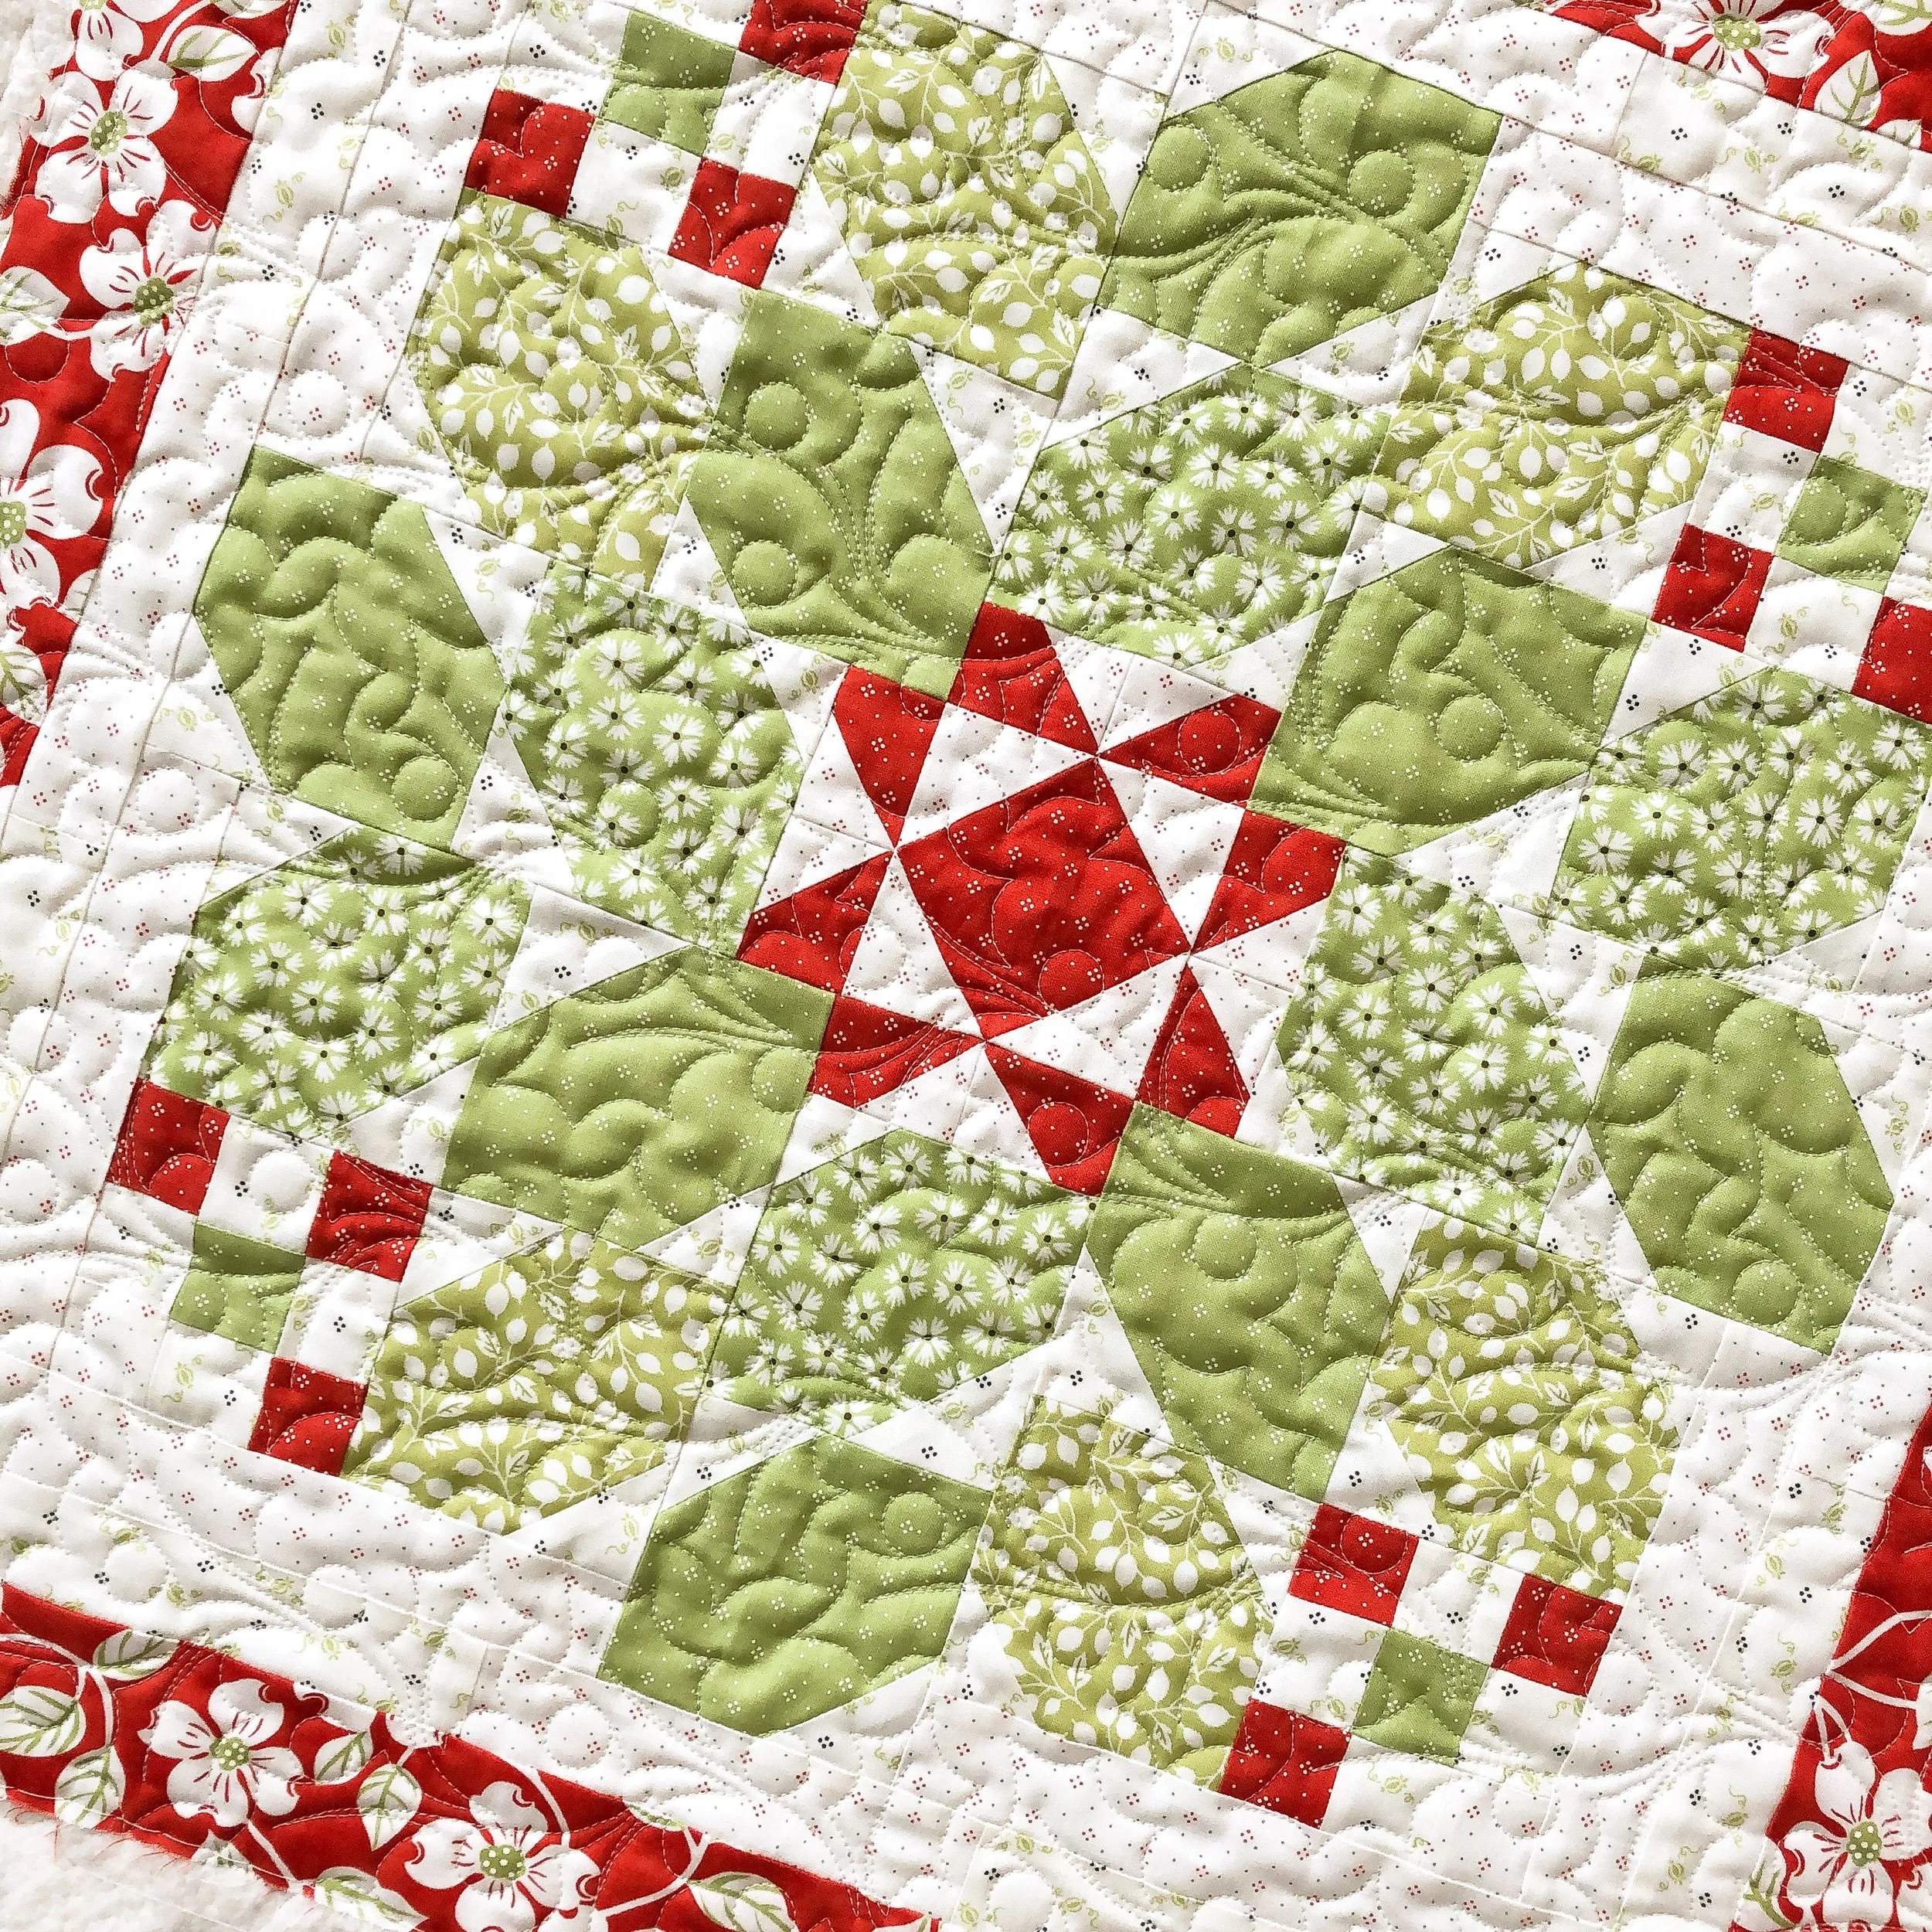
Barbara’s Holly Berries Mini Quilt
Hi Friends,
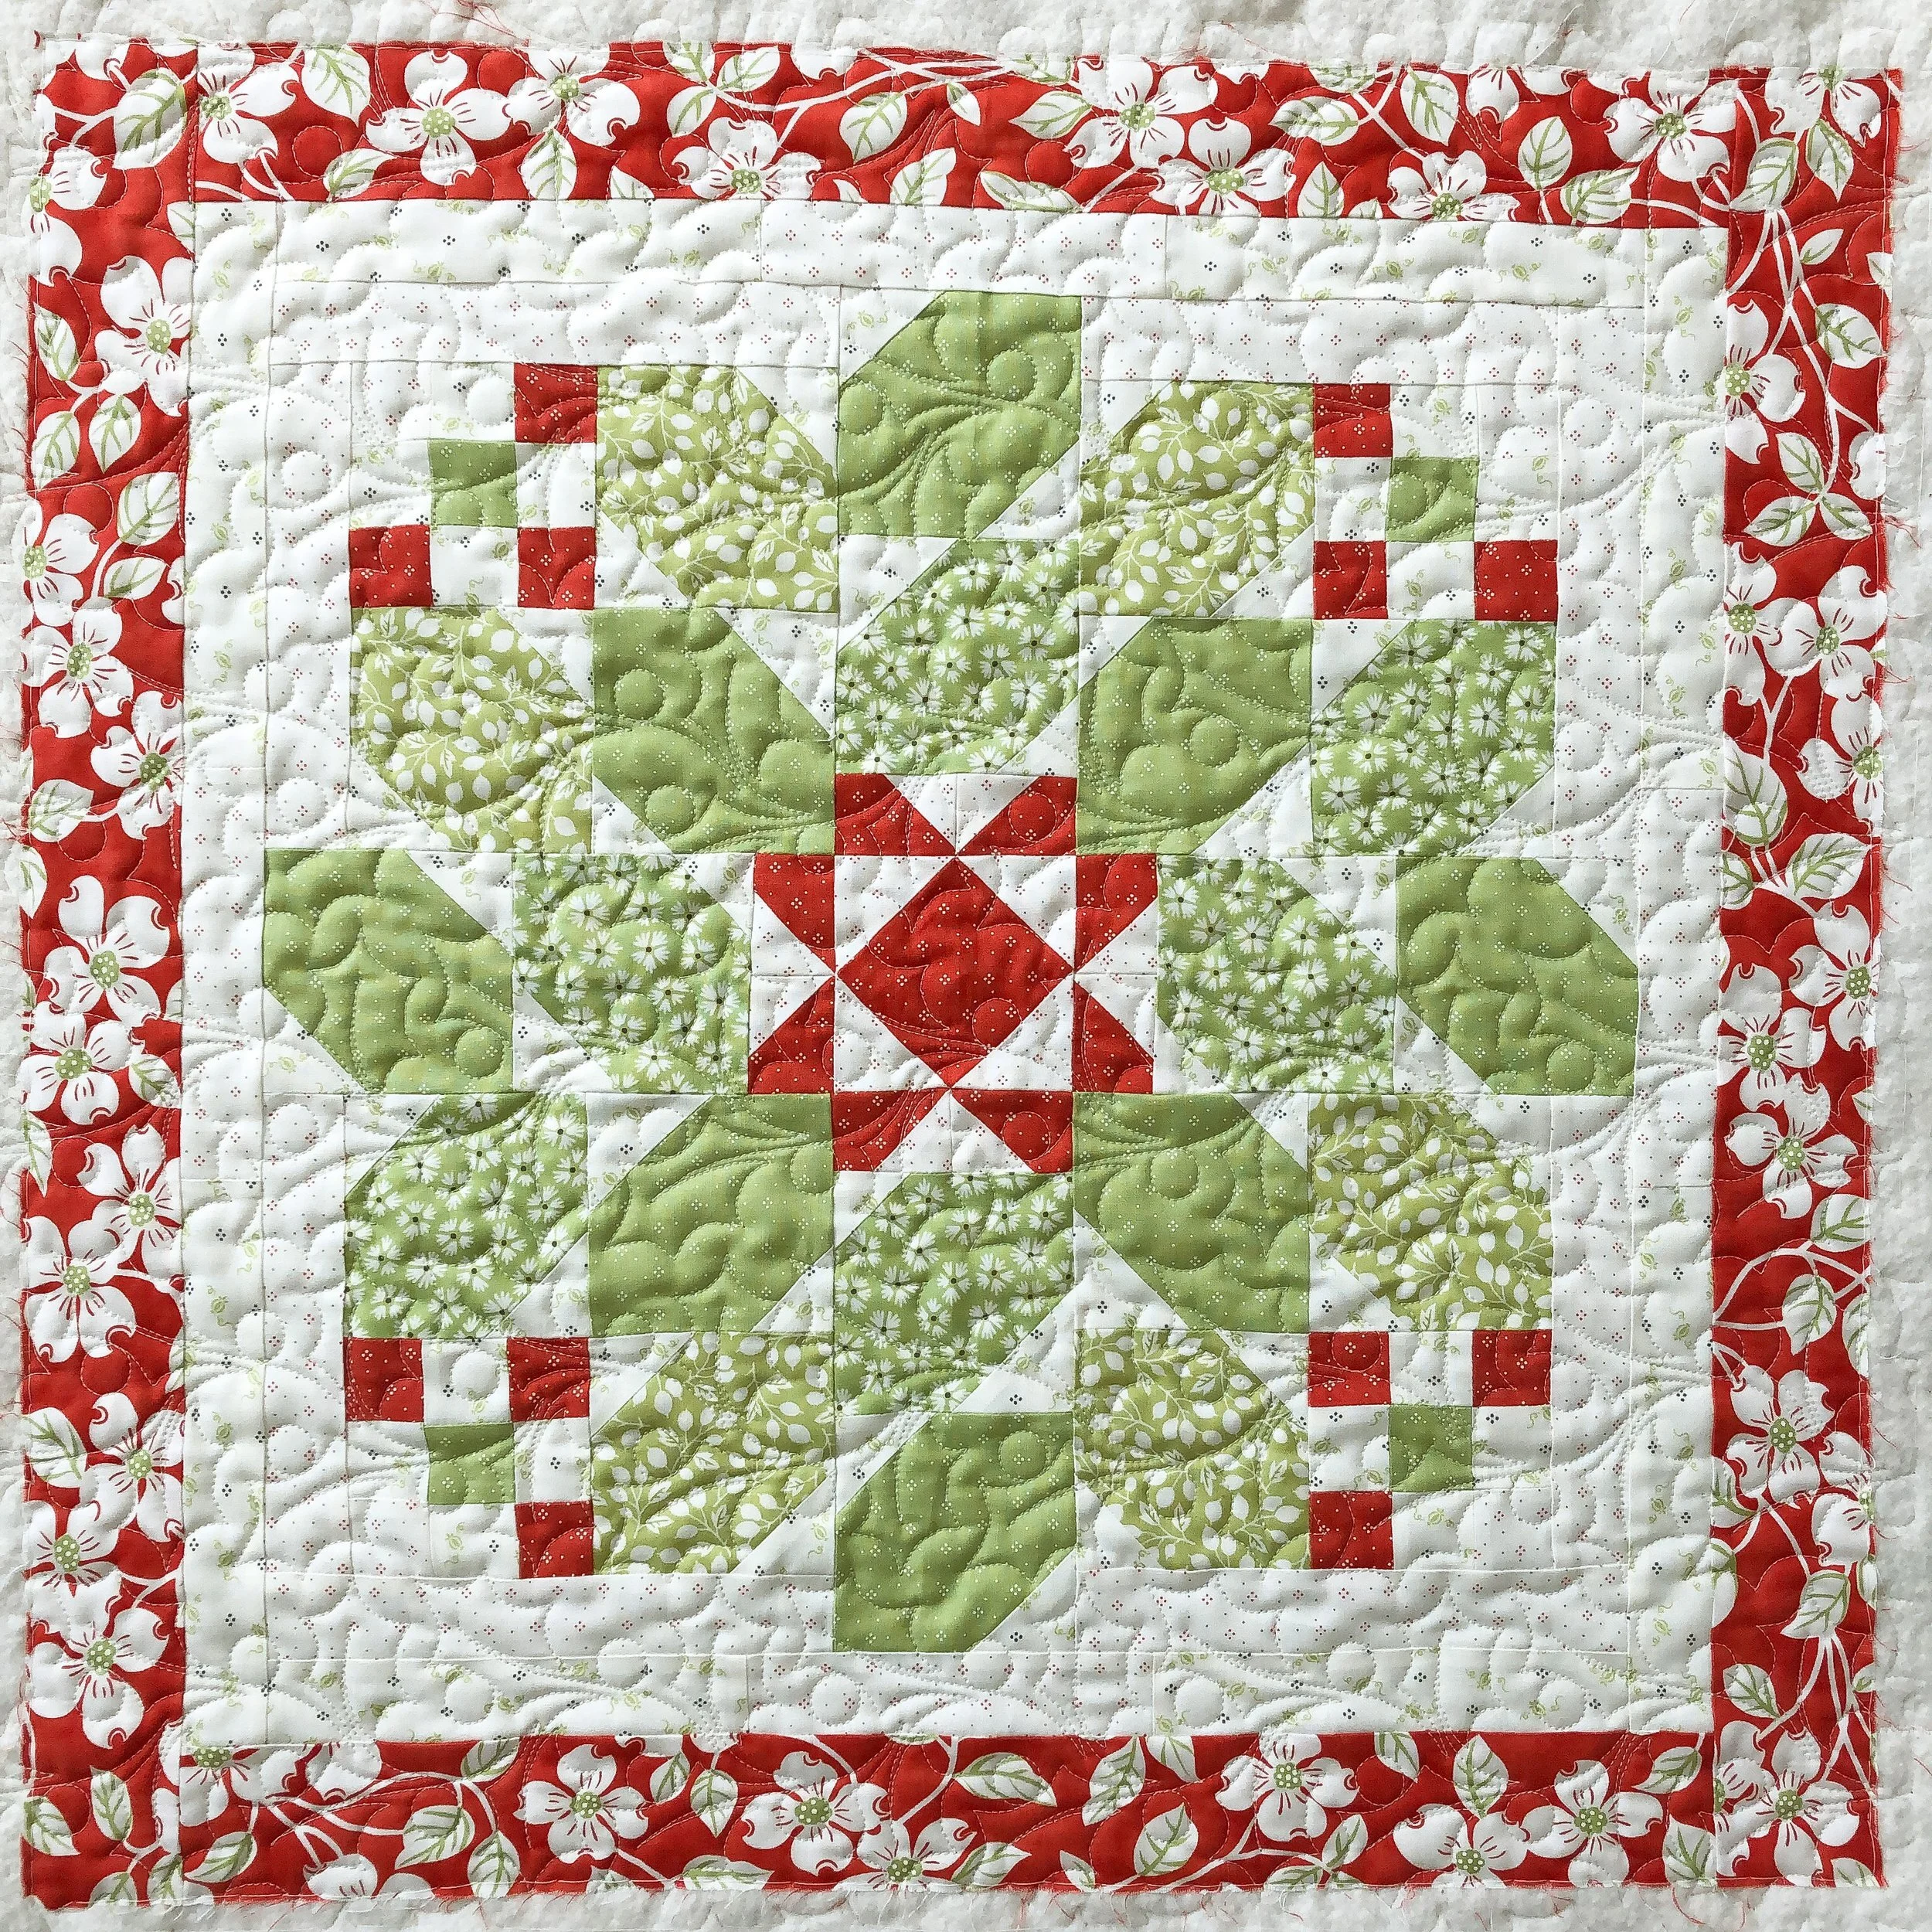
I have a quick little quilt to share with you…Barbara’s Holly Berries mini quilt. The pattern and fabrics are by Joanna from Fig Tree & Co.
I used my favorite natural white Omni thread from Superior Threads, and a scrap of Winline’s 8020 cotton poly blend batting.

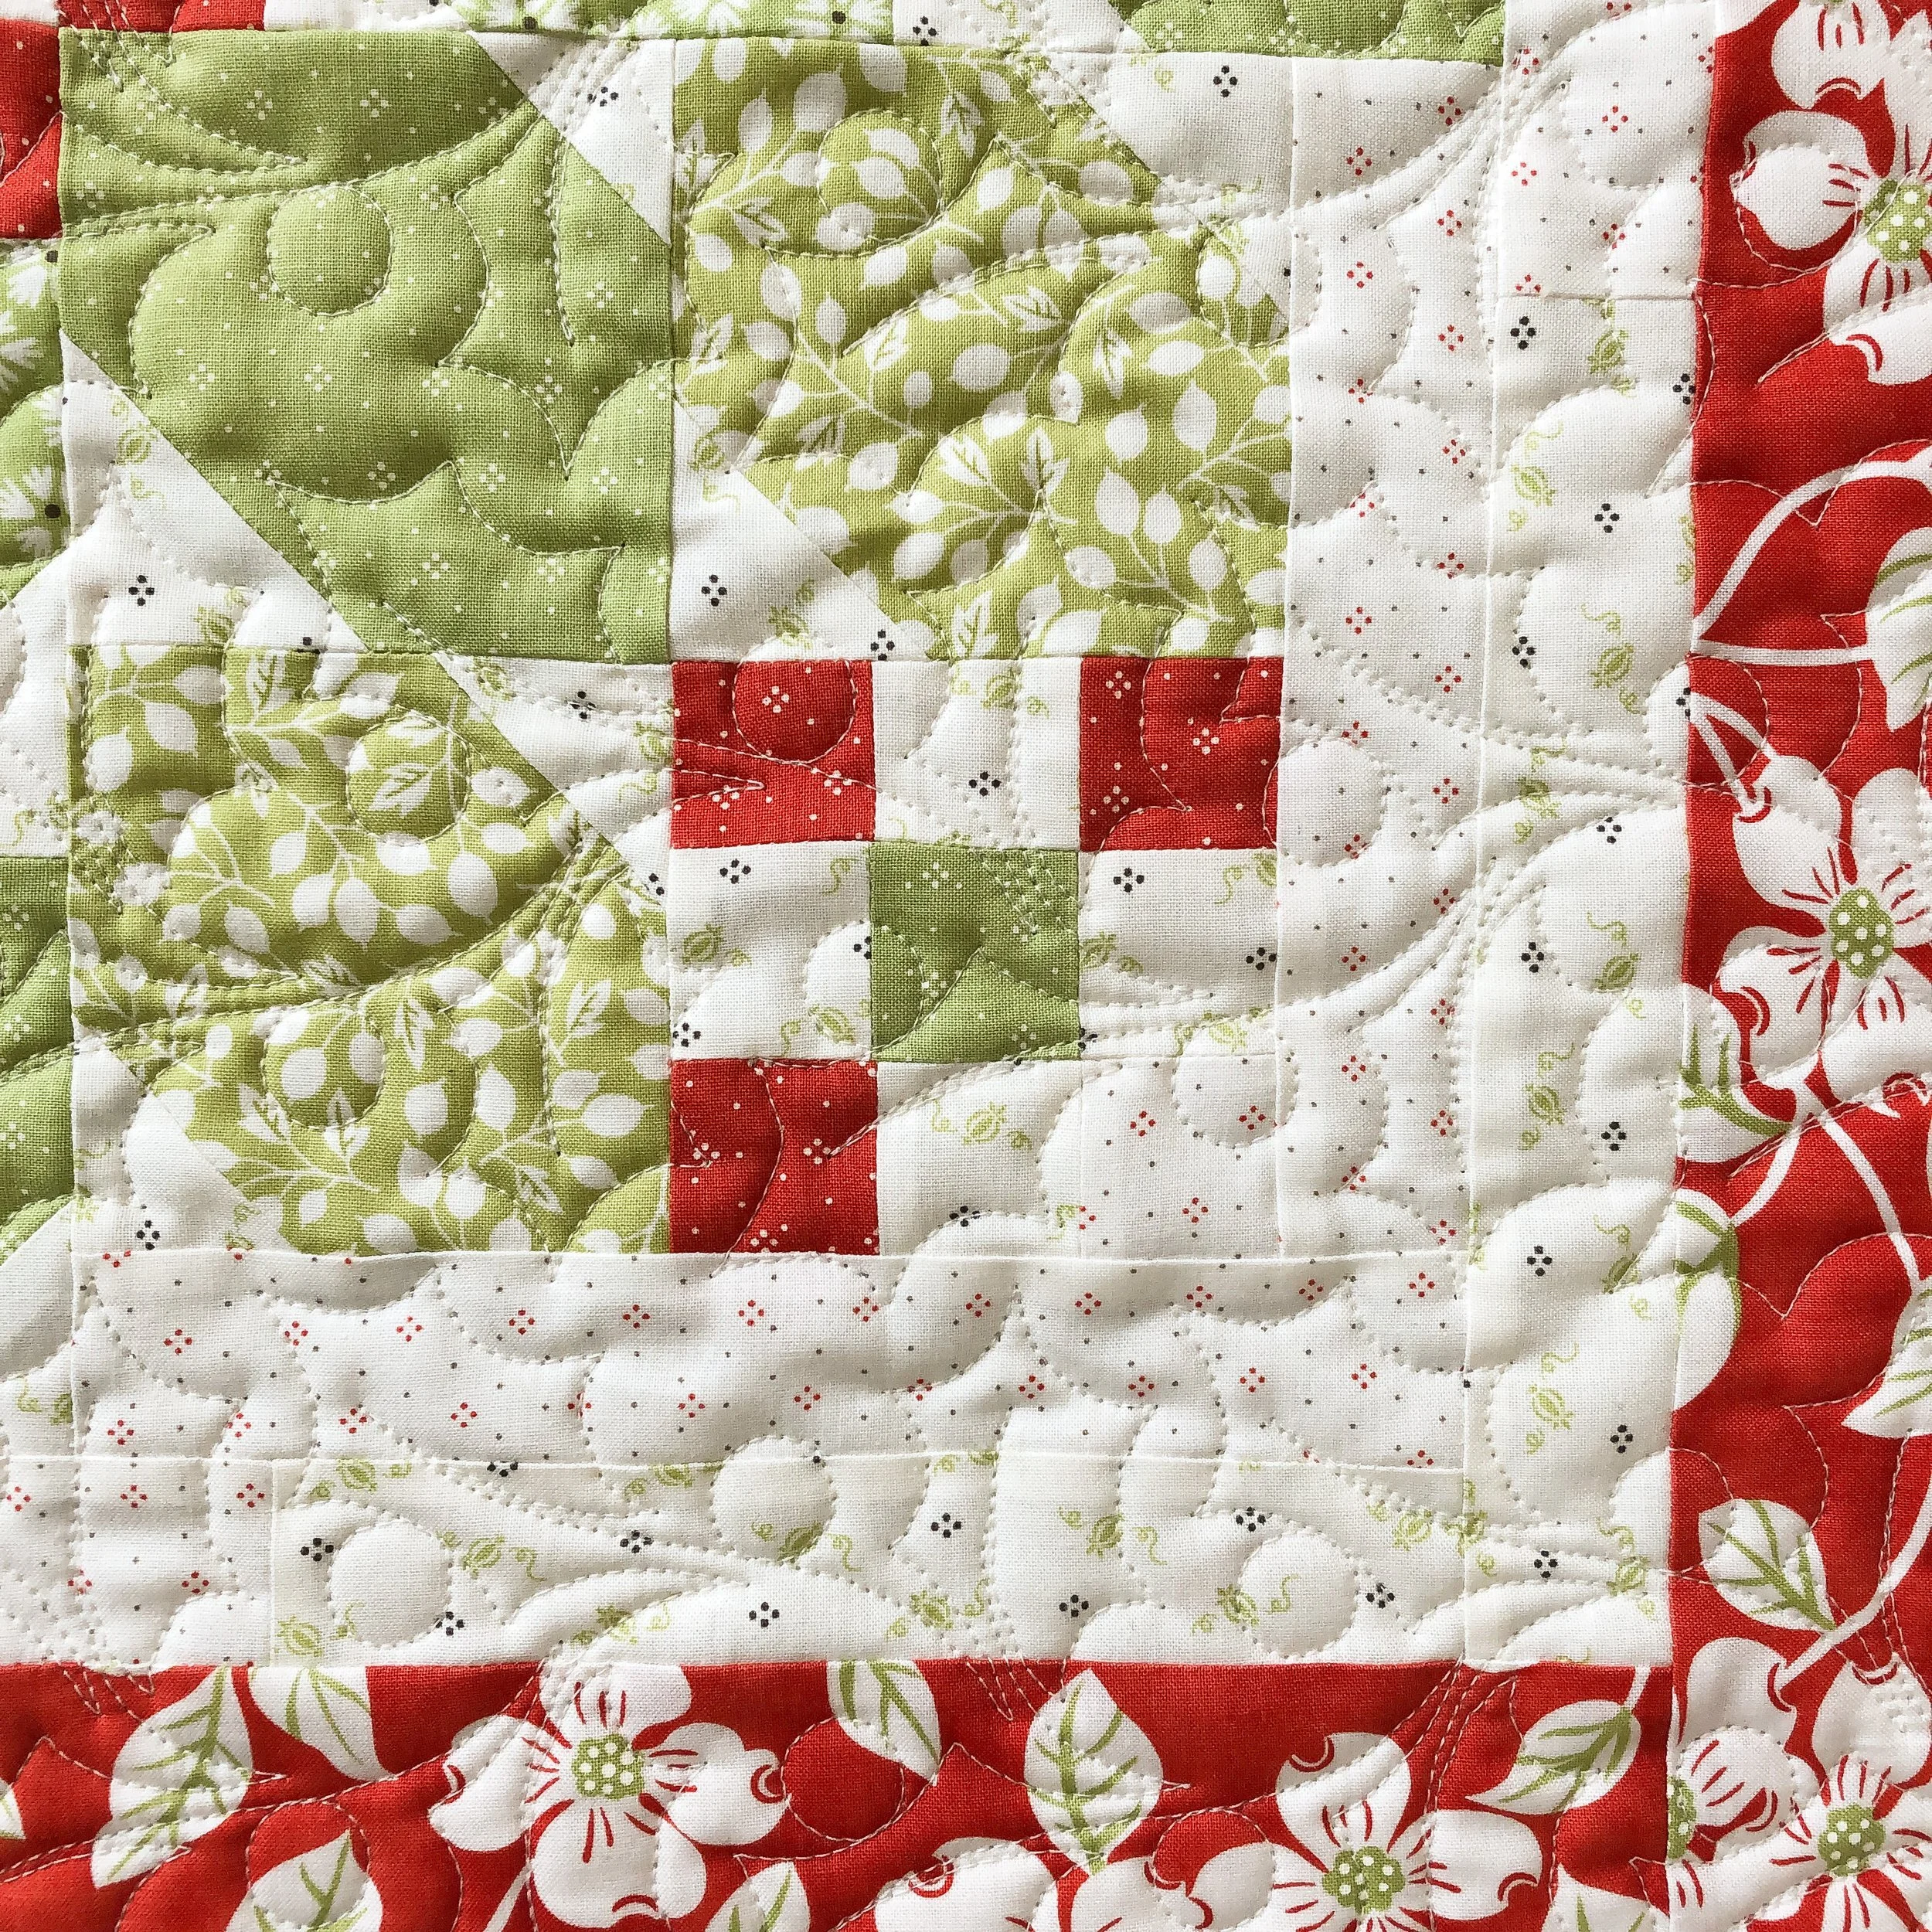
I used the Feliz Navidad border by Patricia Ritter and Natalie Gorman from Urban Elementz to quilt it. It’s such a fun simple design!! If you’re looking for a holly berry design, definitely go get this one.
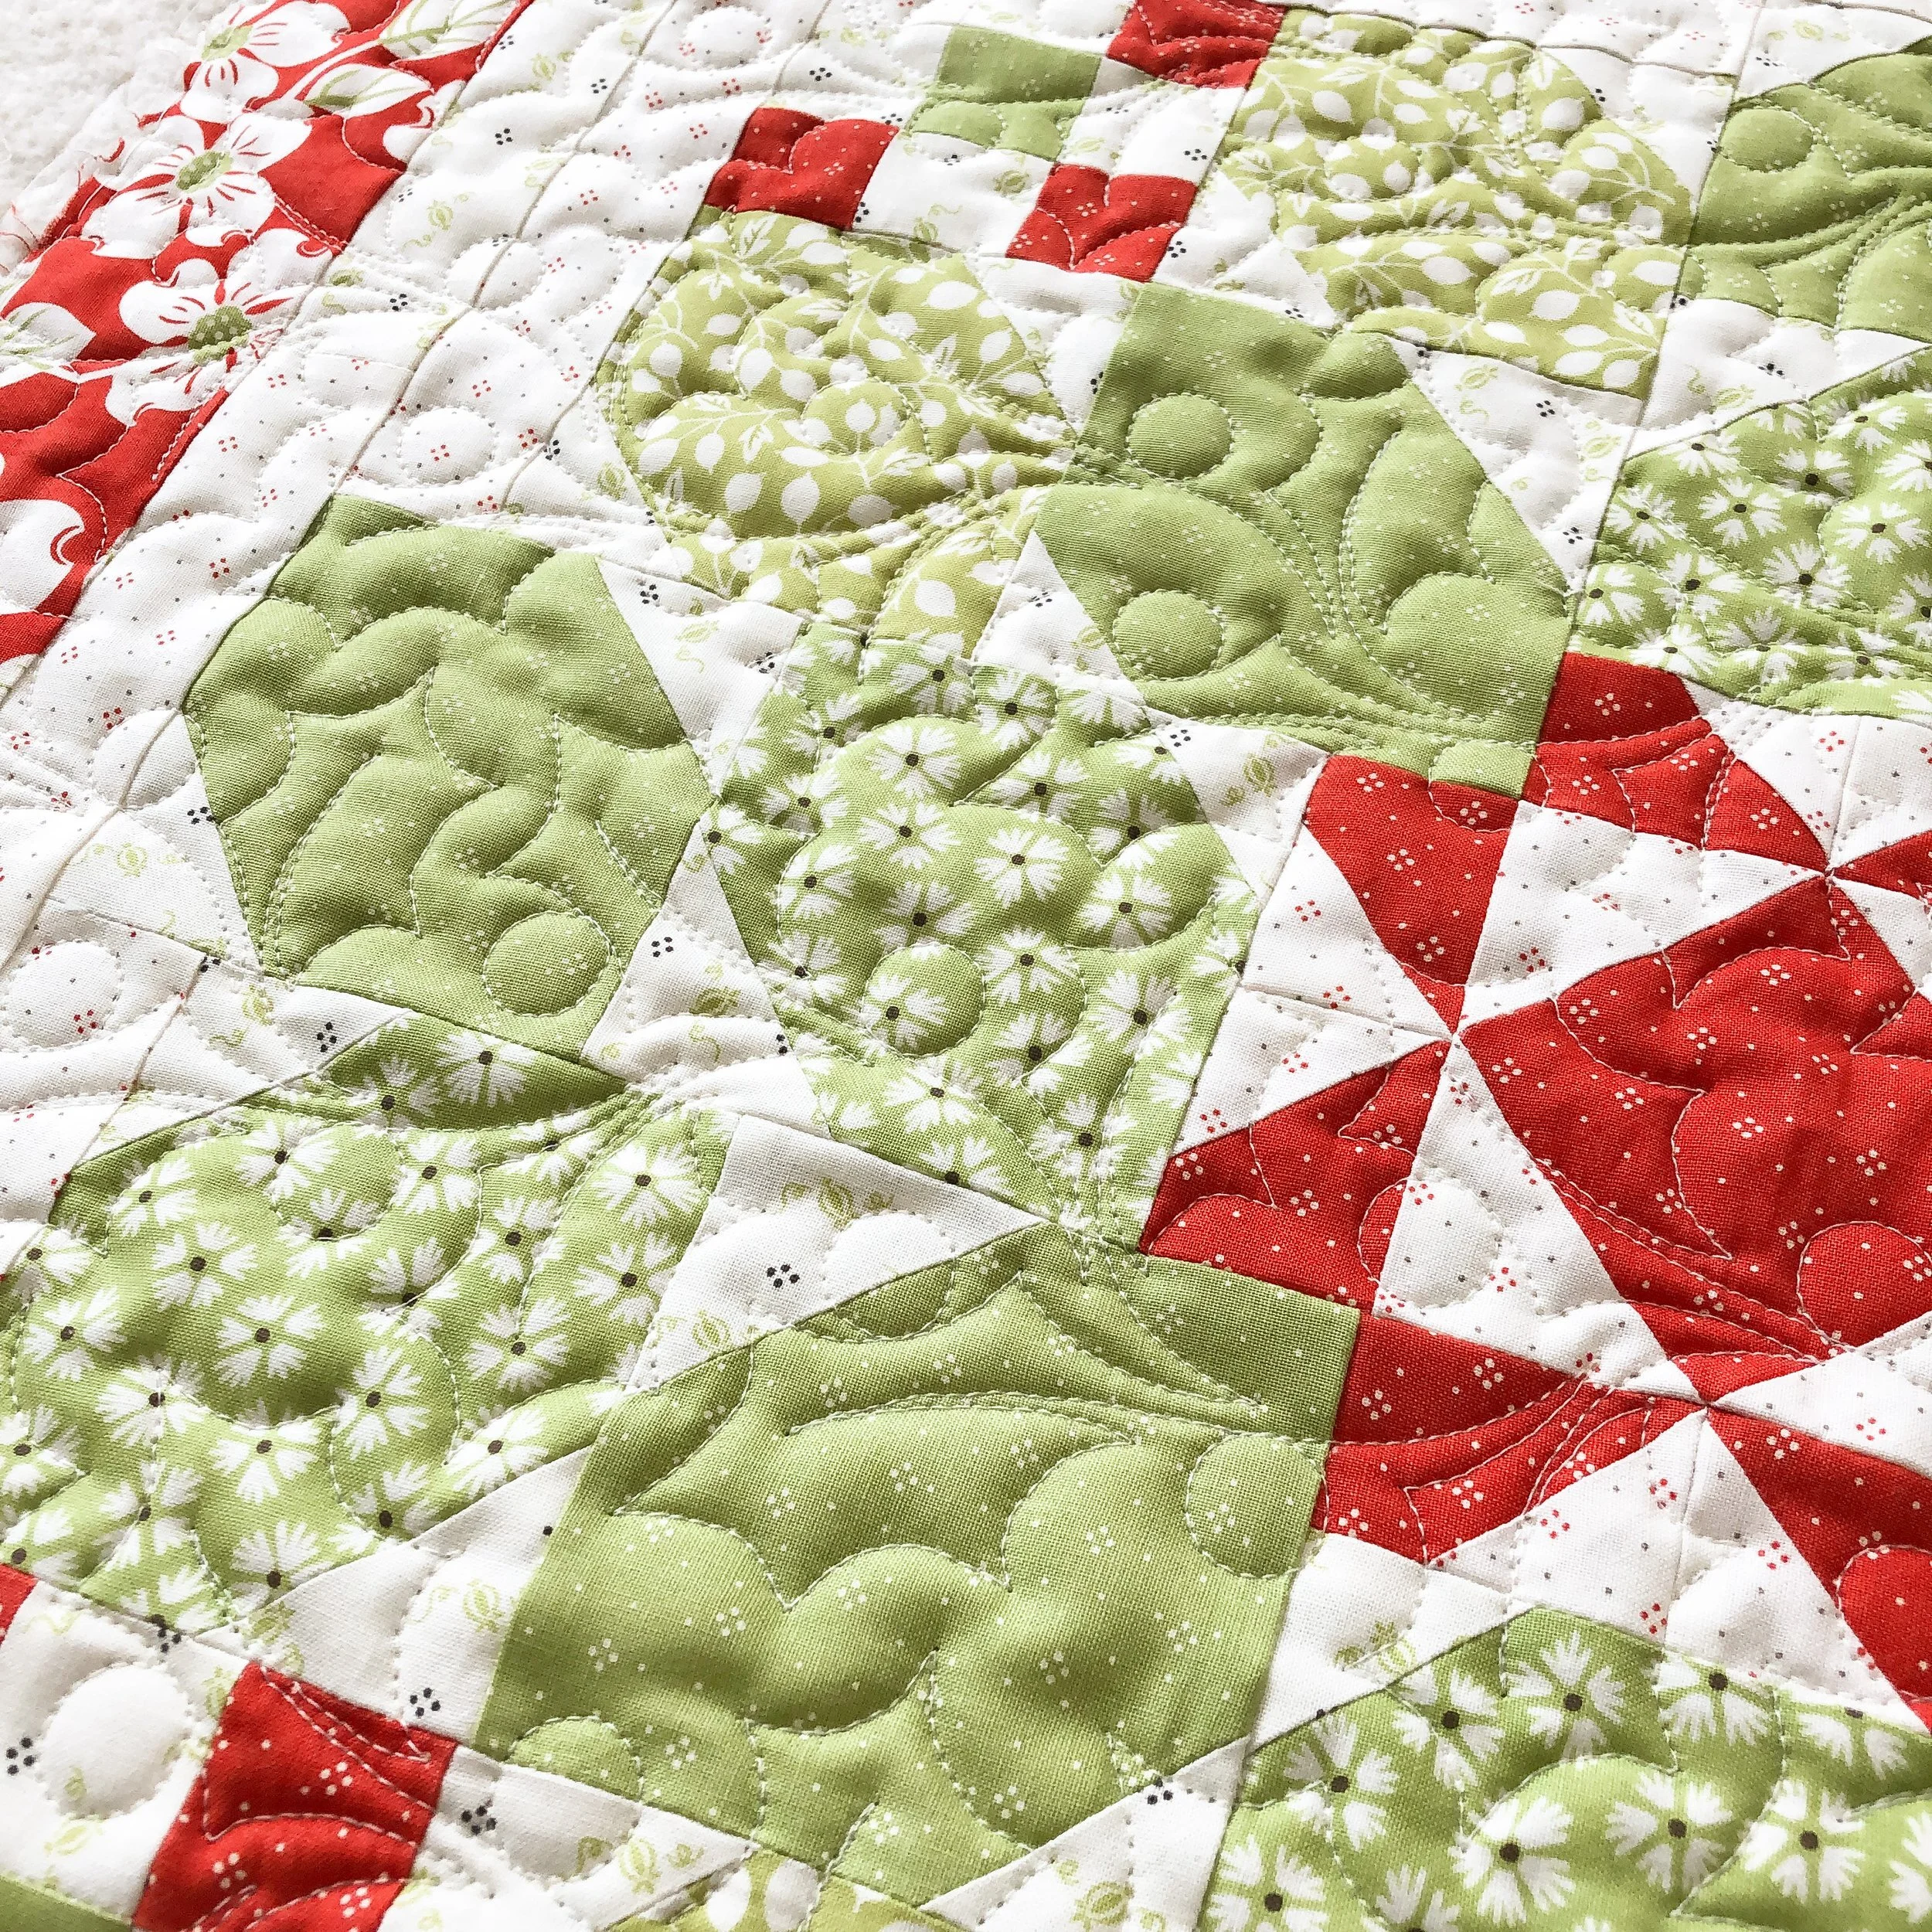
I didn’t know until now that the name of this pattern was Holly Berries, and yet the design looks perfect with the fabrics and overall design.
Thank you for stopping by and checking out this cheerful mini quilt. Have a good one. • Leisha
PS…if you’d like me to quilt something for you, email me at quiltingit@gmail.com and I can add you to my list.
Lisa’s National Parks Quilt
Hello Friends,
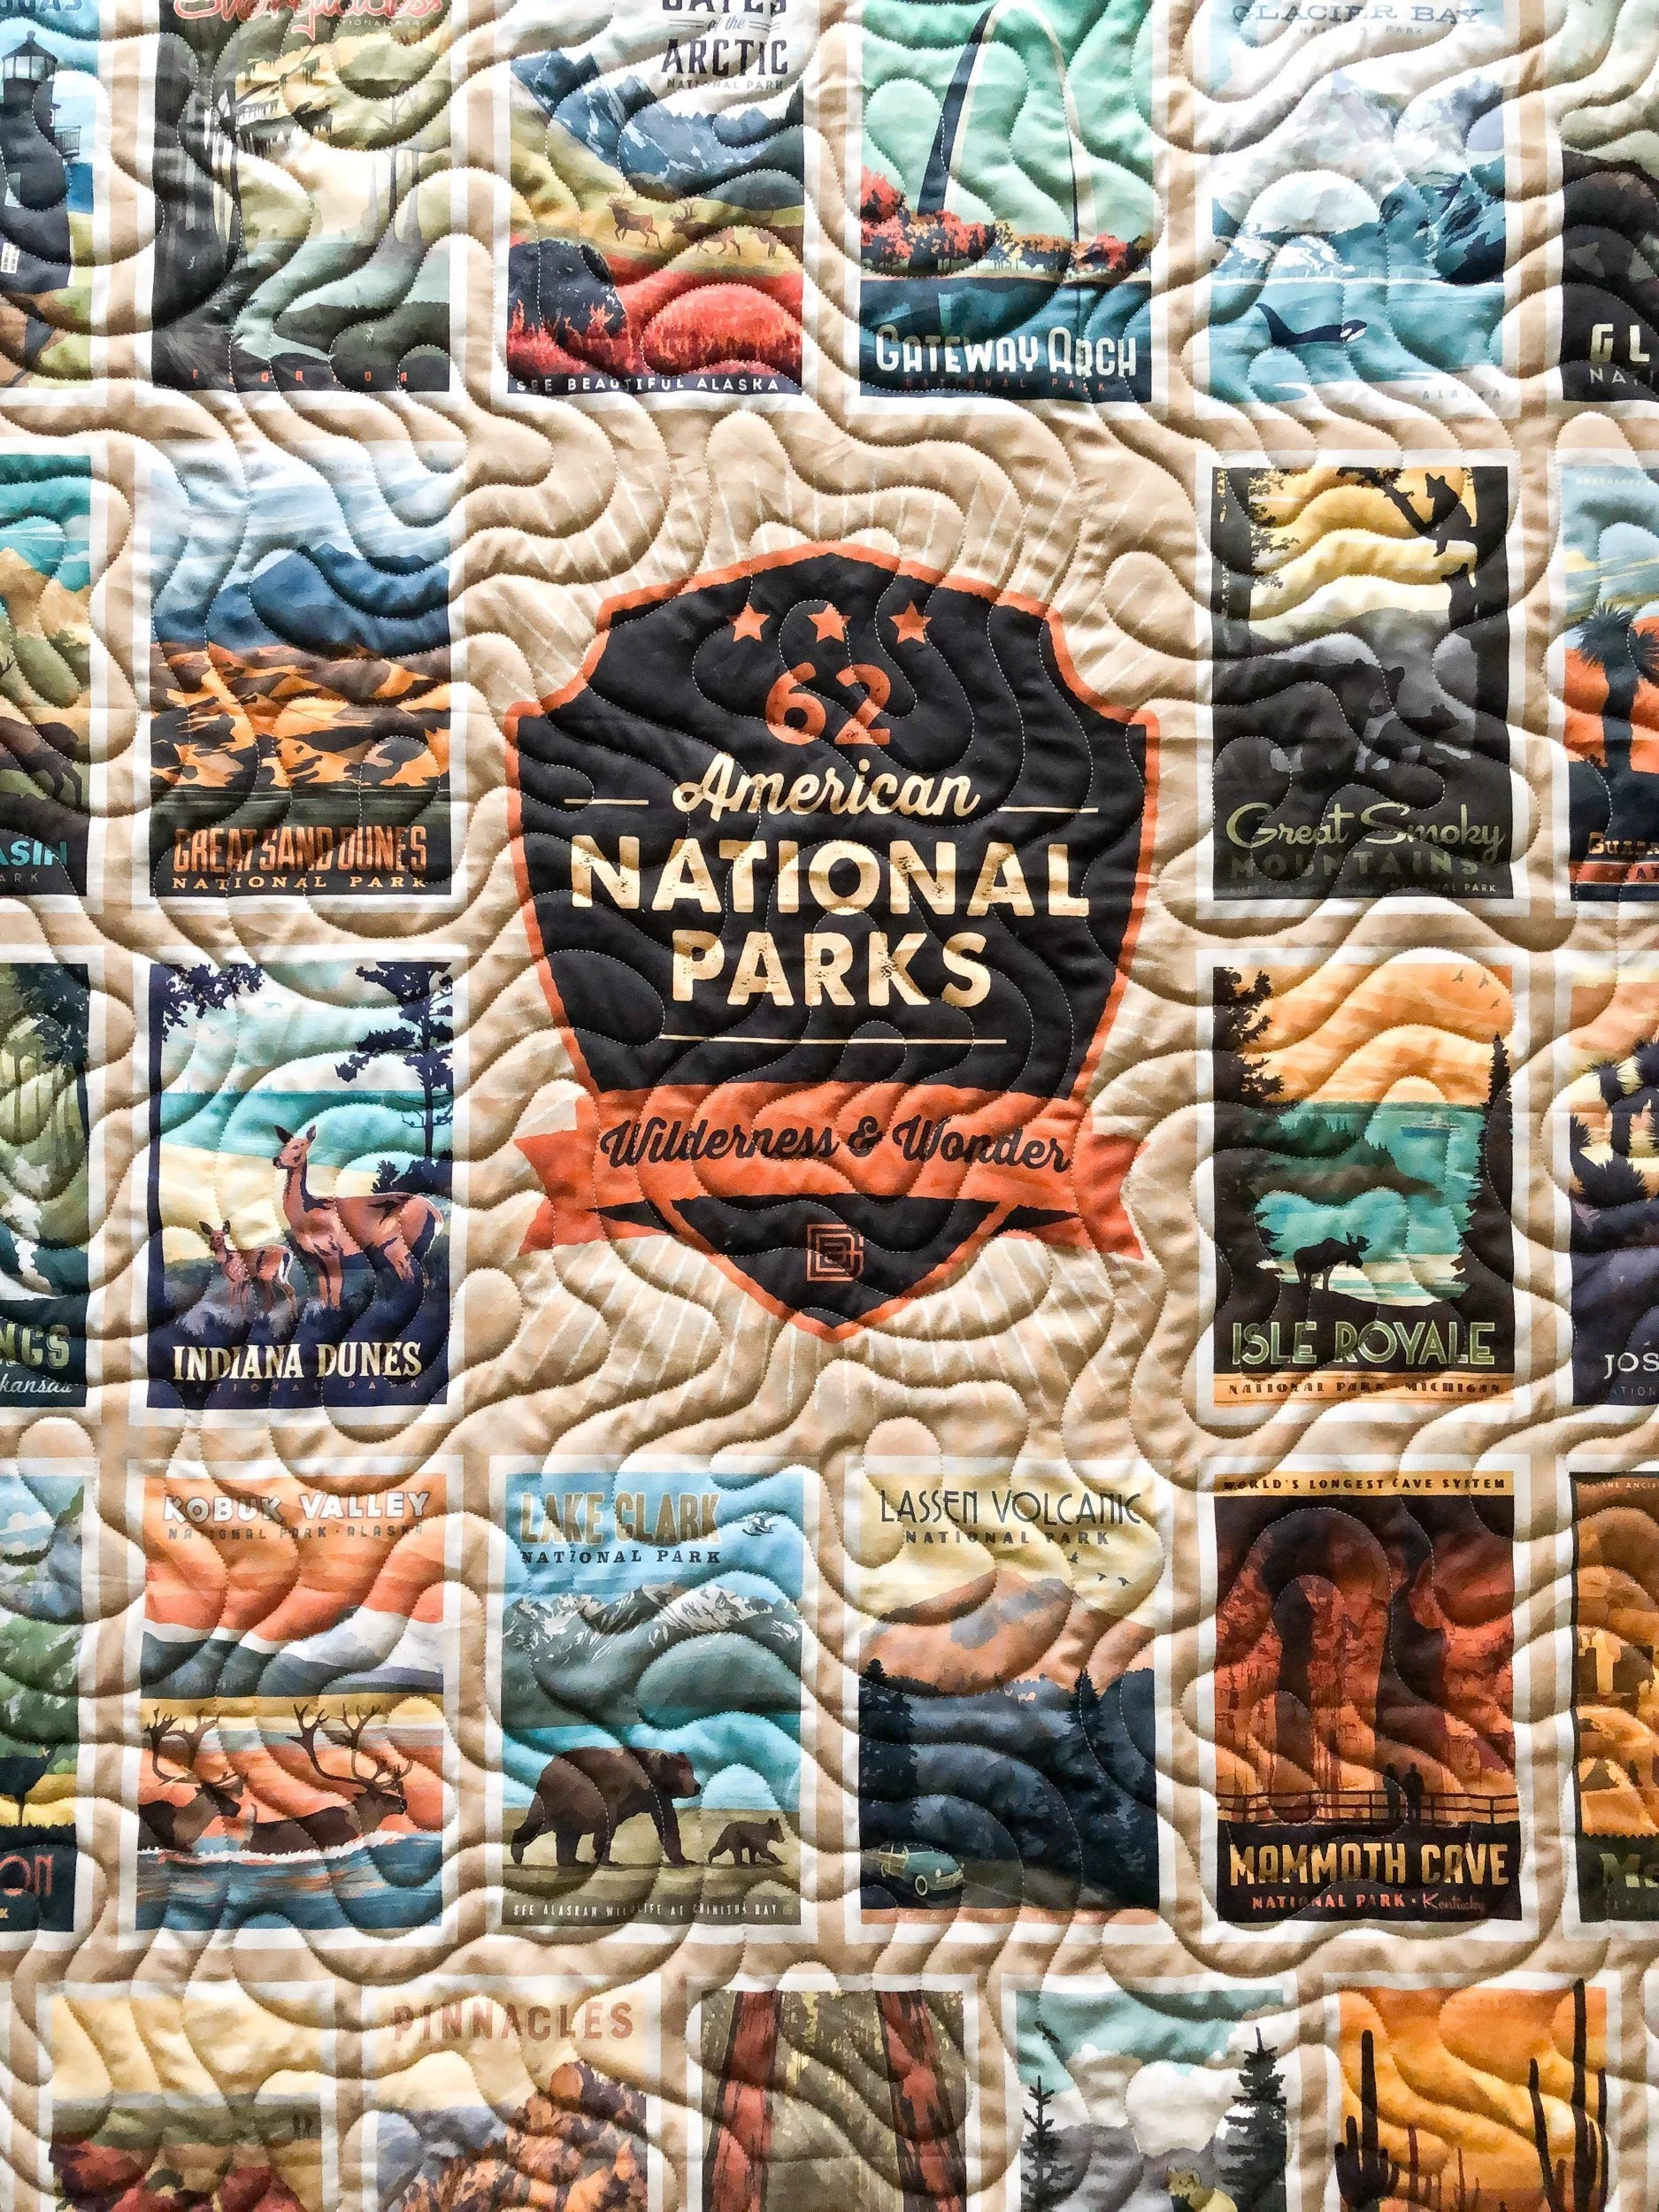
I have a quick quilt to share with you today!! This fun national parks quilt was made by Lisa for her son and daughter-in-law, who love going to national parks!!

The panel is National Parks Wilderness Wonders Panel, by Anderson Design Group for Riley Blake Designs. So fun, huh?!?!

I used Malachite by Patricia Ritter to quilt it. Which I think is the perfect design for this quilt.

I used my favorite Natural White thread from Superior Threads, and 8020 batting from Winline out of Ogden Utah.

Lisa added a fun piano keys border, which picks up all those fun colors. I love it!!

Do you love to visit national parks? If so, which is your favorite? What’s on your must see list?

Lisa backed the quilt in this beautiful green minky!! That texture is sooo good!

Seeeeee….this is why I love solid minky.

Thanks for stopping by! Have a great week, and happy sewing!! - Leisha

Chelsea’s Selkie Quilt
Hello there,
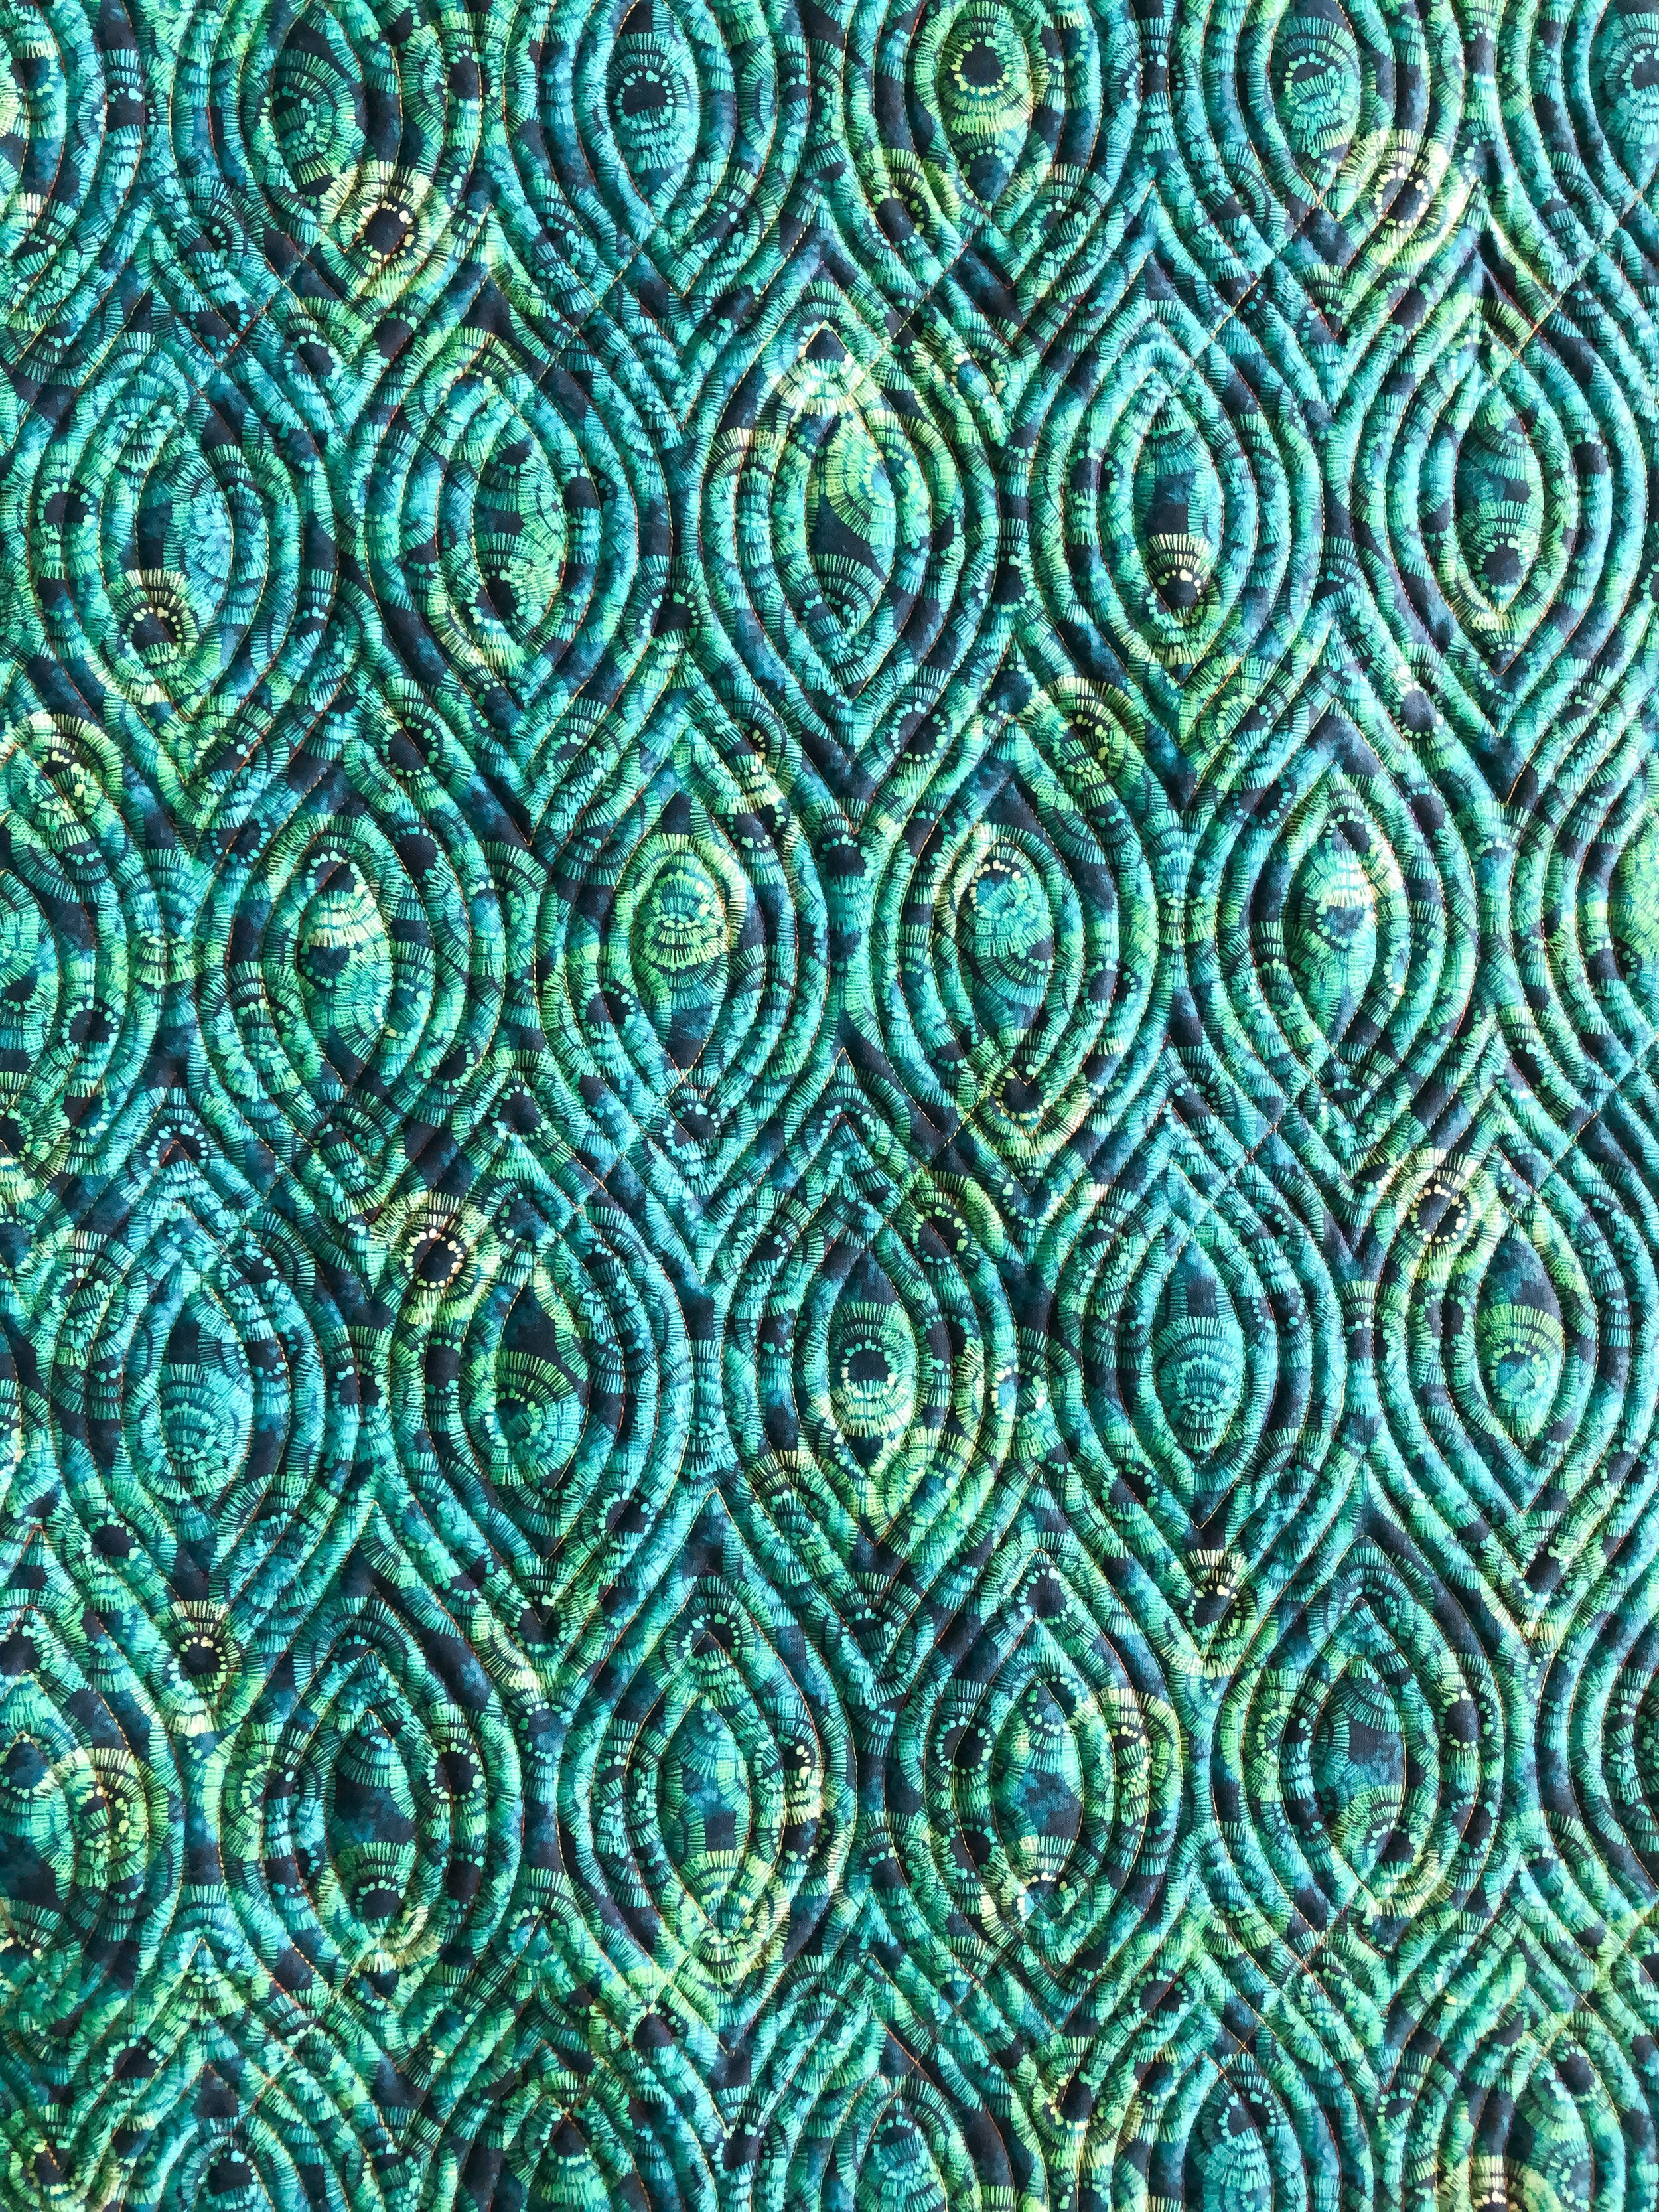
I have an amazing quilt to share with you. Chelsea had these fun bright Kaffe fabrics, and I couldn’t think of a better way to use them than with a metallic greenish back woven background fabric. It literally sparkles. The pattern is called Selkie by Shelley Cavanna from Coras Quilts.
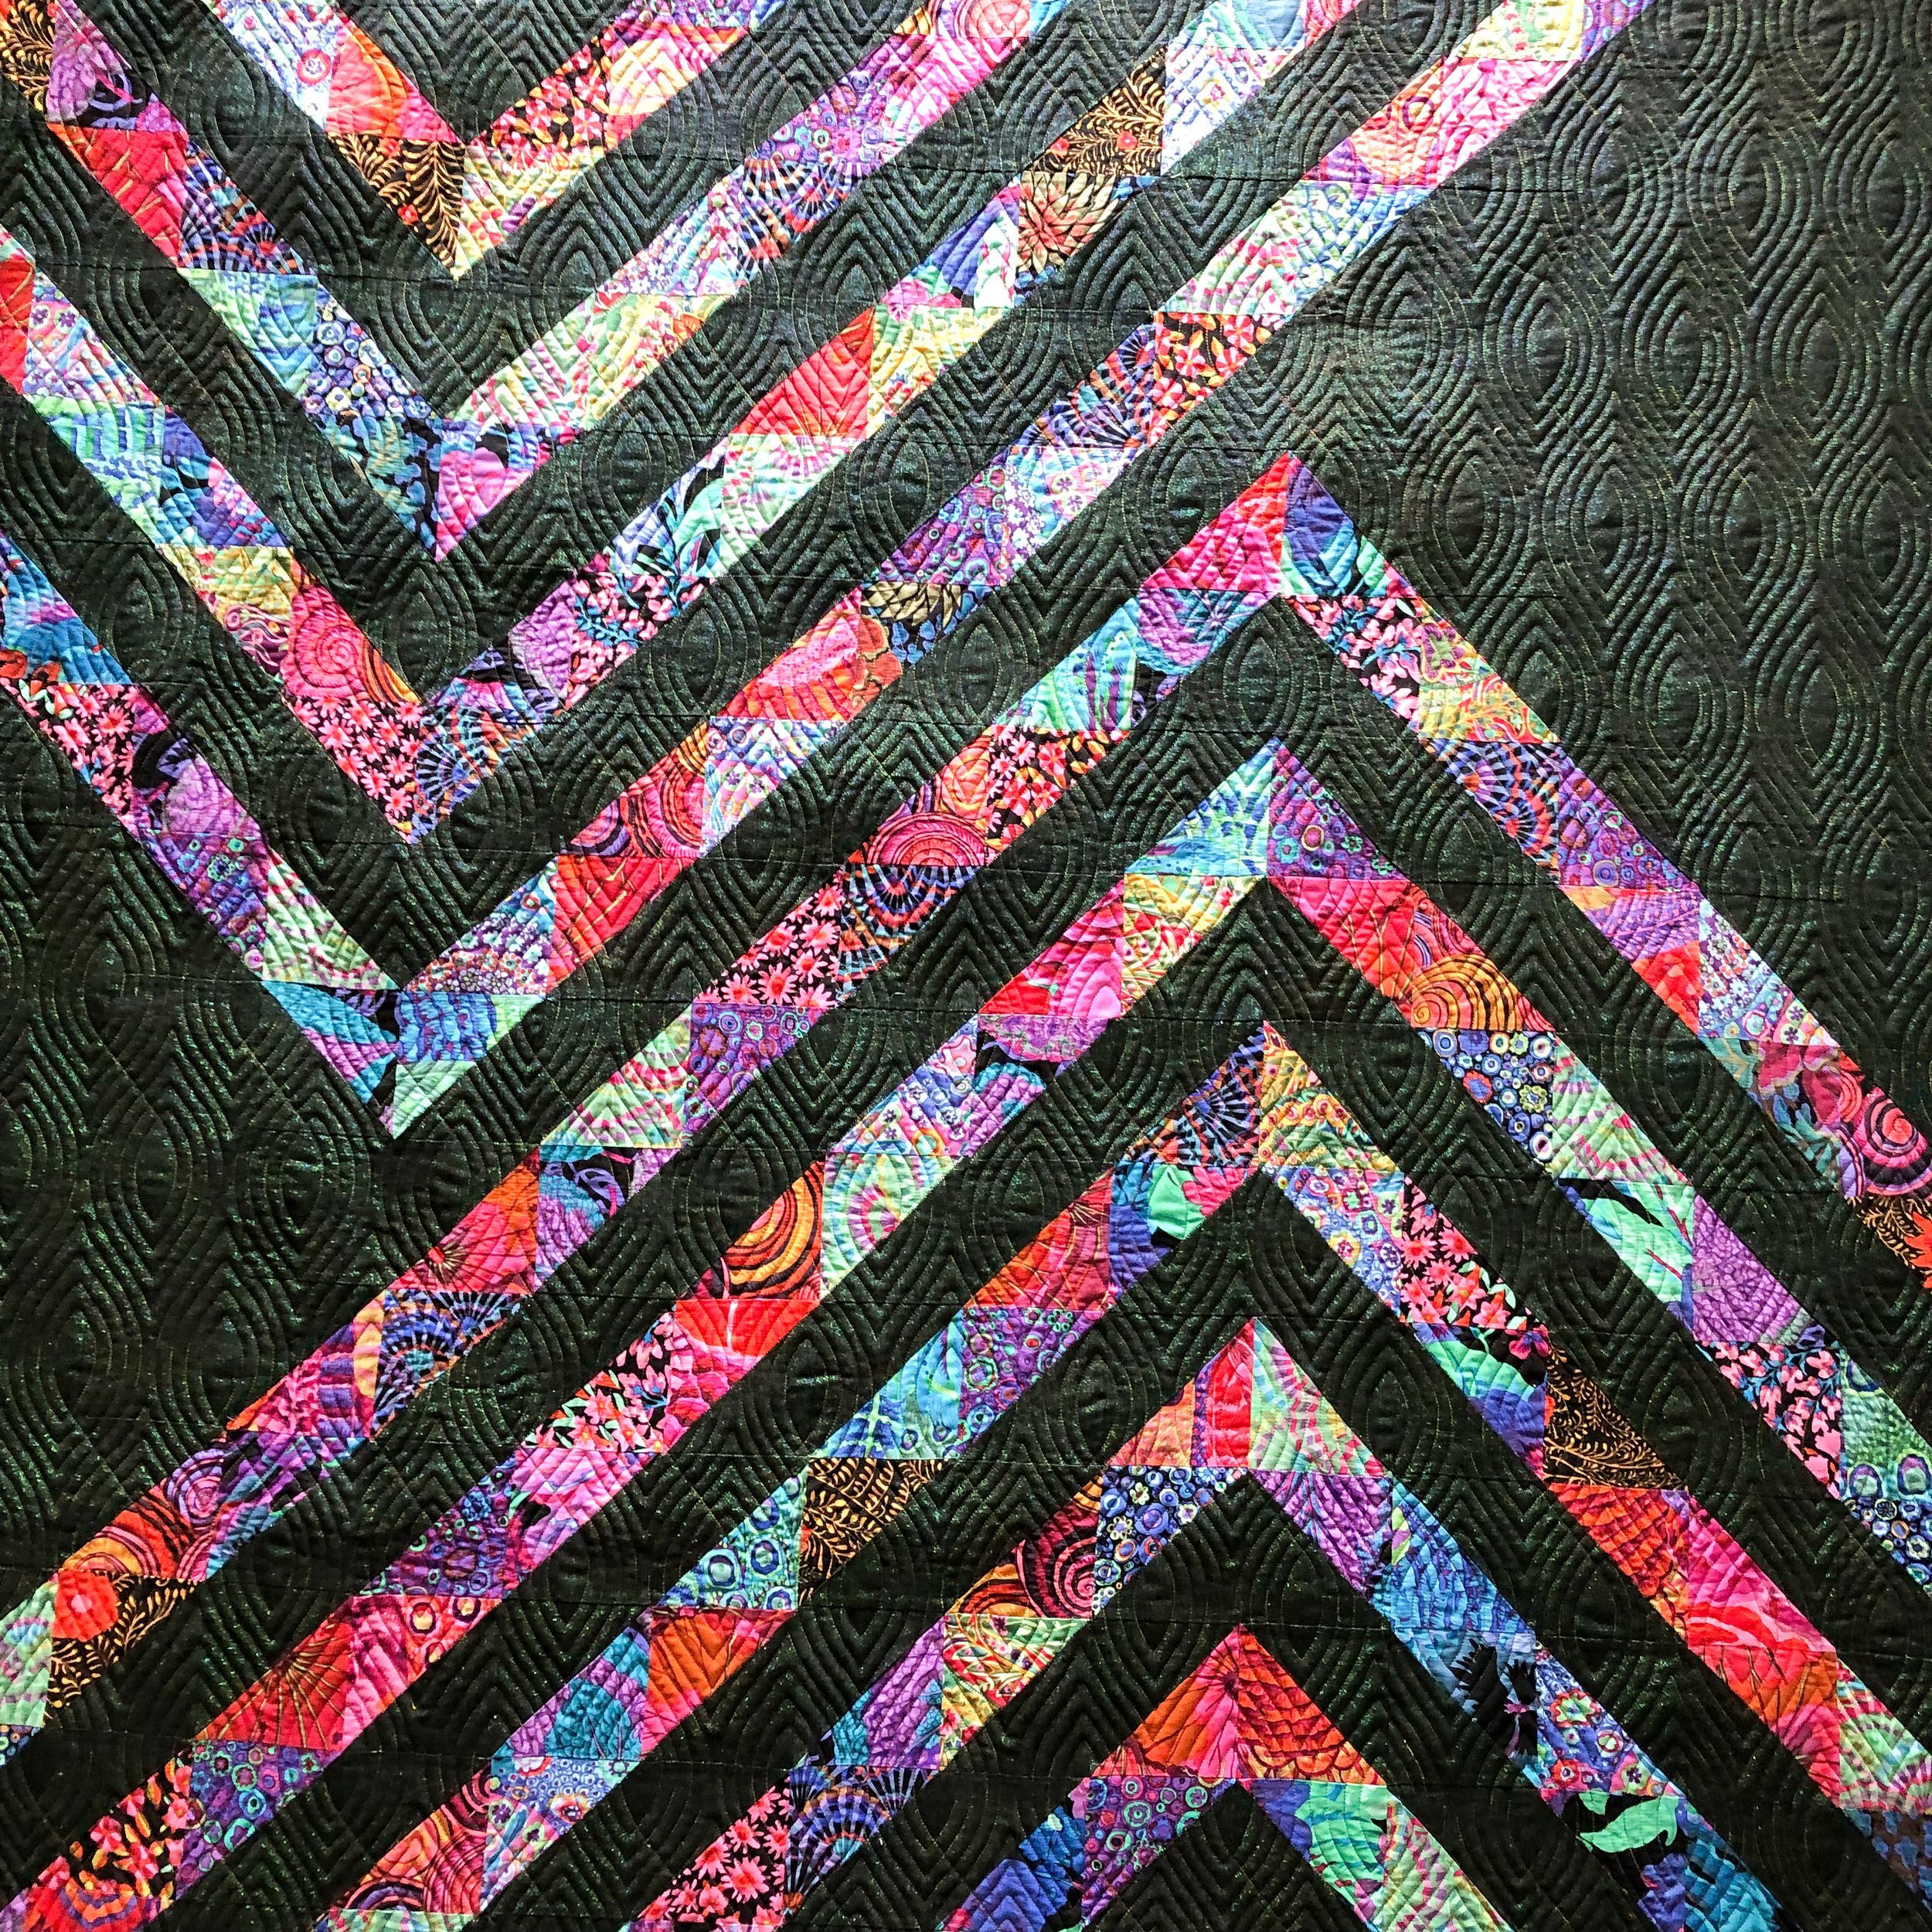
I was looking through designs that I have, and thought this Ikat design by Patricia Ritter at Urban Elementz, would be perfect for this quilt. Side note…because of its density, this can be a tricky design to quilt, because quilts shrink when they are quilted. I didn’t notice it until I started computerized quilting. The denser the design, the more it’s going to shrink. It’s possible, but requires some adjustments as I quilt. It has a pretty incredible look, so it’s worth the effort. Patricia has a few Ikat options.

I used my favorite 8020 cotton poly blend batting from Winline Textiles out of Ogden Utah.

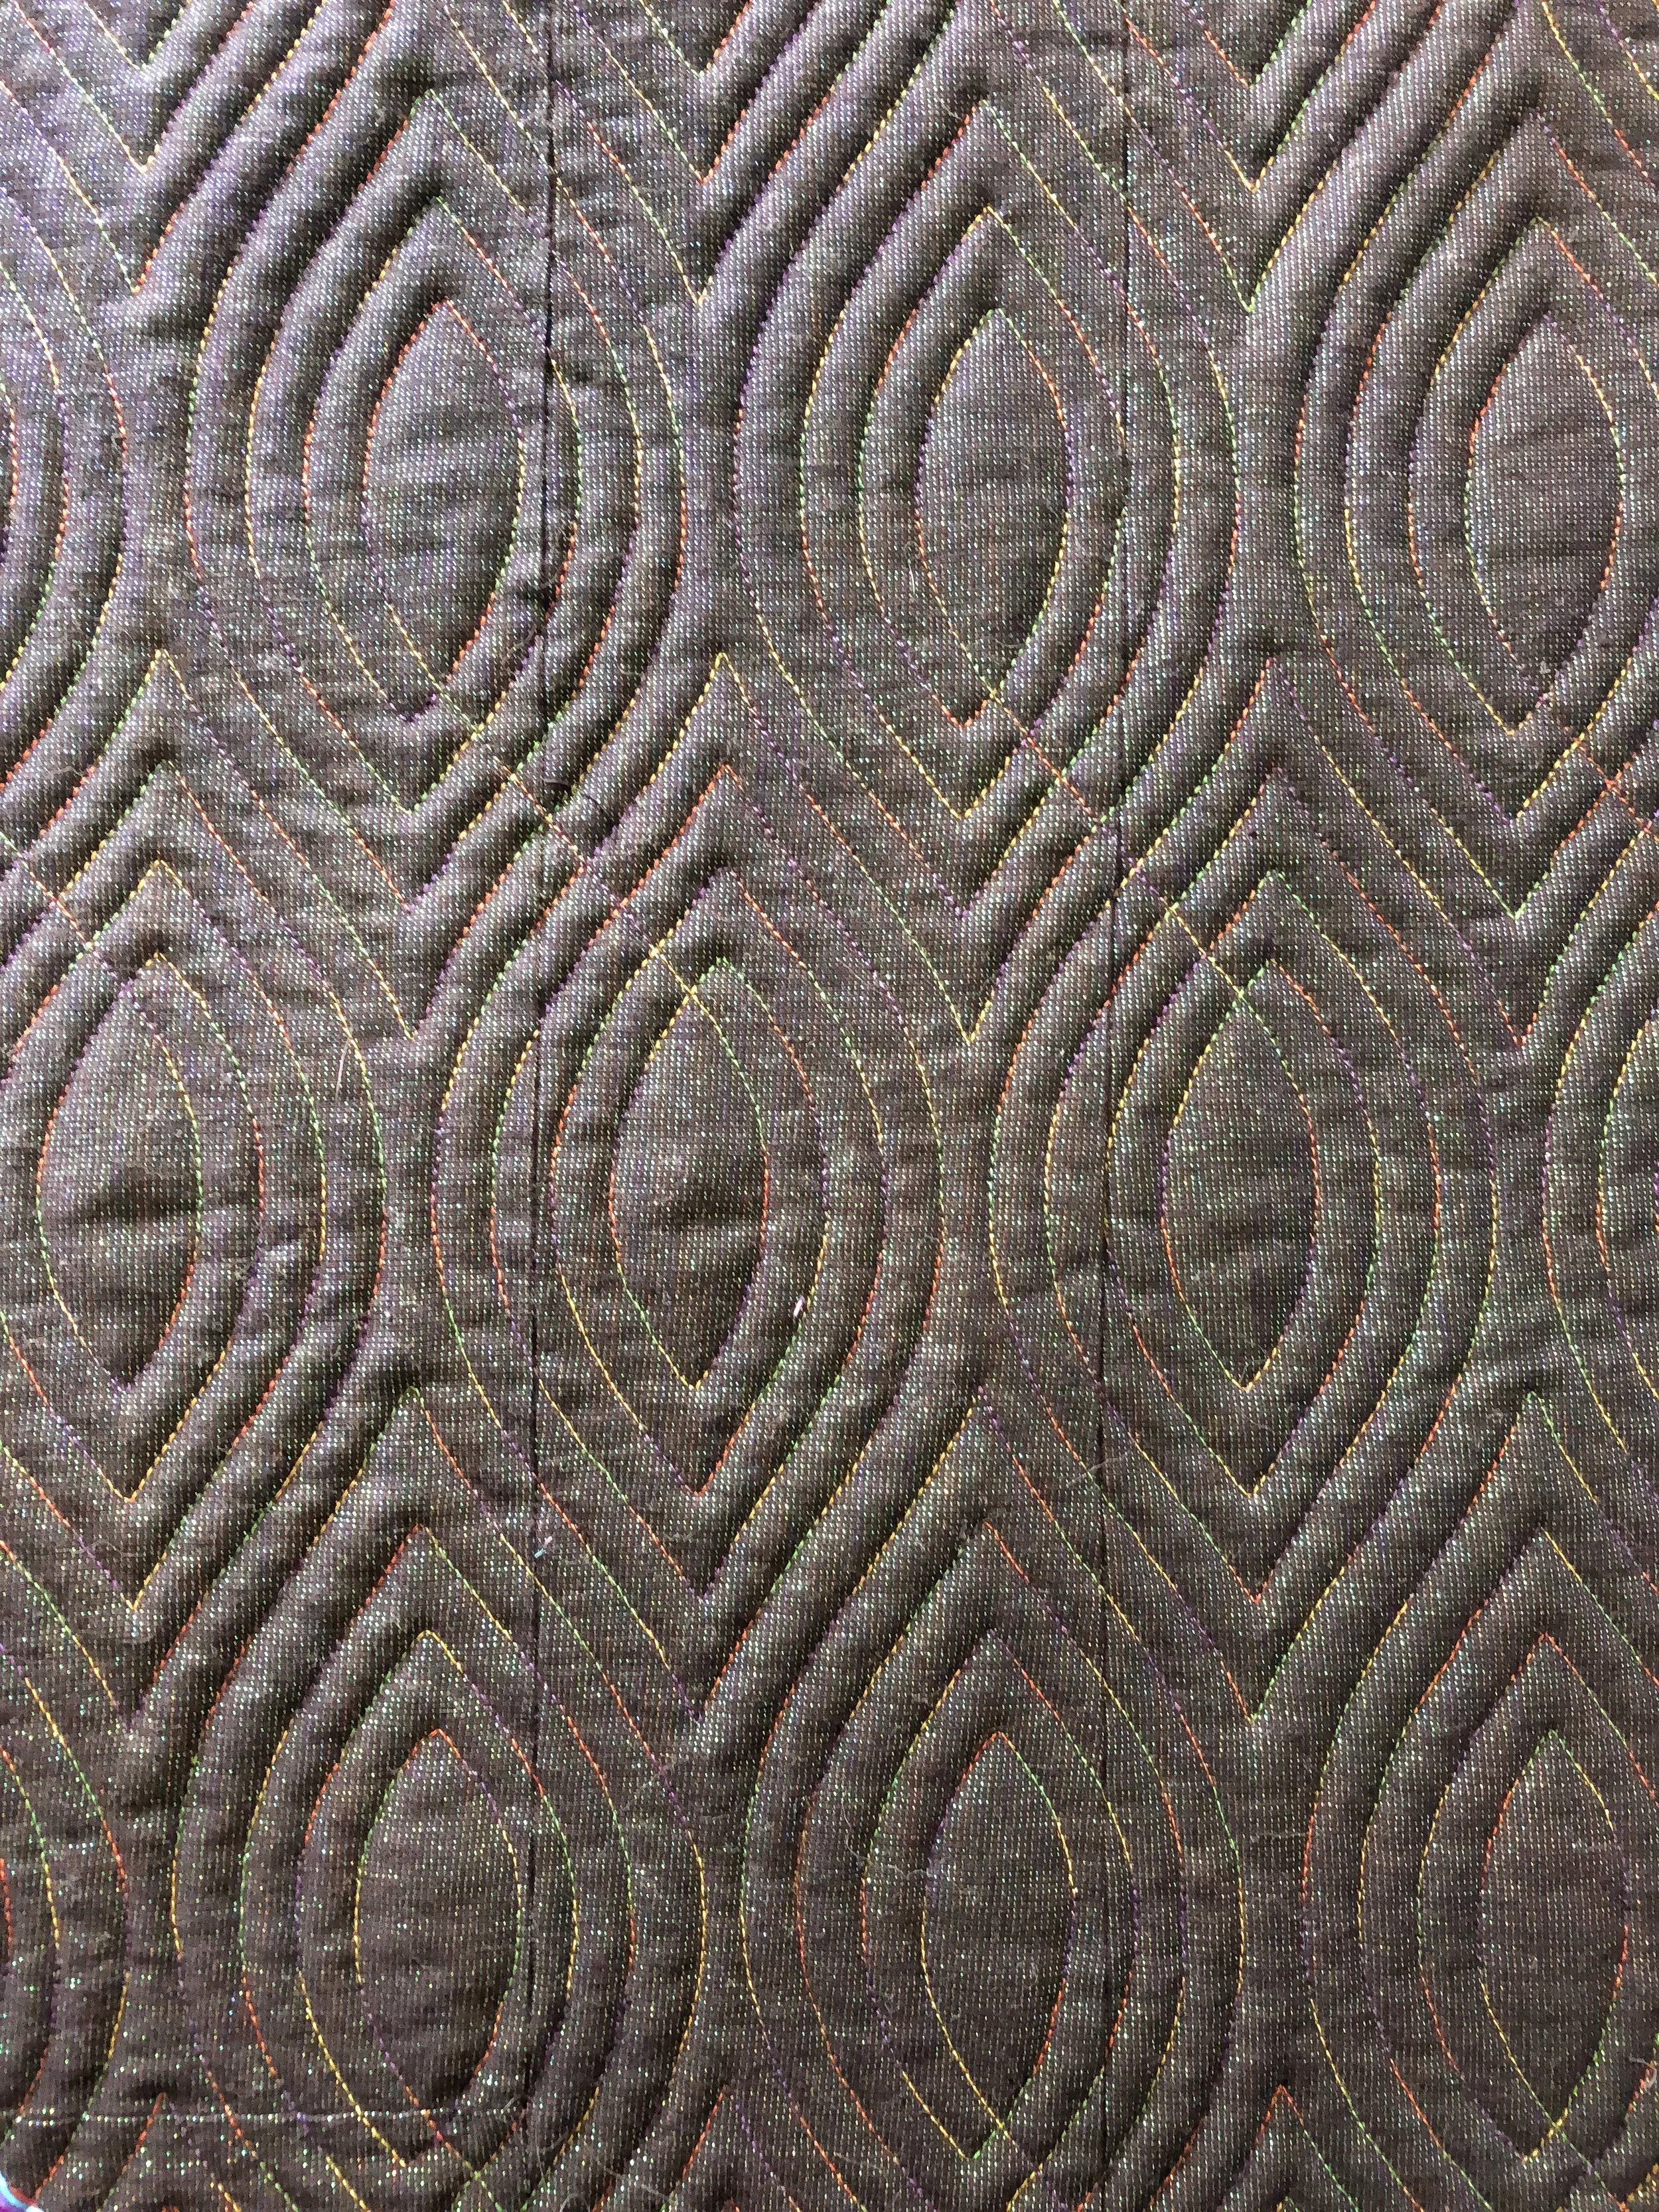
I wish you could see the shimmer in that background fabric.
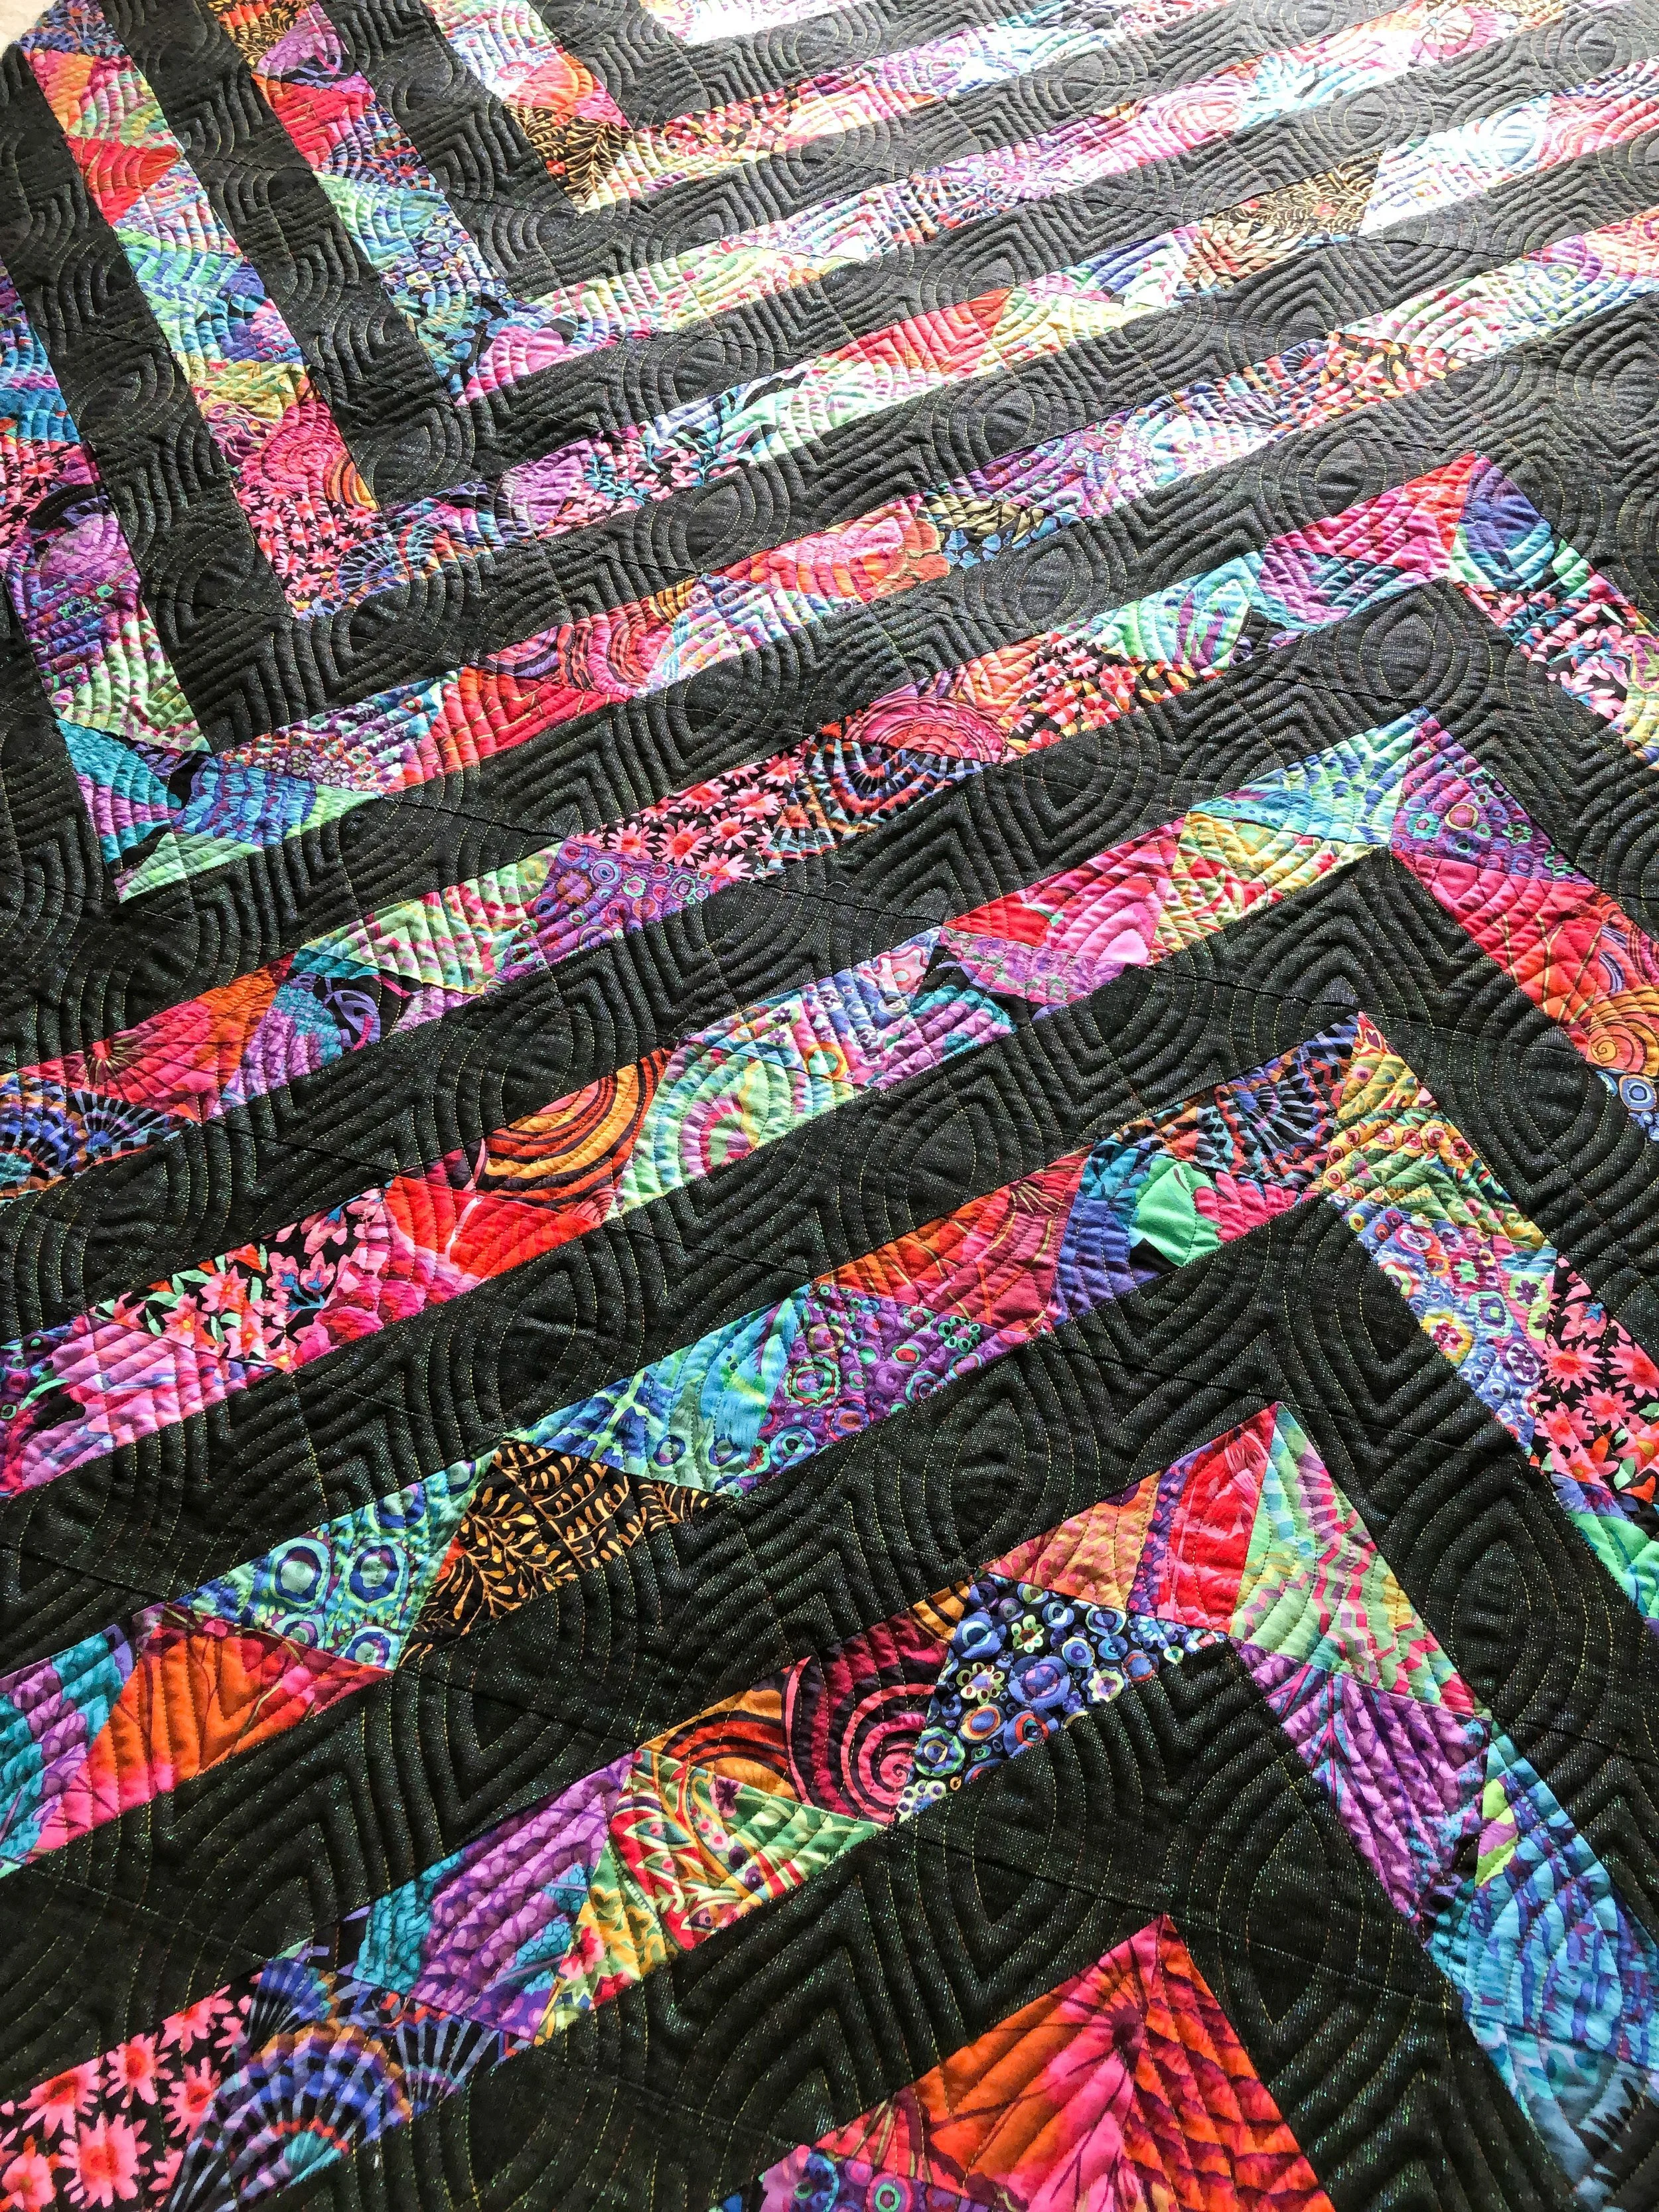
I asked Chelsea what she thought of a variegated thread, and she was all for it!! I used my best matching Omni-V thread, and I think it turned out great!! Color number 9044 Zumba.
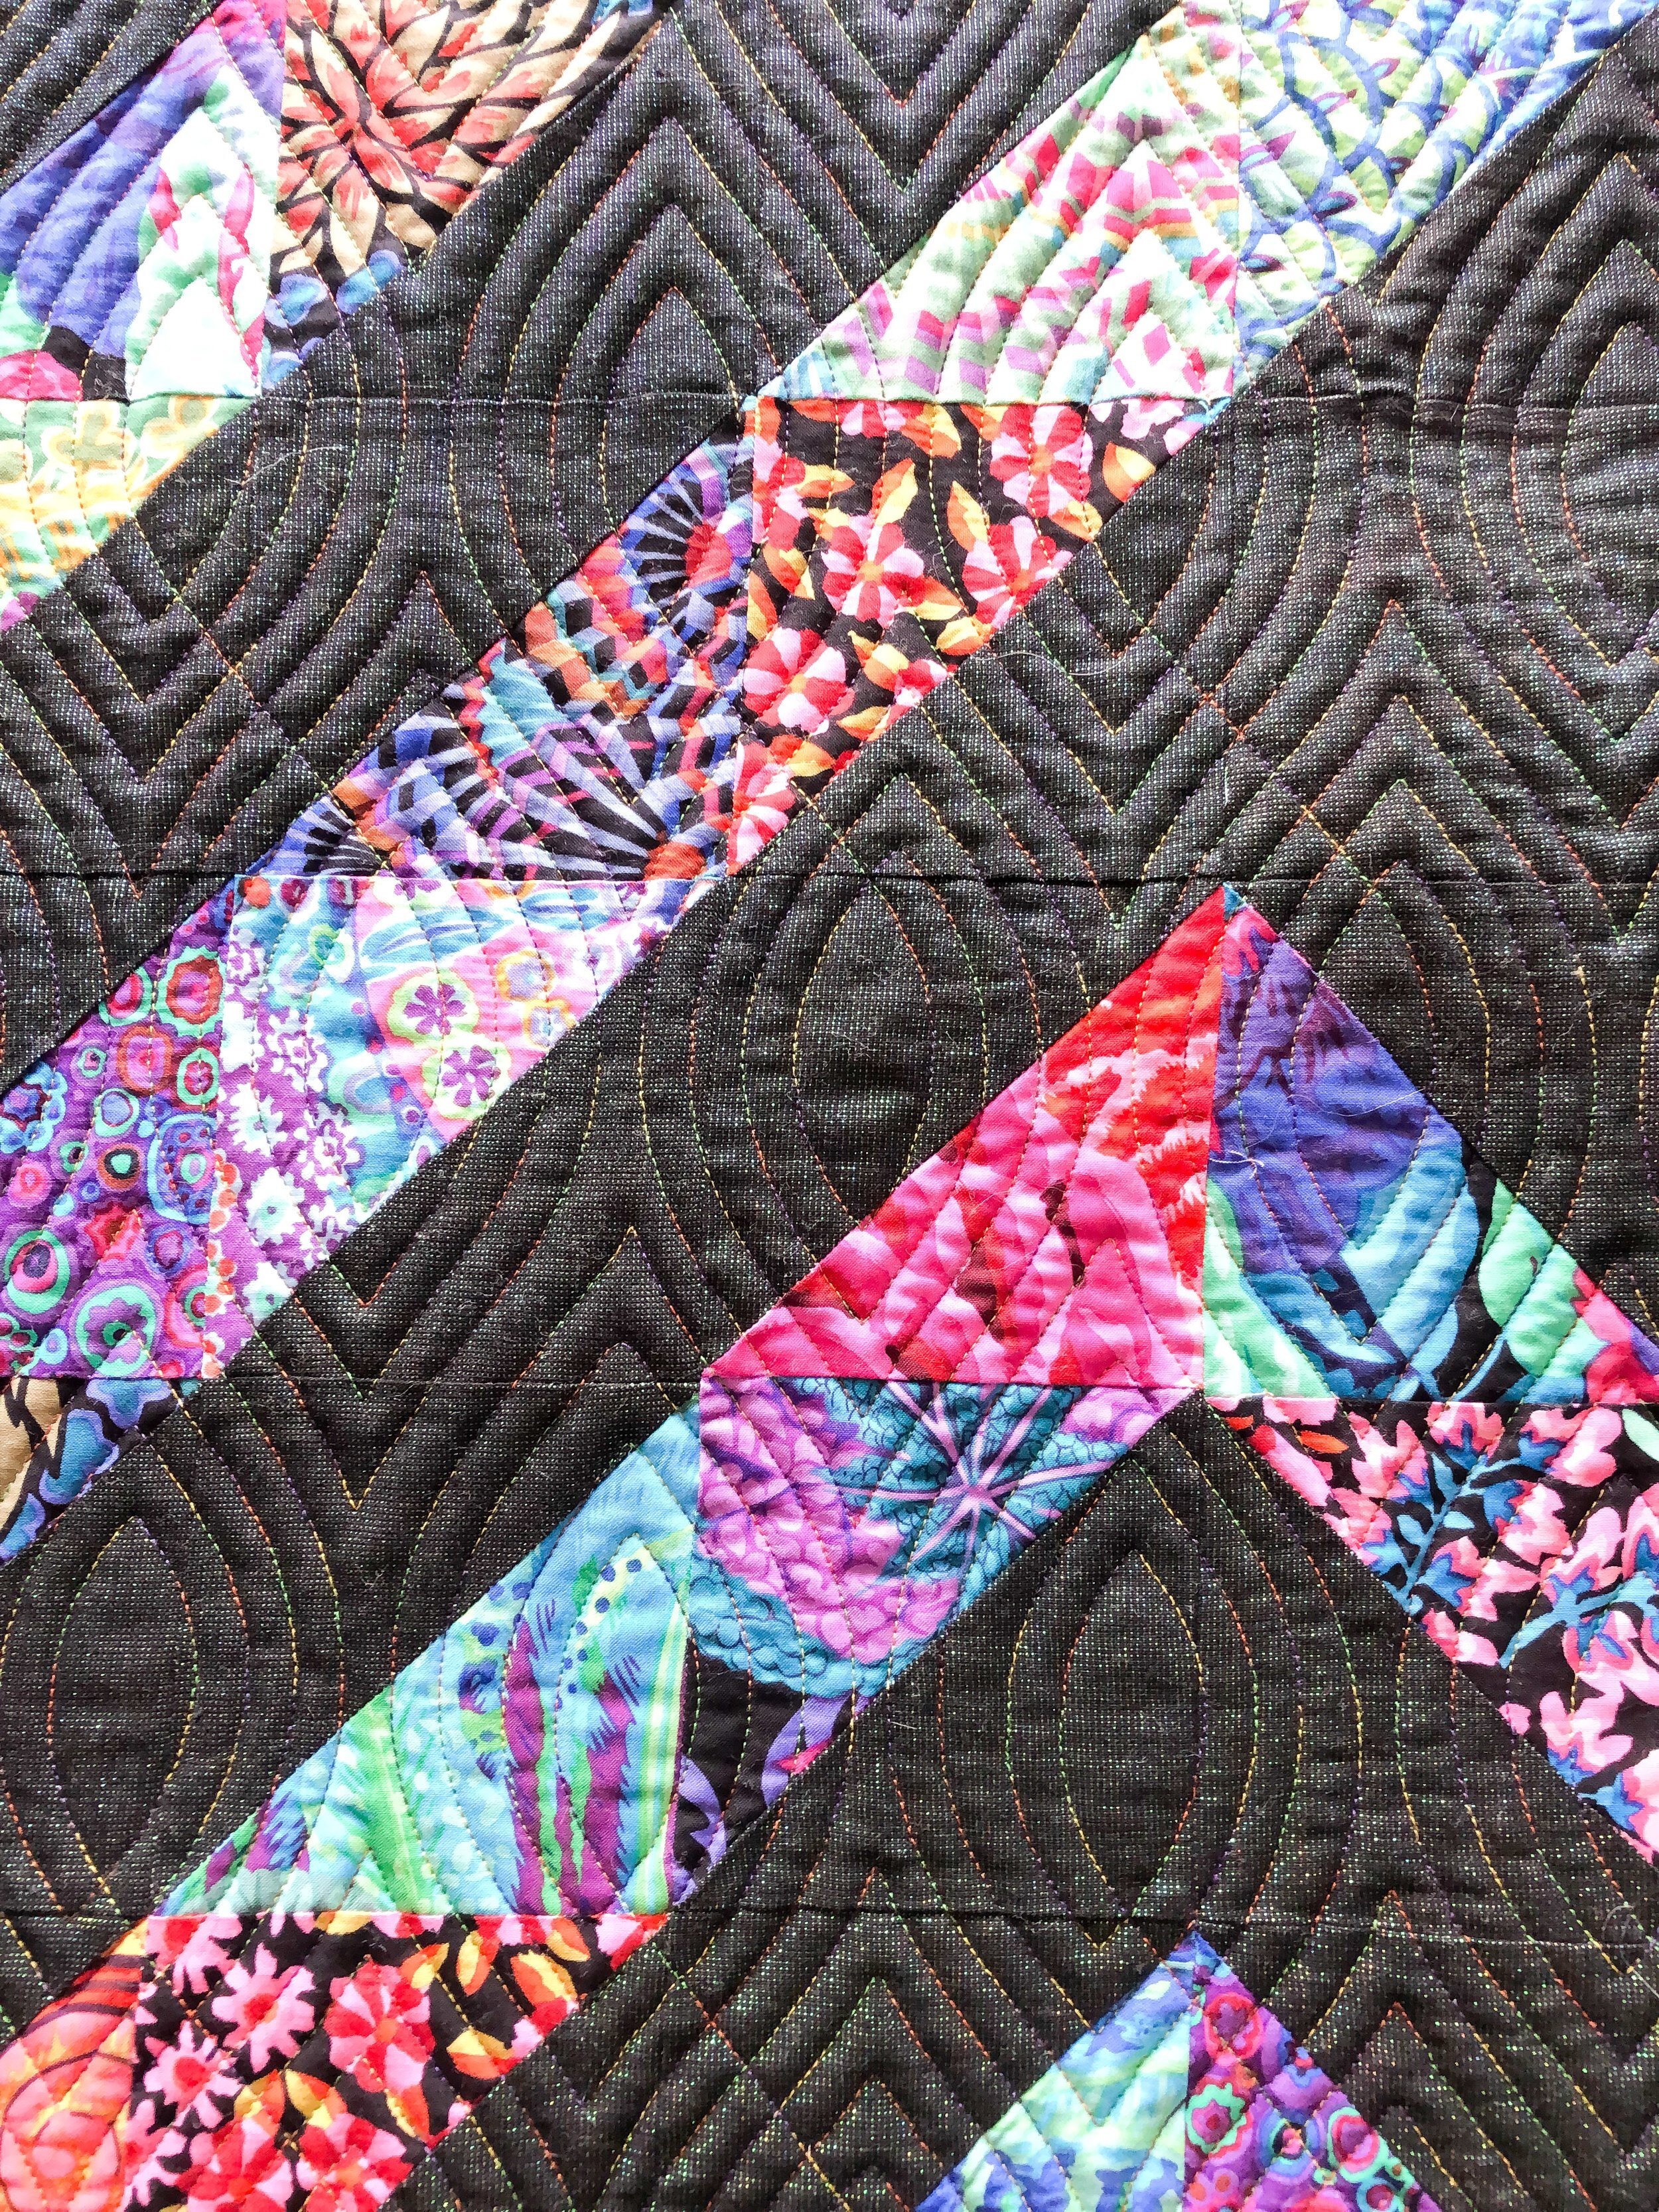
So fun to see the colored stitches.
The overall texture is just too good!!

And of course the backing texture is fabulous, too!
Thank you for stopping by!! Happy quilting! • Leisha
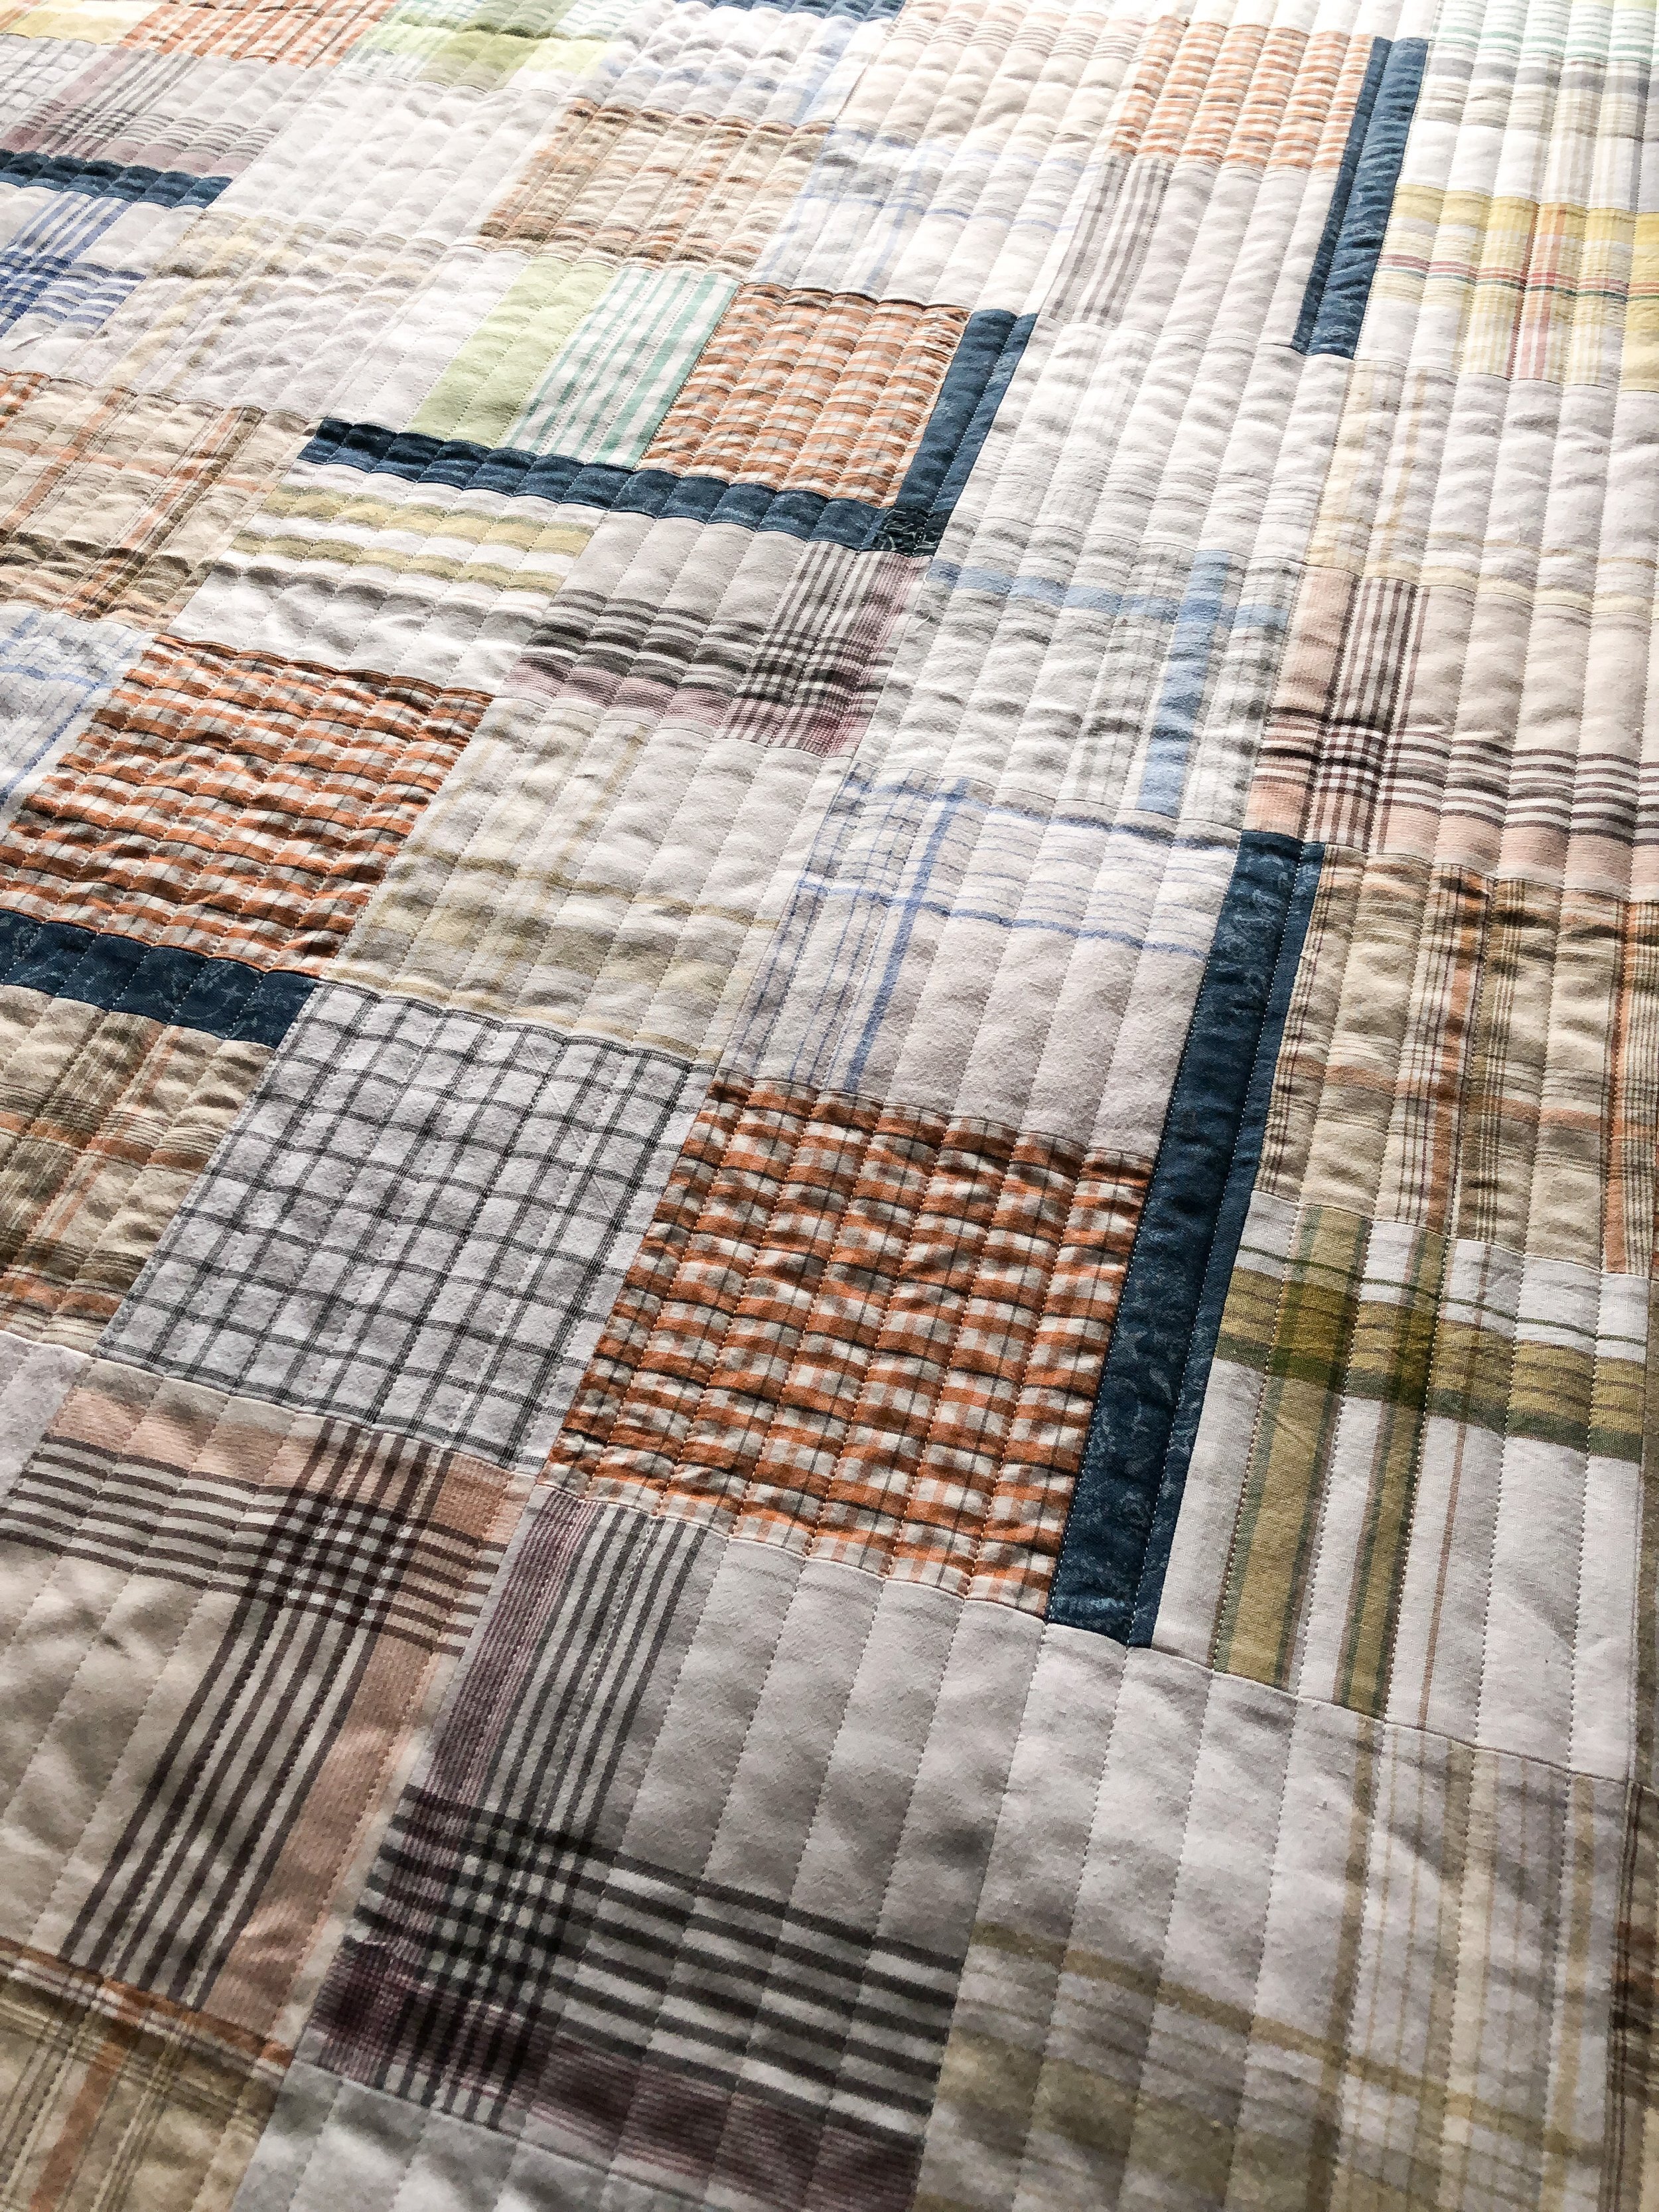
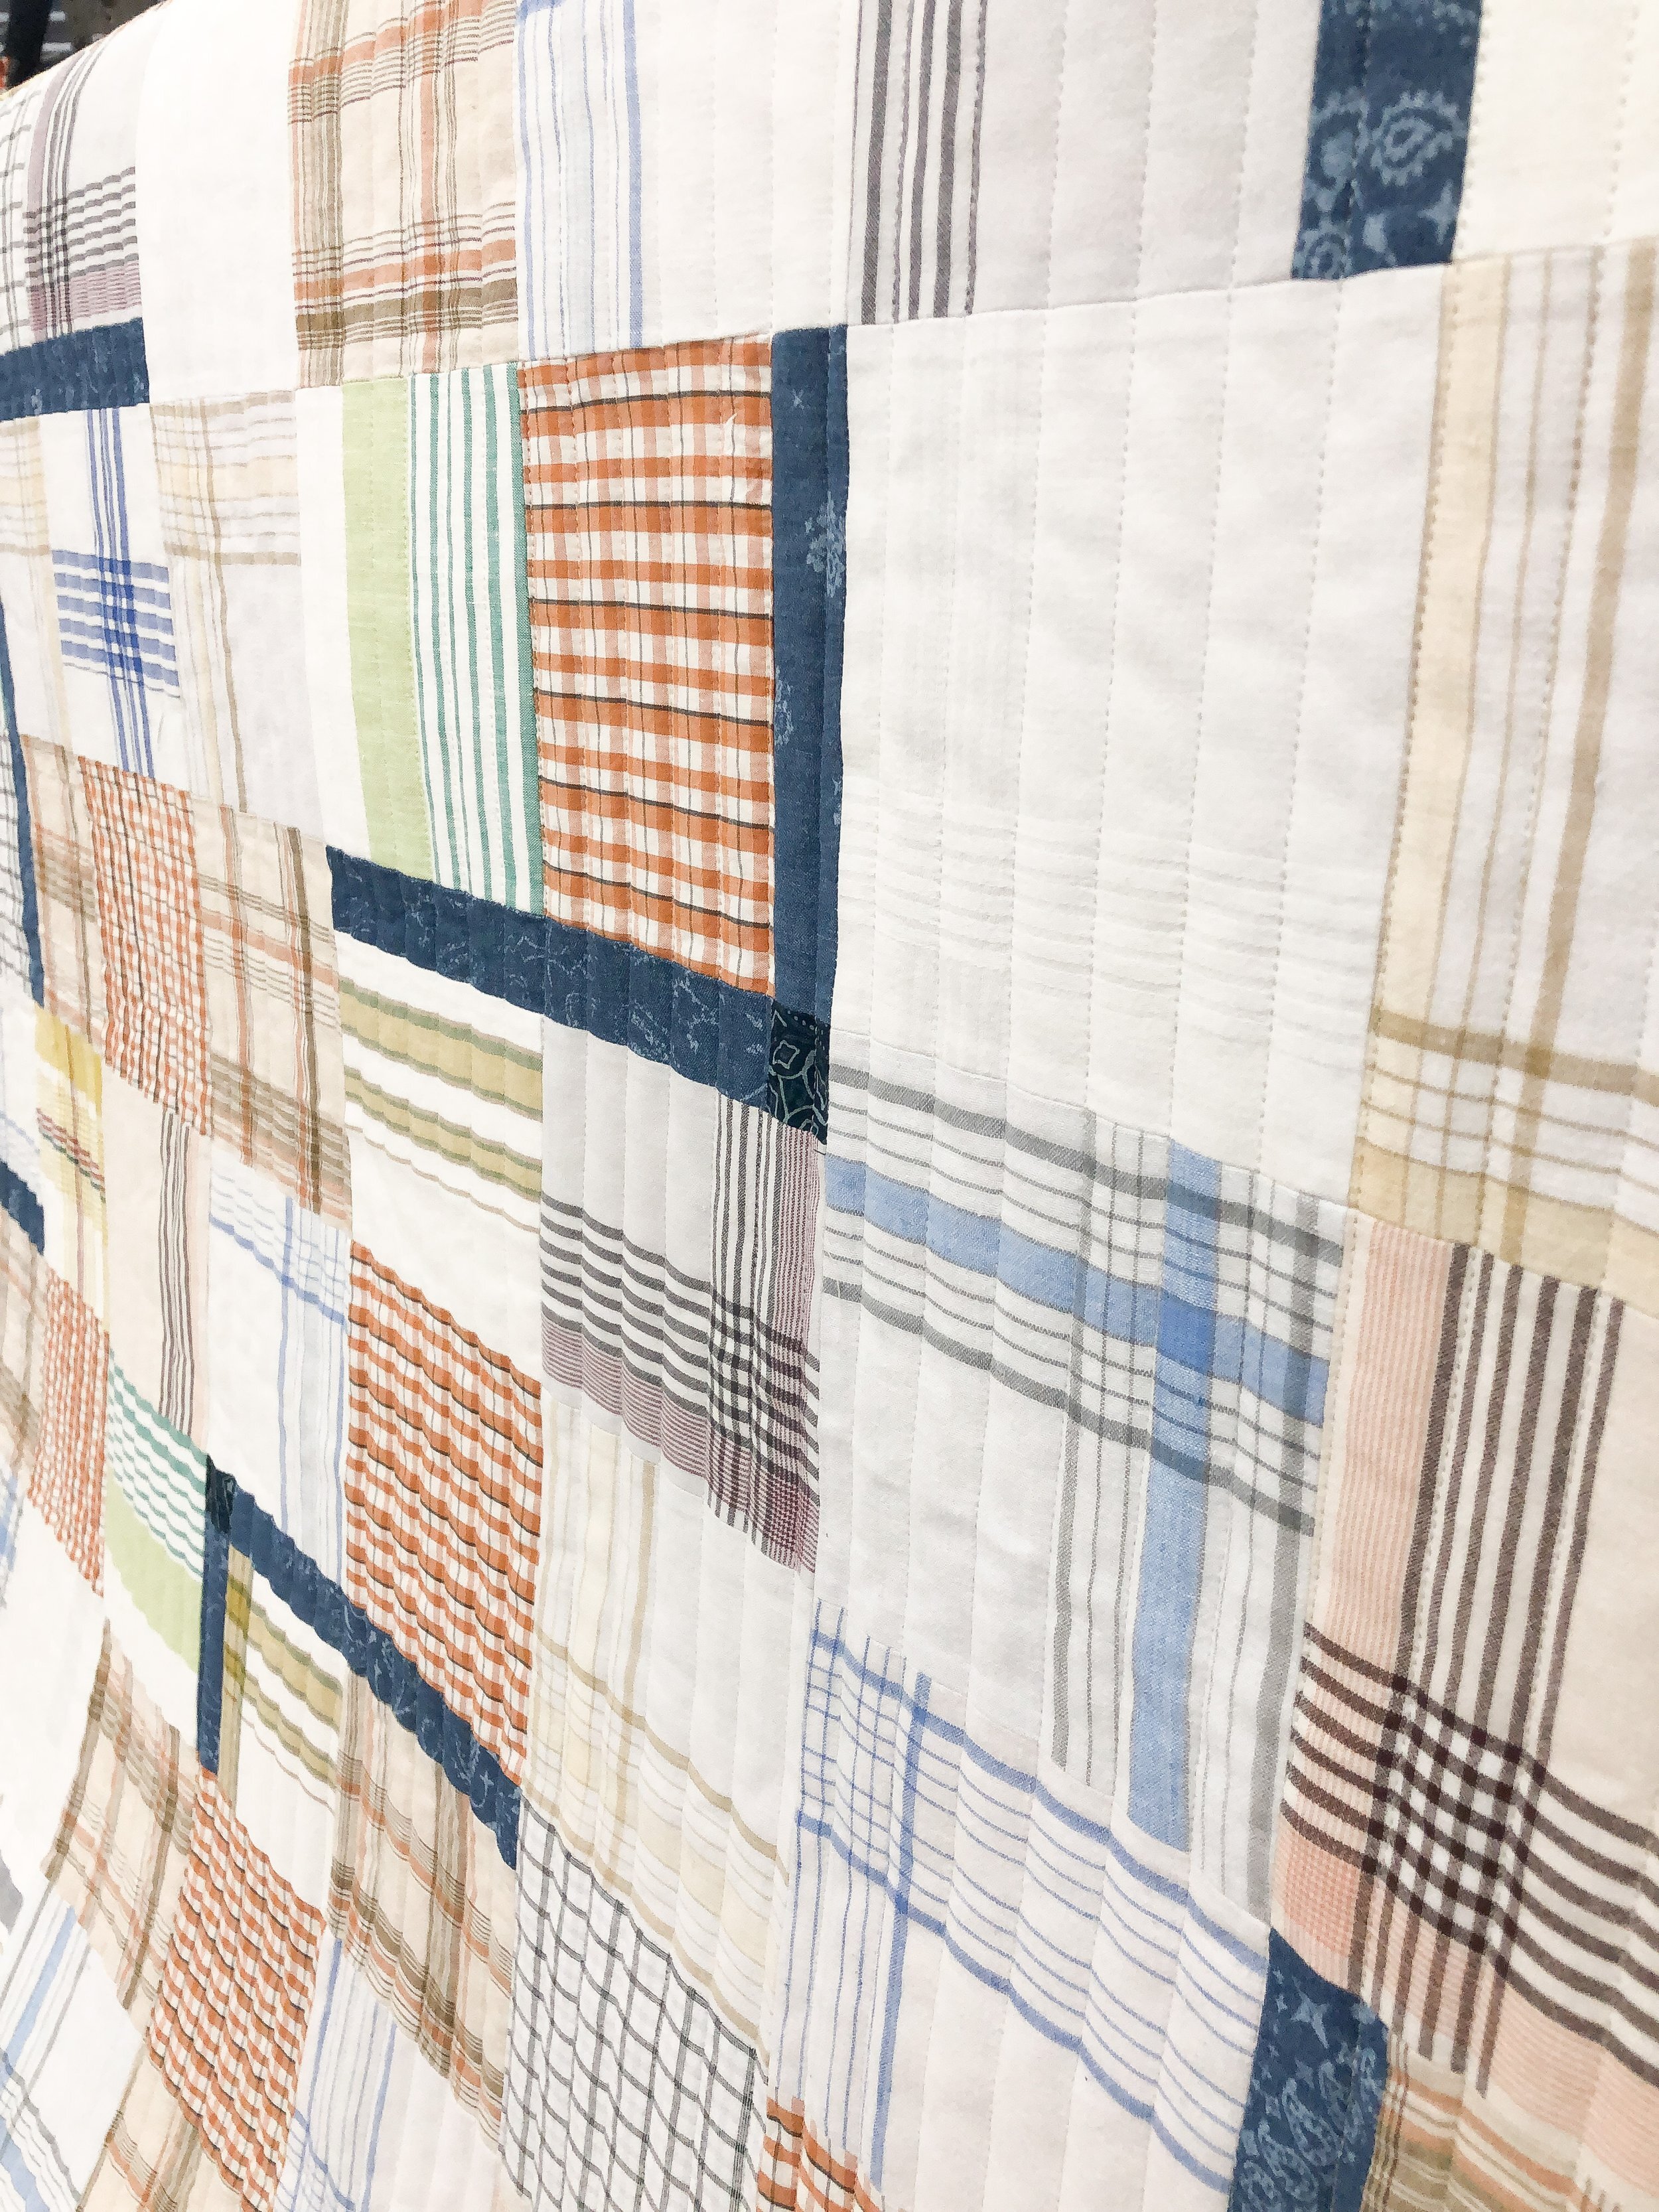
Linda’s Patchwork Memory Quilt
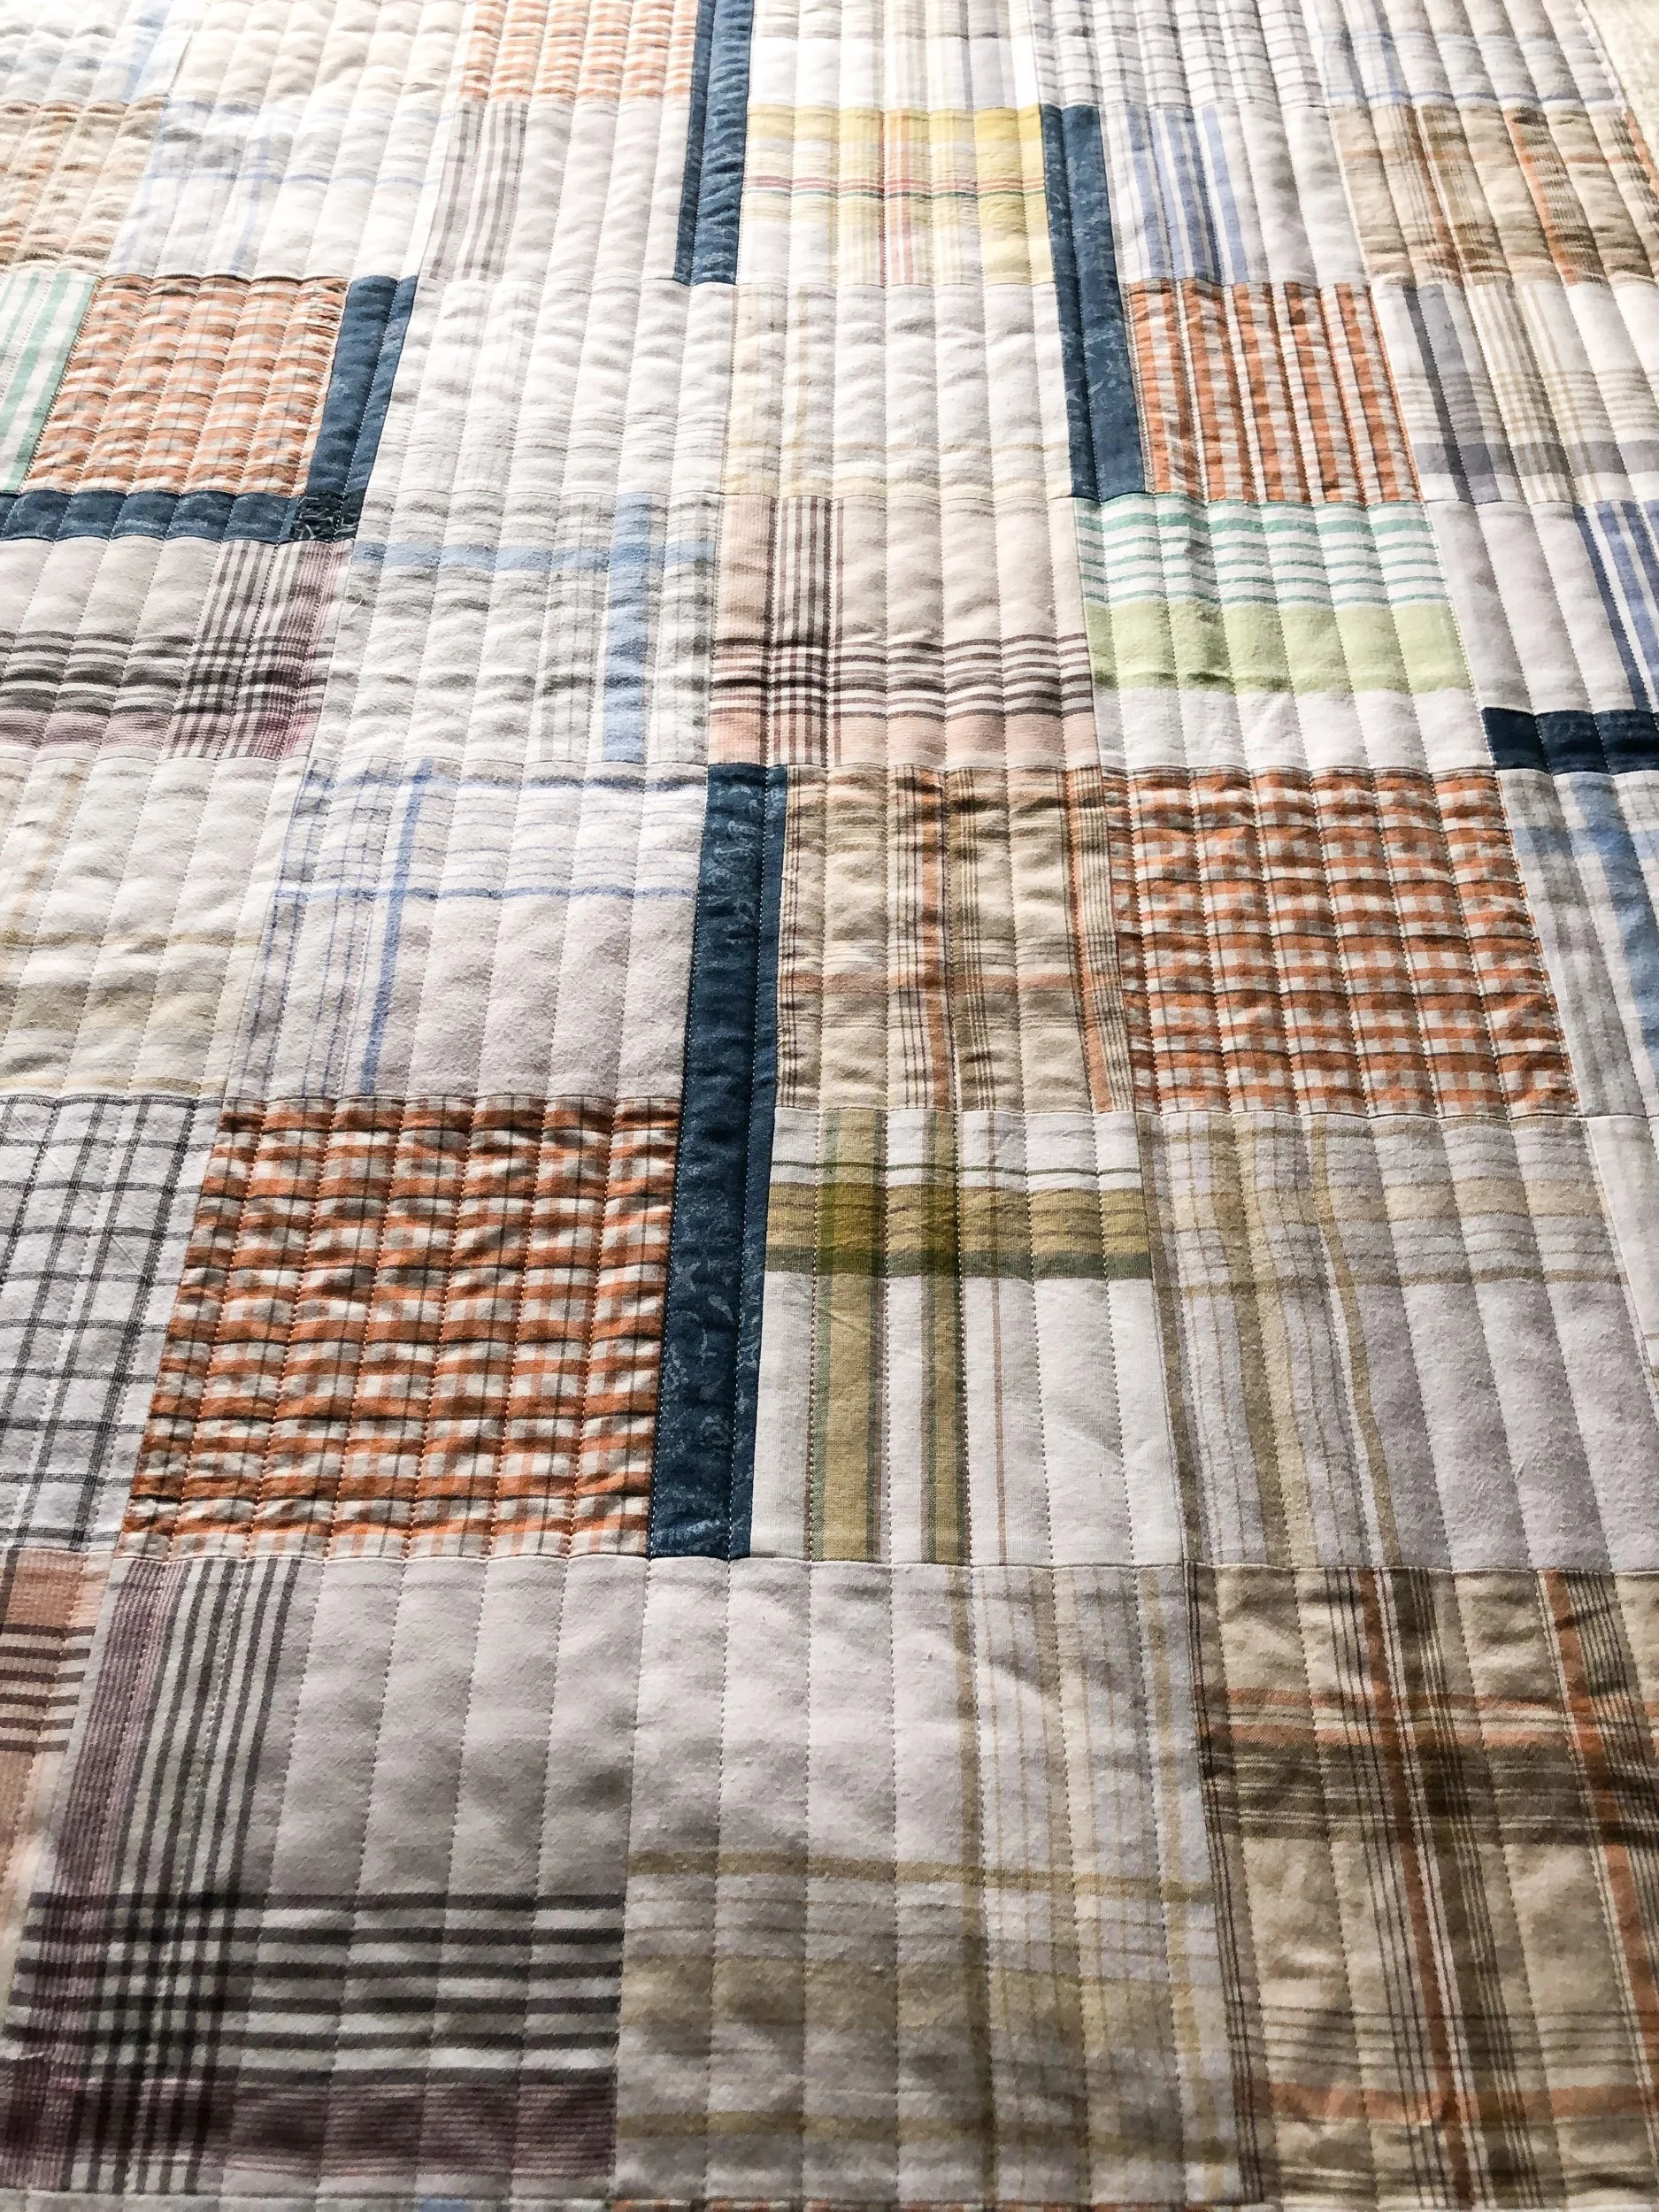
Linda’s memory quilt is such a special one!! She made it with her dad’s clothes after he passed away. I love that she added the navy strips, too. Linda came up with the pattern layout.

Linda requested bamboo batting, which is a wonderful choice. It makes for a softer quilt with a better drape. Have you ever felt bamboo batting before? It’s super duper soft. I currently carry the 4 oz Winline bamboo, but soon I’m going to have the 6 oz available. Which is a little loftier. I’m so excited!! I actually have a quilt of mine I’m waiting to quilt until I get the 6 oz.
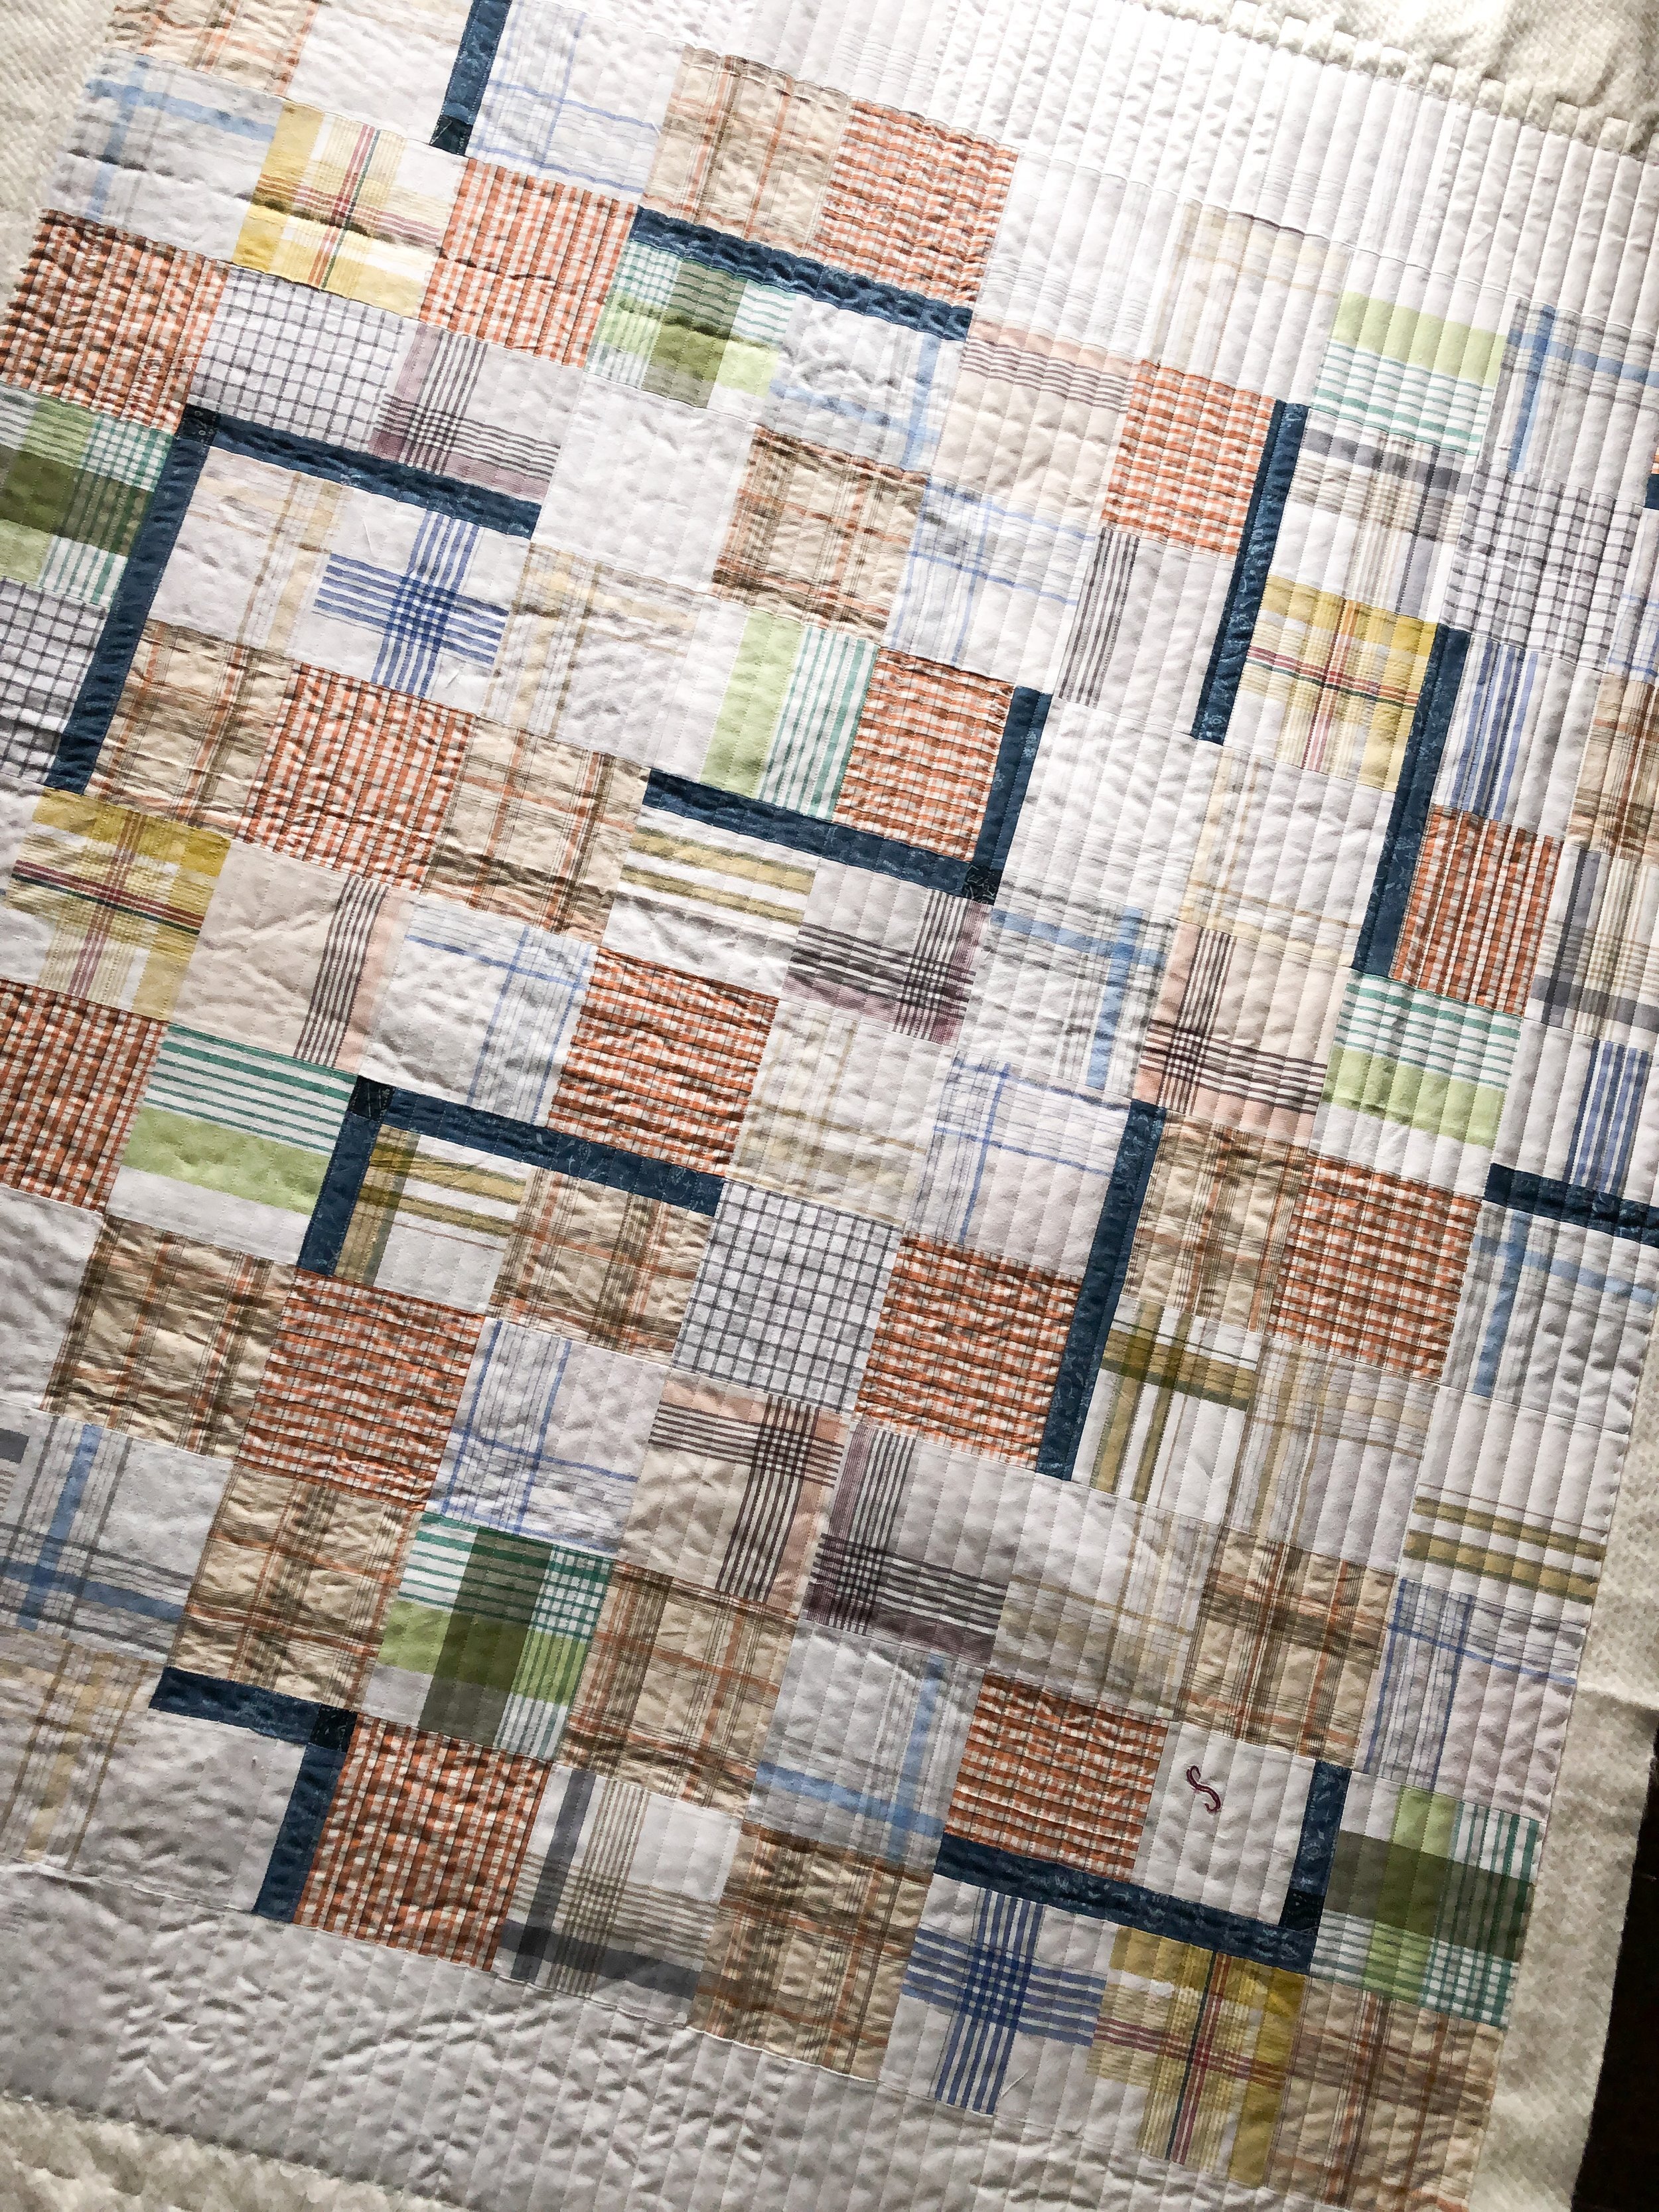
Linda wanted lines quilted, and she plans to go back and do some half quilting between the rows.
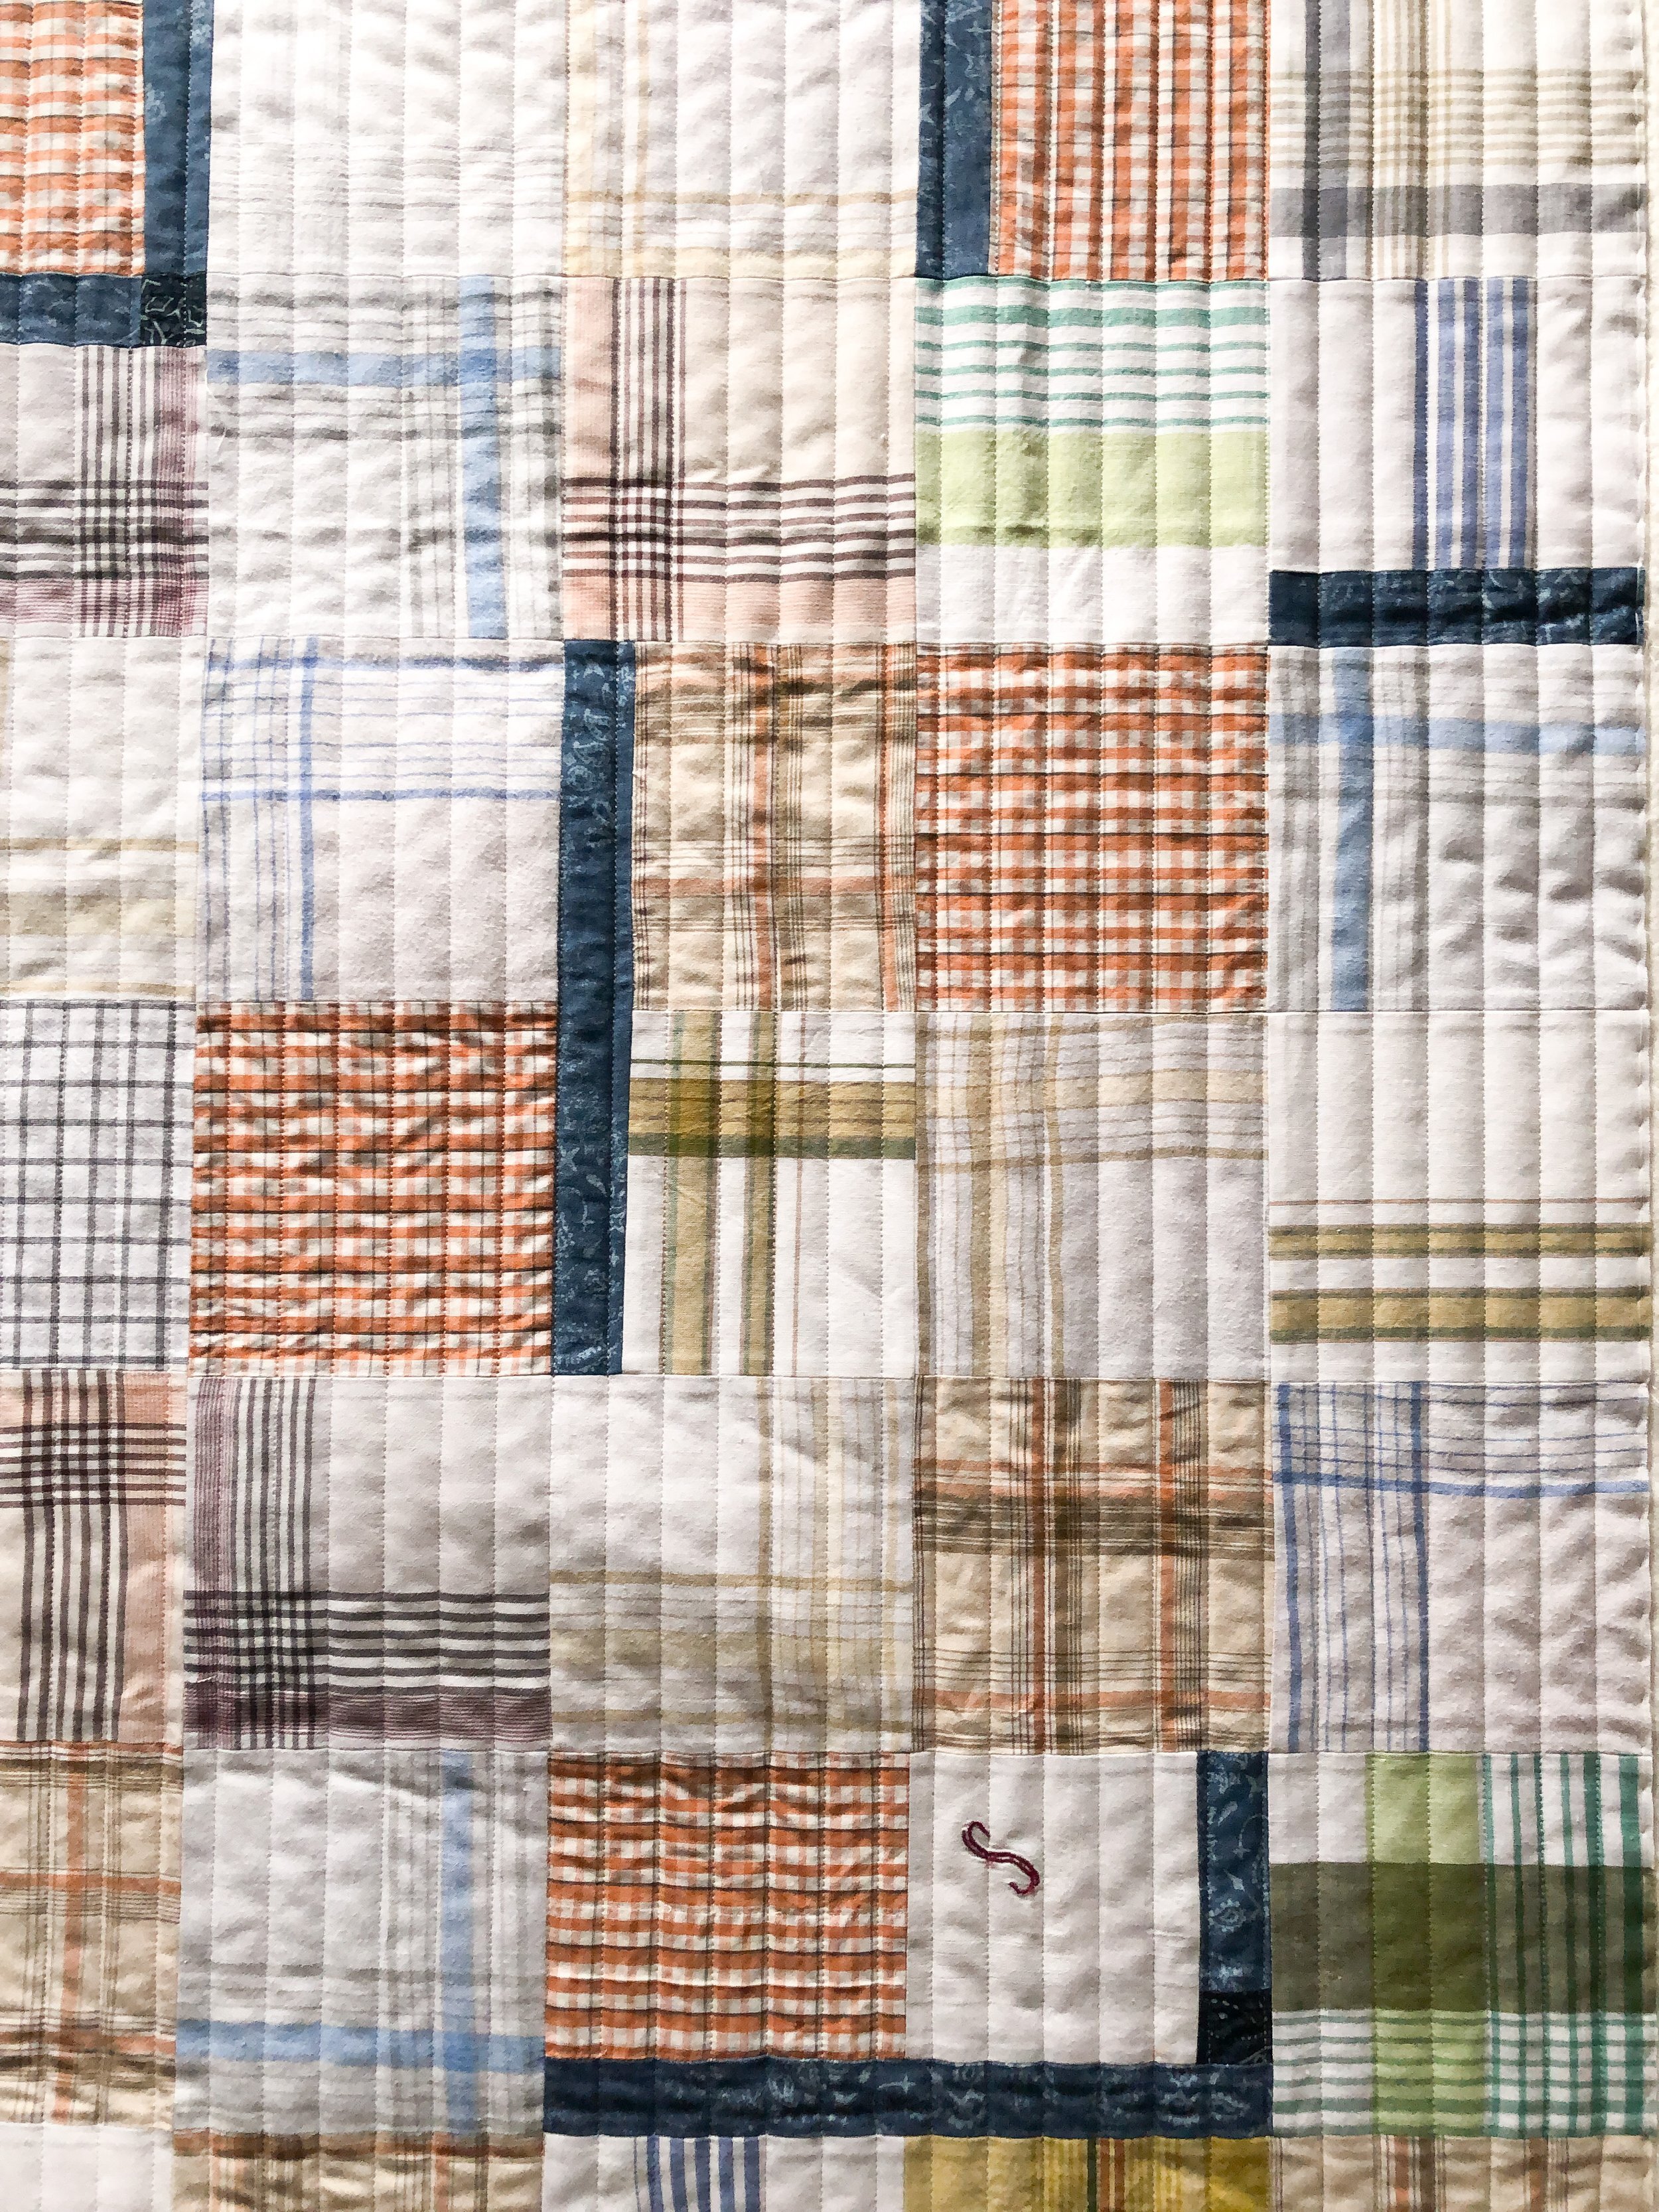
I used an off white Omni thread from Superior threads.
Such a beautiful quilt!! This makes my job so much more meaningful.

The lines on the back!! Love it! Thank you for checking out Linda’s quilt!! Have a happy day! • Leisha
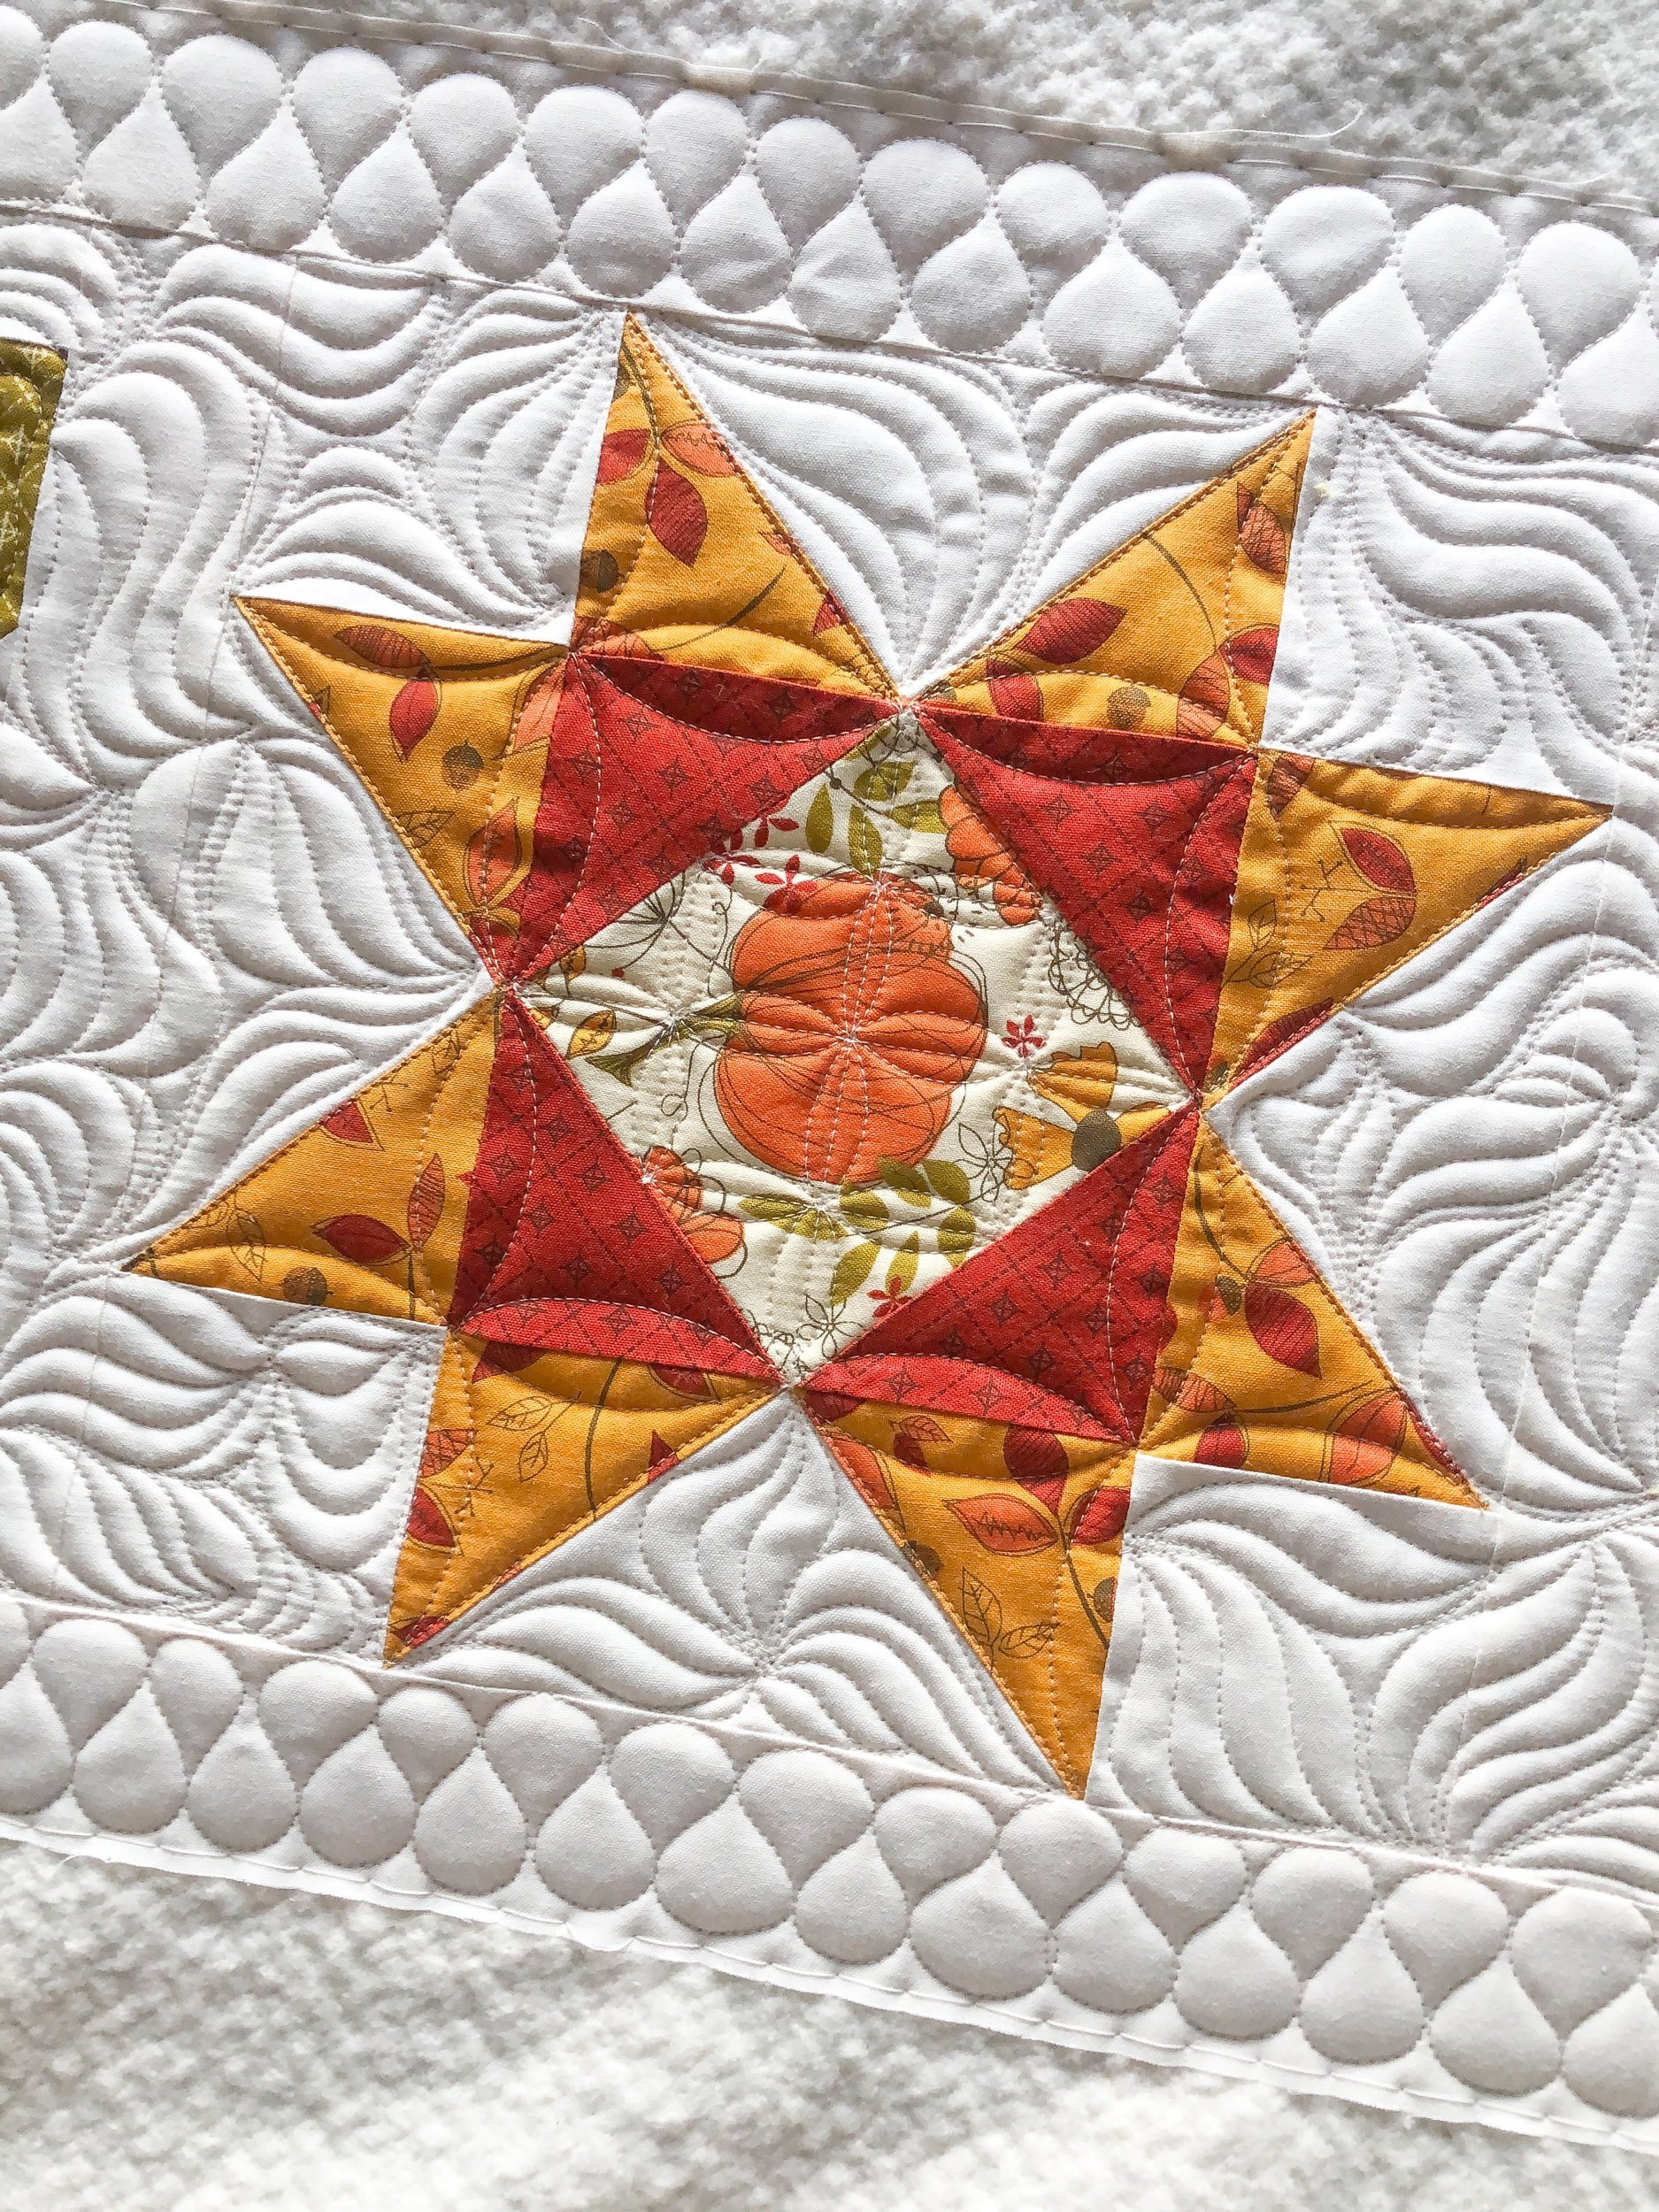
Barbara’s Autumn Abundance Table Runner
Hi Friends,
I have a quick runner to share with you today. It’s a fun one!!
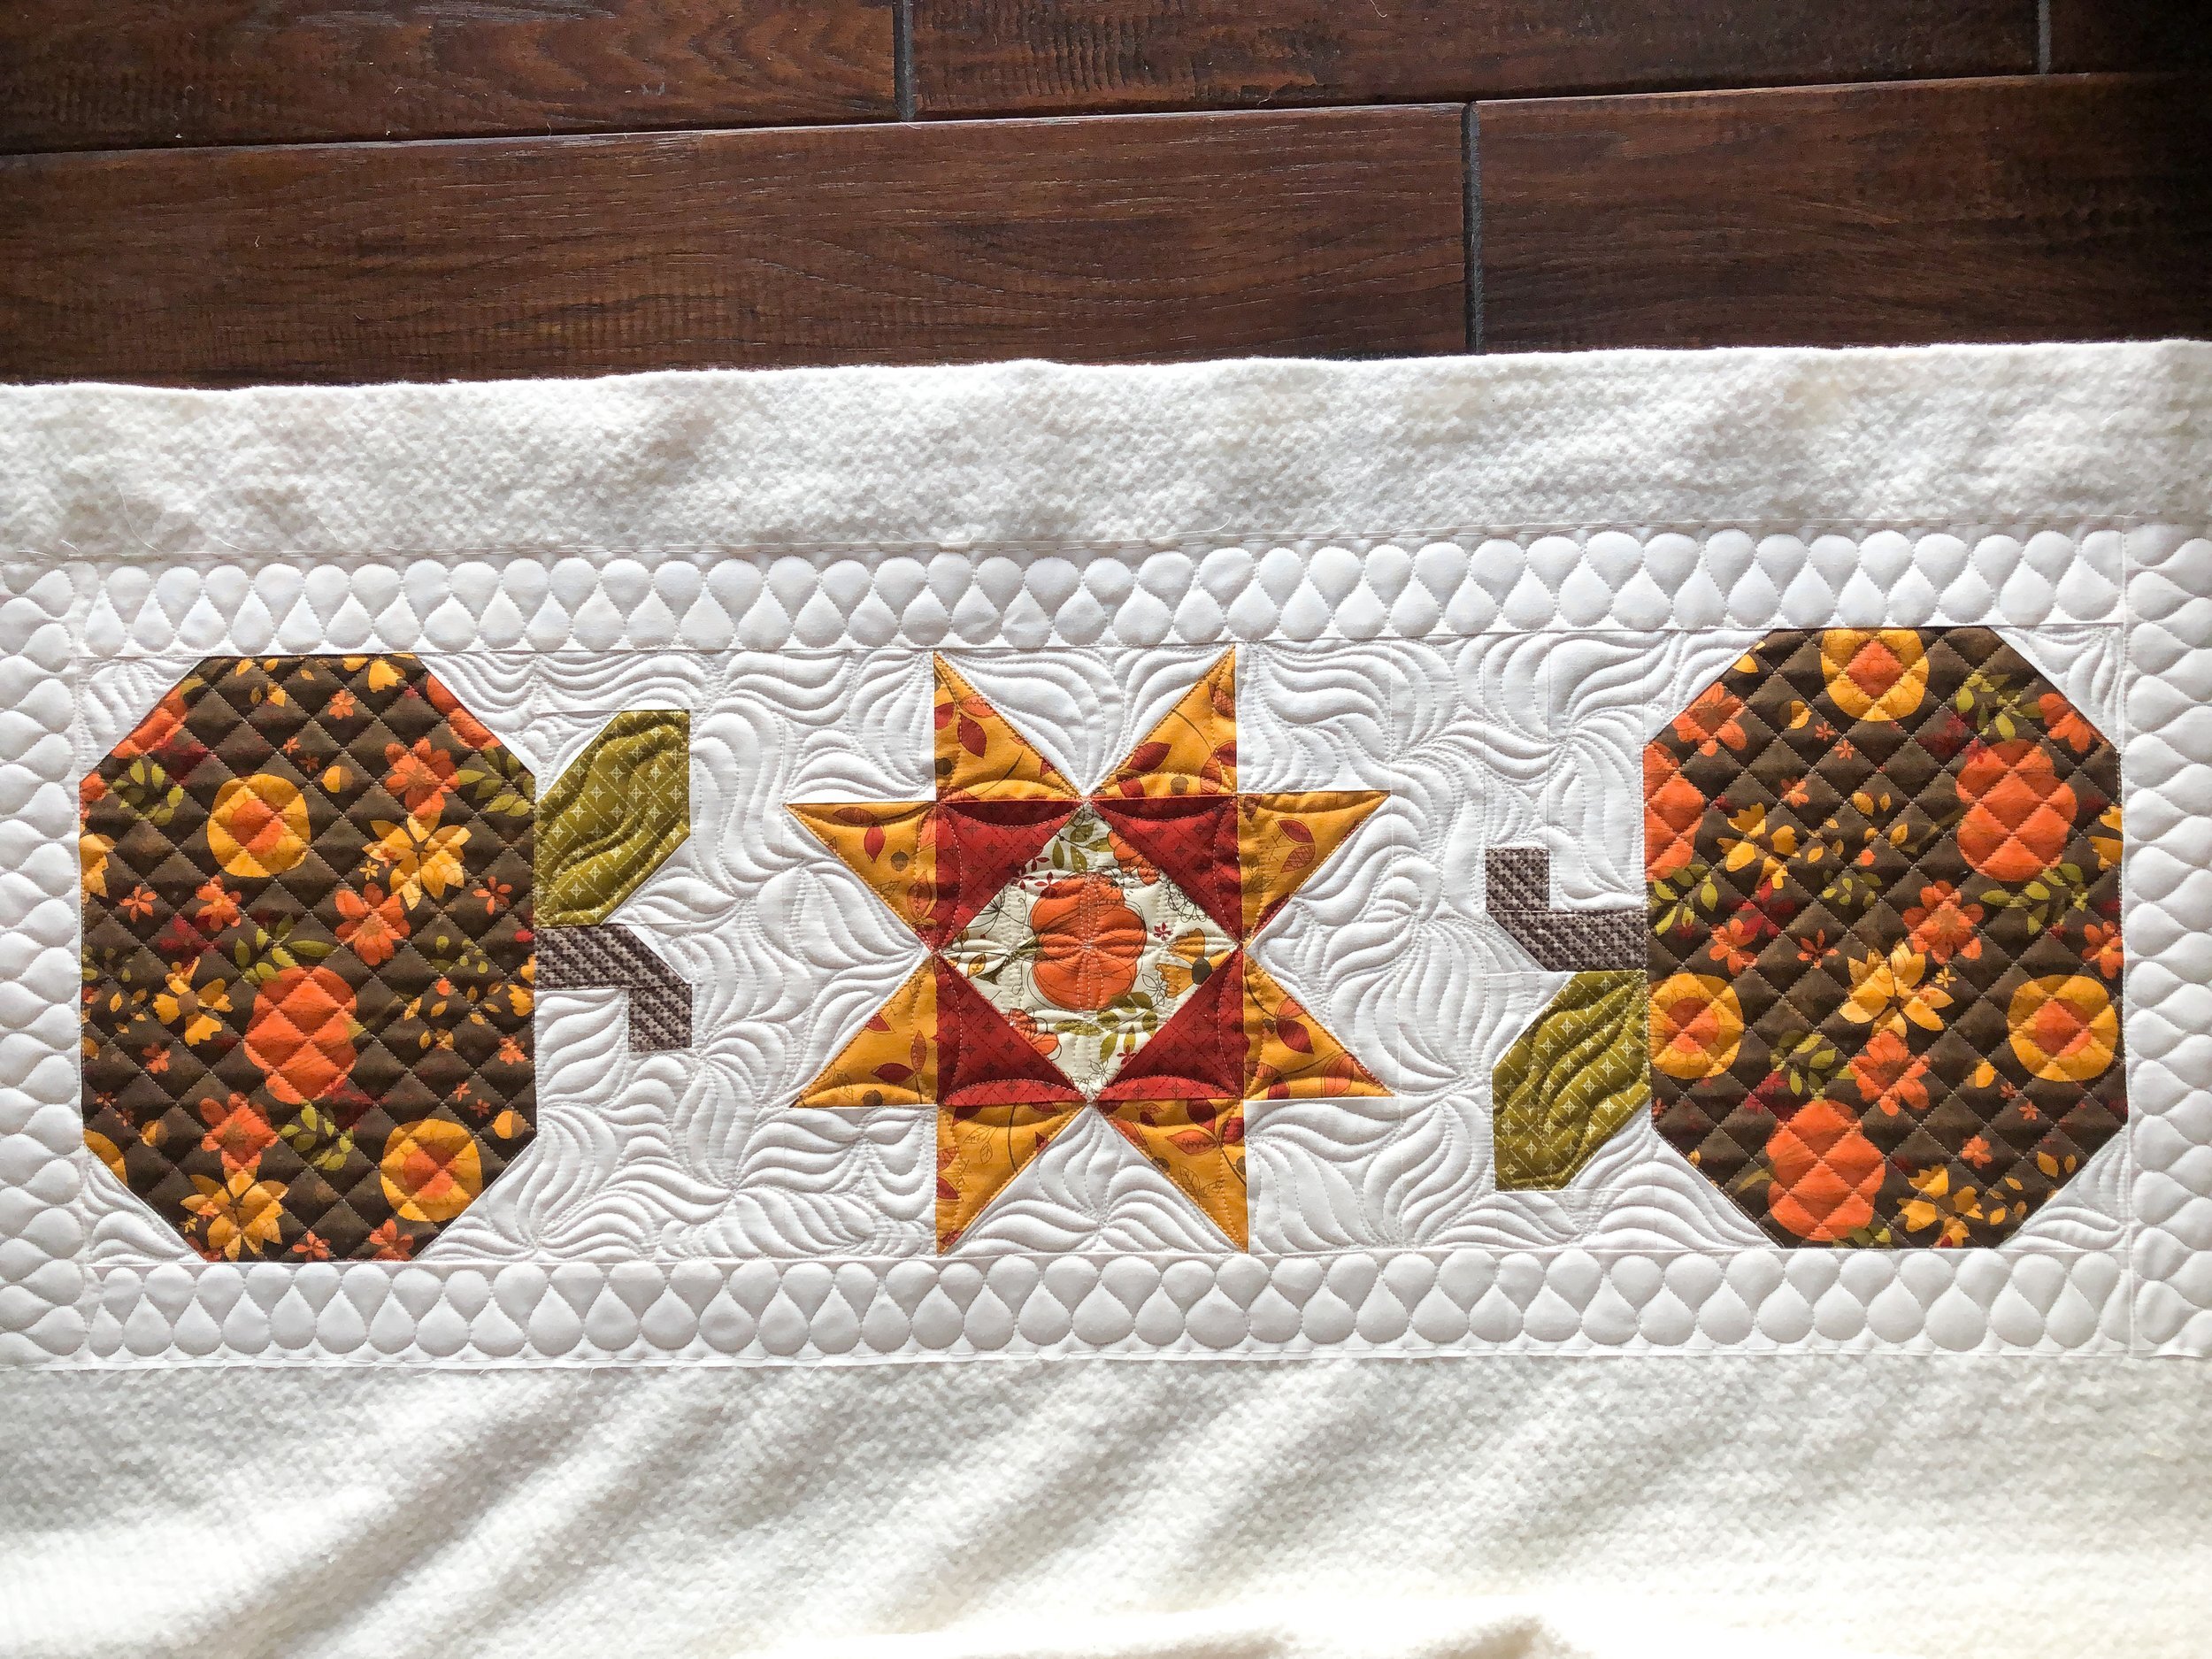
The pattern is called Autumn Abundance by Lindsey Weight from Primrose Cottage Quilts.

Barbara made this for a church fundraiser dinner for the youth that she goes to church with. Amazing of her, right?!?!?!

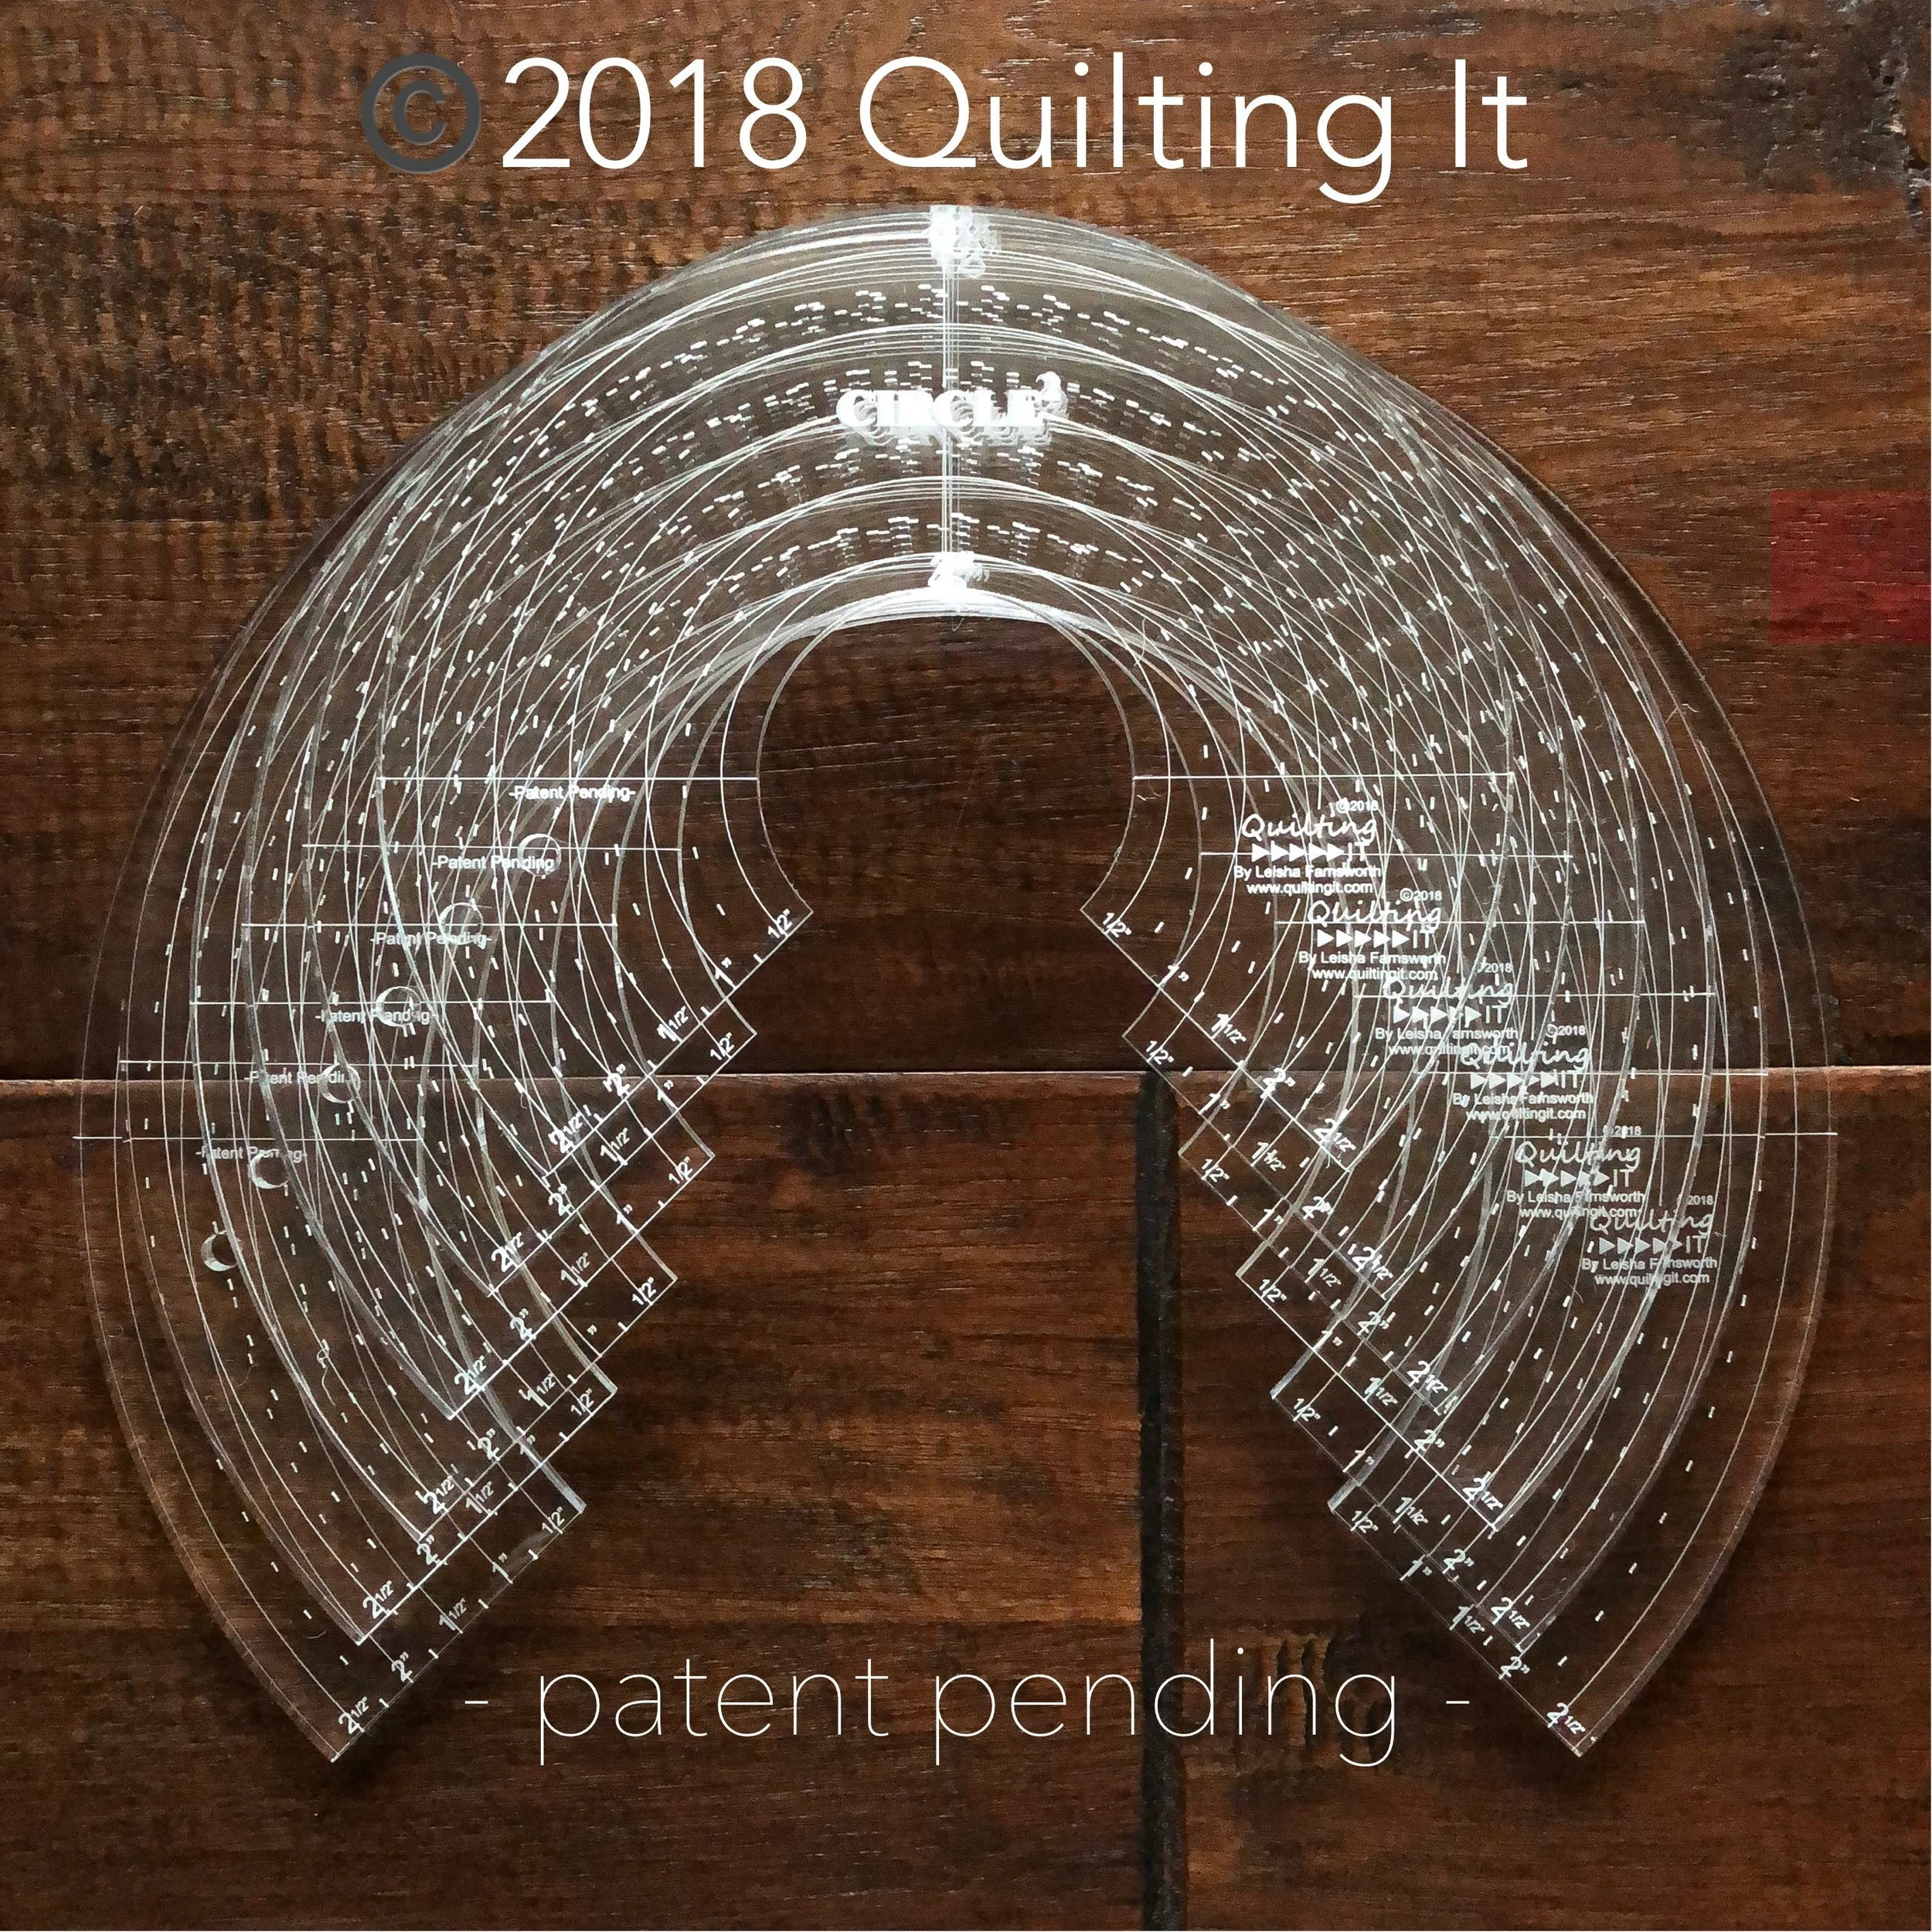
Barbara wanted simple custom quilting. I used my 3” Circle2™ machine quilting circle ruler to quilt the curves in the star. My Circle2™ rulers are available in my shop. I also used an edge ruler from Linda at The Quilted Pineapple for the cross hatching and lines in the pumpkins. The background quilting is my freemotion Grass design. If you’ve ever thought about taking freemotion quilting classes, you should check out my Quilting It Freemotion™ course. I teach 10 different quilting designs and so you can pick and choose what you’d like to learn or get the whole bundle.

I used a scrap of 8020 cotton poly blend batting and Natural White Omni thread from Superior Threads.

Check out the video below for some more info on my Quilting It Freemotion™ course.
Thanks for coming by!! If you’d like to have me machine quilt for you, send me an email at quiltingit@gmail.com or contact me through my website. You can find more info about my prices and quilt prep info on my Longarm Quilting Services page. Thank you!! I look forward to working with you. - Leisha
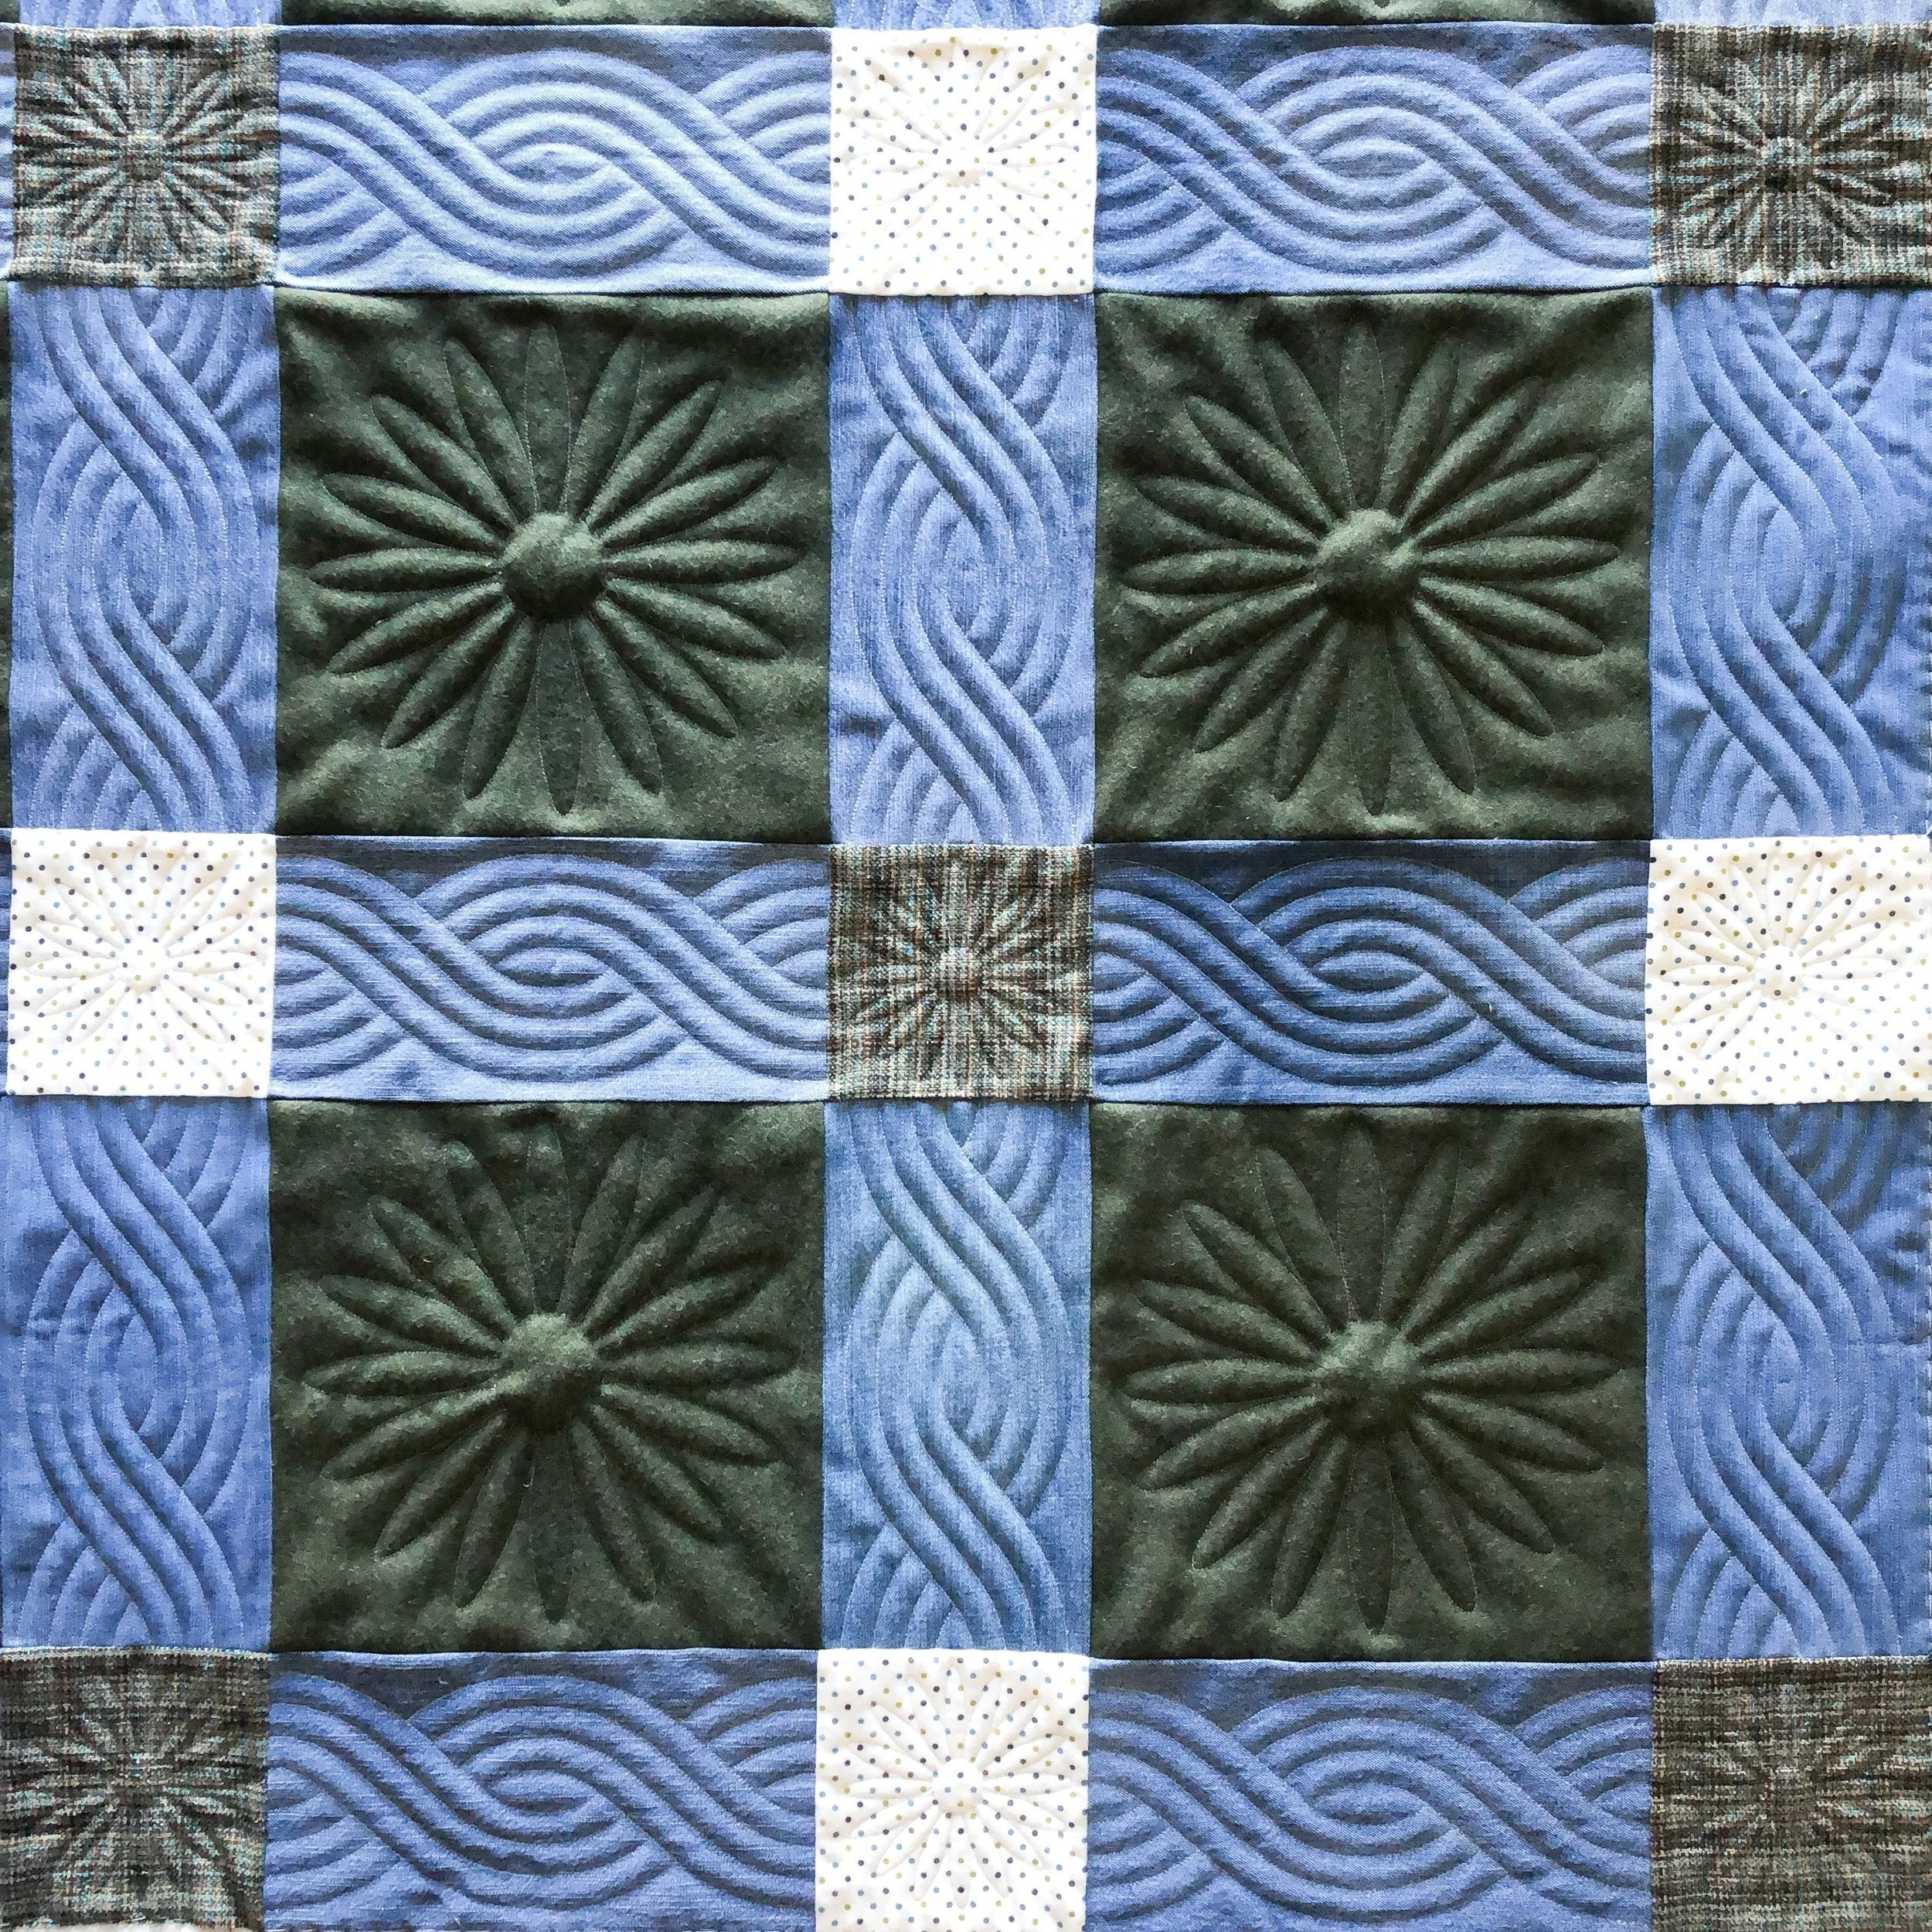
Caroline’s Wool Quilt
This quilt screams texture!! It turned out sooo great!

Caroline made this quilt with wool which is the grayish green fabric, denim for the sashing, and some flannel dotted squares…if I remember right.

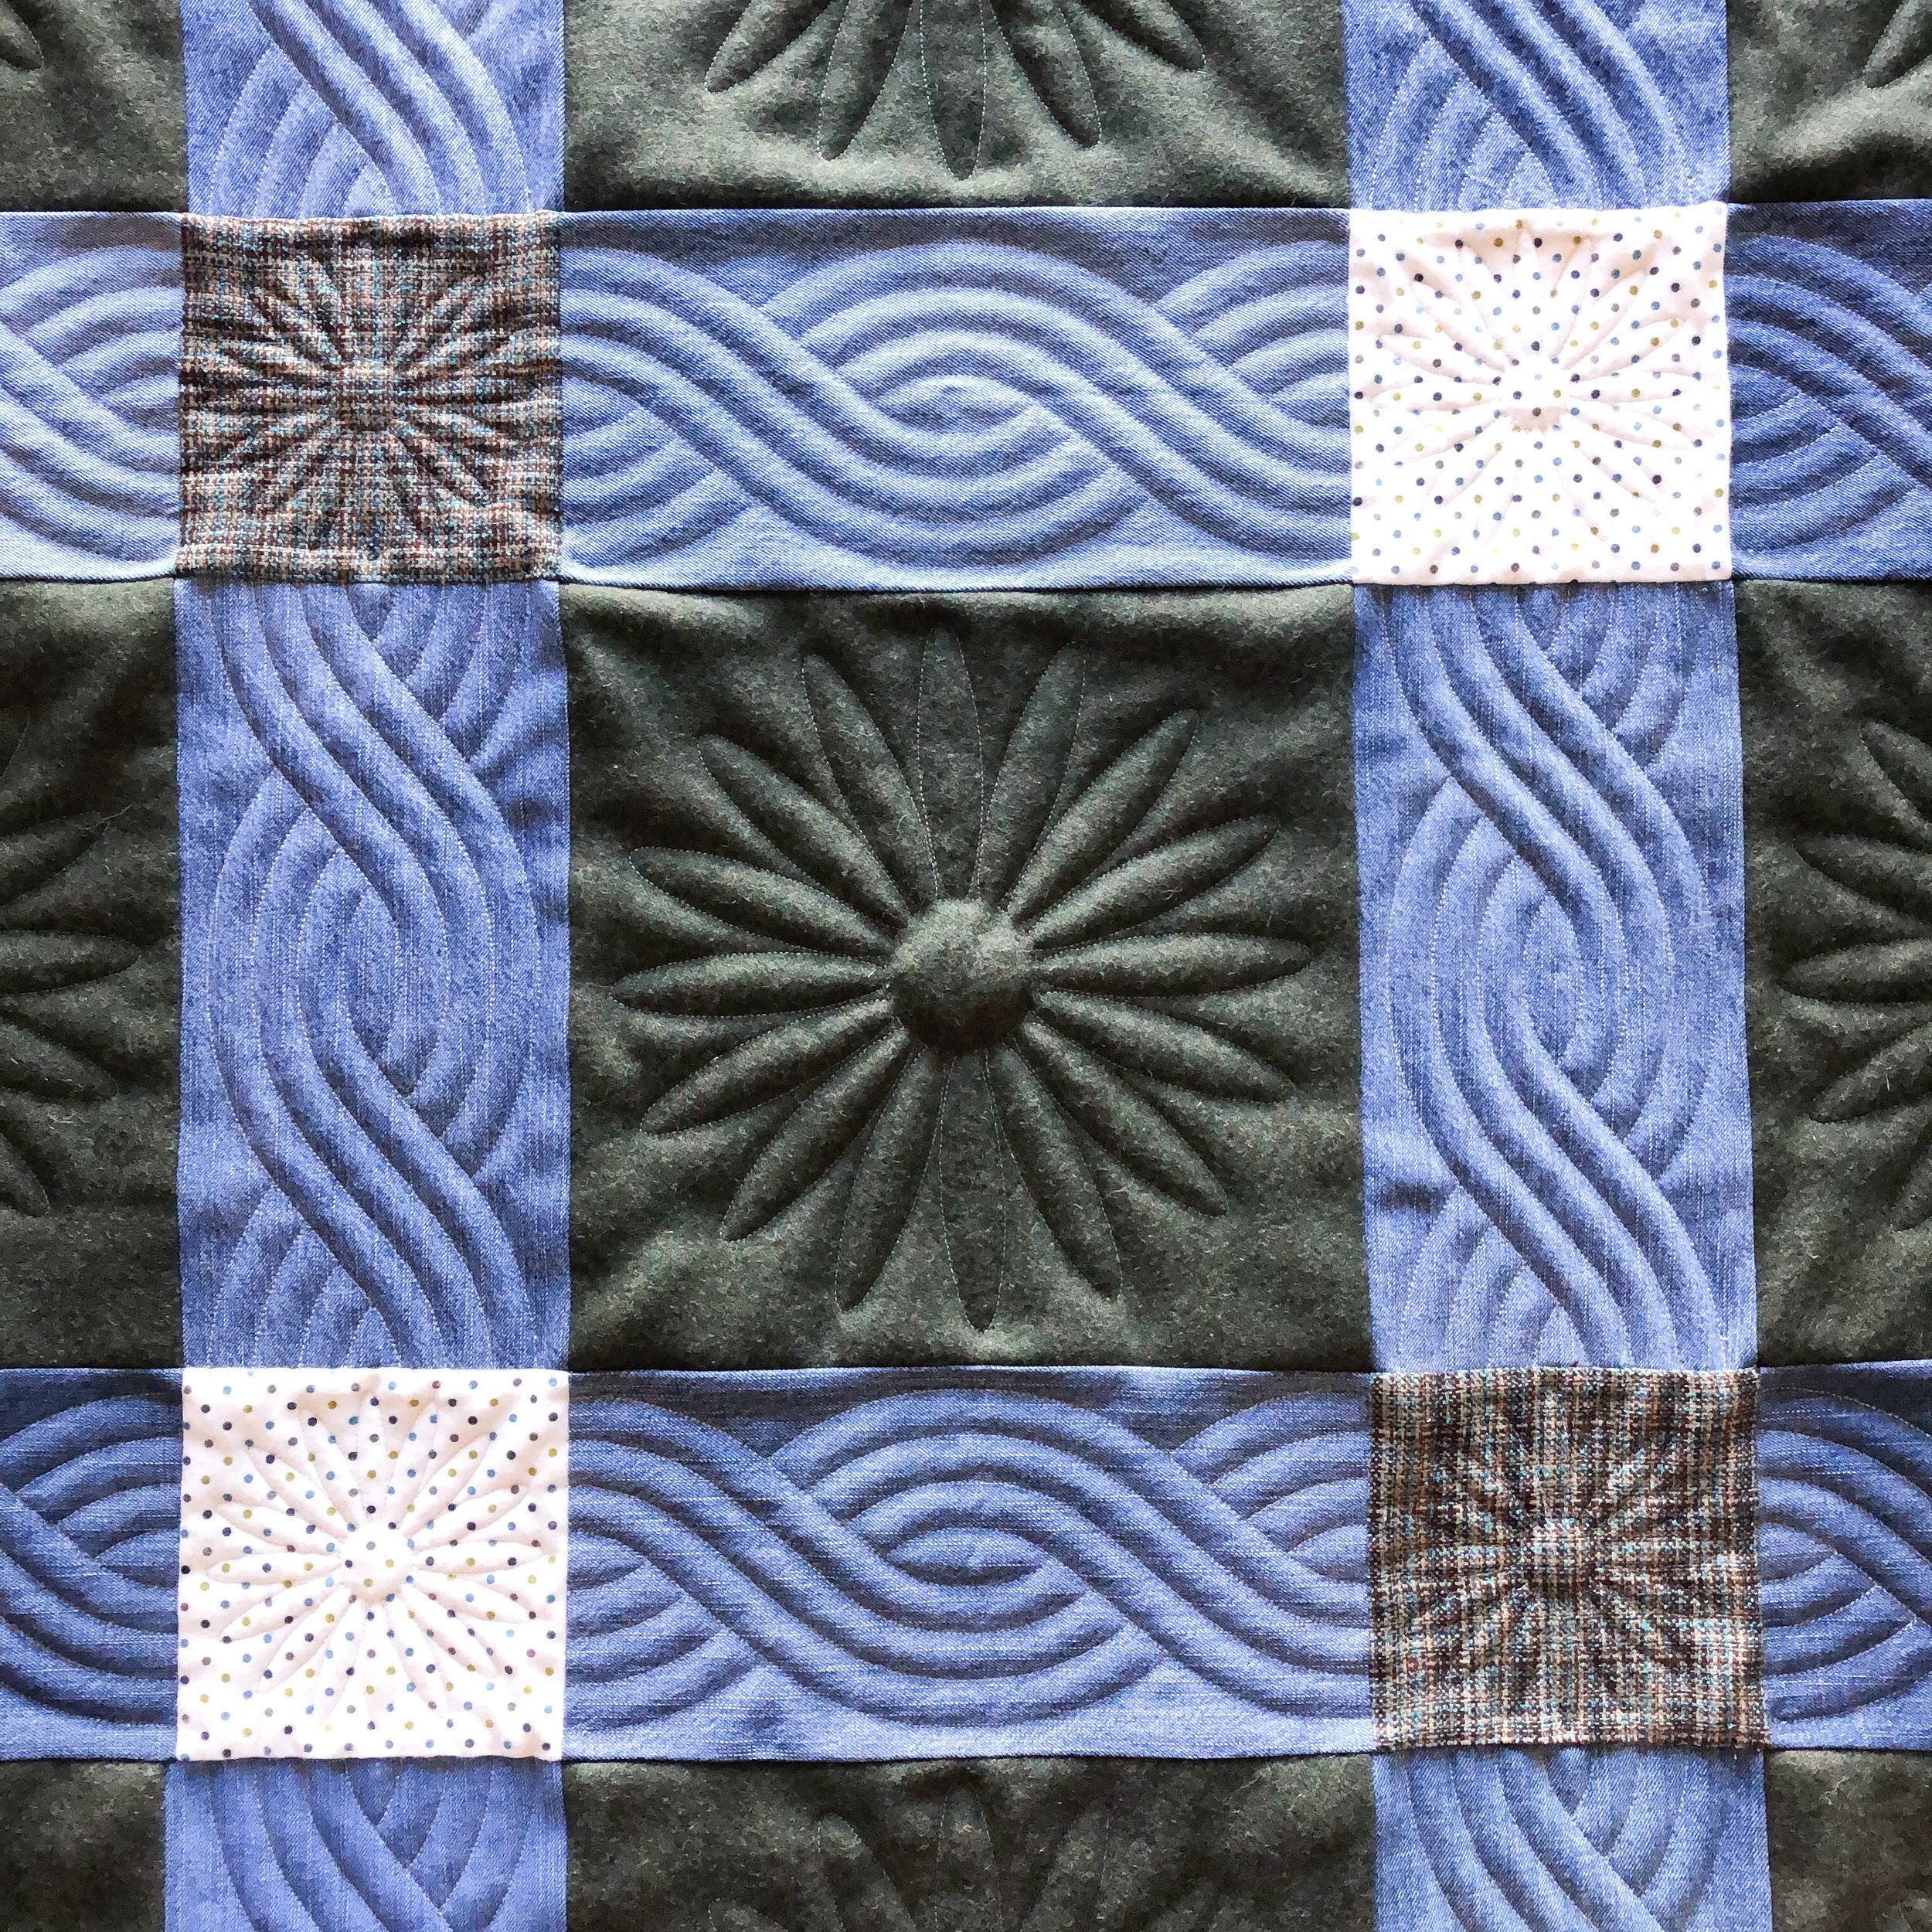
She requested flowers in all the squares, and something that weaves in the sashing, similar to what I quilted. I love how it turned out!!!

I used a daisy block that came free on my machine, and then Even Simpler Cables by Linda Thielfoldt for the curvy woven lines in the sashing. Both of which I had to custom fit to each square and rectangle.
I used Omni Natural White for the thread, and Winline’s 8020 for the batting.

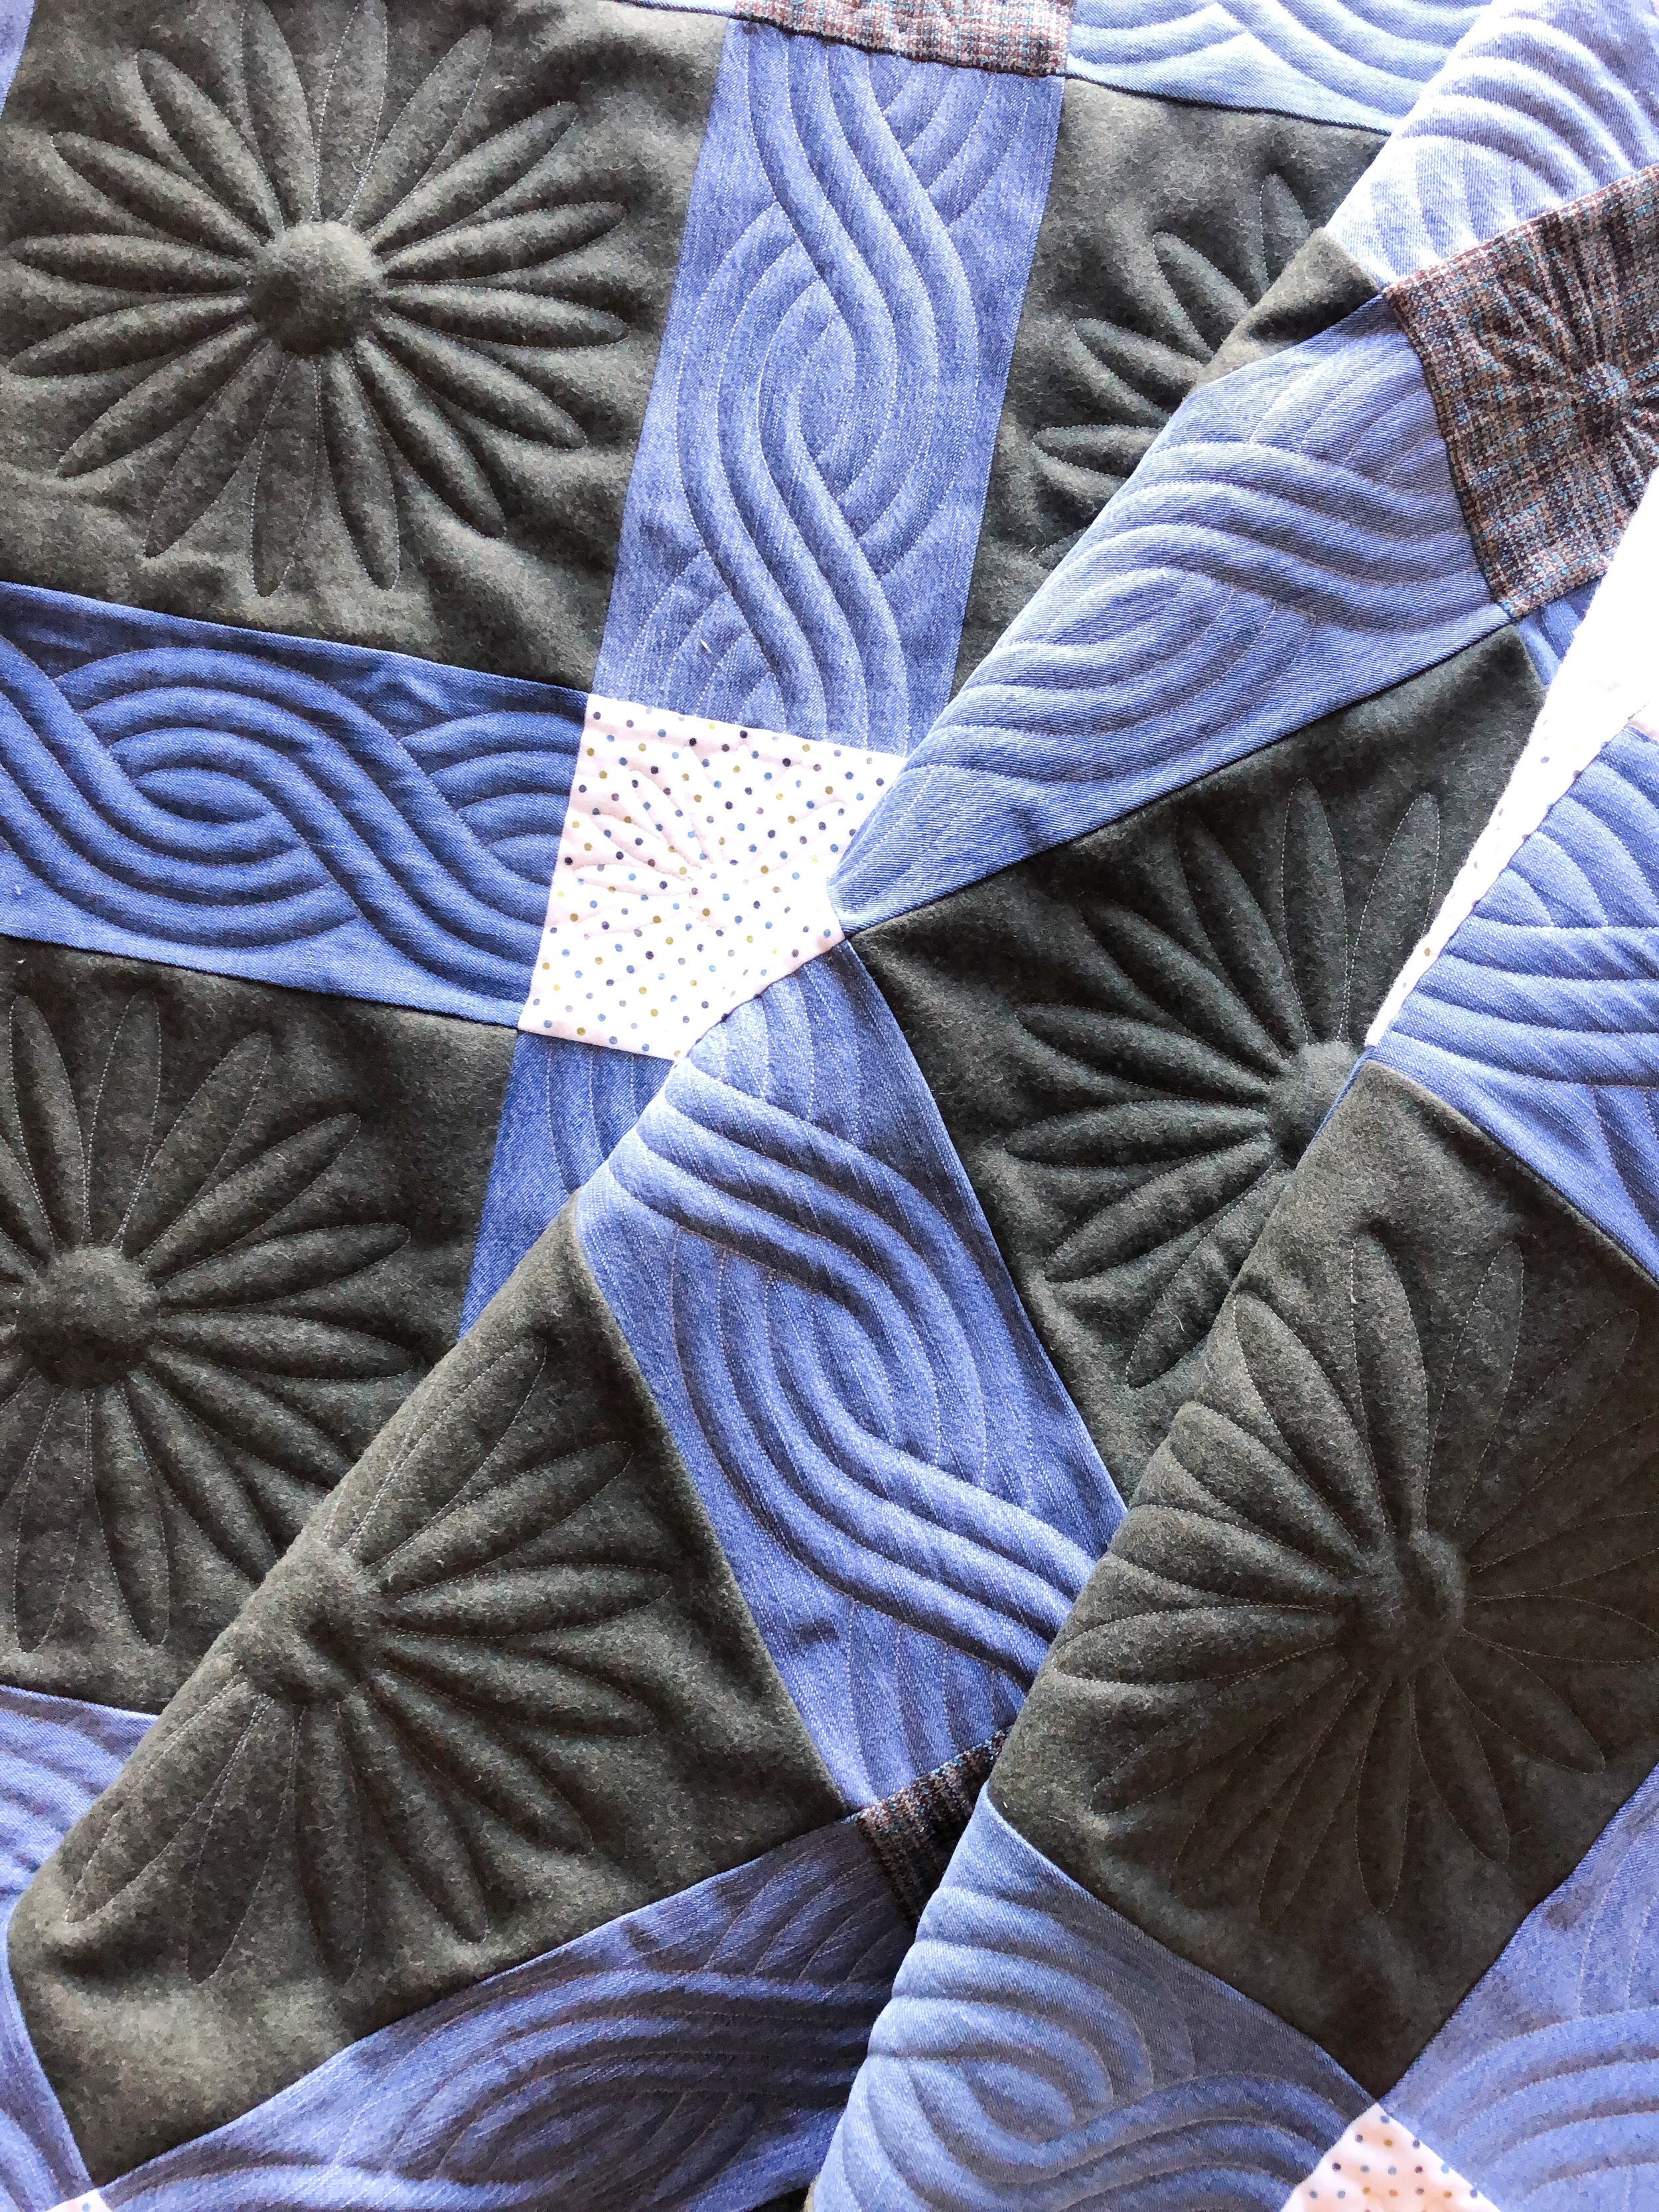
Such fun textures!!
And, look at this minky backing!!

Solid minky is the best!! The quilting creates a unique texture. Love it!!!
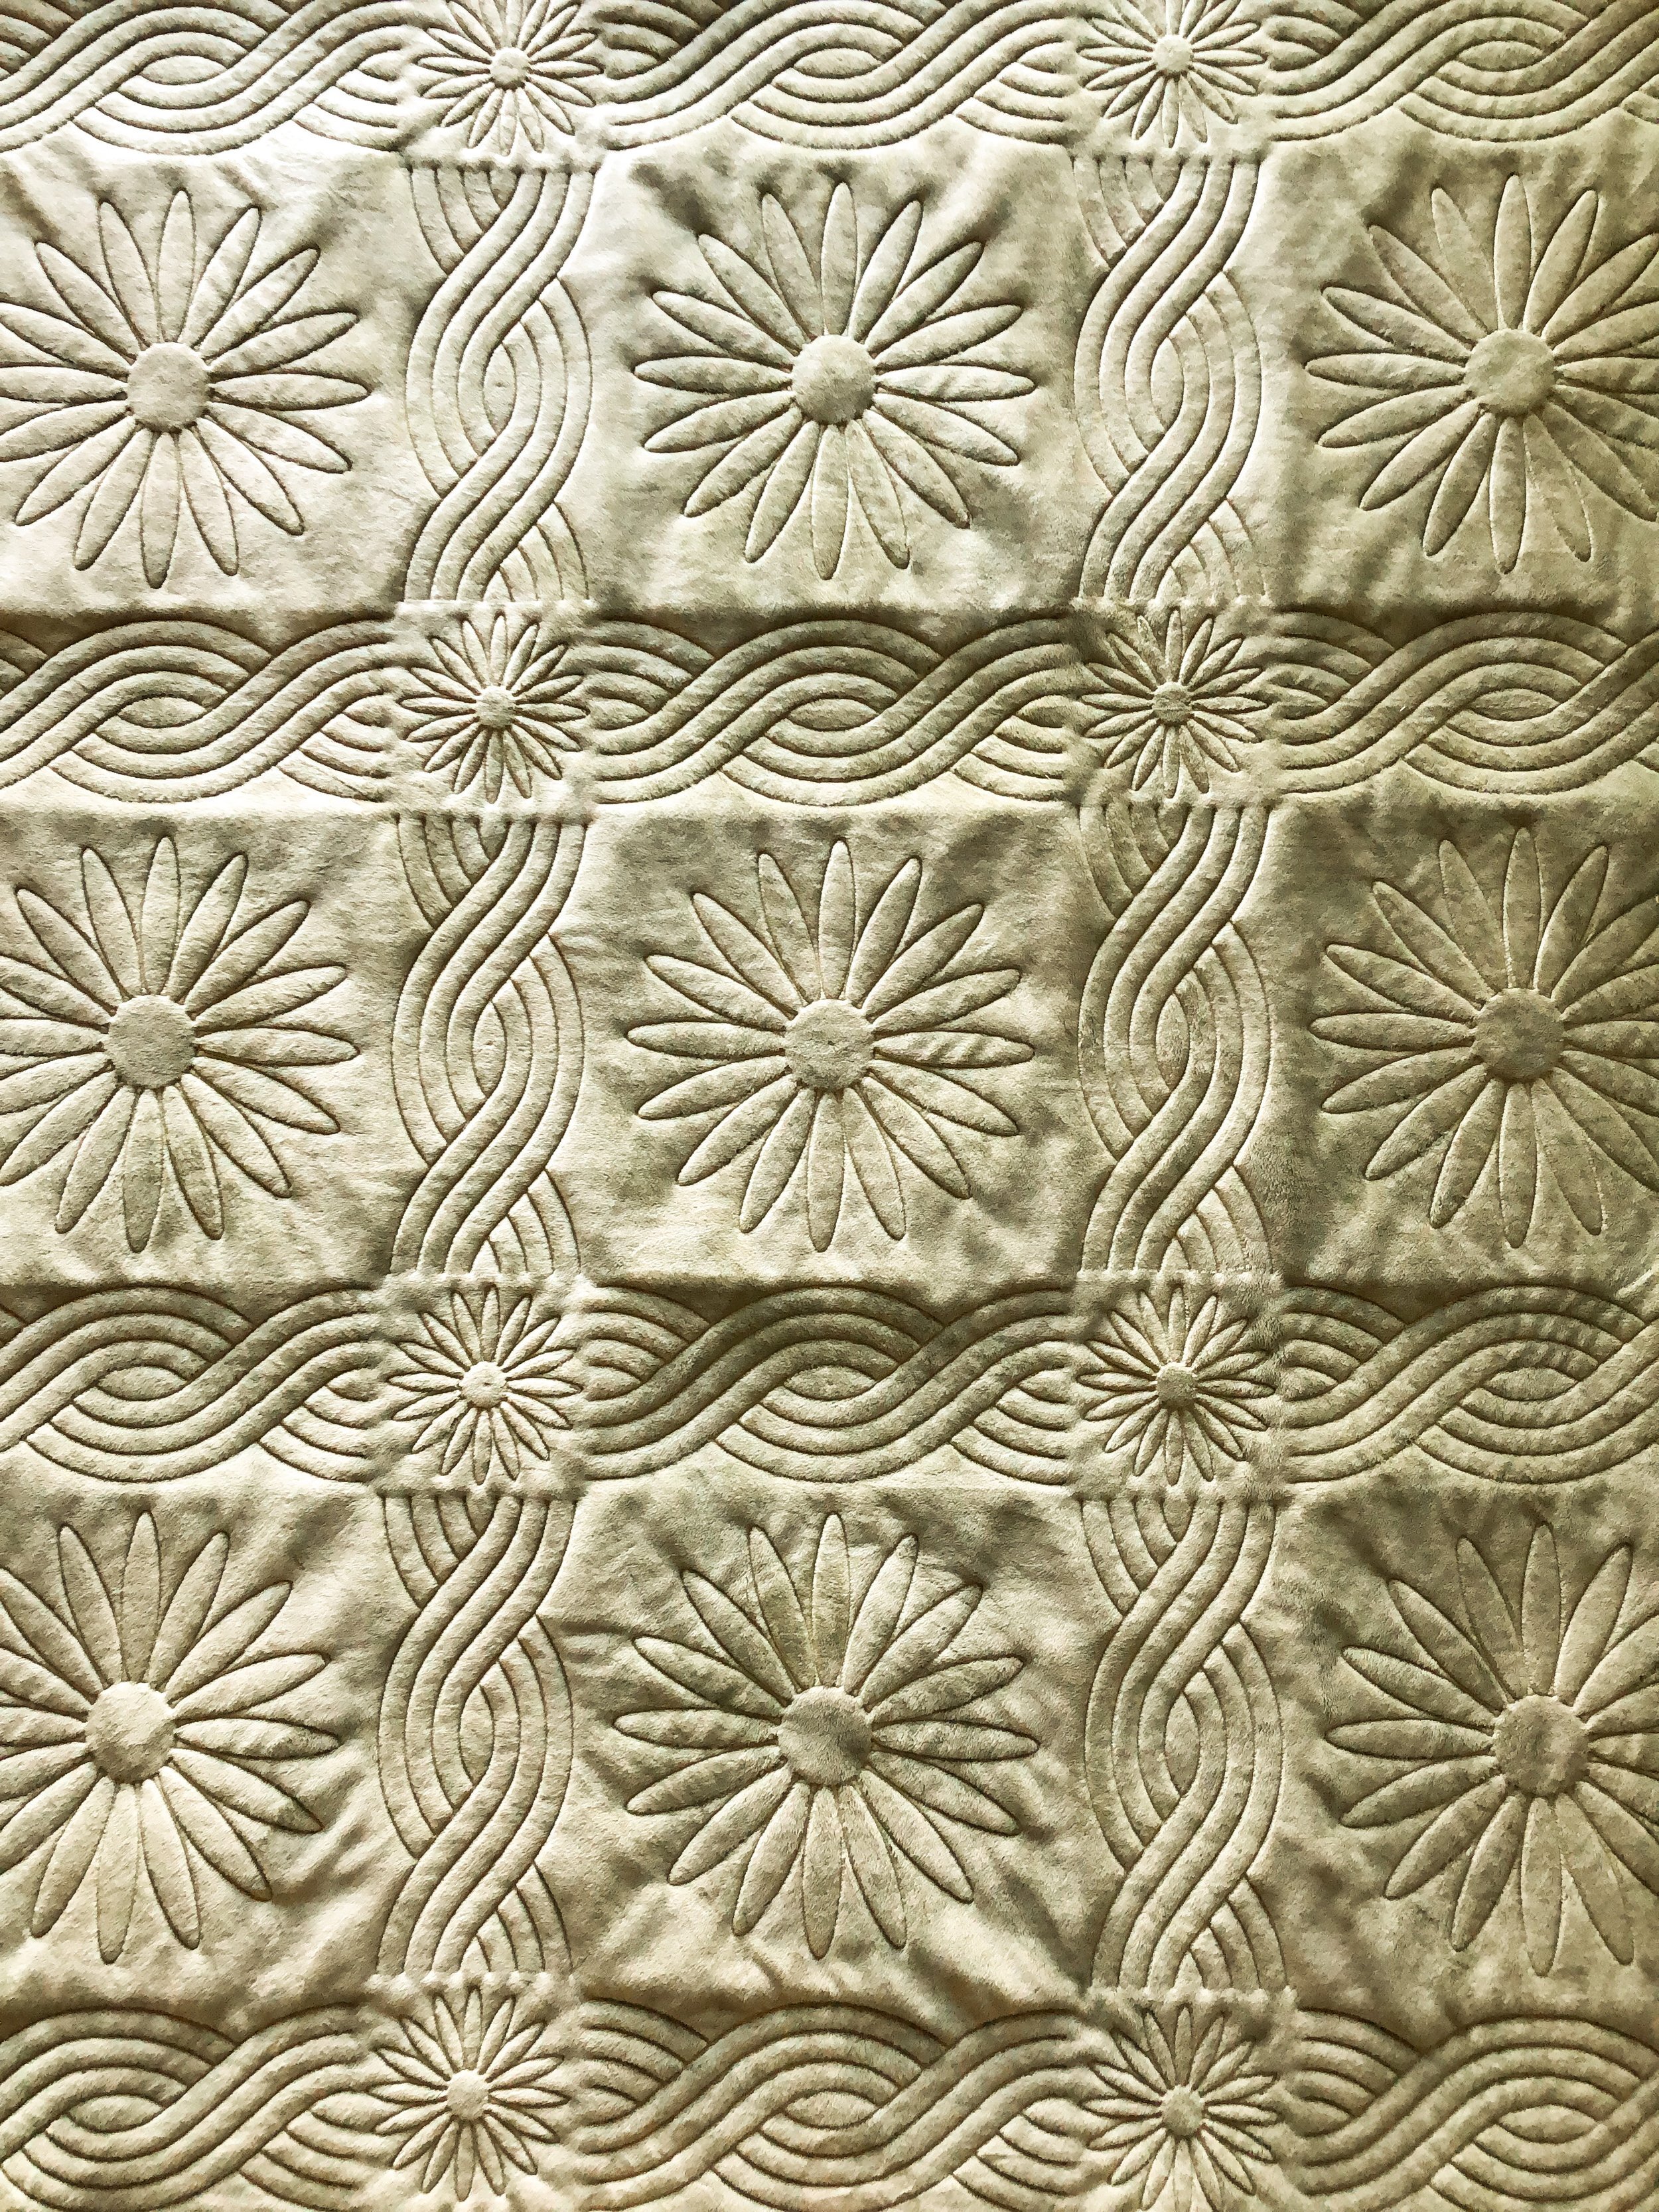
I also love it when backings look this amazing!!! It’s what a little quilting can do.

Thanks for stopping by!! Happy quilting… Leisha
• Lynne’s Quilts •
Last year my friend Molly started a sewing group. She invited me and several other ladies that she had sewn with before, and we had lots of fun!! We actually sewed in the basement classroom of our favorite local quilt shop a couple of days a month. We enjoyed laughing, snacking, sewing, and meeting new friends. That’s where I met Lynne. She was busy sewing one day and listening to my good friend Christy and I talk about longarm quilting. Afterwards, she said…I’d like you to quilt a couple of quilts for me. I told her I was happy to do so. She still needed to finish the borders and backing. Fast forward a few months, and Lynne asked me to meet her and her husband to get her quilts, on their way out of town. I did. Sadly, that was the last time I saw her. Lynne had a compromised immune system and unfortunately got Covid. She never recovered. I had finished quilting her quilts while she was in the hospital, so her husband picked them up, and one of her sewing friends bound them…all in hopes she would be able to recover and enjoy her beautiful work. She passed away before ever seeing them done. I sure hope she’s smiling down from heaven, and so happy with how they turned out. In loving memory of sweet Lynne, I share with you her last two quilts. Quilts I’m grateful I had the privilege of quilting for her. 💙

Ironically, both of these quilt patterns are about love. I hope her husband feels her love, when he’s using them.
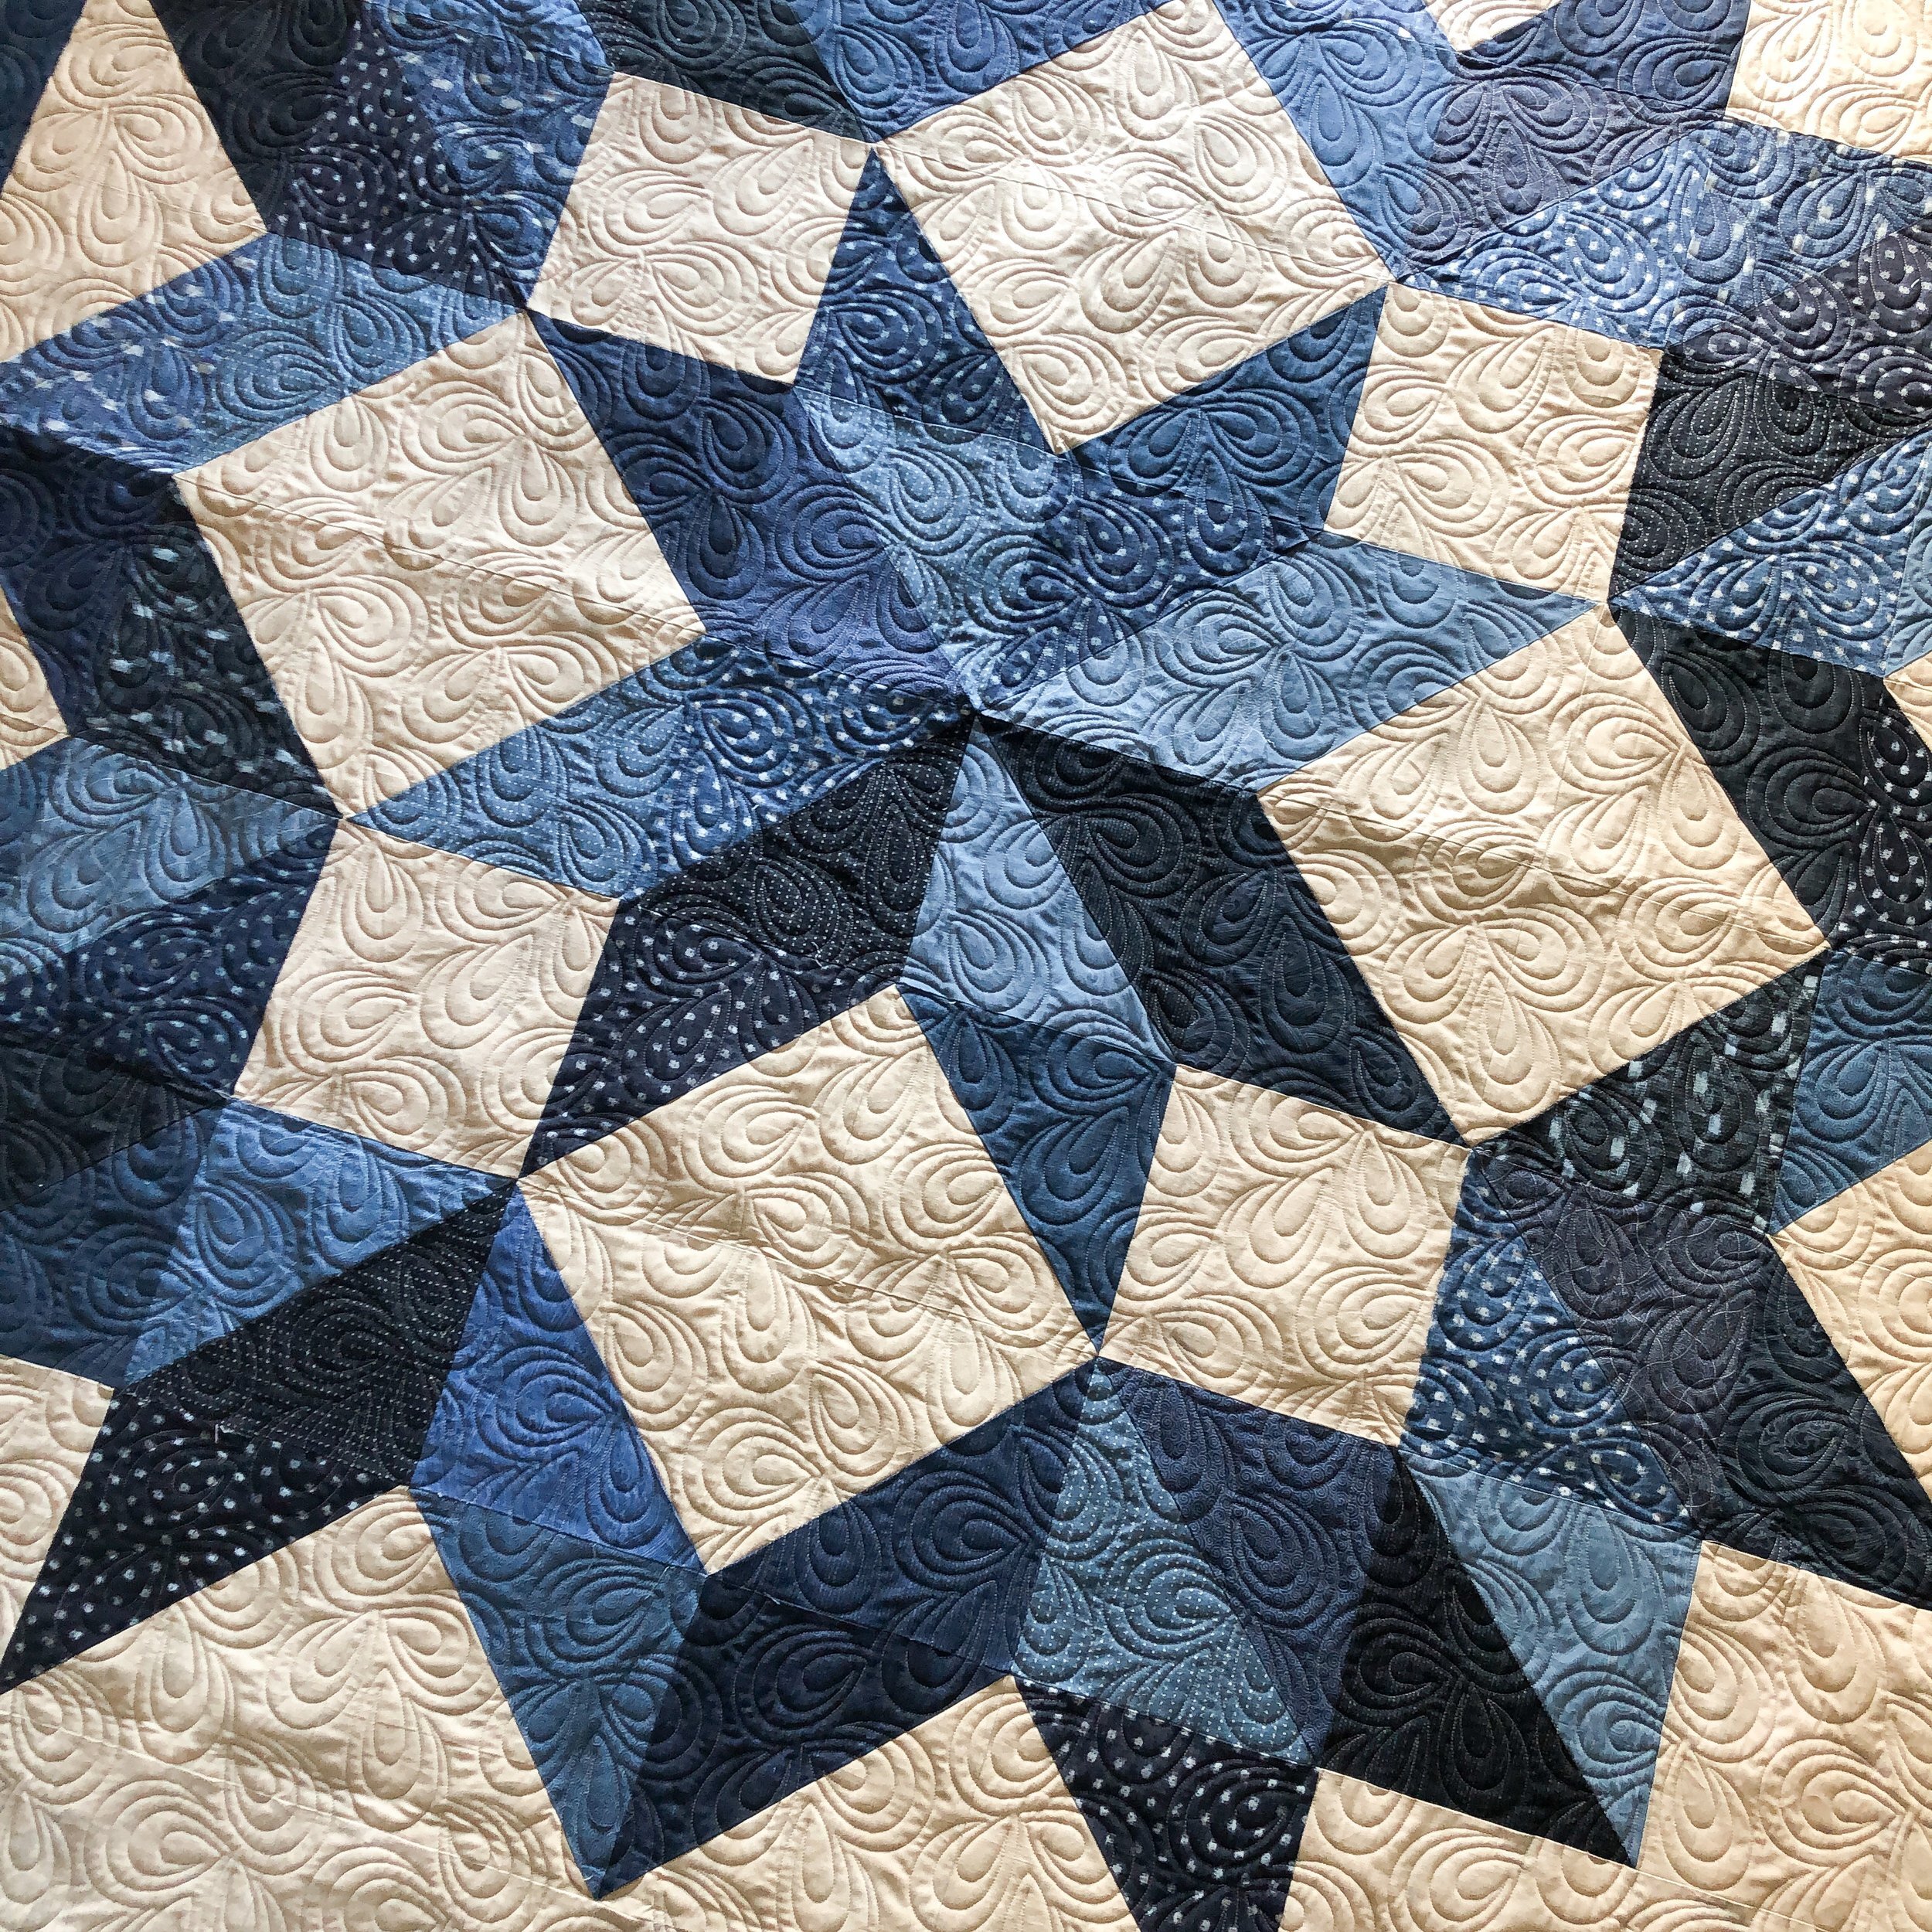
This first quilt is an XOXO quilt made with a traditional snowball block. There are so many free tutorials out there, use google to find one that works for you. These blocks were pretty big, maybe like 8”.

Lynne planned on putting these quilts on two different guest beds, possibly in the same room. I love a great navy and cream quilt!! So beautiful!
I used a cream Omni thread for the quilting and my favorite 8020 cotton poly blend batting from Winline.
I suggested a few designs, and Lynne chose Patricia Ritter and my Opal design for both quilts. Opal is available at Urban Elementz. Which I think is beautiful and classy.

Lynne’s other quilt is the Moda Love quilt, which is a free pattern. It’s a fun quick pattern. I made the mid sized one, and put together 4 blocks. It’s a really lovely pattern.

I love the scrappy look to it!!
The quilty texture is sooo good!

Here is a great look at how nicely the cream threads blend over those deep navy’s. Love it!!!

My job definitely has some tender hard moments. Losing a friend is never easy. Love to Lynne, and her wonderful family!! 🤍
Kristan's Esther's Bloomers Quilt
Hi Friends,
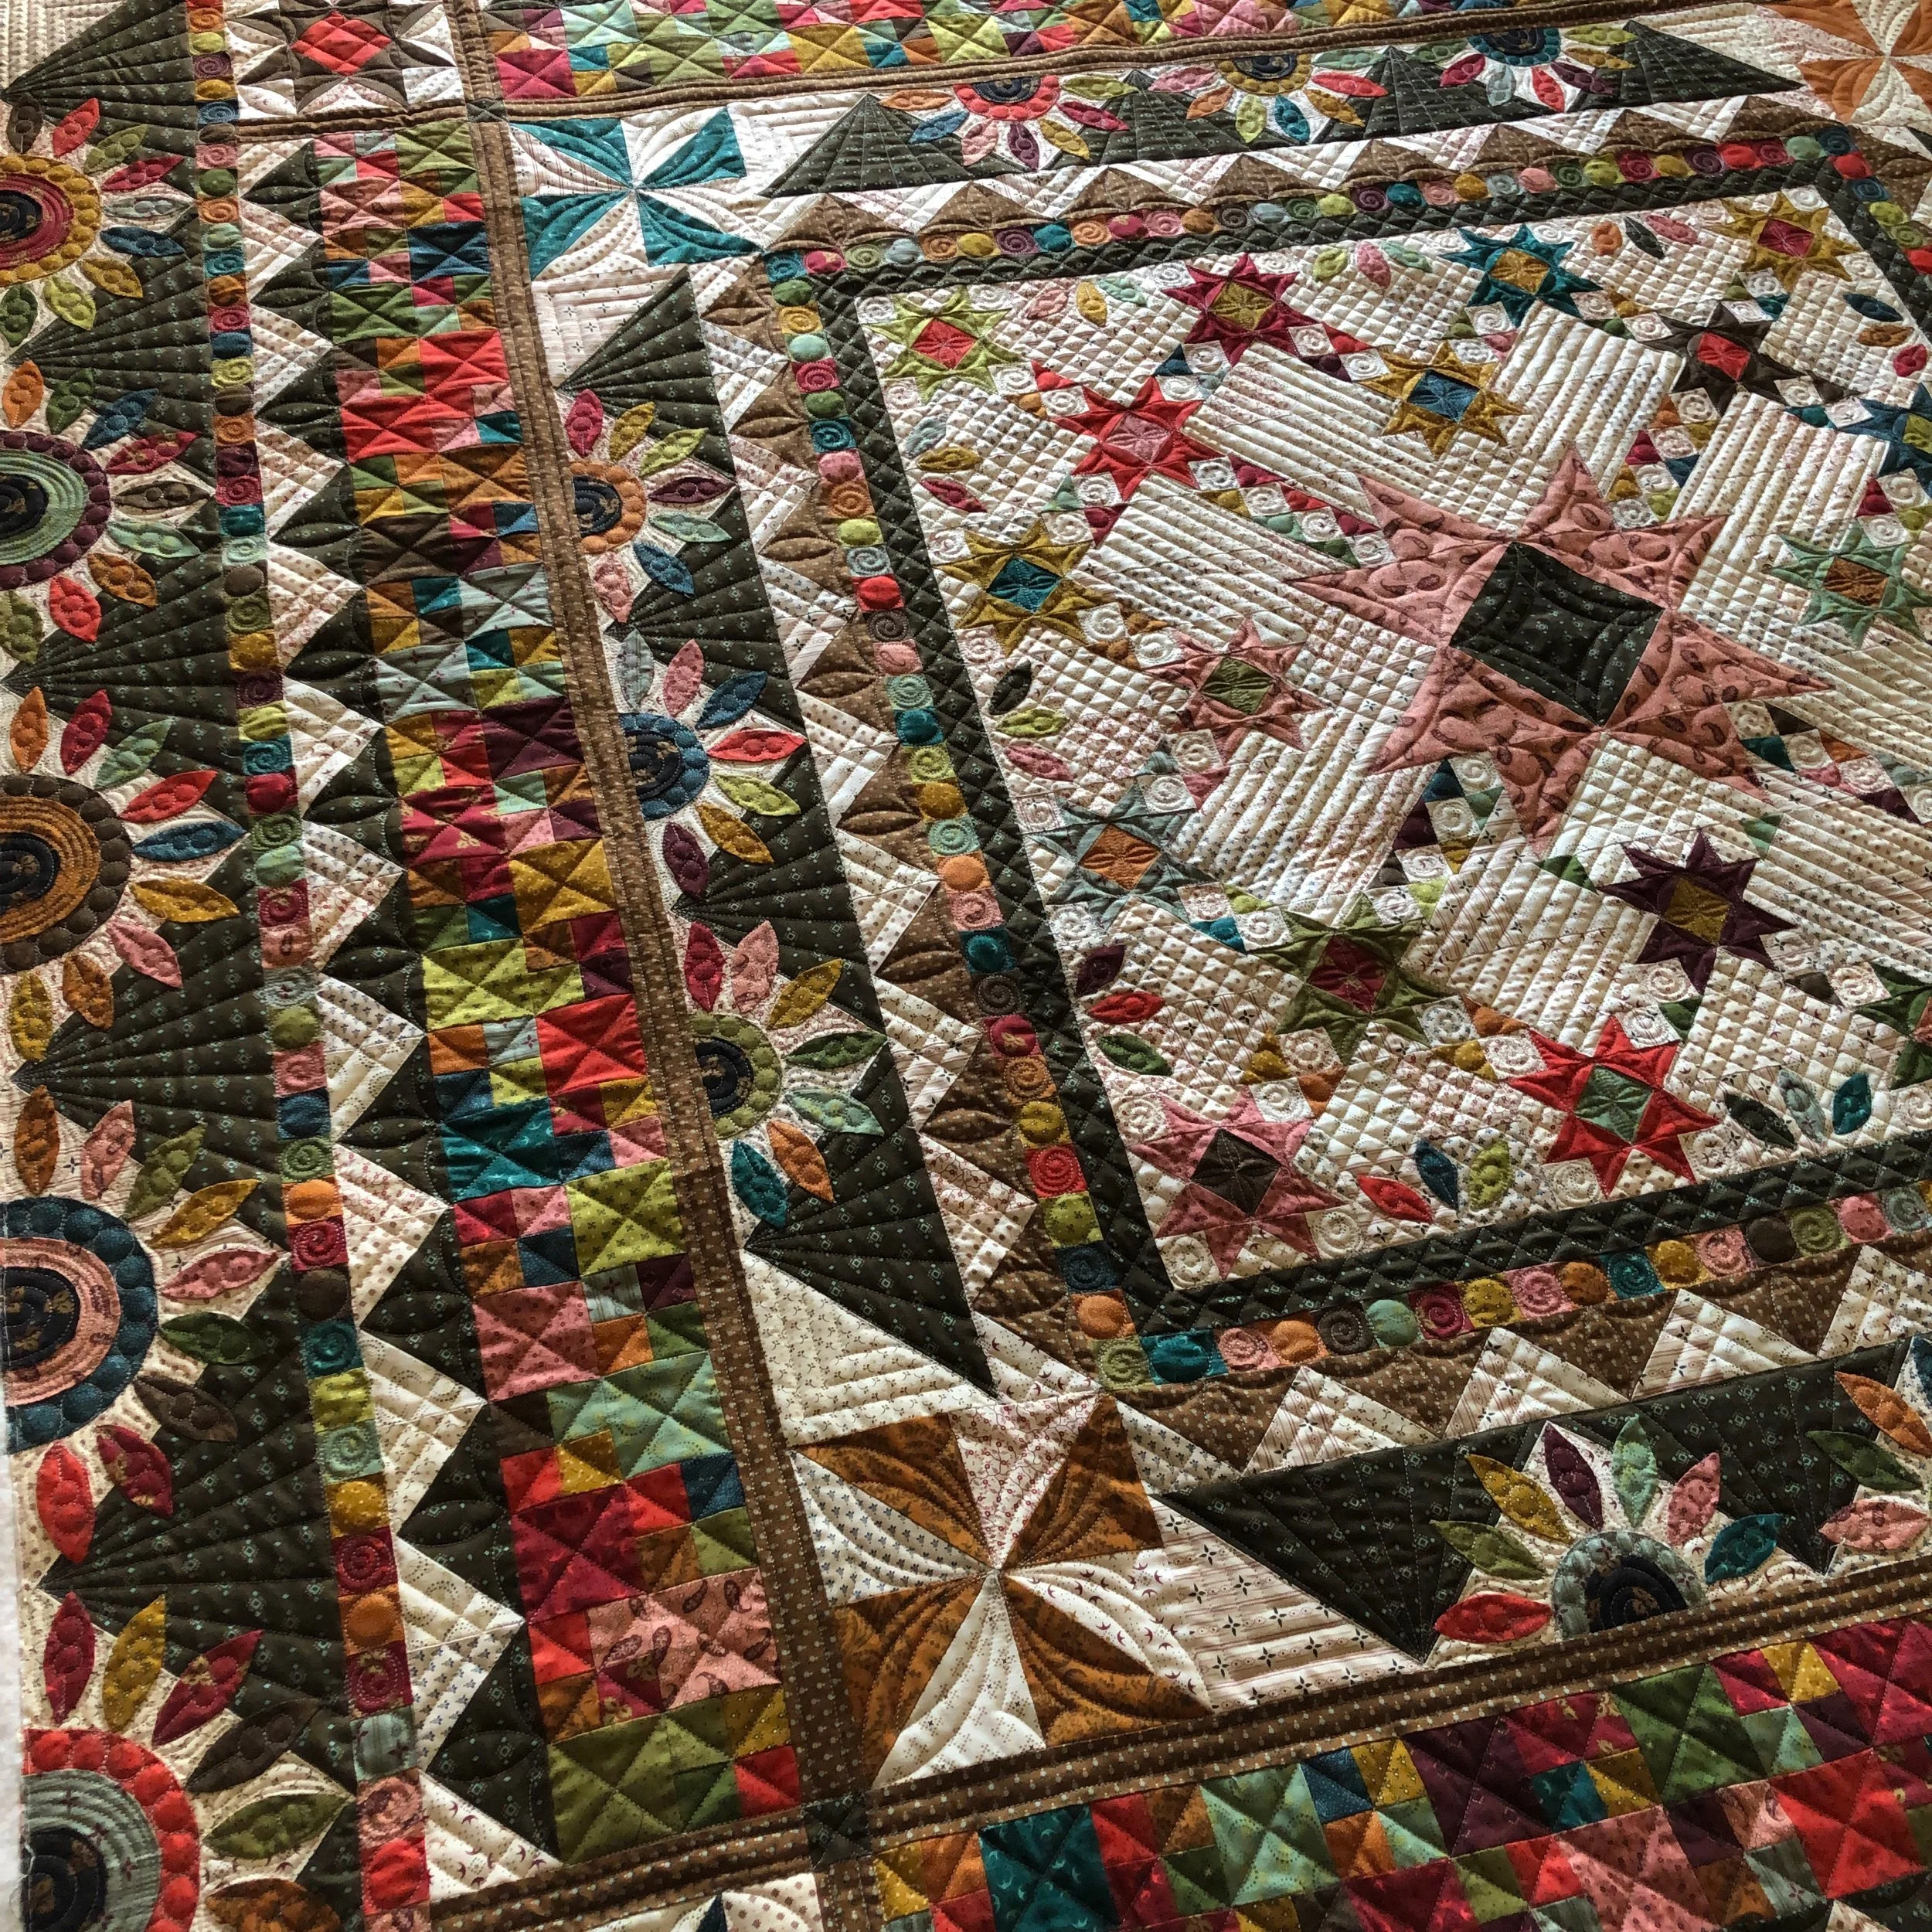
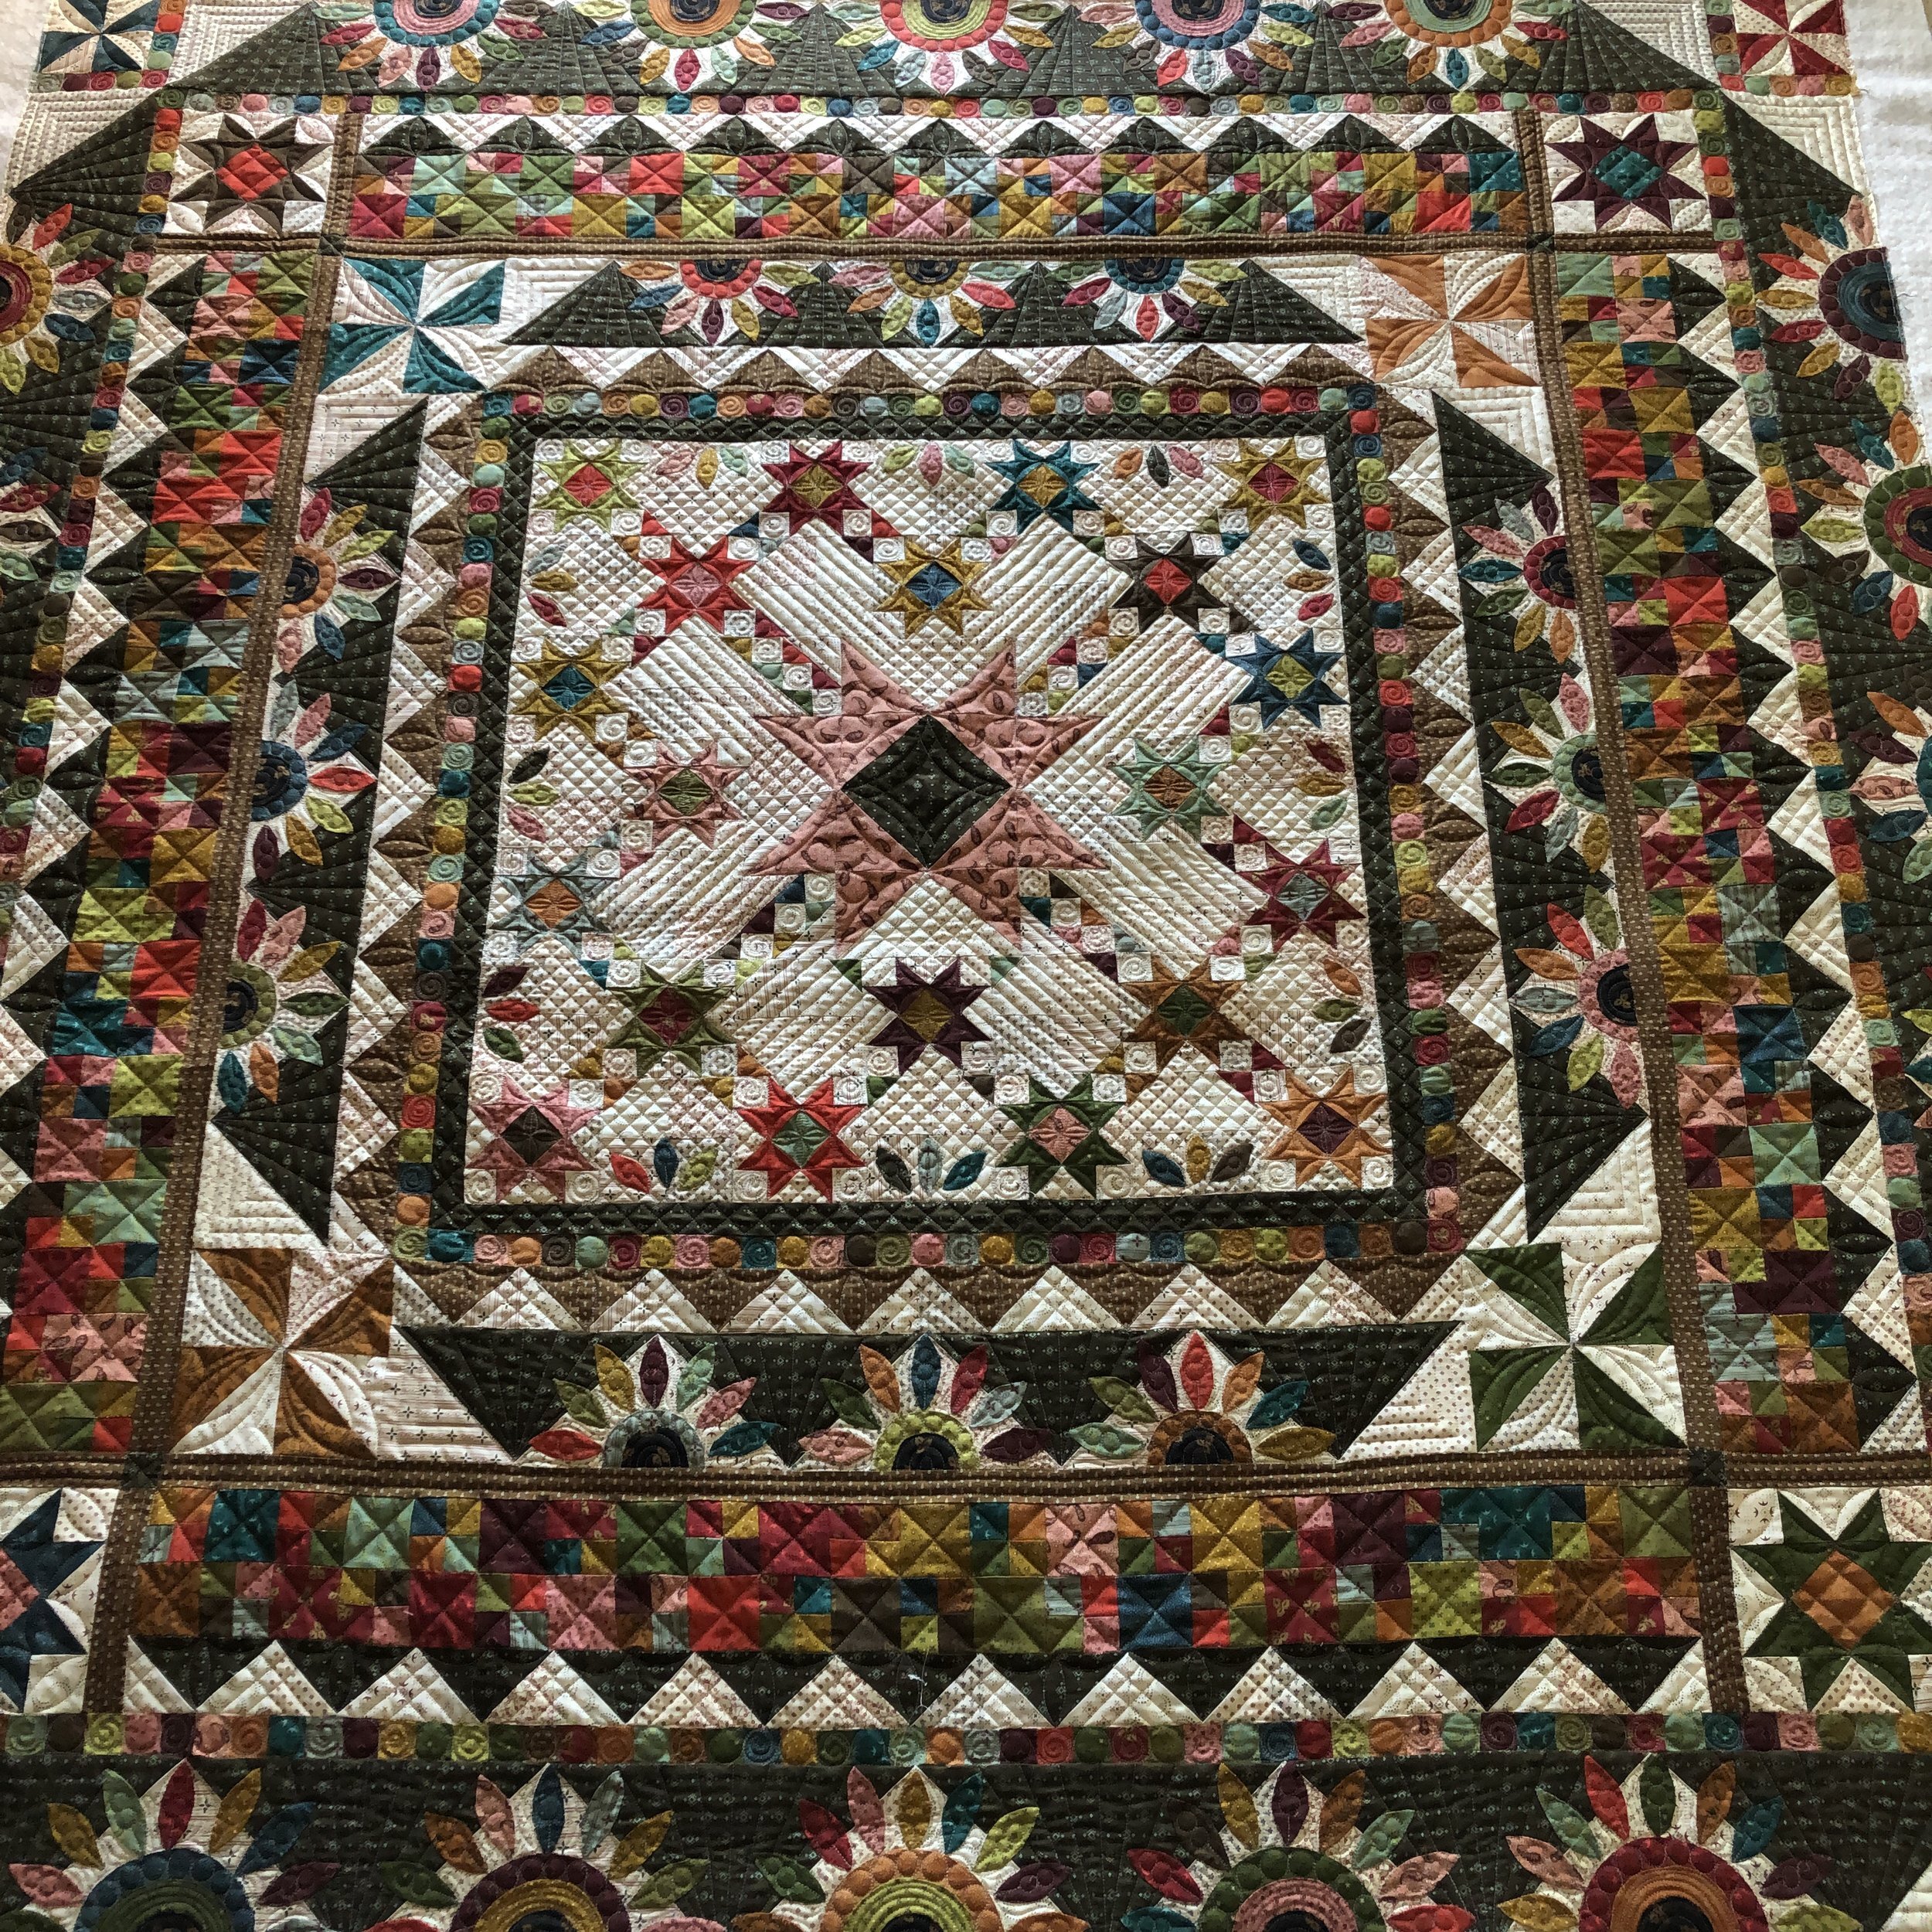
Oh, do I have a gorgeous quilt to share with you today!!! This beautiful quilt was made by Kristan, and it is the Esther’s Bloomers pattern by Kim Diehl which Kristan did as a block of the month with Fat Quarter Shop. Amazing huh?!?!?! The fabrics are Esther’s Shirting’s and are designed by Kim as well.
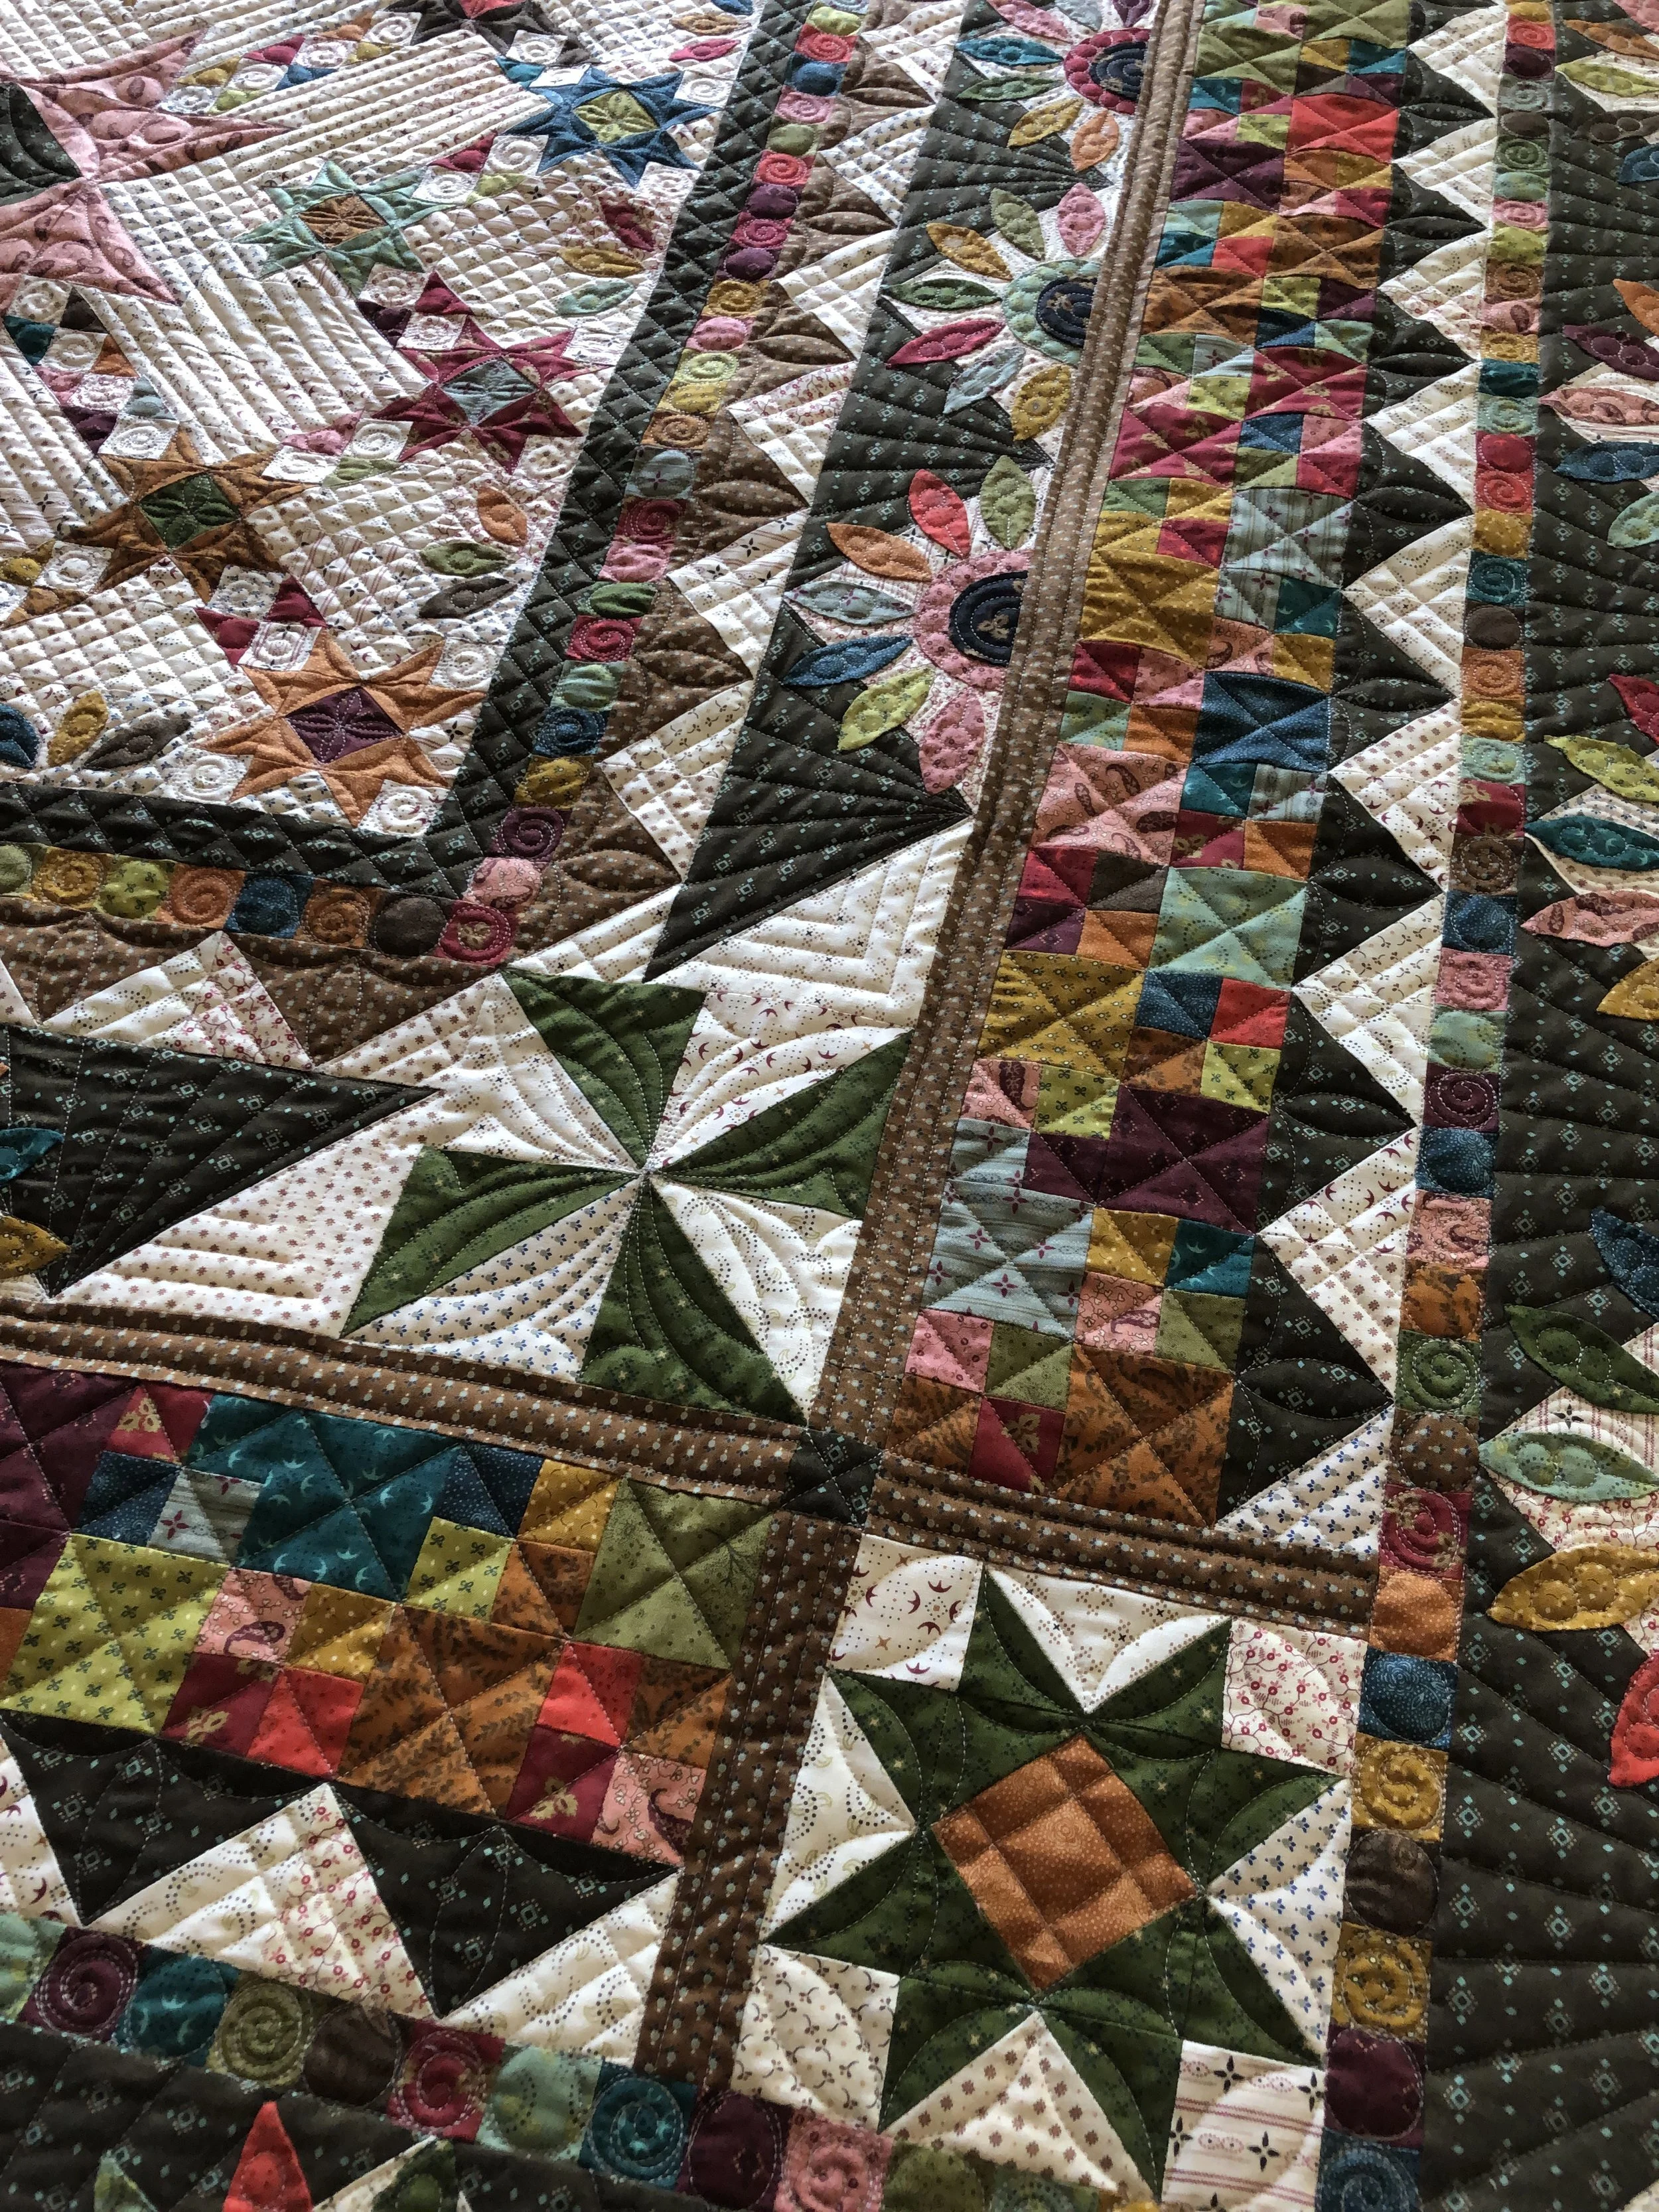
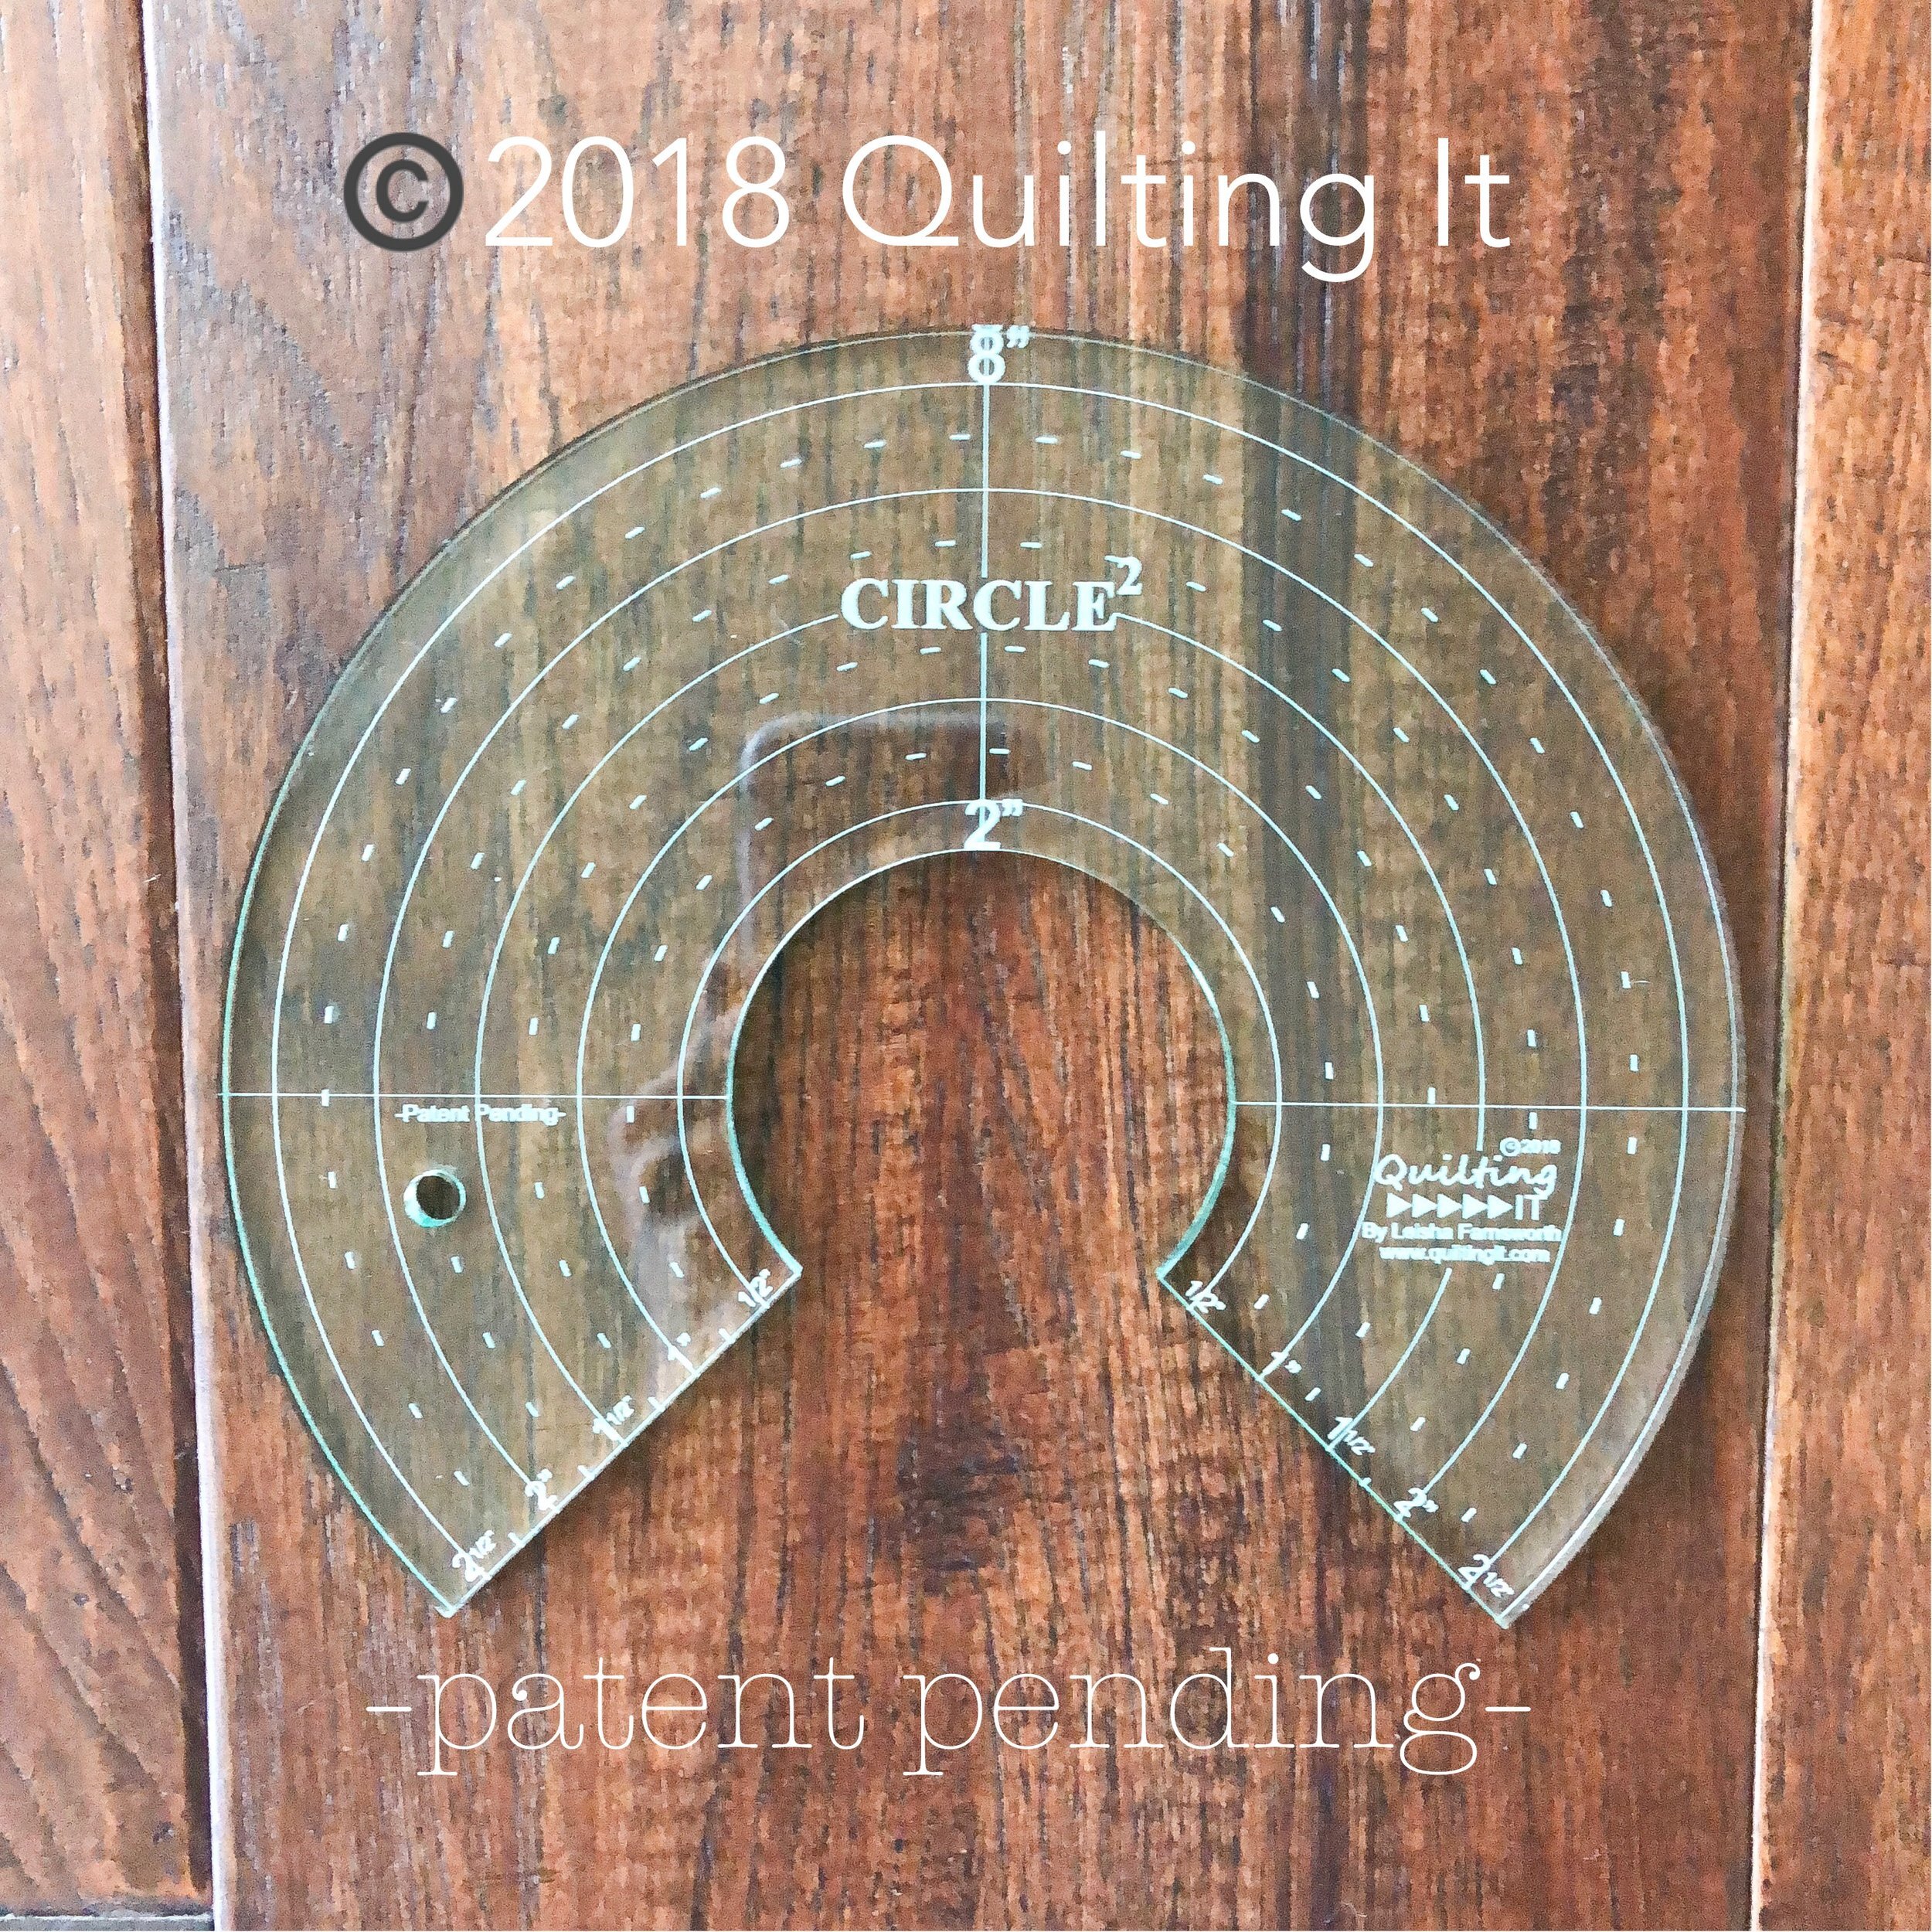
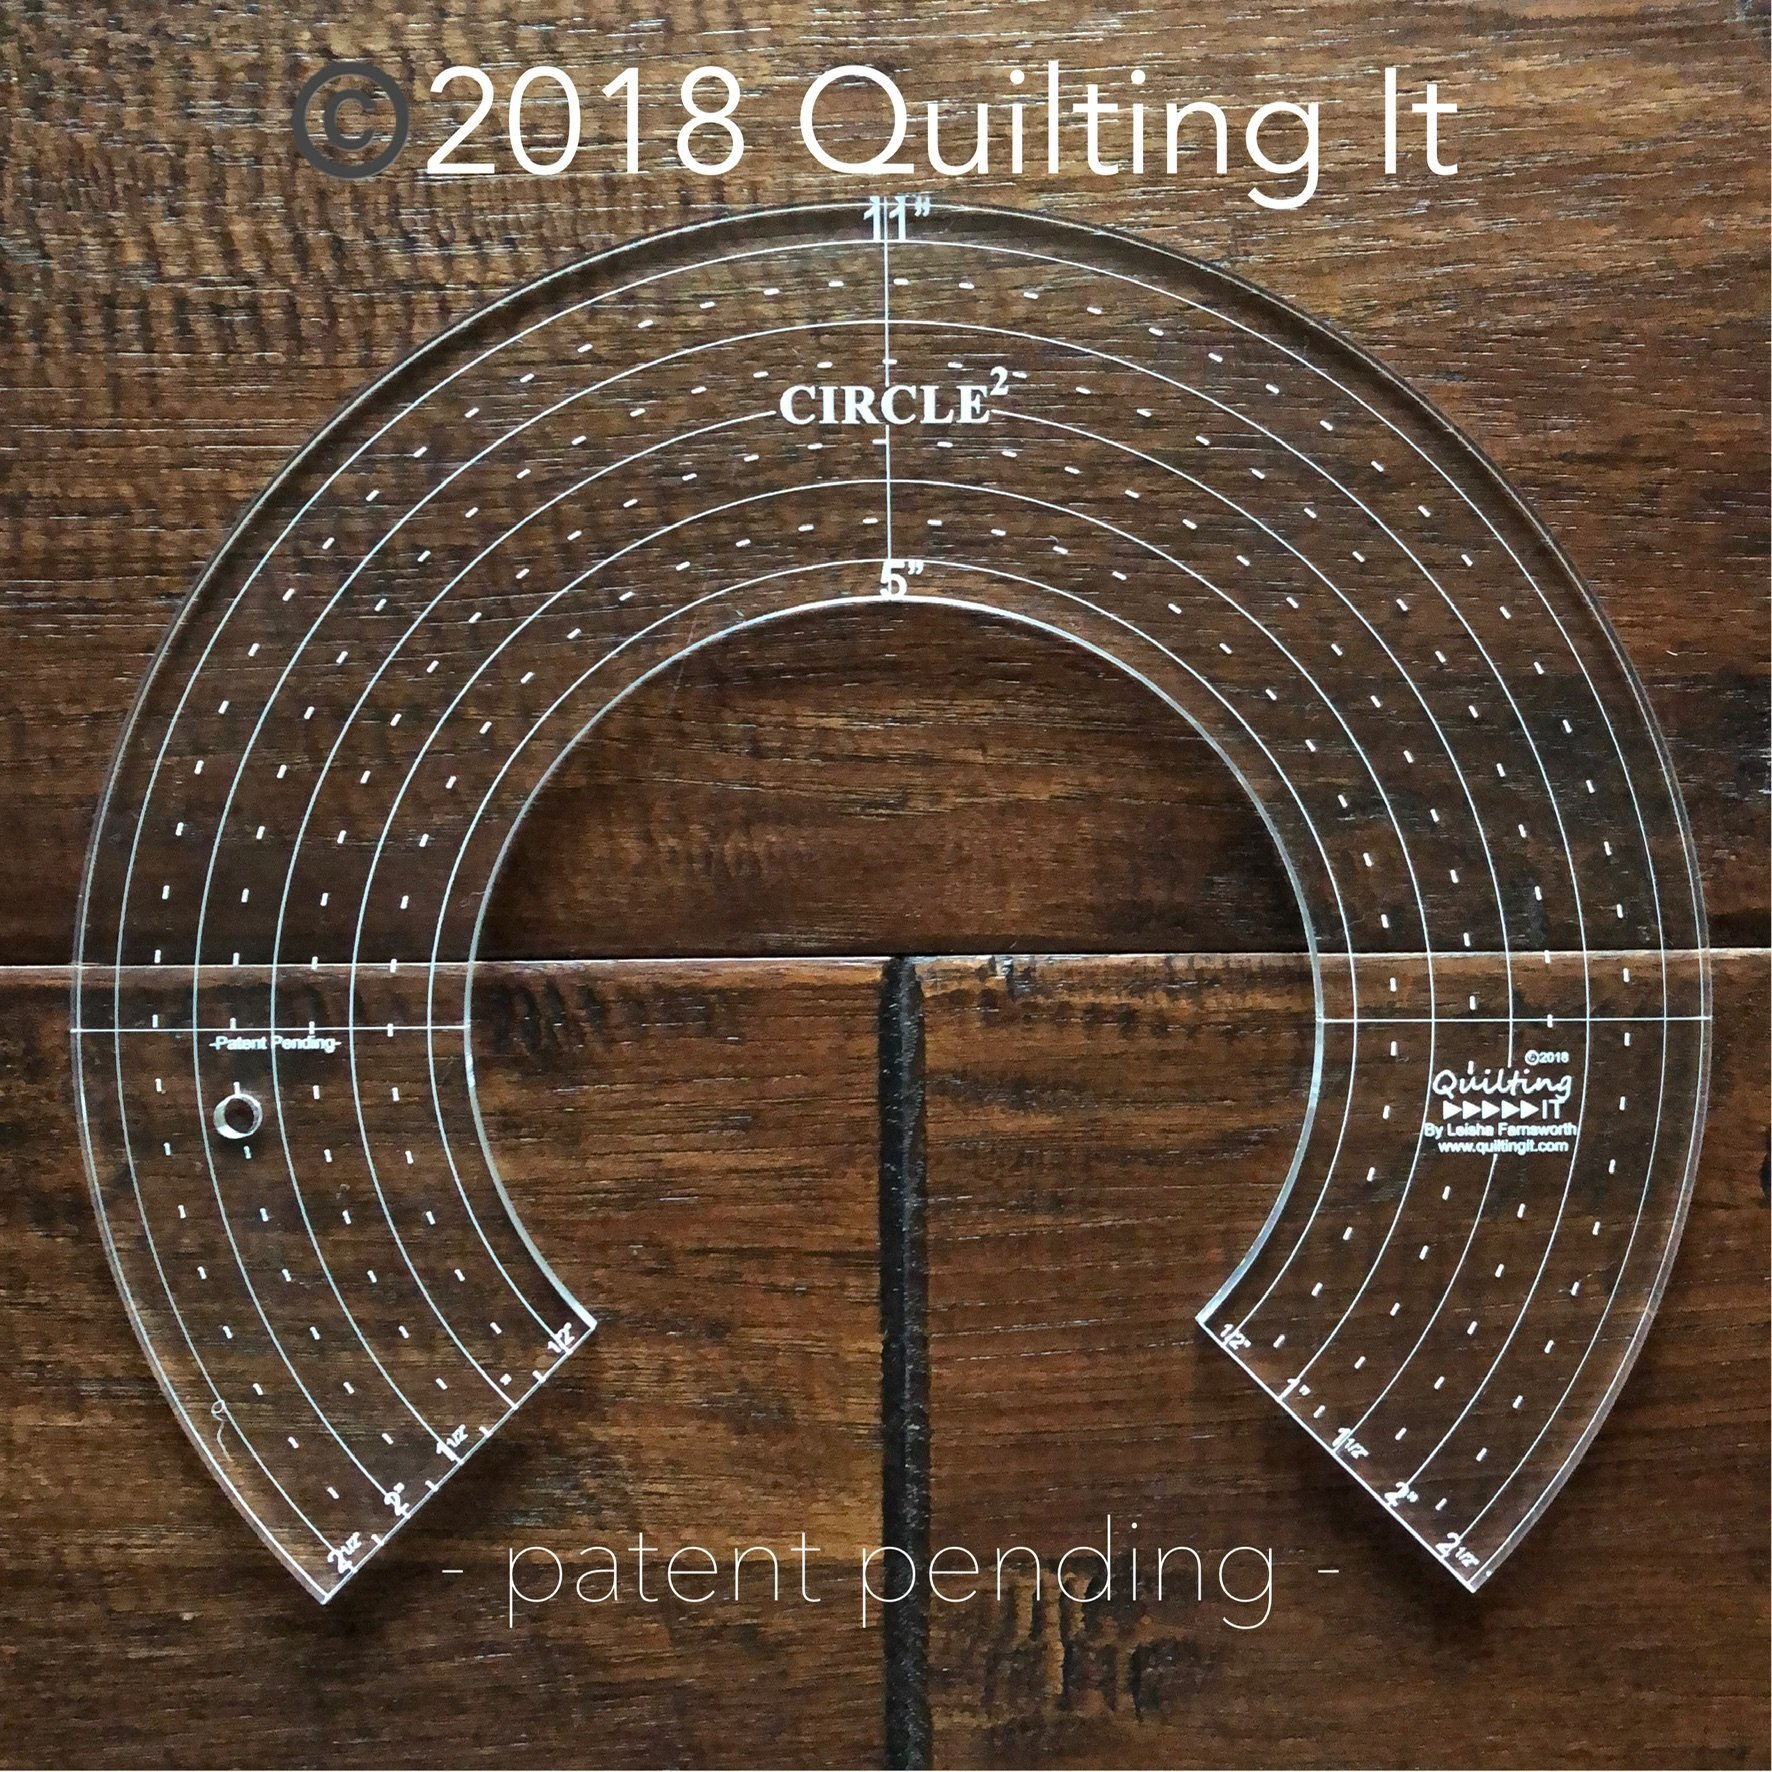
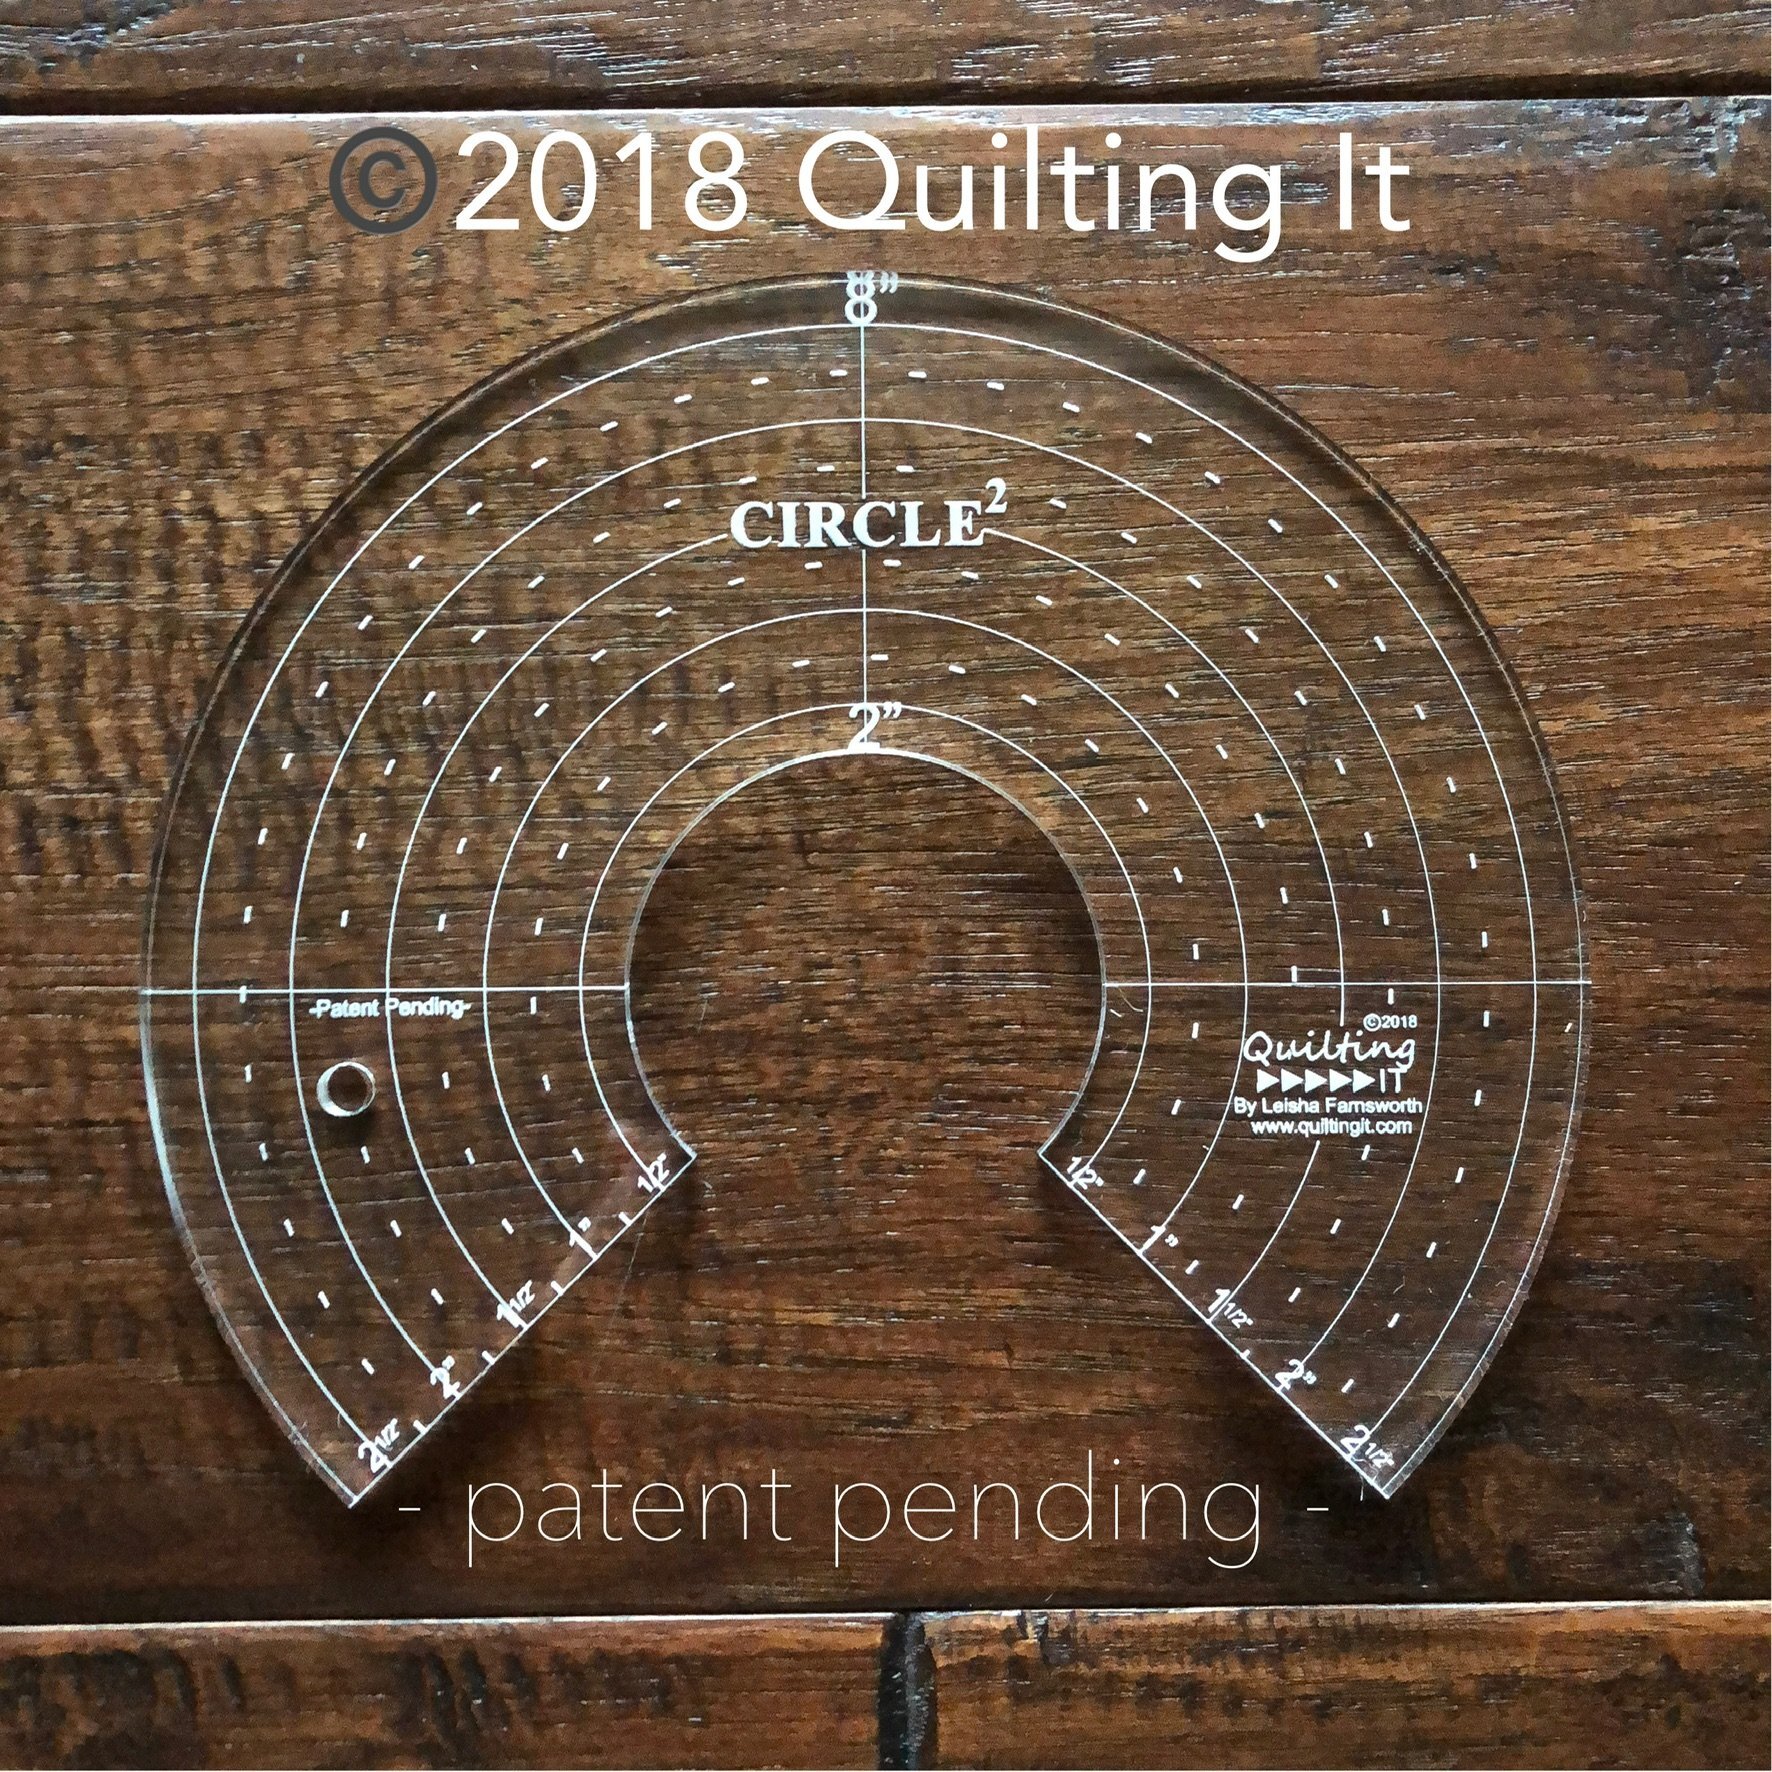
Kristan requested custom quilting and 8020 cotton poly blend batting. The rest was up to me. It’s so fun to turn on the quilting machine, pull out my rulers and start quilting. I actually used five of my different Circle2 rulers™, the 2”, 3”, 4”, 6”, and 8” circle for the variety of different curves throughout this quilt. My Circle2™ rulers are available in 12 different sizes, with two sizes per ruler. Which means every set comes with 6 rulers. My Circle2™ rulers are made in America from 1/4” high quality acrylic. For more information on them, check out this blog post. There is a picture at the bottom of this post of my 2”/8” ruler. Notice the 2” on the inside and the 8” on the outside. I also offer them in either green or clear. The green are great on lighter fabrics, which helps me see the lines better. However, the clear are just as great!

I quilted all of the lines with Edge rulers from Linda at The Quilted Pineapple. My favorite straight rulers!! It’s fun to use rulers and create a variety of different textures, with only a simple line or curve.
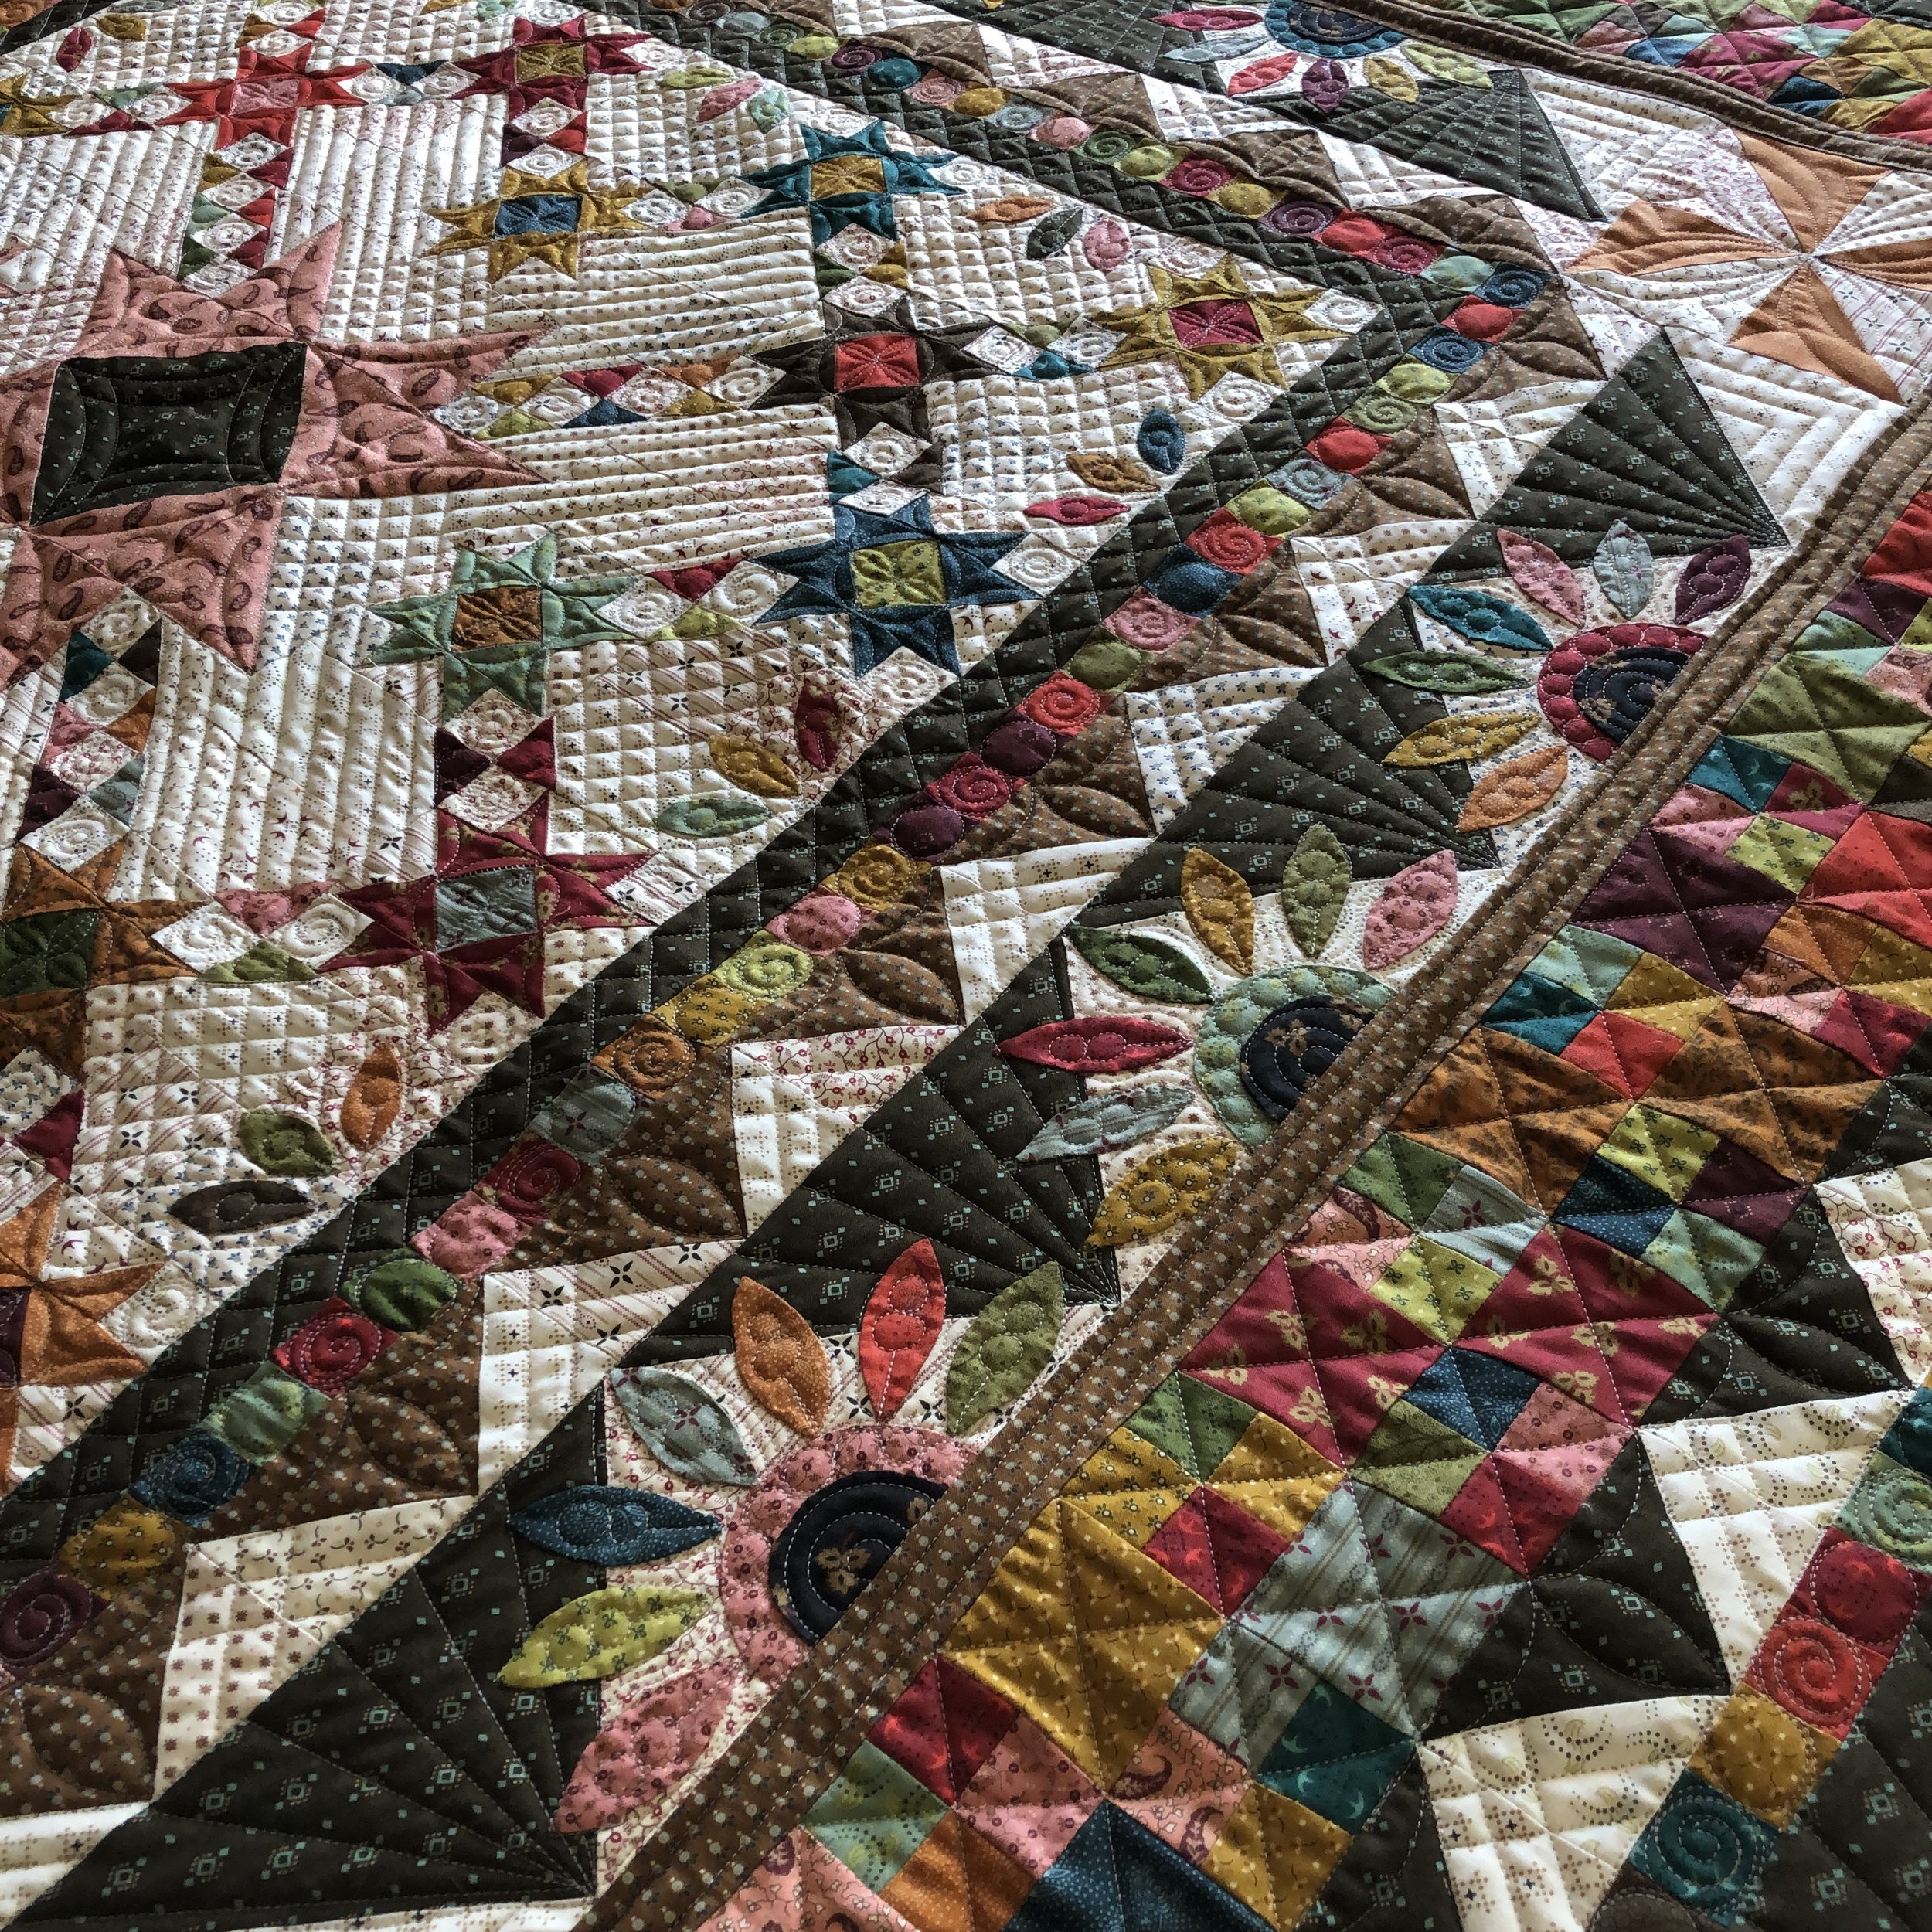
Look at all of those amazing borders!! Kristan did a beautiful job!!
I used cream Omni thread from Superior Thread, on the entire quilt!!

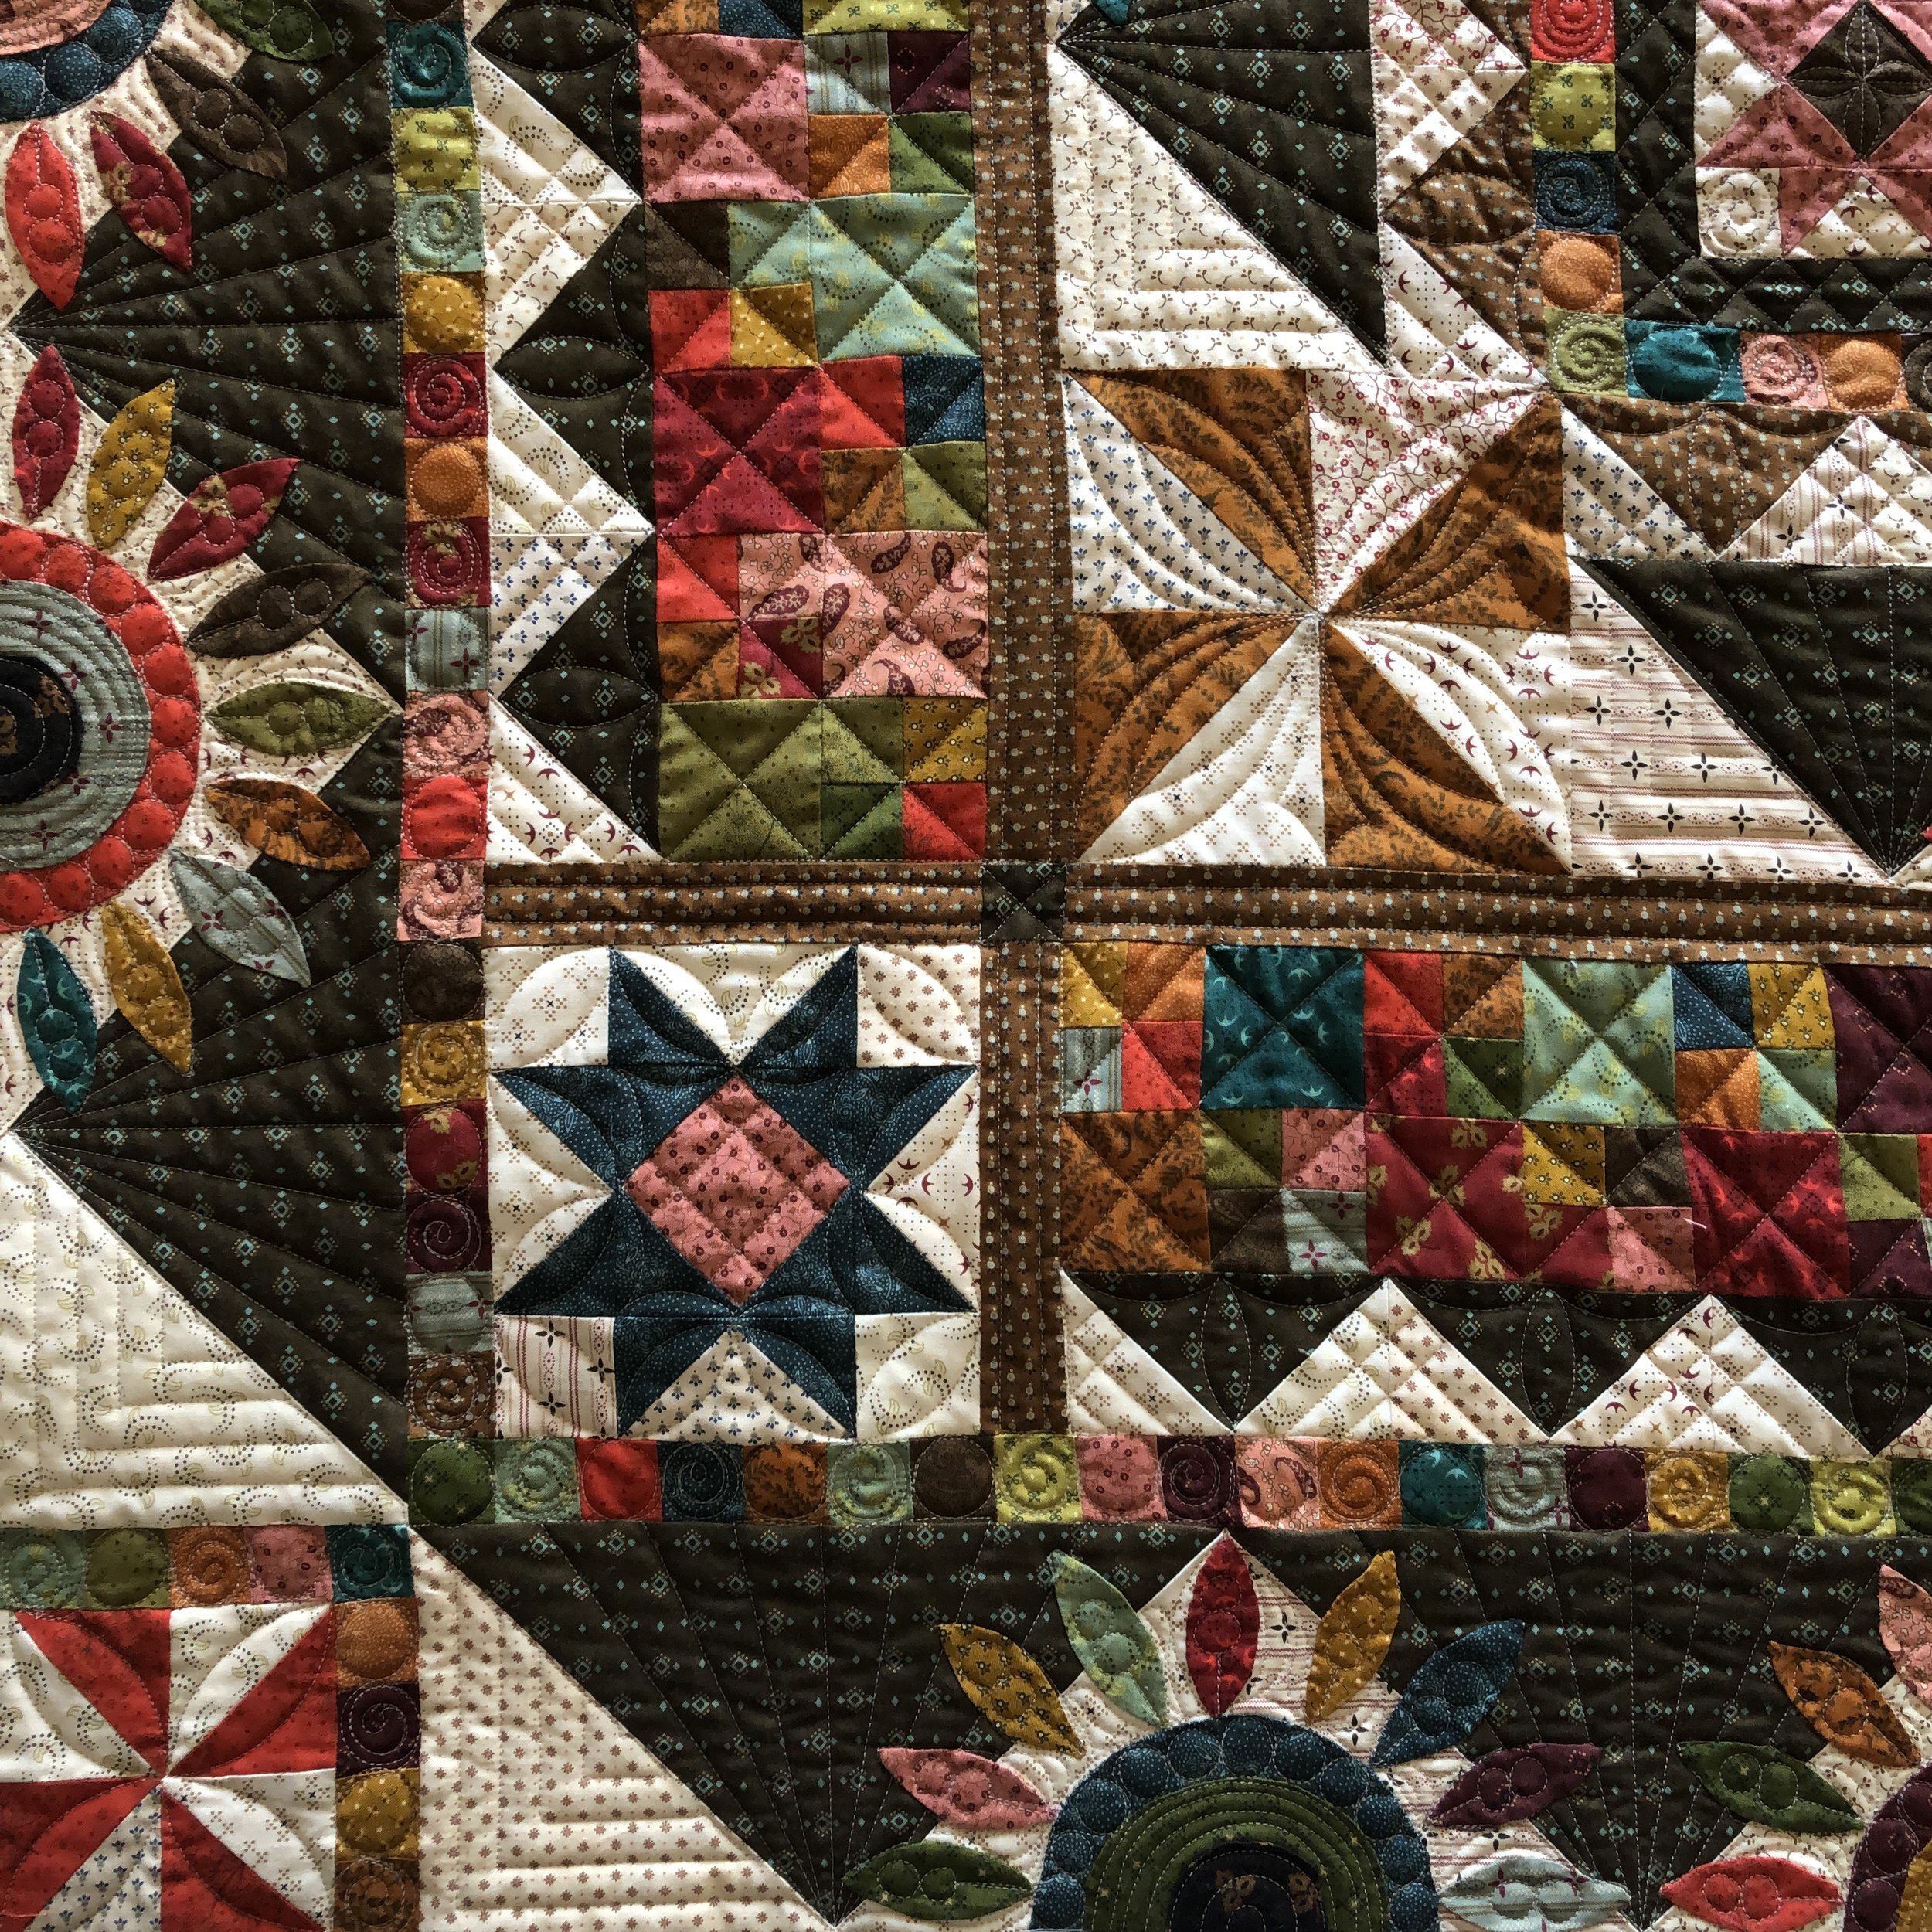
And, just because I can…here are some more pictures. I love adding freehand pebbles in the midst of all of the straight lines and angles.
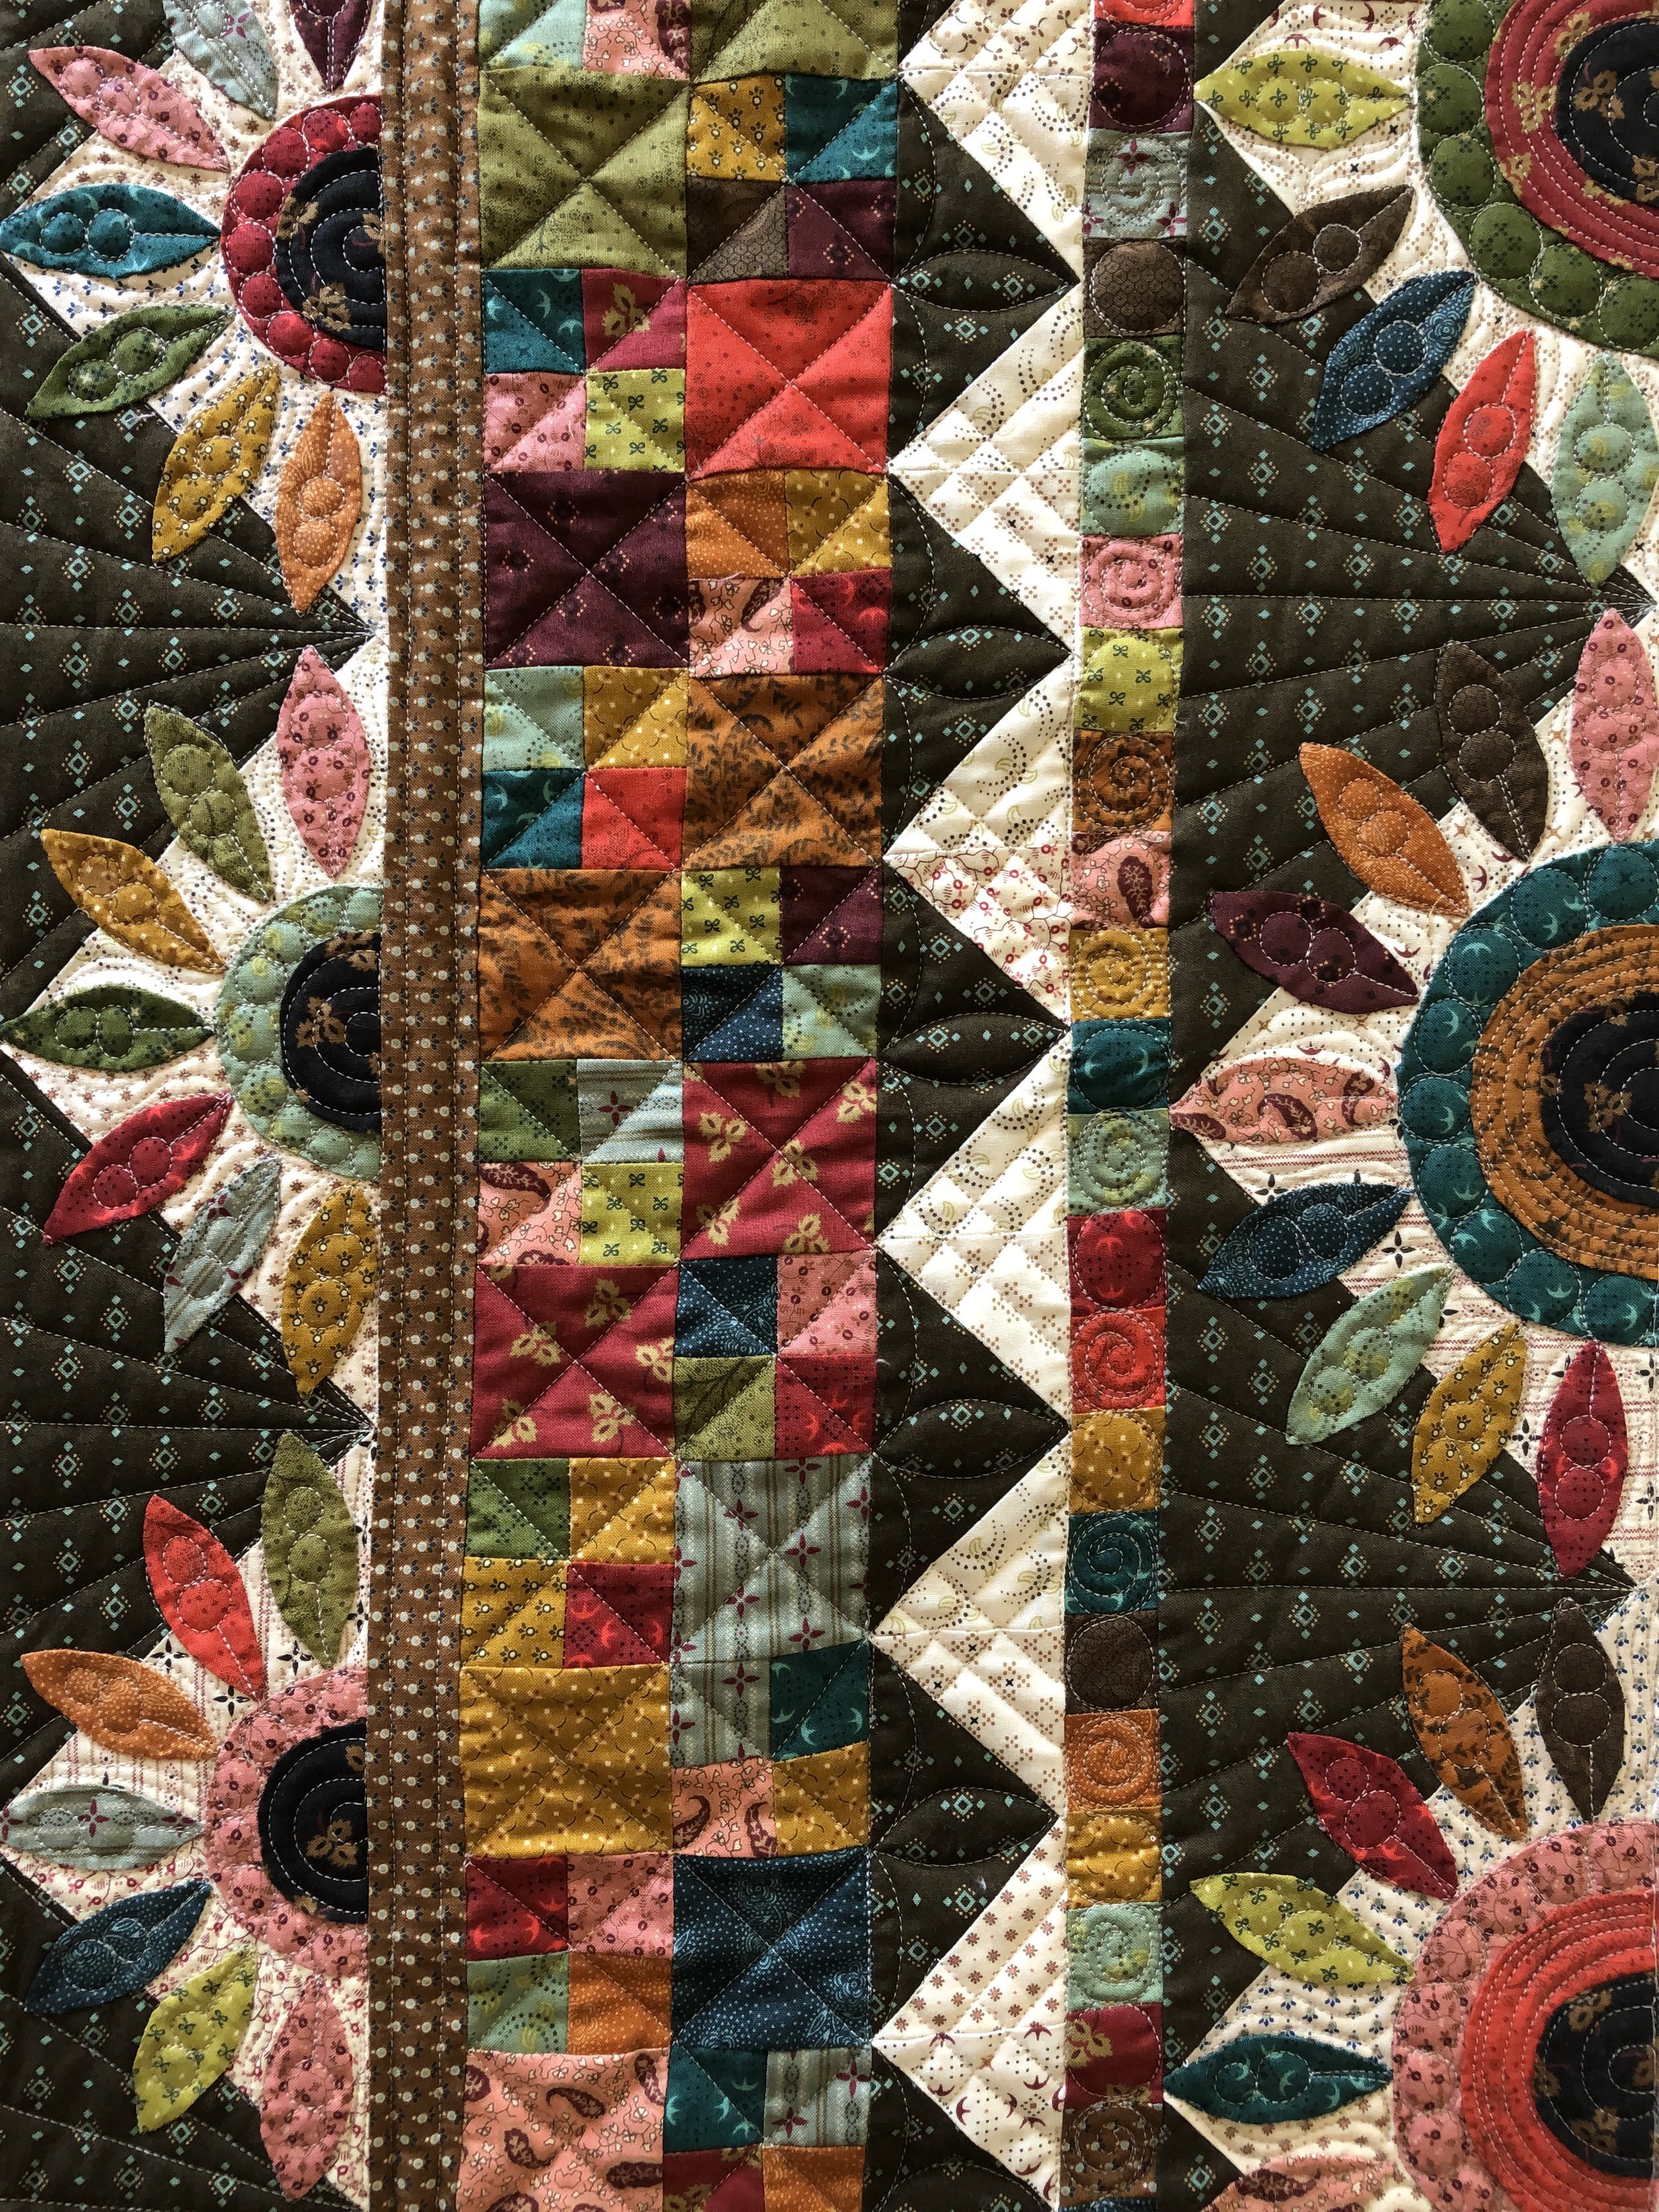
I love the orange peel petals in the darker flying geese, which I did with the 3” Circle2™ ruler, and then the double lines on each side in the lighter flying geese. It’s great to have that mix of scale and texture.


Can you see how great the cream thread blends so great on all of the different fabrics? I prefer lighter threads on darker fabrics, than darker threads on lighter fabrics. I personally think it helps tie the quilt together is a whole.

All the quilting textures on the borders, compliment the large center block nicely.
Below is the green 2”/8” ruler that I mentioned above. The rulers are 2.5” wide to make it easier to handle as you’re quilting.
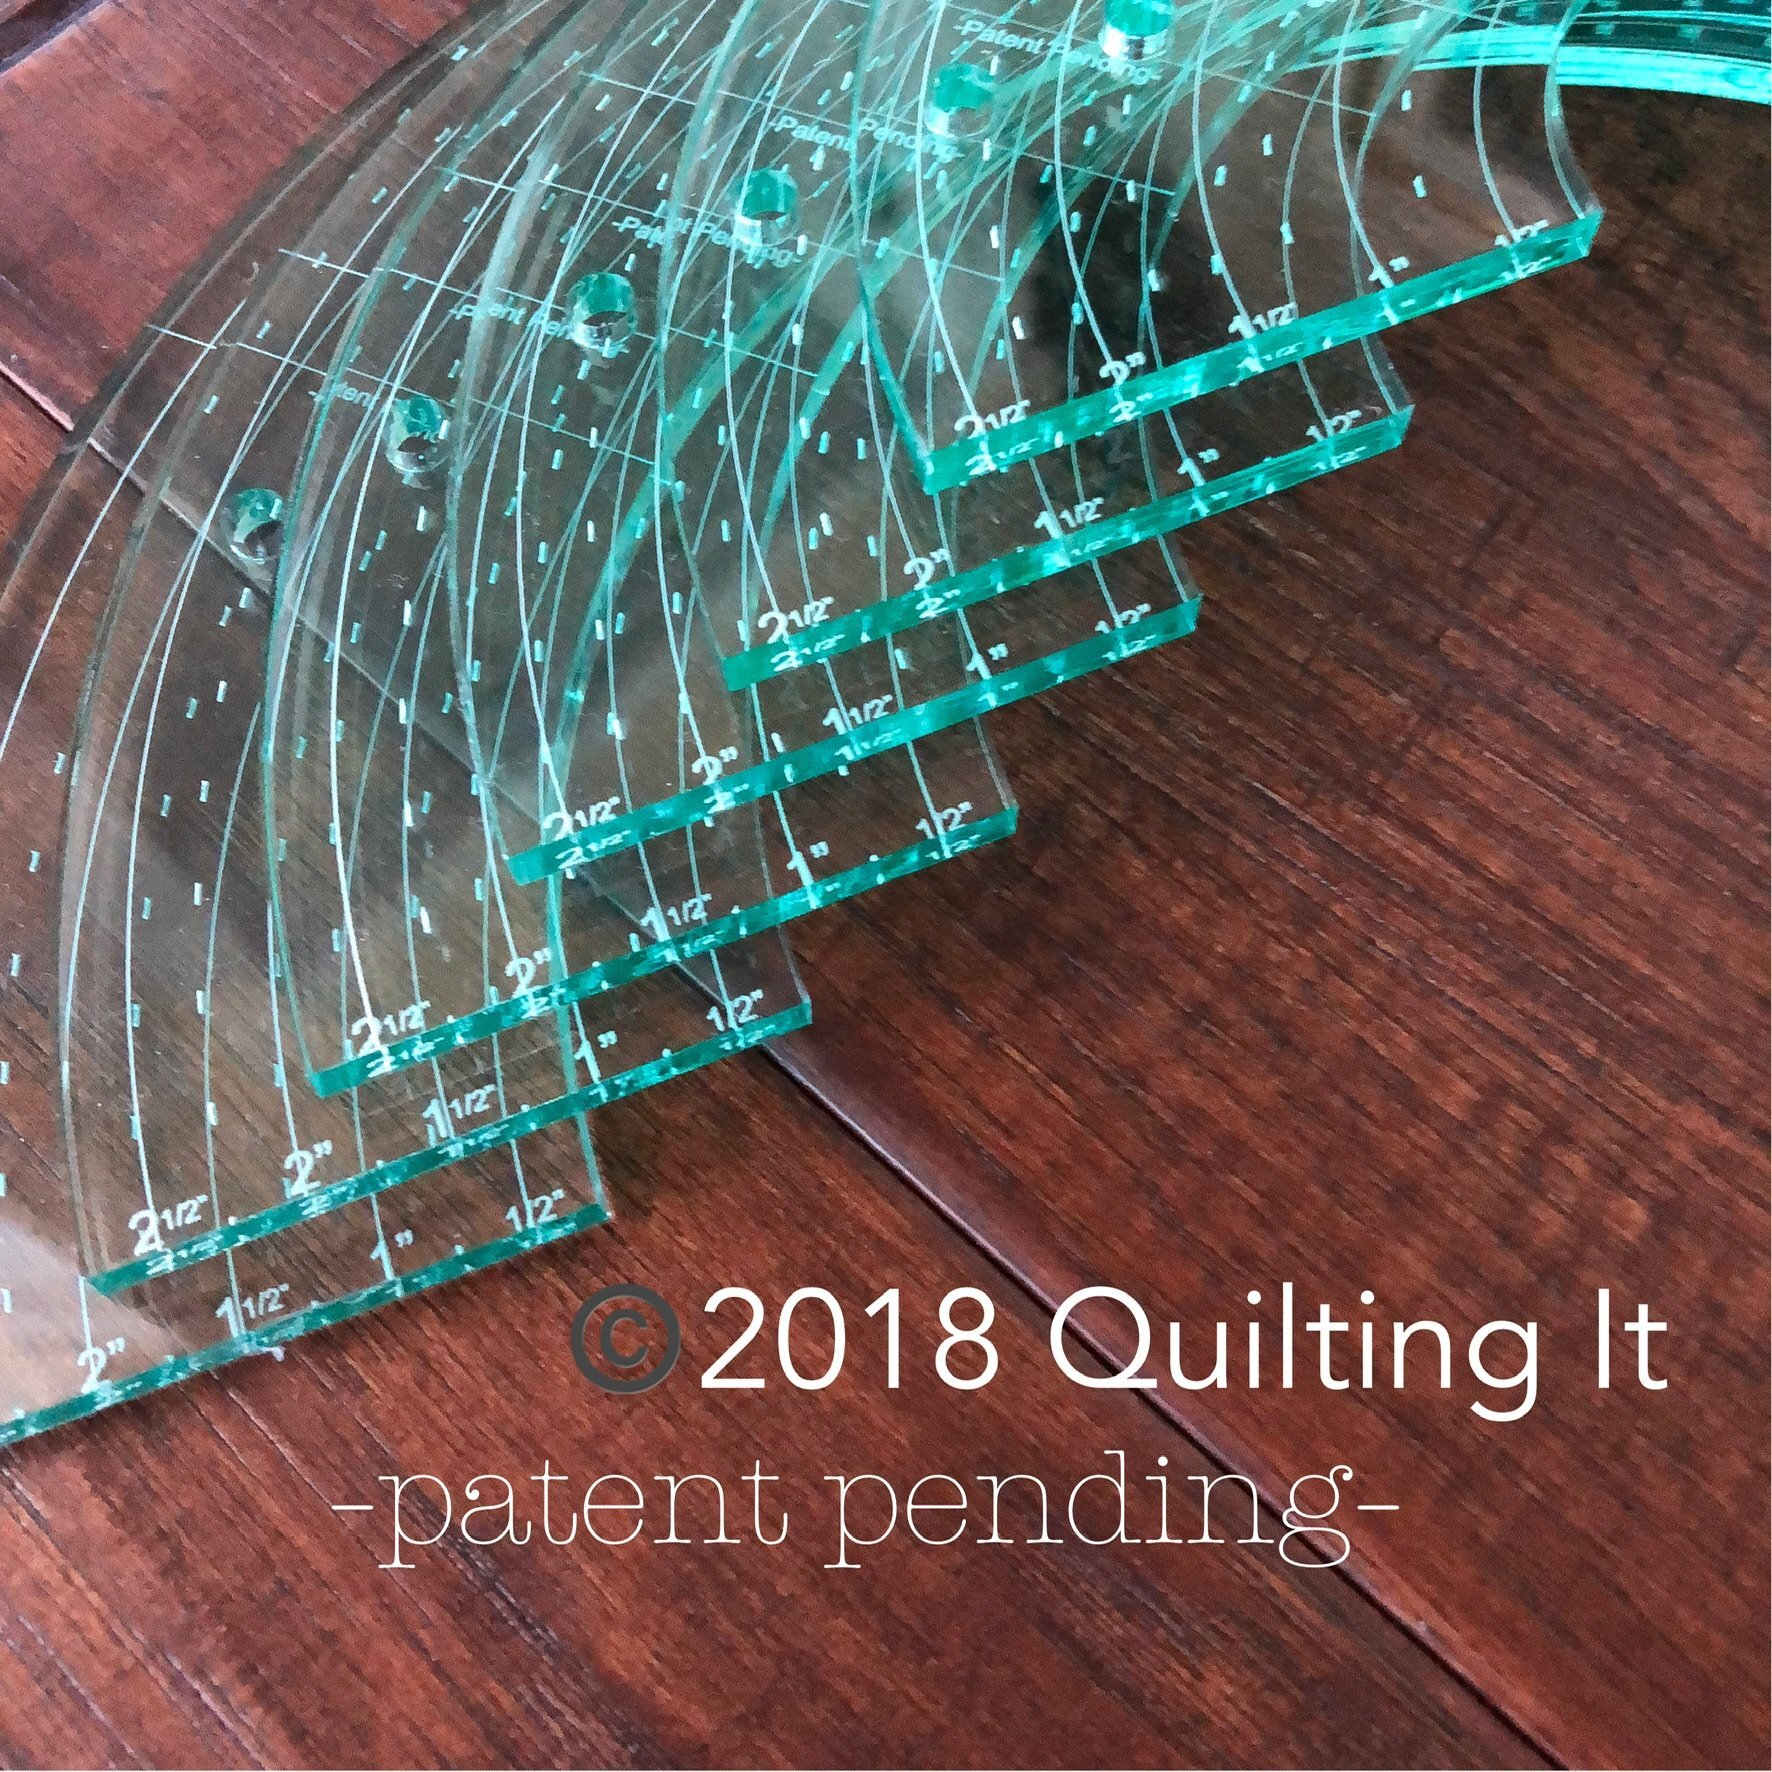
Below is all 6 of the clear Circle2™ stacked up ready to ship out.
- Design Patent D875,574 -
I know that I didn’t go into detail about where I used each Circle2 ruler, because unless you were quilting this same quilt the same way, it’s not going to matter. I did use the 3” and 4” Circle2™ rulers, for most of the curves throughout the quilt. Those are my go to sizes!! When I know that I’m going to quilt a curve, I hold a couple of the rulers up to the block and see which one fits the best, to give me the desired look I’m going for.
Thanks for stopping by, and I hope the quilt and quilting has inspired you!! If you’d like to have me quilt for you, please check out my Longarm Quilting Services page and send me an email at quiltingit@gmail.com Take care…Leisha
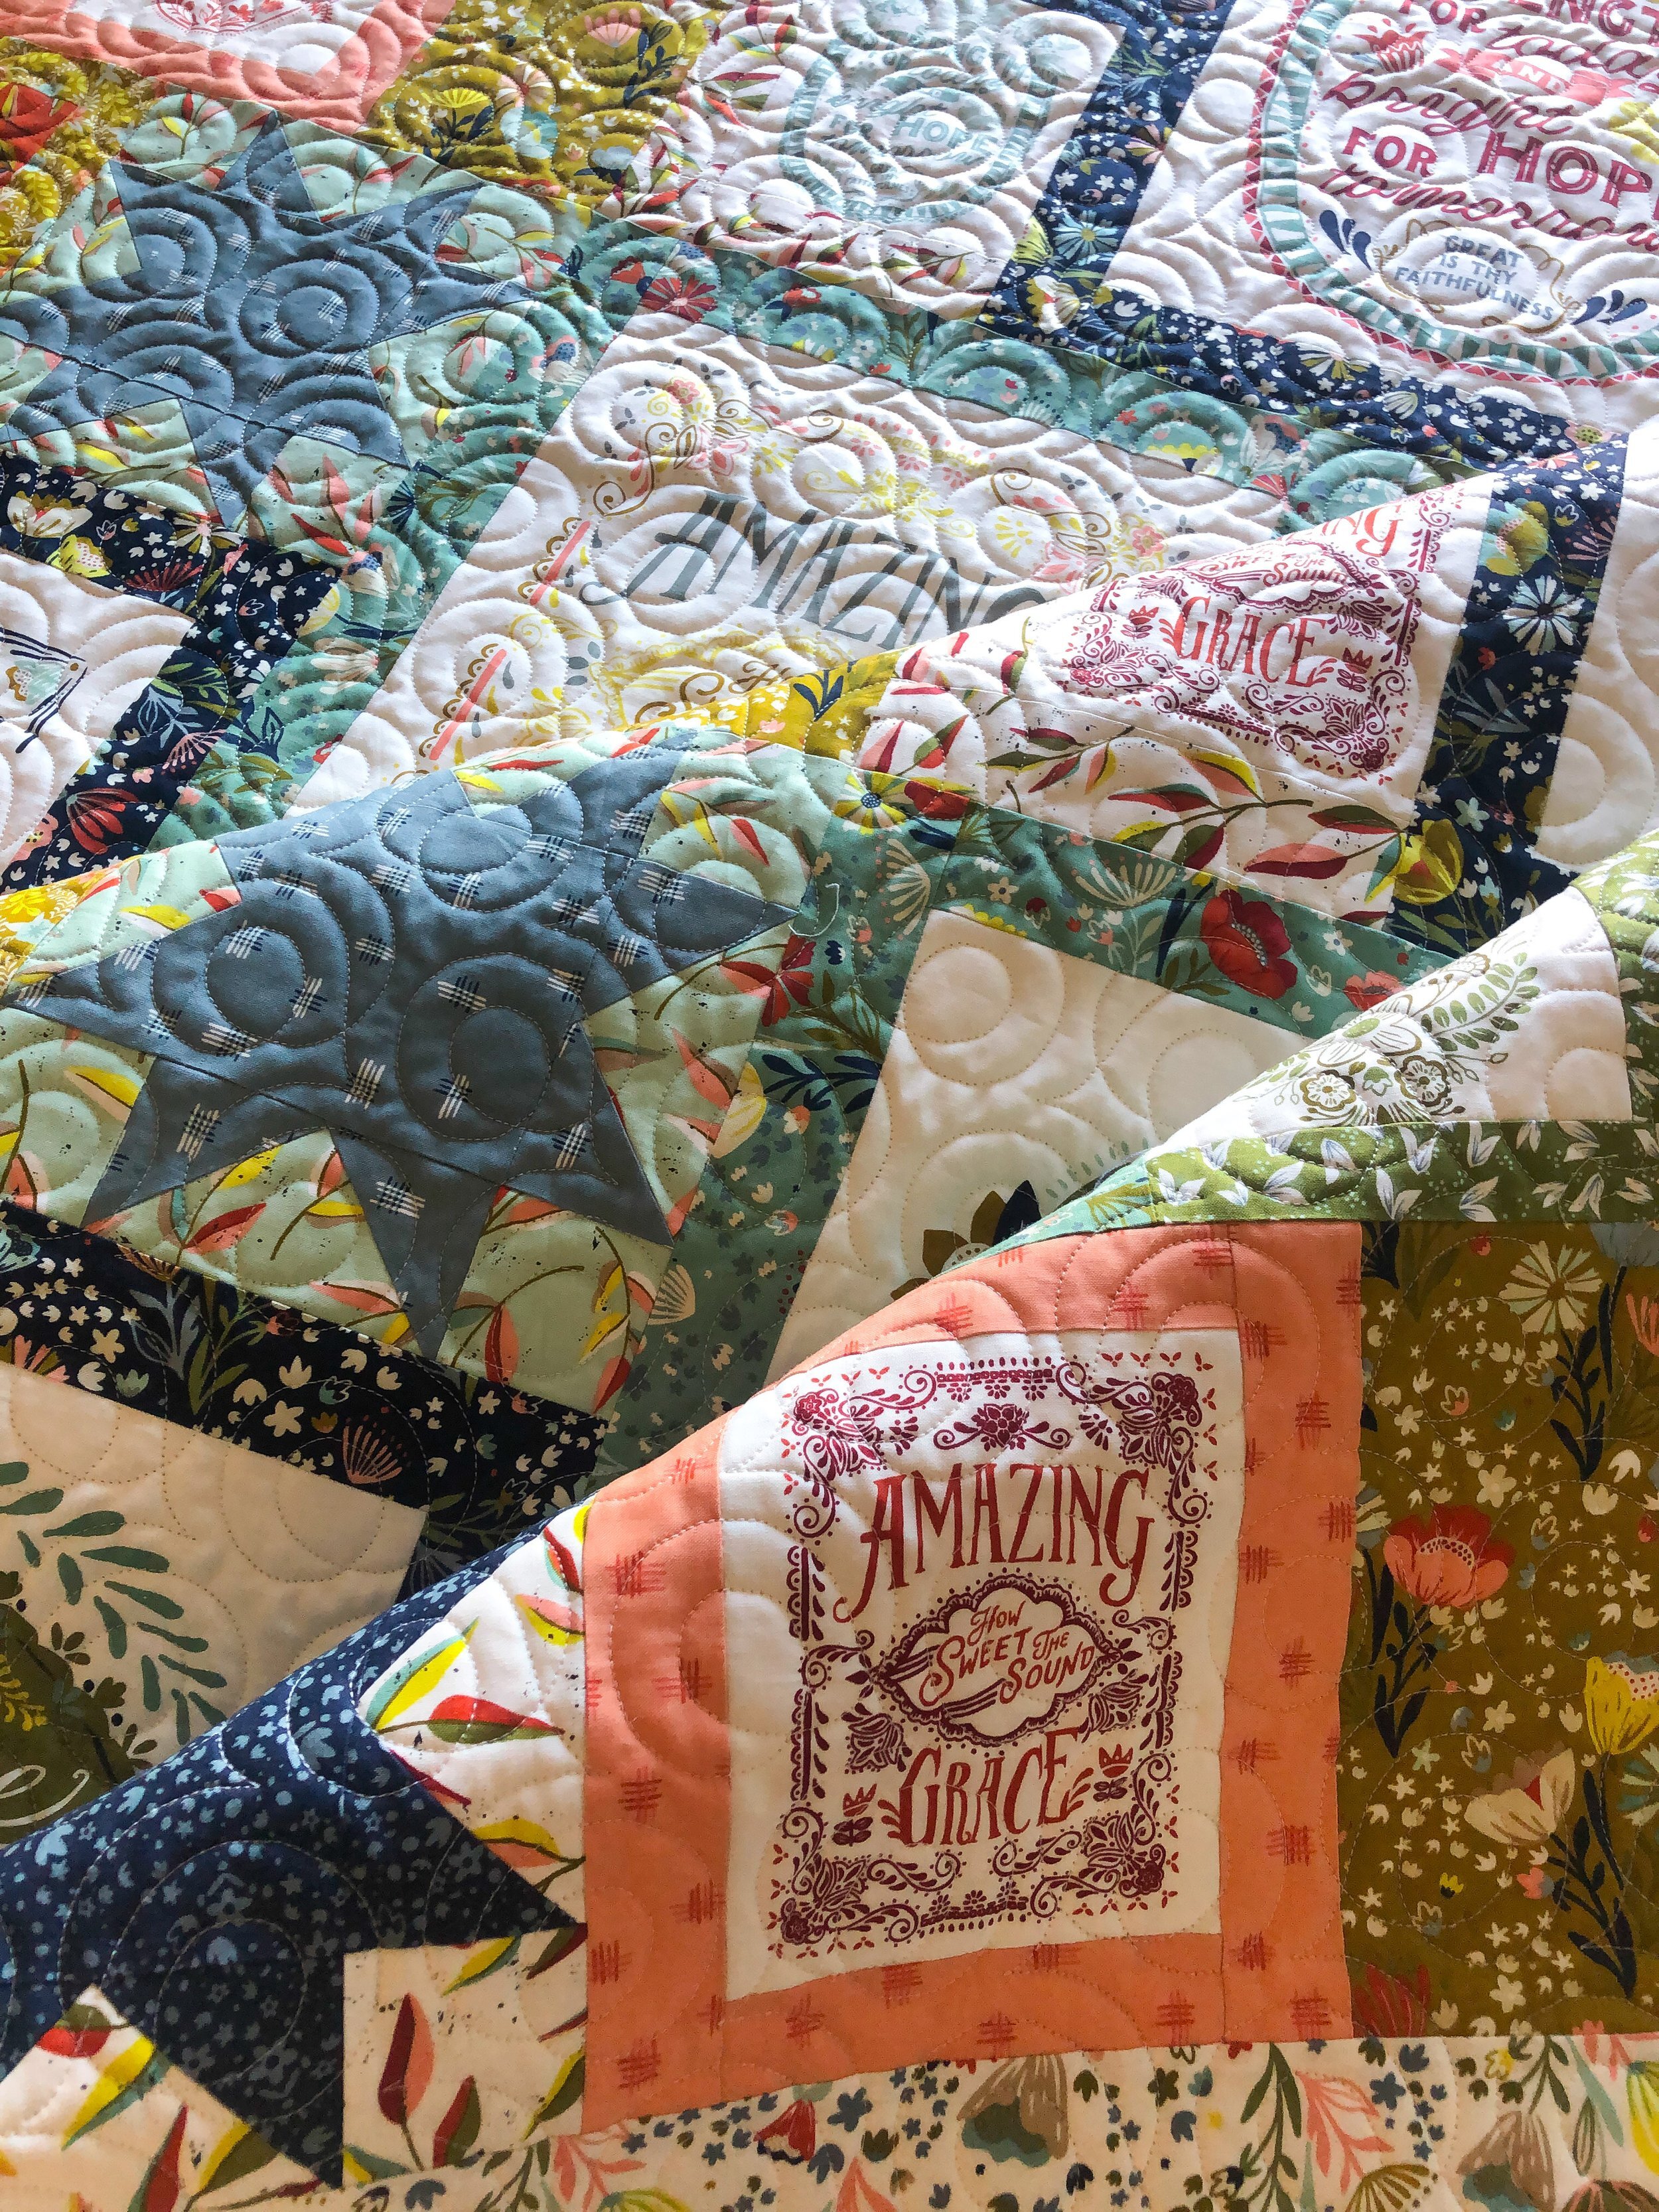
Kim’s Guiding Stars Quilt
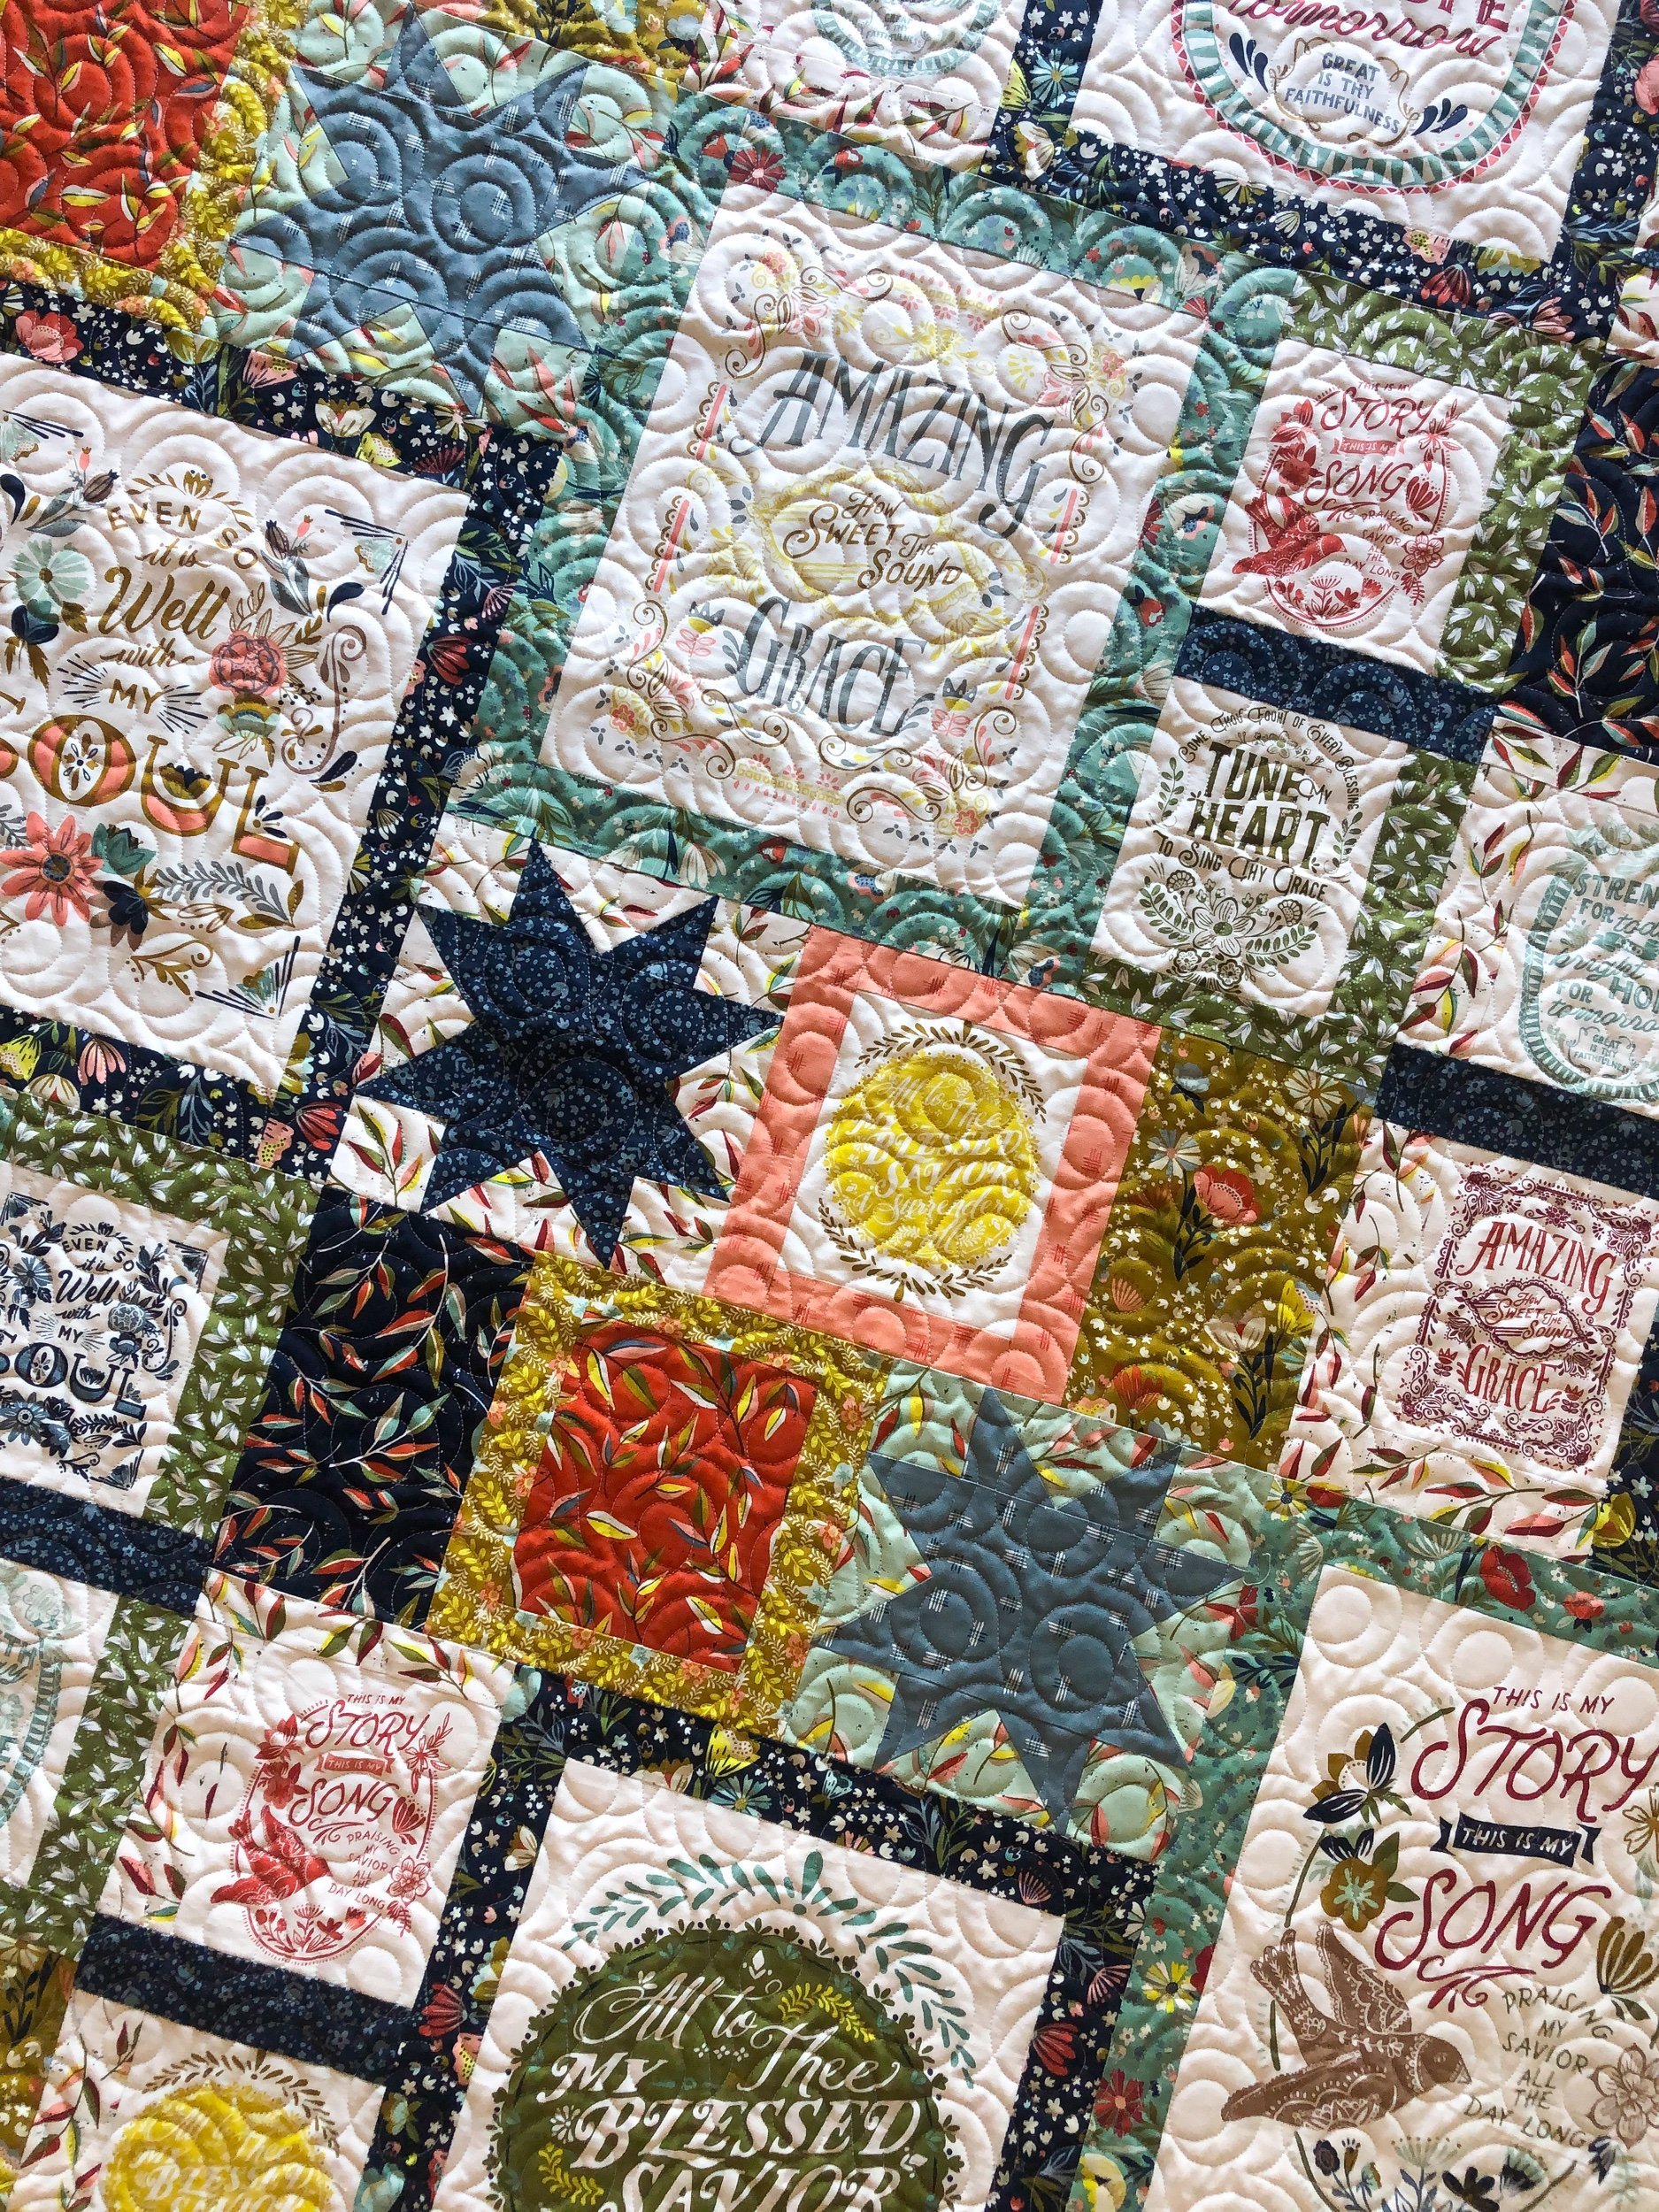
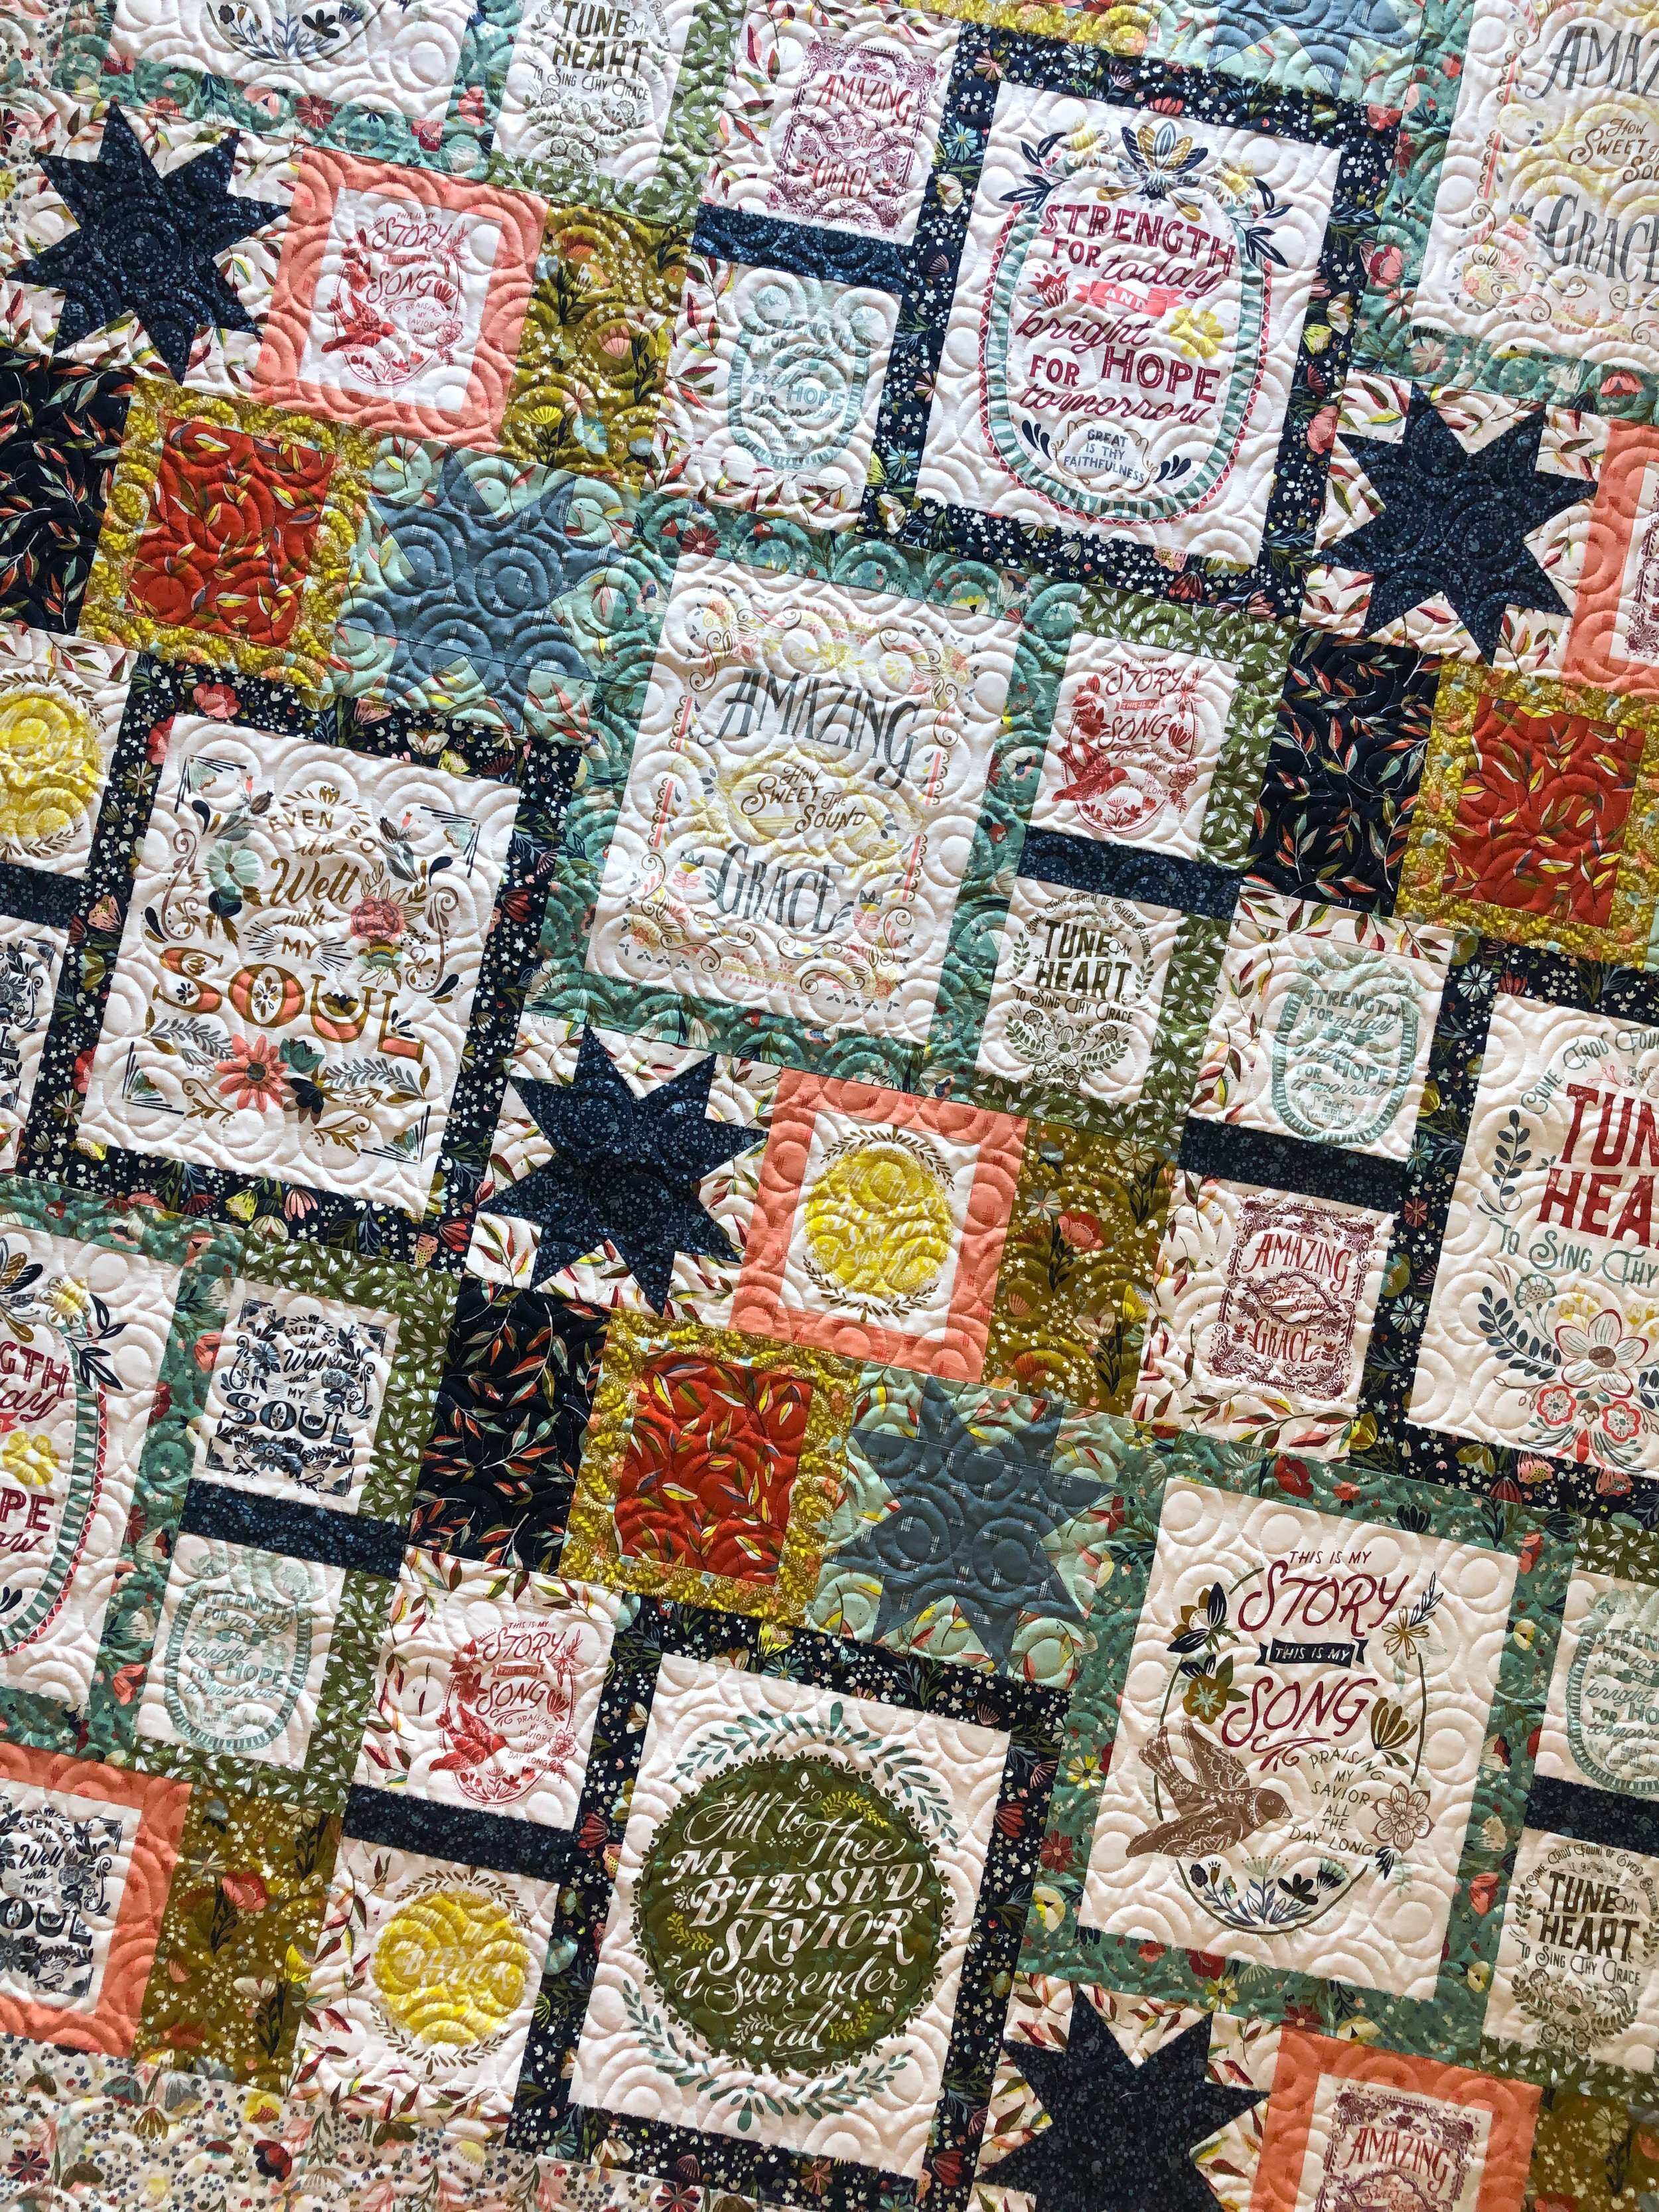
My friend Kim made this for her daughter who just returned from serving as a missionary. It’s the Guiding Star quilt pattern by Kathy Skomp and Bekah Pipes from Lavender Lime, using the Songbook fabrics by Fancy That Design House from Moda Fabrics.

I wish you could see these adorable fabrics in person!! The pictures just don’t do it justice.
I used 8020 cotton poly blend batting and a natural white Omni thread from Superior Threads.

It was fun to see so many of the hymns that I know, on the pretty panels.

We decided on Soho for the quilting, which is by Sarah Ann Myers and is available at Urban Elementz.

We chose this design because of the texture, which is great on a busy quilt like this.
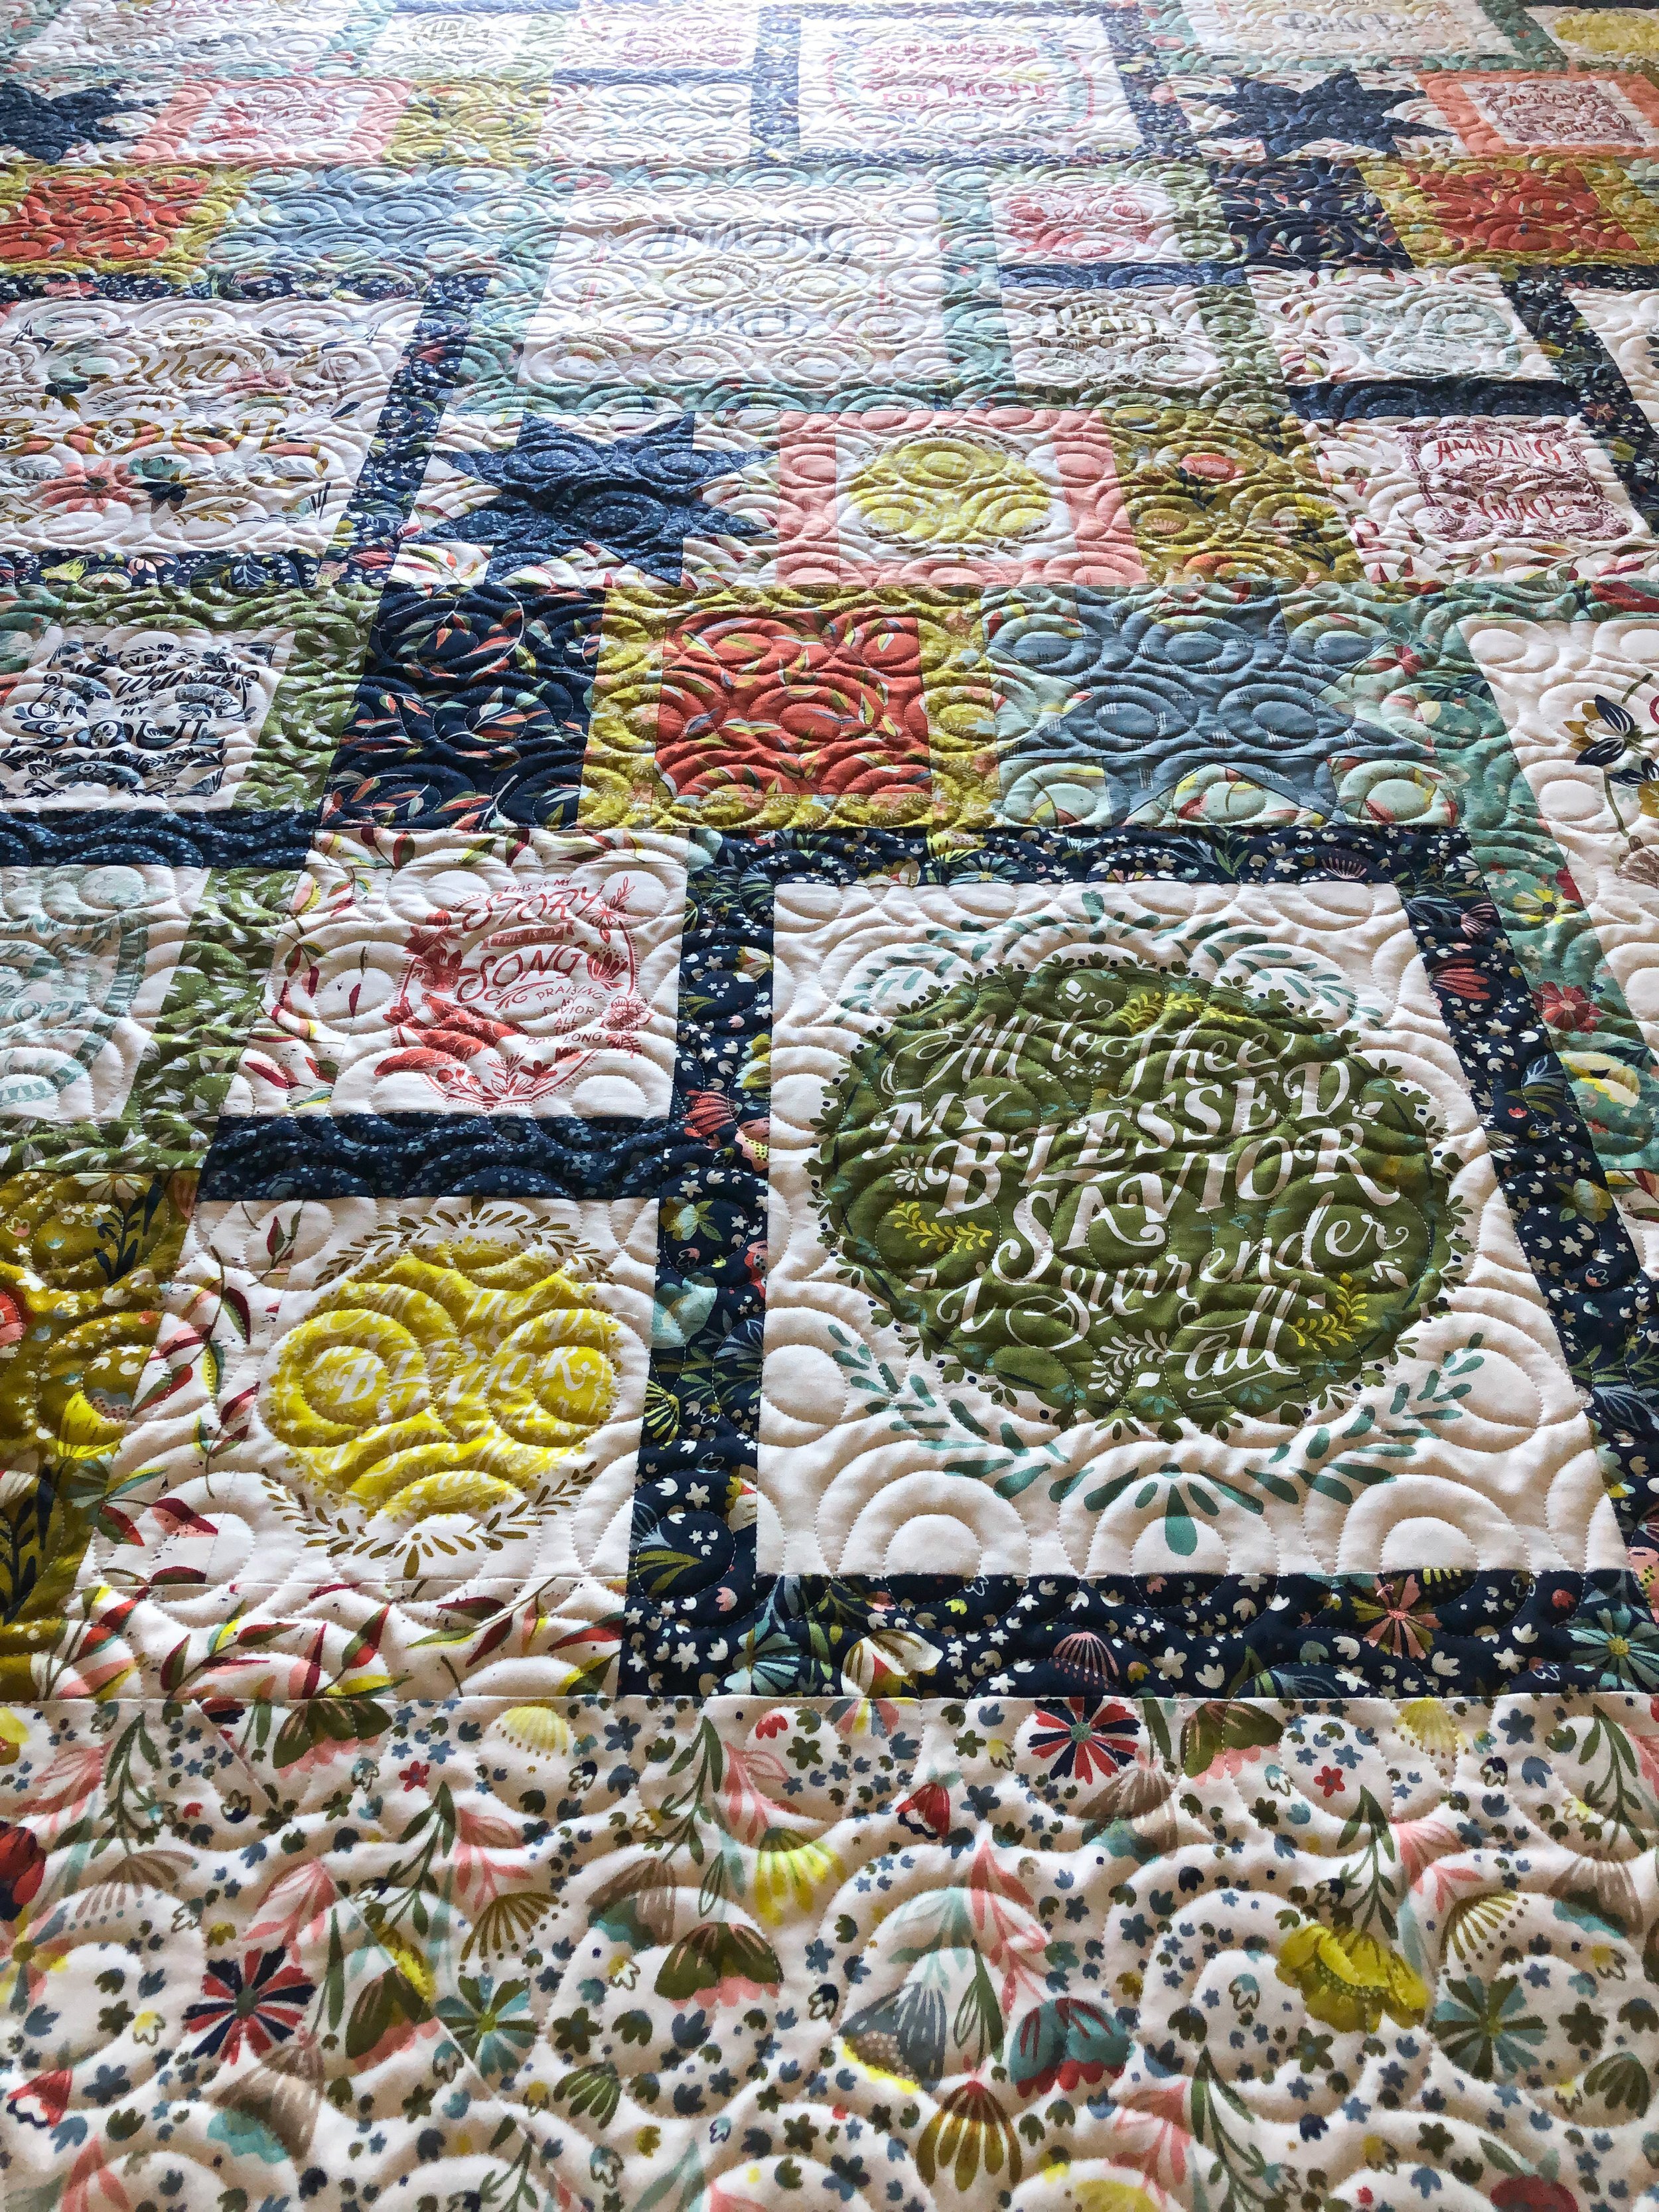
A couple of more close ups.
Thanks for coming on by!! I hope you enjoy seeing the edge to edge quilts, too!! It’s always great for me to see how a quilt was quilted.
Happy Quilting!! • Leisha
Wendy’s Table Toppers
Hi Friends,
I hope you’ve had a good week!! I have a couple of super cute runners to share with you, that Wendy and her mom made. You’ll never believe this…or maybe it’s just me…the designs are both machine embroidered. Yep!! Awesome huh?!?!! They do have hand embroidery patterns as well.

This is the Santa Quartet! Table Runner by Bird Brain Designs. You can select if you’d like a hand or machine embroidered pattern.

Wendy asked that I have fun with the quilting, which is great for me!! I love to add personality and texture to a quilt. Super cute!!!

I quilted Swirls in the checkered border, and Overlapping Circles to the background behind the Santas. Which are a couple of the designs that I teach in my Quilting It Freemotion™ course!! If you’ve been wanting to learn how to freemotion quilt, you should check it out!!!

I used my favorite 8020 cotton poly blend batting from Winline Textiles out of Ogden Utah. I also used a natural white Omni thread from Superior Threads. It is my favorite neutral thread!! I use that color more than any other. Color number is 3002.

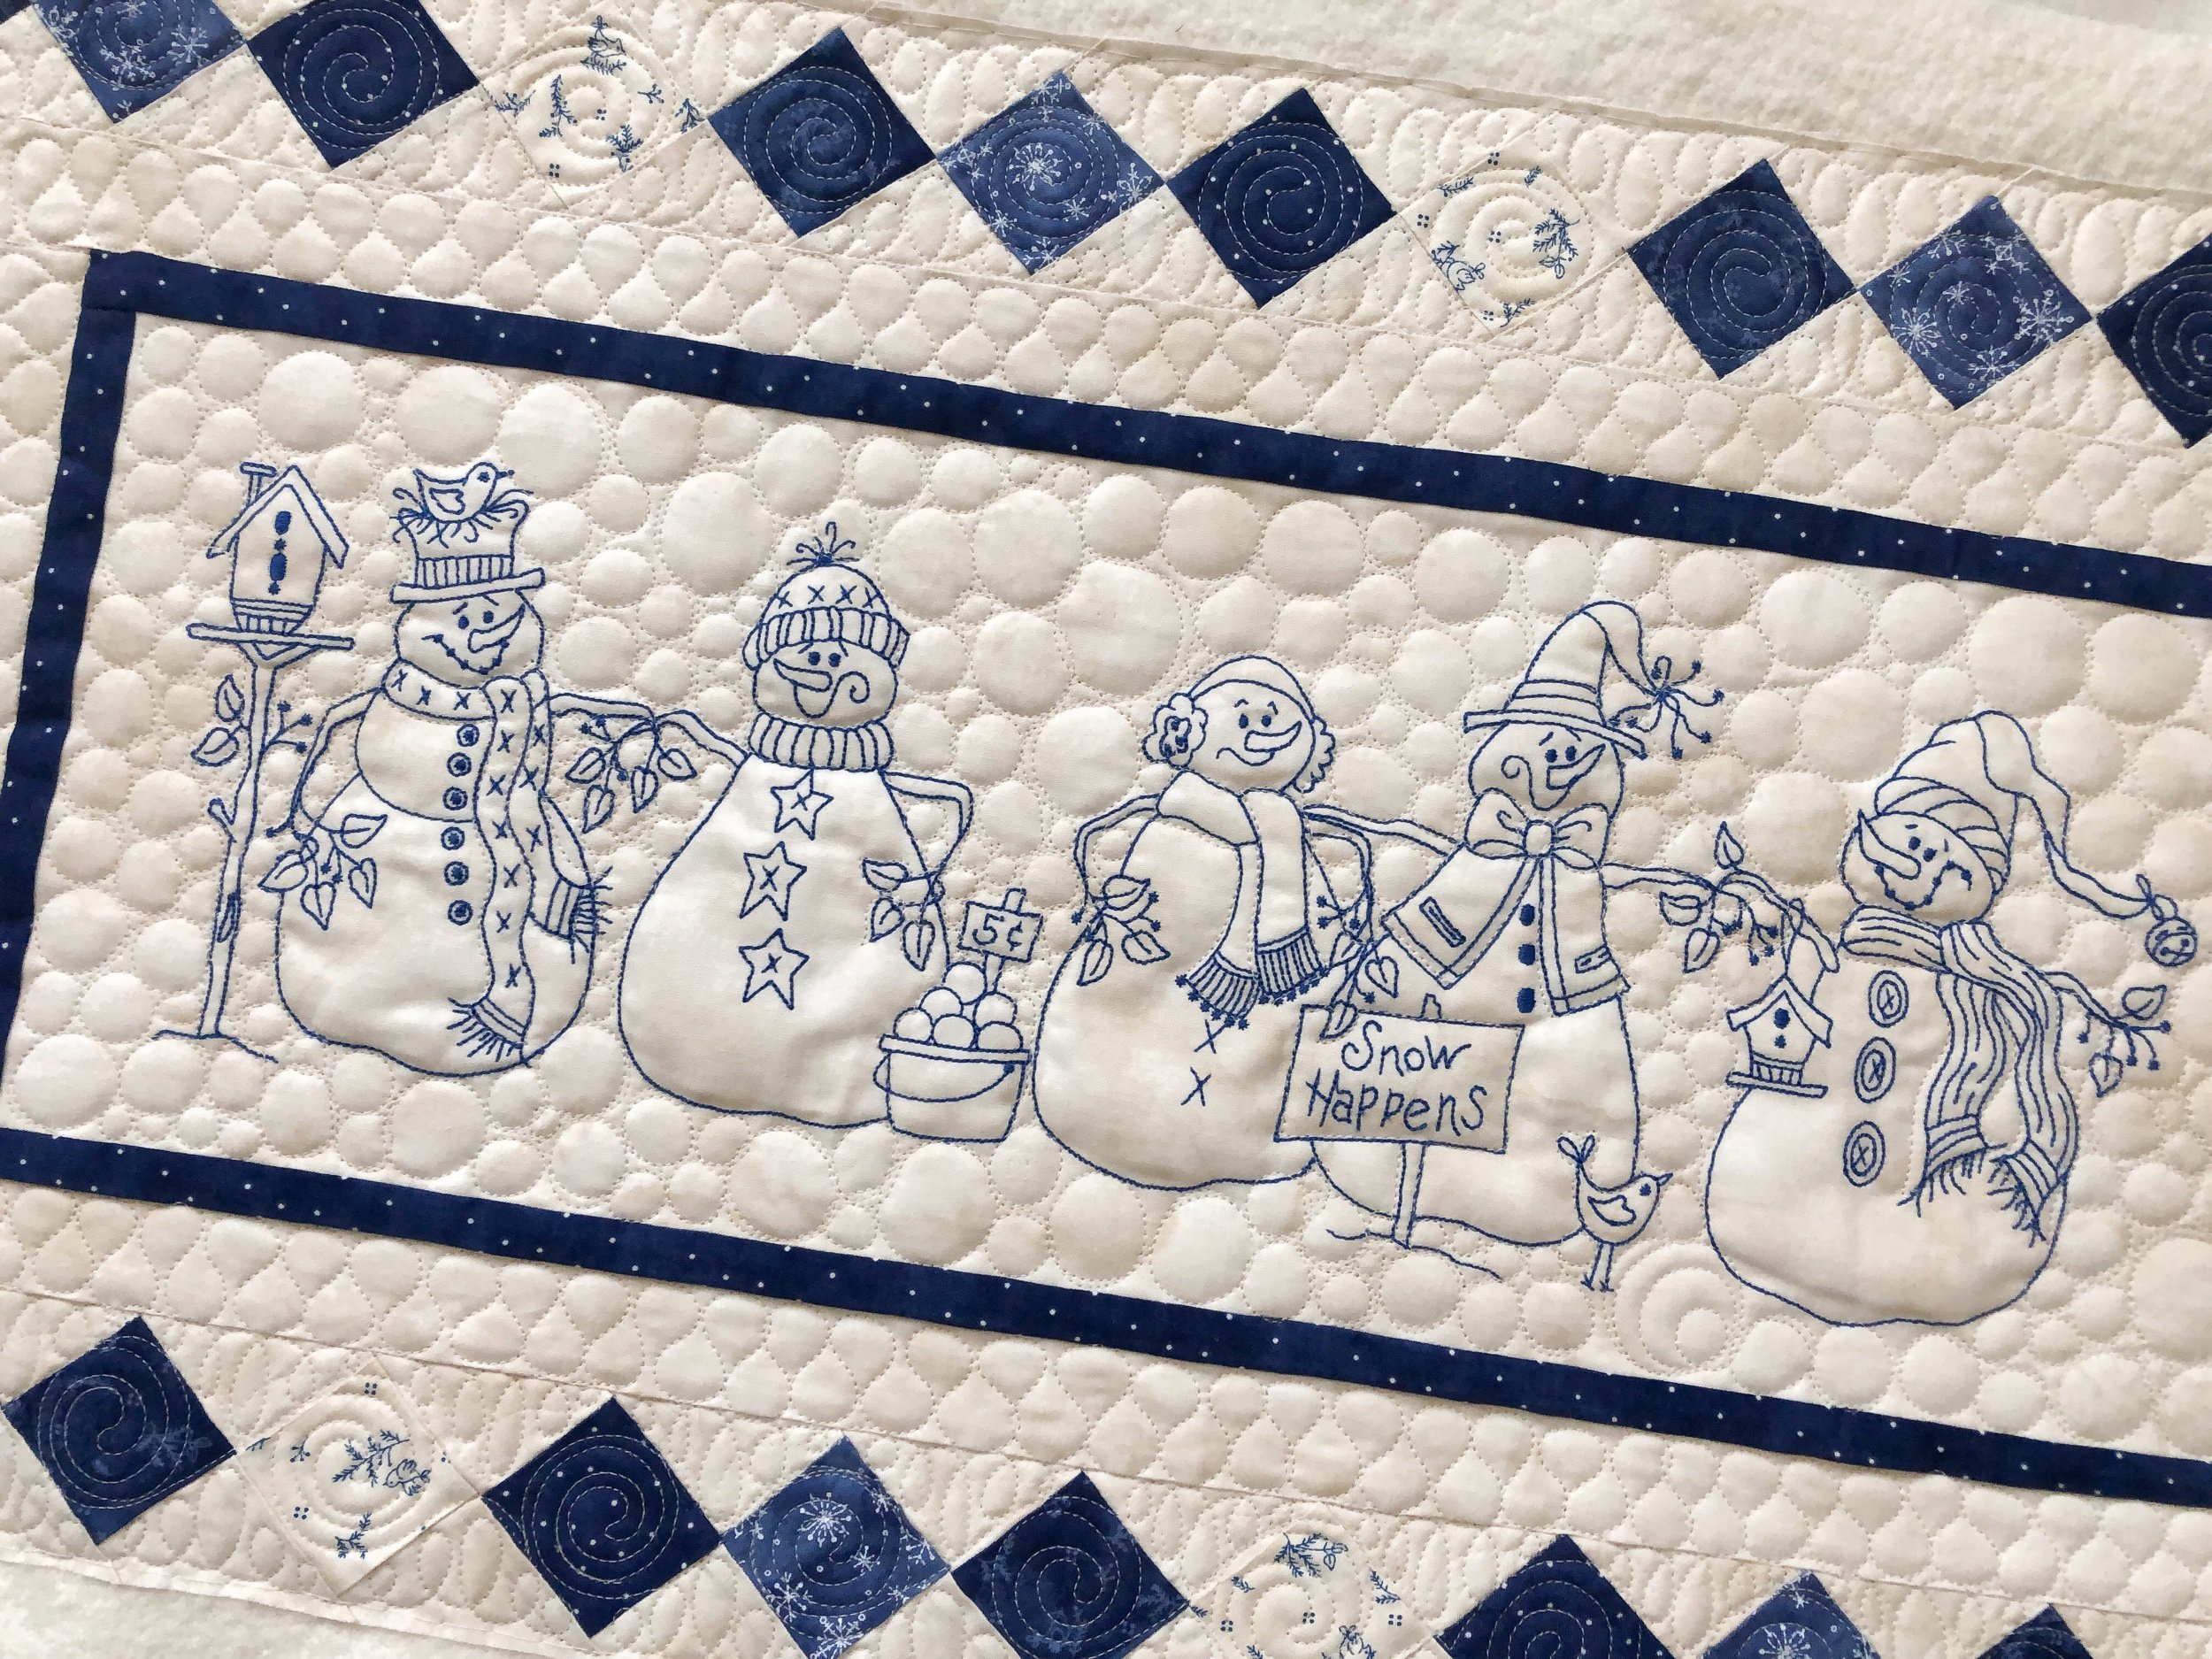
The next runner that Wendy and her mom machine embroidered is the Snow Happens pattern by Bird Brain Designs. Please note that you have to select the pattern type you want, which you can do for both runners, if you scroll down in the links I provided.
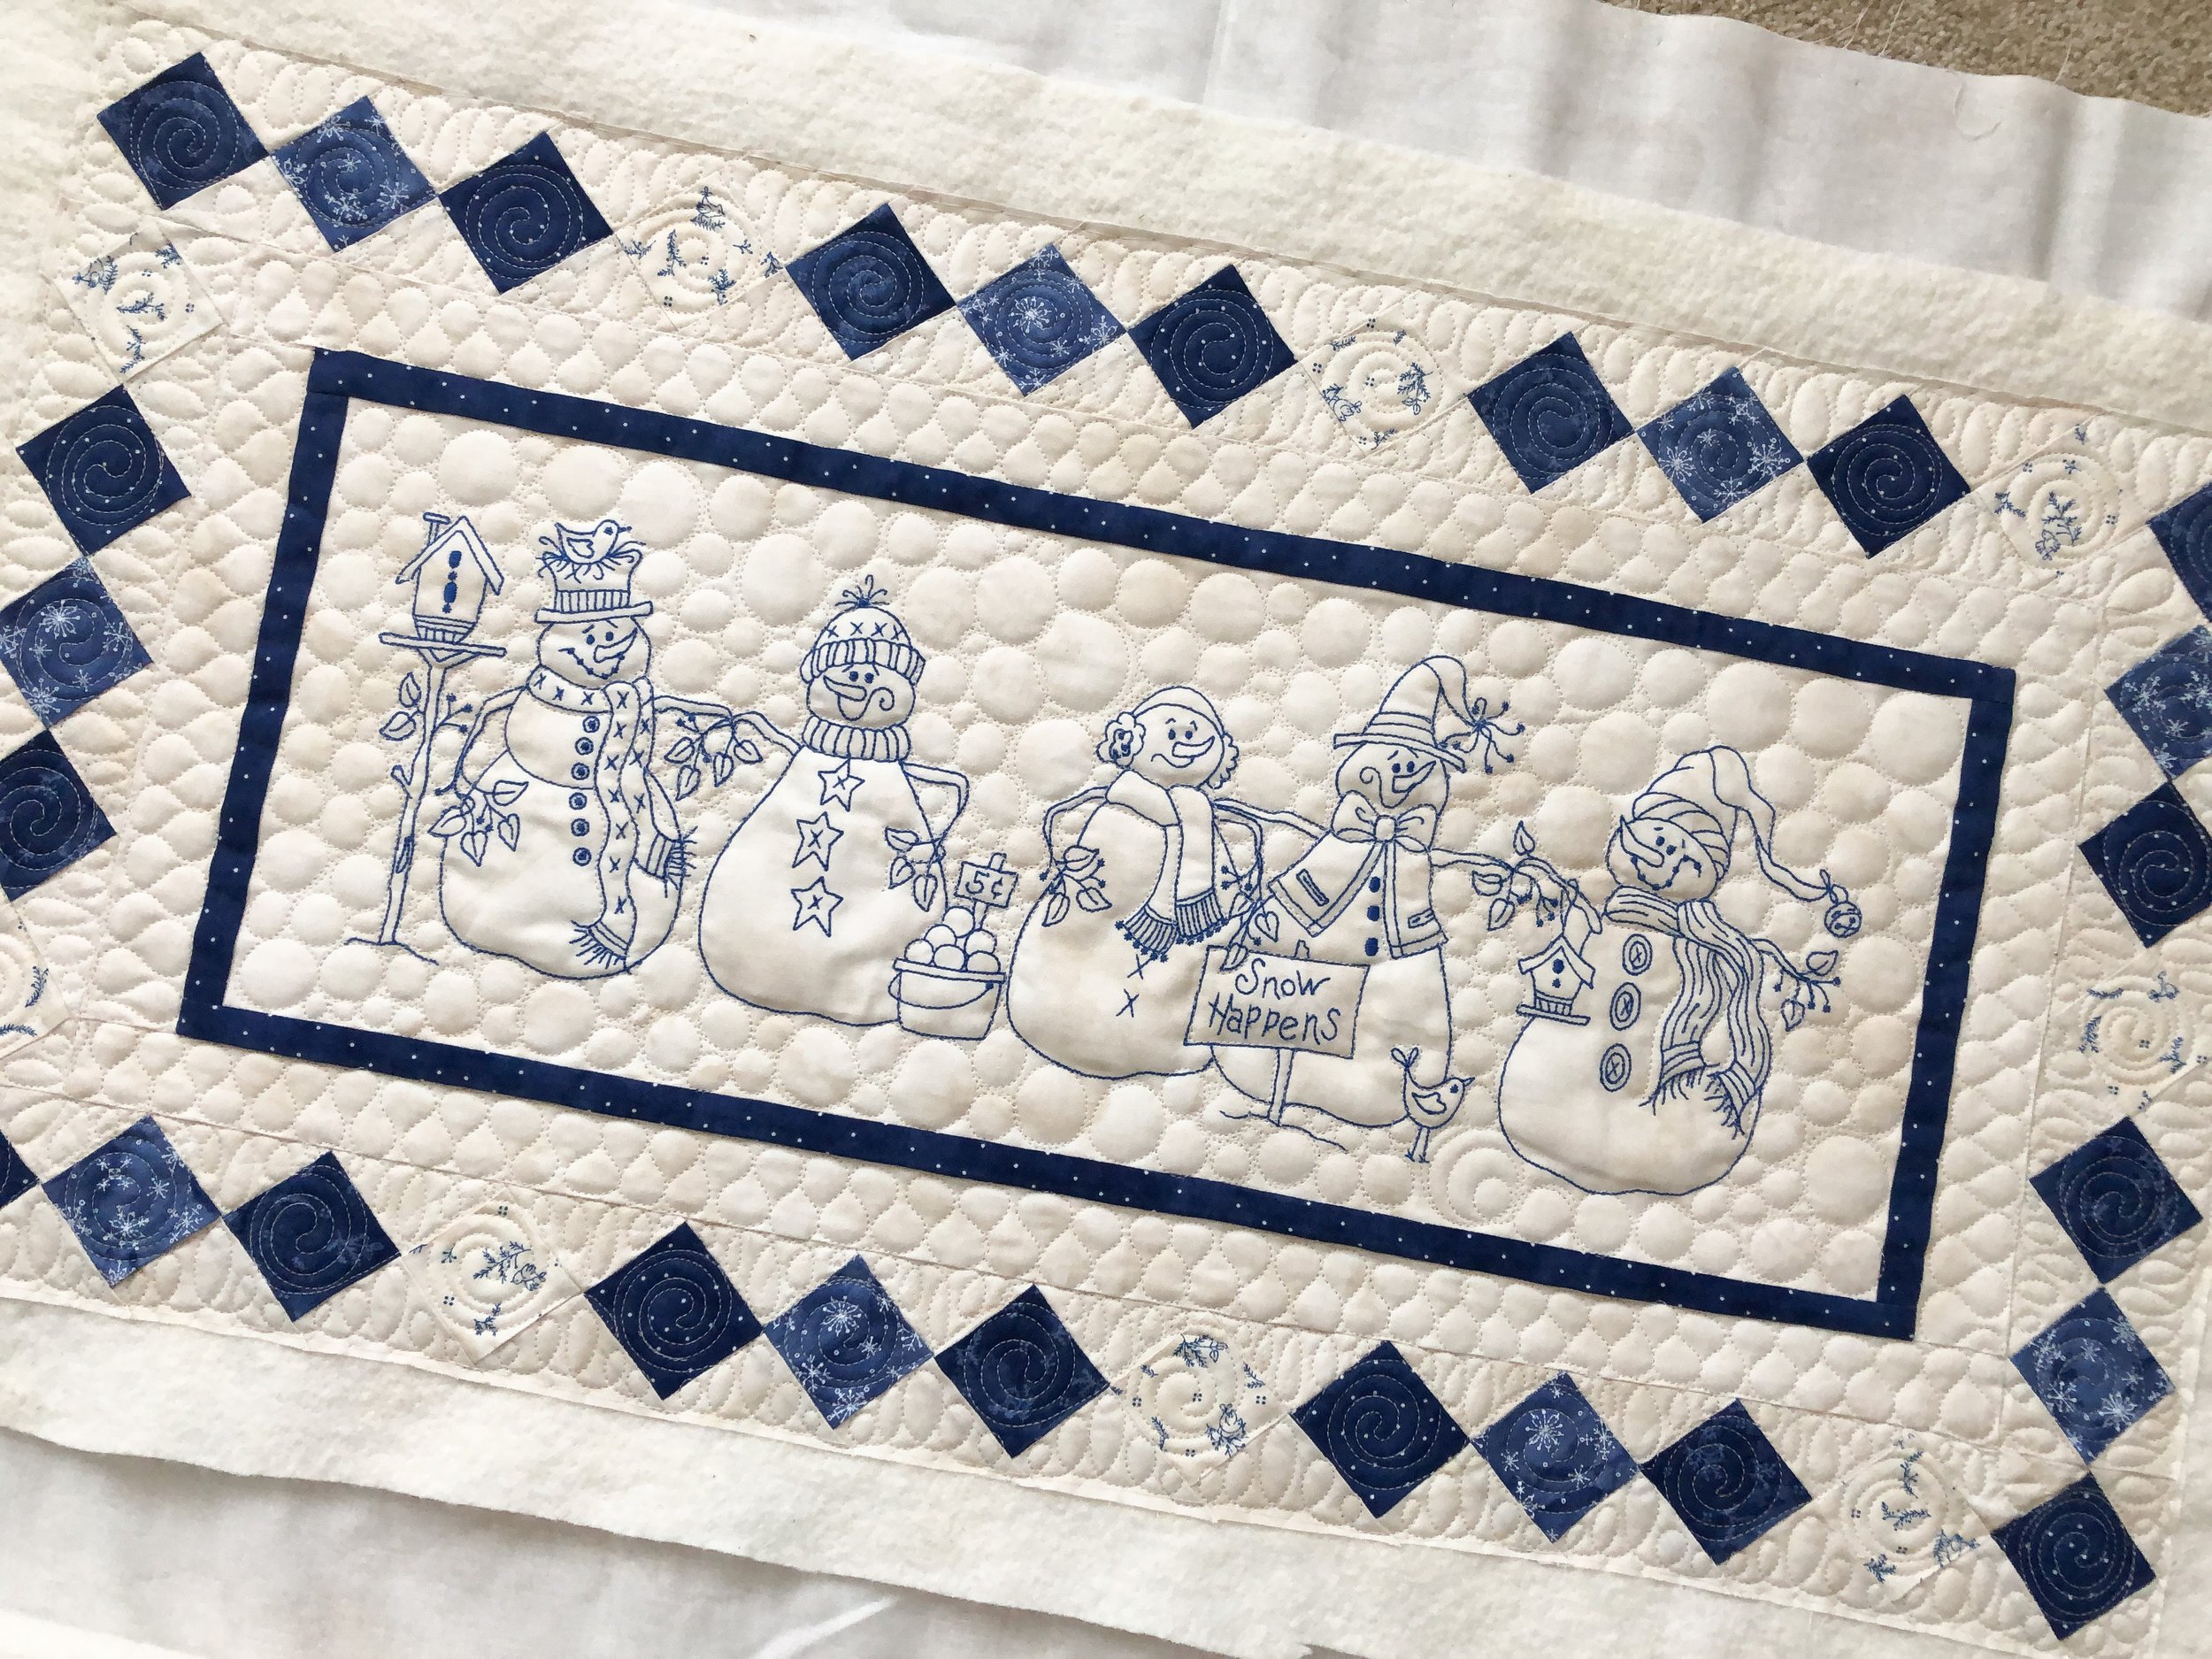
This fun runner got Pebbles in the background, because um they are snowman…and I just love that texture around embroidery. It helps the design pop!

Just because…winter is coming to an end here in northern Utah!! Today was 58°. The snow is fast Lu melting. Hallelujah! Spring is my favorite season so I am so excited.
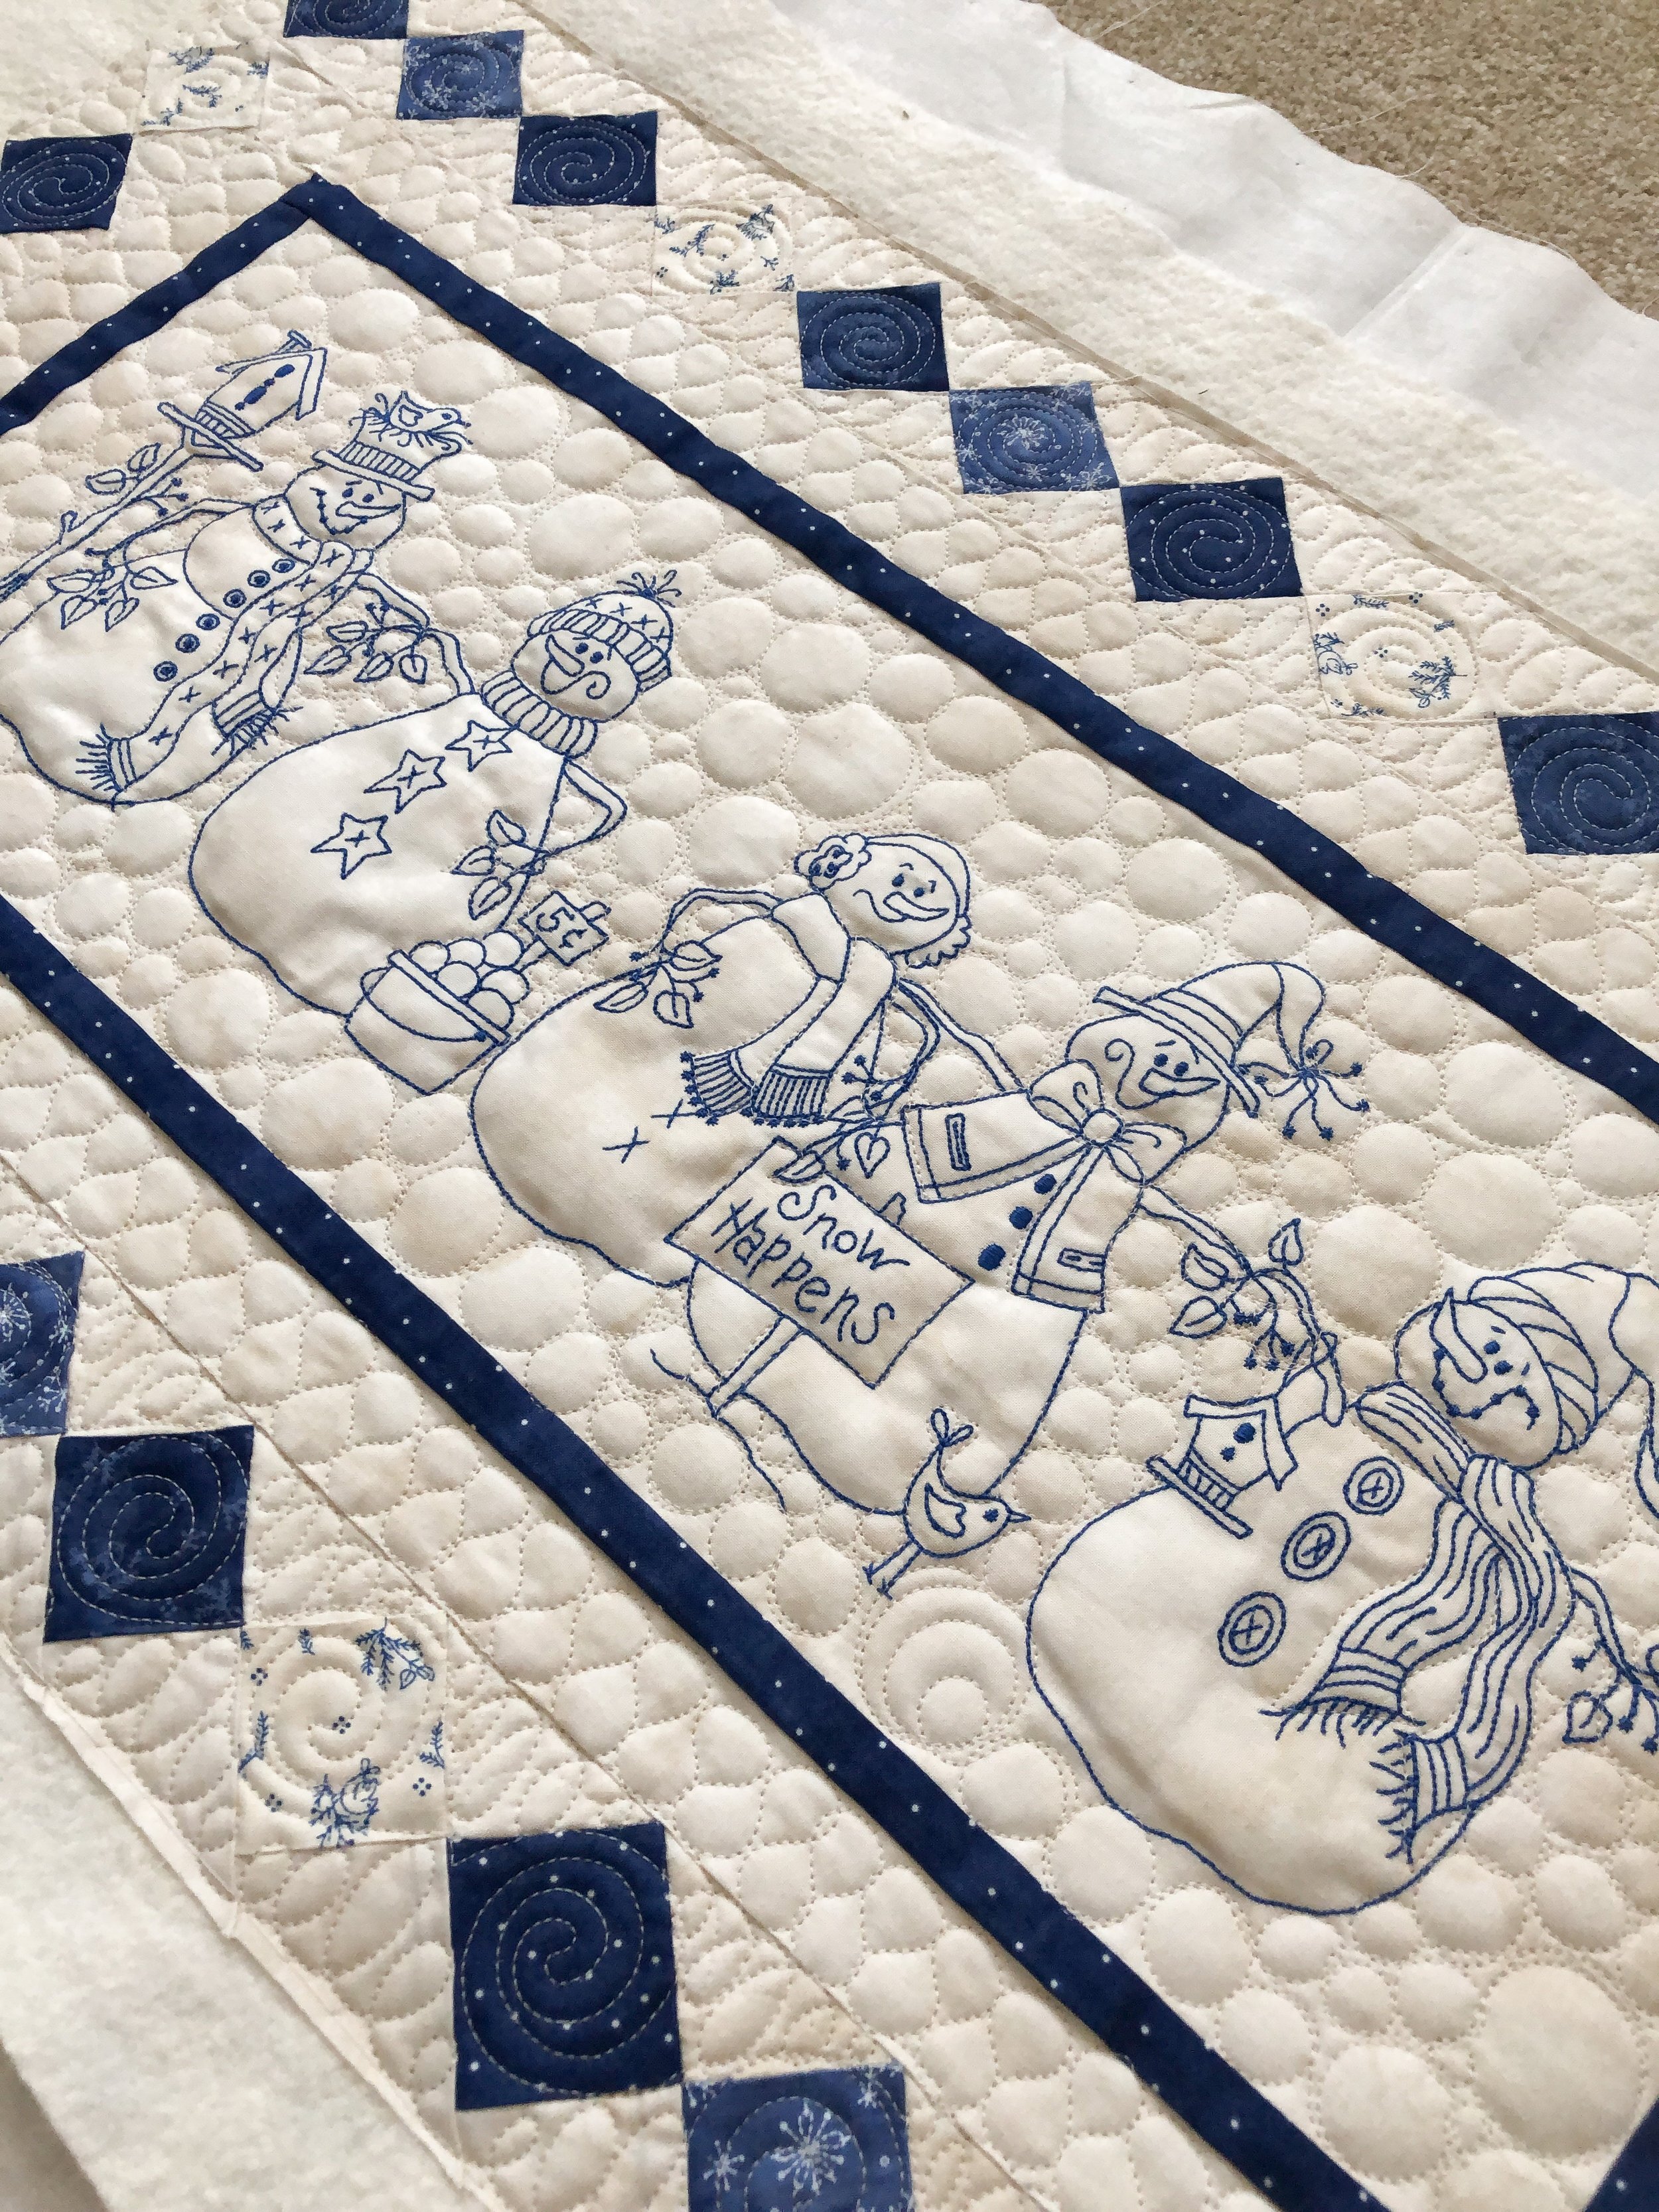
Back to quilting…Swirls, Loops, and ribbon candy in the borders, adds so much fun texture! Freemotion quilting is nothing to be scared of…it’s actually quite fun to try new designs. Do you have any questions about my Quilting It Freemotion™ course? I have some quilters who watched my course, and this is what they had to say.

Thanks for coming on by!! I hope you’re safe and well. Take care and happy quilting. • Leisha
Do you have any quilts ready to be quilted? I have quick turn around times. Email me at quiltingit@gmail.com or contact me, I’d love to quilt for you. If you’d like more info on my quilting services click here: Longarm Quilting Services. I look forward to working with you!
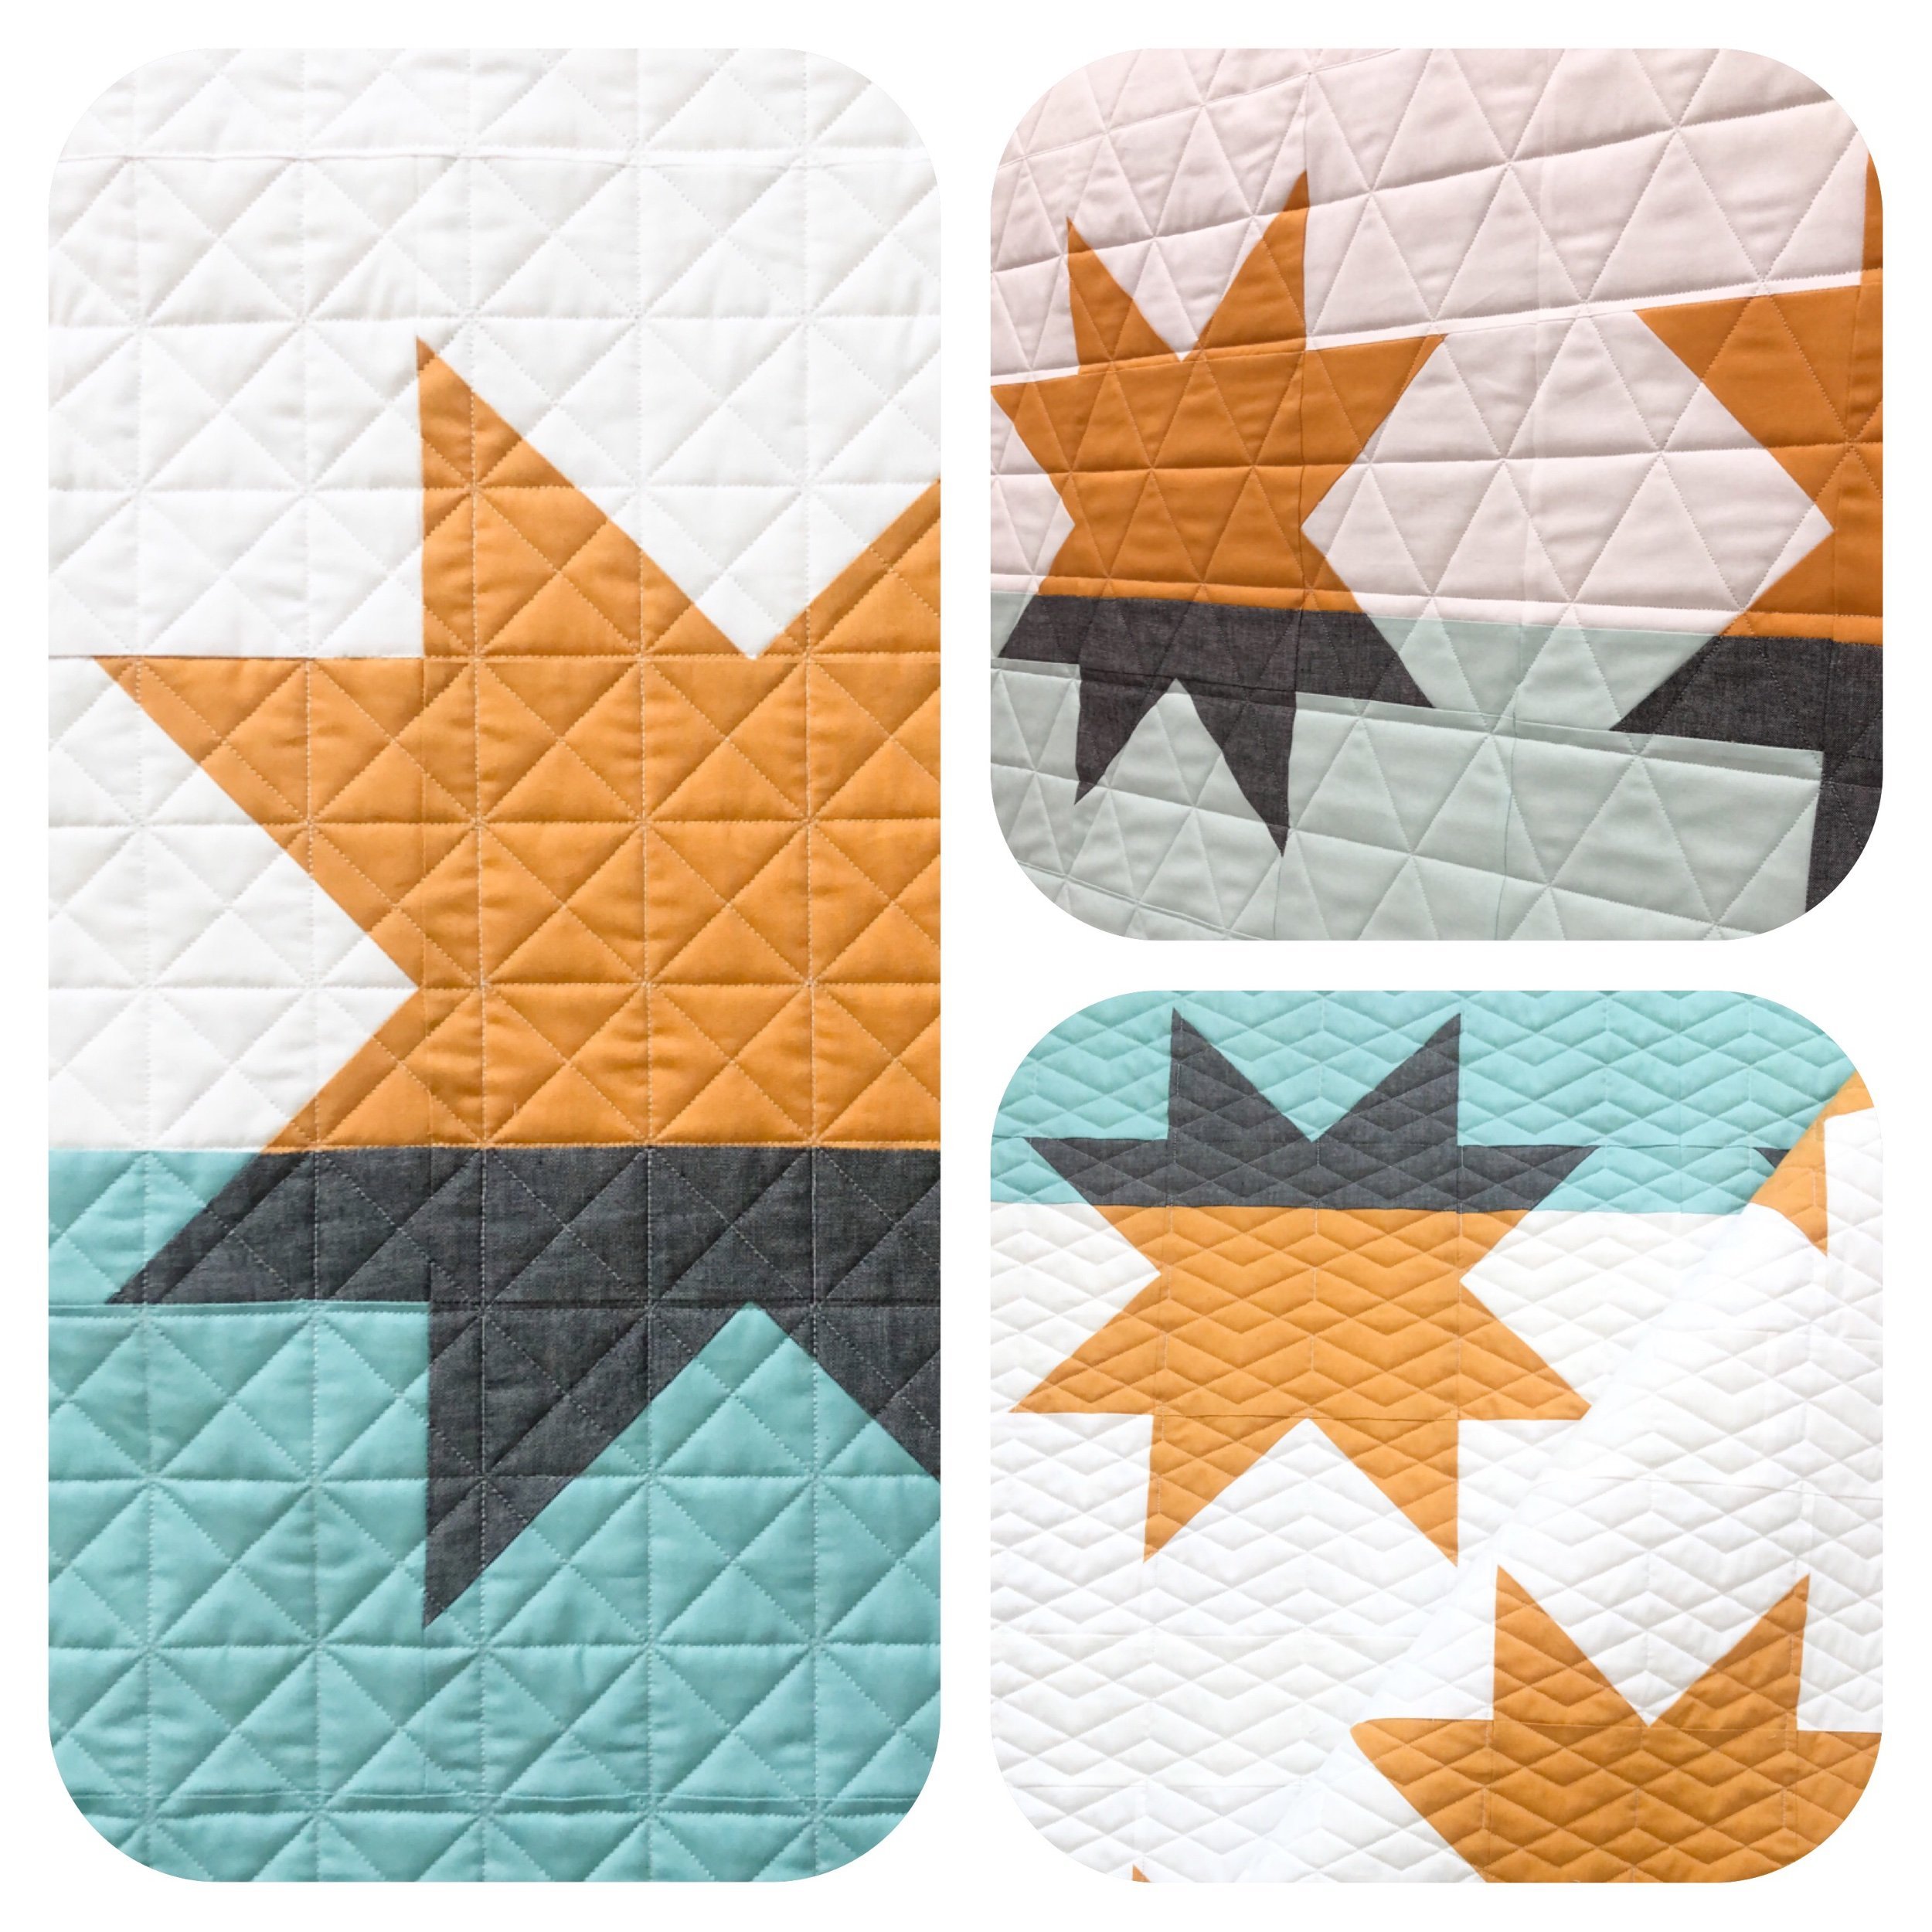
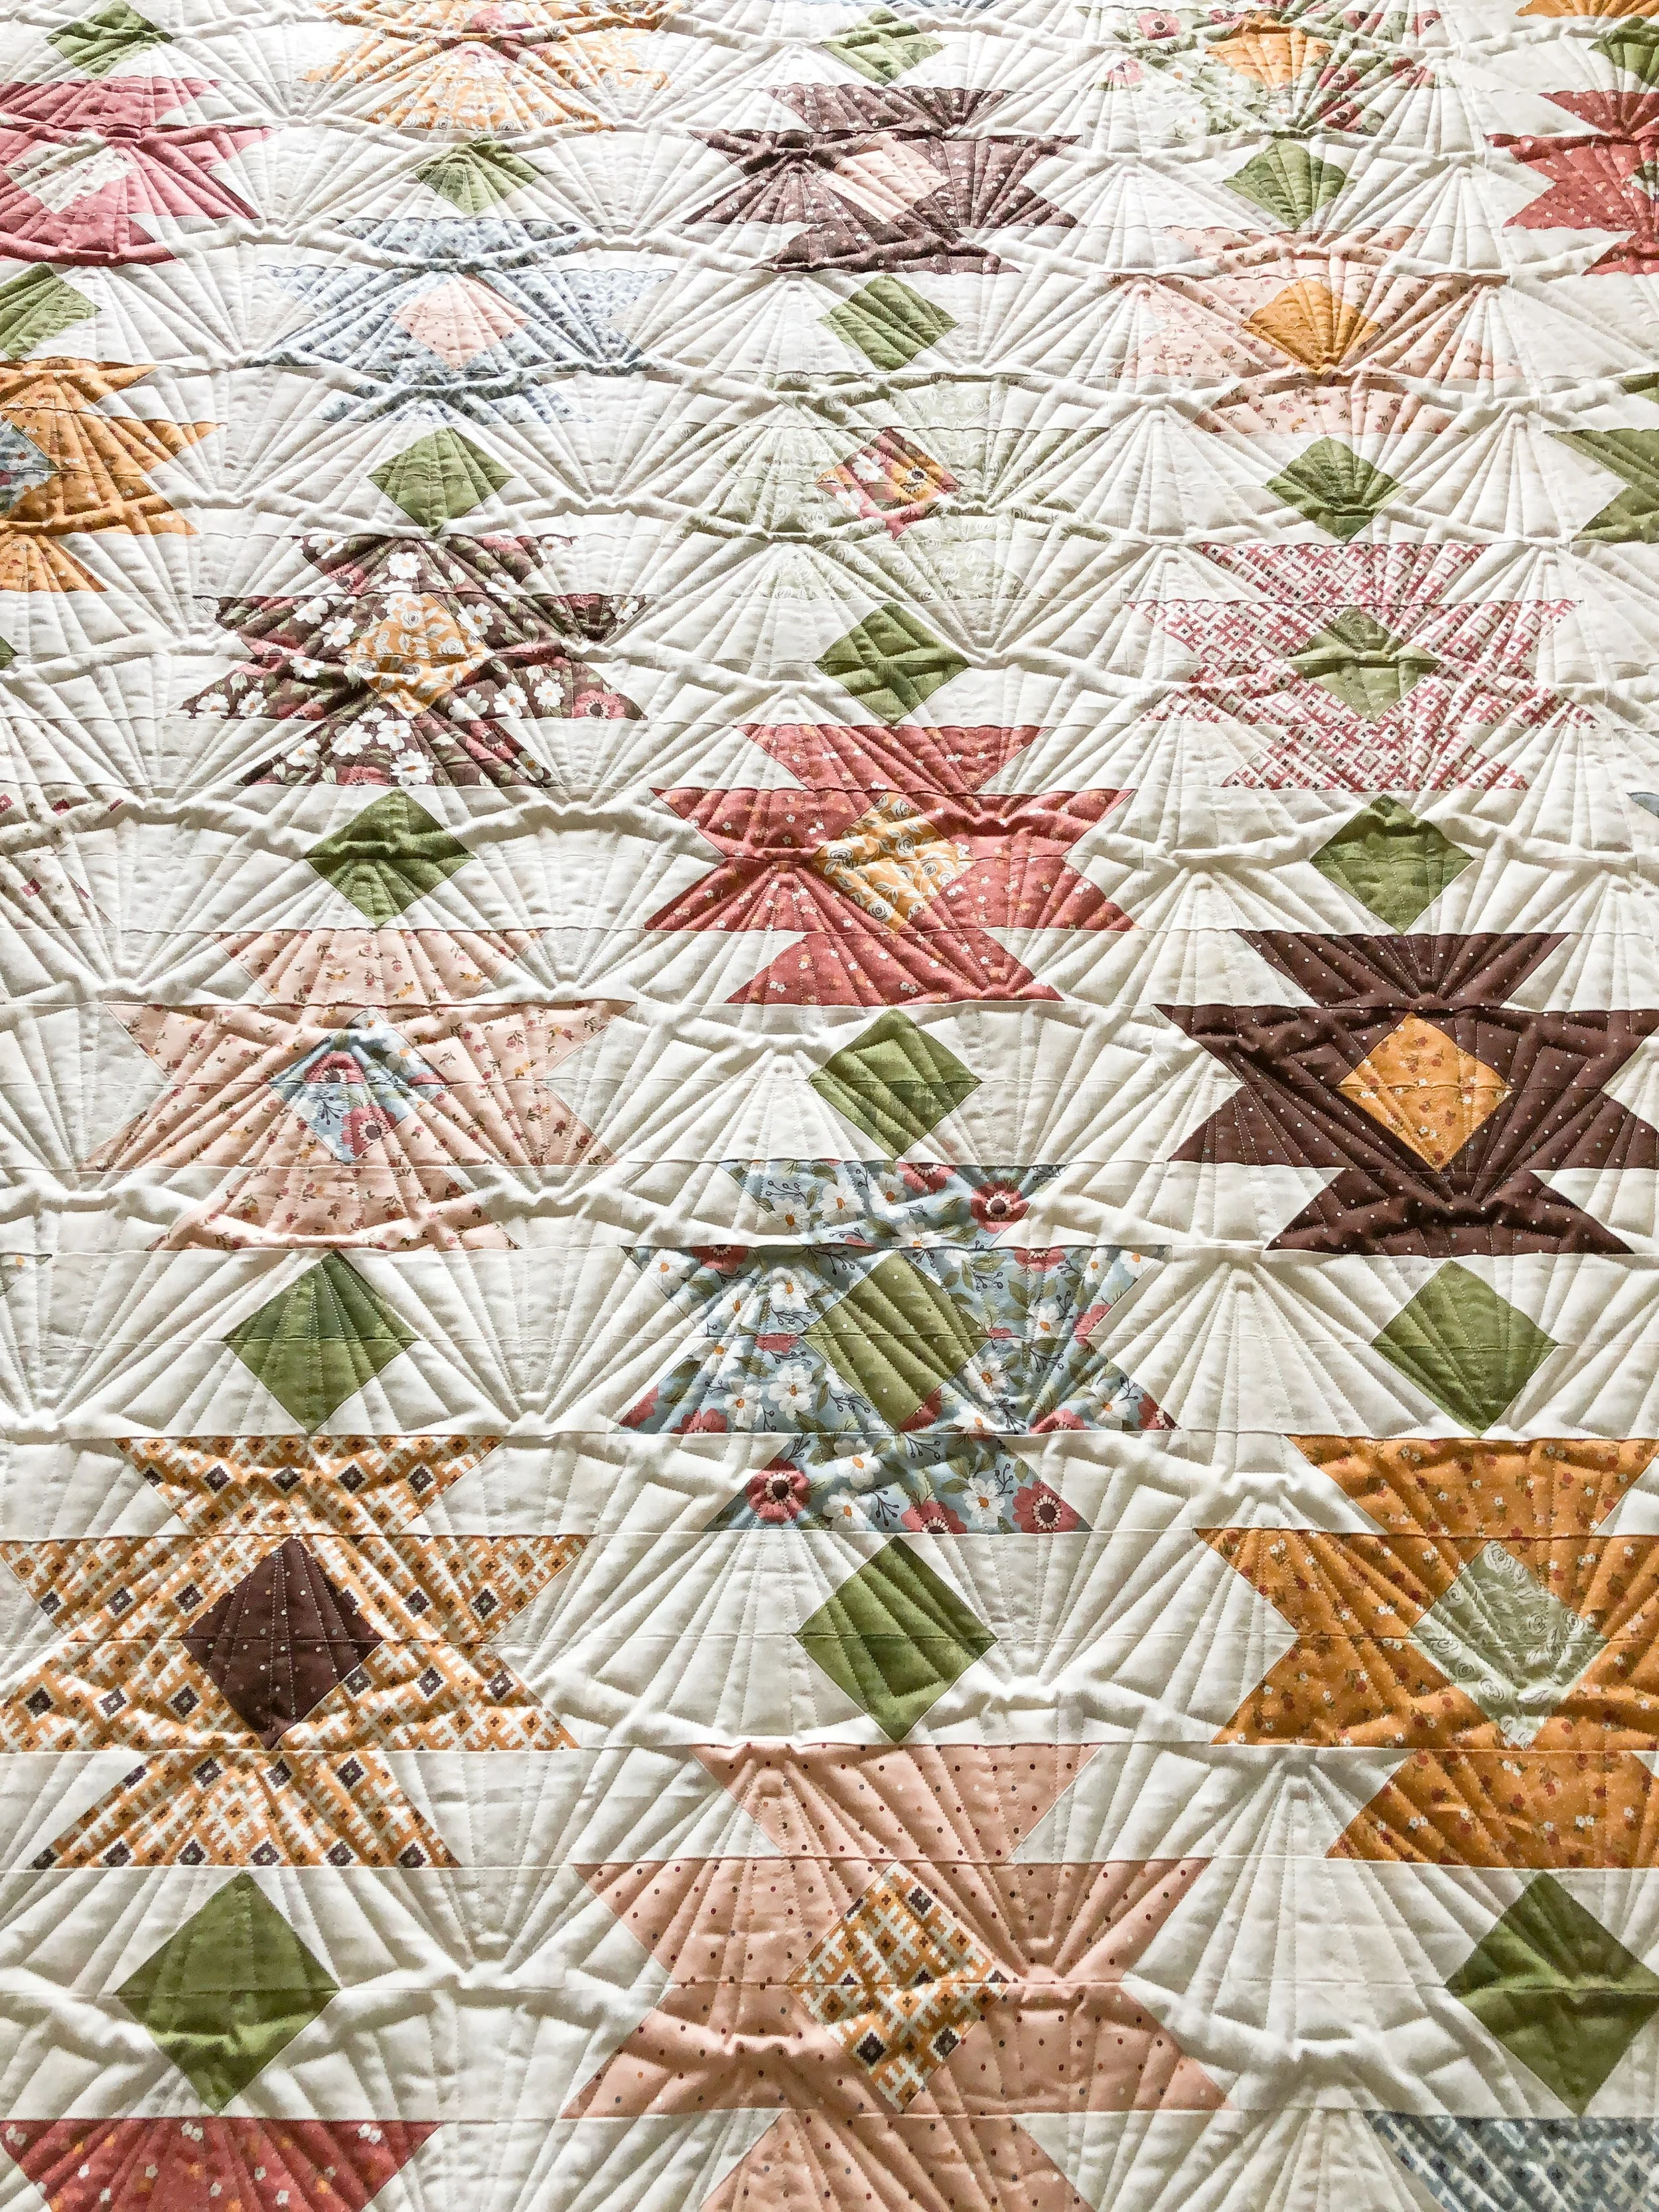
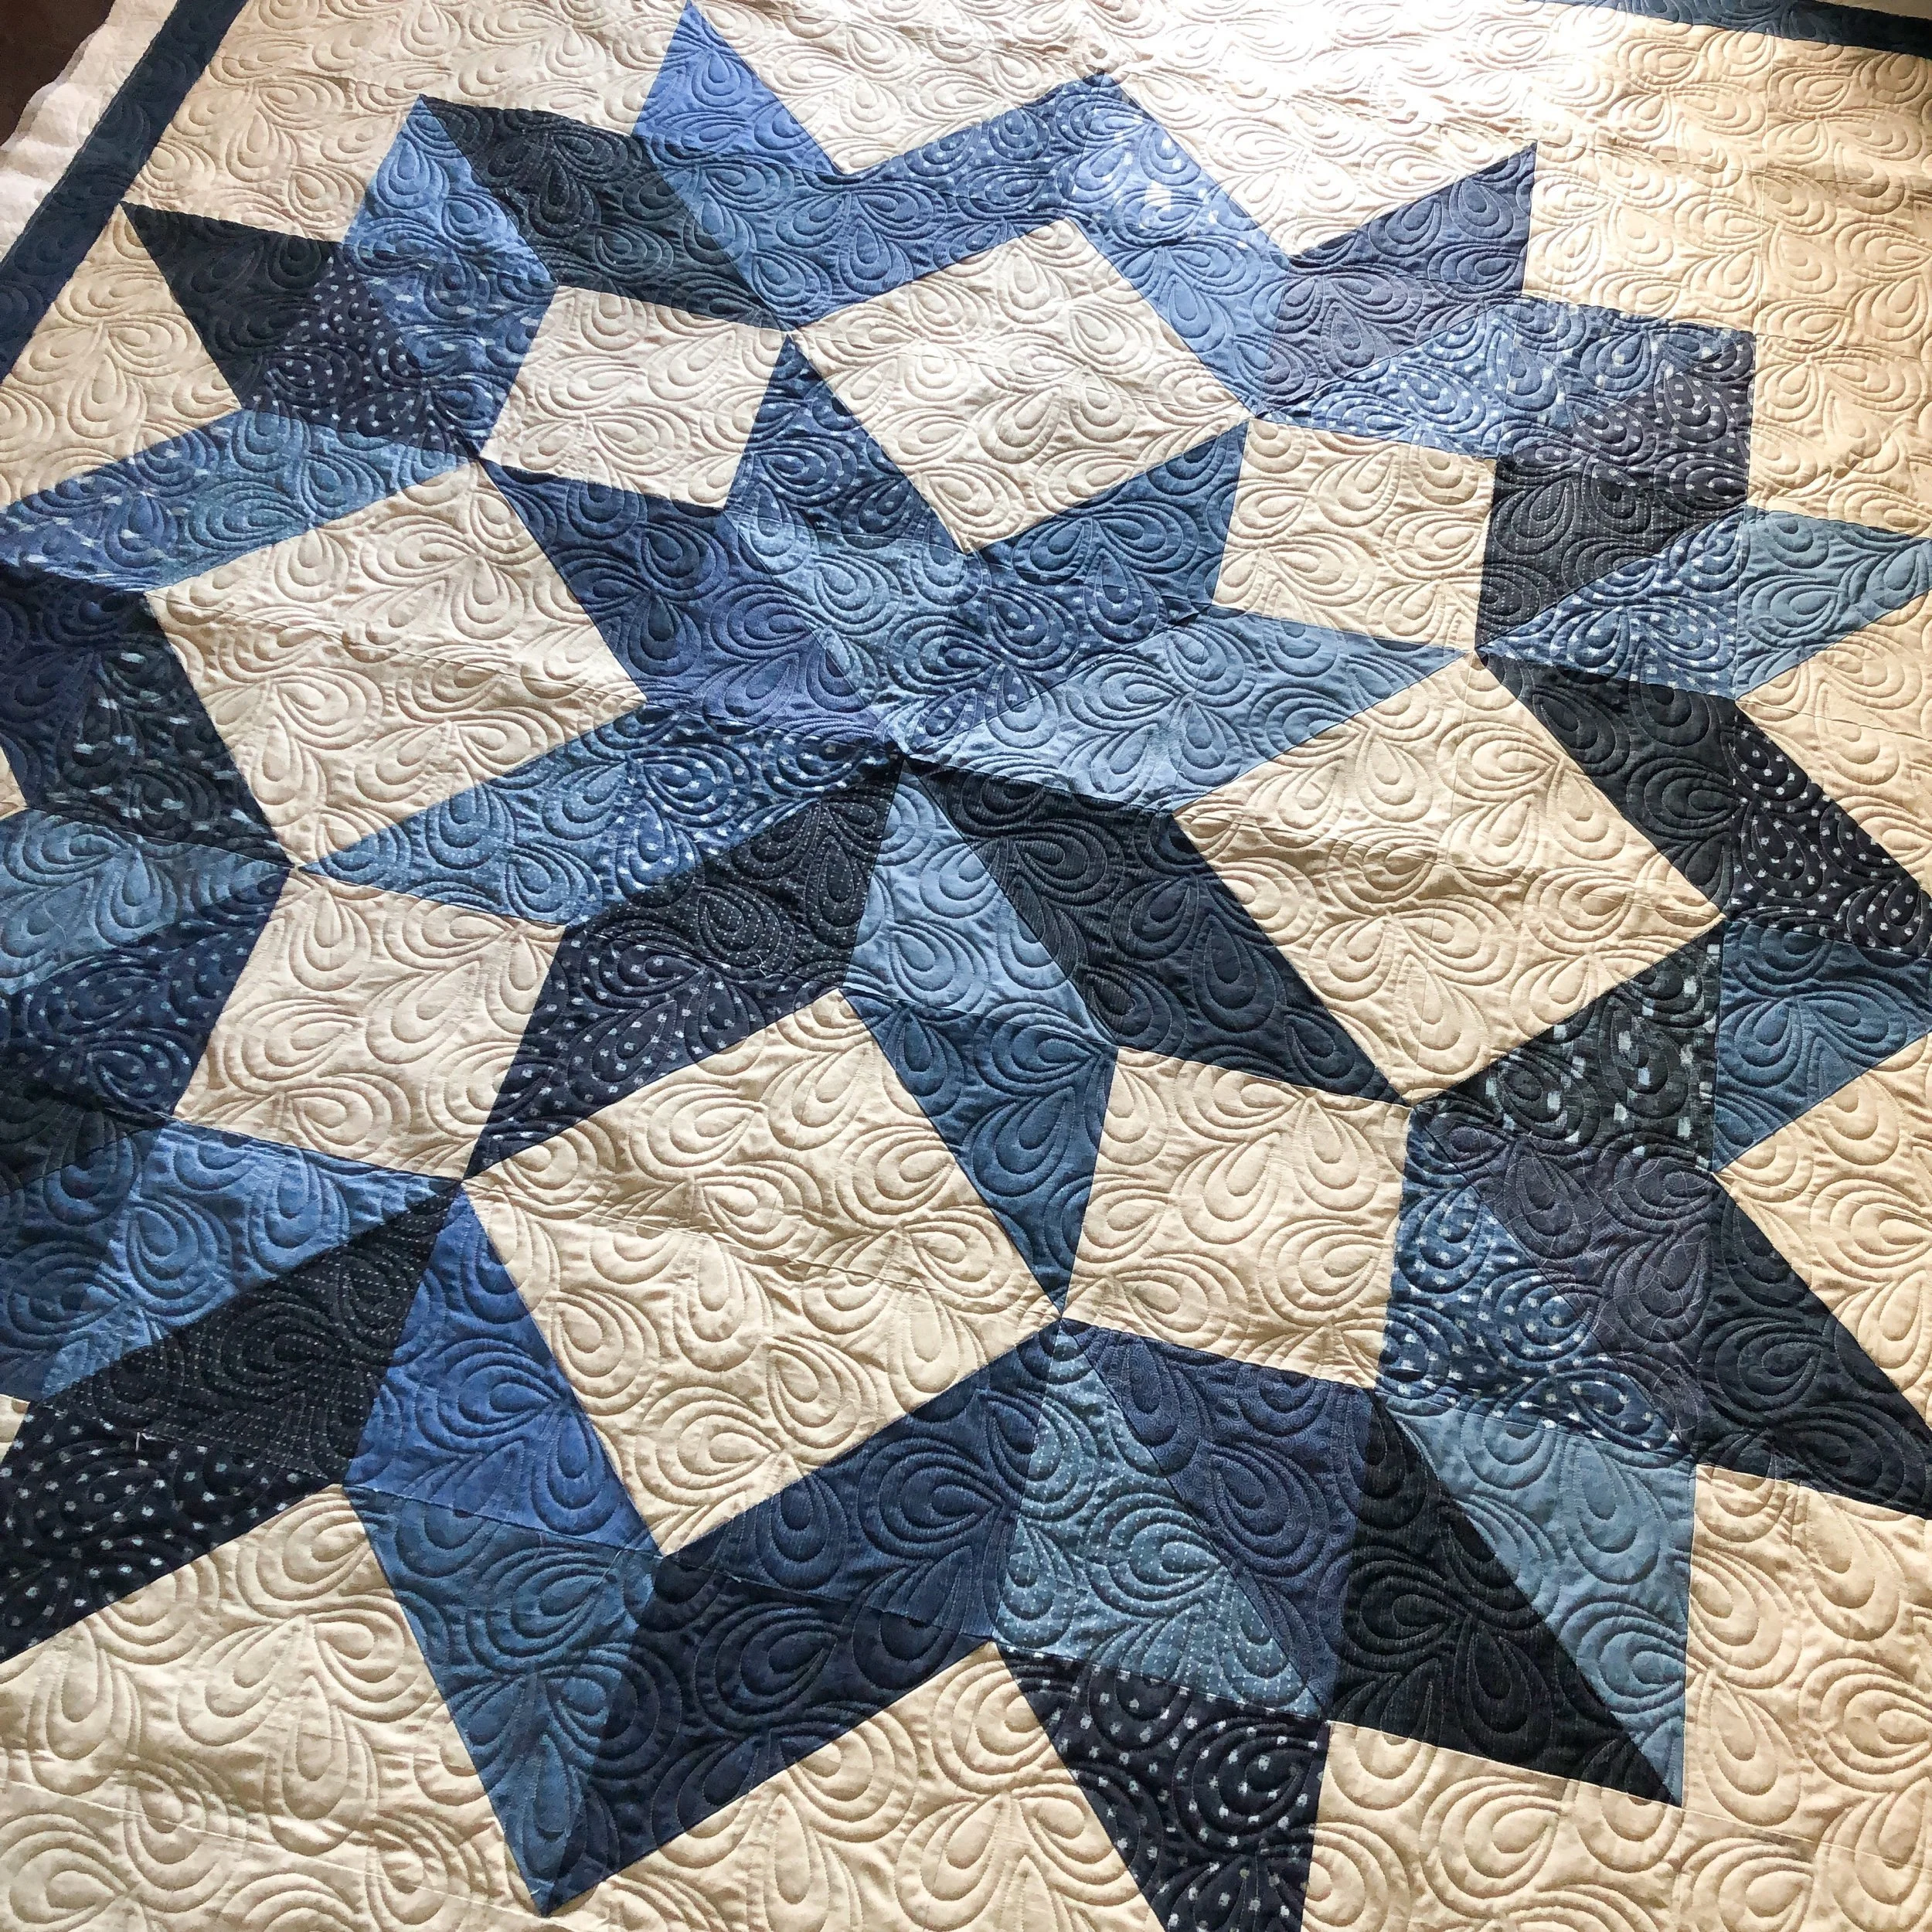
4 Quilts • 1 Pattern • 4 Designs
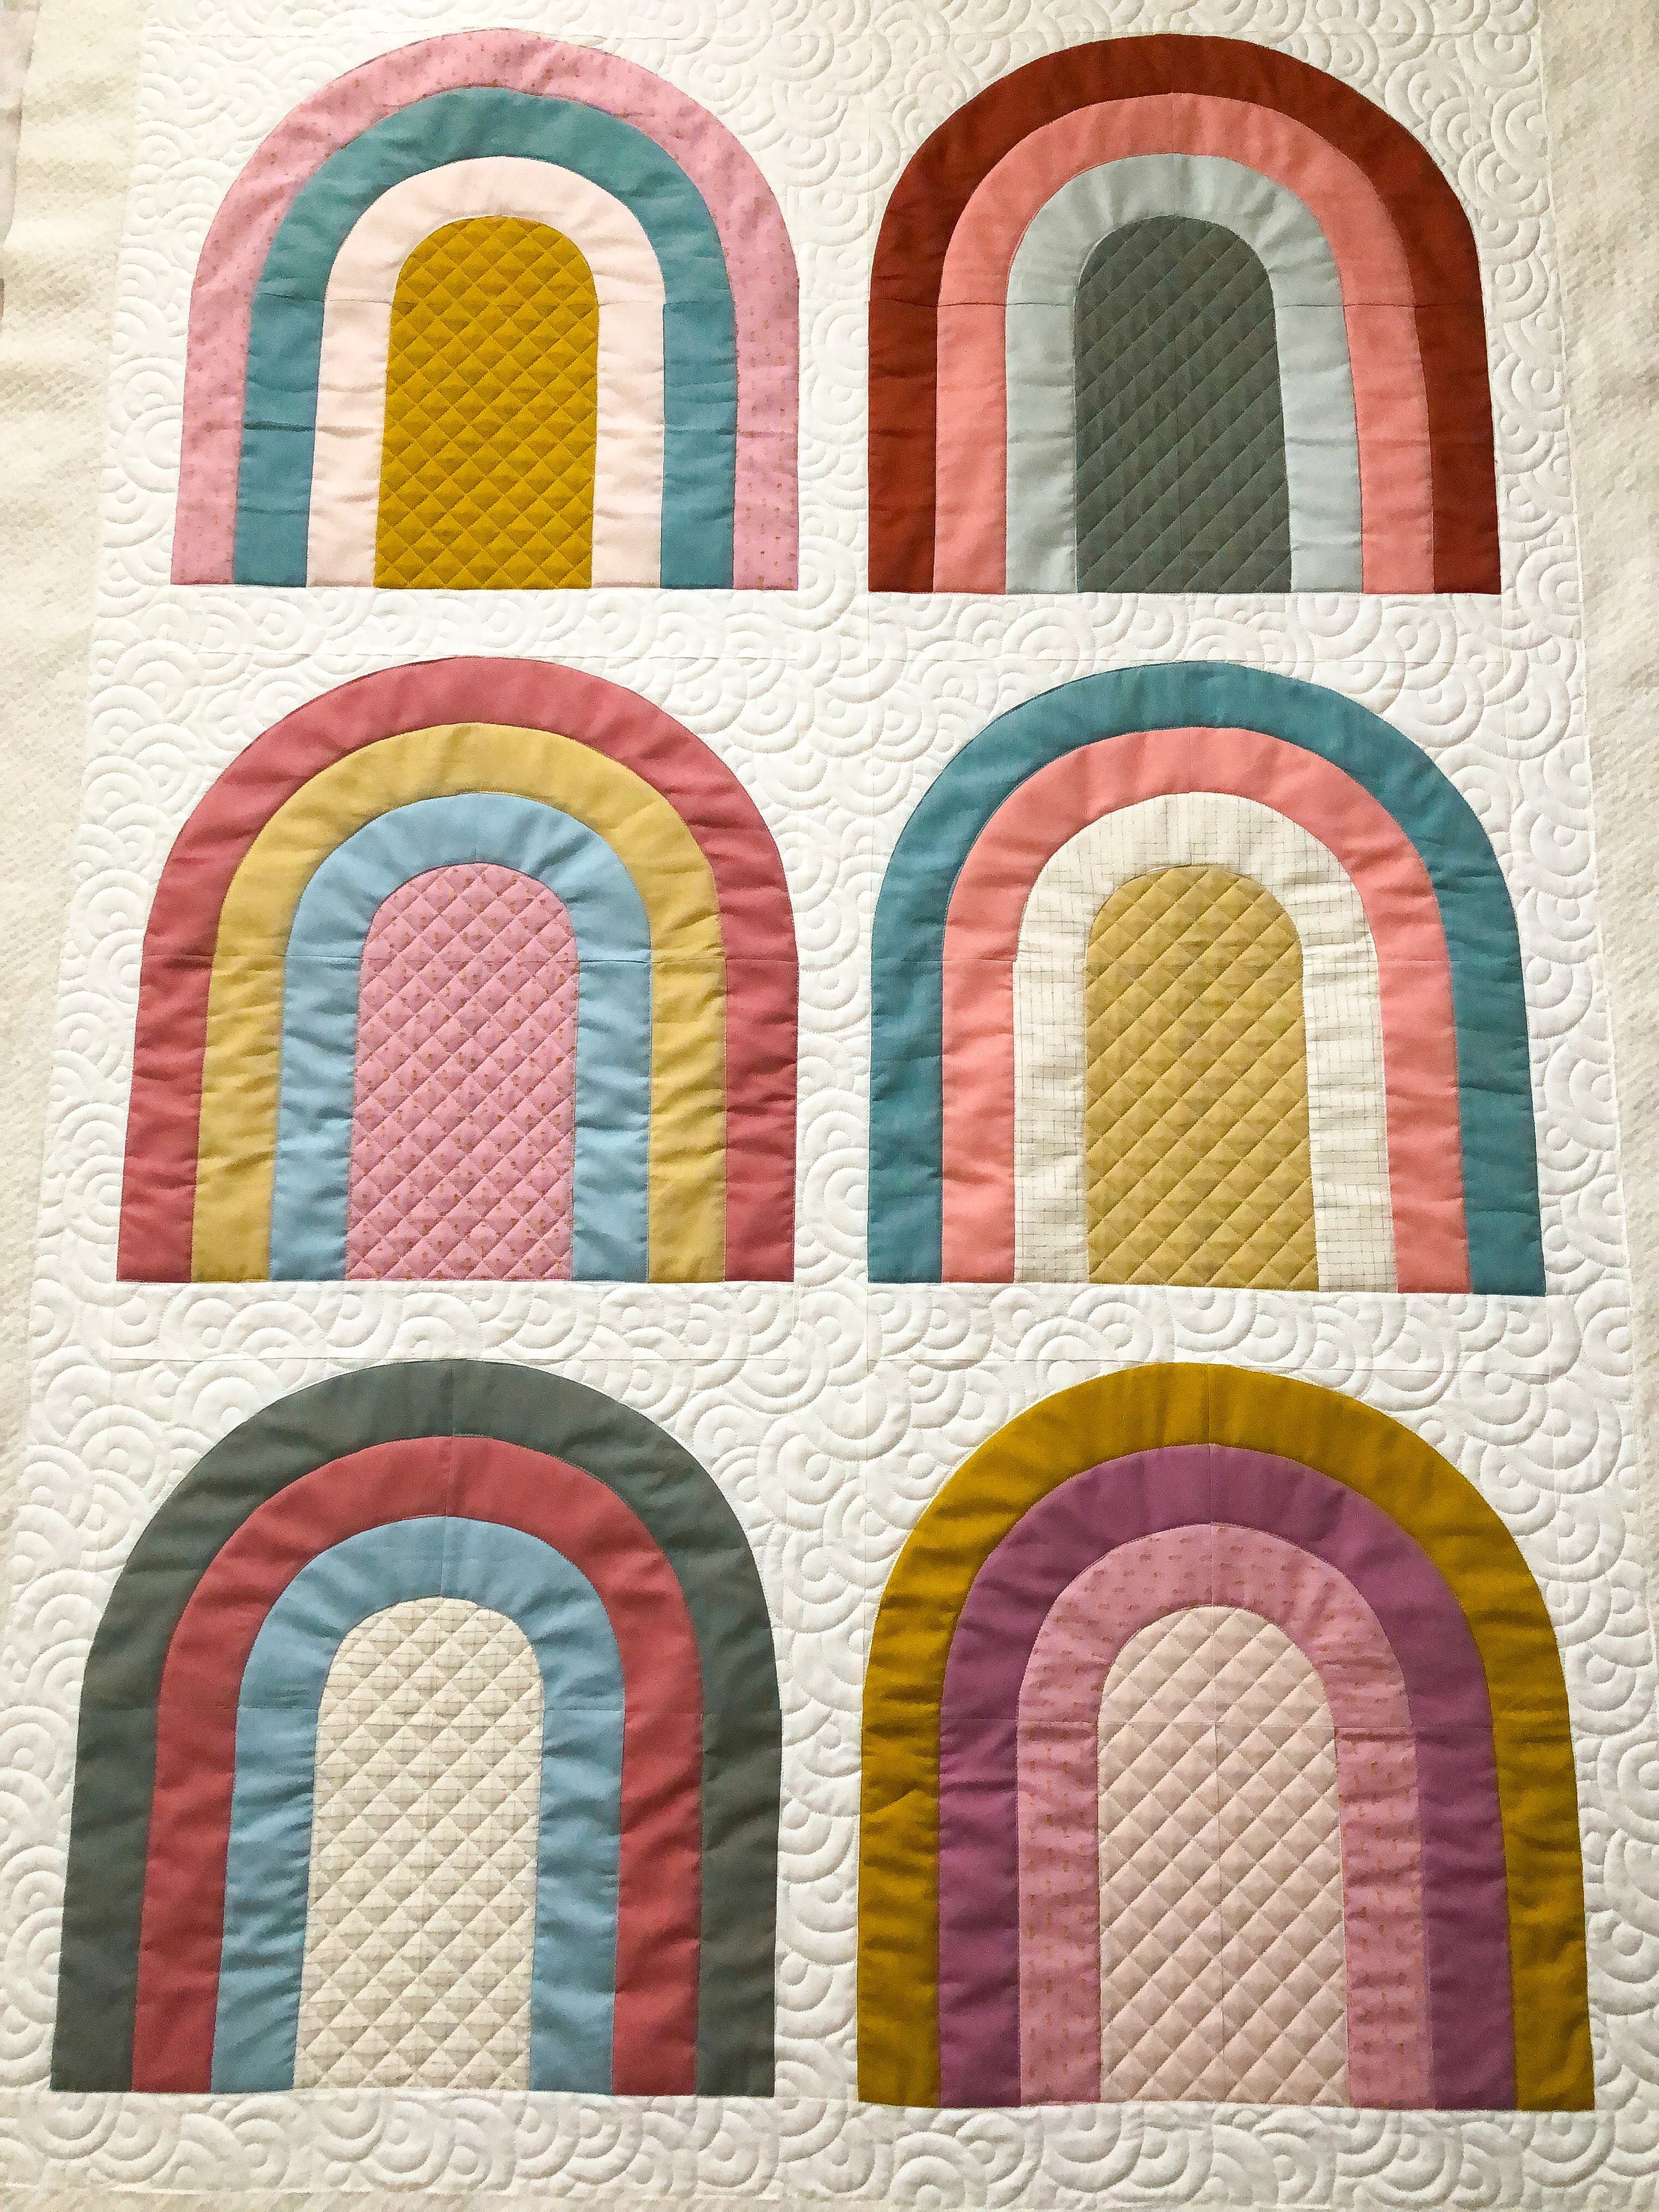
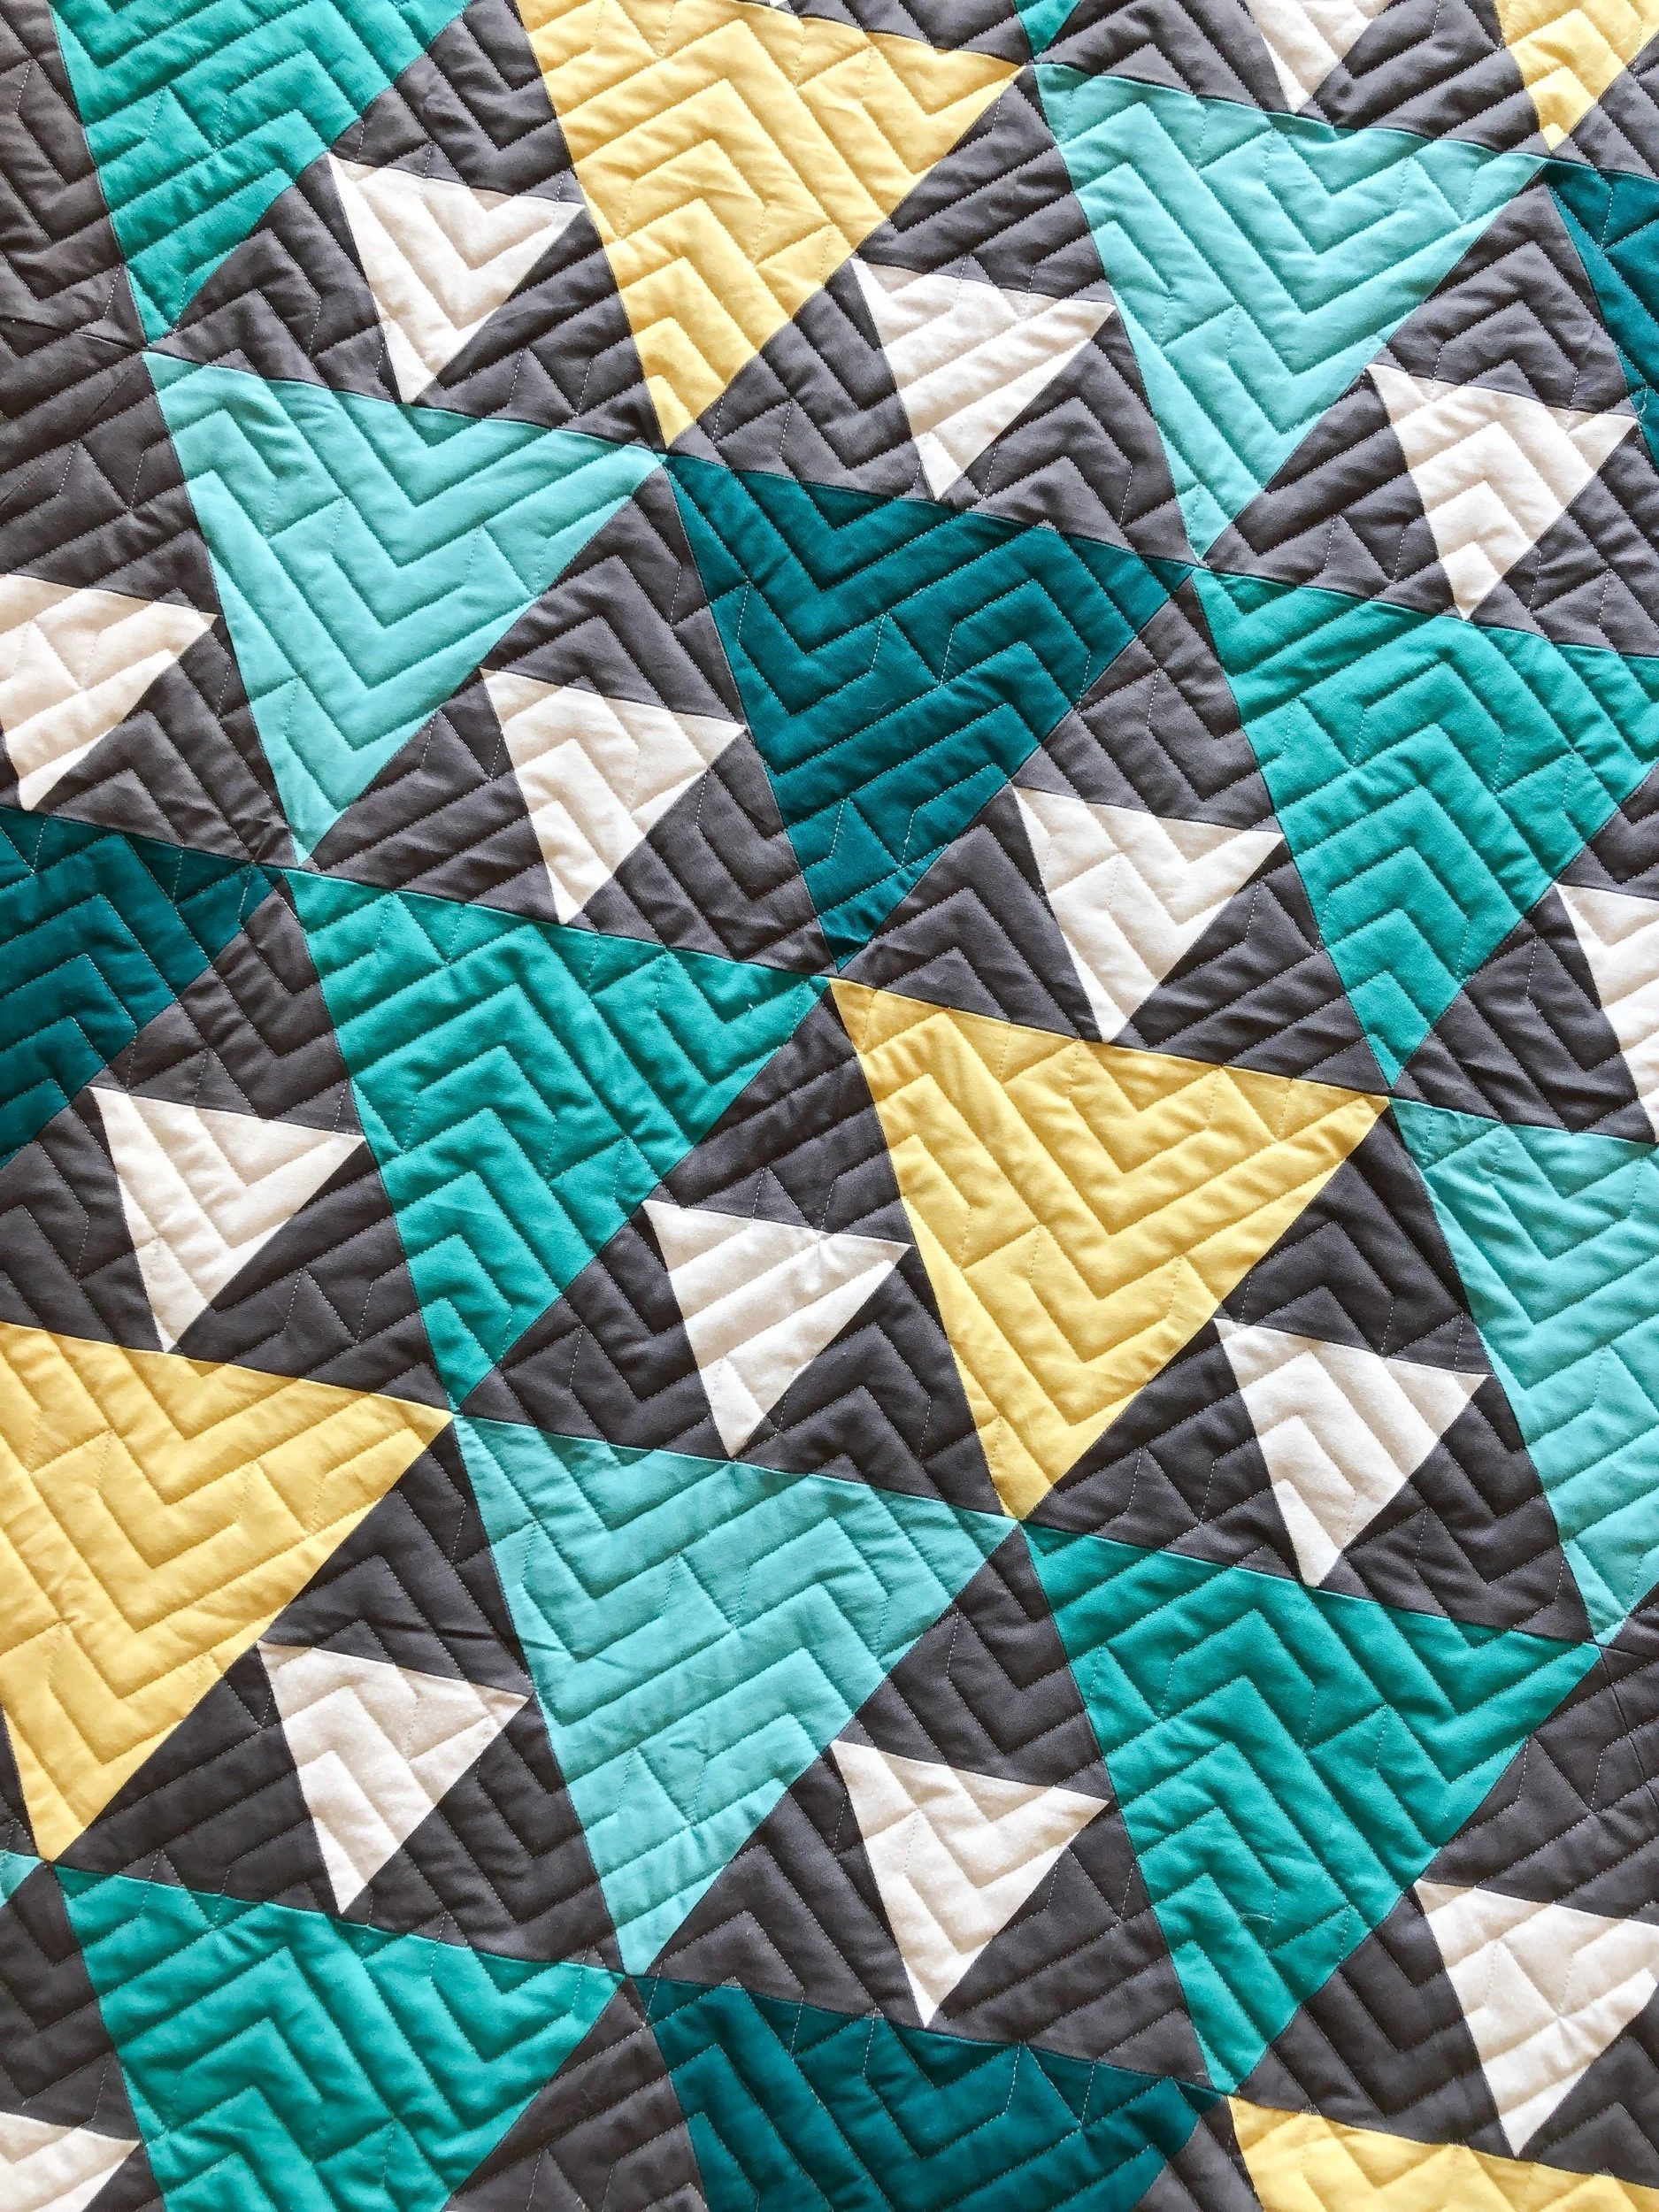
Hi Friends…Do I have a fun post for you!!! I’m going to share four different quilts with you, all made from the same quilt pattern, and quilted with four different quilting designs. Have I piqued your interest?
You may be wonder why we would make four of the same quilts. Truth, we’ve actually made this same quilt two other times. It’s our favorite baby boy quilt. It’s modern, fresh, and fun. I have a very large extended family. When one of my cousins has their first baby, they receive a baby quilt from my mom and me. My mom sews the quilts, and I do the quilting. We then tell those who receive one of our quilts to use them!! No sense in having the quilt folded up on a self and not get used. Which means my mom machine binds them, in hopes that they will be so loved and washed often…and yet still hold up. I love it when we can share something we love to do, with someone we love. Plus, I really love getting pictures of their cute babies having tummy time on their quilt.
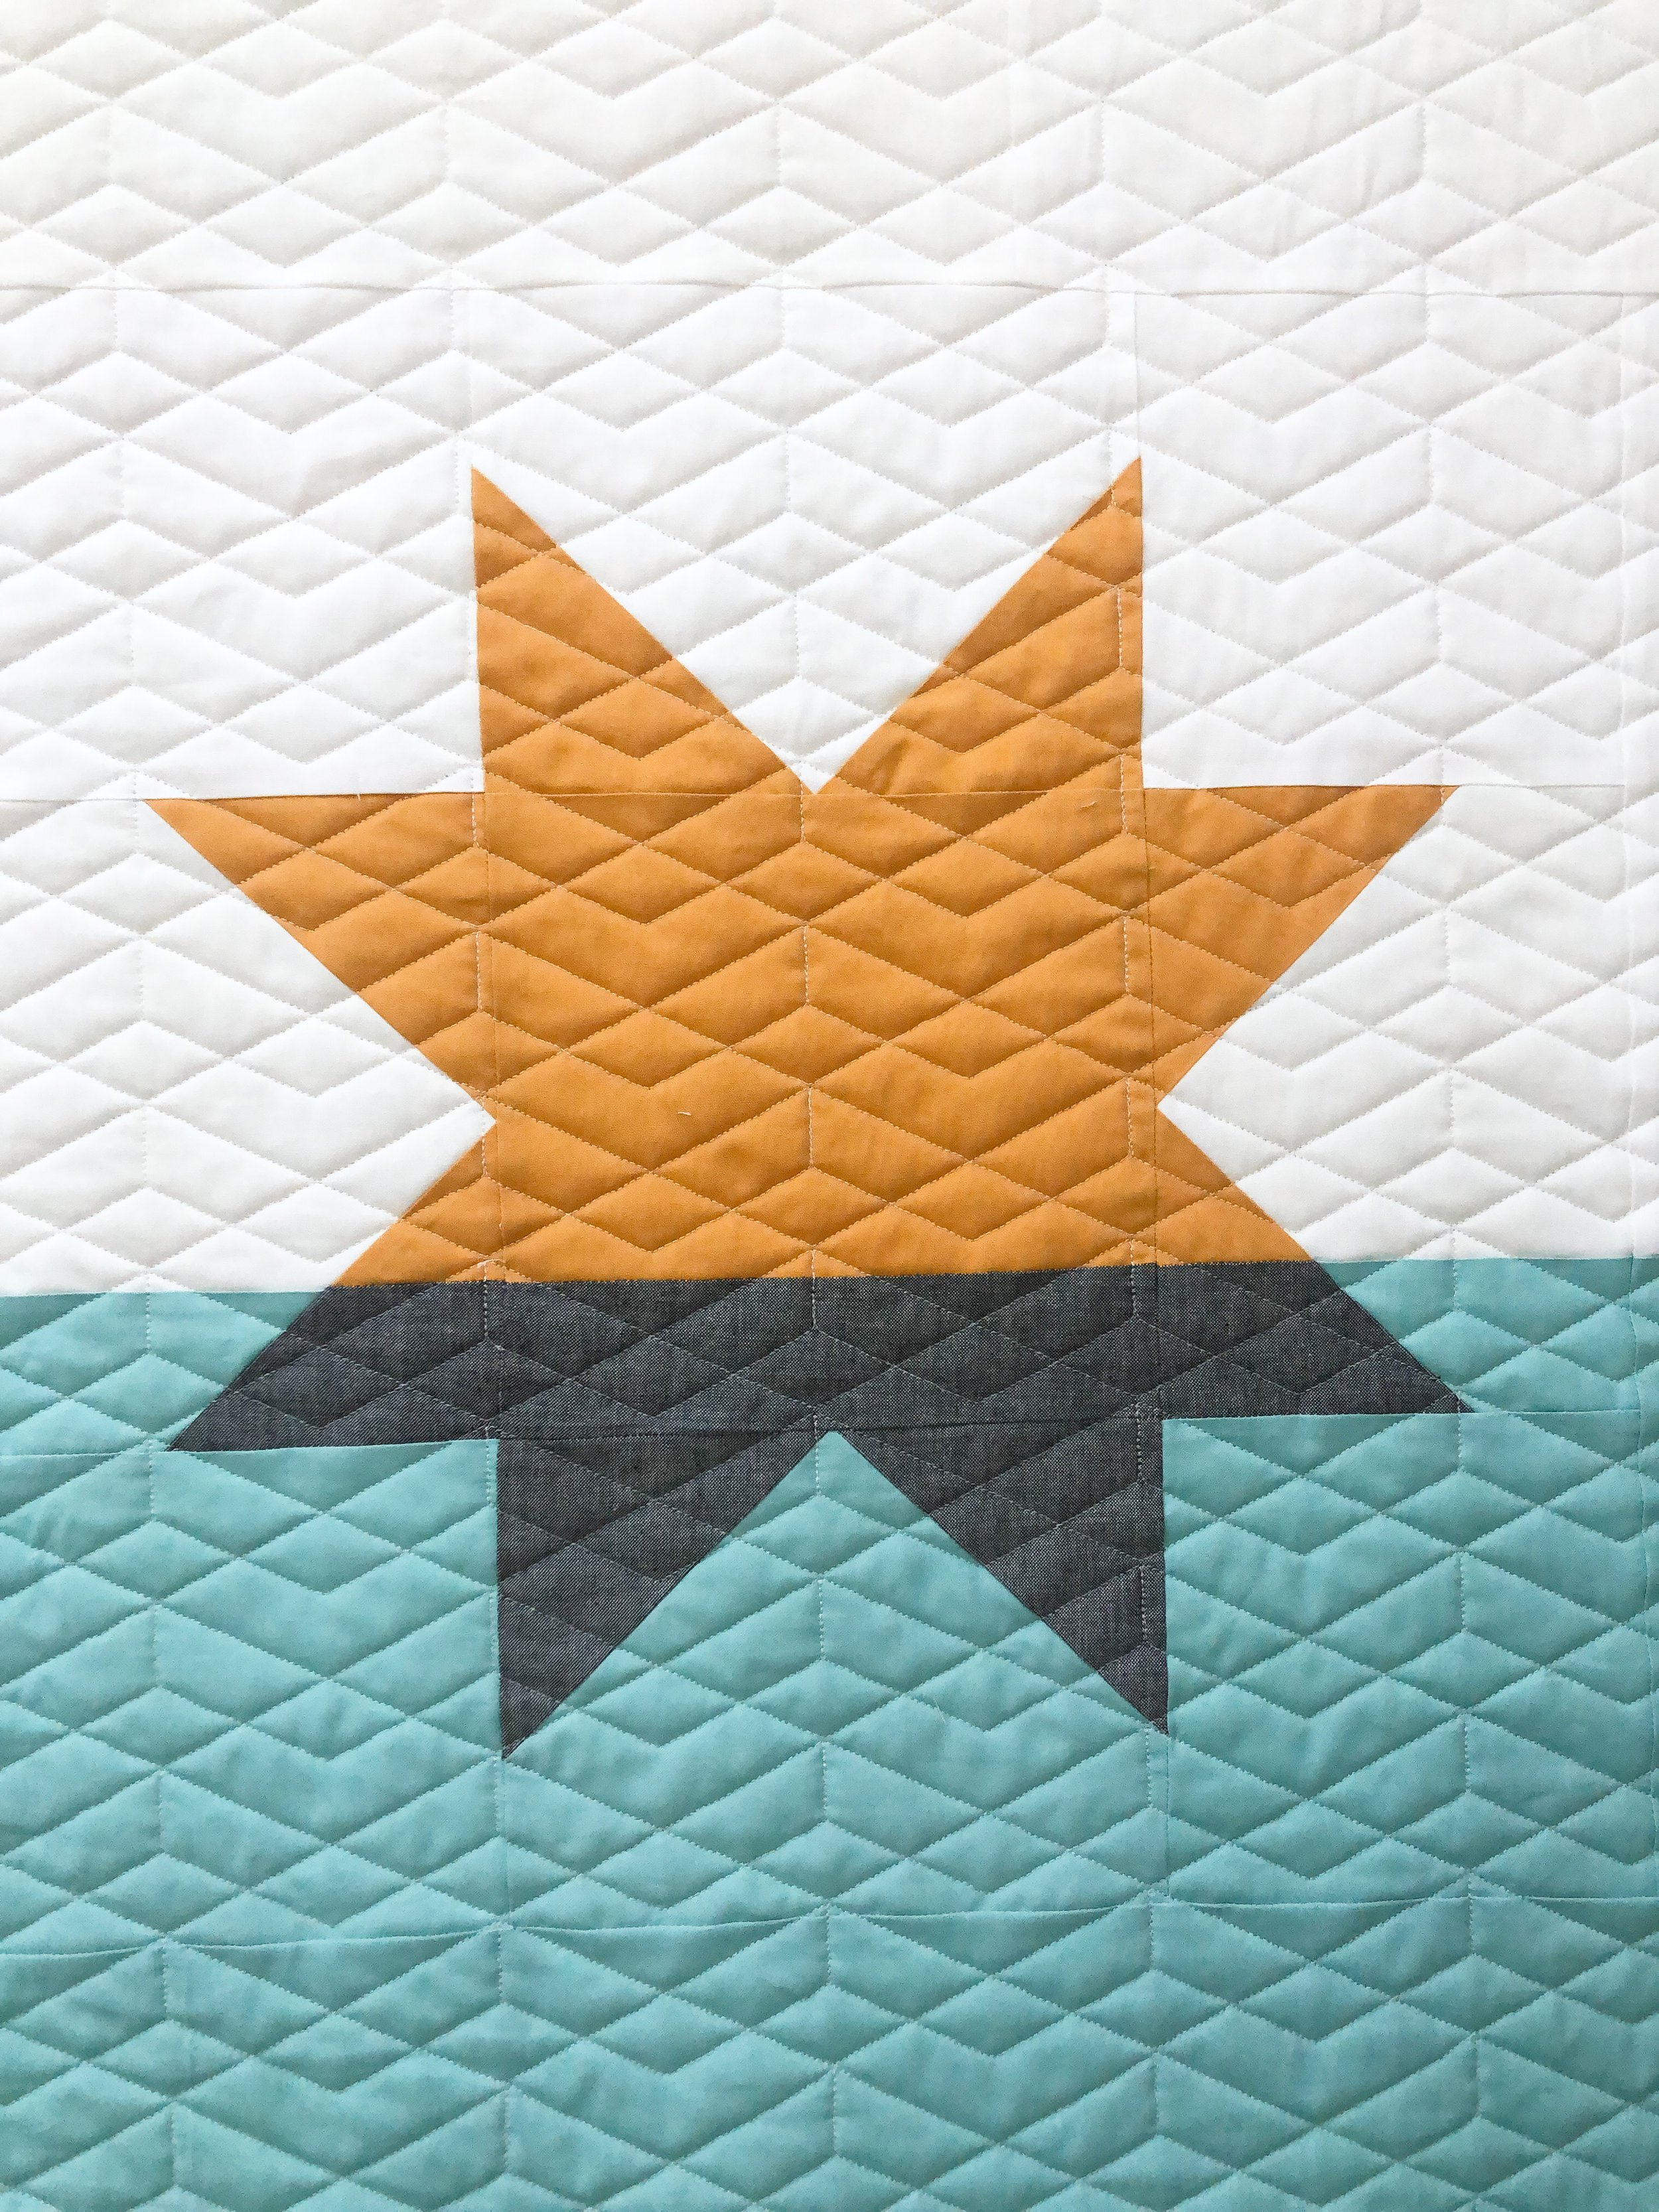
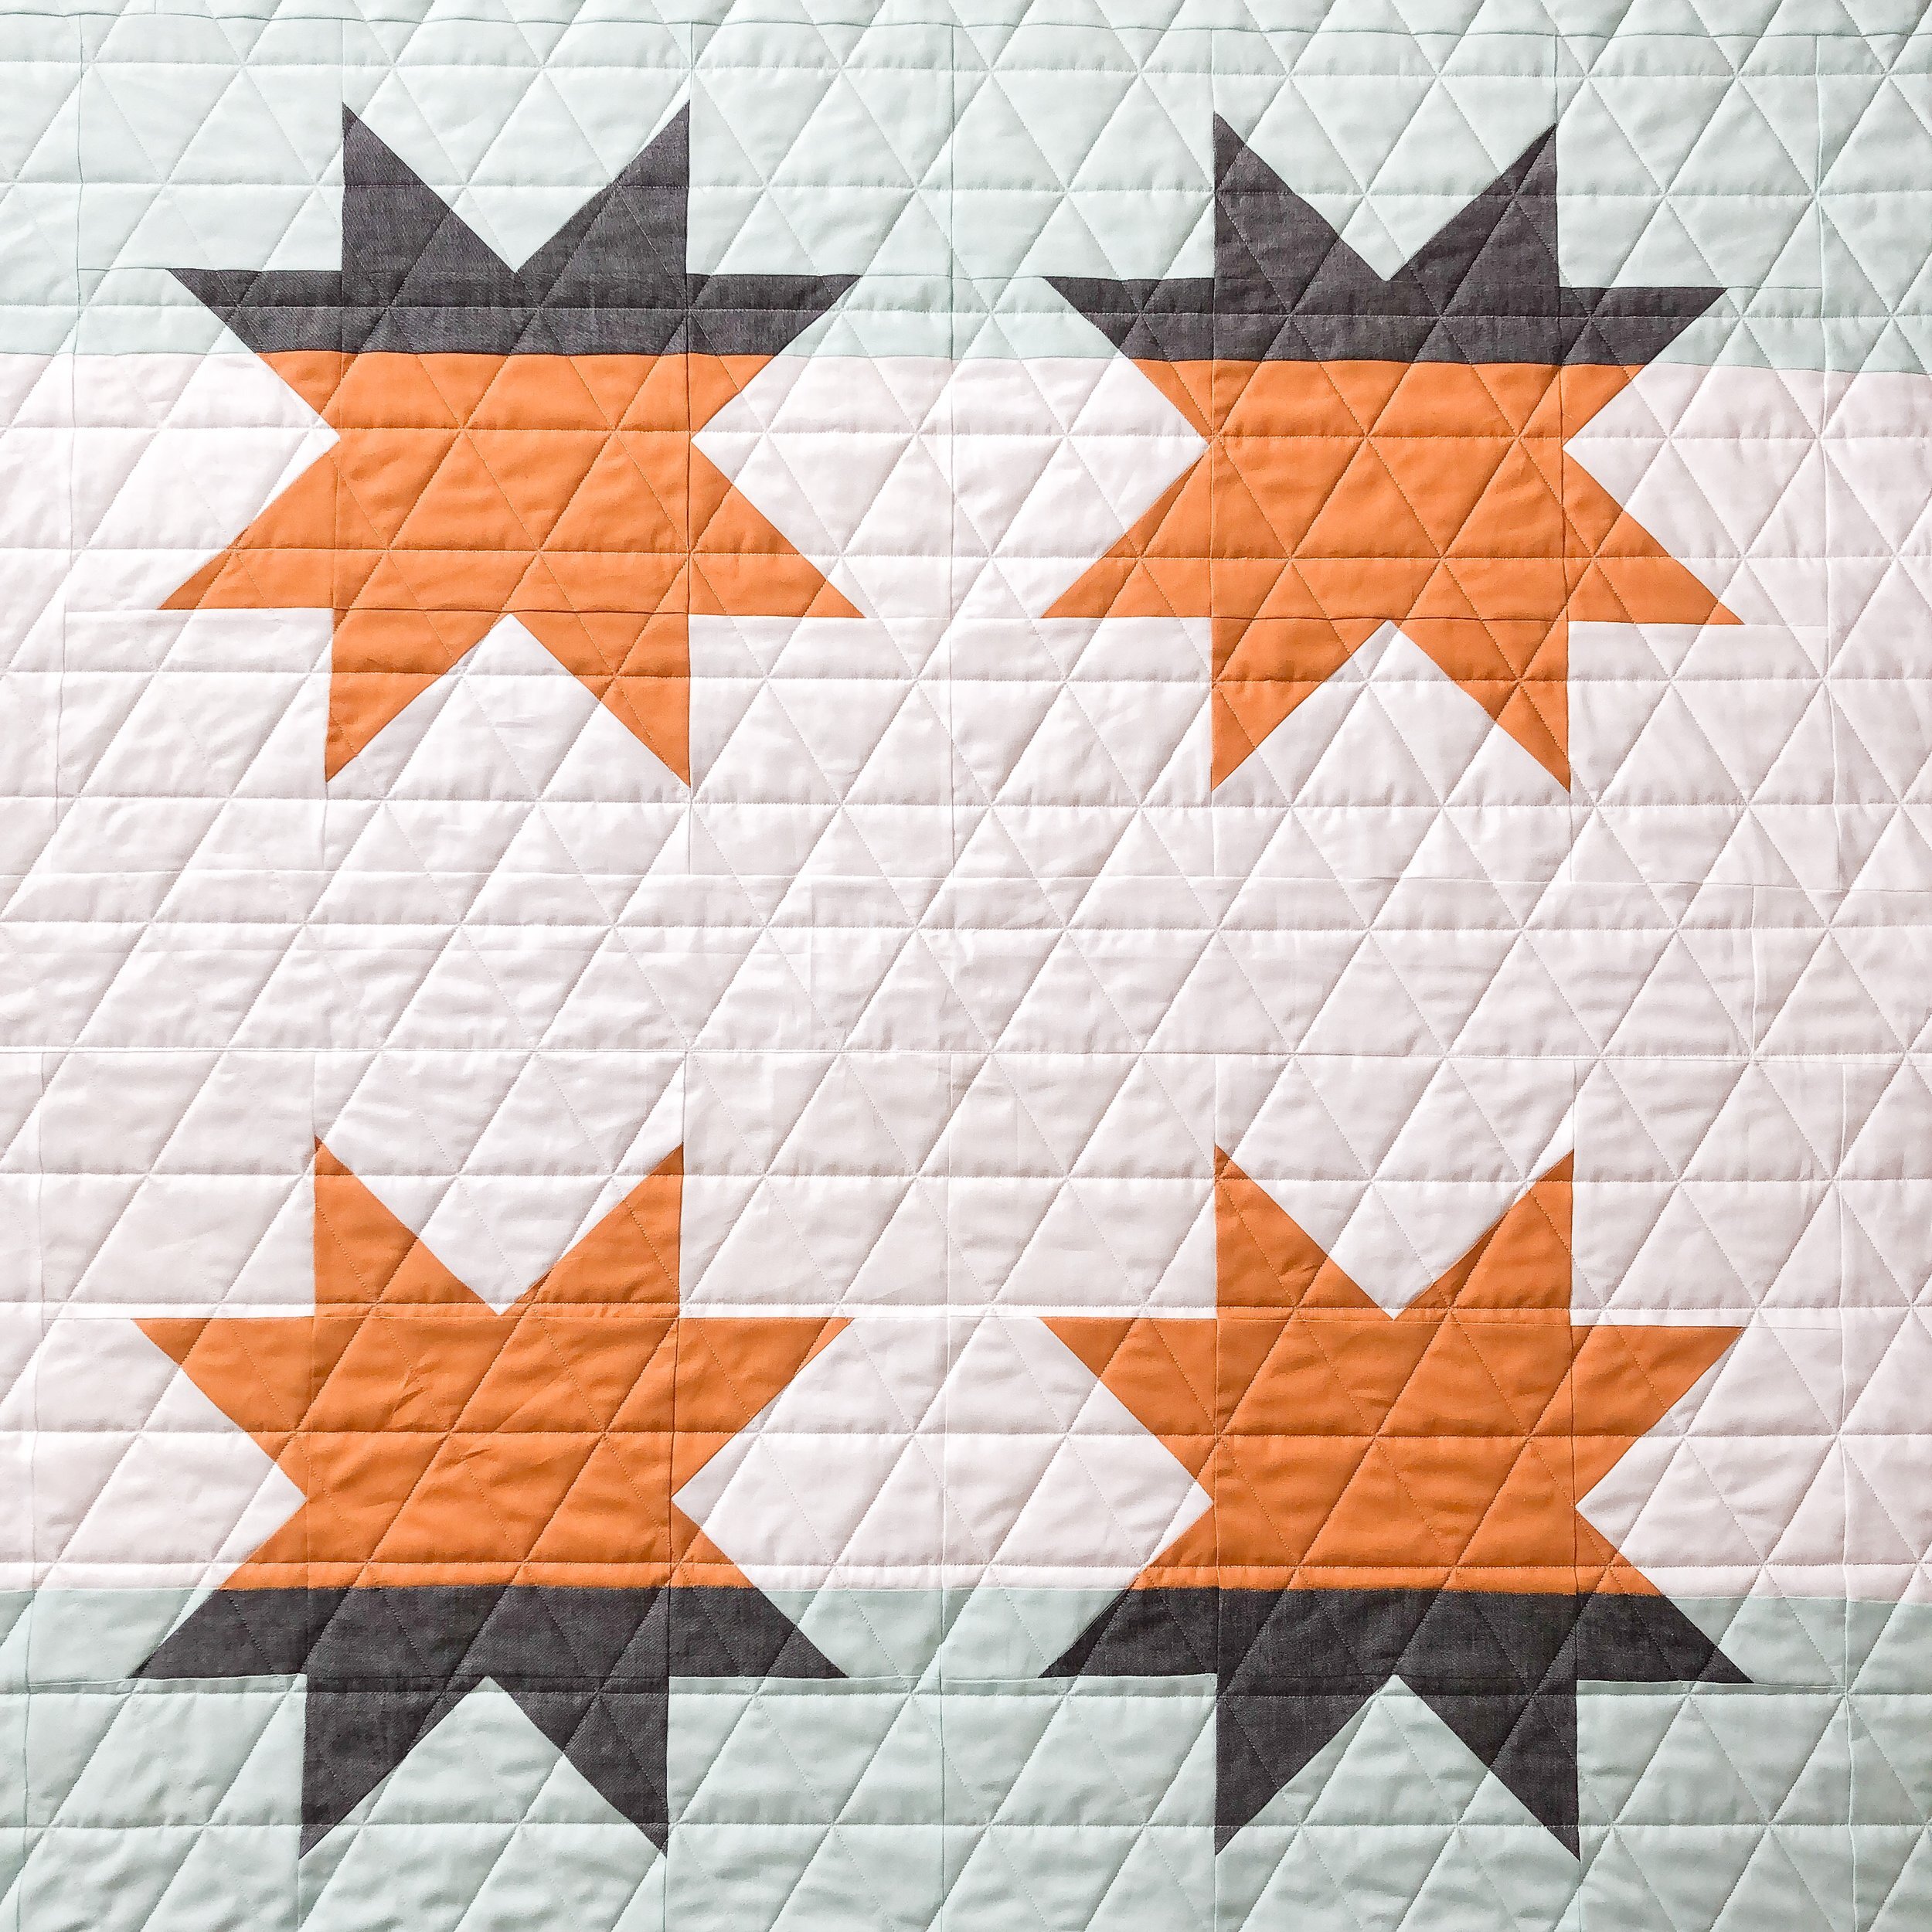
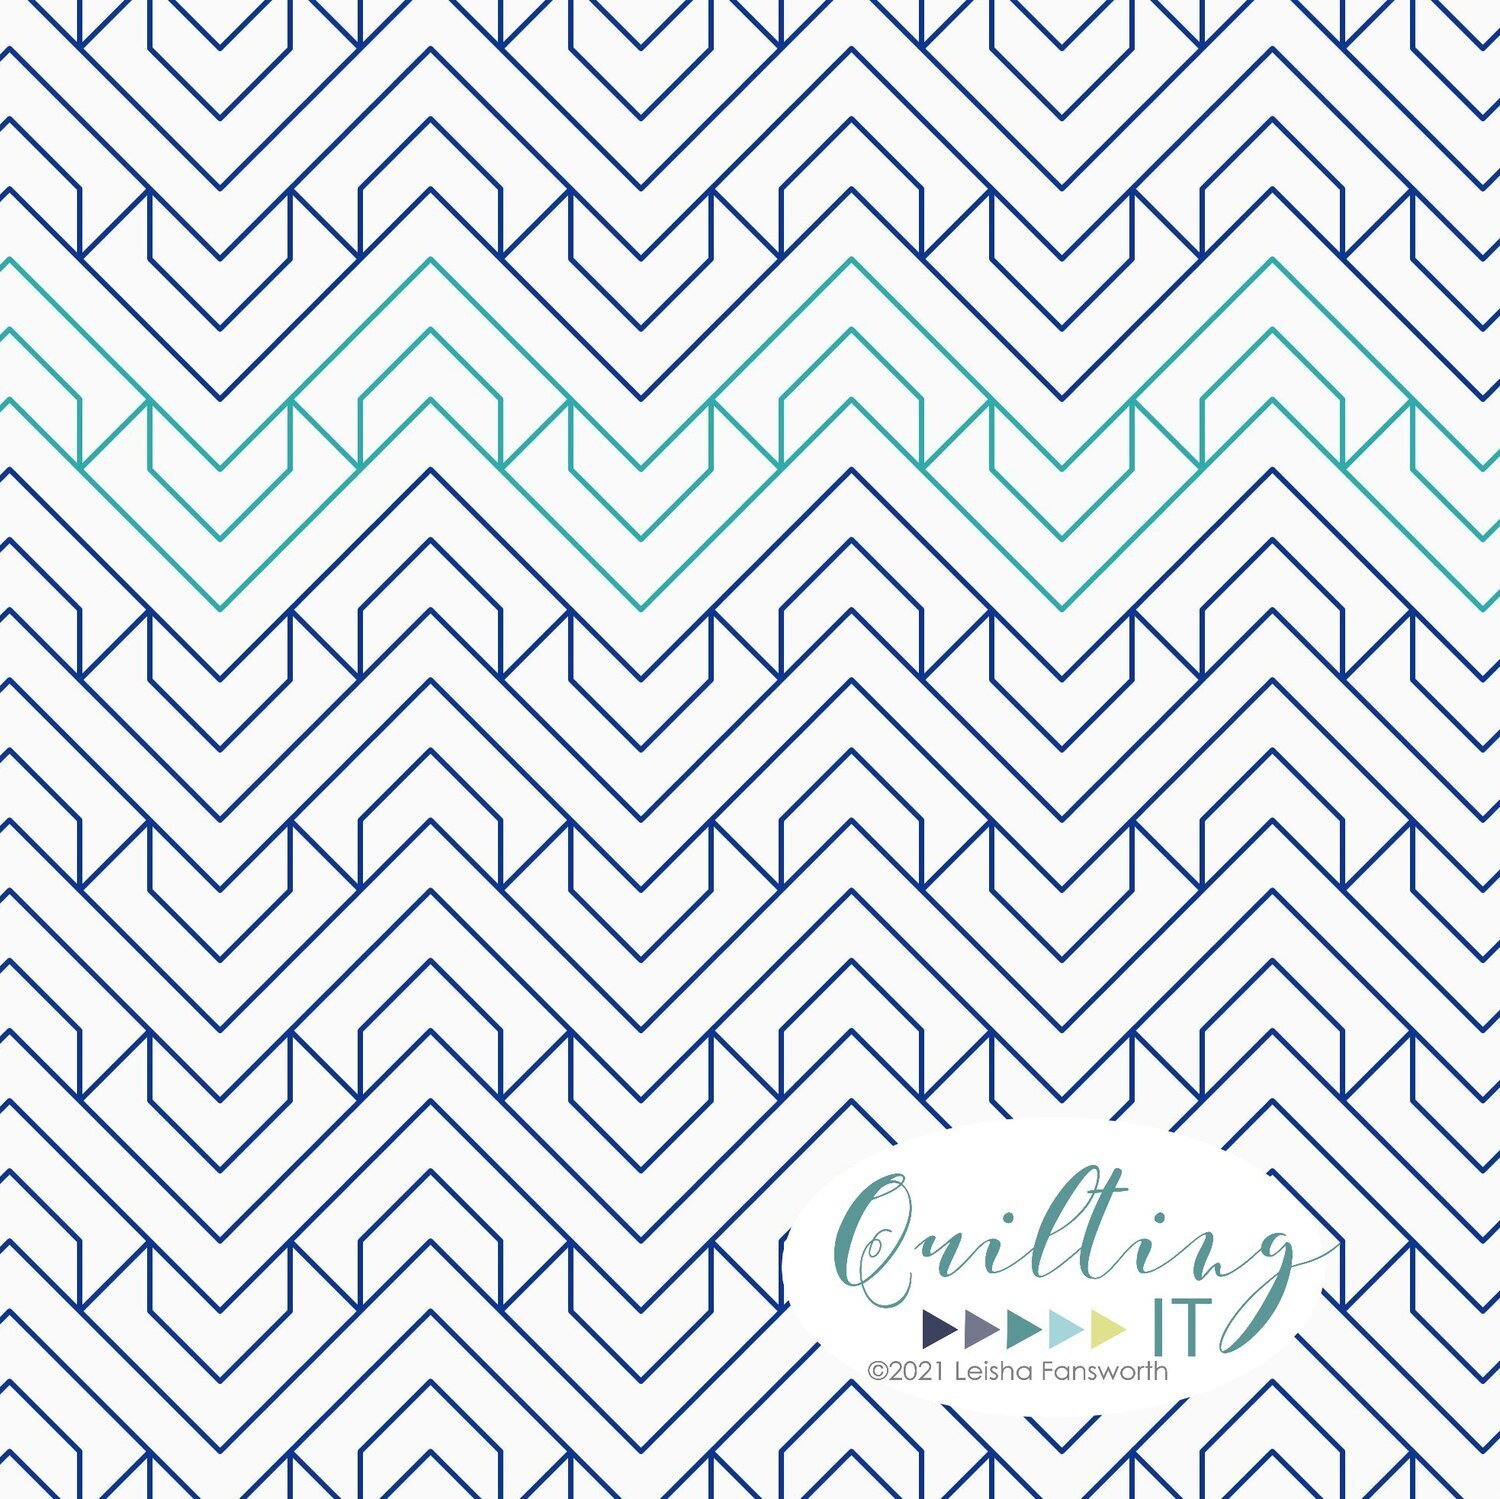
The pattern is in Modern Patchwork’s Sept/Oct 2018 magazine issue. It’s by Krystina Hopkins and is called Star Shadows. It’s a good size quilt…great for toddlers. I actually want to make a throw size and do six stars instead of just the four stars.
I have oodles of pictures to share, just so you can see all the fun textures in the four different quilting designs.

My mom and her sister have a online fabric shop, which is where she gets the fabrics that she uses. She loves to use Bella solids, except for the gray it’s a Moda Cross Weave. Our favorite white is the Bella 200. I love the modern look of solid colored fabrics.
For all four quilts I used Natural White Omni thread from Superior Threads, and my favorite 8020 cotton poly blend batting from Winline Textiles. My mom actually pieced batting for one of the quilts, with the leftovers from two other quilts.

I love the shadowed effect that is created with the gray and blue fabrics.

Can you see why we love this quilt?!?!?! My mom made three of the four quilts at the same time. I helped a little…just pressing. Which helped her sew faster.

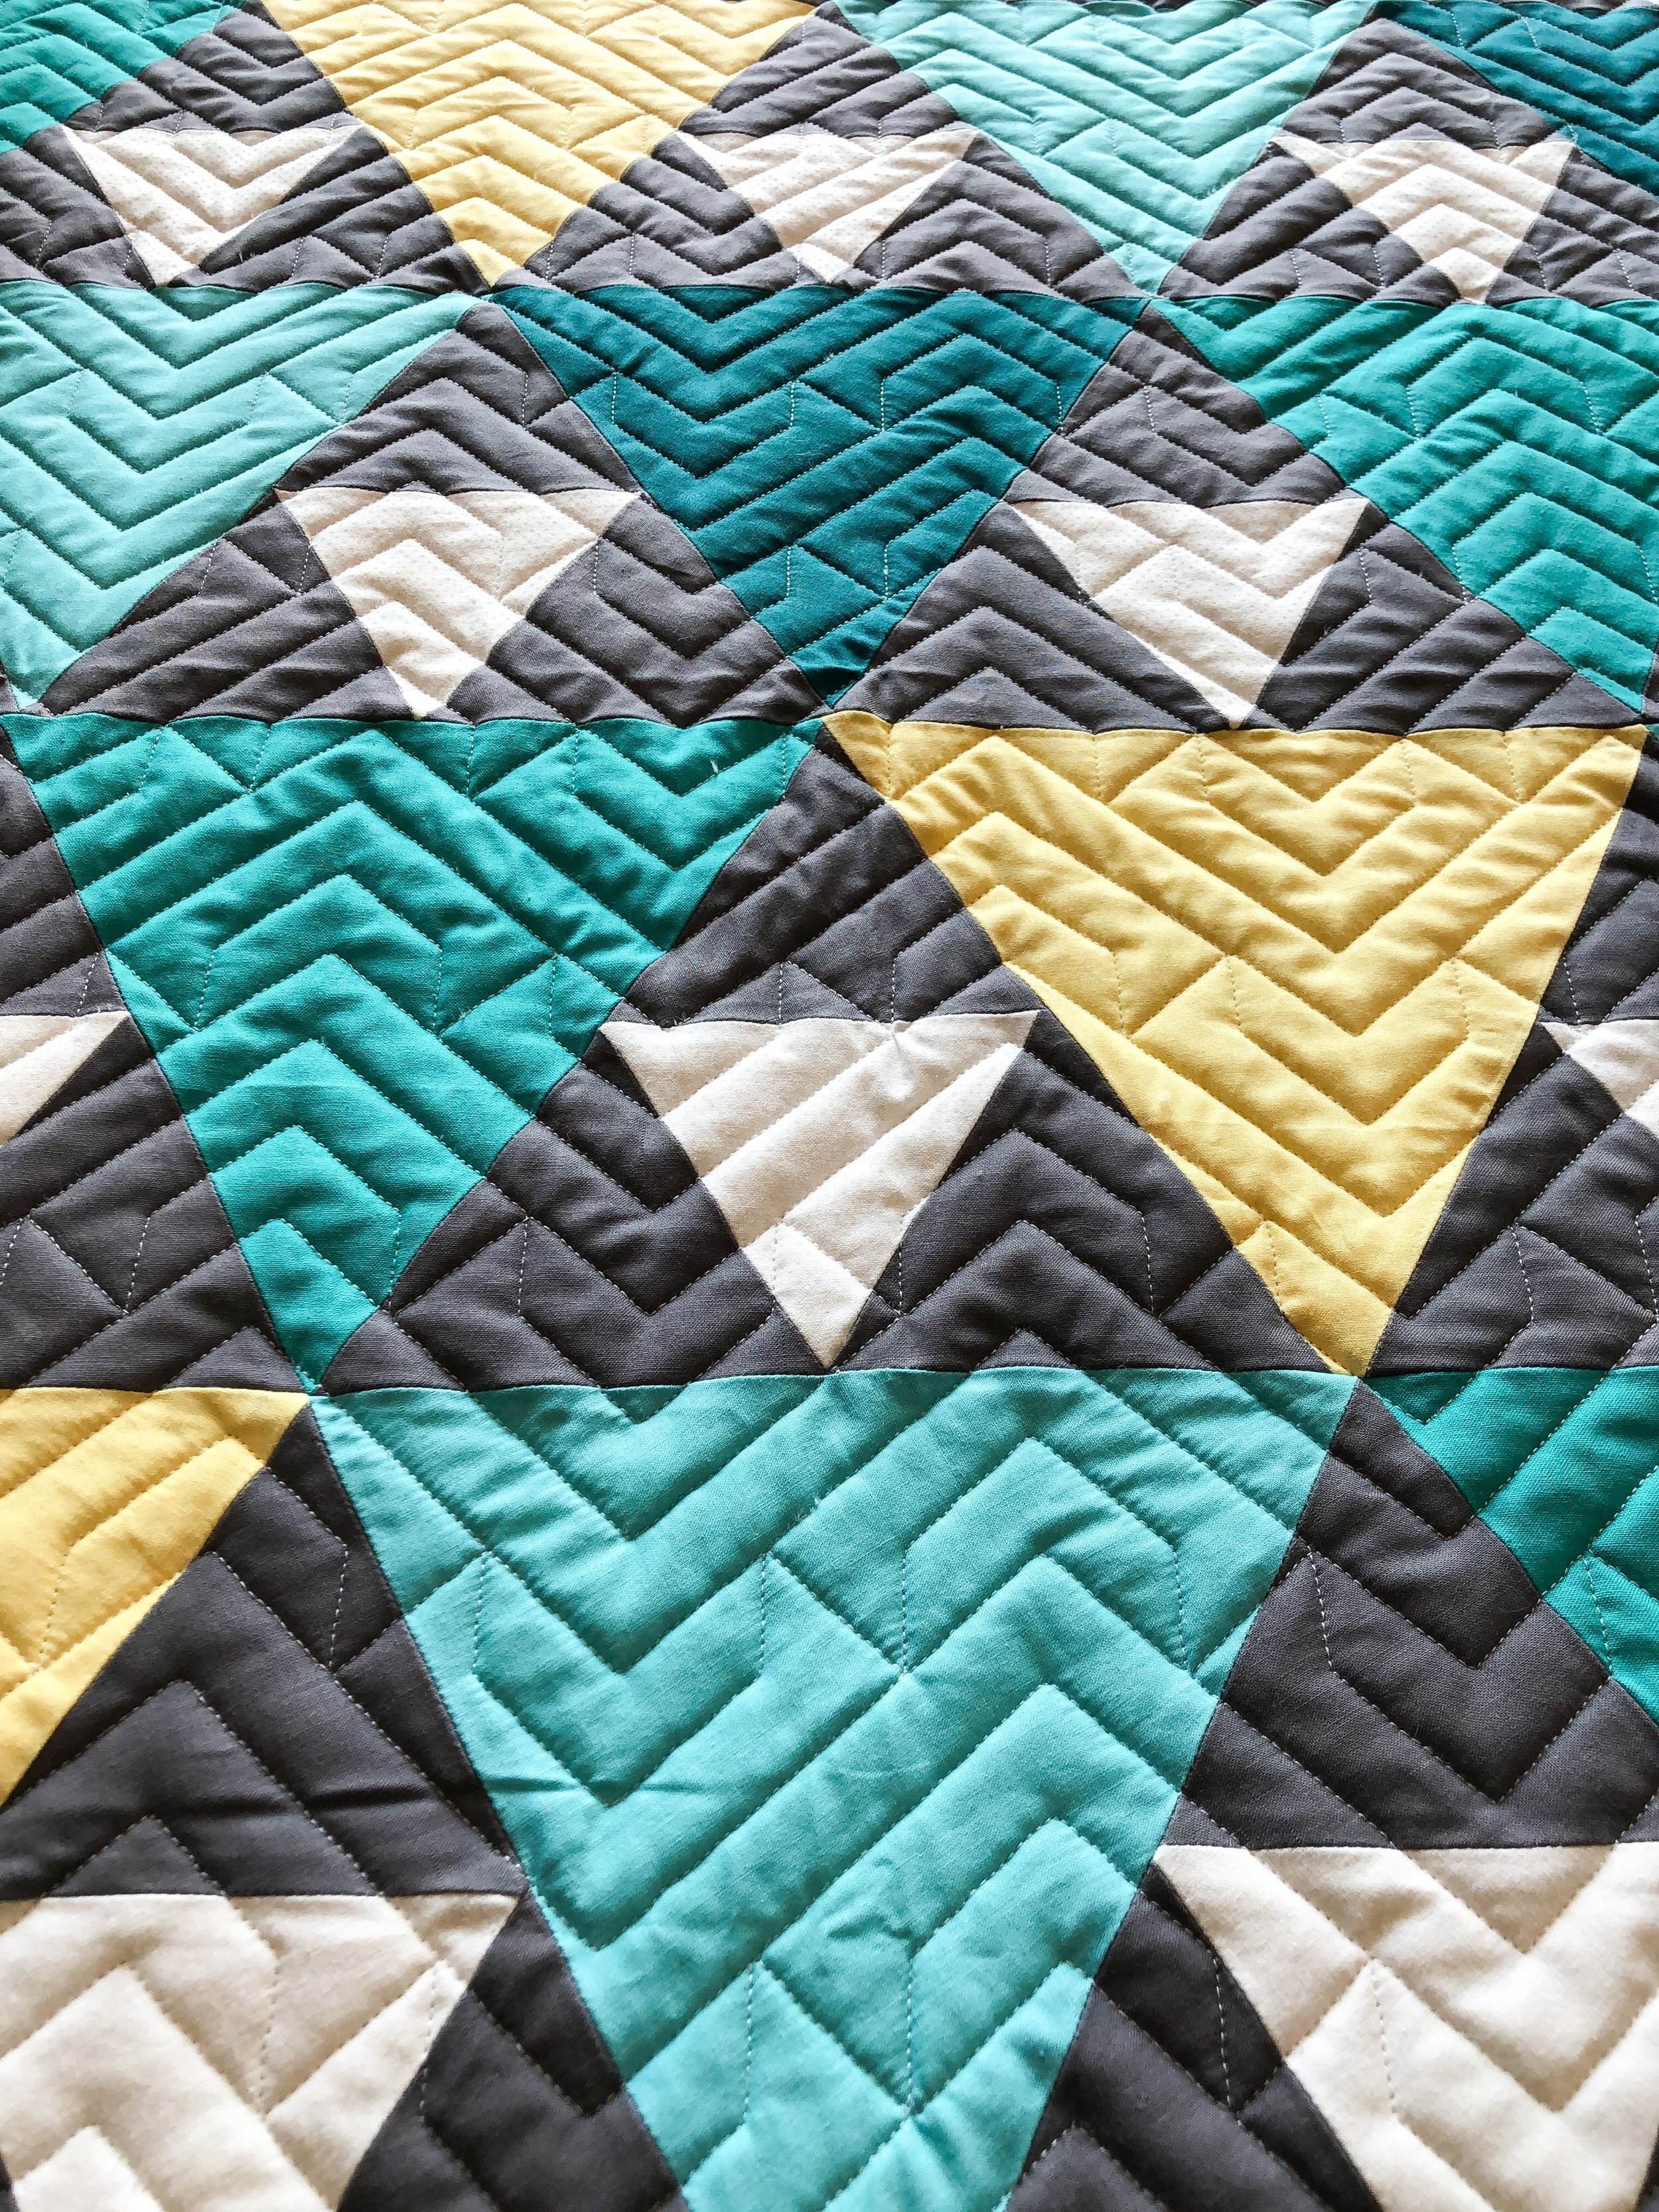
For this particular quilt, I used my digital Cornerstone quilting design. It quilts out beautifully, as you can see, with very minimal backtracking.

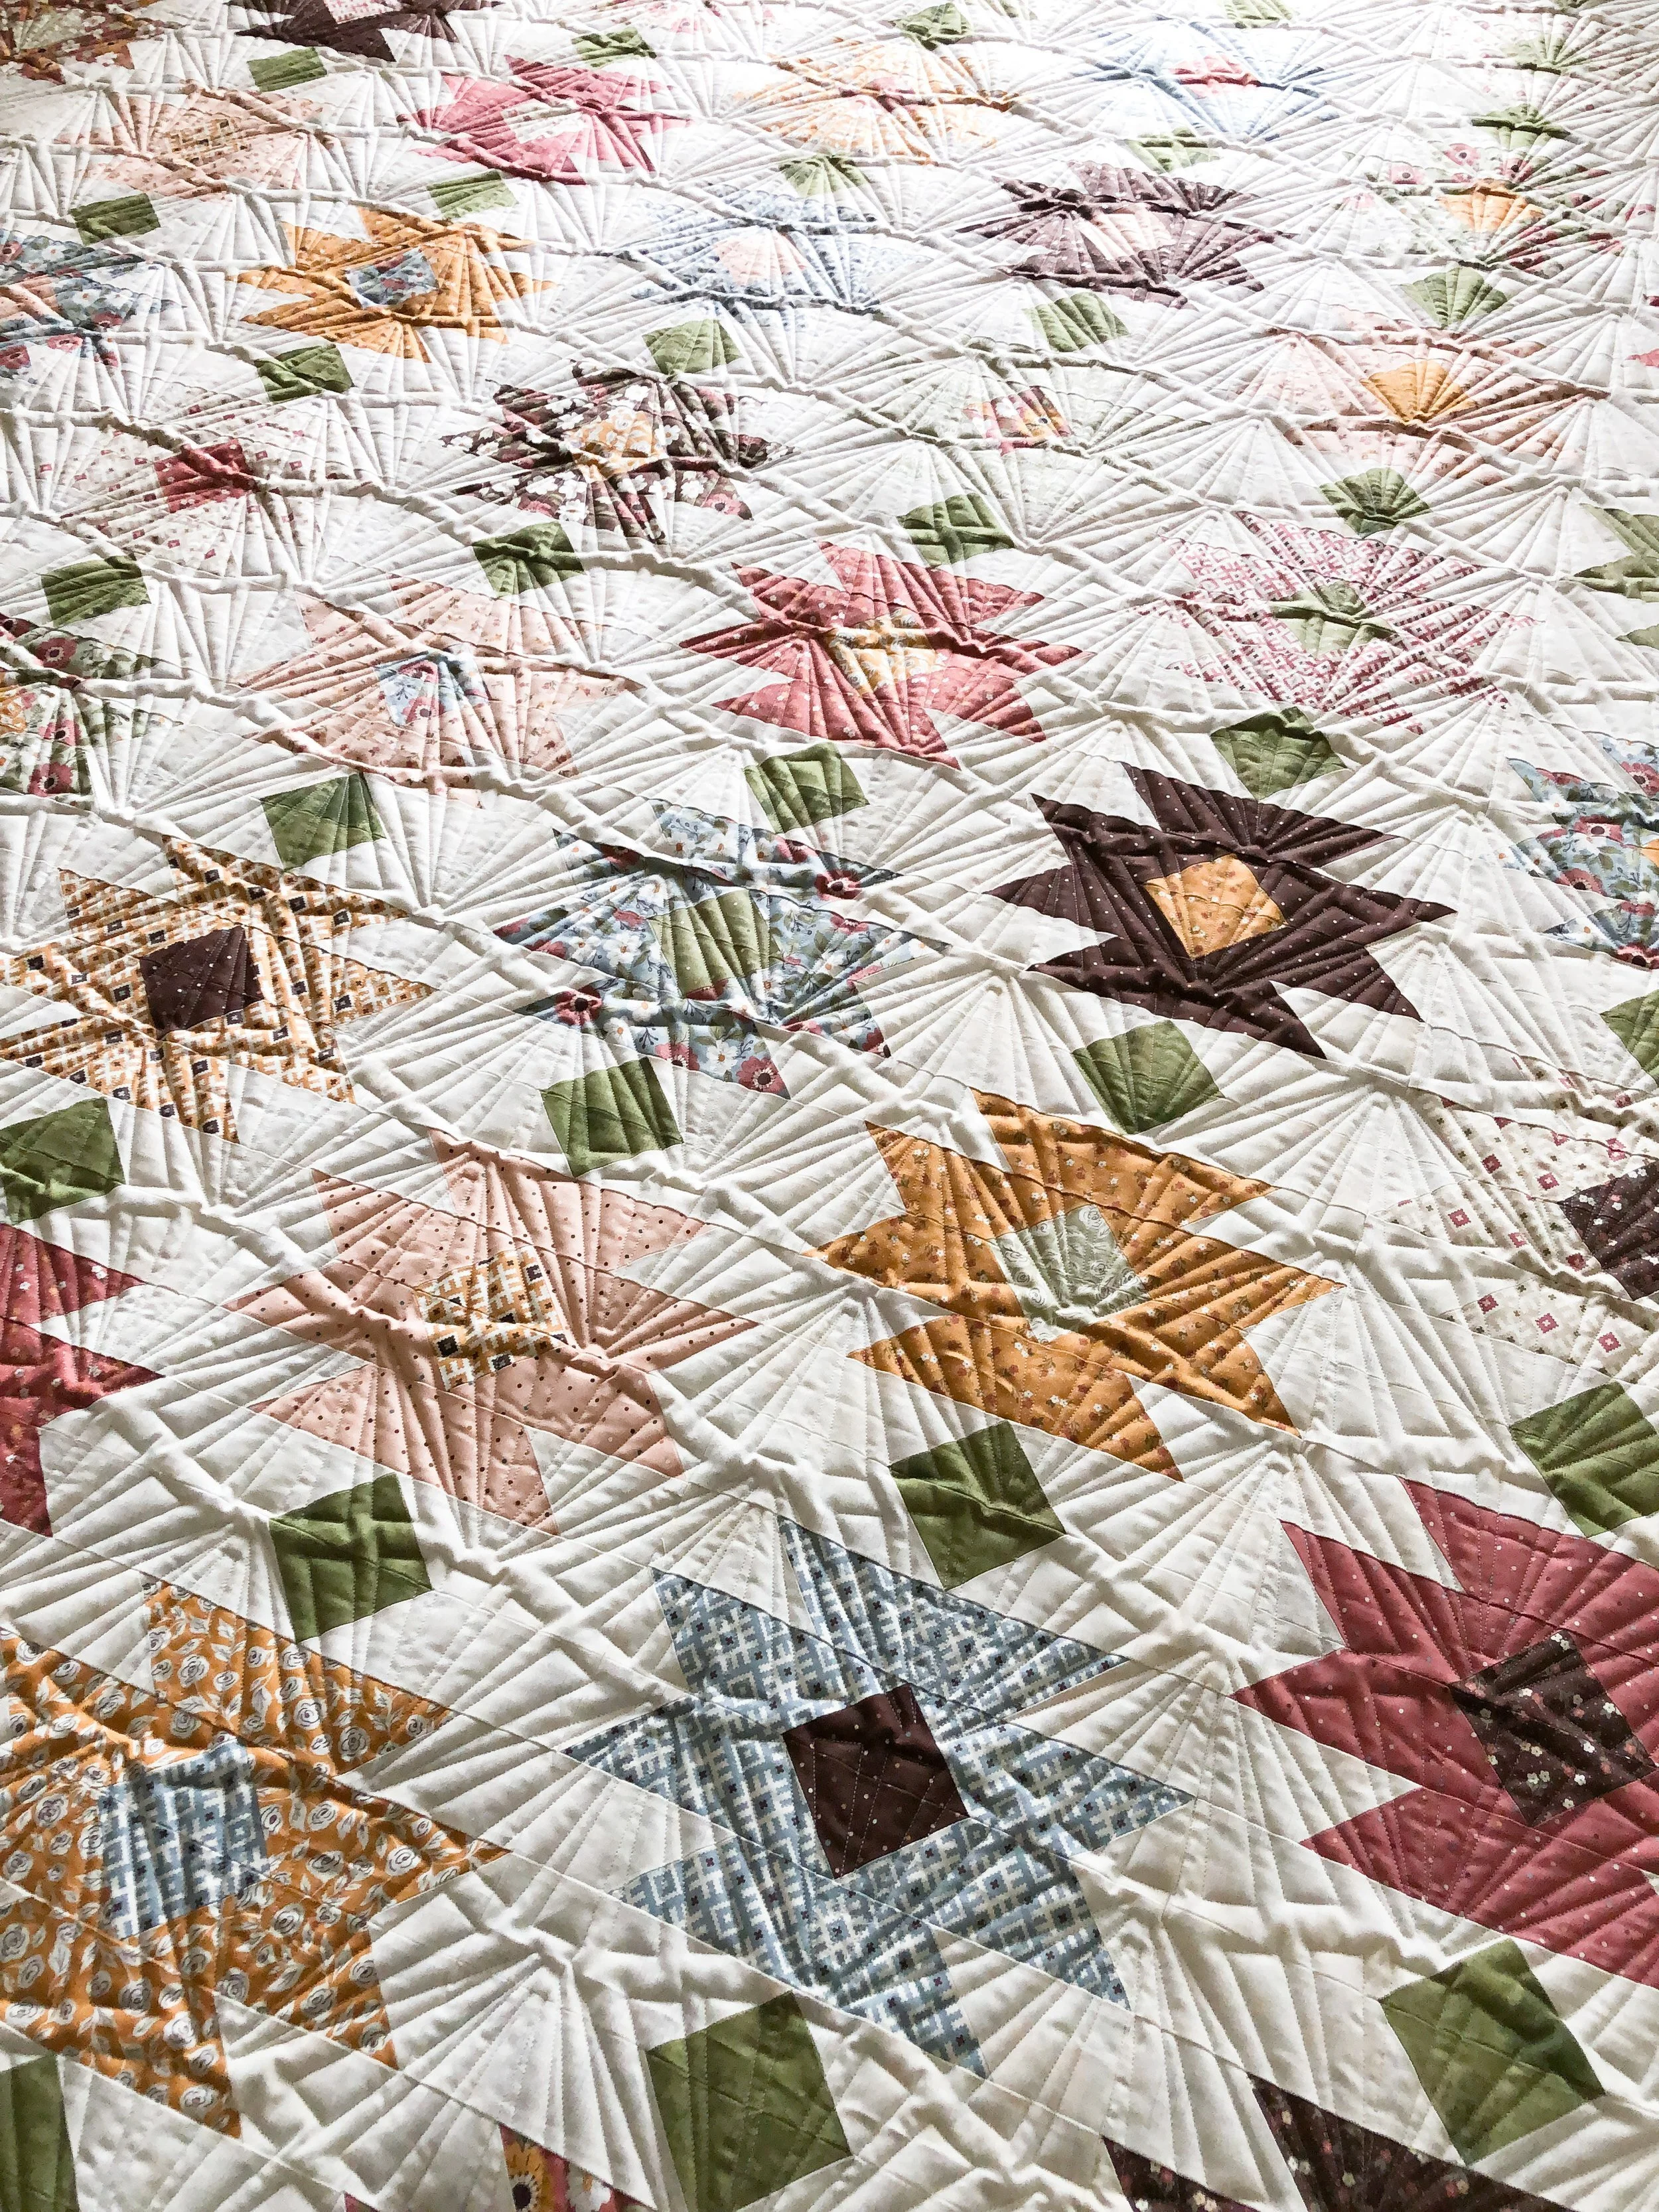
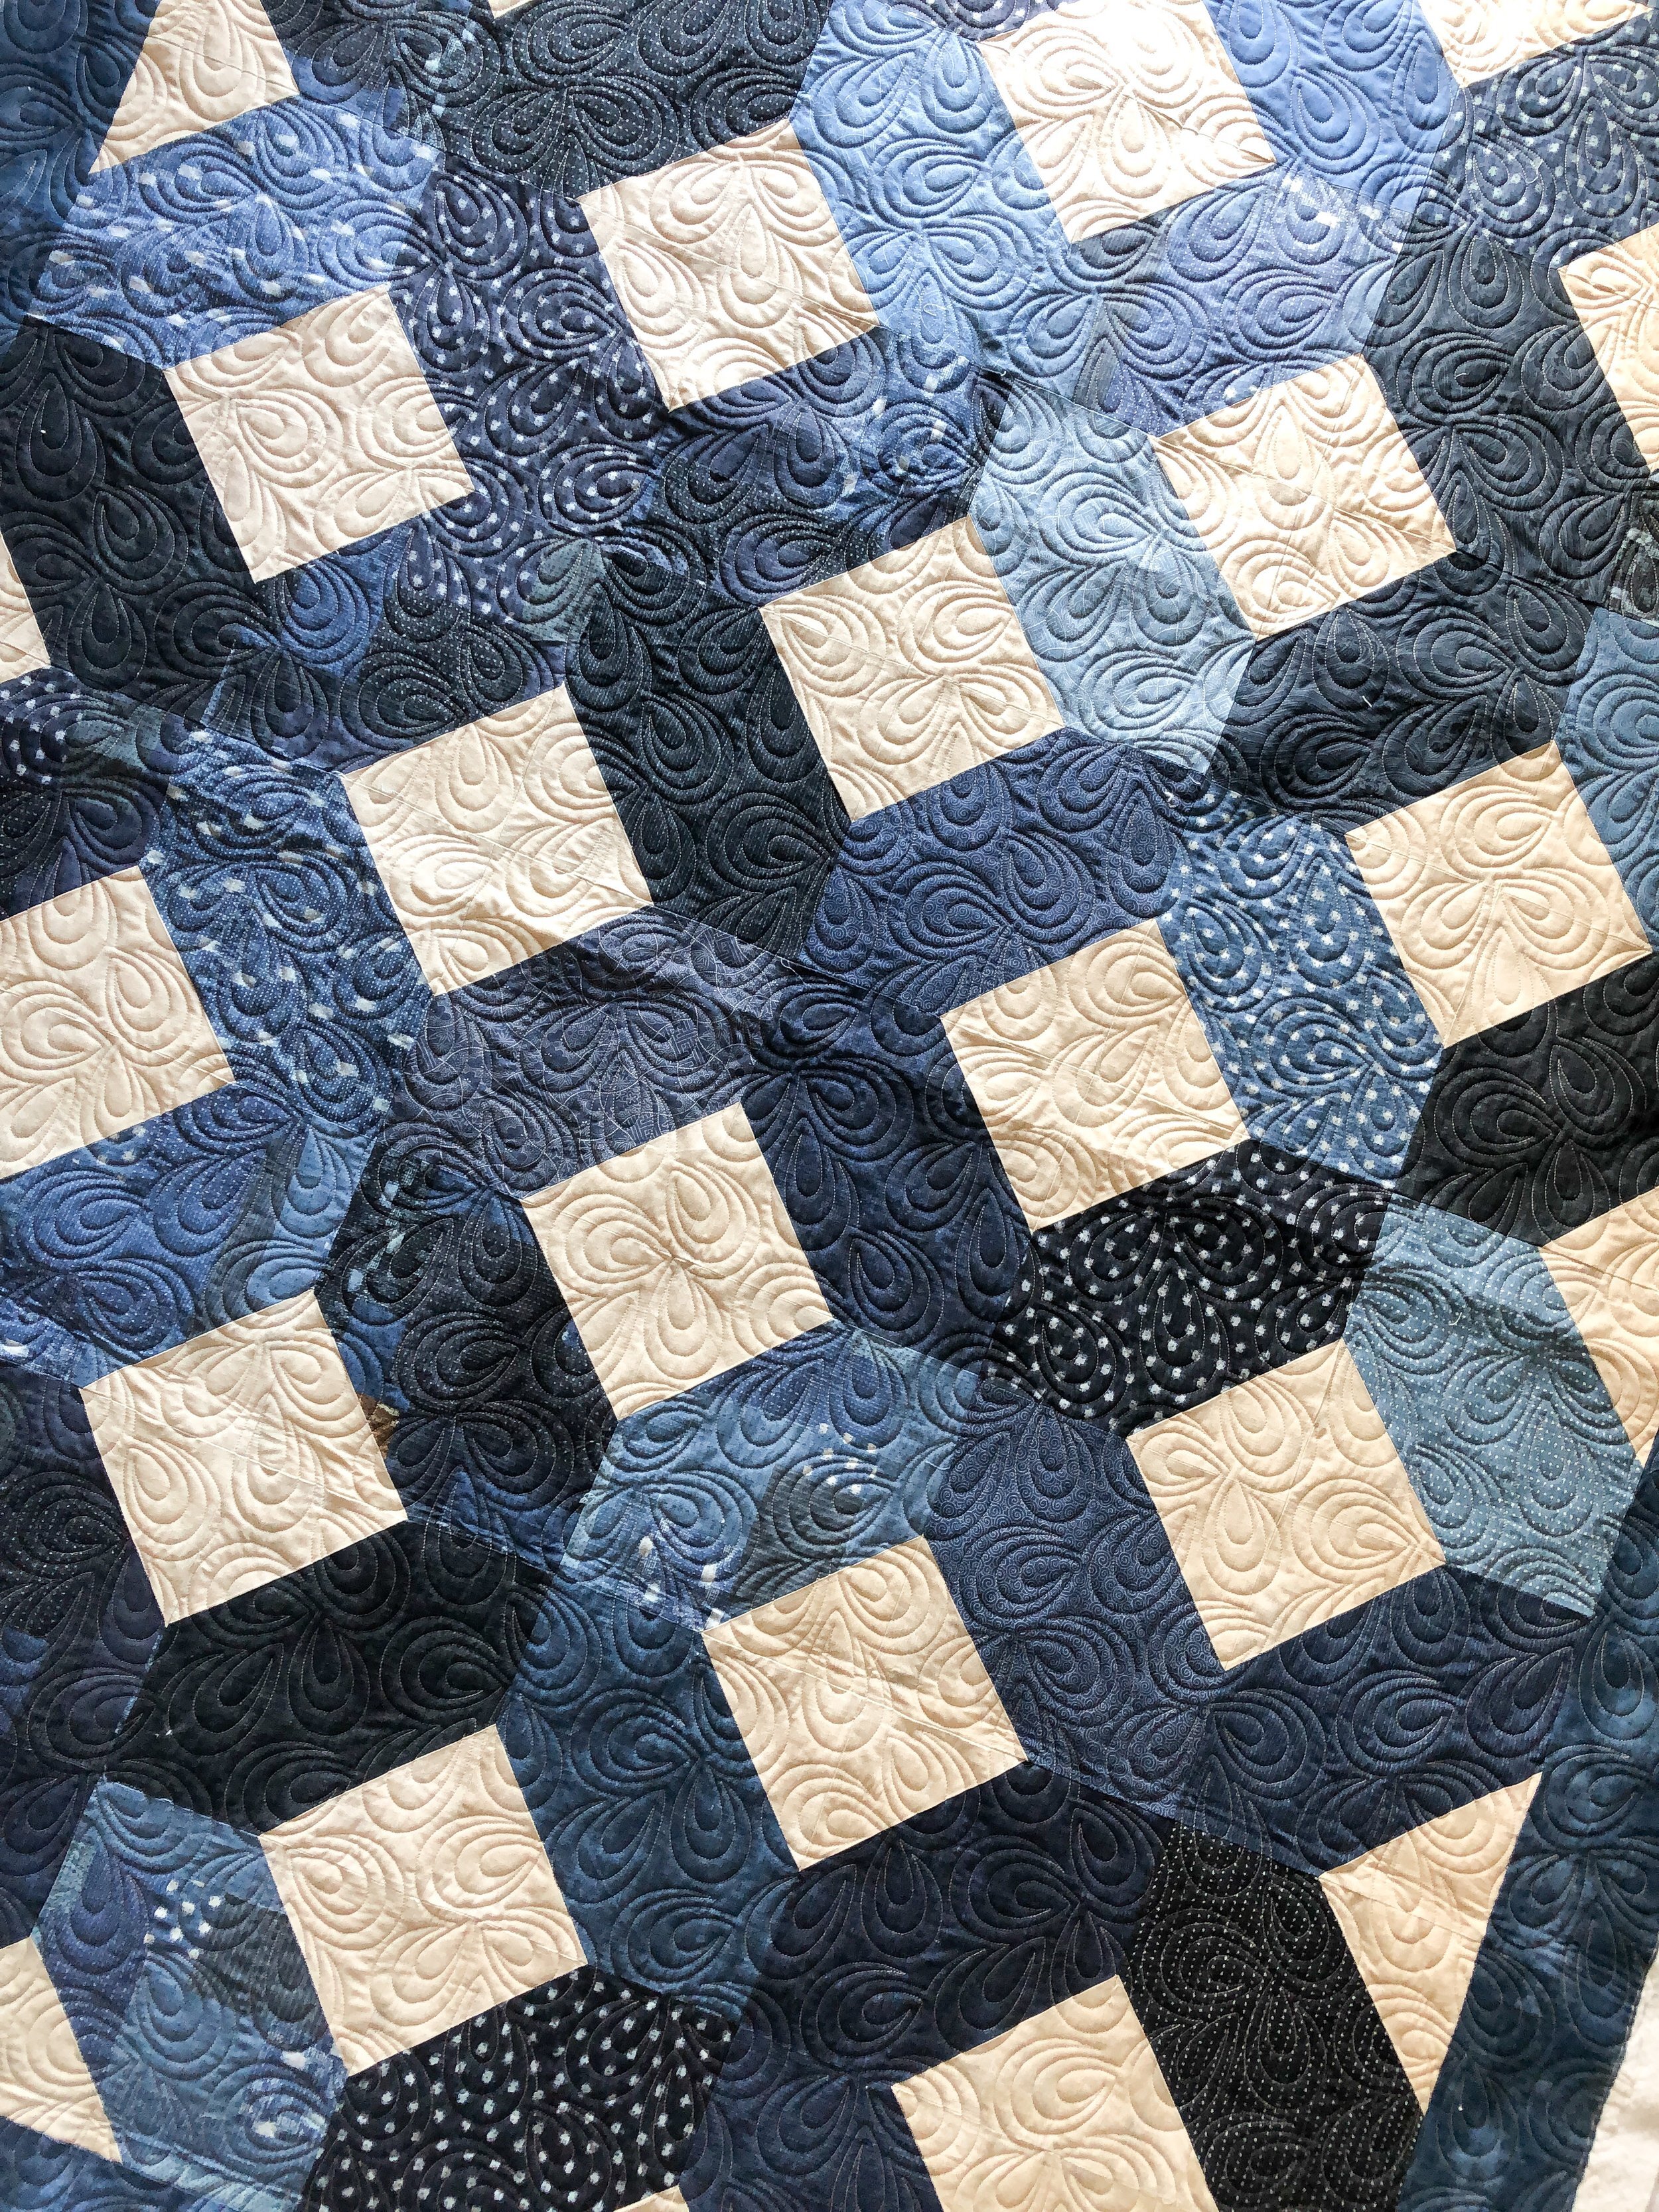
Next up…same quilt, another quilting design. It's great to see the difference in what a quilt can look like, with different quilting designs. This texture is fabulous…they all are, but I am a little biased!!

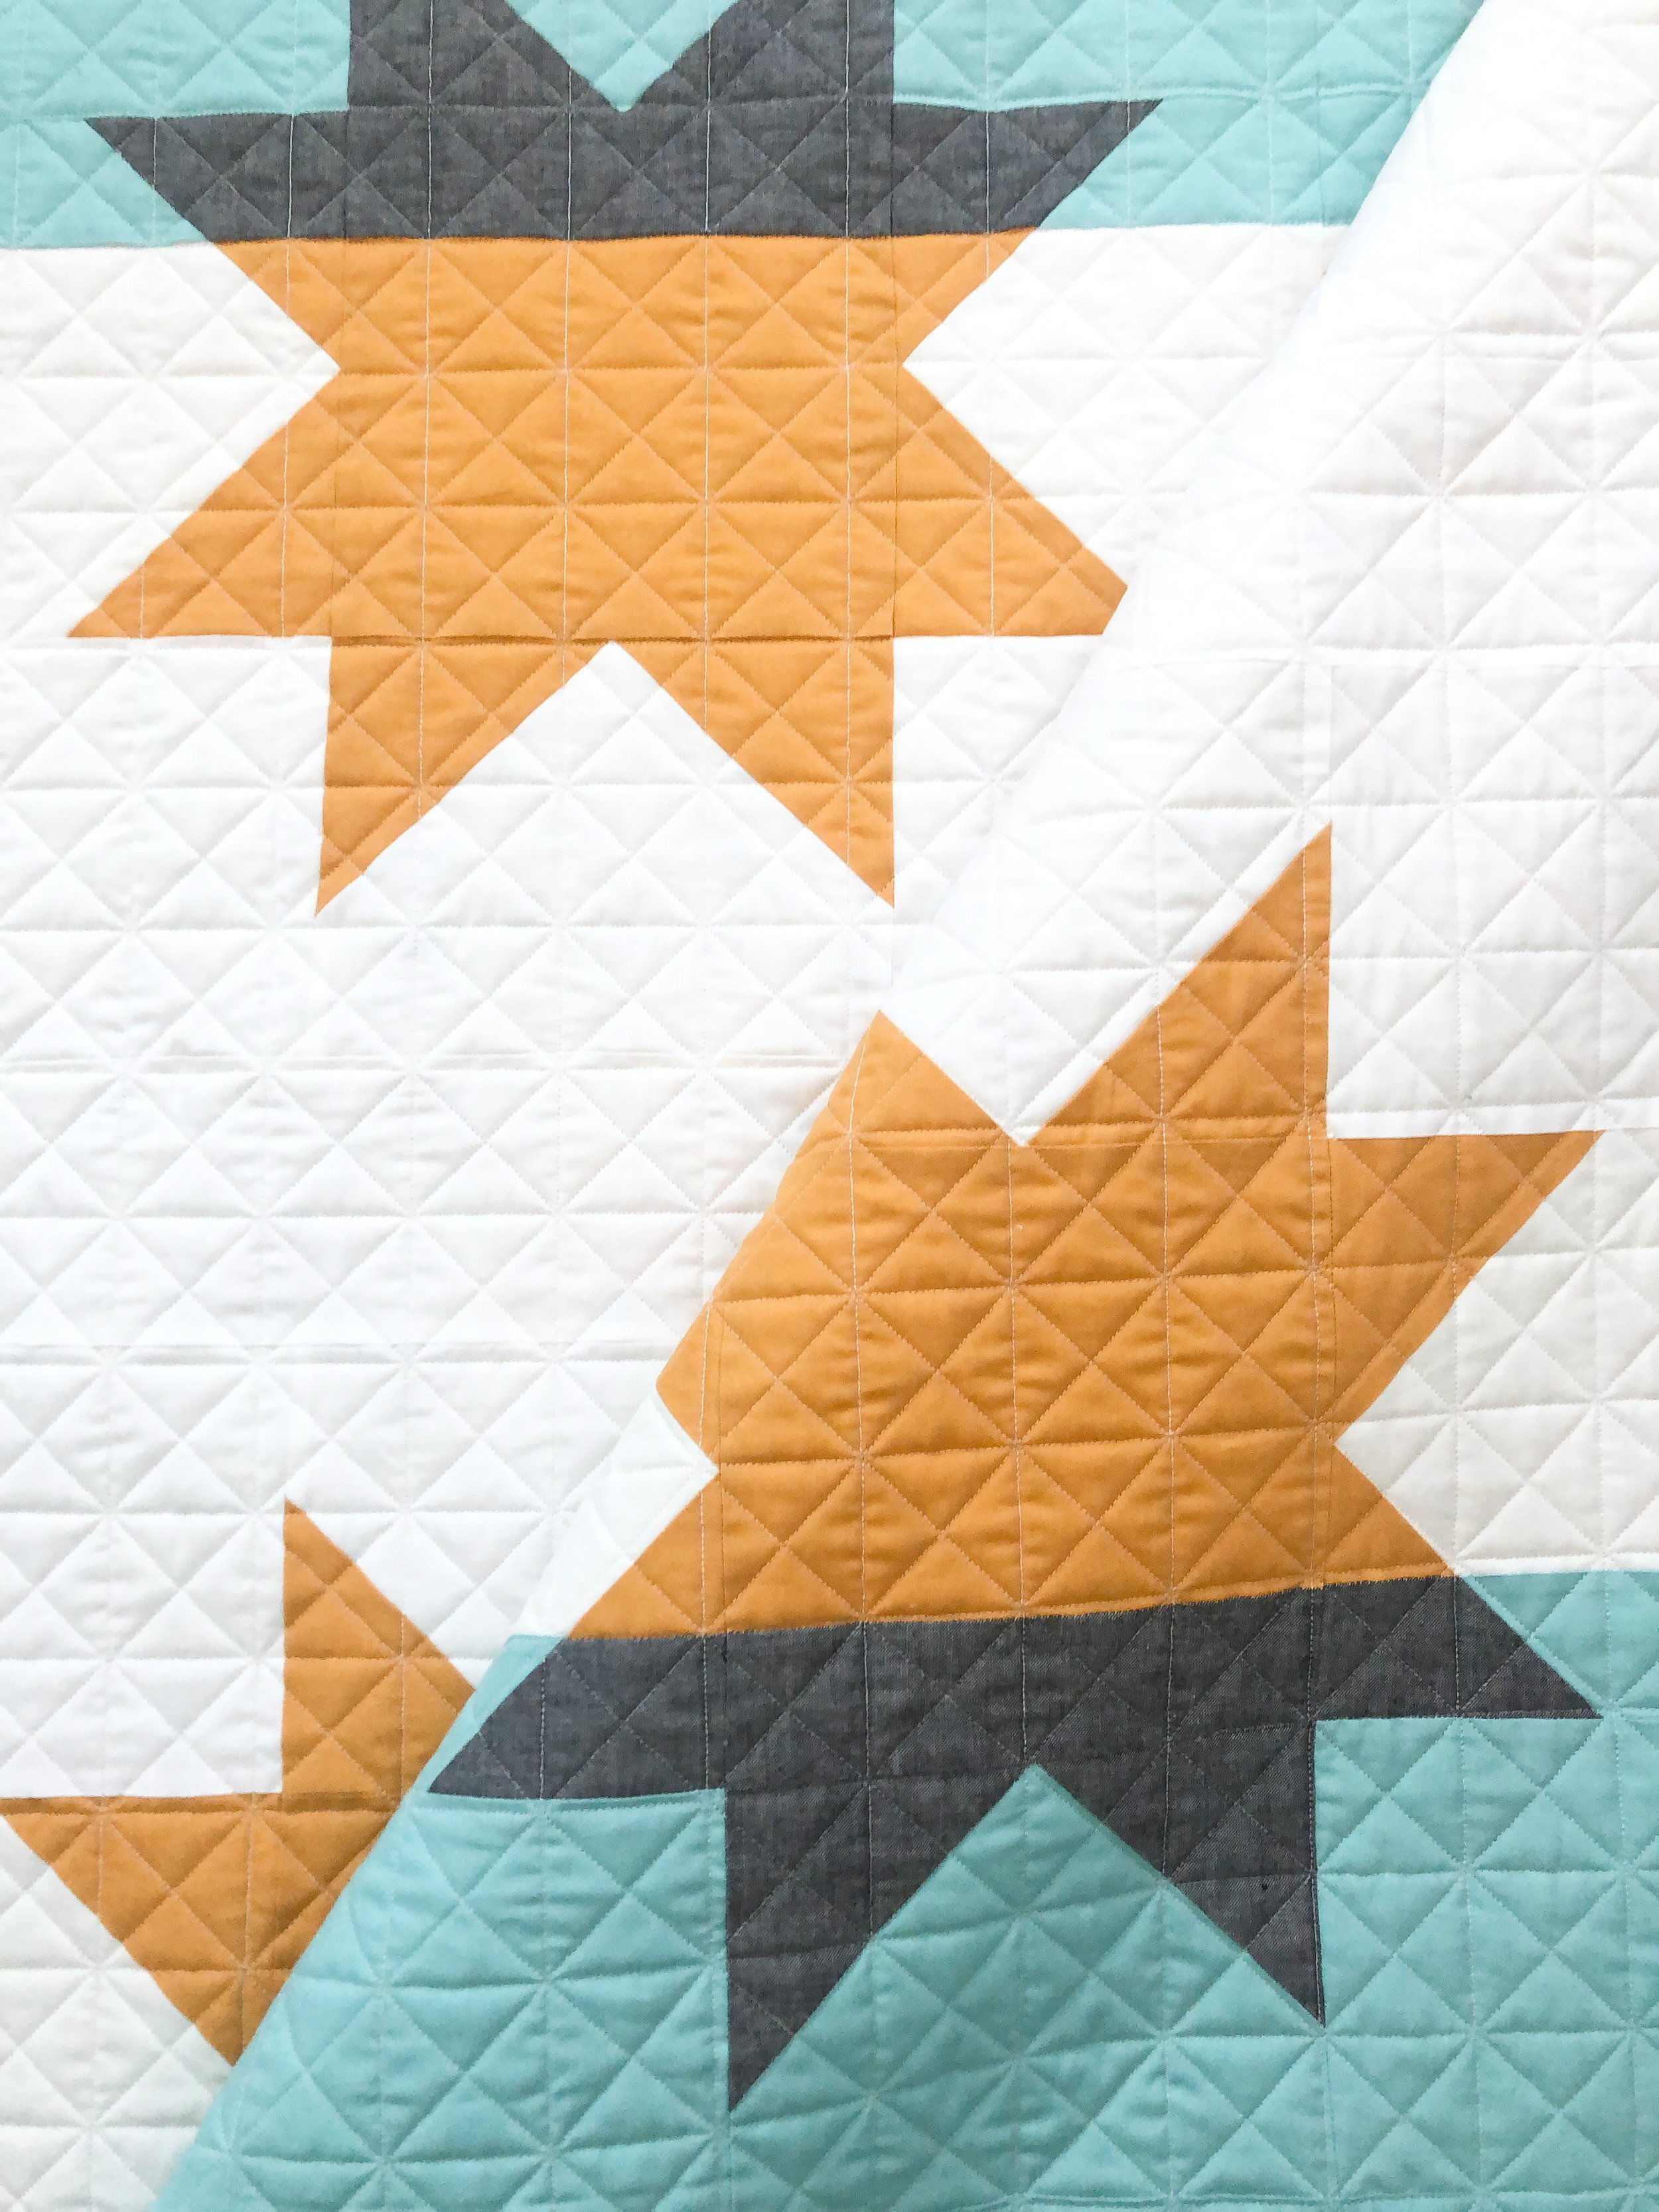
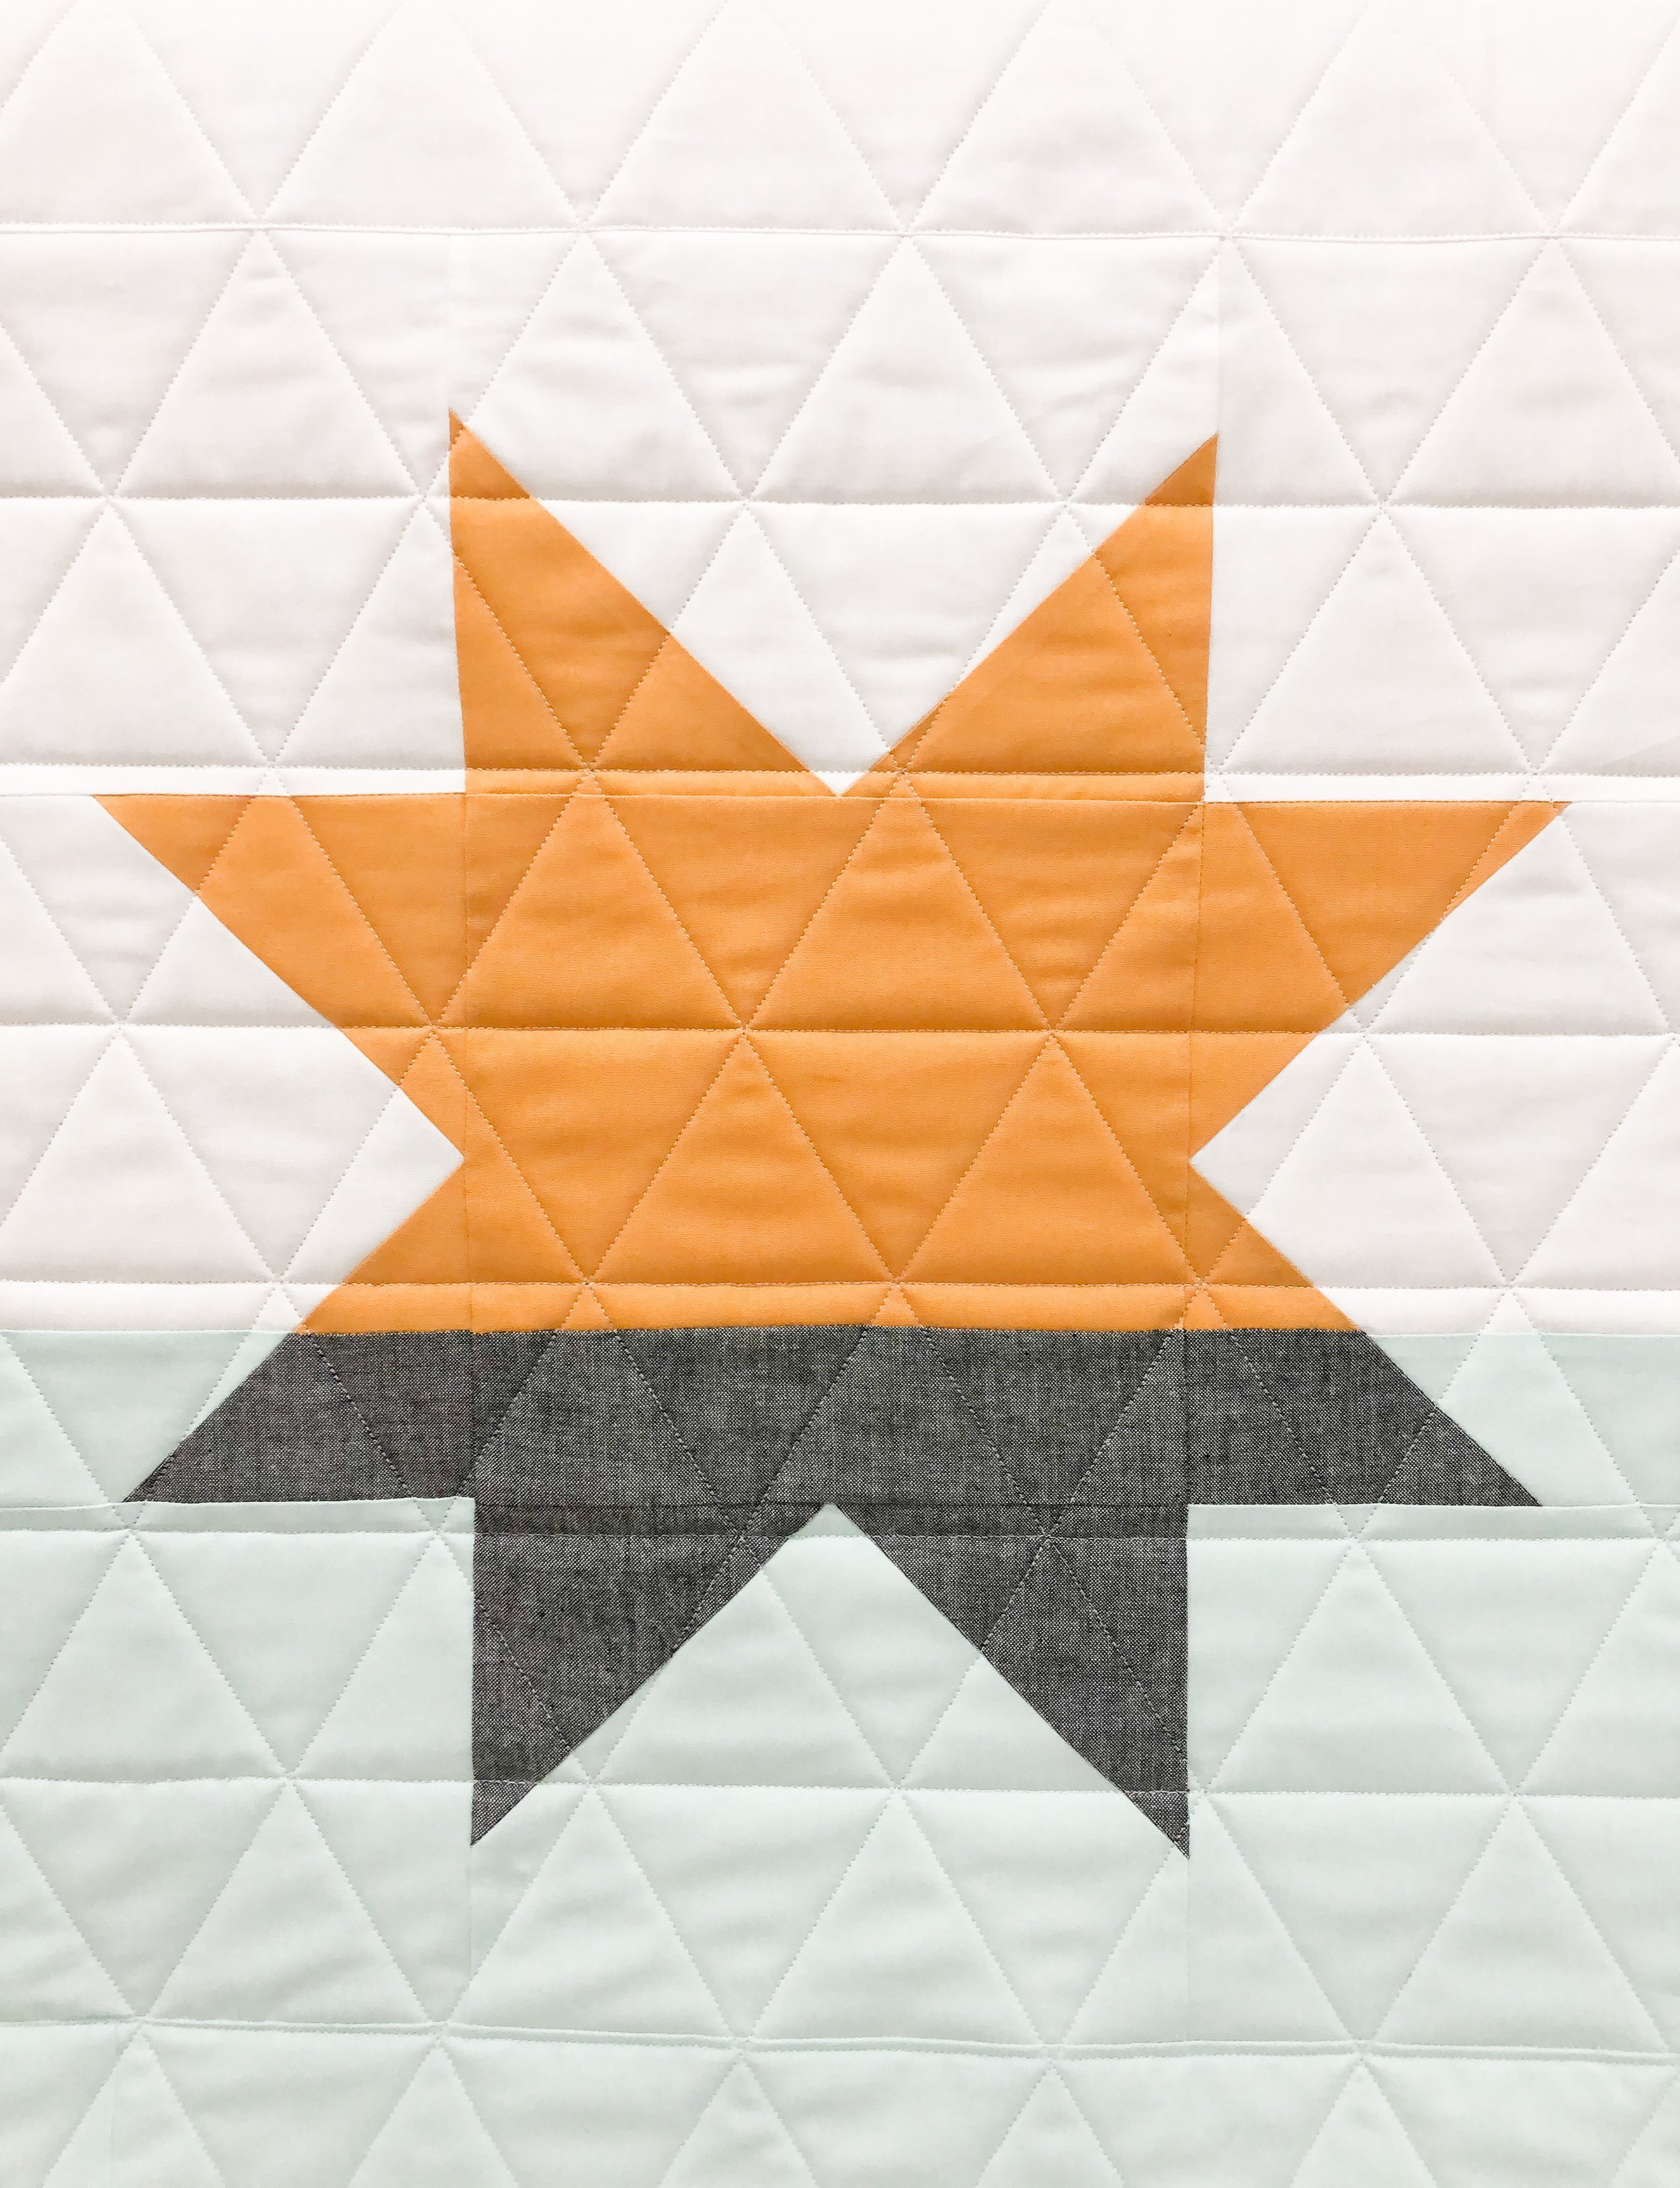
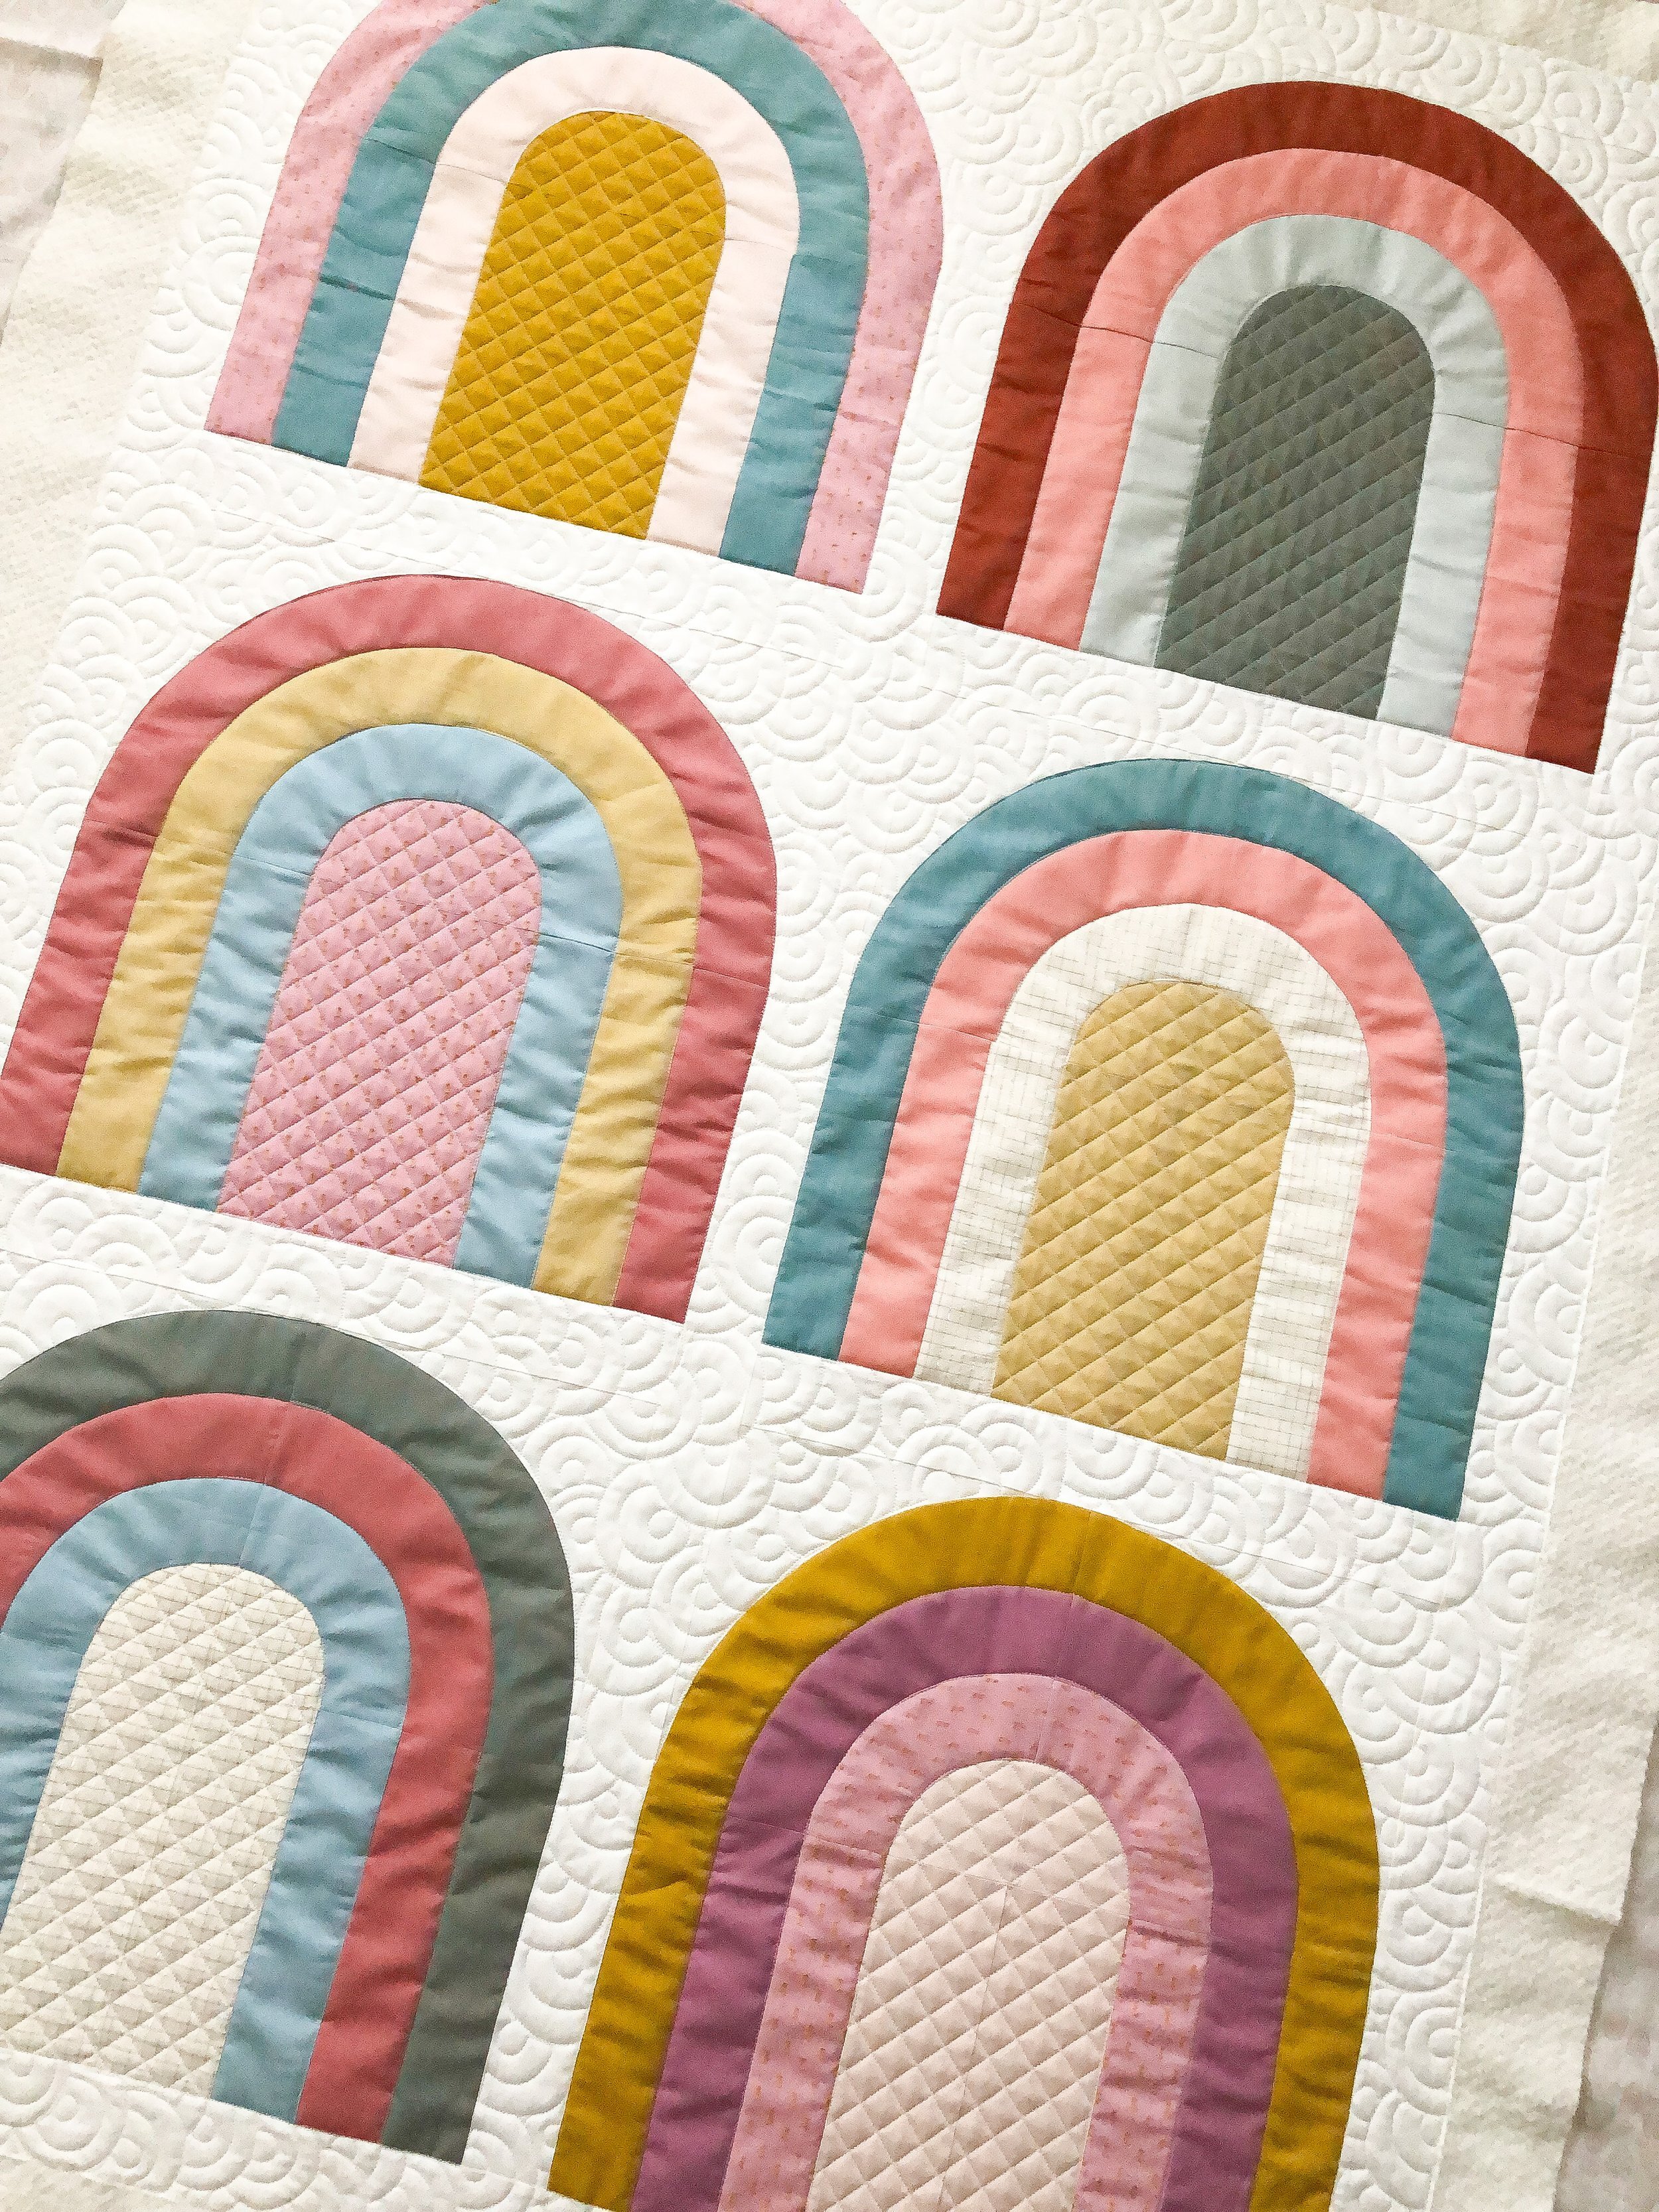
Love this close up of the block and quilting!!!

An angled look at the texture.

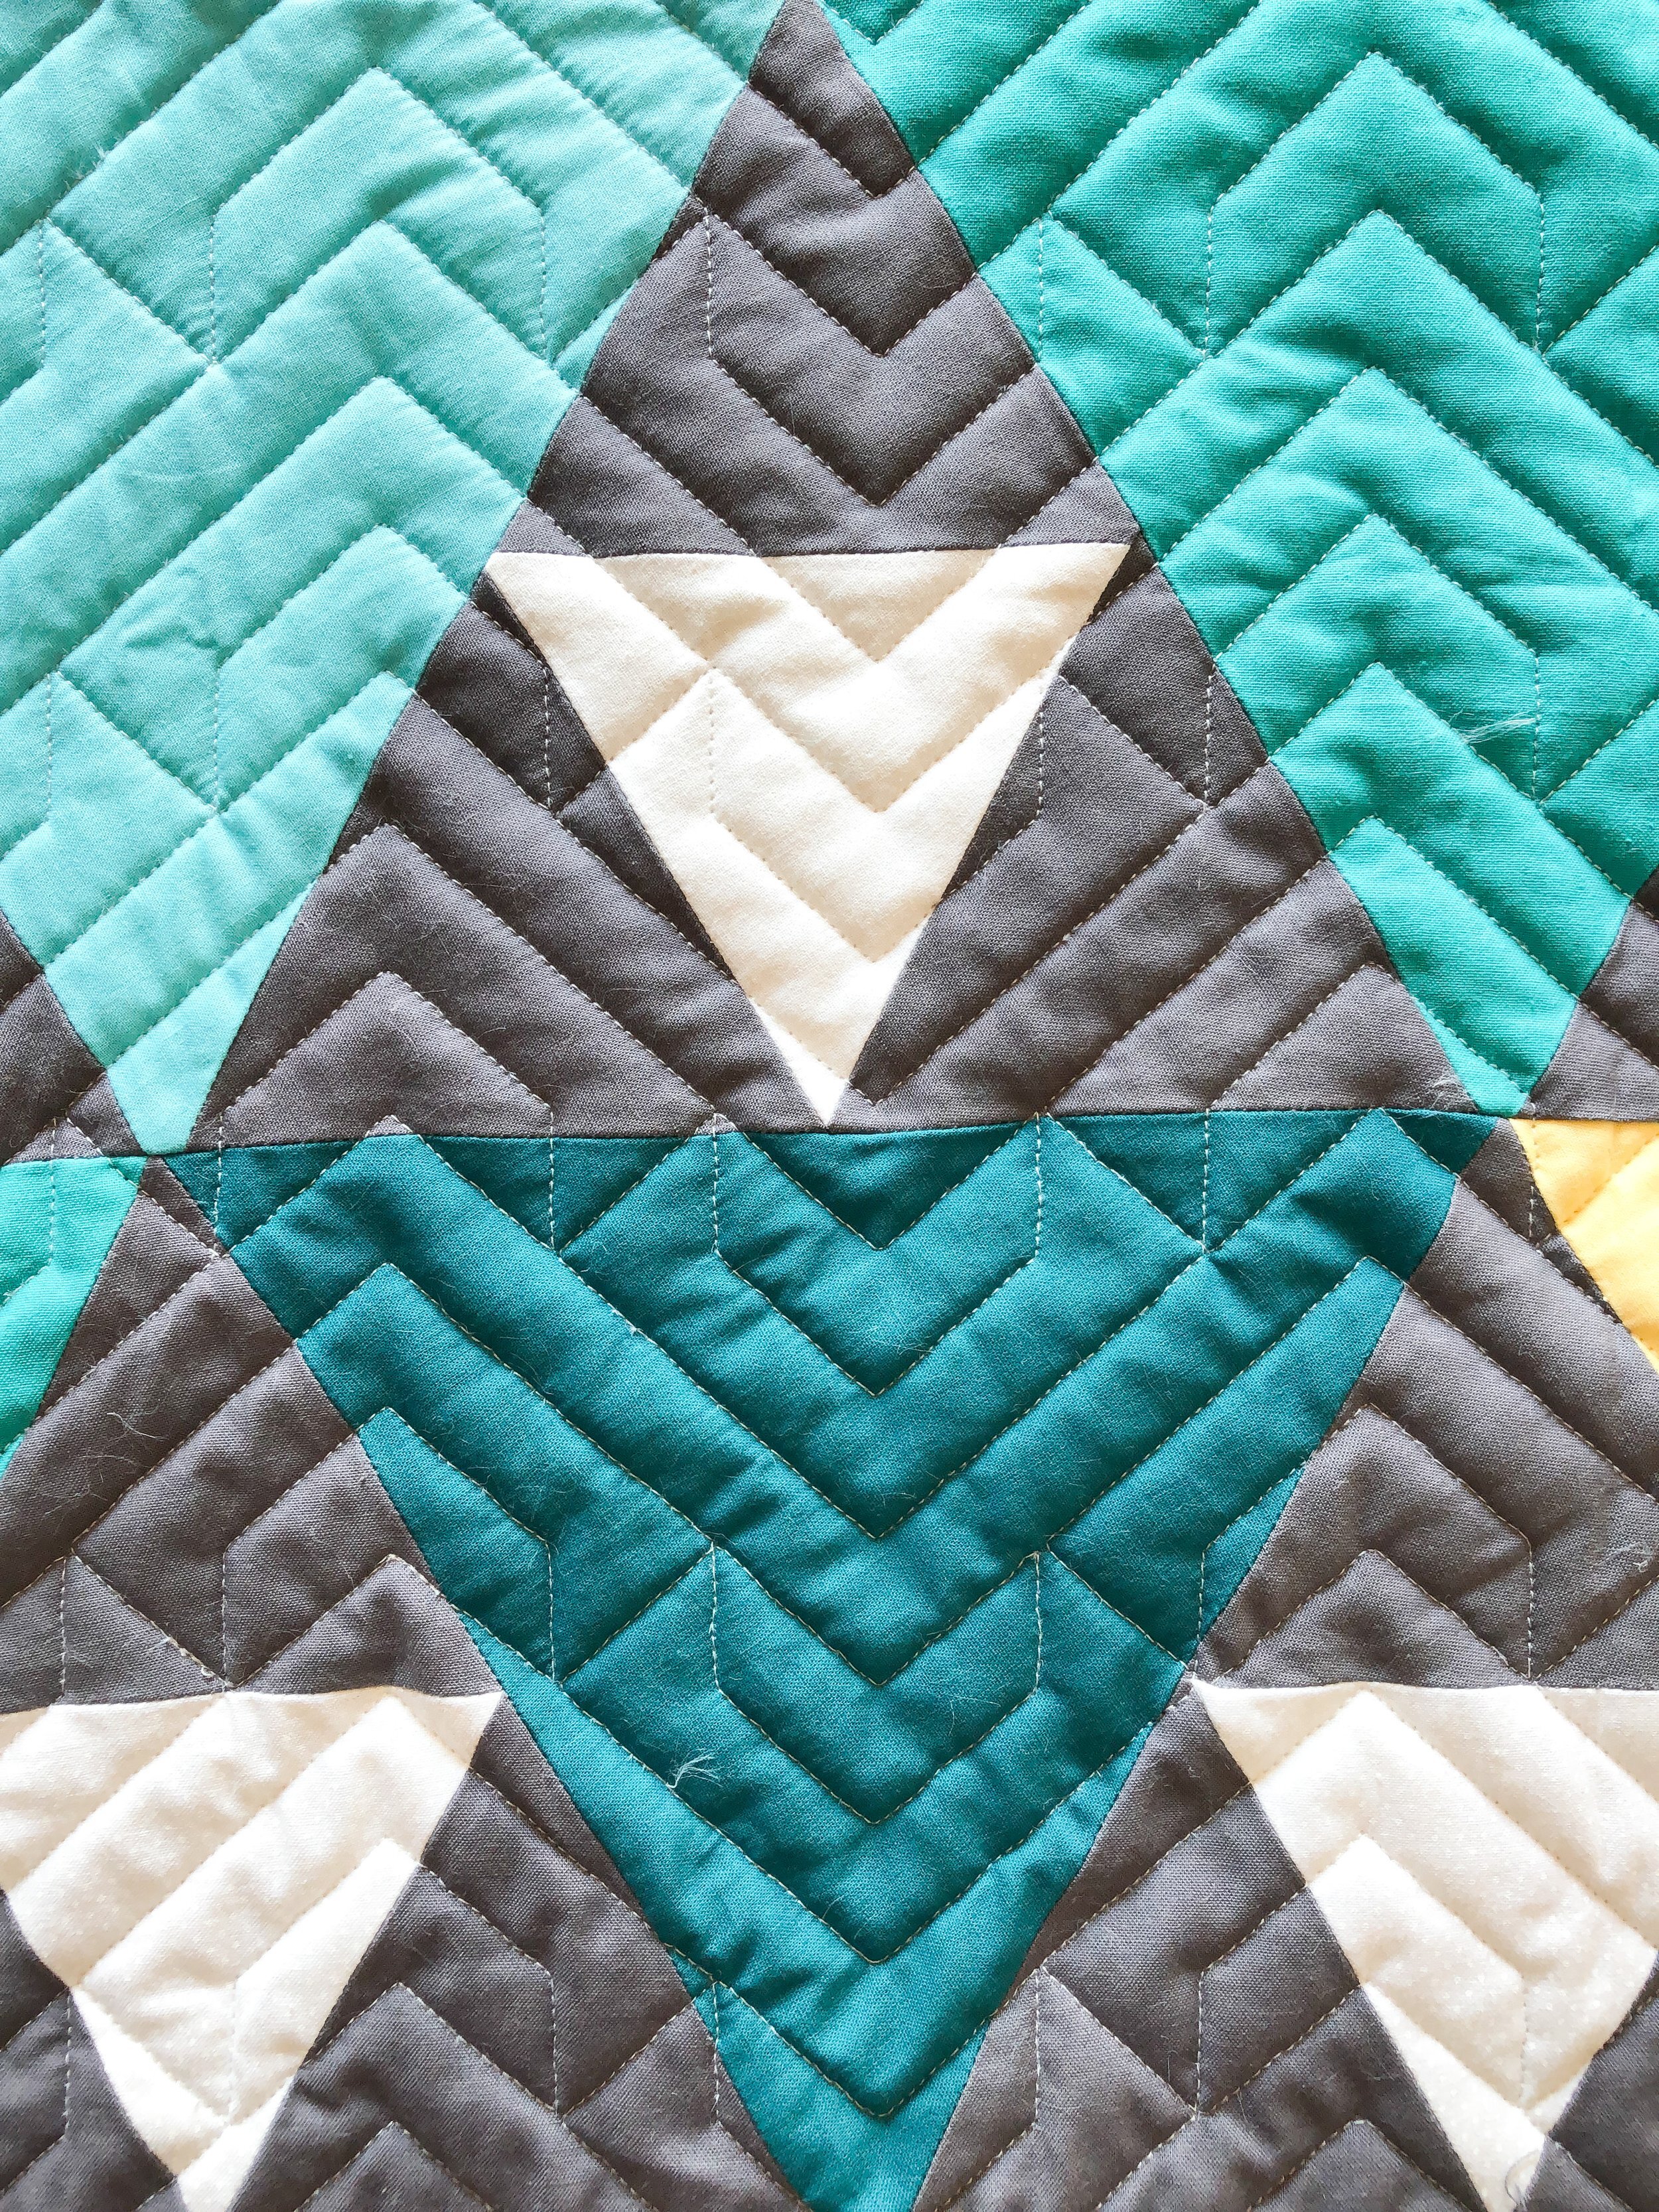
This design is one of my Domestic Stitches designs, called Domestic Stitches - Squared, designed to mimic designs that domestic quilters quilt on their quilts with their sewing machines. Which, believe it or not, is hard for longarm quilters to do. After getting requests over the years, and hearing other quilters get the same requests, I decided to design 9 different designs. I actually offer them in a bundle…which means you get 9 designs for the price of 8 designs. I used one of the other designs on one of these quilts , too.

Another close up…because why not!
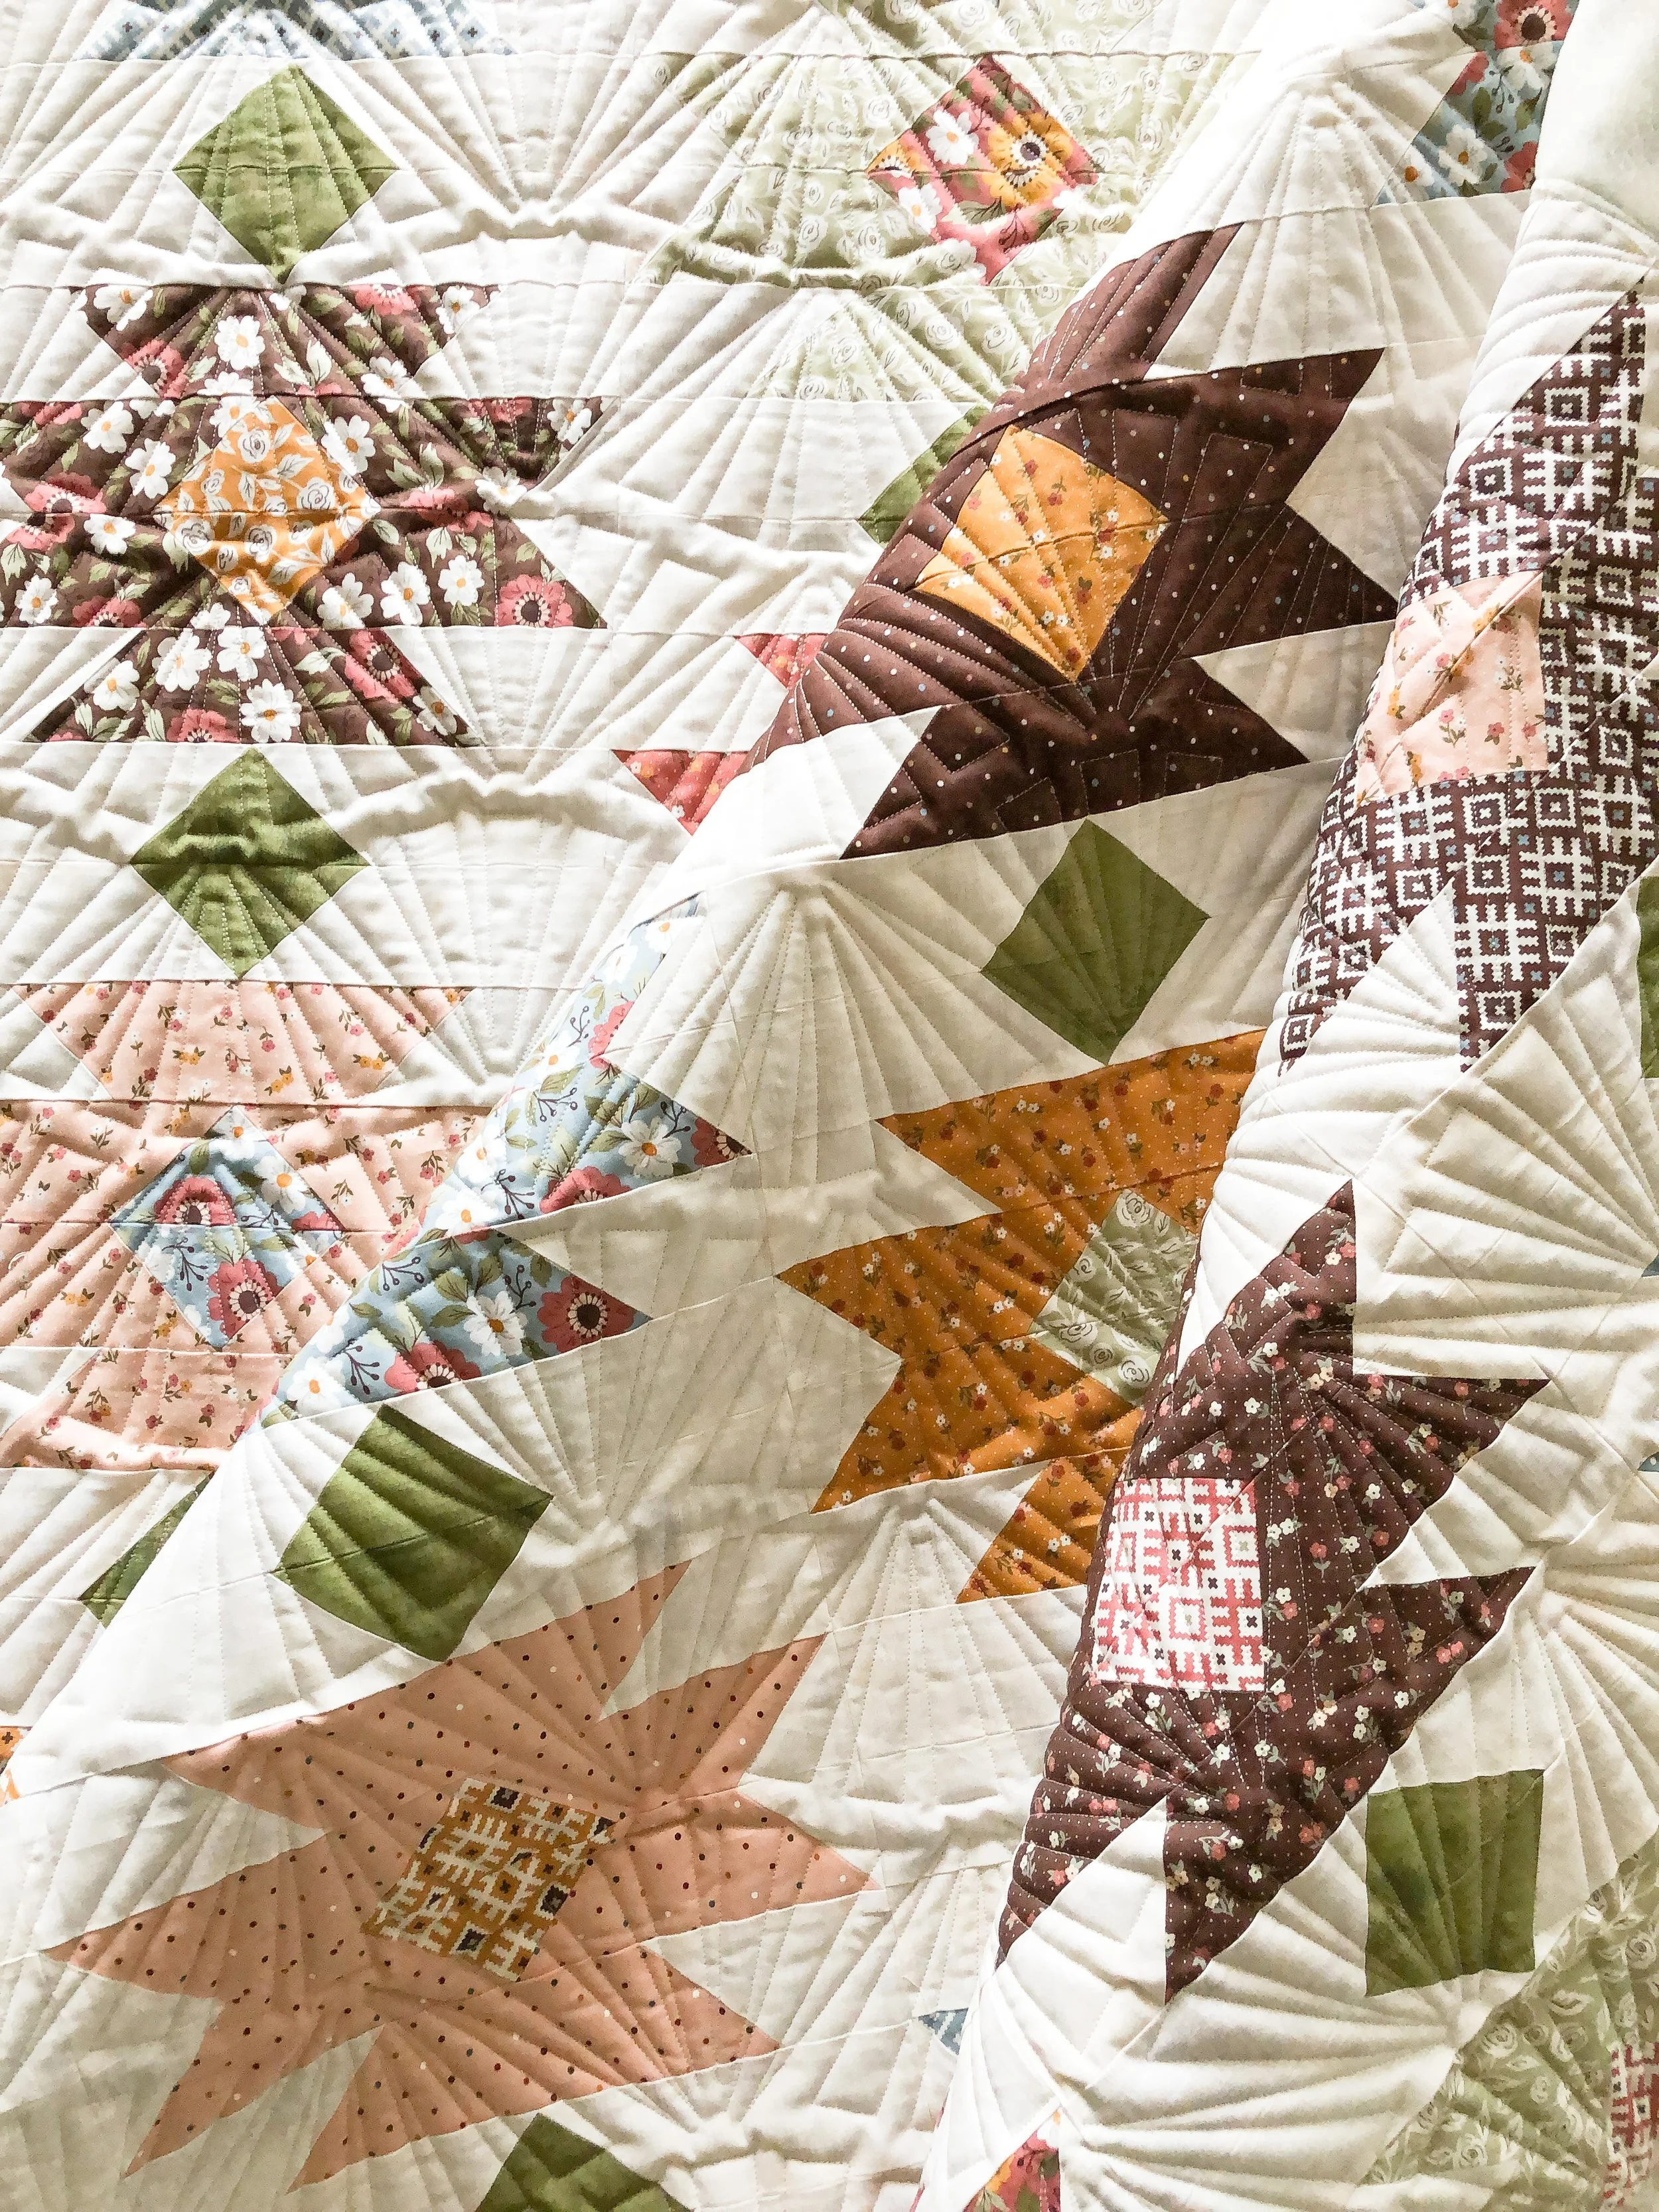
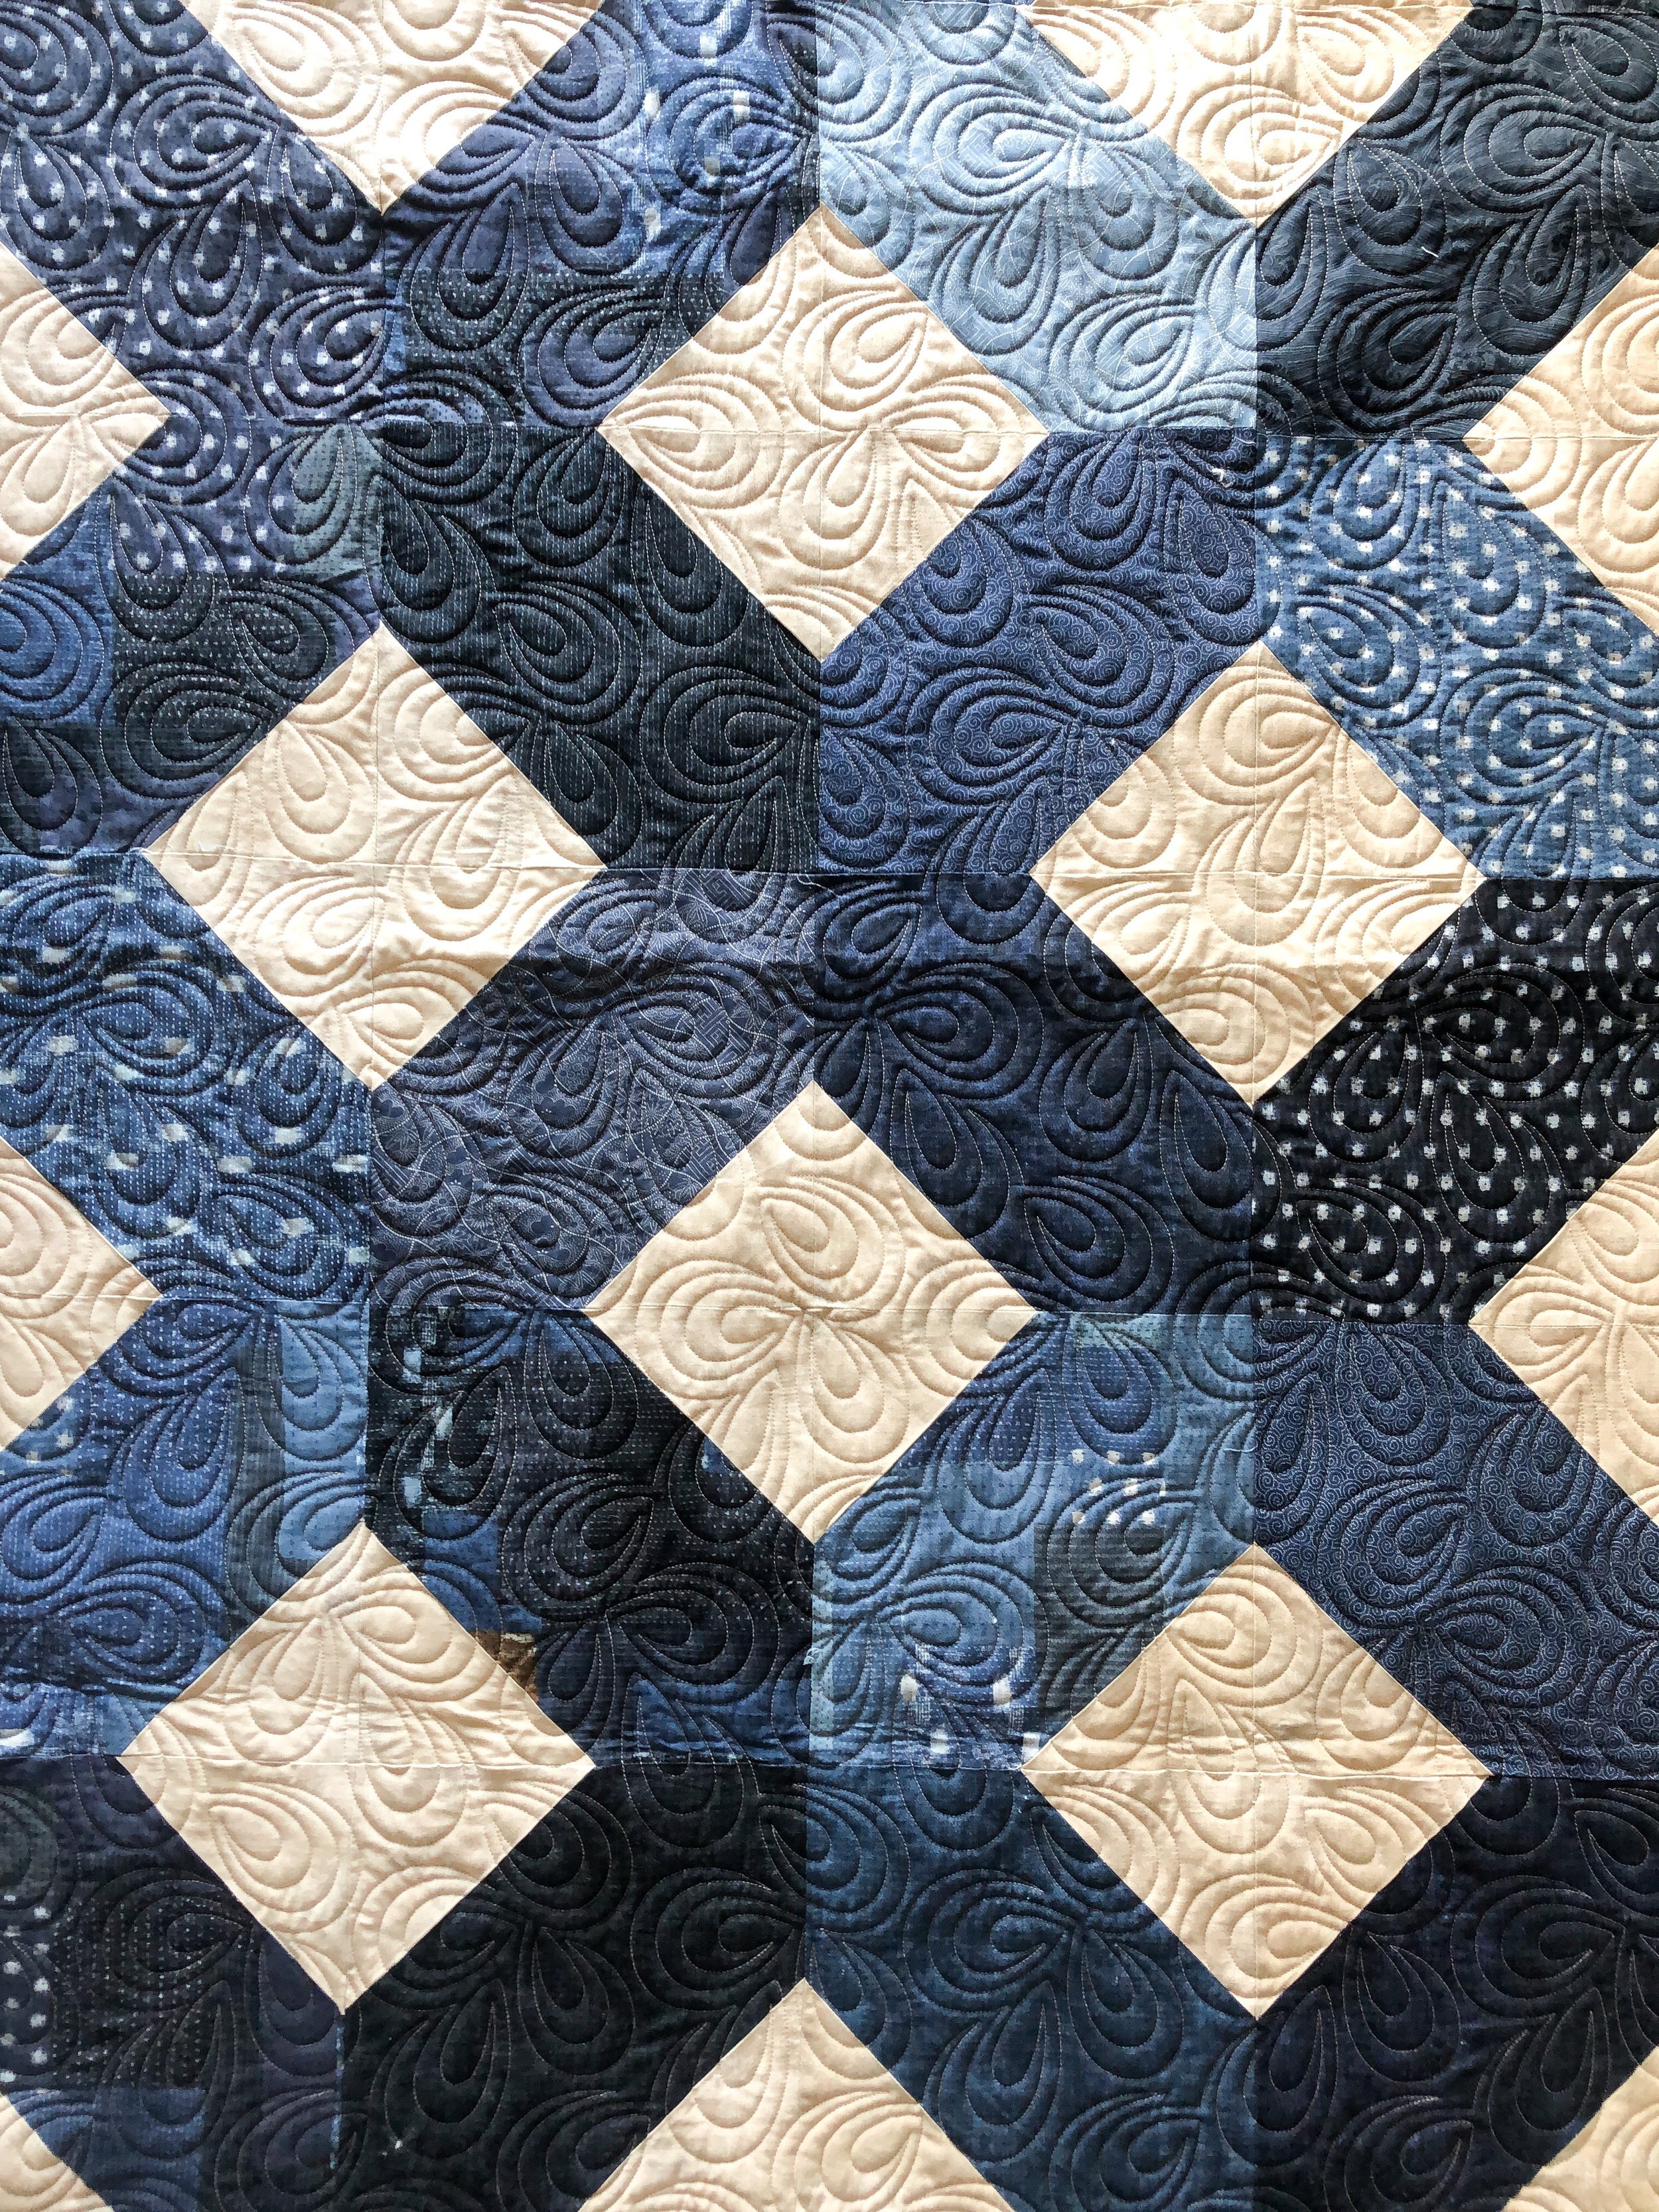
Quilt number three…

Another fun texture, don’t you think?!?!?!!!
This is the first time that I have quilted out this design…which is the same for the other designs, with the exception of the Cornerstone design.
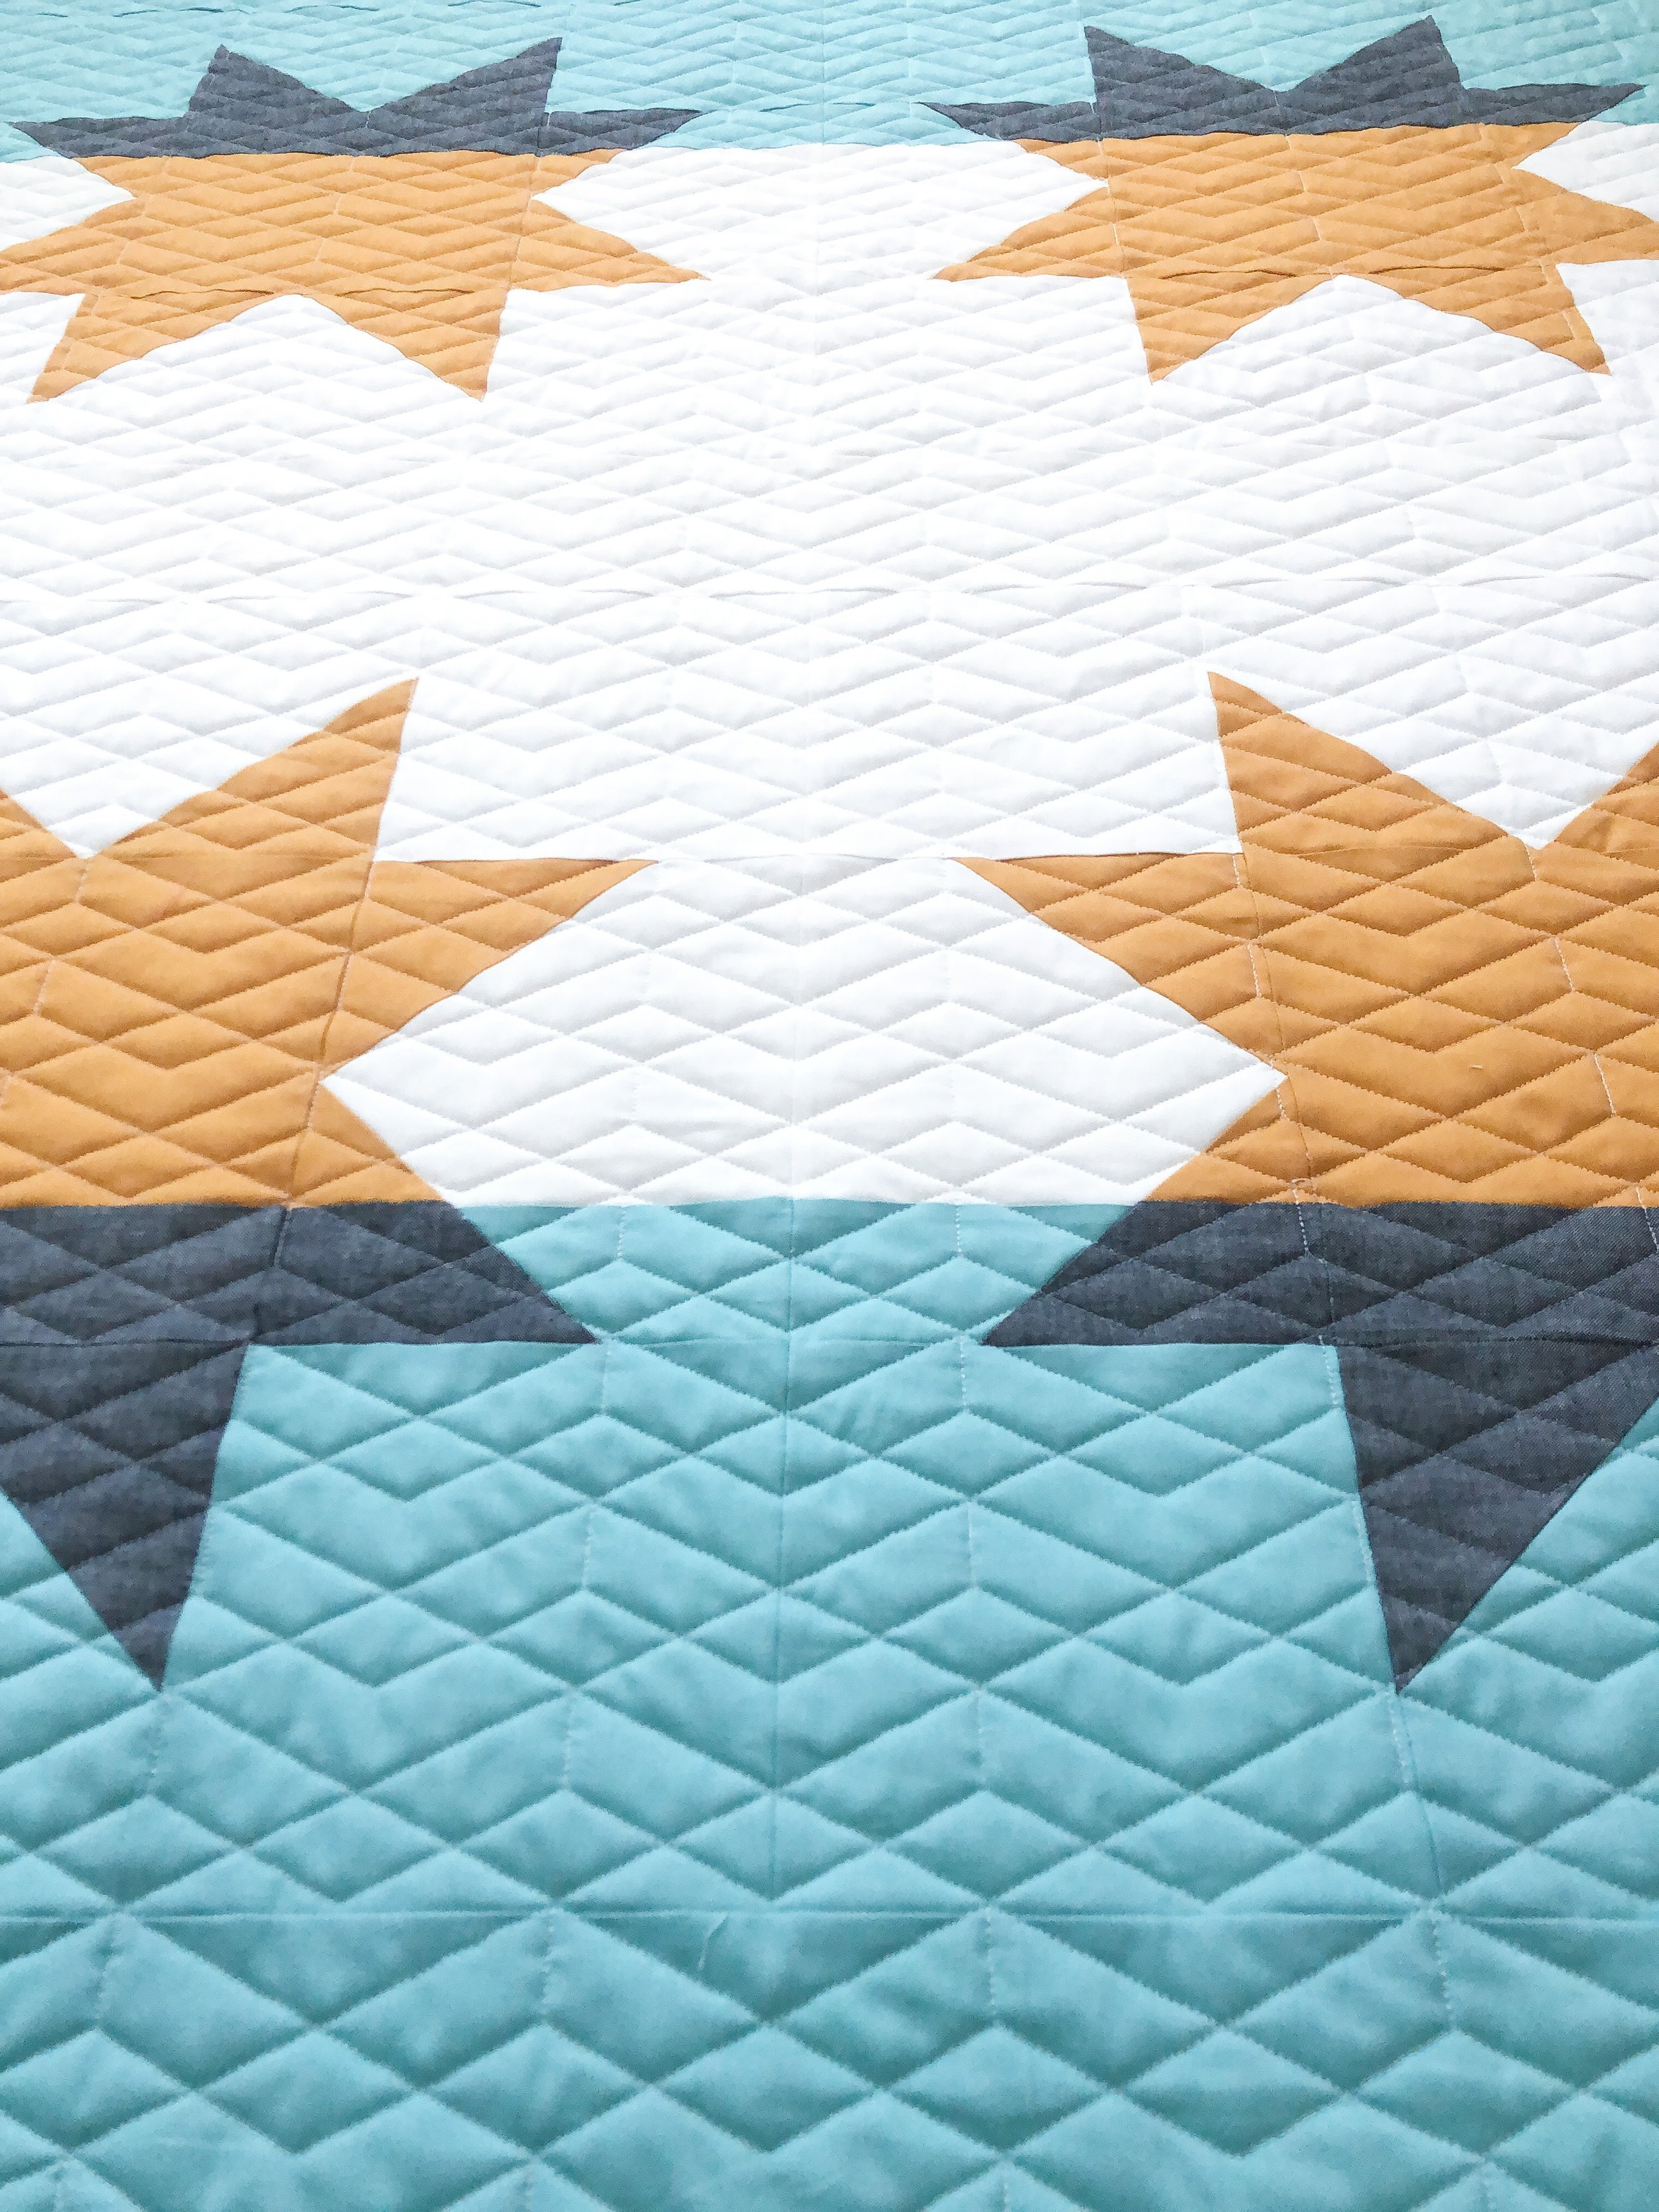
This design is called Steps, and I can’t believe its taken me this long to quilt it out. I designed it back in 2019. I can’t wait to use it again. It lined up great from row to row, even after advancing it.
Love this texture…it creates so many fun angles and shapes.

In this video, which I created a few years ago, I share some tips on lining up quilting designs after I advance a quilt to the next section. I actually do this with every single quilt that I quilt edge to edge, whether they rows touch or not. Let me know if you have any questions.

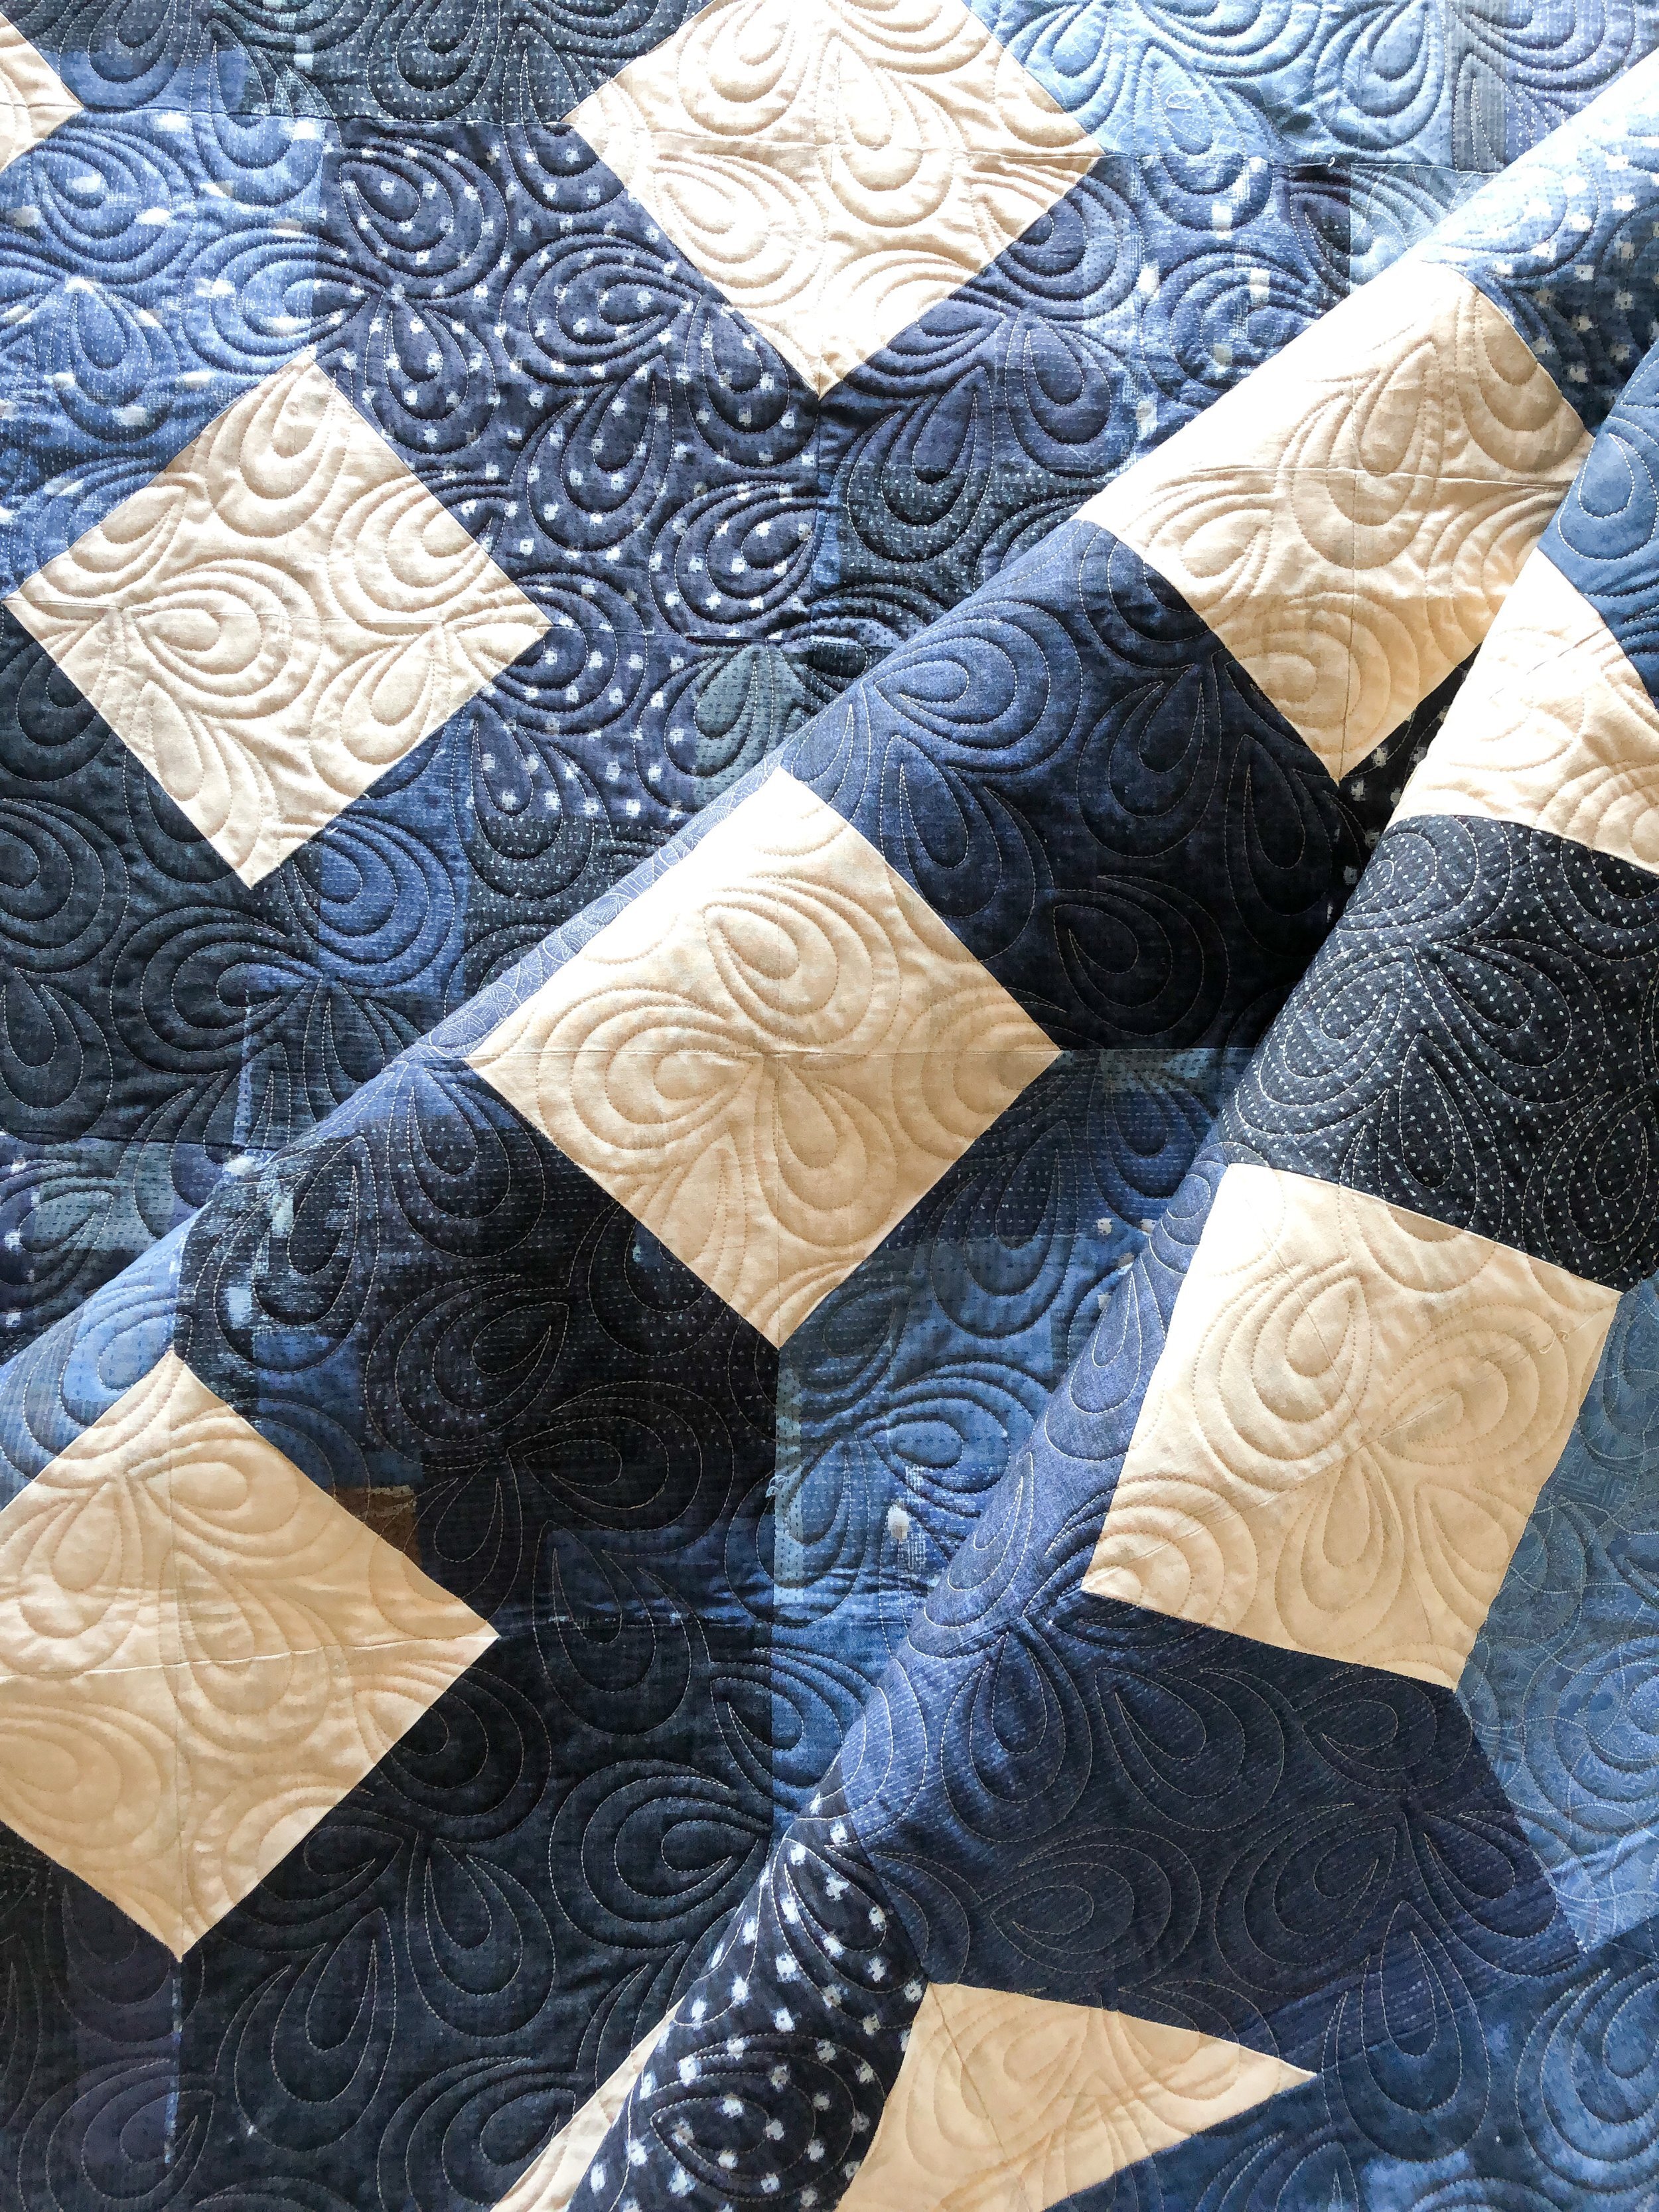
Last, but certainly not least…

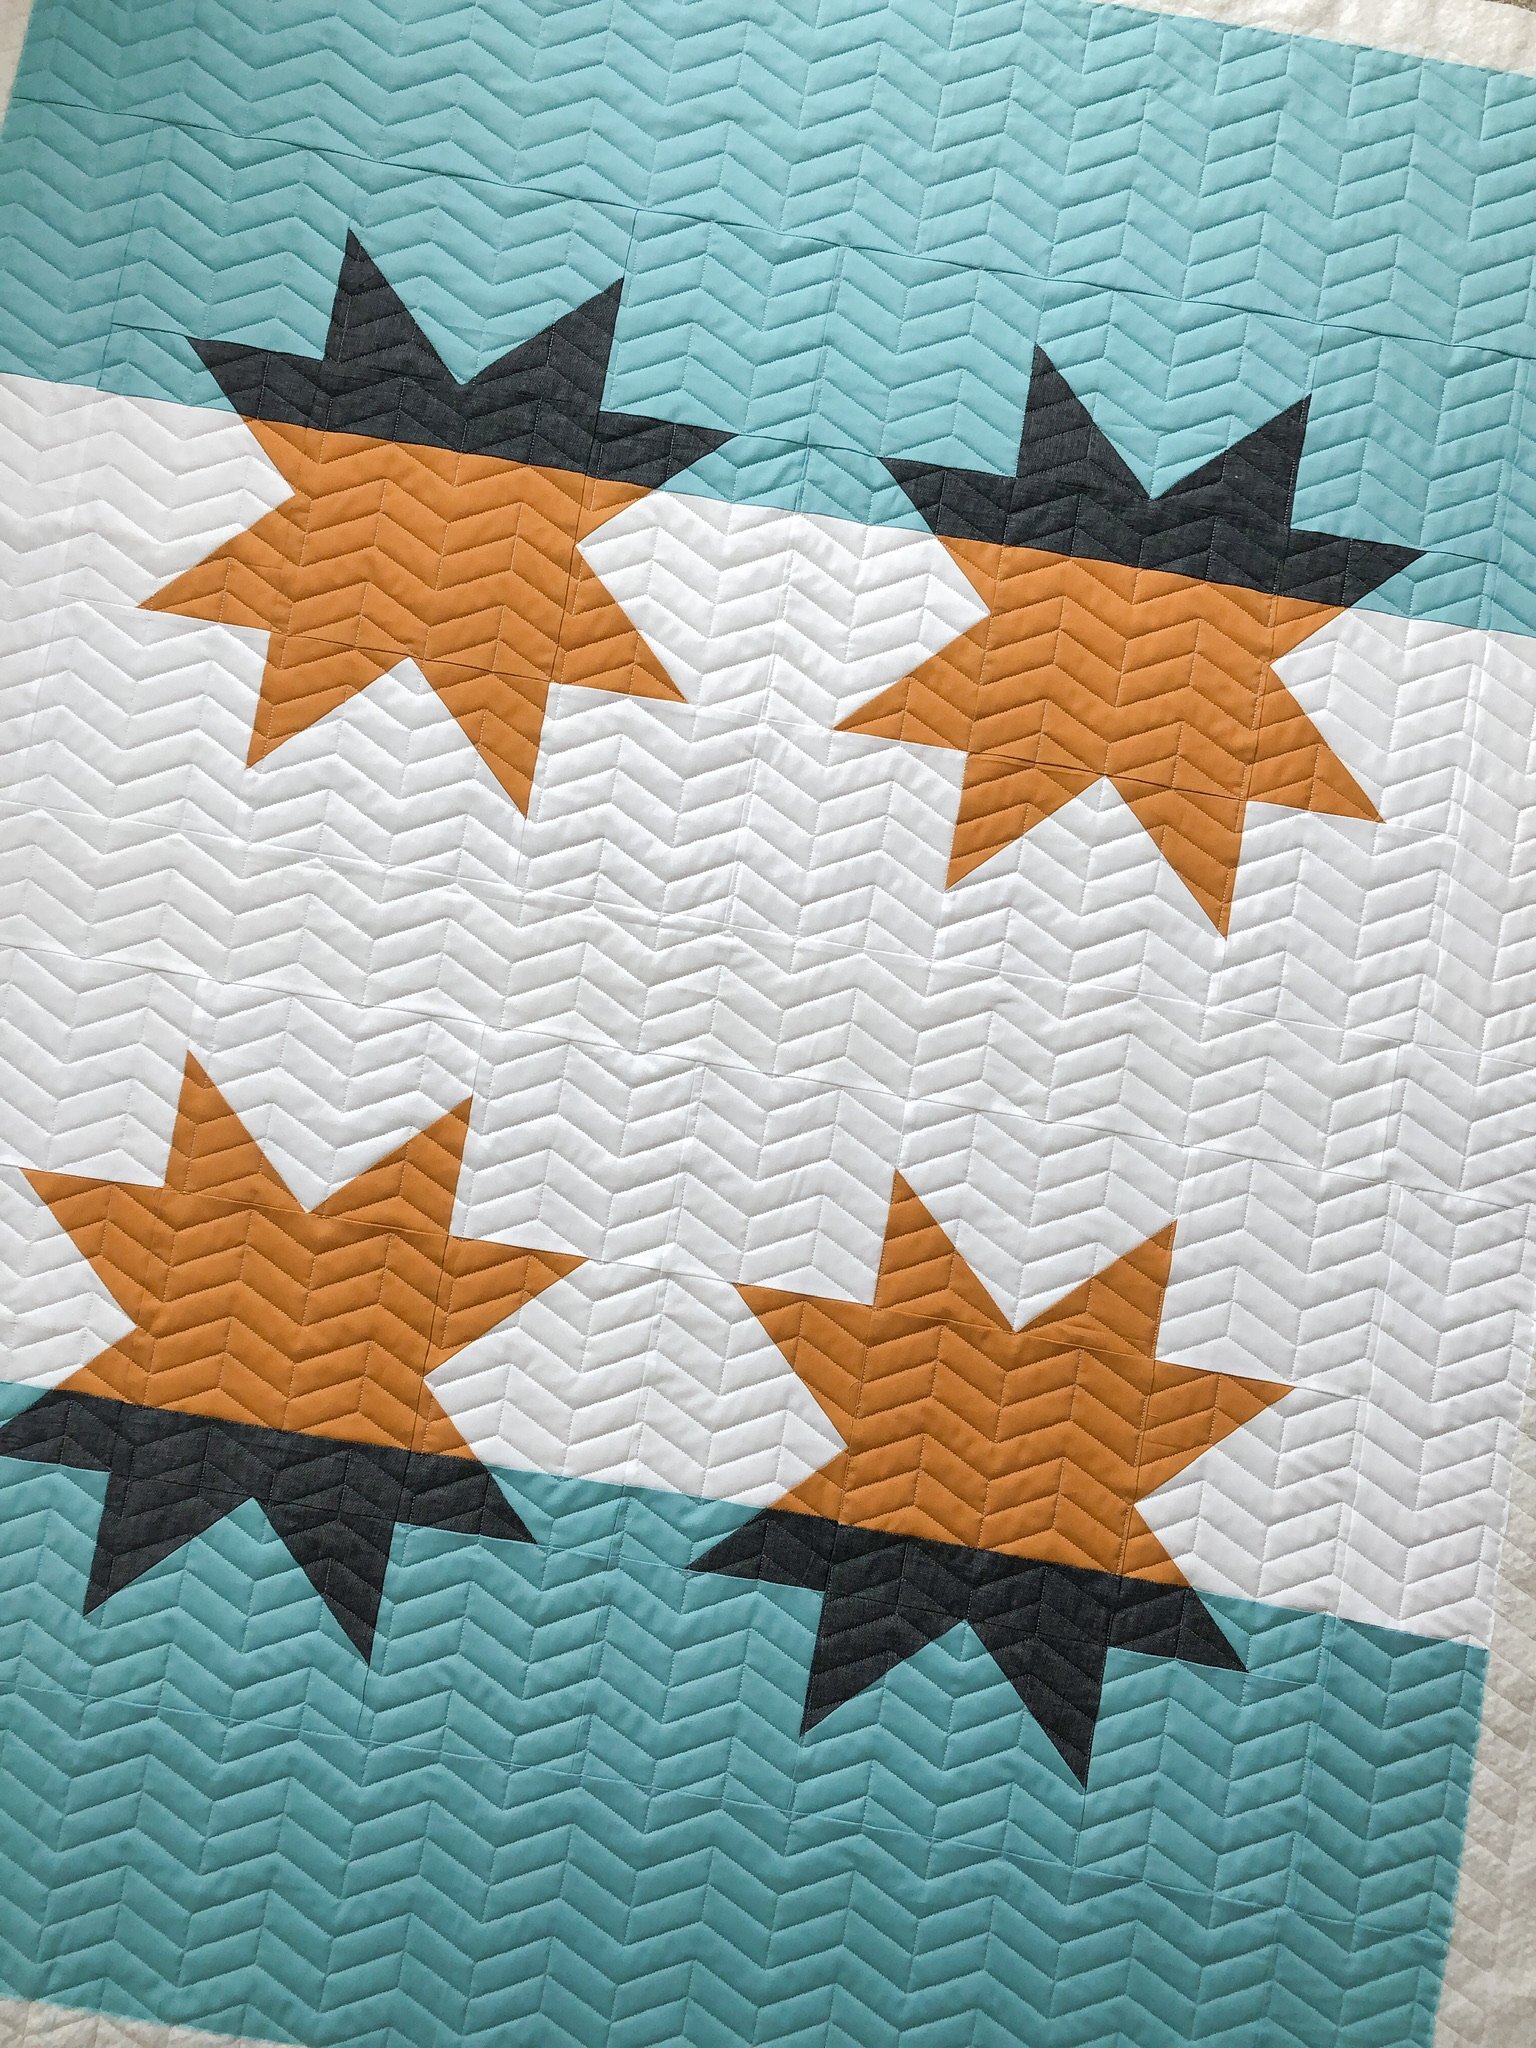
This quilt has a more minty bluish green color, instead of the blue used in the other quilts. The fabric color is a little darker in person, but you know…trying to brighten a photo it gets lighter and lighter.
Okay…here is a close up and angled picture. I have shared a similar picture…the one above…of all the quilts. If you look back, you can see the variety of different quilting designs in this same picture. Plus, I love a good closeup picture of a quilt block.
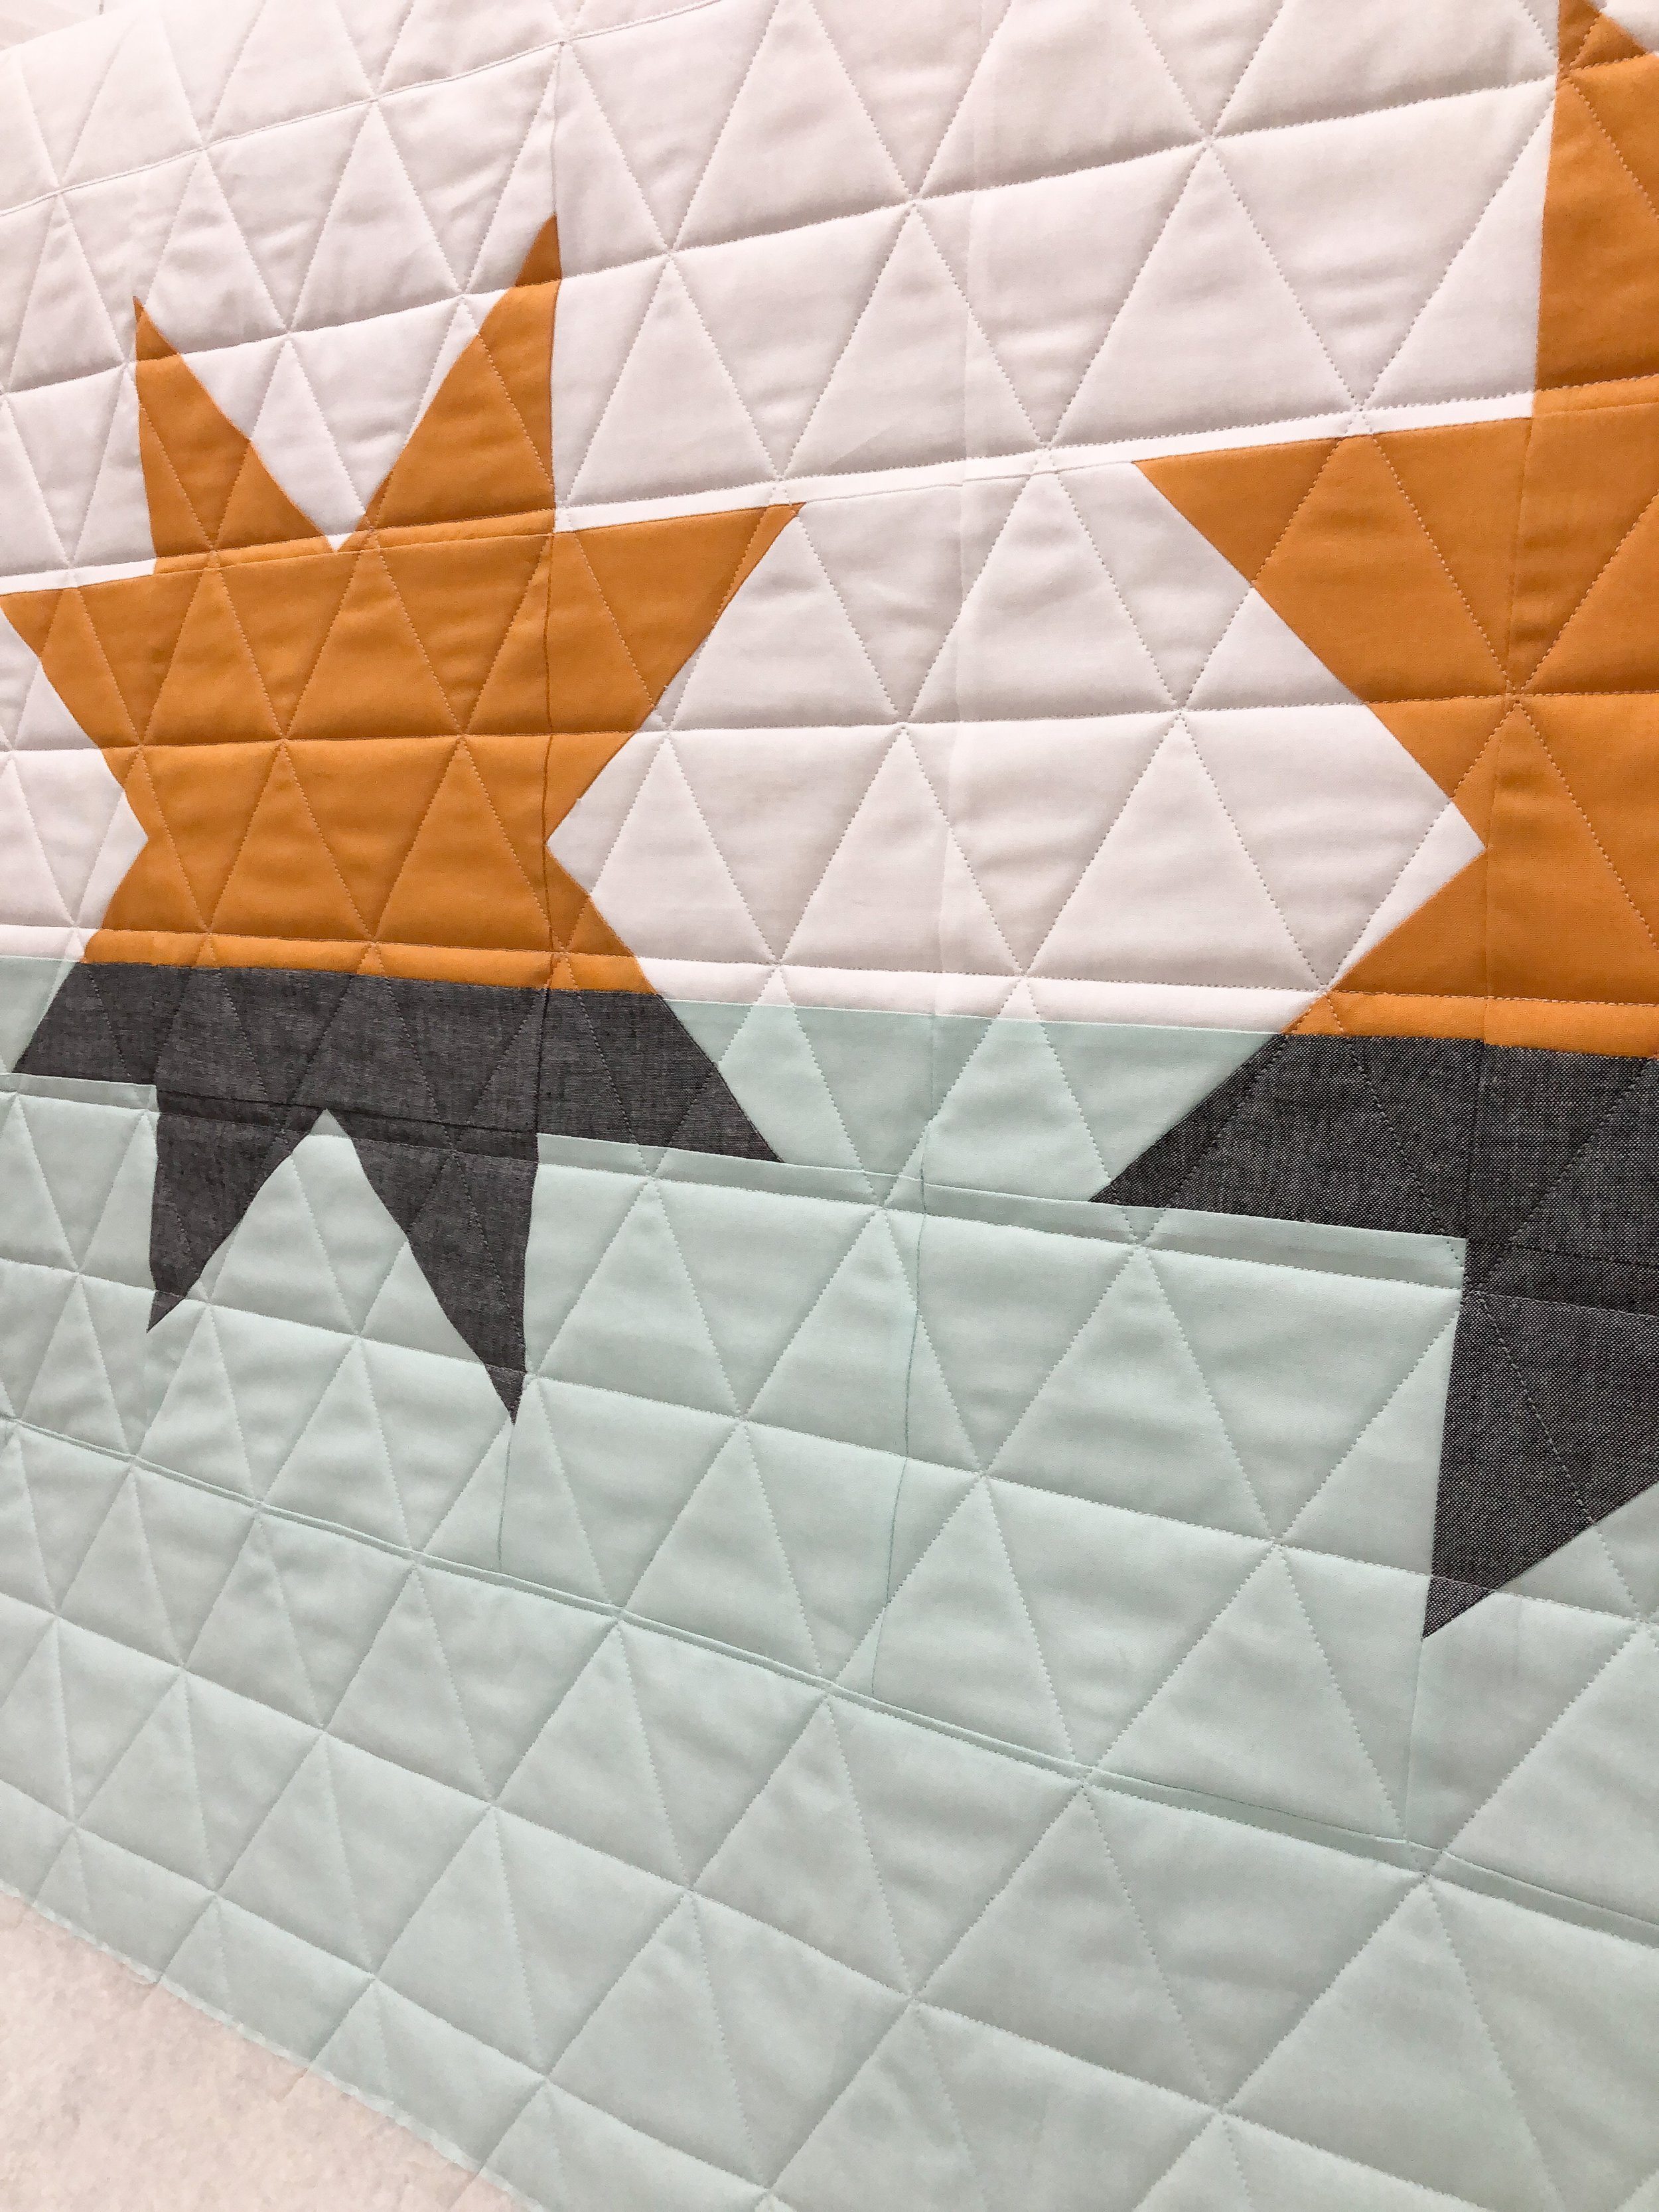
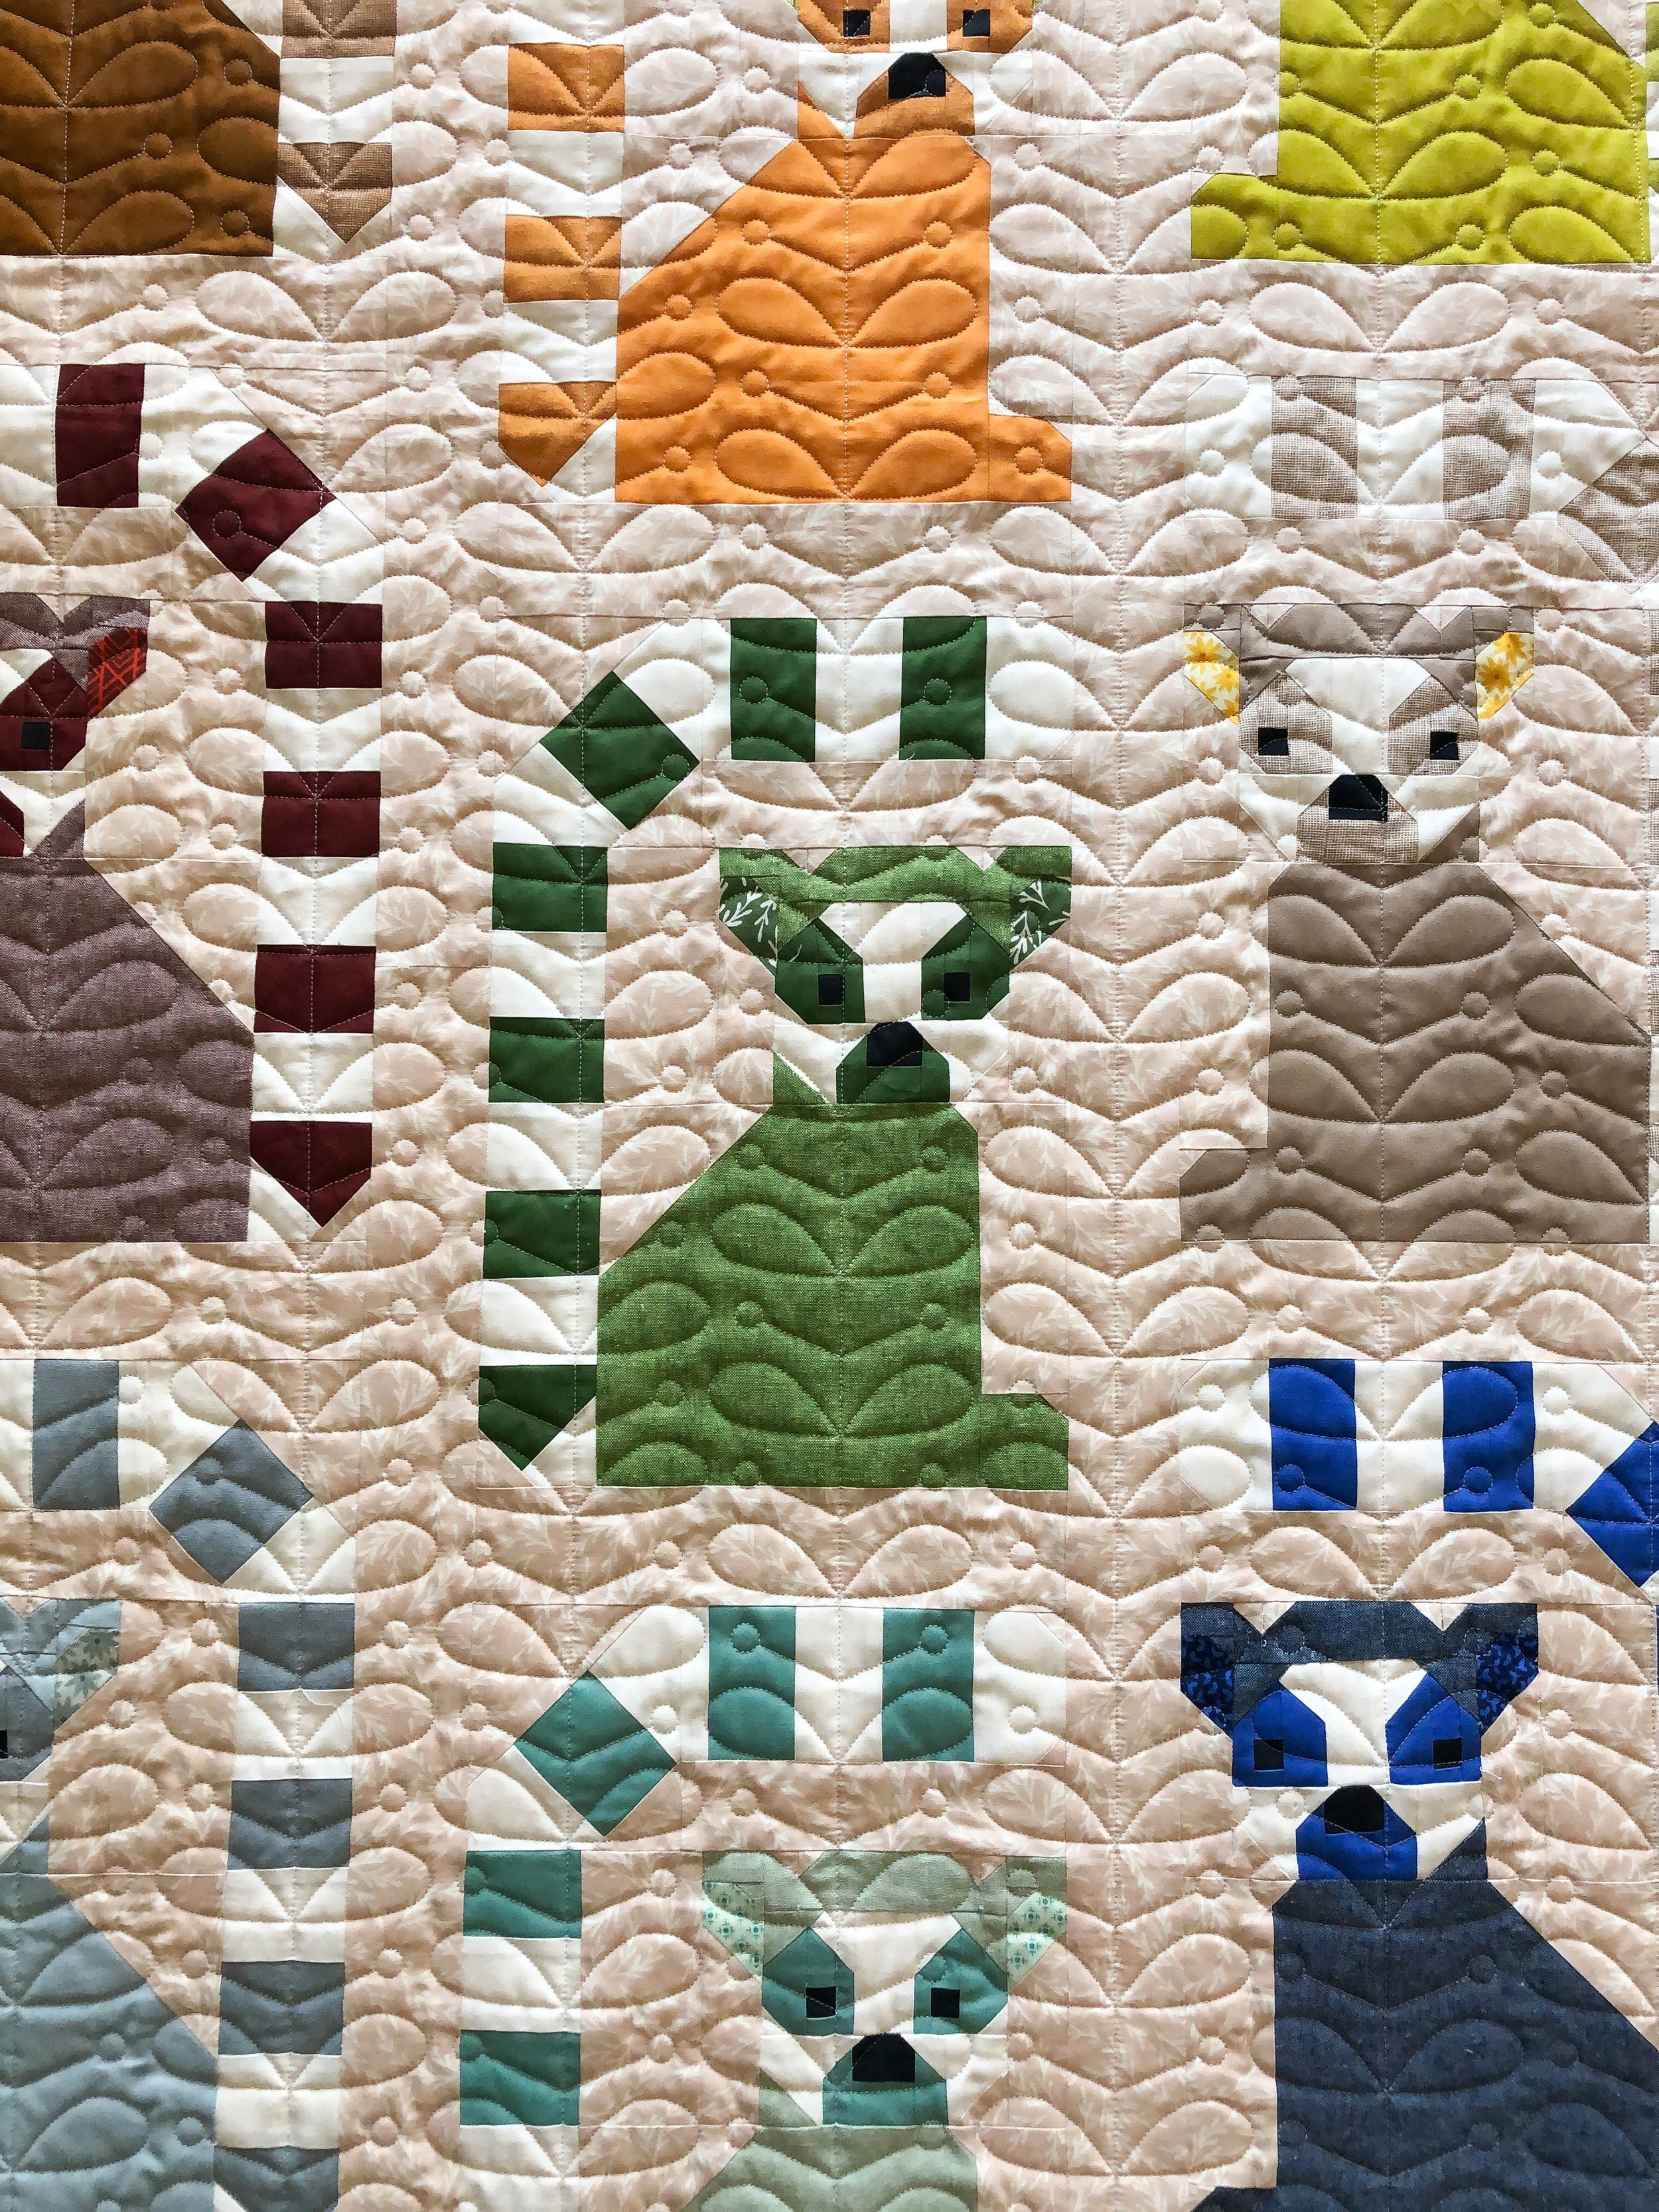
This is another one of my Domestic Stitches designs. This one is Domestic Stitches - Triangles. I quilted it at a 5.5” height, which is perfect to make this quilt cuddly. My friend Kaitlyn from Knot and Thread, just used it on her Lemur quilt and did it super small at 2.25” height. Which I want to try sometime! This design also lines up great!!

Here is a great look at the minty color of fabric!! love it!!

I also bound this one by machine myself…which I am not good at, but this time it turned out great!! I need to keep doing it to get better at it. I still prefer to hand bind my quilts…it’s my favorite part of the process, which may be because when I’m done, I’m DONE!! Hahaha!!

Thanks for stopping by!! I hope that you enjoyed looking at the same quilt, quilted in four different ways. Have a great week!! And, happy quilting. - Leisha
Lisa’s “After the Rain” quilt
Hi Friends,
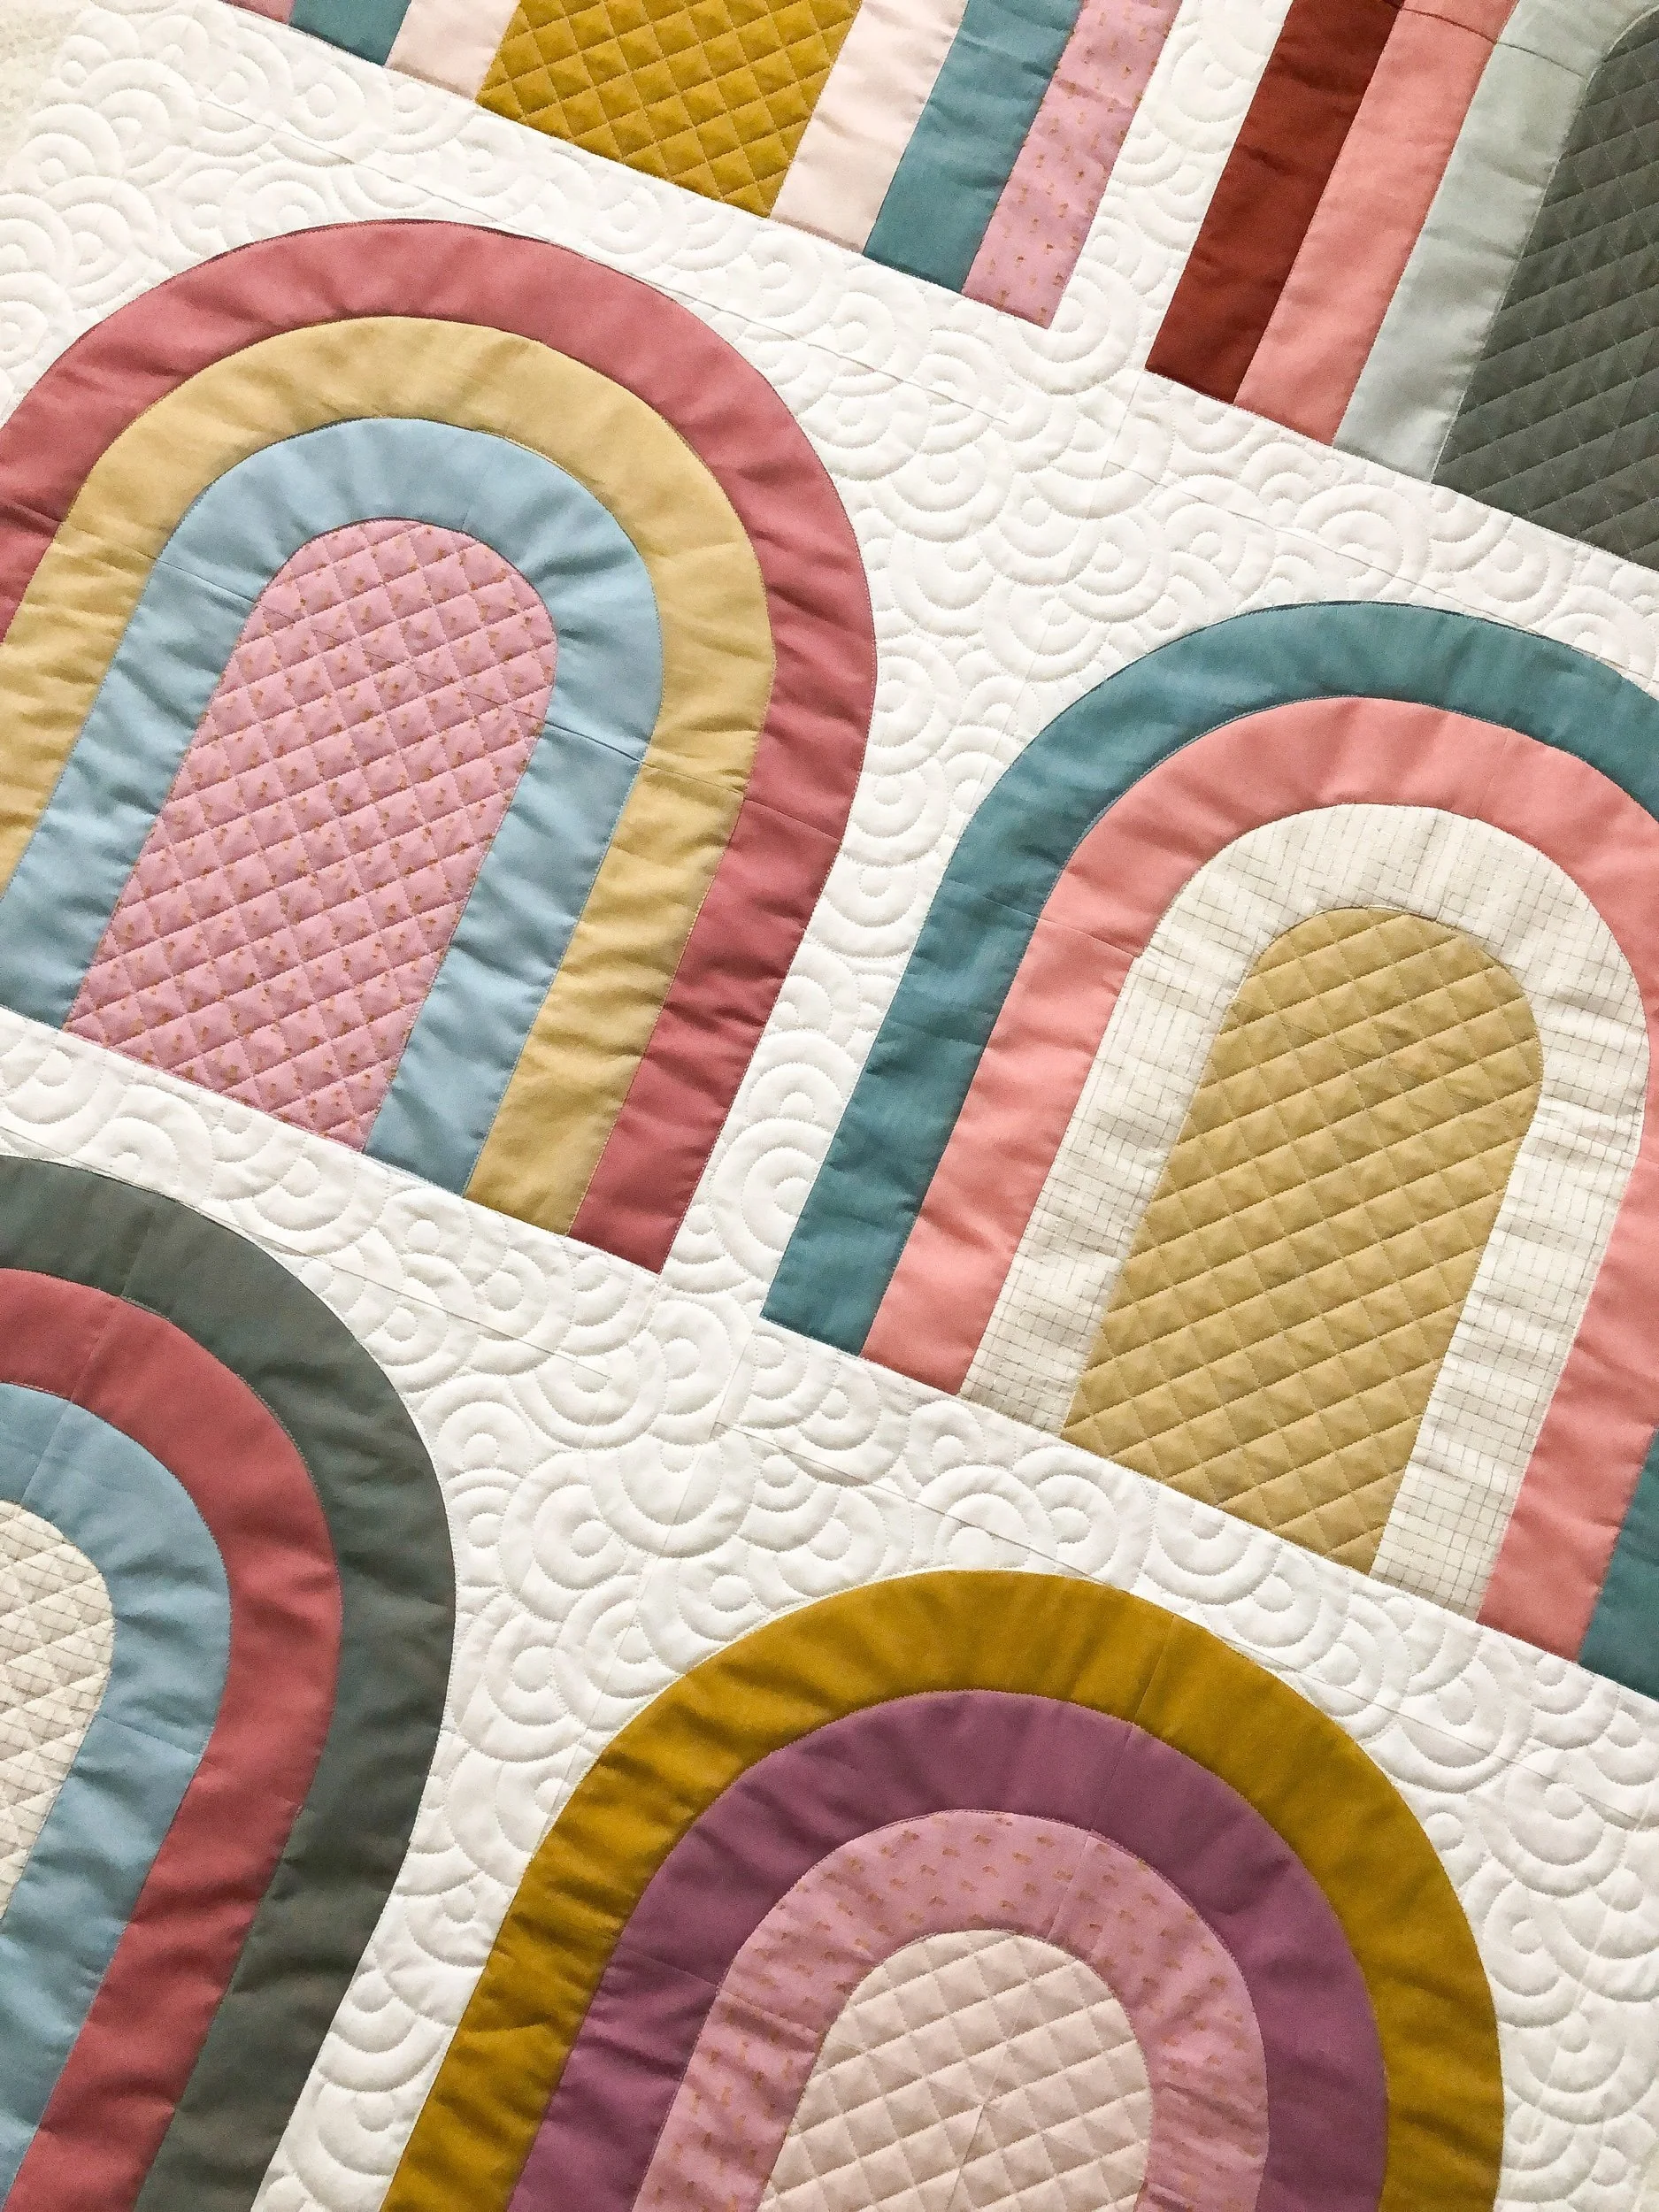
I’m excited to share with you Lisa’s After the Rain quilt! The pattern is by Elizabeth at Quilters Candy.
I love the colors that Lisa chose.
Lisa wanted some custom quilting just in the background, so we discussed my freehand Overlapping Circles design, and she agreed…which I’m grateful for. I’m mean, look how adorable all the mini rainbow’ish textures are behind the colorful rainbows. Love it!!! Lisa’s plan was to hand quilt the rainbows, however just to help them stand out a little, I quilted in the ditch on stripe…but then I felt line the very center needed something more. So, I suggested cross hatching and she loved that idea. Yay, again…I love it!! Just the right texture.
If you’re thinking about starting freemotion quilting, check out my Quilting It • Freemotion™ video course. My Overlapping Circles designs is one of the 10 designs that I have available, you can pick and choose whichever designs you’d like to learn. The videos are available in my shop.

Here is a short video of me quilting the Overlapping Circles on my Vimeo channel.
(If you’re reading this from an email, click this link if you don’t see the video below.) https://vimeo.com/672146793
After Lisa finished hand quilting, she sent me a bunch of pictures so you could also see the beautiful quilt finished.

As you can see, Lisa did a simple dash stitch in each of the stripes.

I used the natural white Omni thread from Superior Threads and I used my favorite cotton poly blend batting from Winline Textiles.

If you’re interested in having me quilt for you, please contact me or email me at quiltingit@gmail.com.
For more information about my quilting, go to my Longarm Quilting Services page. Thank you for reading!! Happy sewing!
• Leisha
Sherry’s “Lana Lemur” Quilt
Hi Friends,
I hope that your week is off to a great start!! I have a fun quilt to share with you, that I quilted last fall.

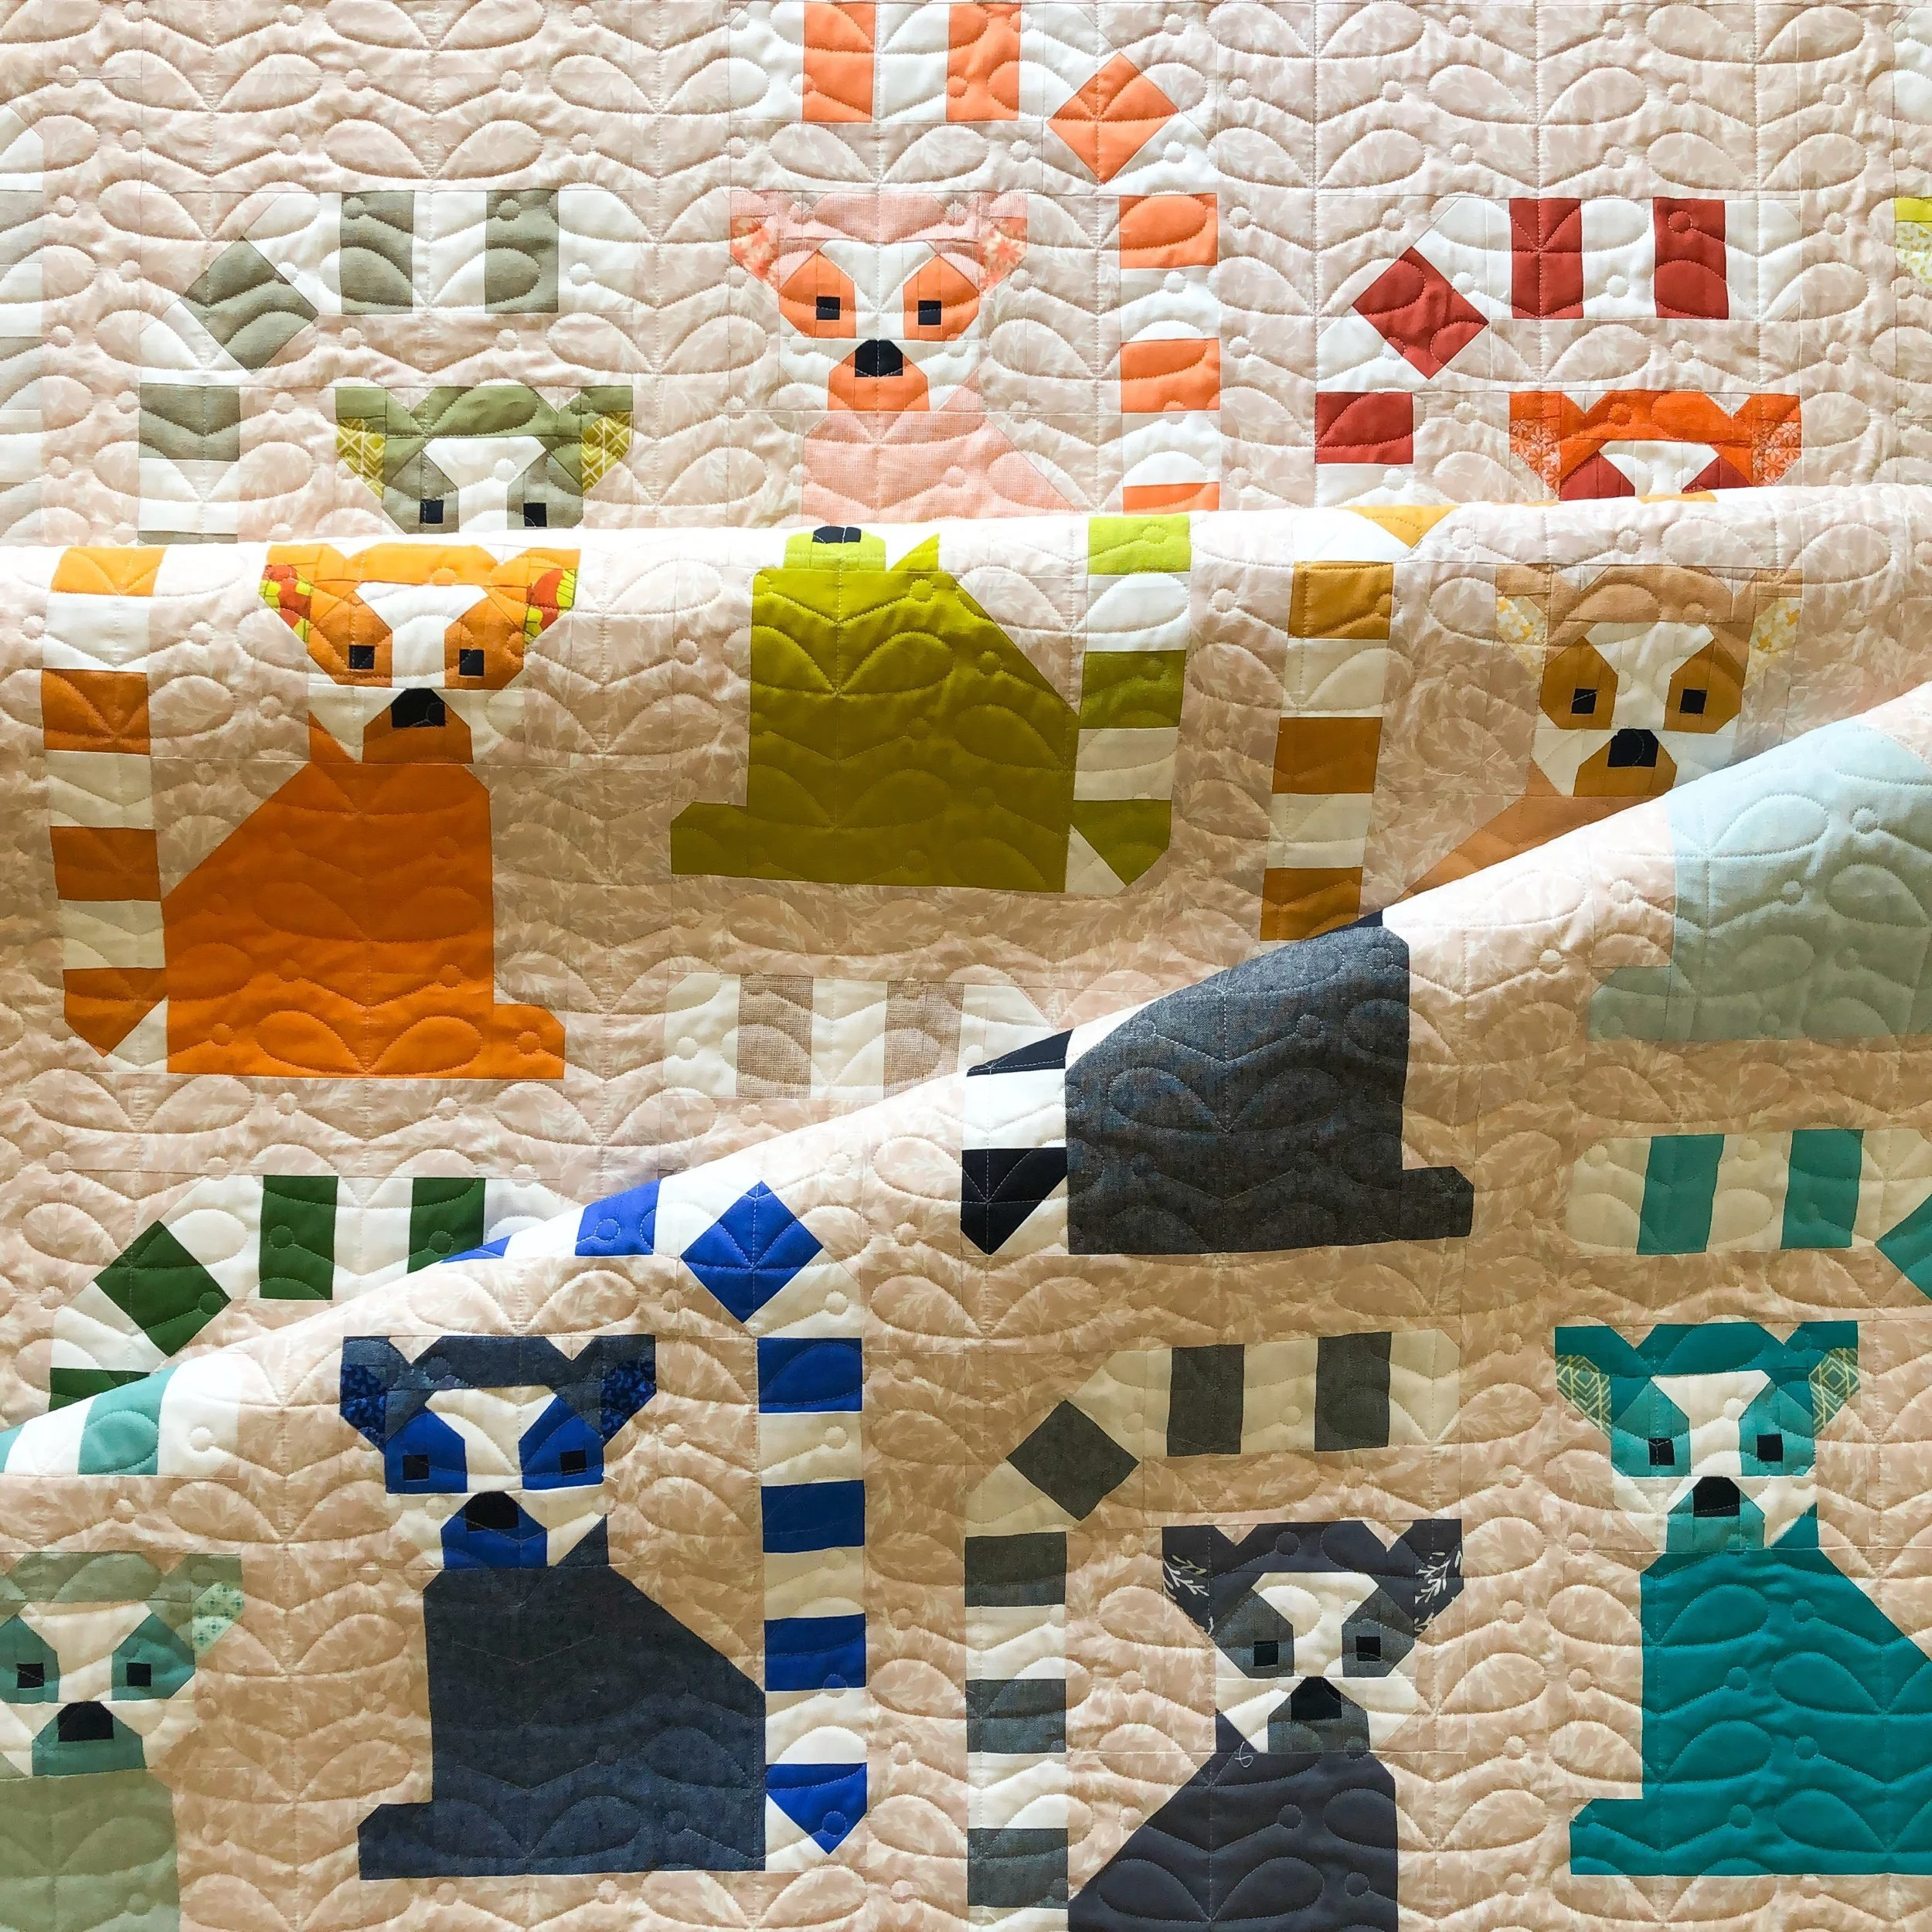
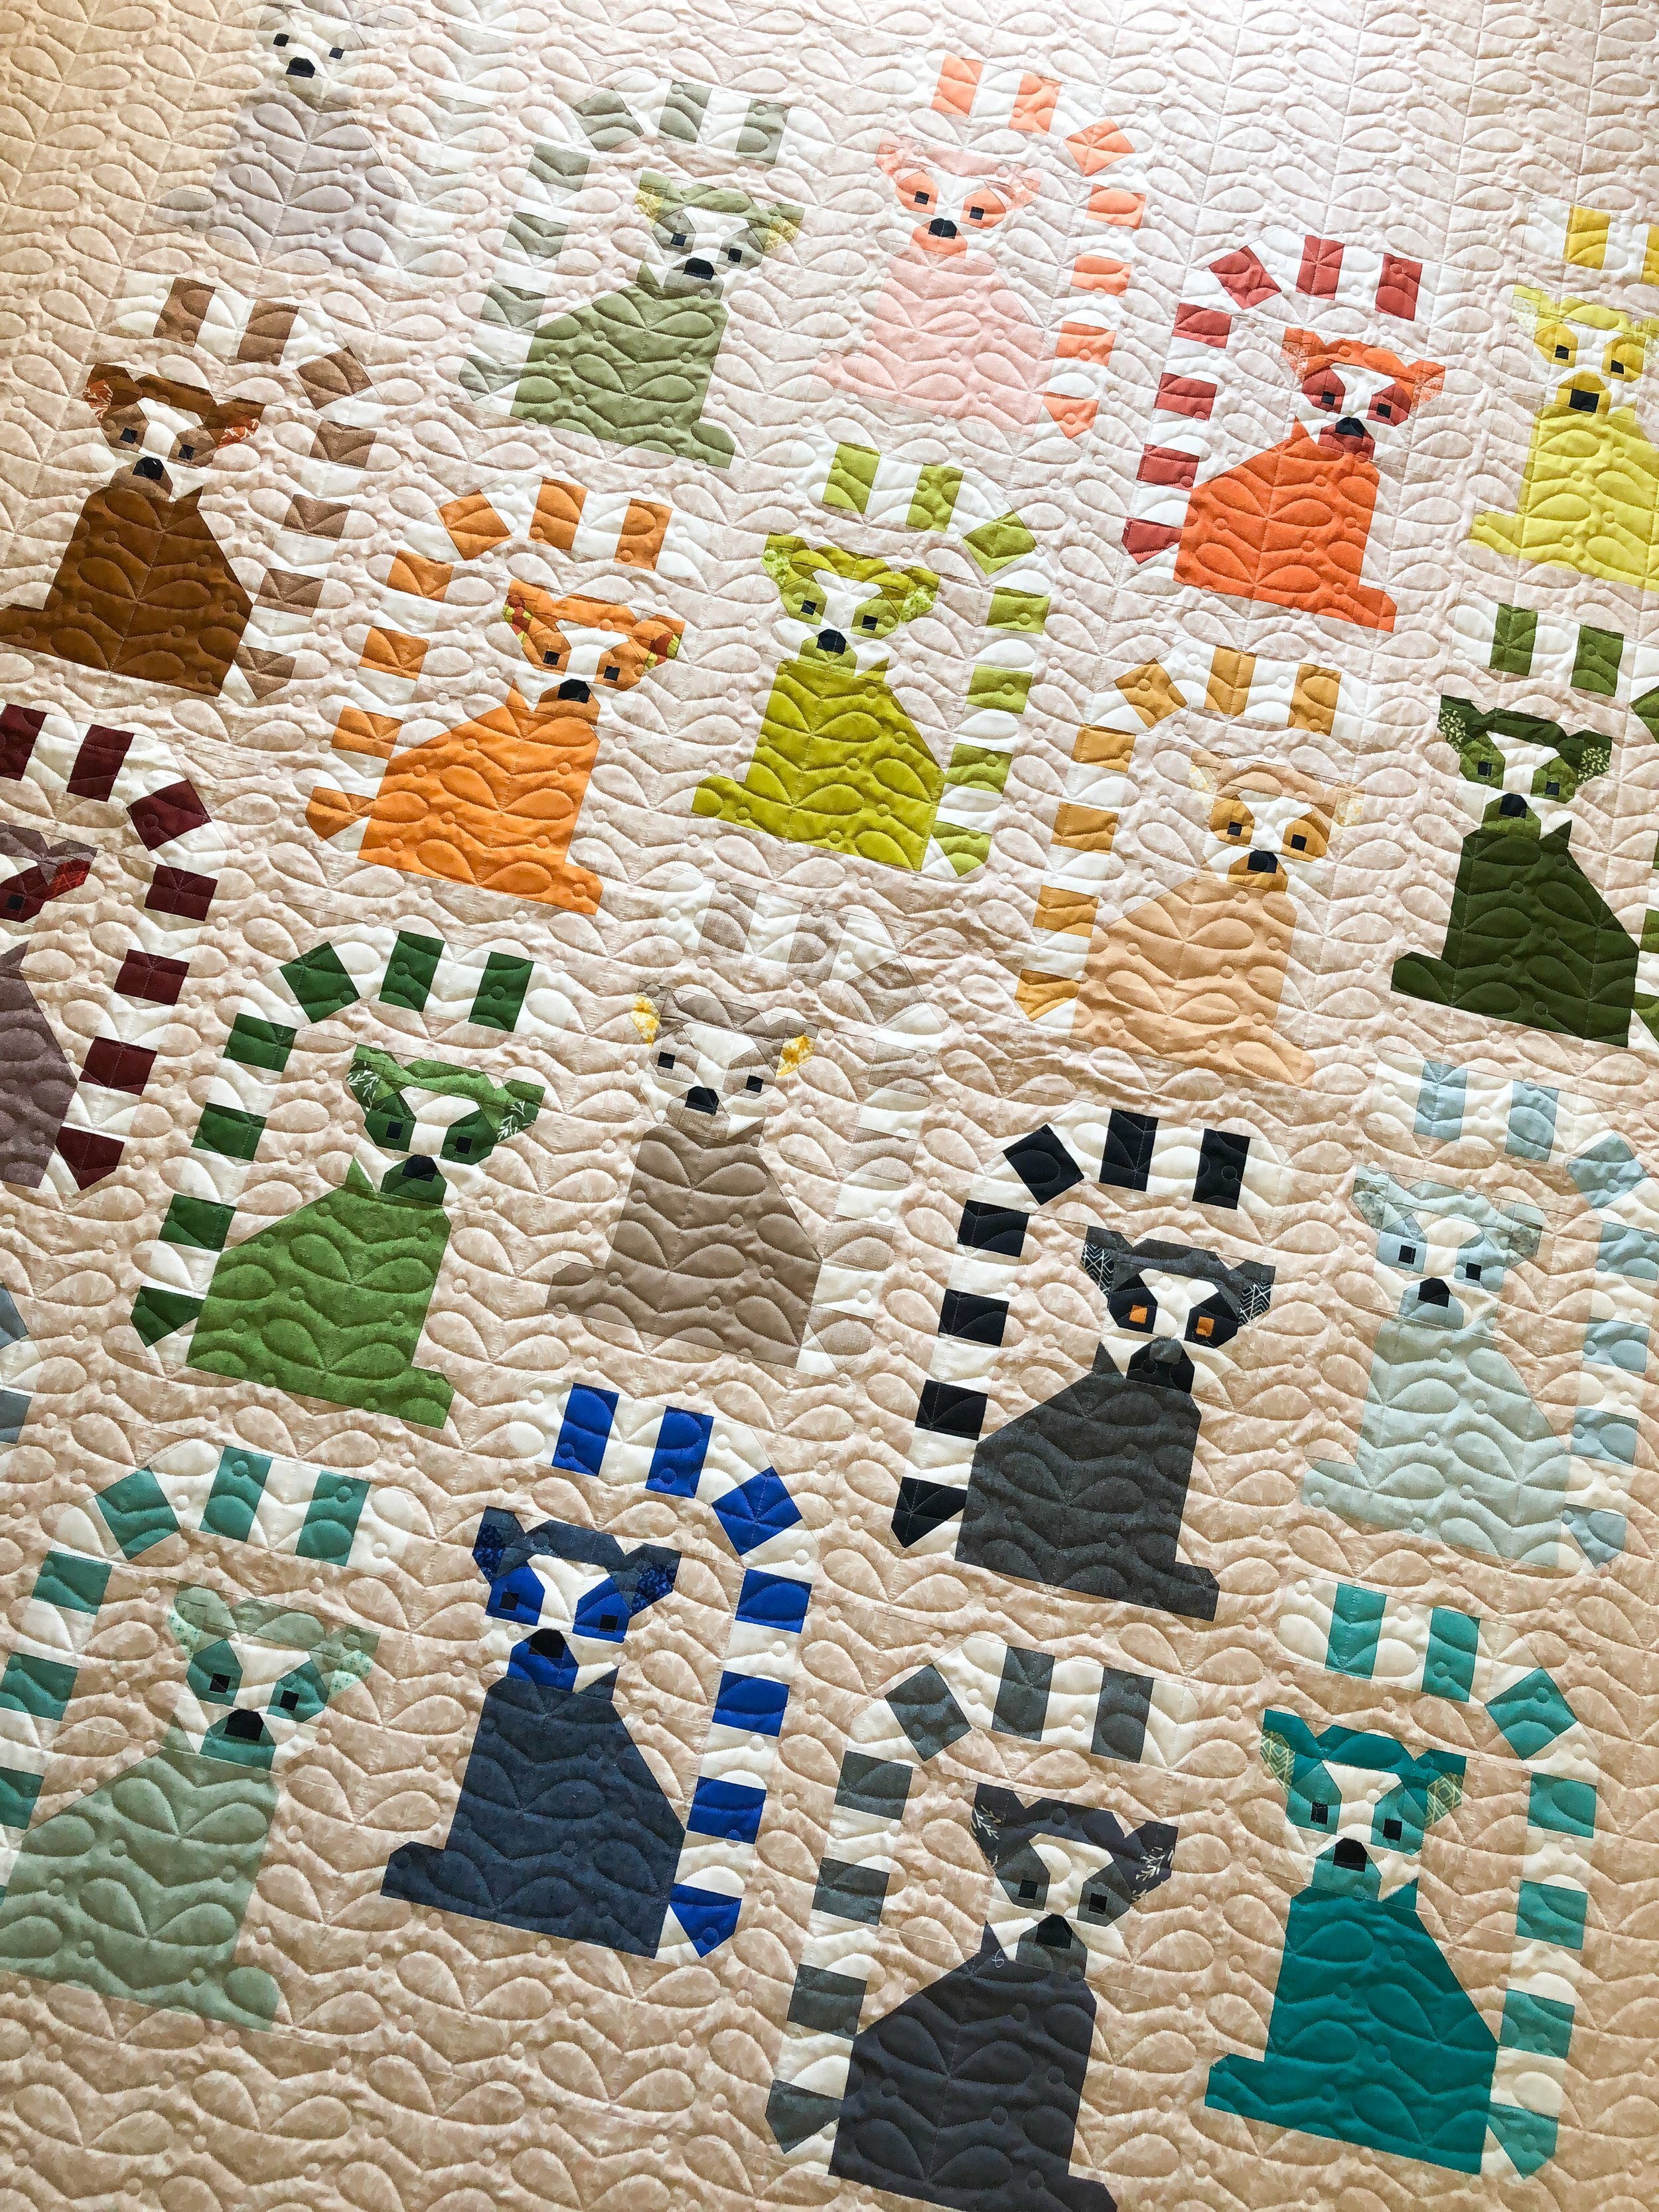
Sherry made this fun Lana Lemur for her lucky granddaughter!! The pattern is by Elizabeth Hartman. Have you made this quilt before?
I used a natural white Omni thread from Superior Threads and my favorite 8020 cotton poly blend batting from Winline Textiles.

Sherry let me choose the design, and so I chose Pyrex Stems by Julie Hirt for the quilting design. It’s a design that quilts out lengthwise…meaning to get the design to look vertical on the quilt, the quilt must be turned sideways and also notice the direction of your quilt, so the design is in the right direction. I also offset the design. I love the look of the texture.
The background fabric is so sweet!! I’m not sure who the fabric designer is, sorry!

It’s fun that the lemurs are all solid fabrics, except for inside the ears, and those striped tails are the cutest.

Do you have some quilts that you need to get quilted? I would love to help you with that!! Send me an email at quiltingit@gmail.com and don’t forget to check out more quilting info on my Longarm Quilting Services page.

I haven’t blogged about my newest Domestic Stitches quilting designs…at least I don’t think I have.
I quilted this fun modern baby quilt that my mom made with my new Domestic Stitches Triangles quilting design. It’s one of nine designs that are part of my Domestic Stitches designs. They are inspired by the quilting that many domestic quilters quilt on the sewing machines. Go to my shop, to check out the other eight designs. Or you can get the bundle of all 9 designs for a discount. I’ve quilted out Domestic Stitches Squared on another one of these Star Shadow quilts. (I’ll share after I get pictures.) The pattern is by Krystina Hopkins and was in the Modern Patchwork’s Sept/Oct 2018 issue.

Thanks for stopping by!! I hope that you have a wonderful week and get to sew or quilt!!
-Leisha
Beth’s Wax Lyrical Quilt
Hi there Friends,
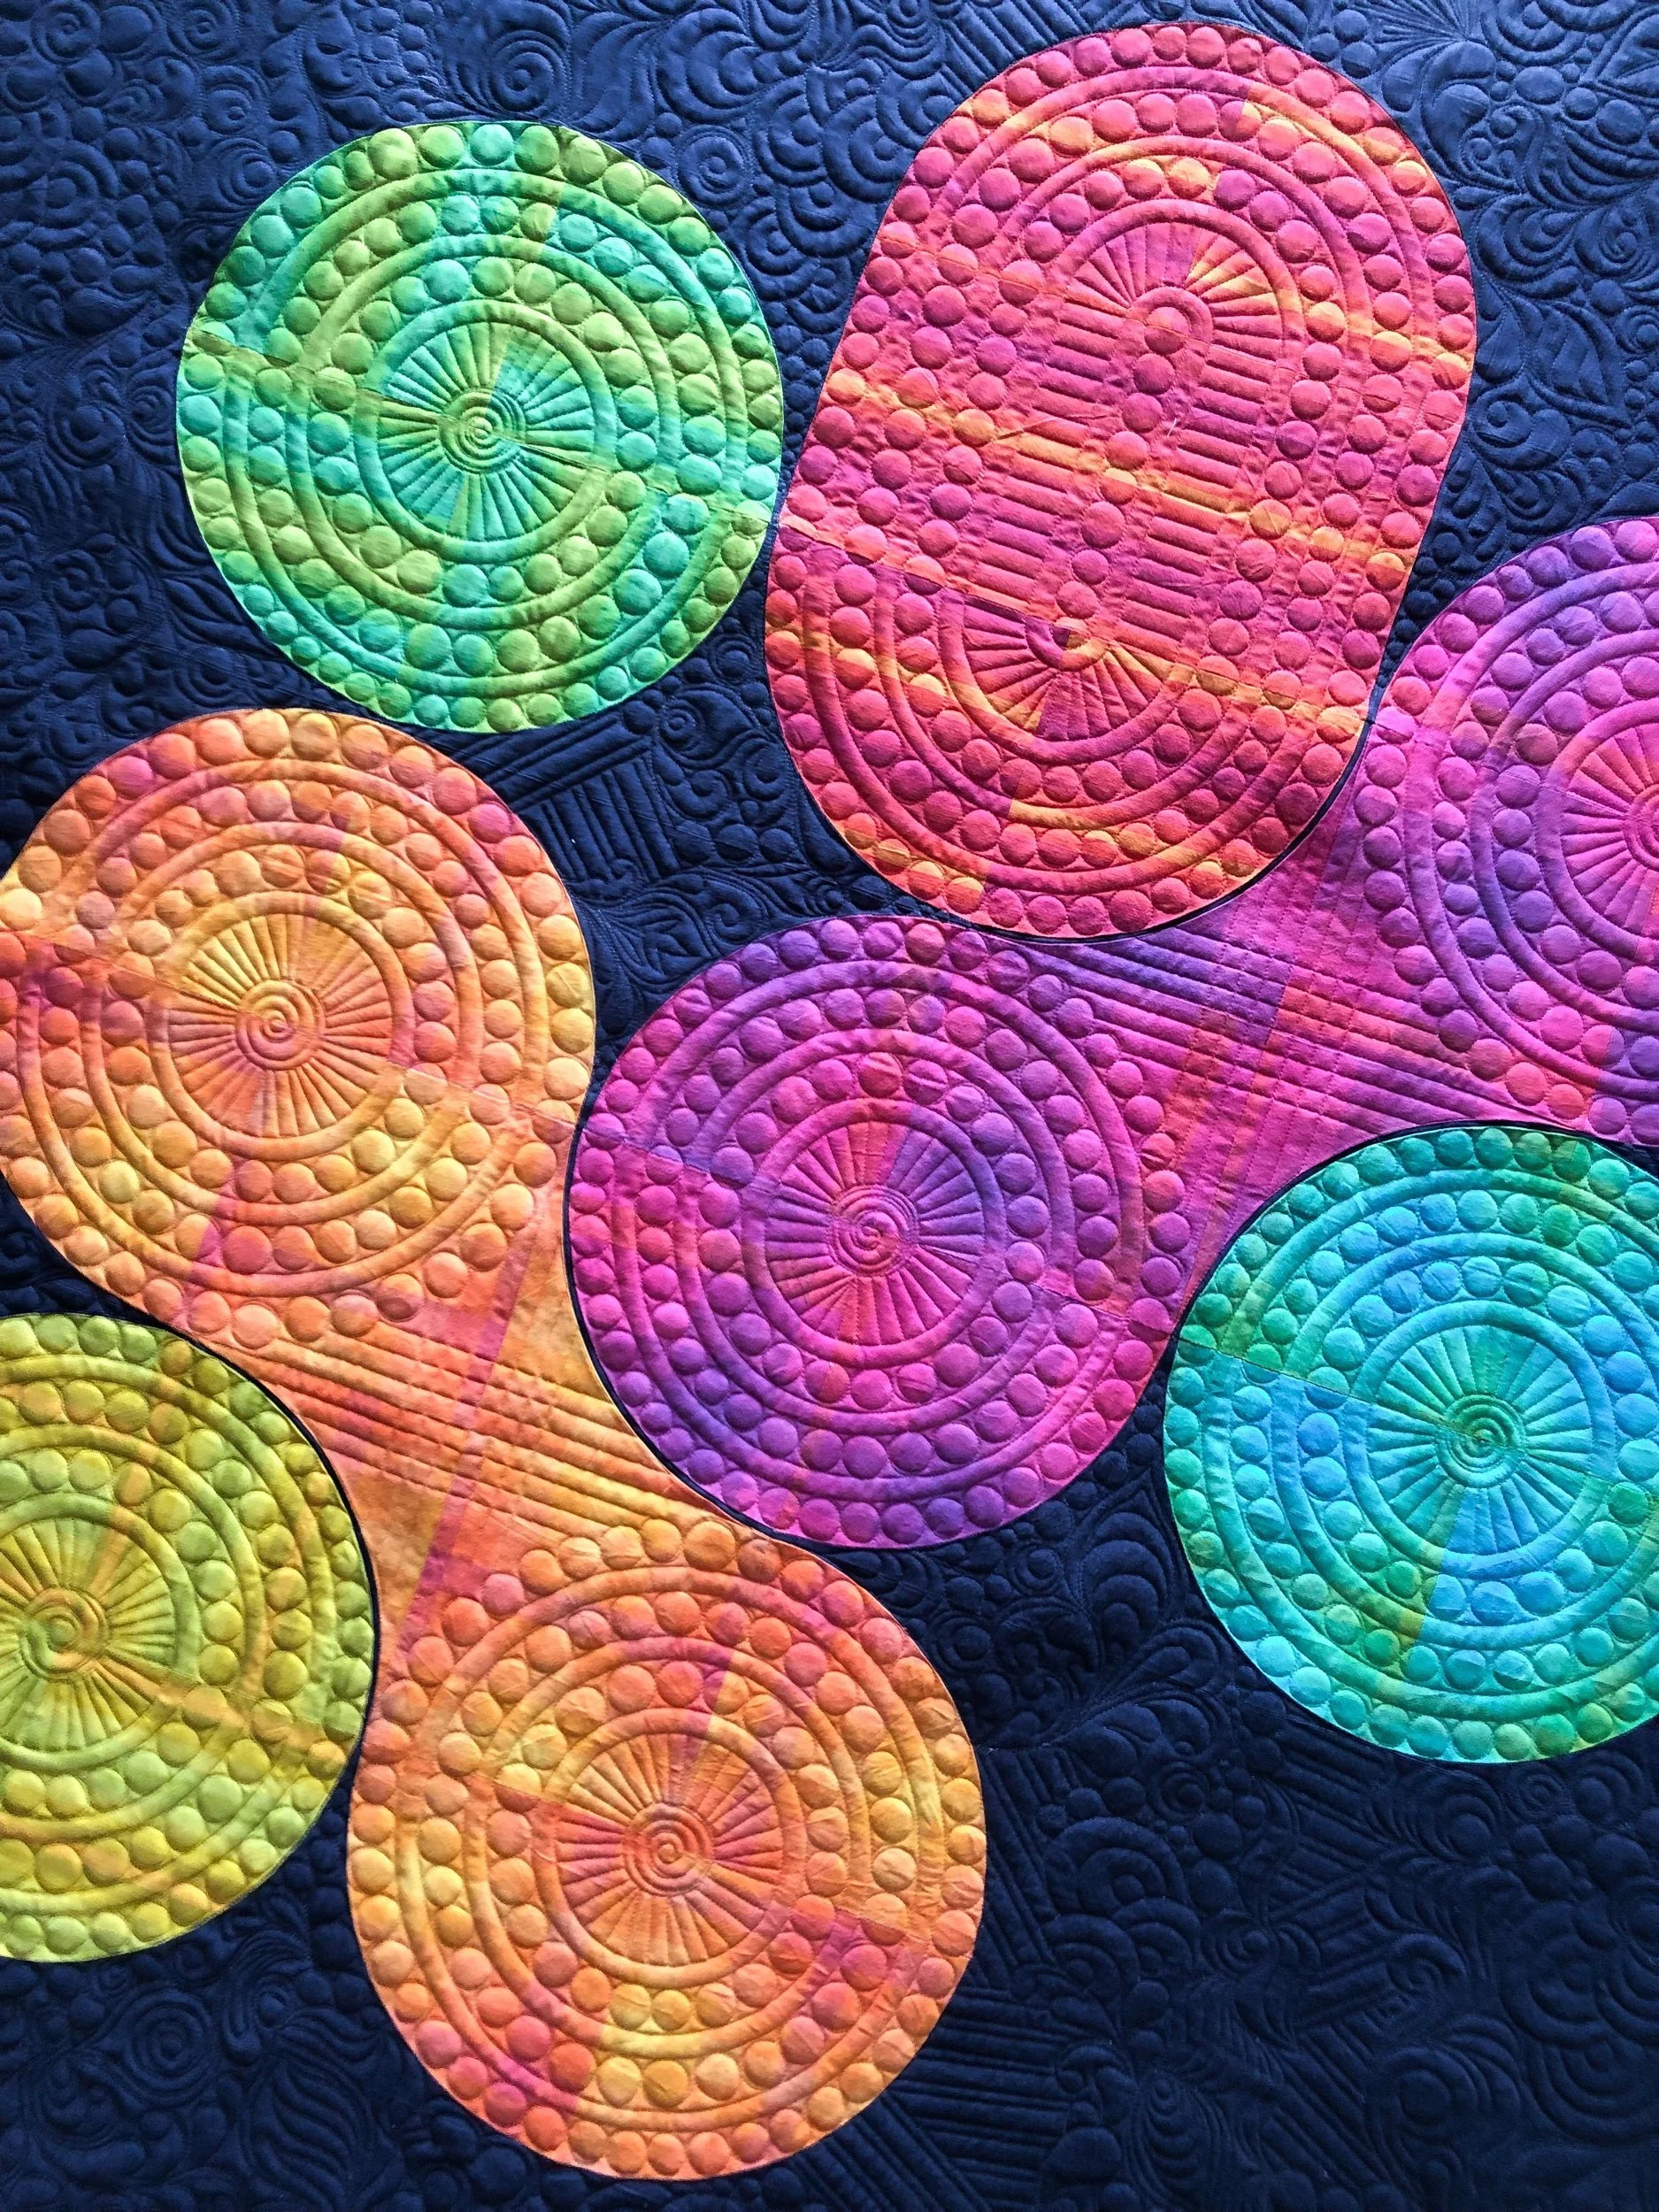
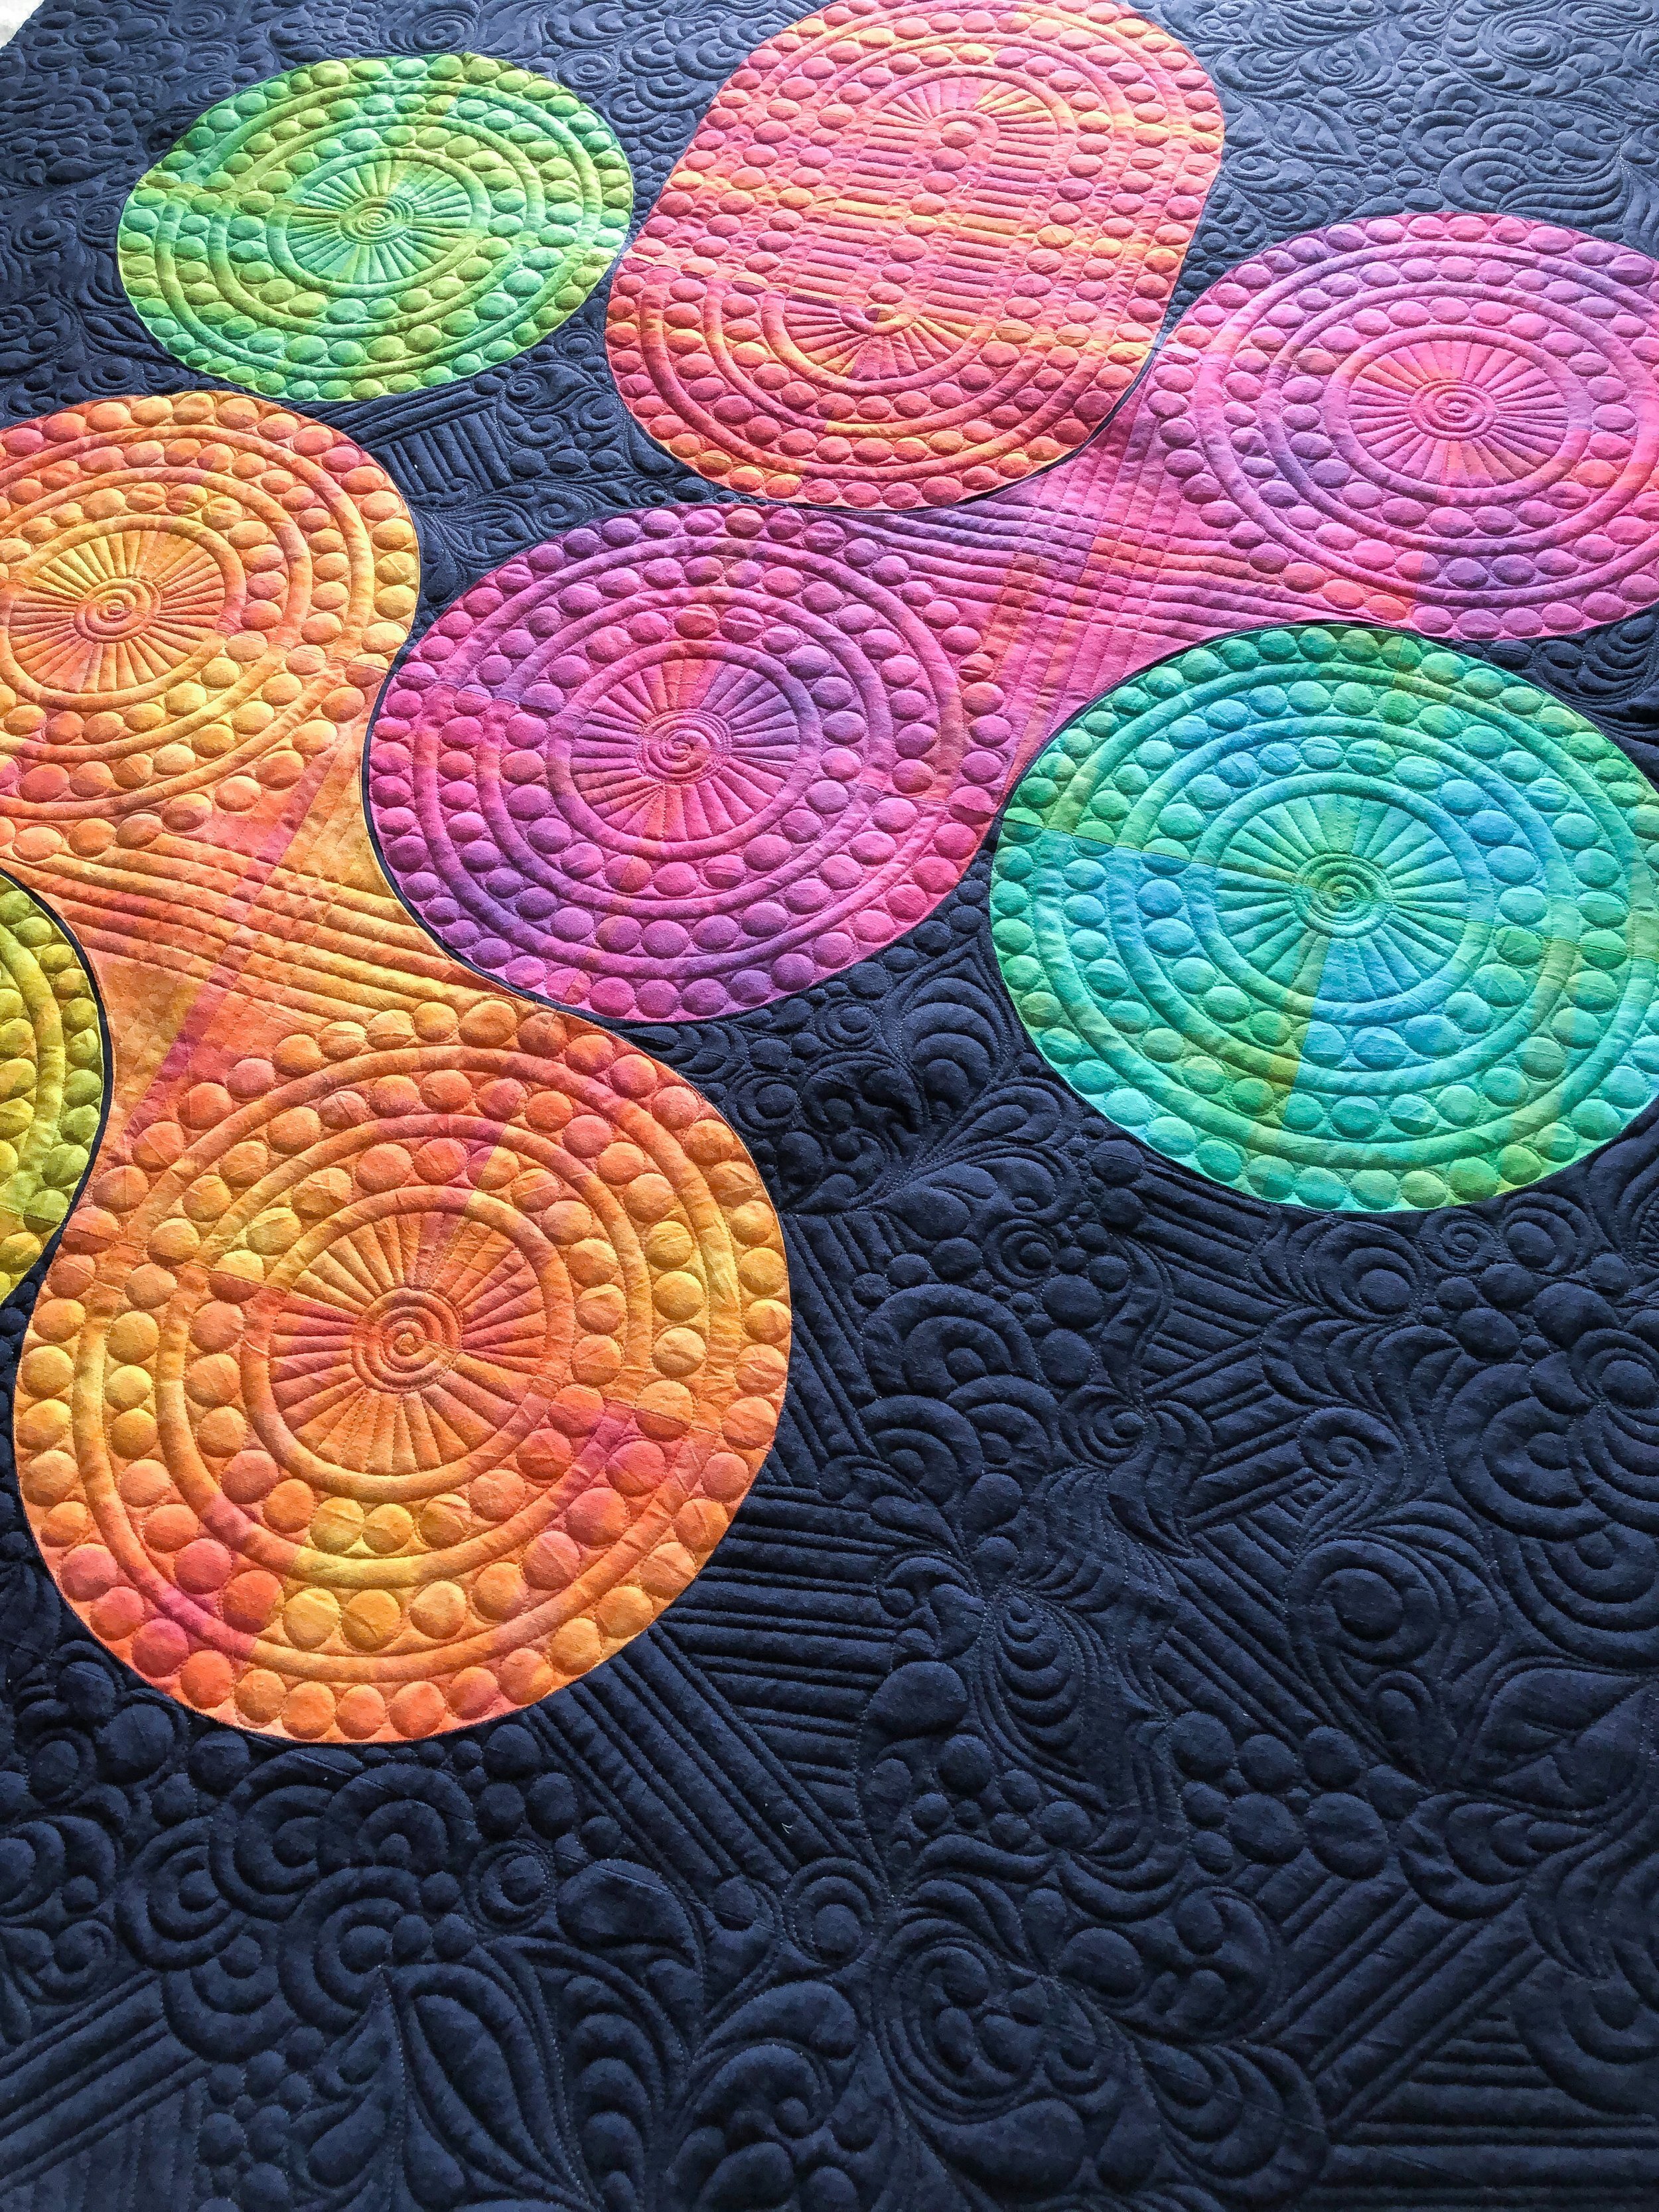
I’m so excited to share with you this amazing Wax Lyrical quilt that Beth made in an online workshop with Jenny Haynes of @pappersaxsten - whose pattern it is. It’s amazing, huh?!?!? The wovens are from Alison Glass’ Kaleidoscope line. If you have been following along on my instagram, then you’ve probably seen the four videos (reels) that I shared about this quilt. Two of them were of me freehand quilting the graffiti background. If you haven’t seen them, go check them out!! @leishakaye (the reels were posted on Jan 18th and 19th.)

My good friend Katie, and fellow longarm quilter from Modern Textiles, sent Beth my way…and I couldn’t be more thrilled with the opportunity to quilt this quilt for Beth. Beth sent me this picture above and asked what I thought about custom quilting this for her. It’s always wonderful to see what your quilts look like beforehand. She asked if I could do graffiti quilting in the background, and do something different in the circles, to help them stand out. She also sent me a few inspiration pictures. When she asked about graffiti quilting, I sent her a picture of the “I will cut you” scissor quilt that I quilted for Laser Cut Quilts, a few years back. I asked what she thought about this type of graffiti quilting, and she loved it!!

For more info on the “I will cut you” quilt, refer to this blog post that has all the details.

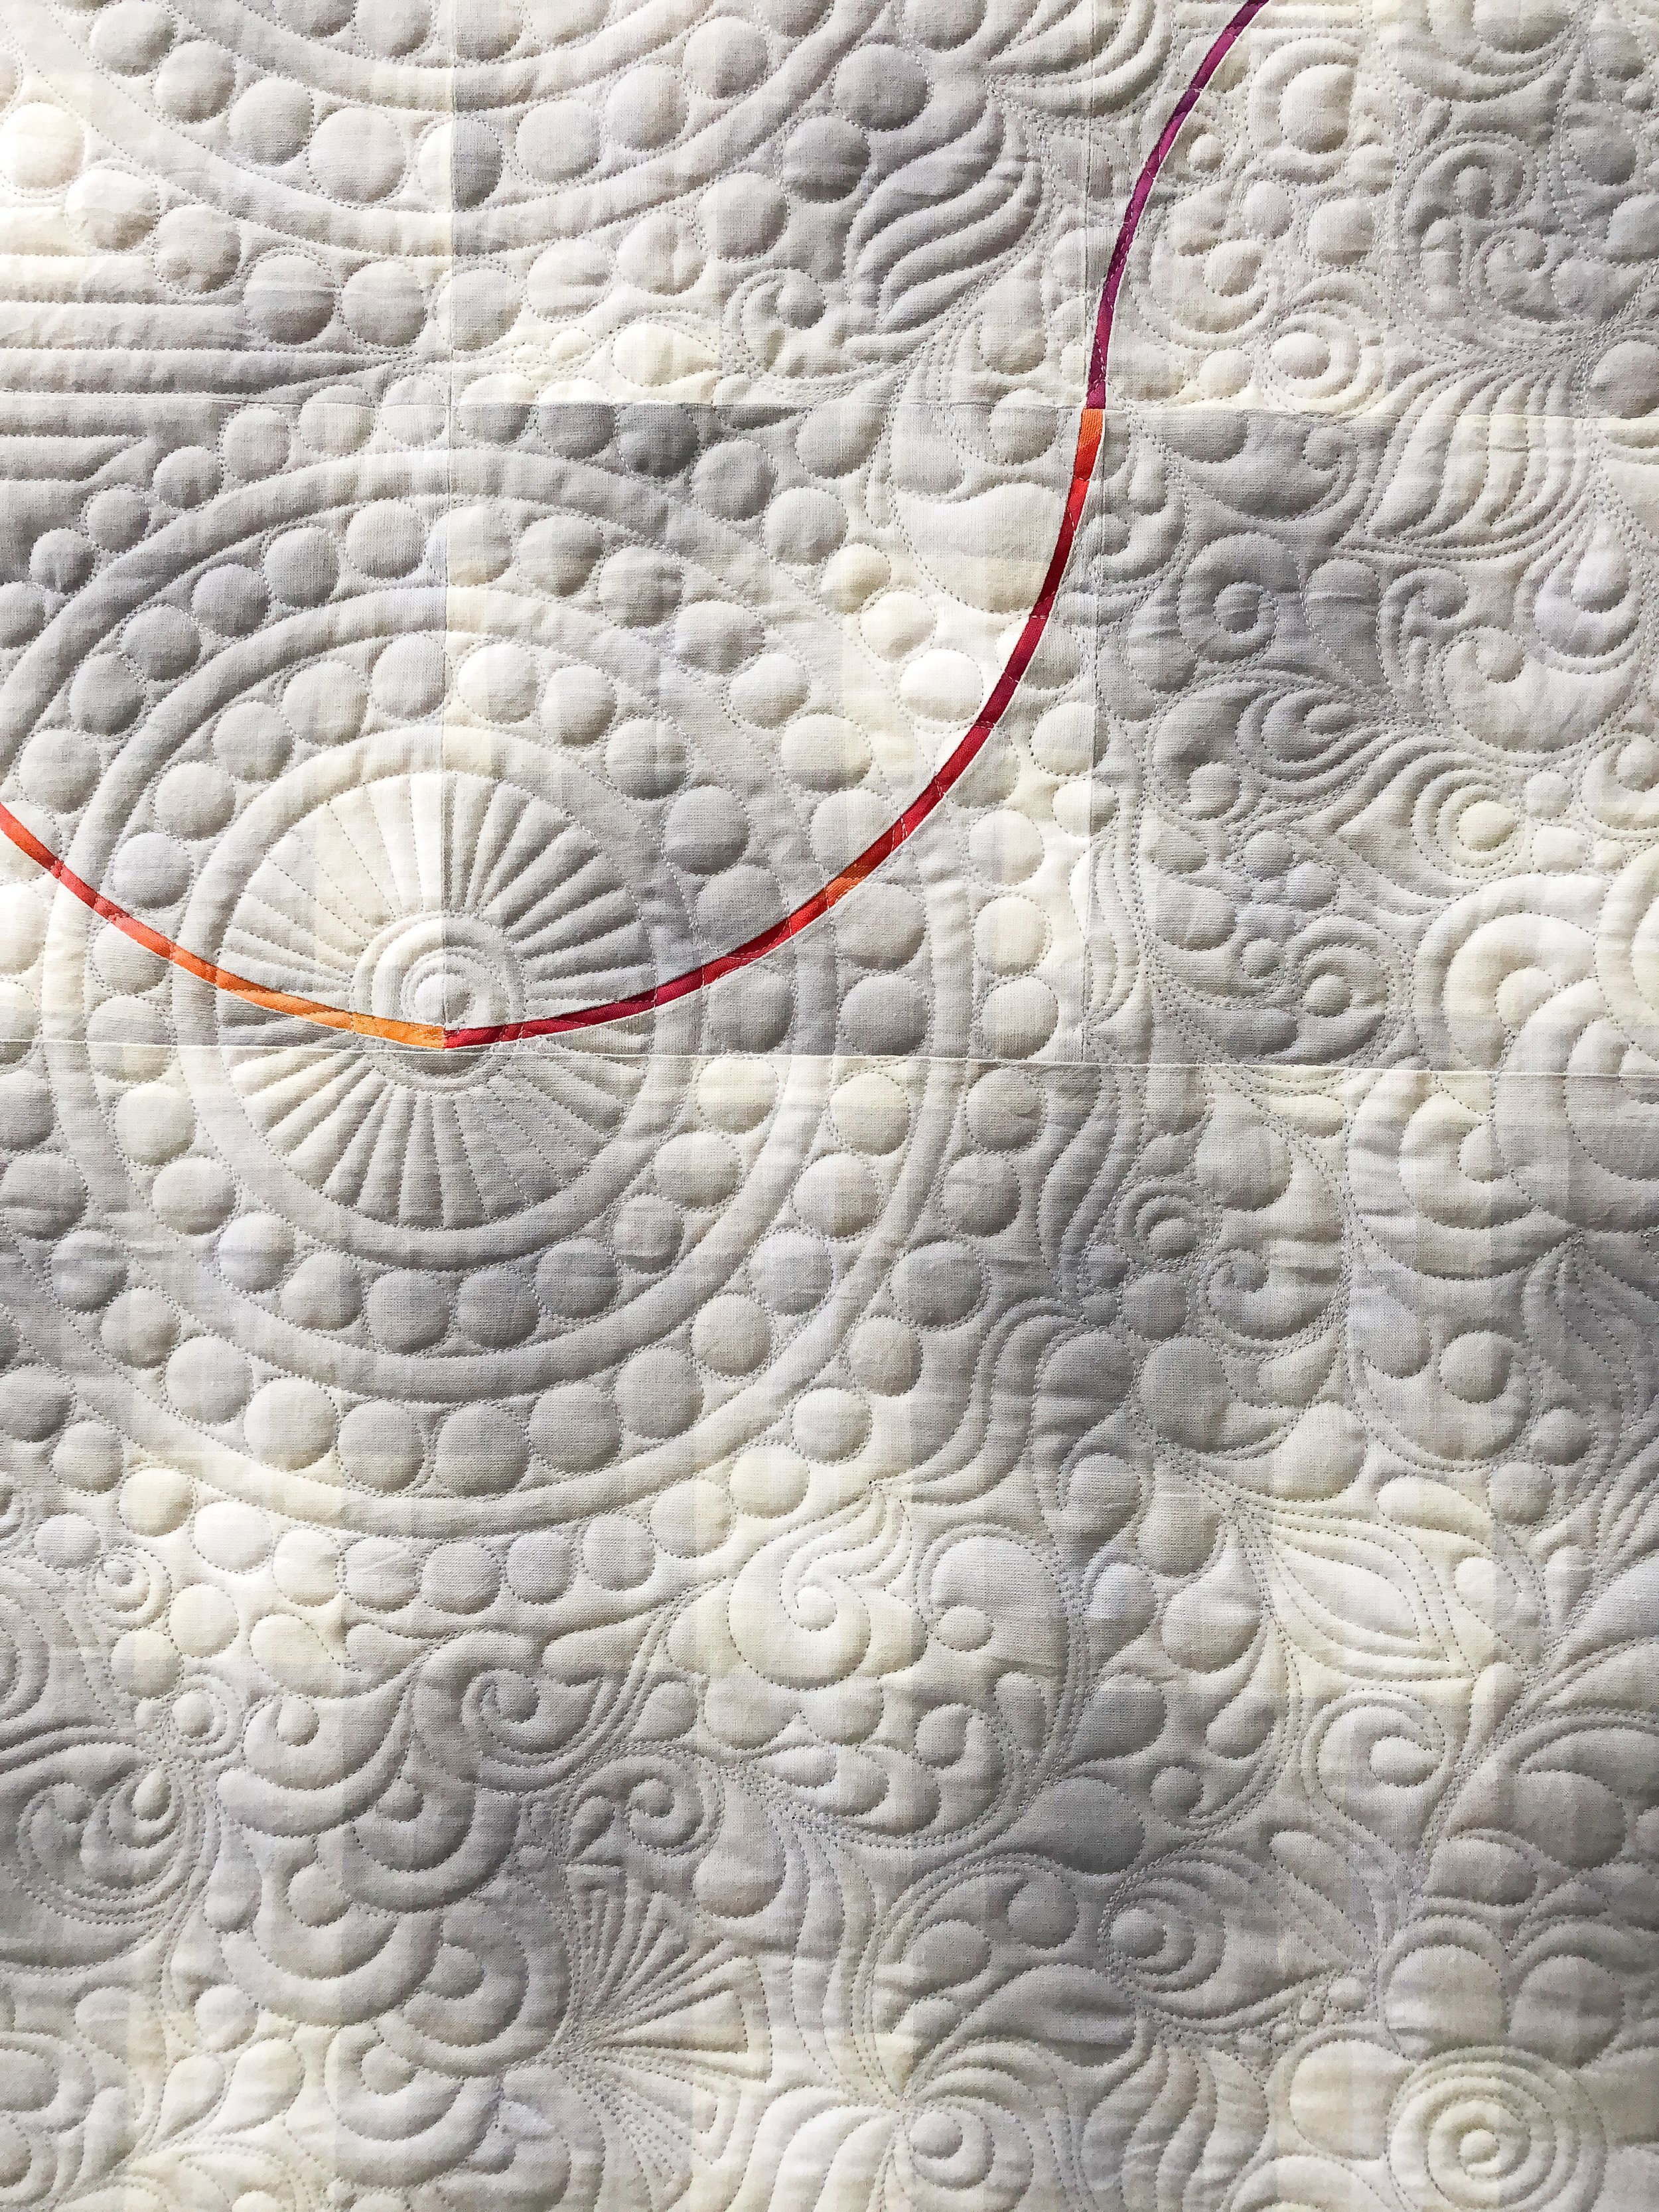
Now…first off, I am so incredibly impressed with Beth’s sewing skills. Curves typically create bulky seams and quilts that just don’t lay flat. I know…I’ve made a few quilts myself that have curves. Beth did such a beautiful job, and not just on the front but also the back…scroll down to see the incredibly beautiful thin curvy stripe that runs through the backing. Look at all the beautiful details…love this quilt!

Now let’s talk about details. First, the backing is a light gray plaid with a beautiful colorful stripe, and I didn’t want navy thread on the backing…because I use the same thread colors on the front and the backing. Tension is never 100% all the time. I was trying to figure out what to do, and then asked Beth what she thought of me using the Mono.Poly thread from Superior Threads on the top, and an Omni light gray thread in the bobbin. A few tips...I quilt on a Gammill Classic Plus. I loosened my top tension, so it was easier to pull through, but kept it threaded the same way that I do with regular thread. The thread comes with a net, keep that on the thread or it will unravel quick, and have the thread come up through the top of the net. This thread is plastic, so there is a minimal sheen to the thread. It is invisible, so it blends perfectly. If you’d like to use a darker Mono.Poly there is a Smoke color, however I have never used it. I used the same needle size, 18, that I normally use on my machine, and I didn’t change the needle position. My bobbin tension is 200 on my Towa bobbin tension gauge. If you don’t have a Towa gauge, it’s a really handy tool. Just make sure you get the correct size for your bobbin case. Mine is an M style. I used the same Mono.Poly for the quilting in the circles, too. Beth chose 8020 cotton poly blend batting from Winline Textiles, out of Ogden Utah.

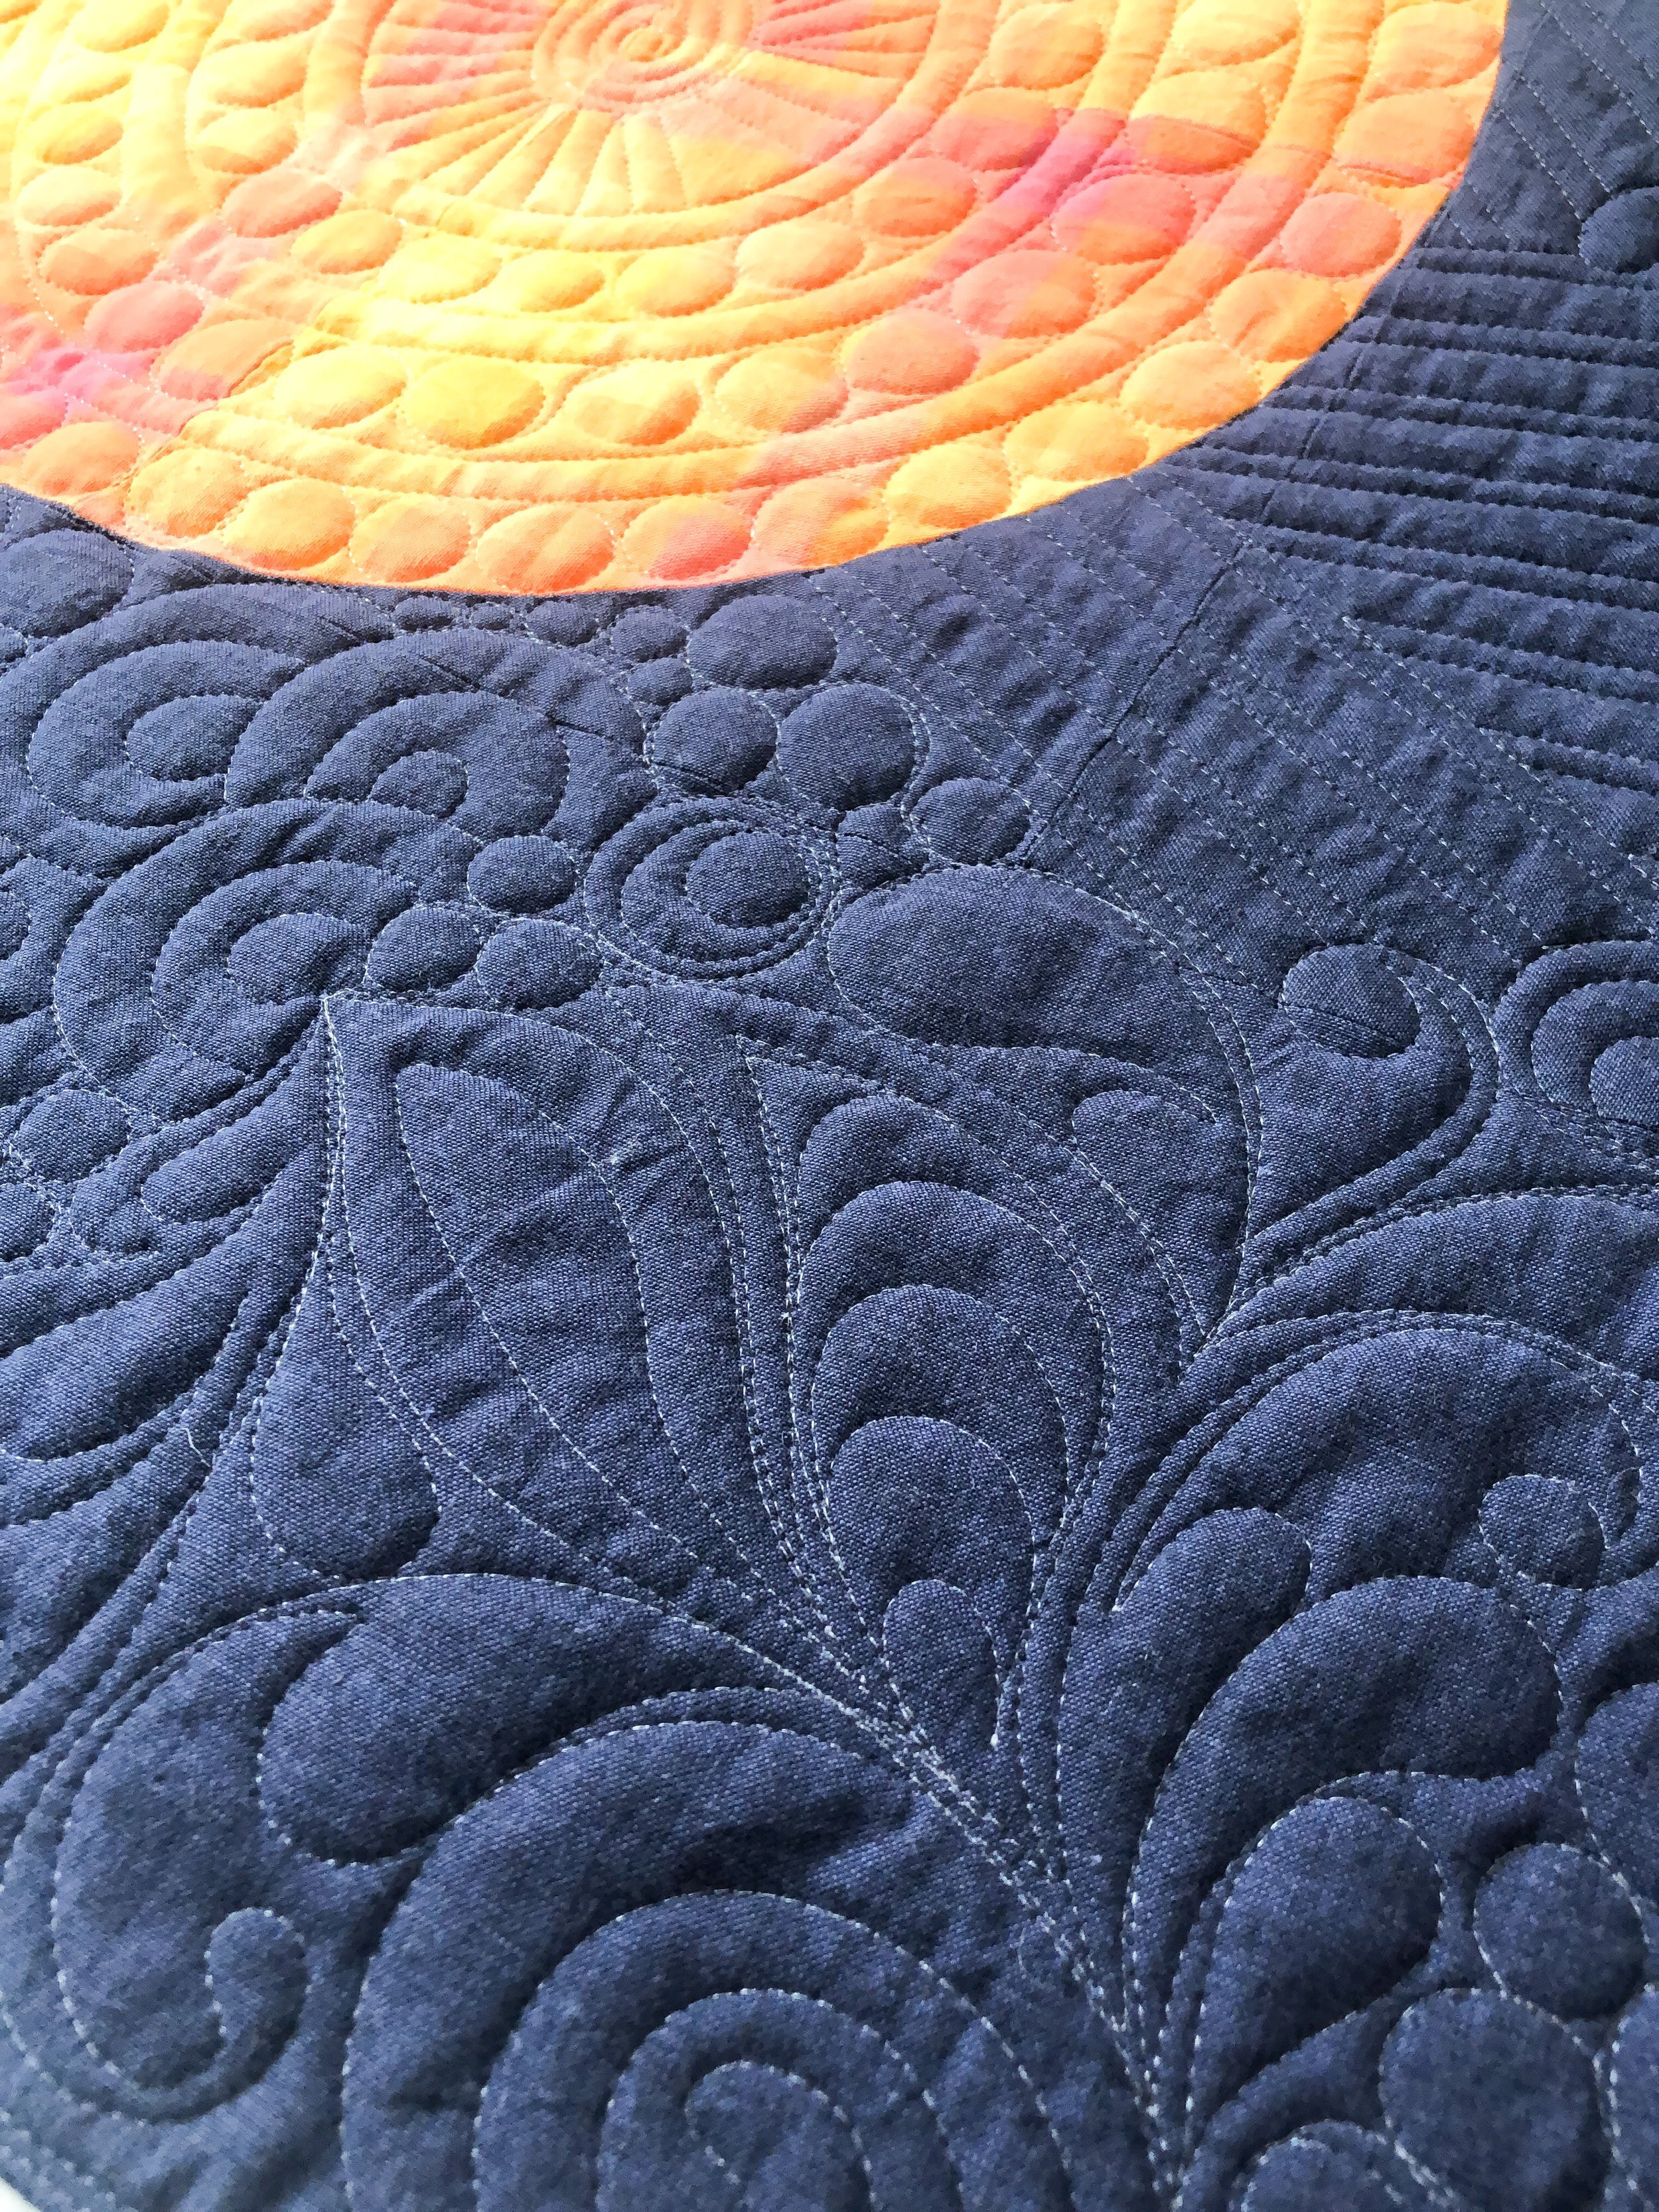
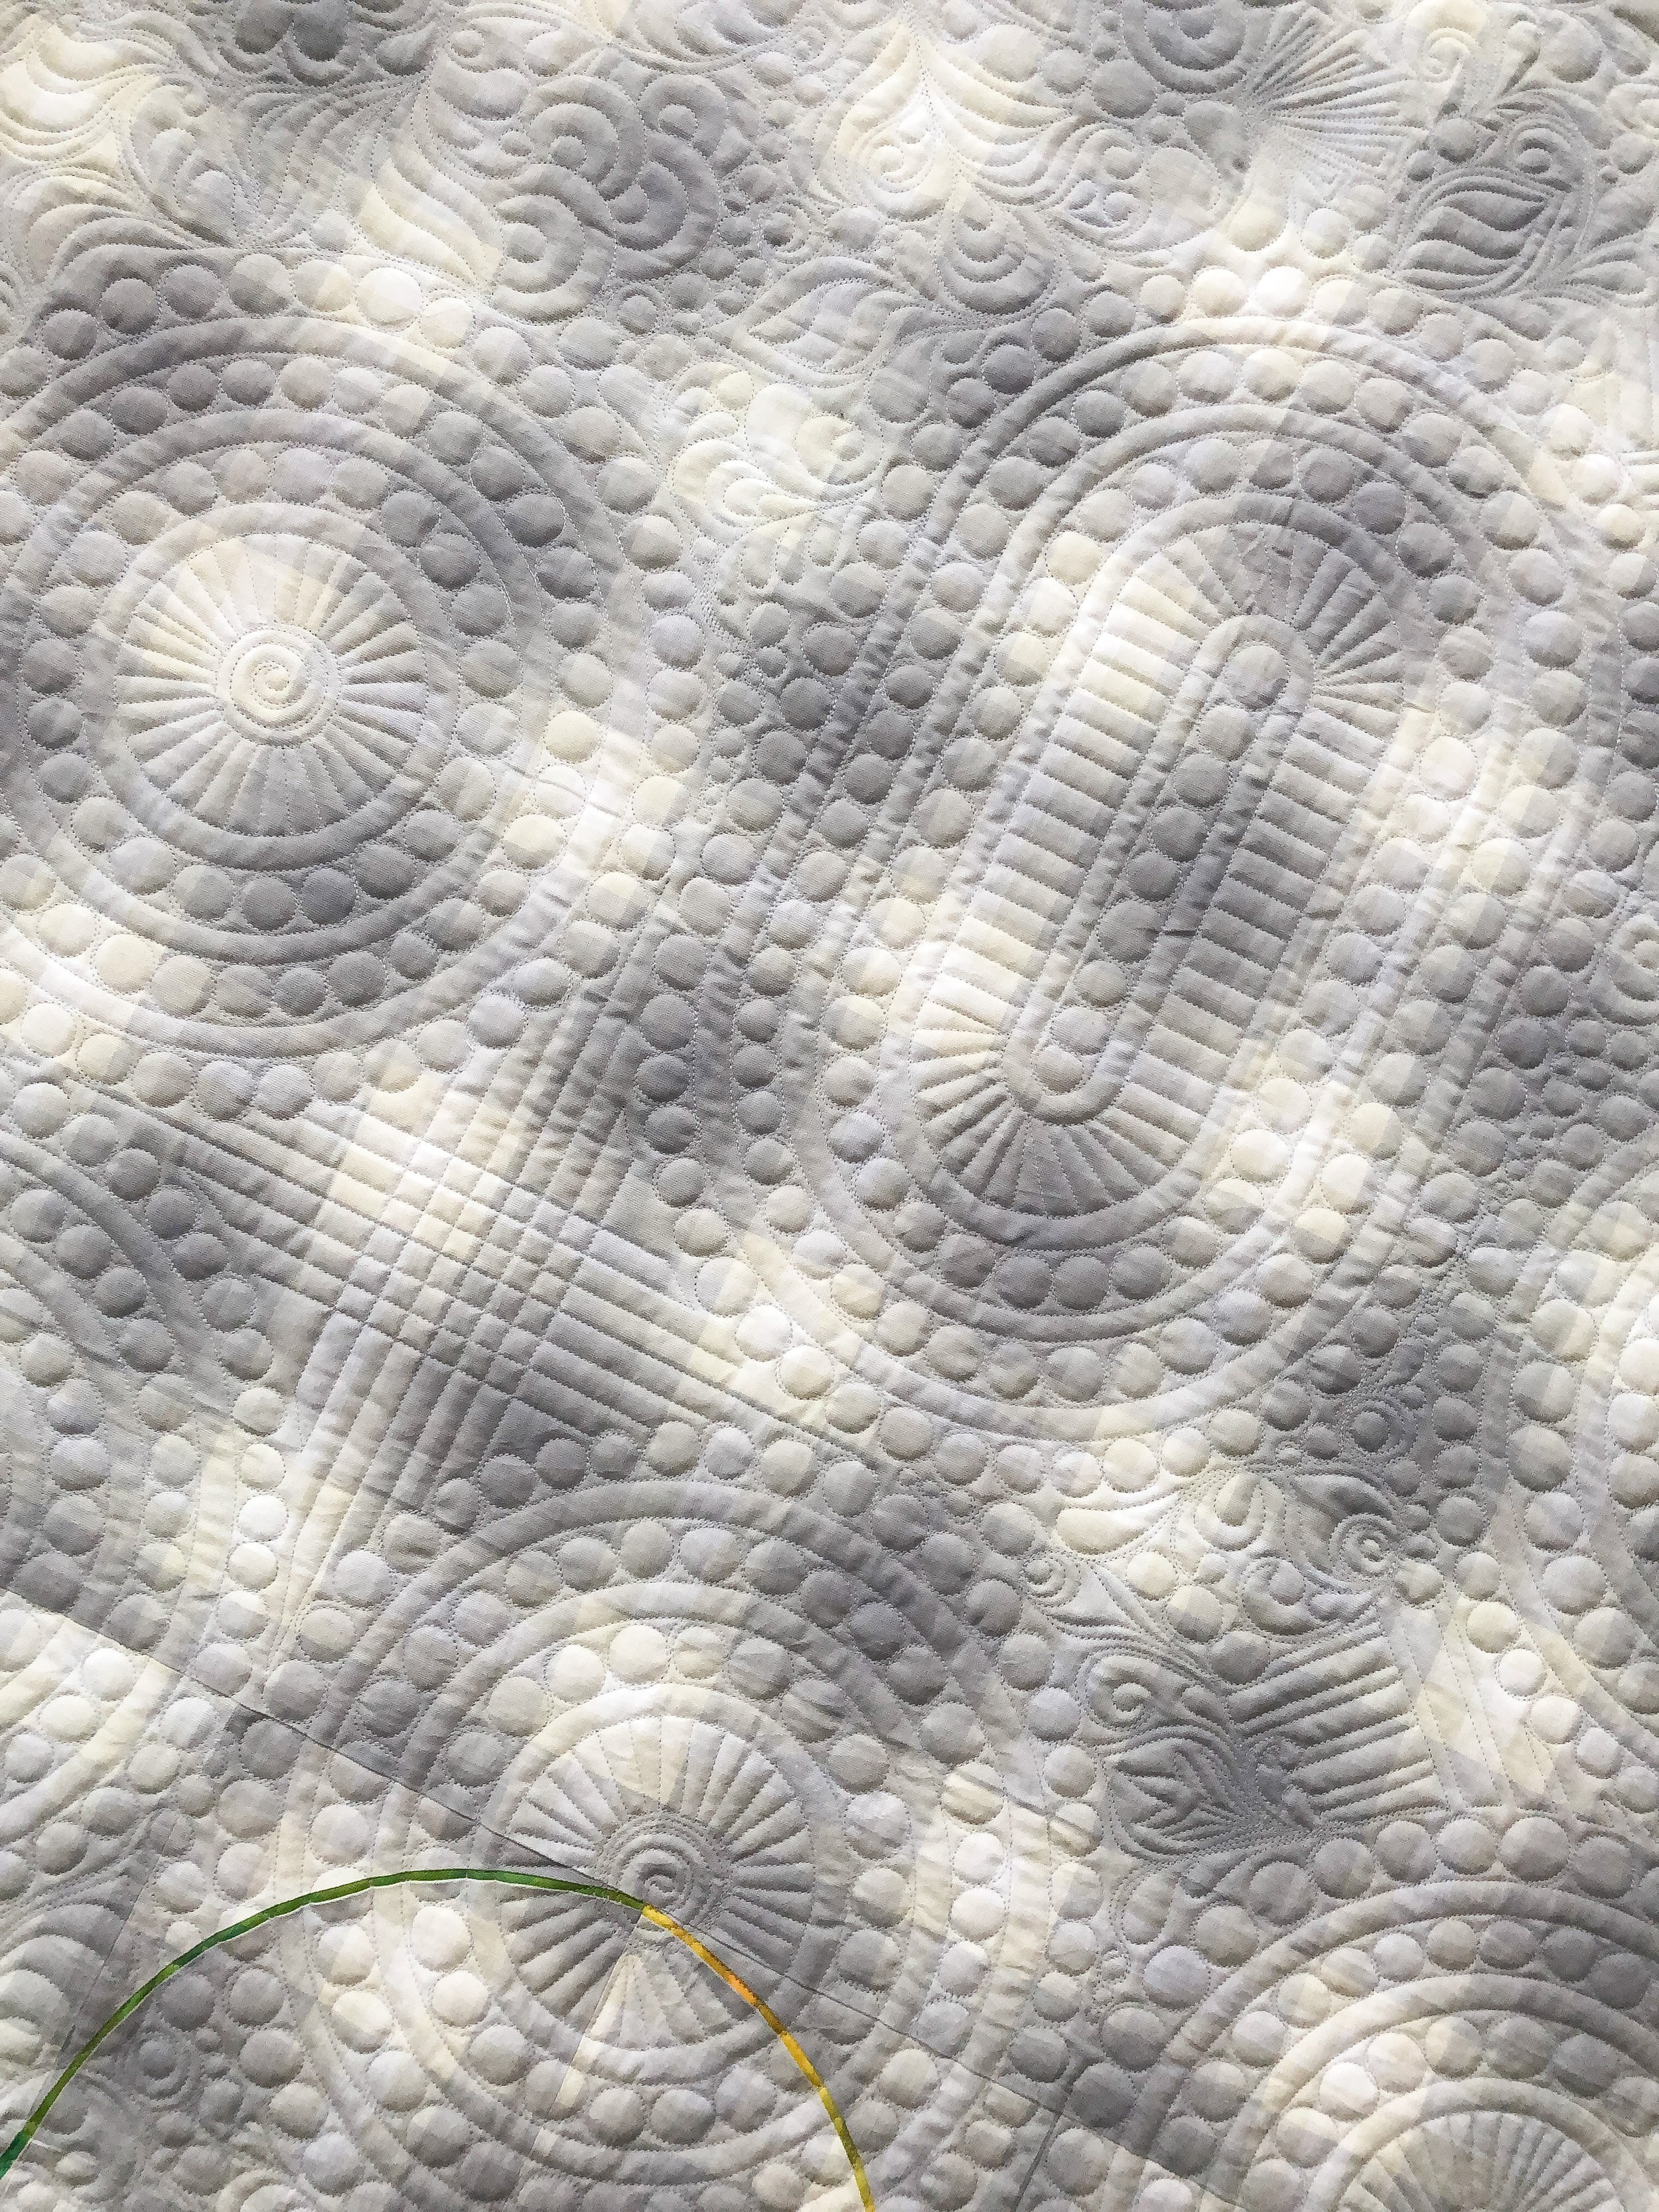
Let’s first start with the background graffiti quilting. Have you heard that I have a Quilting It Freemotion™ course? I created a series of 10 videos, where I teach one quilting design per video. I don’t have a course on graffiti quilting, however I did use six of the ten designs that I teach, intermixed in the graffiti quilting and then I added some other fun details. The designs I used on this quilt that are in my course are…Pebbles, Swirls, Swirly Feathers, Grass, Overlapping Circles, and Overlapping Lines. Of course I have four other designs that are great to learn as well, and all are available in a bundle too. When it comes to graffiti quilting anything goes…hence the graffiti name. Whatever you’d like to include, go for it. Your graffiti quilting is going to look different than mine. That’s totally fine. When I quilt something this random, I like to have the designs travel throughout the quilt. That is the only rhyme or reason to quilting graffiti…at least for me. If you’d like to watch me quilt a little section of the graffiti, remember to go to my instagram and check out the two reels I shared. Video 1 and Video 2.
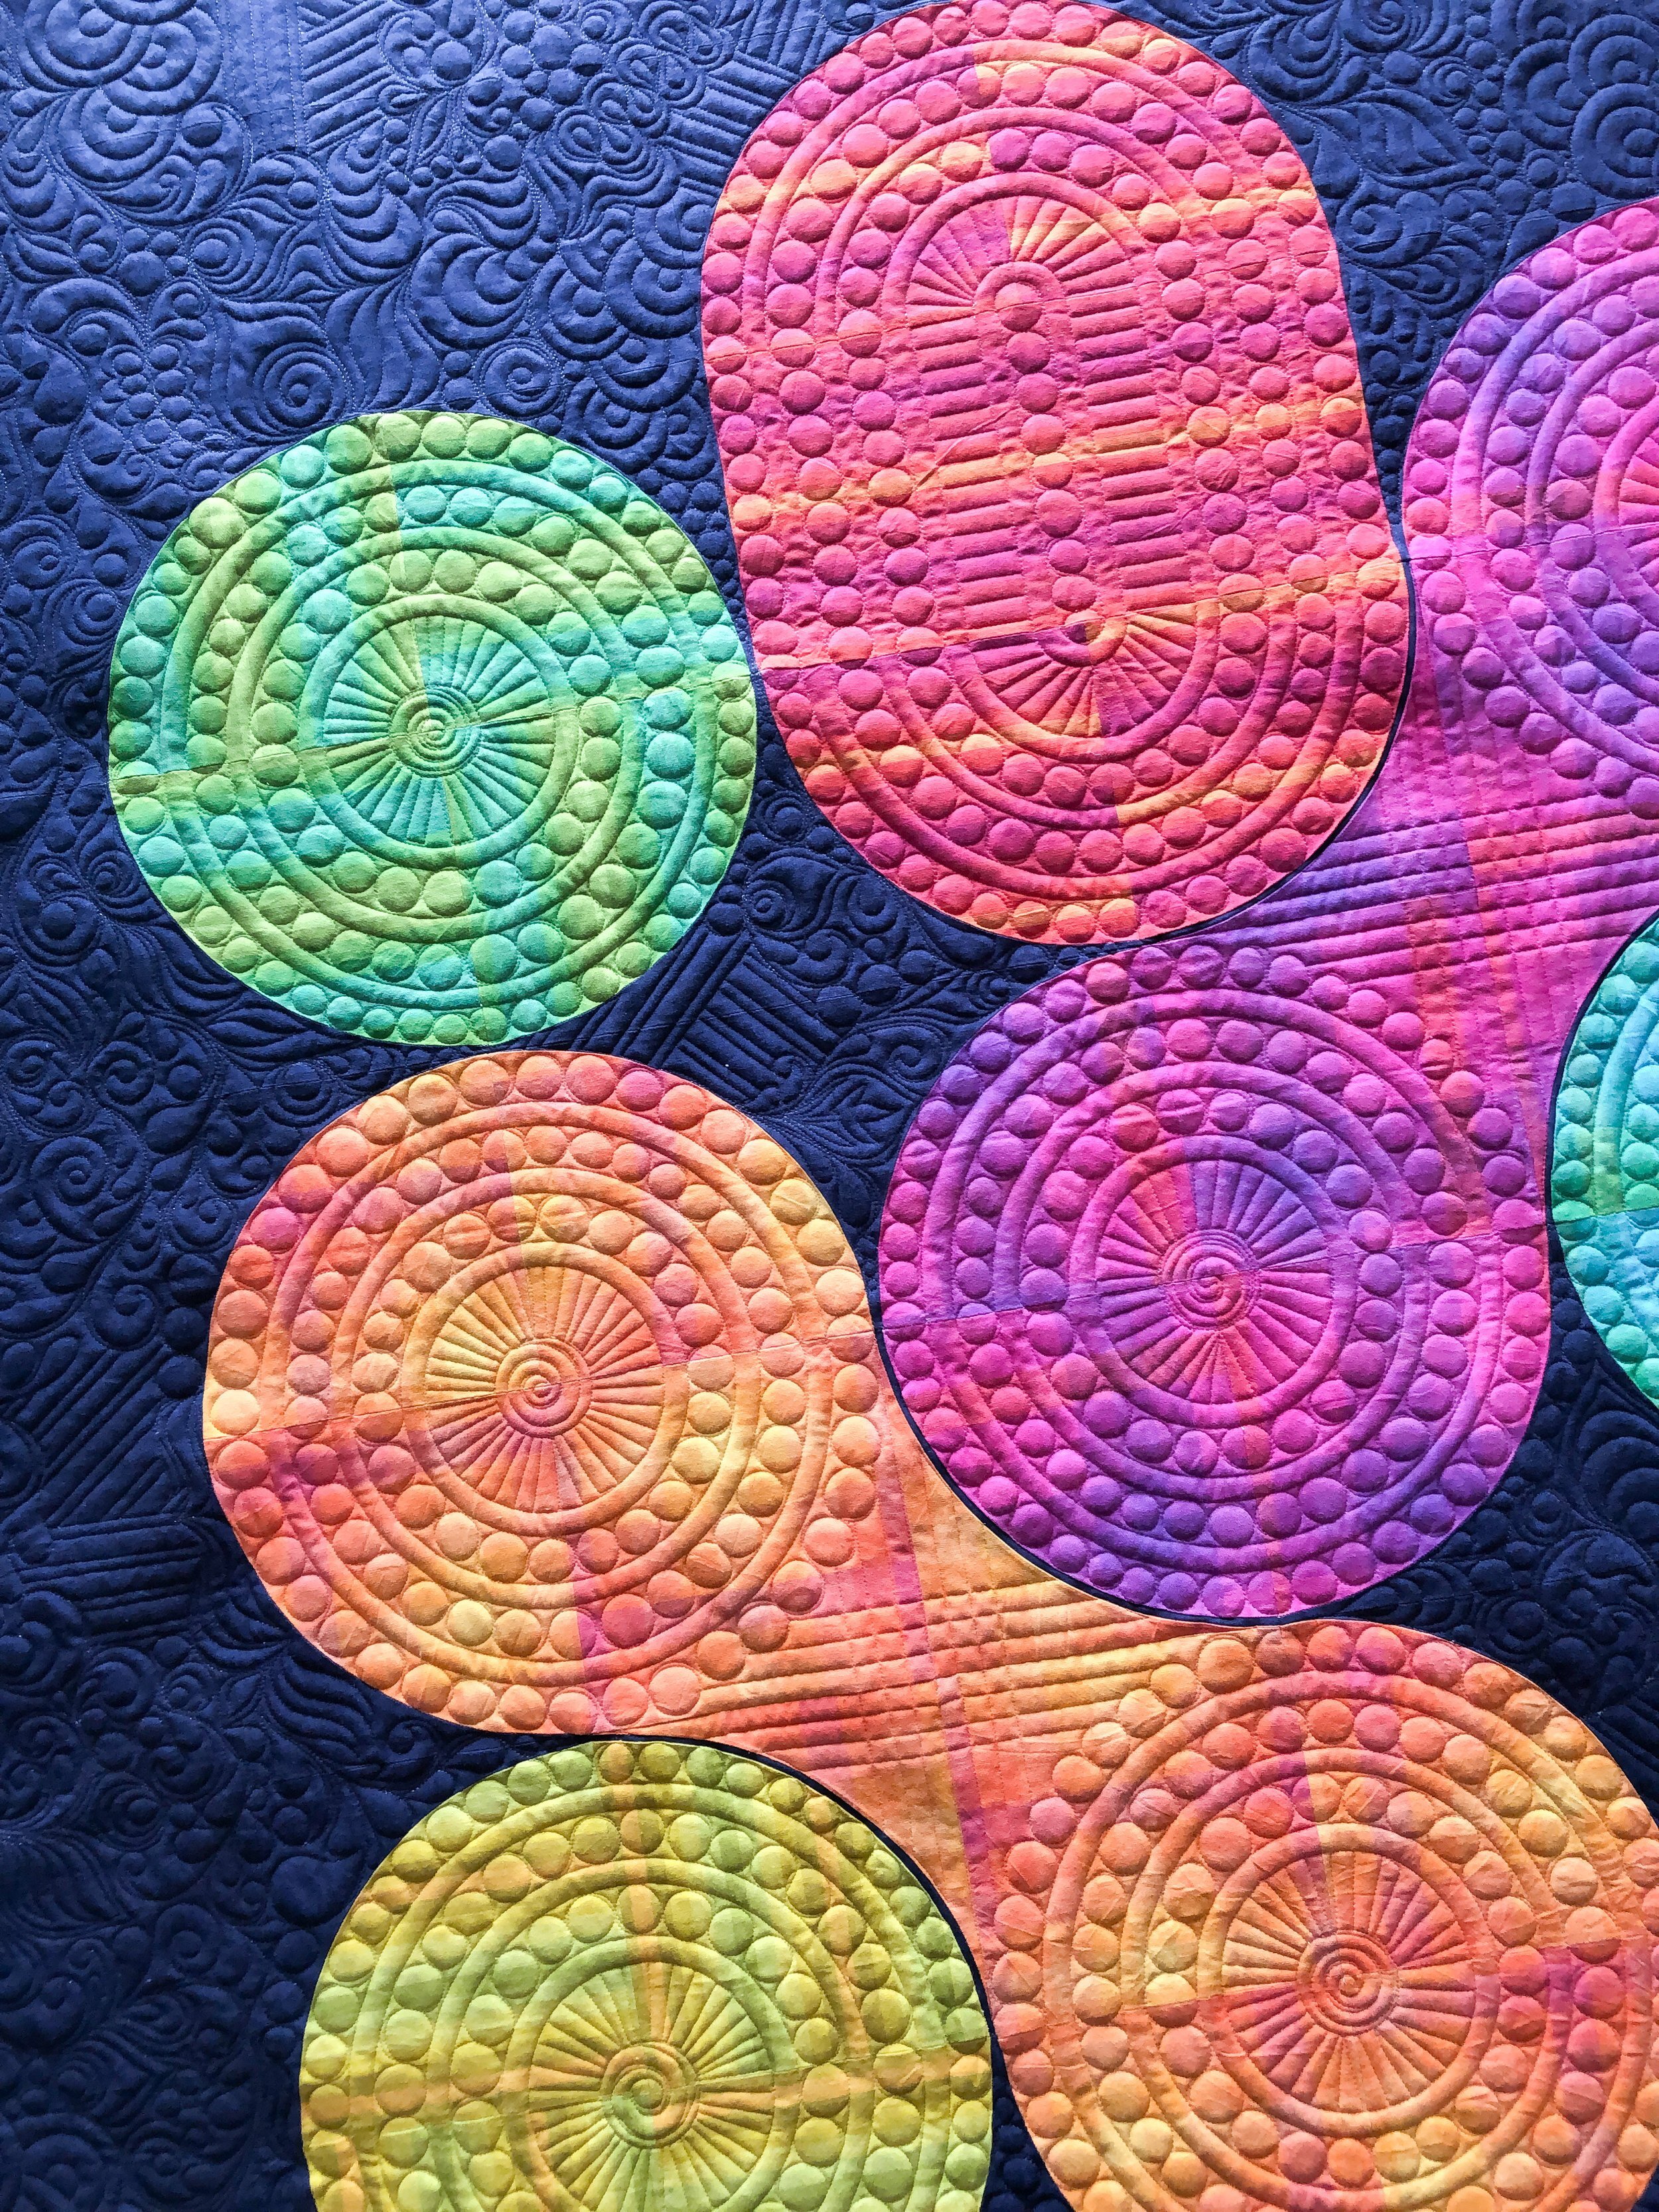
What do you think of all the different designs together? And…the circles, I’ll talk about those next. I love the contrast of organic quilting in the background and the modern look of the circles. It makes the overall design and look of the quilt, pop.

When I was teaching my Overlapping Lines, I had a new version pop into my head…introducing the pinstripe version of my Overlapping Lines. I hadn’t quilted it before so, I just drew it out. It’s fun to finally have a quilt to quilt in on. I love the look of it, and can’t wait to quilt it over and over again!

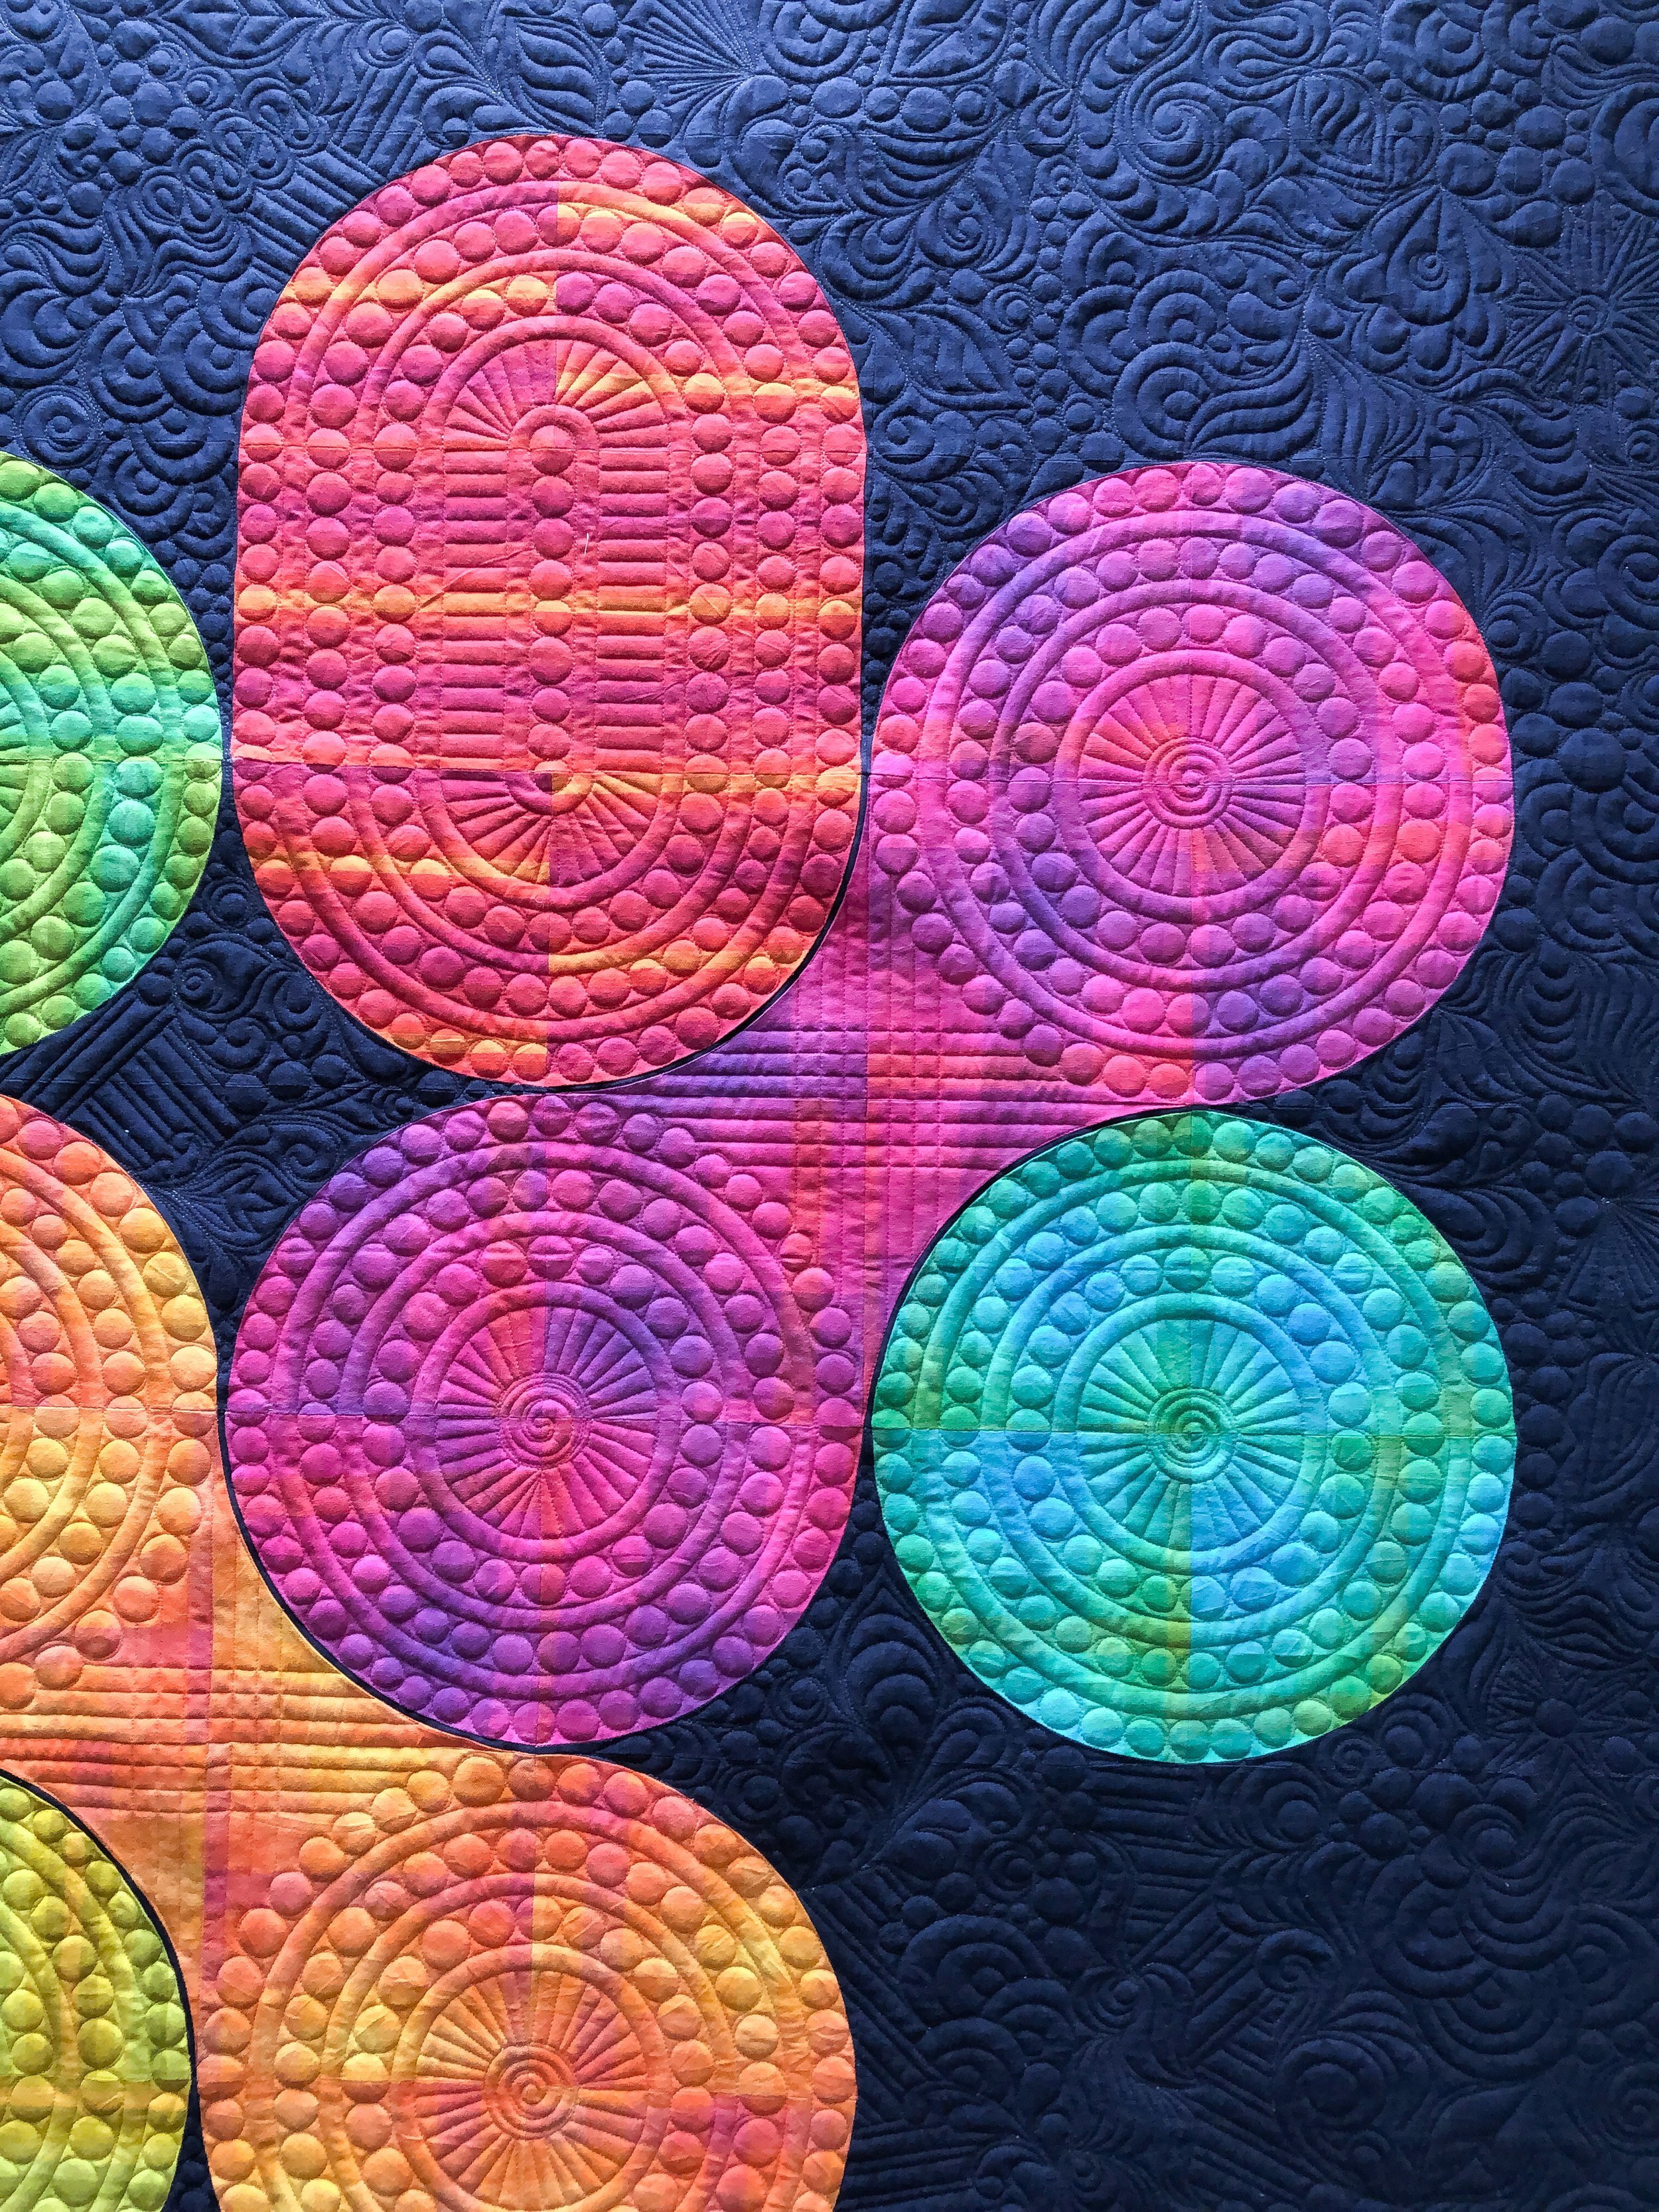
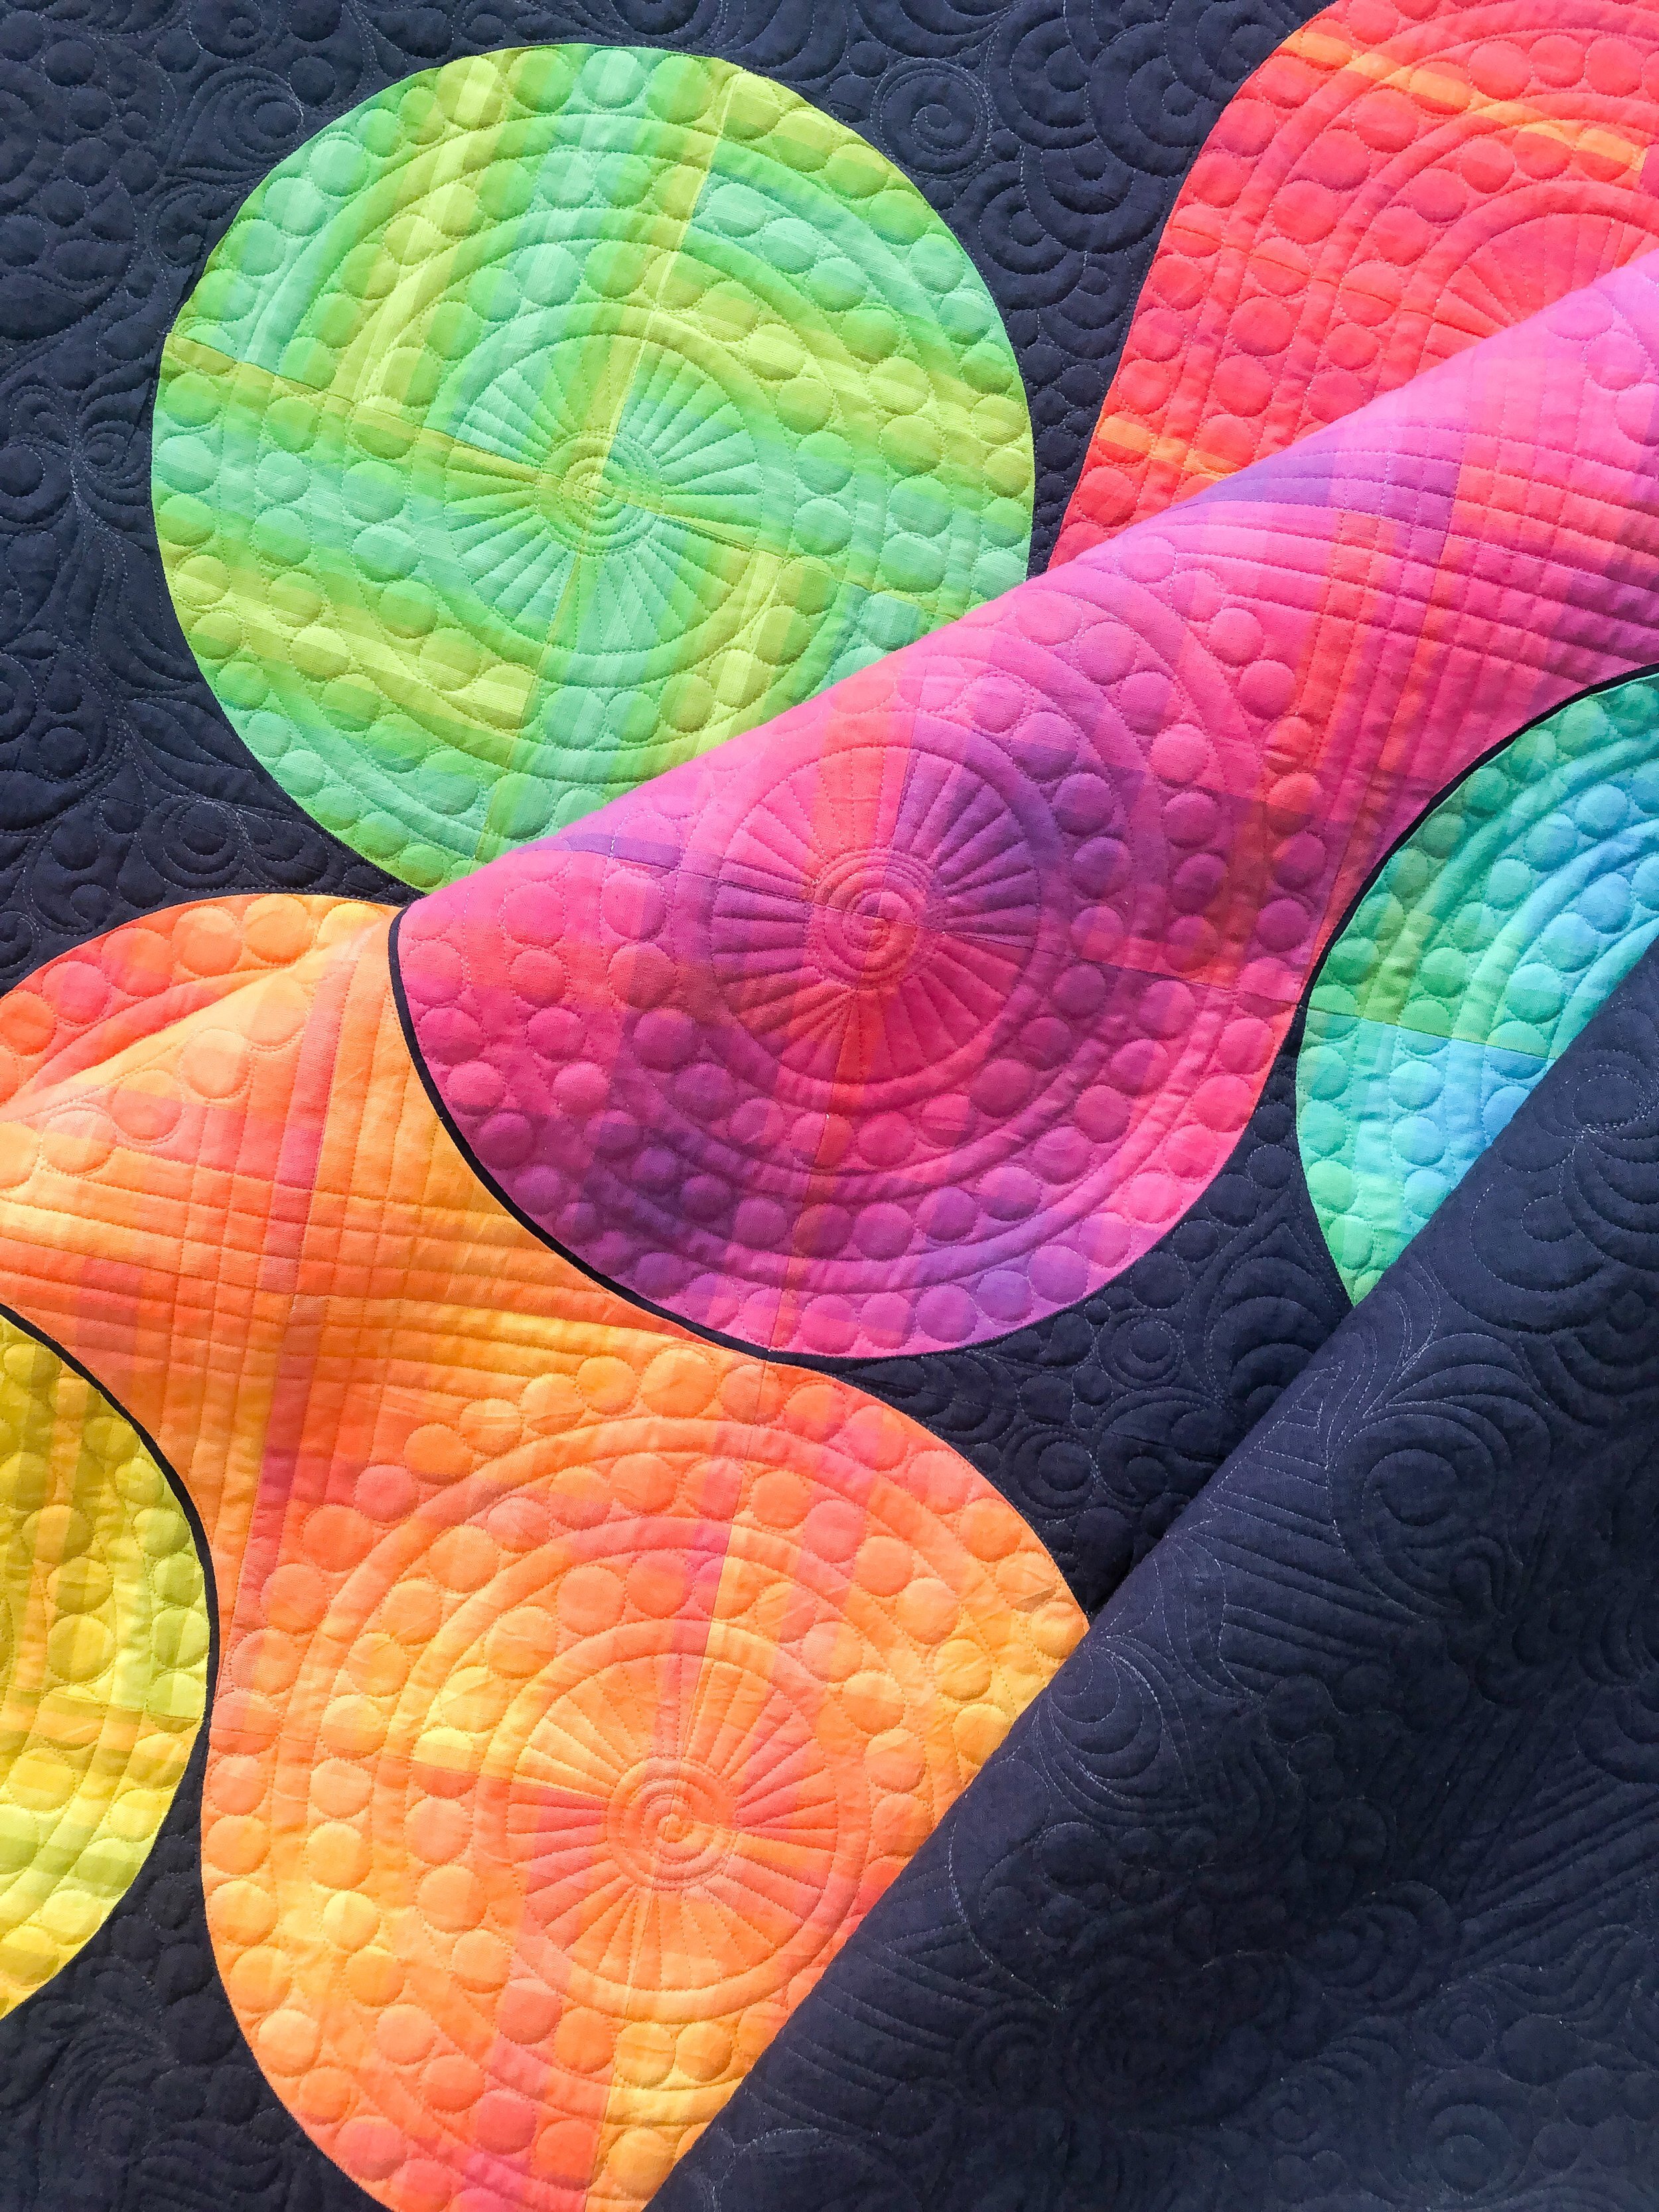
Now, for the circles…I pulled out my Circle2™ ruler set, and I ended up using 7 of the 12 sizes of circles. Starting on the outside and working my way to the center, I used the 12”, 11”, 9”, 8”, 6”, 5”, and 2” in that order. My rulers are 3/4ths of a circle, so I quilted most of the circle and then rotated the ruler to finish up the circle. The 3/4ths of a circle design allows you to have one sized circle inside, and one on the outside of the ruler. I was so grateful to have this set, for those beautiful circles. This quilt is quilted entirely freemotion, not computerized in any way. I used a couple of Edge rulers from Linda at The Quilted Pineapple for the straight lines. I was trying to figure out a creative curvy way to quilt the space between the two circles in the two blocks in the orange and purple colors. I decided to quilt straight lines 1/2” apart instead, and I love how it adds to the look of those blocks. Making it seem like the circles are connected. Love what simple lines can create!
It’s much easier to quilt all of those pebbles when there is a boundary of sorts. So, I made sure to quilt the large circles first, then filled in the pebbles afterwards.

Love all of the fun textures together.
If you are a longarm quilter, have you ever done graffiti quilting before? Graffiti quilting became popular from Karlee Porter. It’s fun to be inspired by other quilters. The quilting inspiration pictures that Beth sent me were from Jenny from @pappersaxten. Of course, I quilted my own versions of these designs. It’s not easy to exactly replicate another quilter’s quilting.
The oval shape below was quilted the same way as the circles, except that I used an Edge ruler for the straight center section.

I hope that you have enjoyed hearing the details about this quilt!!
A little close up, on only one part! Love, love, love!!
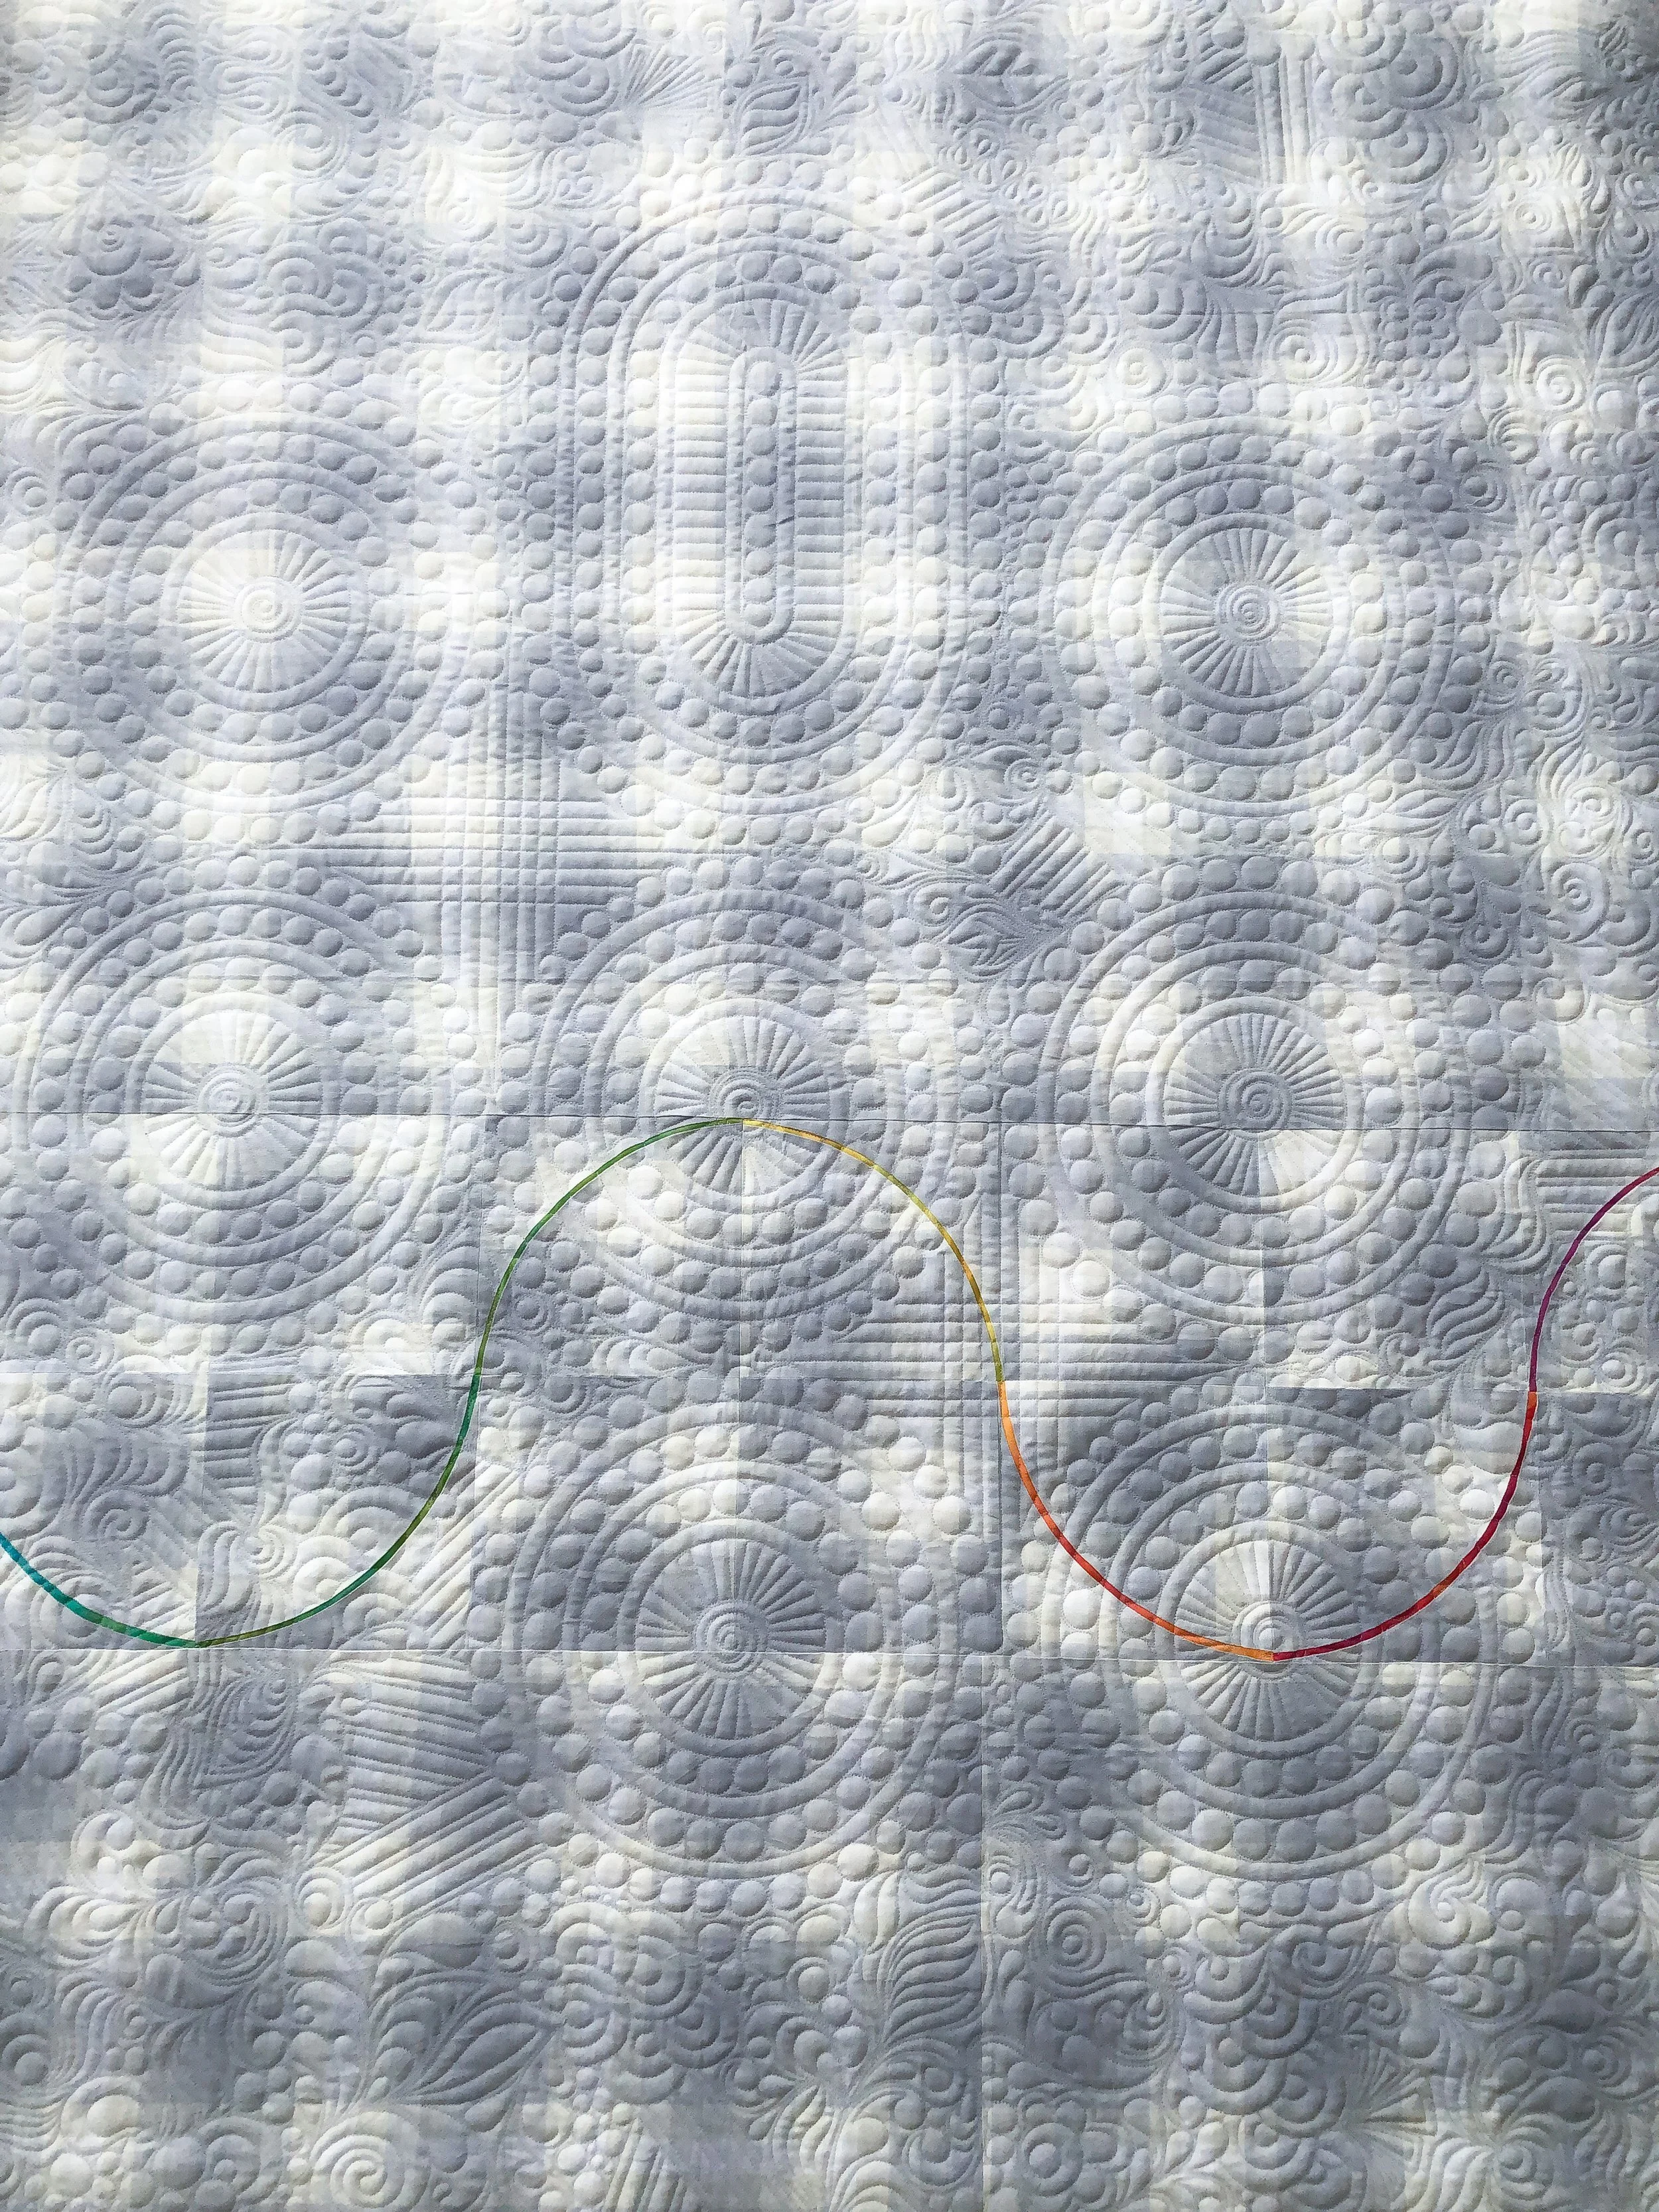
Here is a look at the backing. I love it when a back turns out awesome!! Love that thin curve. Can you see why I didn’t want to use navy thread on the backing…because I typically use the same thread colors on the top and bobbin.

Here are some fun close-ups of all of the quilting textures!!
Another, because one is not enough…
and another…

So much quilty goodness. Such a fun quilt for me to quilt!
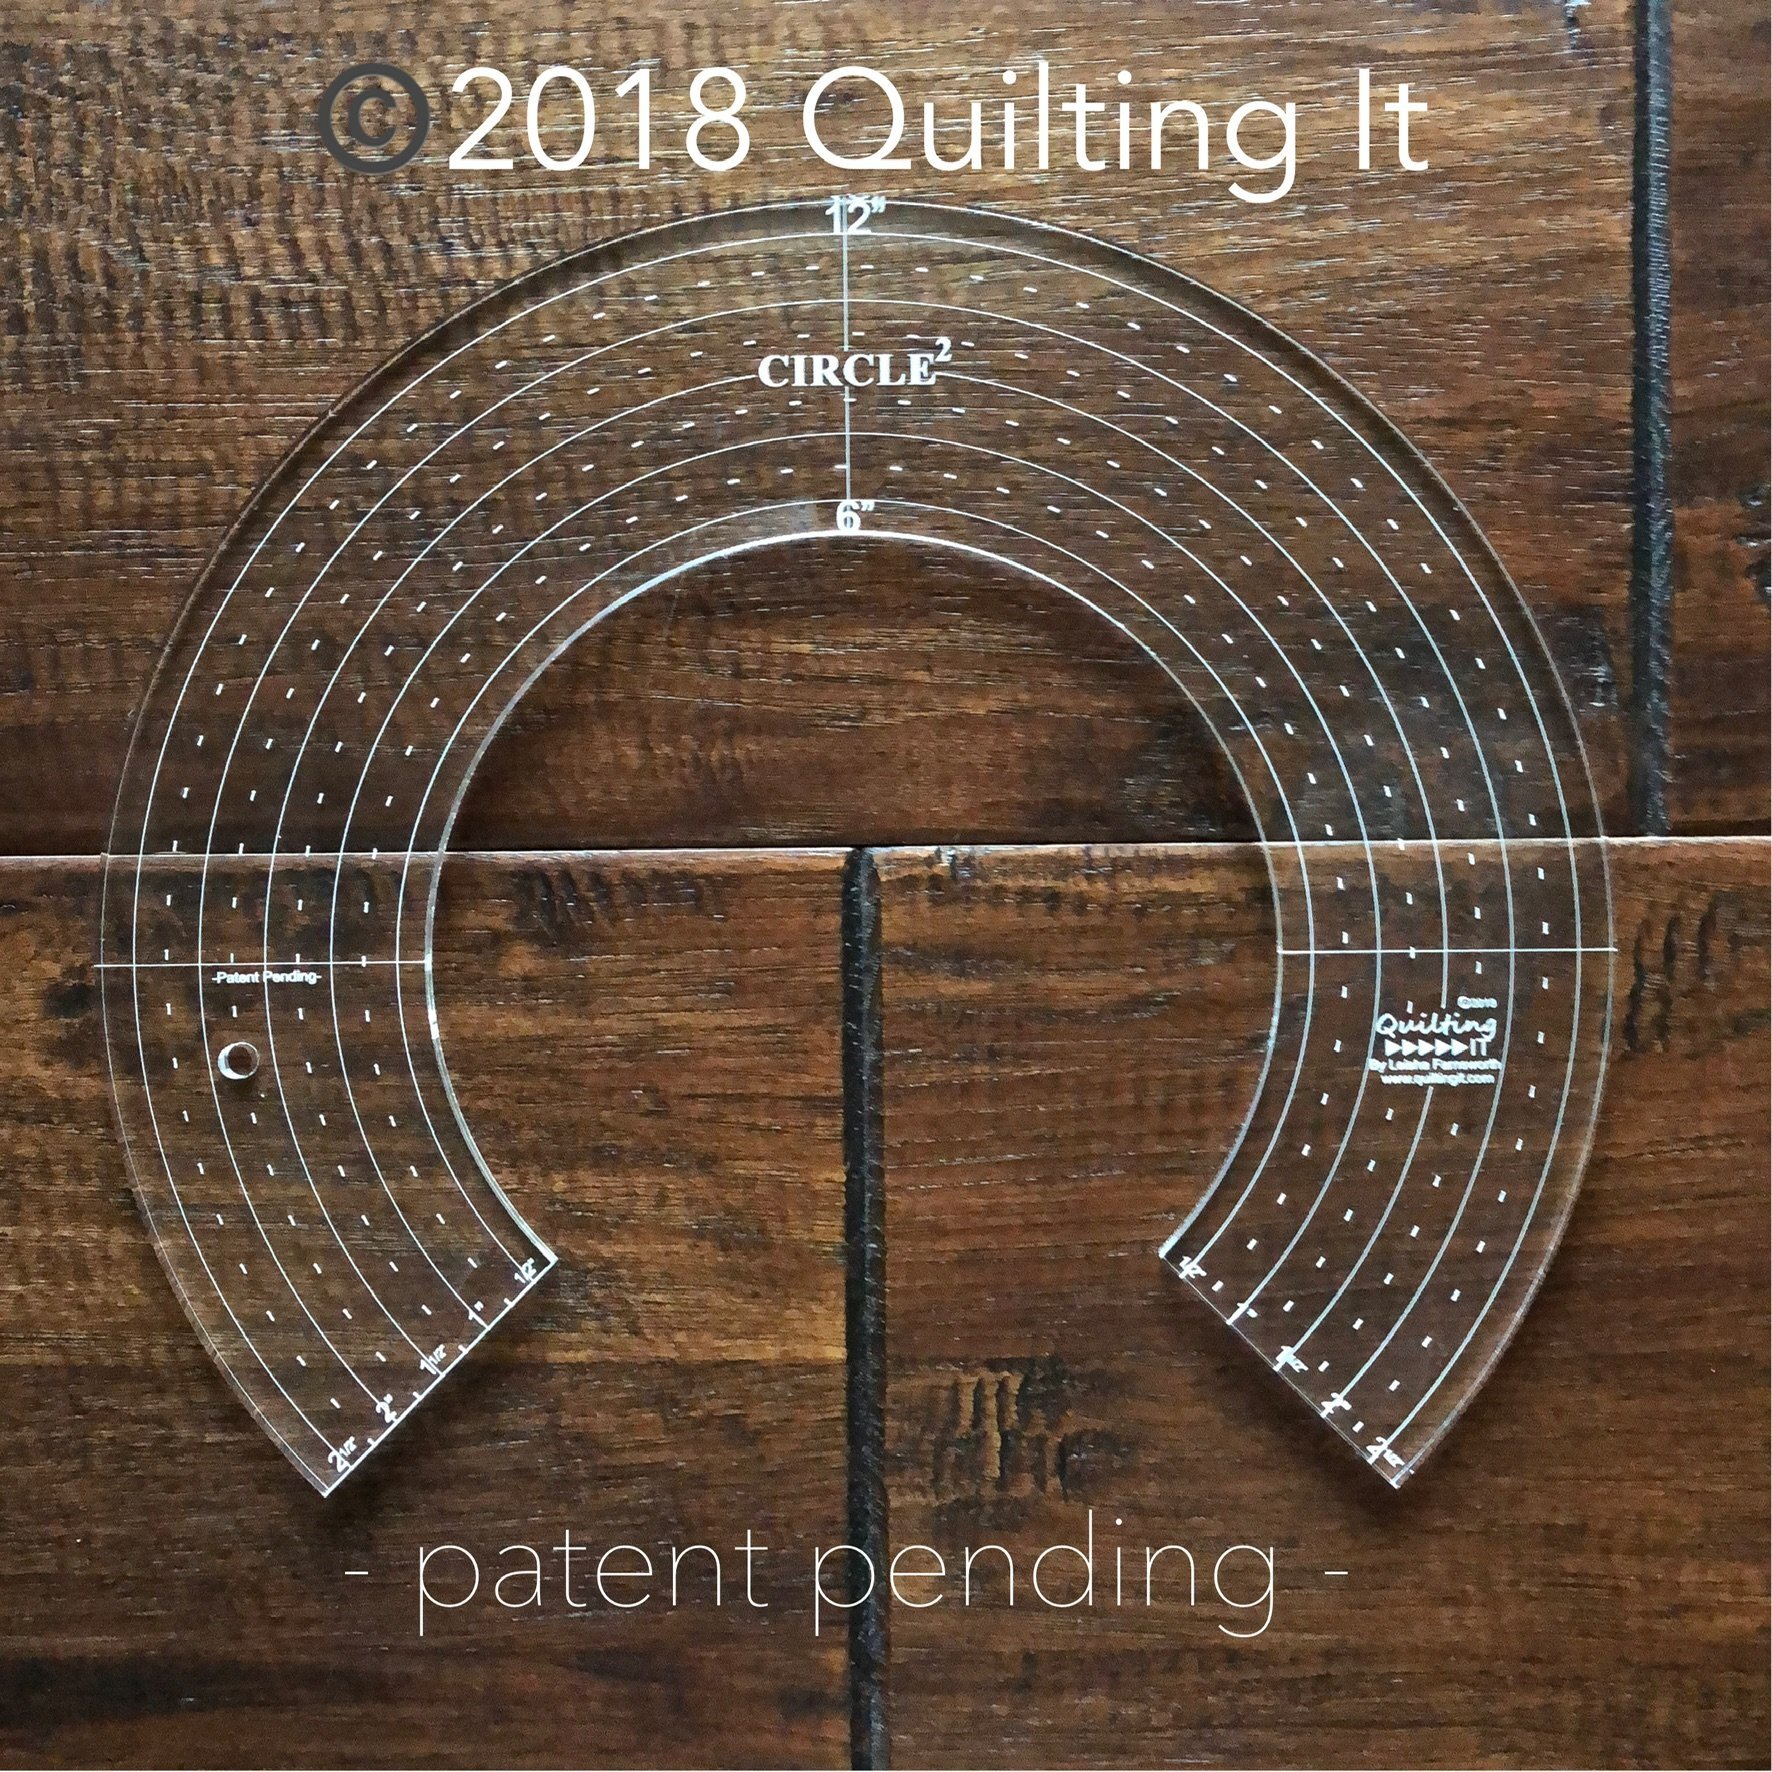
Here are my Circle2™ rulers that I used for the circles…I used both the 12” and 6”.
- Design Patent D875,574 -
I used the 11” and the 5”.
- Design Patent D875,574 -
I used the 9”.
- Design Patent D875,574 -

I used the 8” and 2”.
- Design Patent D875,574 -
Here is a look at the clear set all stacked up together. There are 6 rulers and 12 different sizes of circles. For more information go to this post.
- Design Patent D875,574 -

Below is a look at the green set. The green set is great for lighter fabrics, so it’s easier to see the lines. My Circle2™ machine quilting circle ruler set is made in USA from 1/4” high quality acrylic. It’s such a versatile set of rulers. Starting at 2” and goes up to 13”.
- Design Patent D875,574 -
Thanks for stopping by and checking out the details about Beth’s Wax Lyrical quilt!! Hope you have a great week, and get some quilting or sewing in. Take care, Leisha
Courtney’s Triangle Peaks Quilt
Hi Friends,
I hope your week is off to a great start!! I have a fun baby quilt to quickly share with you…Courtney’s Triangle Peaks Quilt. The pattern is by Emily Dennis from Quilty Love. And, I love the colors of fabrics she chose!

Even though there isn’t a ton of white on this quilt, I still used my favorite natural white thread from Superior Threads because it blends so well, and is not stark at all. Plus, if you’ve been around here for awhile you know that I prefer lighter threads on darker fabrics, than darker threads on lighter fabrics. I also used my favorite 8020 cotton poly blend batting from Winline Textiles out of Ogden Utah.

I sent Courtney a few options for quilting designs, and she chose my Southwest design!! Which I love!! It created some excellent angled texture to an already very angular quilt. Why and how does it work??? It’s all about the scale of the design. Not too big to compete, not too small that it doesn’t make sense, it’s just right.
Also, please refer to the images I provide to check out the suggested spacing between rows. I line the spacing between the rows of the design, to fit in line with the spacing in the design. Space done correctly adds to the overall look itself. Too much space shows, and makes the design look off.
You can see the spacing in this close up better.
The backing has minky, and so this one was extra cuddly.

Thanks for stopping by!! I hope you have a fabulous day. Happy quilting!! • Leisha
Courtney’s Urban Abacus Quilt
Hi Friends,
I’m thrilled to be sharing this quilt with you finally!! I’m trying to blog in order of how I quilted my client’s quilts…and this one was hard to wait for. Why am I excited to share it??? I just love how it turned out.

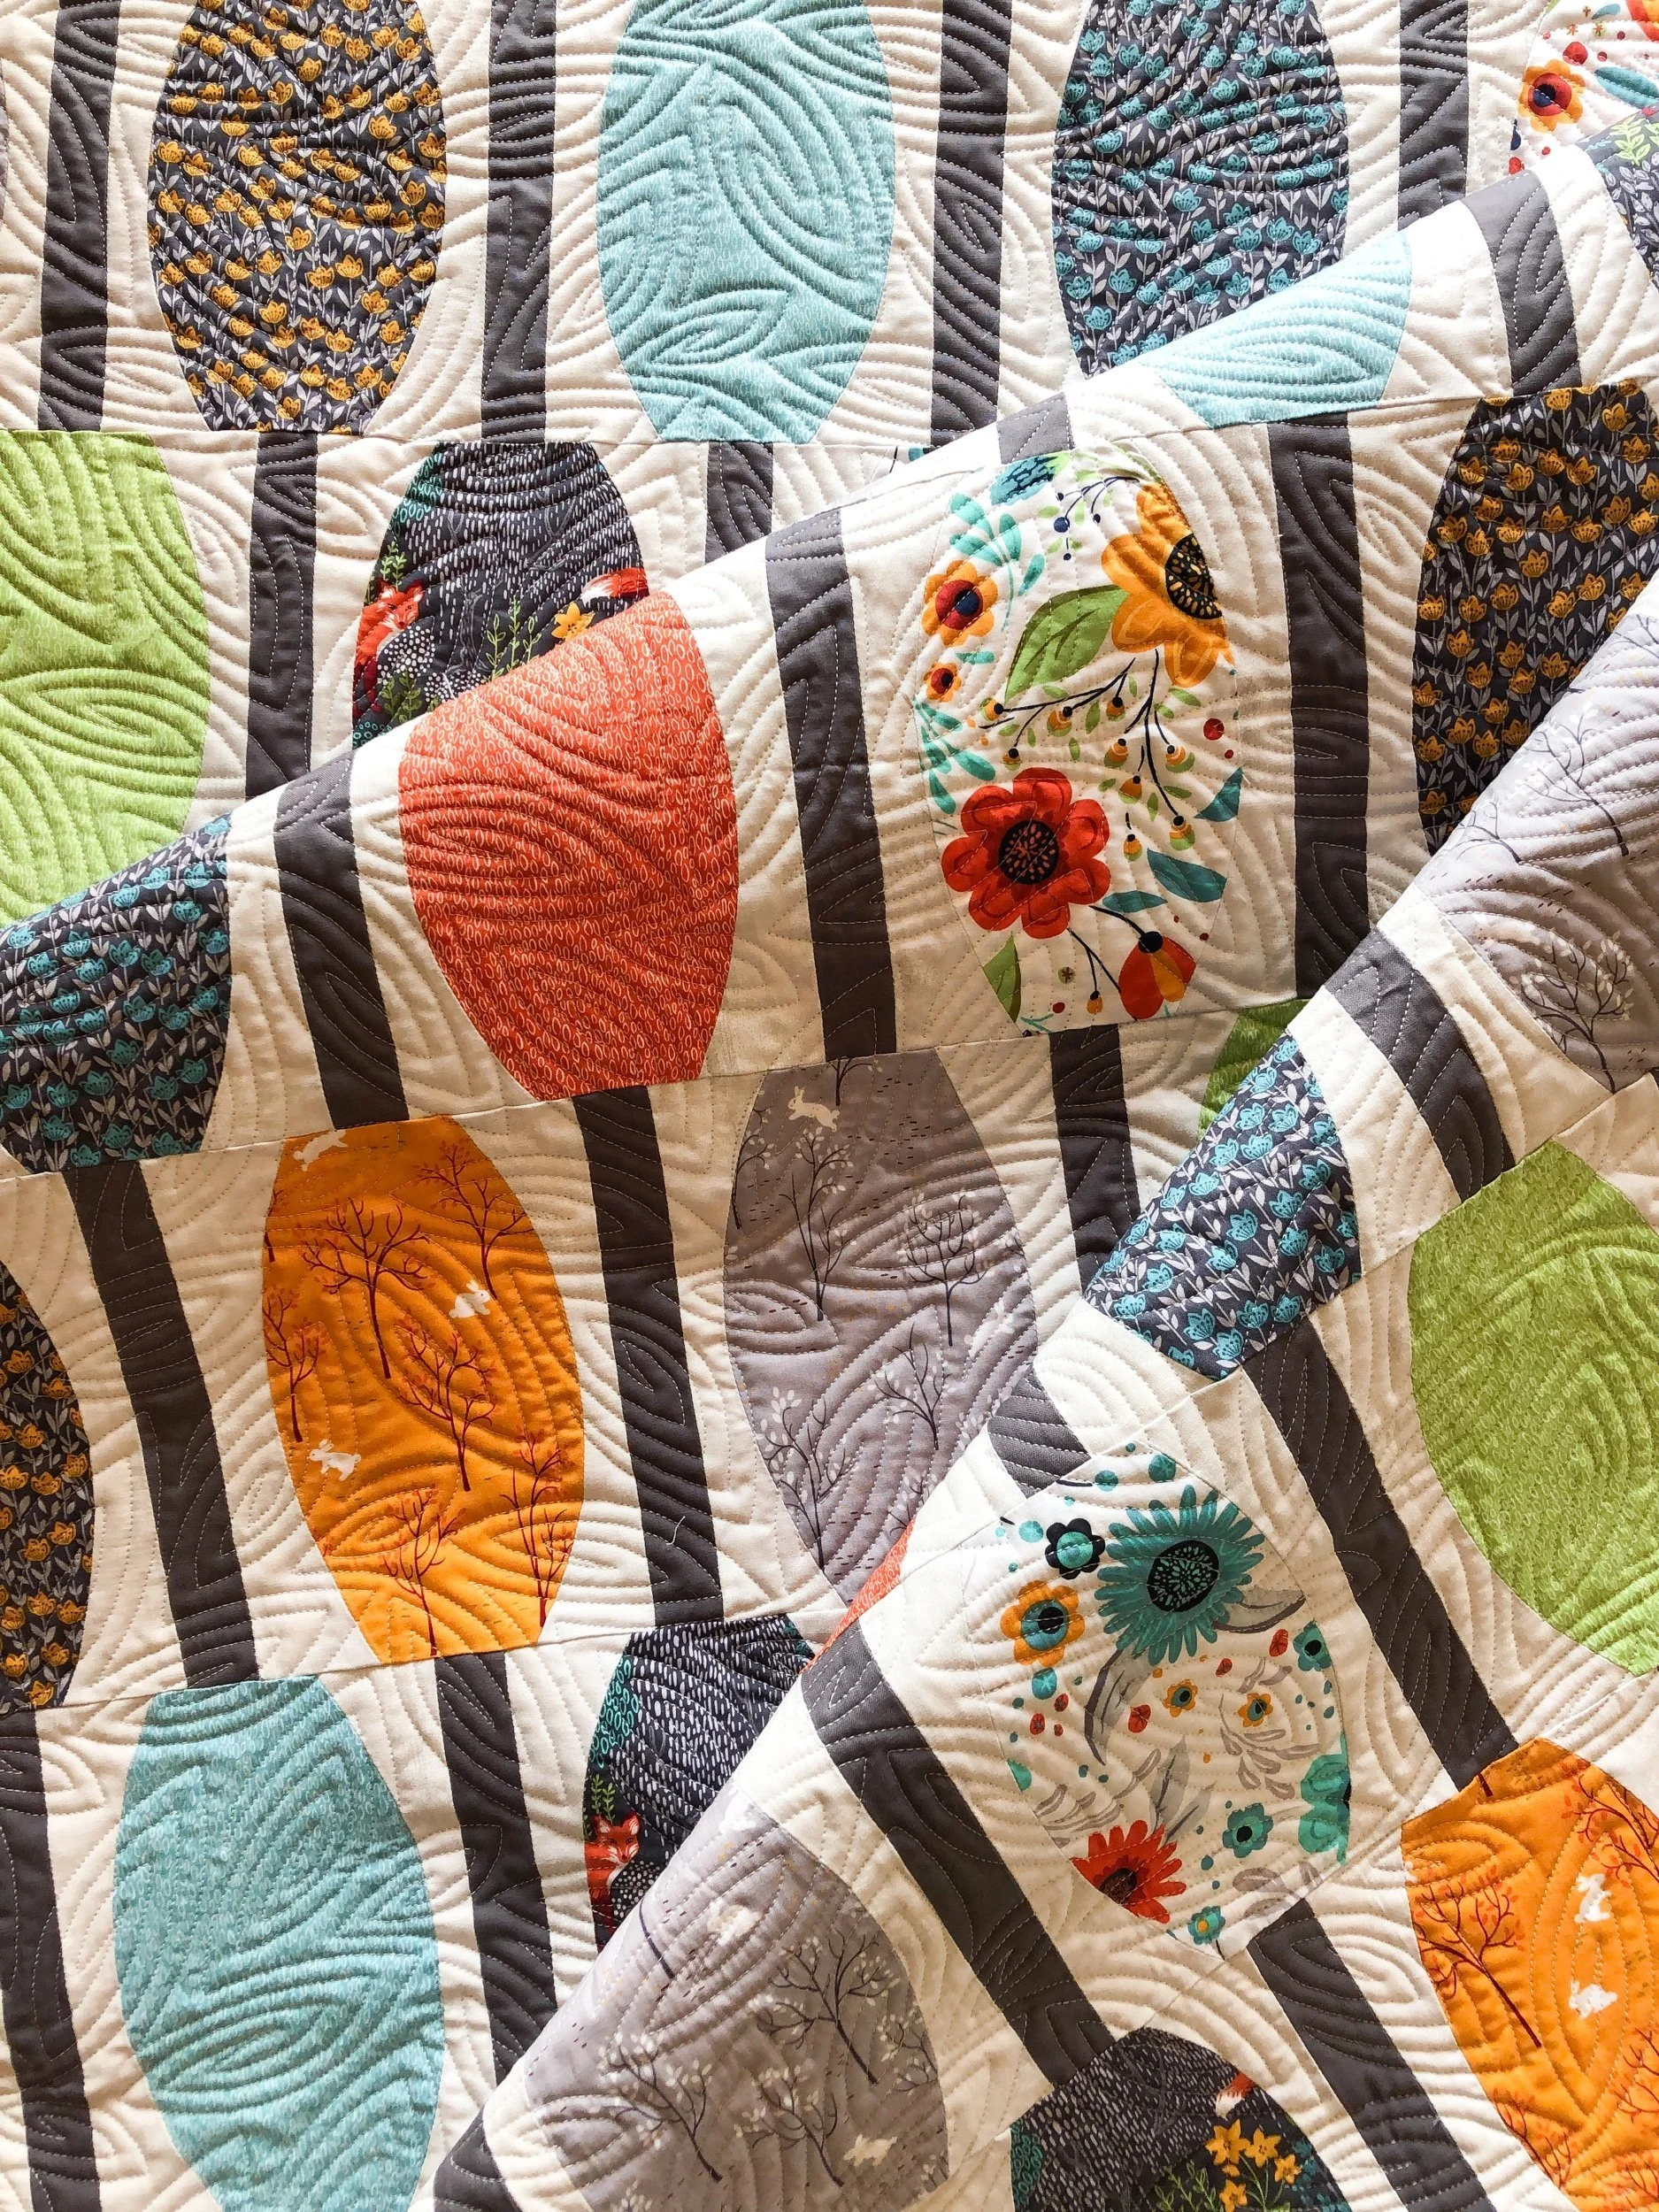
Courtney made this beautiful Urban Abacus quilt, amazing huh?!?!!! Courtney is young and does a beautiful job making her quilts. I’m serious impressed with her abilities. I shouldn’t be surprised she’s already making a quilt with curves, when her first quilt was a Hexie quilt with Y seams. This fun pattern is one of the oldie but goodie patterns by the Sew Kind of Wonderful sisters, using their Quick Curve Ruler. Click on the Urban Abacus link above to be directed to the pattern, and then don’t forget to get their ruler while you’re at it. They have made curves not only possible, but so fun…instead of frustrating.

I’m loving the fabrics and contrast of the colors against the cream background. This would be the perfect pattern to showcase fabrics that you love.
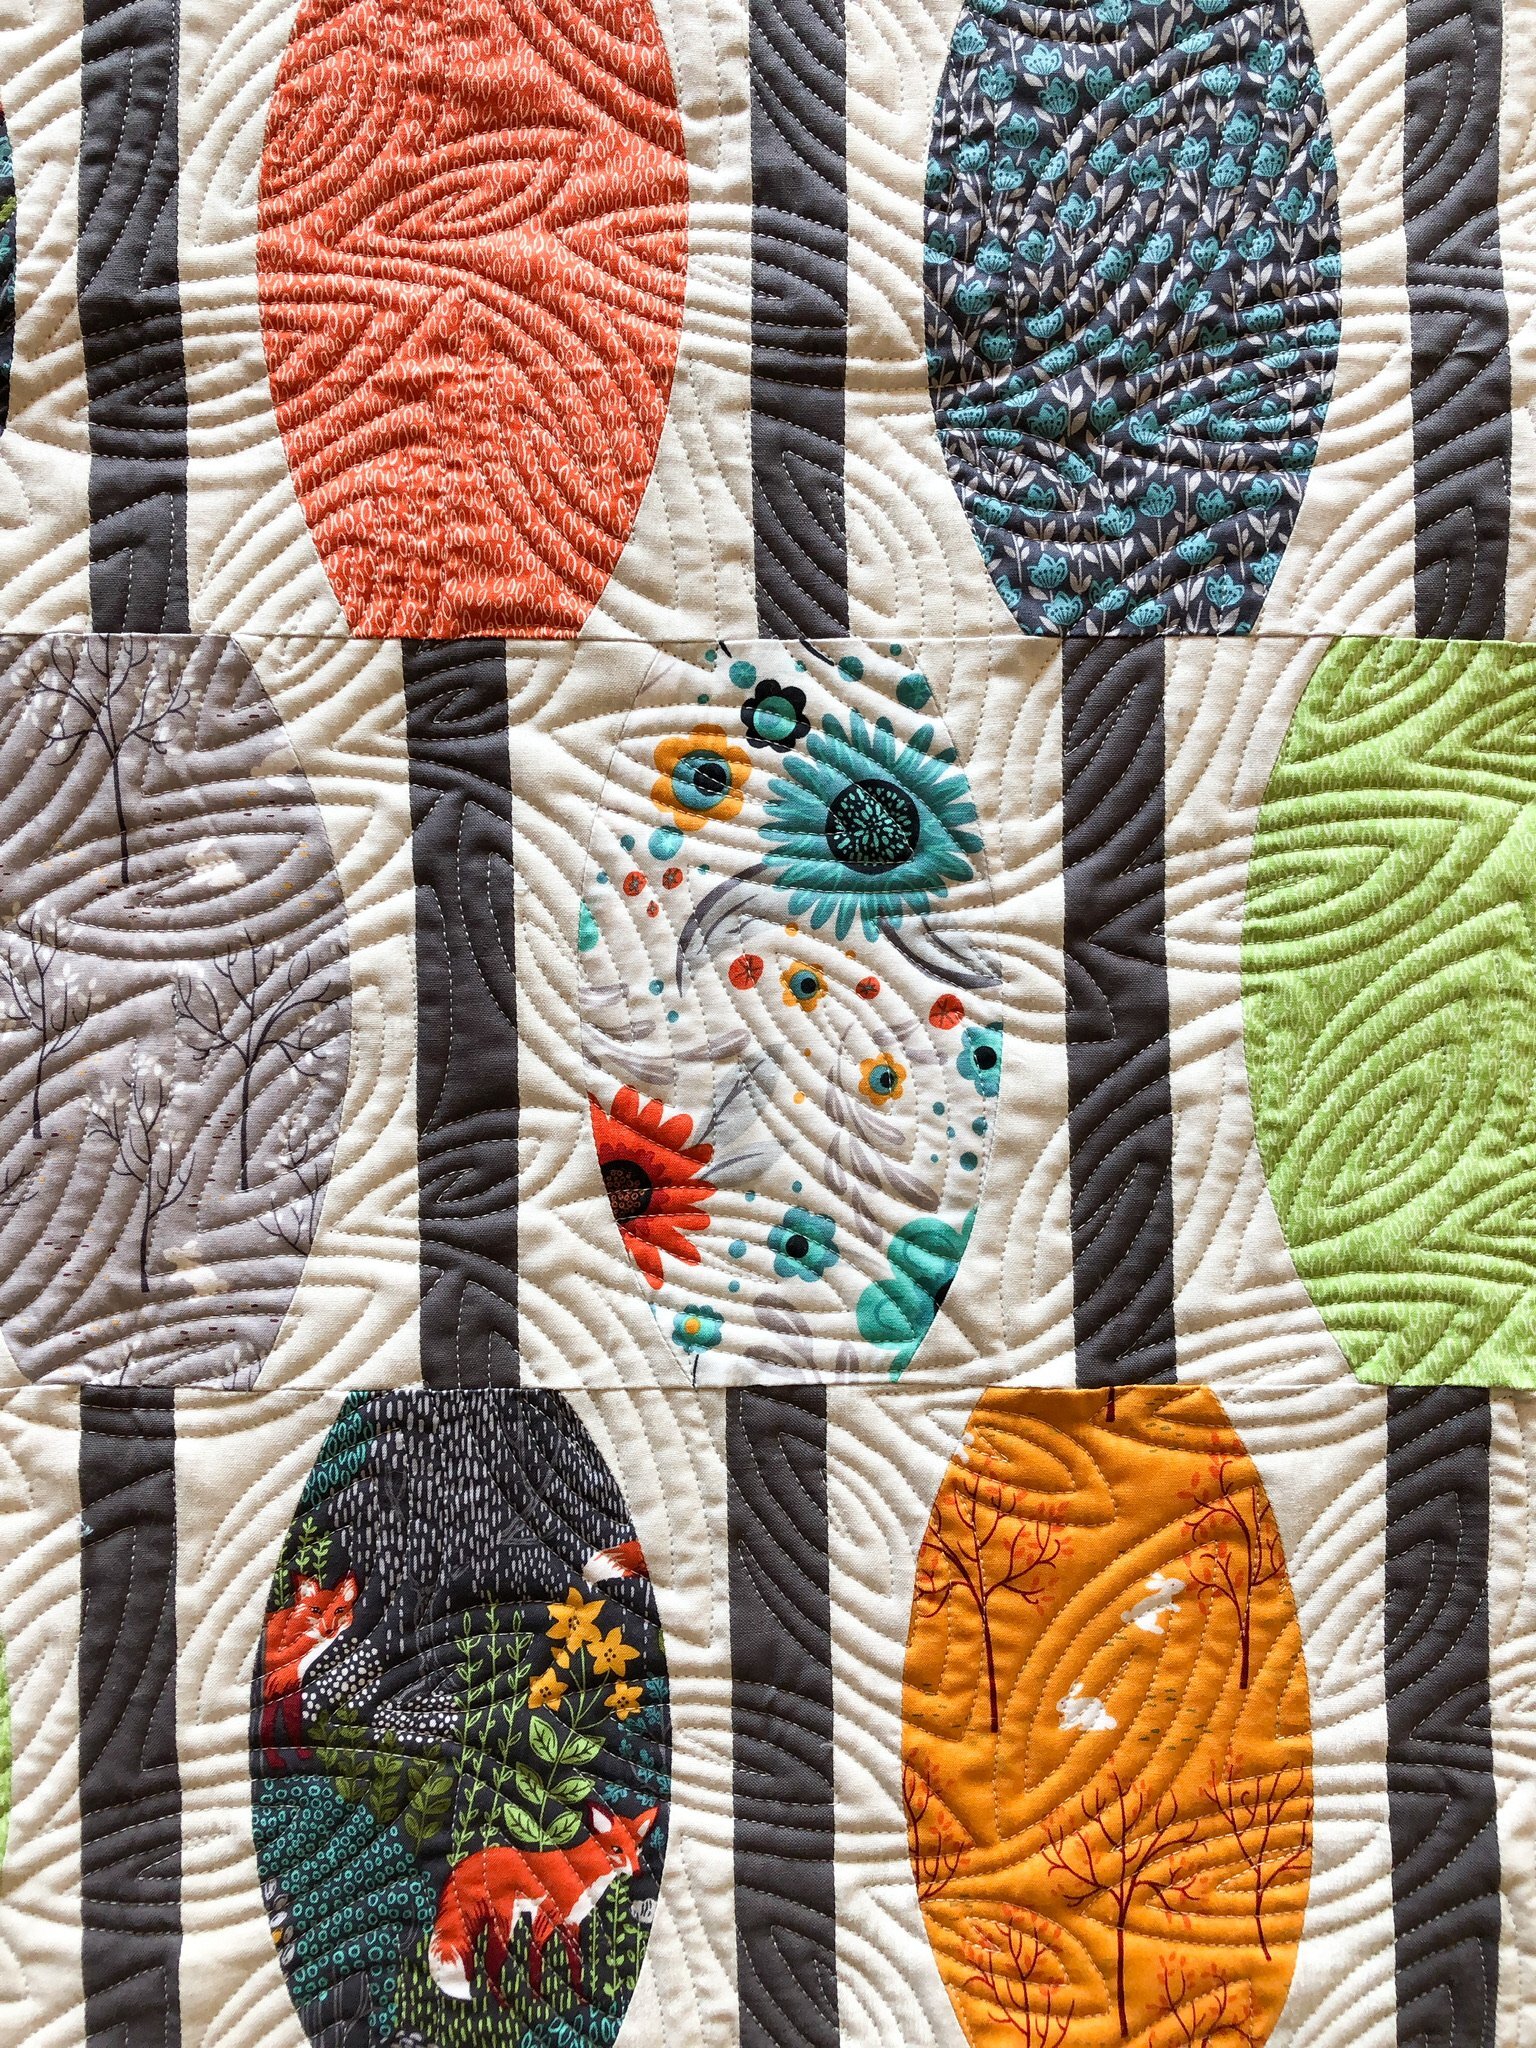
With the overall look of the leaves and foxes, I thought that Patricia Ritter’s and my Birchwood quilting design would look great!! I’m a little biased, I know, but I think it looks fabulous!
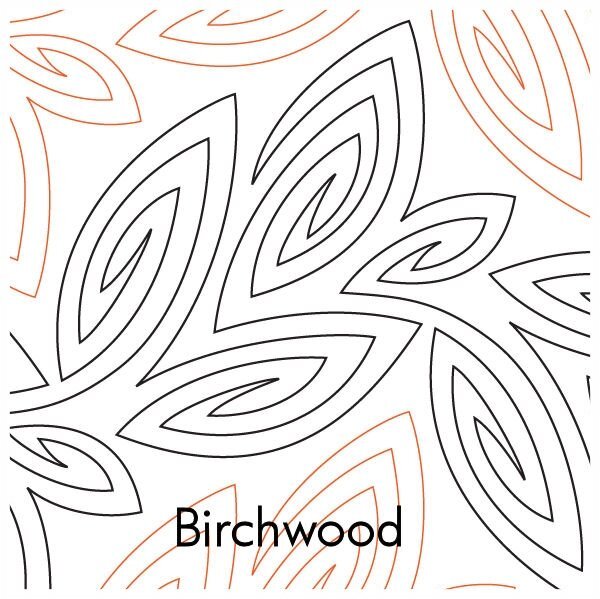
I actually love this design so much, I used it on my Christmas quilt. It’s a fun take of a leaf shape wood grain. Such a versatile design. It’s available at Urban Elementz.
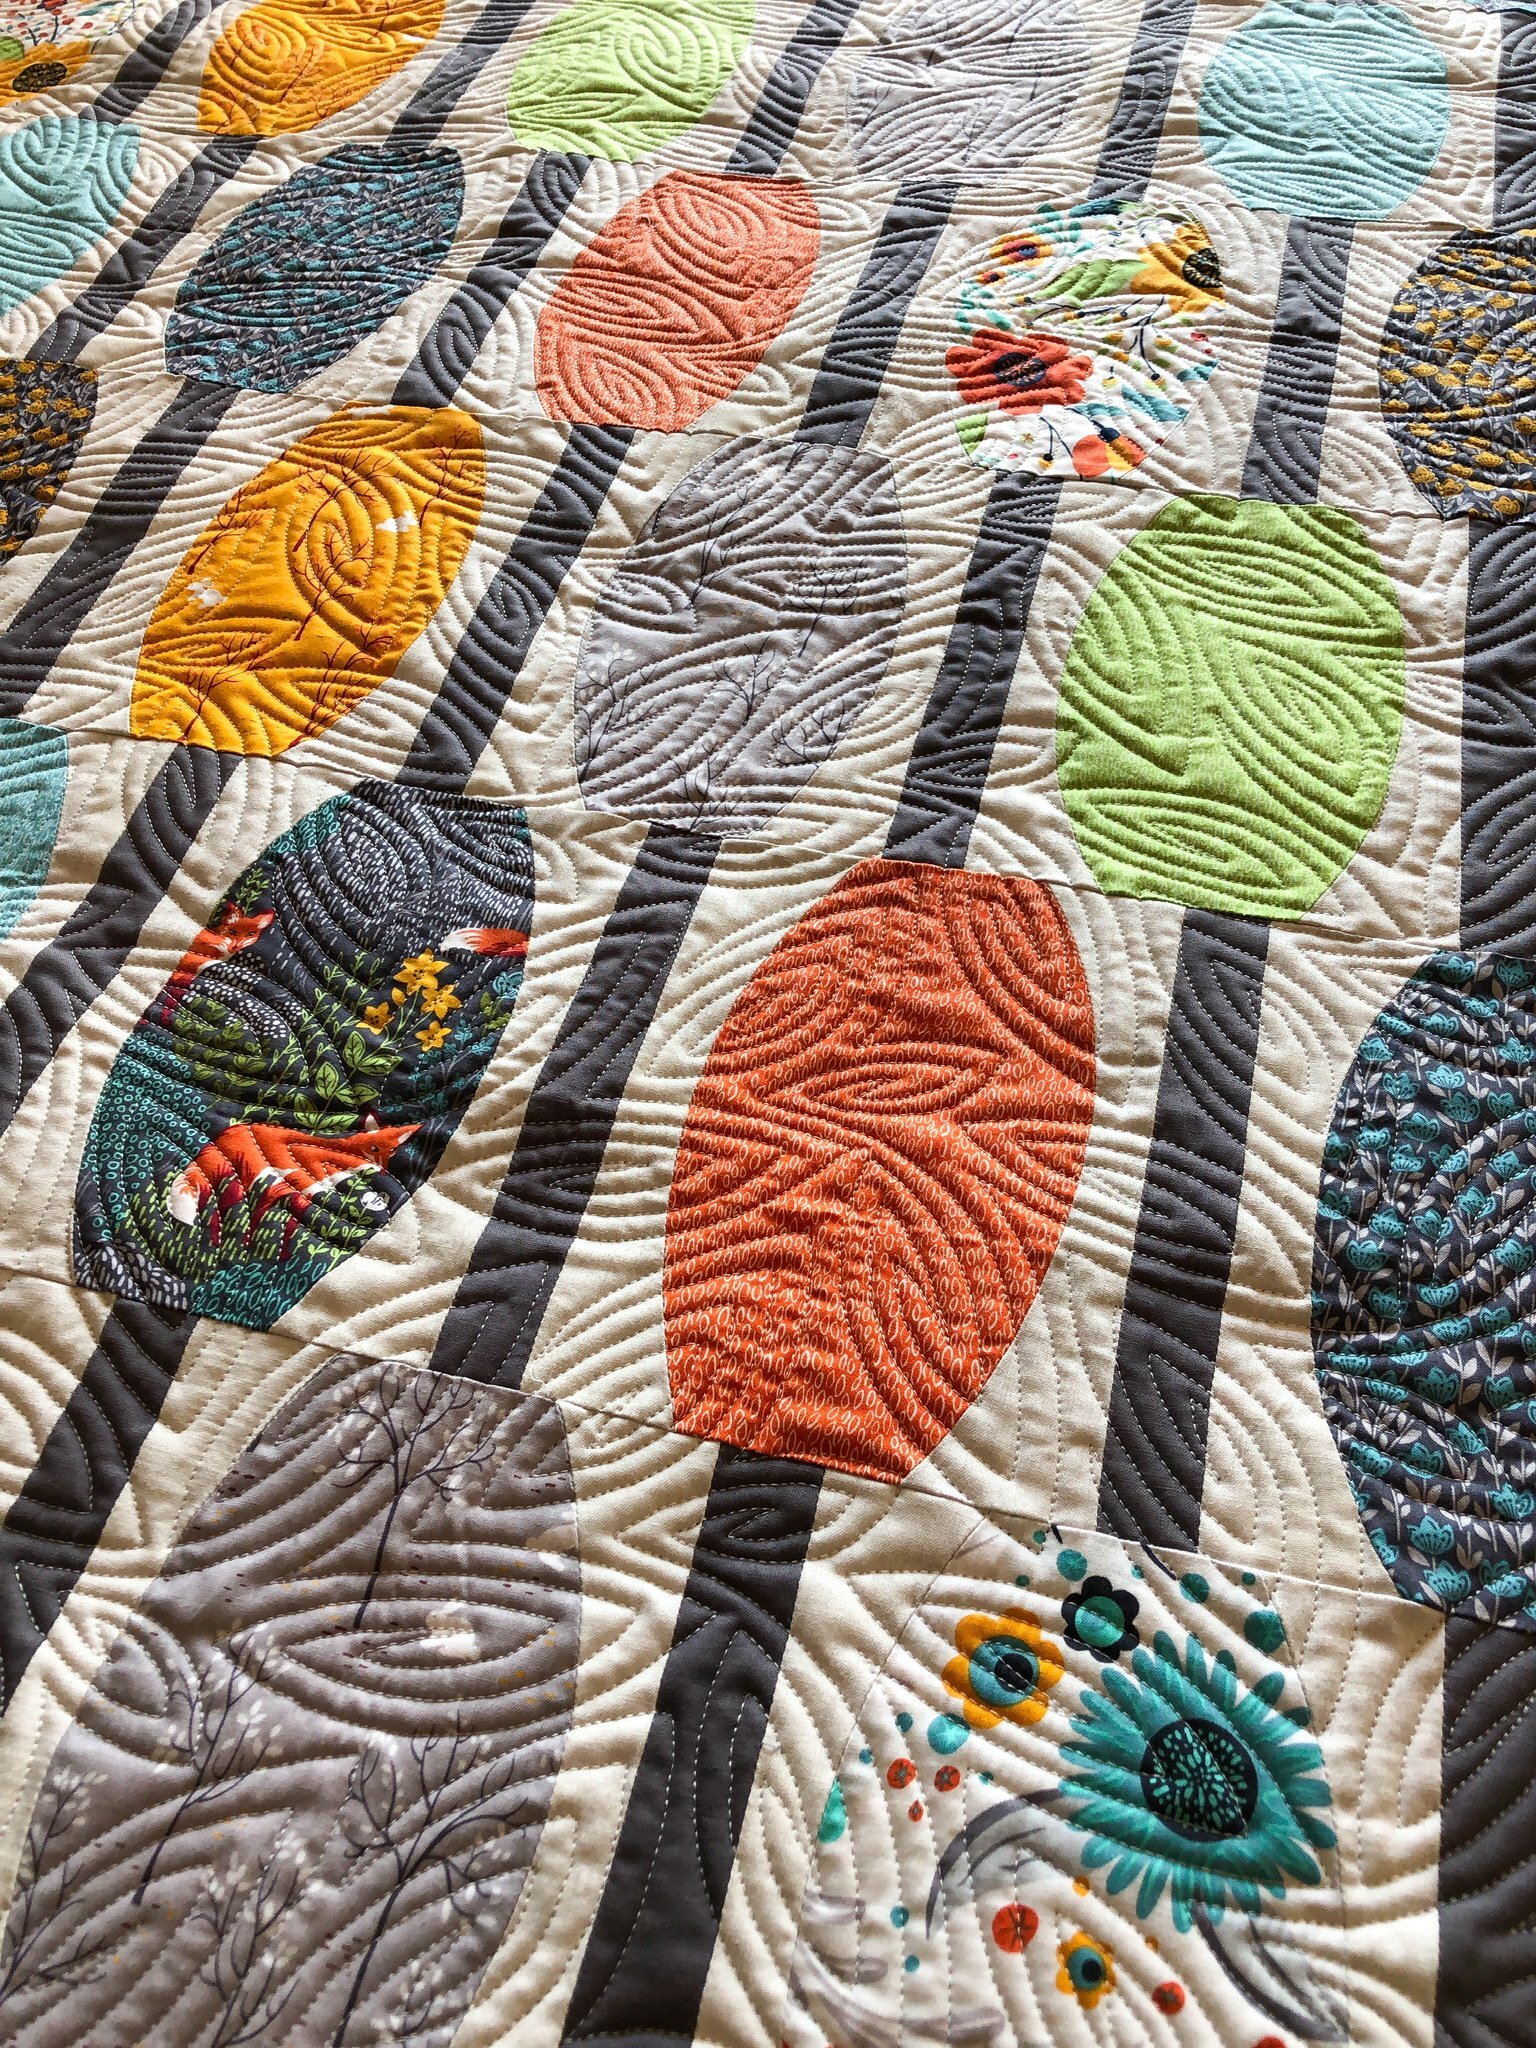
I used a cream Omni thread from Superior Threads, and my favorite 8020 cotton poly blend batting from Winline Textiles.
This quilt is a dream make for me. There are a few others I want to make as well, now I just need to be on the lookout for some fun fabrics.

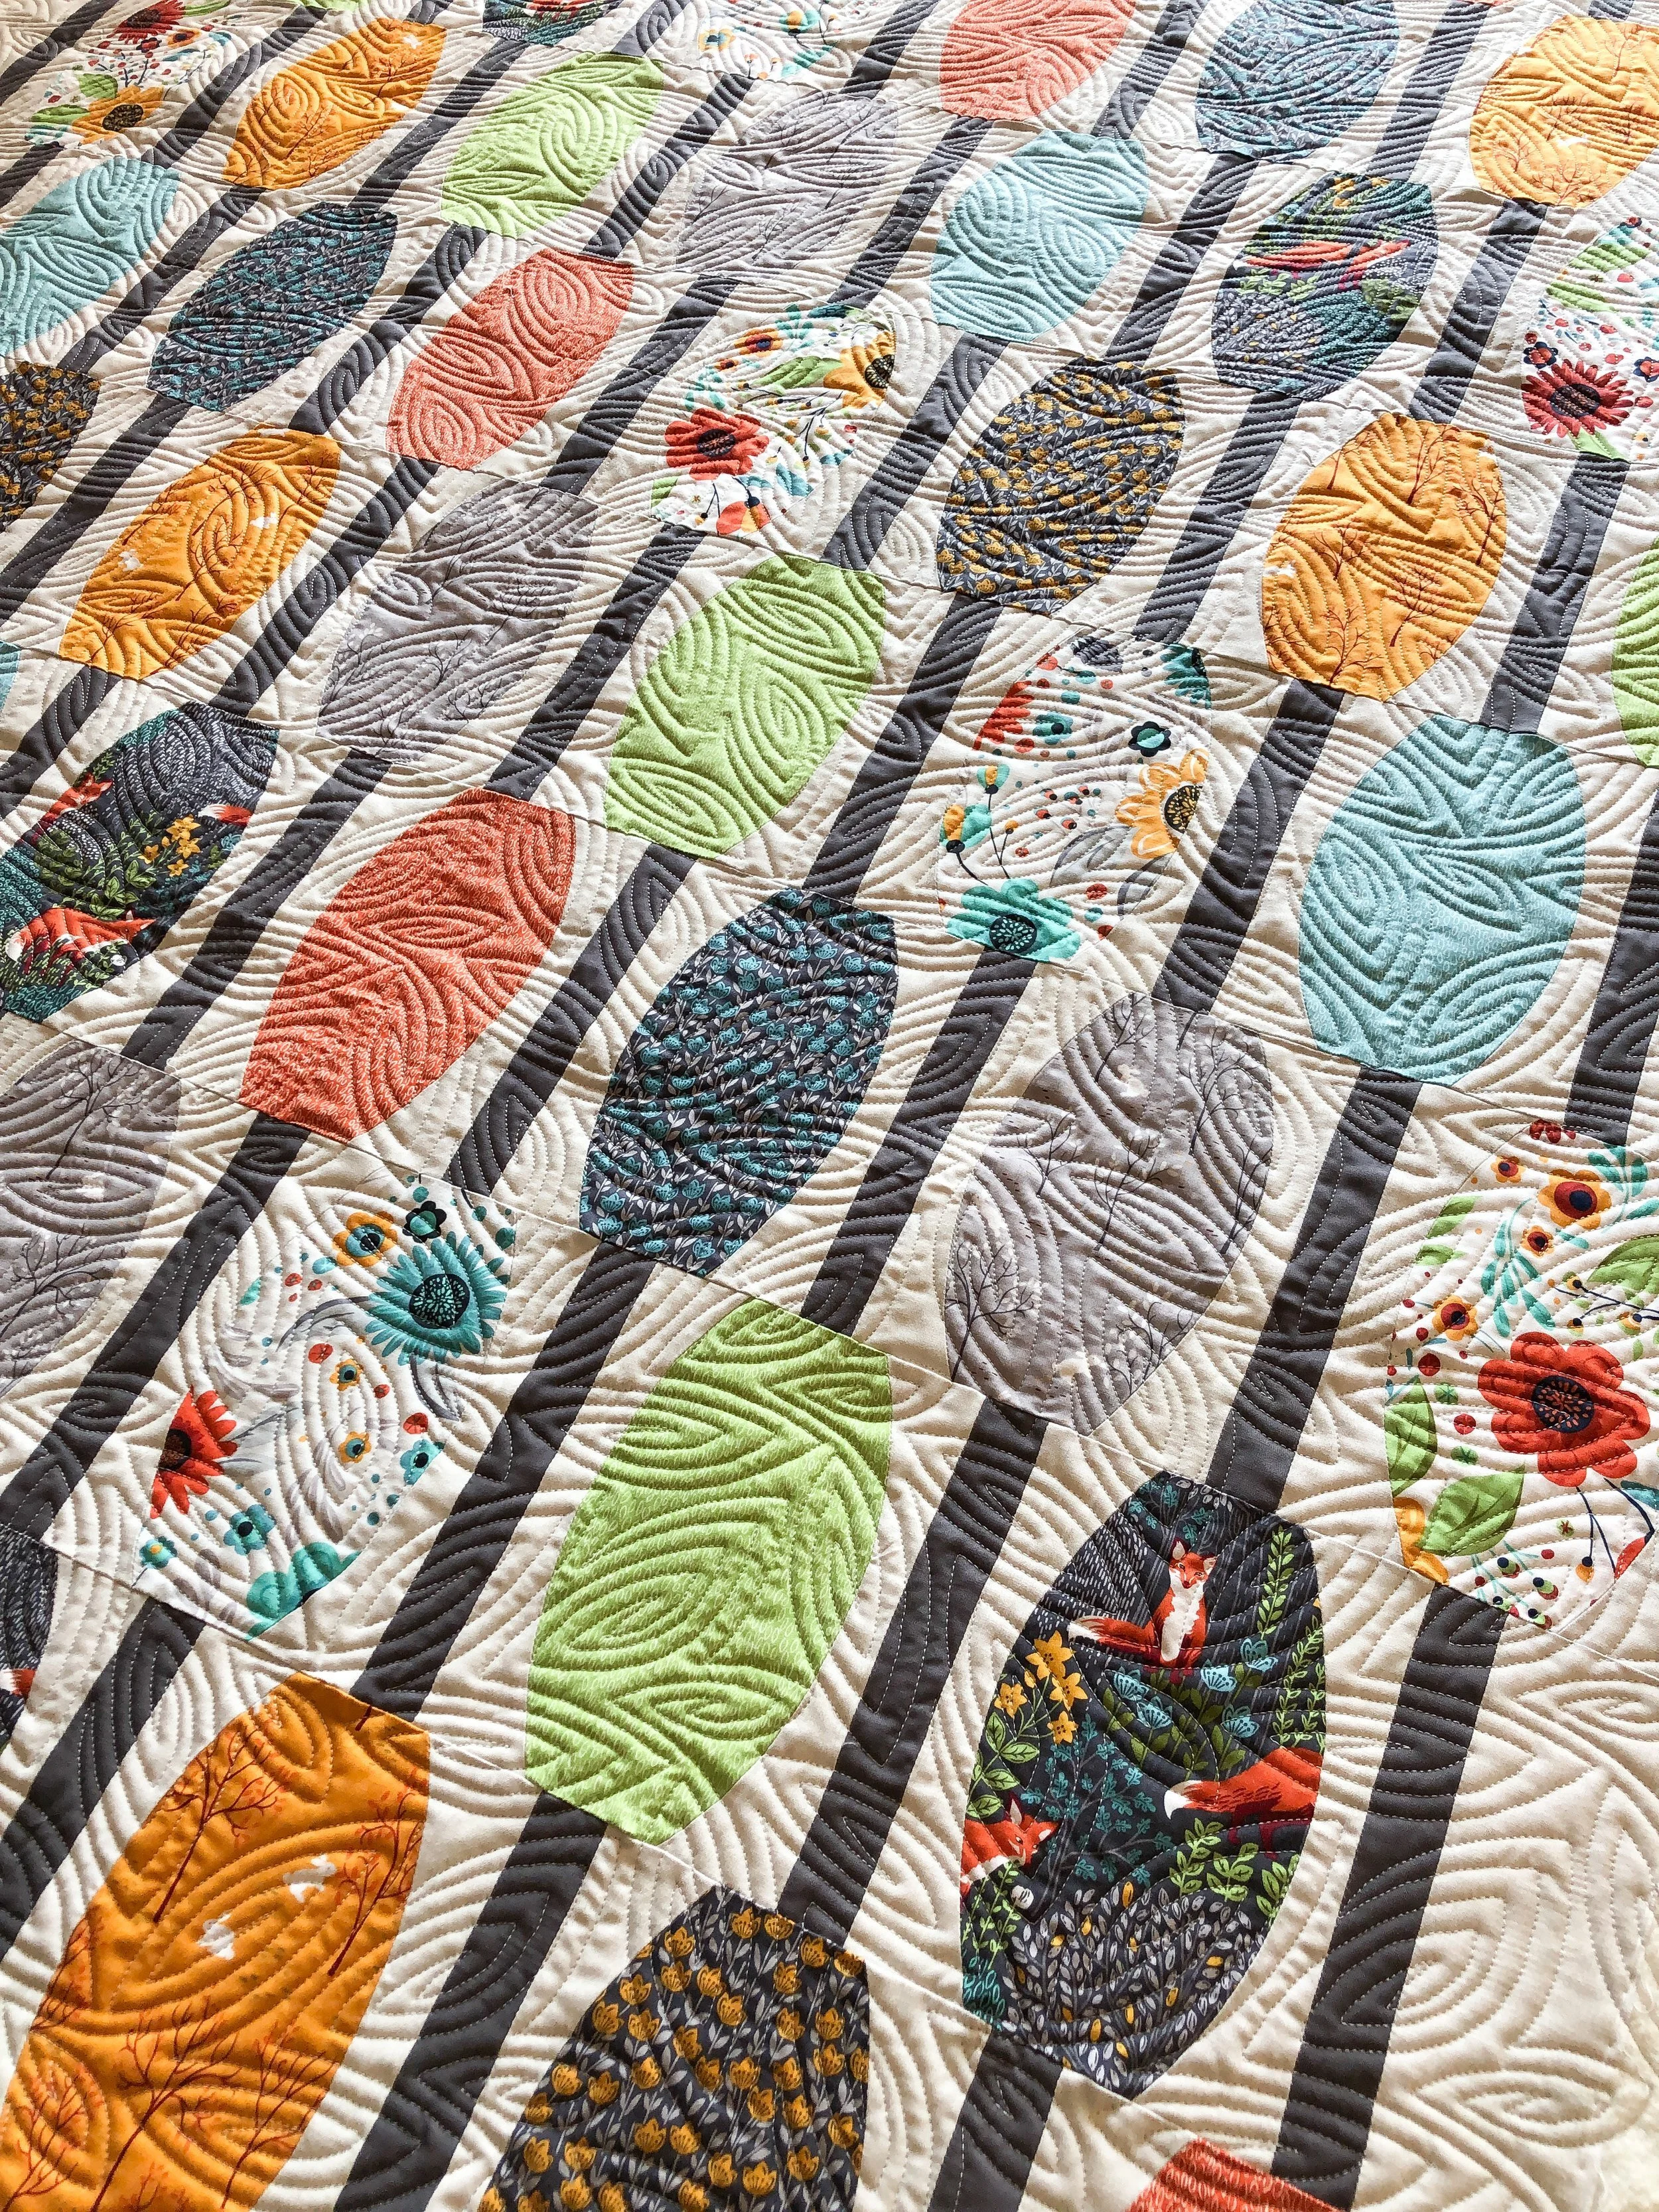
A couple of other close ups. Just love it sooo much!

Thanks for being here for another quick quilting blog post. I hope you enjoyed all the pictures, and appreciate the info about quilting. Happy quilting • Leisha
Kathy’s Halloween quilt
Hi Friends,
Check out this super cute Halloween quilt that Kathy made in one day!! We sew together at a sewing group, and she put this together so quick.
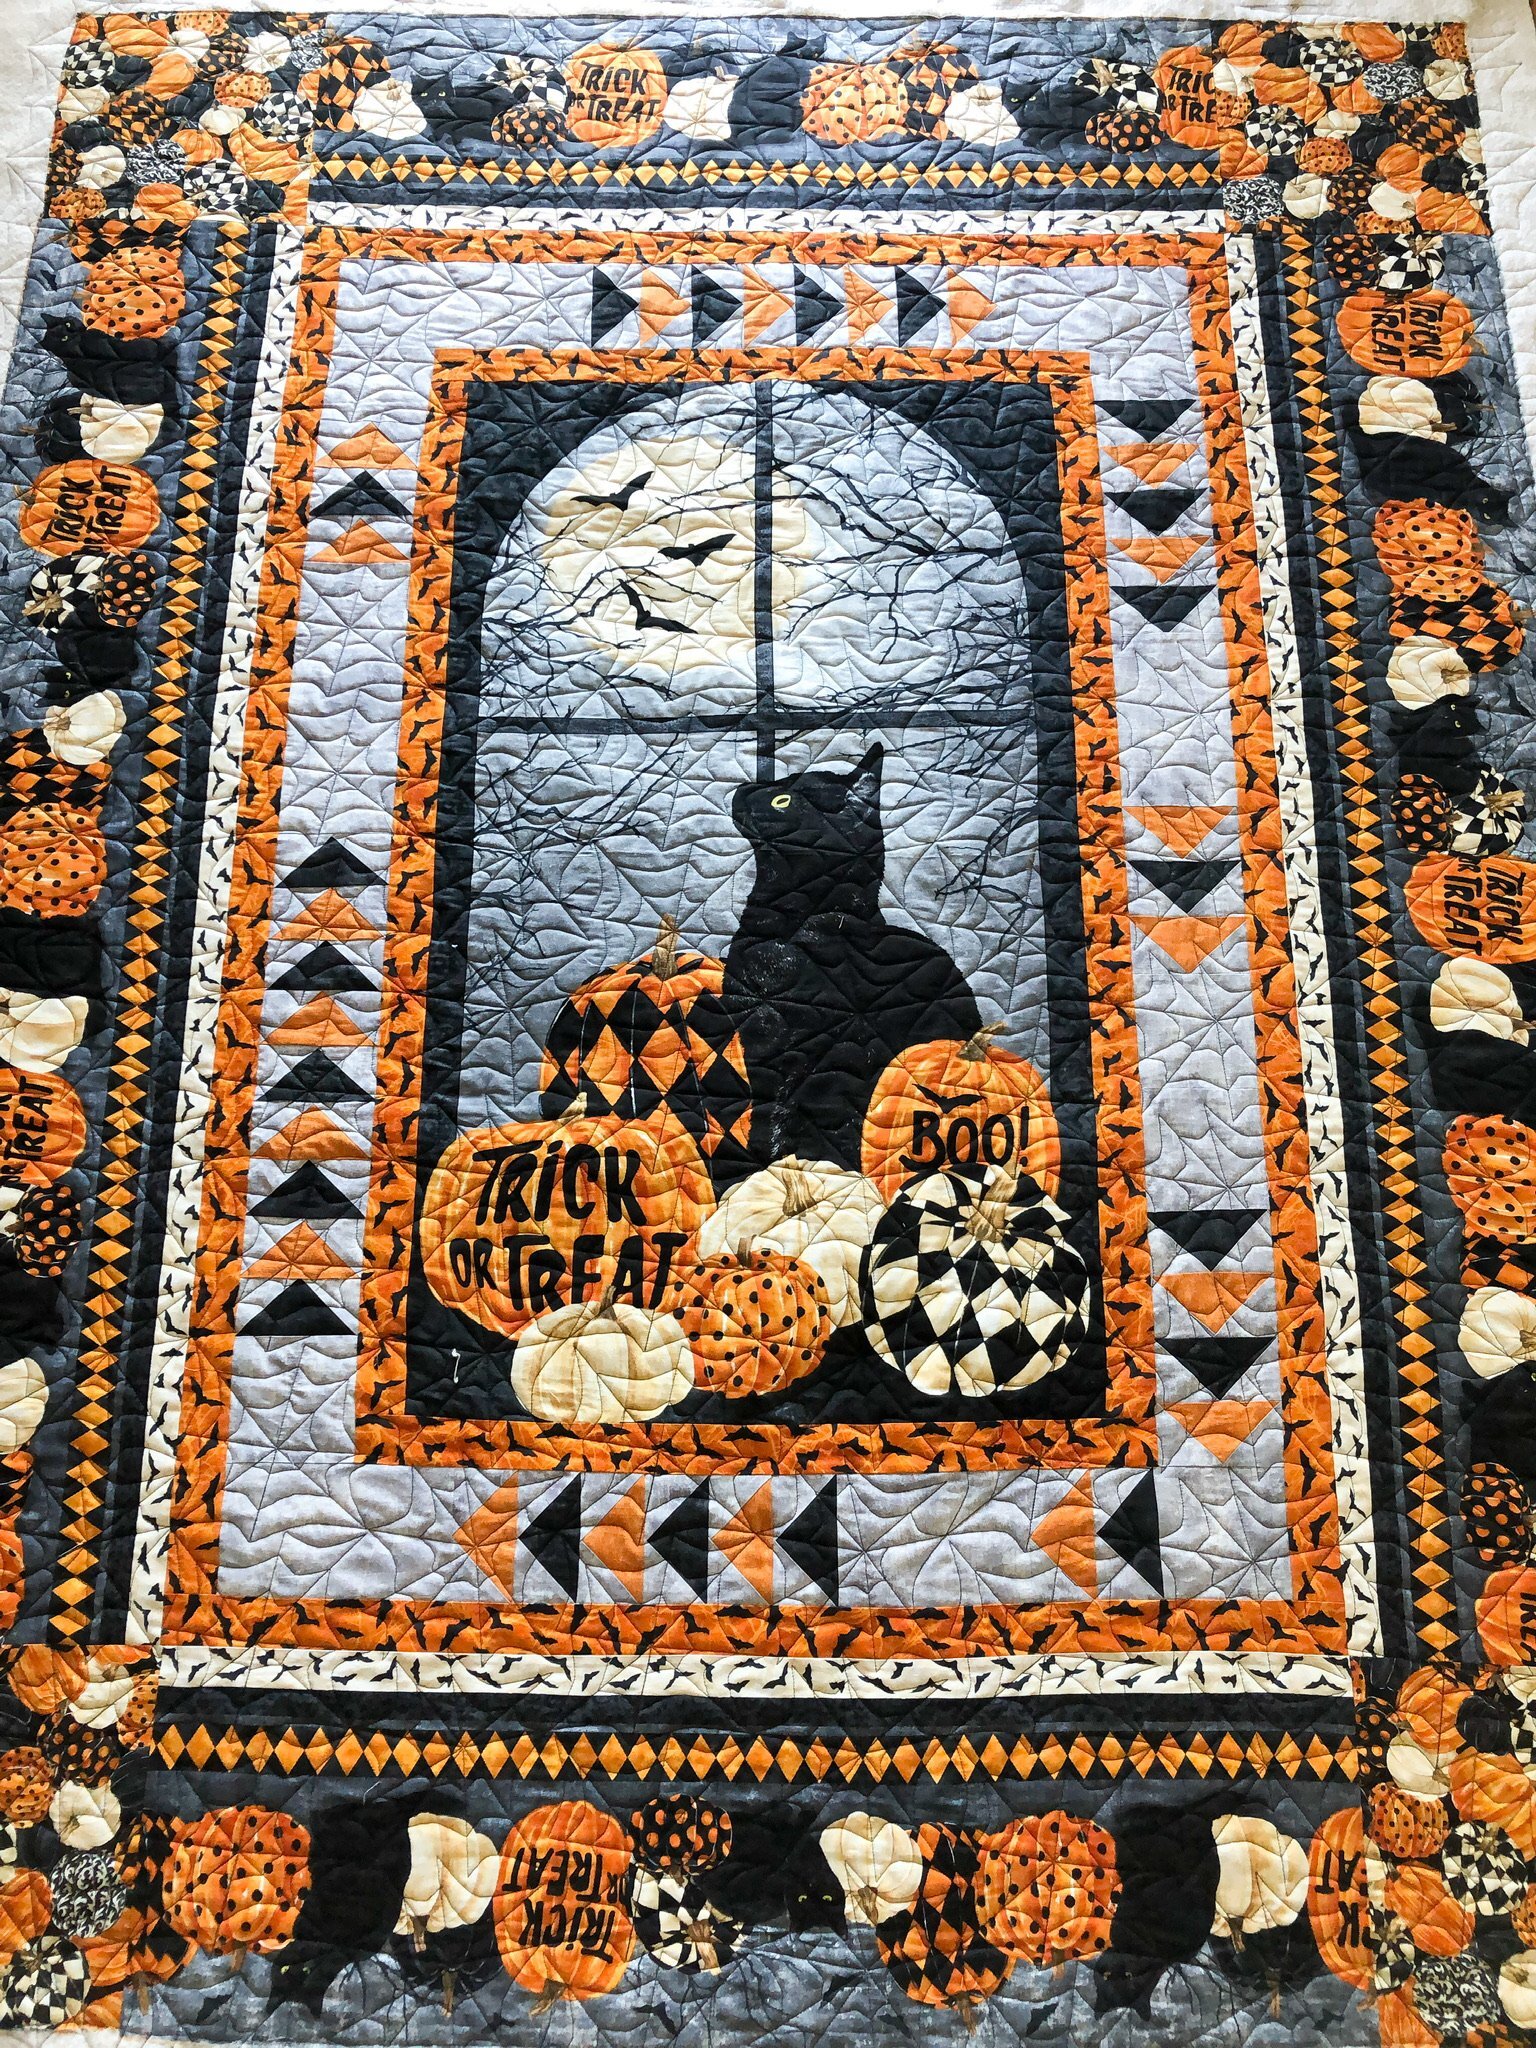
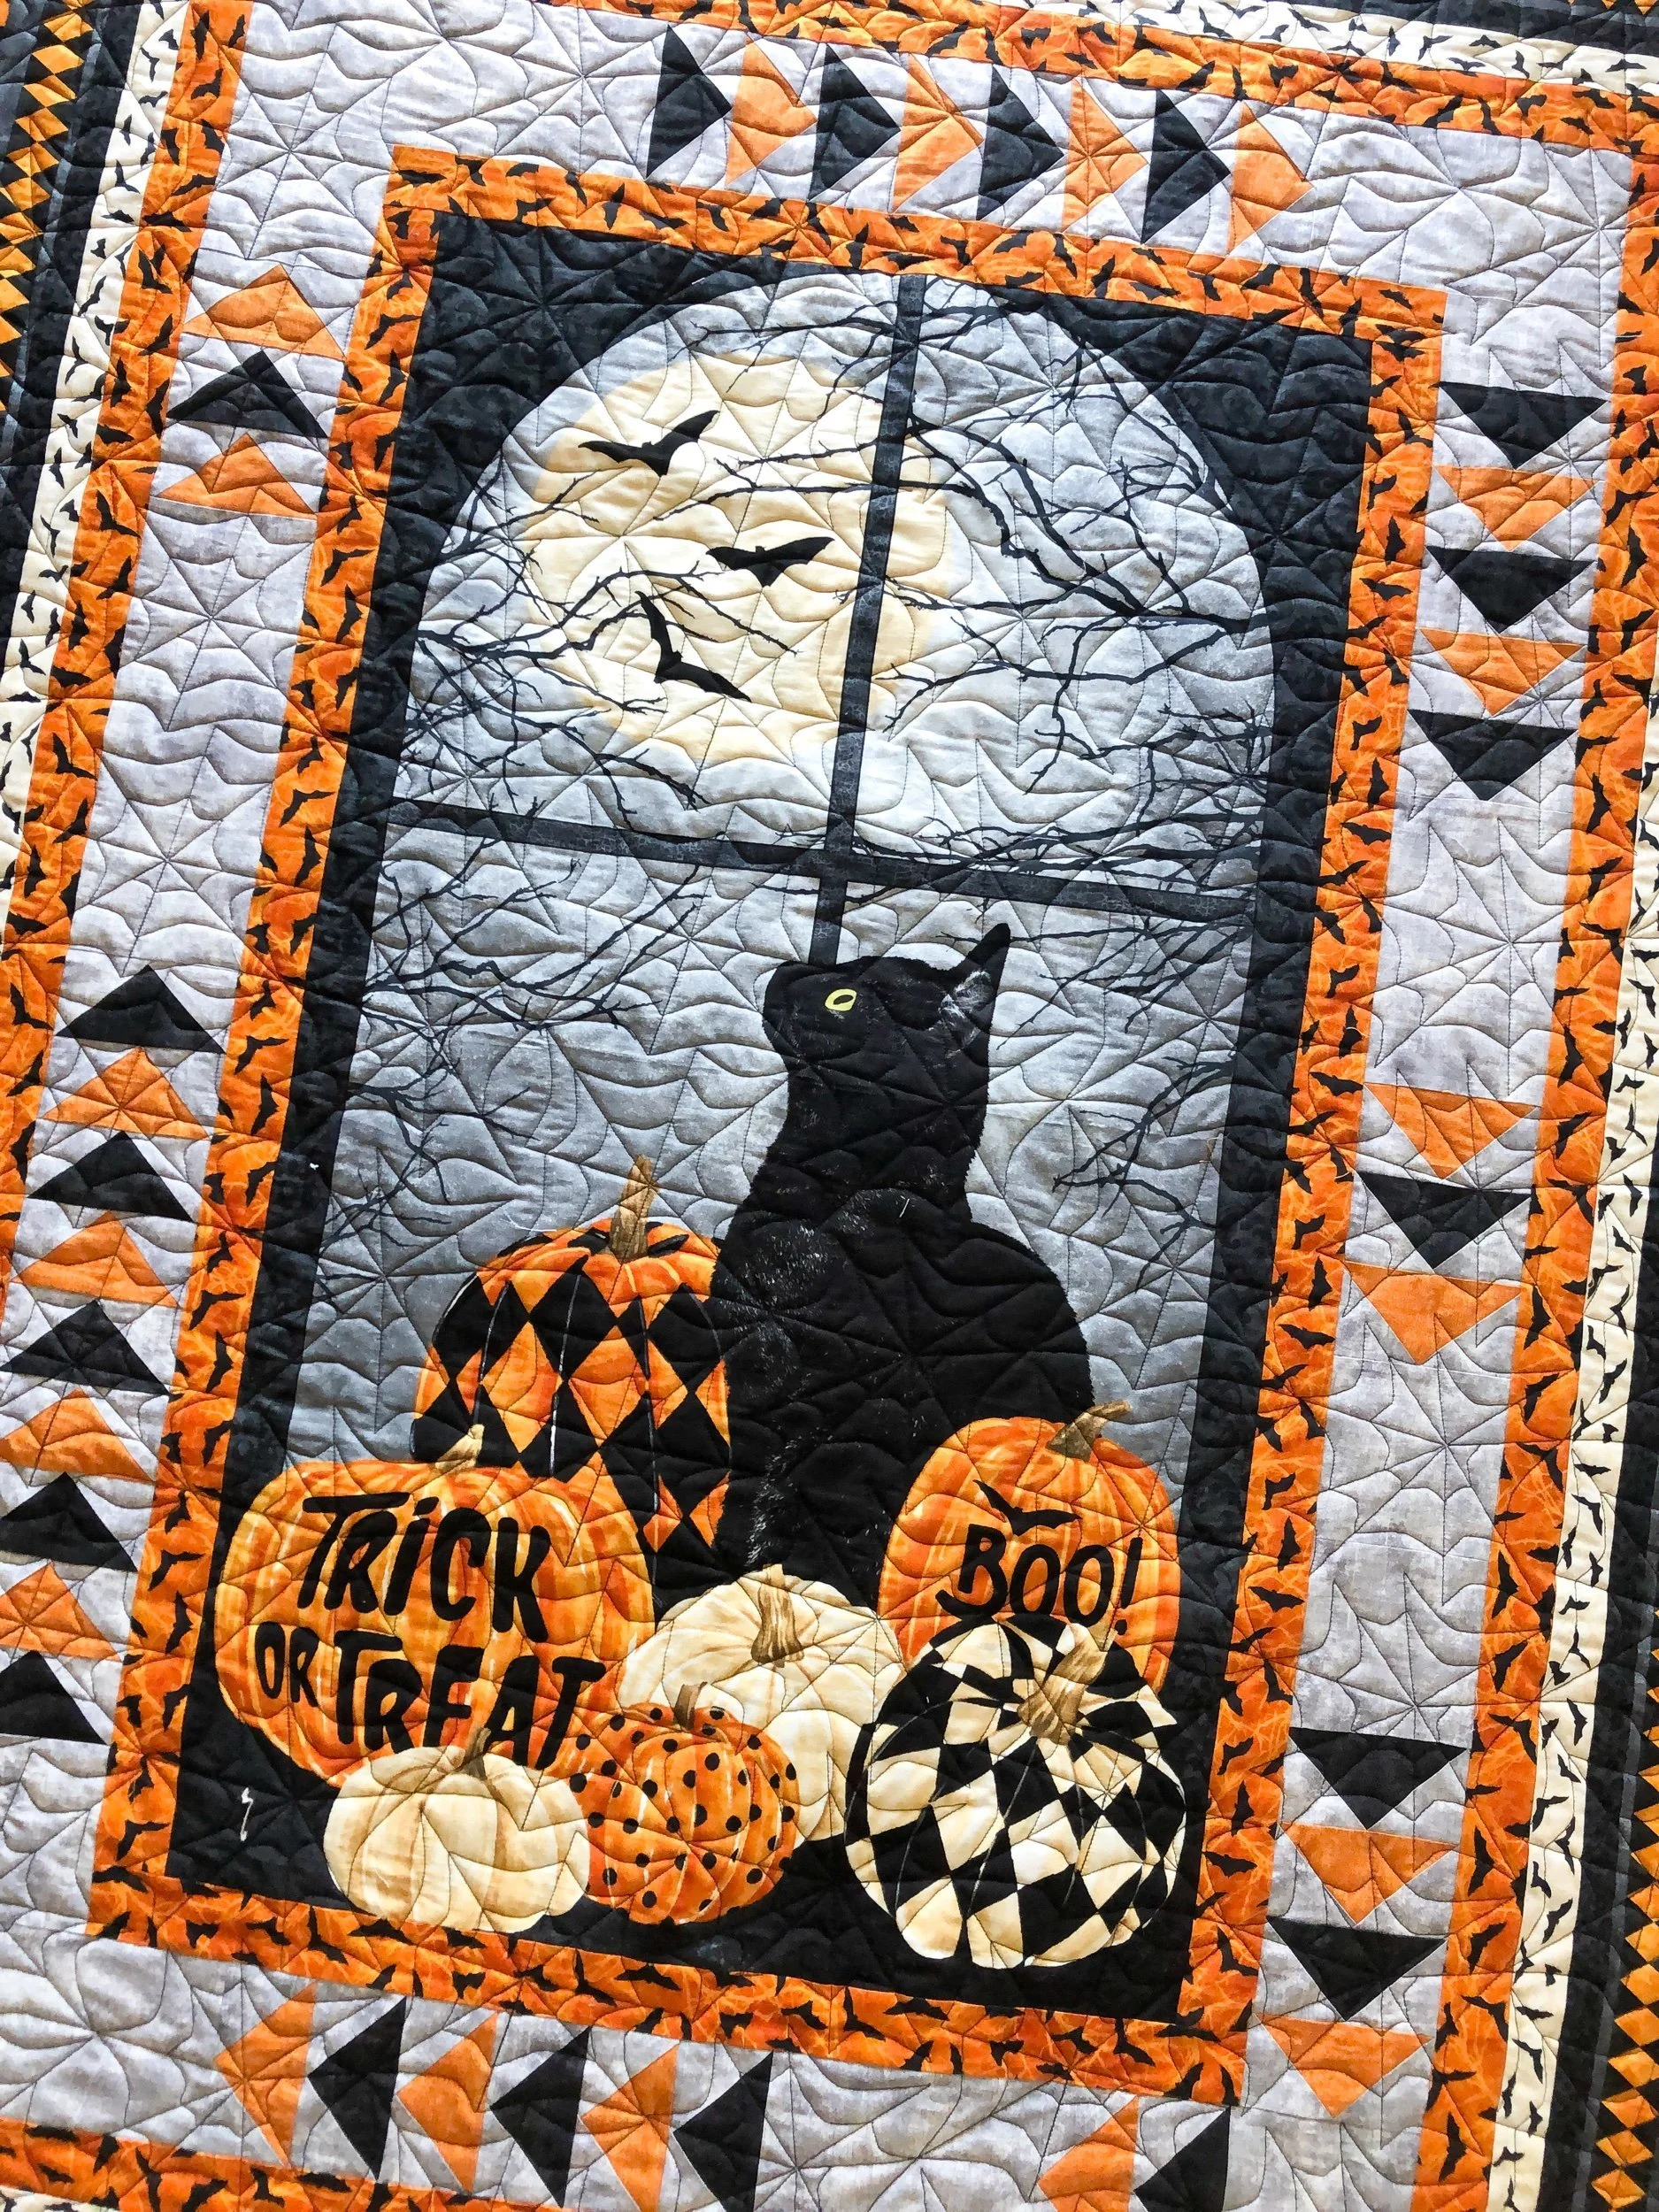
The pattern is called Goose Chase by PineRose Designs, featuring the Black Cat Capers fabrics from Northcott. Kathy got it in a kit from our local quilt shop, Stylish Fabrics. As I was searching for the pattern, a blog post said something about this being a hard quilt to make, once the panel is out of stock. If you’re interested in it, please use the information above to search for one. I’m not aware of anyone who has this quilt kit available.

We talked about different thread colors, and decided Black would be great!! I used my favorite 8020 cotton poly blend batting from Winline Textiles.

Kathy wanted spiderwebs for the quilting, which is perfect with the black thread. I used Haunted Web by Apricot Moon Designs.

Looks so cute quilted over that cat!!

What holiday themed quilts are you wanting to make this year???
Thanks for coming on by! Happy quilting, - Leisha
Do you have something that you’d like to have quilted? I’d love to quilt for you. Please check out my Longarm Quilting Services page for info.
Julie’s Twin Stars
Hi Friends,
I’ve blogged a lot this week, in an effort to catch up. I have another beautiful quilt to share with you.
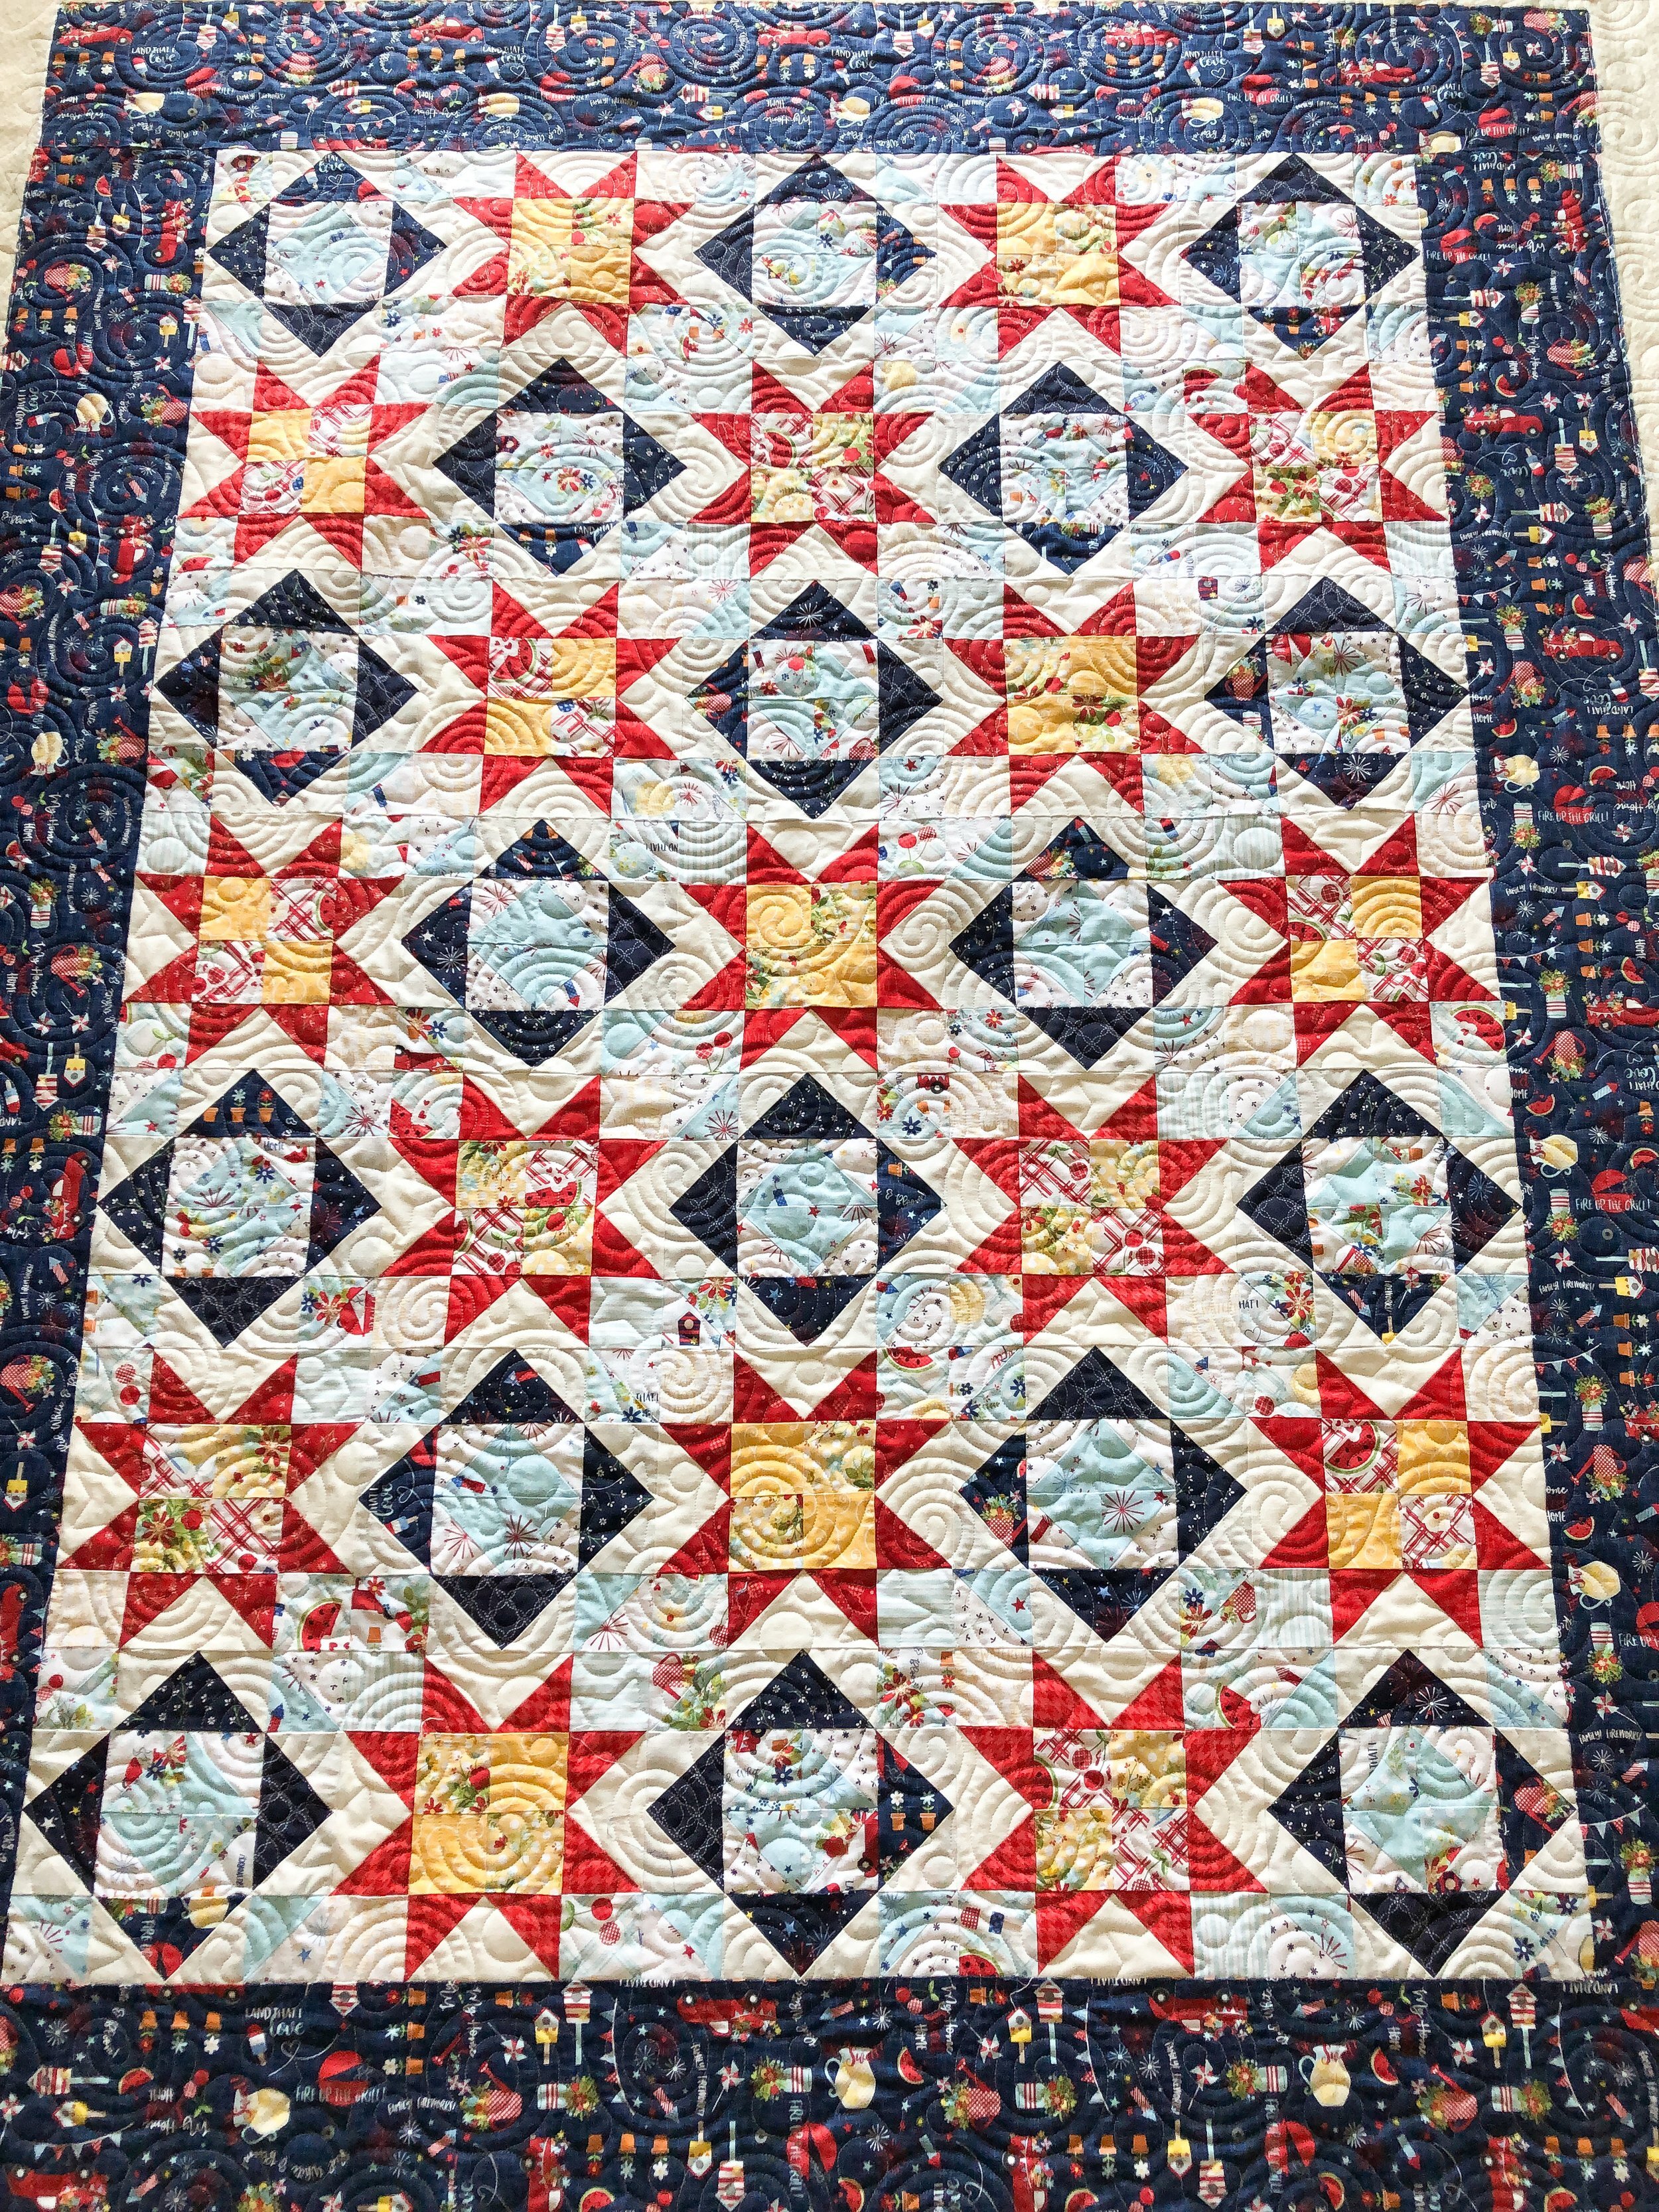
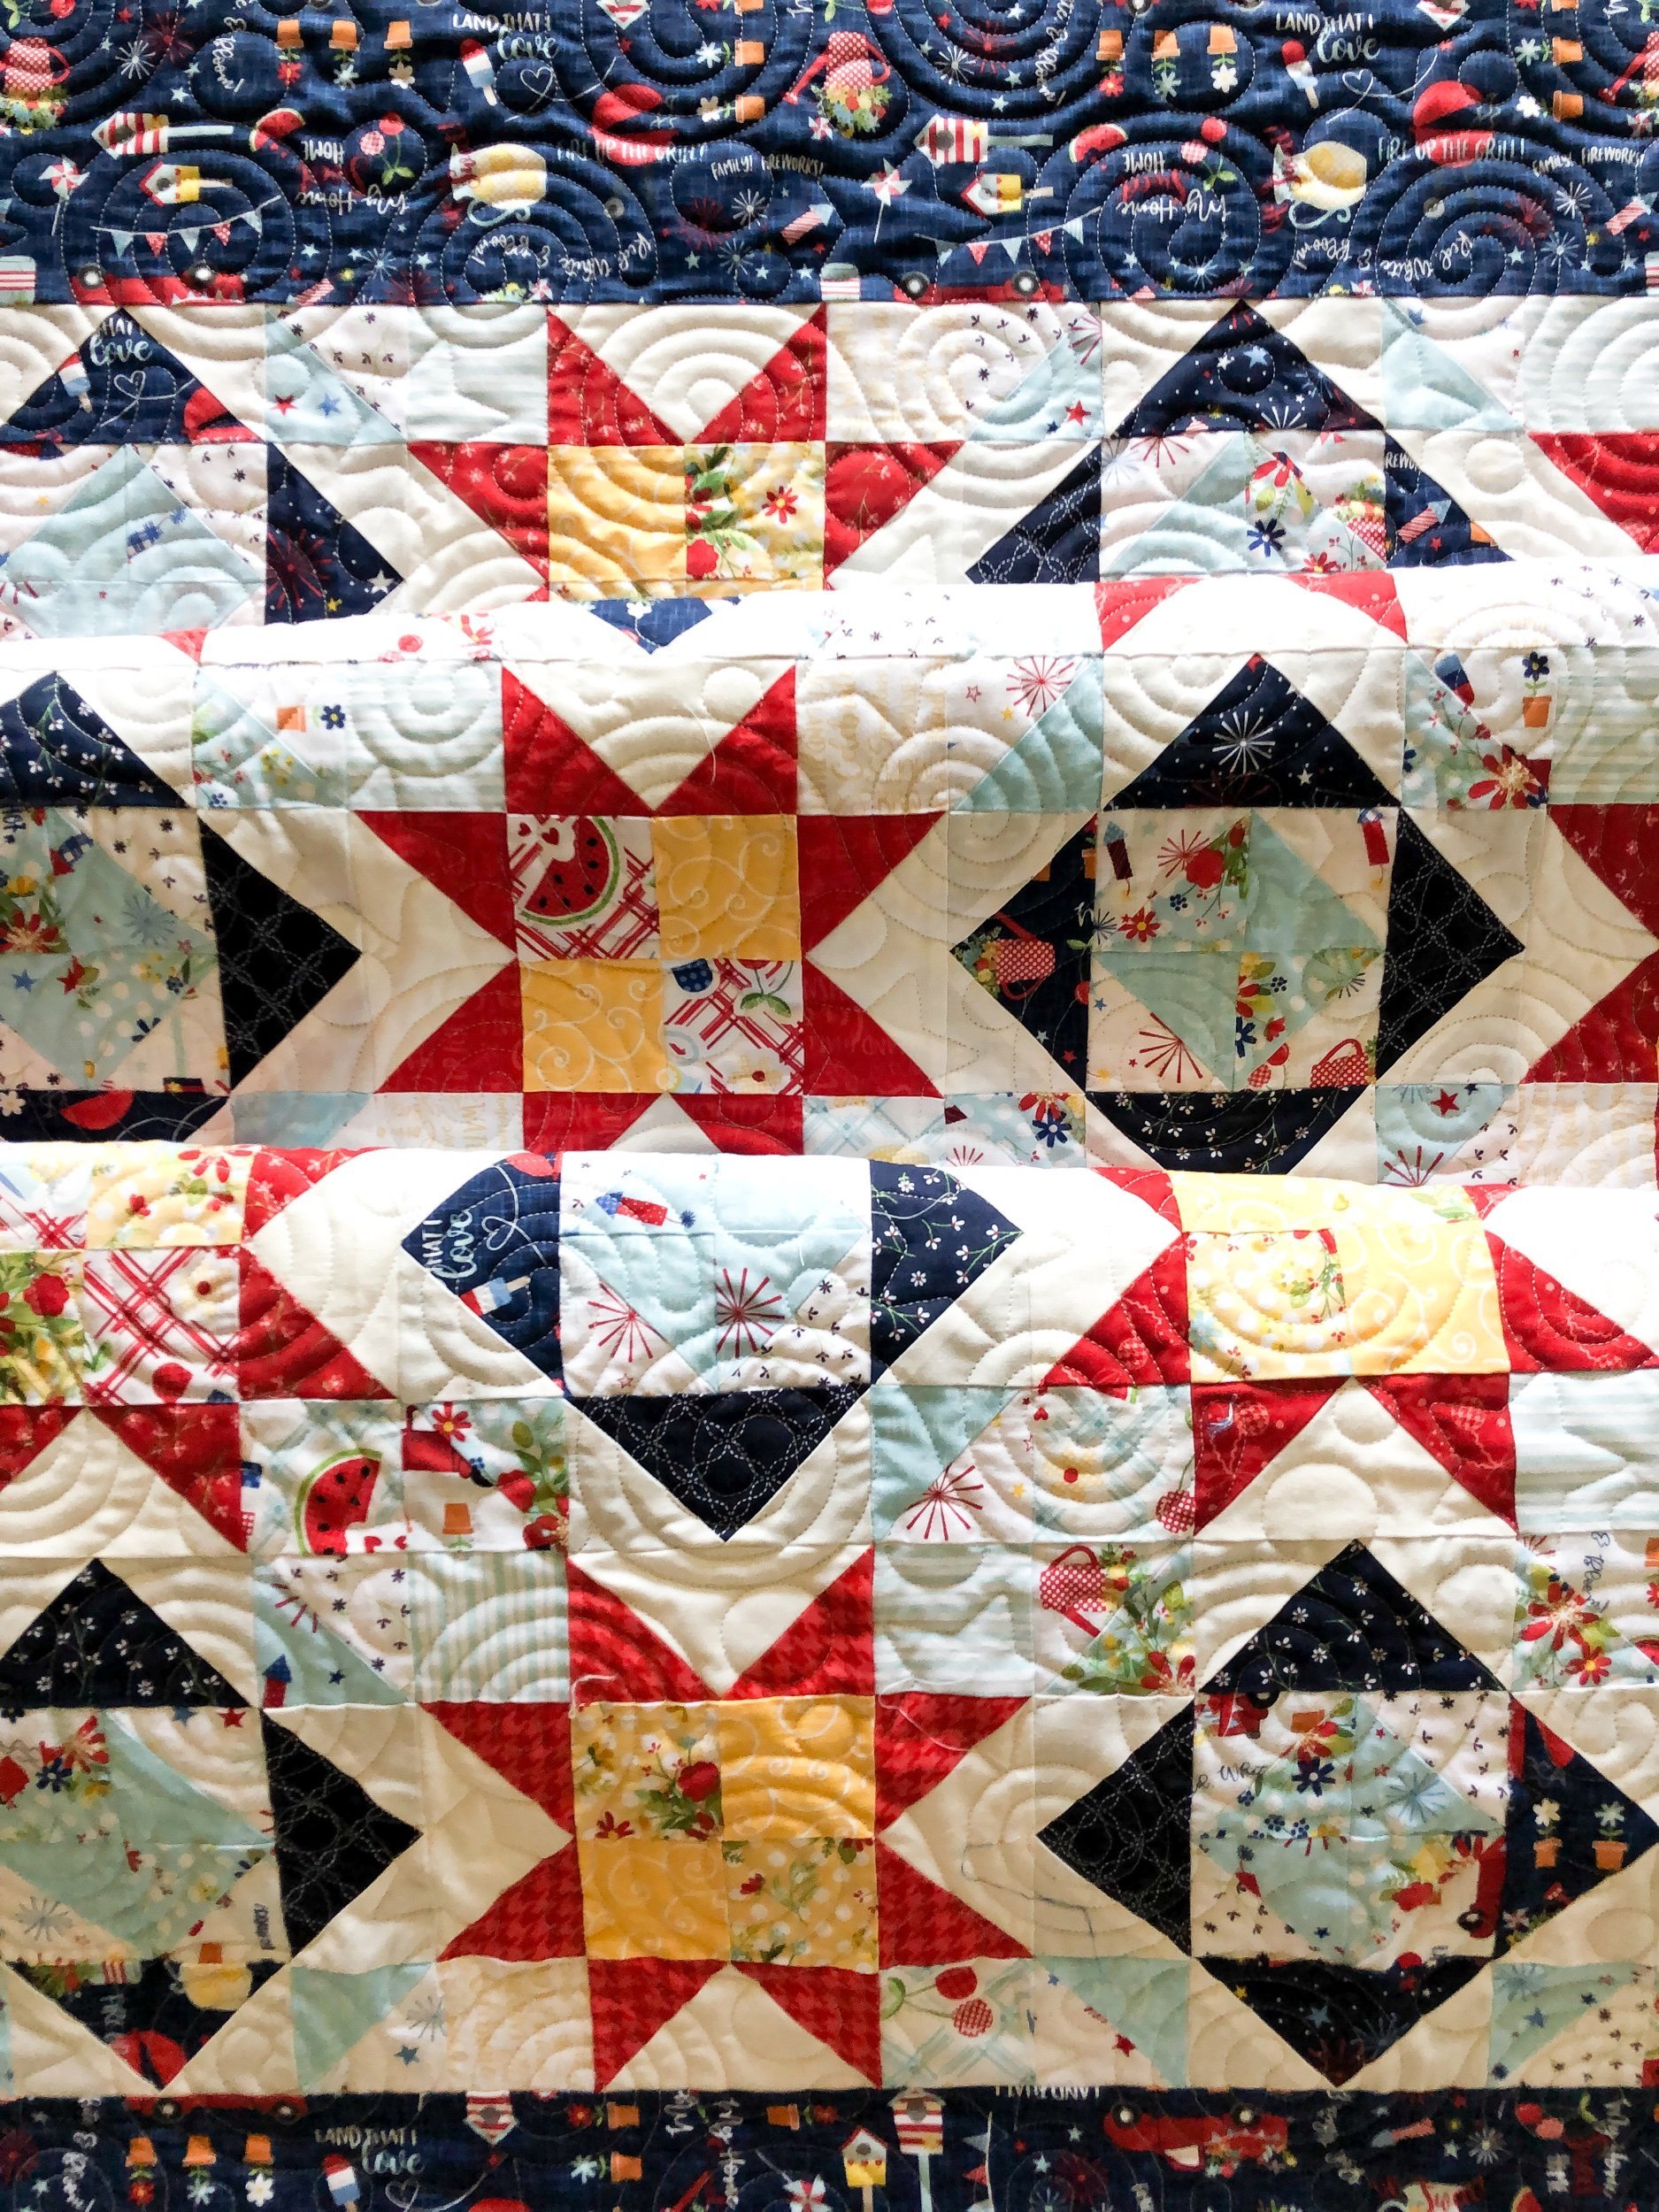
Julie made this Twin Stars quilt from a book called Jelly Roll Quilts by Pam and Nicky Lintott. It’s such a striking quilt!

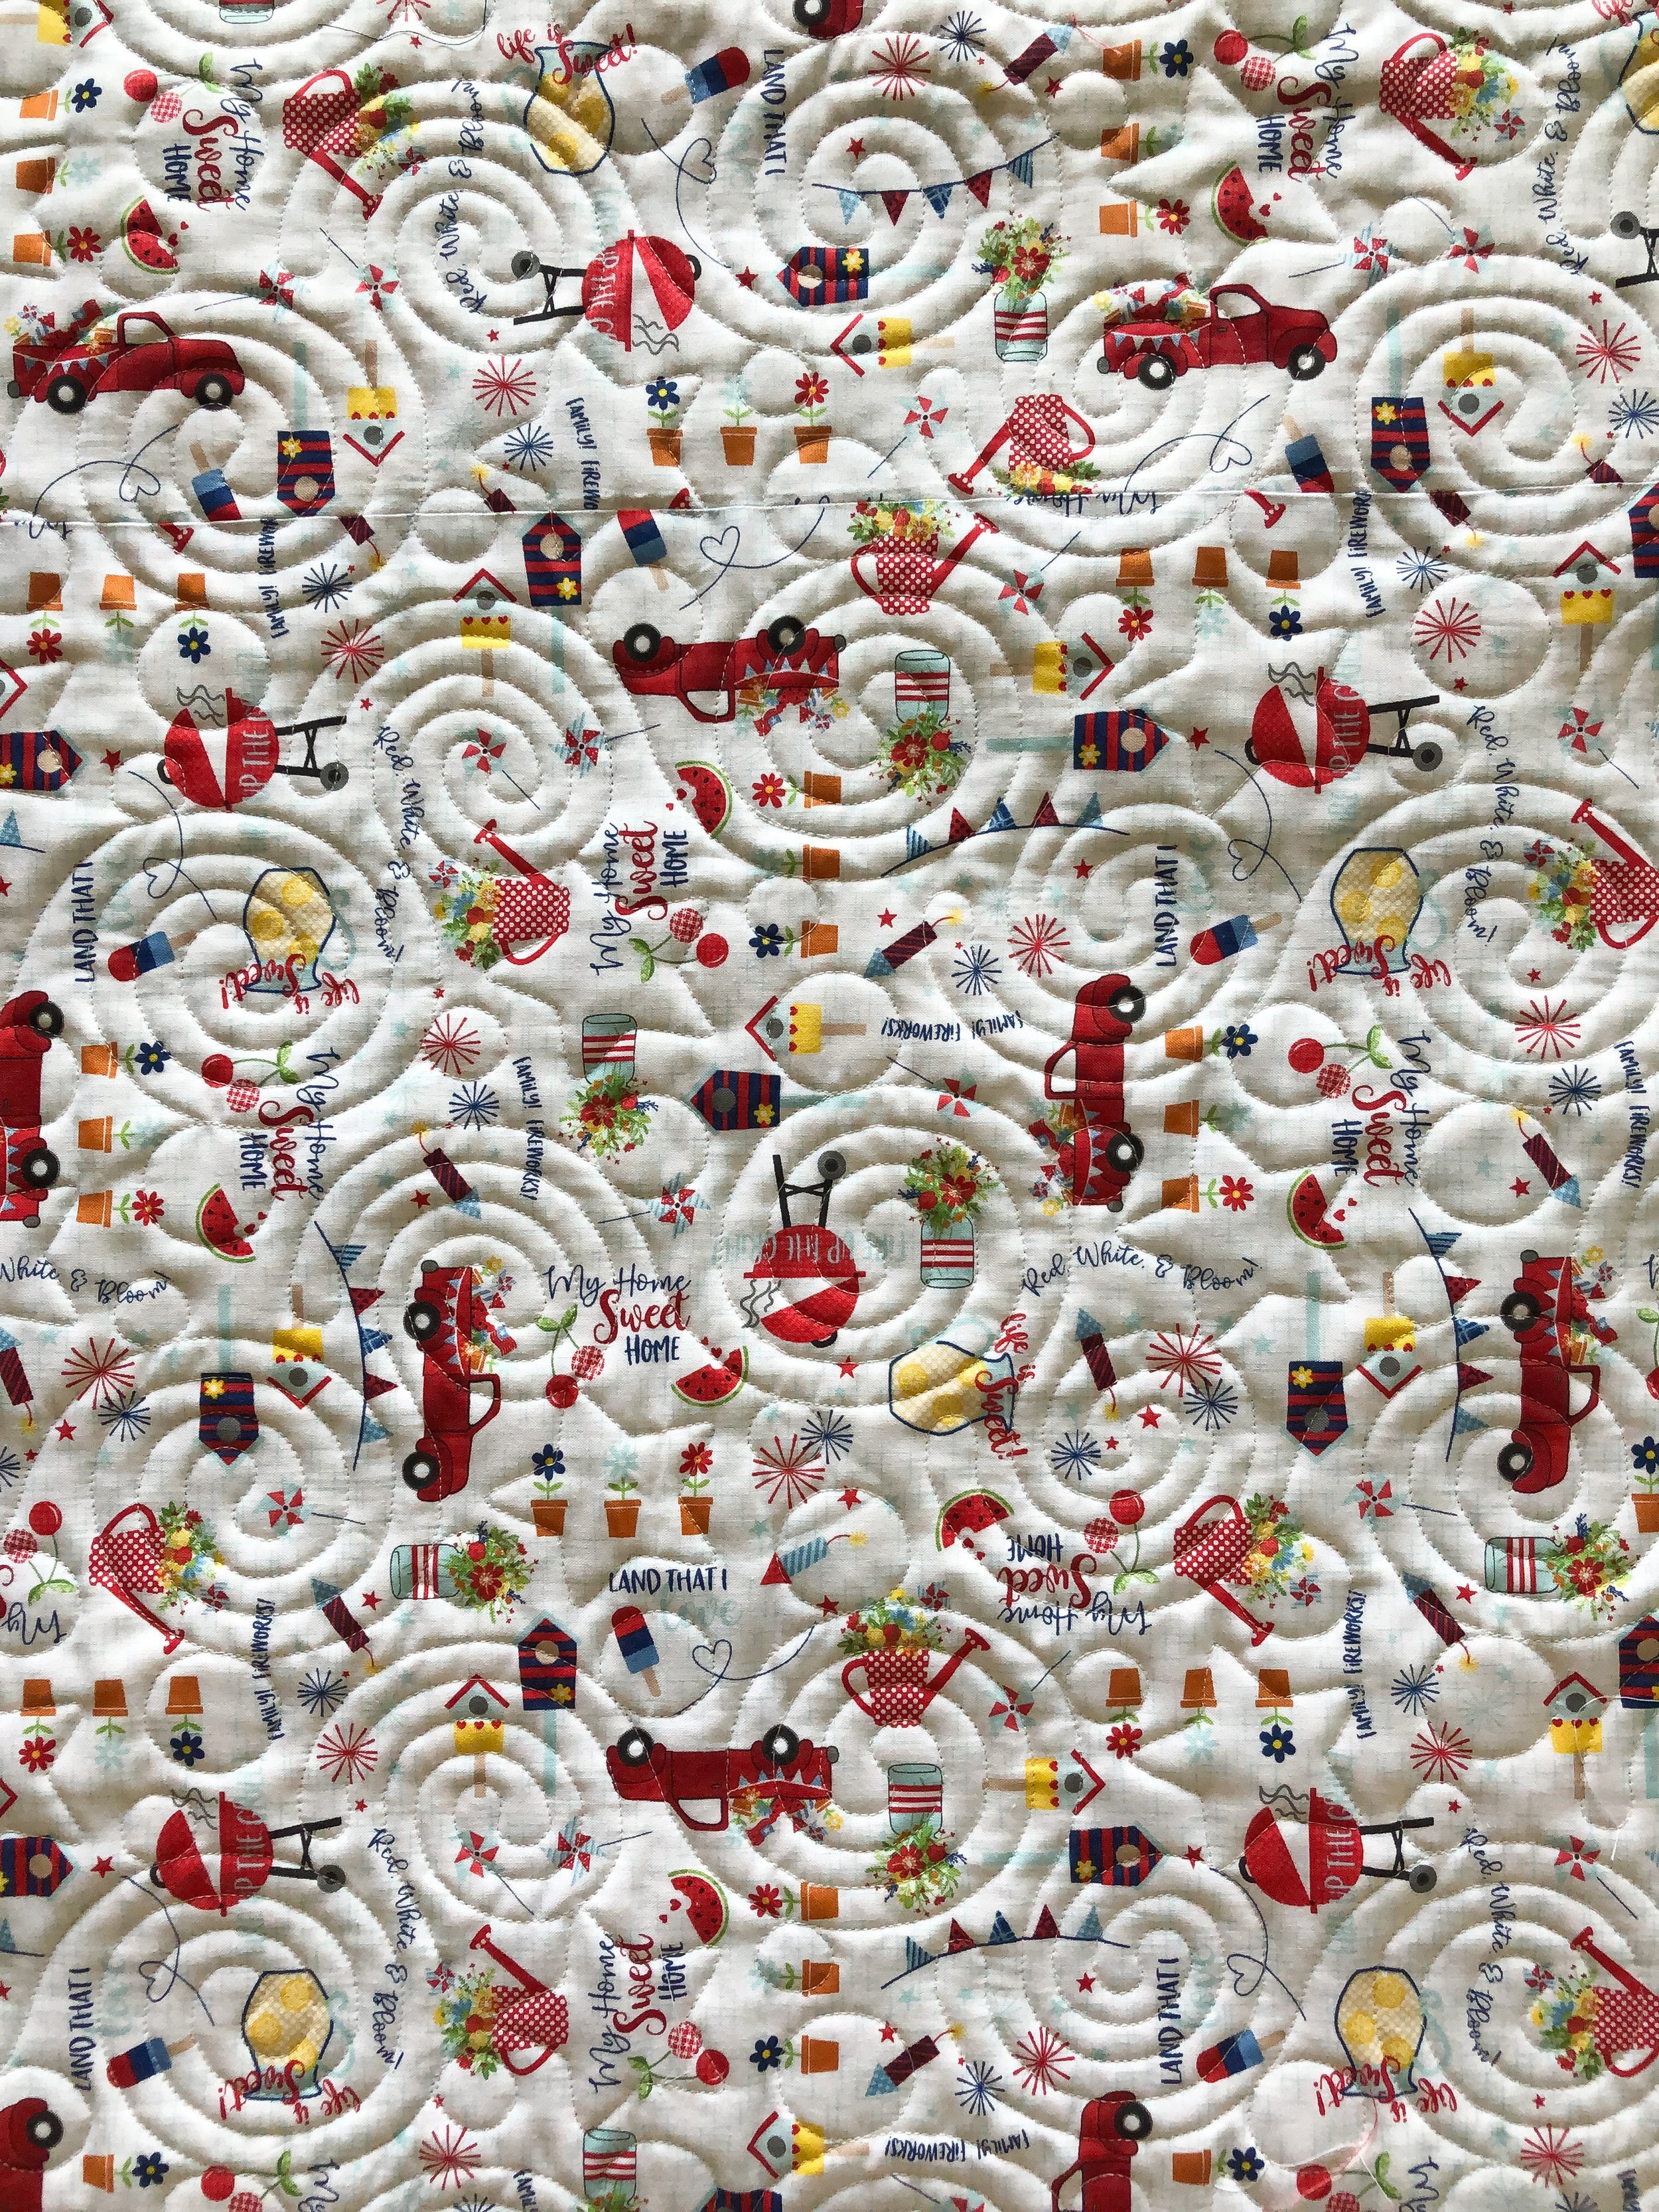
Julie used Red, White, and Bloom fabric line by Kimberbell.
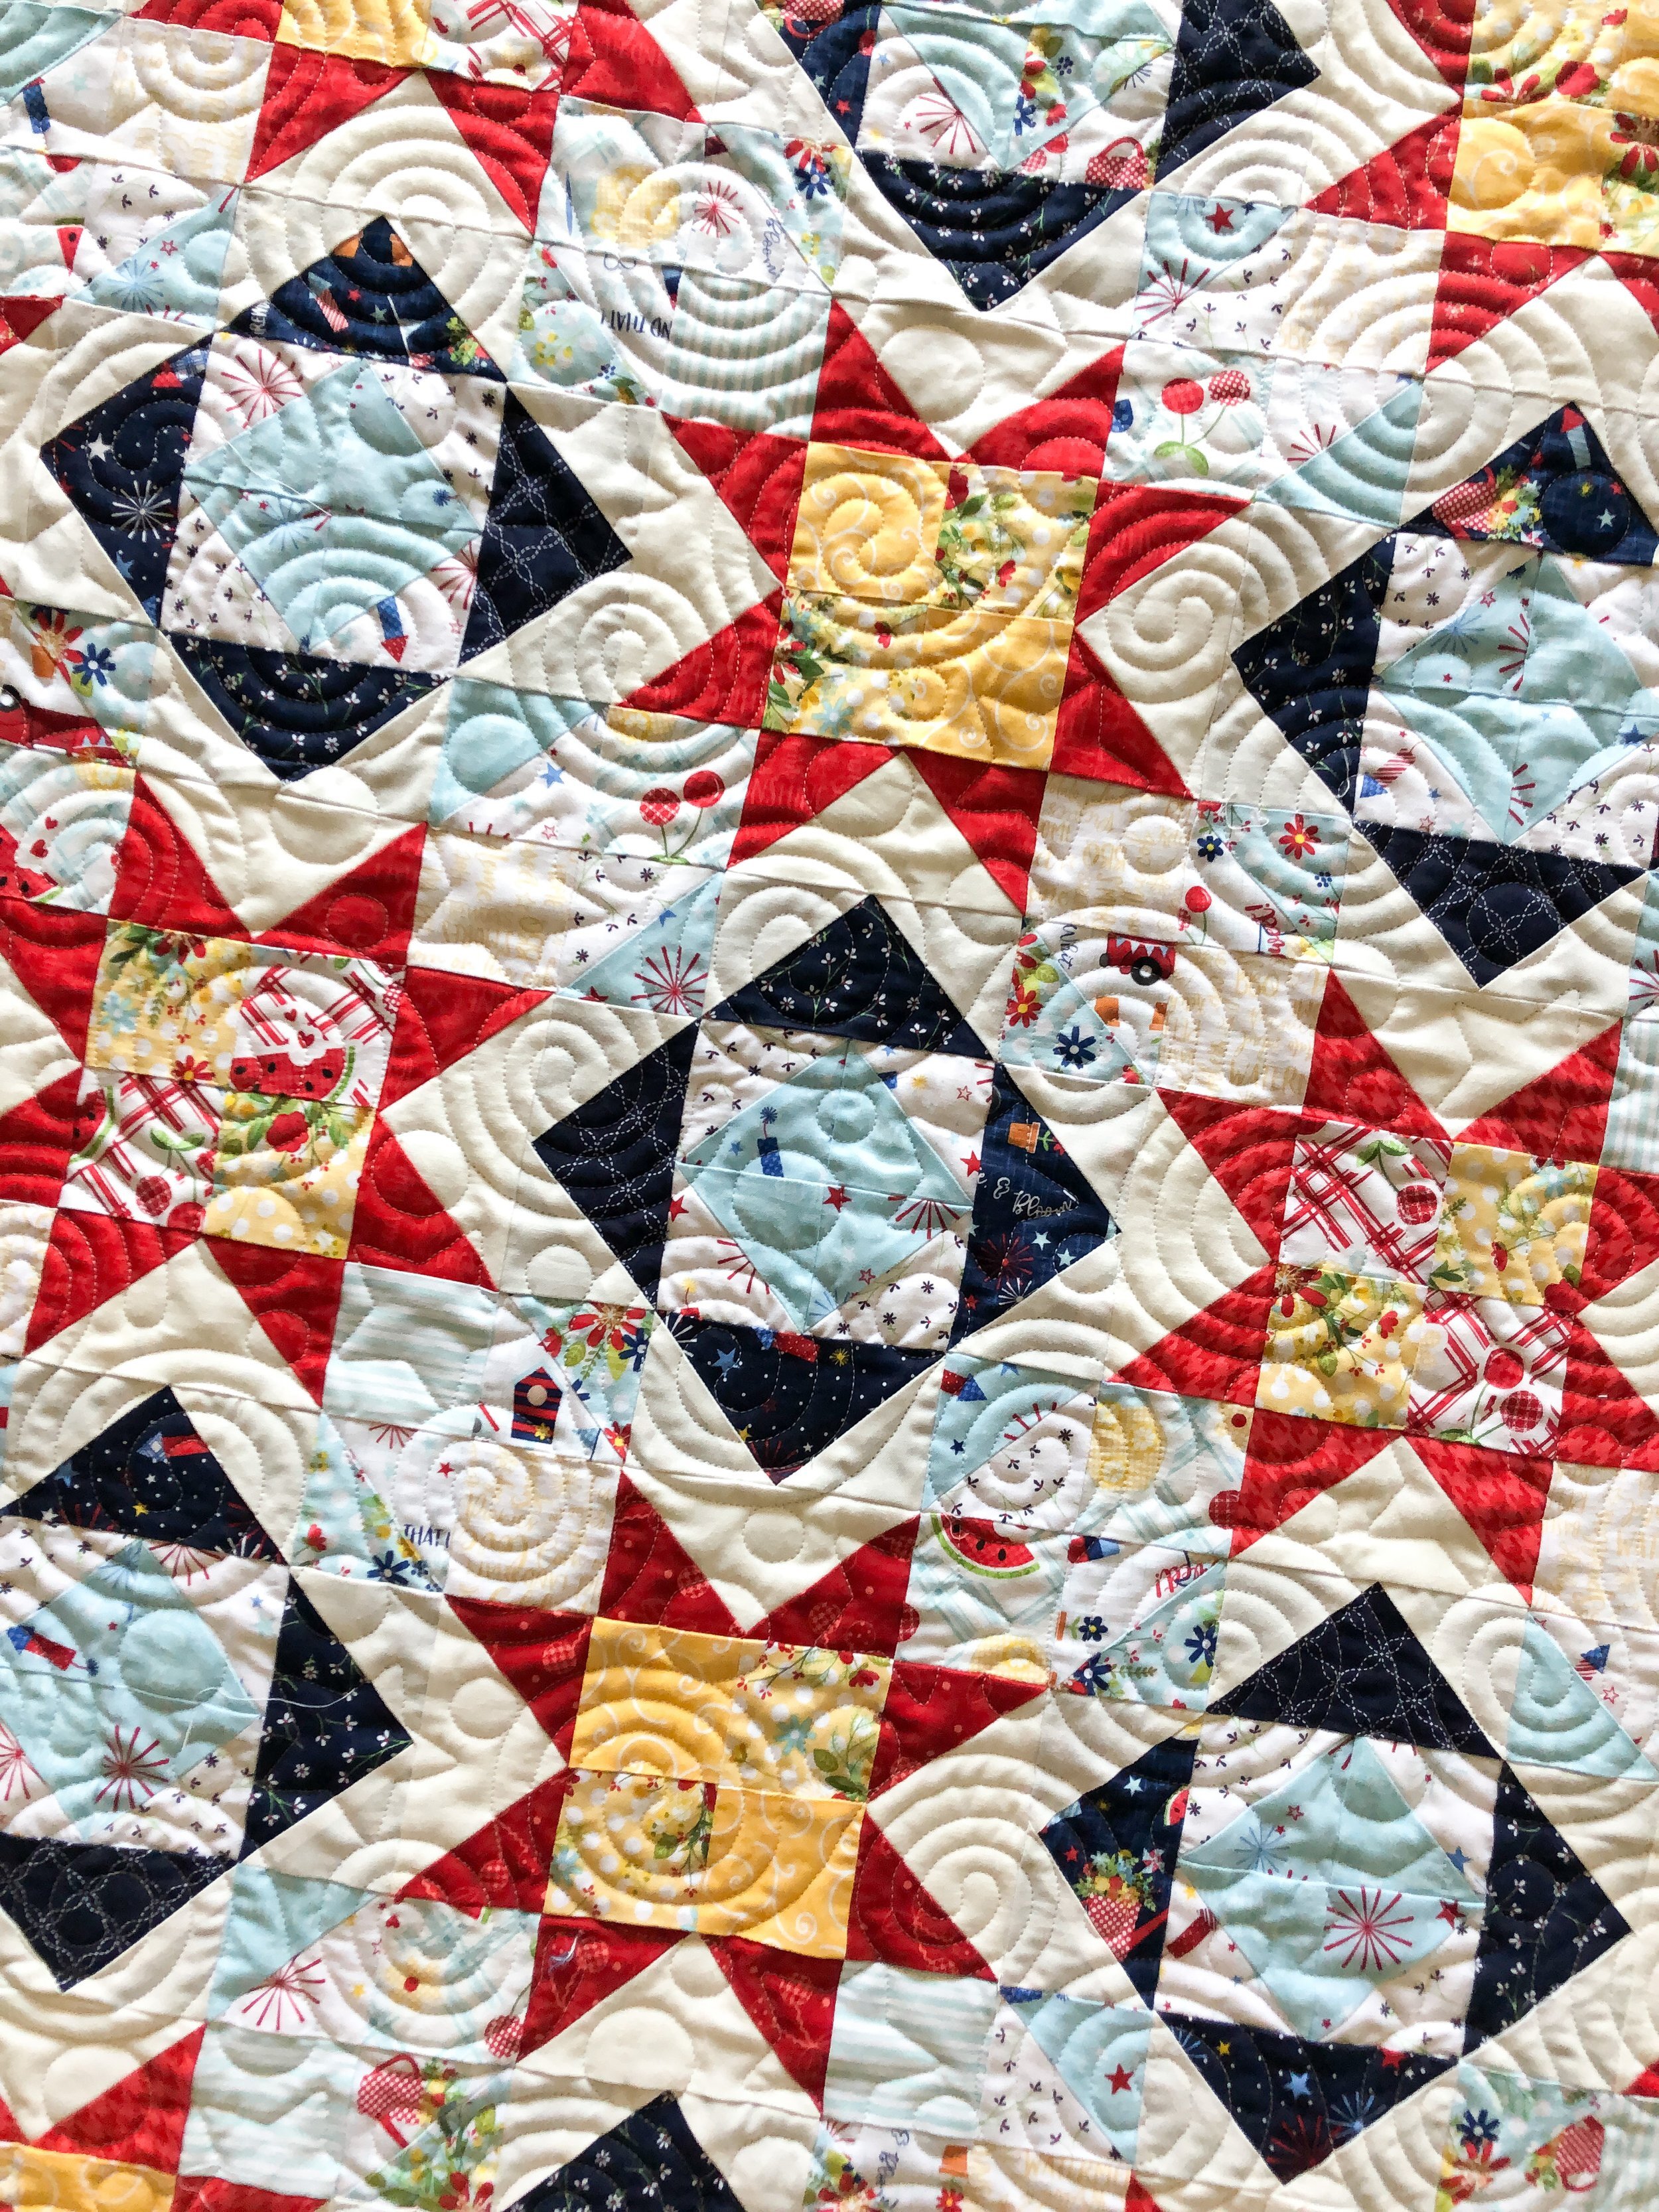
Julie requested Patricia Ritter and my Liberty quilting design, which I was thrilled to quilt for her. It was a great choice!!

I used natural white Omni thread from Superior Threads and 8020 cotton poly blend batting…if I remember right.

Such a fun cheerful 4th of July quilt!!
I blog quilts that I quilt edge to edge for a couple of reasons…to show off a great quilting design on an actual quilt, and also to show ideas on what looks good quilted on a particular quilt pattern. As a pantograph designer, I get asked all the time how a design looks on a quilt. I hope over time, my blog can be a great resource for that very thing. Also, I try to link every pattern…and I’ve quilted such a great variety, it’s always fun when a new one comes into my studio.
As I’m trying to catch up on blogging, I’ll be sending out a few emails here and there with links to other blog posts. That way I’m not flooding your inbox, but you still see the other blog posts.
Have a wonderful day!! Happy quilting, Leisha

Barbara’s Good Night Baby Quilt
Hi Friends,
I hope your first week of the new year was great for you!! I have my second quilt on the Longarm for the year. A large queen sized quilt, that I’m quilting custom. I only have a few other quilts ready for quilting. I’d love to quilt for you!! Email me at quiltingit@gmail.com and I’ll get you added to the list! For info on my prices, go to my Longarm Quilting Services page.

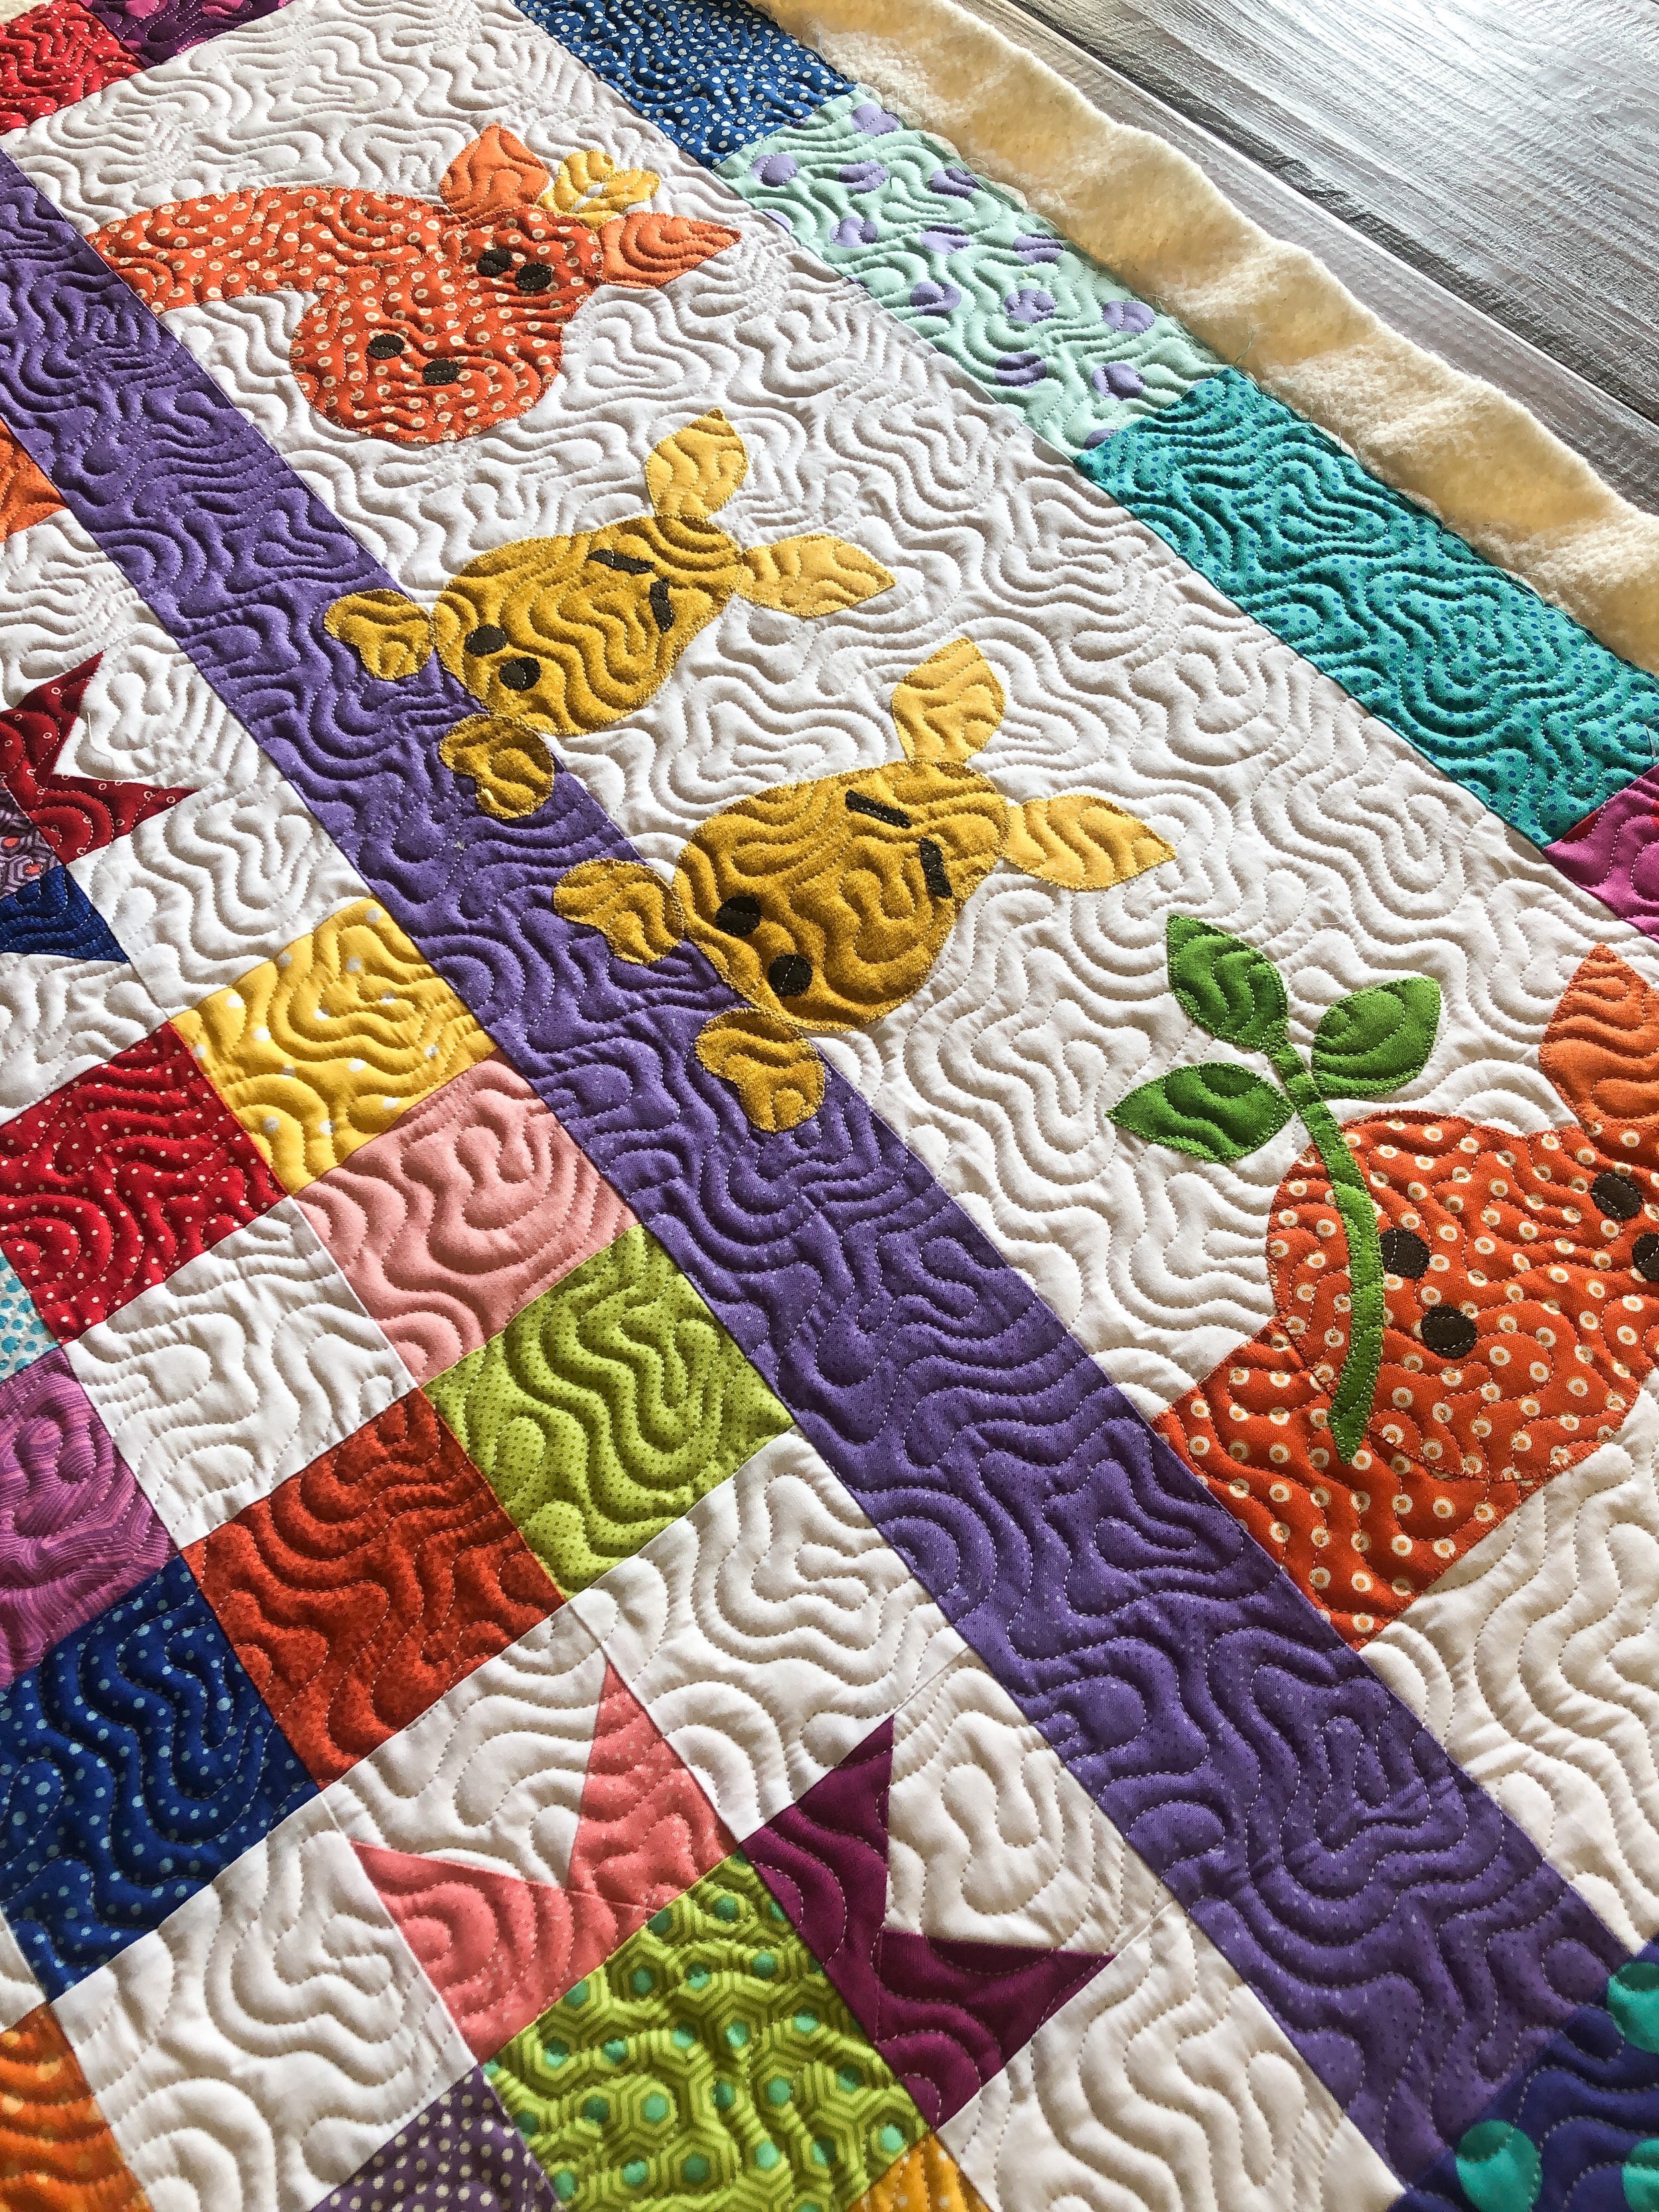
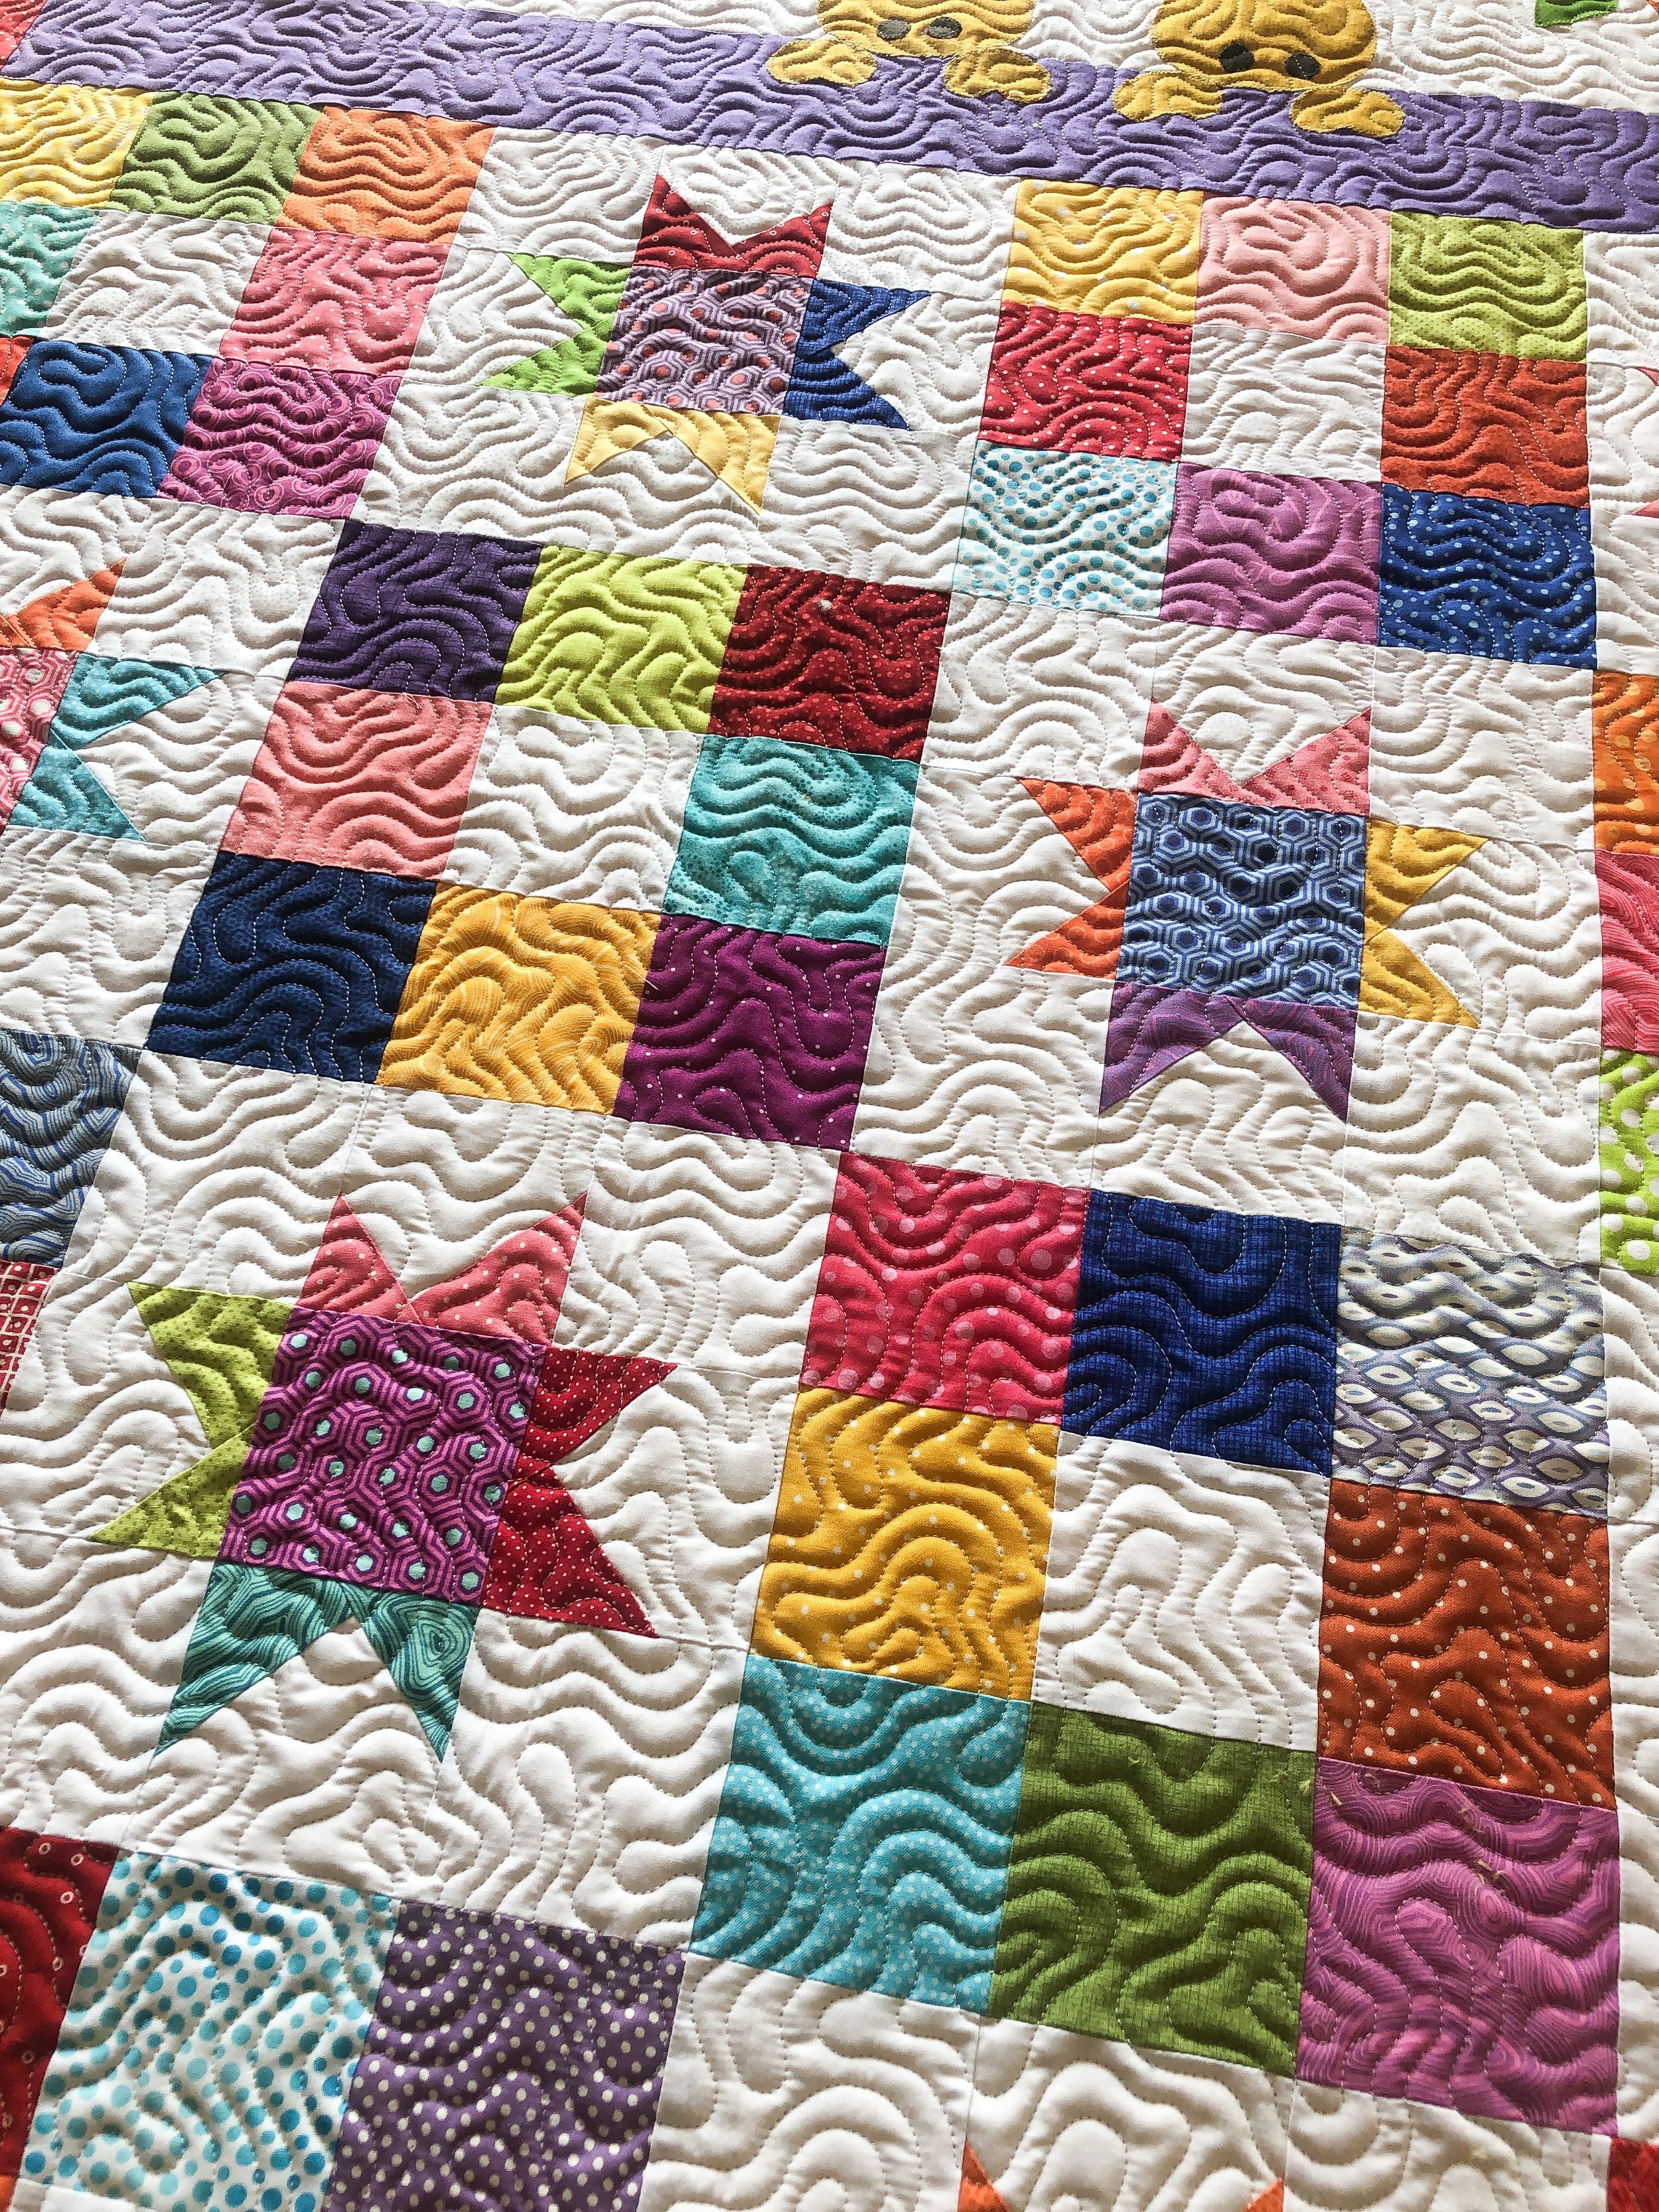
I quilted this bright and happy baby quilt for my friend Barbara last fall. Isn’t it adorable?!?!!!! She made it for her niece, who had her first baby. The pattern is called Good Night Baby and is by Annie’s. I found the pattern on anniescatalog.com.
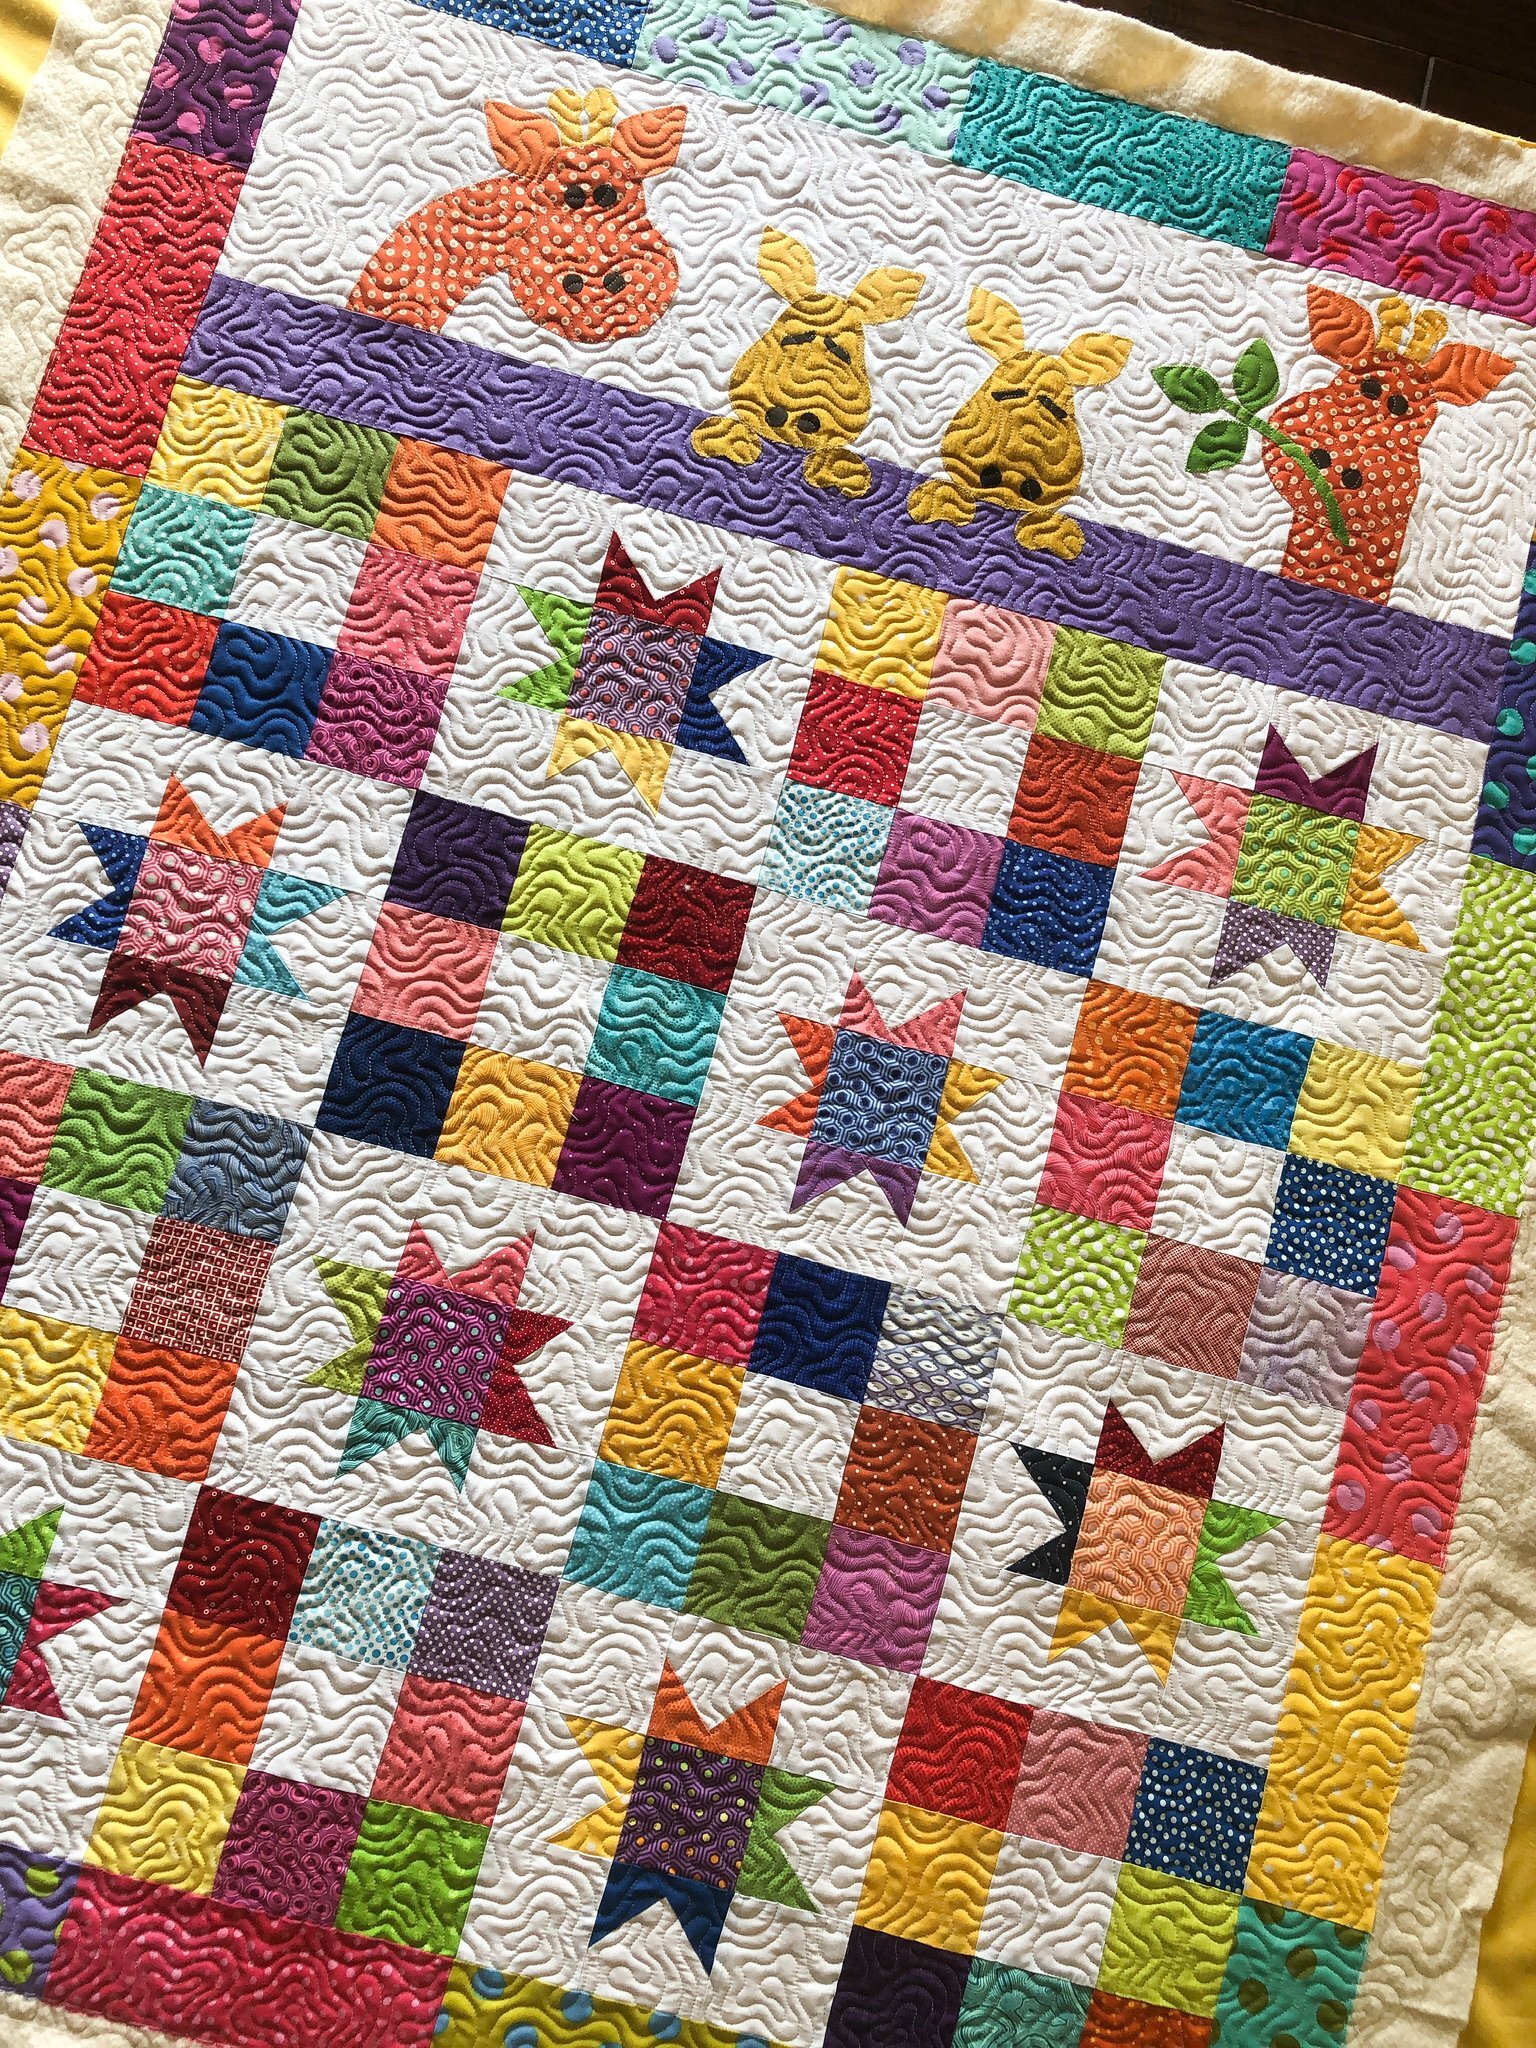
I love all the colored fabrics that Barbara used!!

I used an natural white Omni thread from Superior Threads, and 8020 cotton poly blend batting from Winline Textiles.
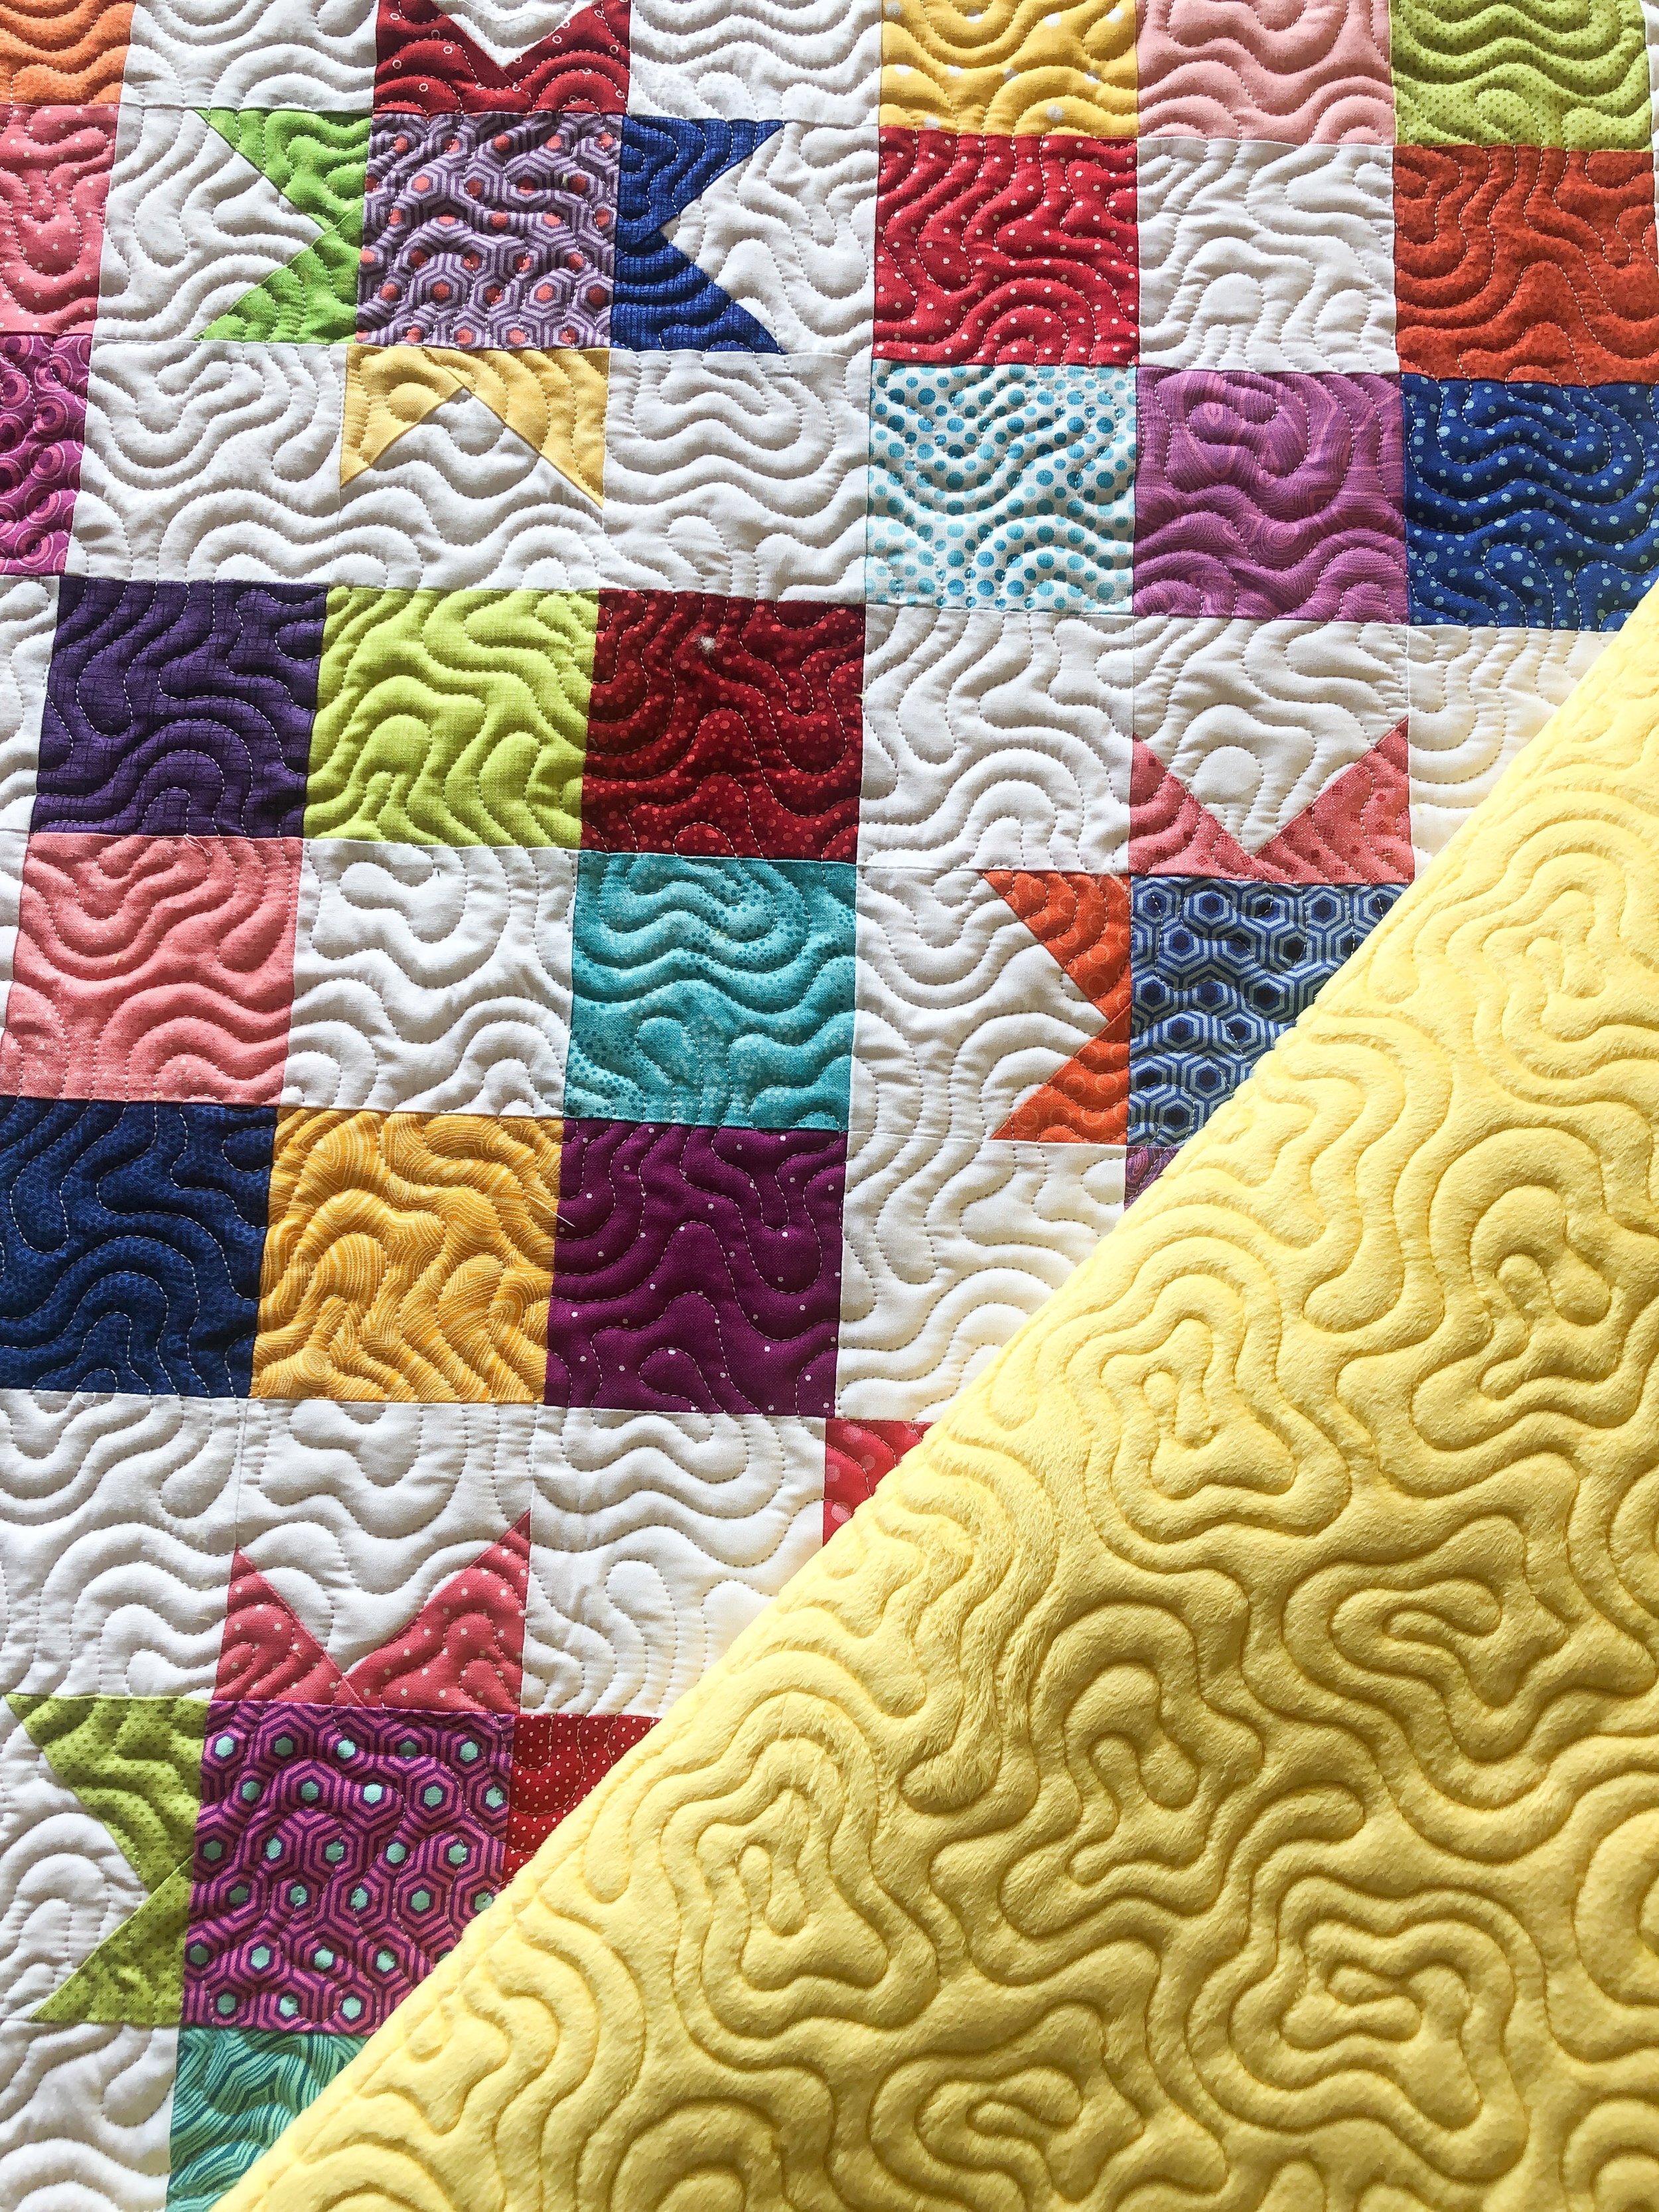
The backing is minky, so I suggested Malachite from Patricia Ritter at Urban Elementz for the quilting. I knew the texture would be incredible. I love it!!!
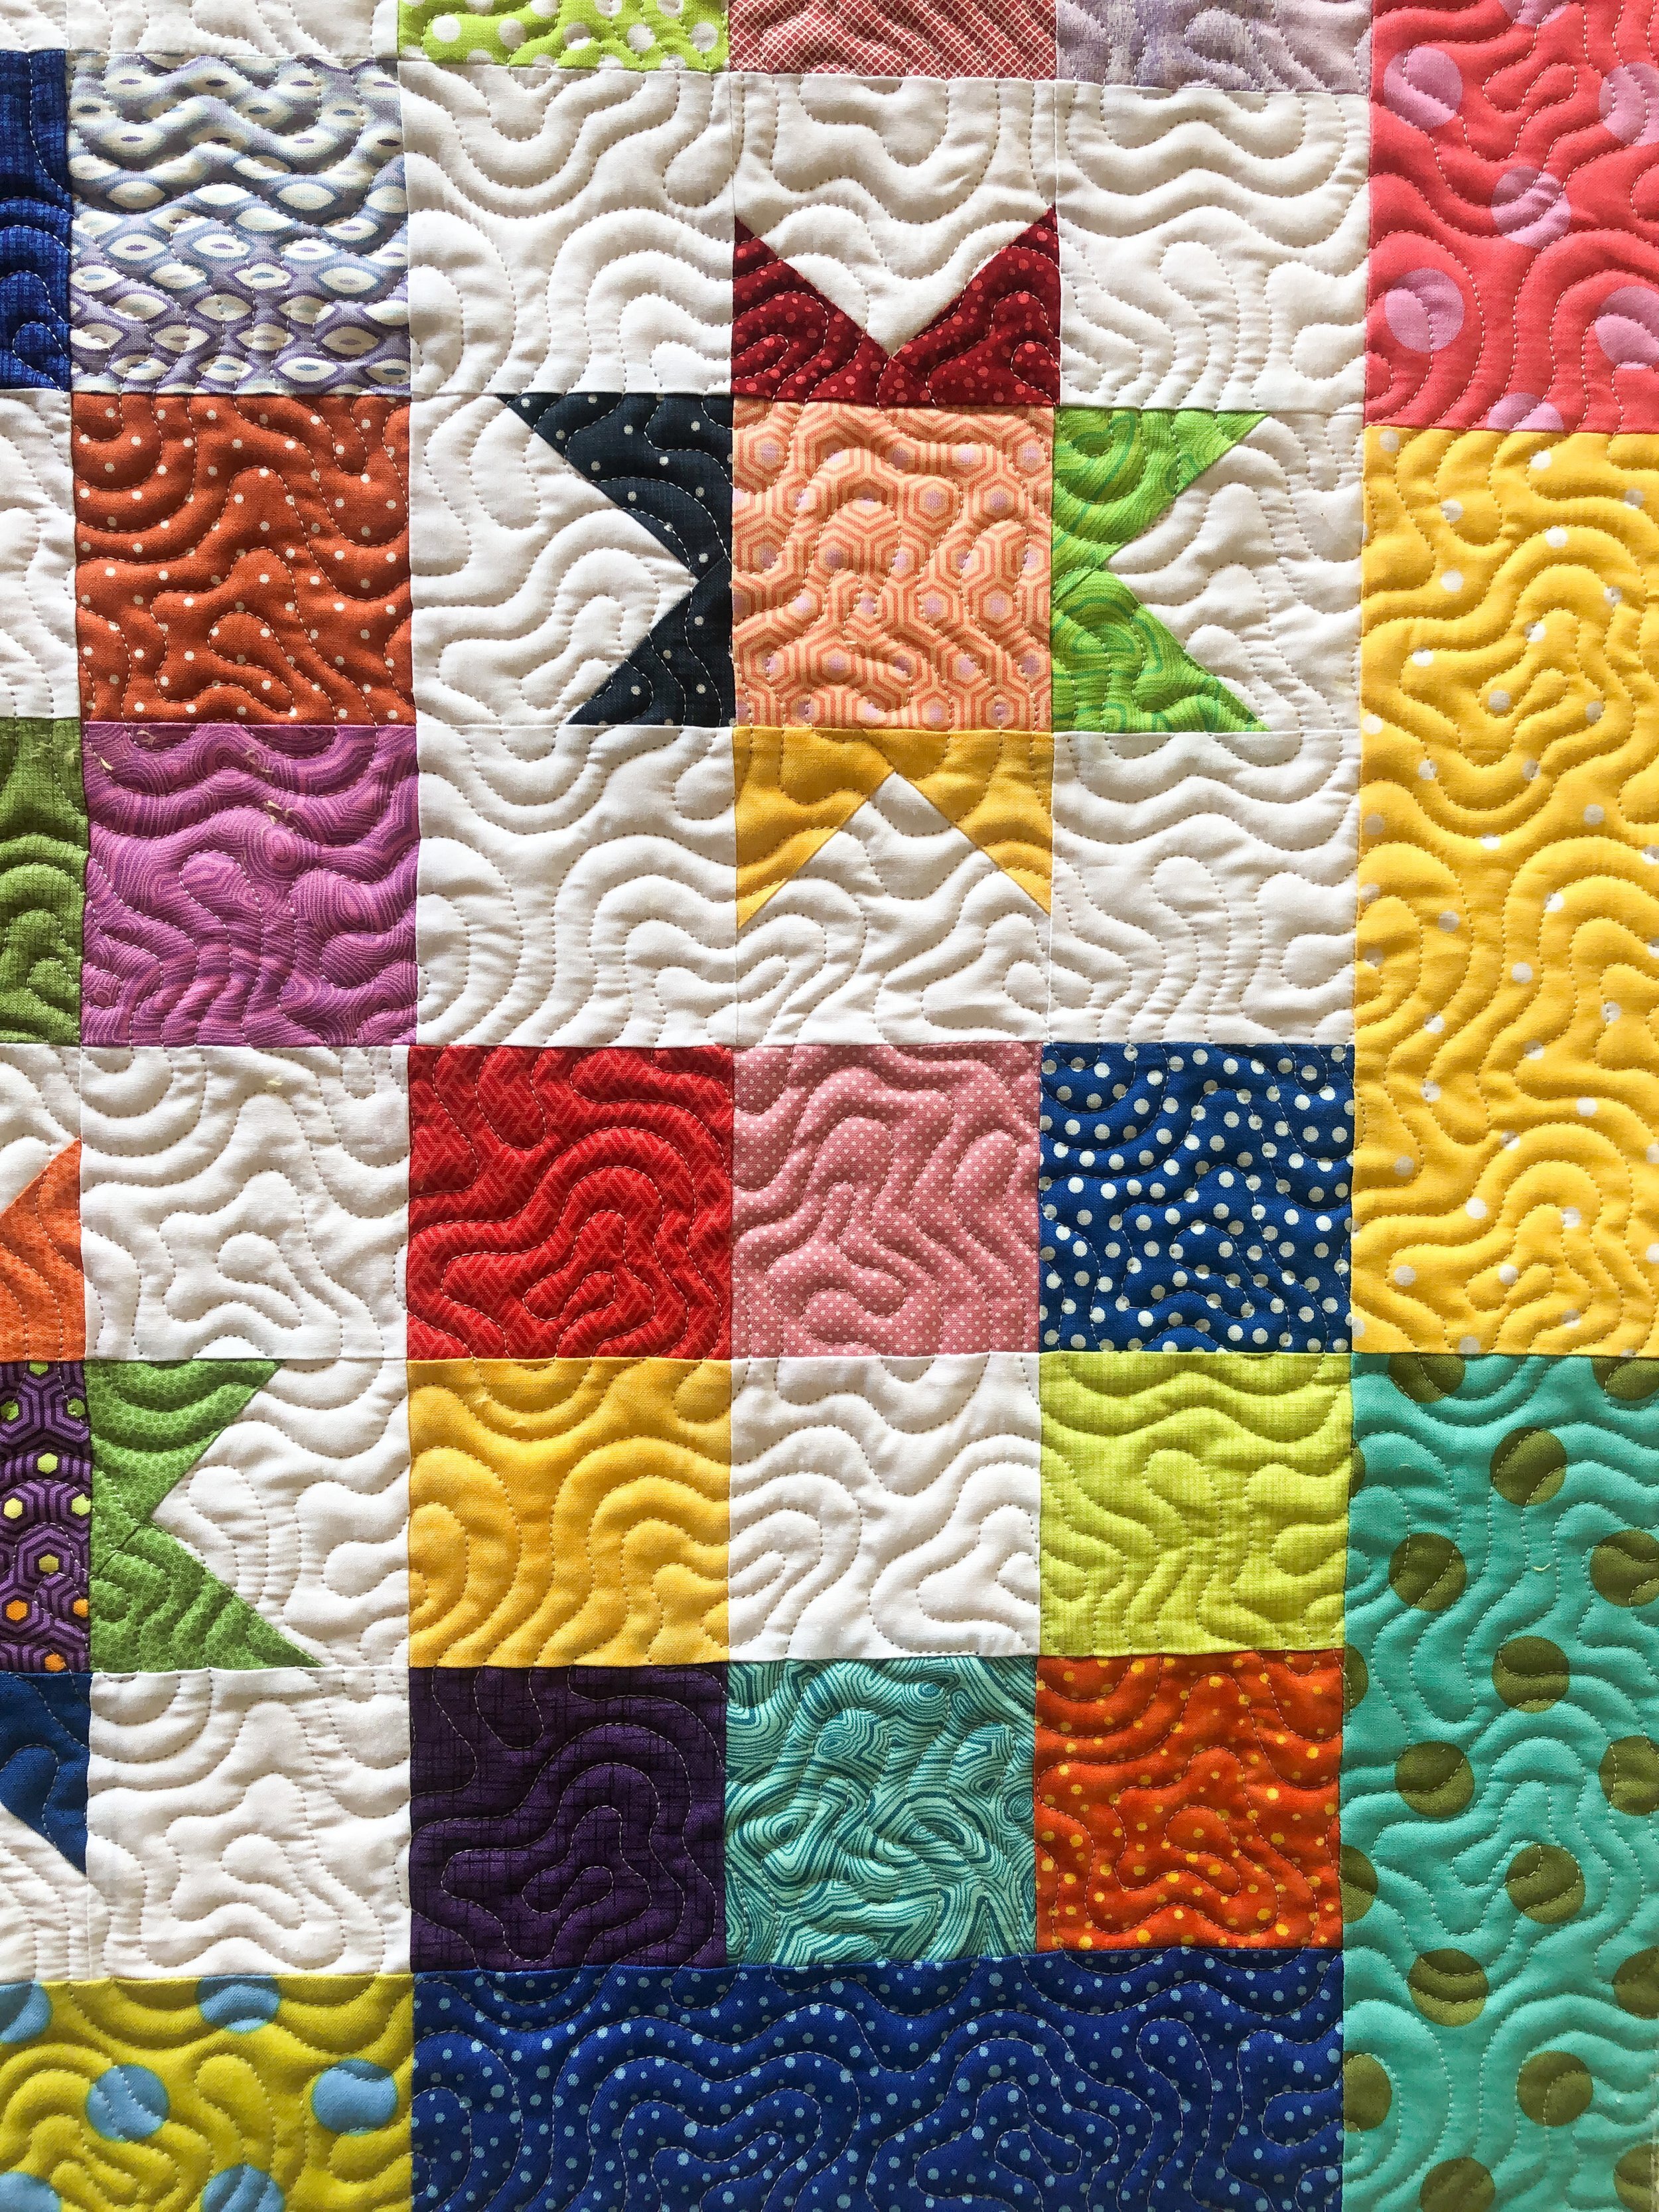
More pictures of that fabulous texture!!!
And…the minky yellow backing!!!
Have you made any rainbow colored quilts? I have a few, and they are just so fun.

Thanks for quickly stopping by!! Have a great weekend, and I hope you get in some sewing time. Happy quilting, Leisha