
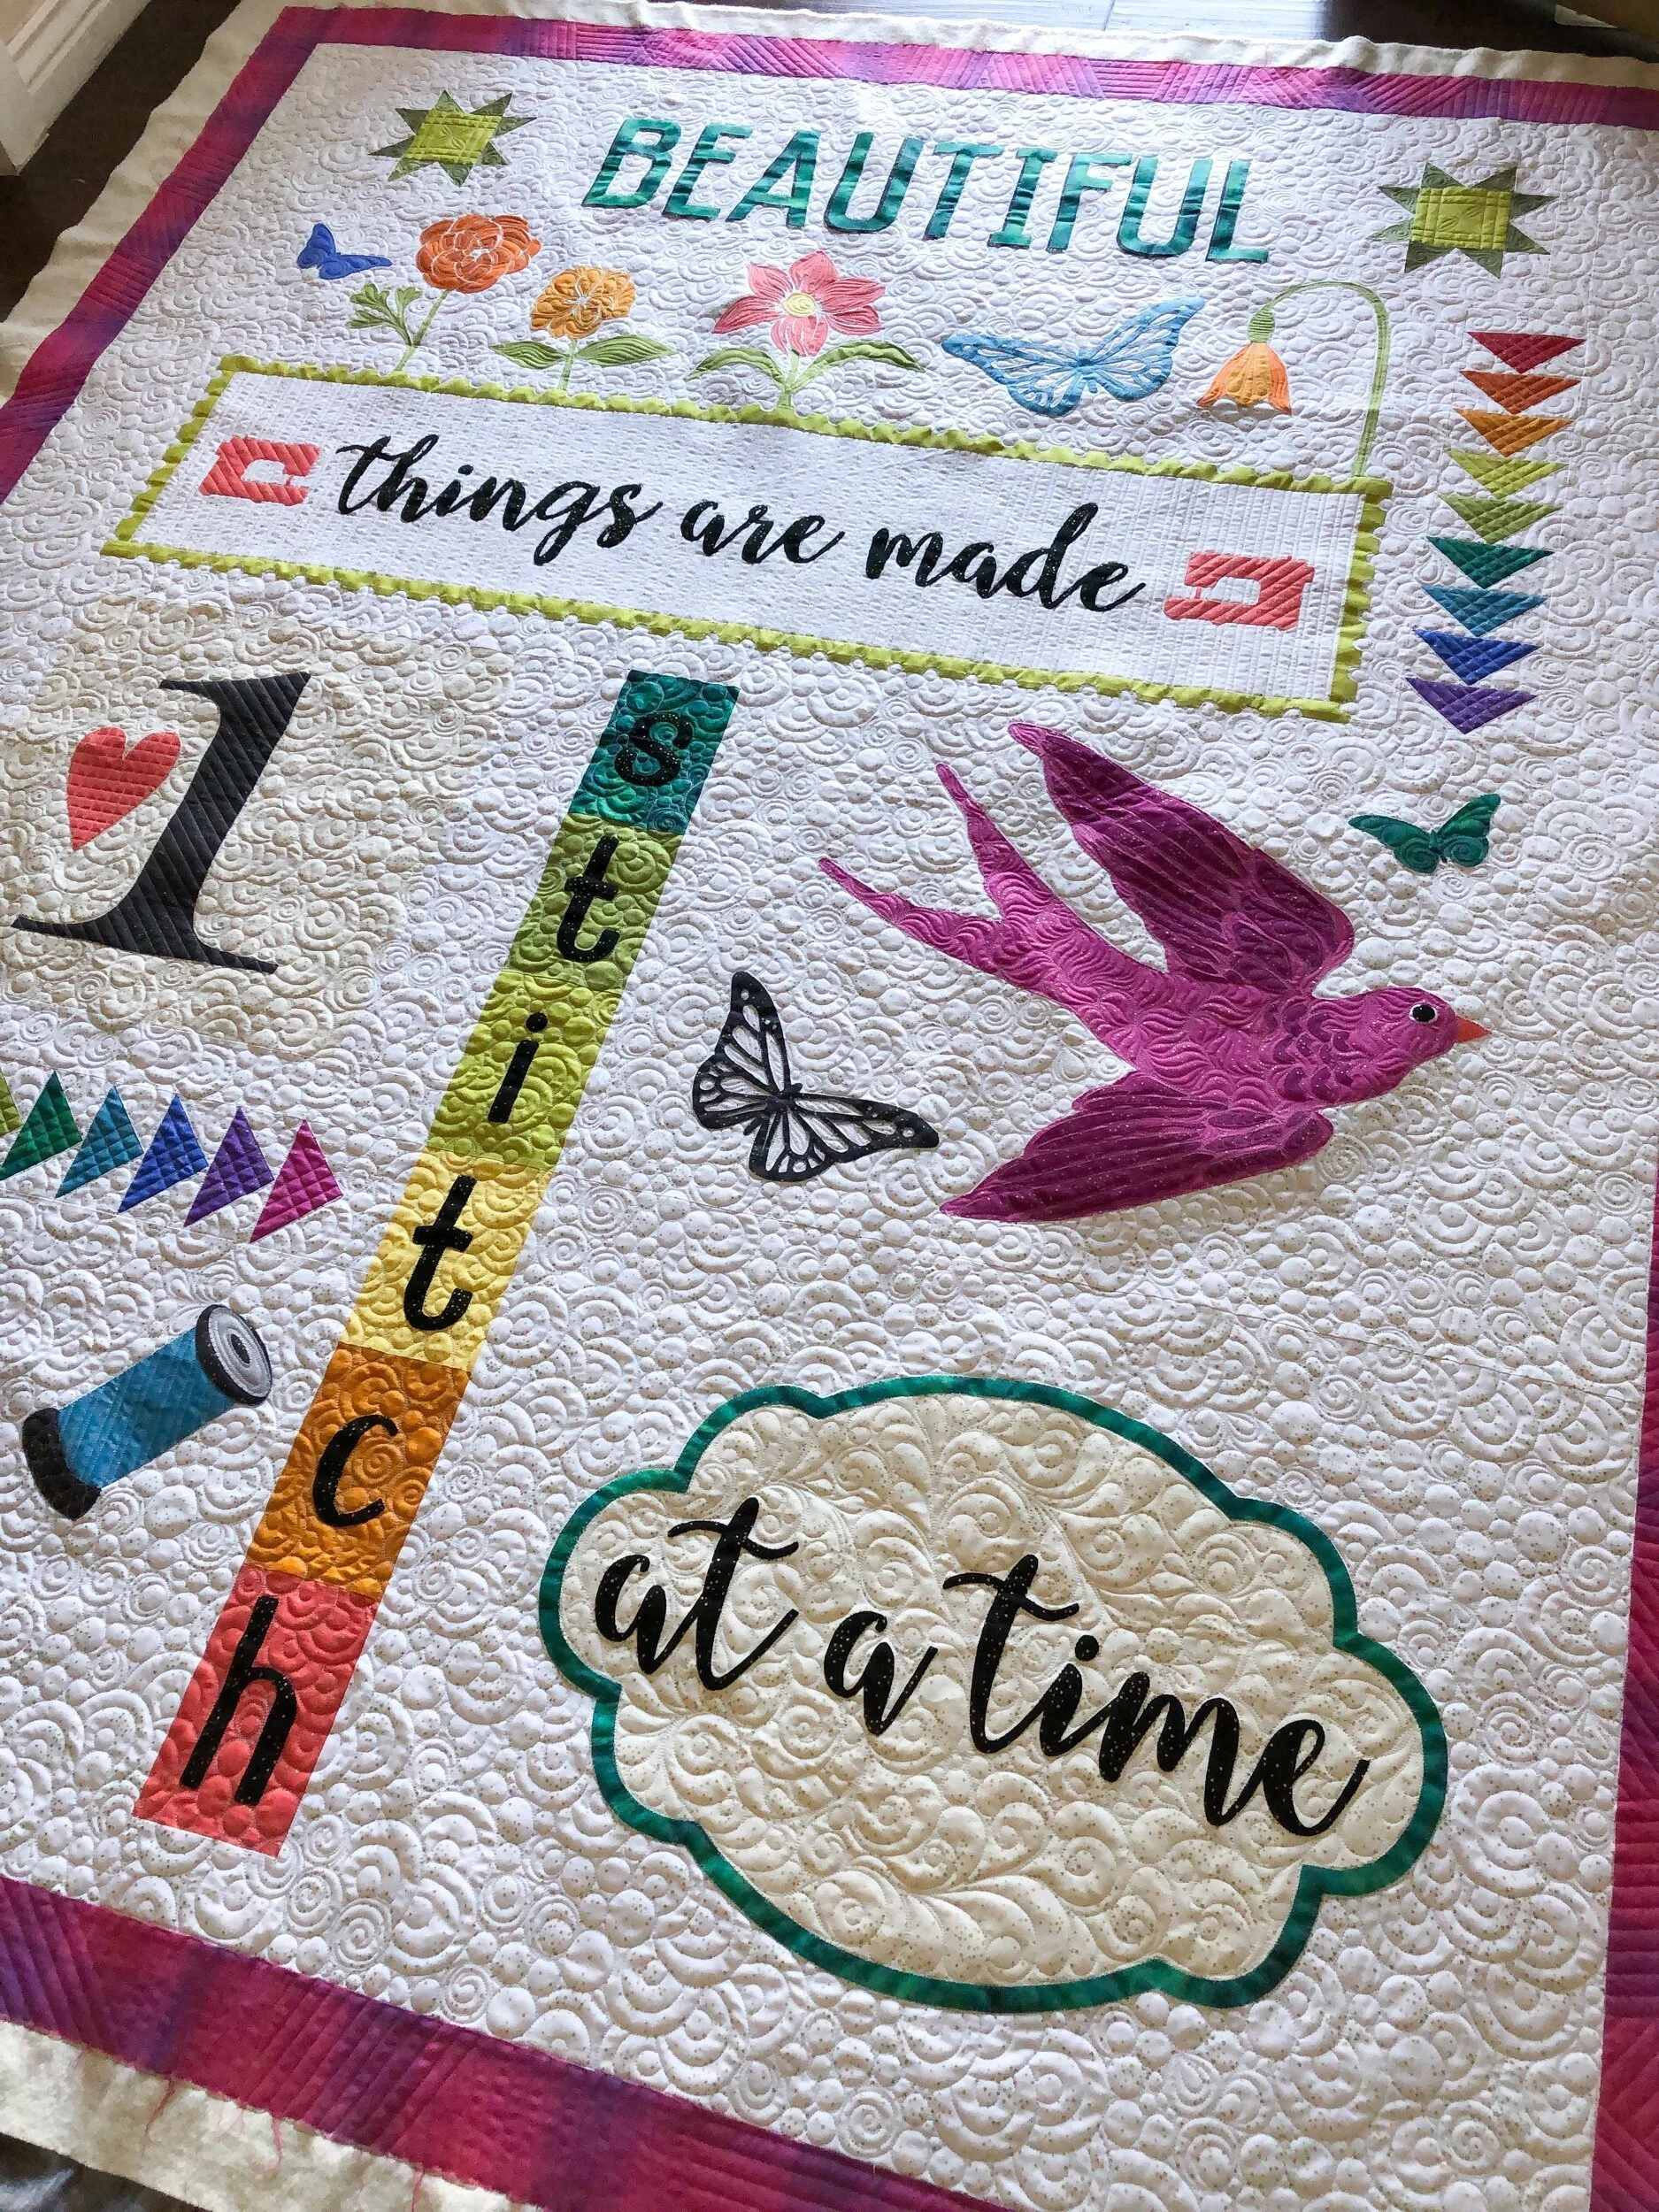
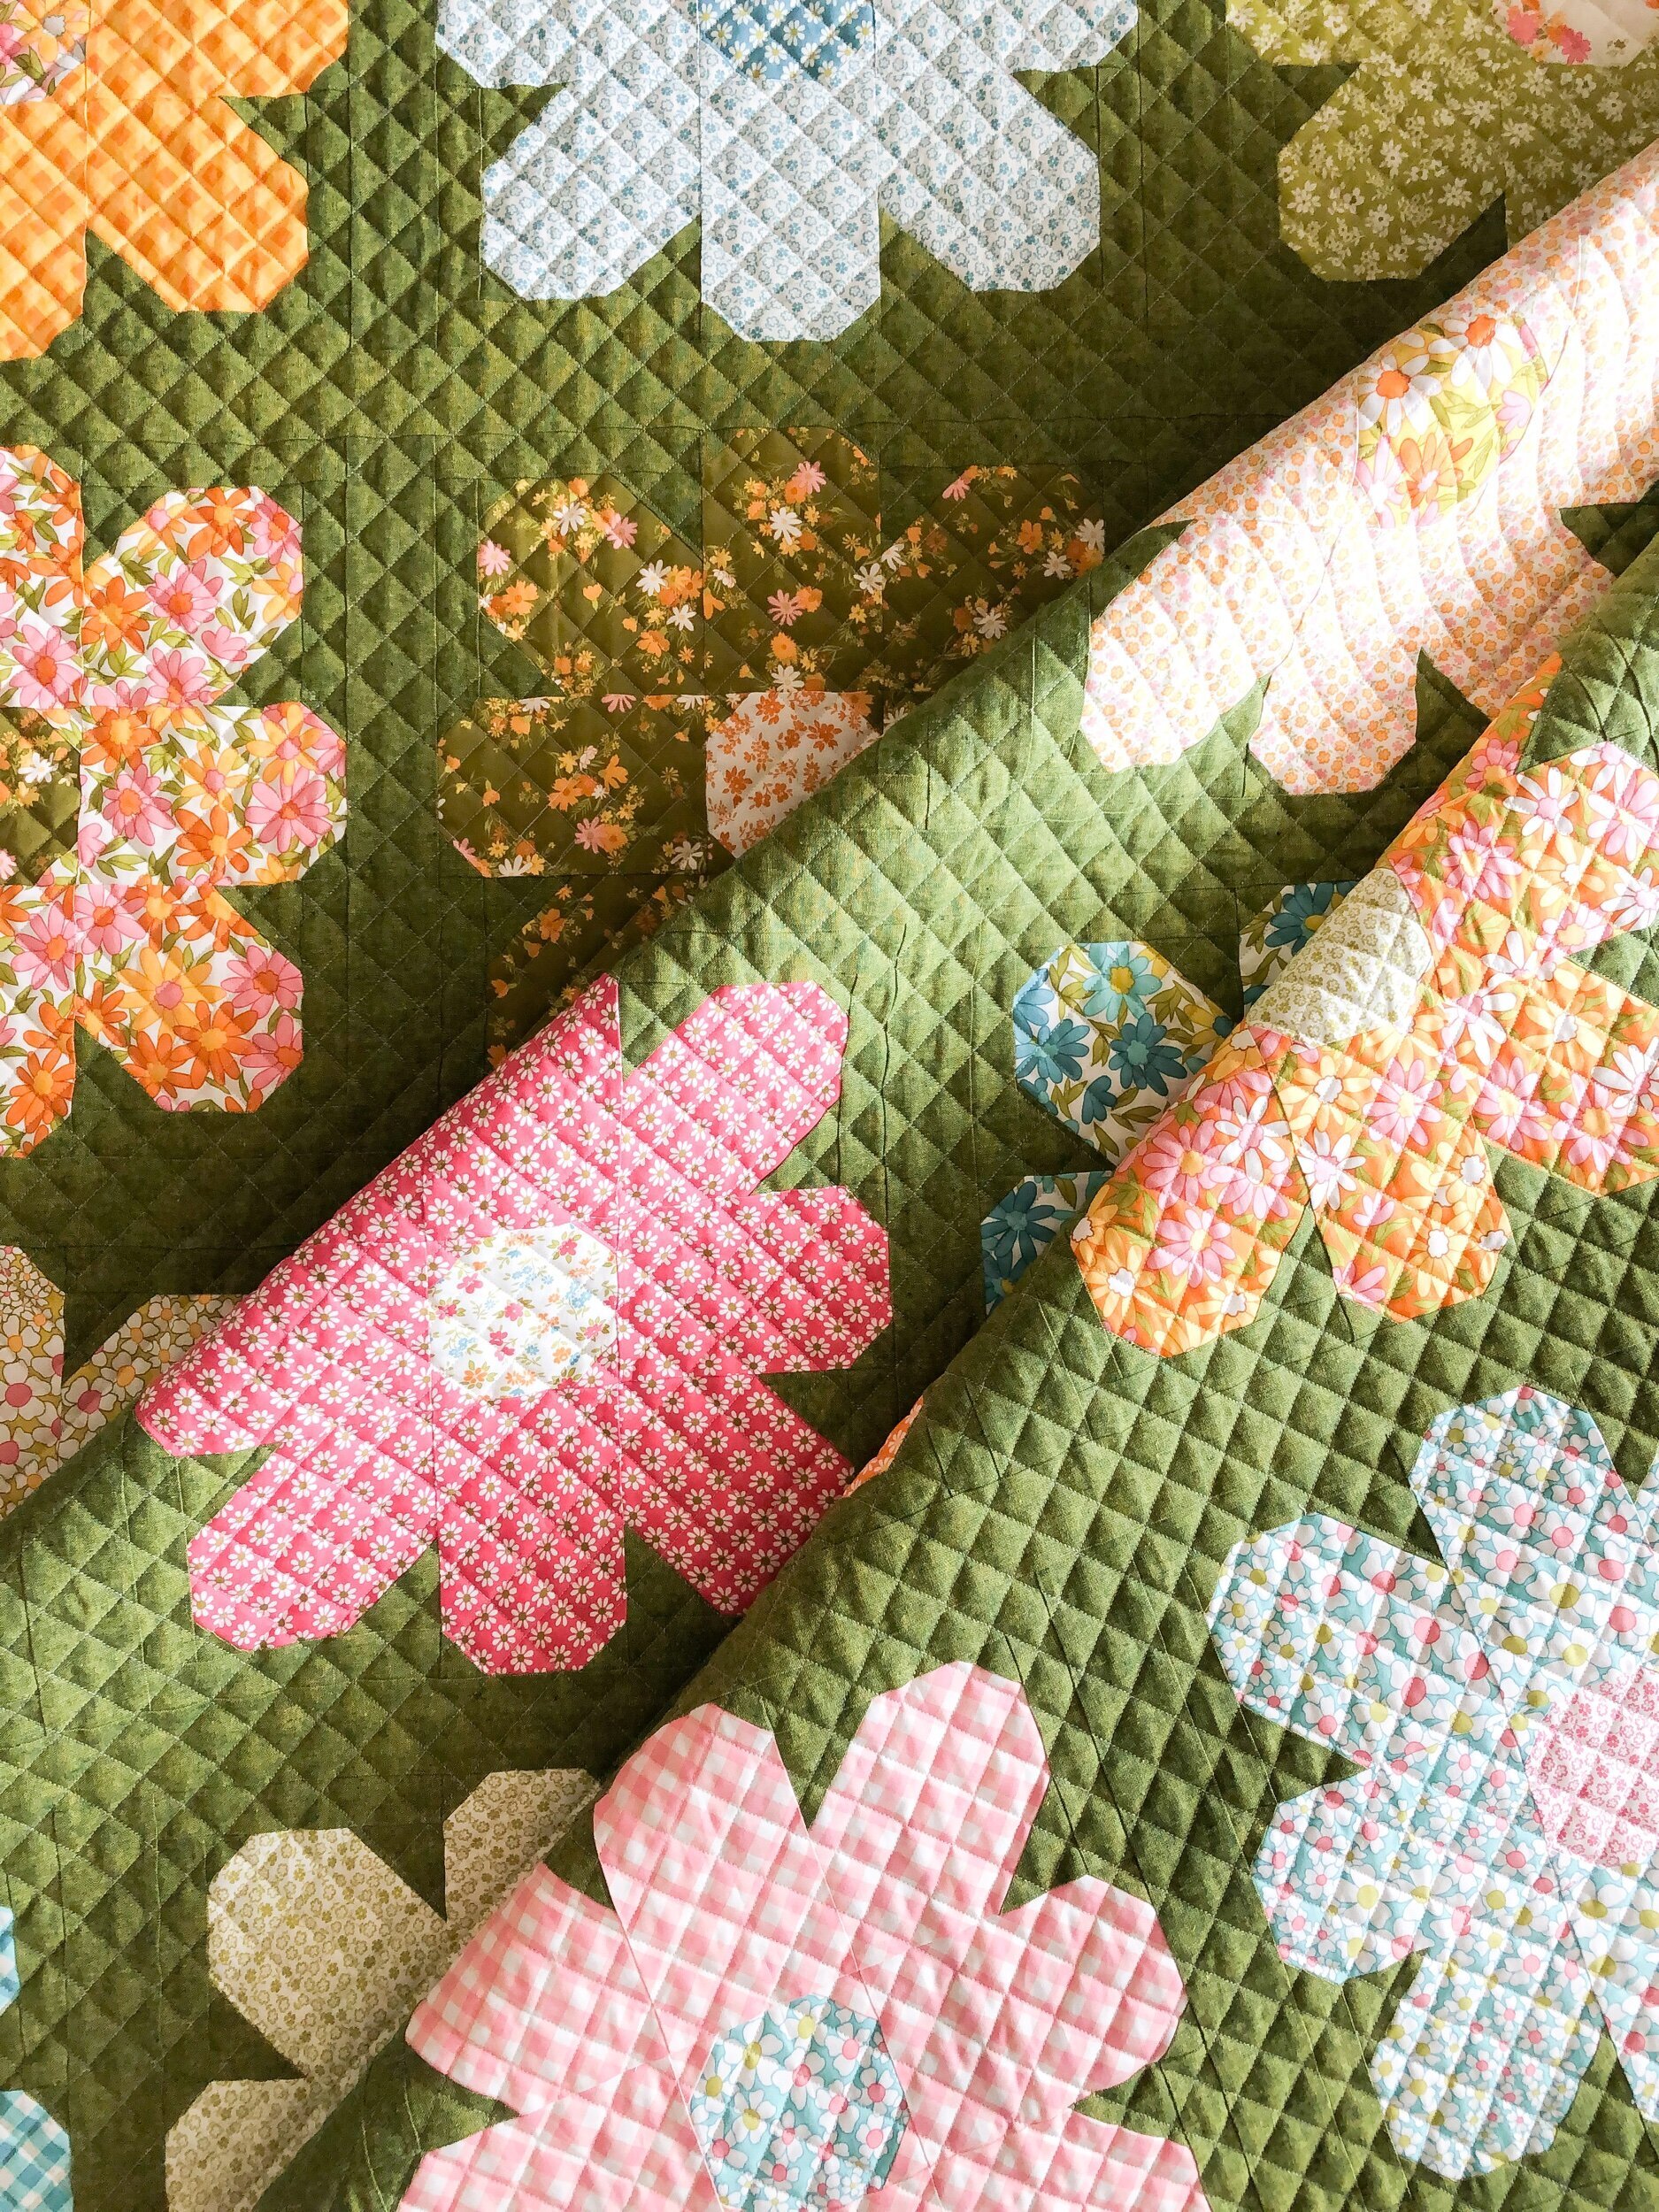
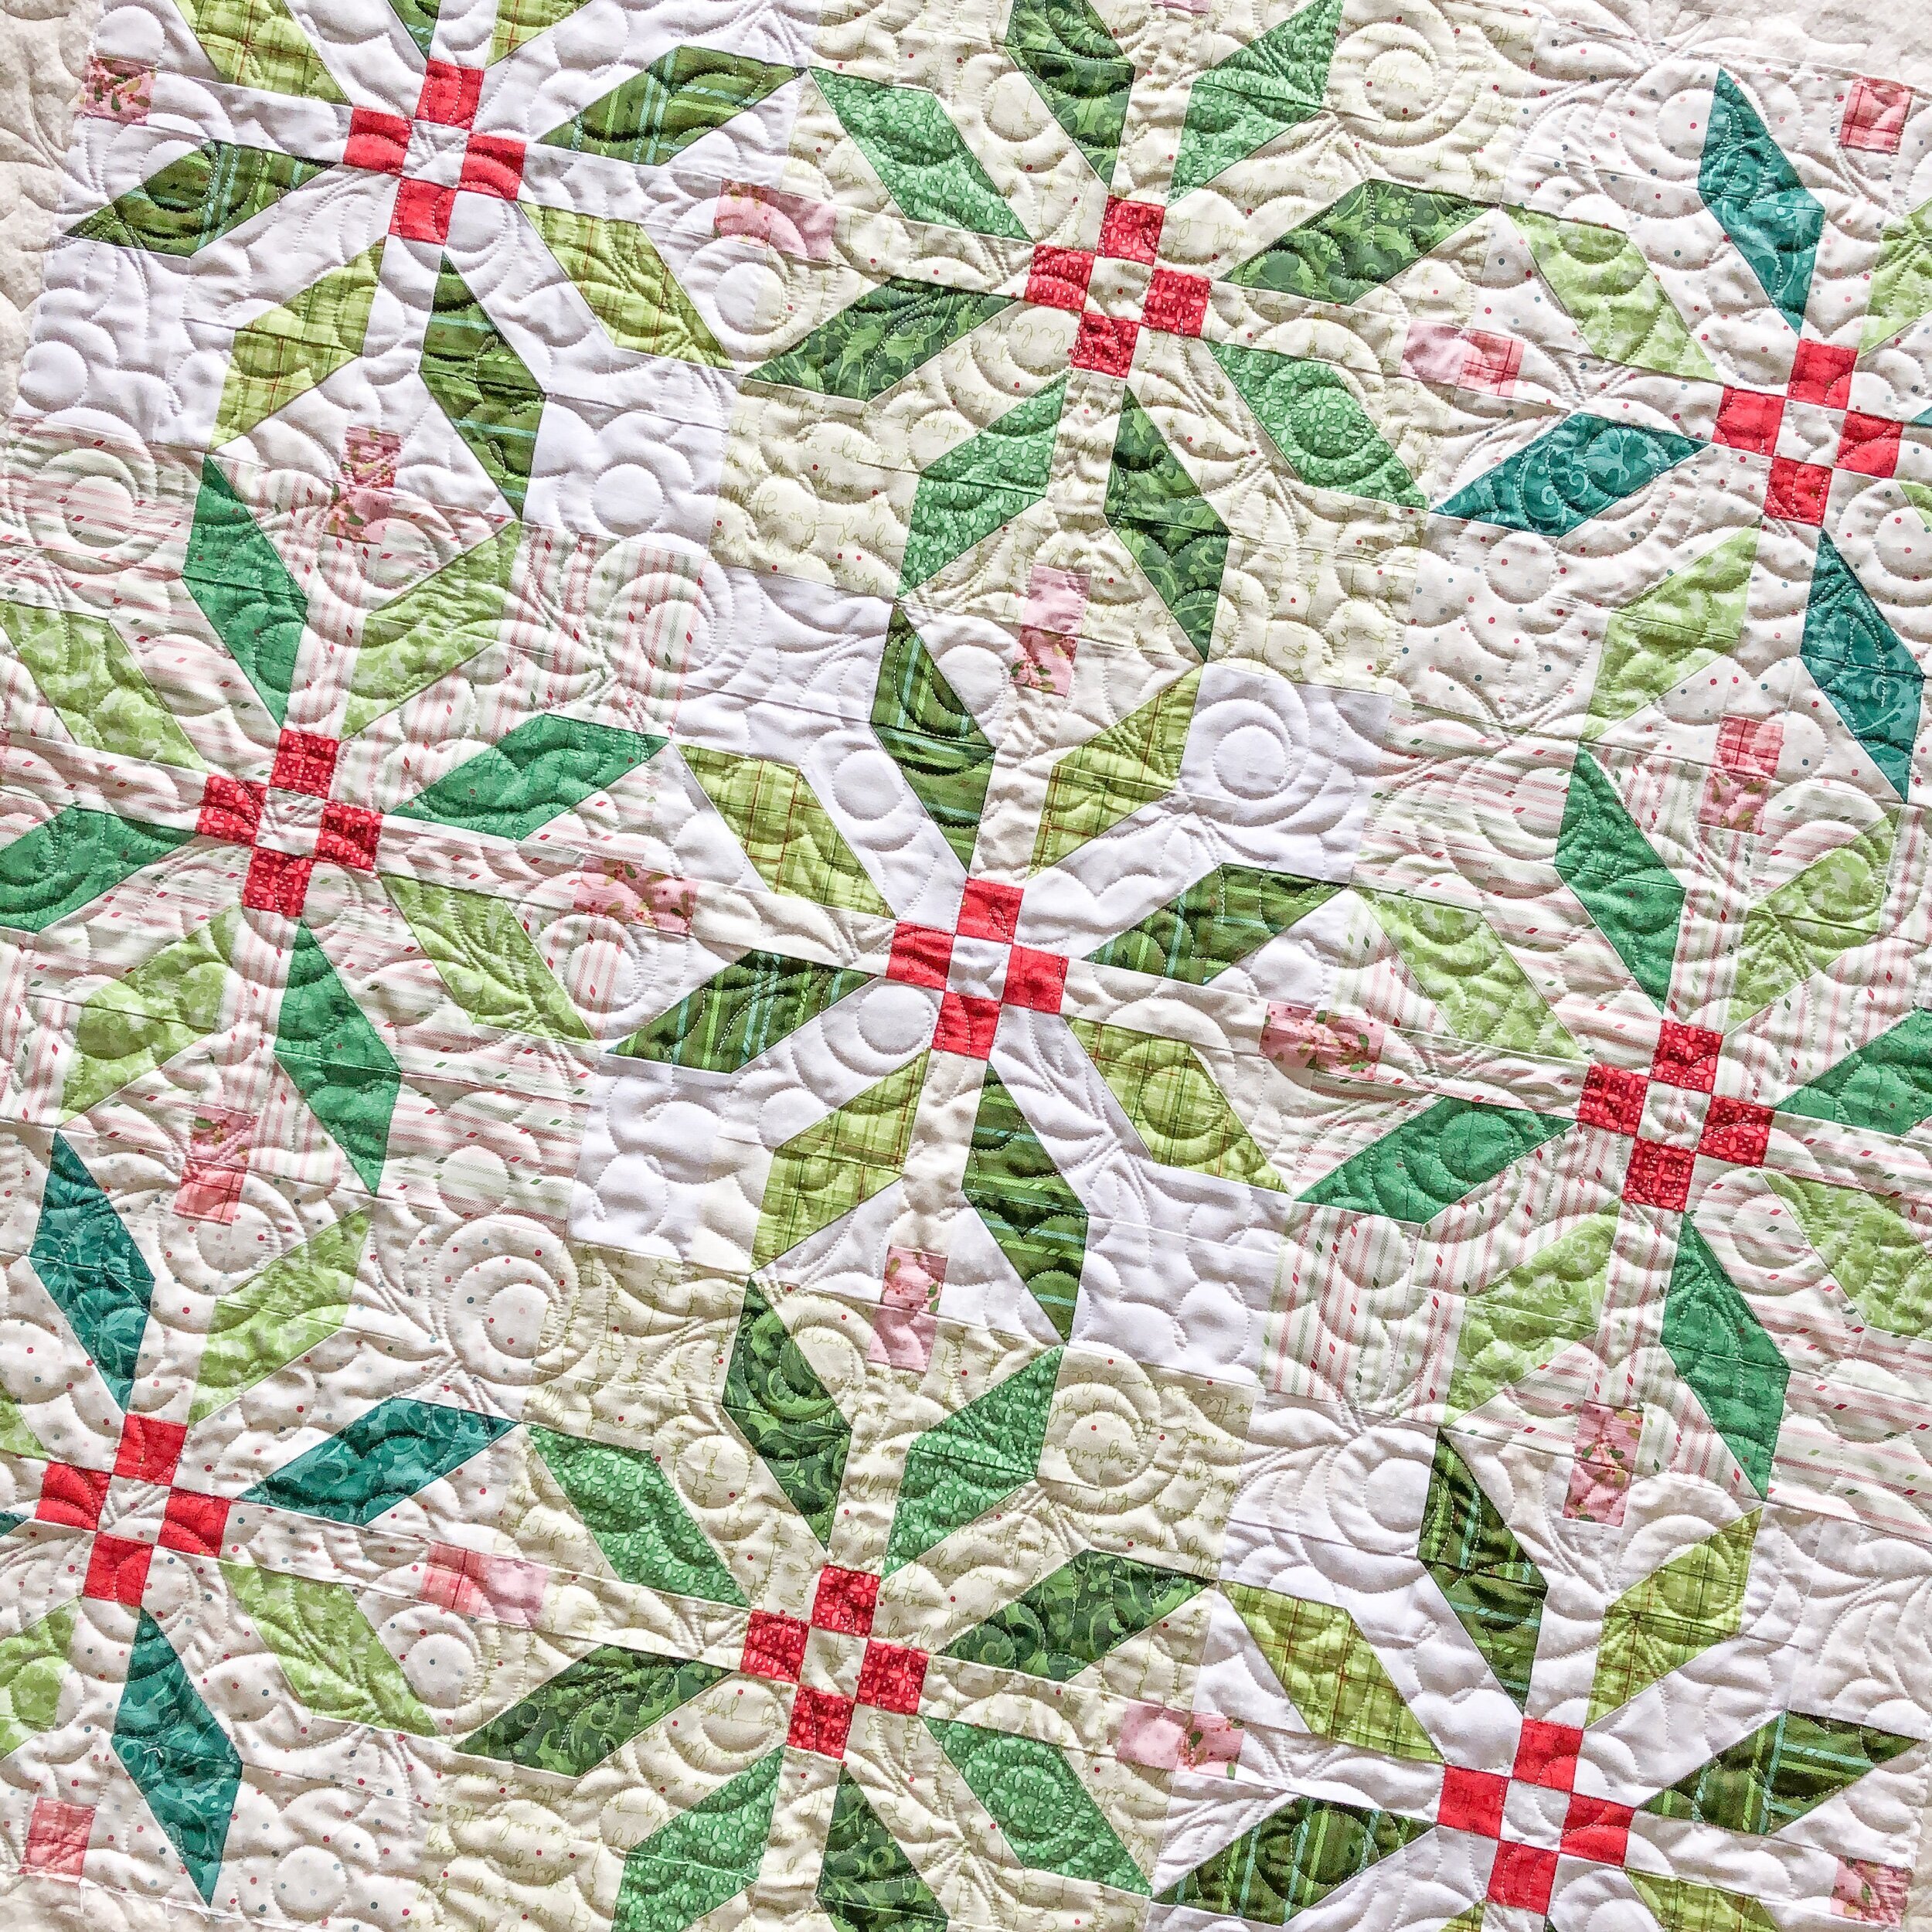
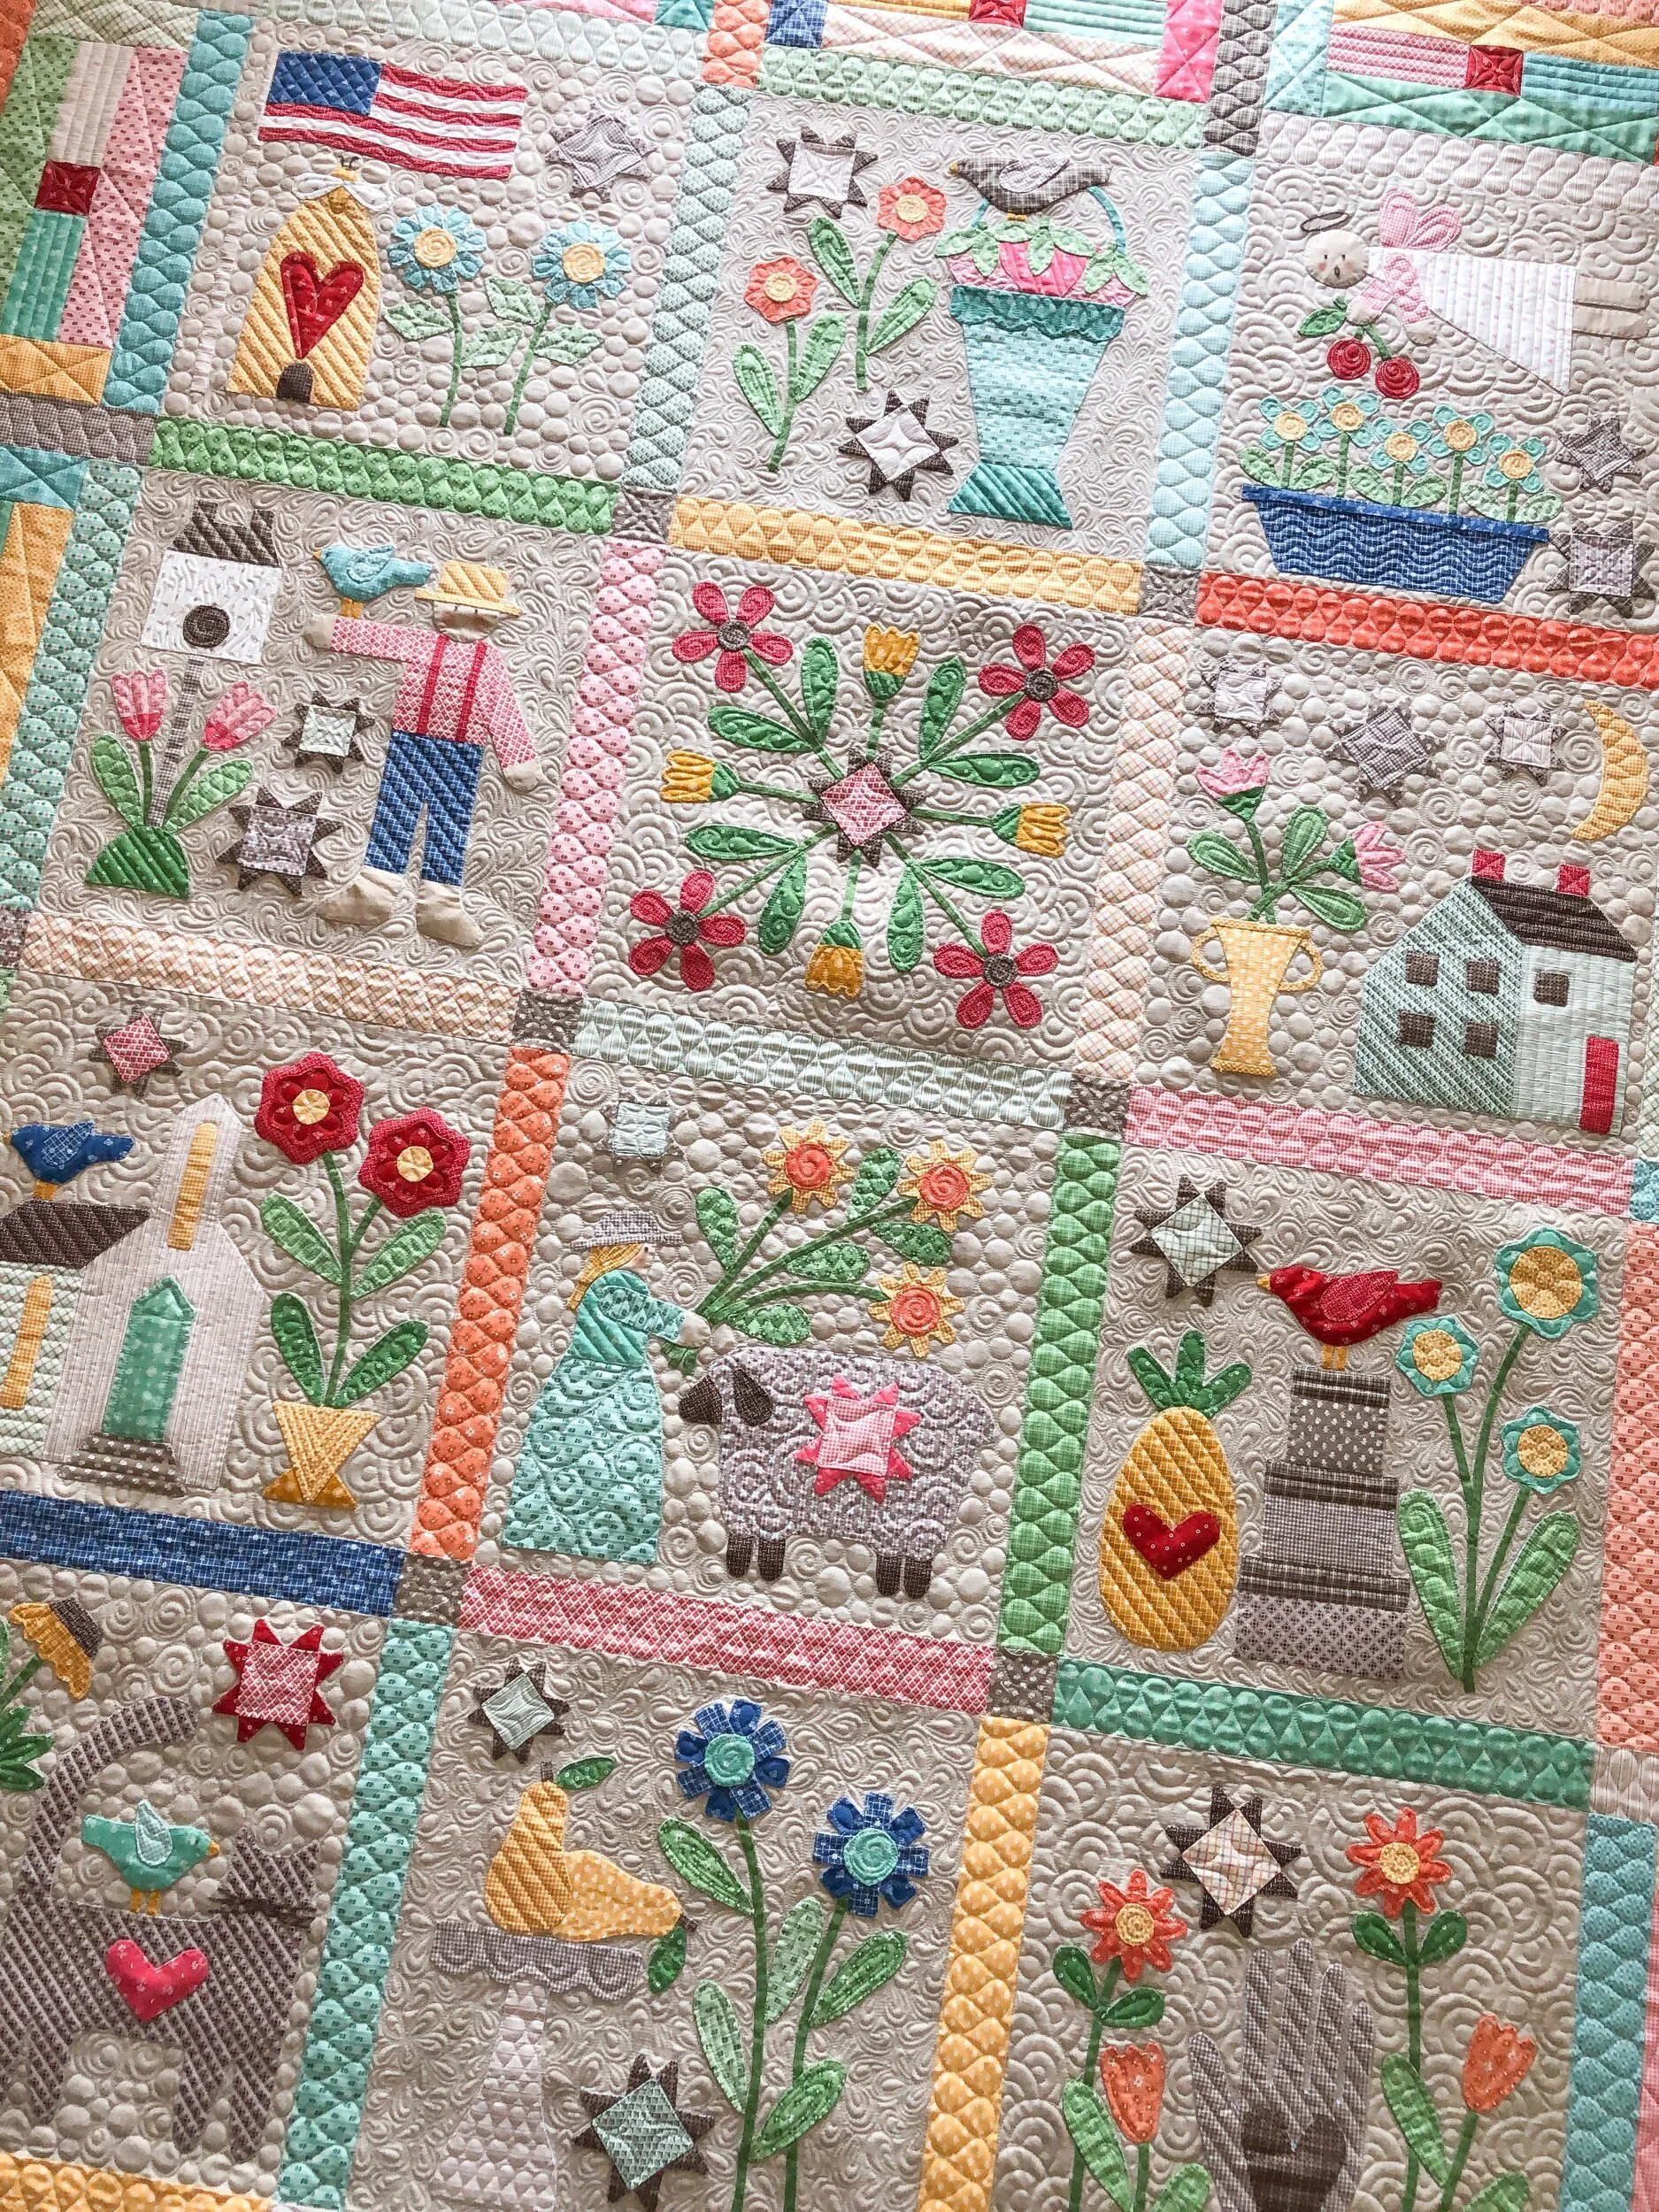
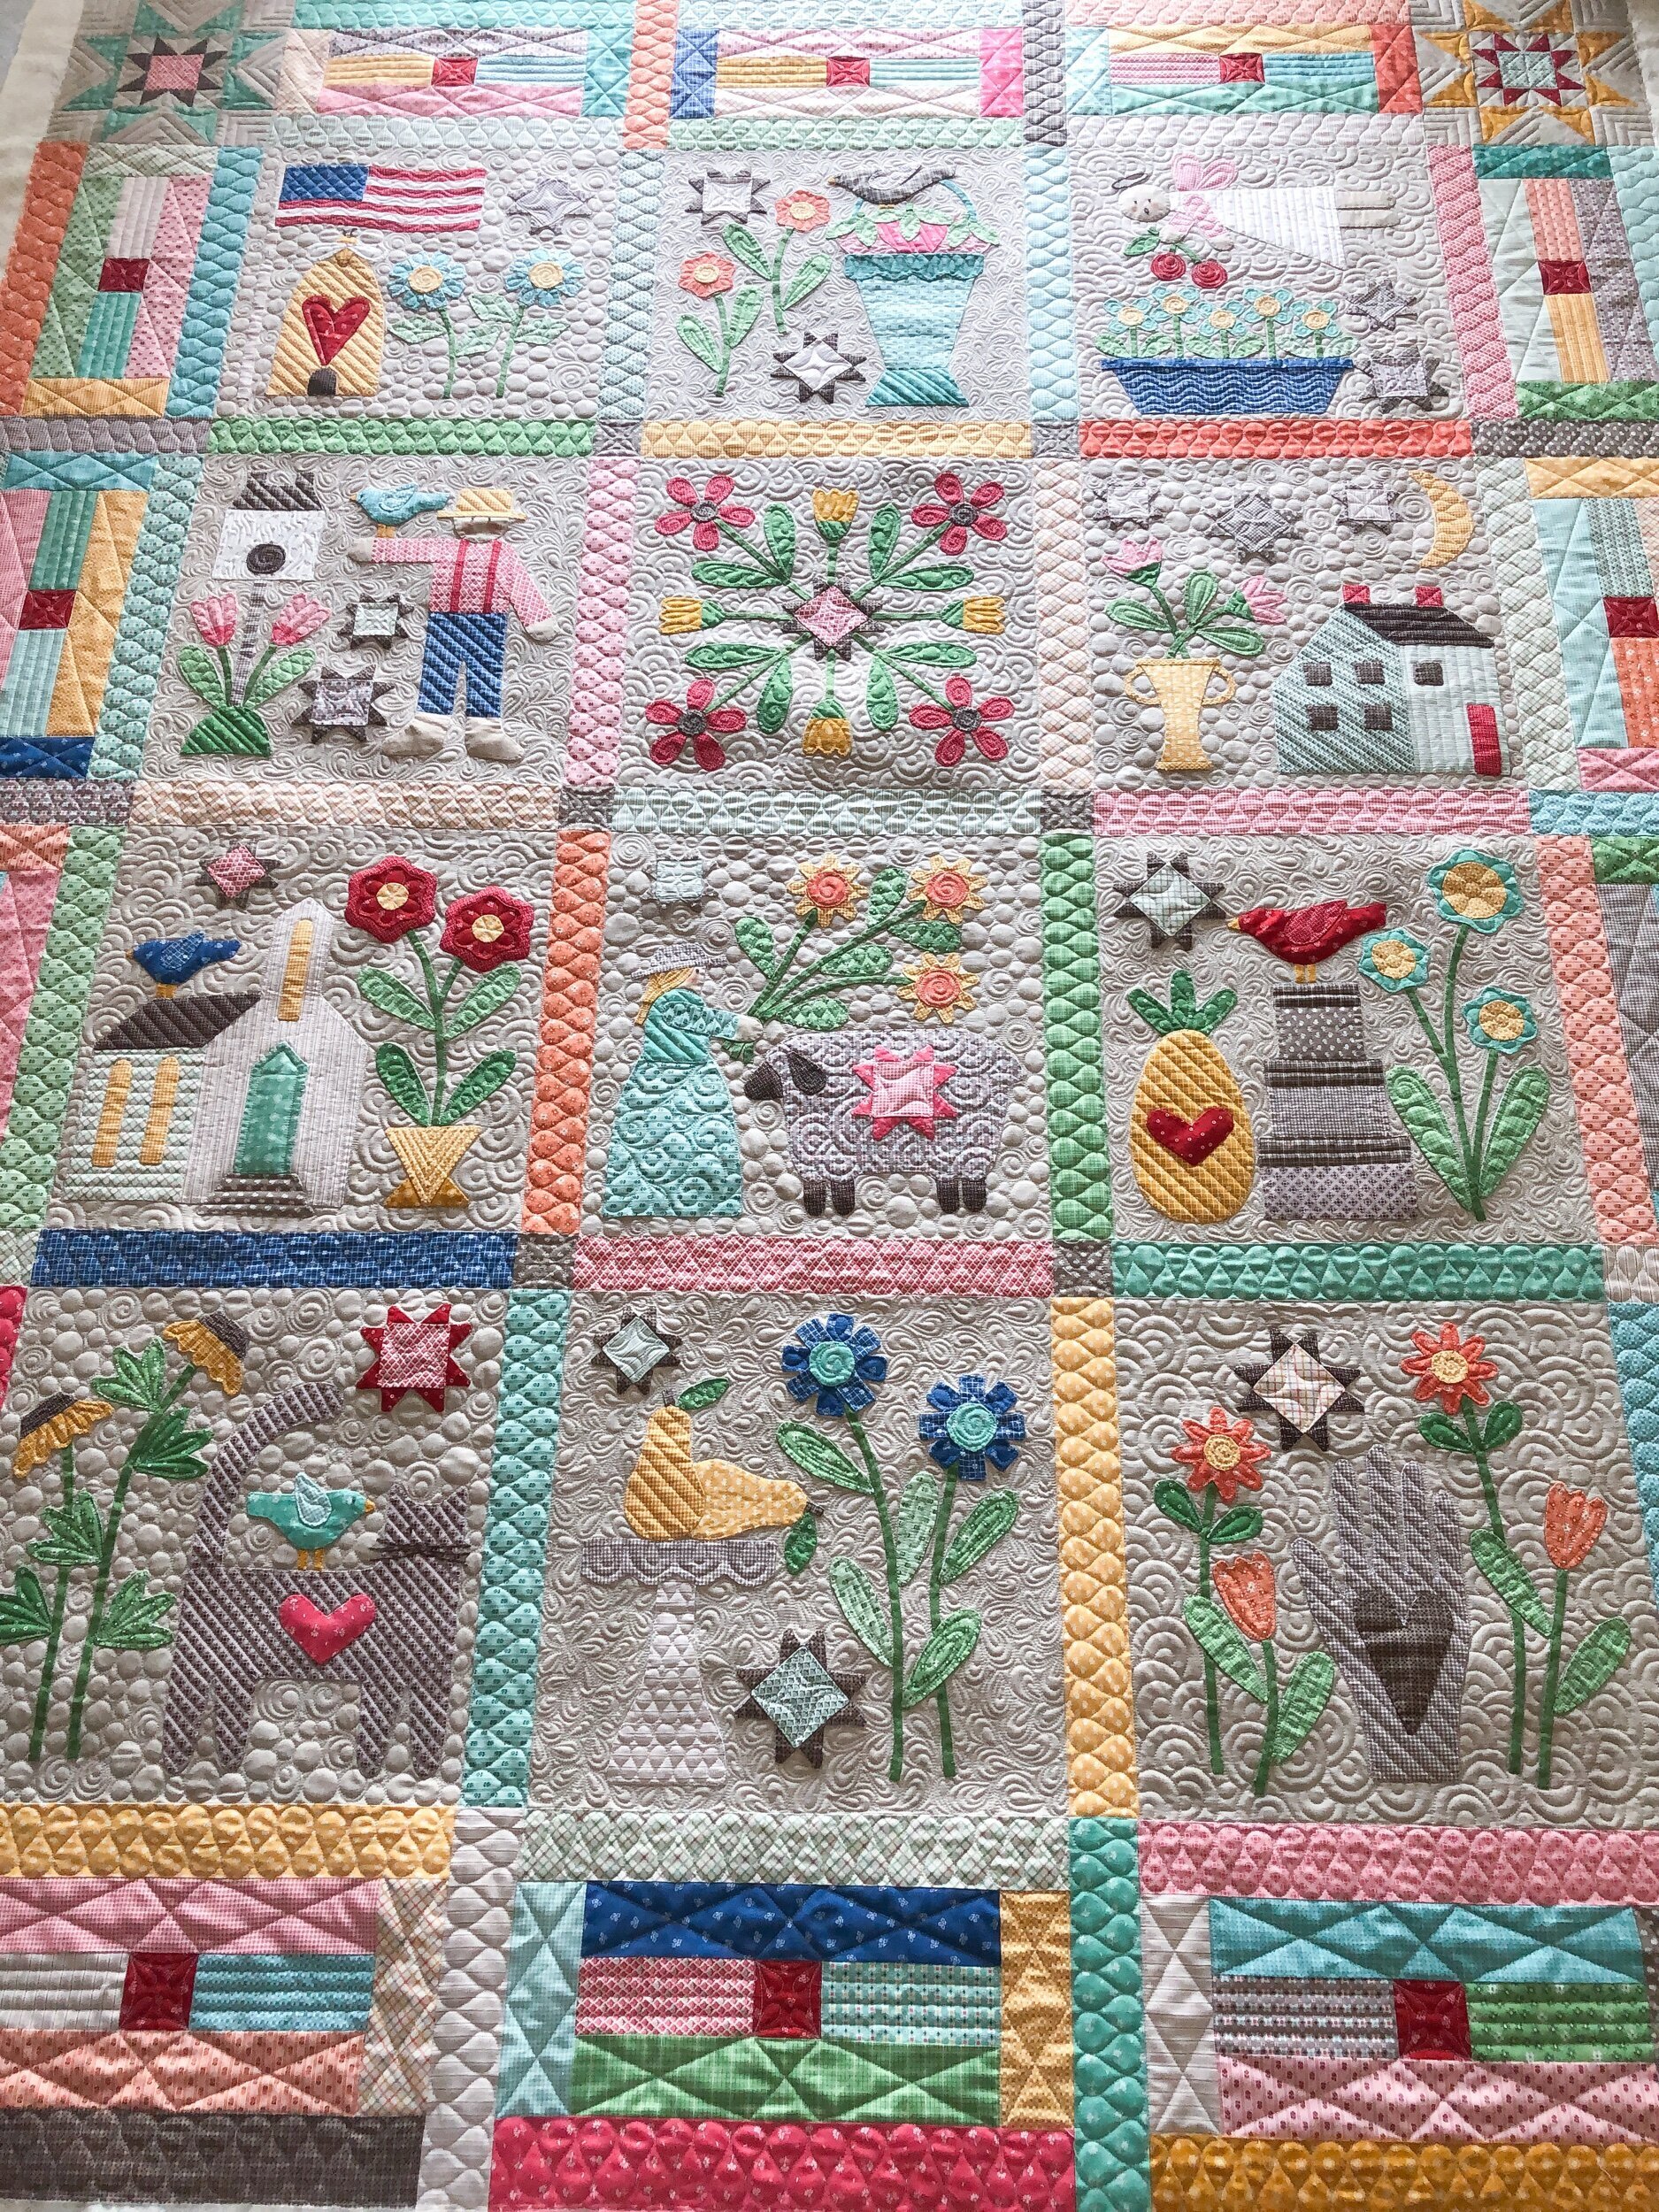
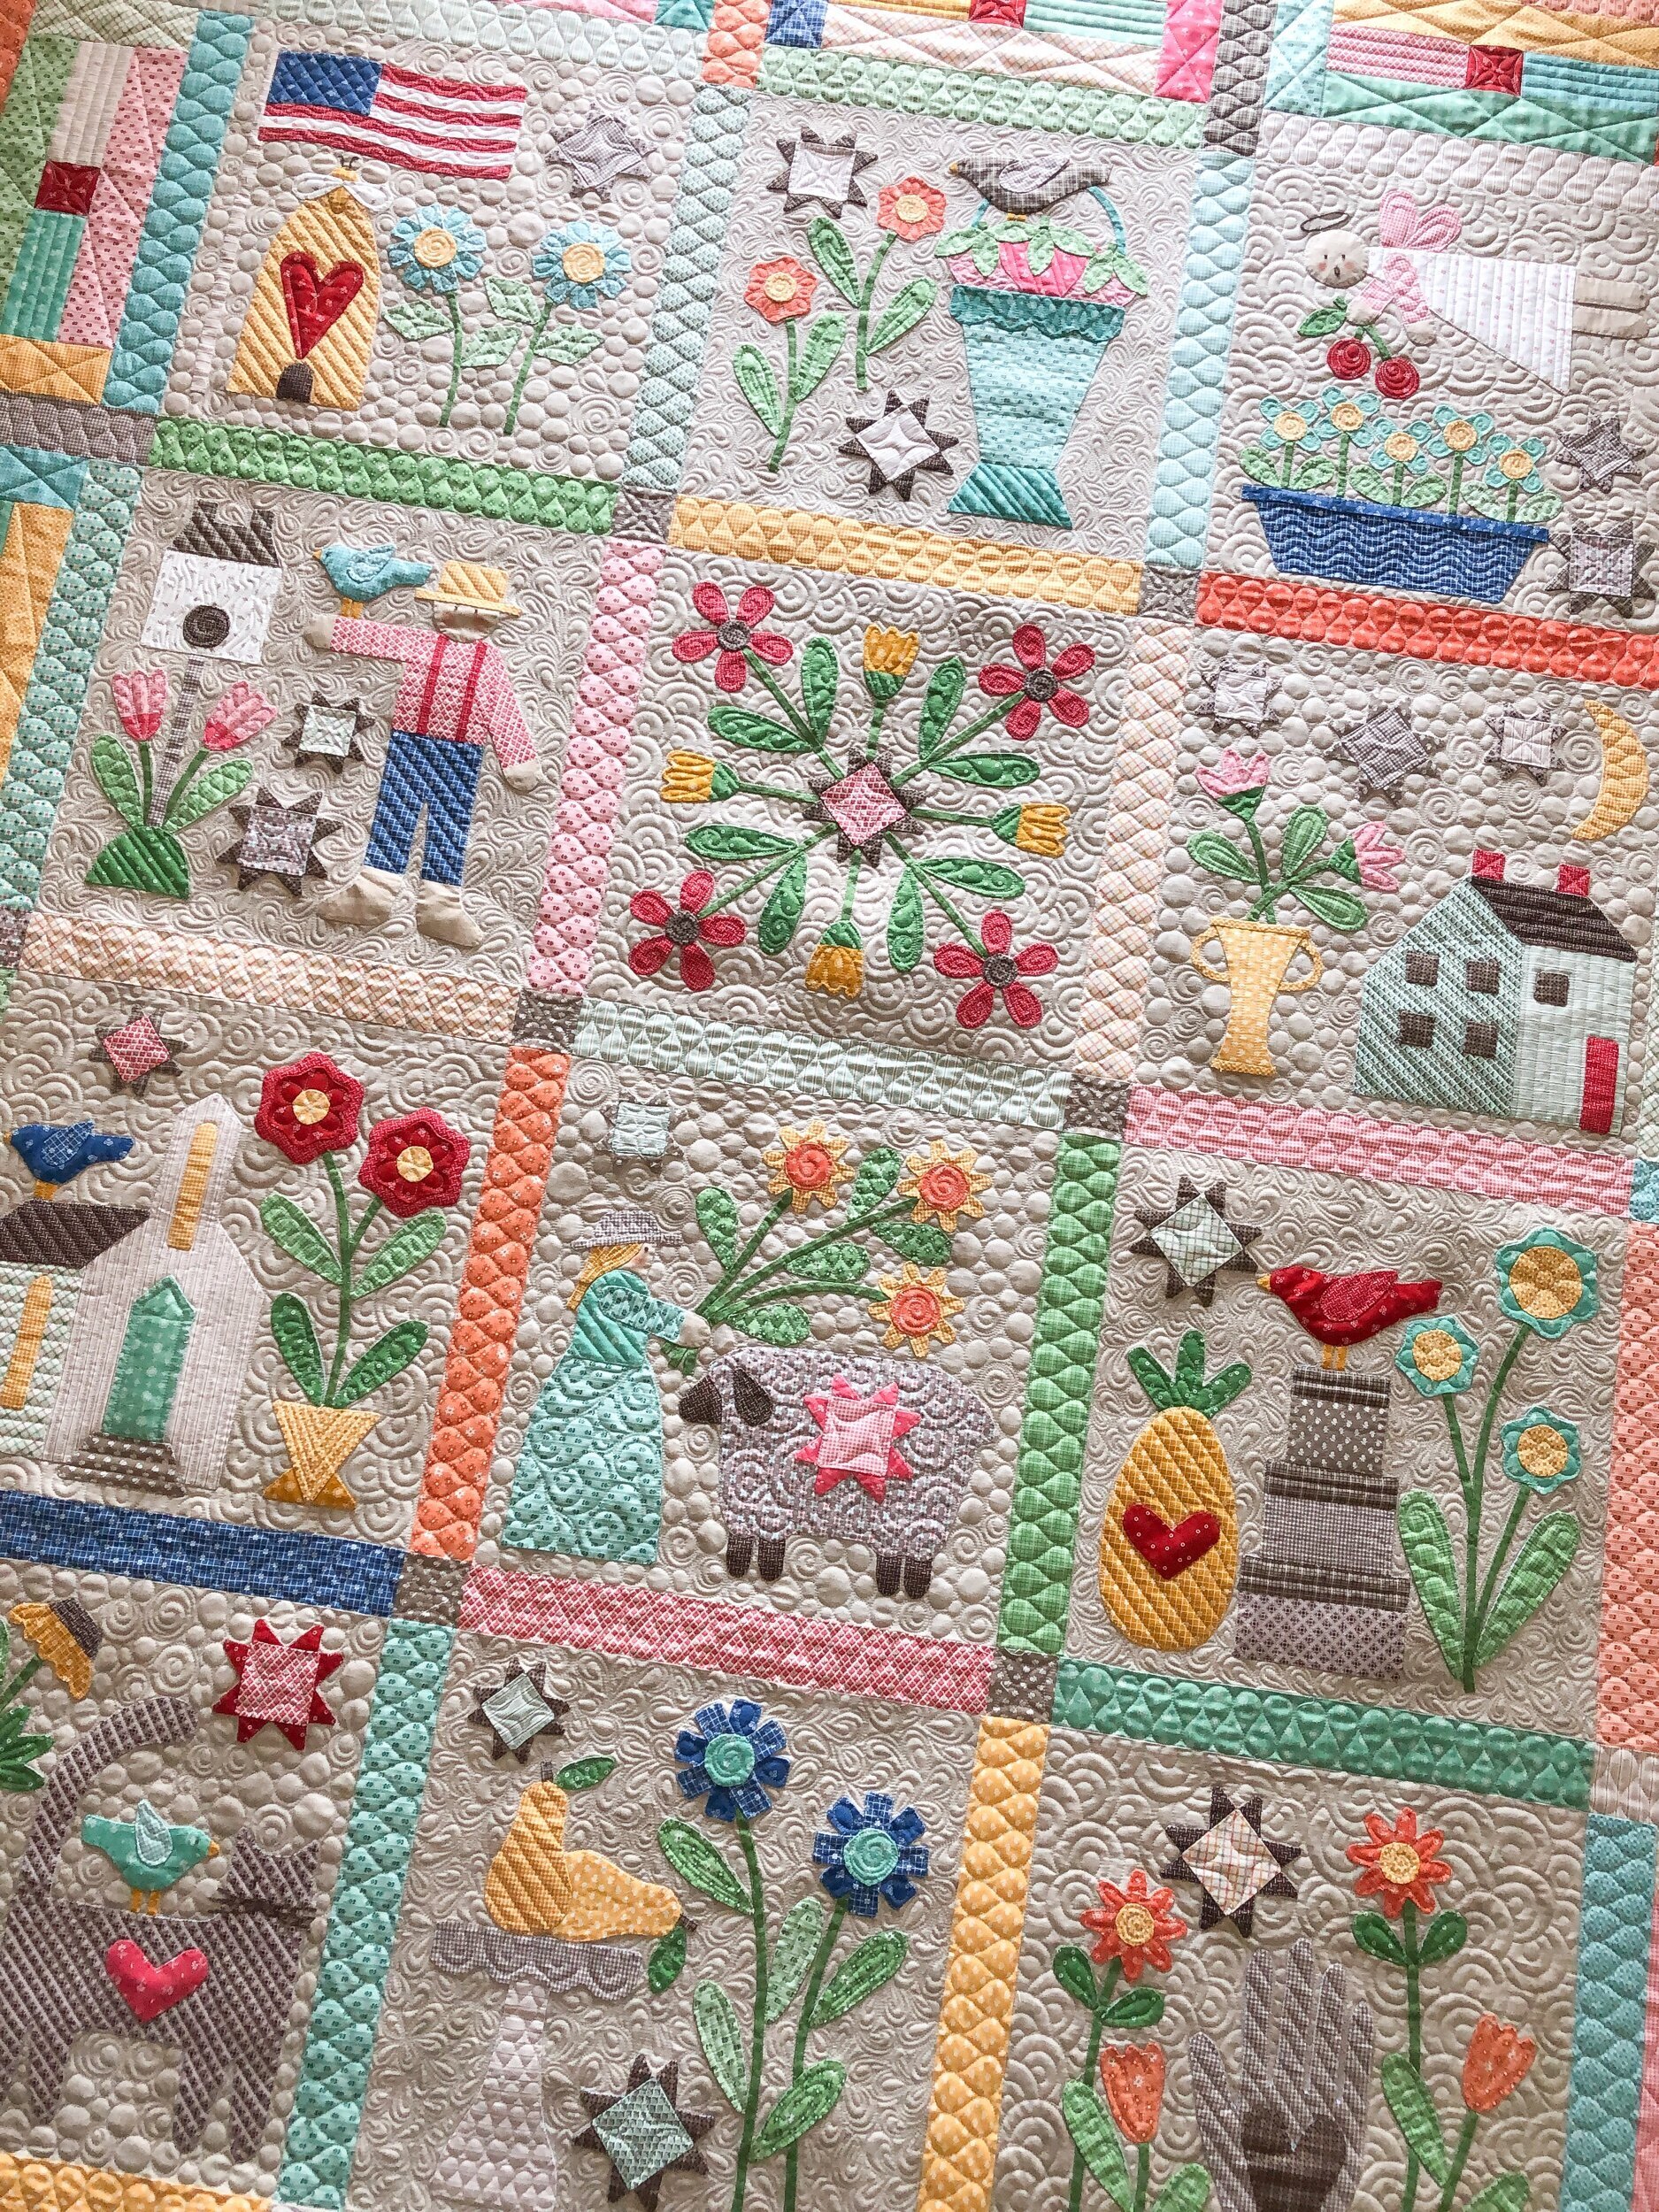
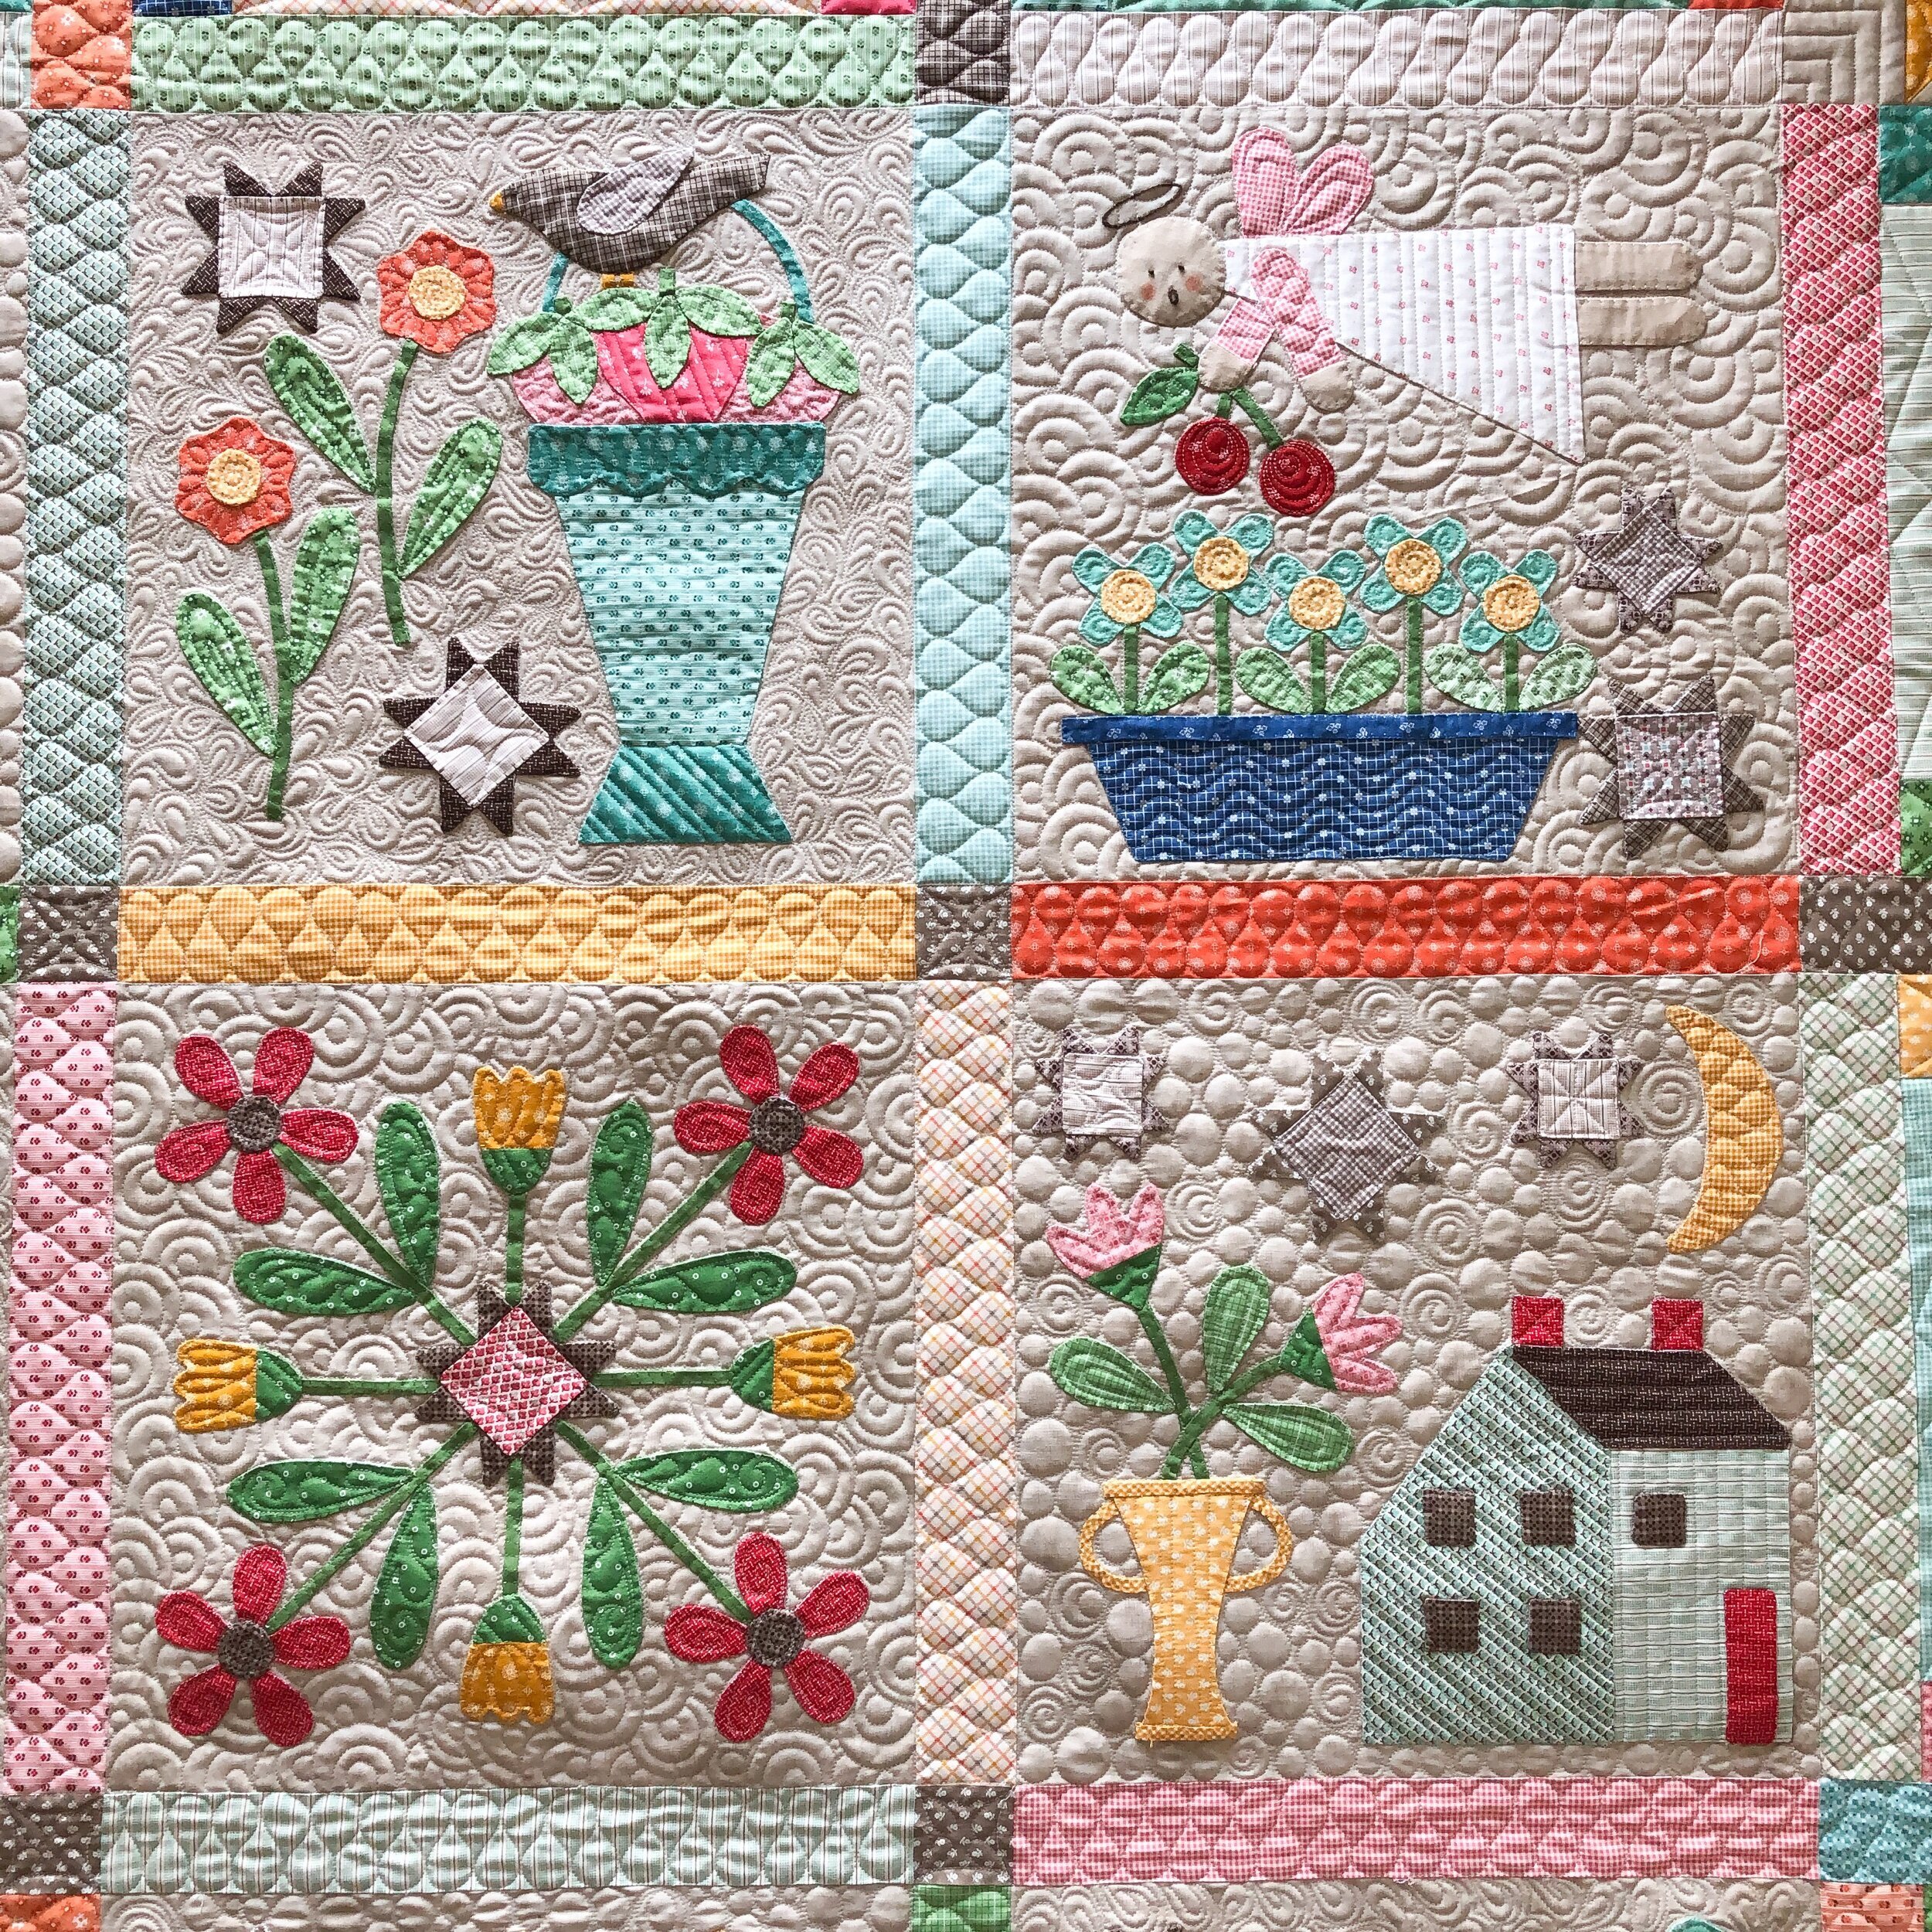
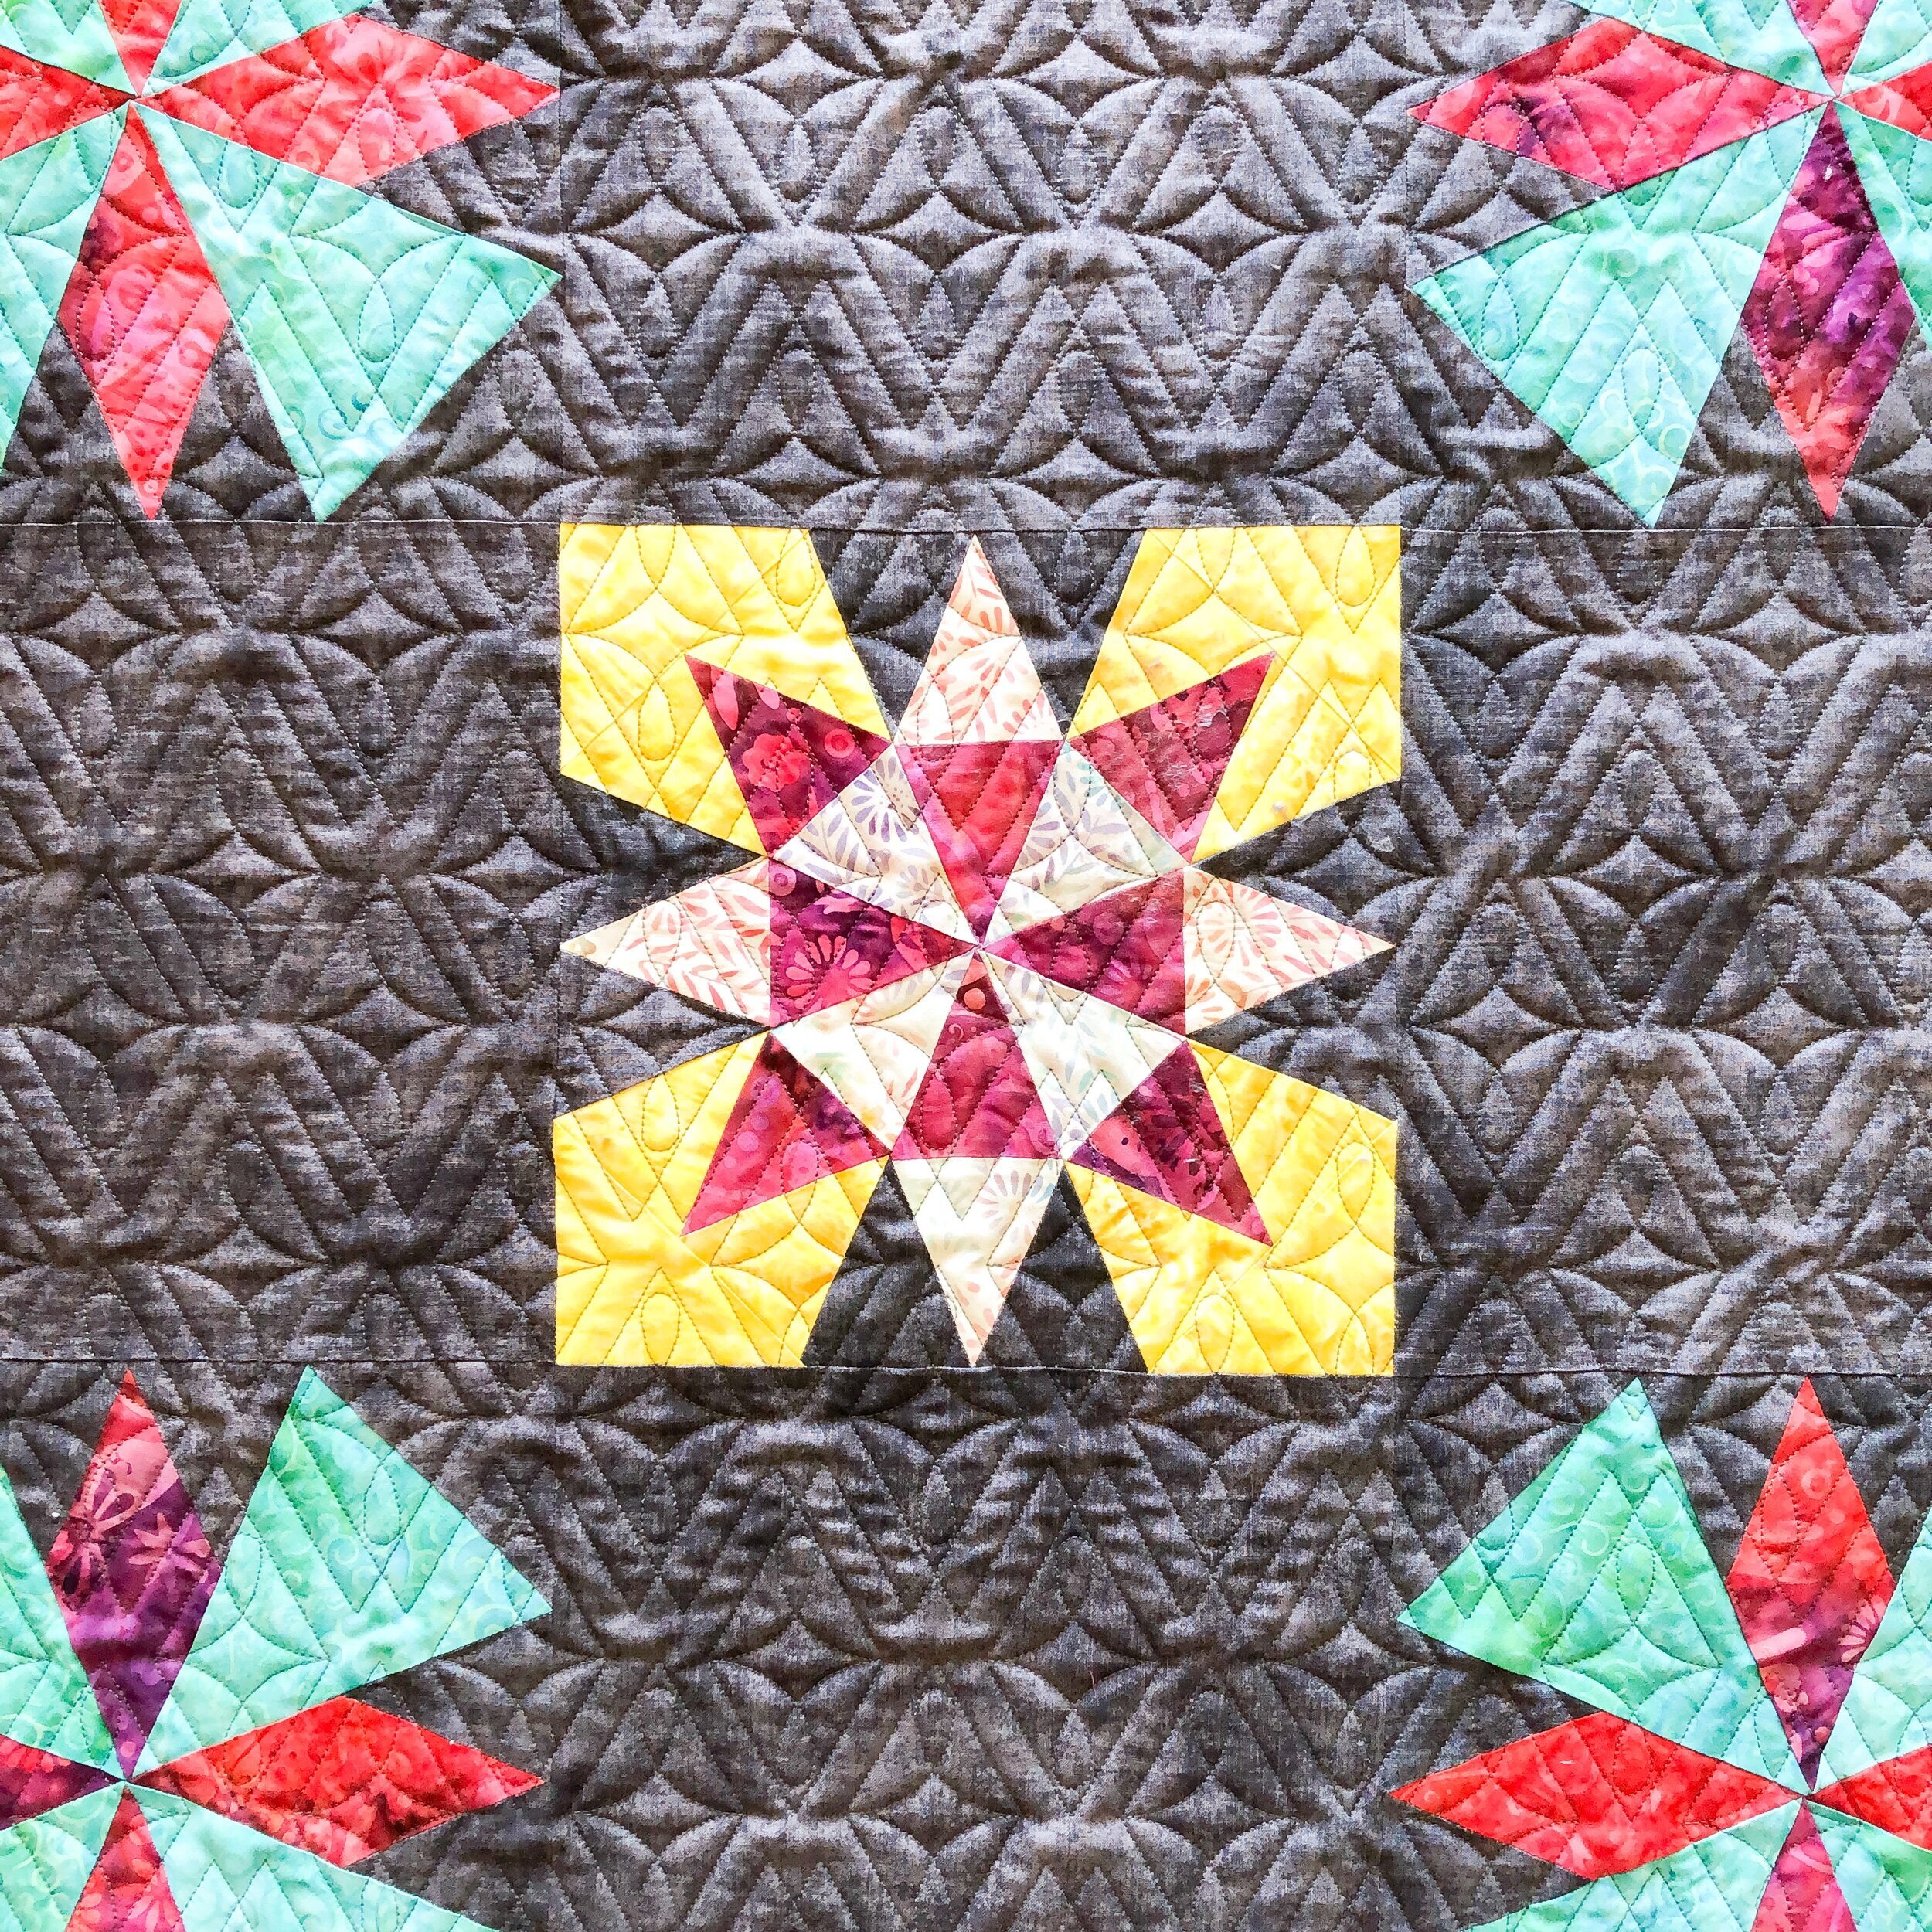
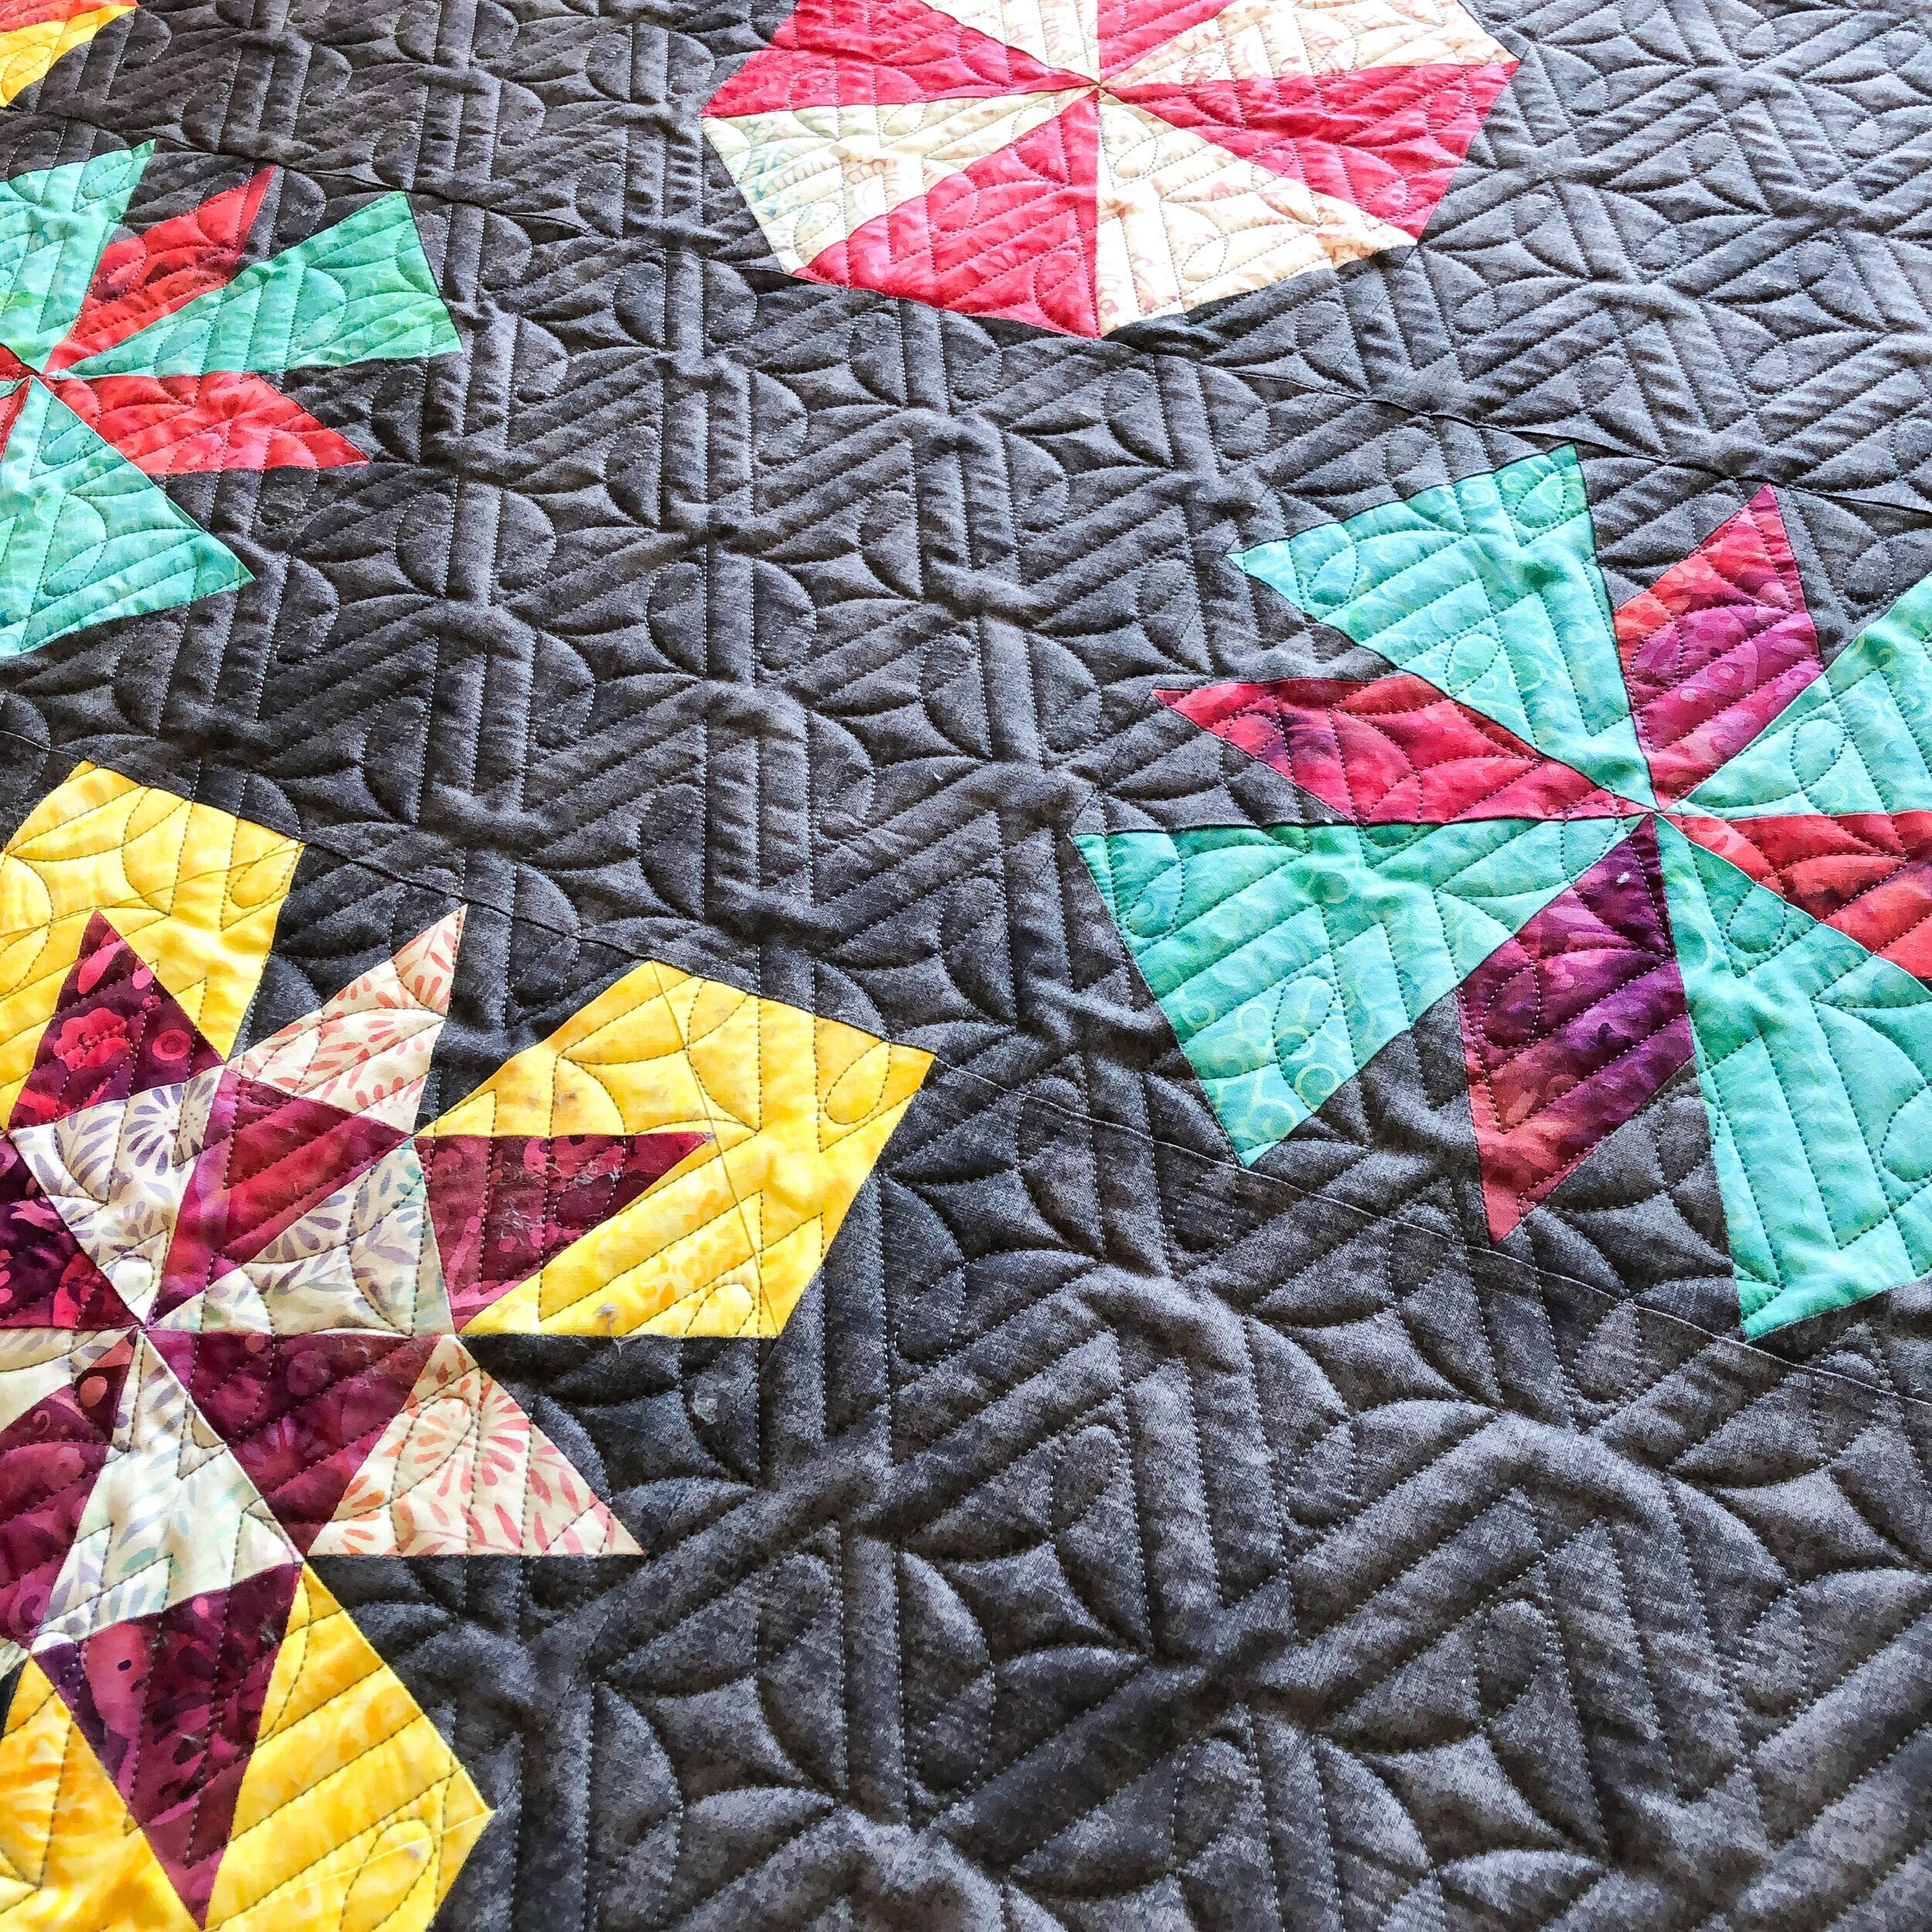
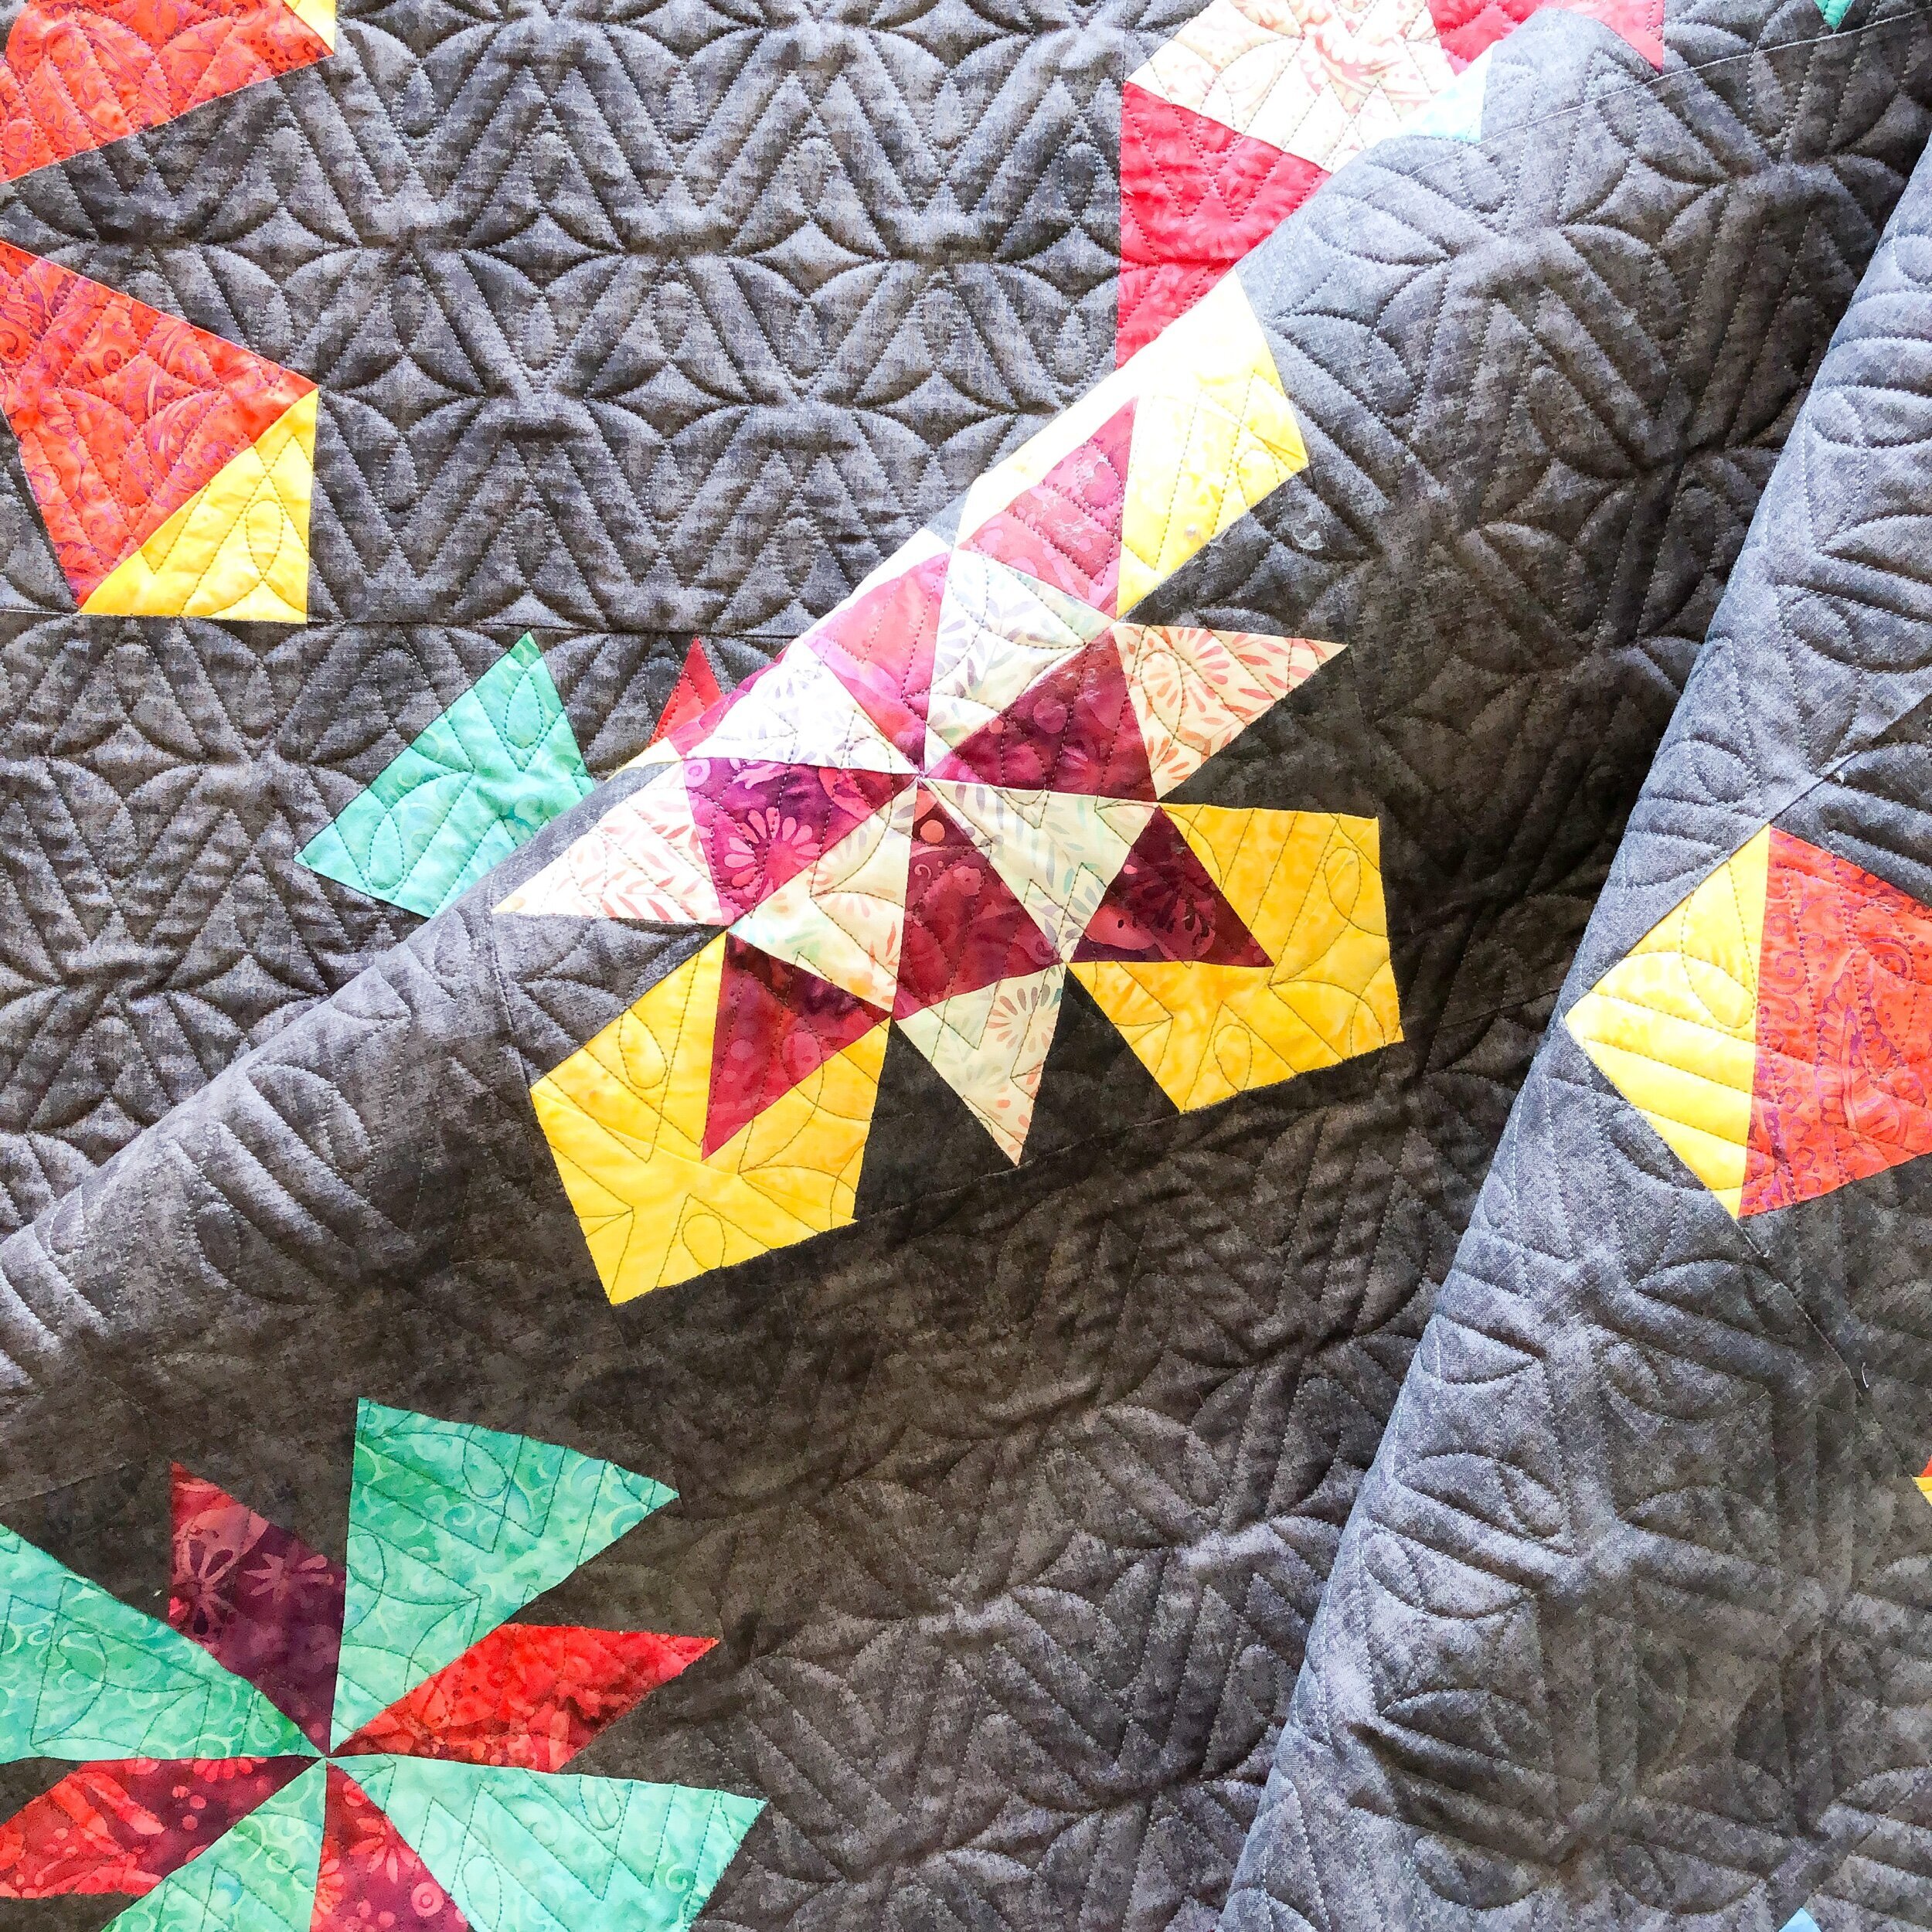
Madi’s Beautiful Things Quilt
Hello…happy weekend to you!
Excited to share this next quilt with you. It’s called Beautiful Things designed by Madi Hastings of Laser Cut Quilts. It is available in a kit with all of the pieces laser cut with their fabulous Flexi Fuse interfacing on the back. It’s an absolute breeze machine quilting through all of those appliqué layers…that’s how good it is!
It’s amazing, huh?!?!?!!!!! Madi designed it as a quilt along and has several people join her. I got to be the lucky one to quilt it custom.
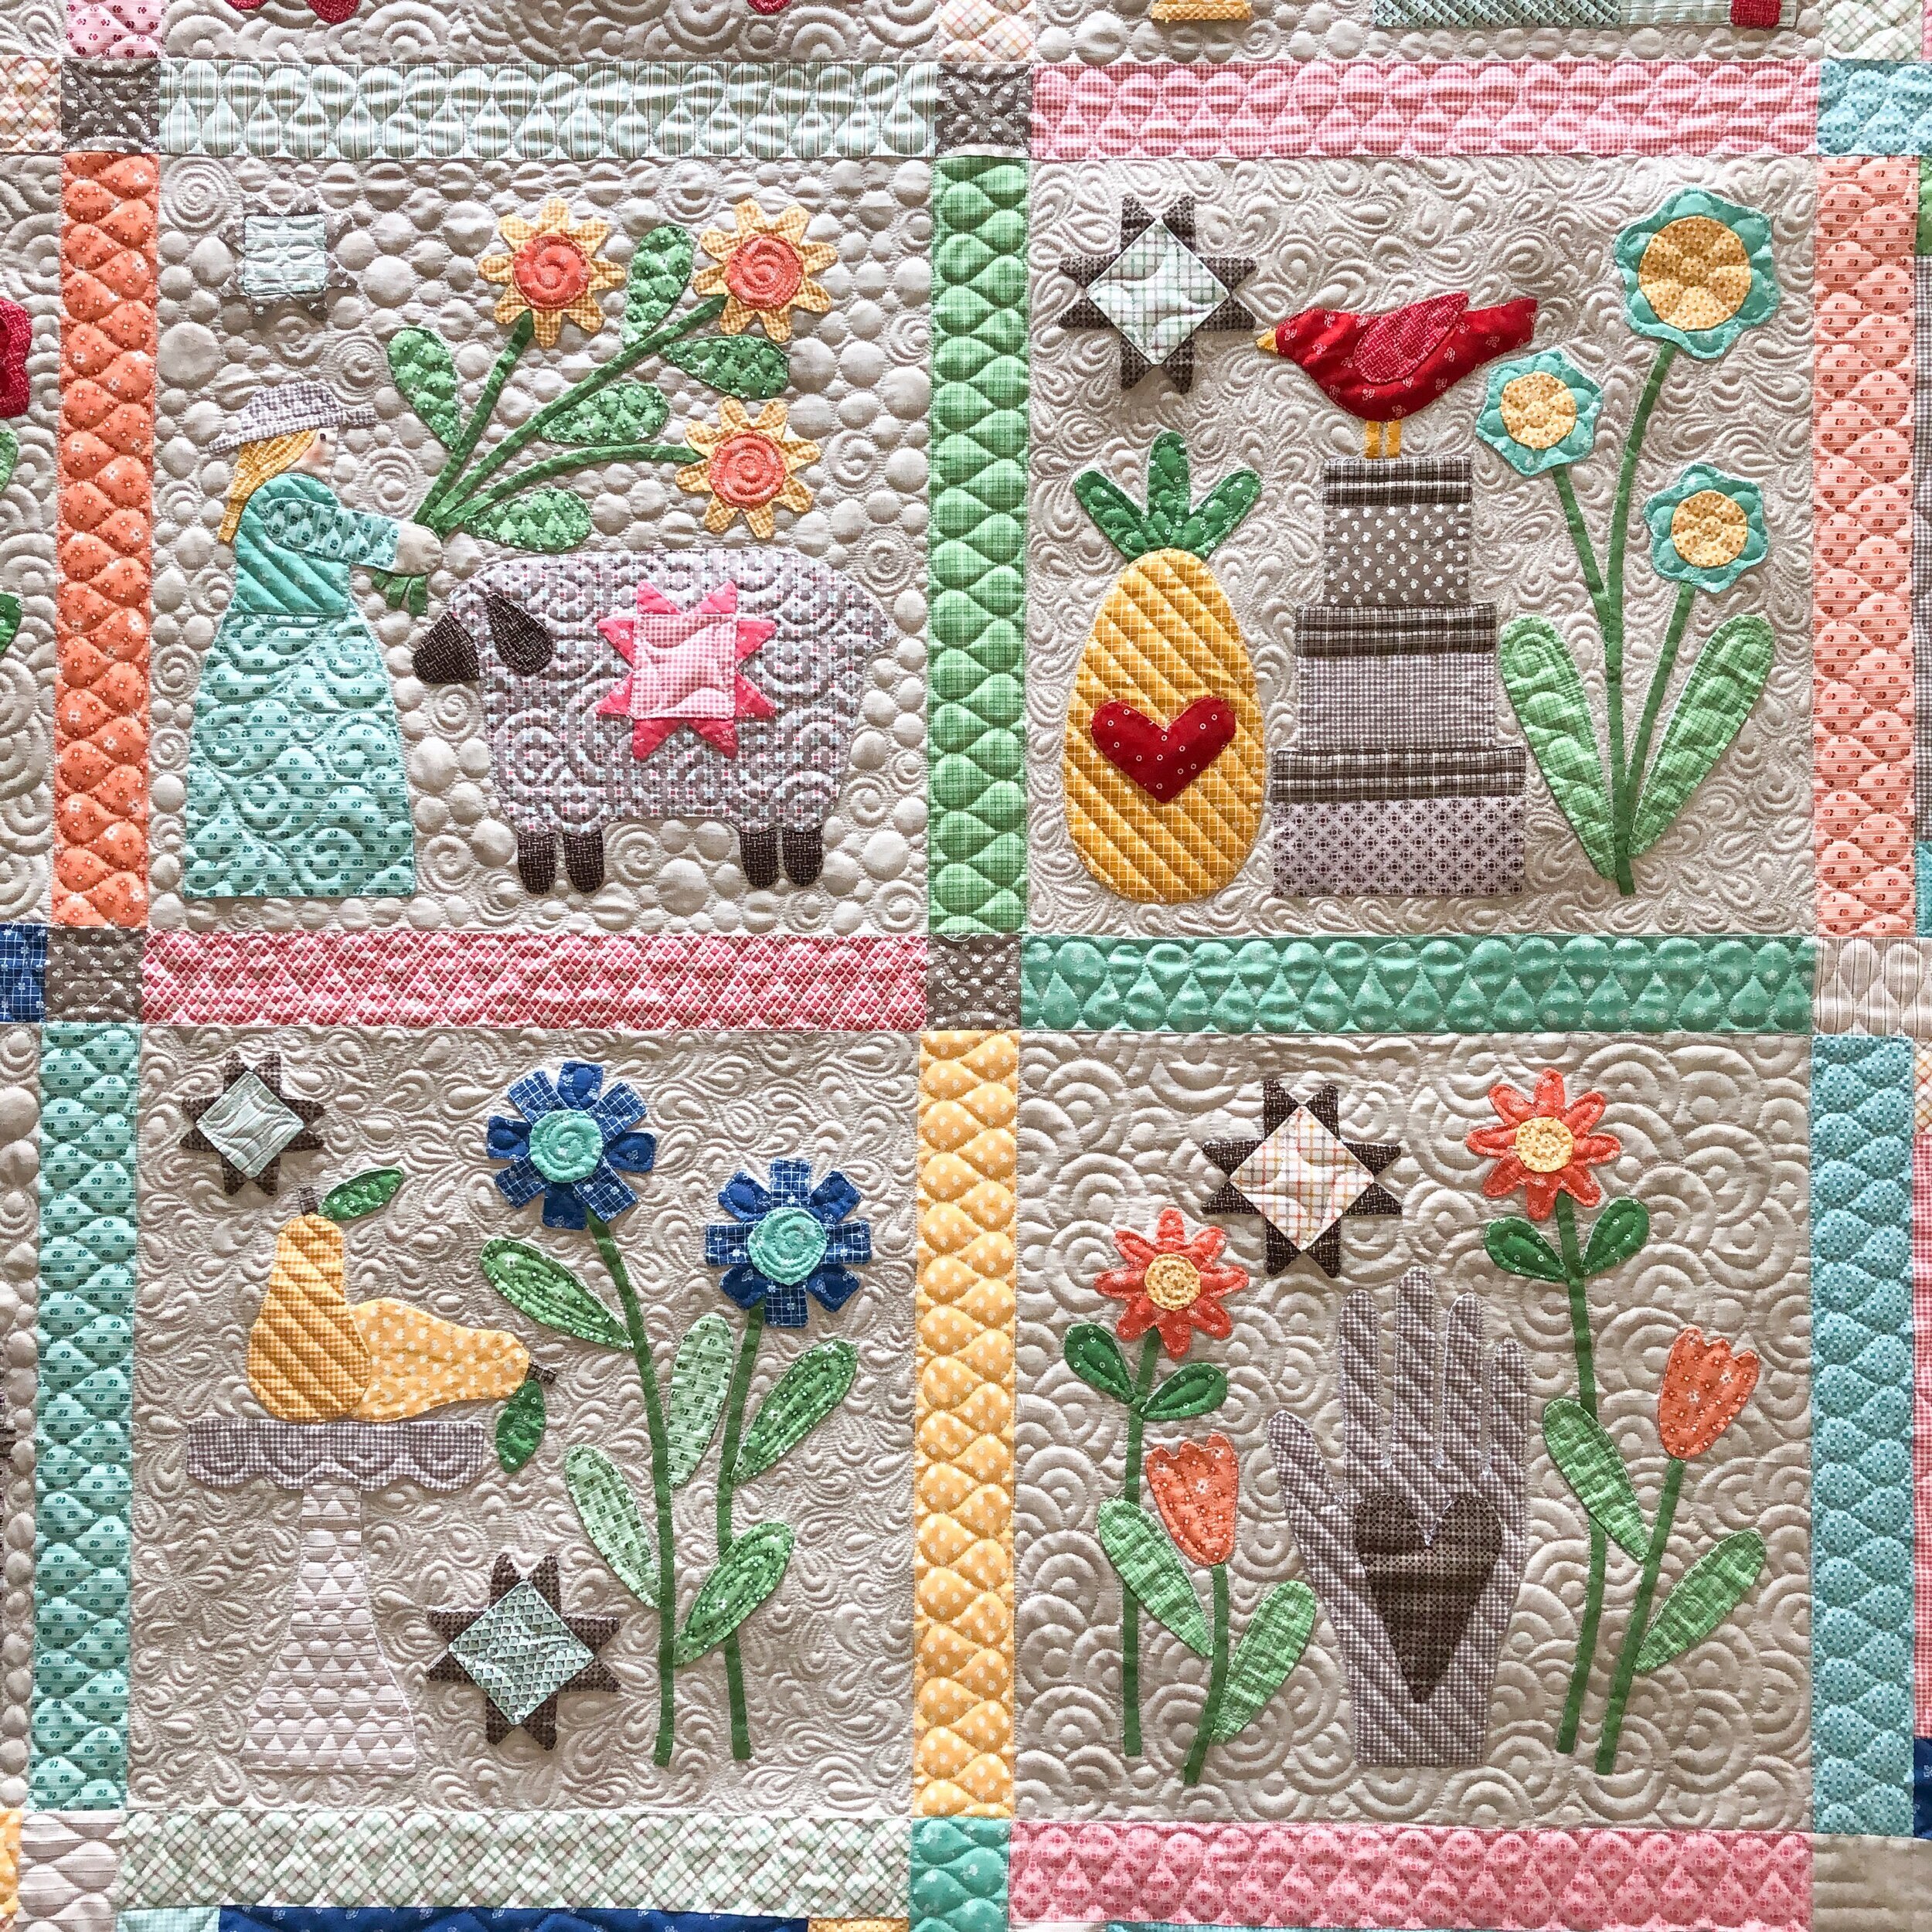
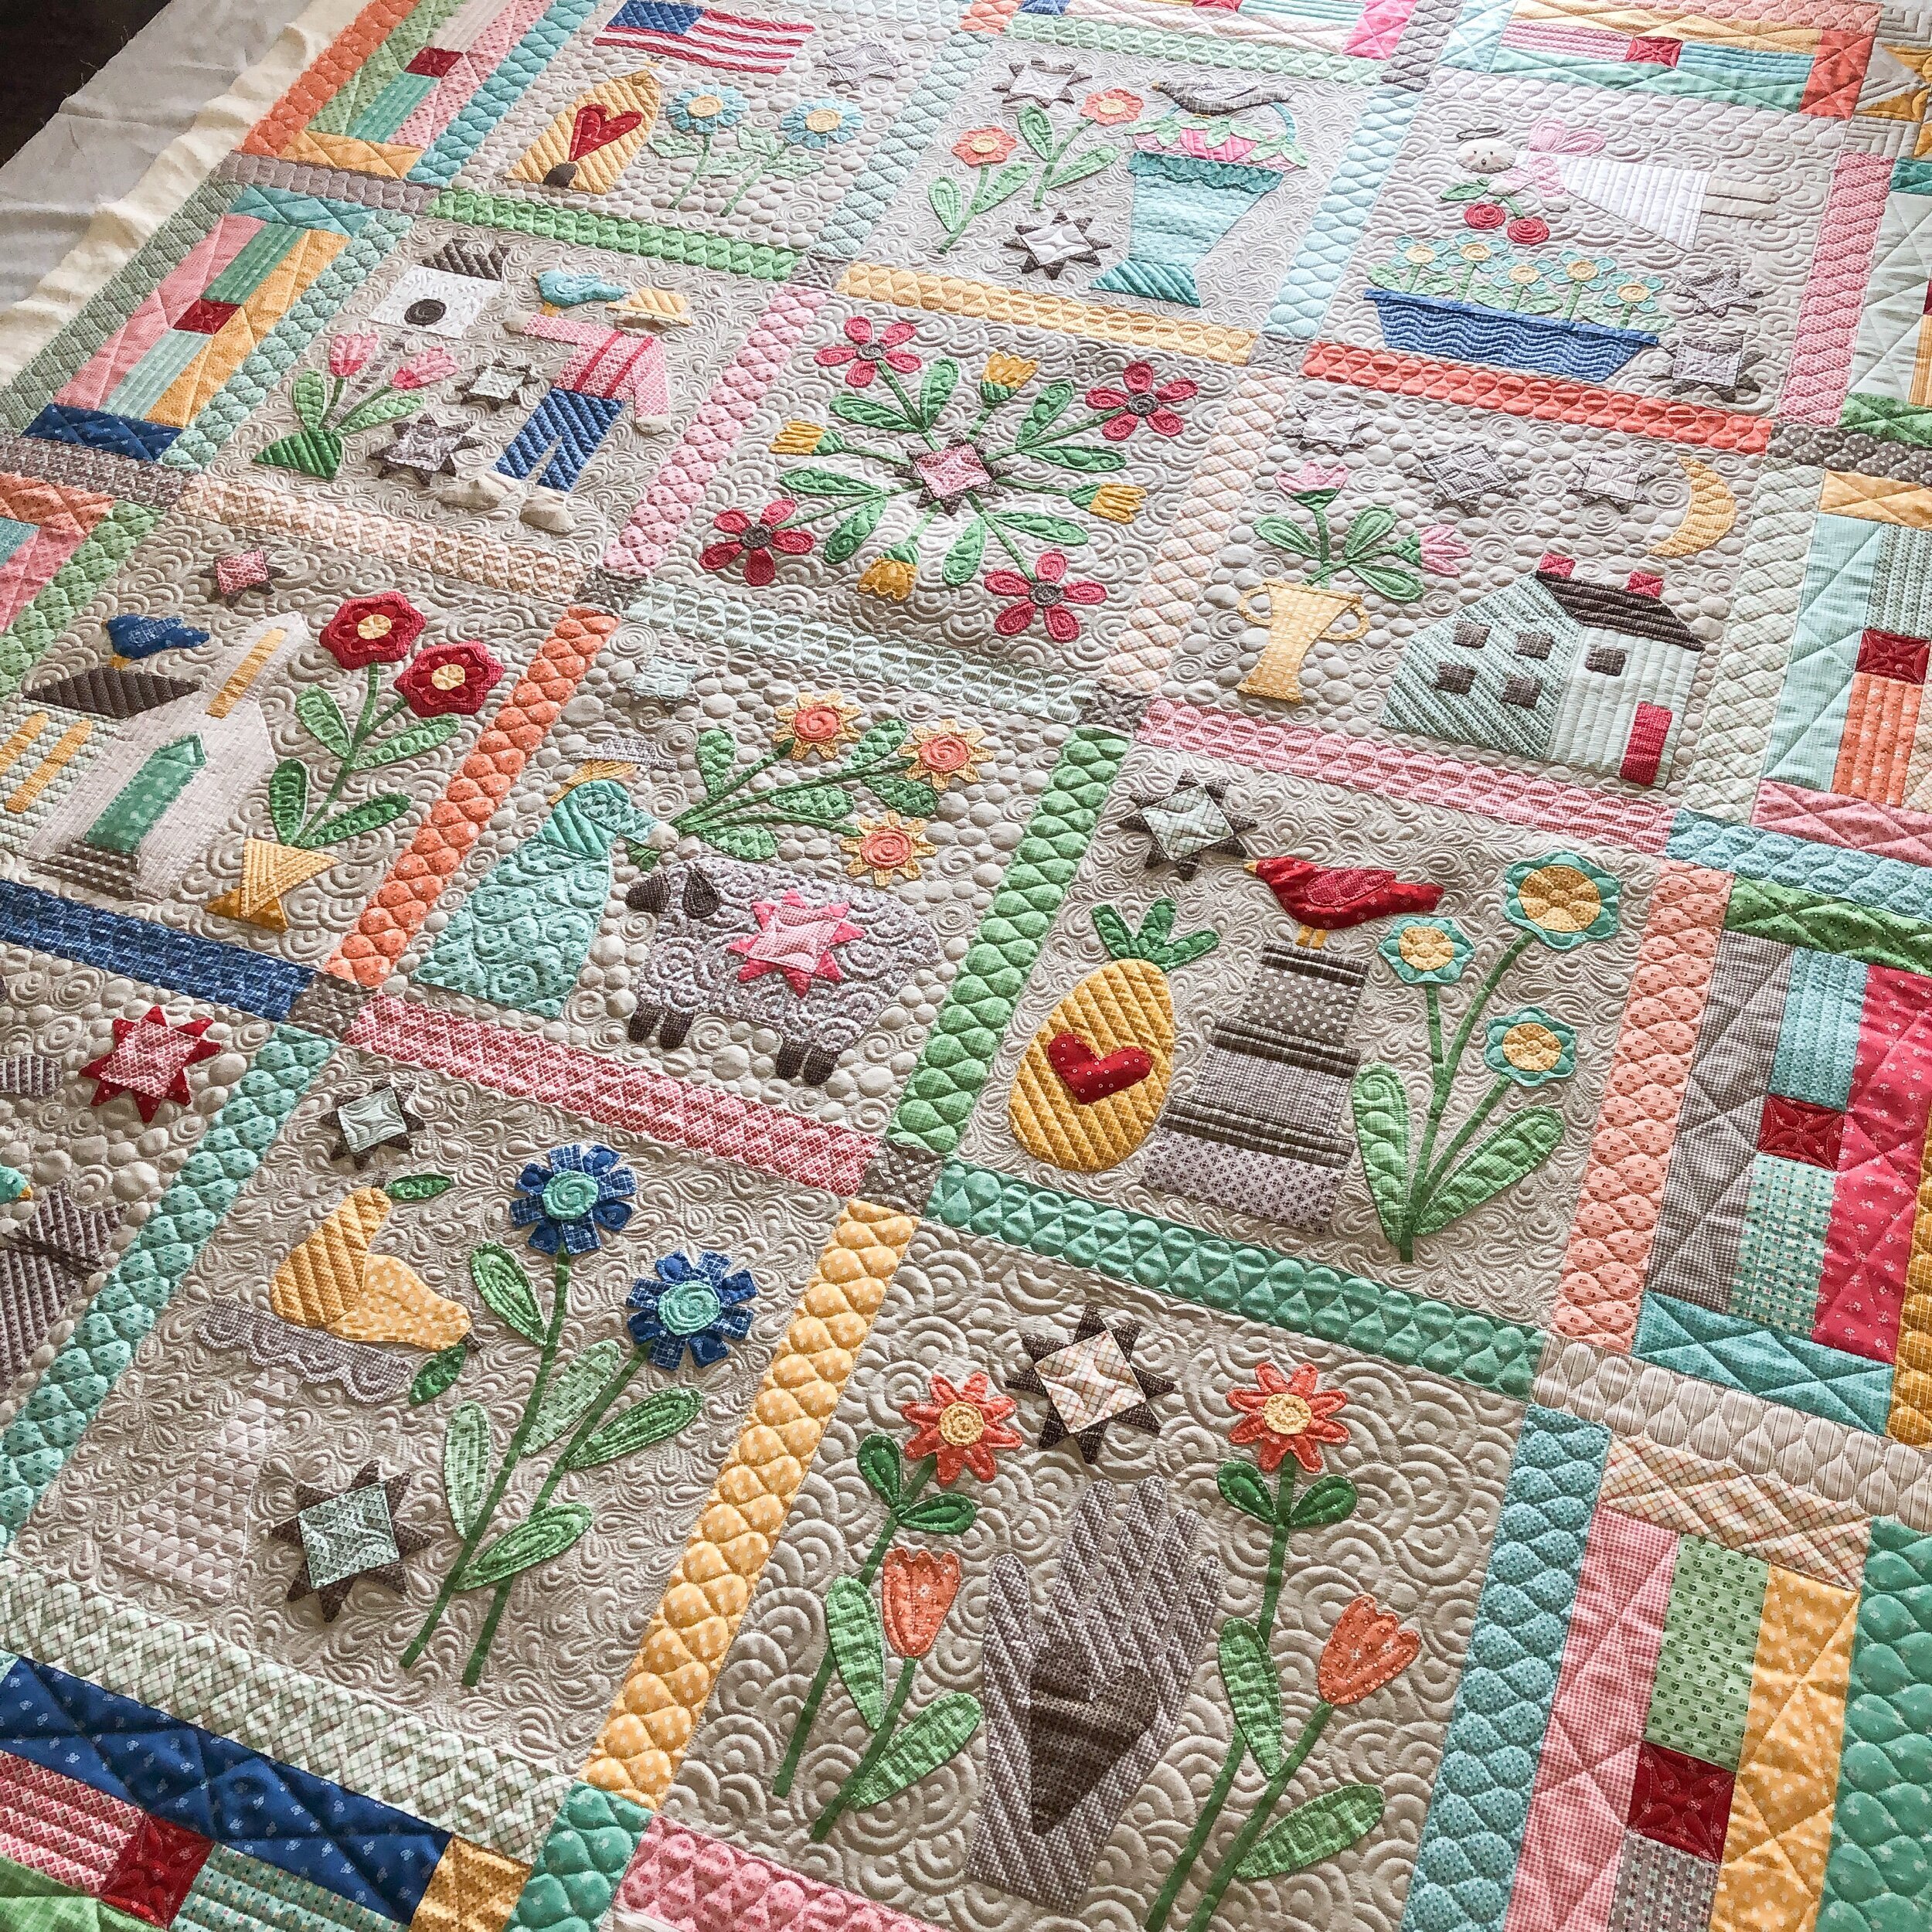
The quilt says Beautiful Things Are Made One Stitch at a Time. It may be hard to catch that from my pictures. This is a good sized quilt.

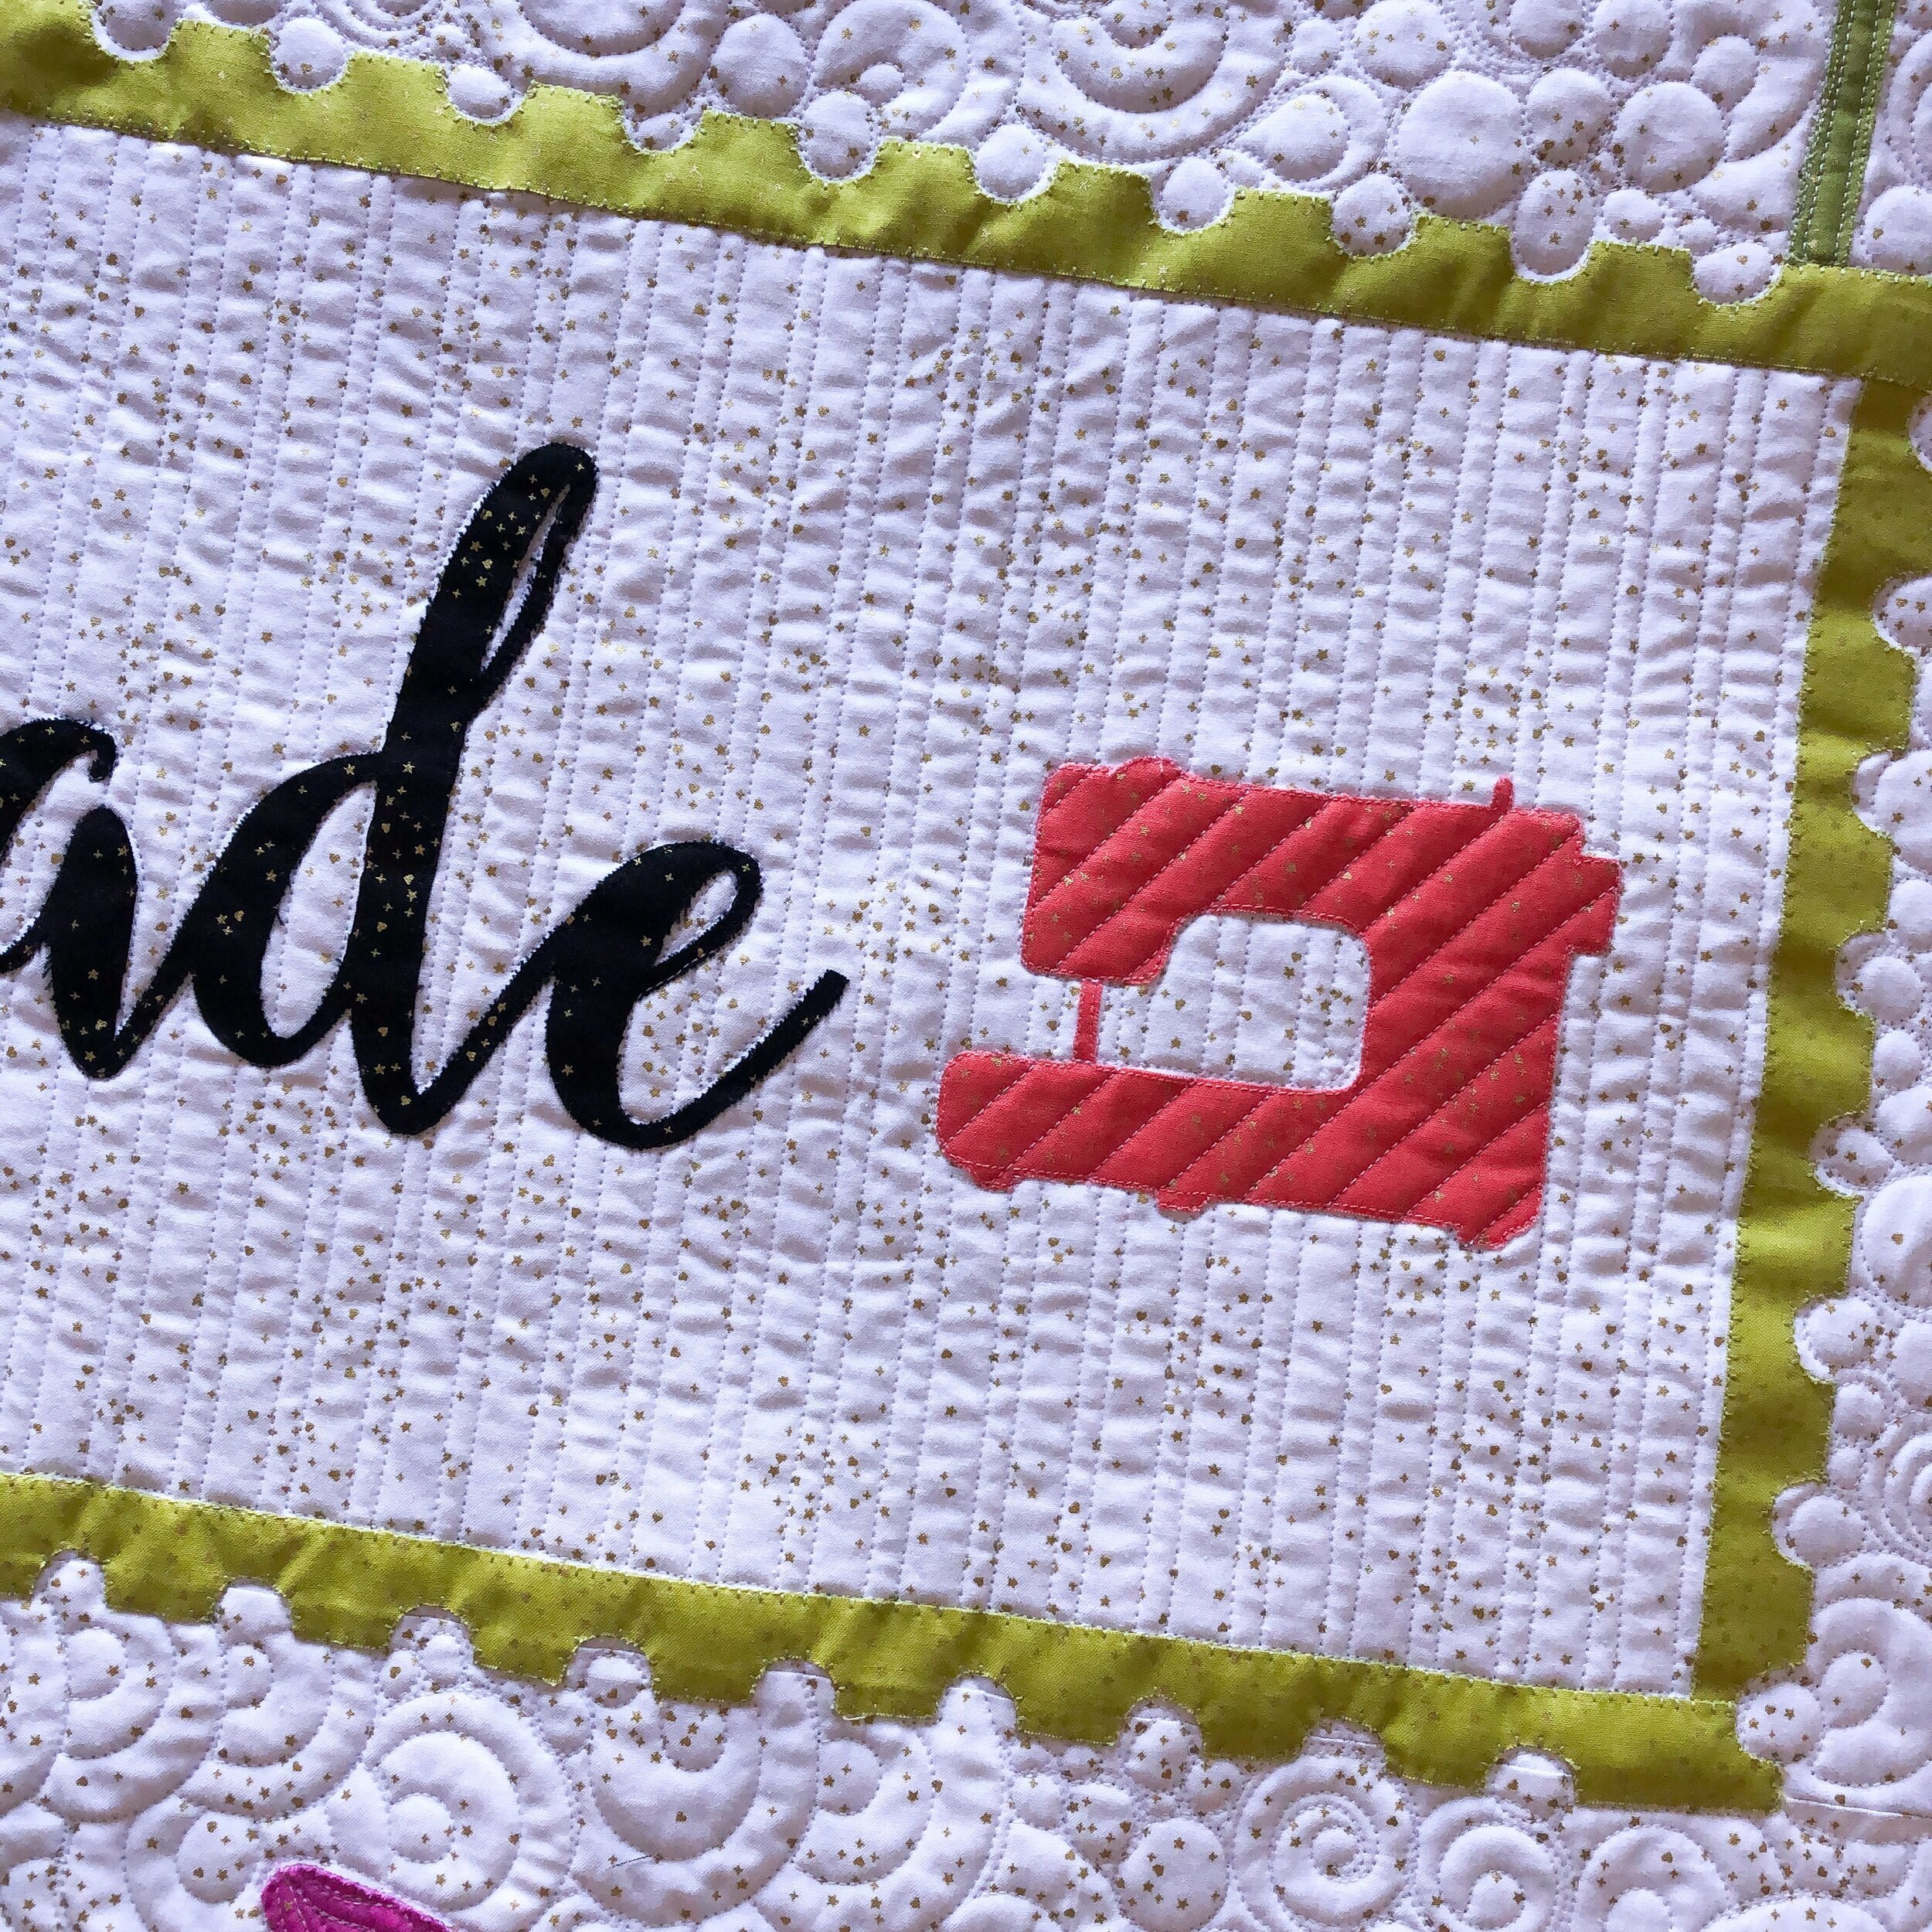
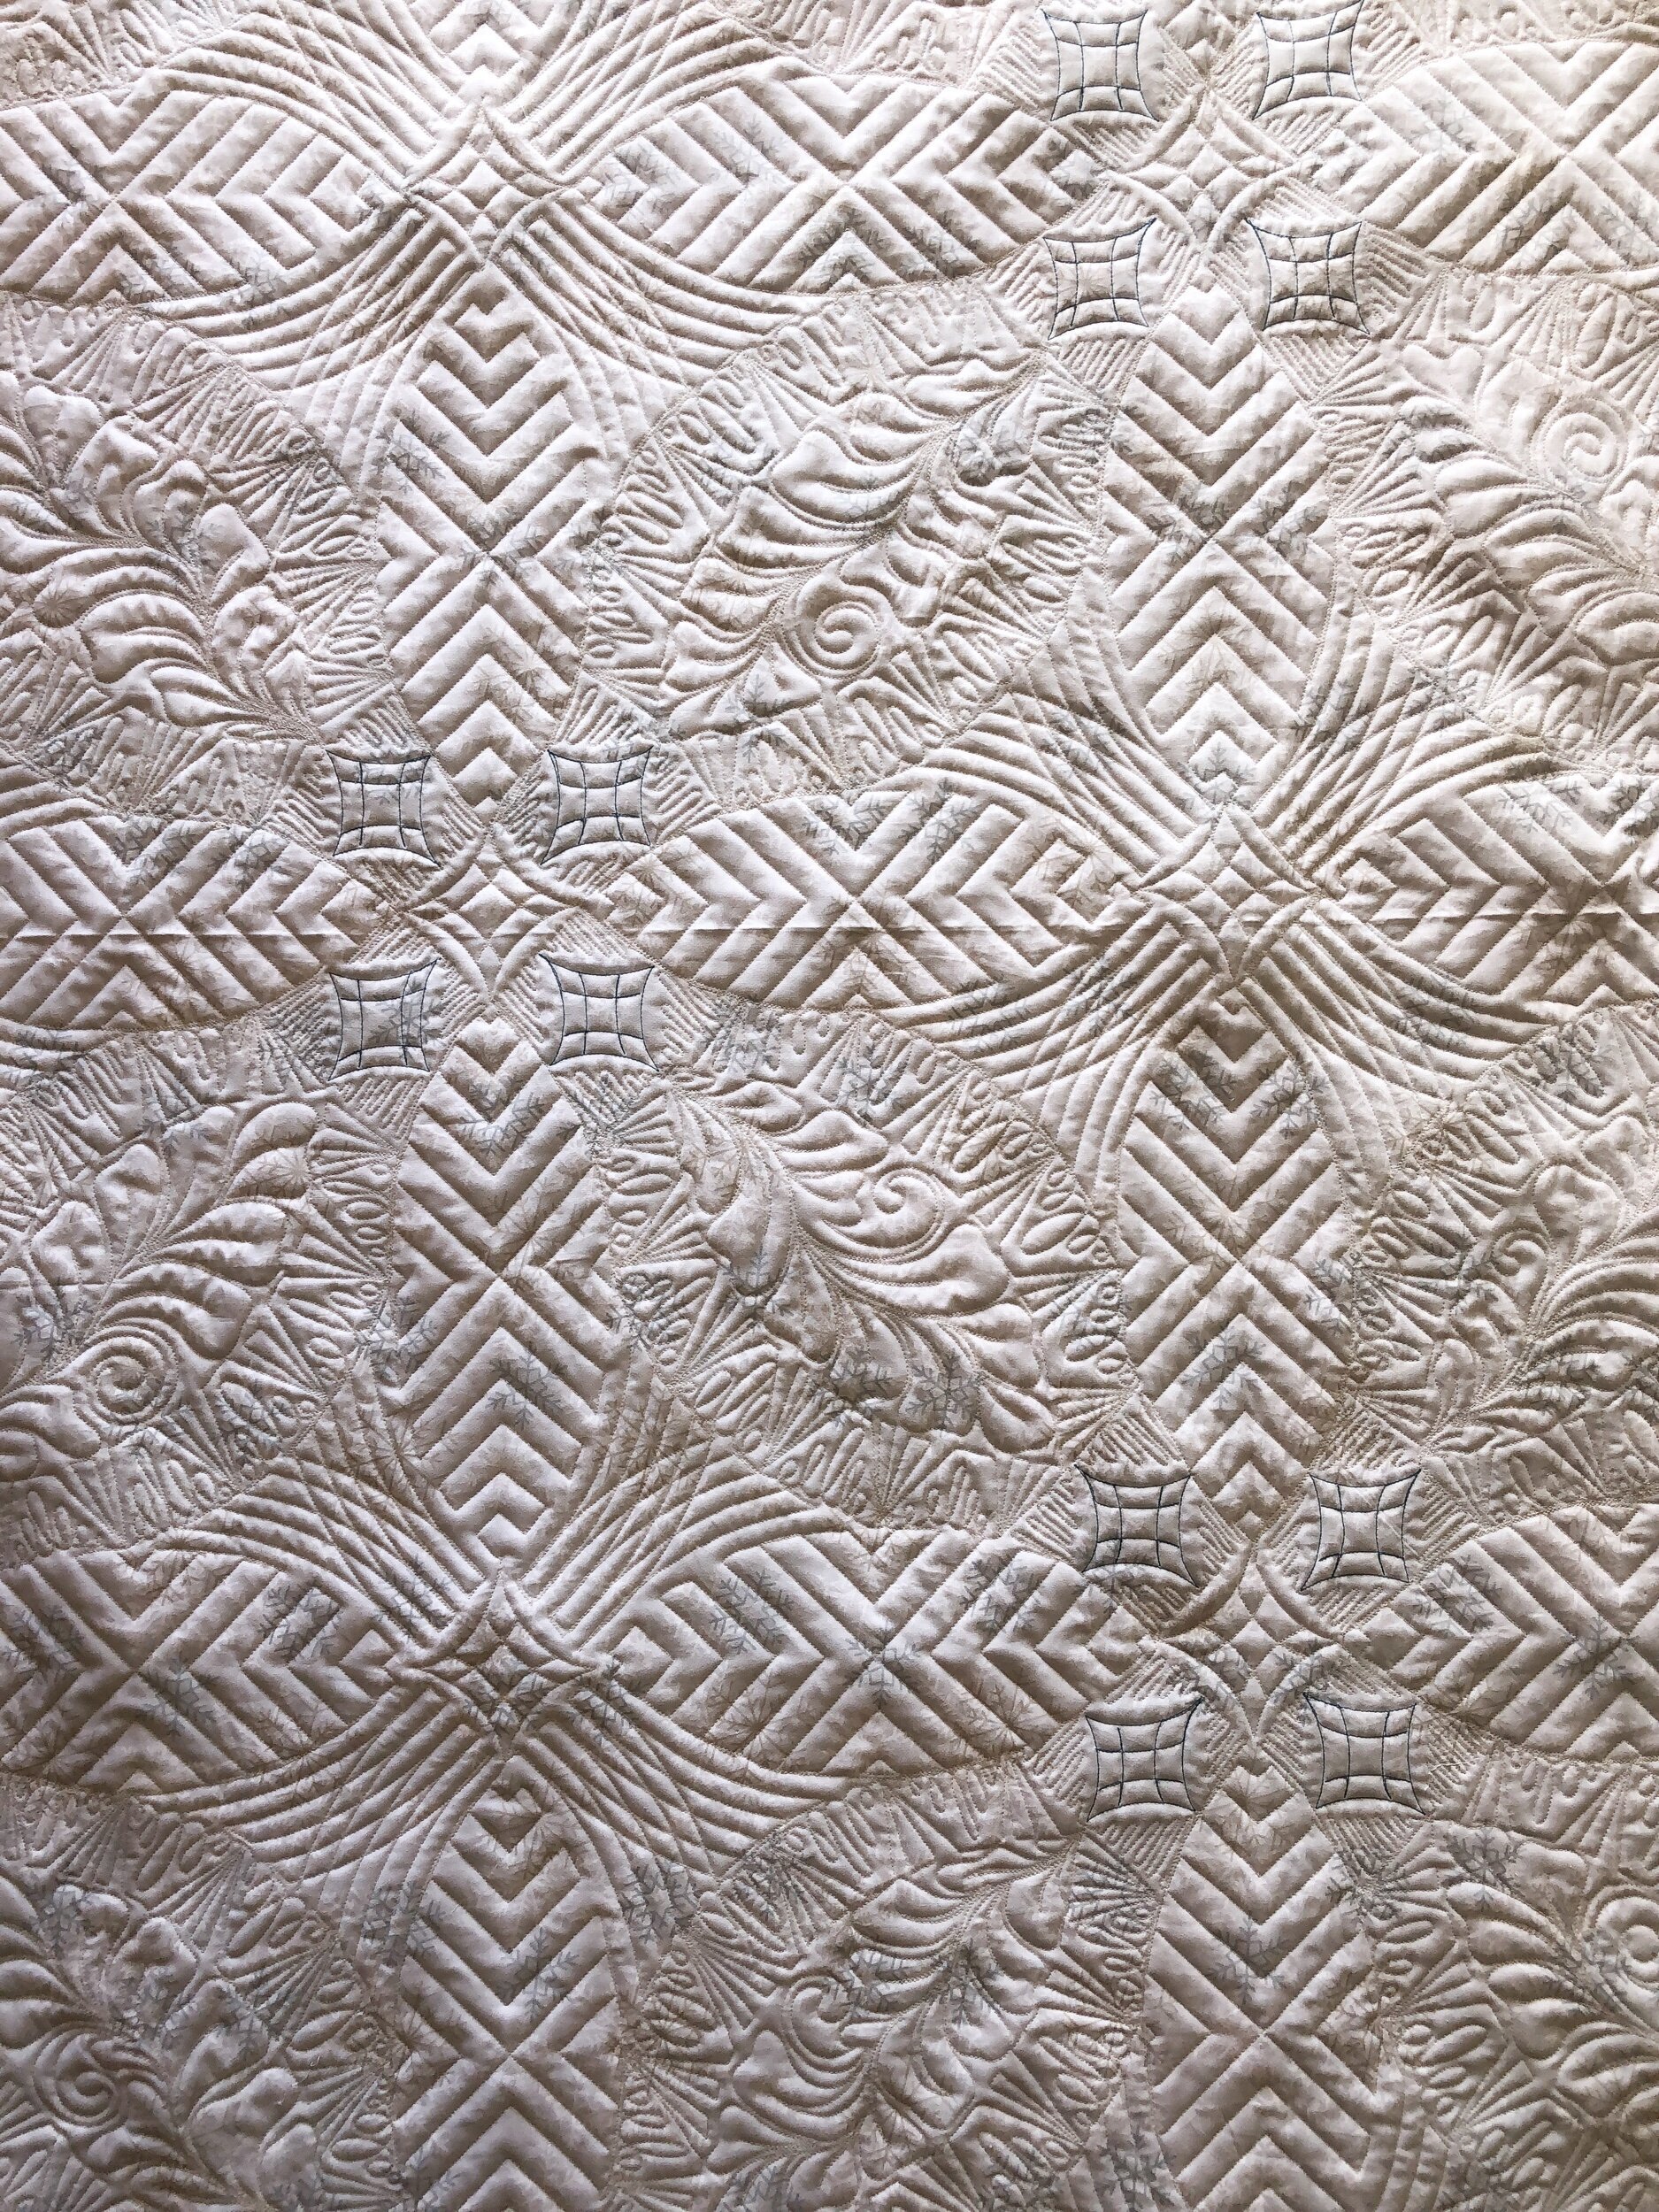
I did a variety of my overlapping circles with pebbles and swirls for a majority of the background. I then did a 1/4” pinstripe behind the “things are made” section. I kept the appliqué quilting simple, and also didn’t quilt every piece. I used Linda from The Quilted Pineapple’s Edge rulers for all the straight lines. The quilting in the number one is diagonal 1/2” lines, and the grid in the heart is 1/2” as well. You can also see the border in the picture below. It’s also 1/2” I believe.

I used natural white Omni thread from Superior Threads and my favorite 8020 cotton poly blend batting. For the border I used a variegated thread to match.
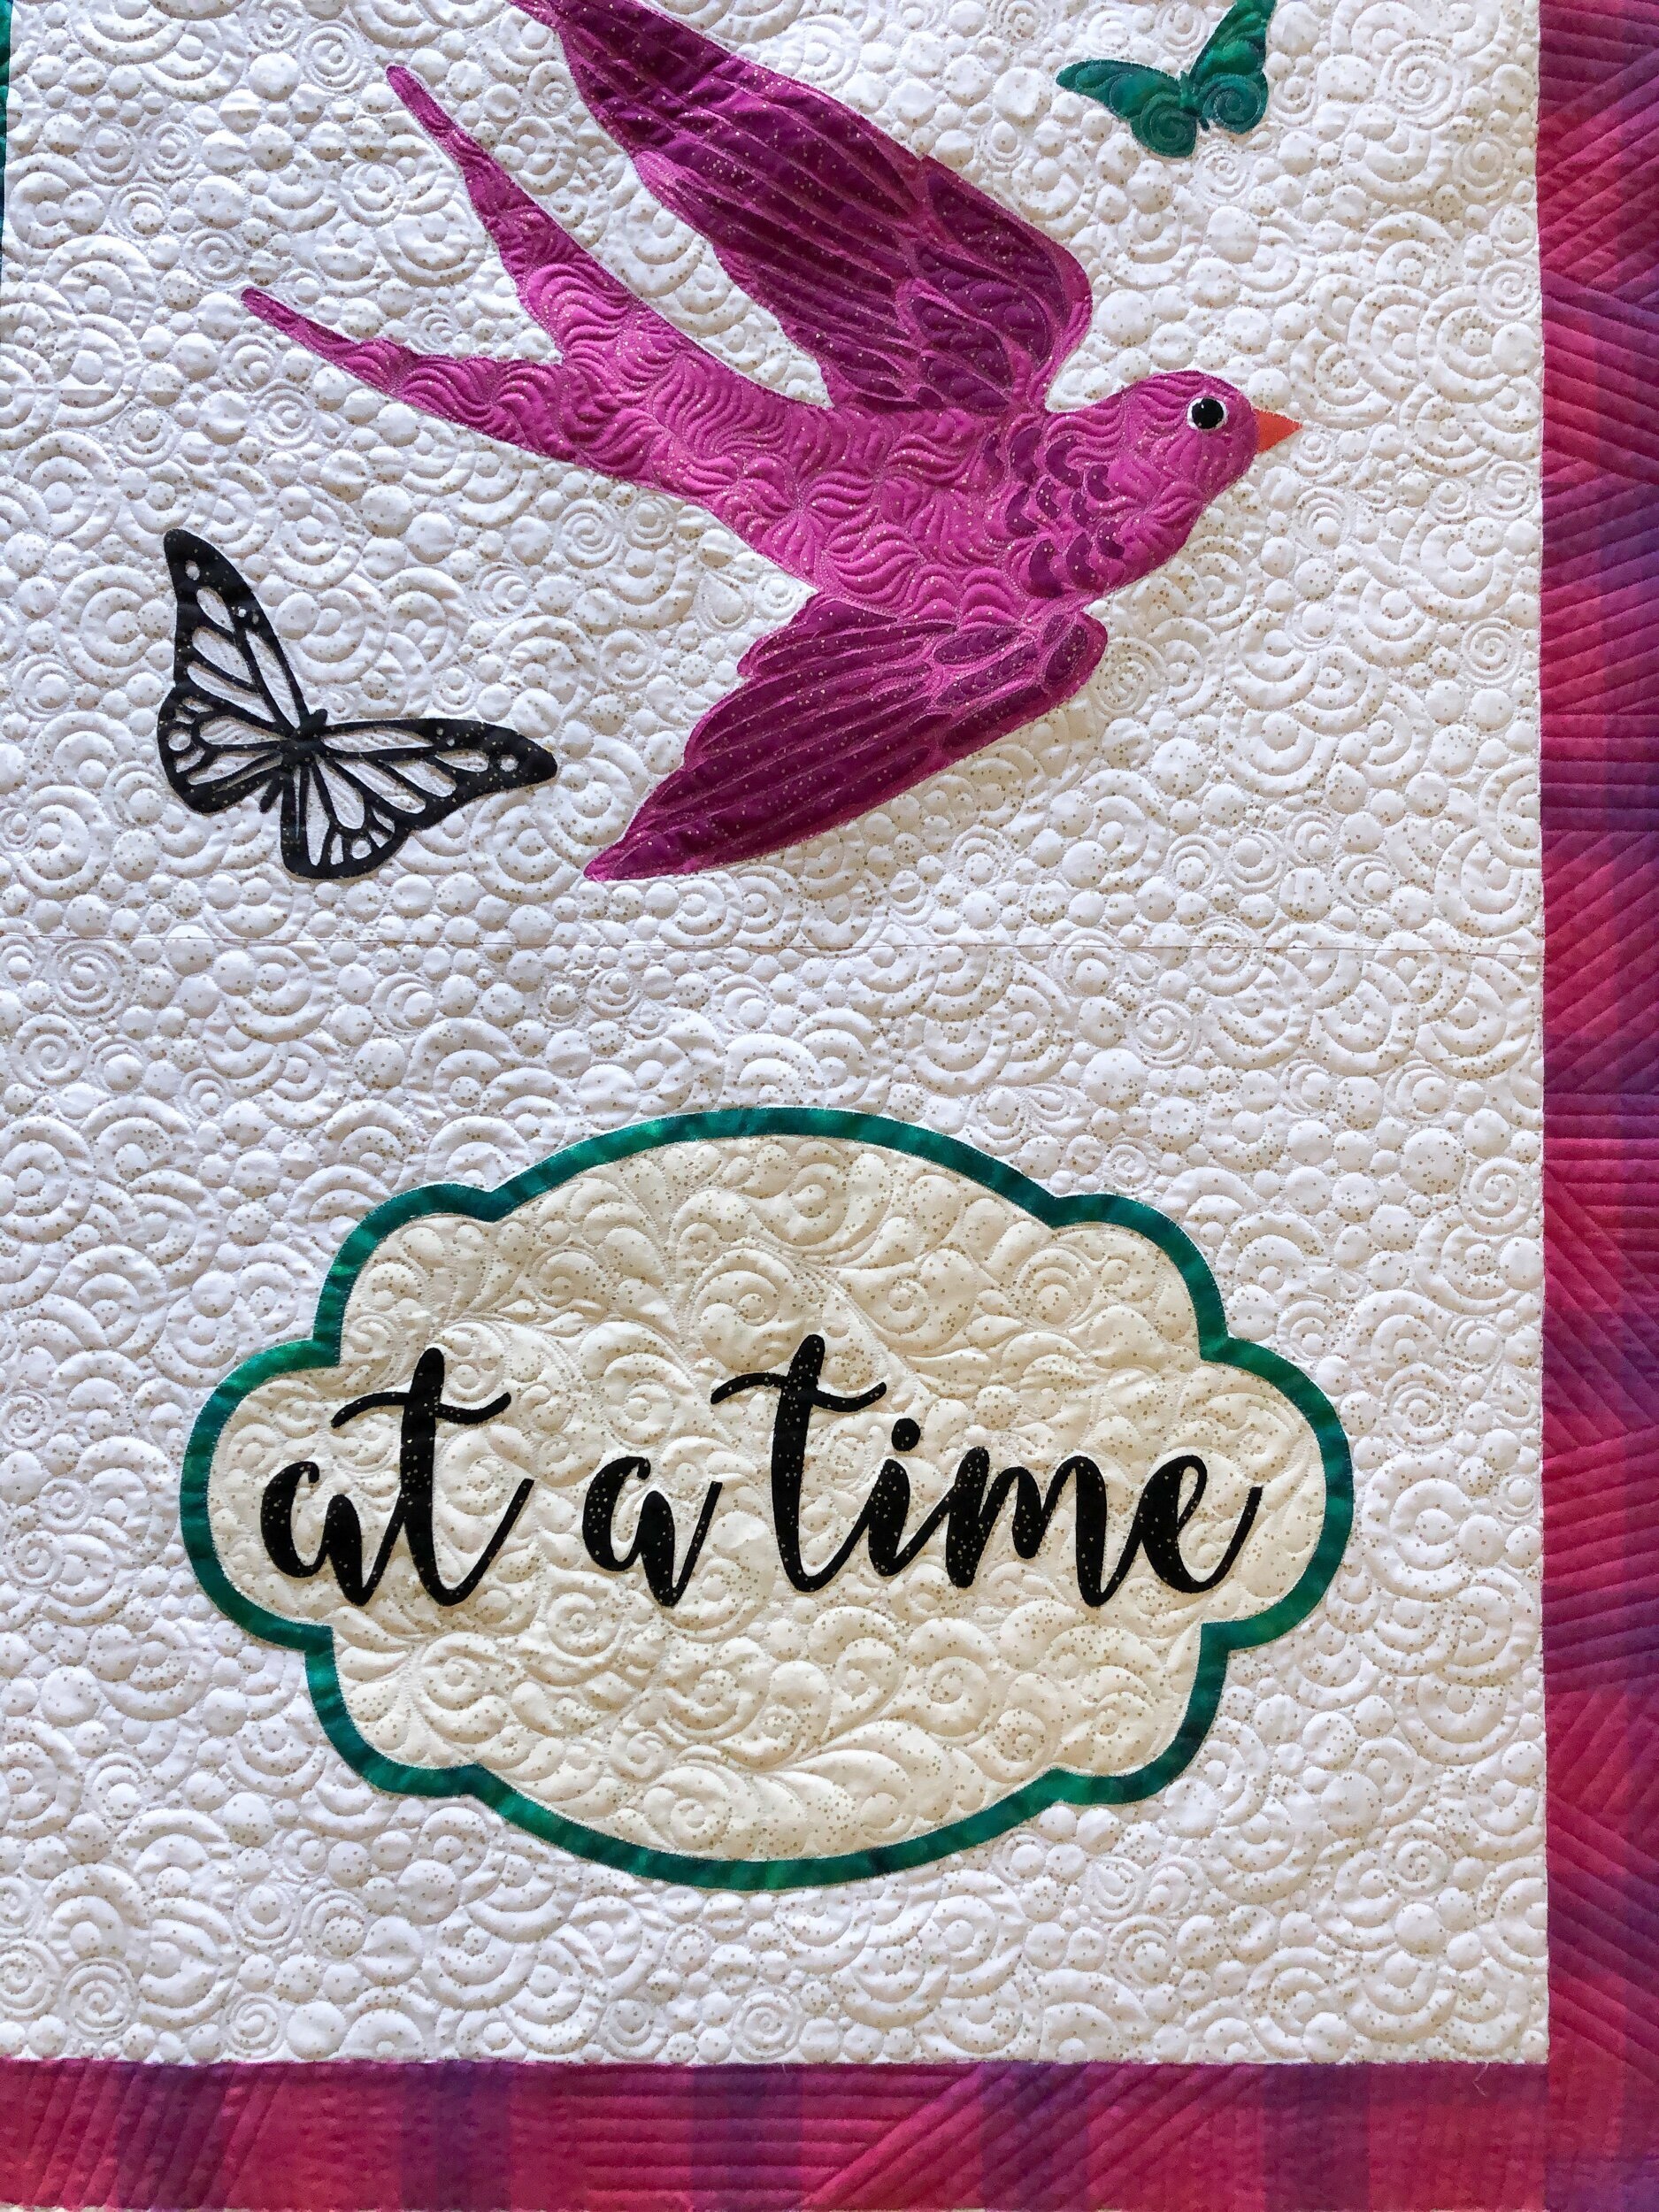
I did a grassy design in the bird to create a feather look, and swirly feathers in the “at a time” part.
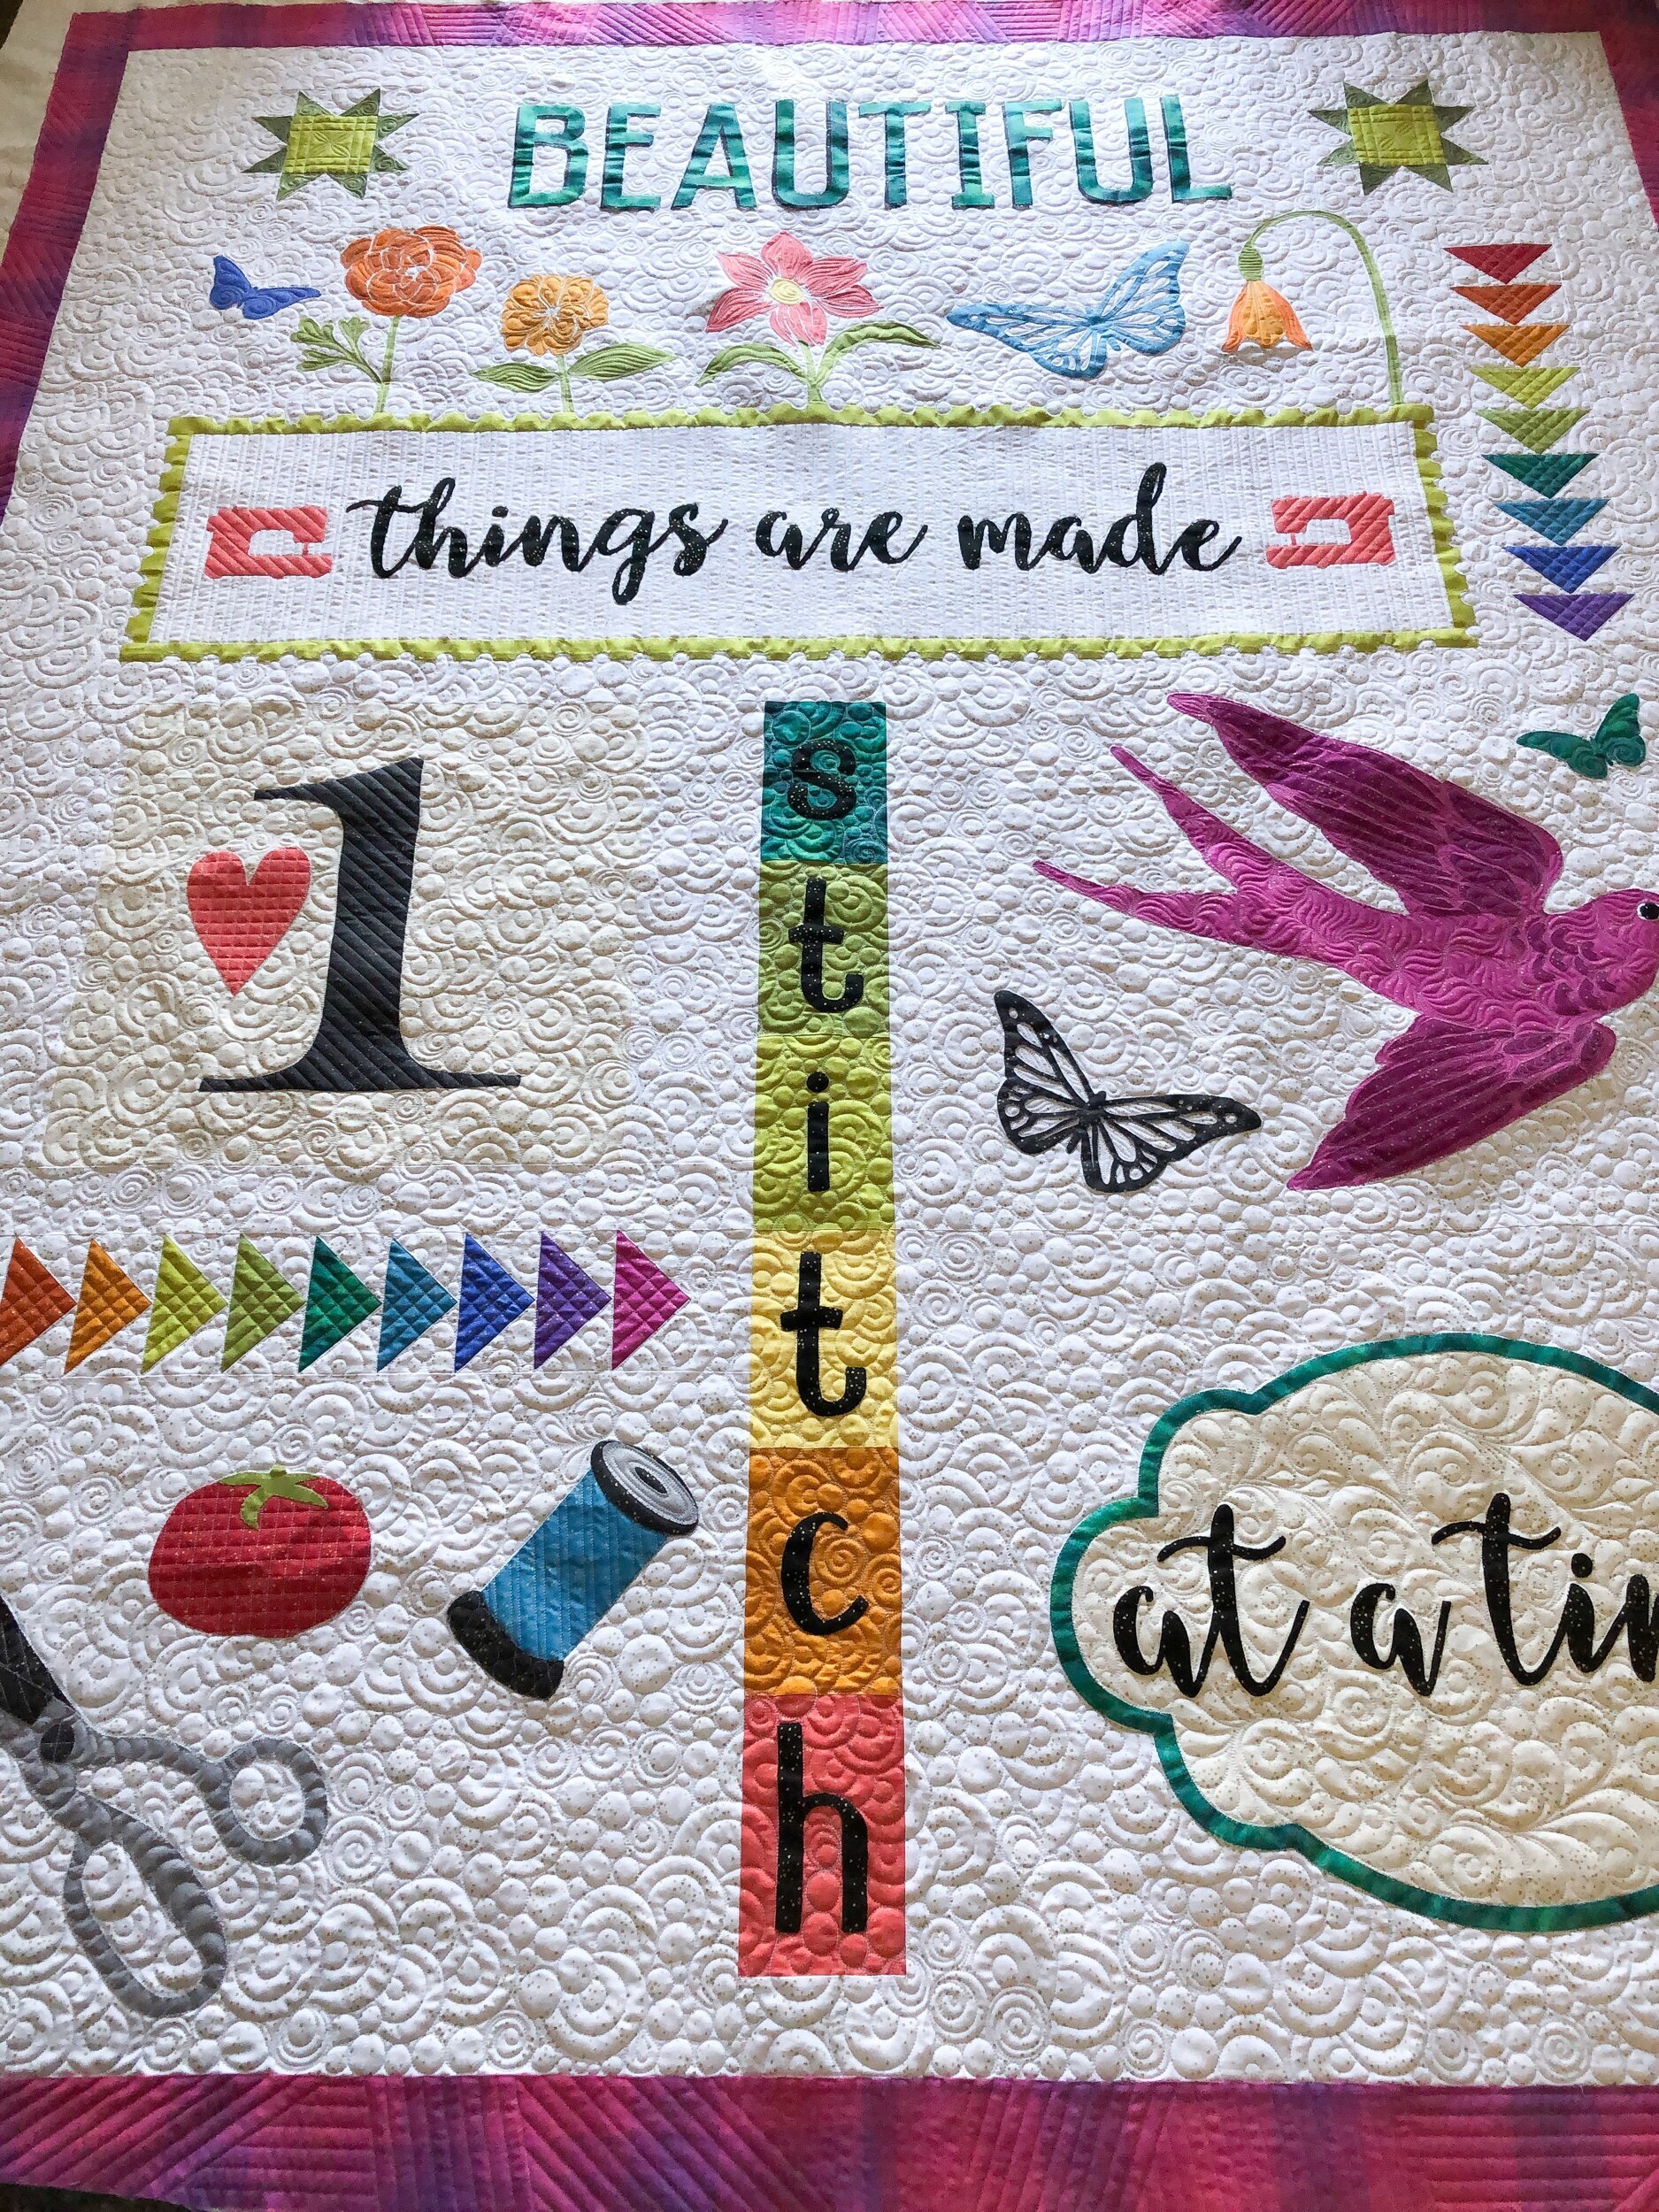
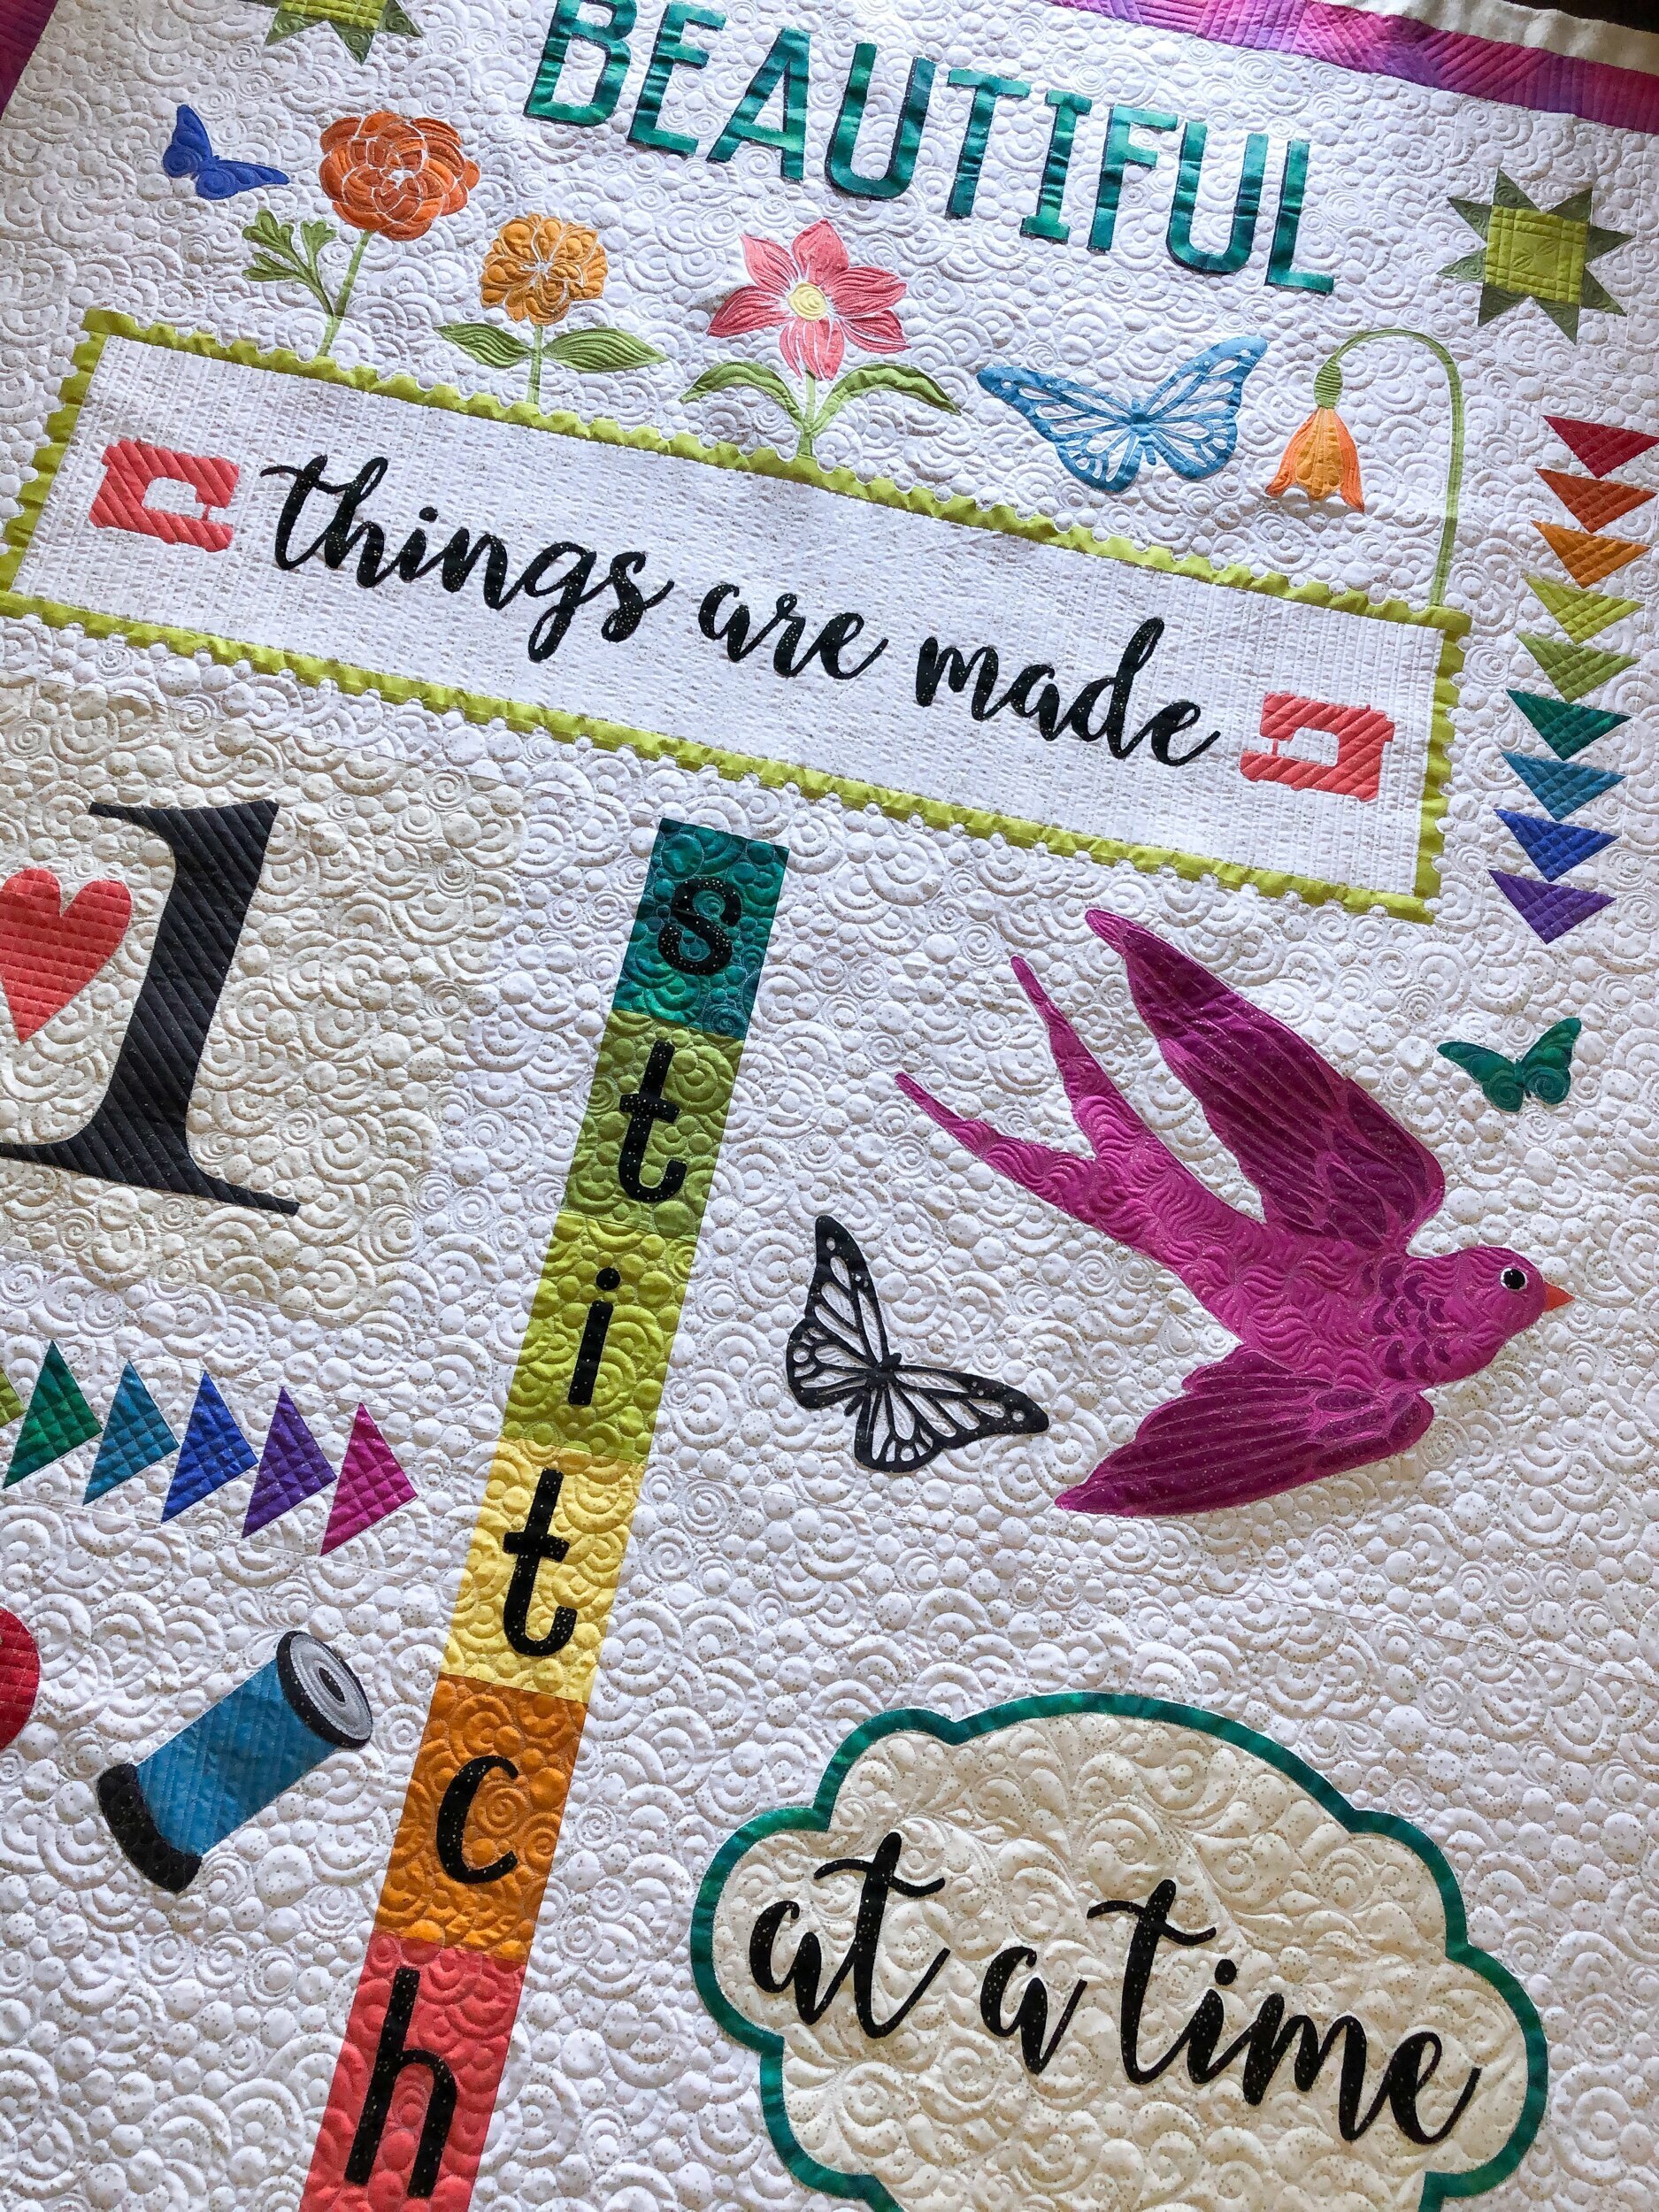
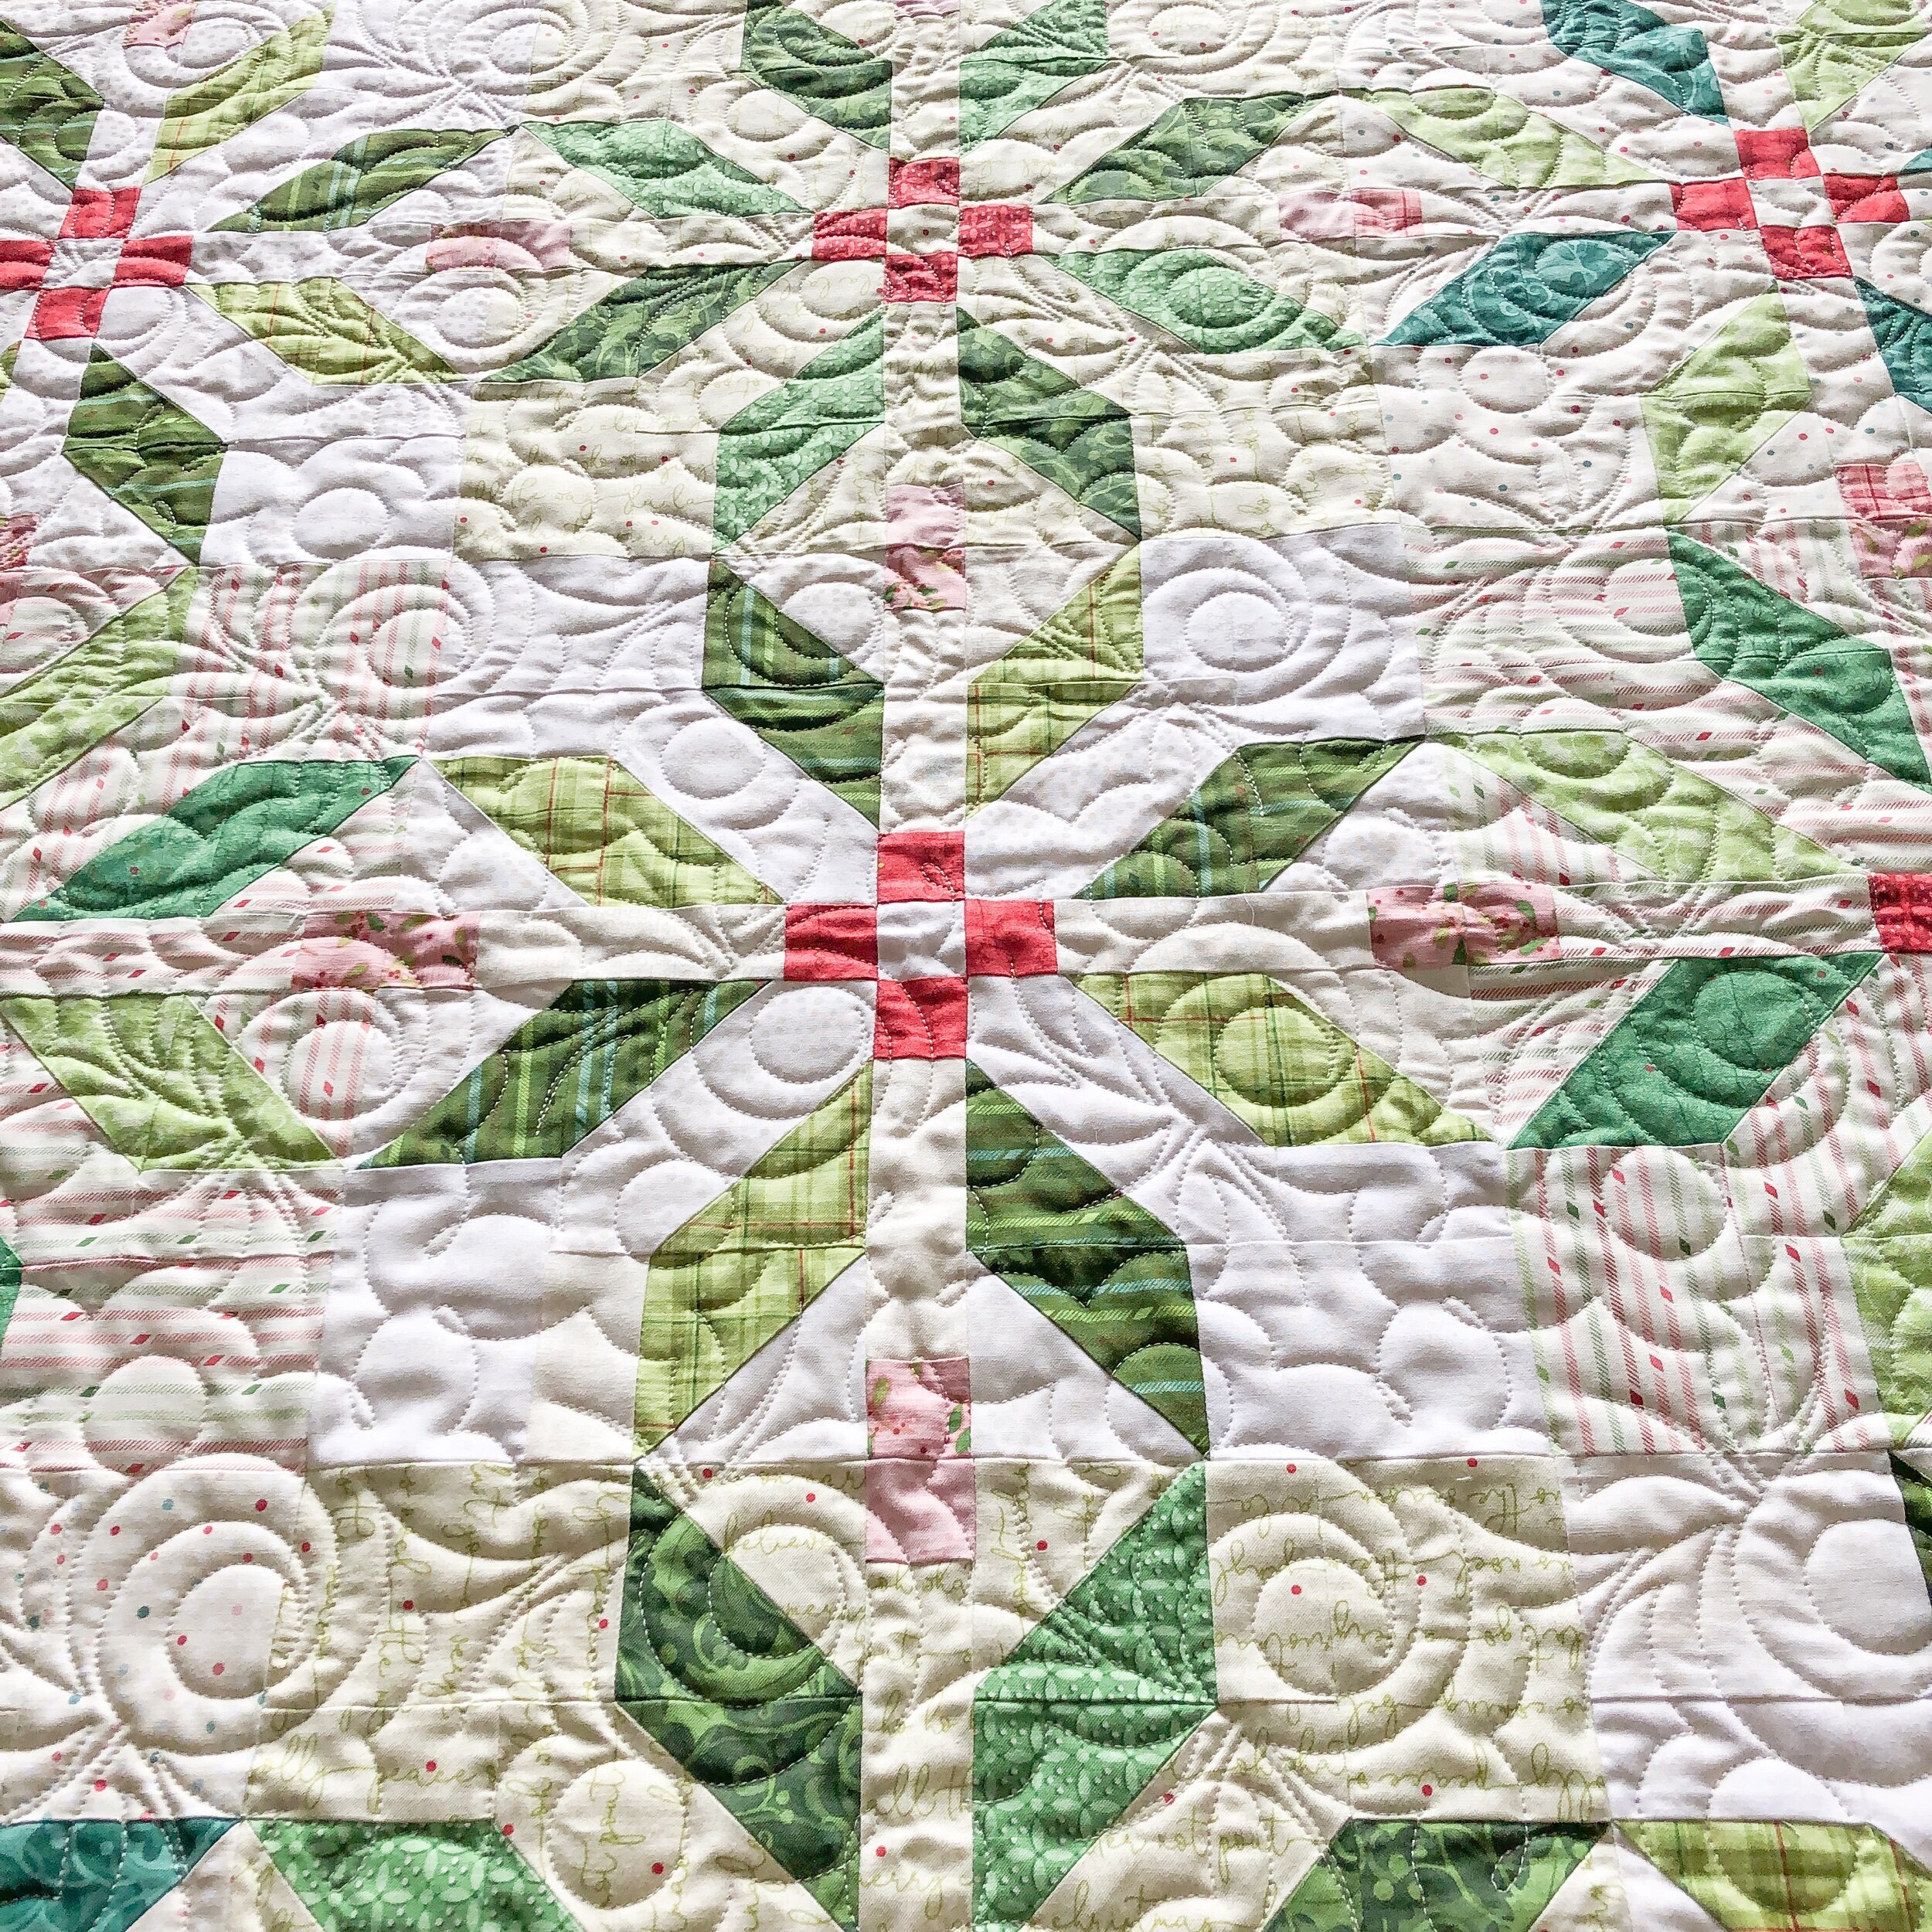
Here are some close ups on the details.
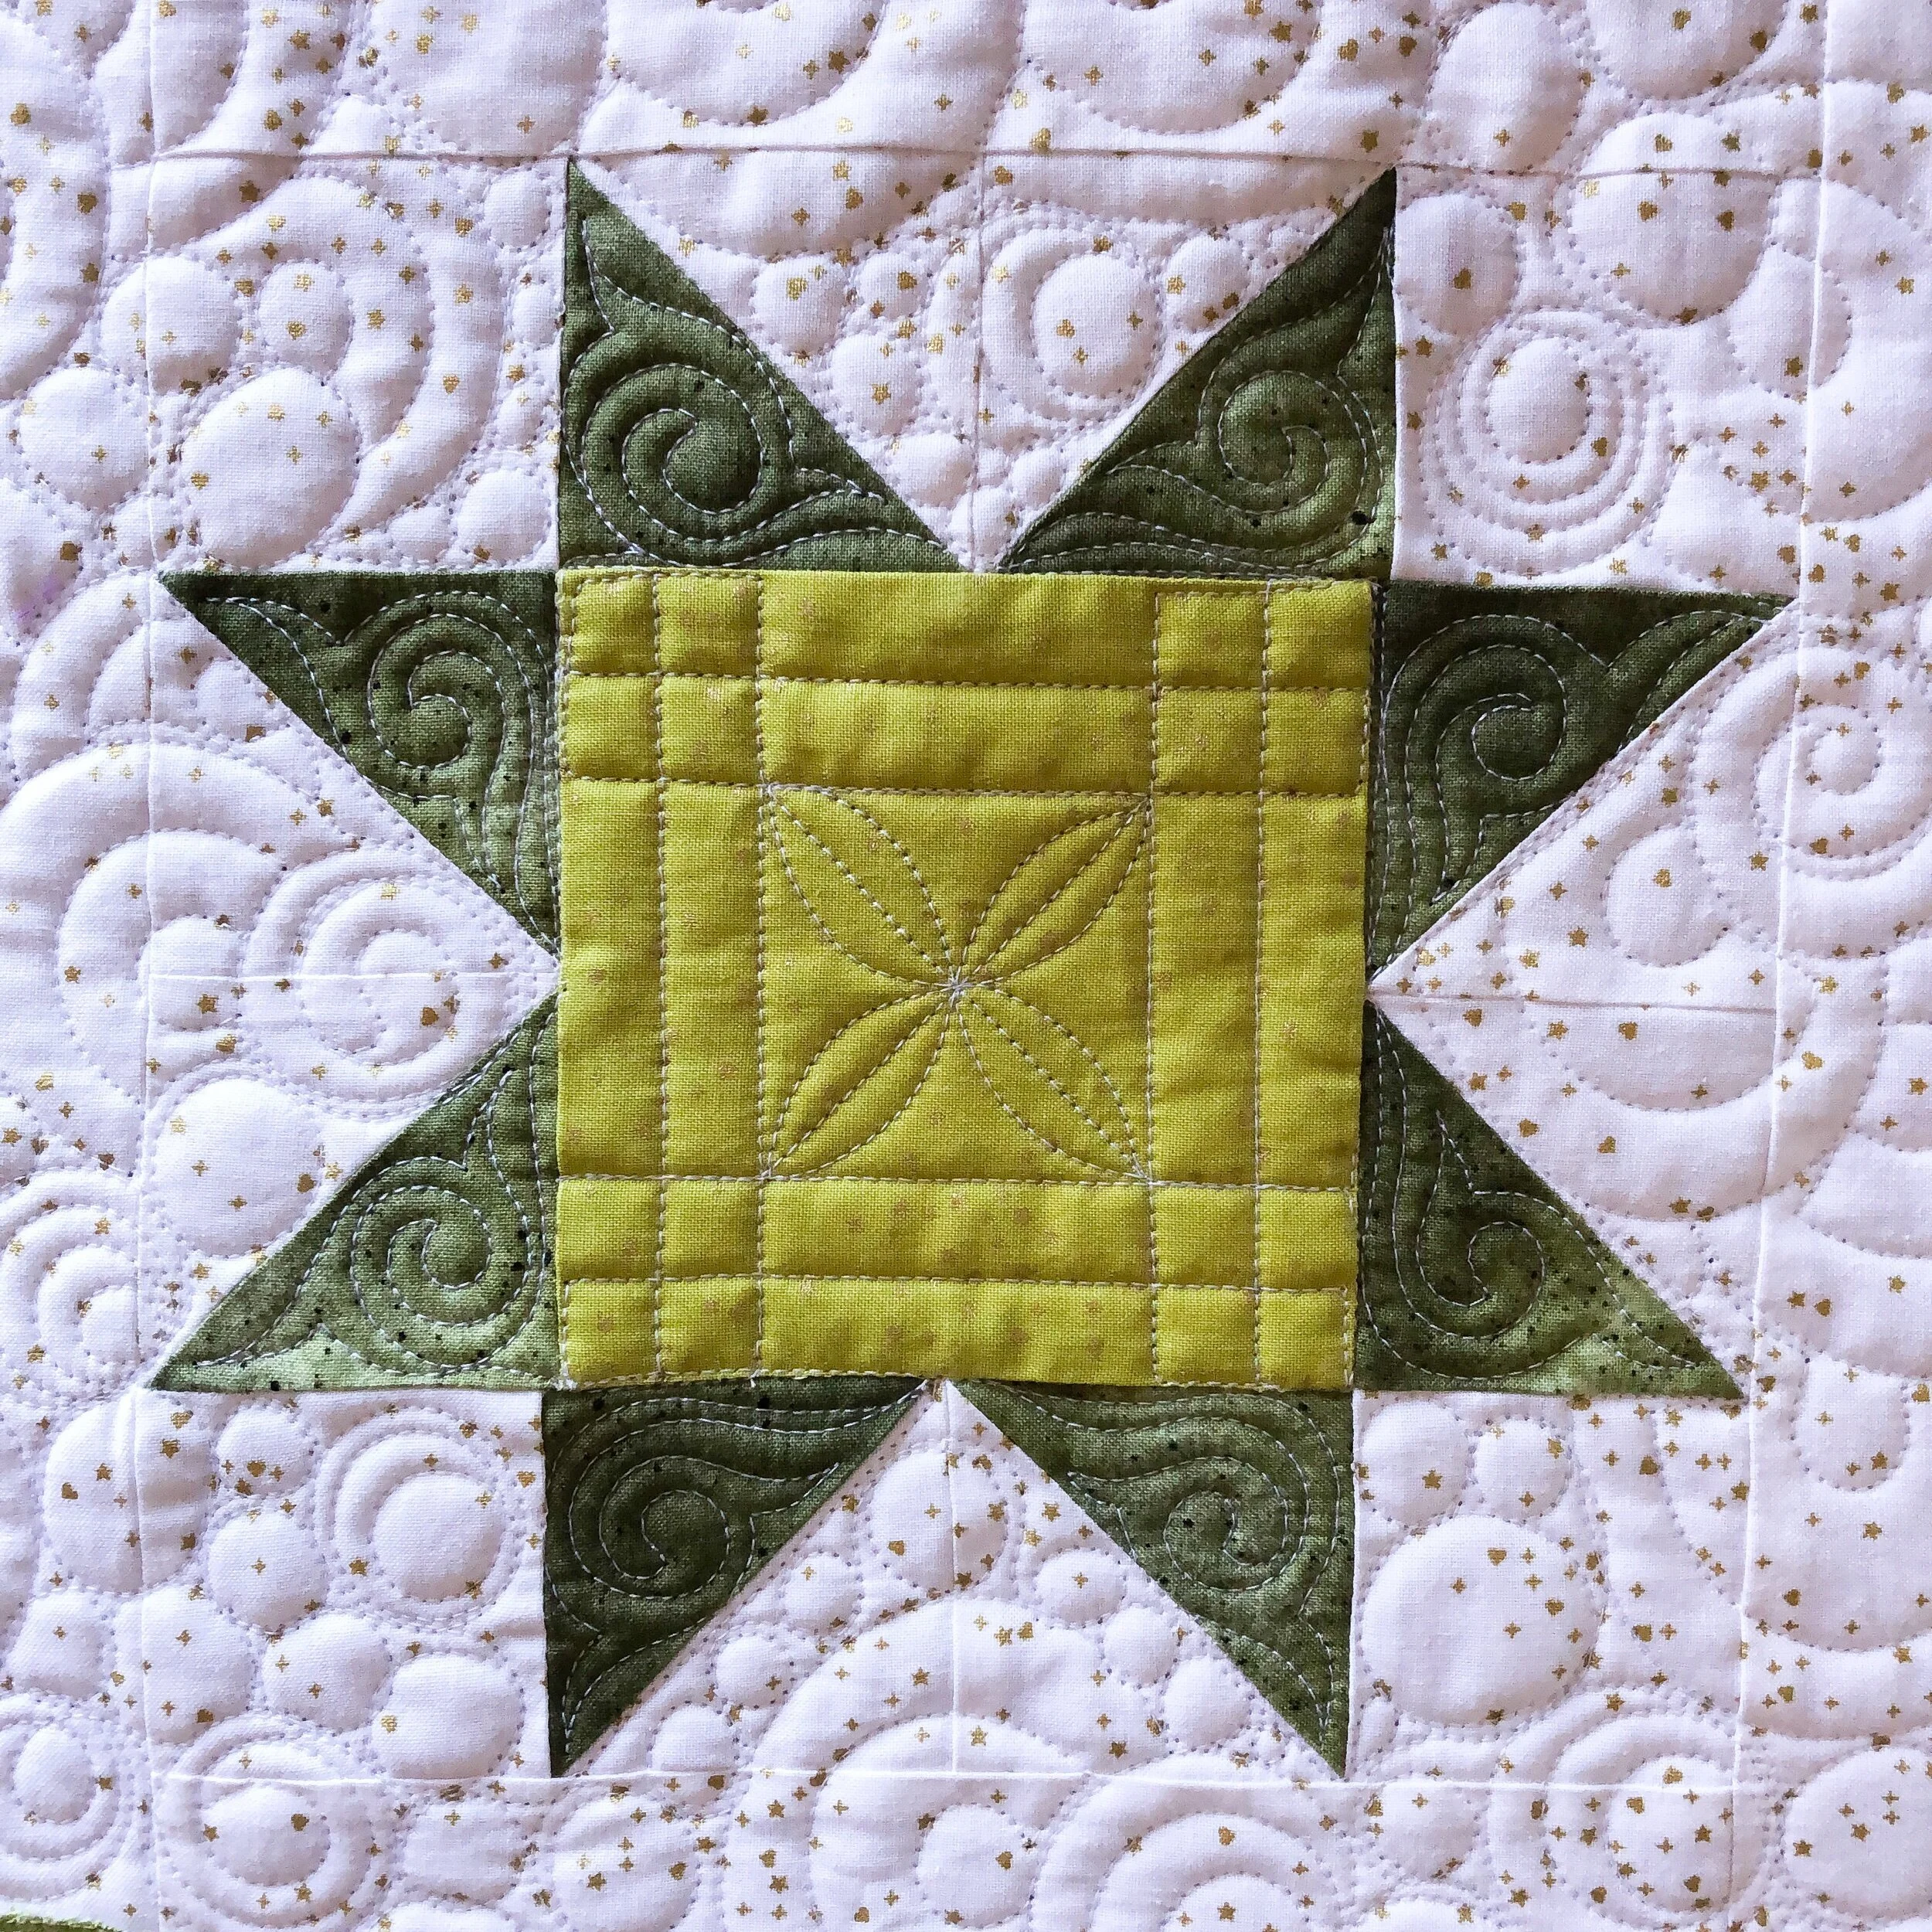
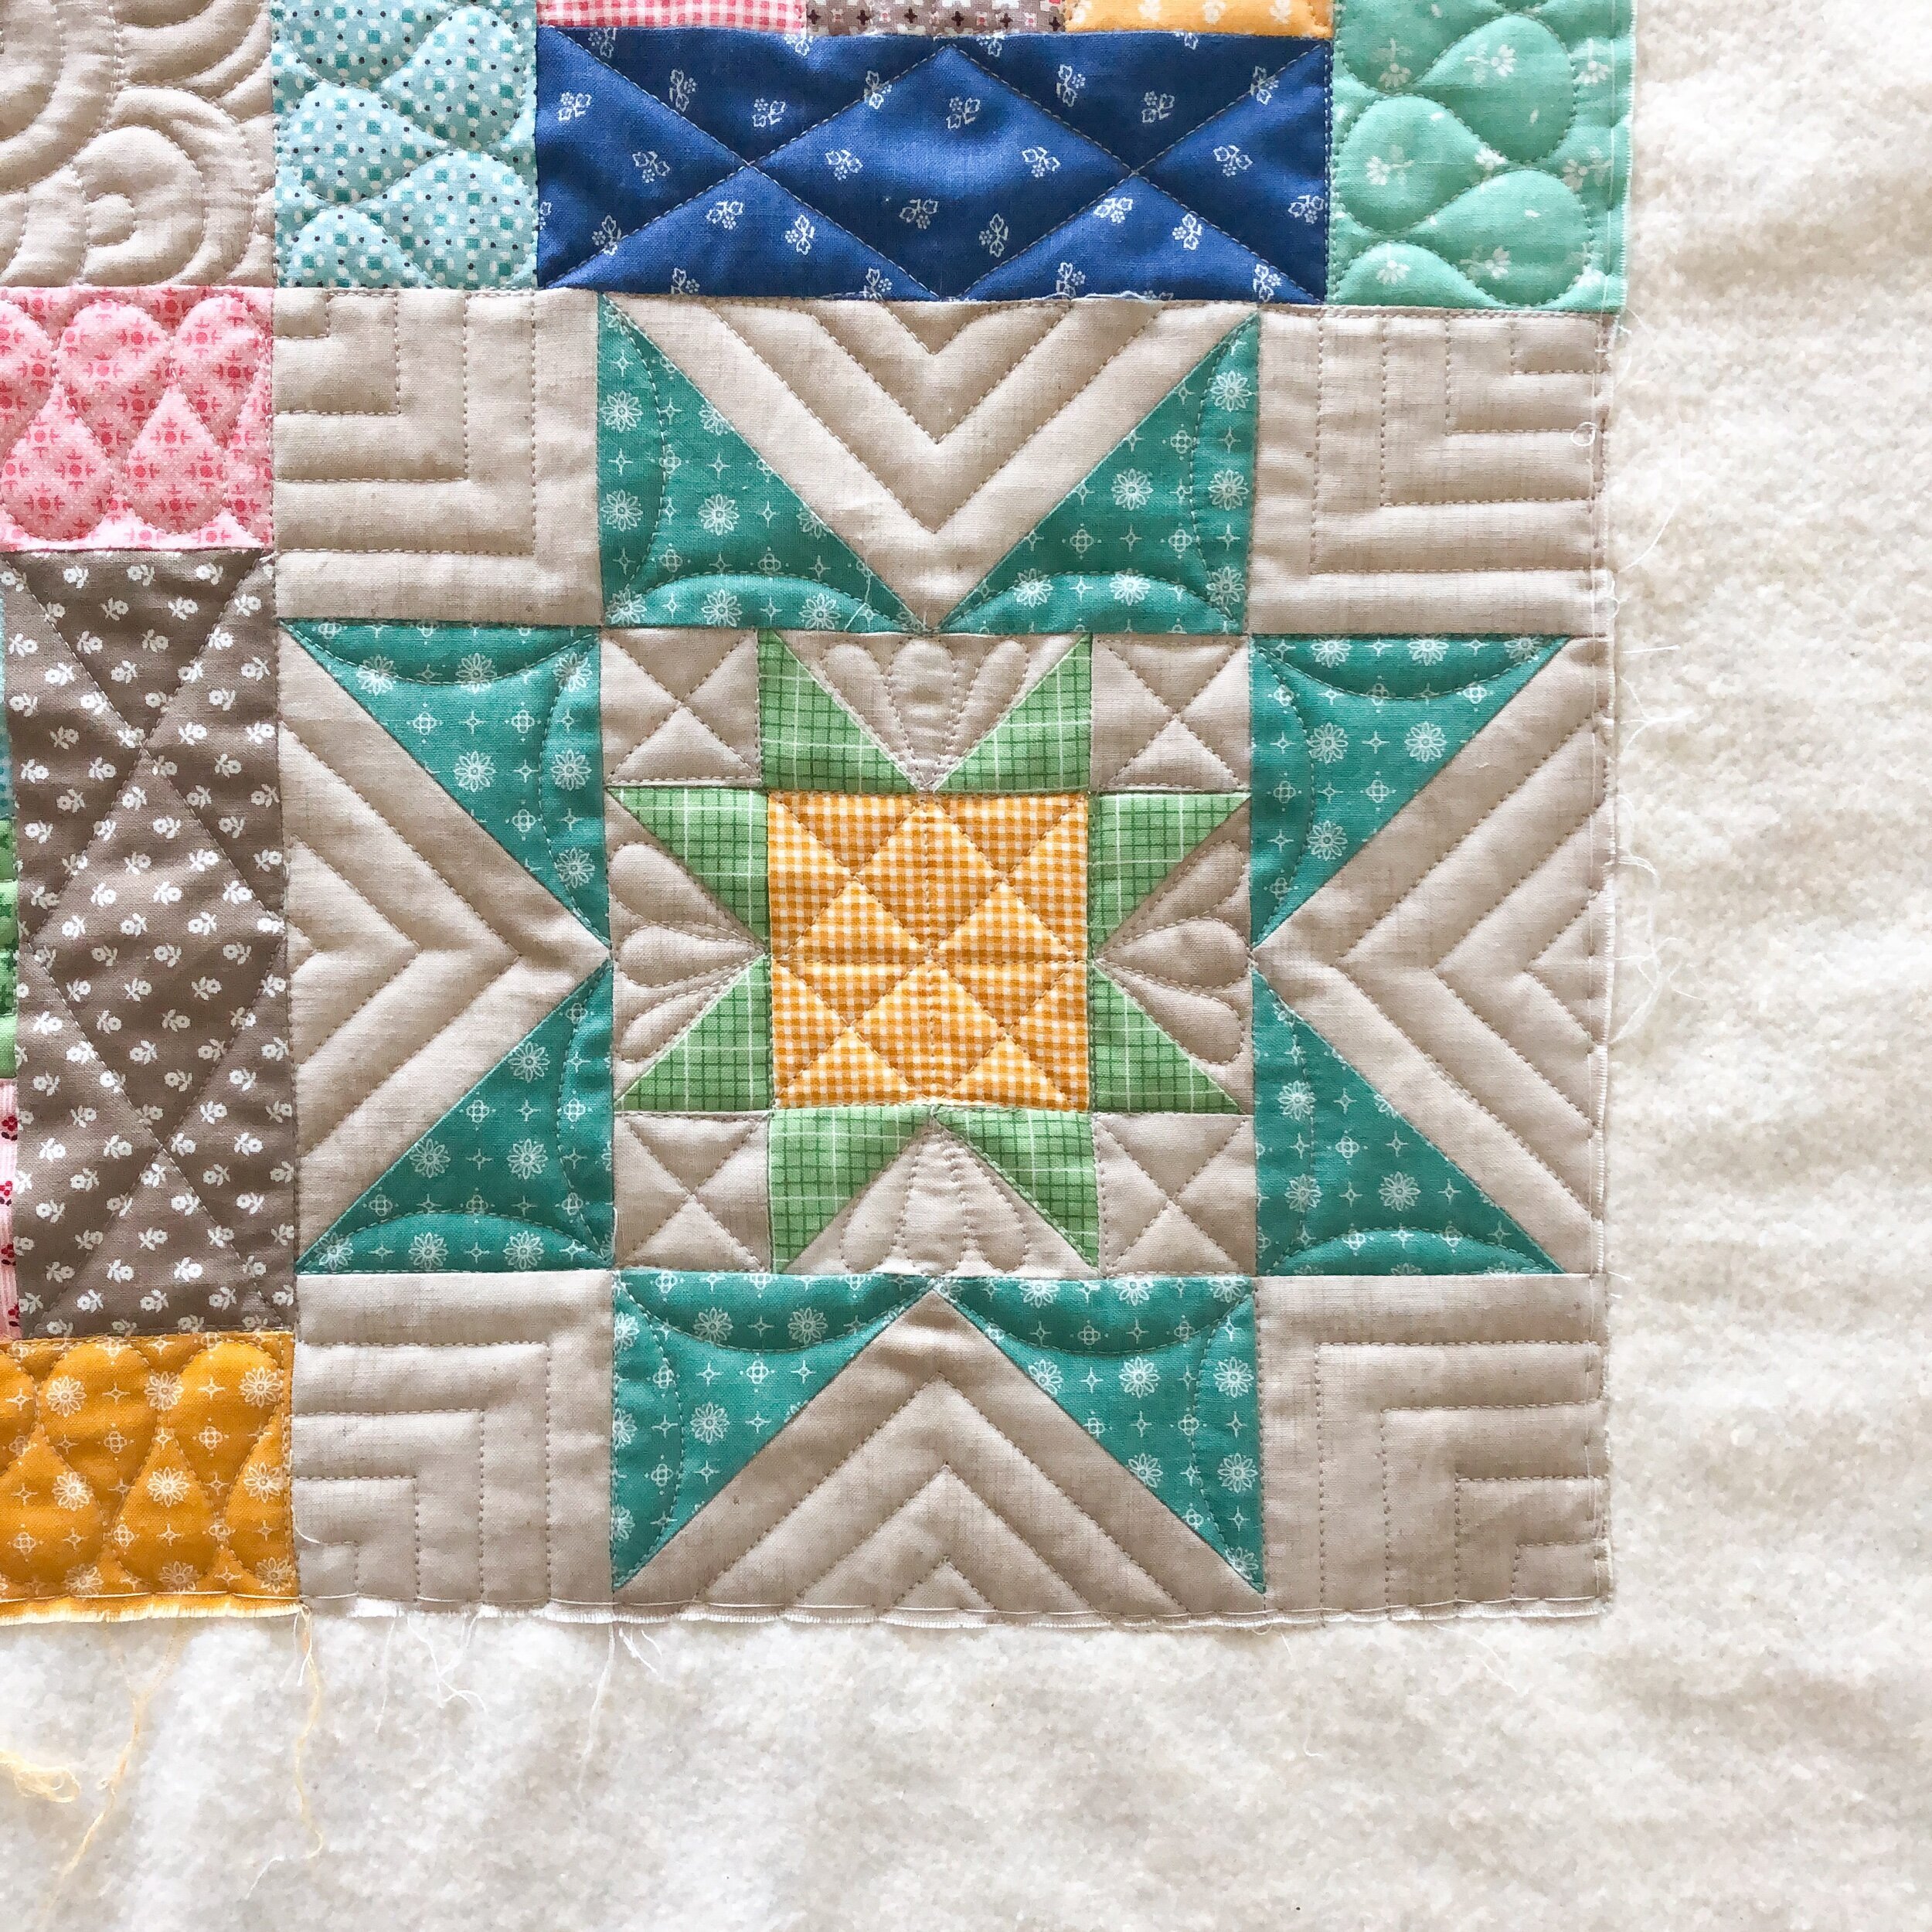
I used my 2” Circle2™ machine quilting circle ruler to quilt the curves in the square above.

My Circle2™ rulers are available in my shop…in a set of 6. Ranging in size from 2”-13”. For more info on them head to this post: https://www.quiltingit.com/blog/2018/10/10/introducing-my-circle2-longarm-circle-ruler-set
- Design Patent D875,574 -
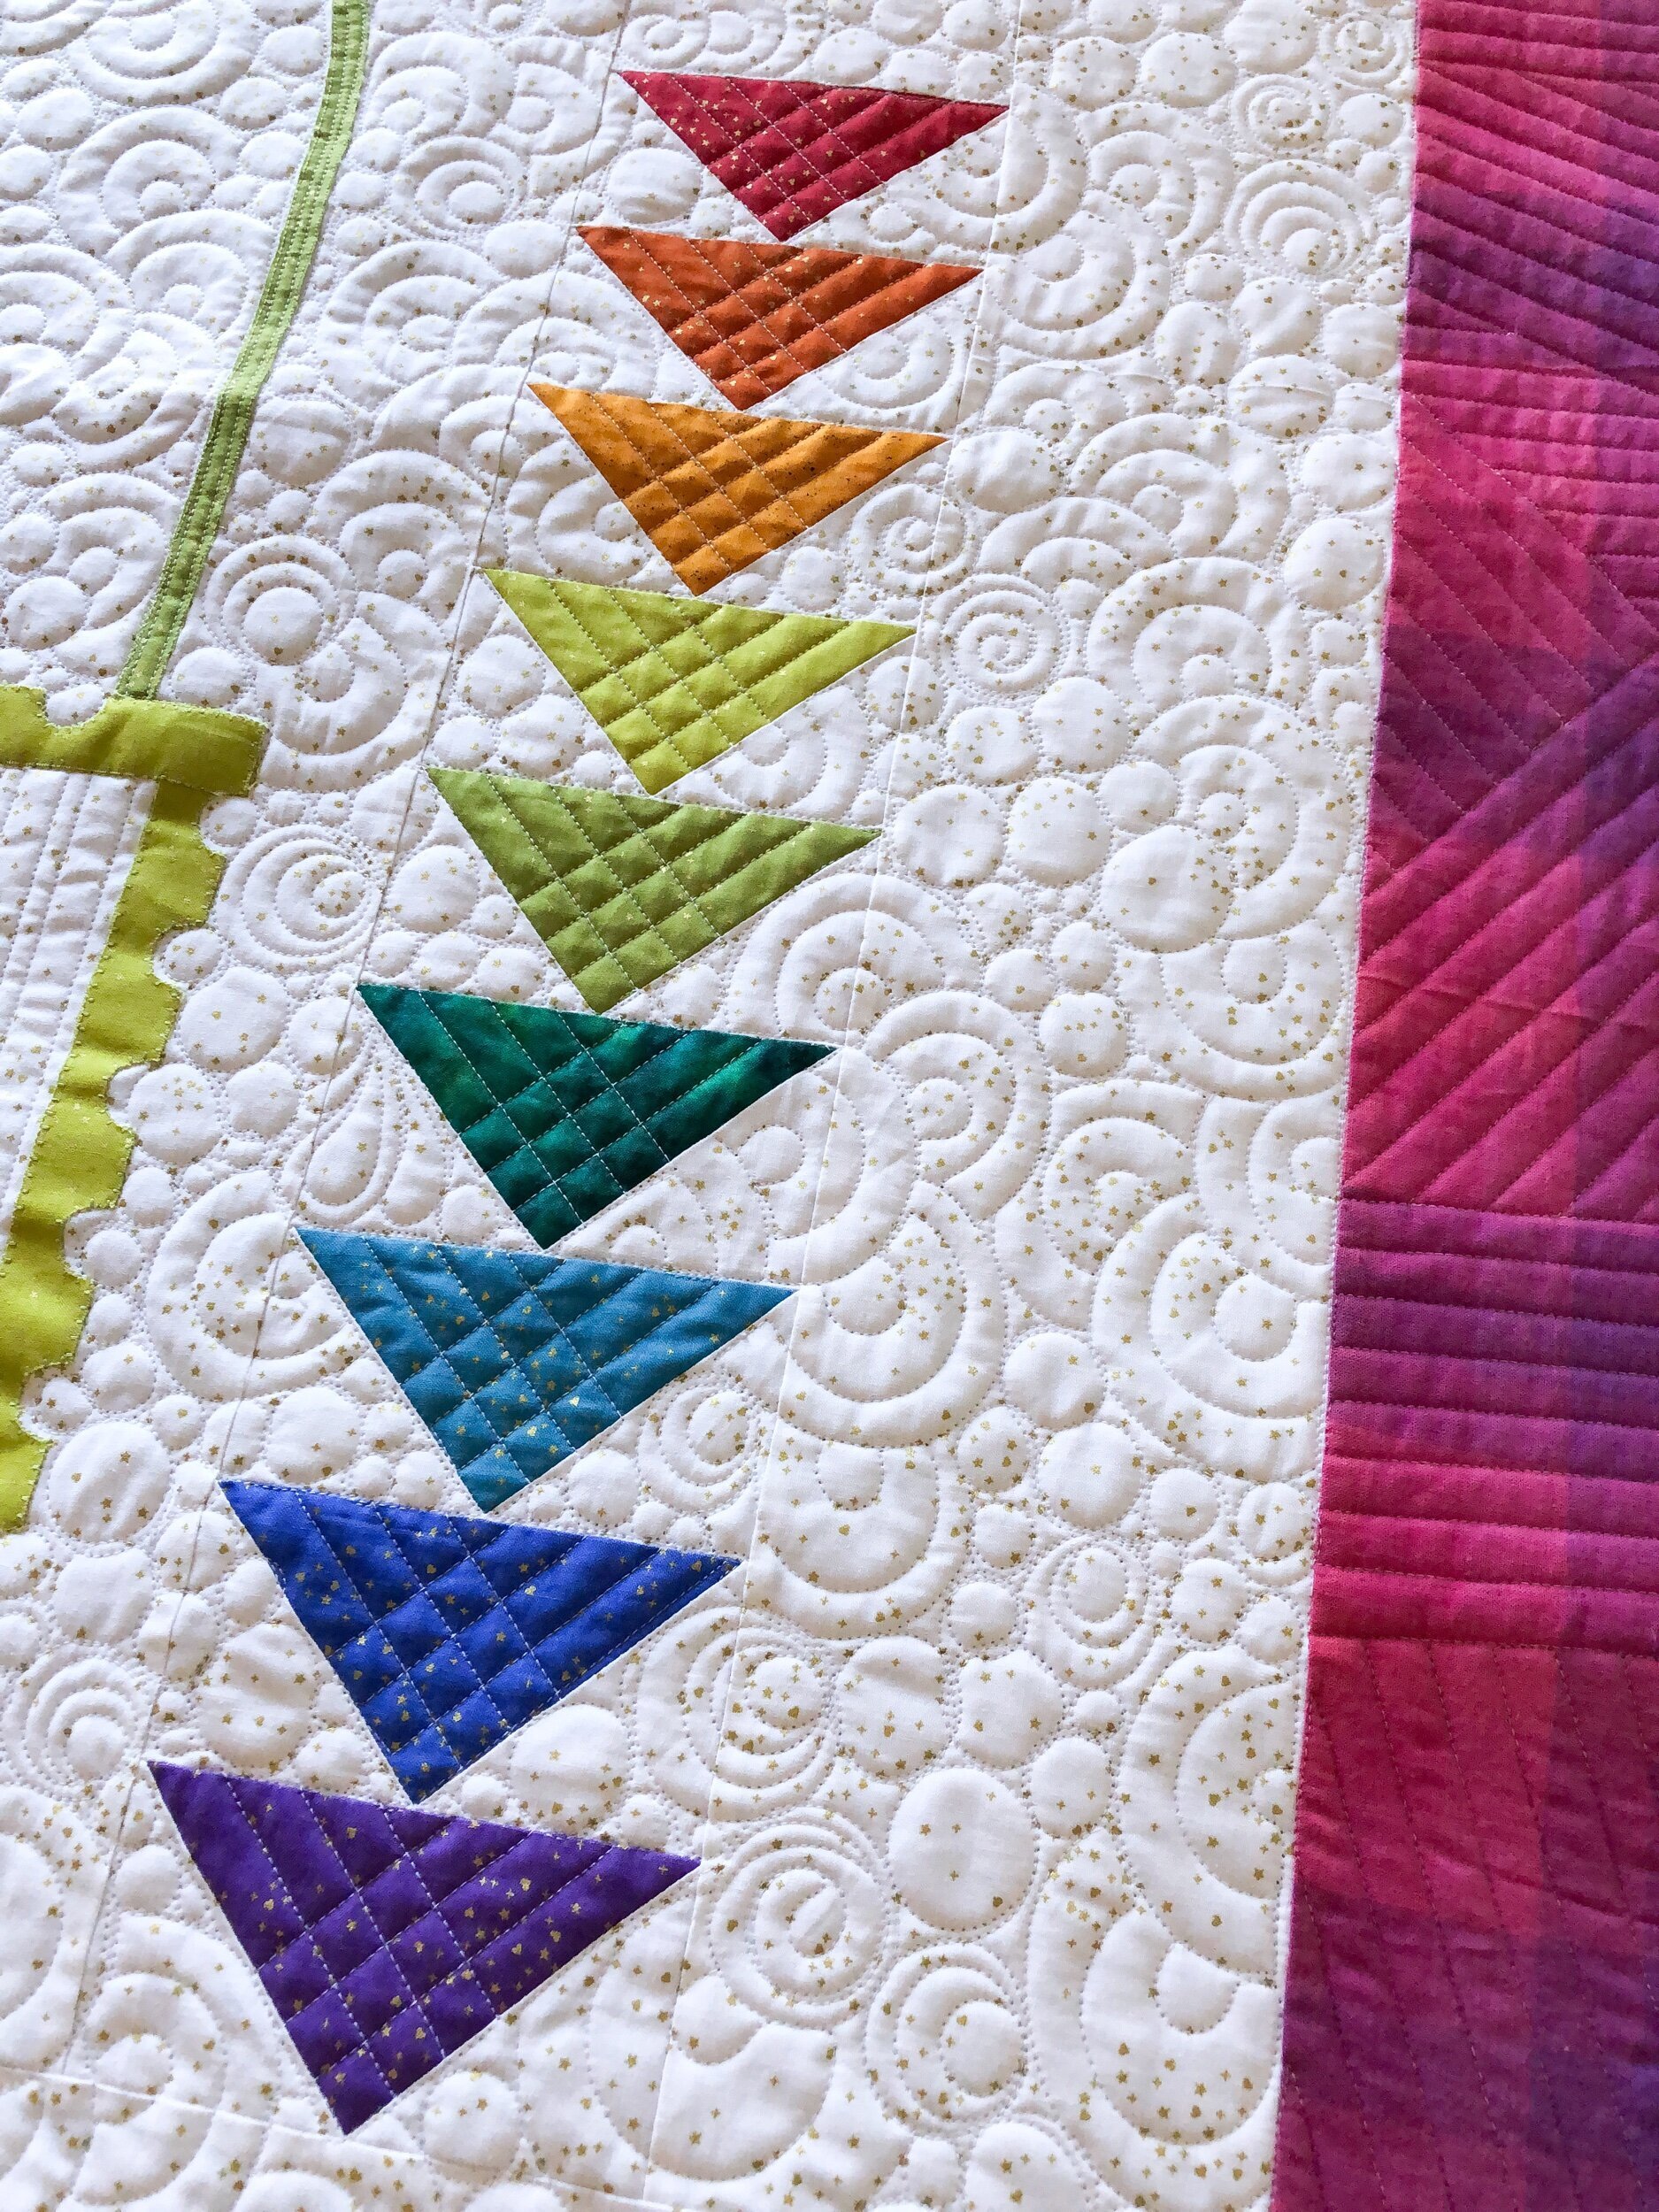
Okay…so quilting these flying geese blocks became one of my favorite parts. I quilted the lines 1/2” apart. There is another look at the border, above…and the bird below. And, that sweet butterfly, feathers in the top of the wings with a swirl to fill the bottom of each wing.

This background fill really makes things pop!!
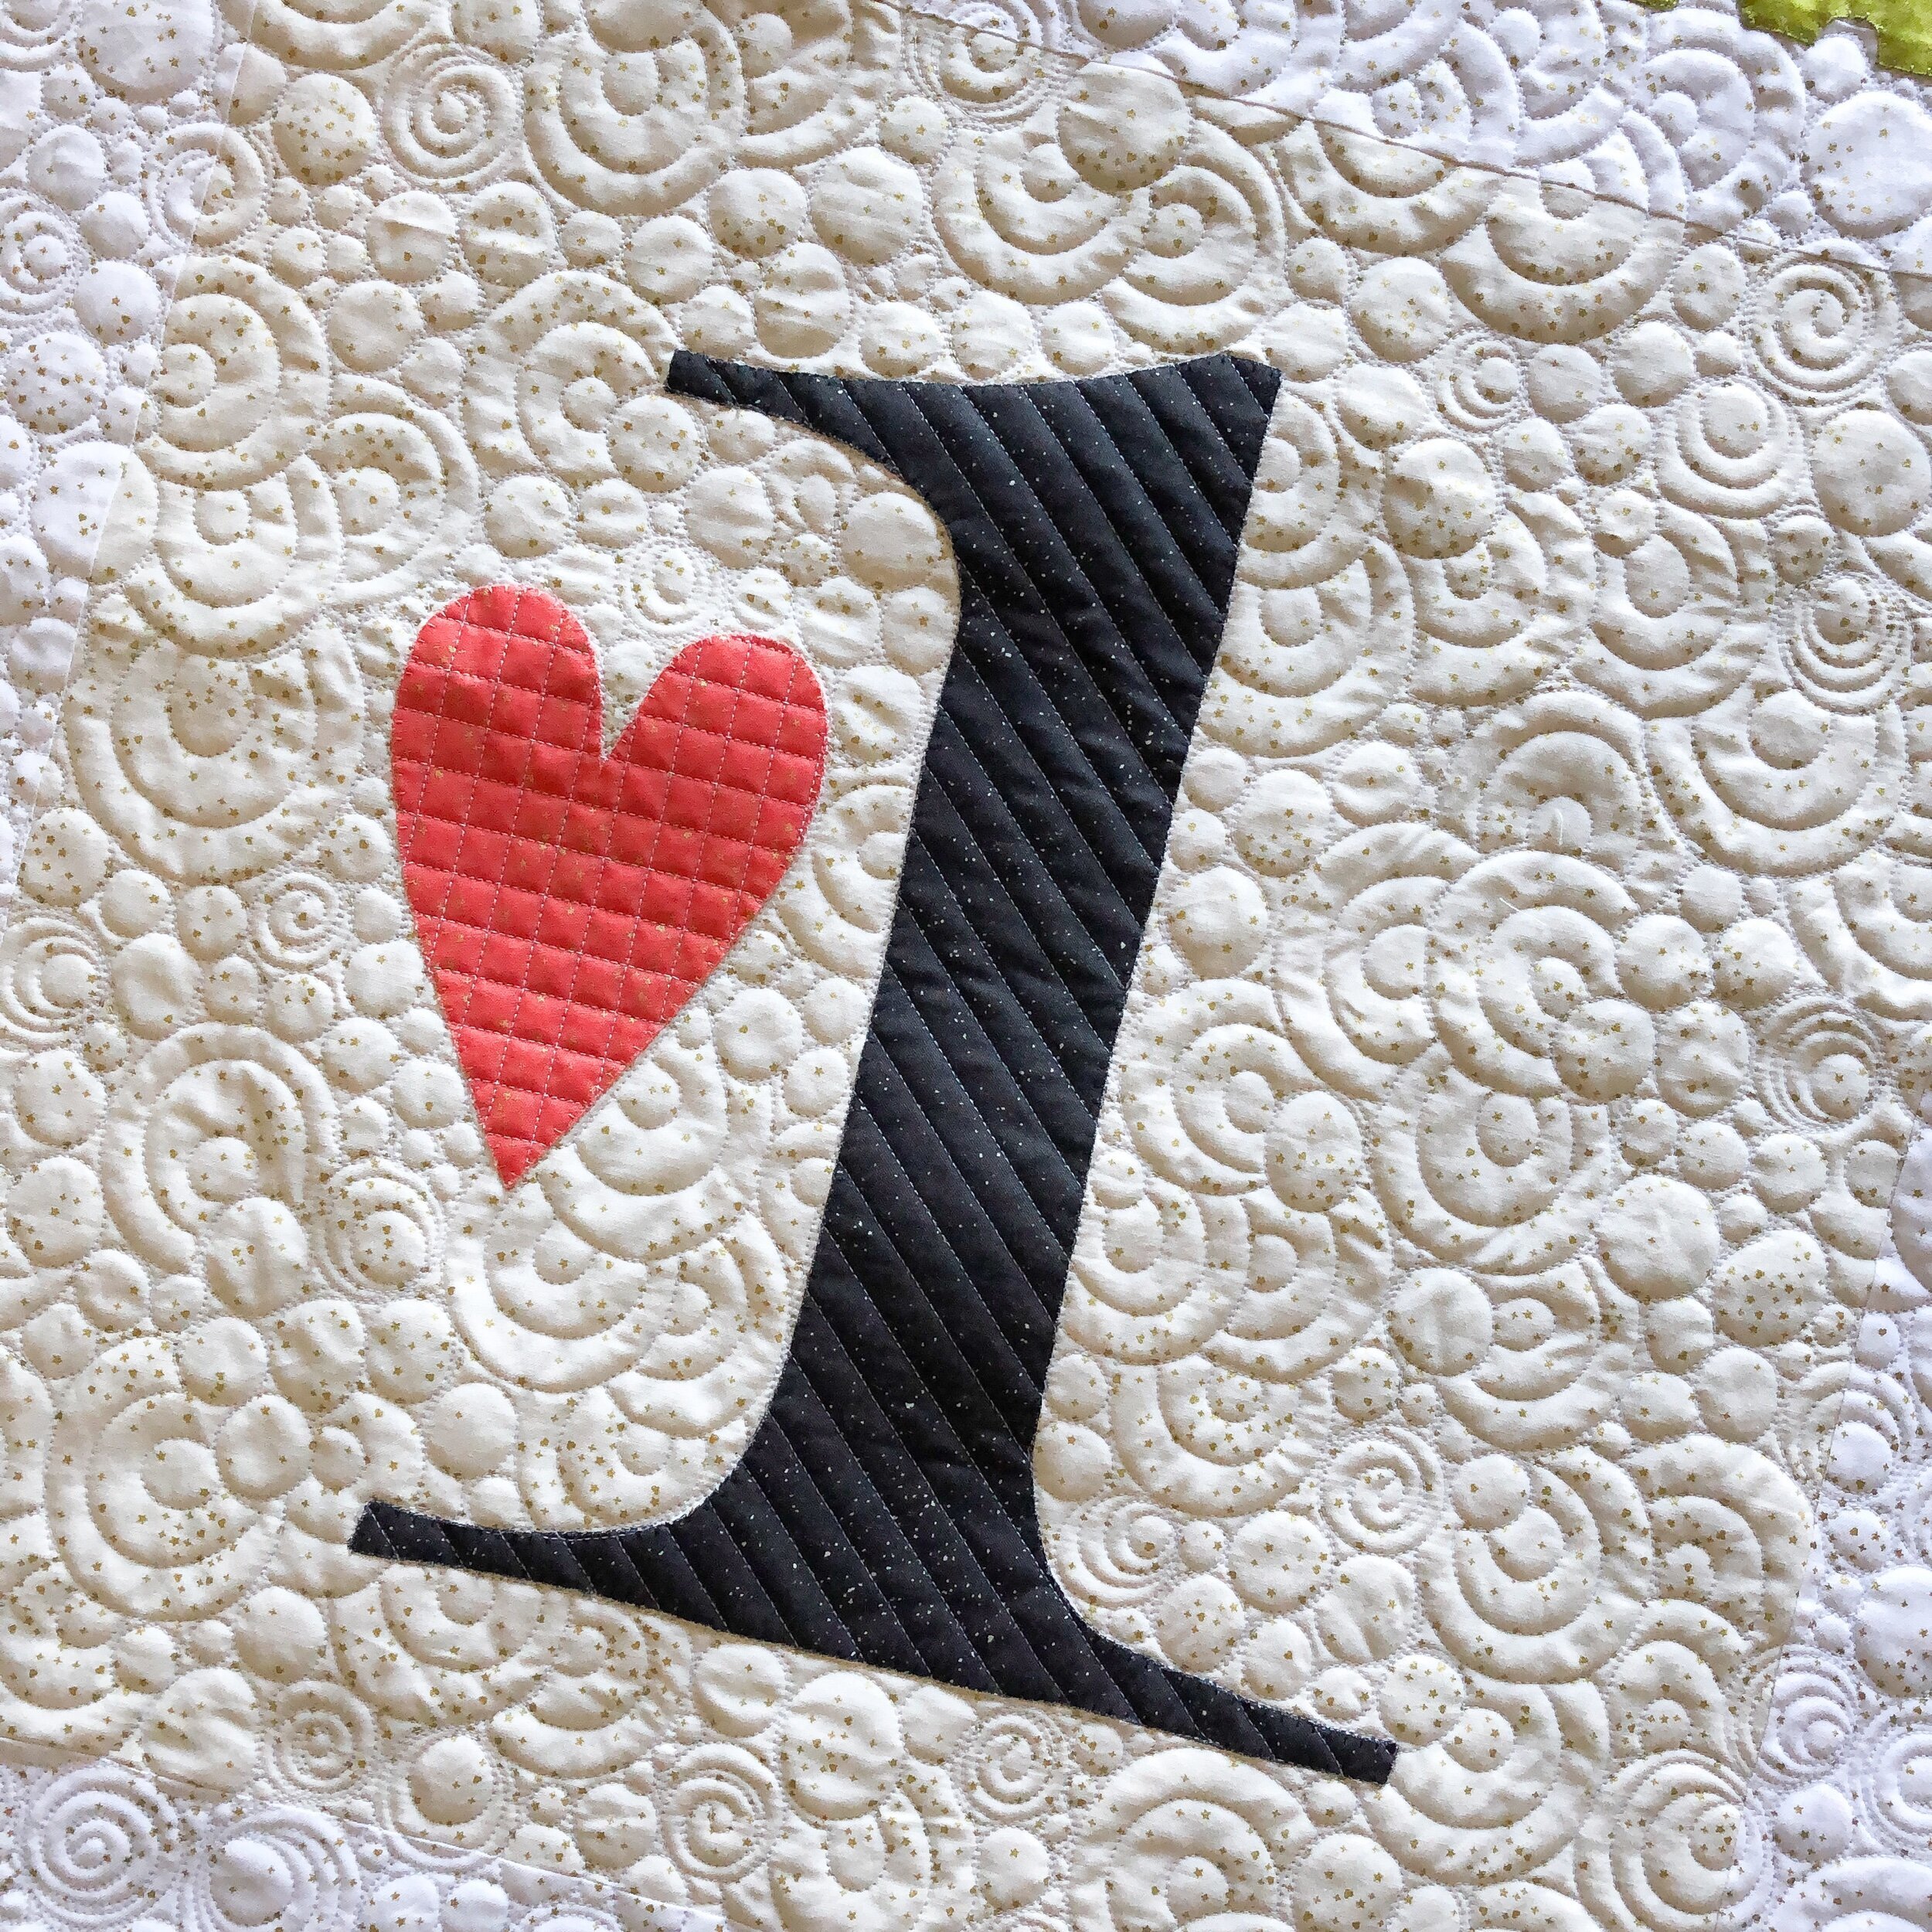
I like to mix up the textures…the curves and swirls with the hard lines in the heart and number one.

You’ll notice I didn’t quilt anything in the teal/greenish border around the “at a time”. It’s not necessary, and would have been too much to quilt it.
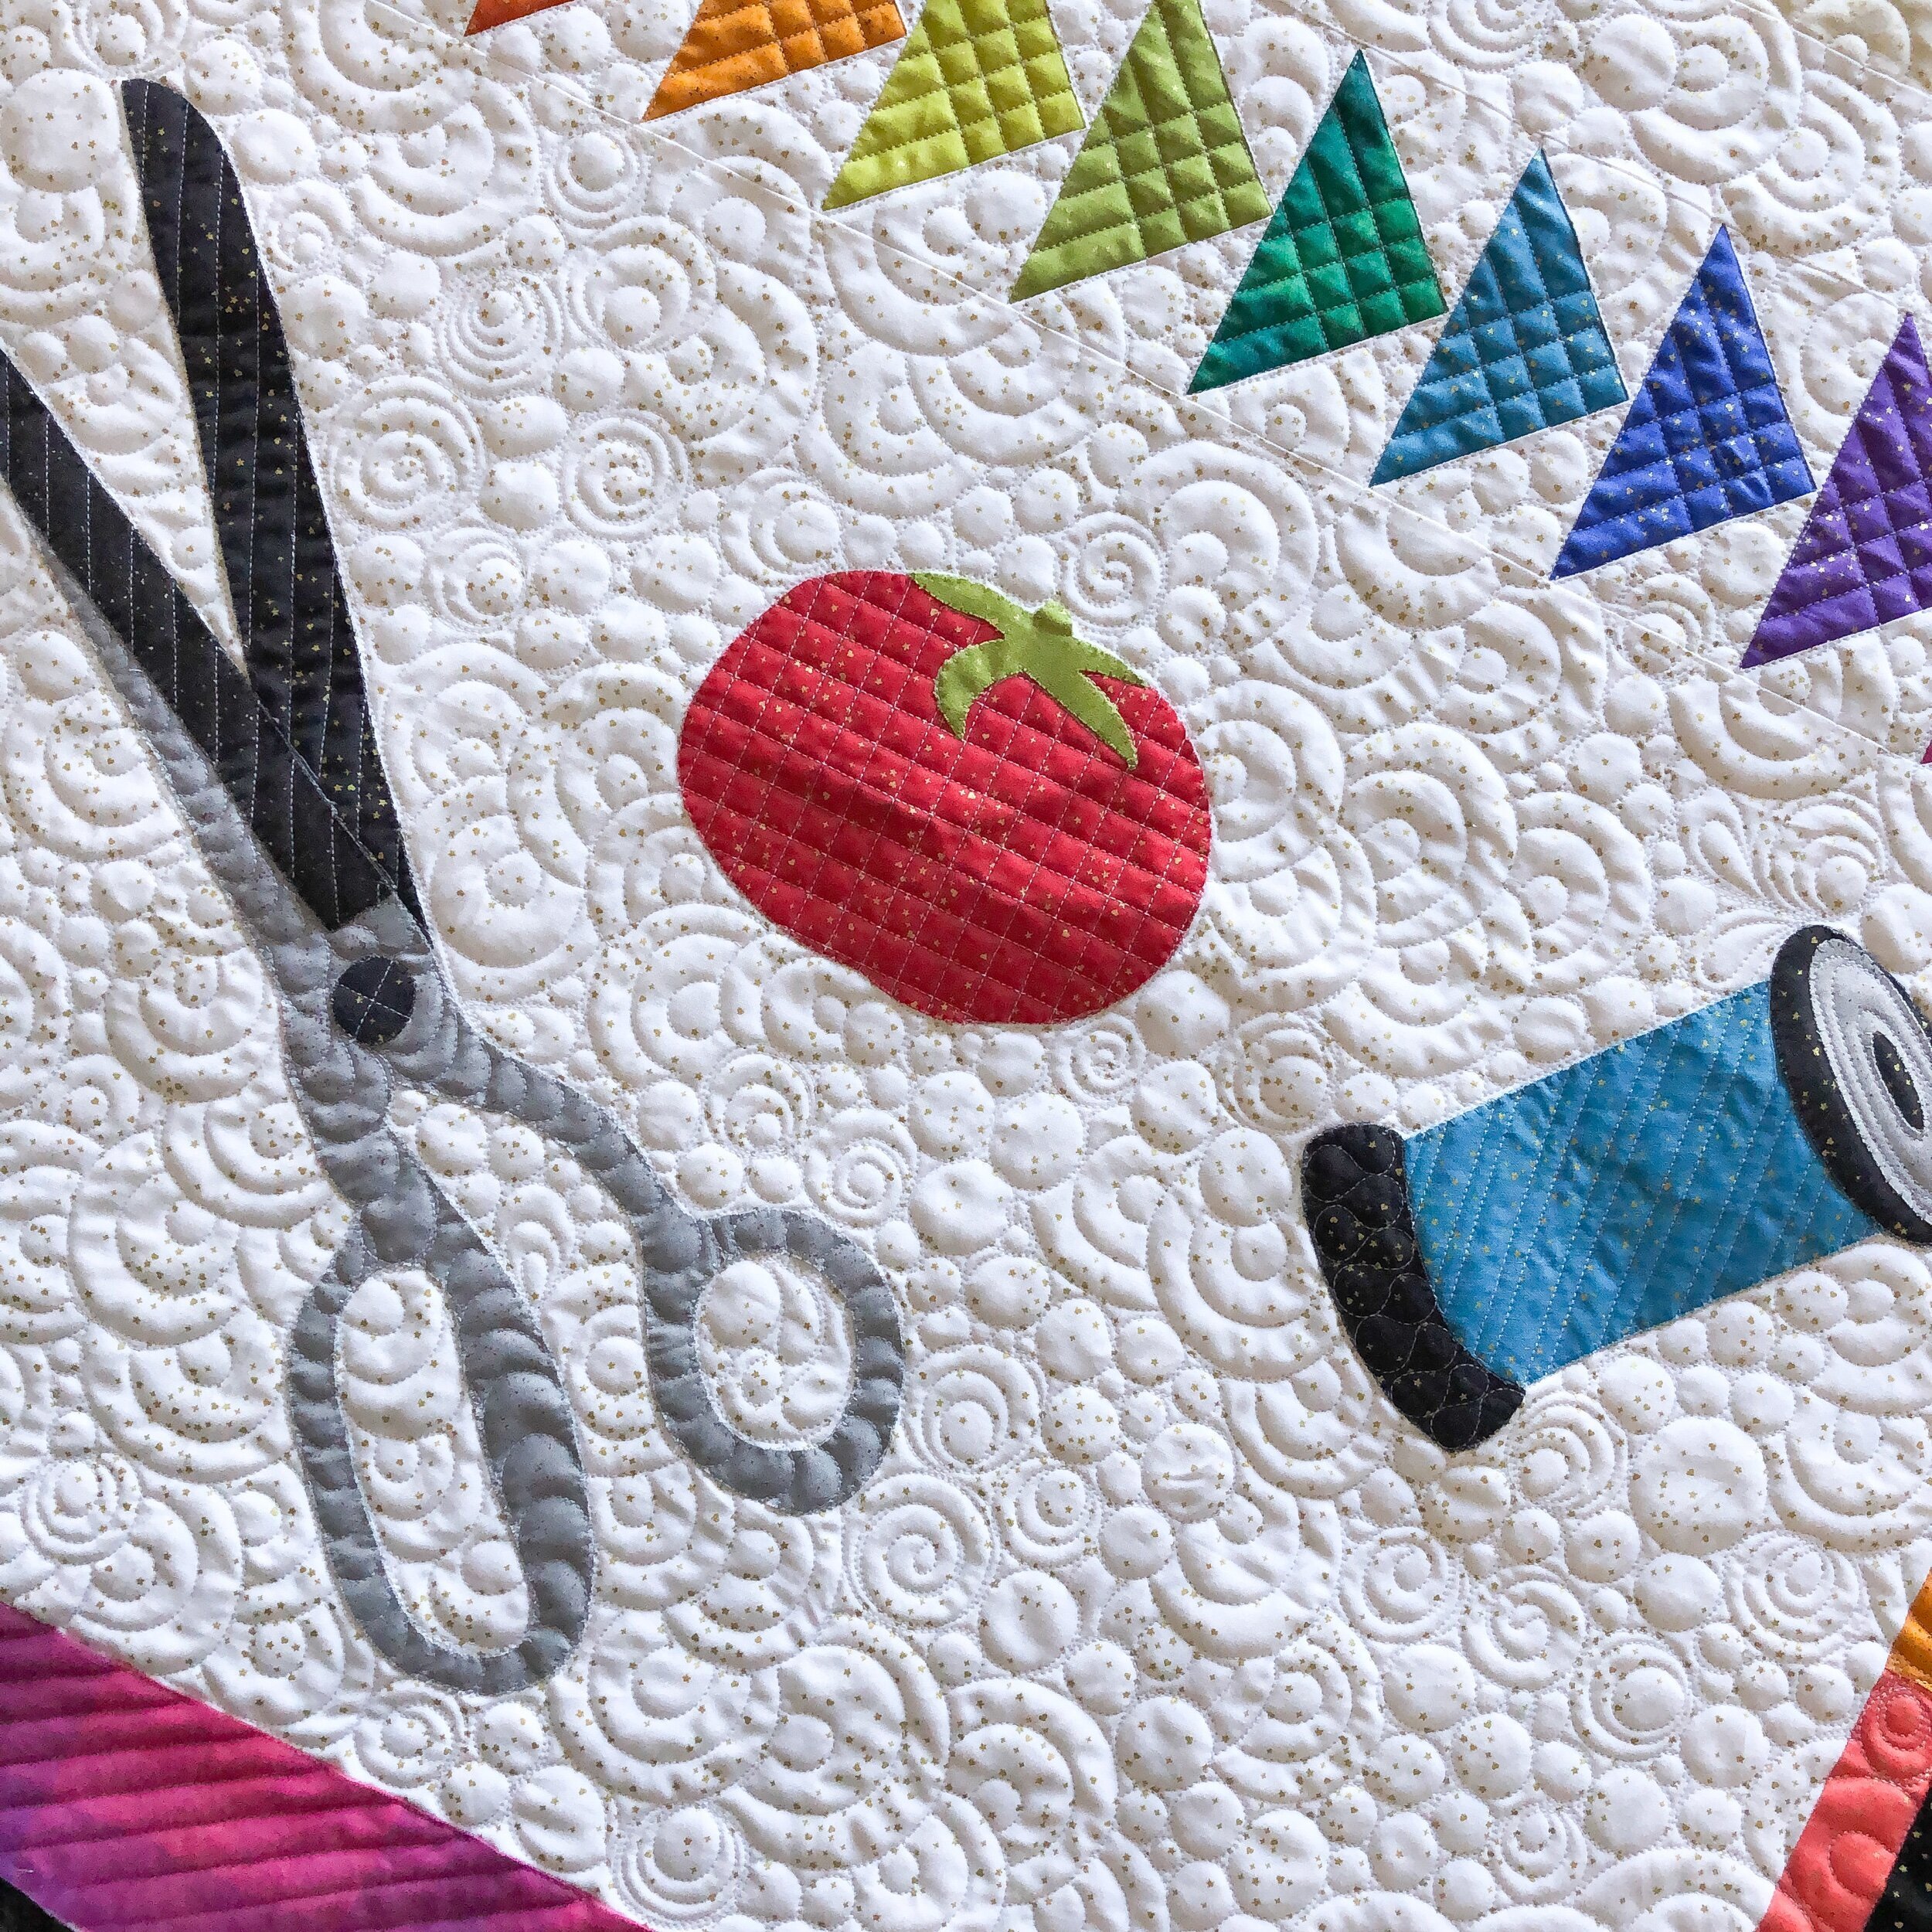
I also added a grid to the pin cushion at the same 1/2” measurement, and 1/4” pinstripe with a 3/4” spacing in the spool. Oh…and that swirly circle on top of the spool was fun to quilt, too…it’s the little things! I added diagonal lines and curves to the scissors.

This back turned out so fun…Madi paper pieced a butterfly, which was a little bulky to quilt though. It’s a fun touch though. It’s fun to see the quilting from the bird and butterfly show up as well.
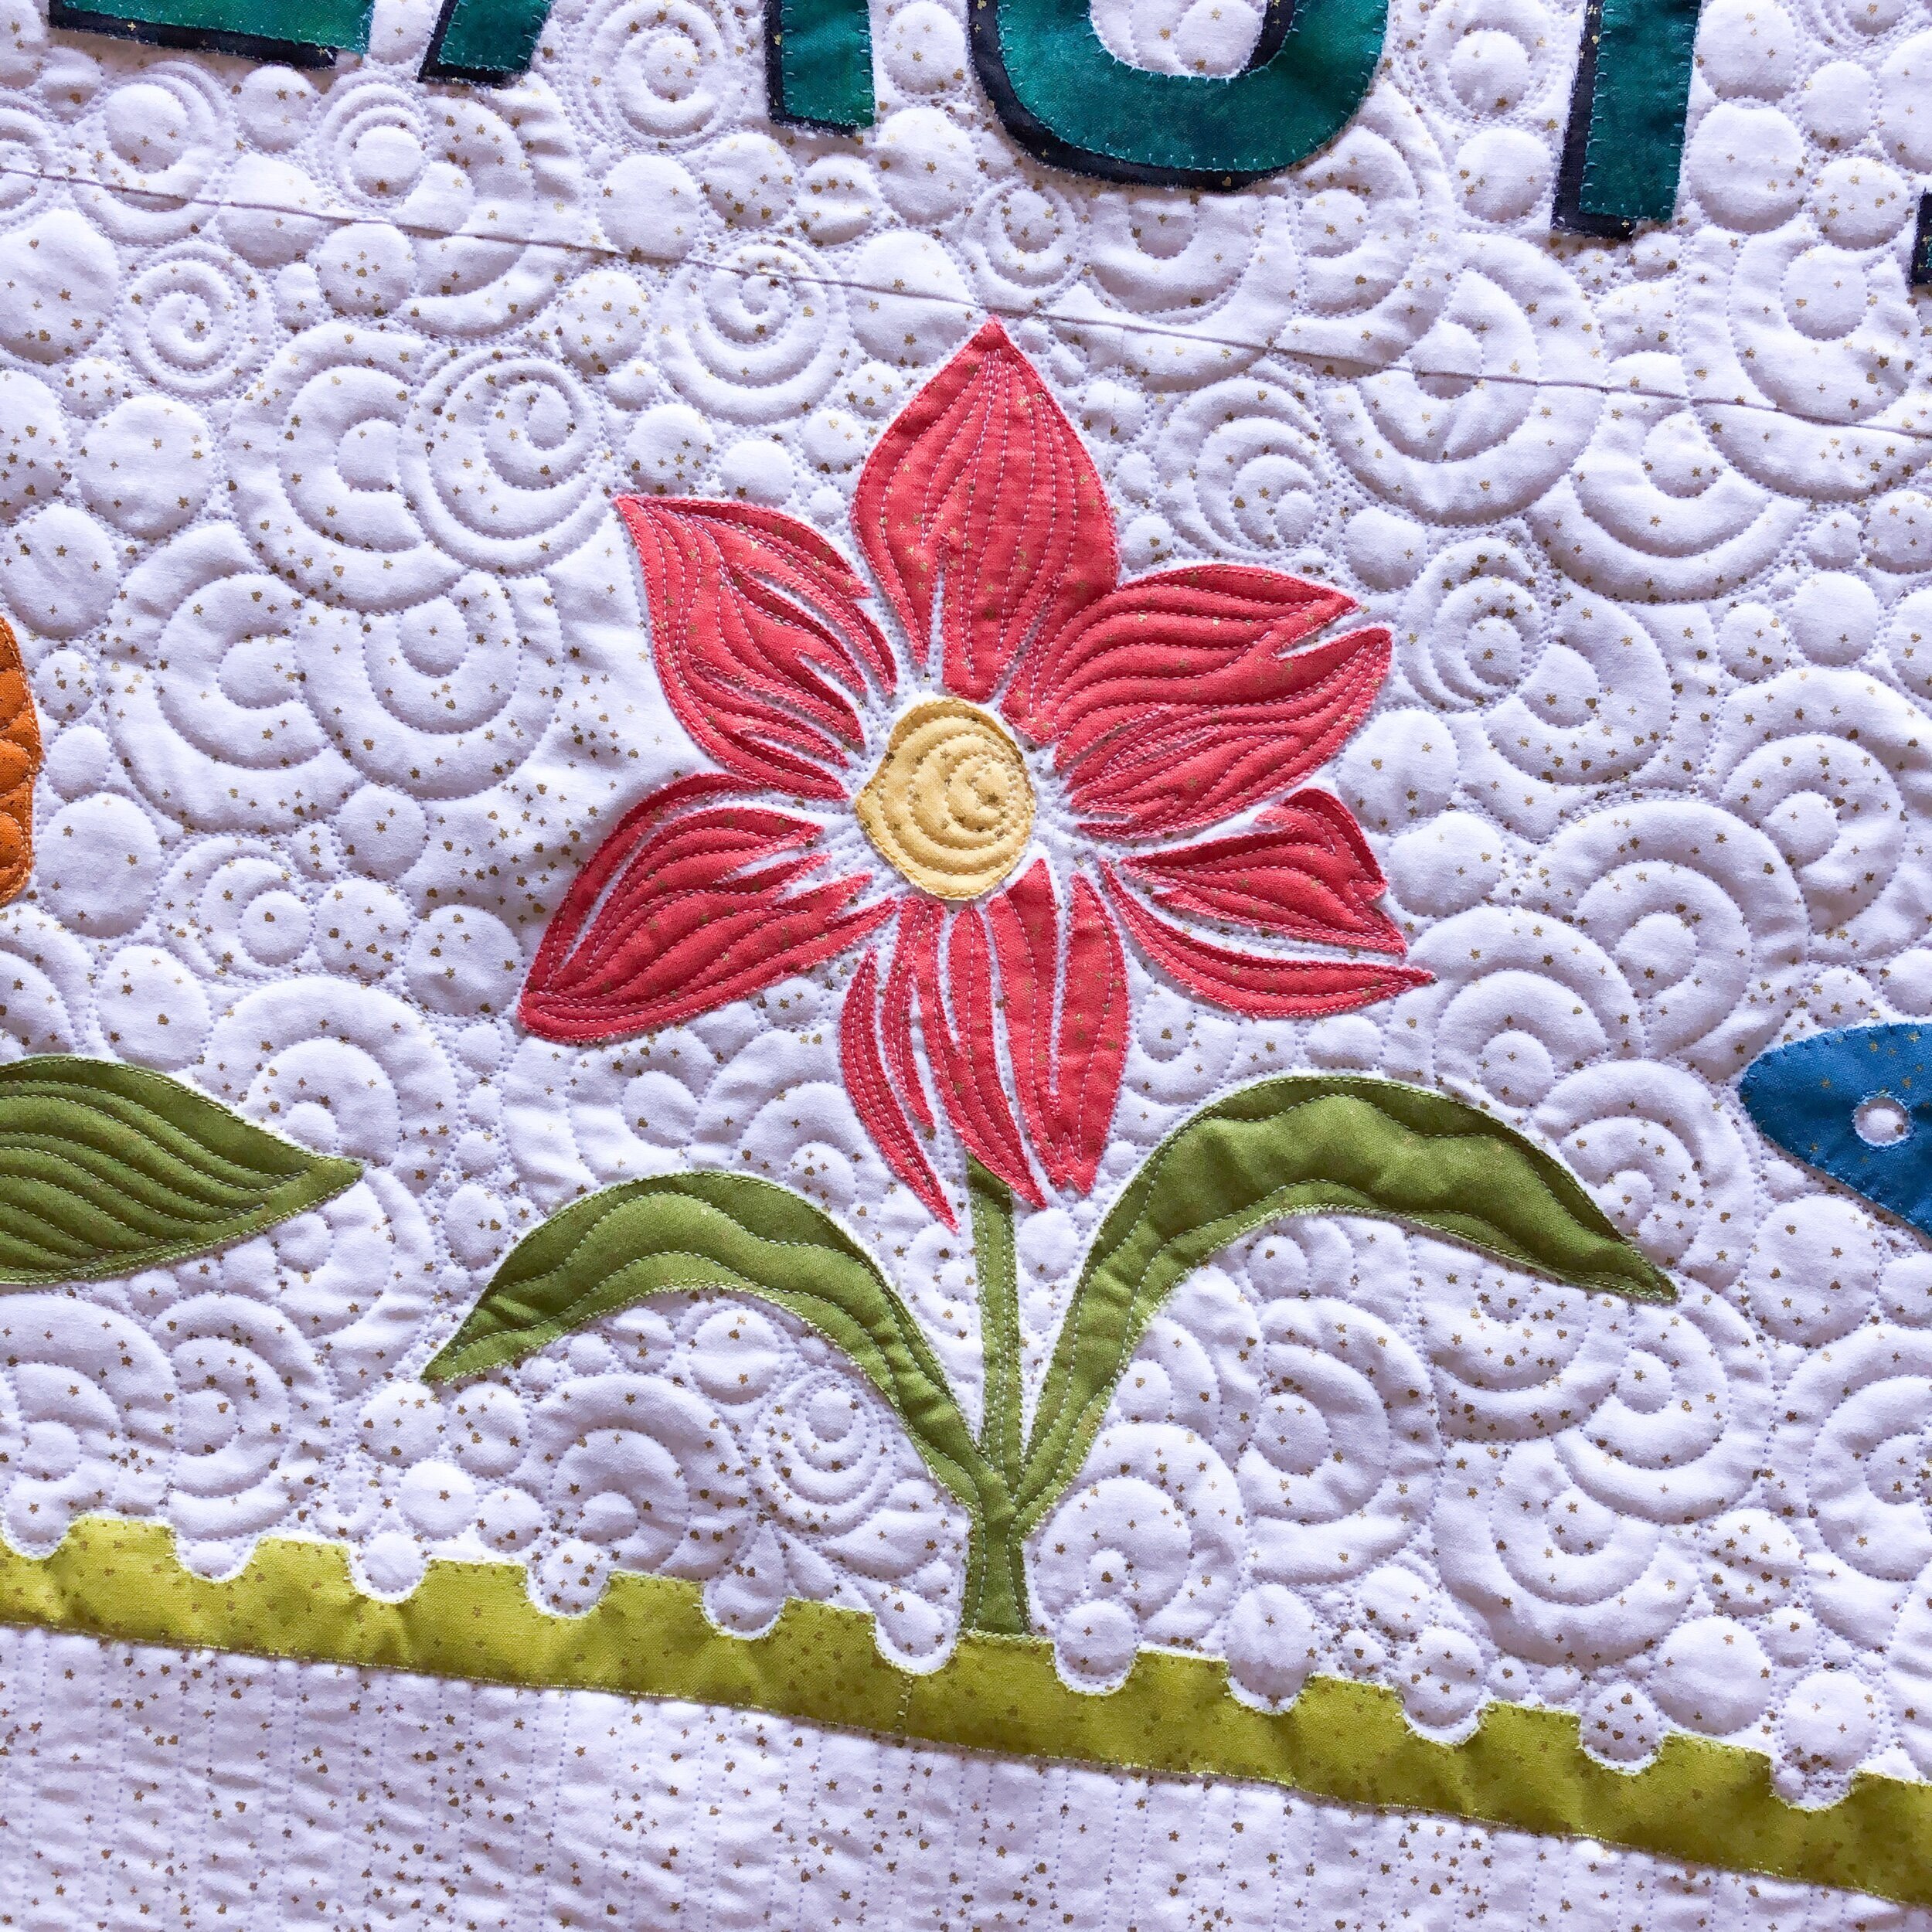
To keep things real… I noticed I forgot to quilt to the left of this flower…I’ll pin it back on the machine and fix it when Madi brings it by. It can be hard sometimes to see what I’ve missed in a section when the thread blends so well. It’s an easy fix!! You can also see how I quilted that adorable flower. Have a great weekend!! Thanks for stopping by. • Leisha
ps…. I have a new post in my Machine Quilting 101 section, about the need for straight cut quilt backings. Check it out!! It’s not apart of my email list.
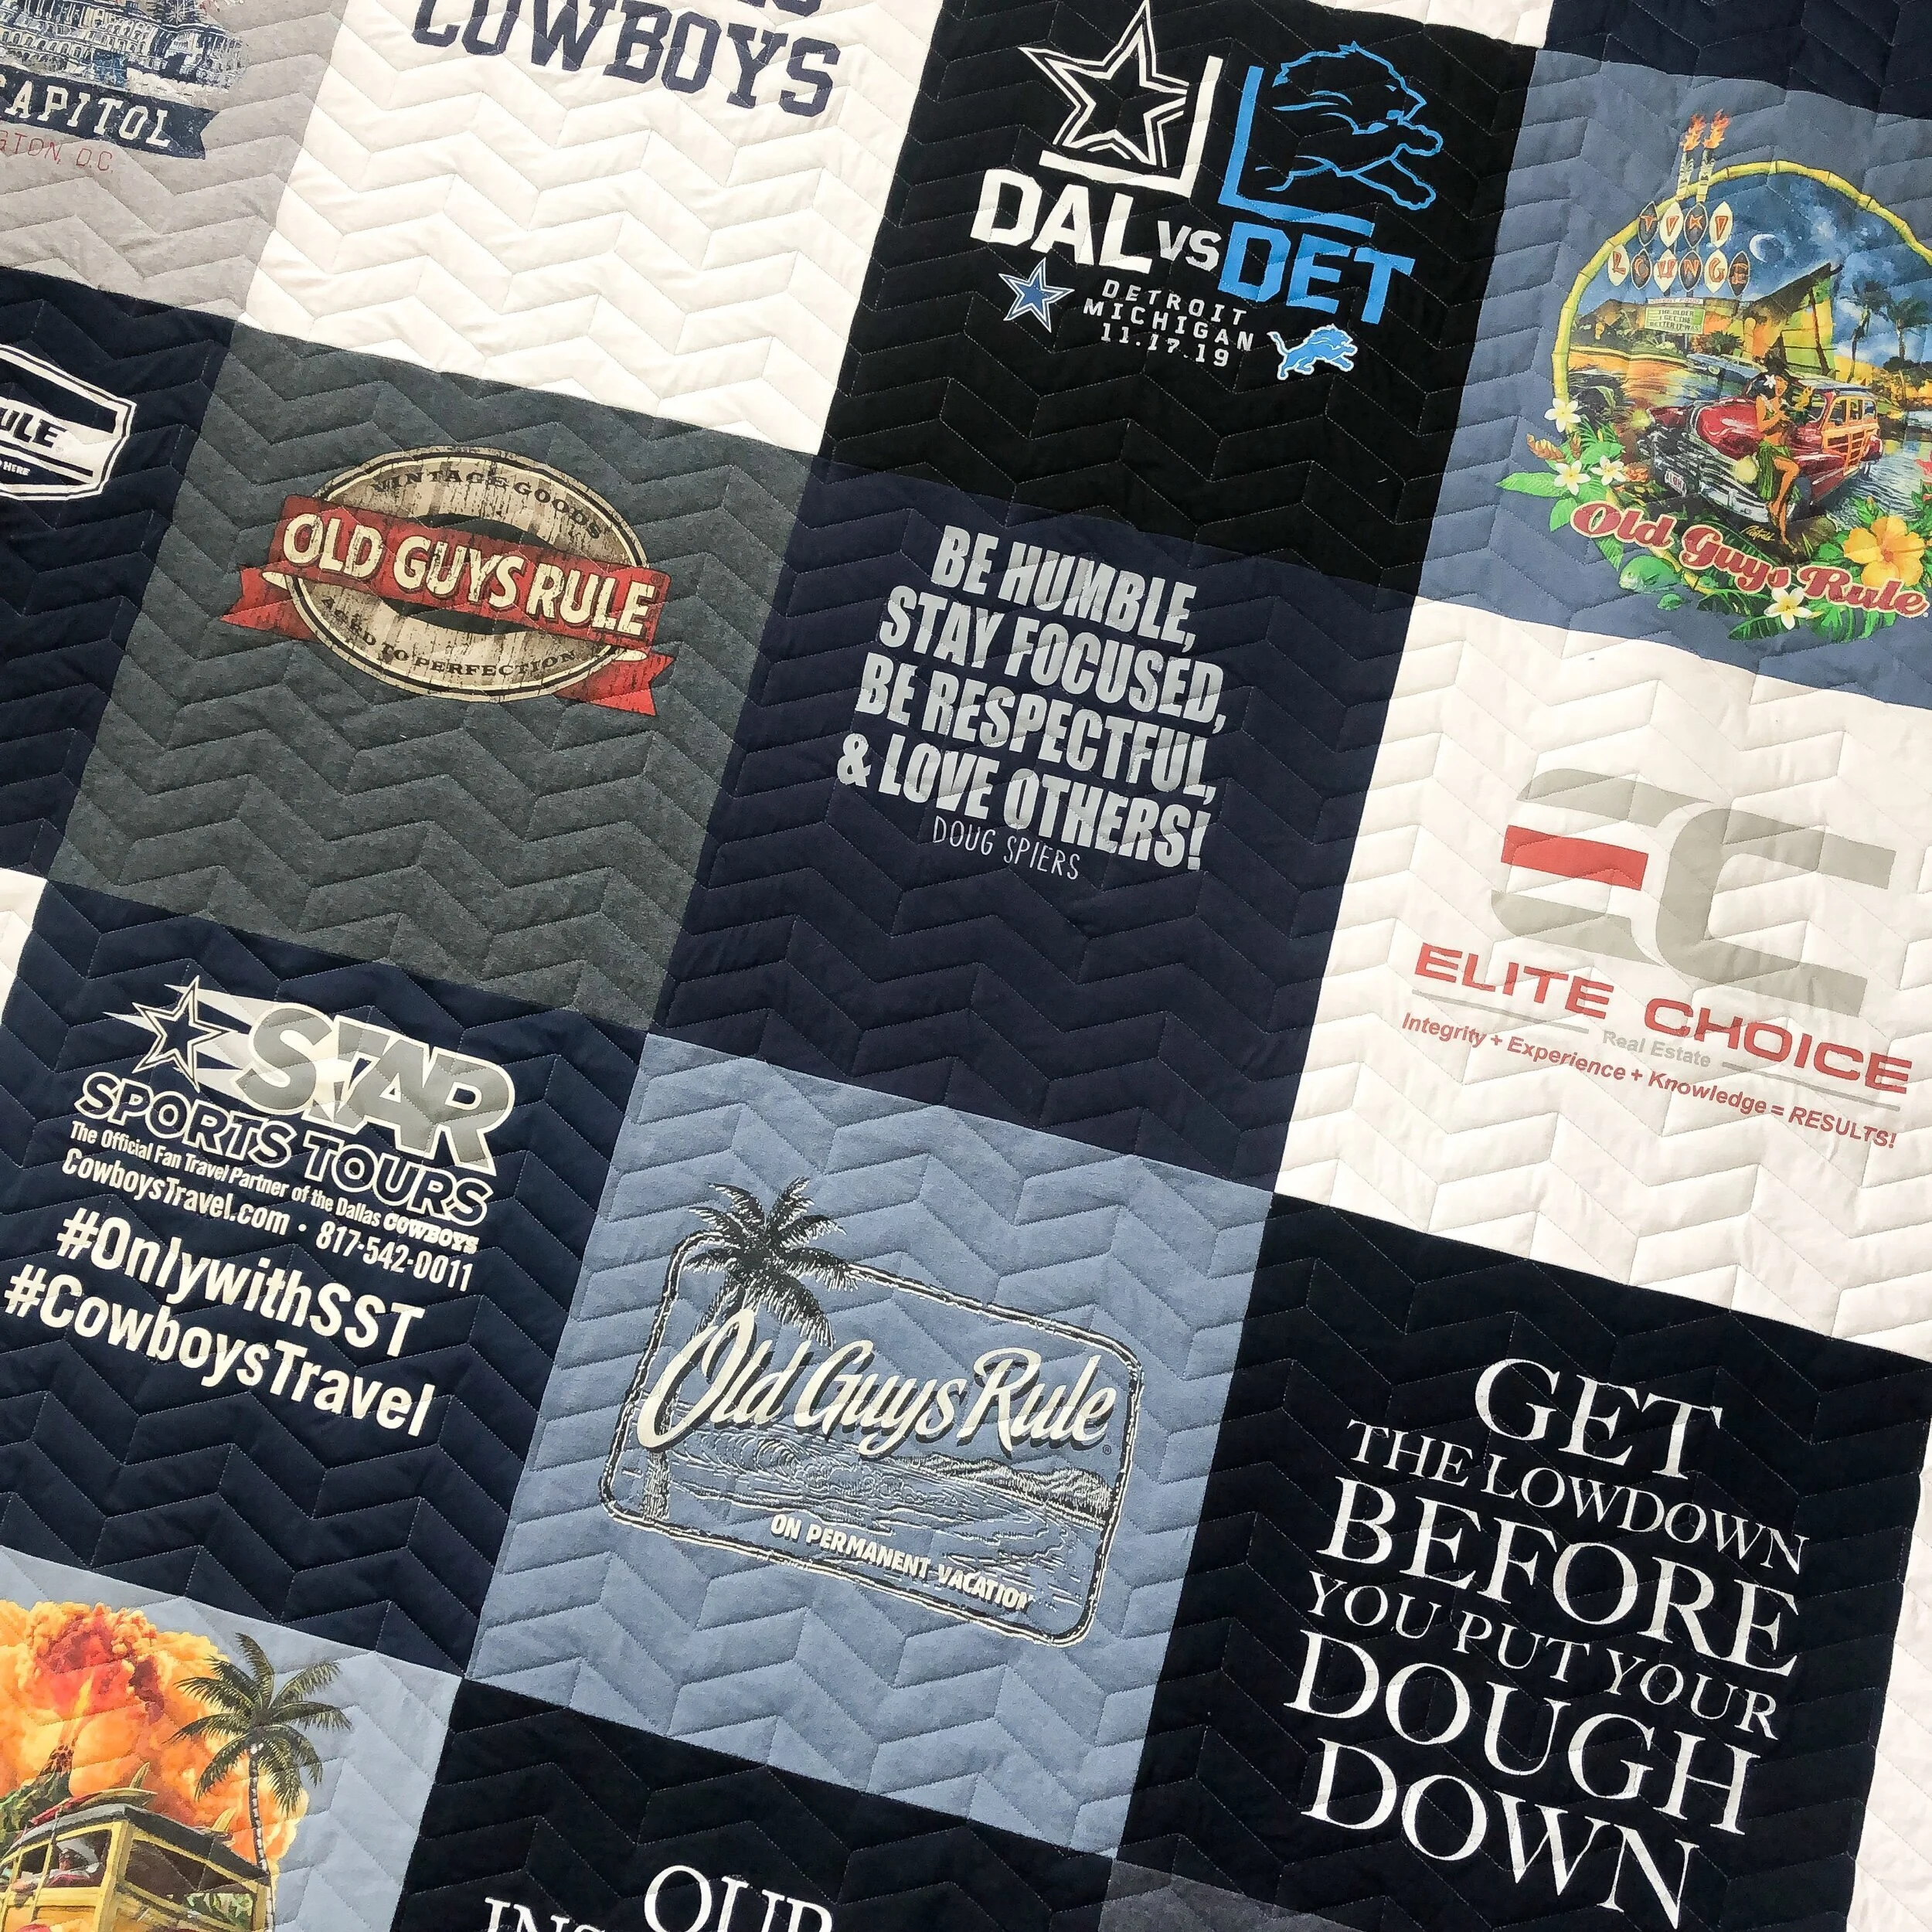
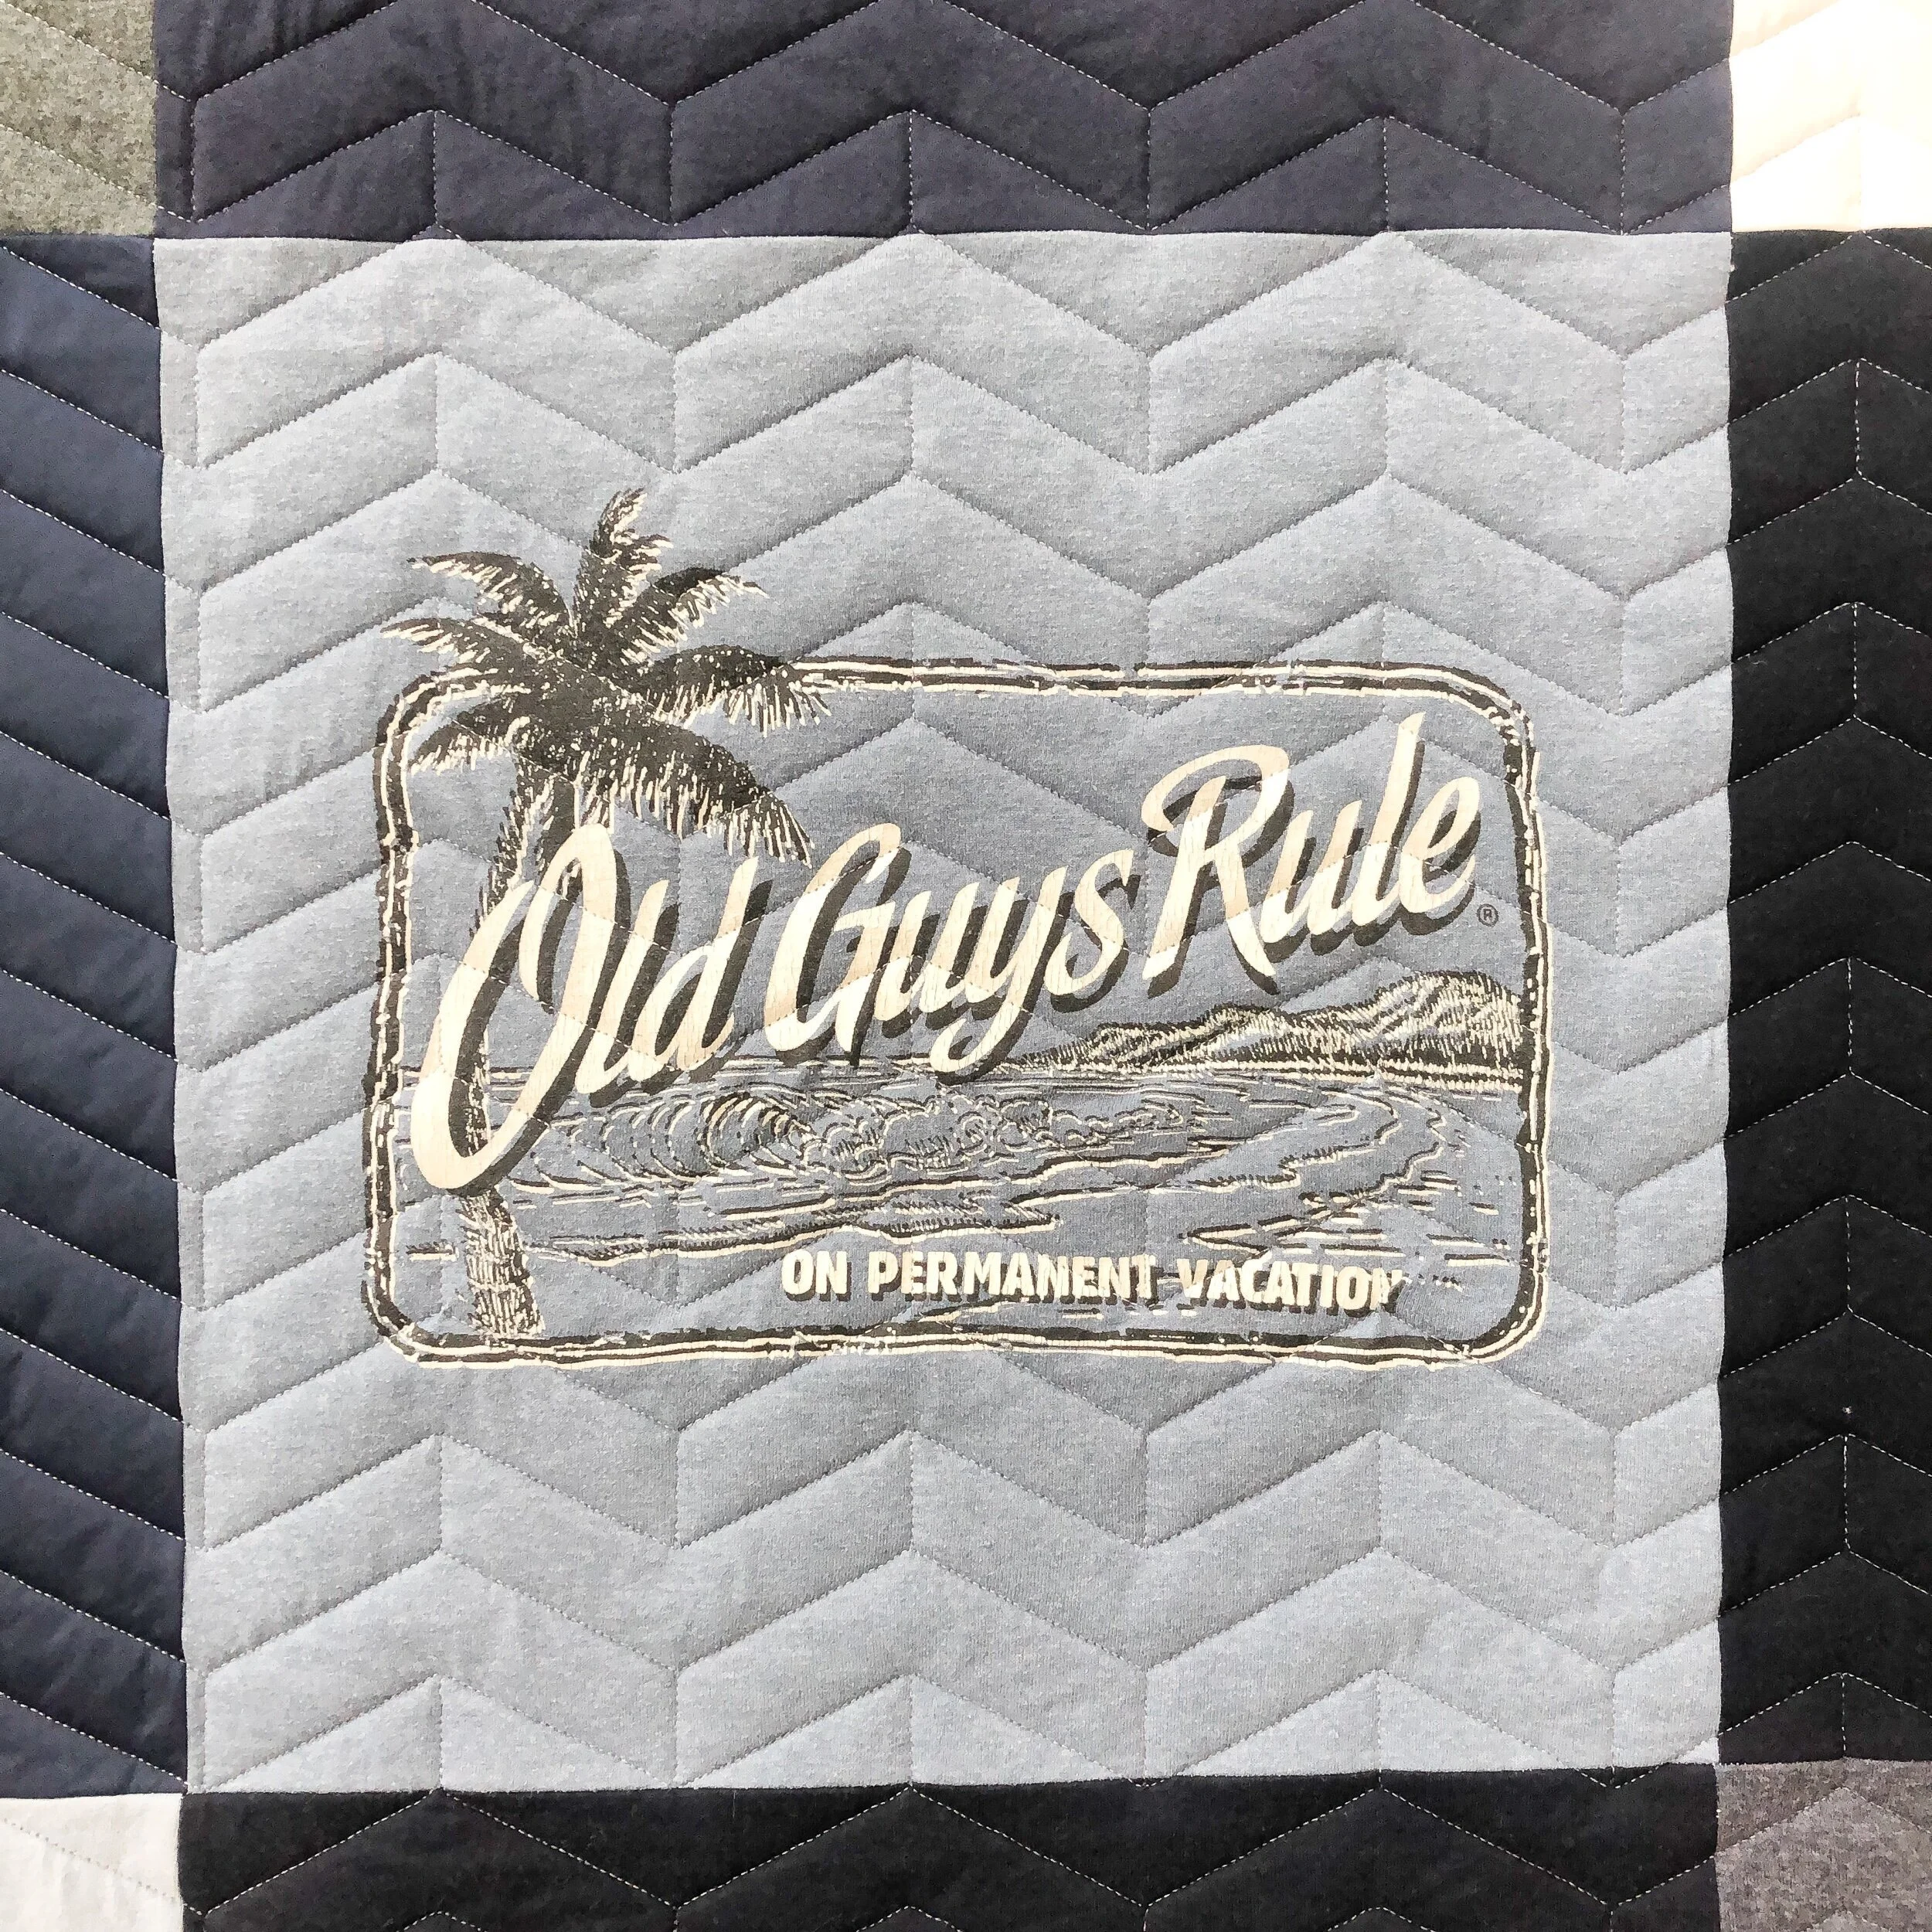
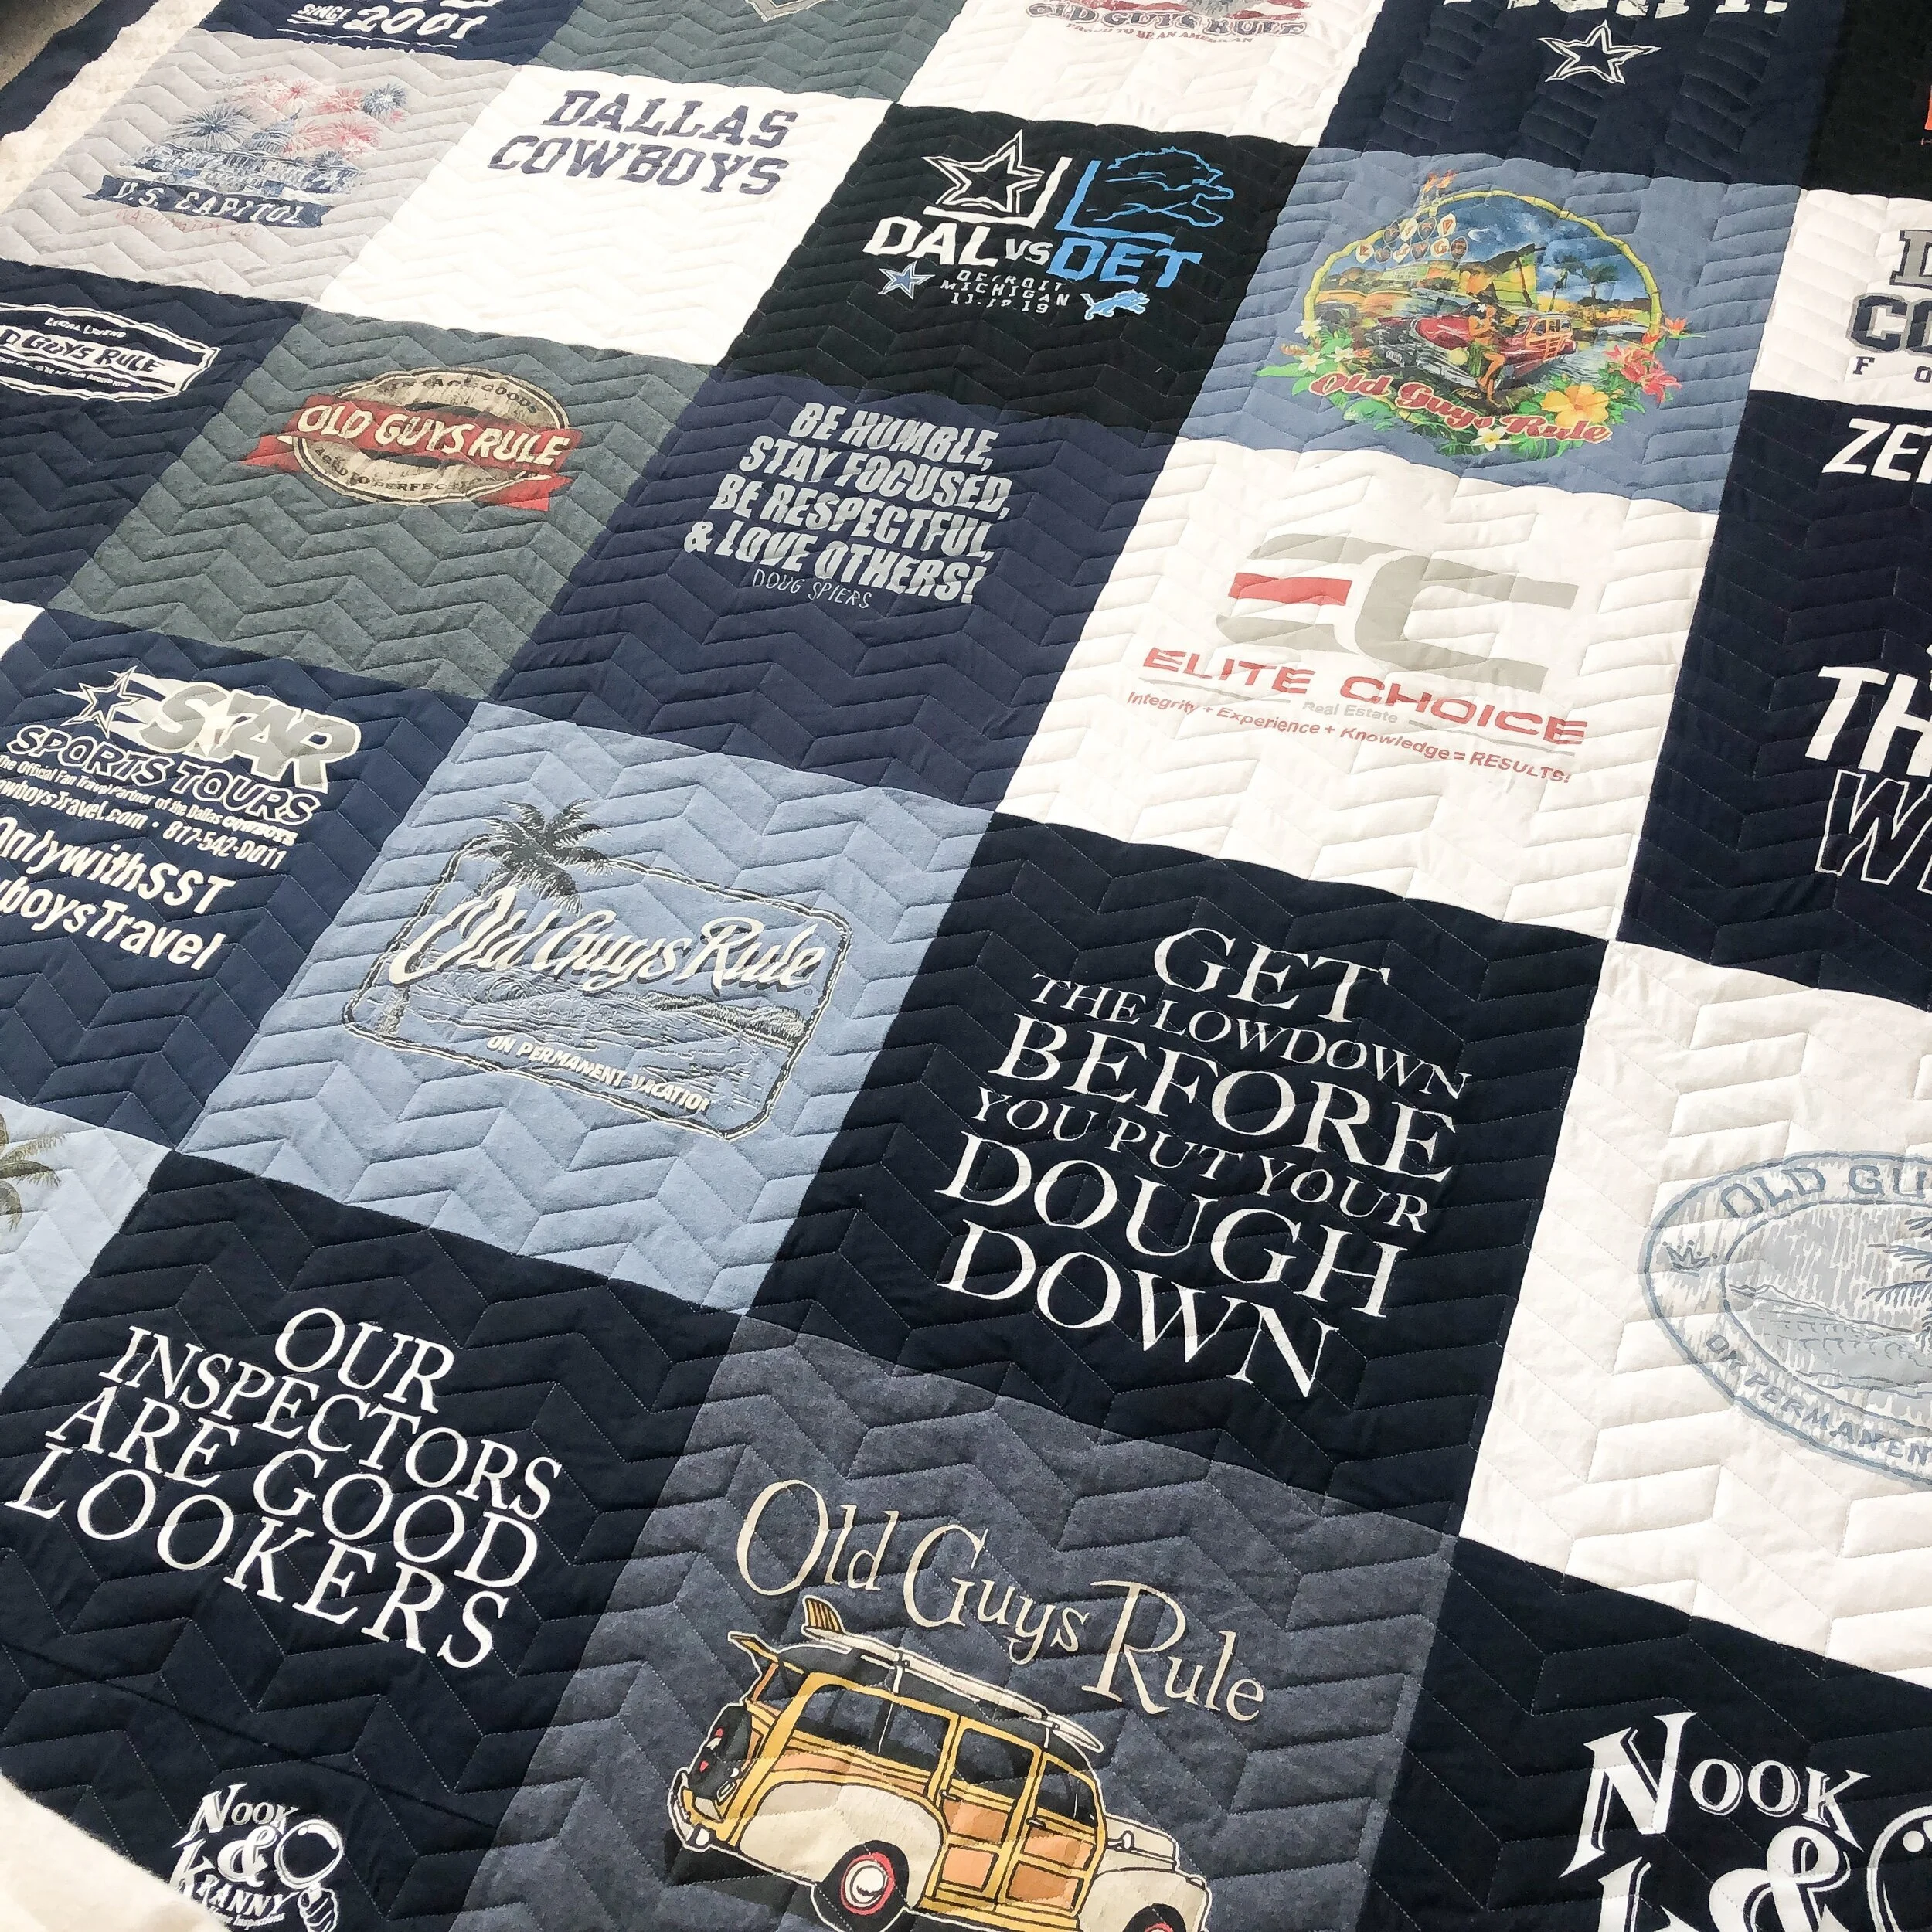
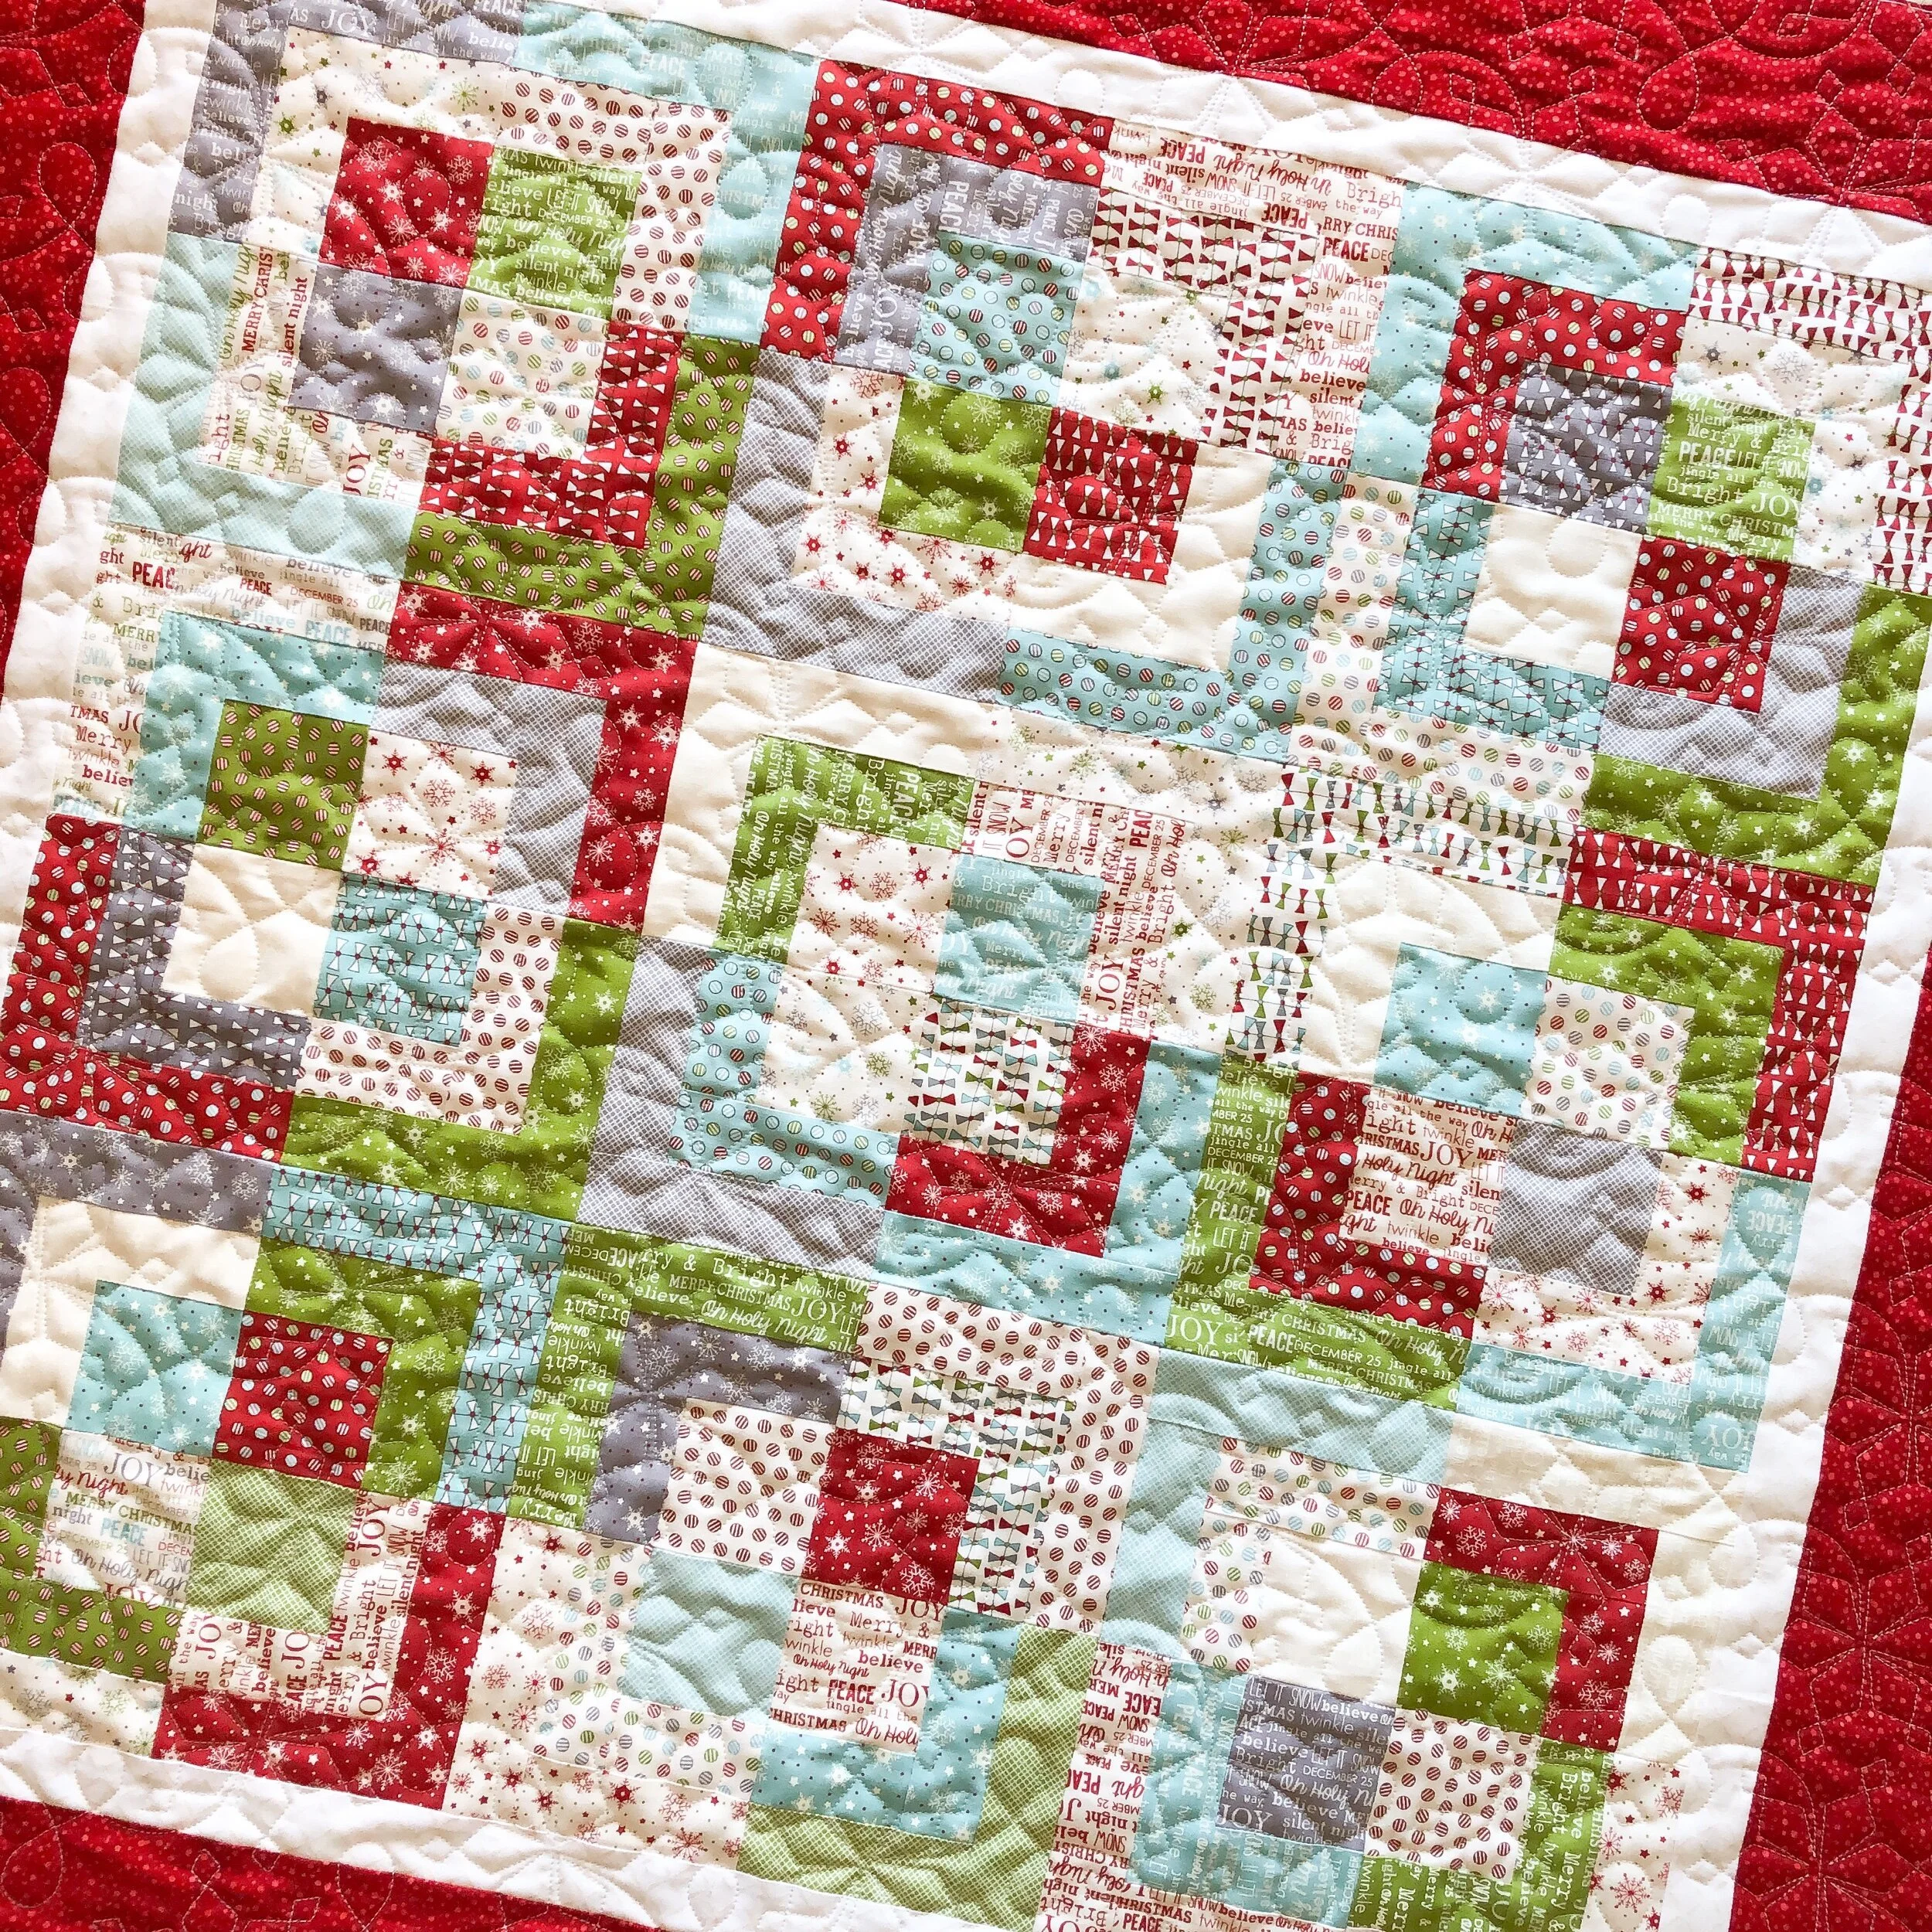
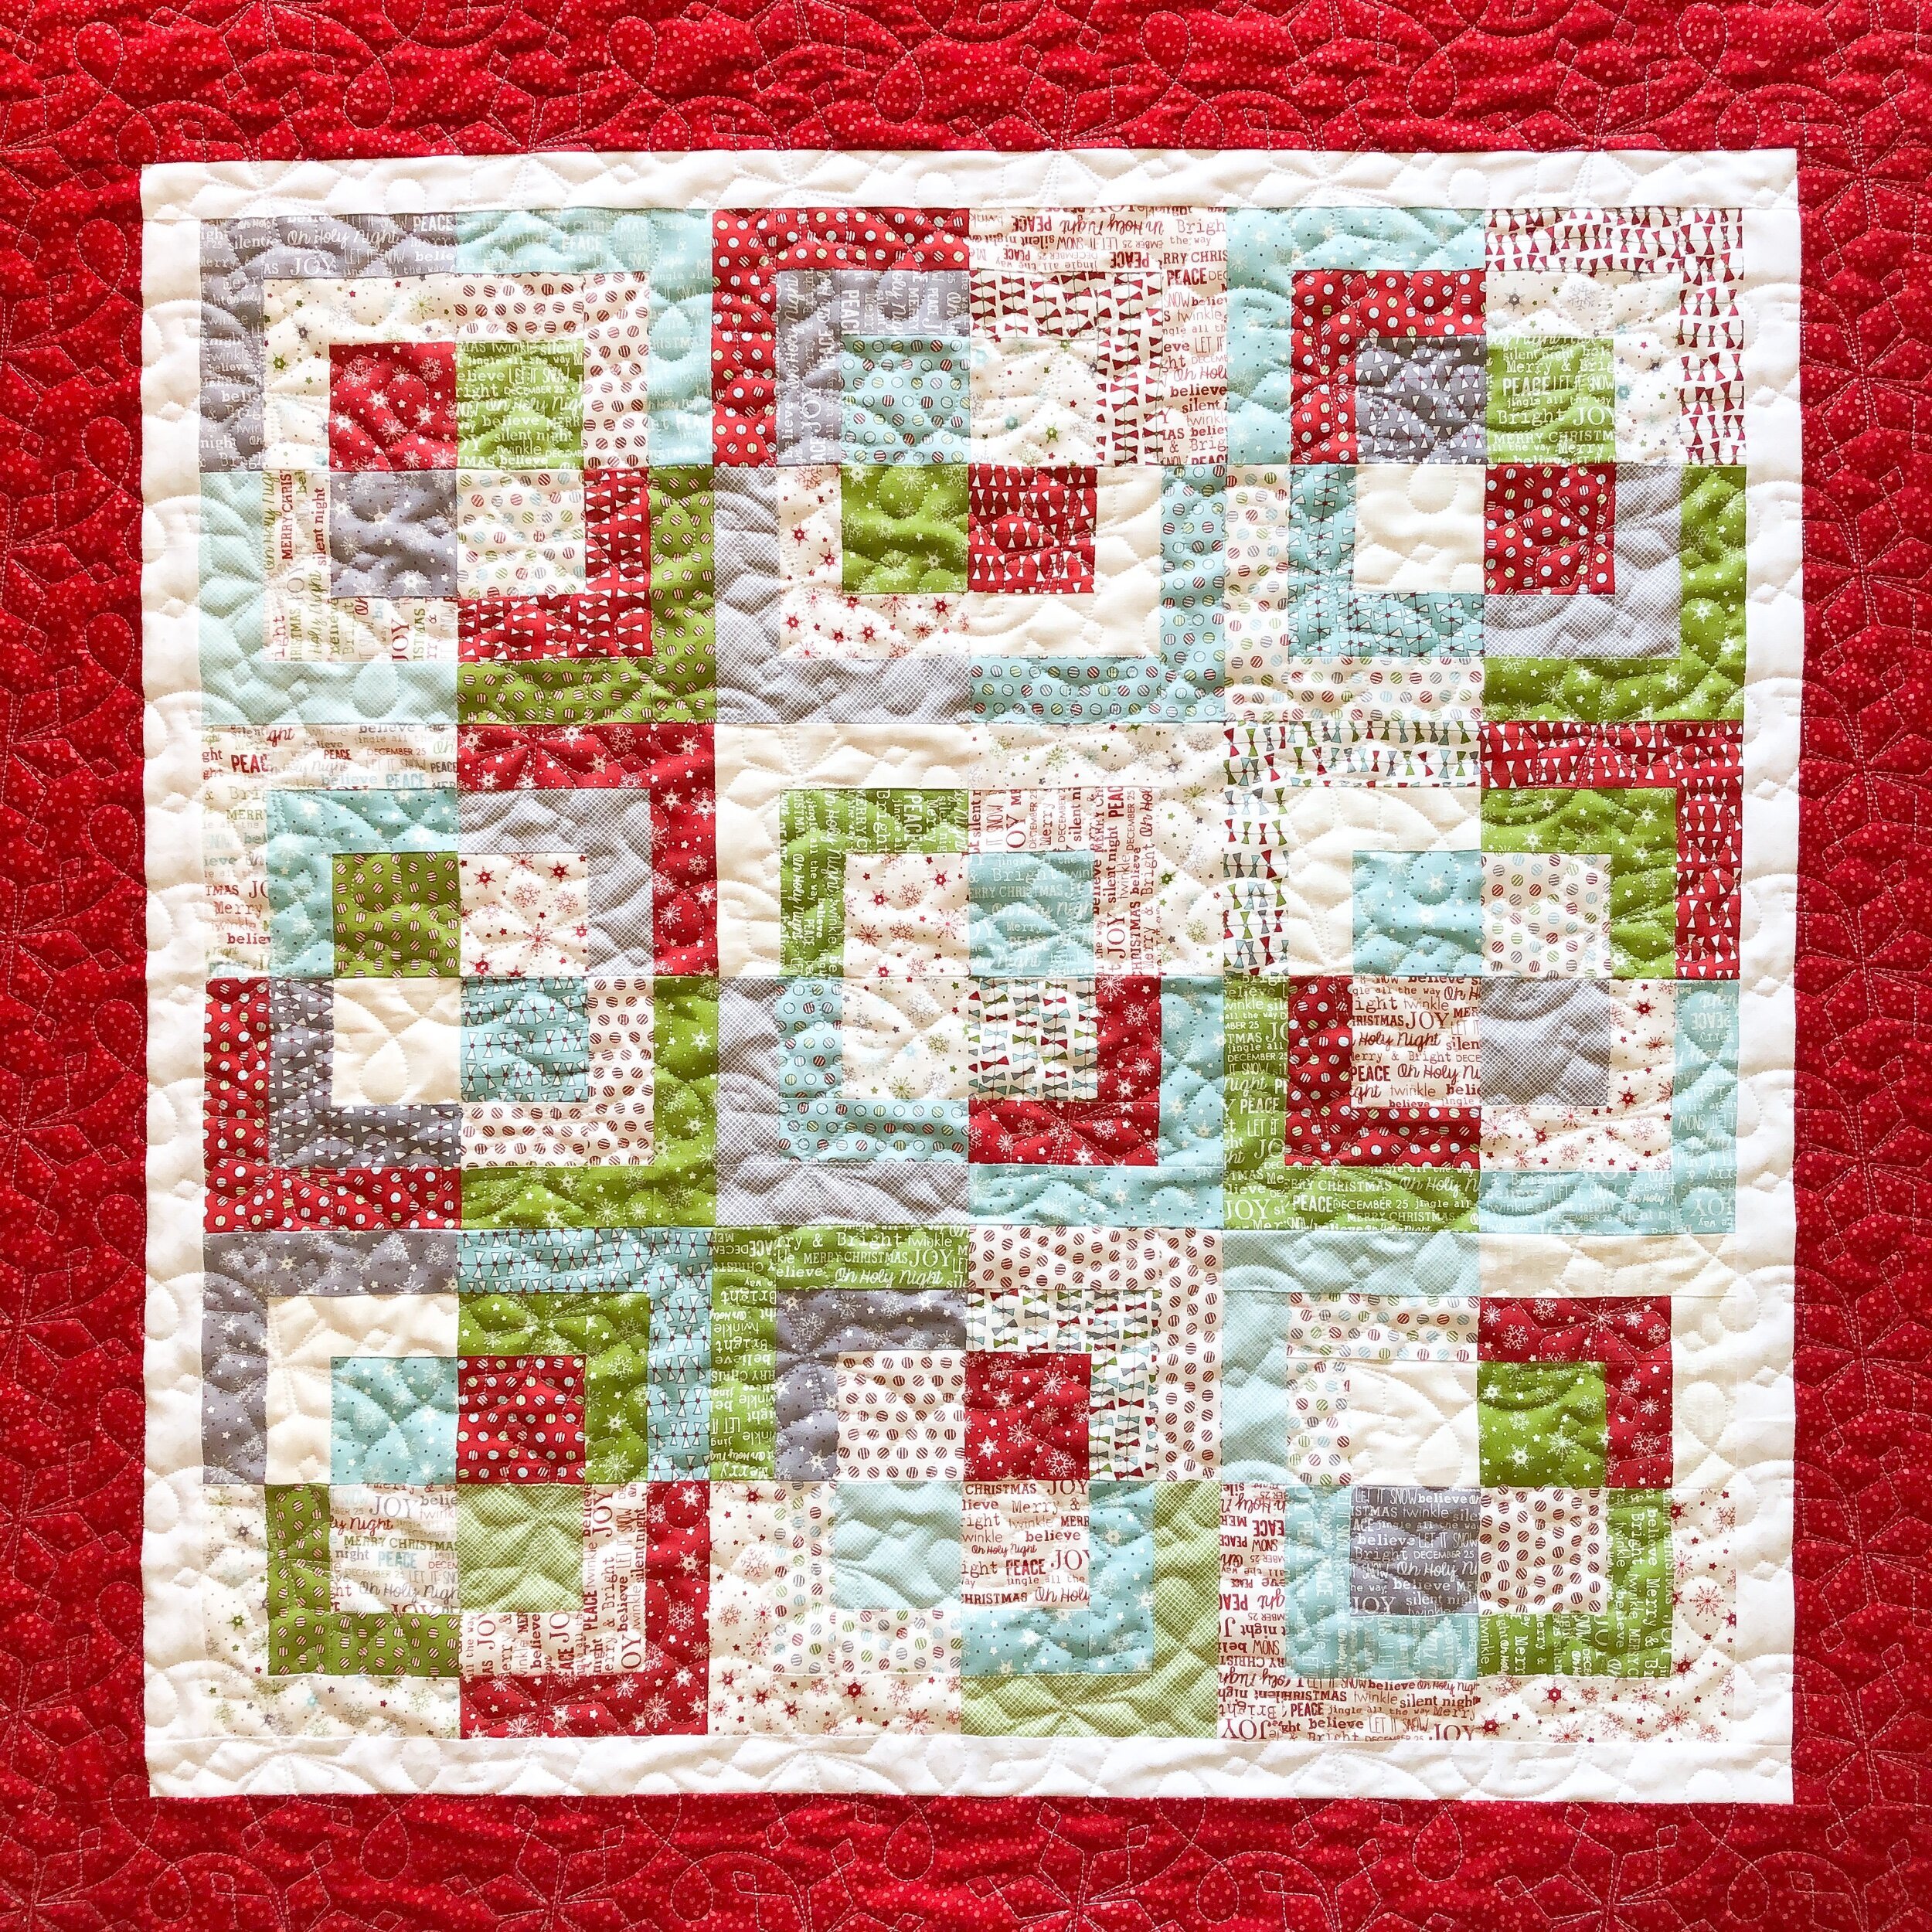
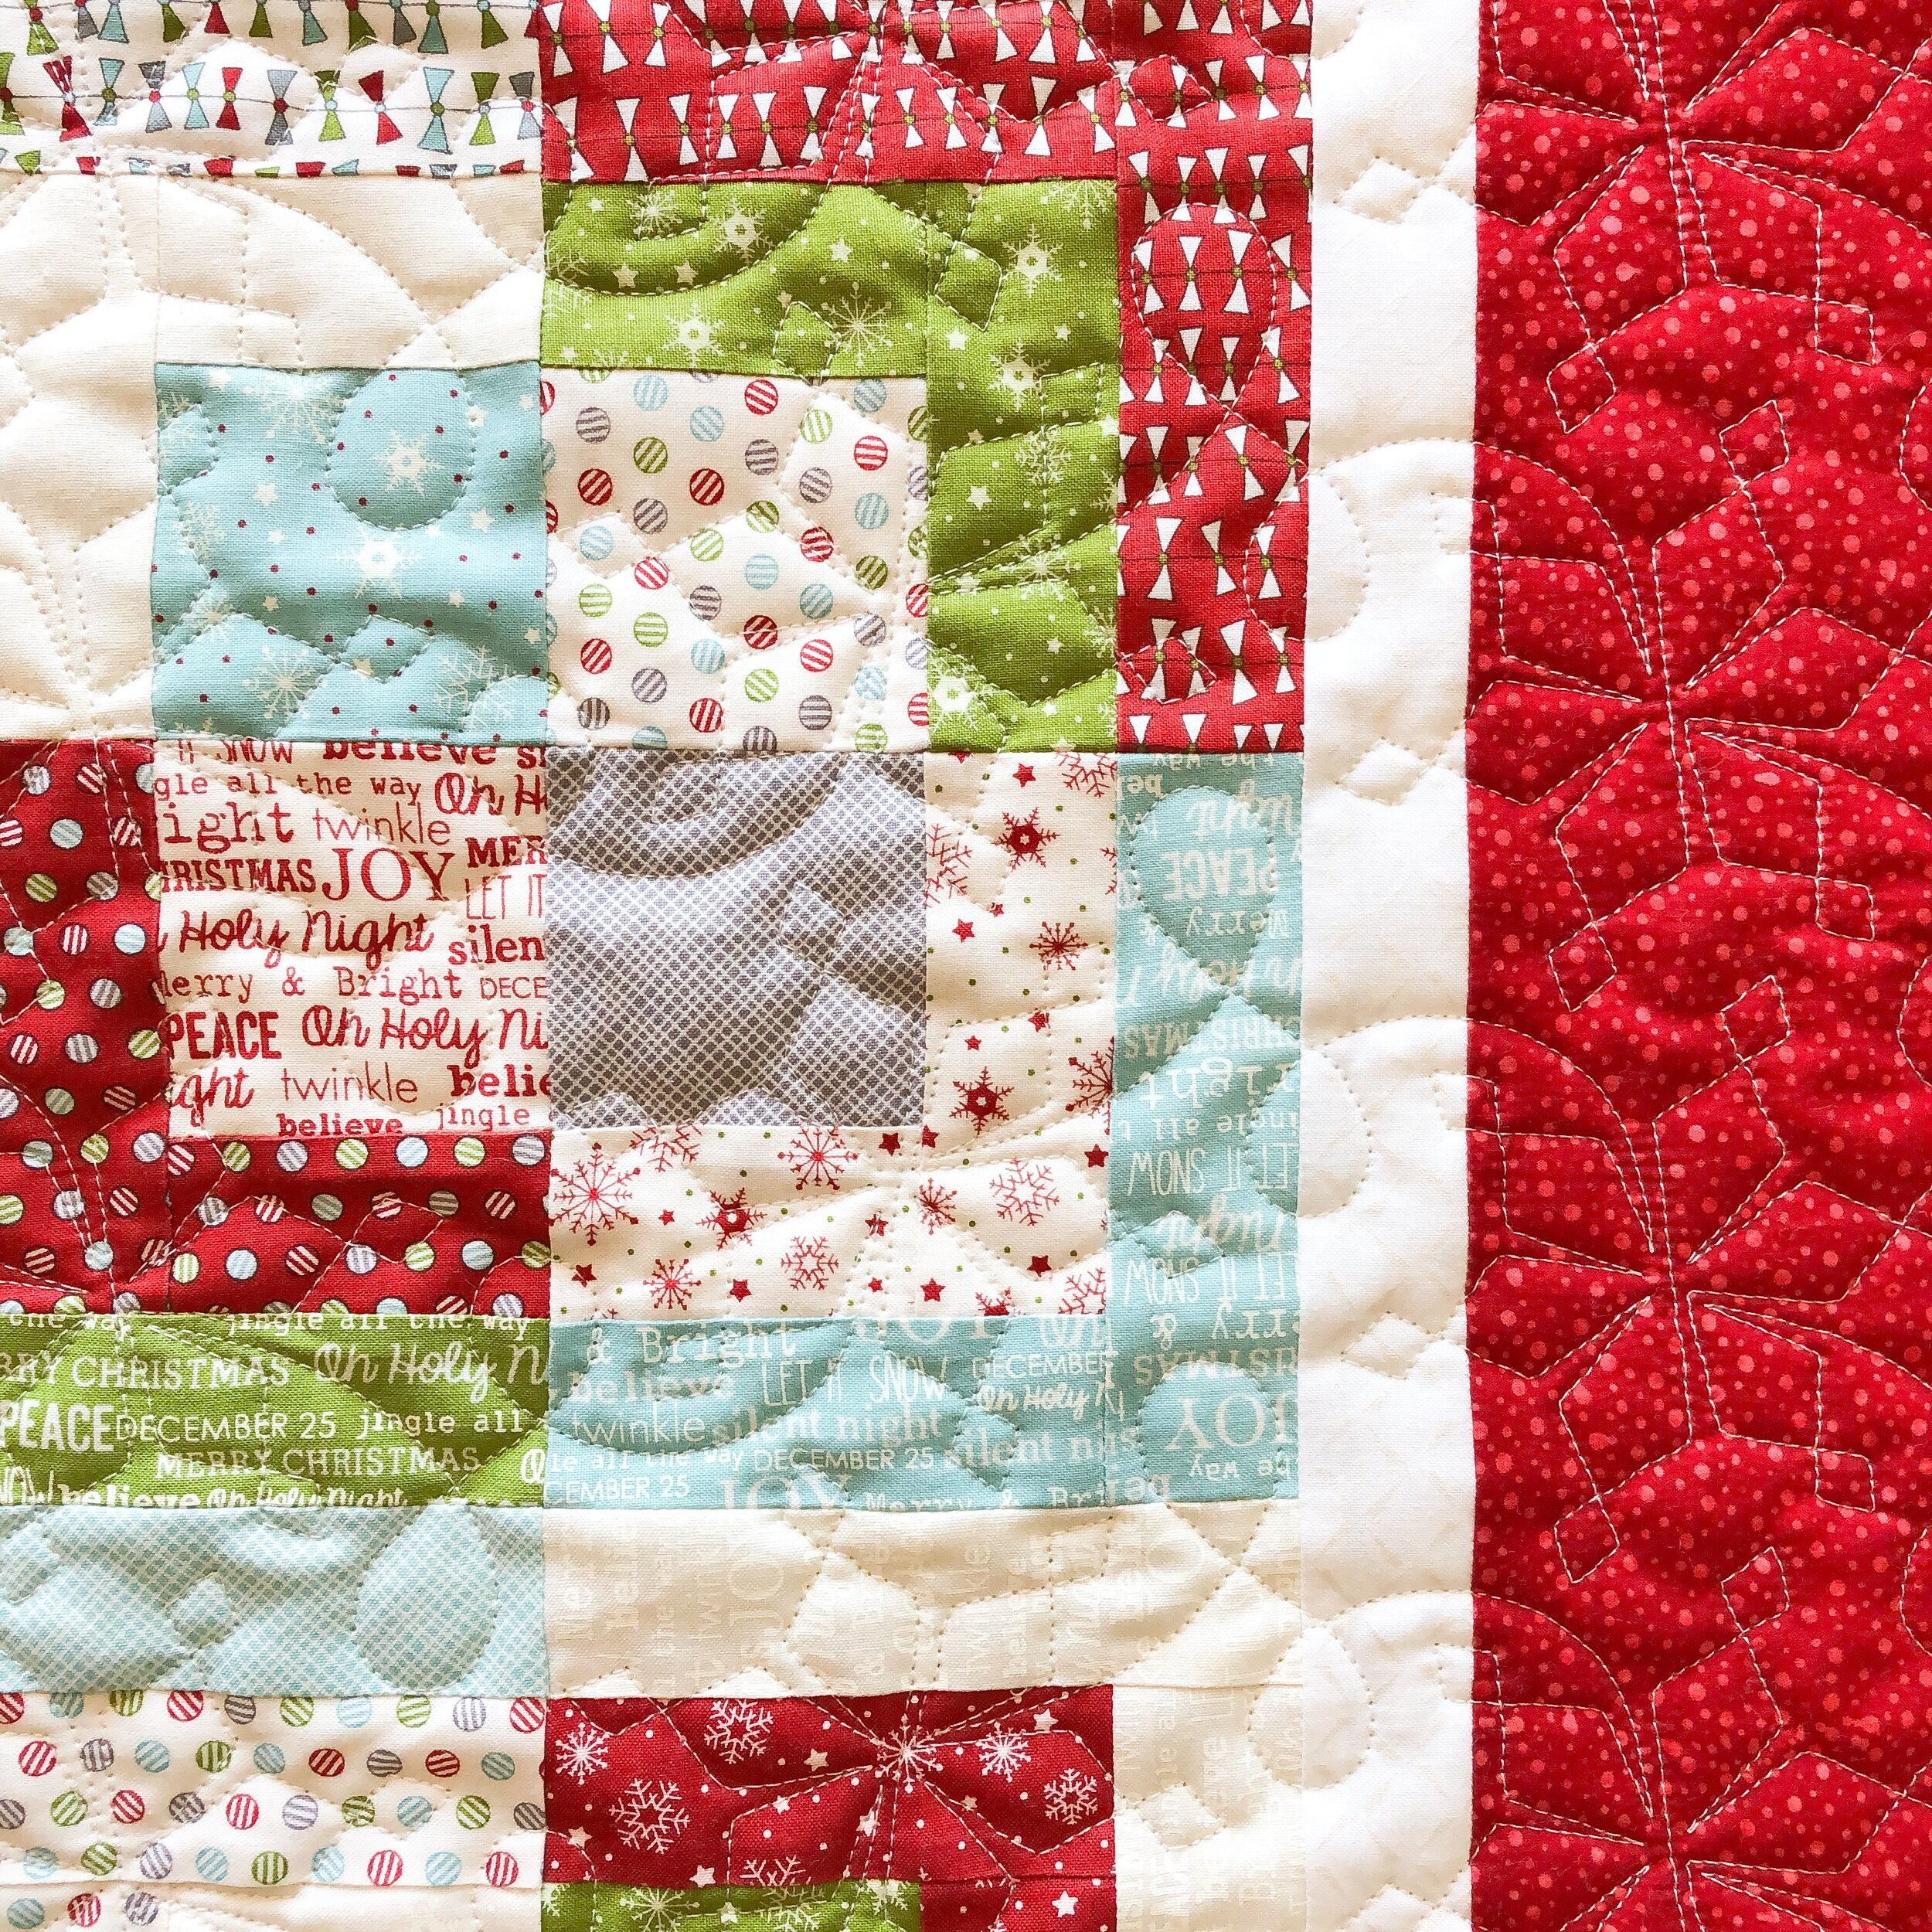
Debbie’s T-Shirt Quilt
Hello there,
I hope you’re doing well!! I got my second Covid vaccine yesterday, which I’m grateful for, but it sure has slowed me down. I think the worst of the side effects are over. I’m sitting on our front porch, it’s 77° f and a beautiful sunny day.
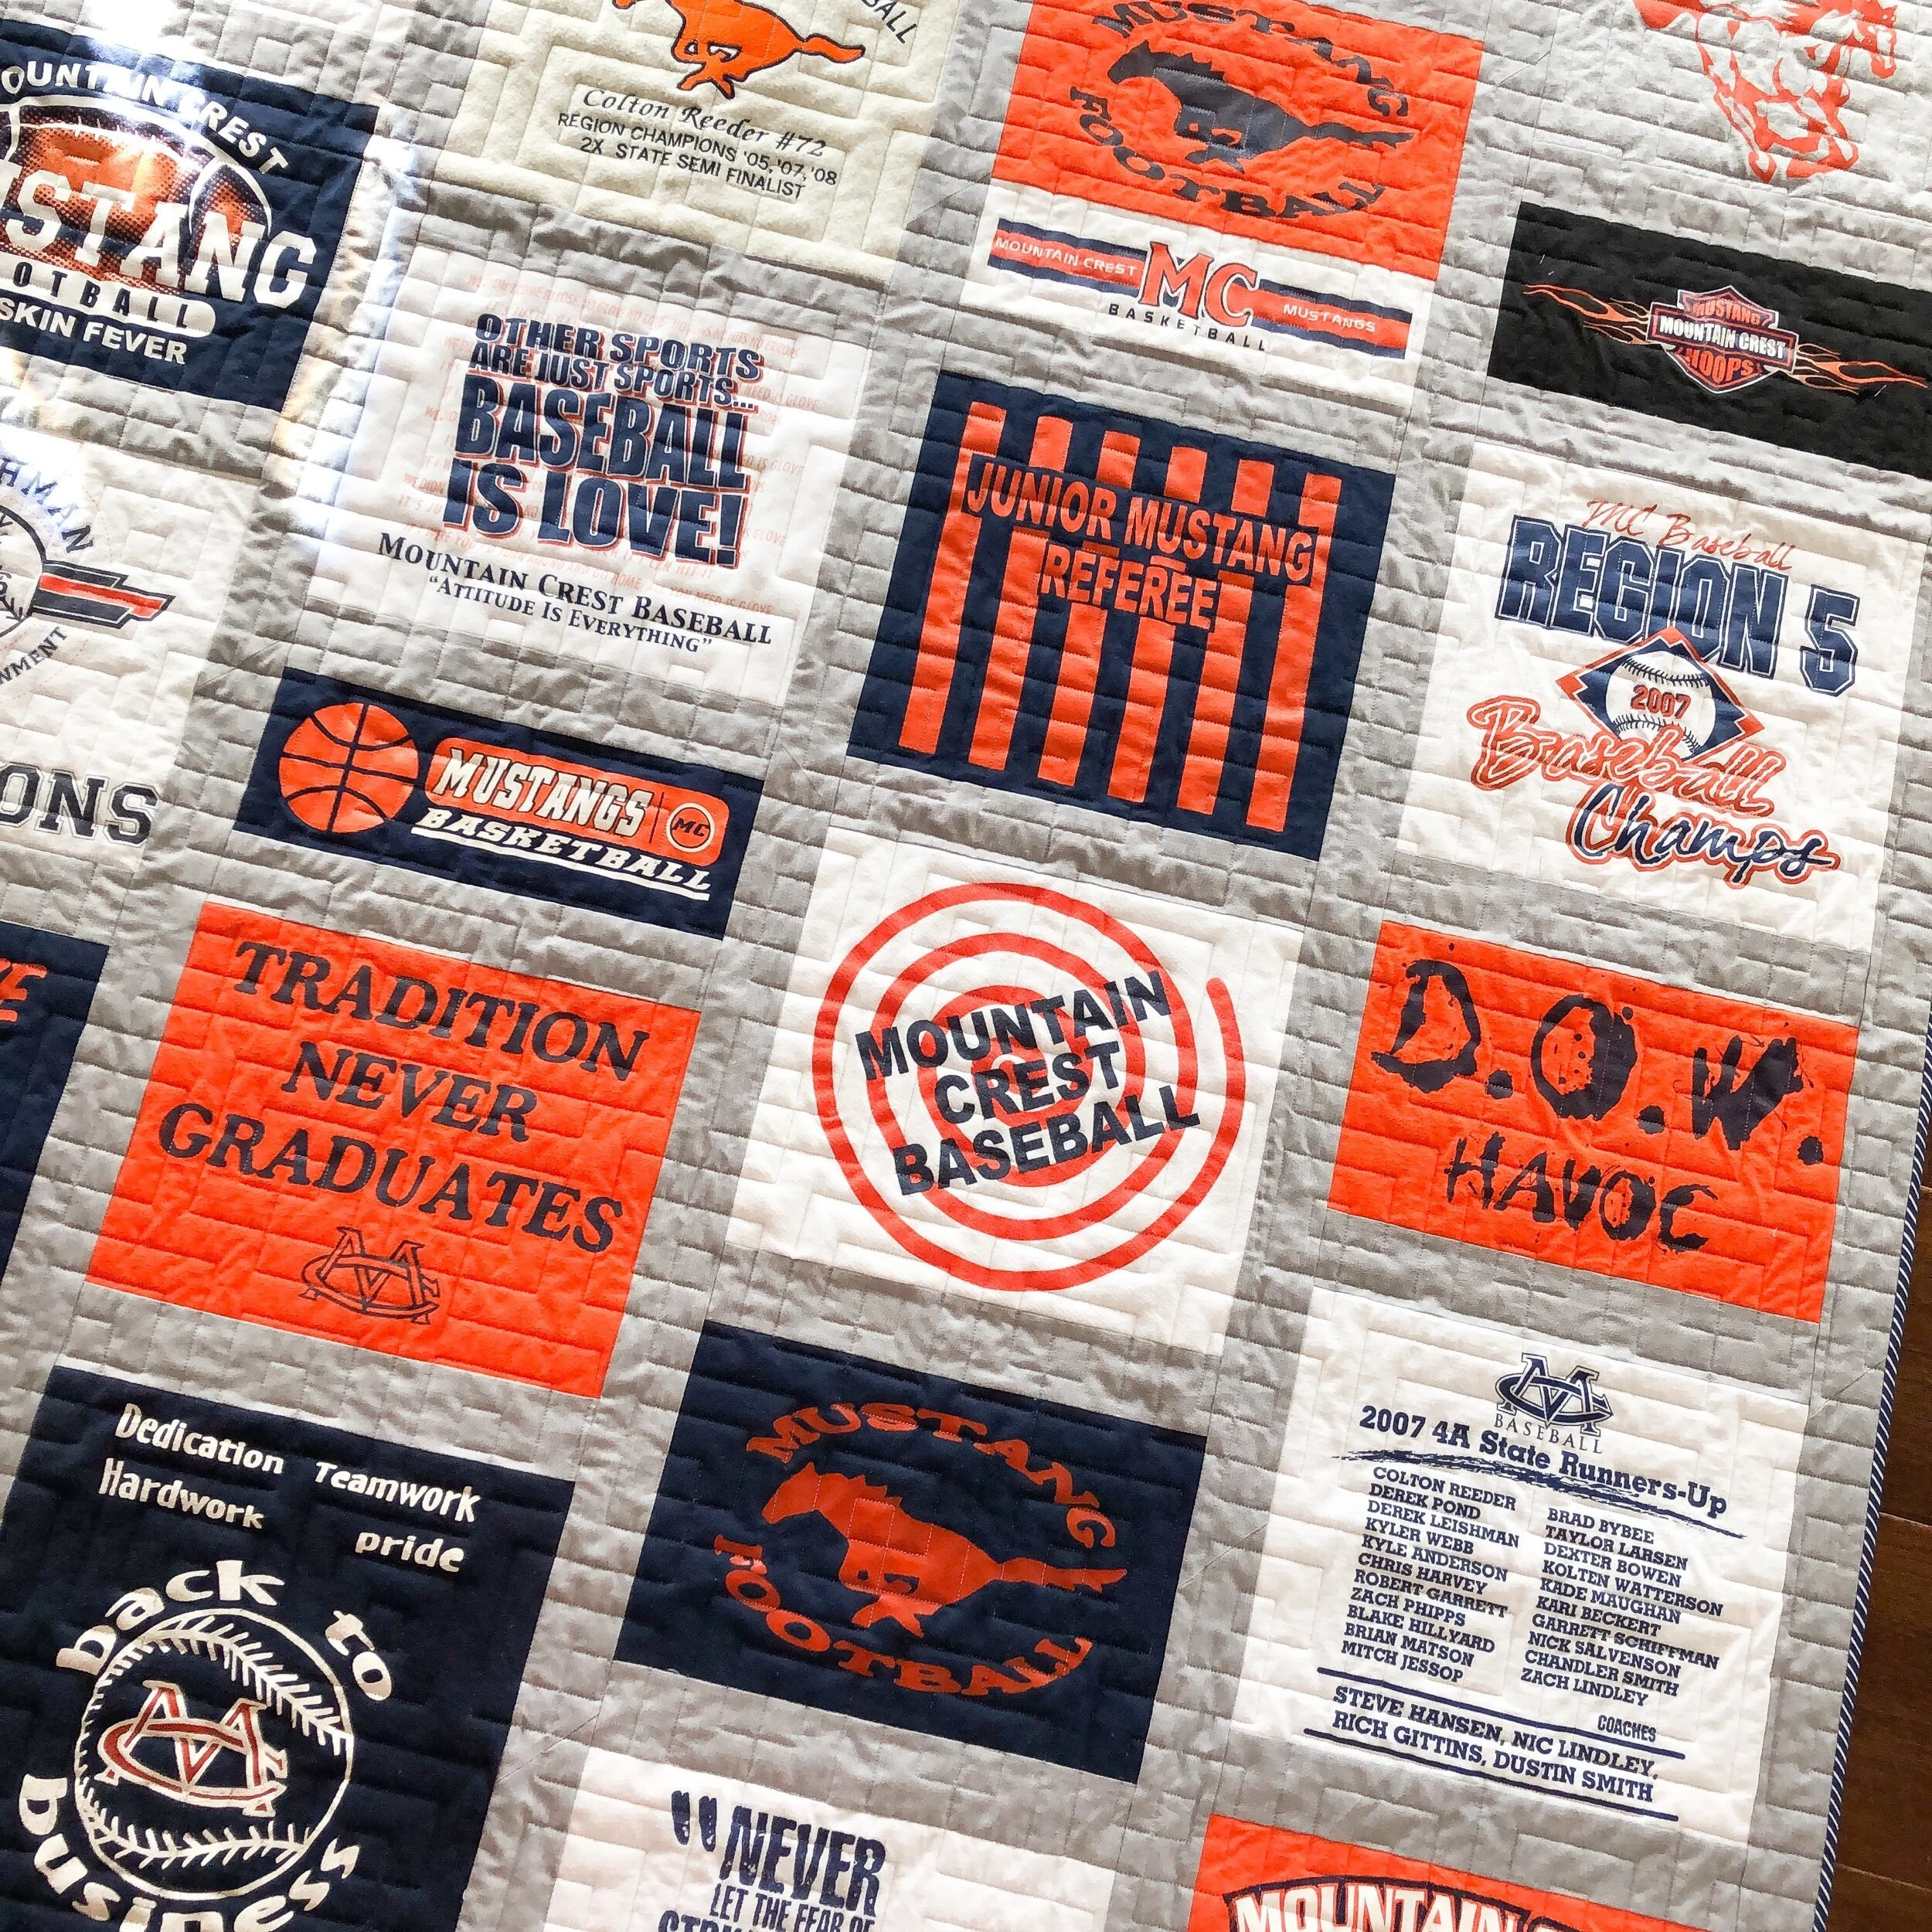
If you follow me over on Instagram, then you saw me make this quilt for my client Debbie. I made it using all her son’s high school shirts. Here is a link to my Instagram stories…there are actually two links, I couldn’t fit them all in one. The great thing about Instagram, it allows me to share videos in the stories feature, and then allows me to save them in a highlight bubble. Which gives me the opportunity to walk you through step by step.
This is the first one: https://www.instagram.com/s/aGlnaGxpZ2h0OjE3ODY1MTg3MjQ0MzgxMzAx?story_media_id=2517287054063112084&igshid=psji3jpxllhv
This is the second one: https://www.instagram.com/s/aGlnaGxpZ2h0OjE4MTk4OTI1NjU3MDIyODU1?story_media_id=2517873591590947806&igshid=8drlmwx9u9p2

I showed Debbie a few options, and she liked the t-shirt quilts that have the shirts trimmed close to the logos. To help make it easier for me, all the shirts are cut the same width. The height is what I cut to fit the logos for each shirt. I love how it turned out!!
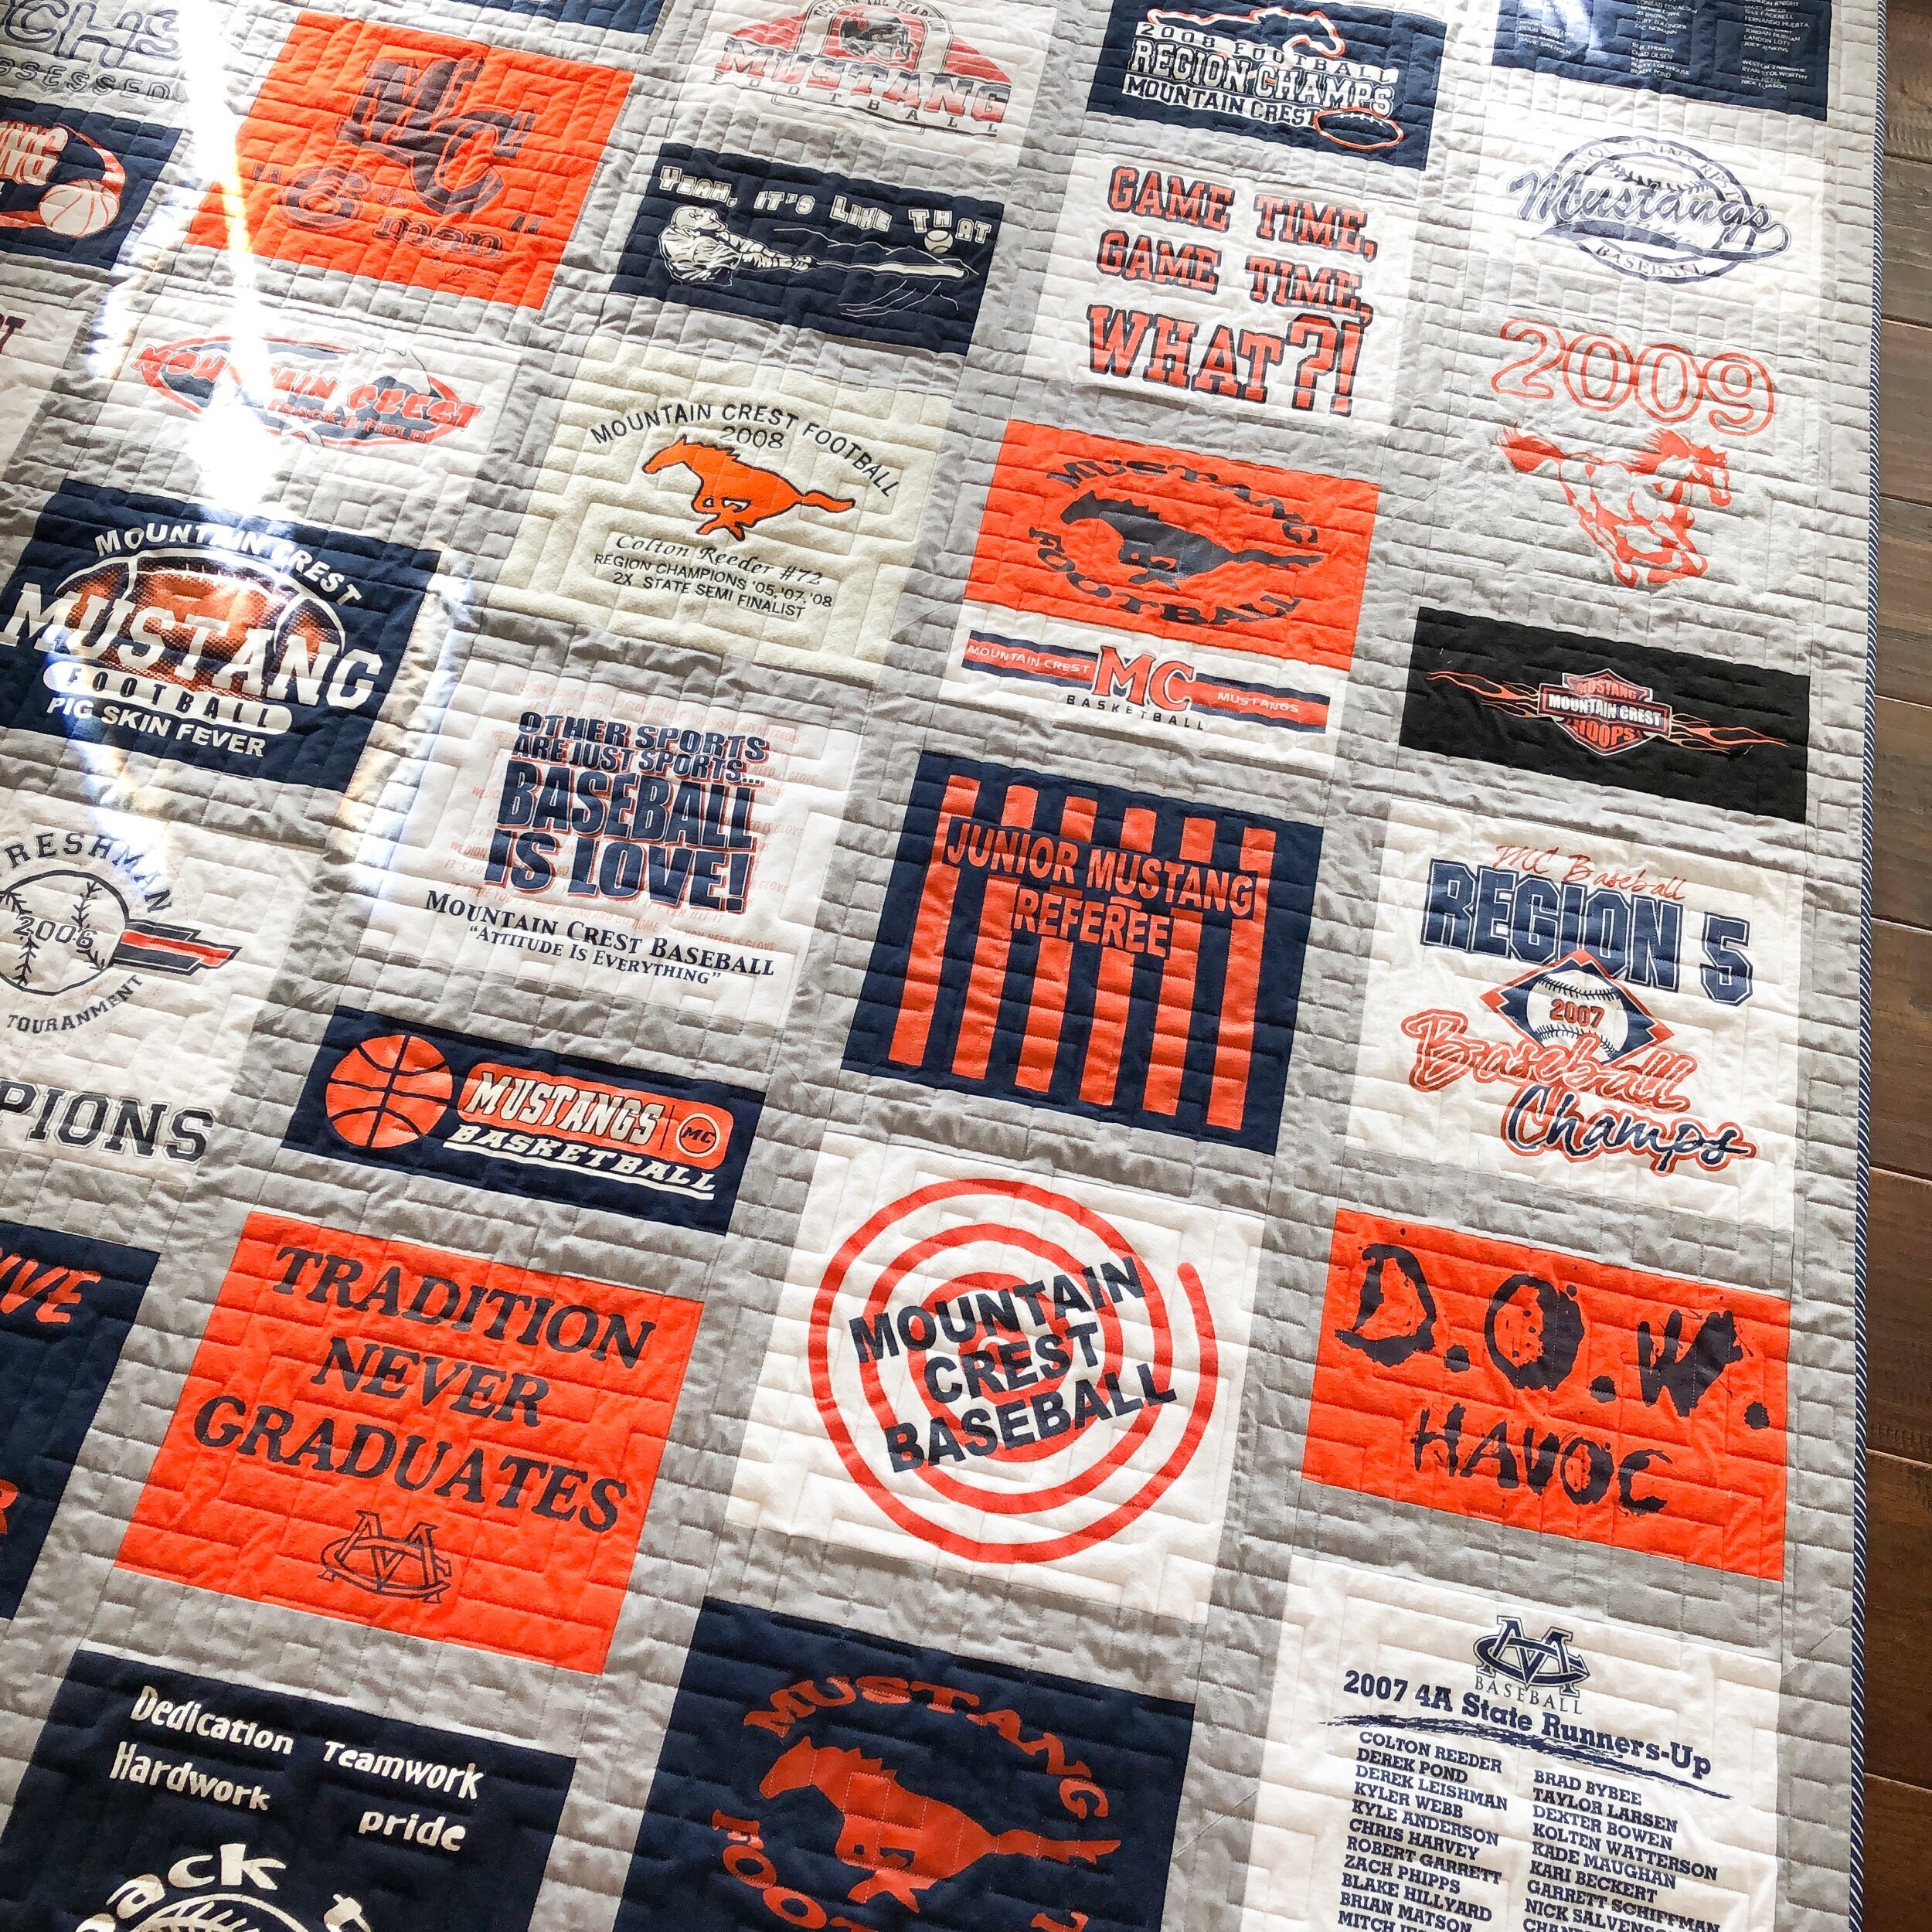
I used a Pellon to stabilize the shirts, found at JoAnn’s, called Apparel Interfacing - Basics 931TD fusible midweight. It helps the shirts not stretch. I use a paper towel over the logos so they don’t melt onto the iron. And, after a while I needed a new paper towel because it pressed too thin. Be mindful of that. Also, make sure you press it as good as you can. Sometimes it doesn’t stick to older shirts very well.

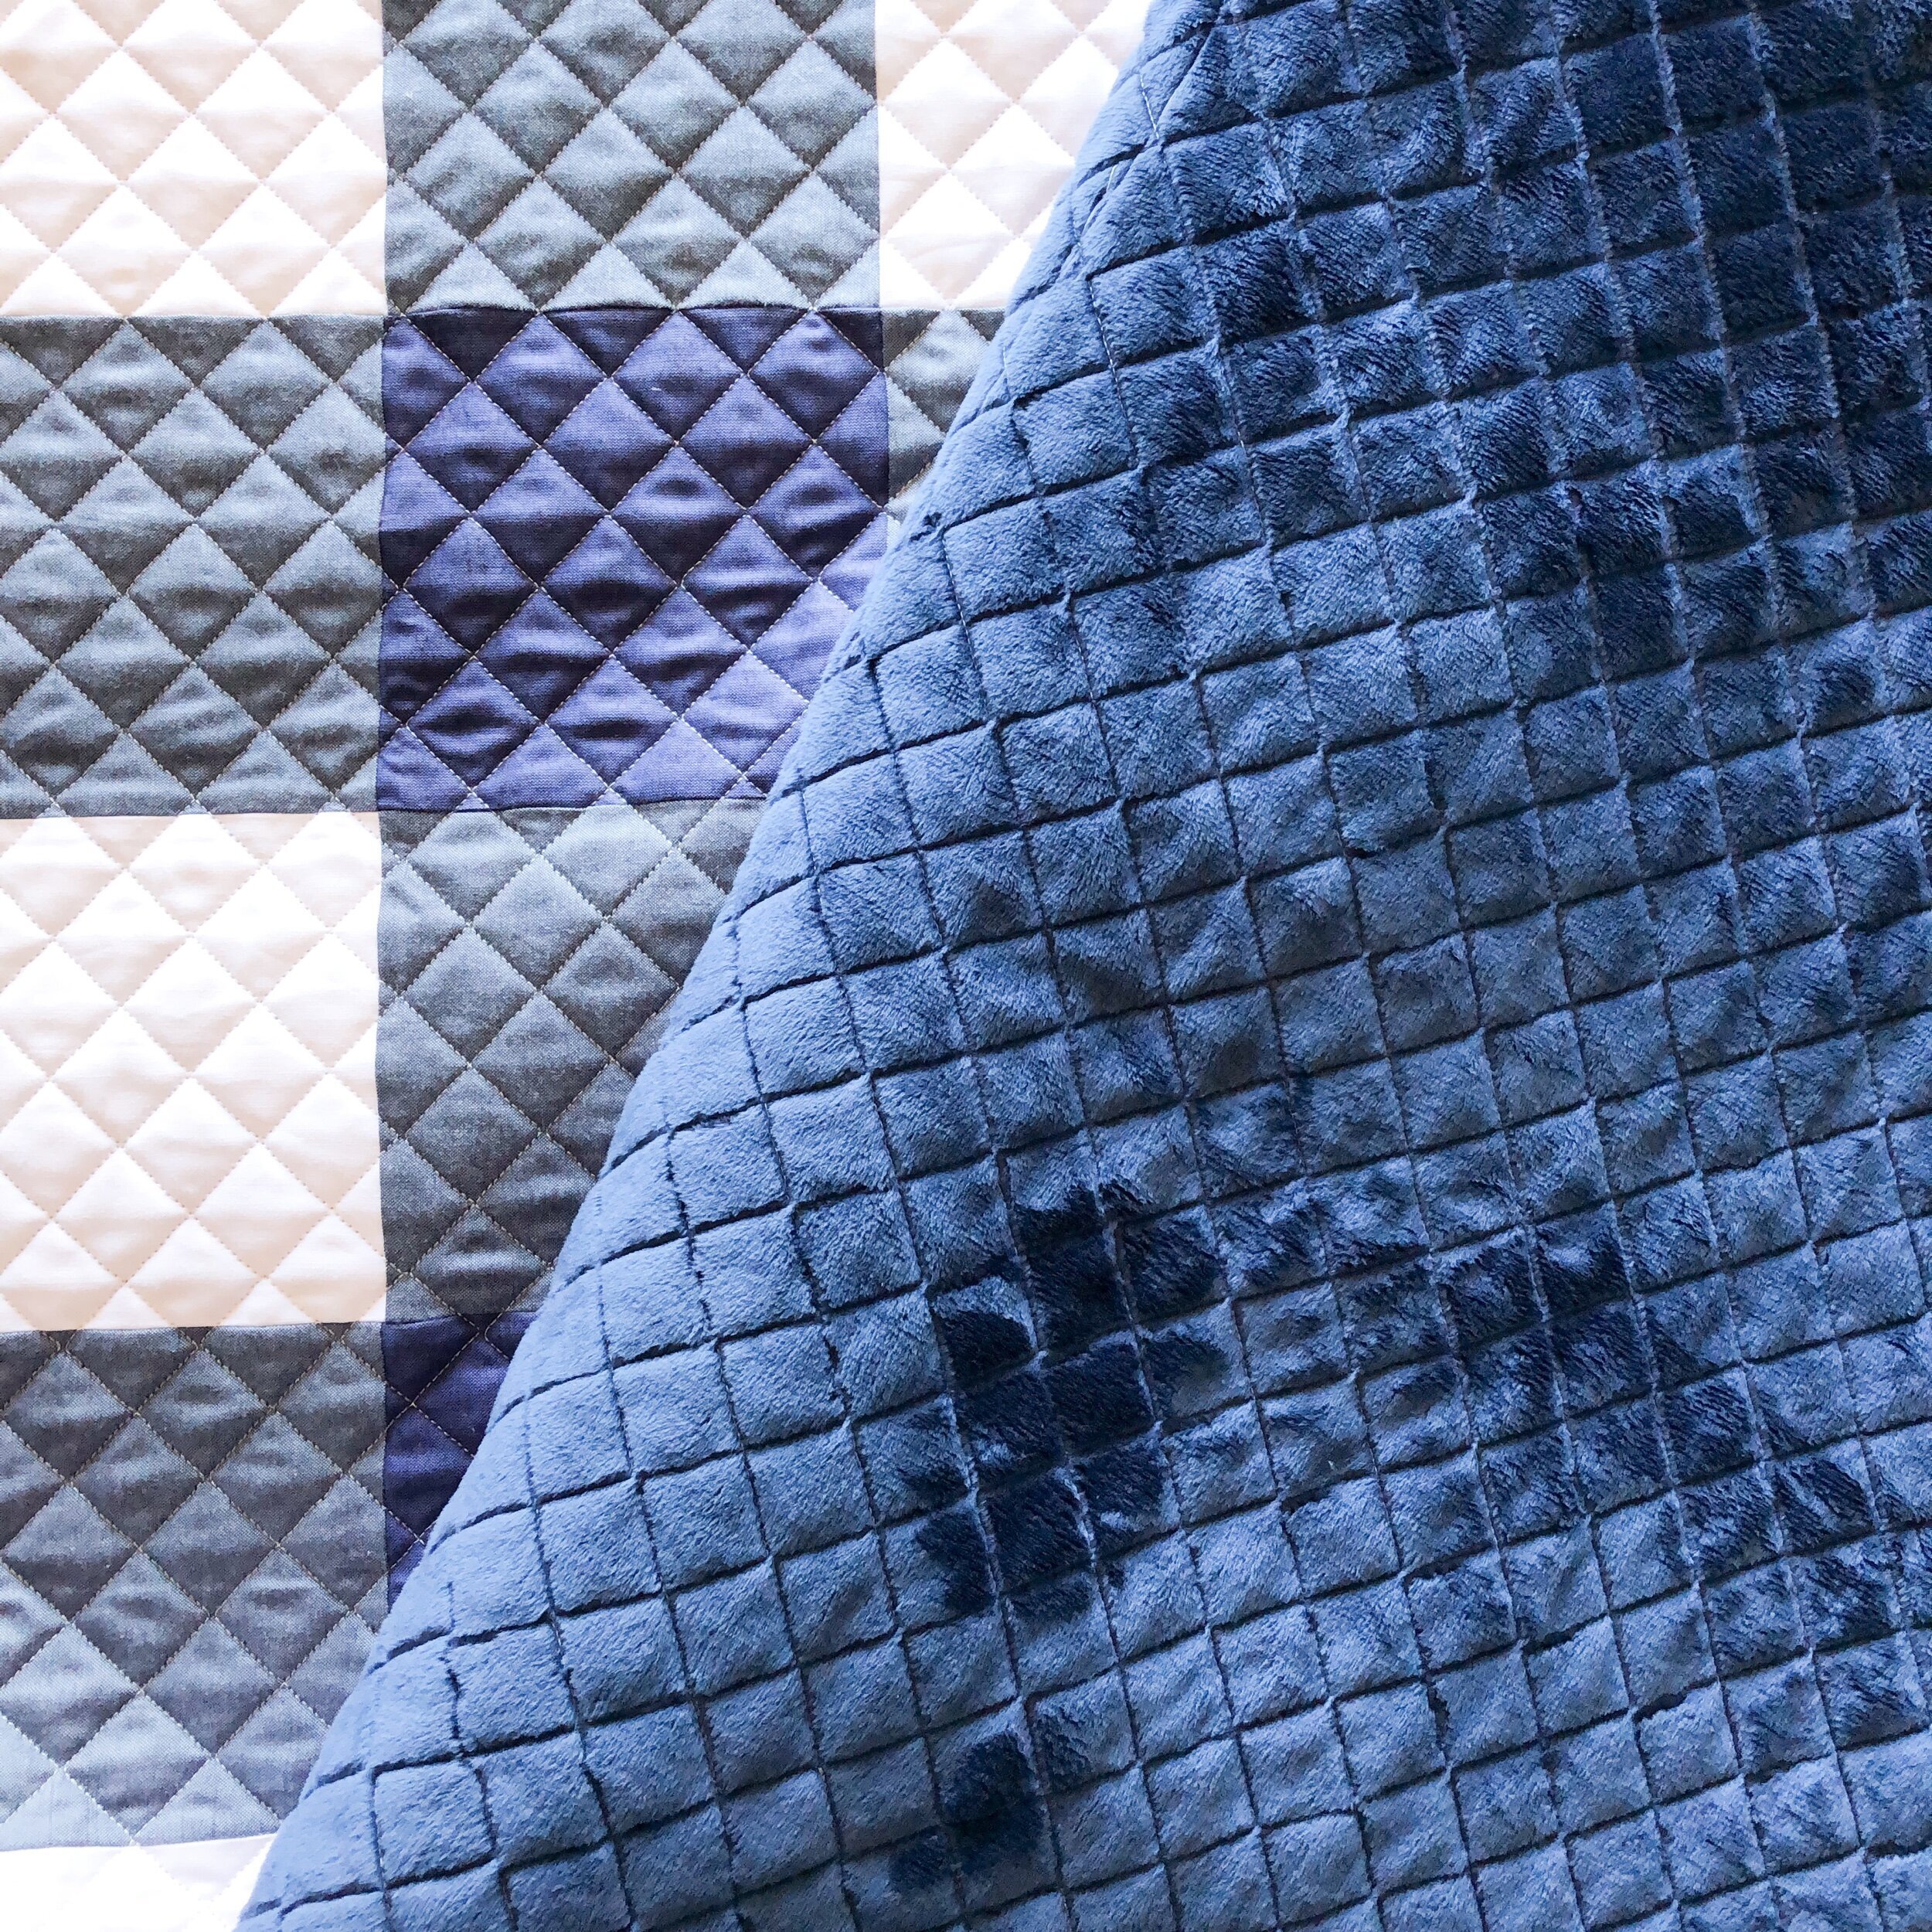
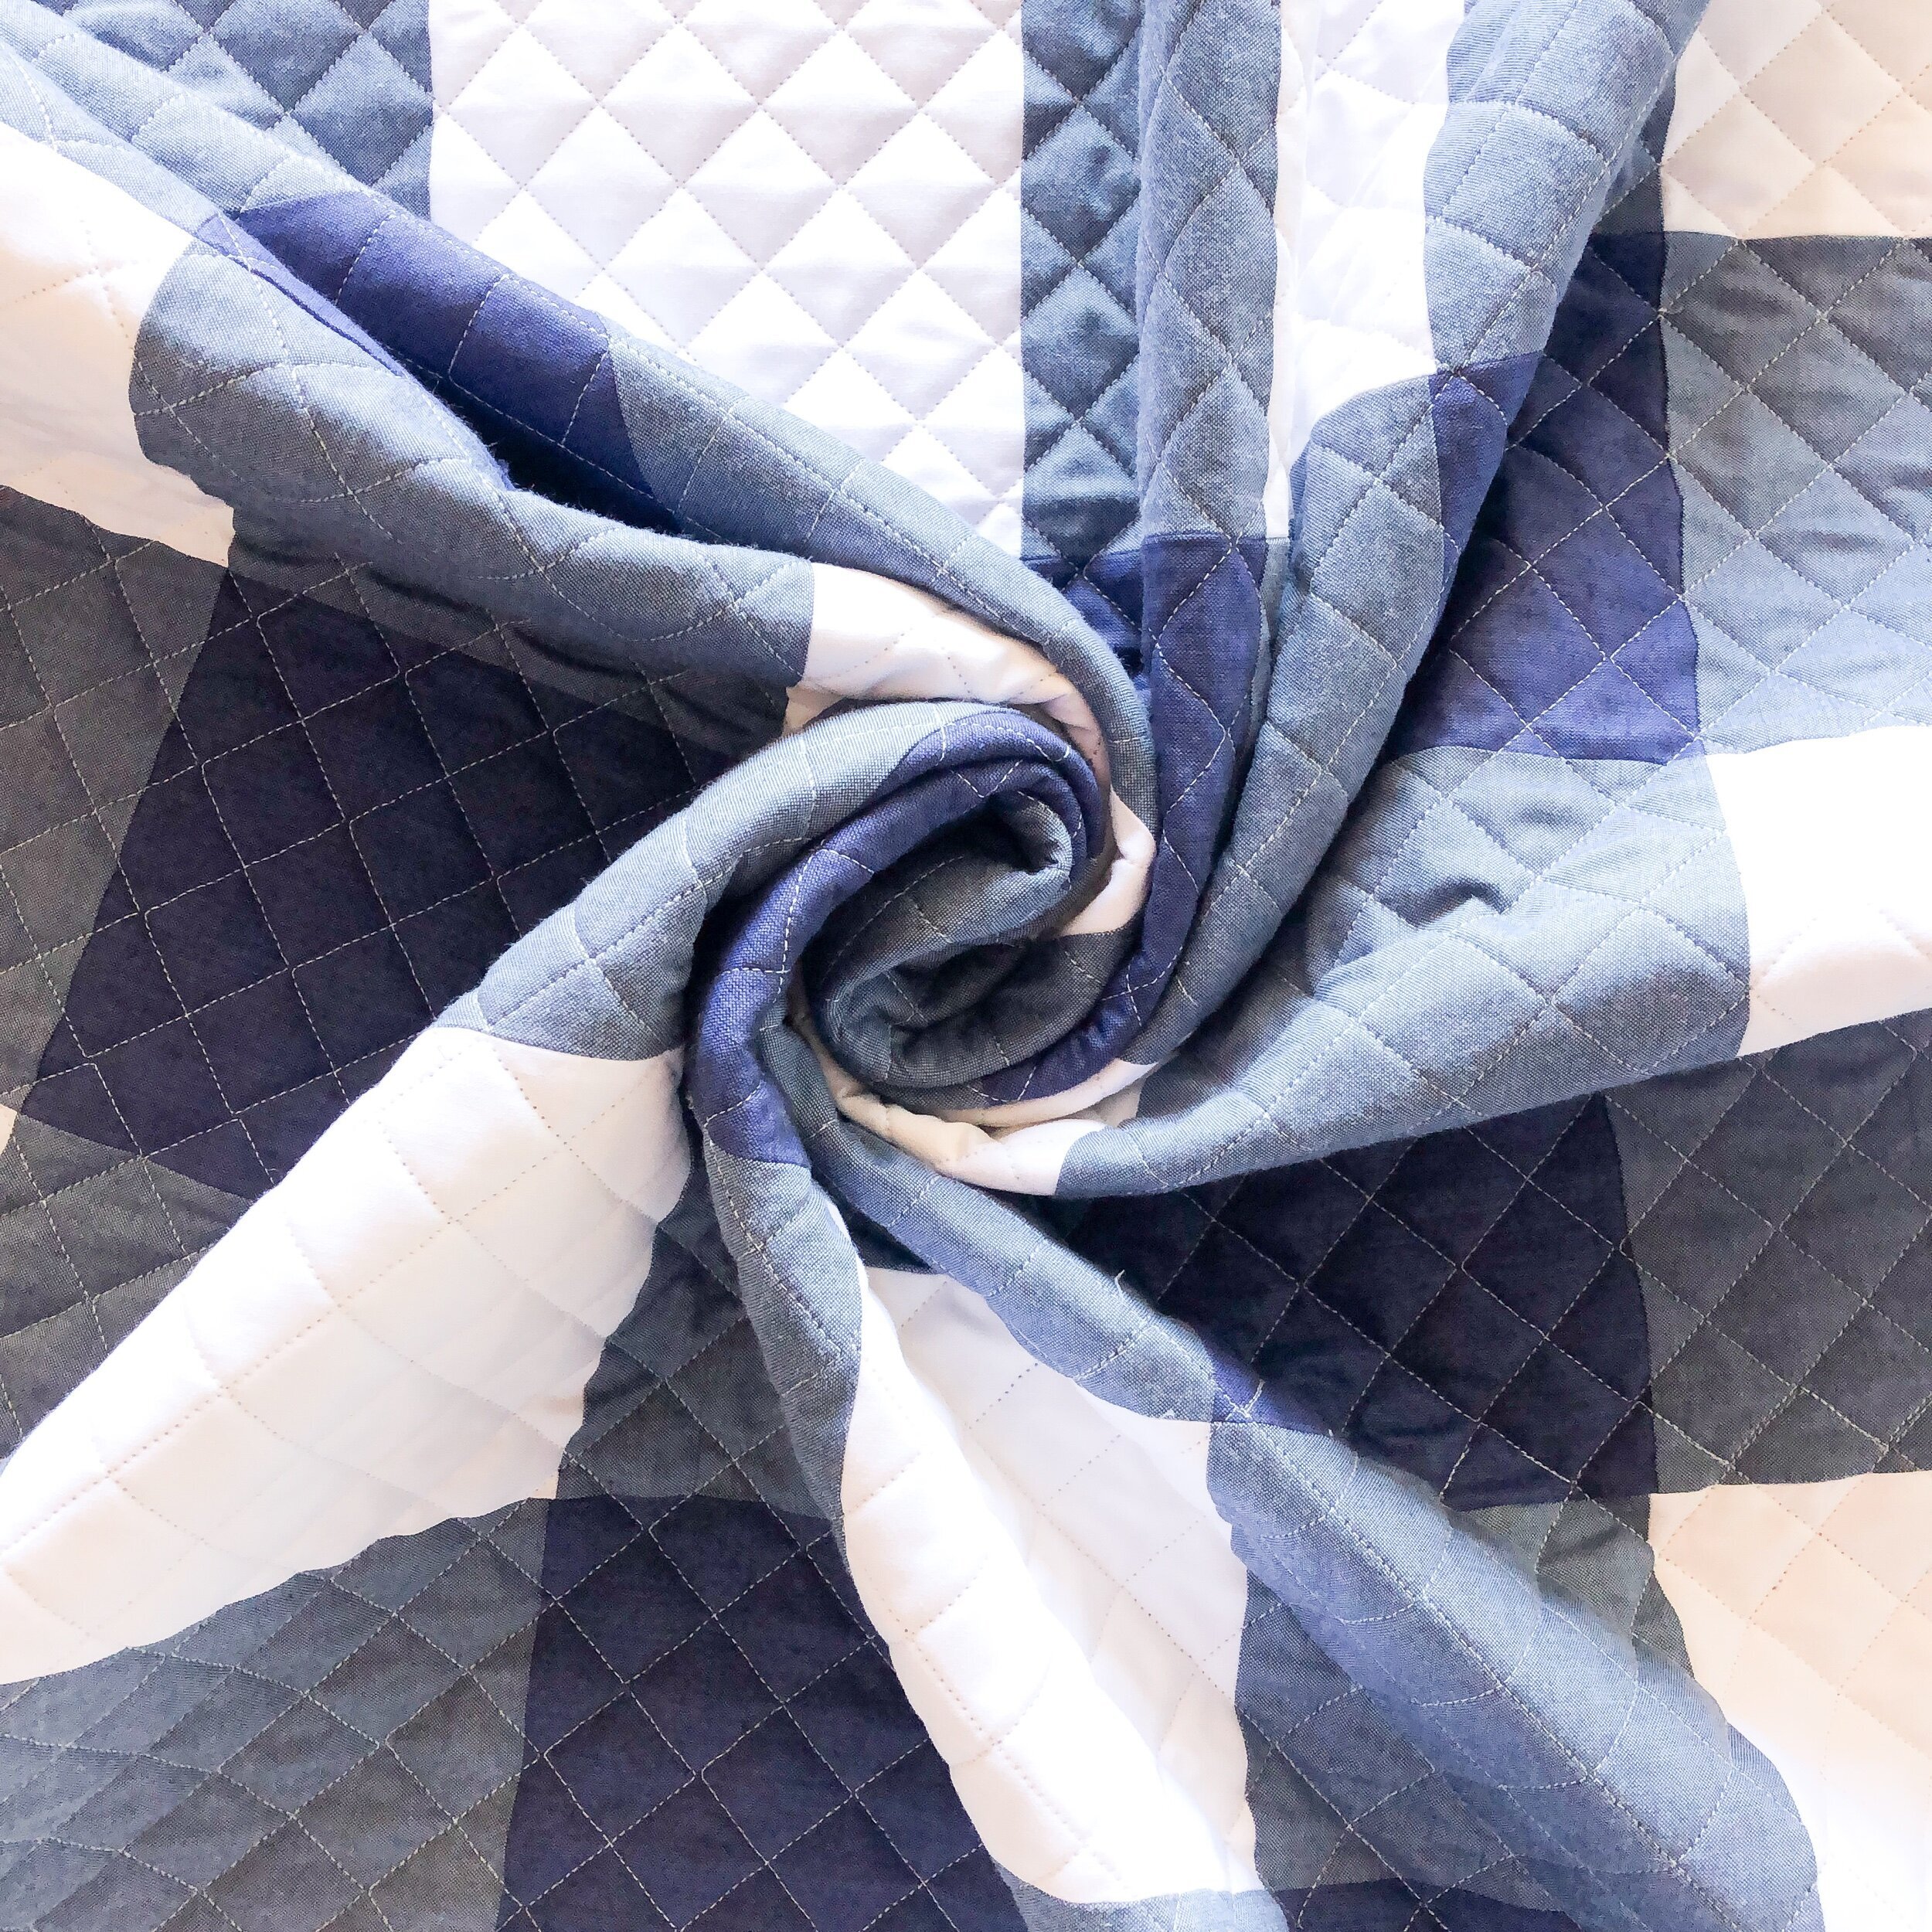
I used a gray cross weave from Moda, that I got from Sisters and Quilters. I think I used the graphite color, for the sashing. I used a navy pinstripe that I cut on the bias, for the binding…also from Sisters and Quilters, and a navy buffalo plaid for the backing.

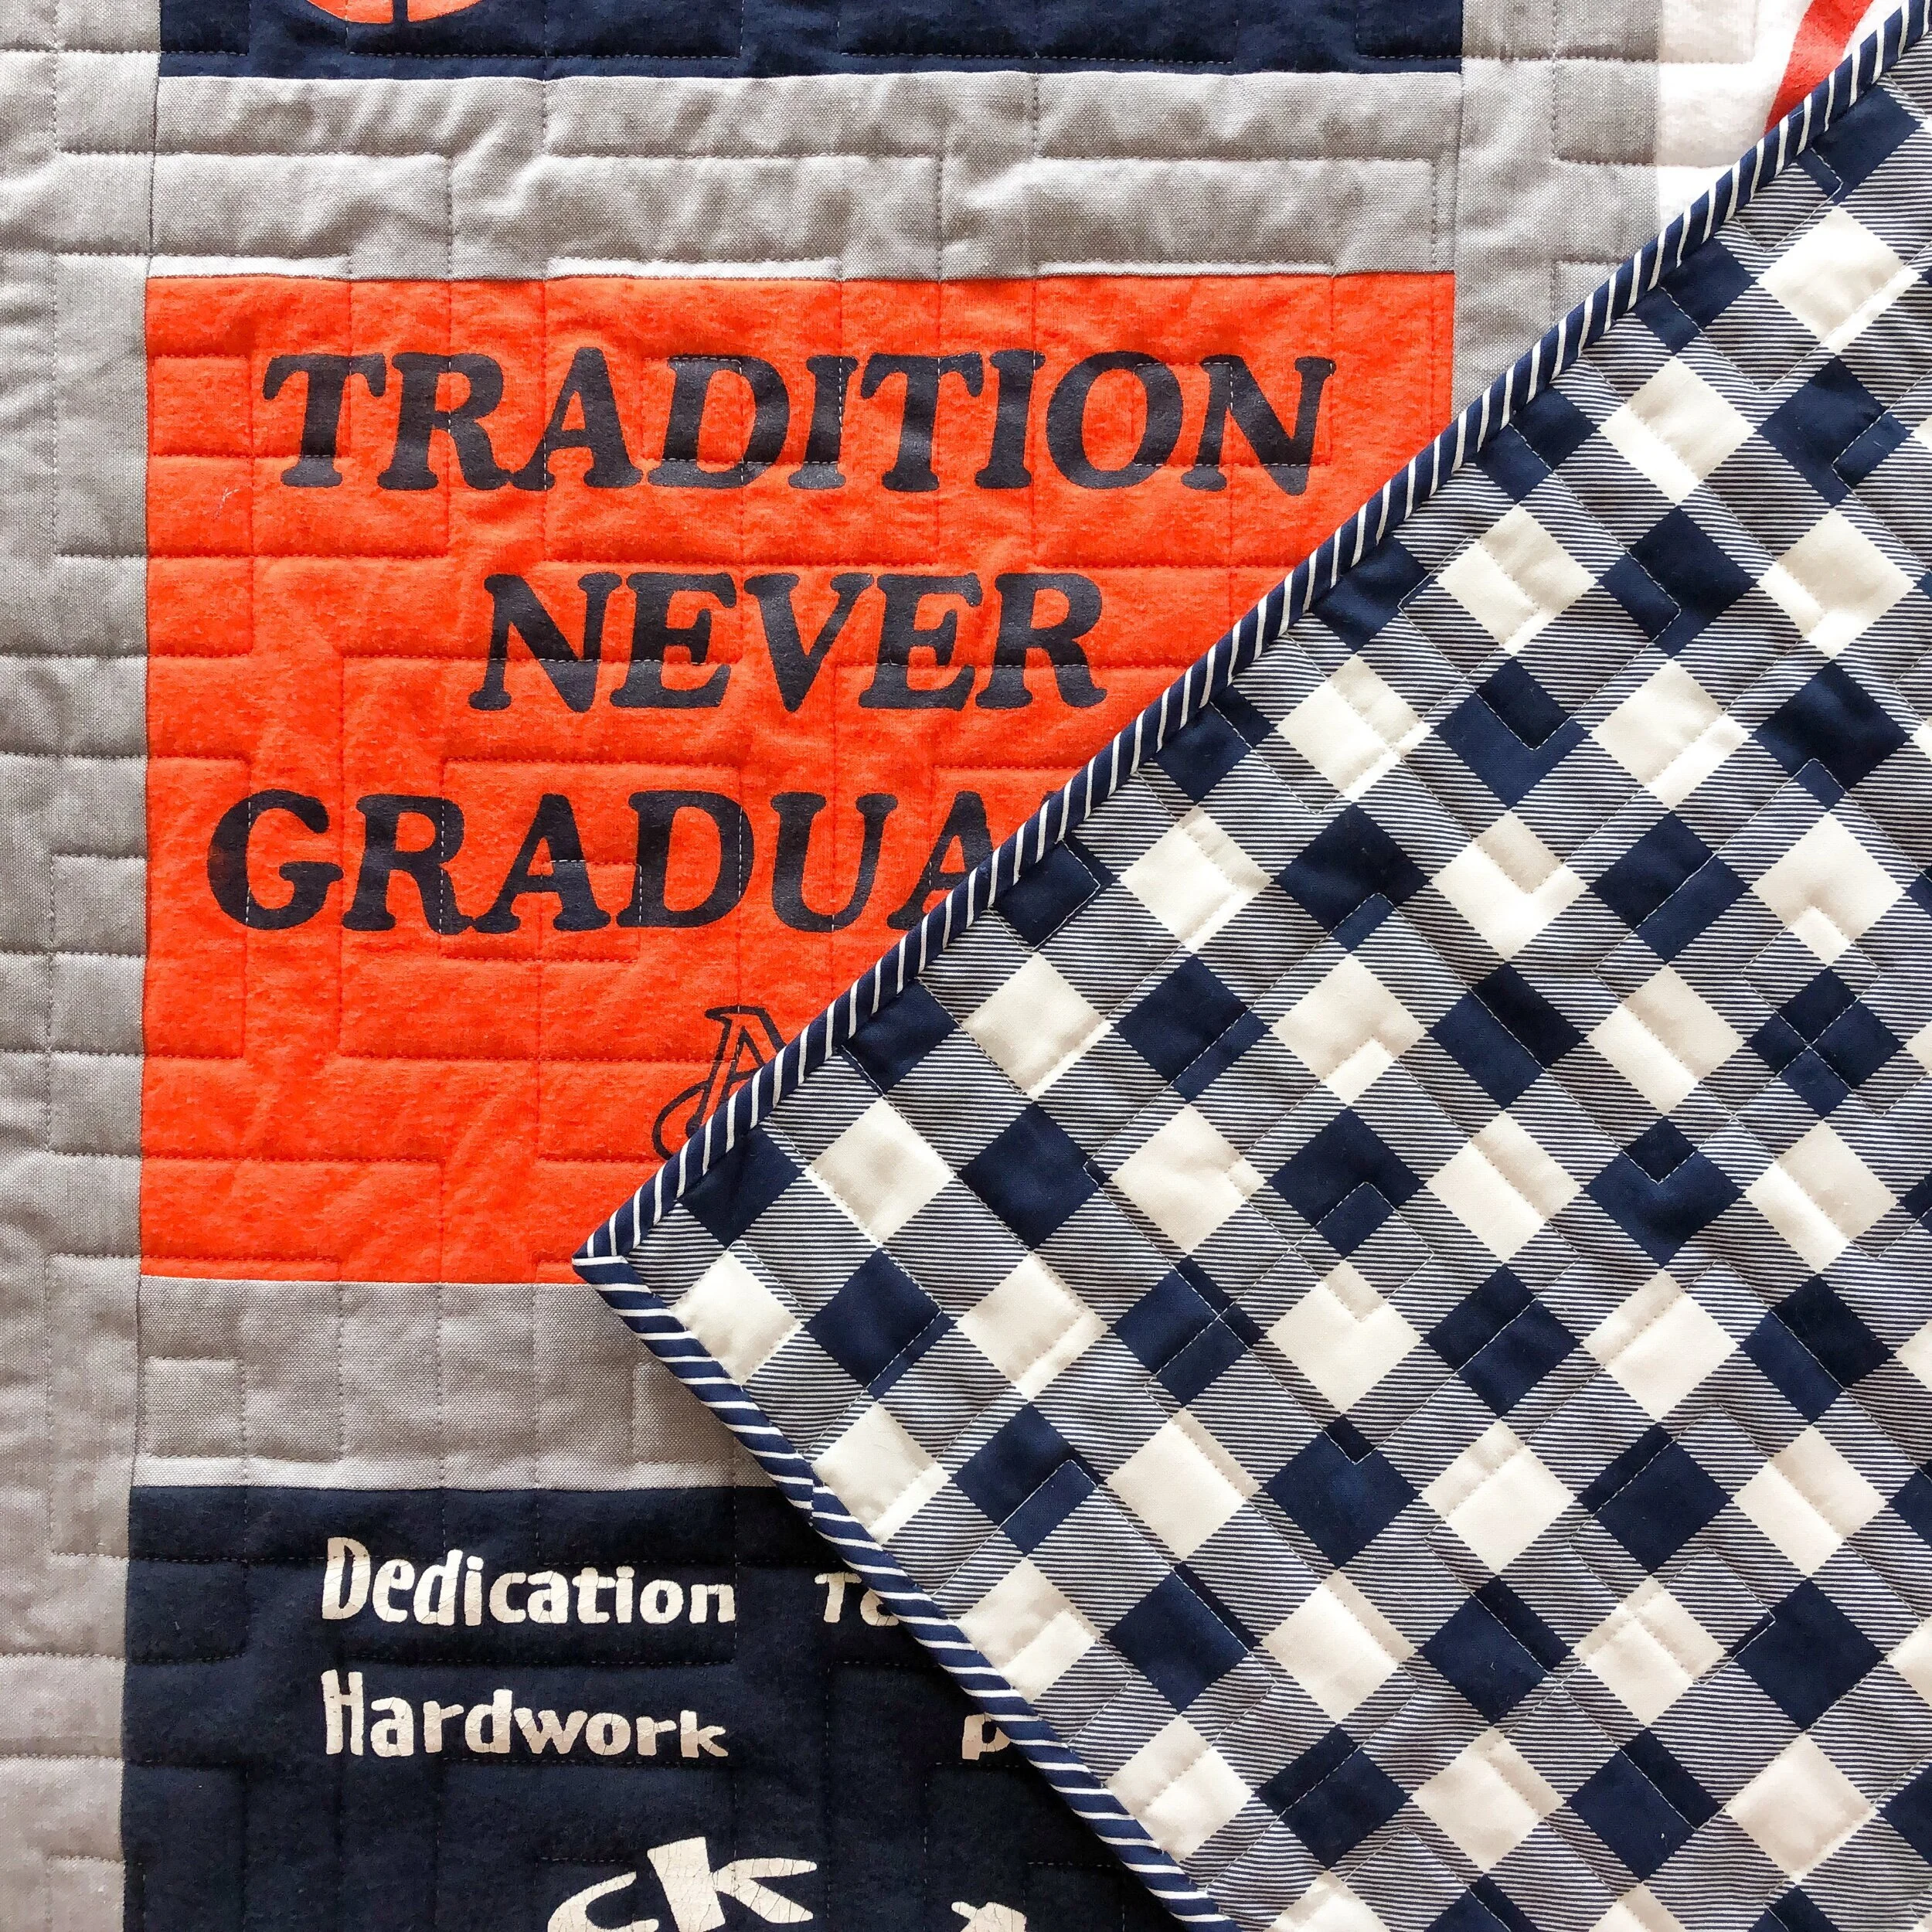
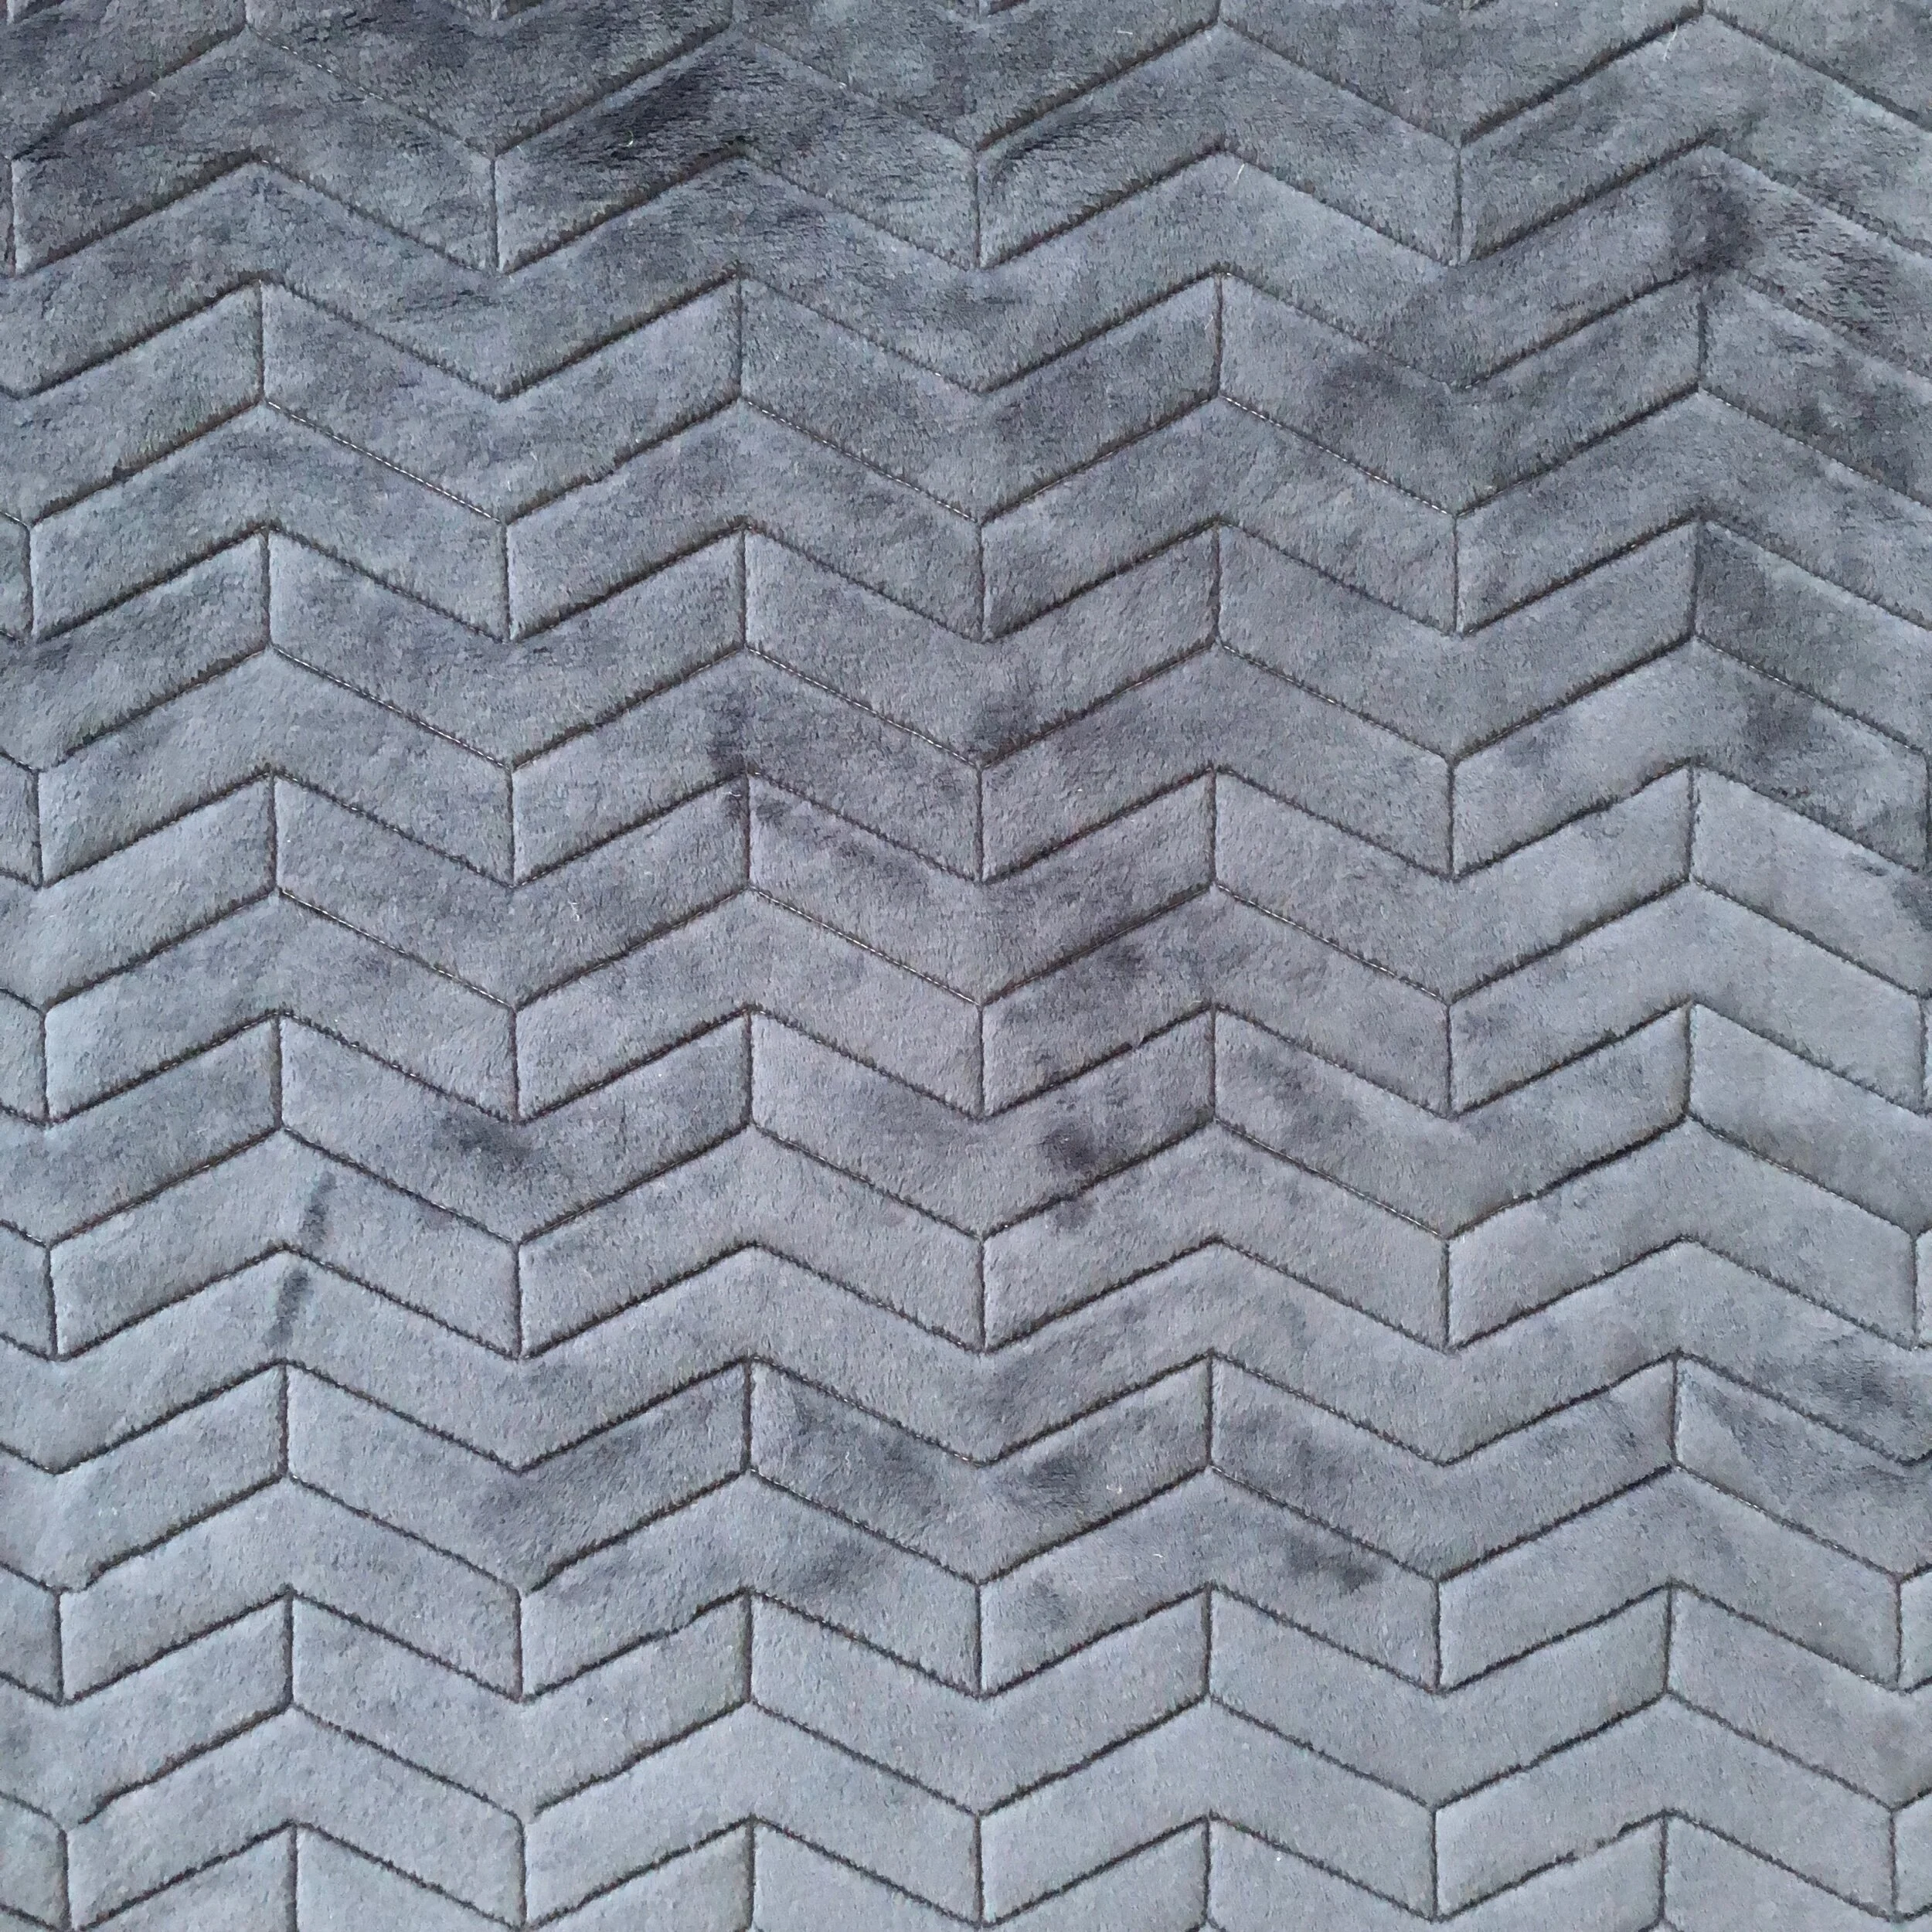
I chose my Double Squared©️ design for the quilting. Which I think is a great masculine quilting design. Double Squared is available in my shop.

I also used my favorite 8020 cotton poly blend batting and natural white Omni thread from Superior threads.

Debbie loves her quilt so much, that she didn’t want to give it away!

I don’t make commissioned quilts very often, because I’m busy with machine quilting. This one was fun!
Thank you for stopping by!! Have a great weekend. • Leisha

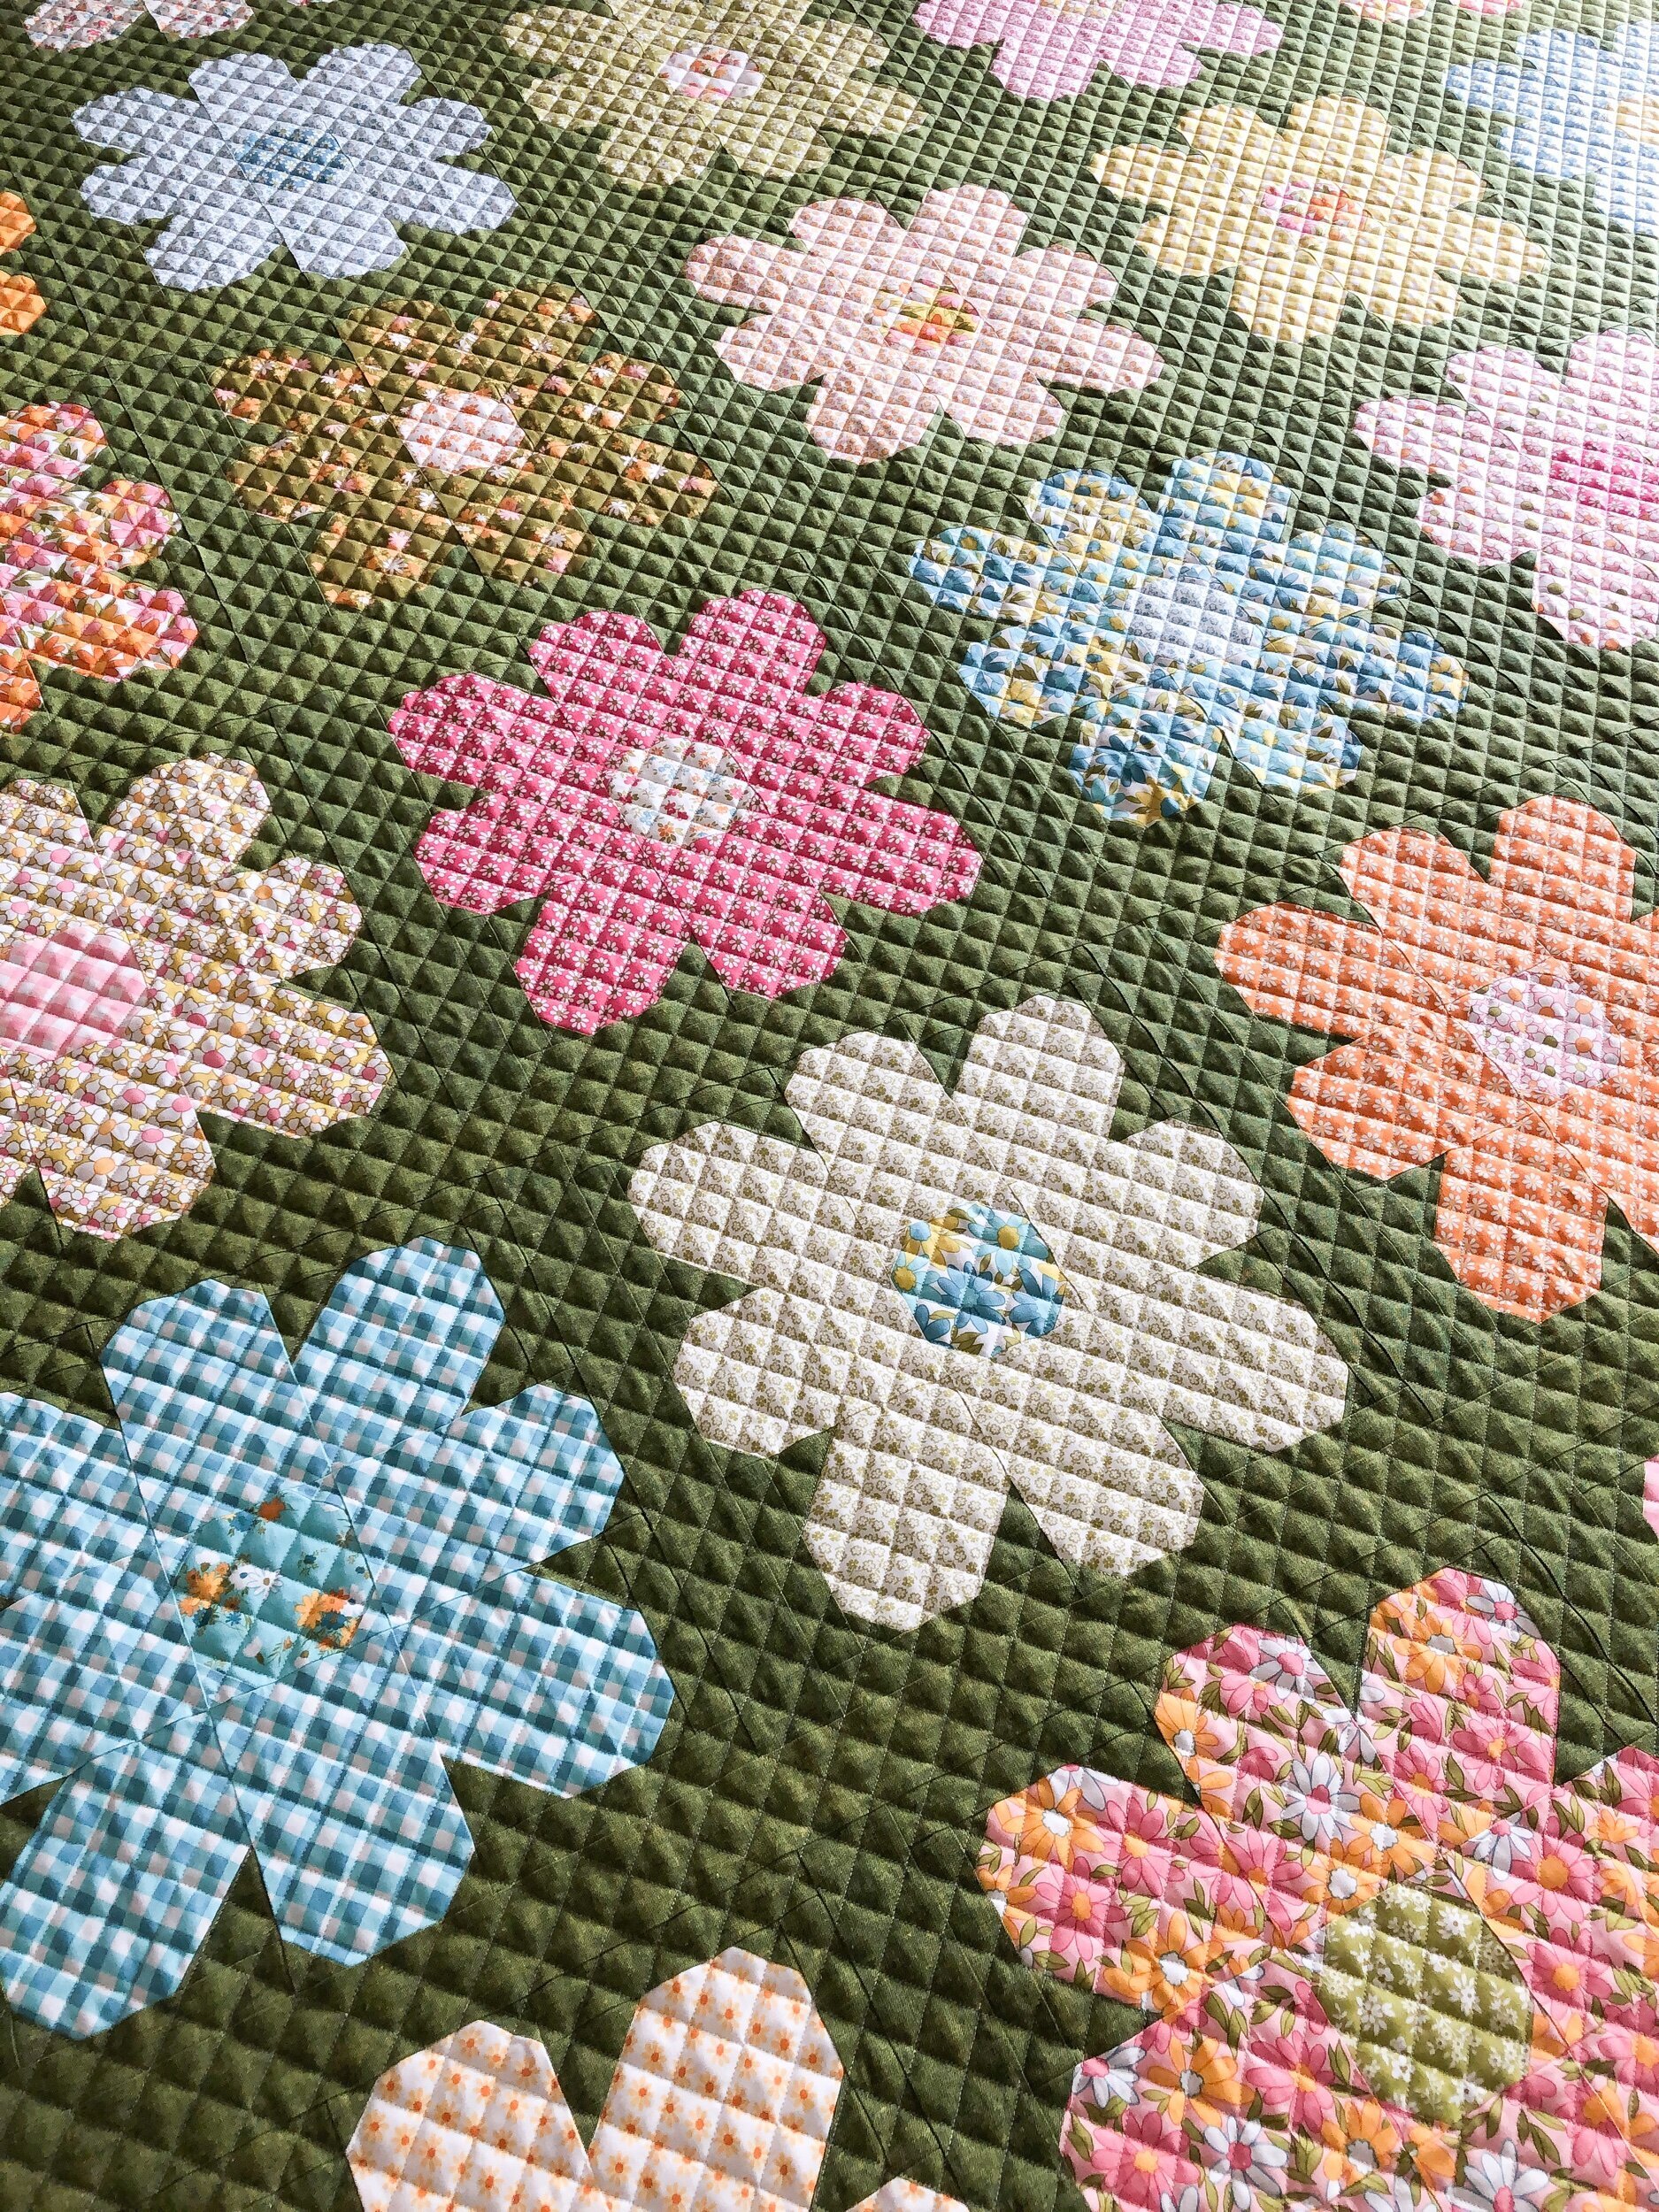
Dot’s Flower Power Quilt
Hello,
it’s Monday again. Wow, are the weeks going fast or what?!?! I’m going golfing in a little over an hour with my two youngest sisters. I’m excited!! I’m not very good, but they are patient with me. It’s something we all love to do together. I thought I would quickly share another quilt with you first.
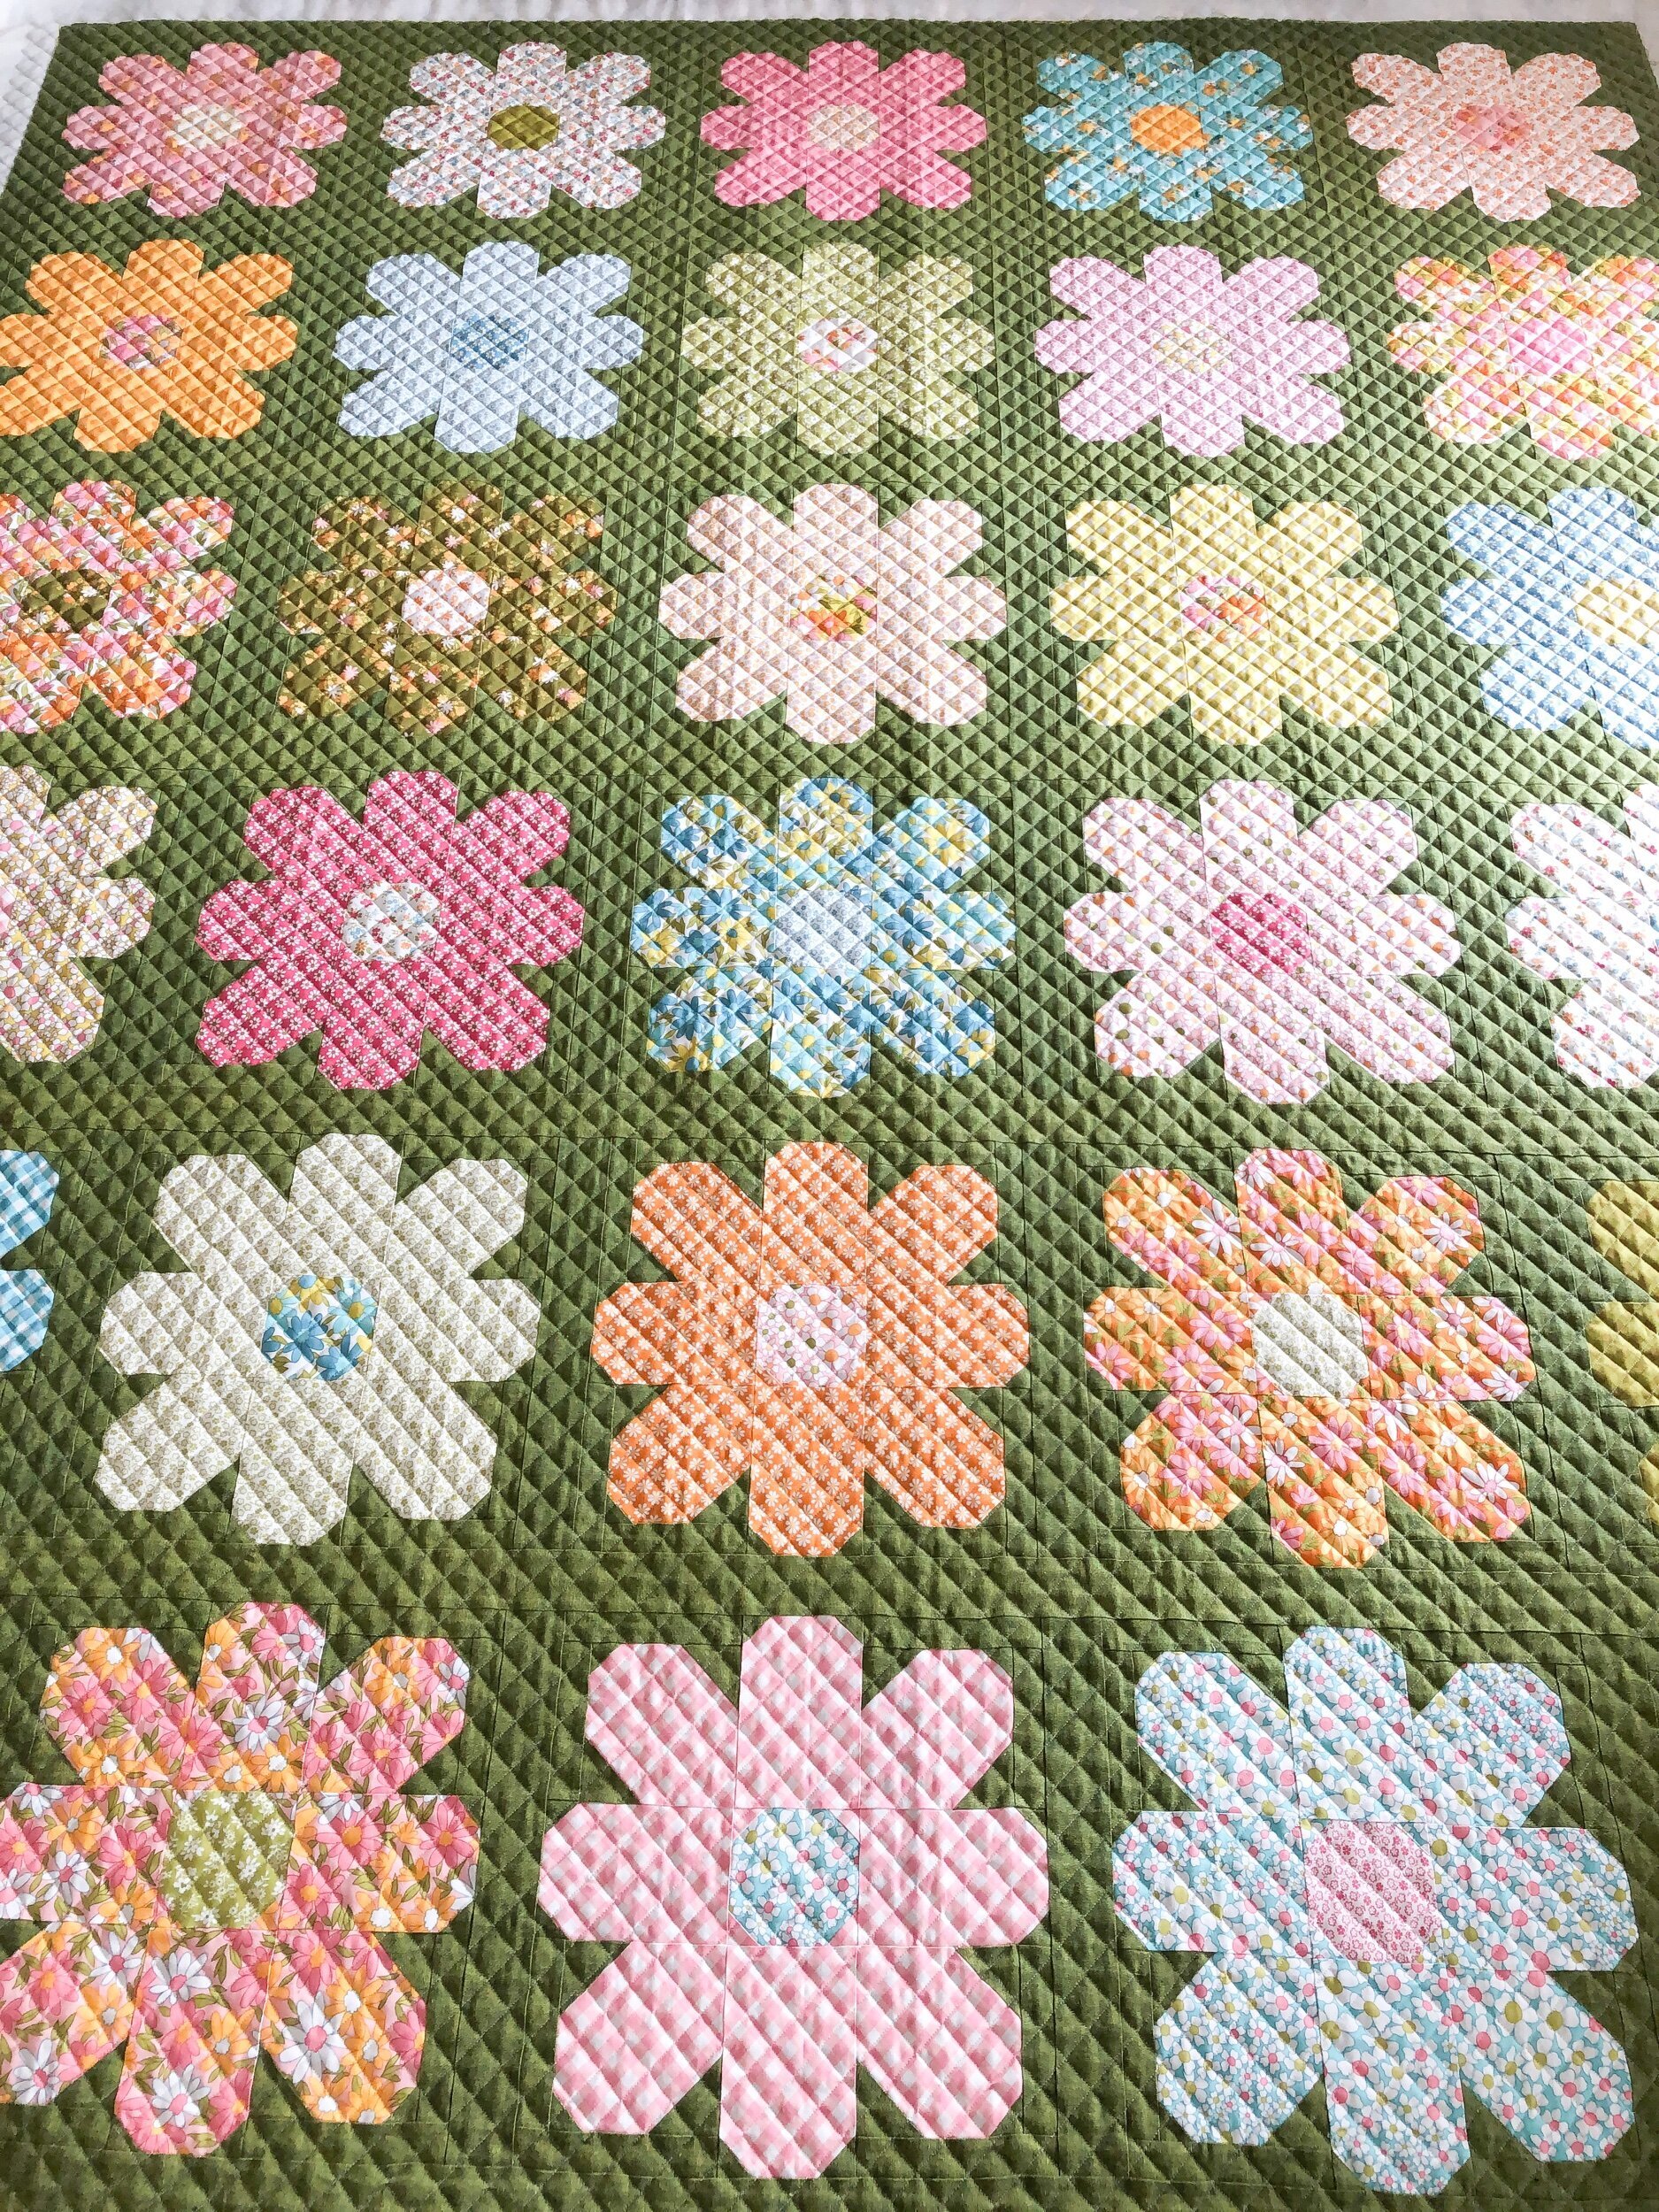
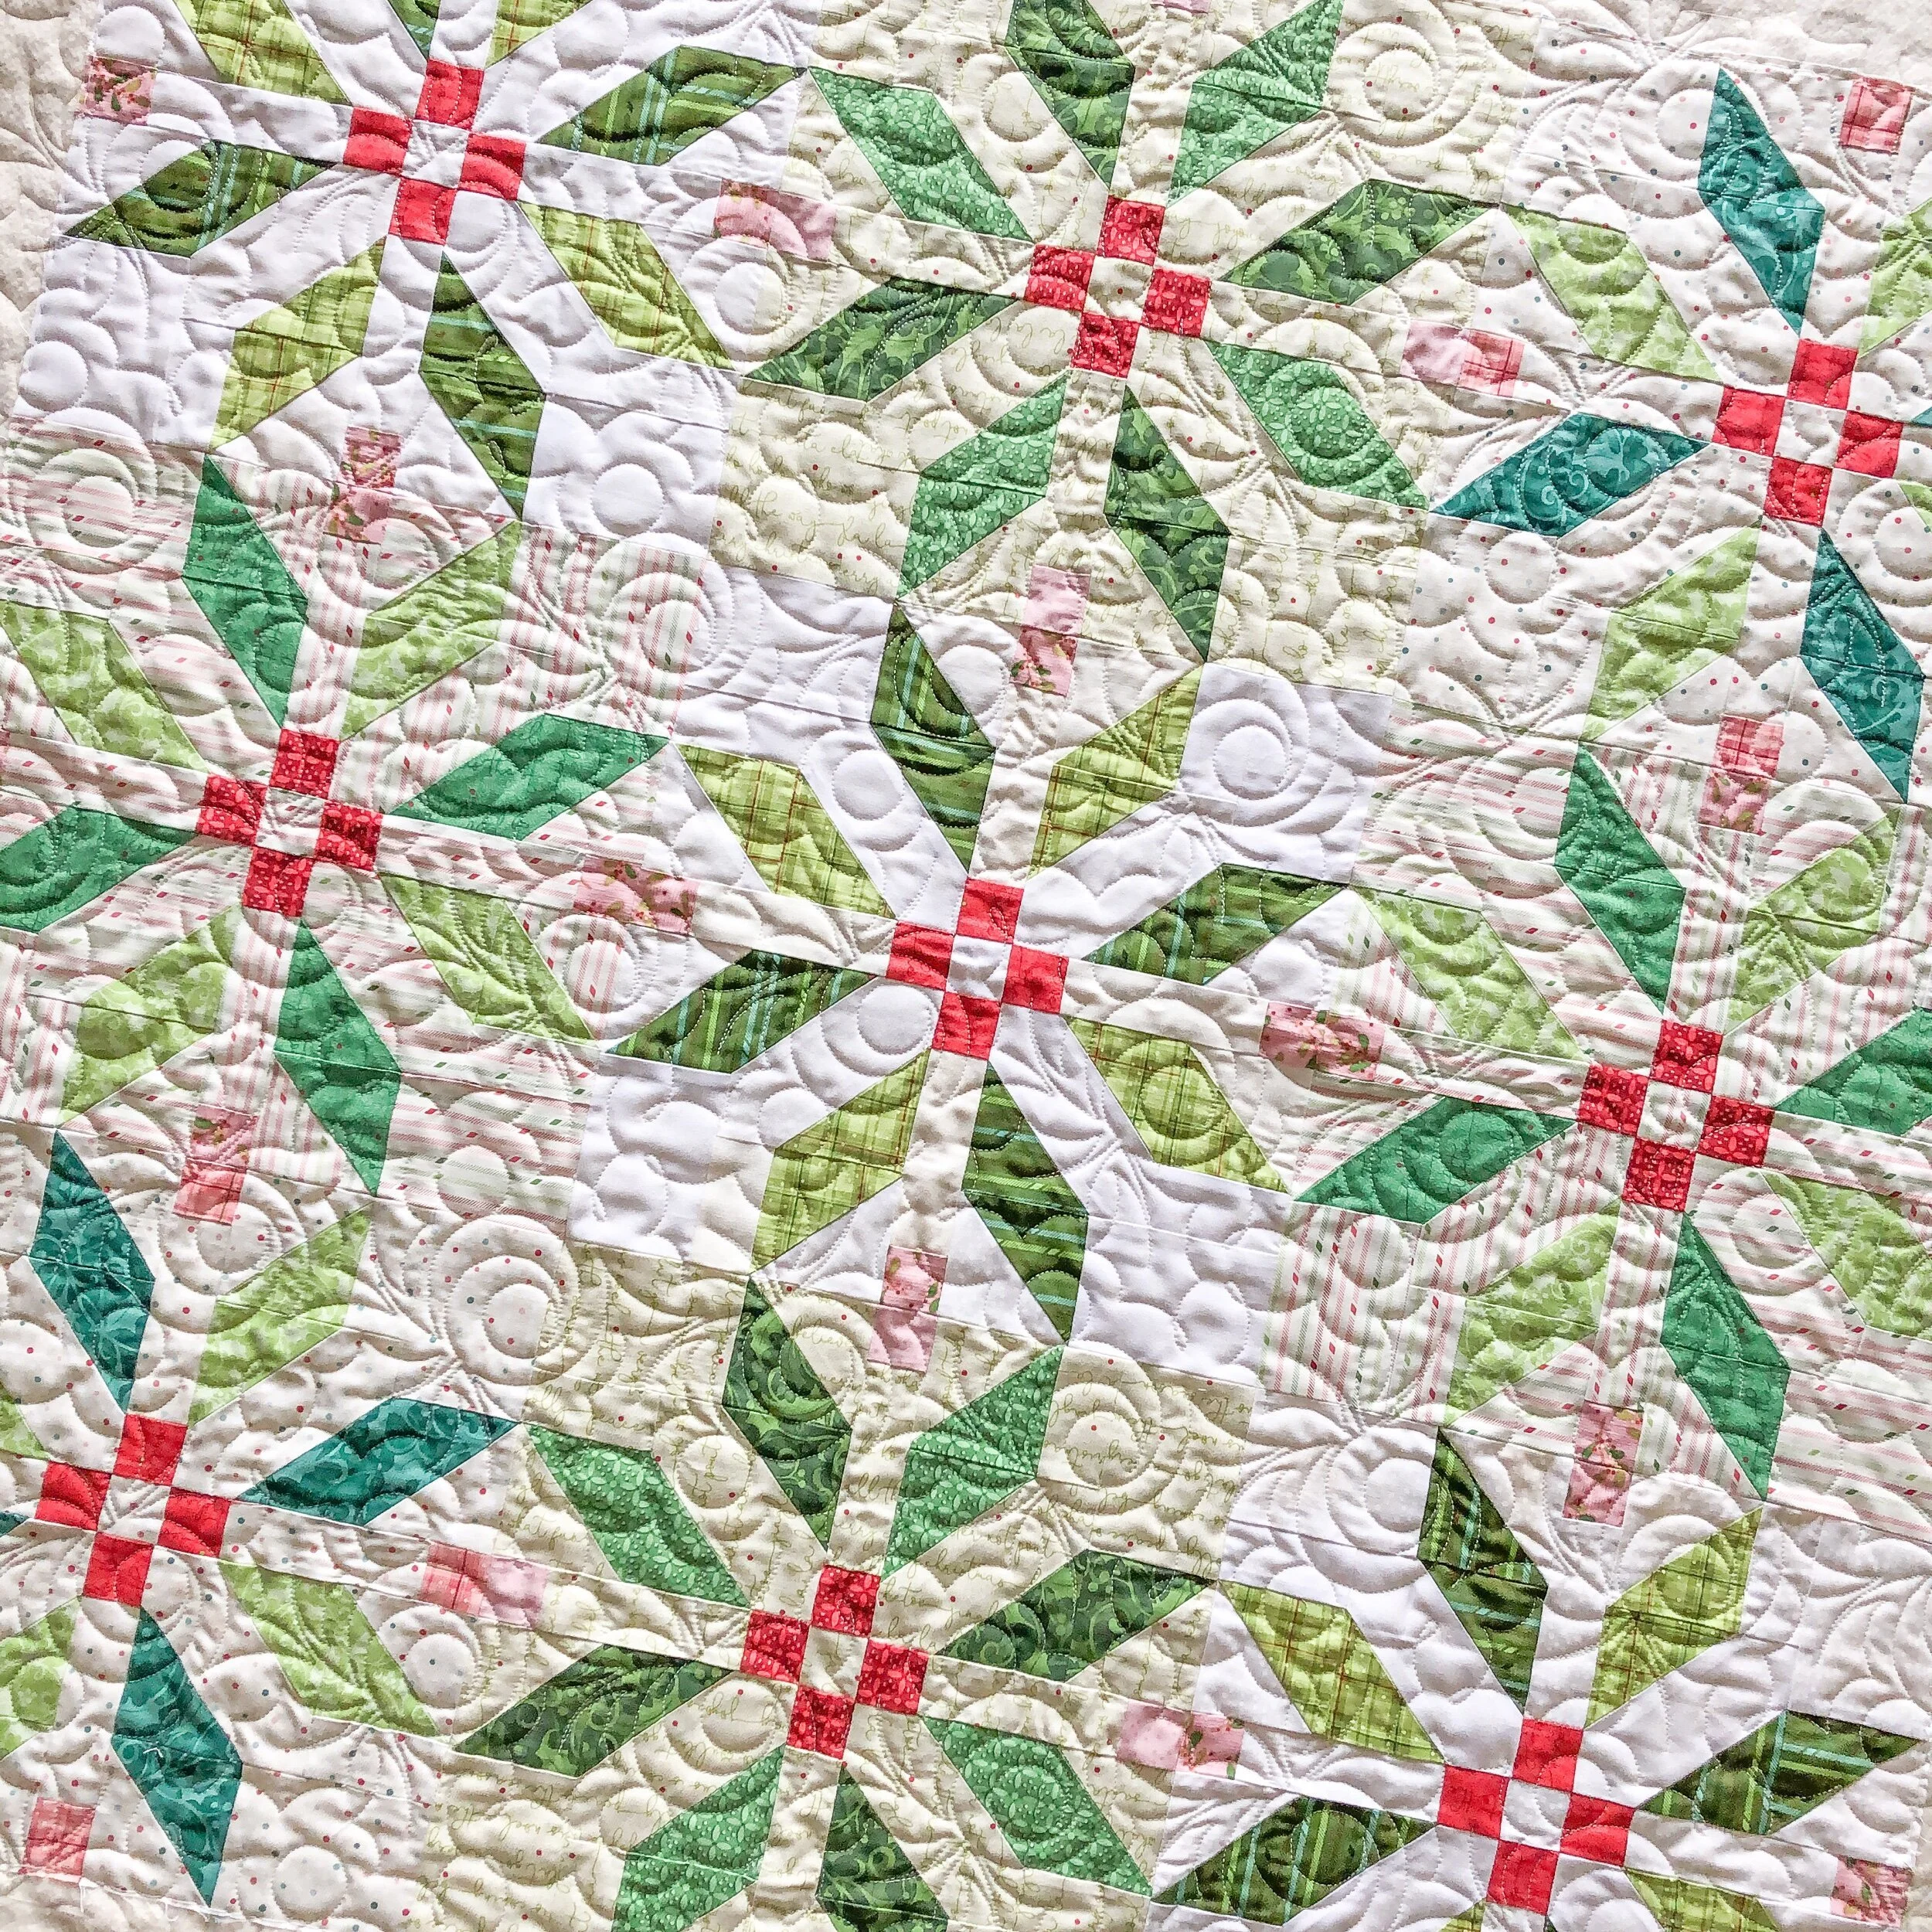
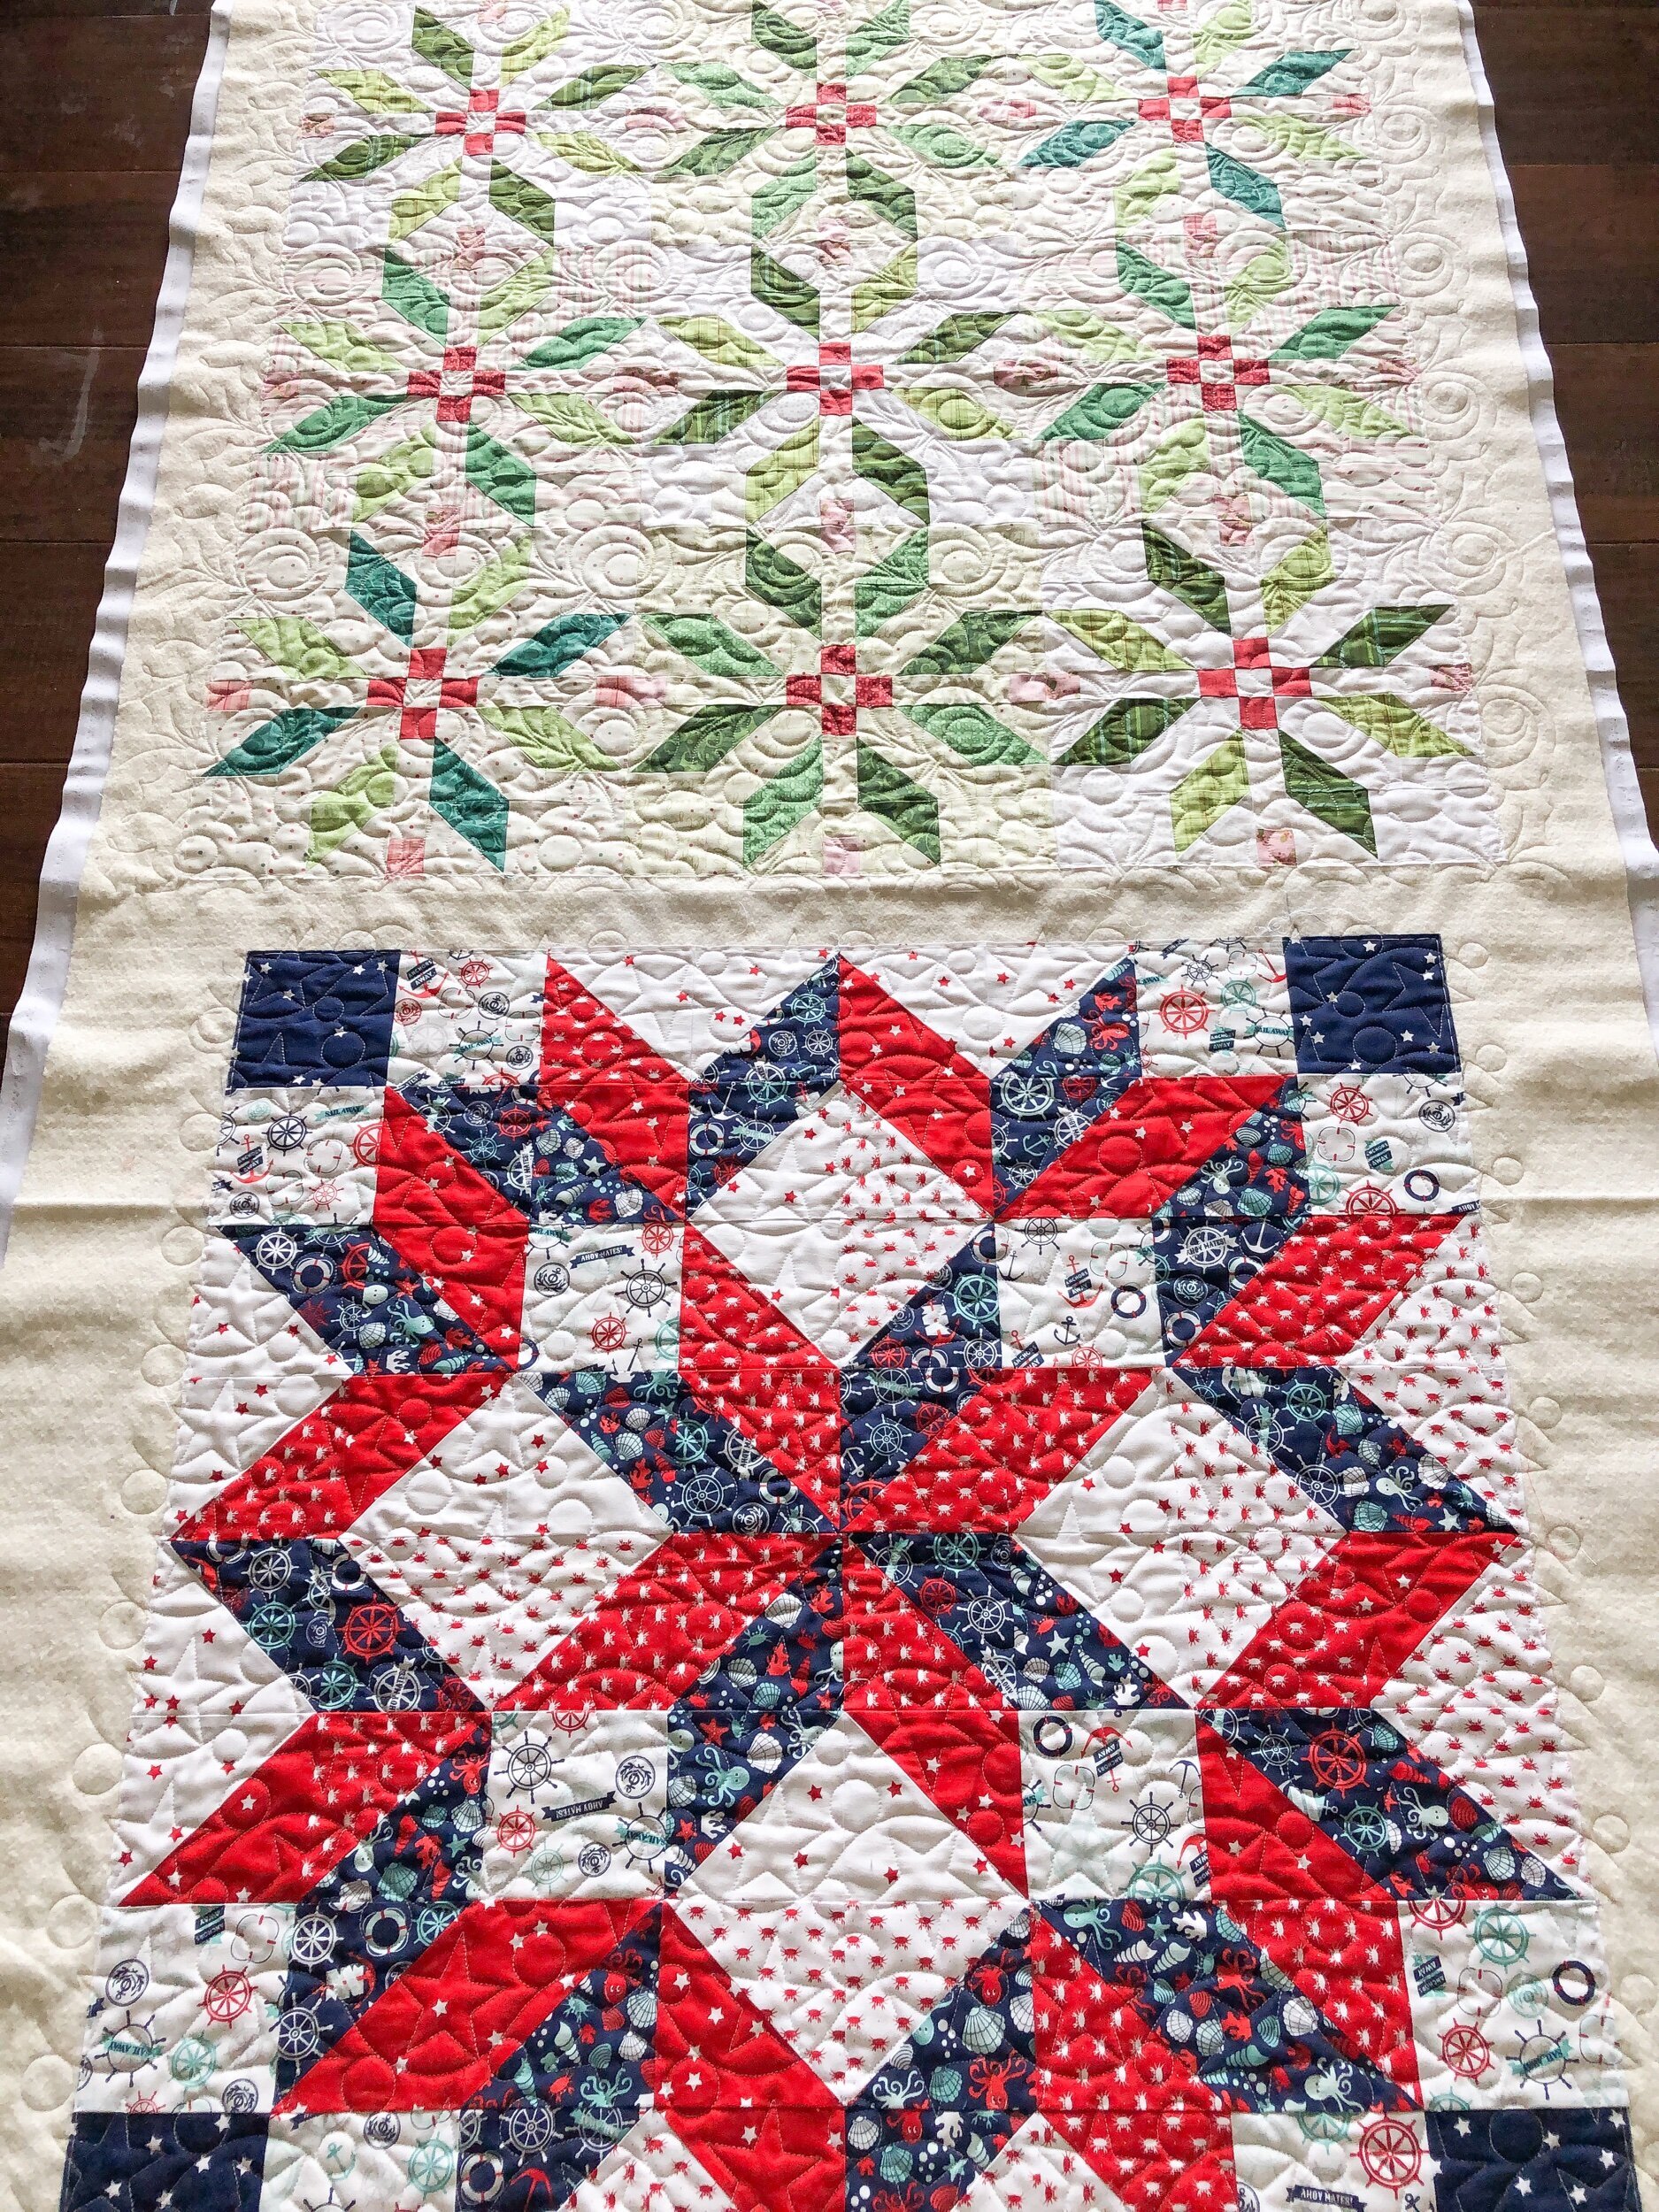
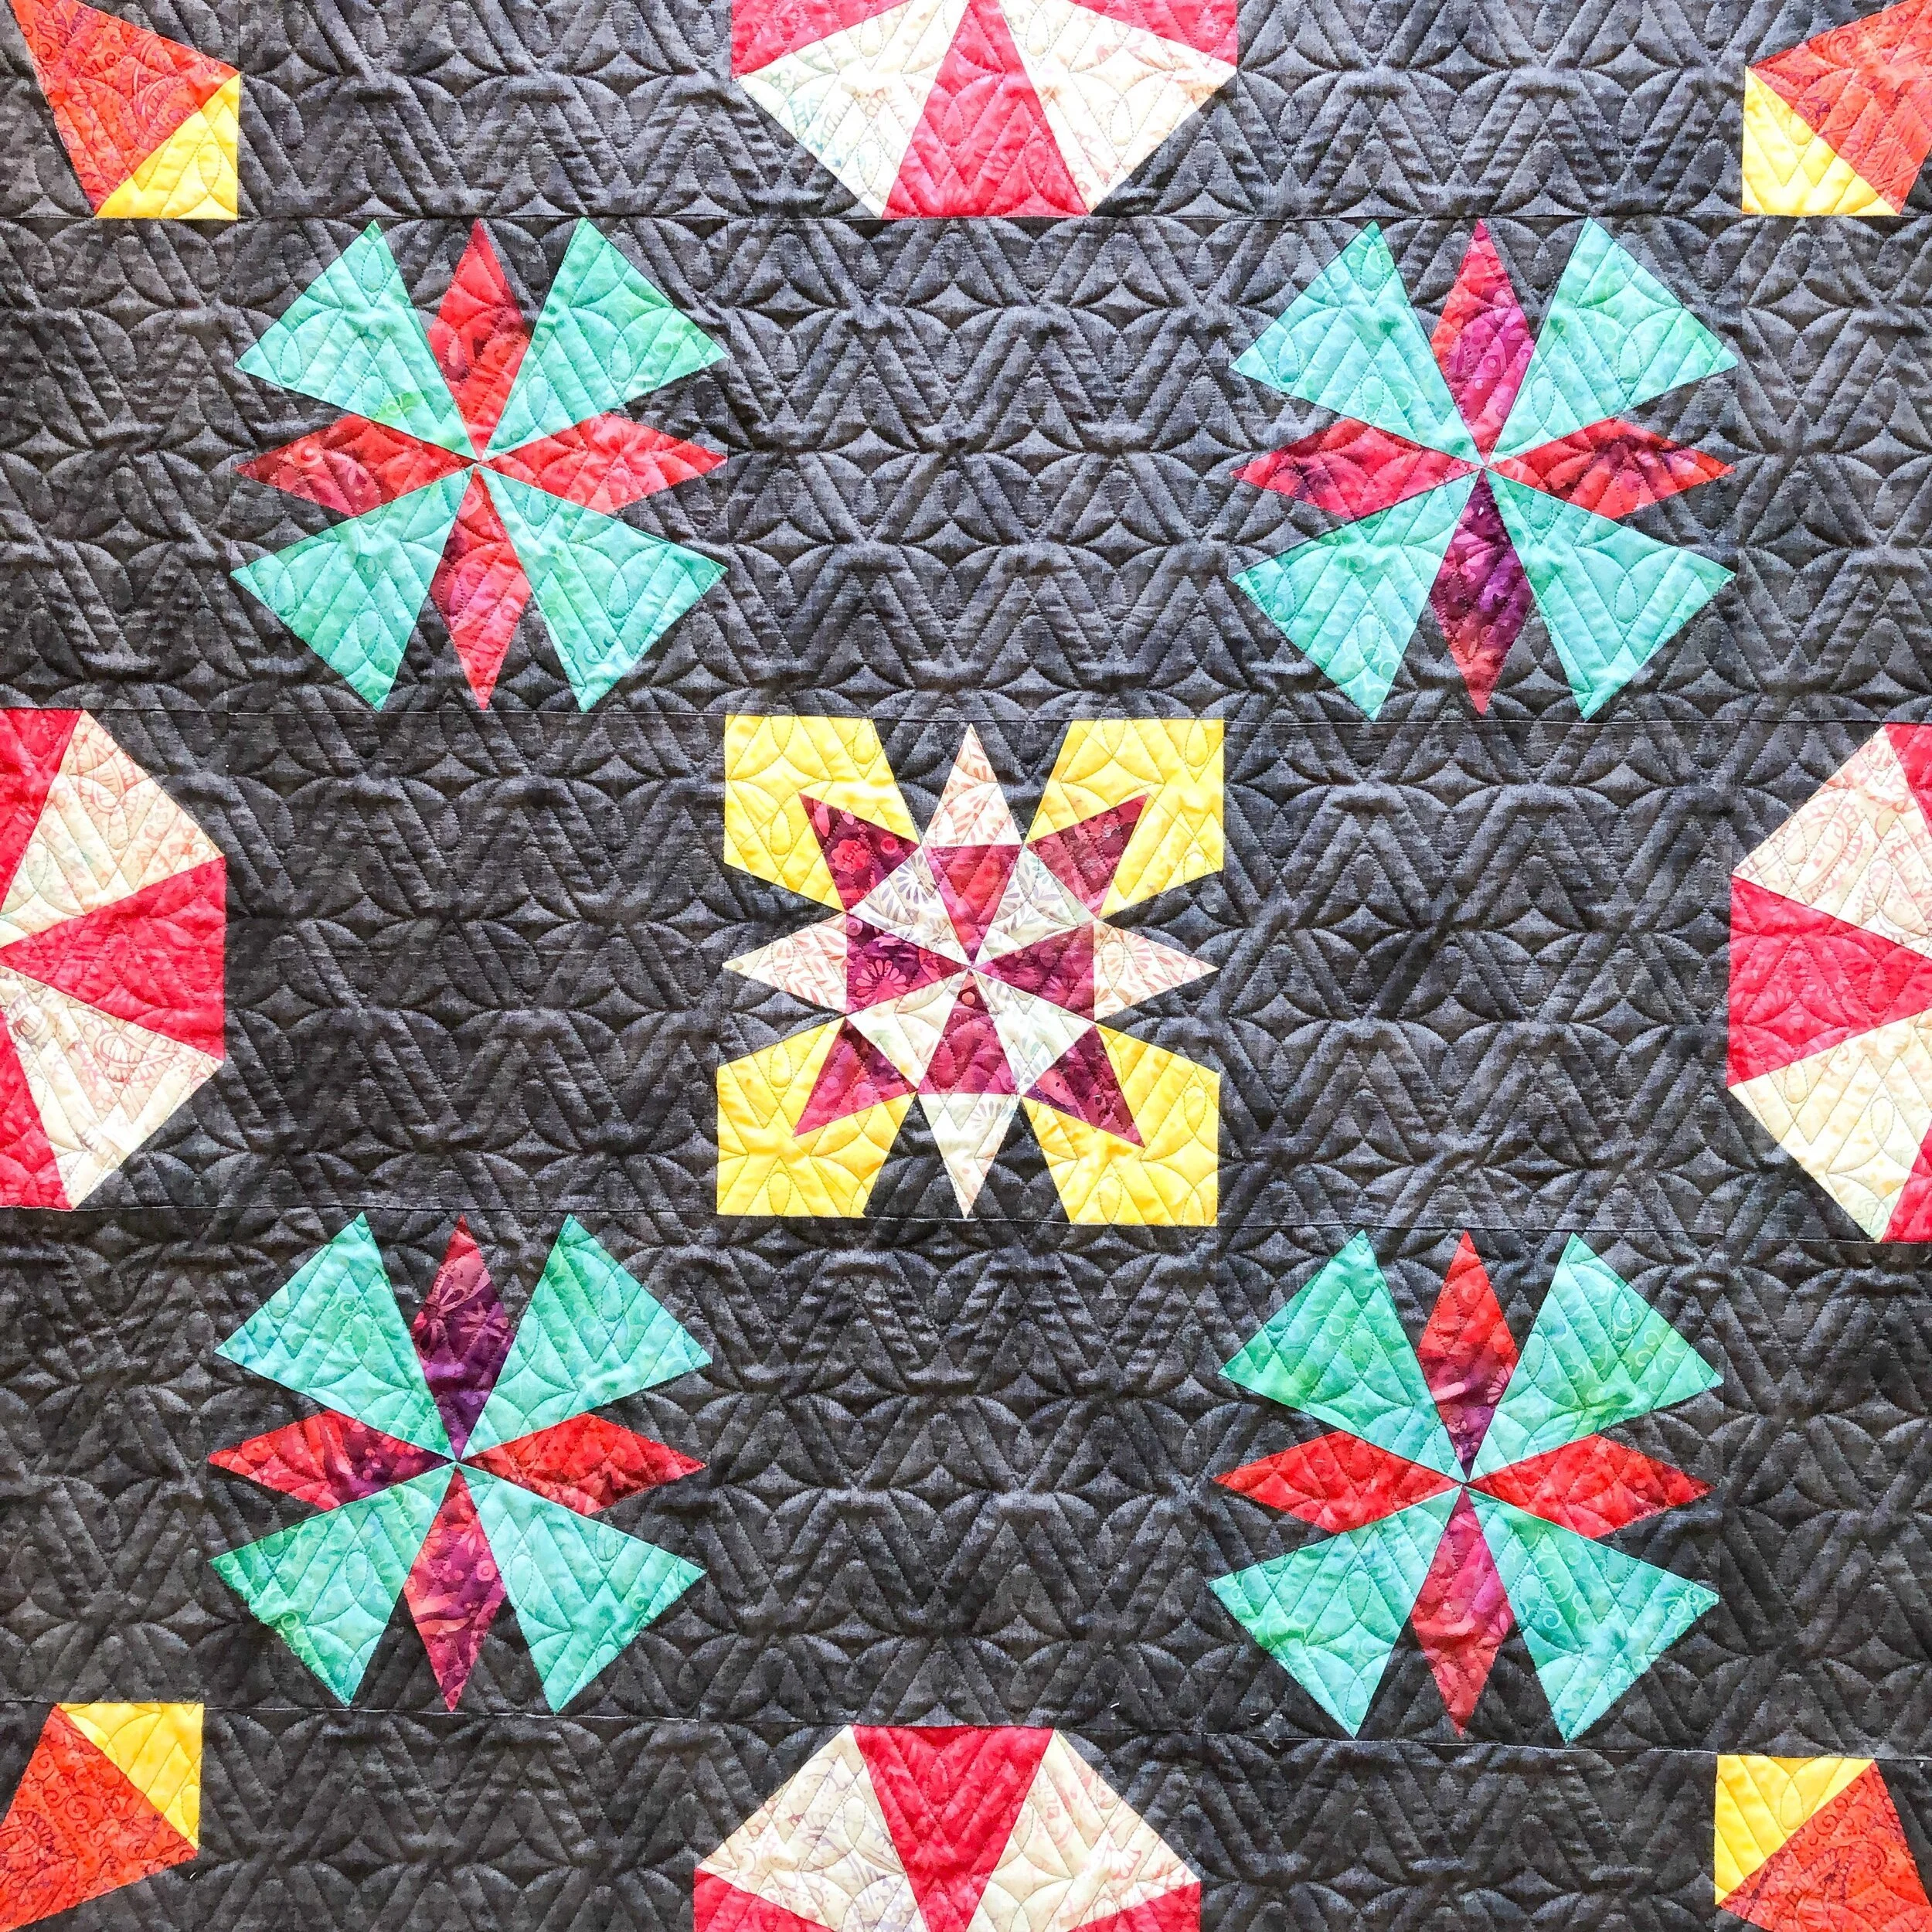
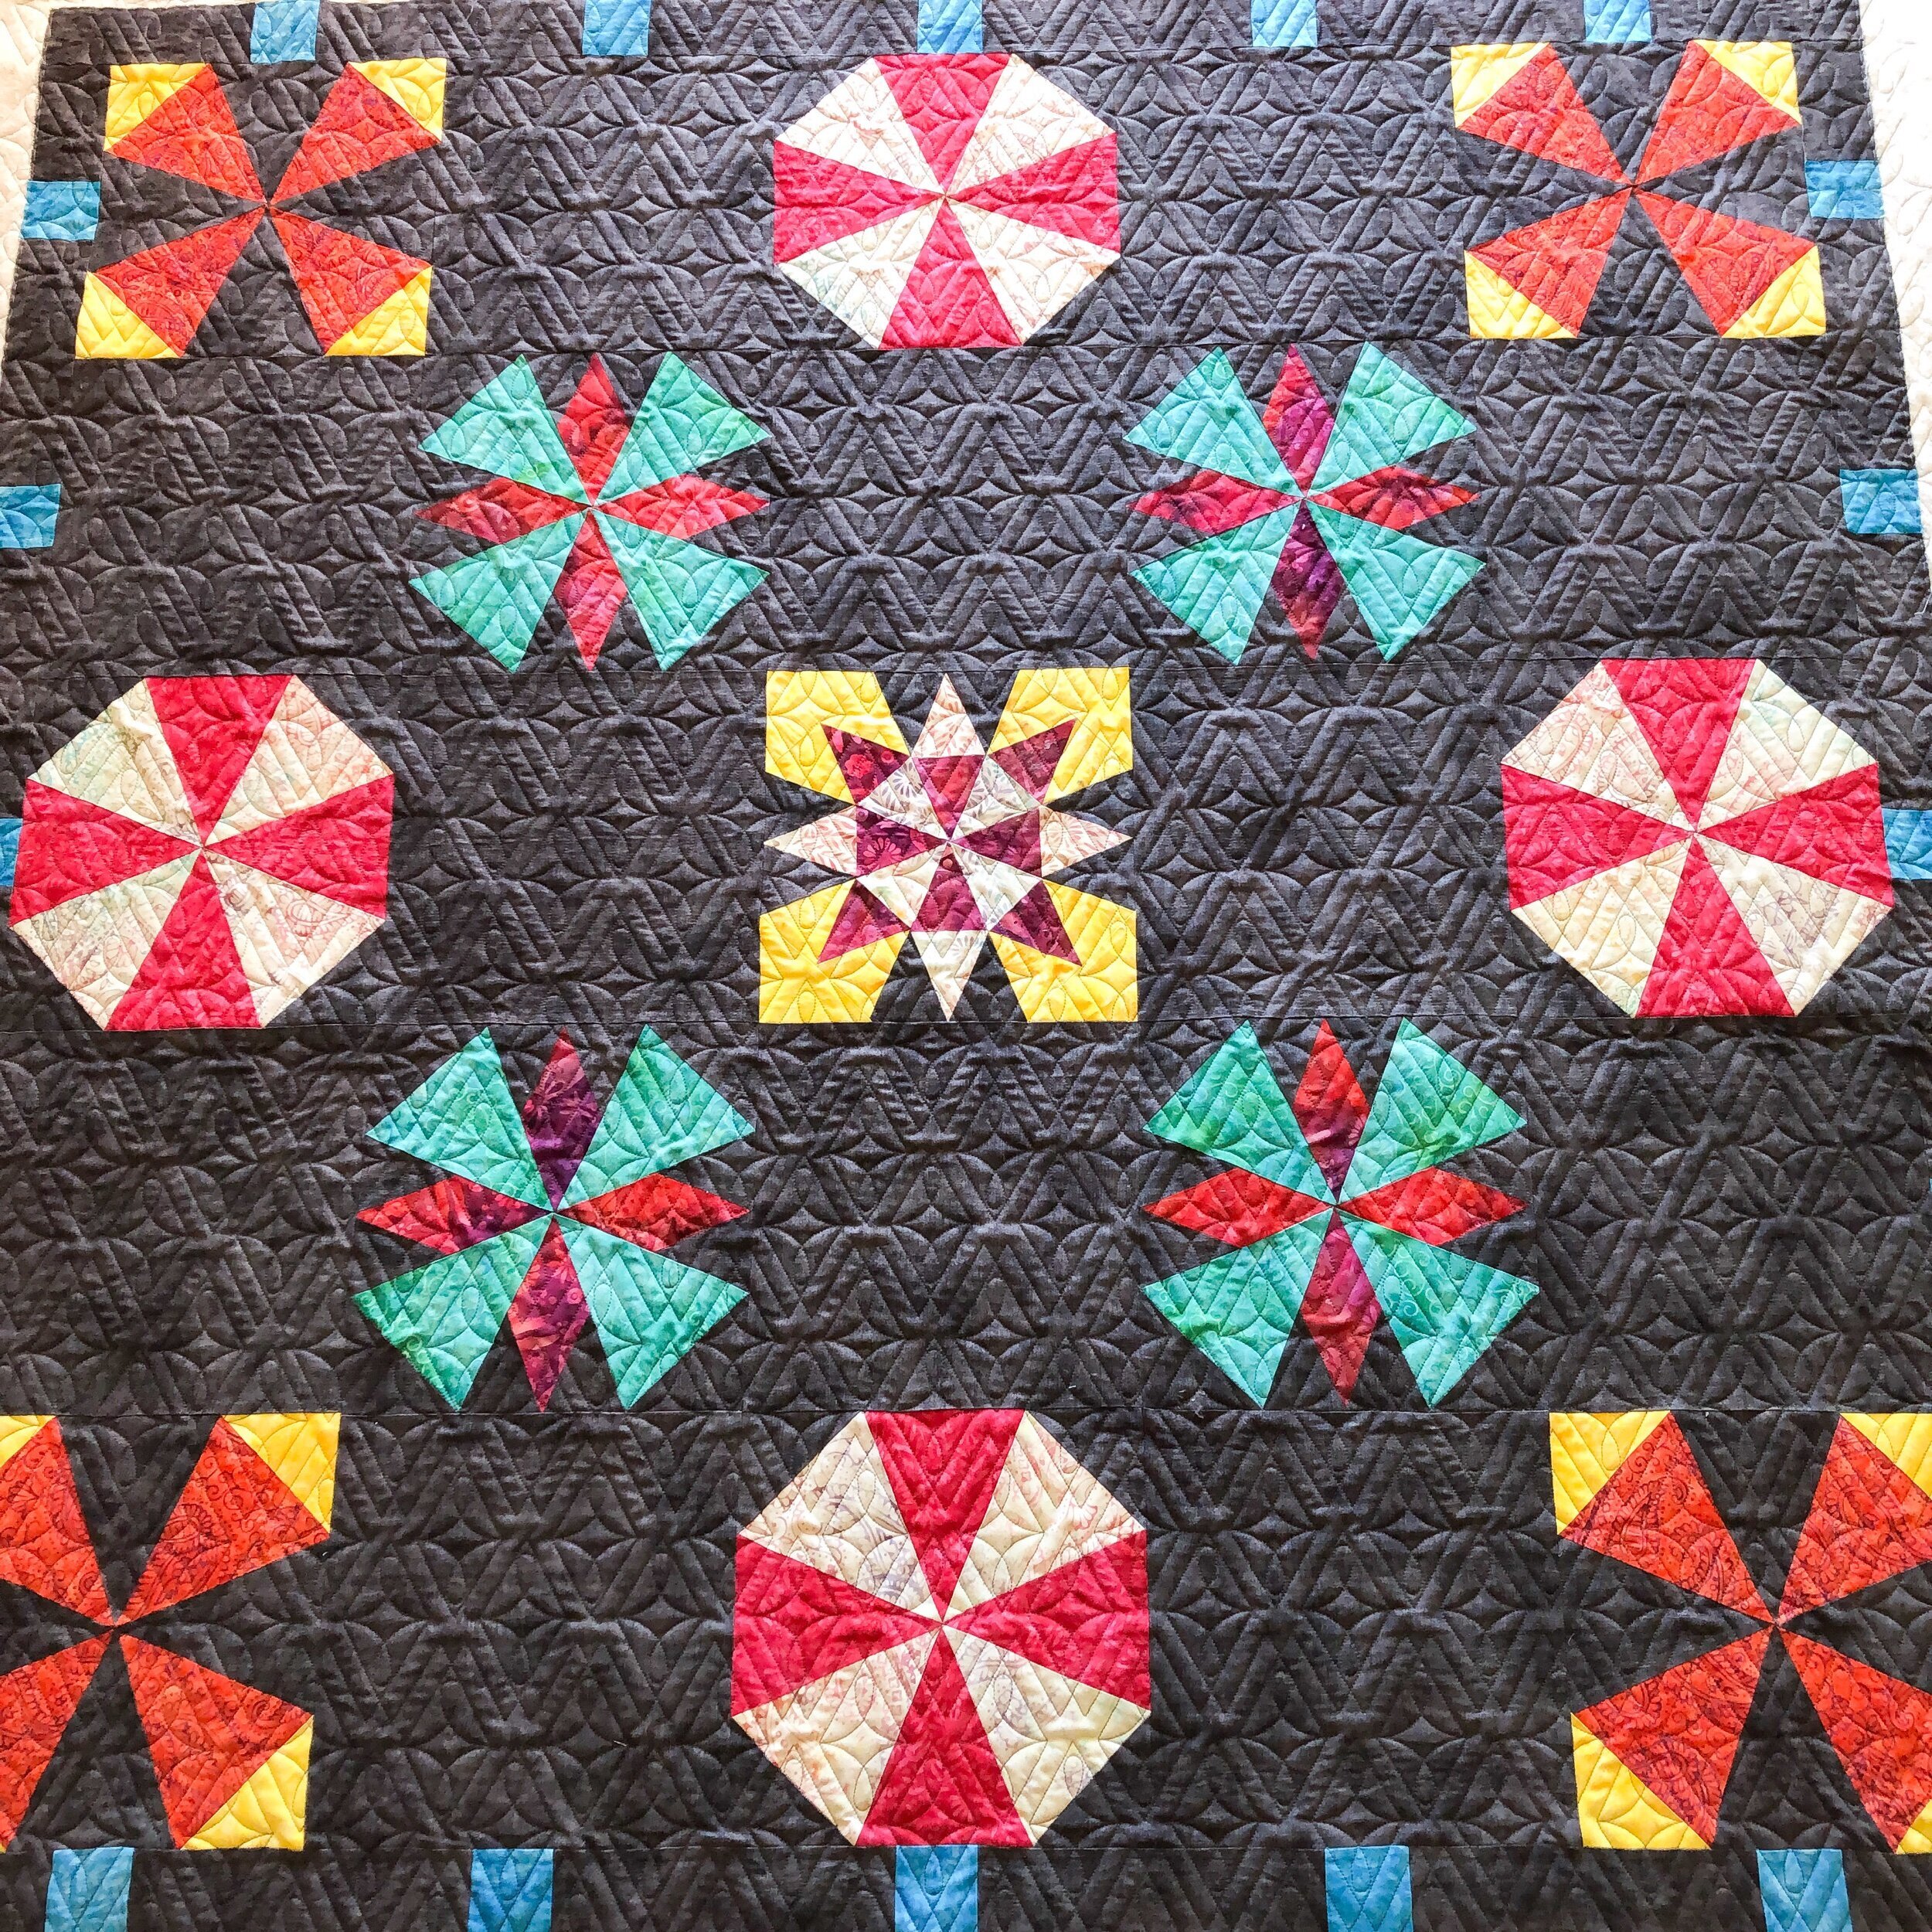
This beautiful quilt was made by Dot. The pattern is called Flower Power by Kelli Fannin. The fabrics are A Blooming Bunch from Maureen McCormick, from Moda. Yes, Maureen (Marsha from the Brady Bunch show, has a fabric line) and it is such a sweet line of florals.

I wish you could each see this quilt in person!! It was beautifully made which helped me with the quilting.
I used Hobbs wool for the batting and a natural white thread for the quilting.

Dot requested my On Point©️ design. Which I knew would look great, but would be a challenge to do with wool batting. Lining up quilting designs that touch can be tricky. However, the week before I quilted it I came across this video from Linda’s Electric Quilters. Corey explains to Linda an easy way to outsmart the shrinkage while quilting cross hatching designs. I tried it, it works!!! I’m so grateful. Watch it here: https://youtu.be/DQ_Kthwof9I
The only thing I did different, I went back and used my ruler to fill in the gaps. I actually shared this on my Instagram page in the stories…walking you through each step. Go here to check those out…. https://www.instagram.com/s/aGlnaGxpZ2h0OjE3ODg2NDE1Nzk2MDA0Njg4?story_media_id=2522927156319547382&igshid=102vv2kxe6vr4
If you don’t have an Instagram account, you should still be able to view it. I’ve opened my page on my computer before click here and then there are circles above all the pictures I’ve posted…they are called highlight bubbles. Go to the Crosshatch bubble, and you’ll see all the tips I shared. https://instagram.com/leishakaye/
This technique will forever change how I quilt this design. You may be wondering why I’m sharing all of this…when quilts are quilted, there is shrinkage…sometimes a lot. Especially when there is a thicker wool batting. I was so worried that it was going to be impossible to get it to line up. However, using Corey’s technique it was easy peasy!! If you’re a longarm quilter with a computer, I encourage you to give it a try. My On Point design can be found in my shop. To get 1” squares, the design should be set up at 8” in height. For 1/2” squares, a 4” height.

This quilty texture is one of my absolute favorites!! It was a perfect choice for this quilt.
And…look at the flowers on the backing. Normally I don’t love backs like this. It can throw things off, however Dot did an absolutely beautiful job!!! Which made quilting it a breeze.

Thanks for coming by!! I hope you enjoyed this beautiful quilt. Happy quilting. • Leisha
Cornerstone • Design of the Week
Hello there,
I just wanted to quickly pop in and let you know about this weeks Design of the Week, Cornerstone©️!! It is 20% off until Friday May 7th. No code necessary…it’s available in my shop.
I quilted Cornerstone on the awesome t-shirt that Barbara made. It turned out so great!!
I quilted the design at a height between 10.5” to 11”, and left a gap between the rows, which is as thick as the spacing in the shapes within the design.
I used a gray/silver thread and winline’s 8030 cotton poly blend batting.
This is navy minky on the backing… the light does something funny exposure.
I love this quilting texture. I wanted to try something different than my the typical designs that I use on t-shirt quilts, and I’m glad that I did. Which designs are your go to designs? Thank you for being here…Happy Quilting!! • Leisha

Pat + Liz’s Mini Quilts
Hello…
I hope your week is off to a great start! I have a couple of cute mini quilts to share with you today. Made by Pat and Liz.

Pat told me these were classes at the local quilt shop…she didn’t know the pattern names. For info call Stylish Fabrics (or it’s called Bernina by some of the locals). (435)752-4186 Their website is…. https://www.stylishfabricsandquilts.com
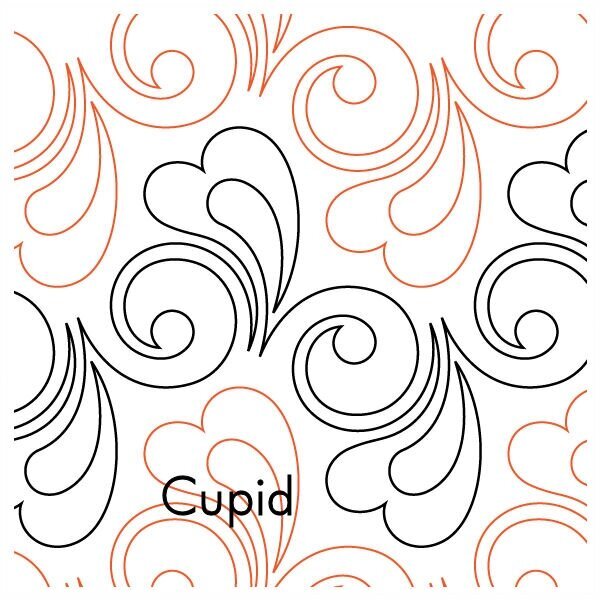
I used Patricia Ritter and my Cupid©️ design to quilt it. It’s available at Urban Elementz. I love how it turned out!! So did they. If you’re looking for a fun design, that can be used over and over again, Cupid is it!!!
I used my favorite Winline 8020 batting for both of these mini quilts, and a white Omni thread from Superior Threads.
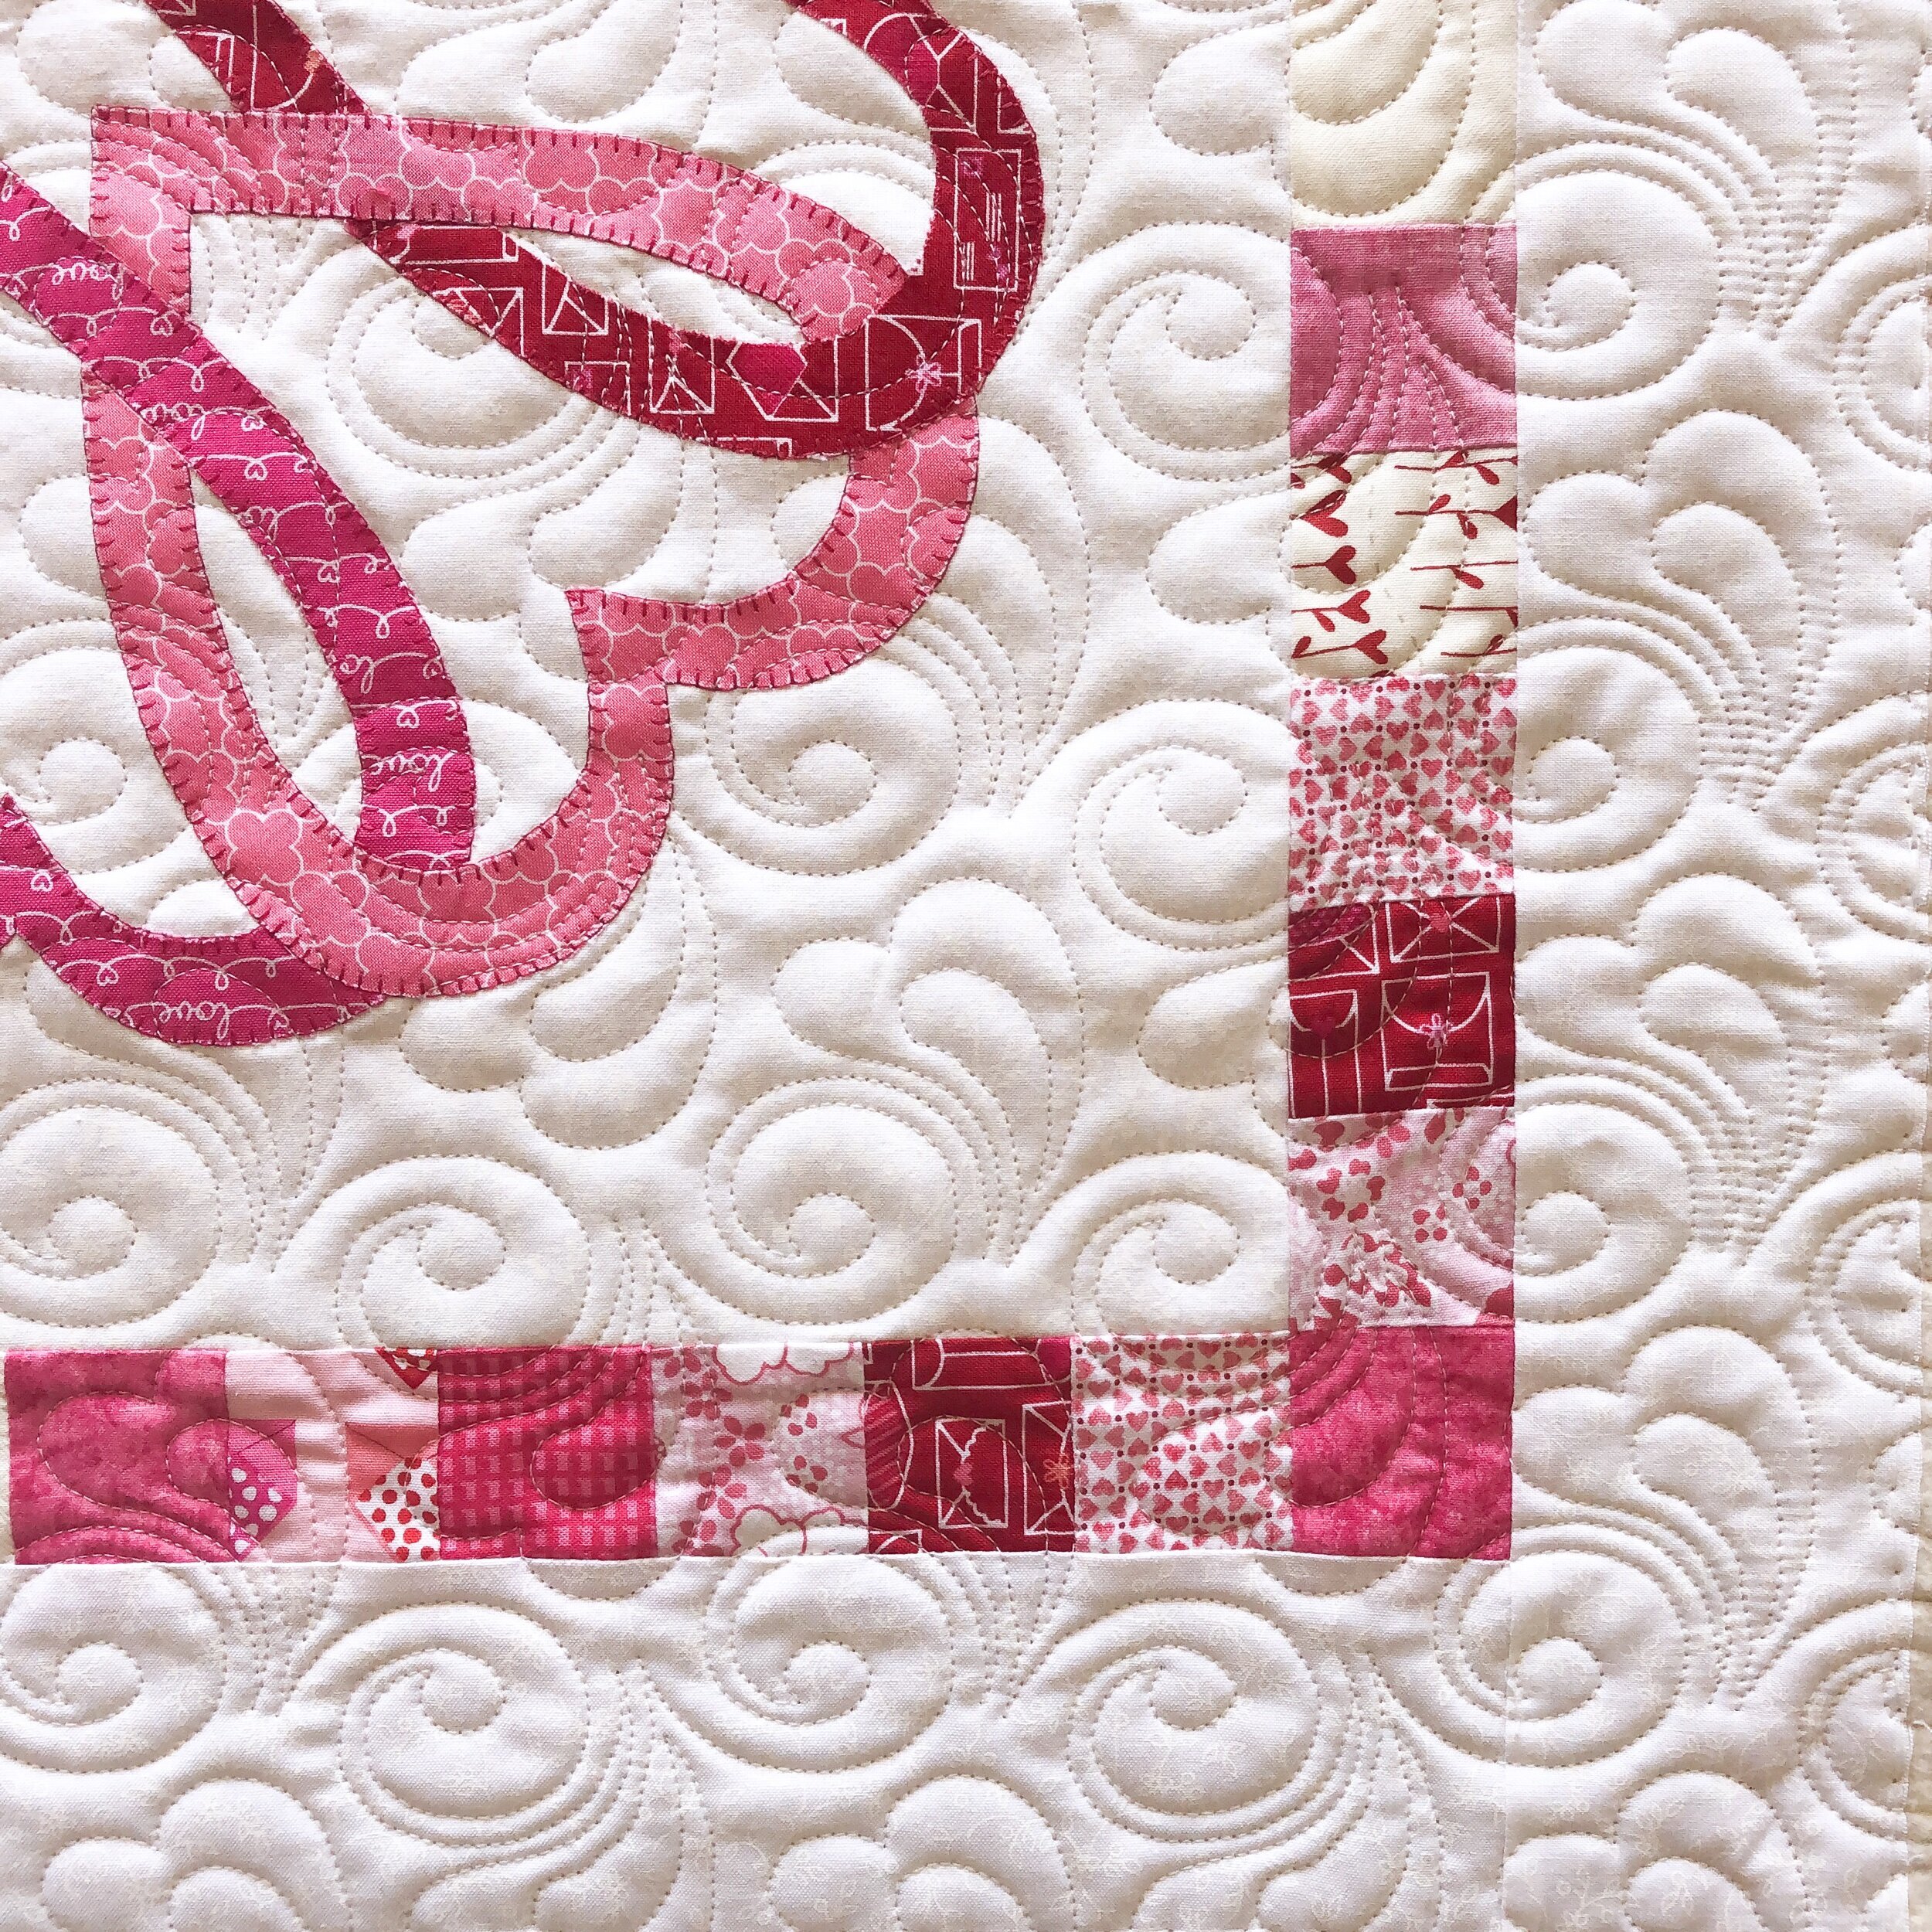
The hearts are appliquéd down, and with an interwoven look…it’s so cute!!

This next one is not appliquéd, the circles are sewn with a machine. I was told years ago about this technique, but I can’t quite remember…it’s amazing to me!

I bet it’s great to make with a charm pack.

I’ve quilted this quilt custom before, with swirls and maybe orange peels…it’s been awhile.

I quilted Patricia Ritter and my Marmalade quilting design in it. I have seen Marmalade on hundreds of quilts on social media…it’s such a fun versatile design!! Marmalade©️ Is available at Urban Elementz. We also have a fun new take this design…Sweet Marmalade.
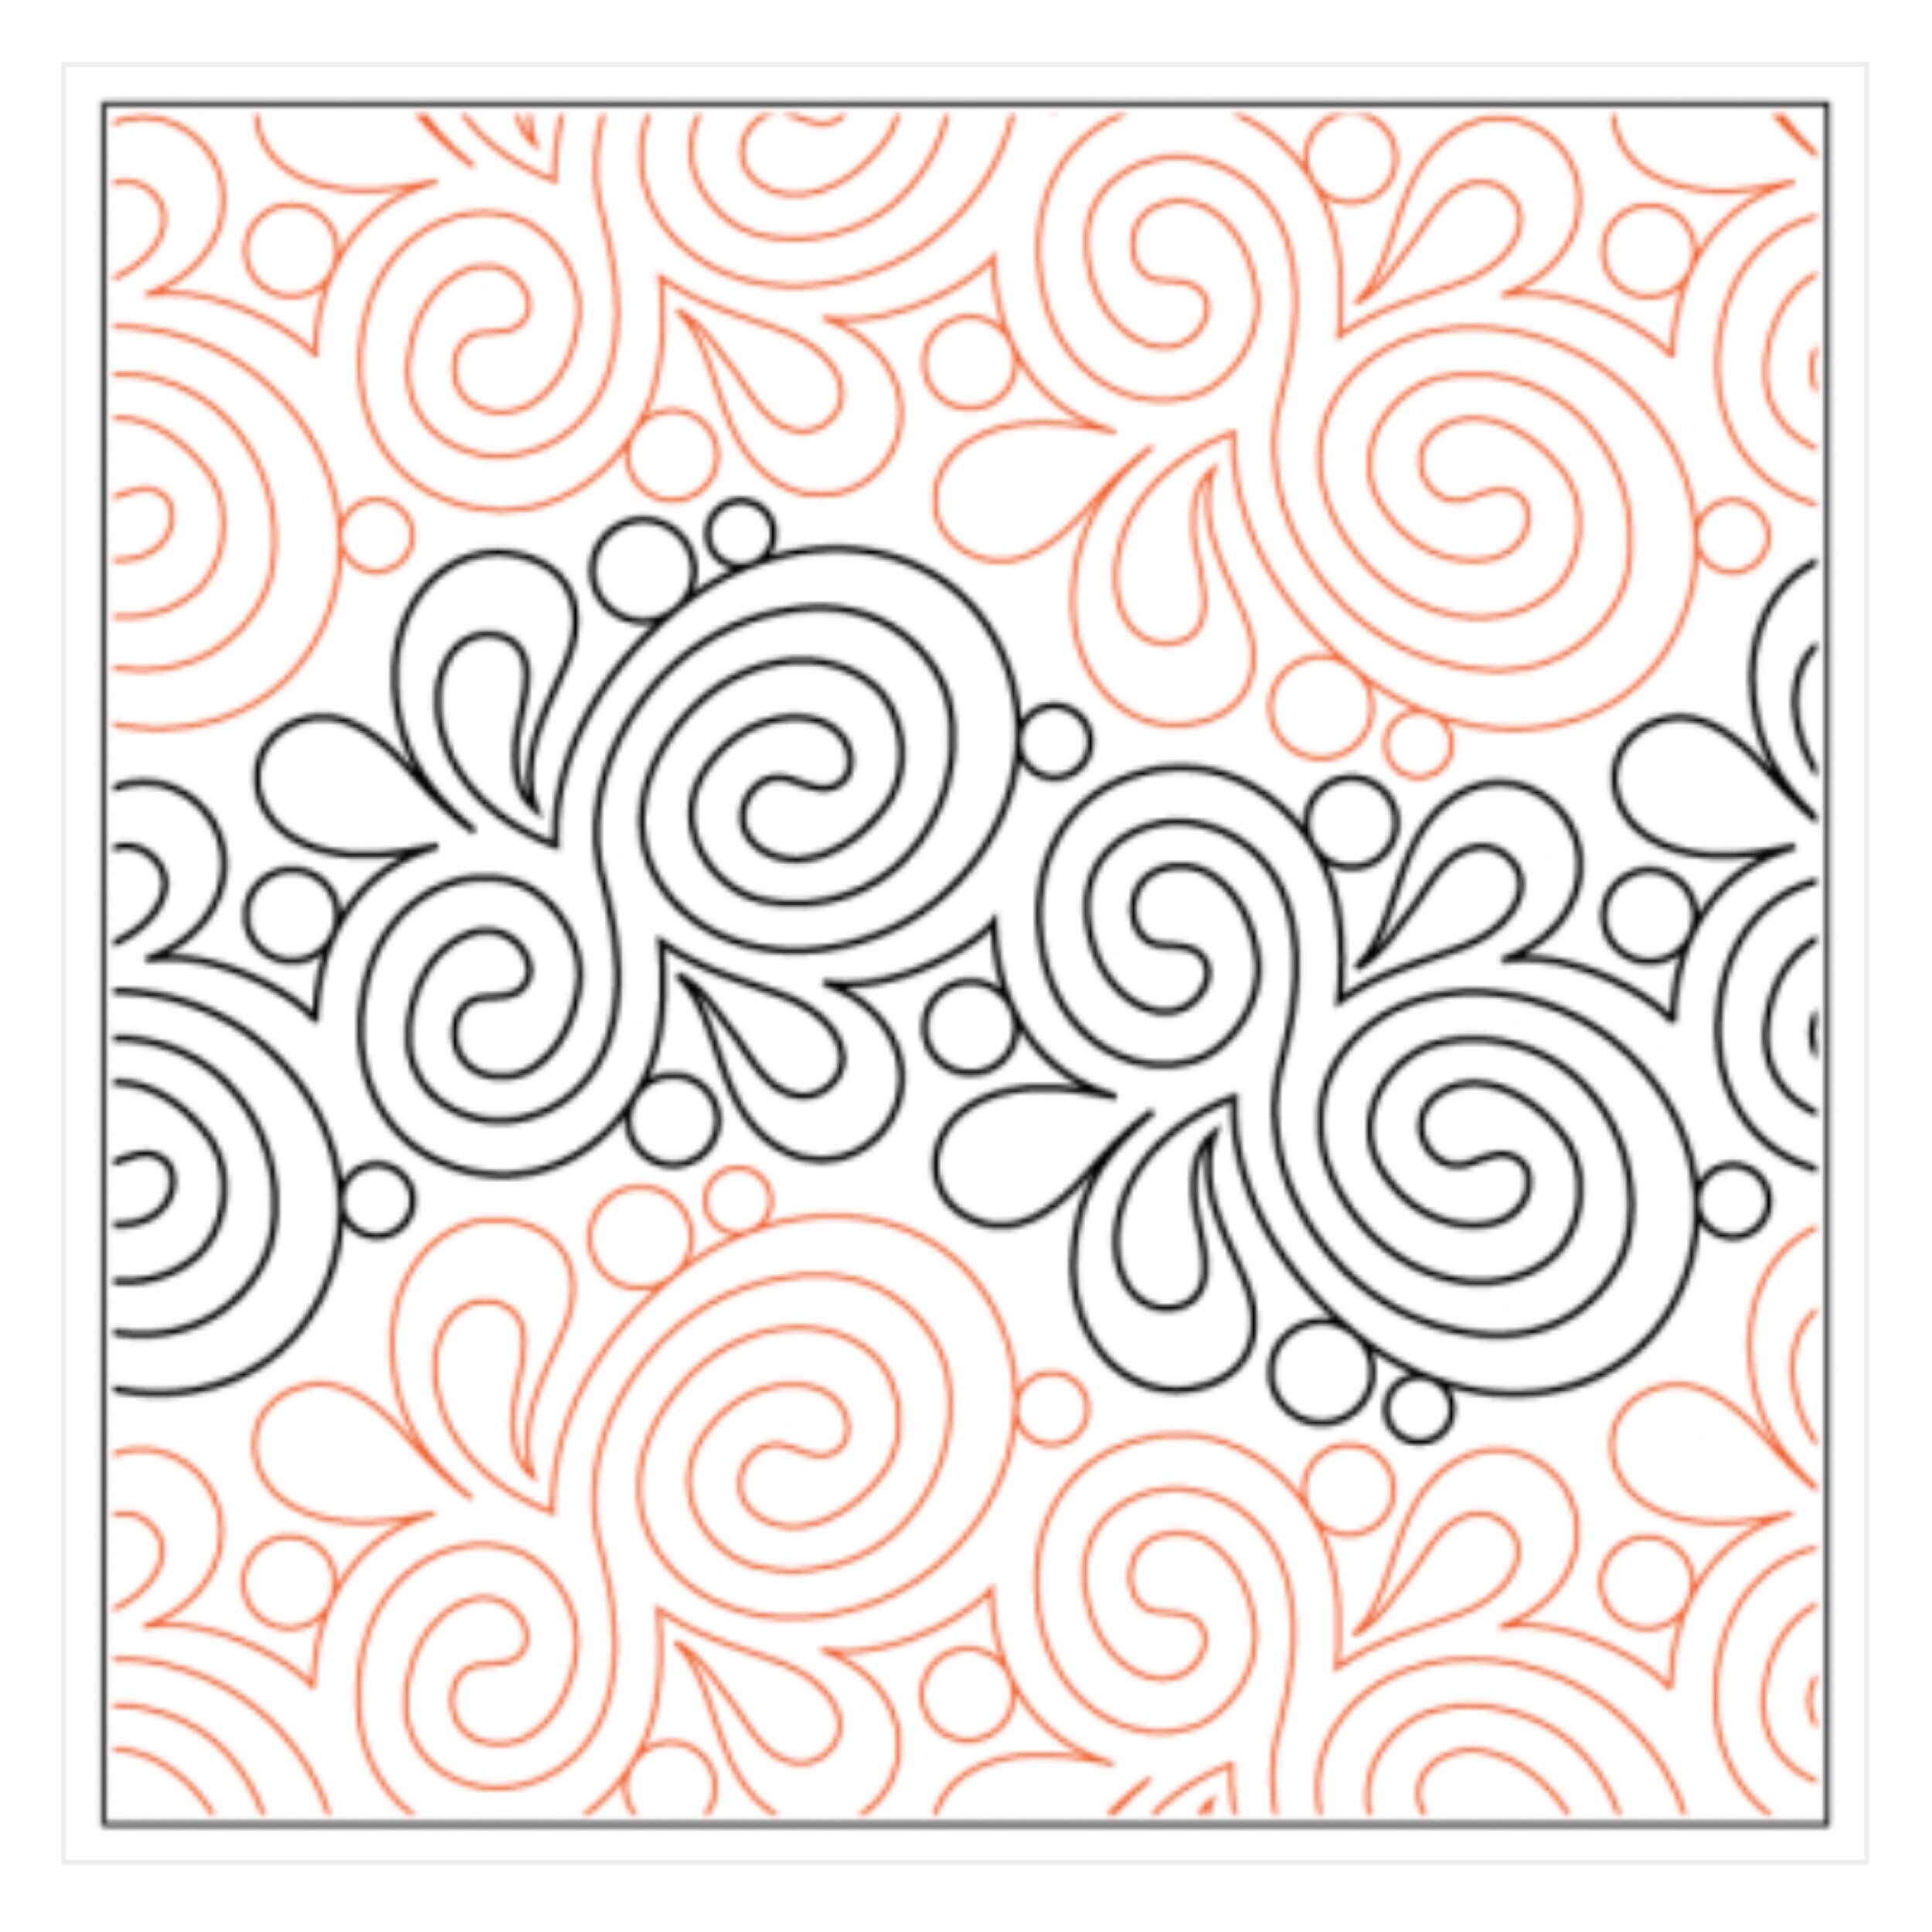
I love the texture this particular design gives to a quilt. Swirls, circles, and feathers. Love love love!!

Hope you have some fun sewing projects you’re working on!! I have a few…I just need to schedule some time to sew them. Thanks for coming by, • Leisha
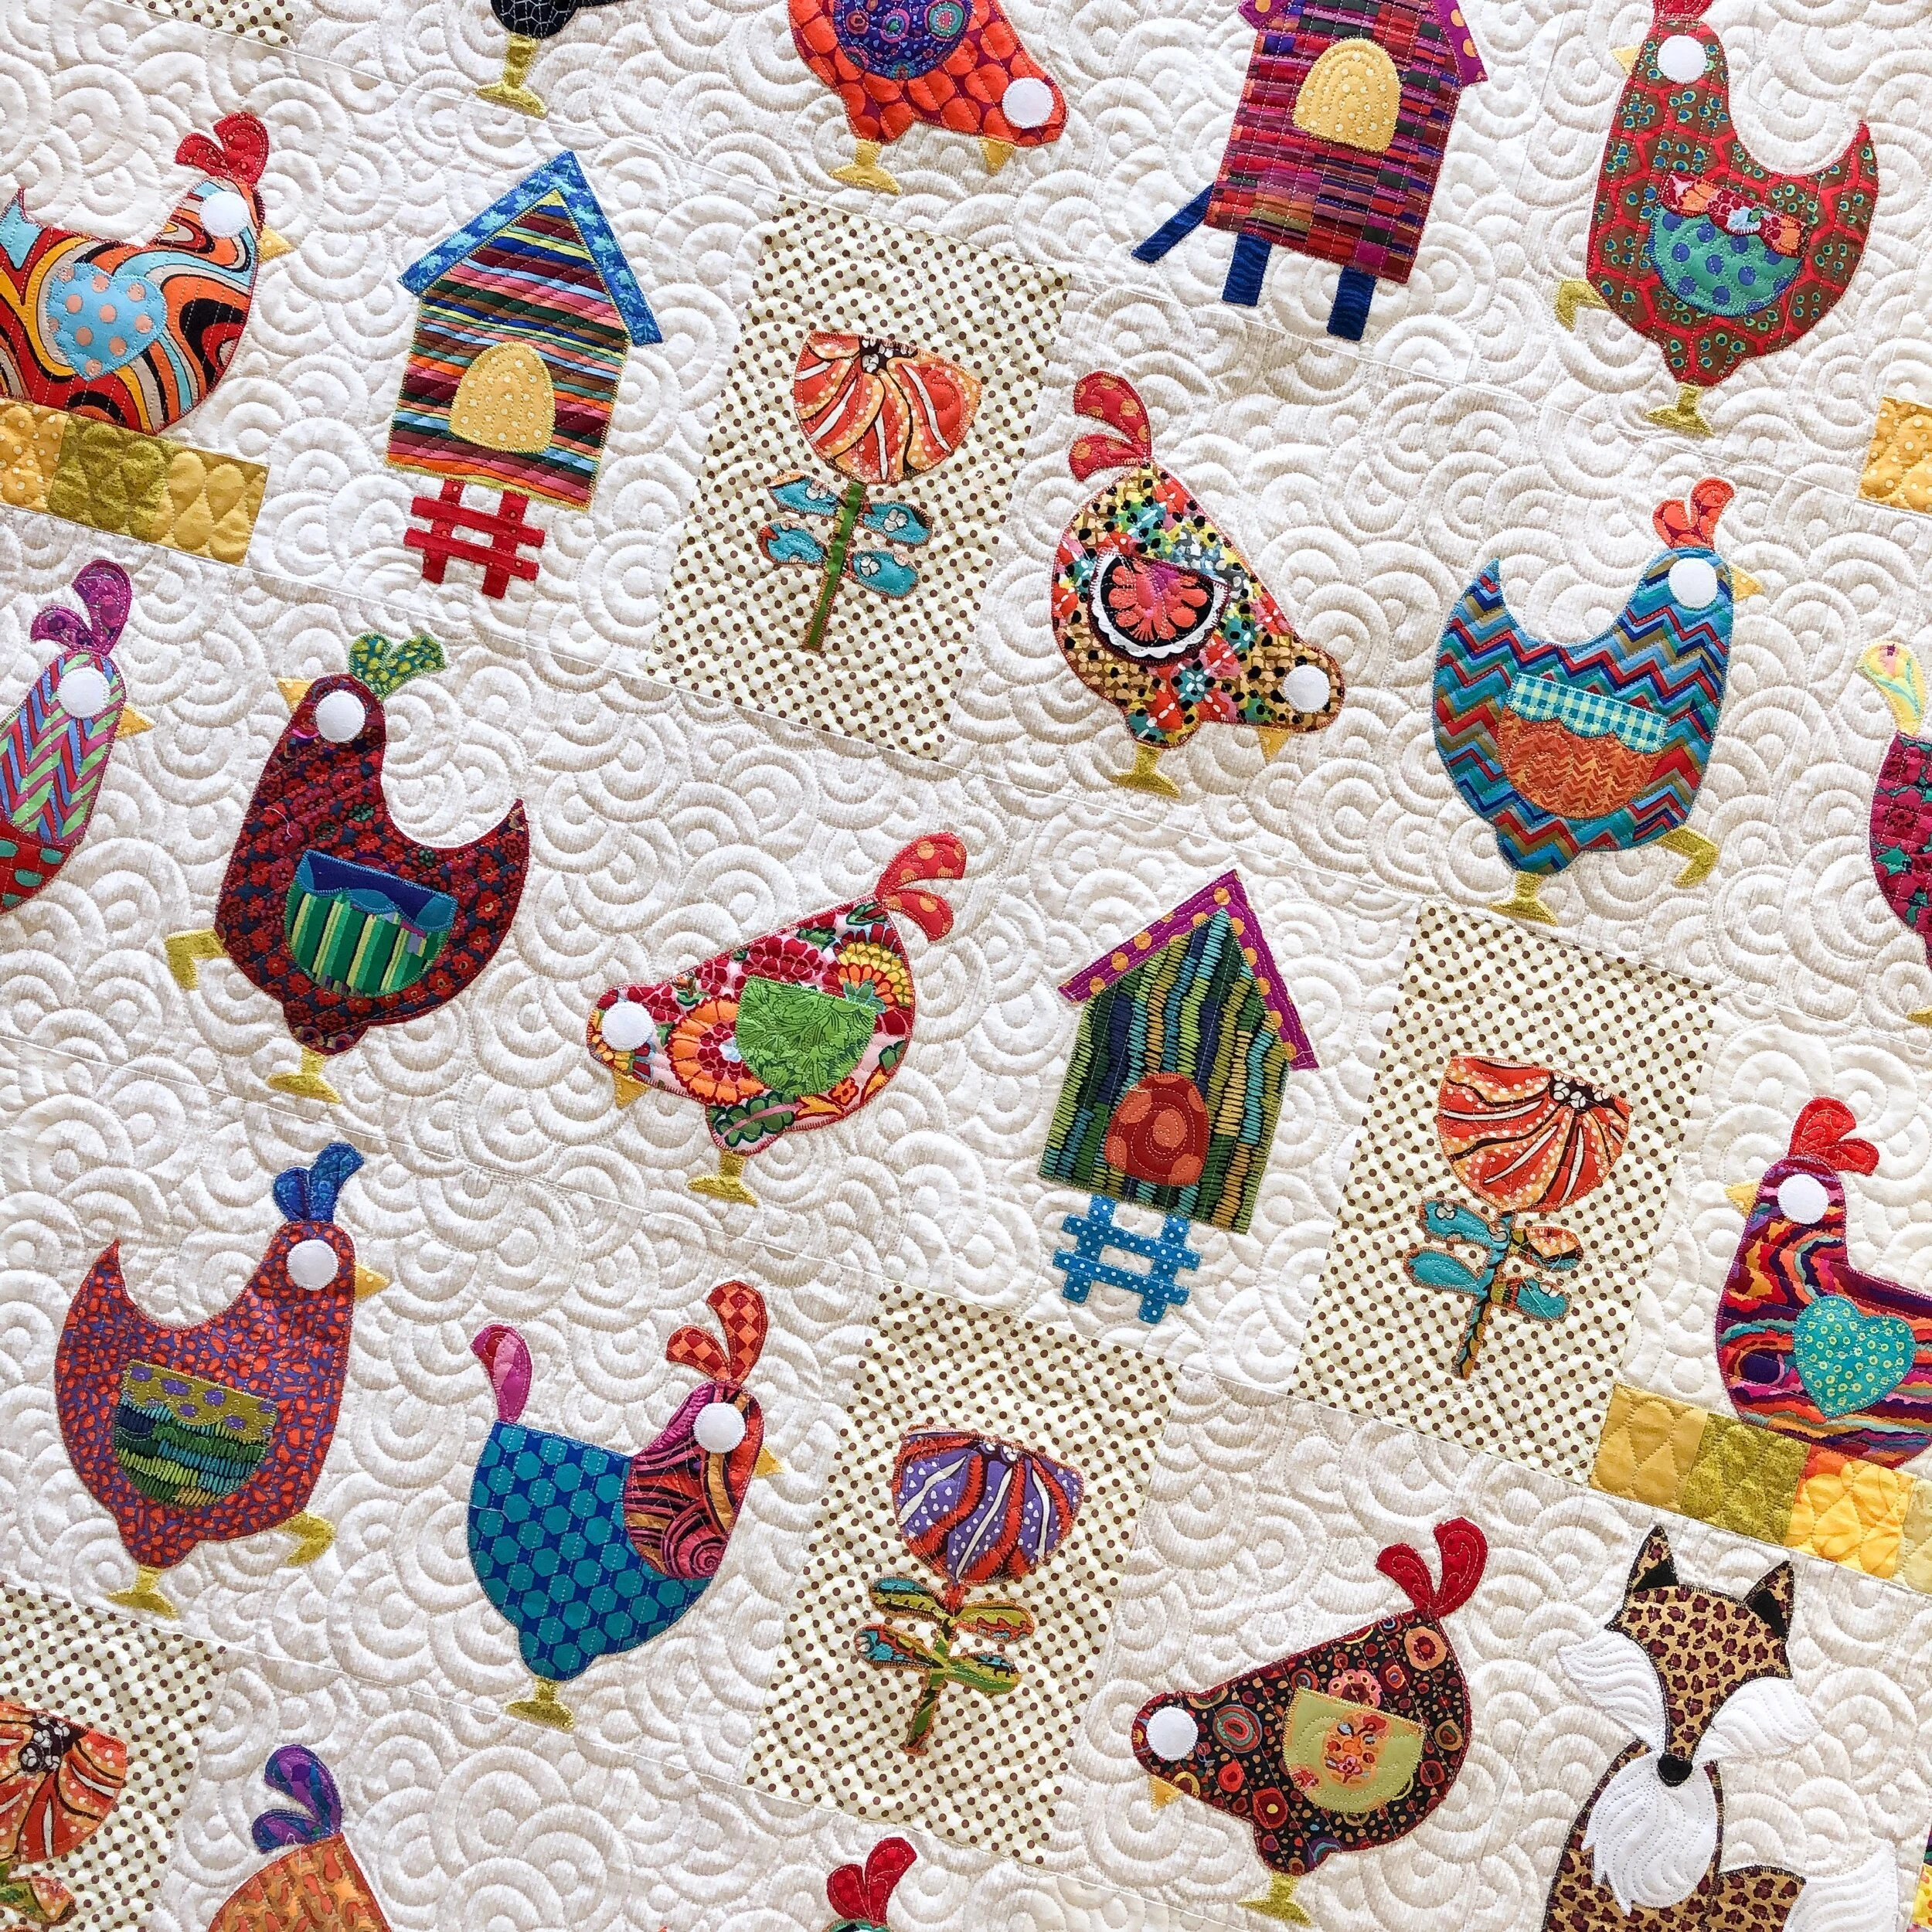
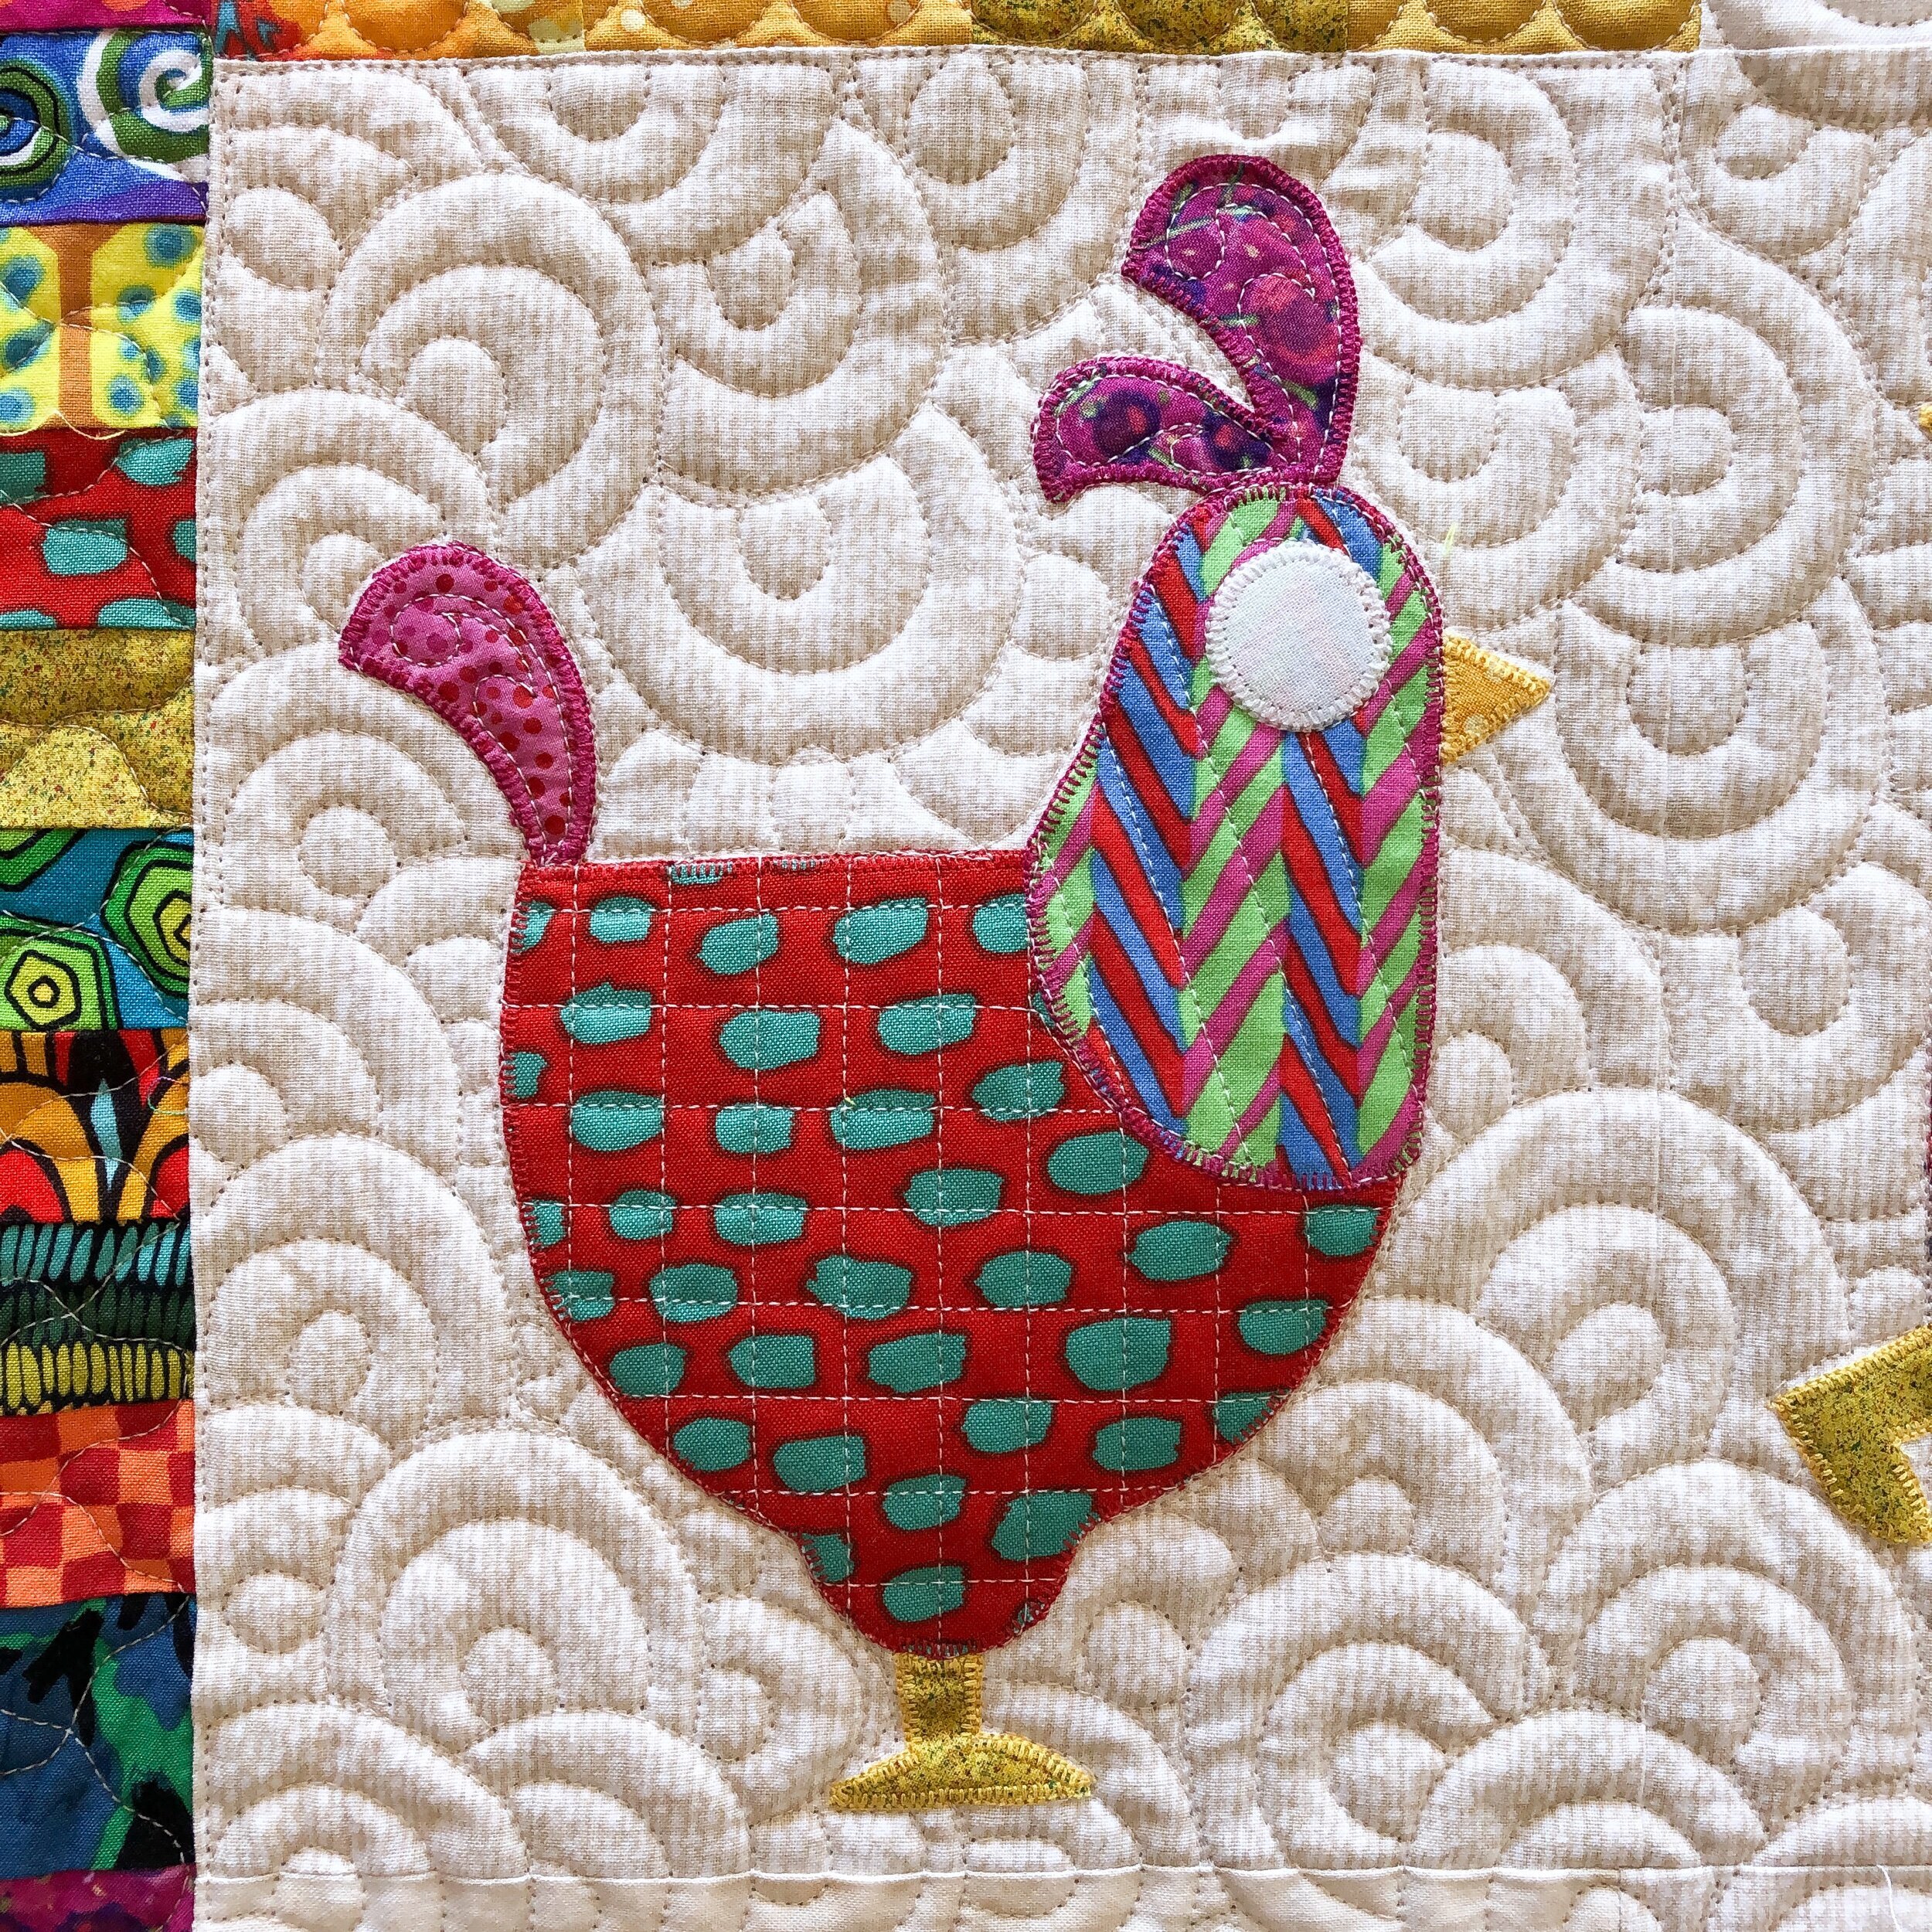
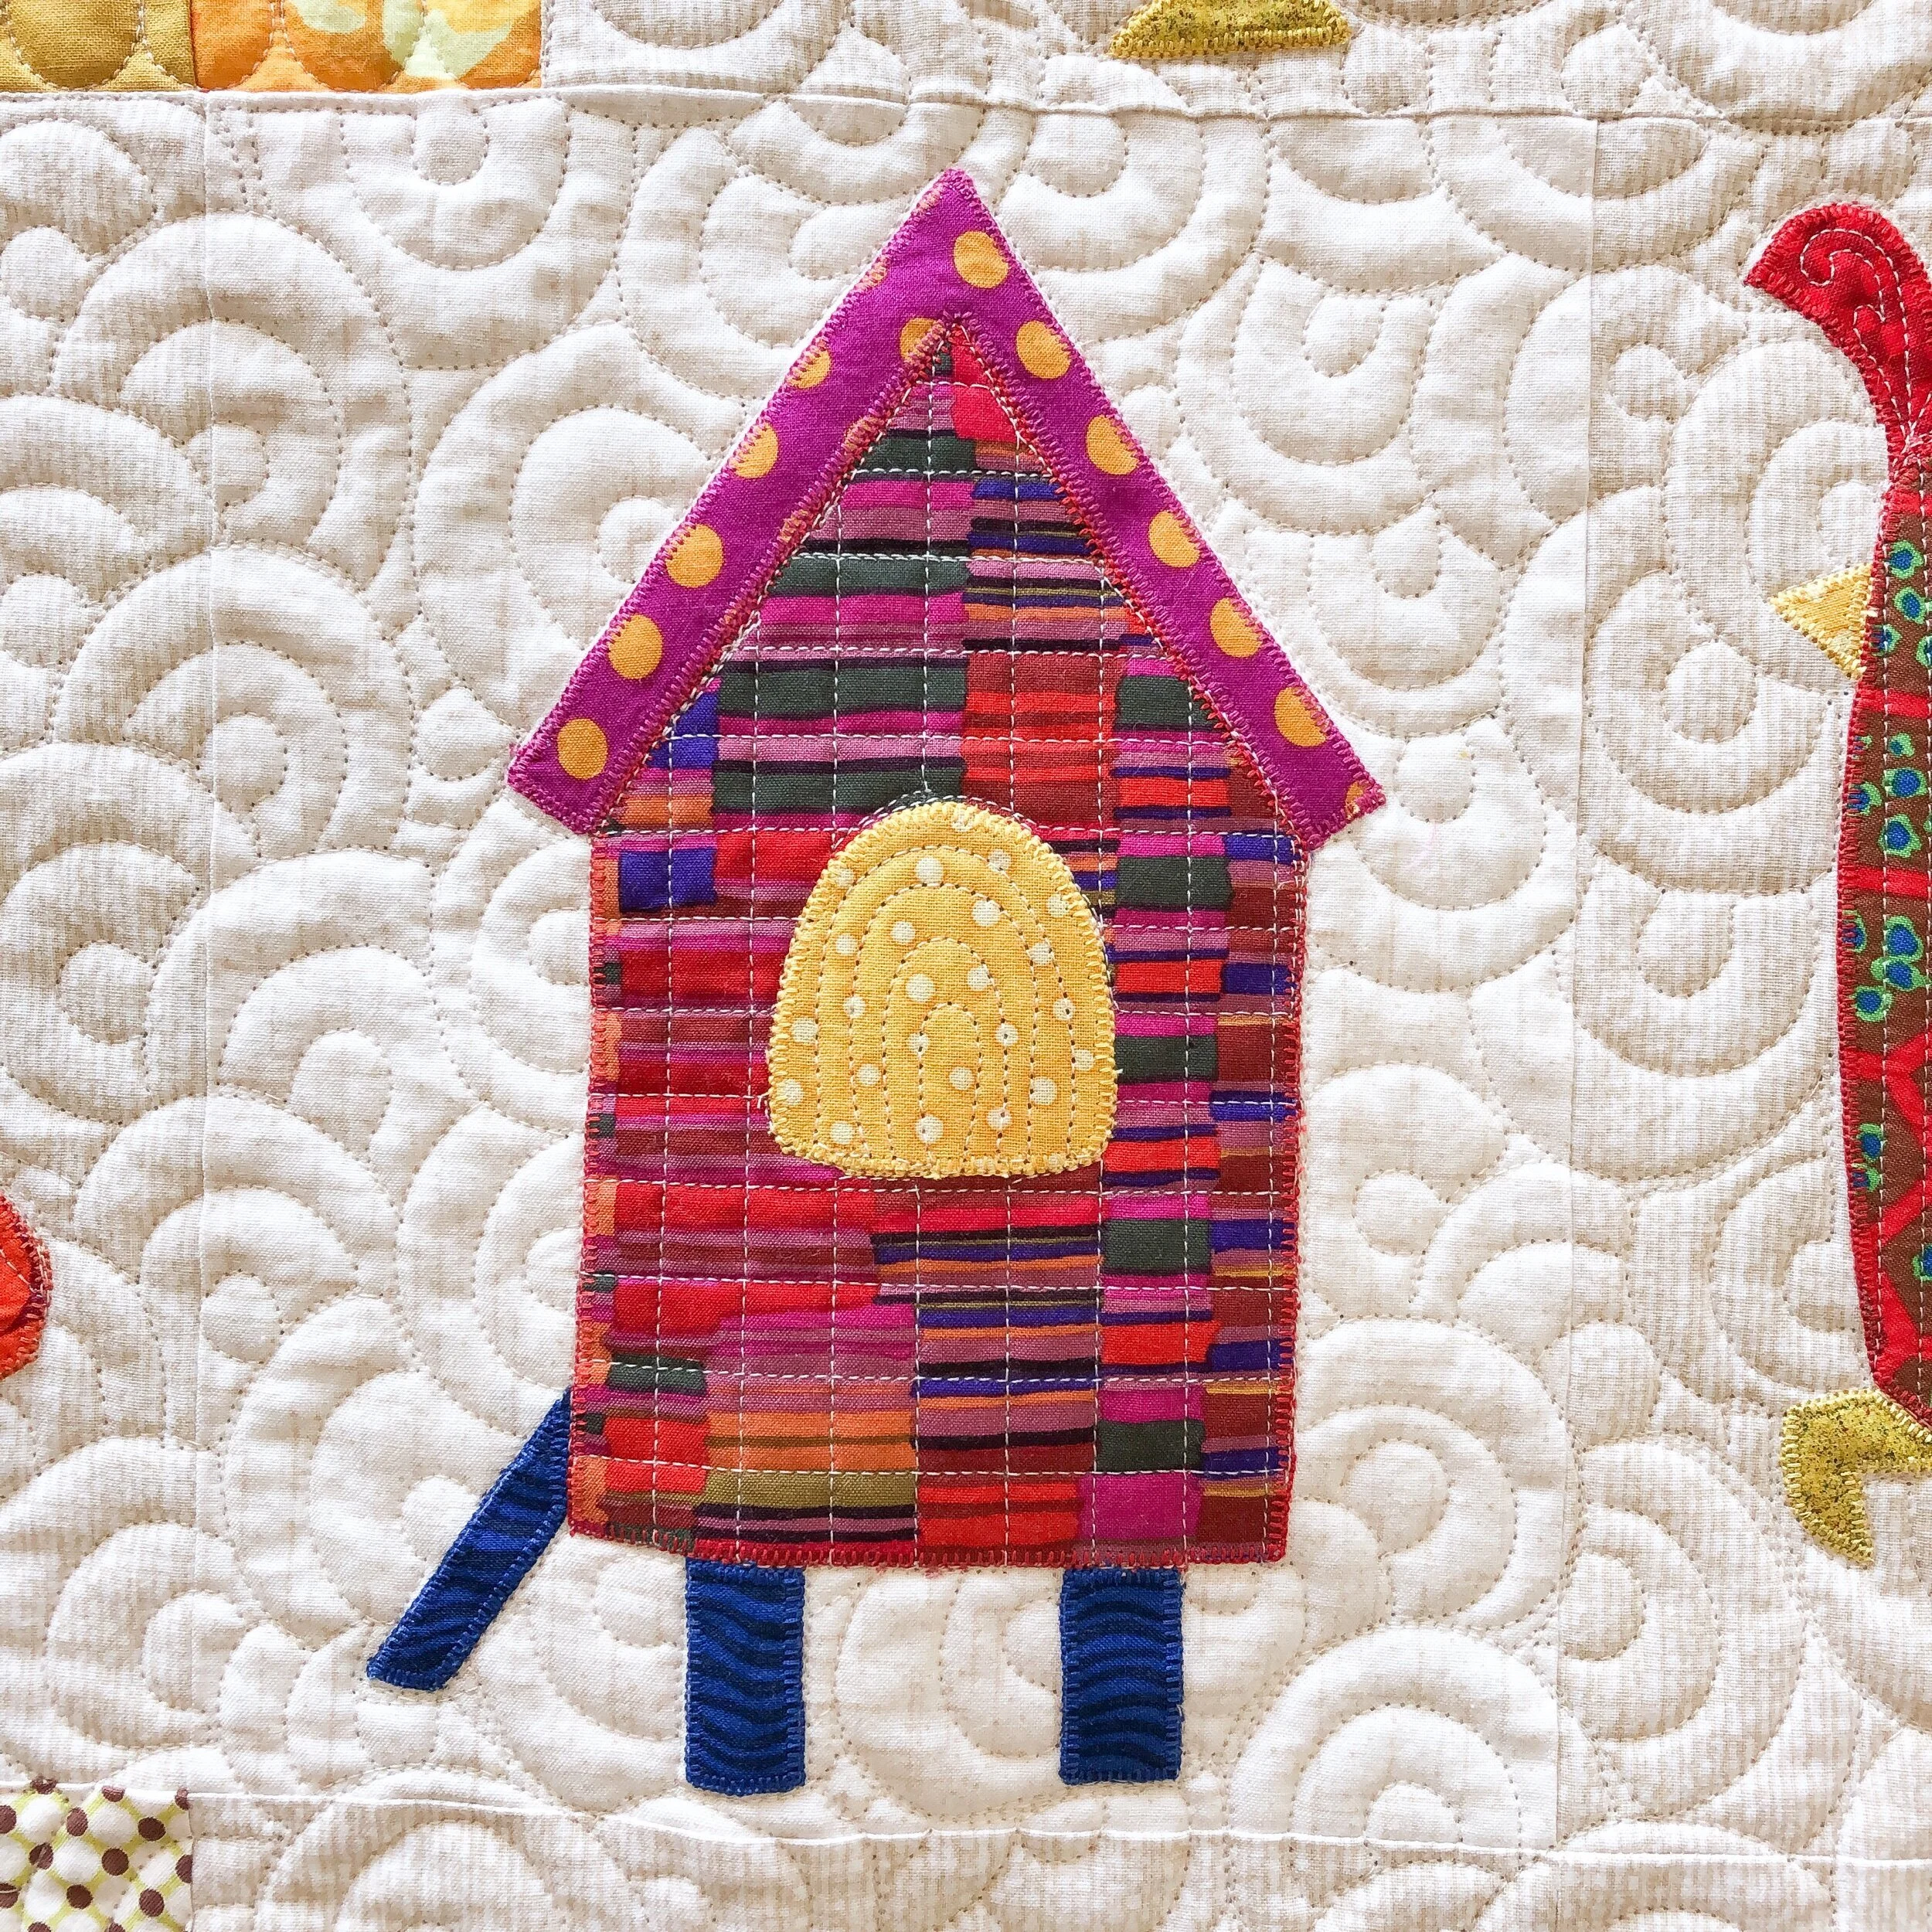
Loranne’s Hen House Quilt
Happy Monday!!
I actually like Monday’s, how about you? I have such a fun quilt to share with you today!
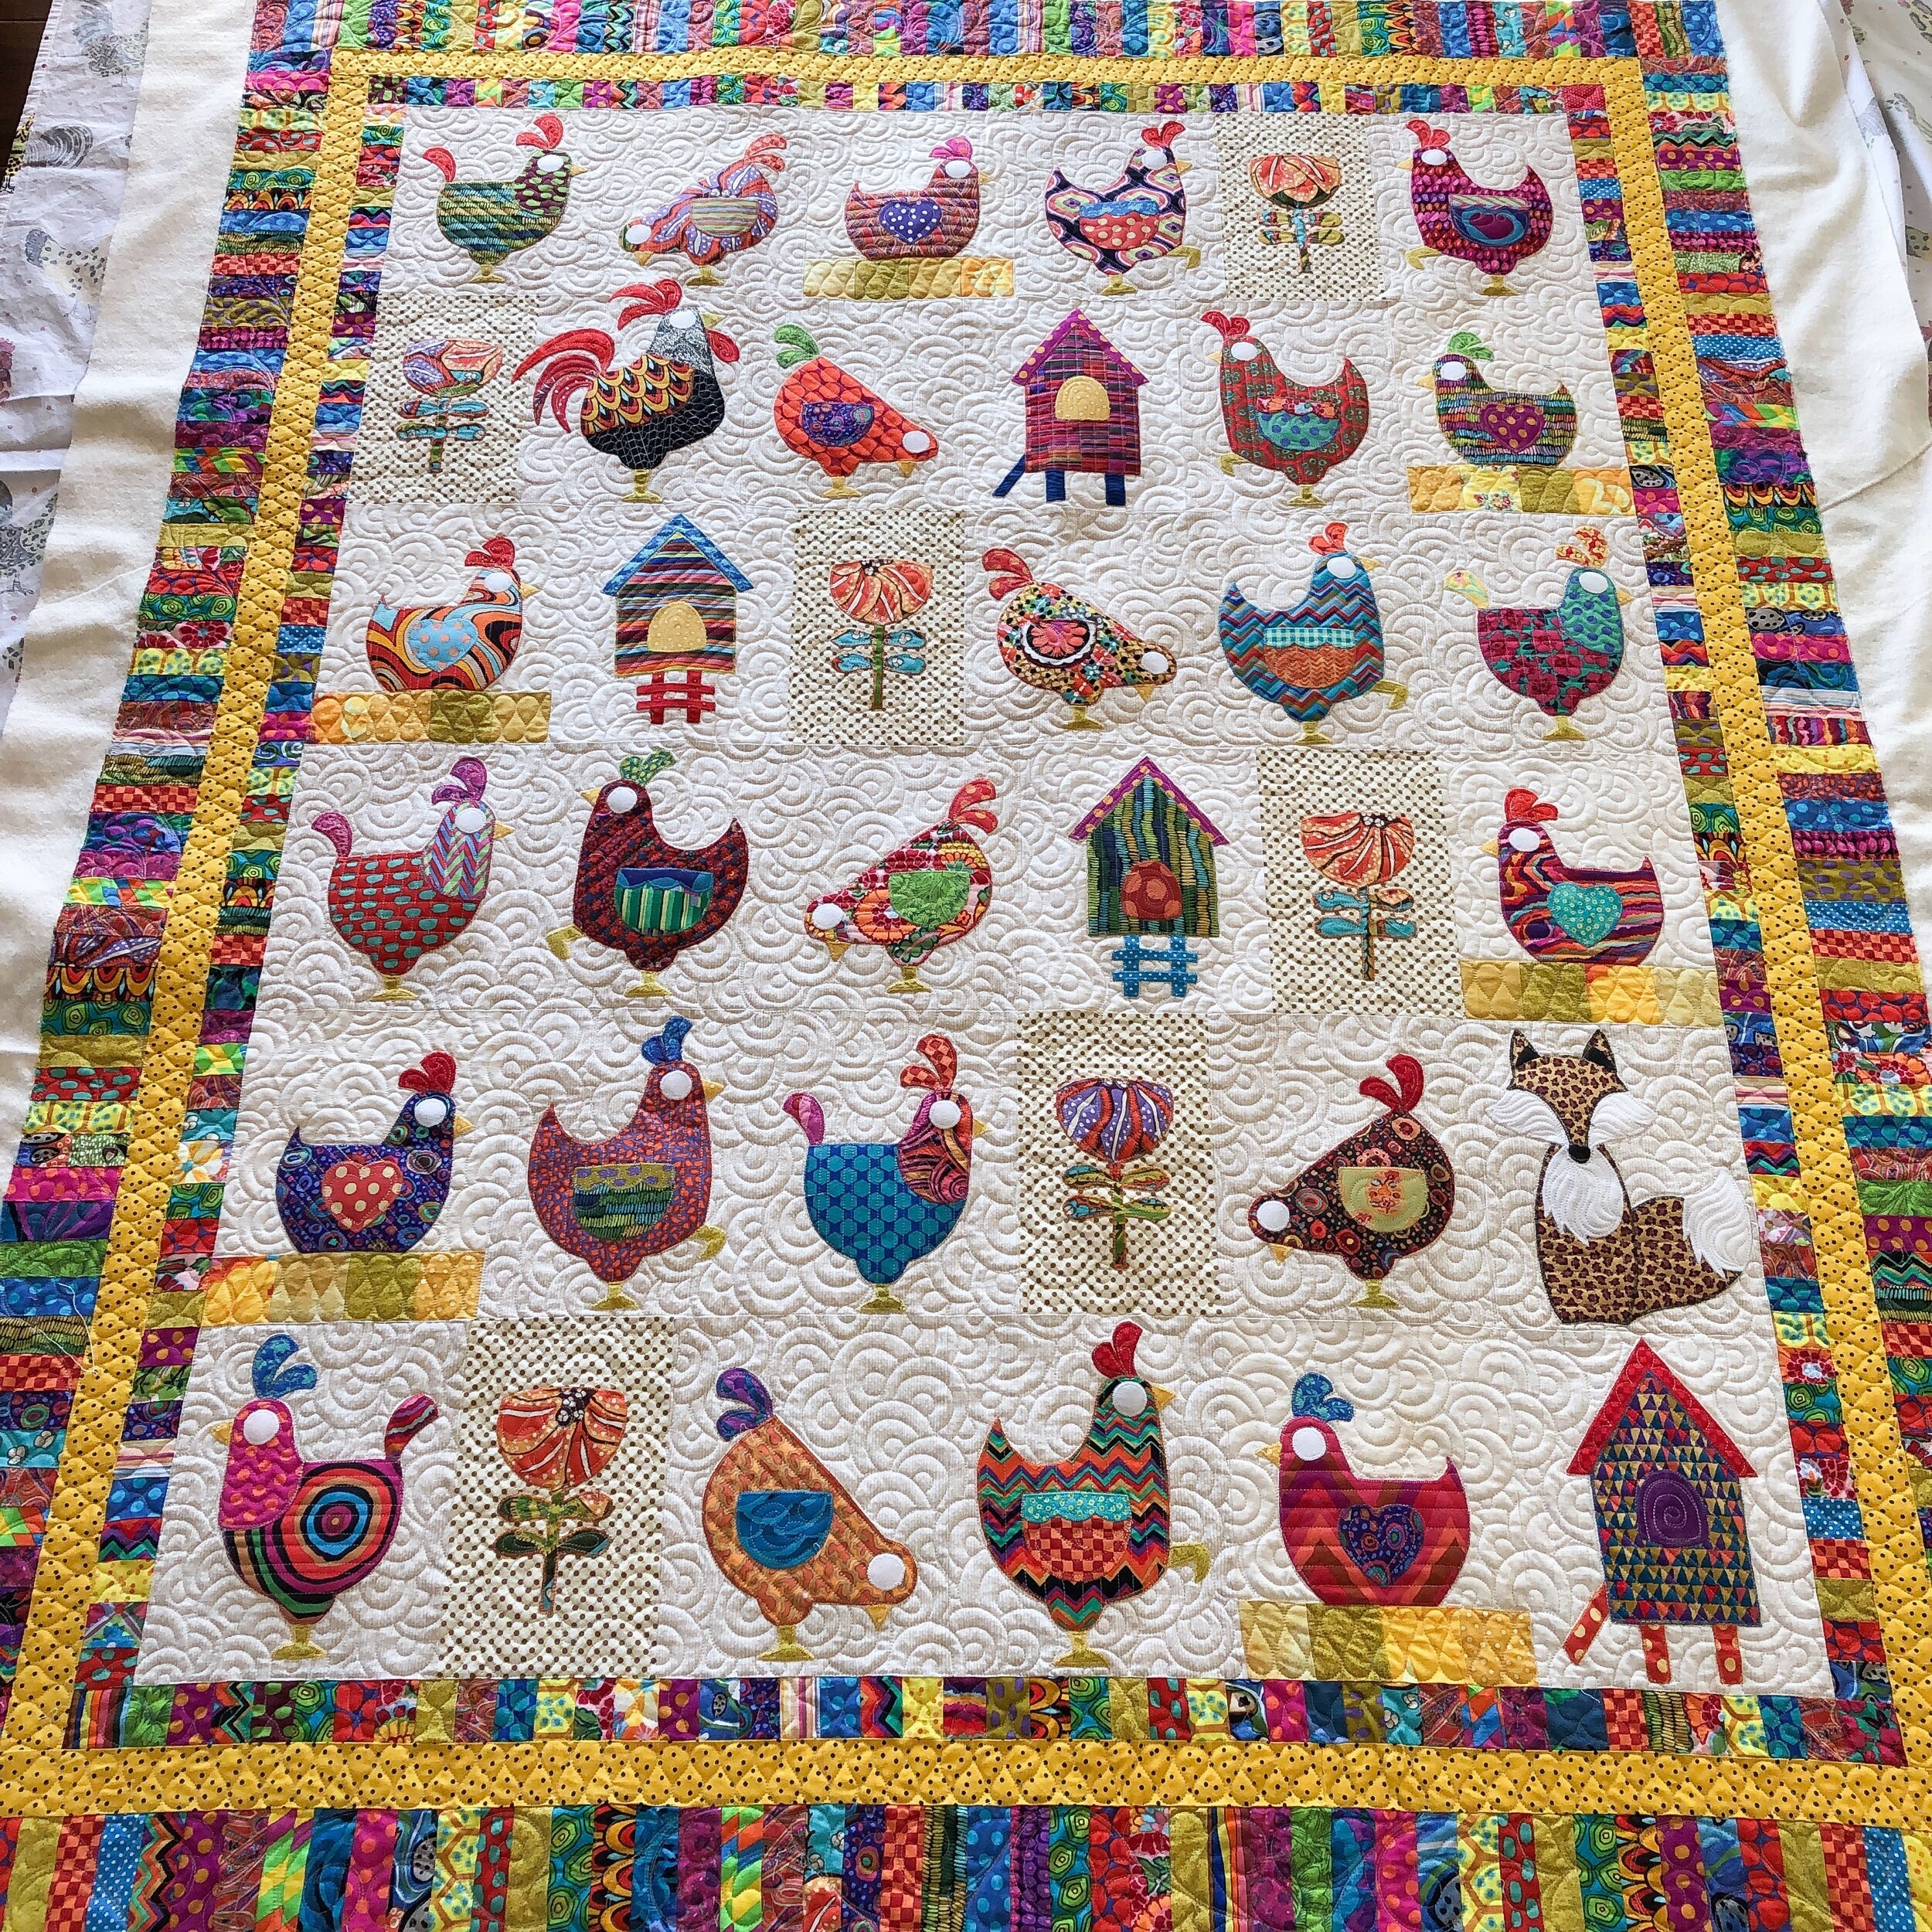
This is another quilt made by Loranne. The pattern is called Hen House by Claire Turpin design, and can by found at www.claireturpindesign.com

I used a cream Omni thread from Superior Threads, and Winline’s 8020 cotton poly blend batting.

Loranne wanted something custom, so I thought my freehand overlapping circle design would be a fun texture! It’s one of my favorite designs to quilt.
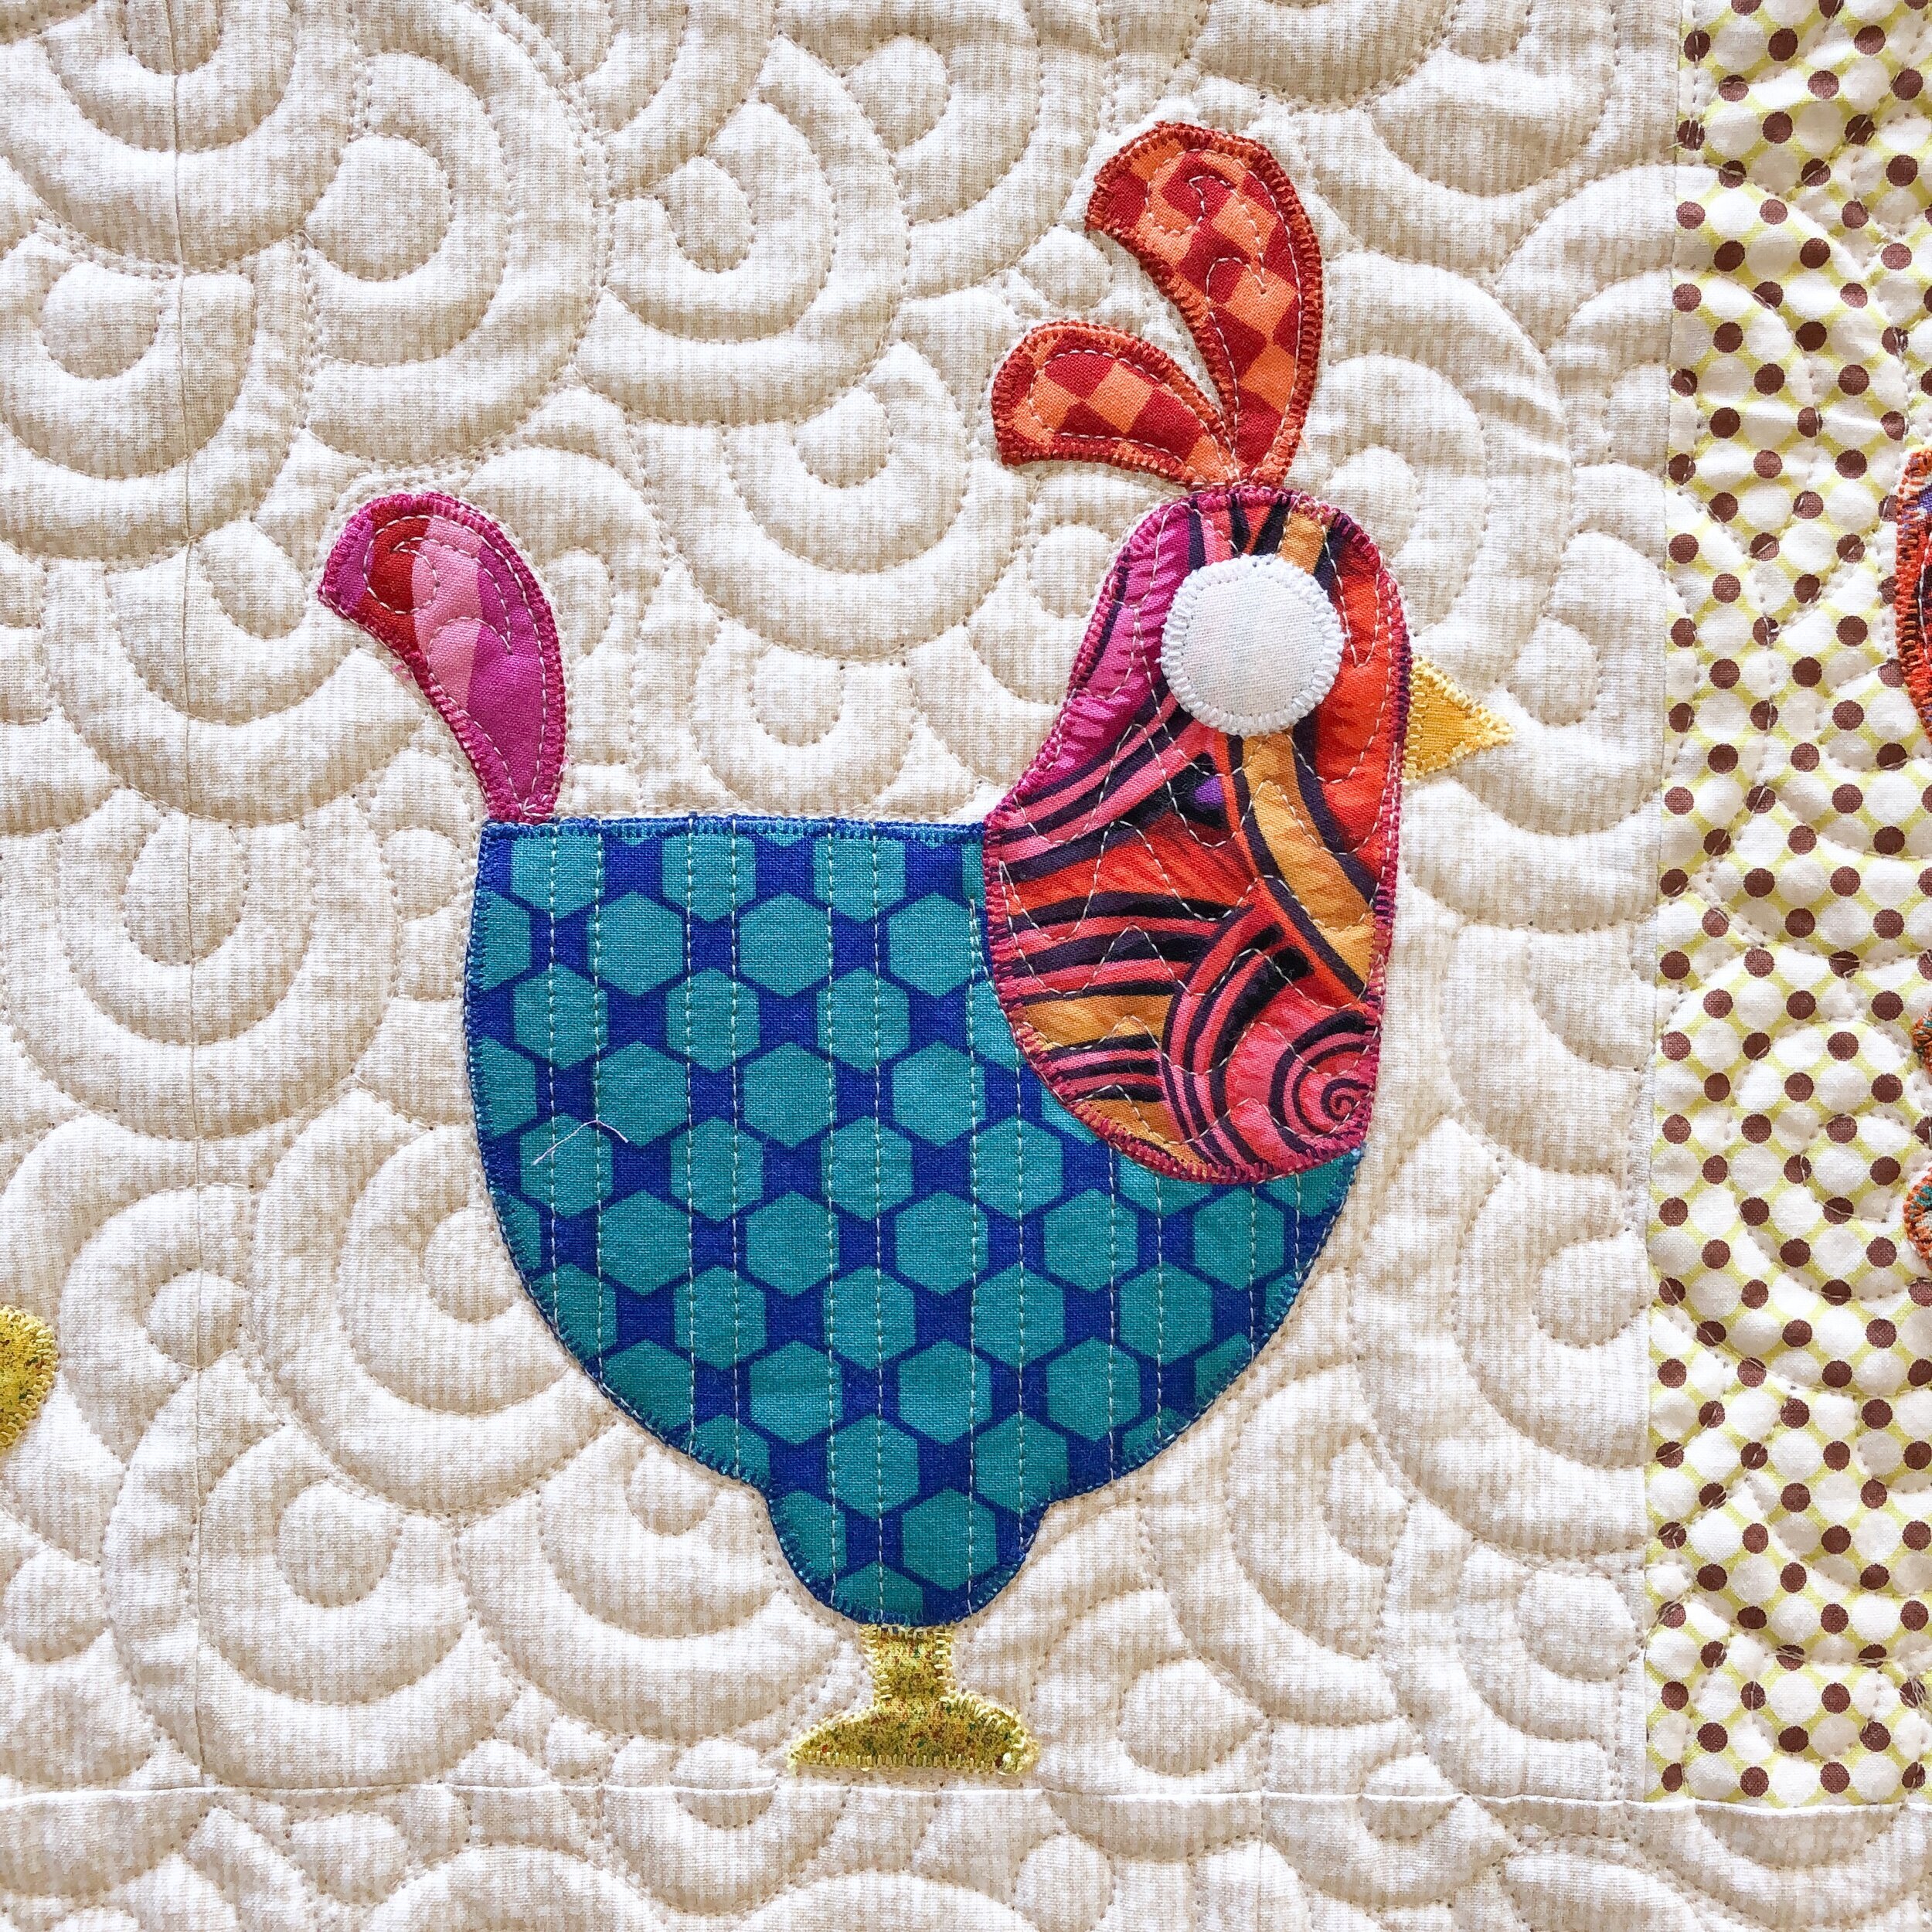
To offset all the curves in the background and give the chickens their own textures, I quilted lines in a variety of different patterns and angles. Then some feathers in the feathers. Leaving the eyes, beaks, and feet unquilted. Sometimes every little piece doesn’t need to be quilted. I used my favorite 8” Edge ruler from Linda at The Quilted Pineapple to quilt all the lines.
Same with the houses and flowers.
Okay…how cute is this fox! The fur turned out soooo fun!
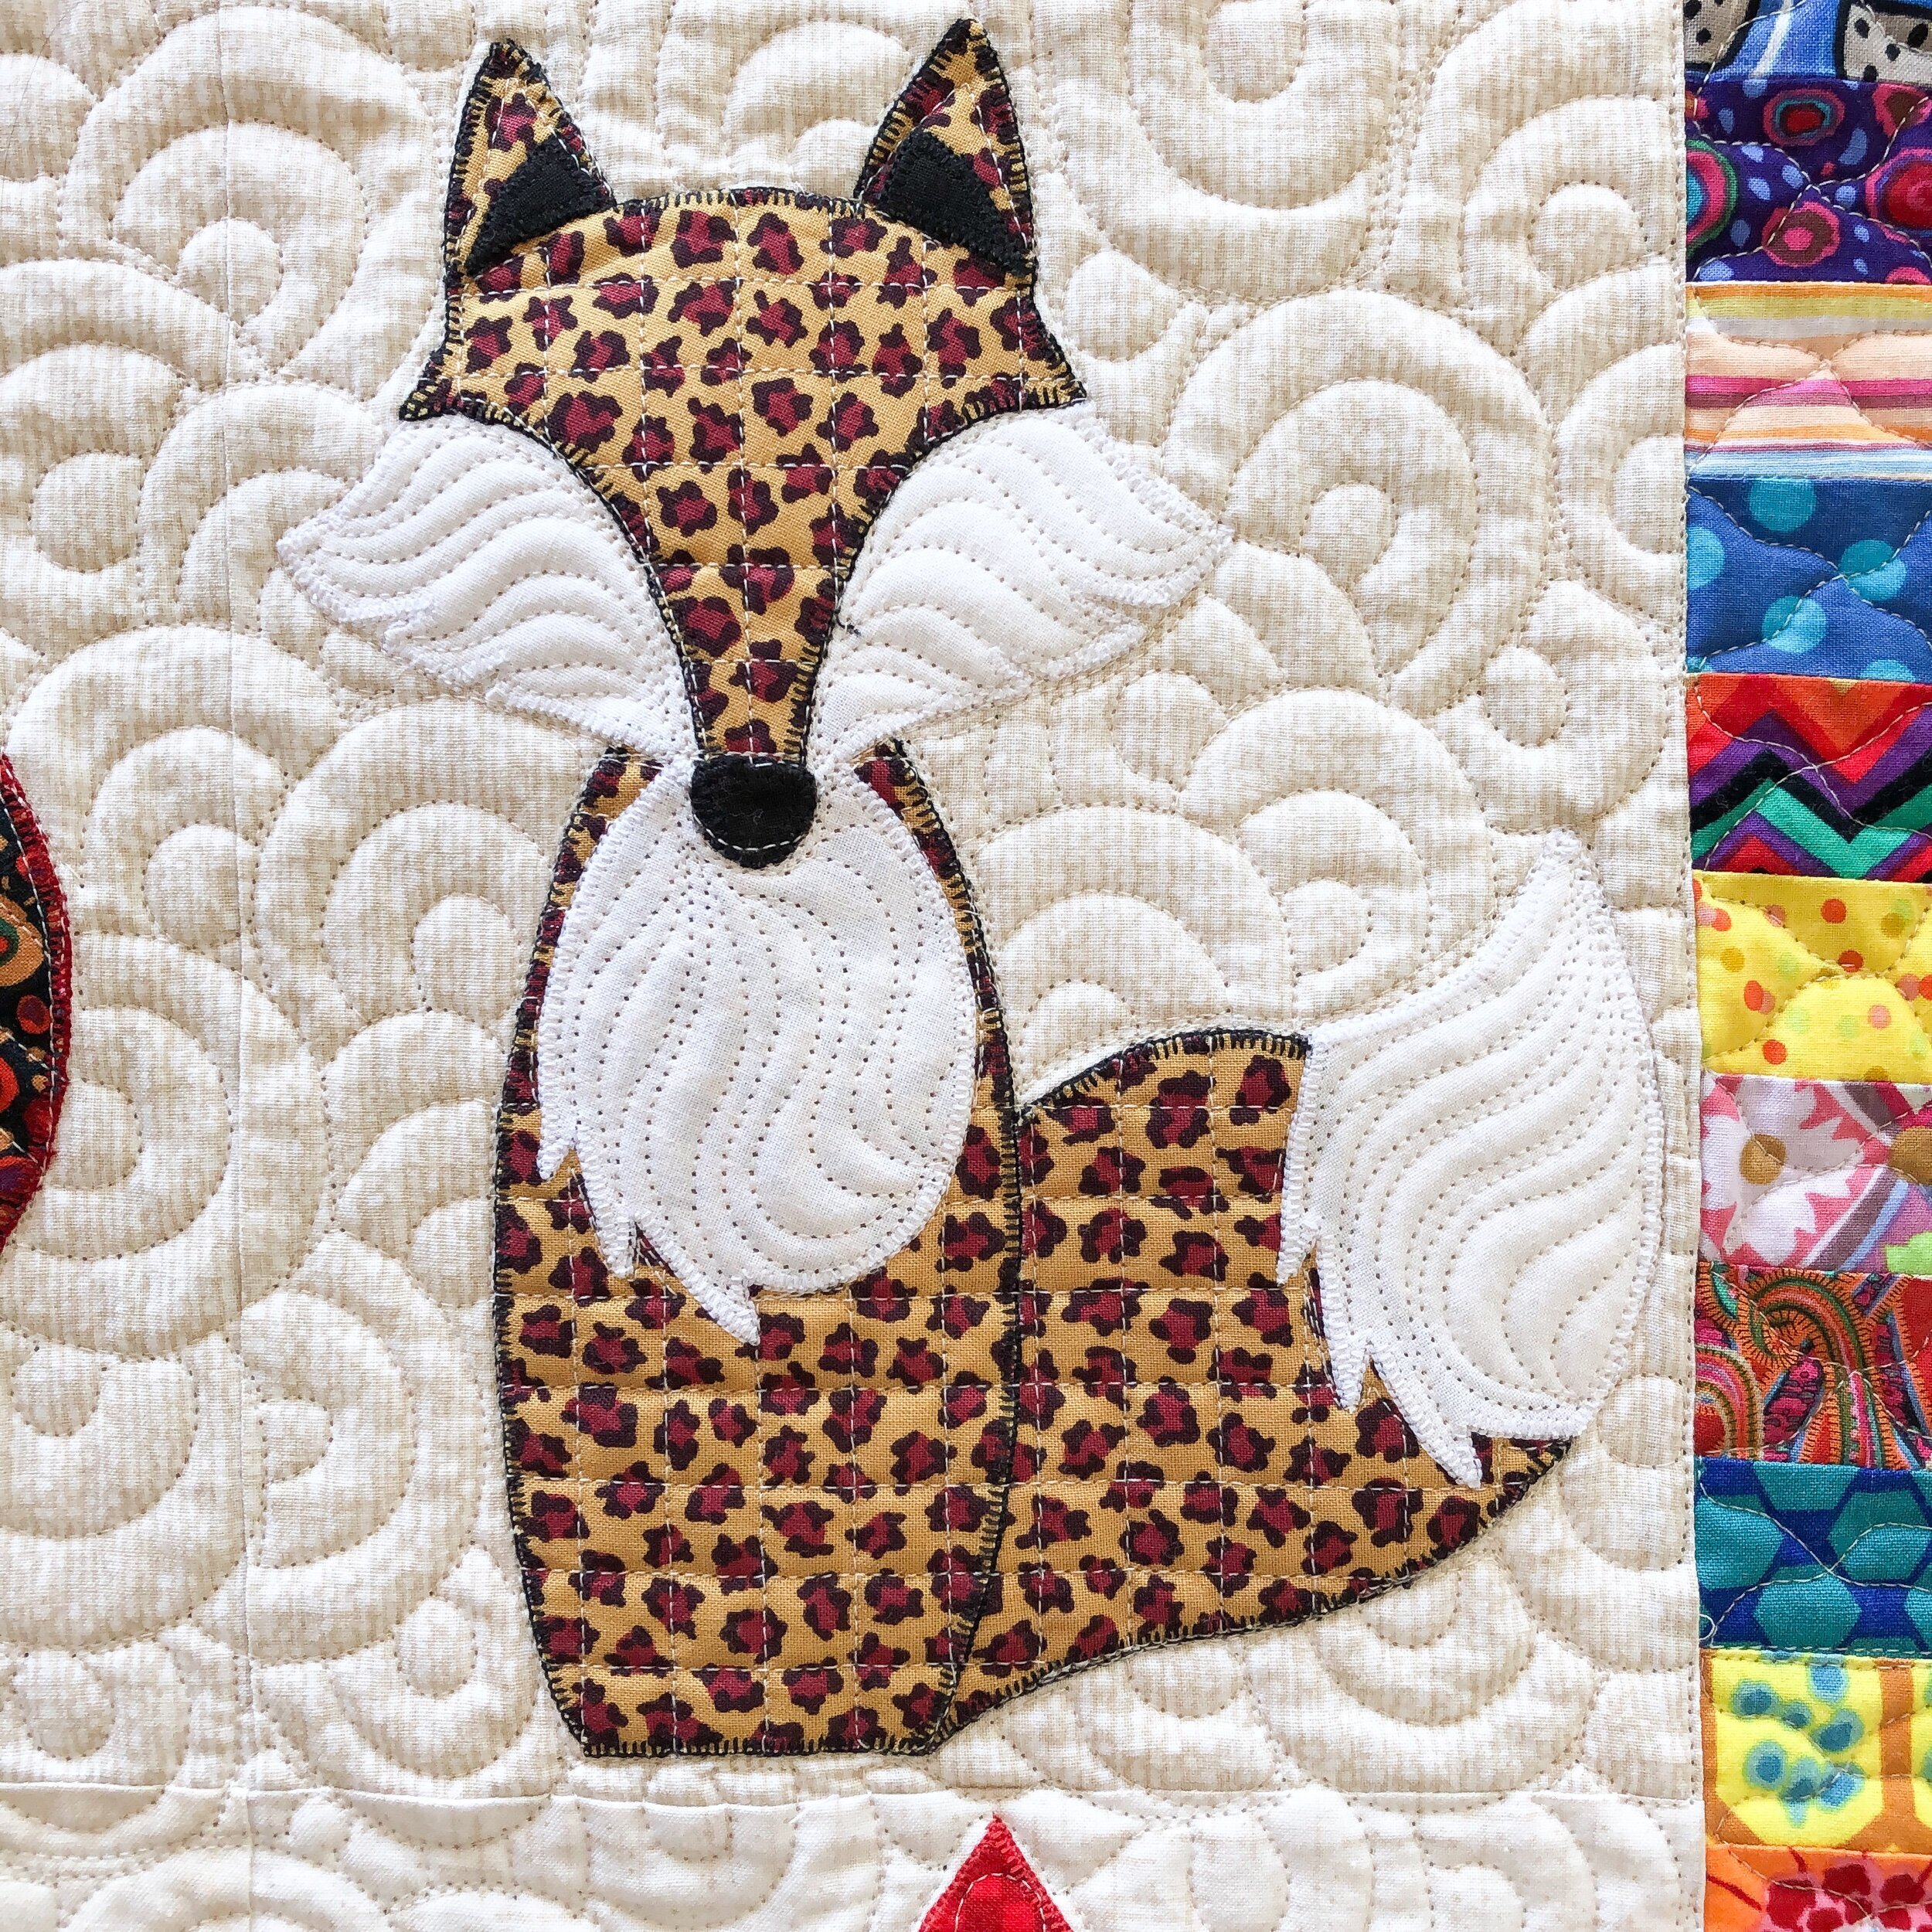
I quilted a wavy line in the mini rectangle border, ribbon candy in the yellow border, and my feathered swirl in the outer piano keys border.

Thanks for coming on by!! It fun to add texture to quilts and share the details here. Happy quilting!!
• Leisha
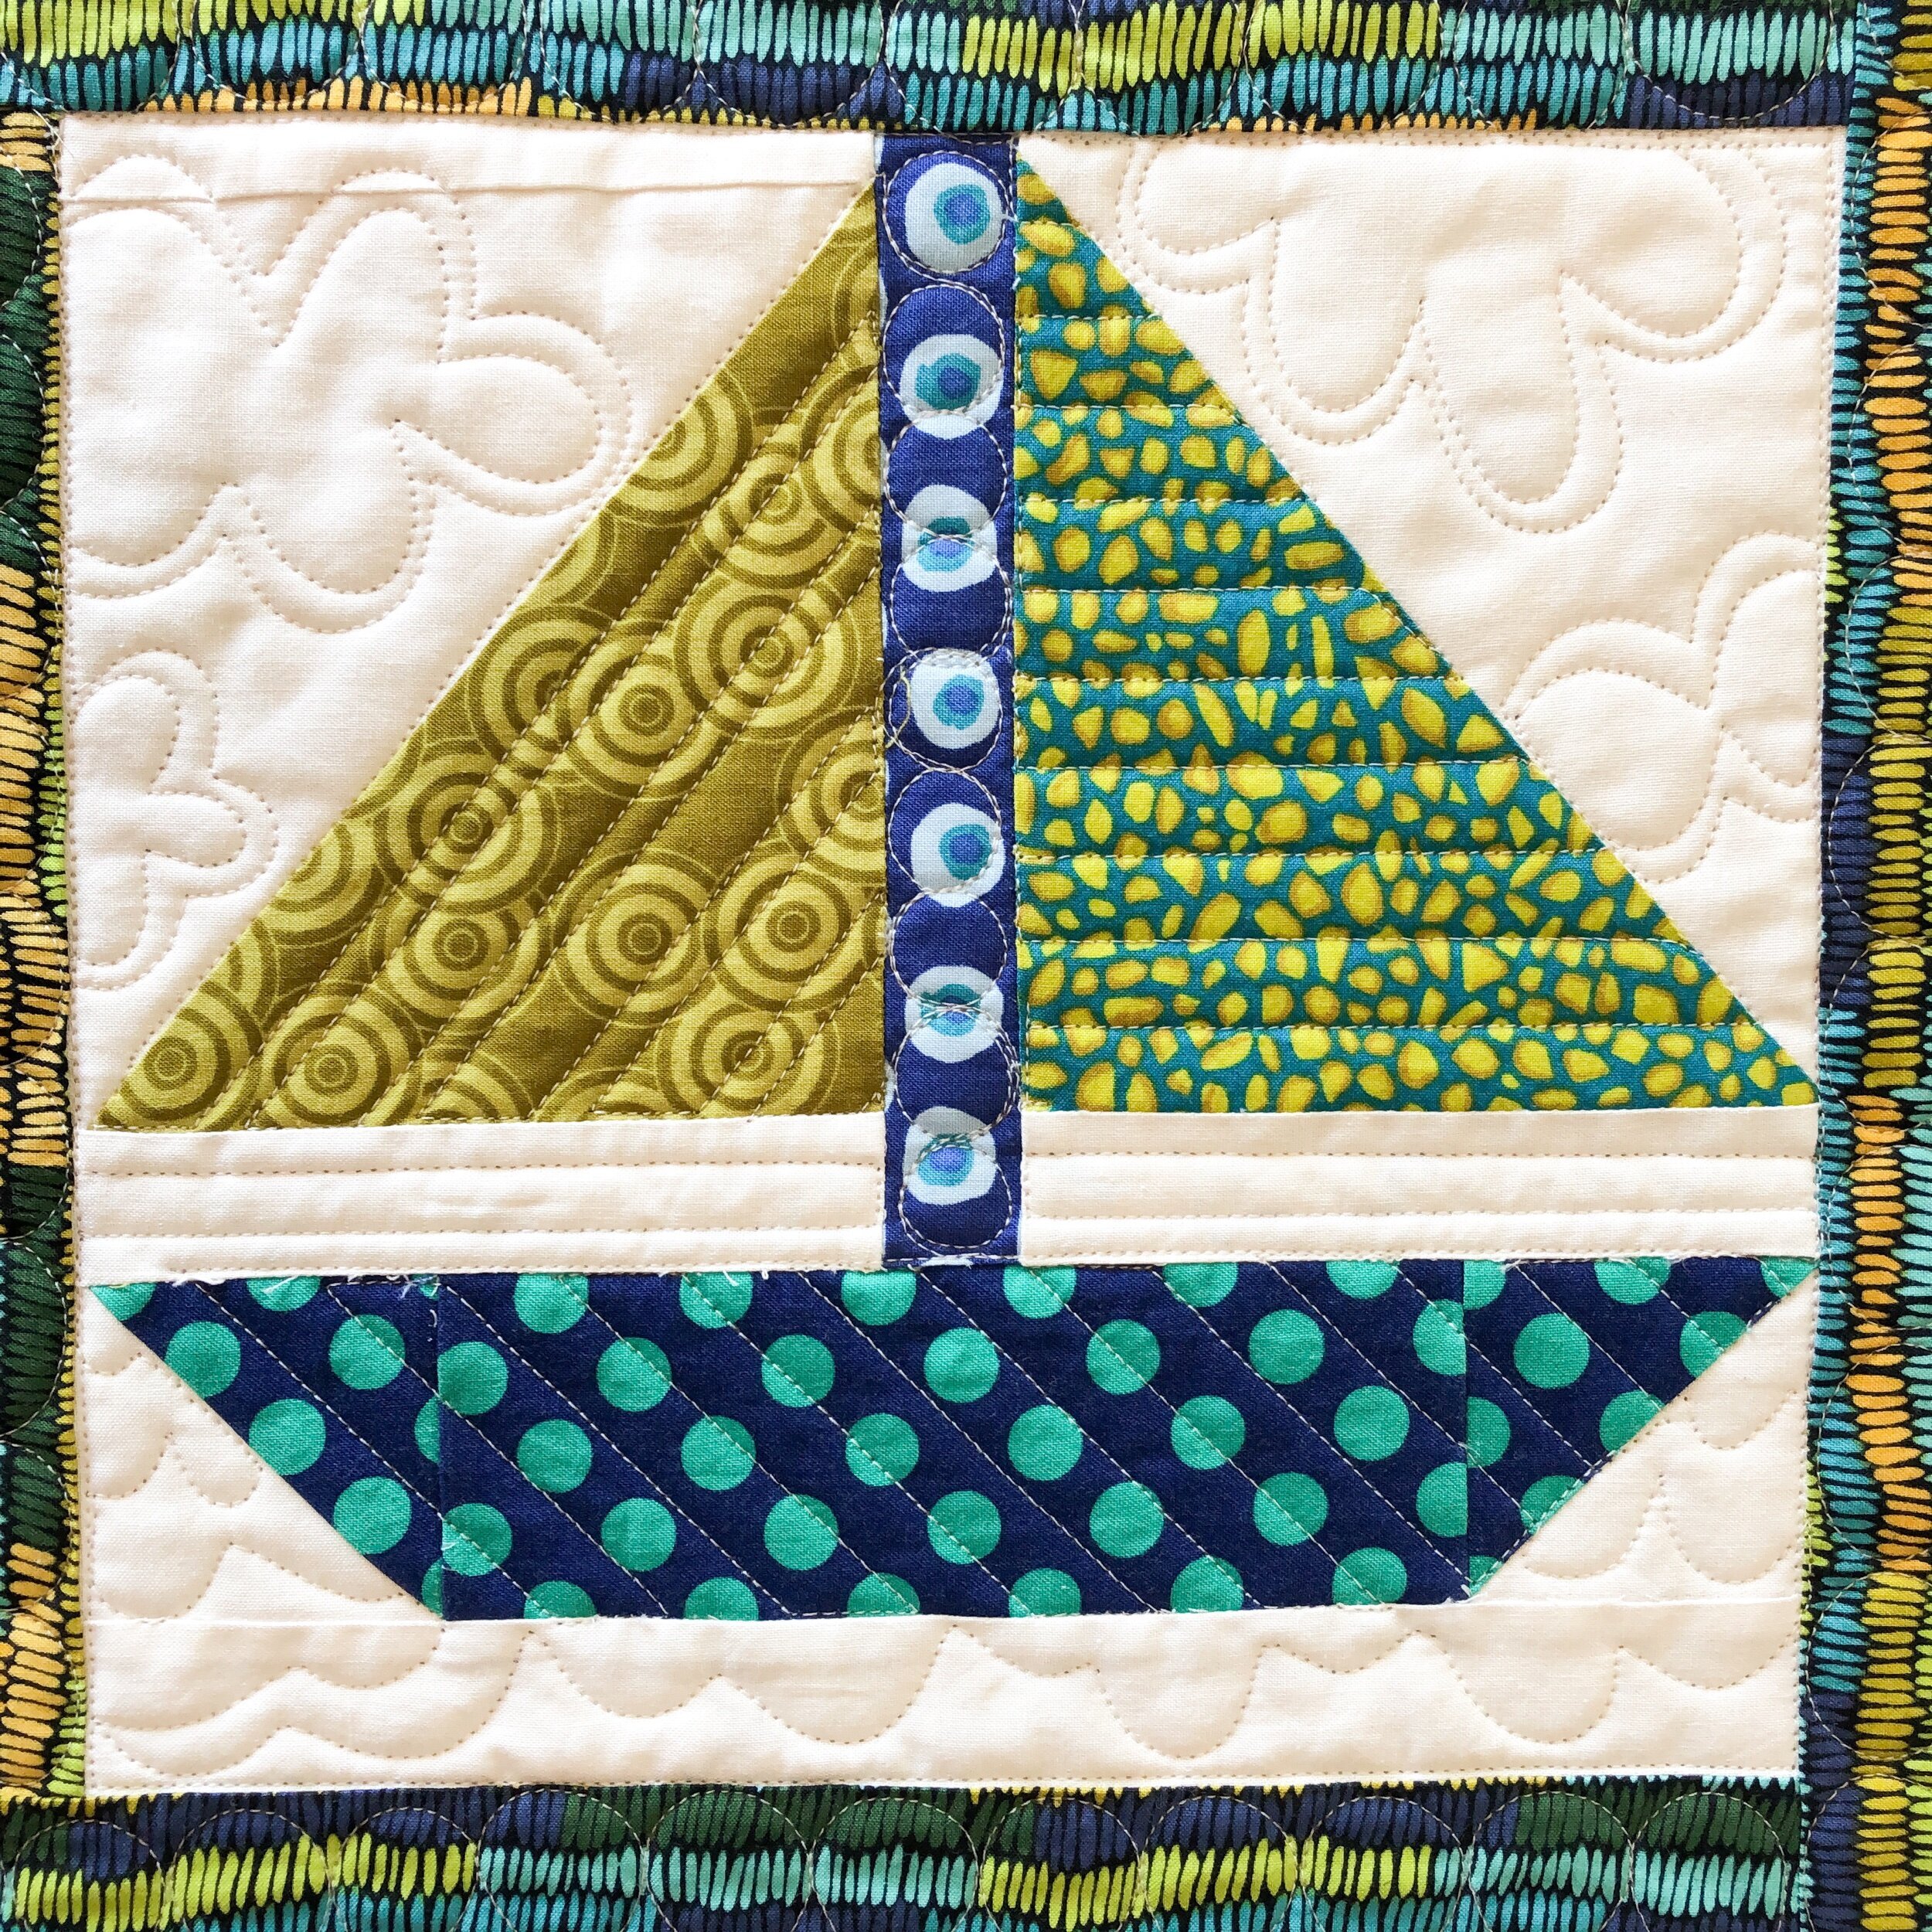
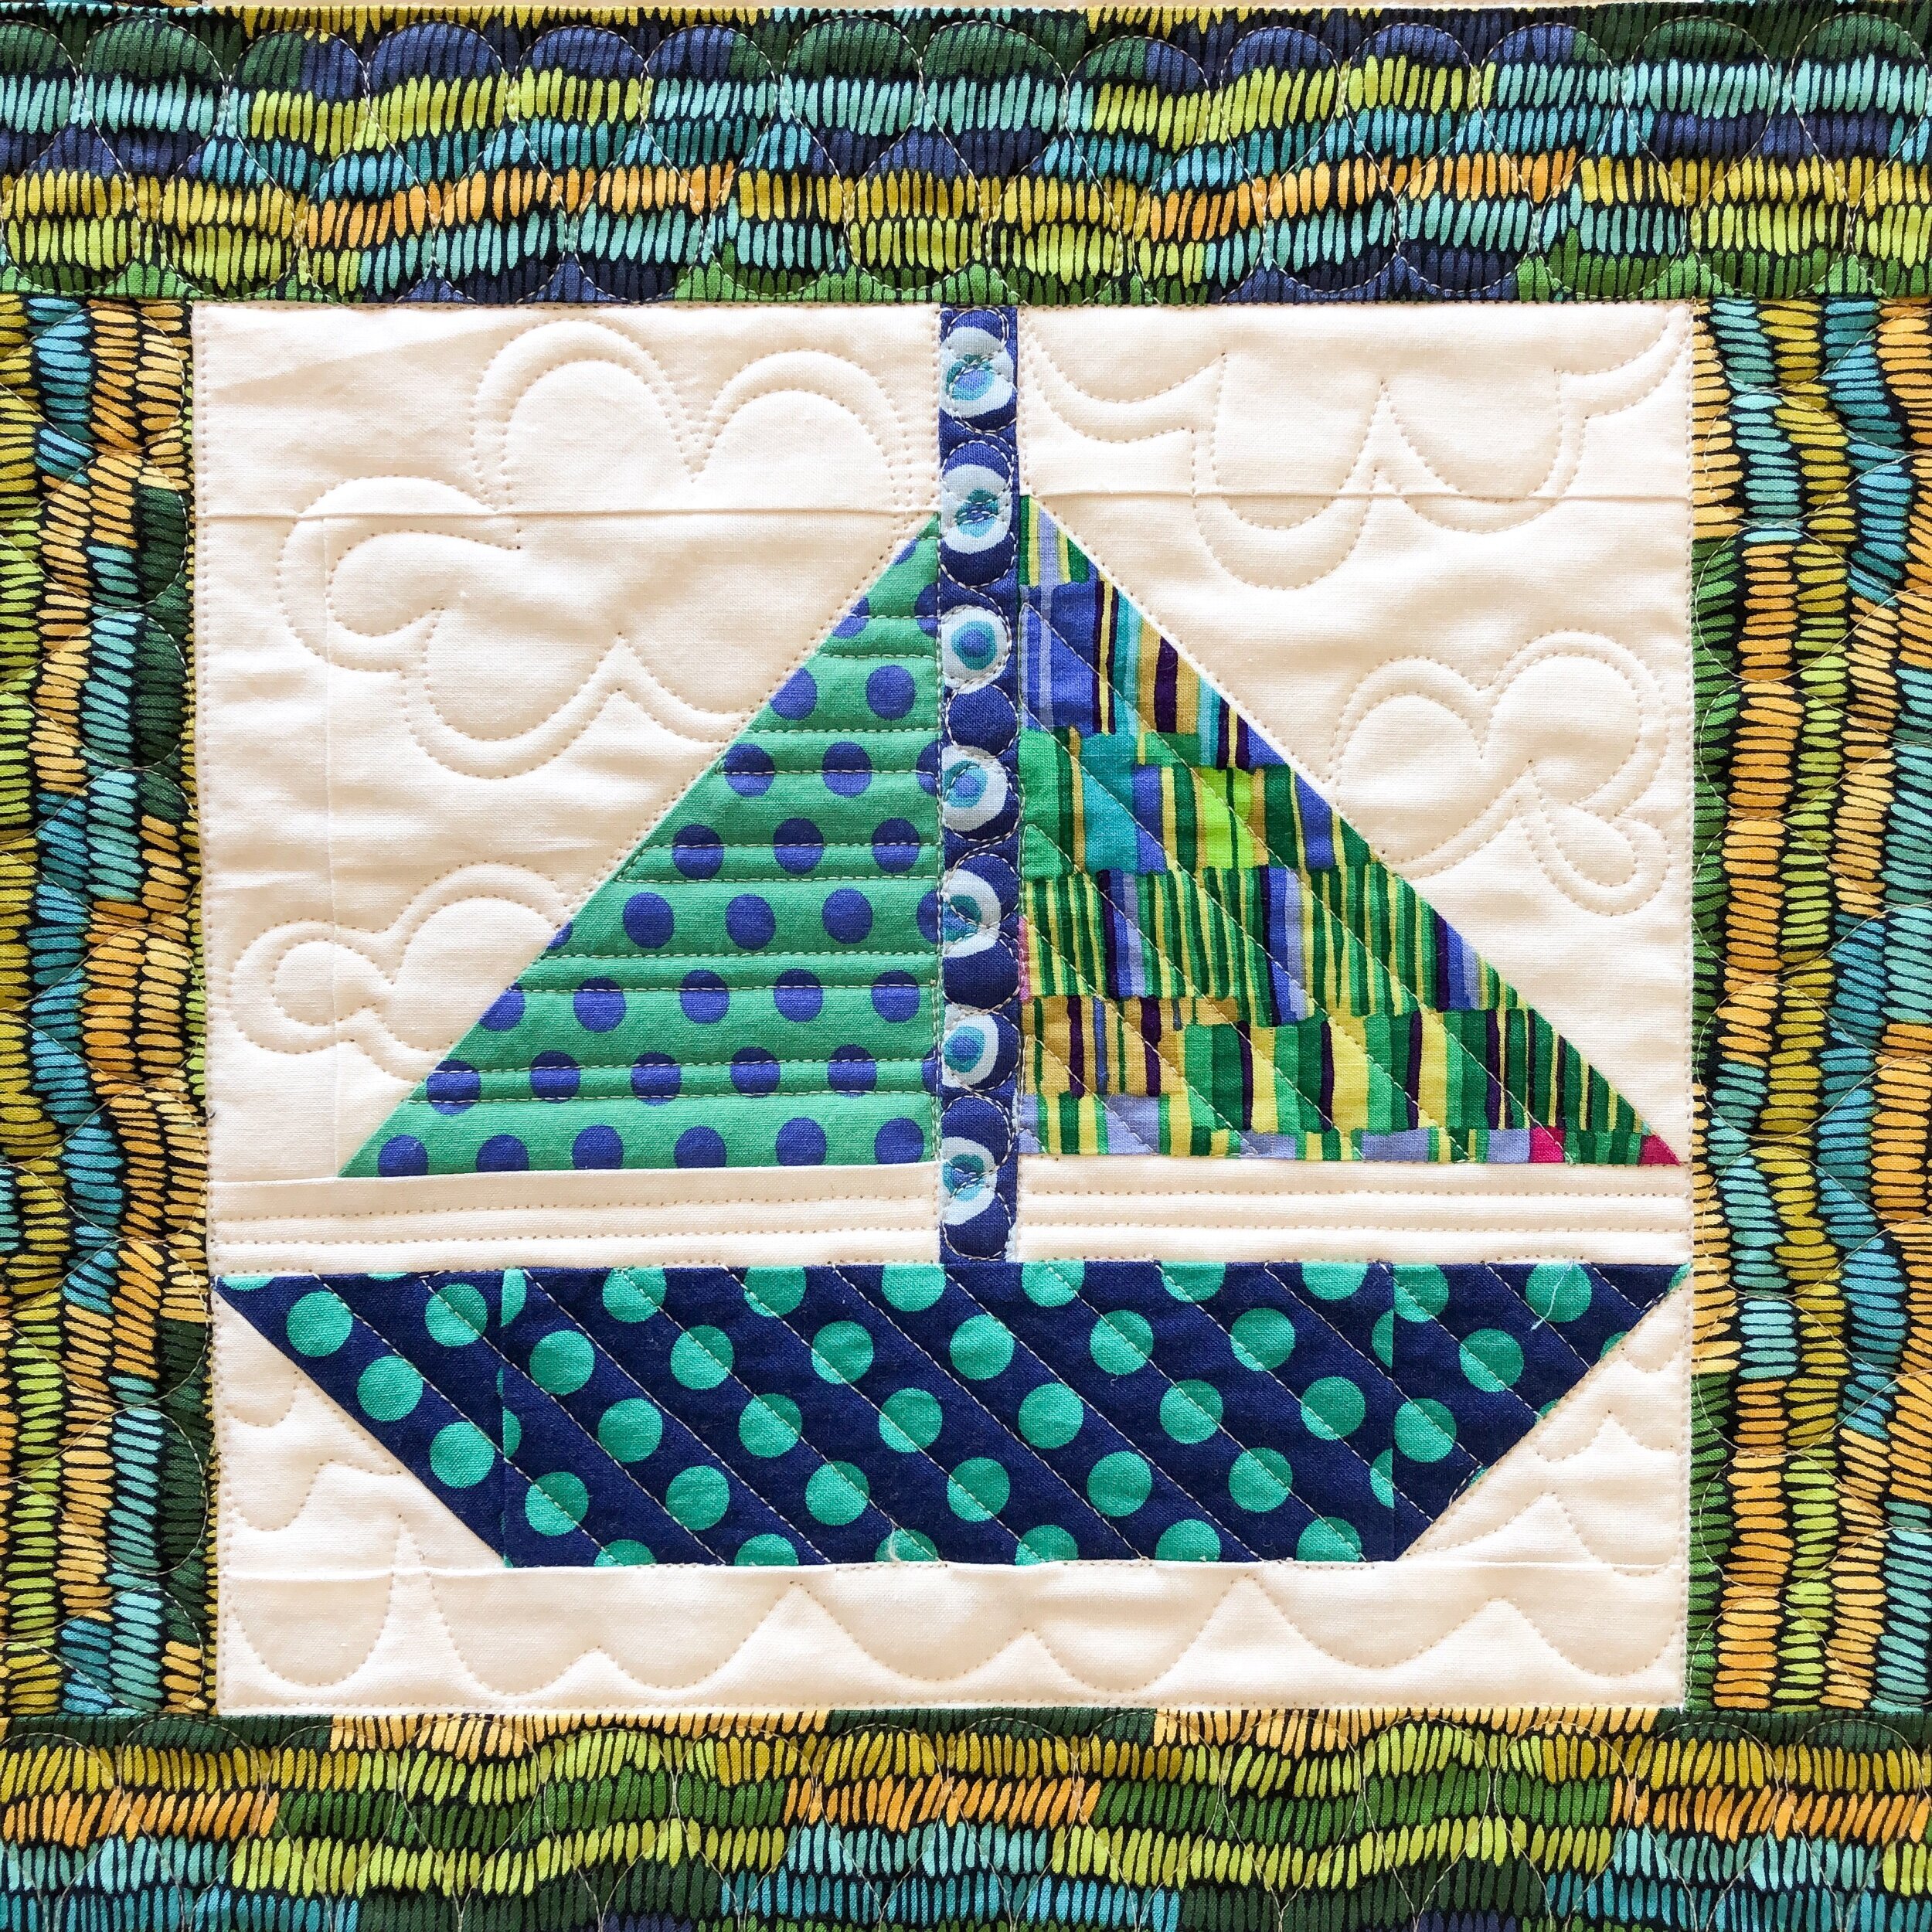
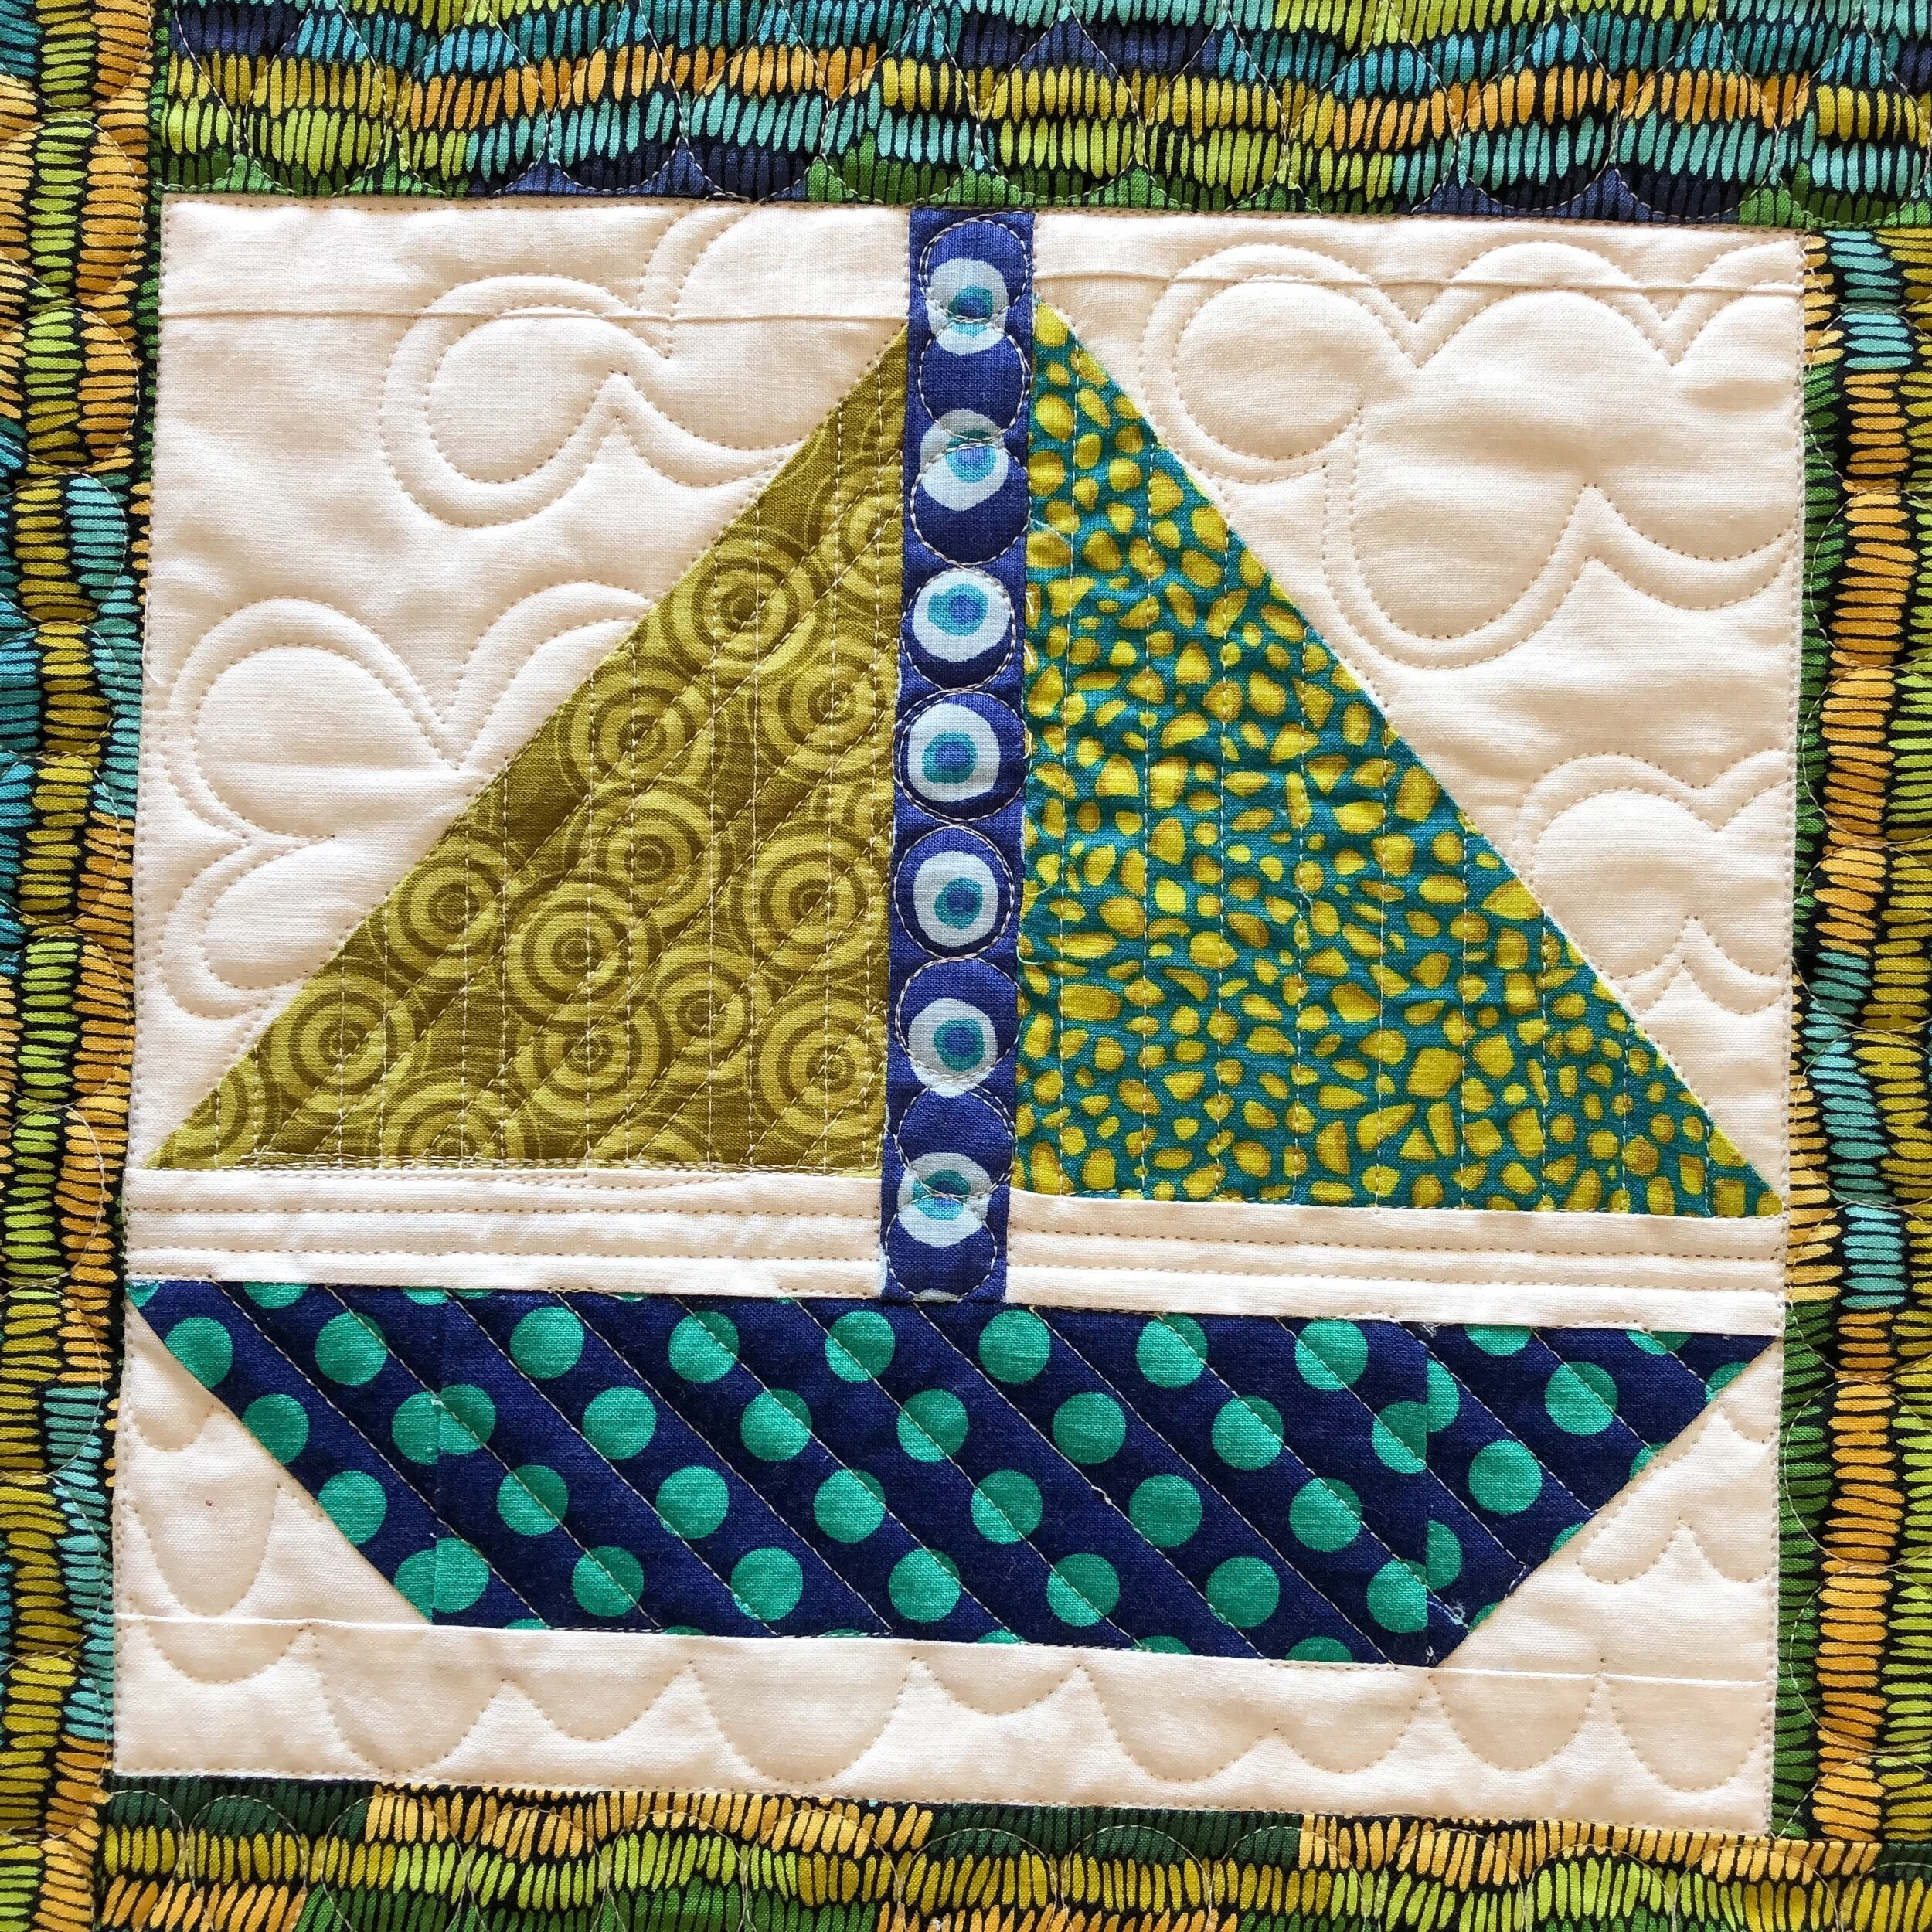
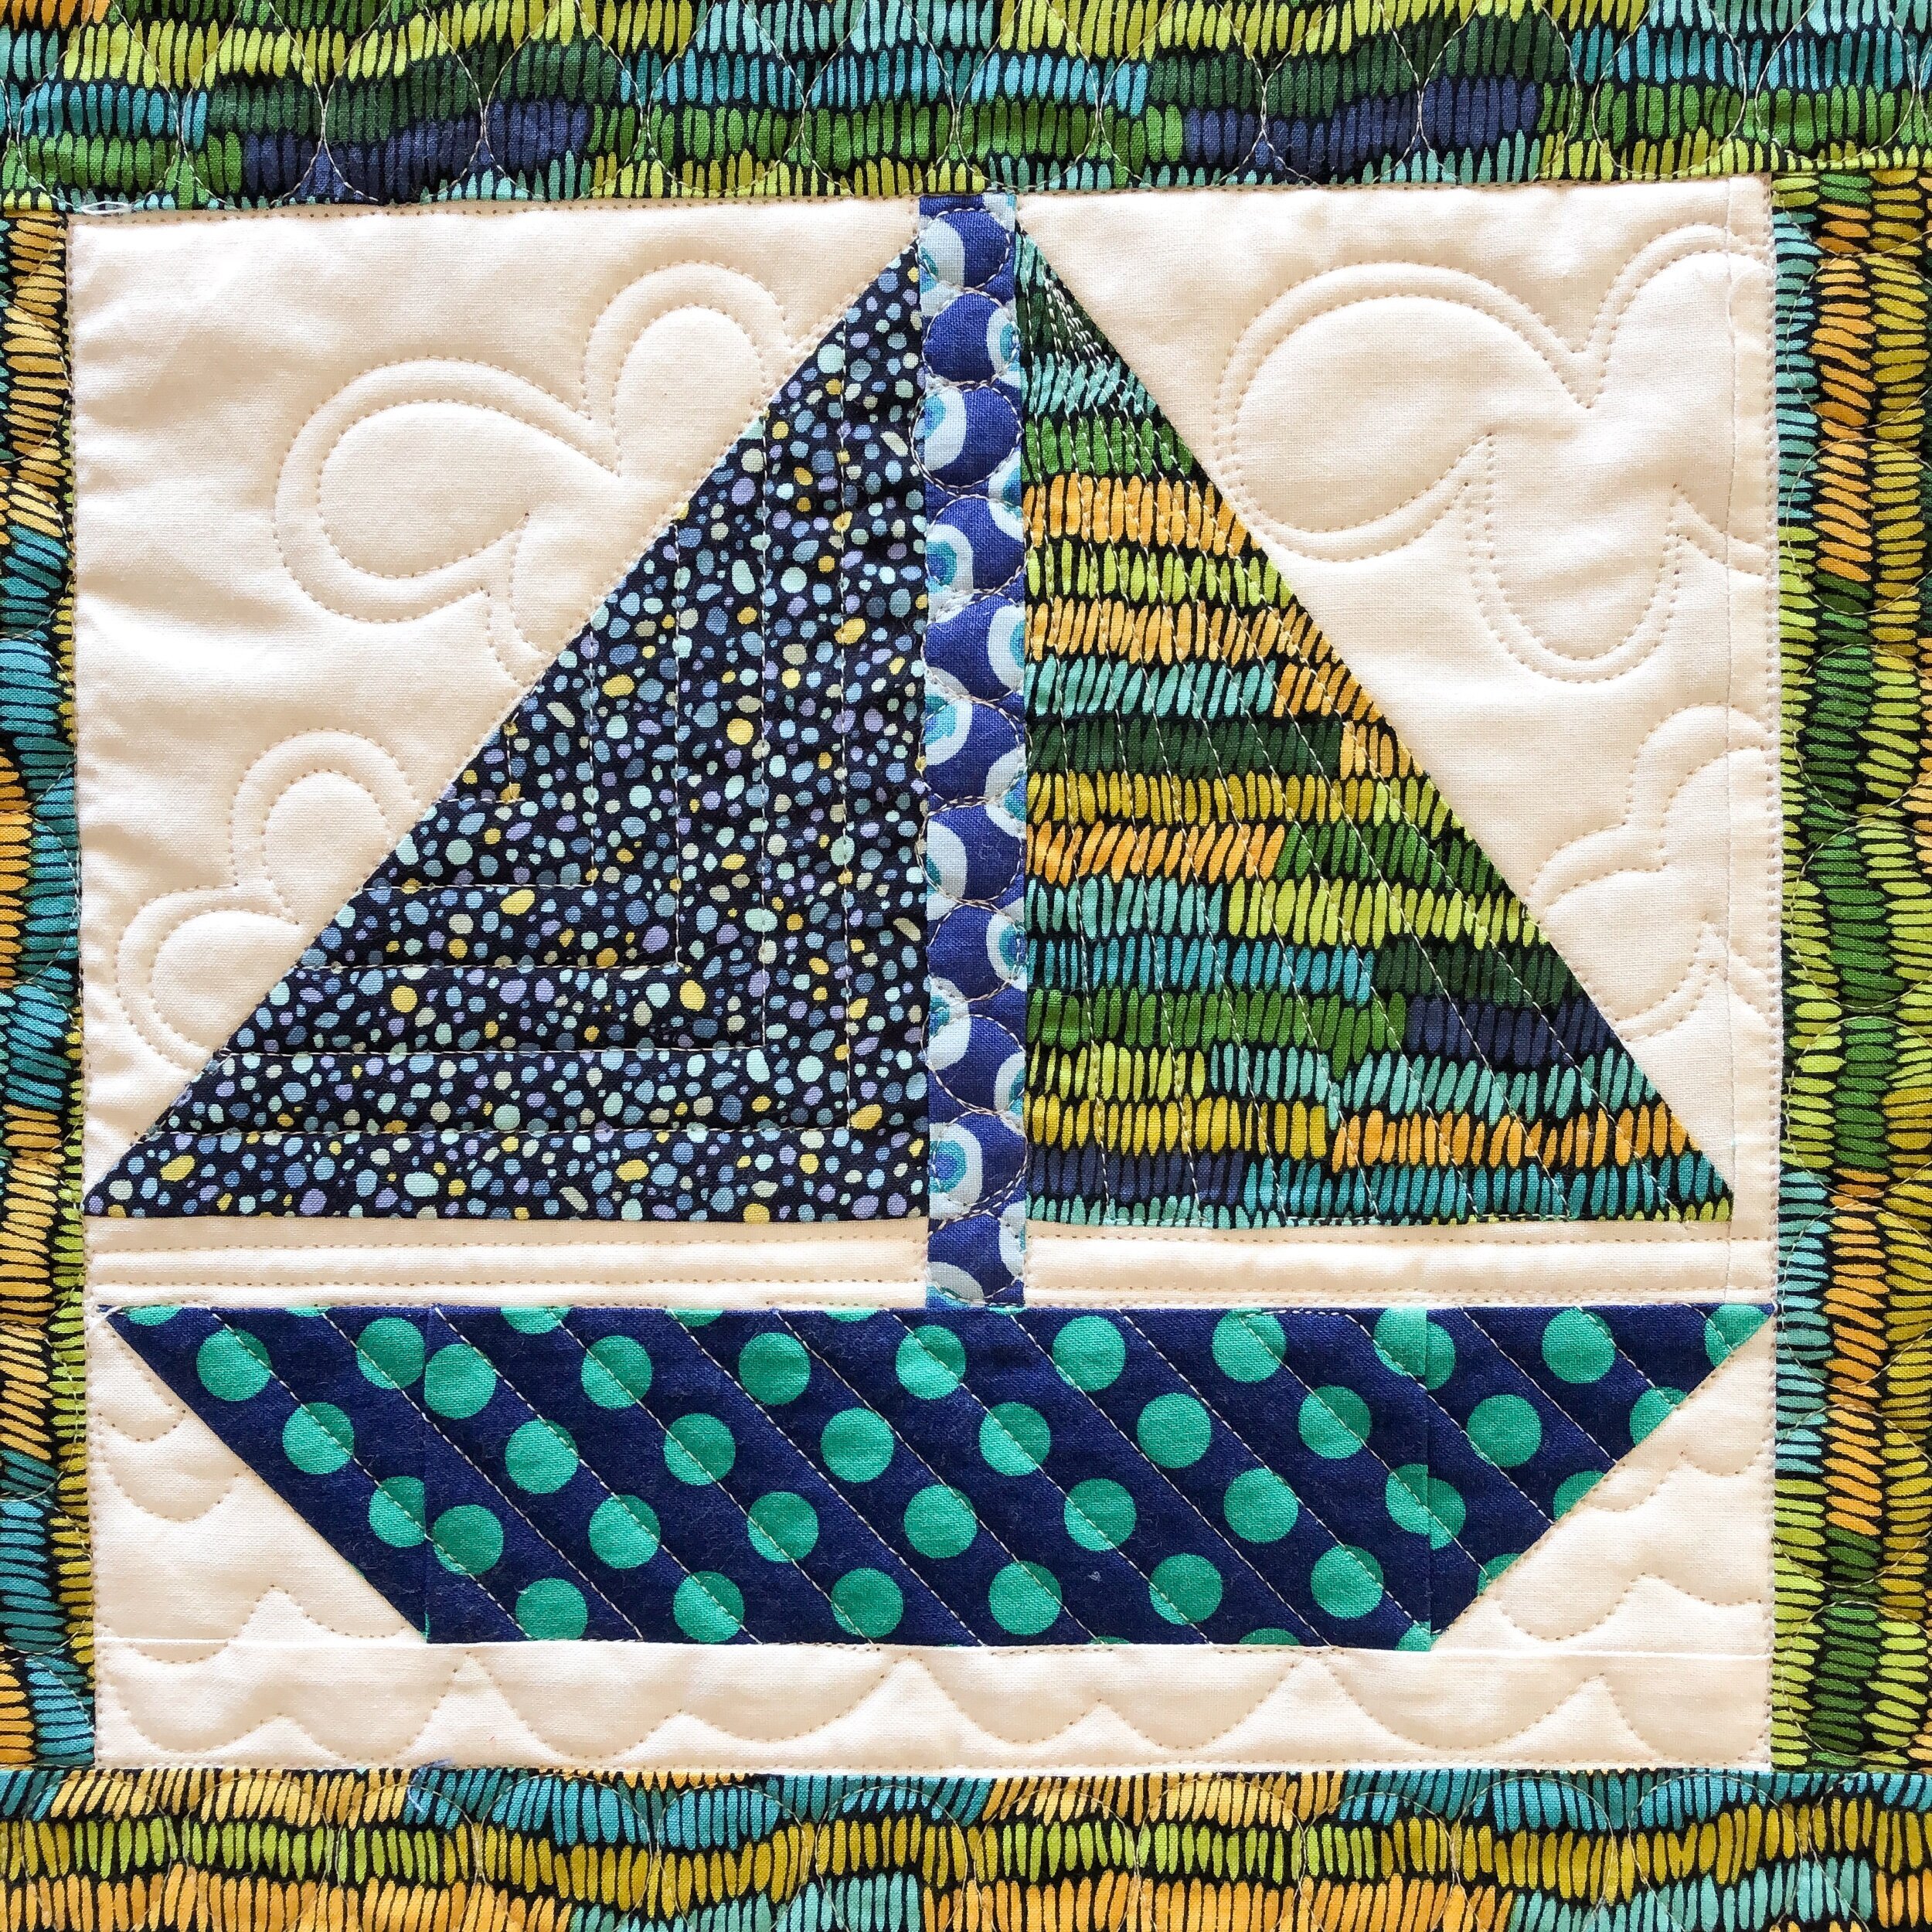
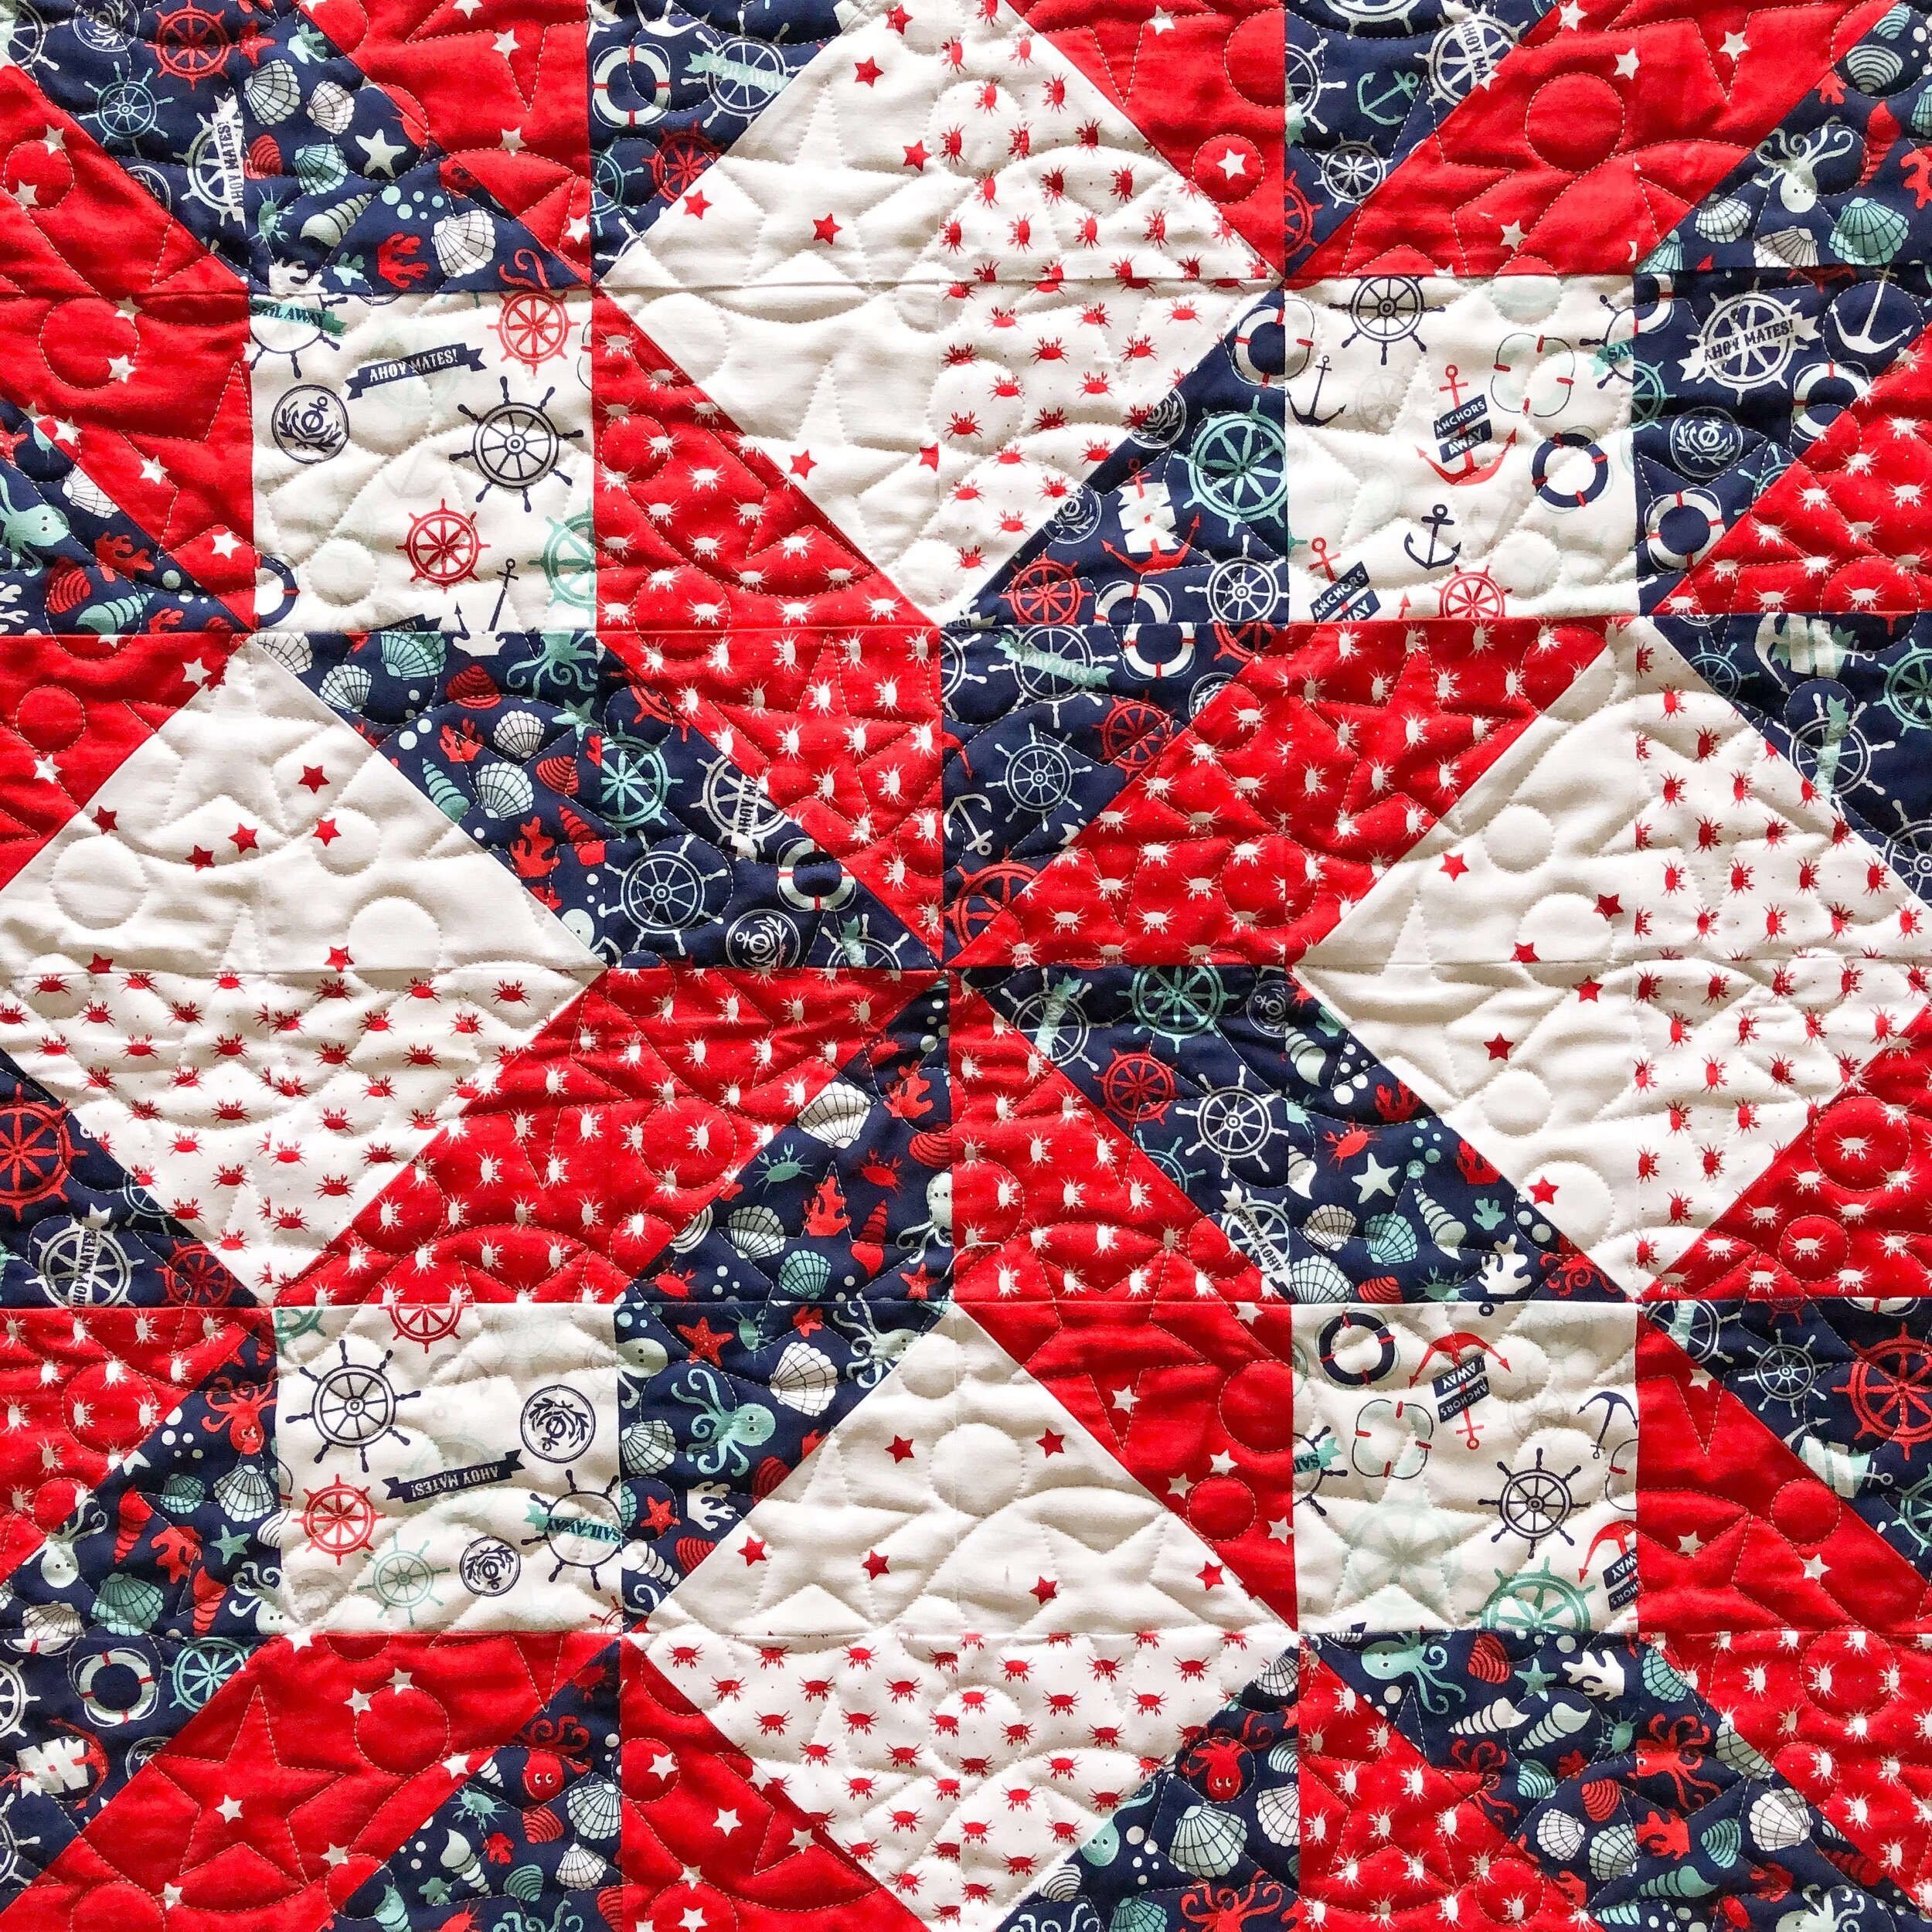
Loranne’s Baby Sailboat Quilt
Hi there,
hope you’re having a great spring or fall!! I love the Spring time, it’s my favorite. Oh, do I have a sweet baby boy quilt to share with you!
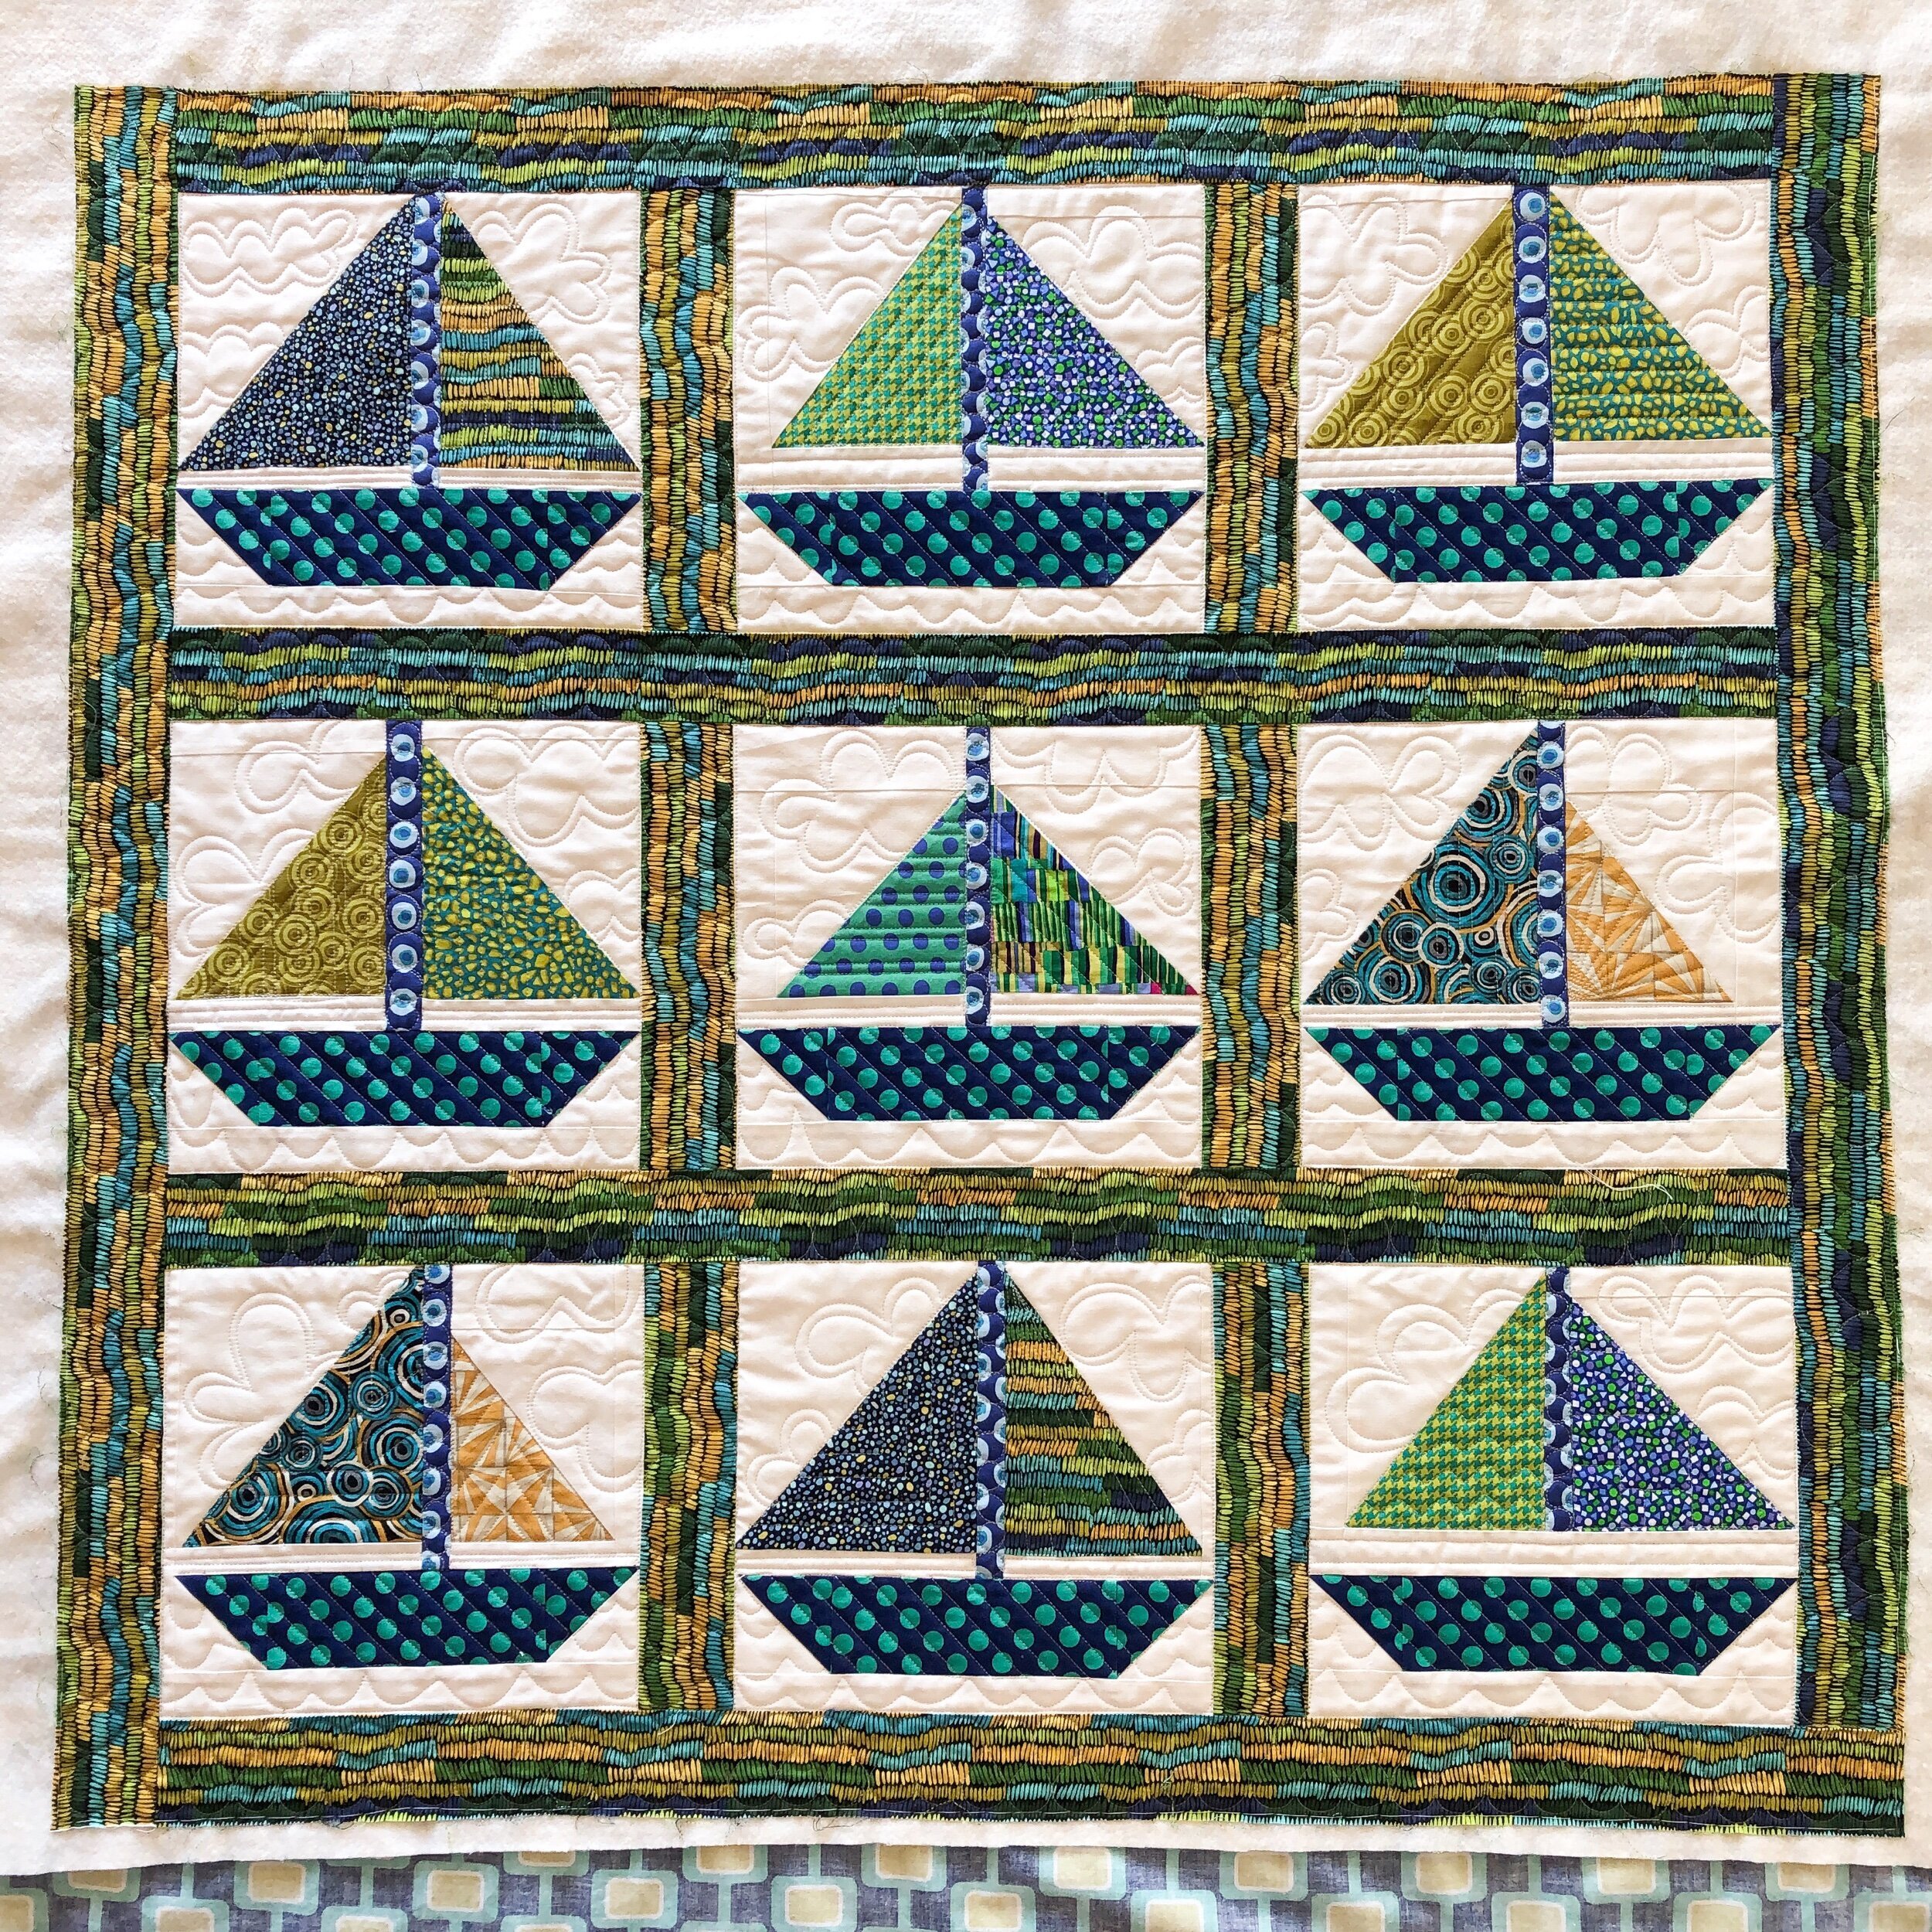
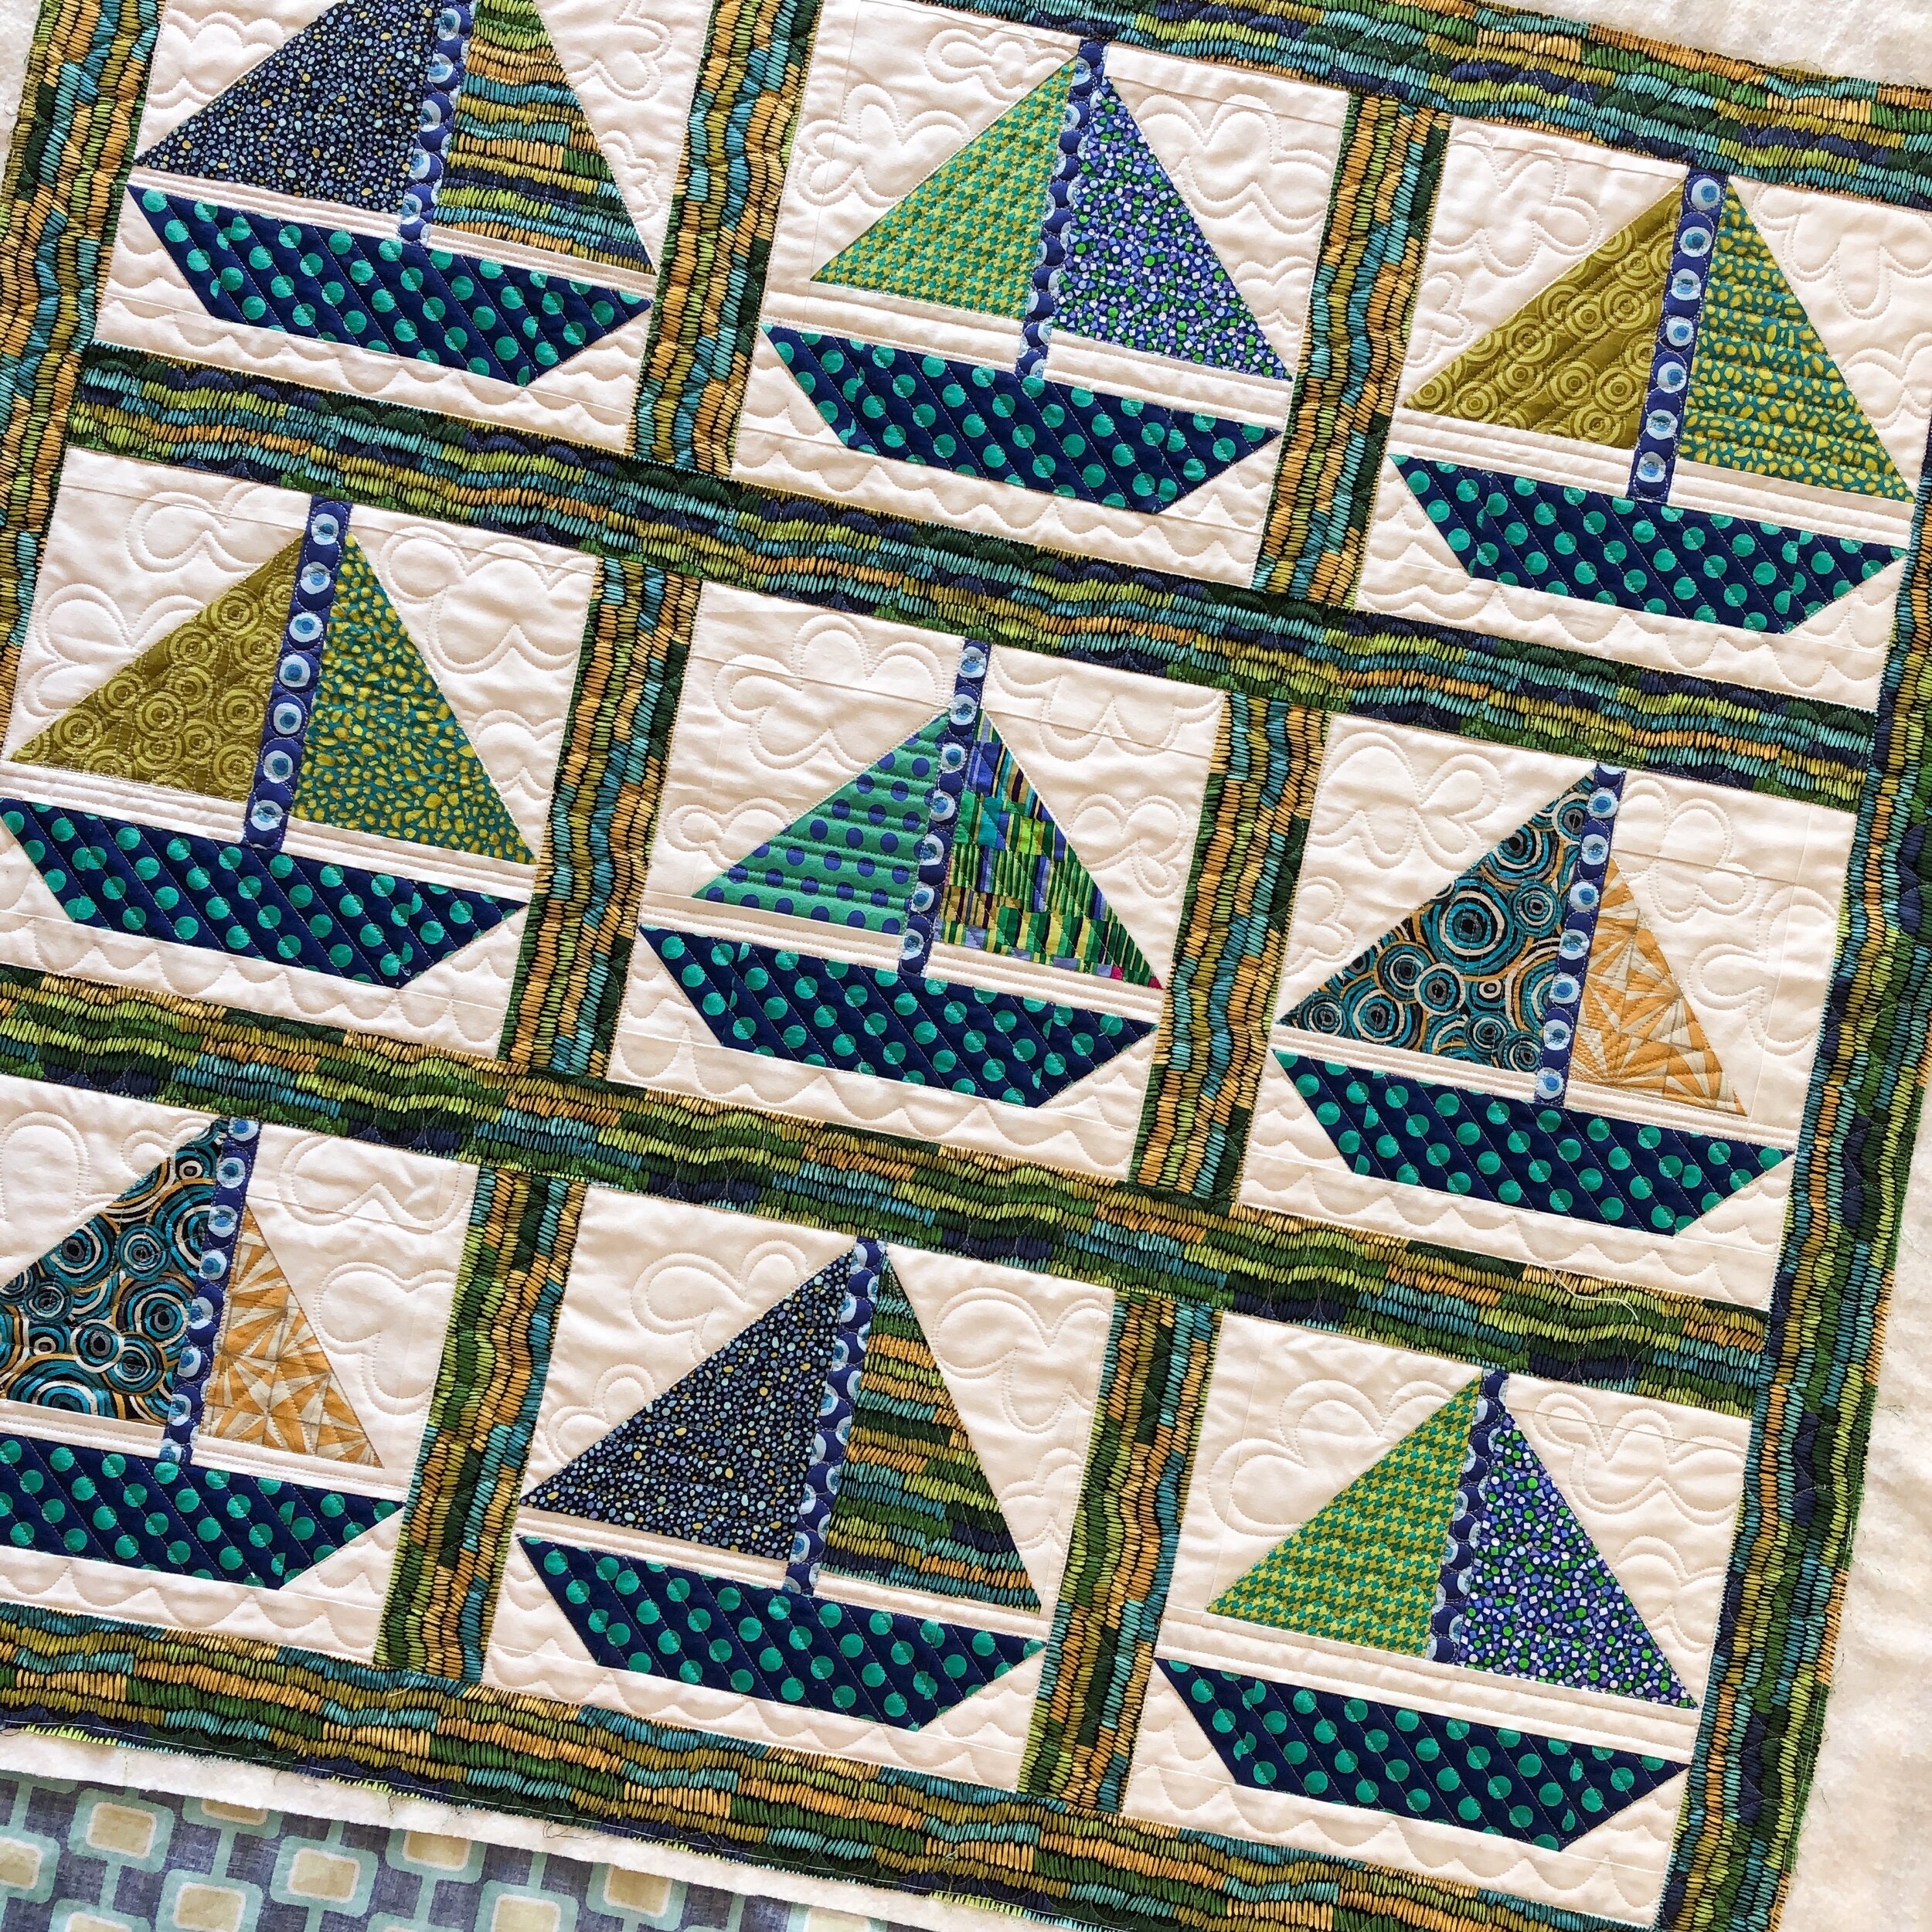
This fun quilt was made by Loranne, and like this one most of the quilts that Loranne makes, she does without a pattern.

I used 8020 cotton poly blend batting, and an Omni cream thread from Superior Threads.

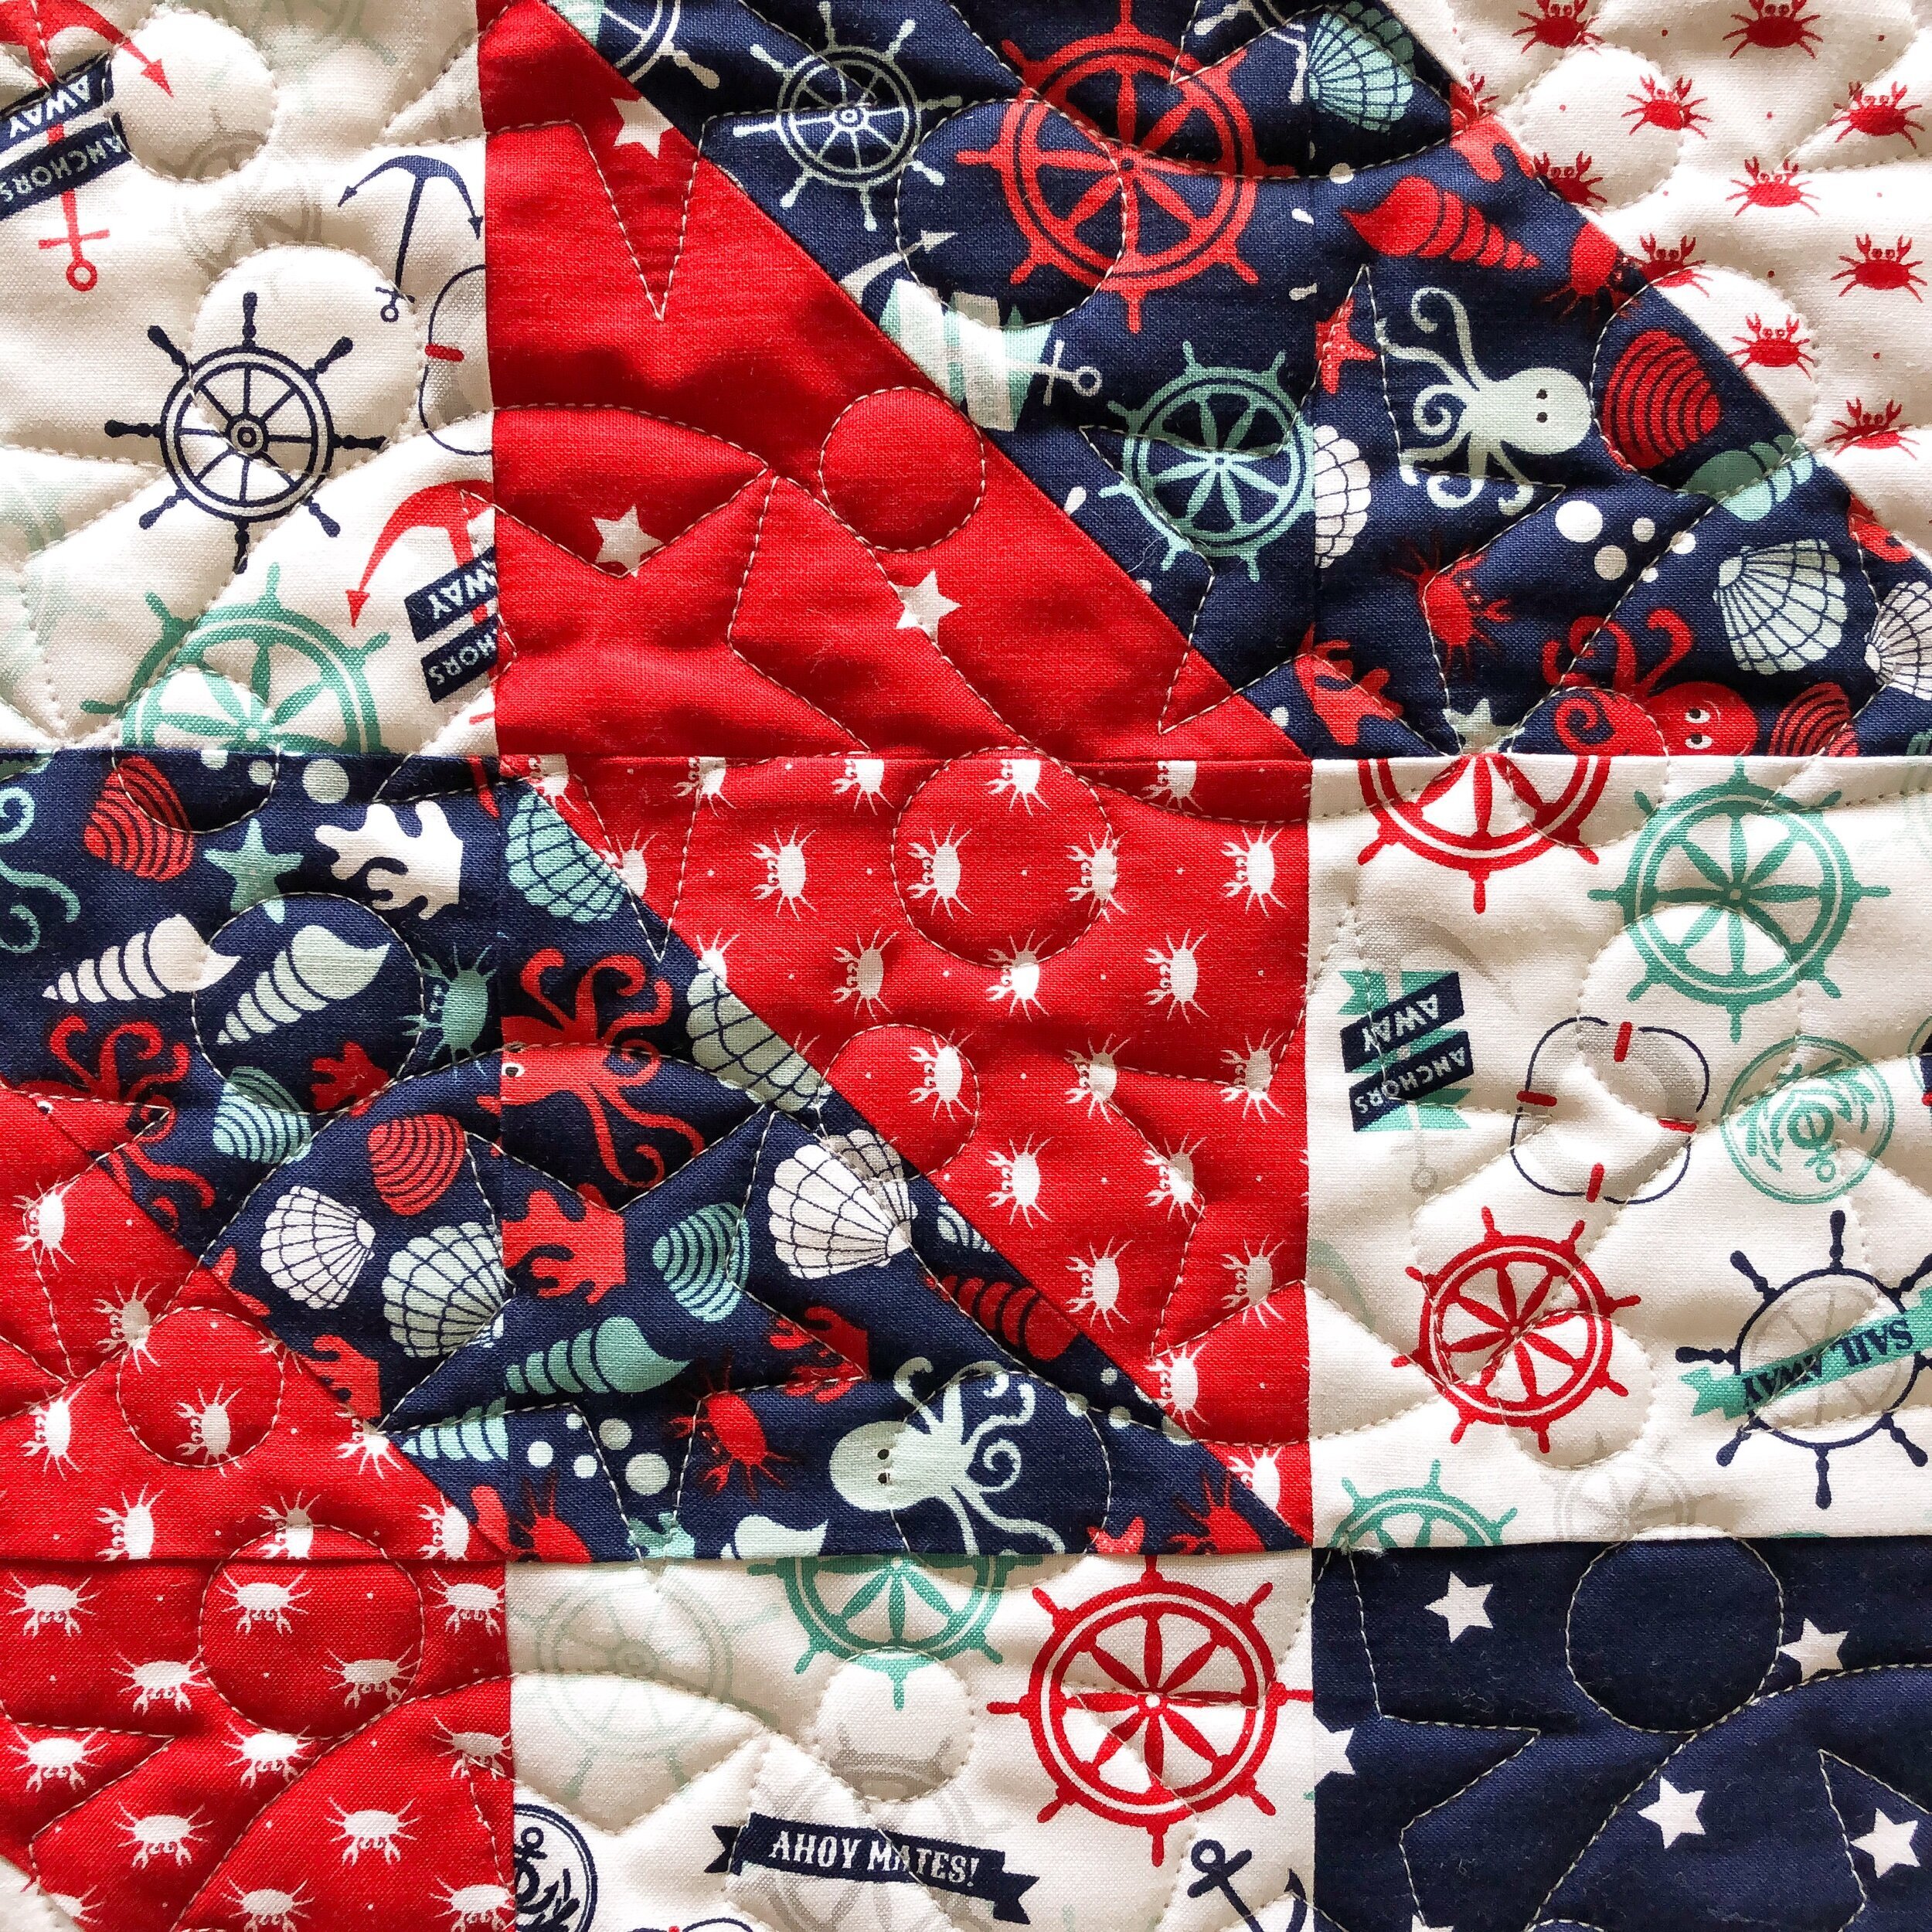
I decided to do the same diagonal lines in the ships and circles in the pole, throughout the quilt. For the sails, I did a variety of different designs. I’ll share what I did below each picture, I know some of them may be hard to see. The one above has 1/4” pinstripes on the left sail, and a 1/2” grid on the right. With waves and clouds to add to the whimsy of this quilt.
Pictured above: I quilted half inch diagonal and vertical lines to create a diamond shape, then a pinstripe grid on the right.
Pinstripe diagonal lines, and horizontal 1/2” lines…above.

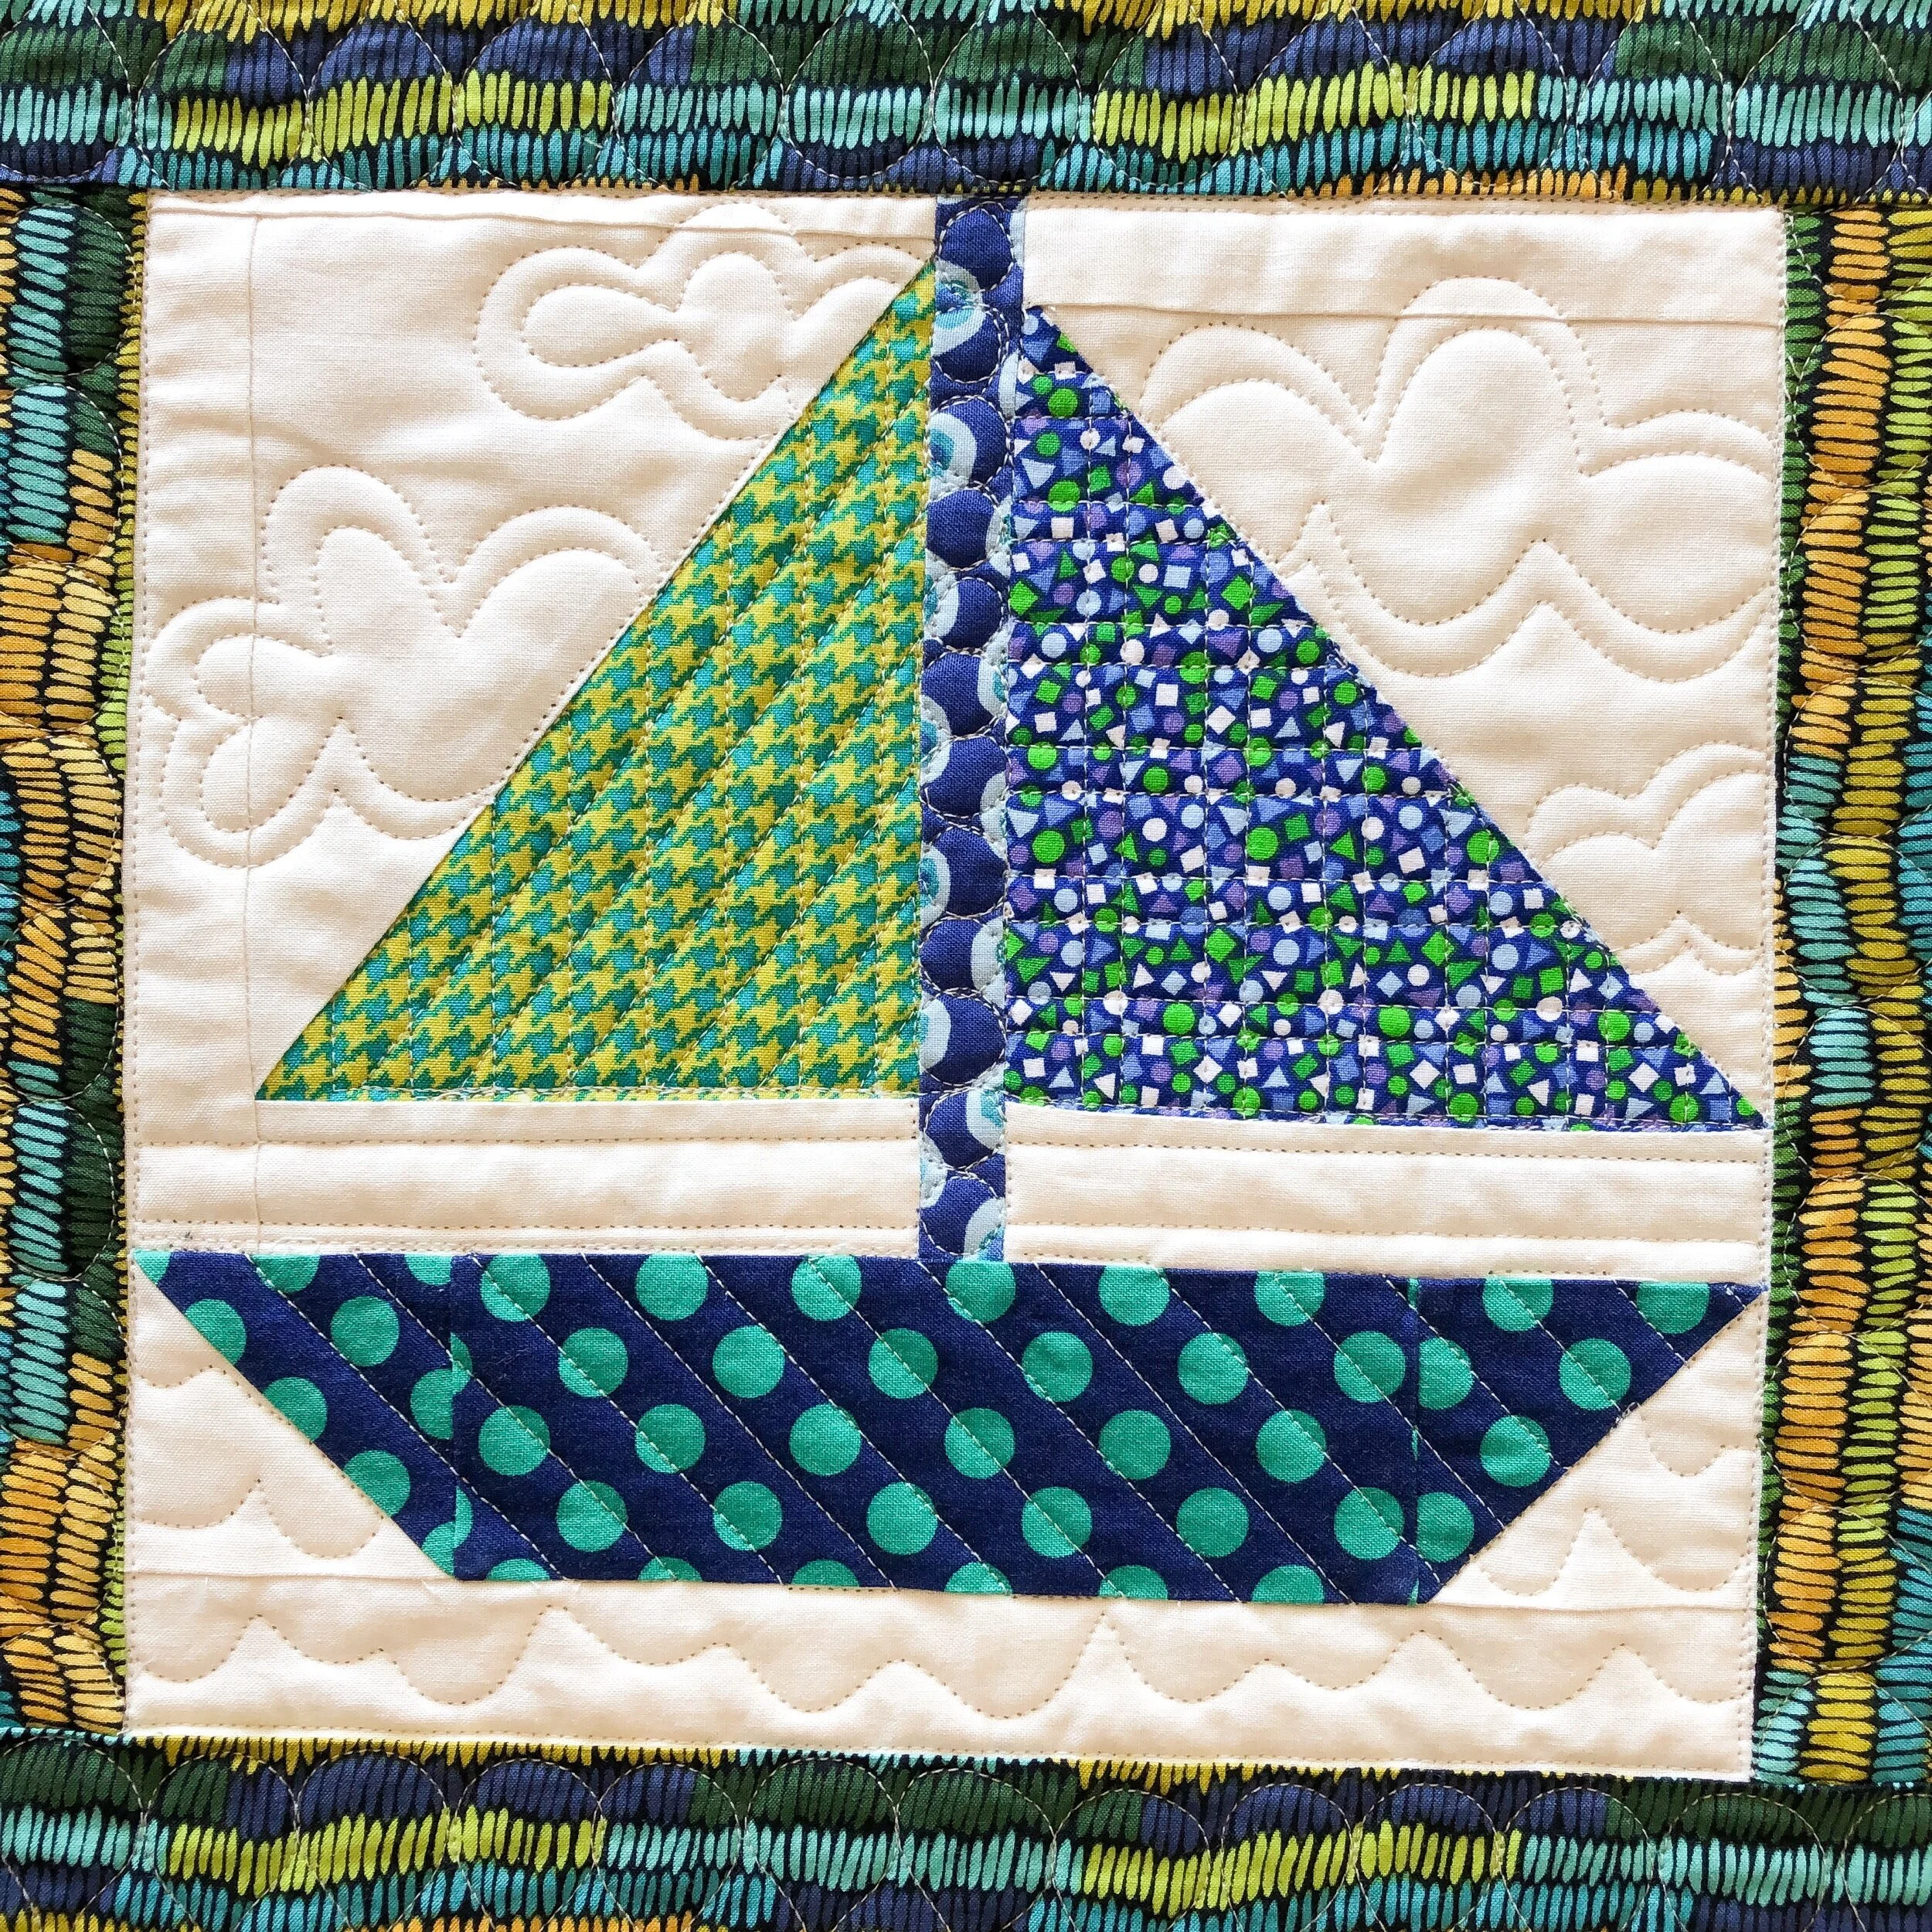
Instead of the typical two lines to make a pinstripe, I did a triple pinstripe vertically, and a burst of lines coming up from the inner corner of the sail.
A horizontal pinstripe, with the same diagonal line I did in all the ships.
A pinstripe diamond grid, and vertical 1/2” lines.

My 1/2” woven design even works in small doses, as well as an echoed triangle.
L shape echo on the left, and a ray shining down on the right.
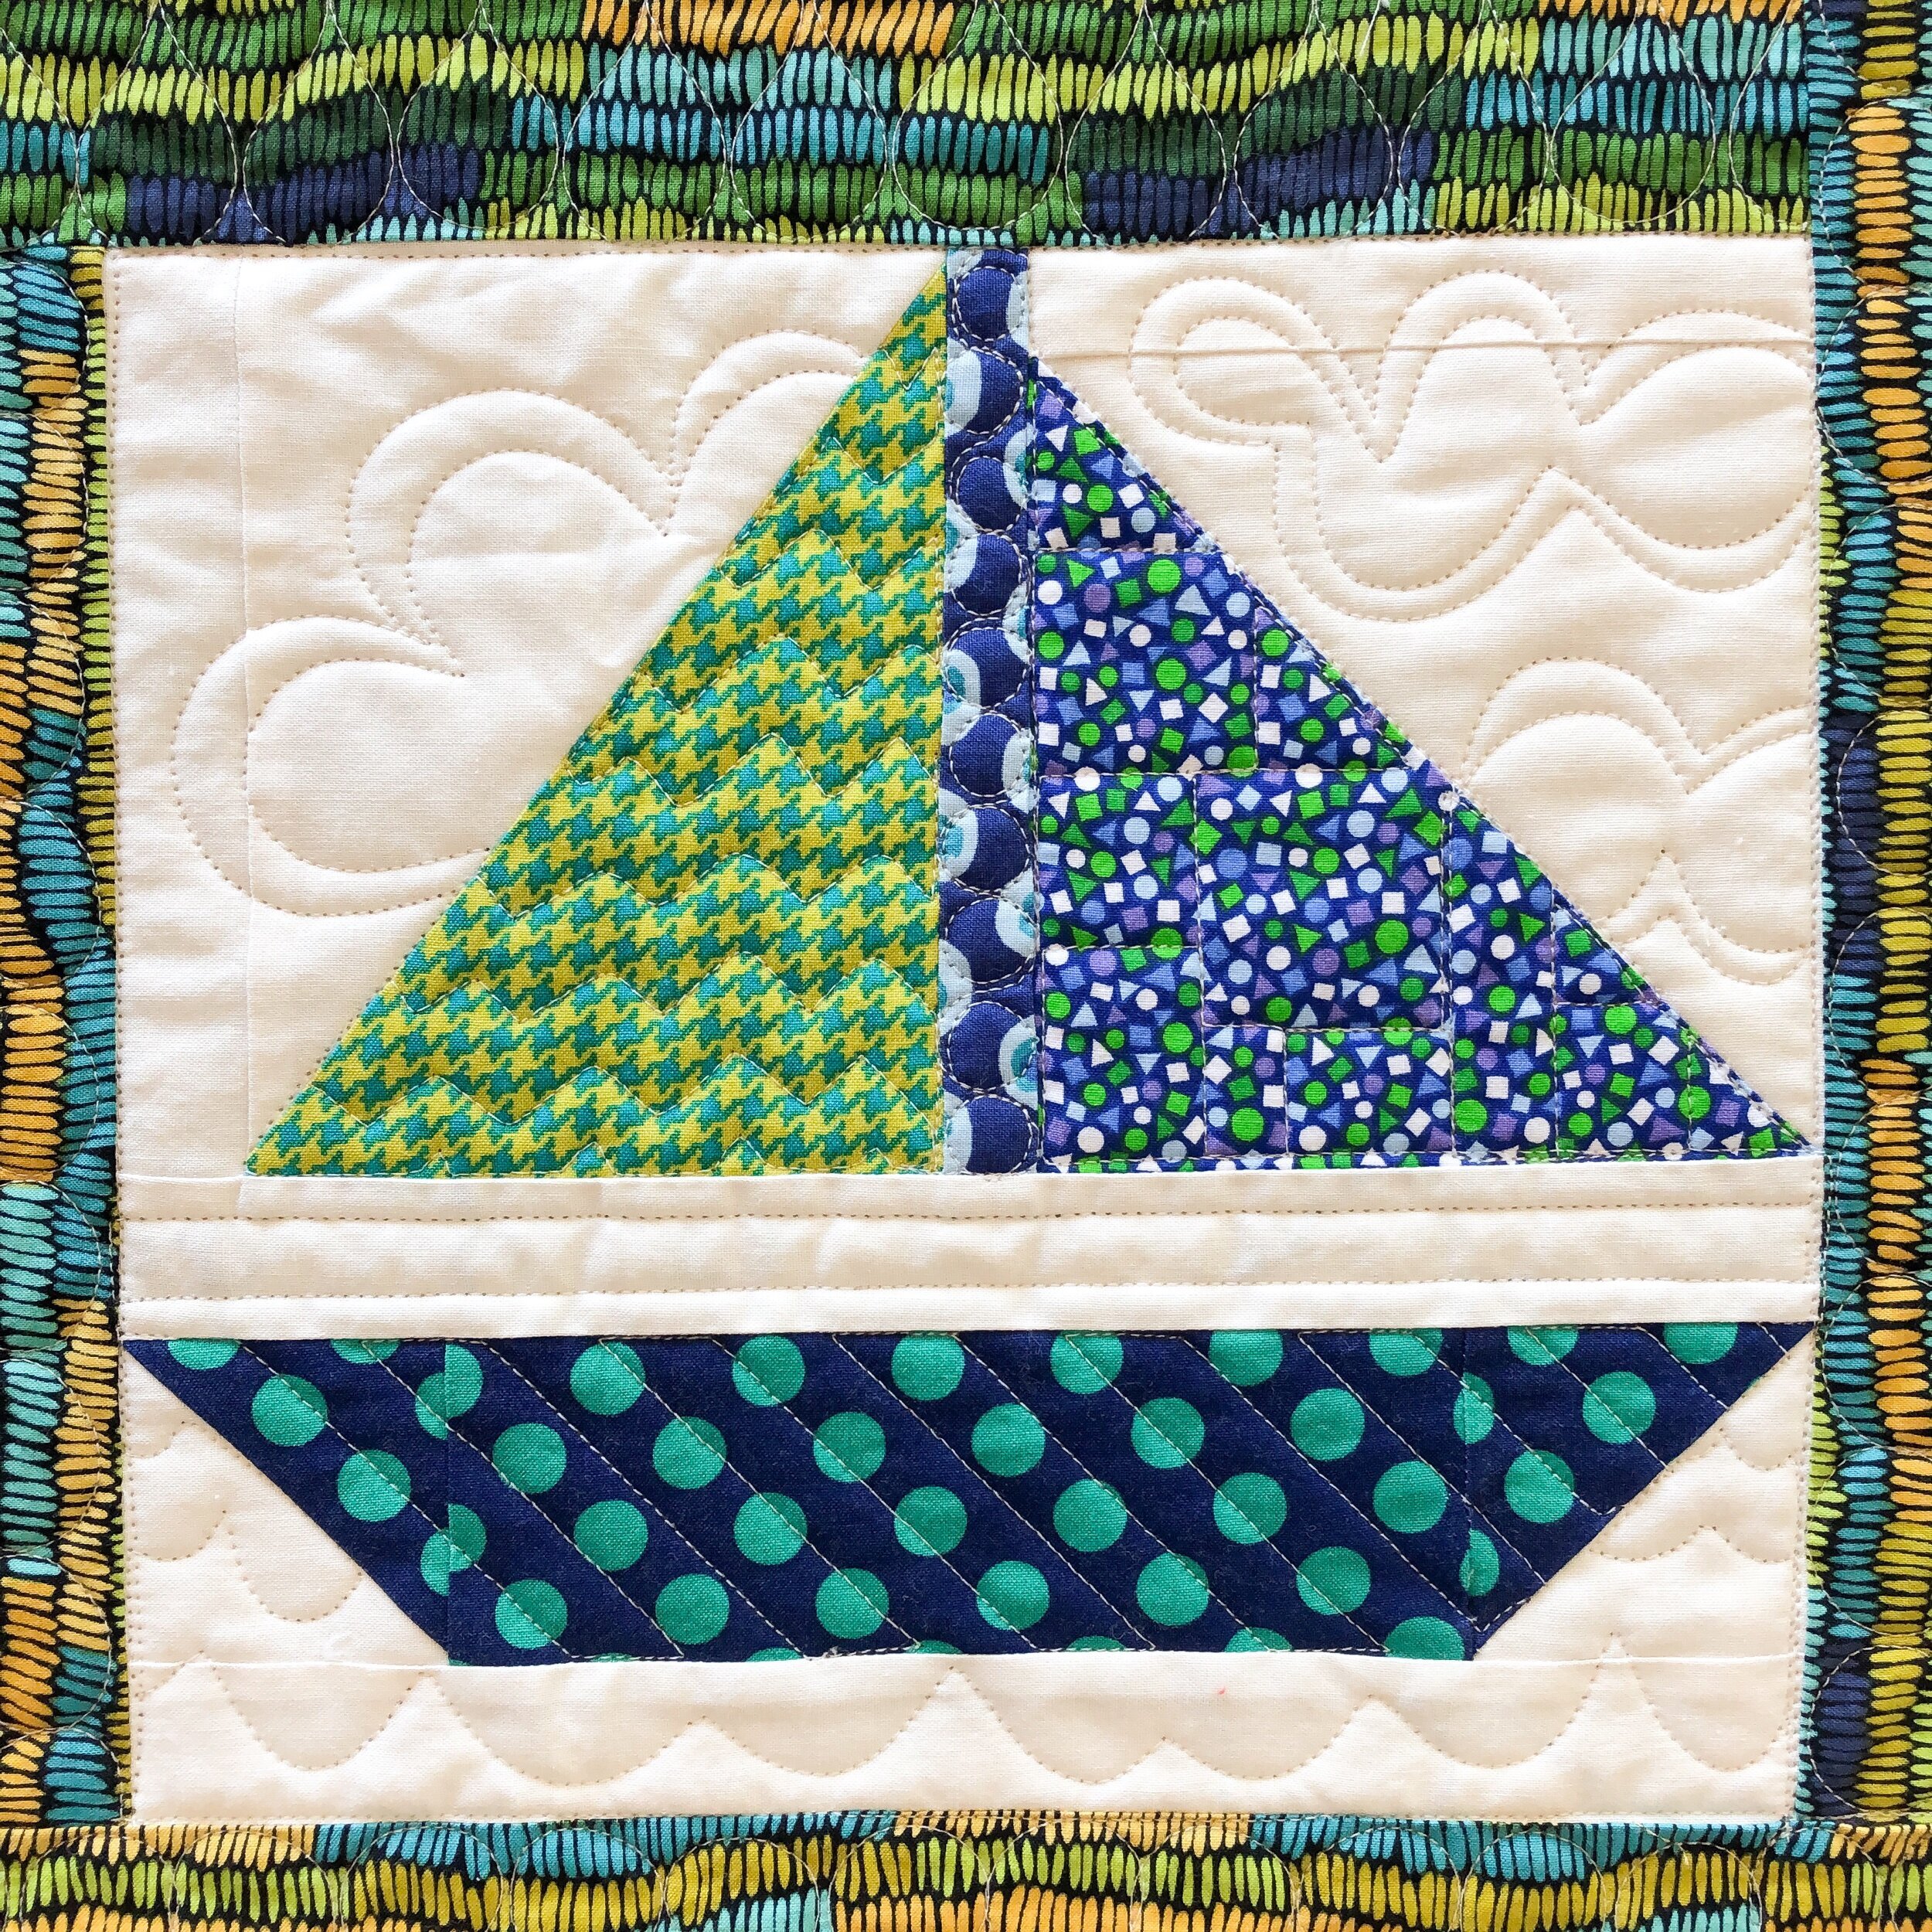
Wavy lines left, and random sizes of squares…right.

I know there are some that are similar, yet they are all different. It looks beautiful to have some variety. I finished off the sashing with freehand ribbon candy.
Thank you for stopping by!! • Leisha

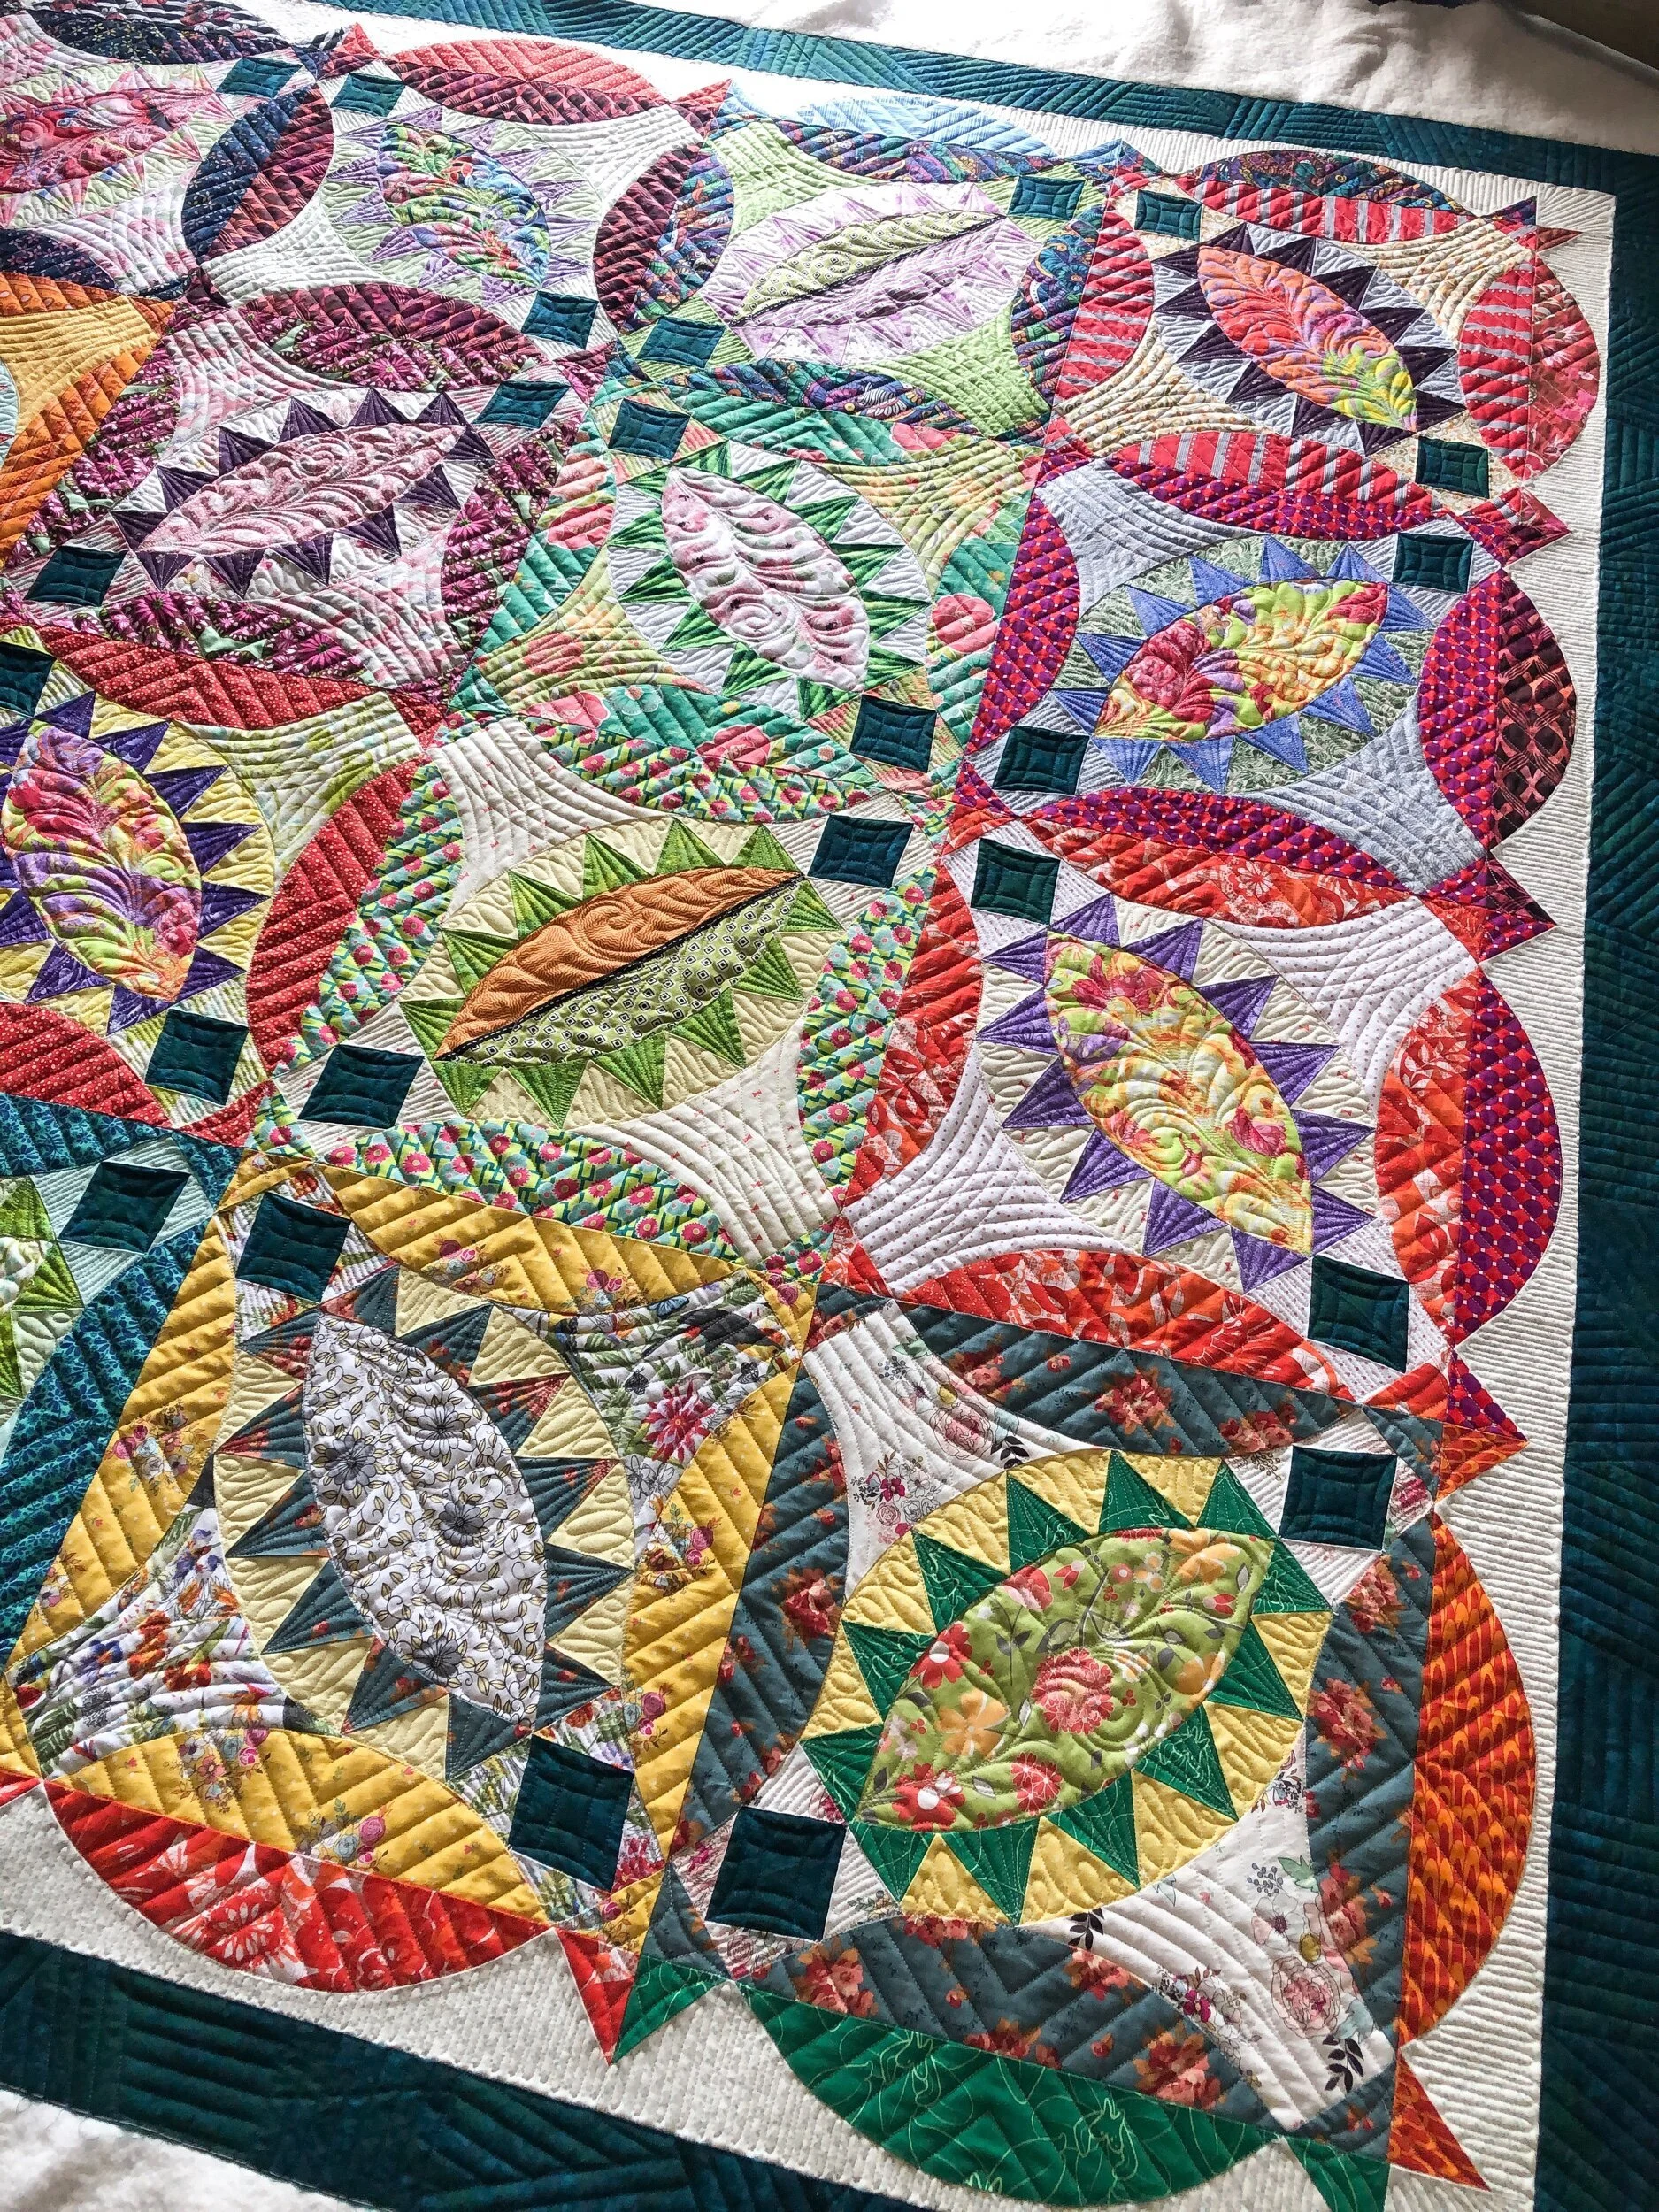
Susan’s Pickled Fish Quilt
Hello!!
I keep thinking I’m going to keep blogging each day, hoping to catch up. Then, life just gets too busy. I do have lots of fun quilting to share…like this AMAZING quilt that Susan made.

This is called Pickled Fish, pattern by Patchwork Fun. She has some other amazing patterns as well.

She used such a fun variety of fabrics…which I think makes this quilt even better!

I love highlighting each shape, yet doing something that looks great with all the other quilting. Curves with straight lines and a swirly feather…and I love how it turned out!
Susan provided a 8020 batting and I used a cream thread to quilt it.
Now, let’s talk about all the quilty details! In the eye shape I quilted a feather swirl. Which I think helps soften up all the lines in the pattern and quilting.

In the triangles surrounding the eye shape, I quilted lines coming from the point and “l” loops in the background.
I love a good angled picture…to see all that texture!

Okay…now, my two favorite parts!! In the odd curved shape I used the -15- curve ruler from Linda at The Quilted Pineapple, and used the curve of the seam and quilted half inch lines. In the other eye shape I quilted 3/4” lines. I started by quilting the “x” in the center and then the quarter inch lines out to the edges…I just love the texture!

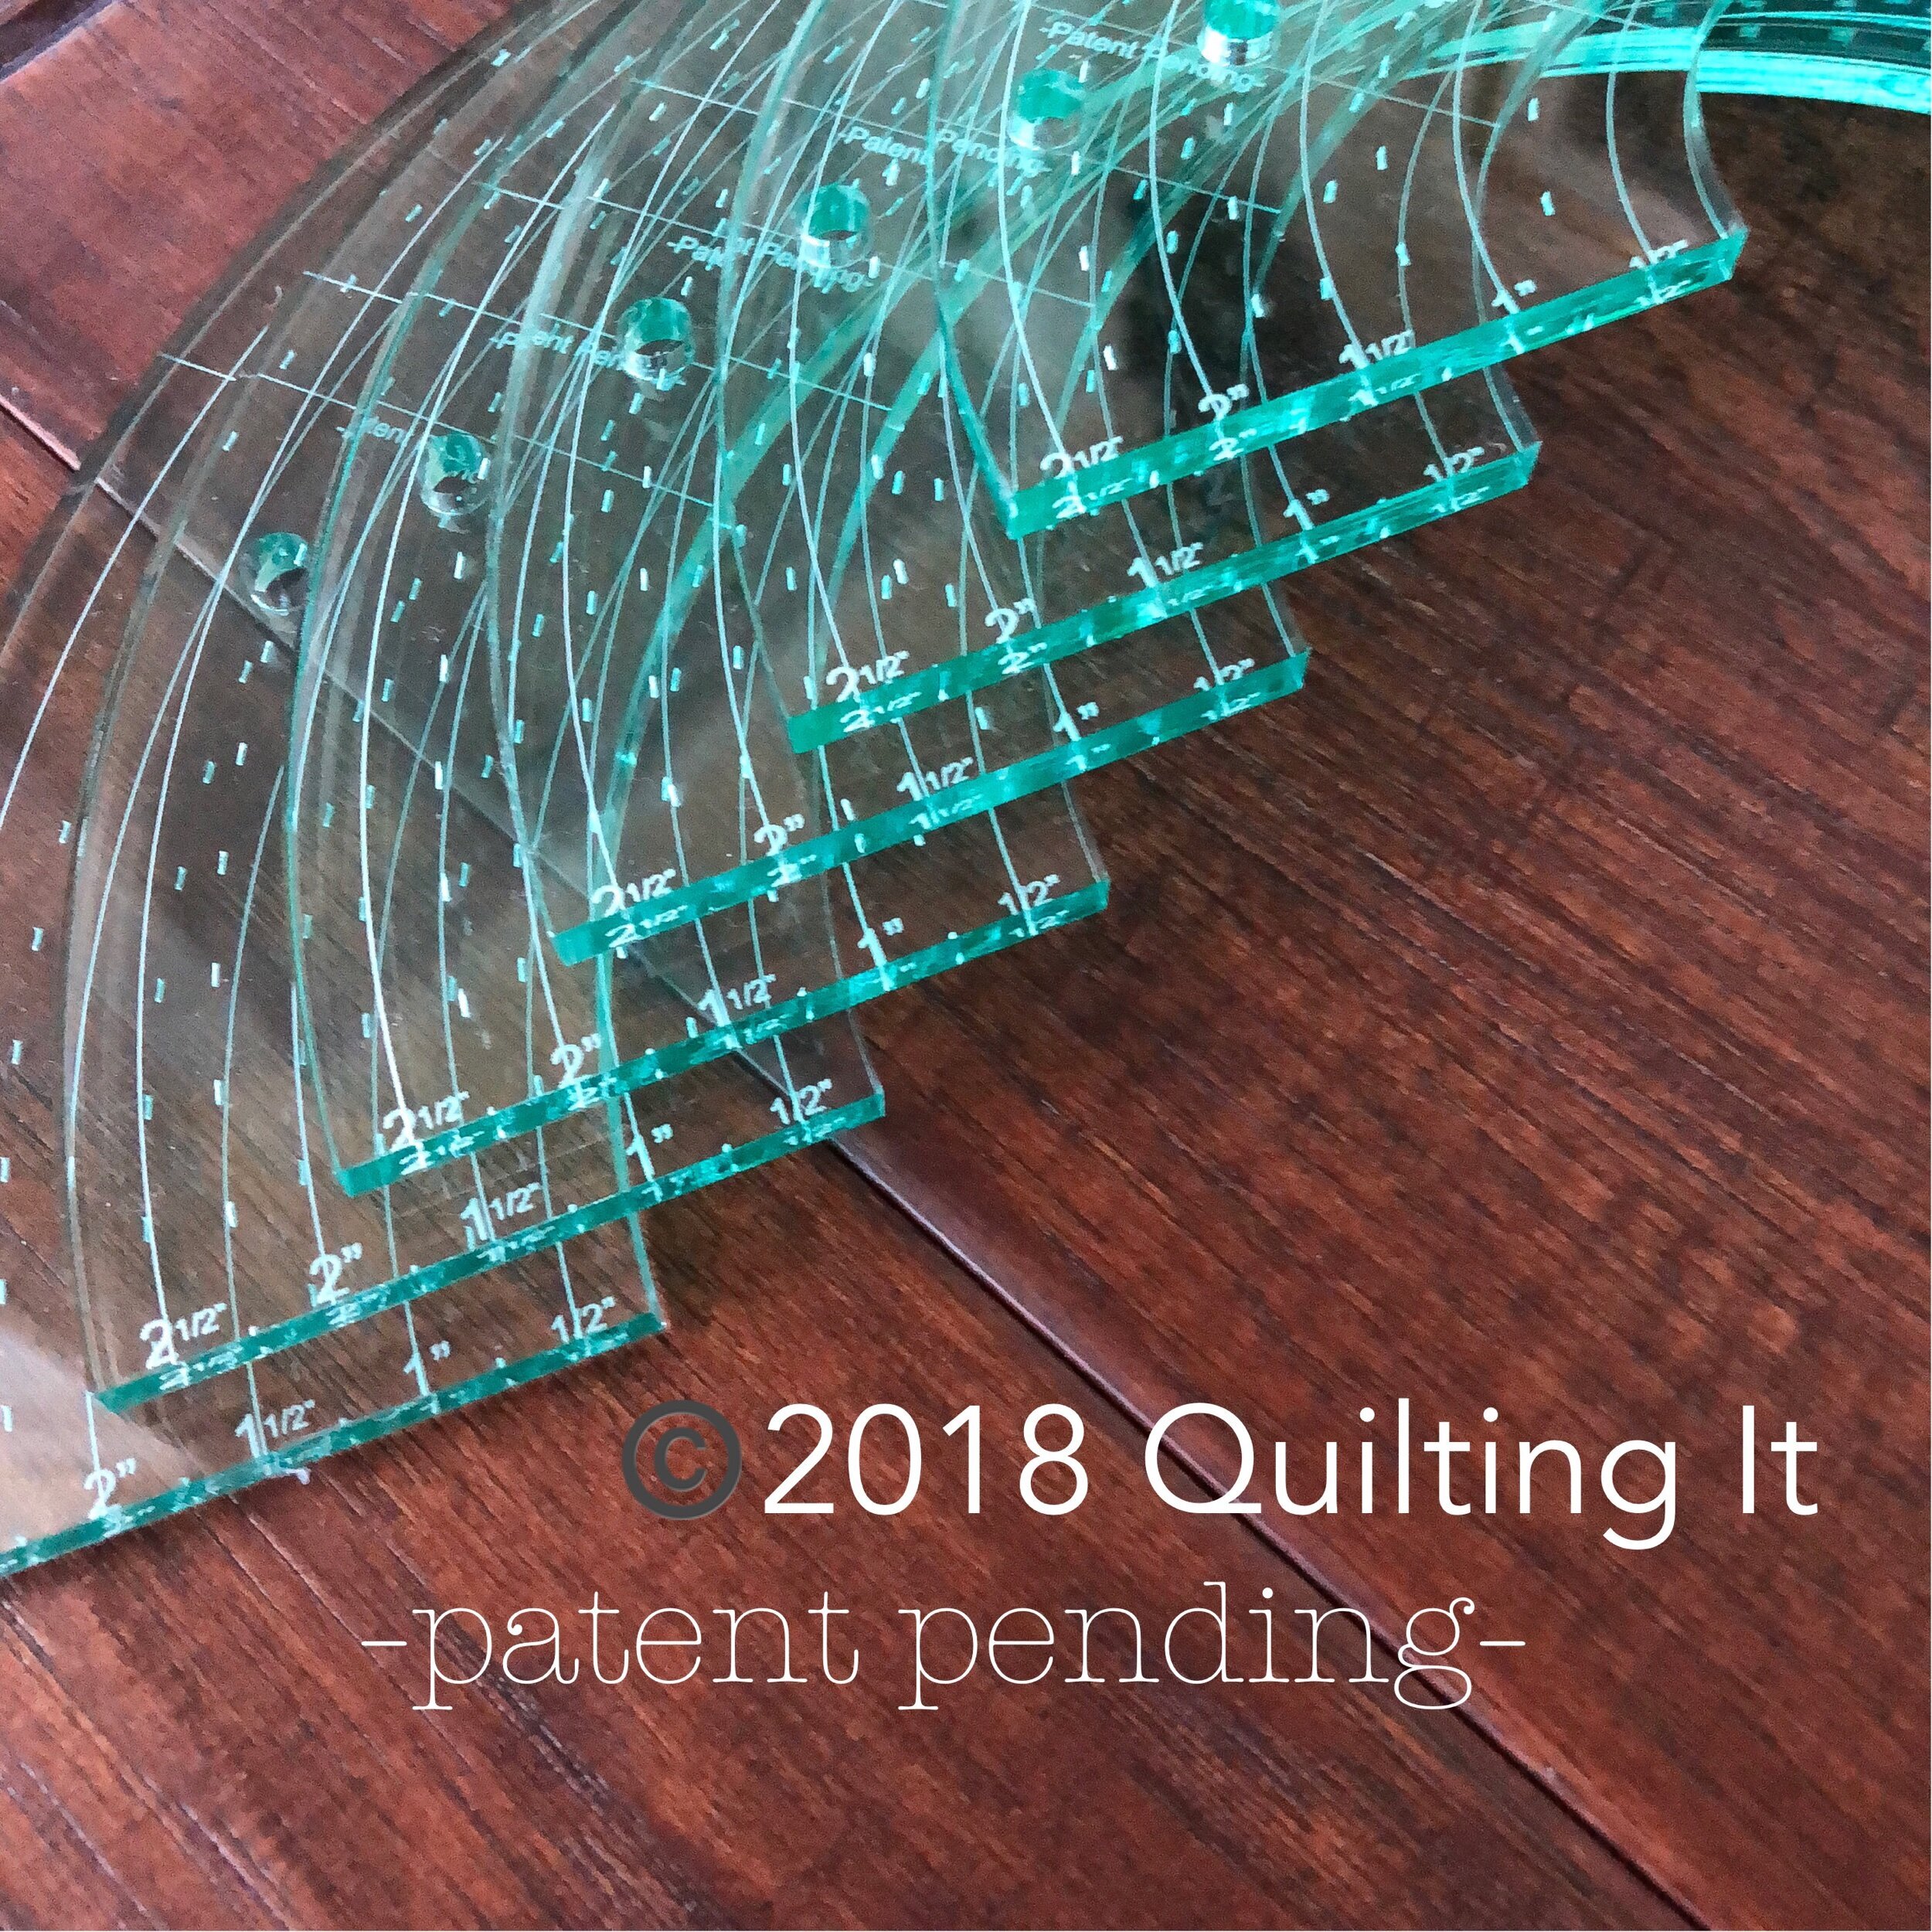
In the squares I used my 3” Circle2™ machine quilting circle ruler to quilt the curve. I did use a bluish green thread in the smaller square and border.

This is my green 3”/9” Circle2™ ruler. My Circle2™ machine quilting circle rulers come in a set of 6, ranging in size from 2” up to 13”. As you can see, there are two sizes of circles per ruler. They are made with 1/4” high quality acrylic, in the USA. They are available in green or clear in my shop. For more info on this ruler set, click on this link…. https://www.quiltingit.com/blog/2018/10/10/introducing-my-circle2-longarm-circle-ruler-set
- Design Patent D875,574 -

In the background behind the squares and along the edges I did a close back and forth freehand line. Then I used the Edge rulers from Linda at The Quilted Pineapple to quilt the 1/2” woven lines along the border. I also used her Edge rulers for all the lines throughout the quilt.
This was such a fun fun fun one to quilt!! Looking at the backing is so rewarding…and this one is one of my all time favorites.
Thanks for coming by!! I hope you enjoyed looking at this one. Have a great weekend! -Leisha
Colleen’s Quilts
Hello!!
If you haven’t heard already, Urban Elementz is having a 25% off sale on all quilting designs!! If you’re a longarm quilter, go check it out. It’s the best time to get items on your wishlist! I had a question on my Instagram…what go to designs would I recommend? You know, the ones you’d use over and over!! My suggestions are Marmalade, Chantilly, Kindling, Birchwood, Squared, Ginger, and Sweet Indigo. Our newest design Sweet Marmalade is definitely a winner as well! There are dozens of others!! Go to: https://www.urbanelementz.com/catalogsearch/result/?cat=0&q=LeisHa+FarnsWorth
The designs that I used for these quilts are also available at Urban Elementz…they are on sale, too!

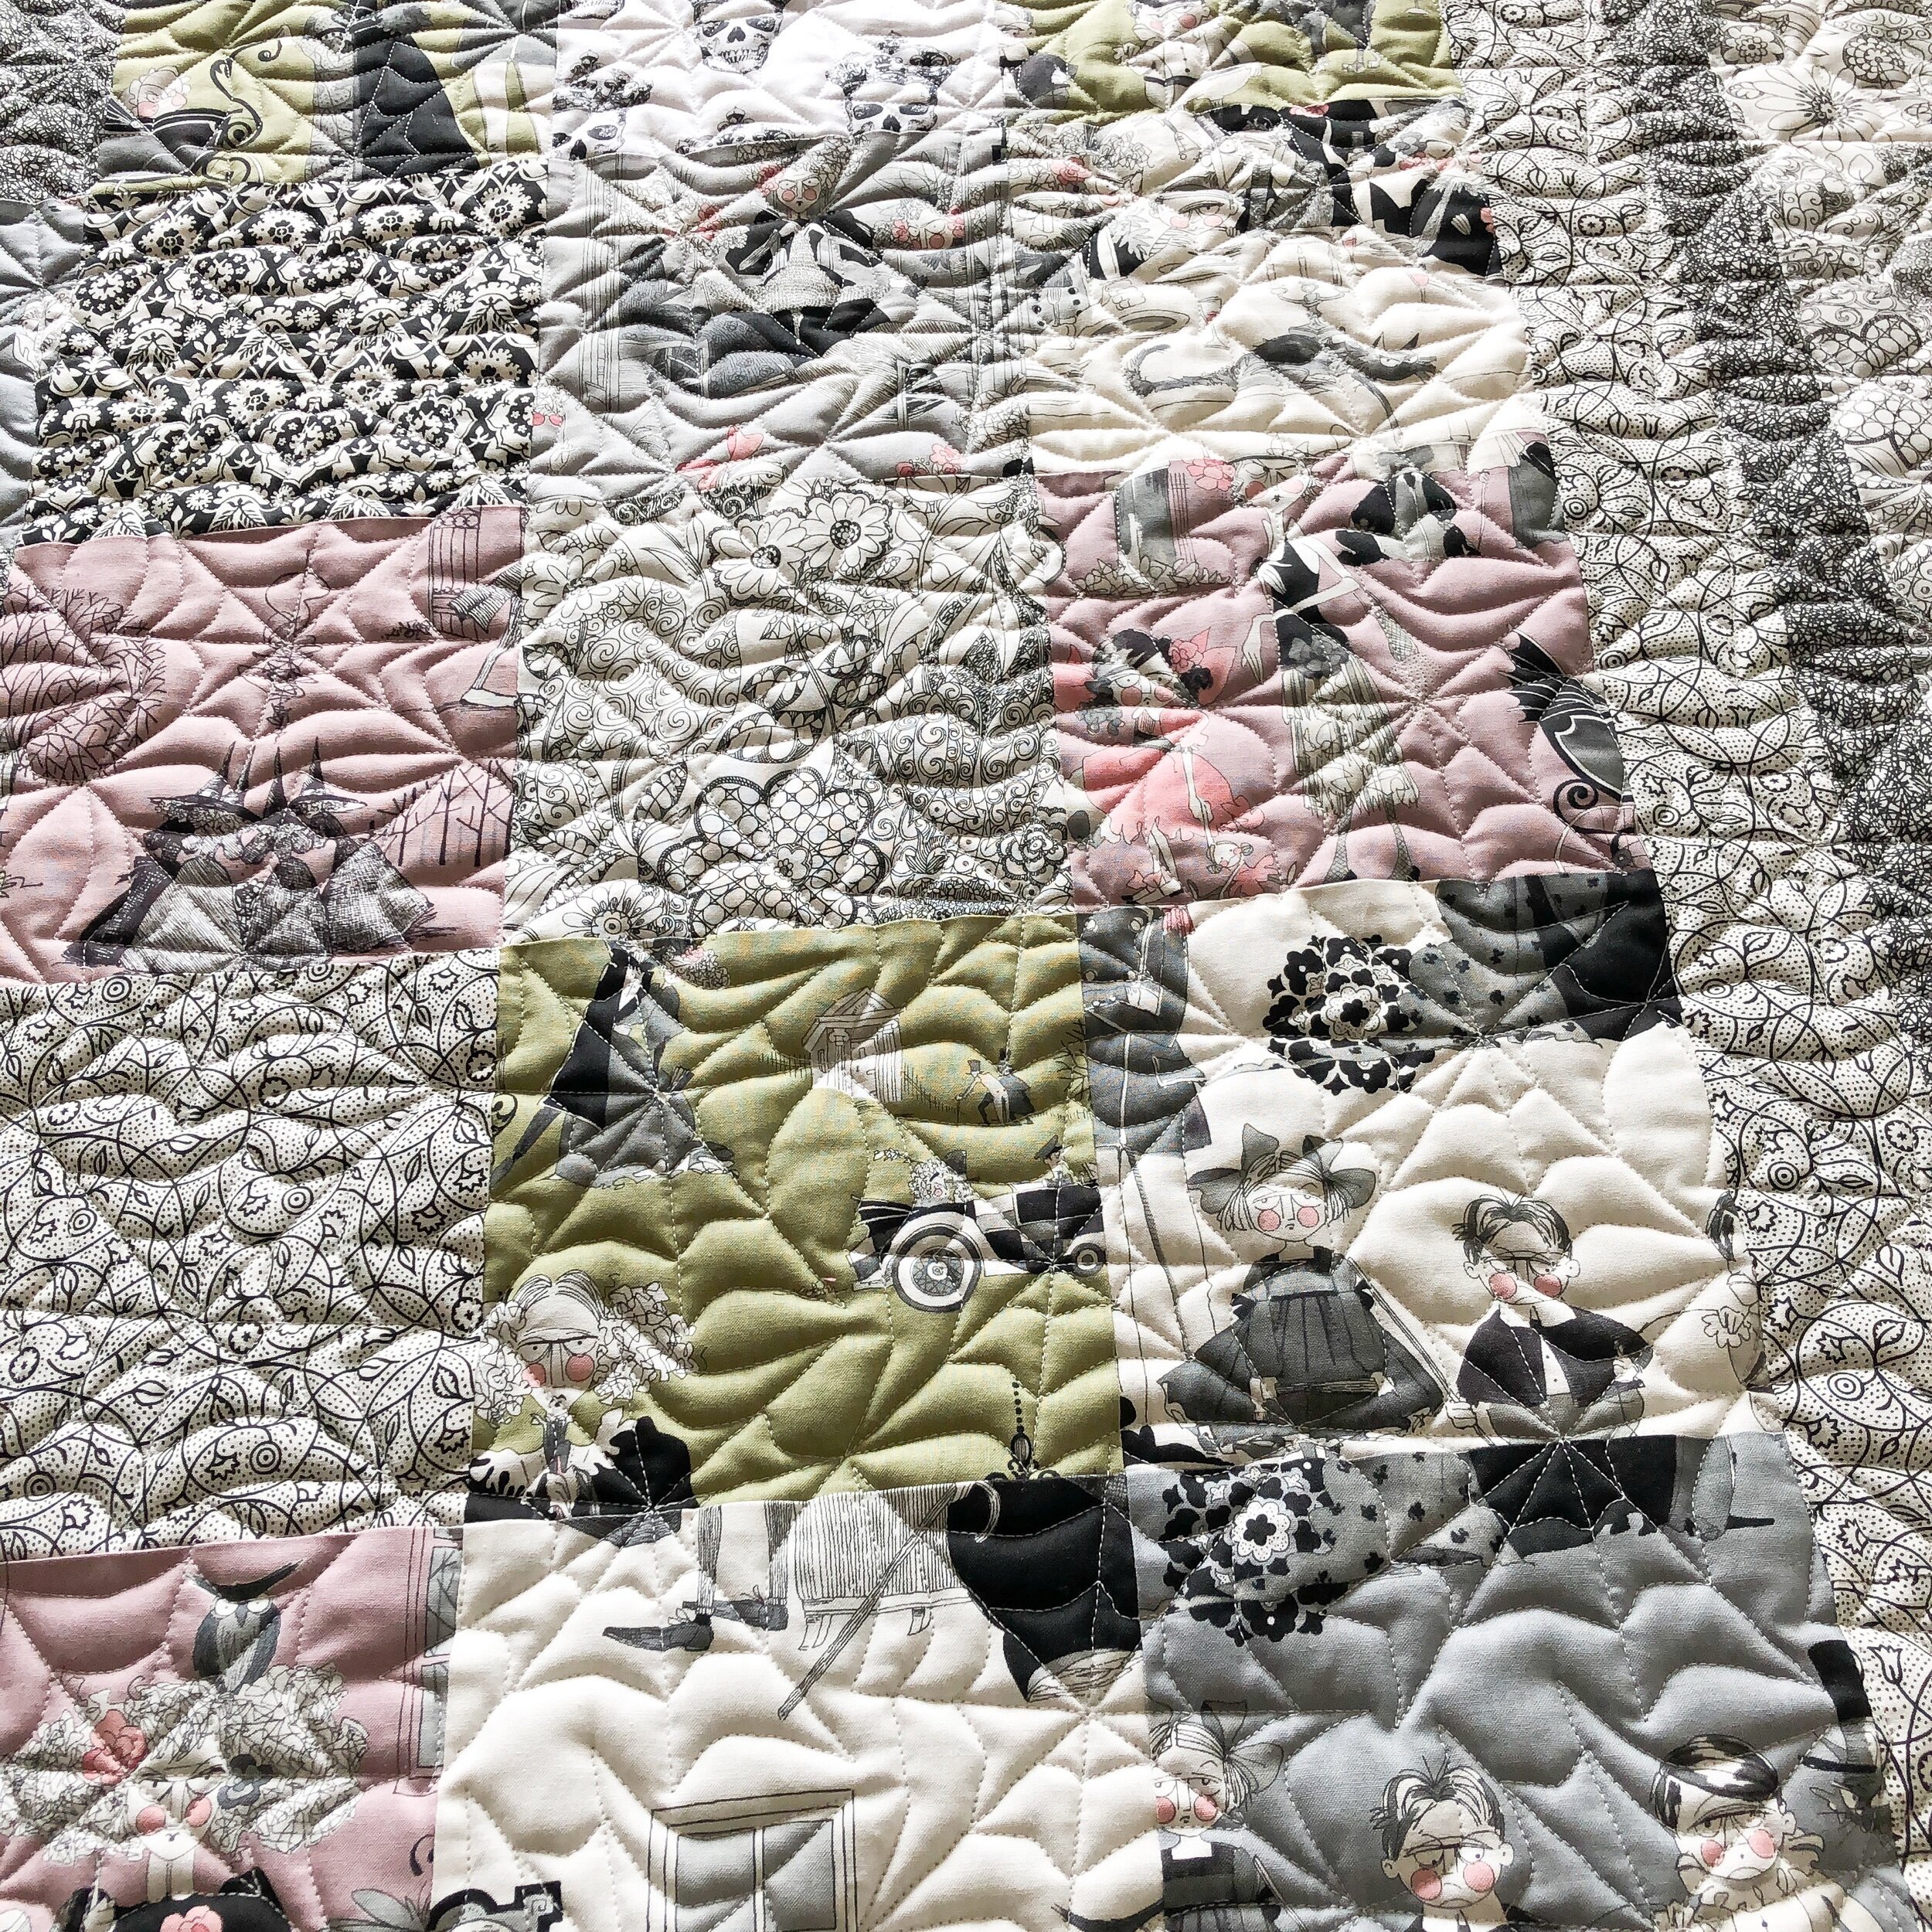
Let’s start with this cute quilt!! Colleen made this using the Ghastlies fabric line!! I’m not sure if this fabric is still available, it’s an older very popular fabric line from Alexander Henry. I’ll let you do that search.
The wonderful thing about keeping the quilt simple, 6” squares if I remember right, you can see the print nicely. Add a couple of borders to finish it off.

Colleen requested spider webs, so we went with Haunted Web by Apricot Moon Designs. It’s available at Urban Elementz.
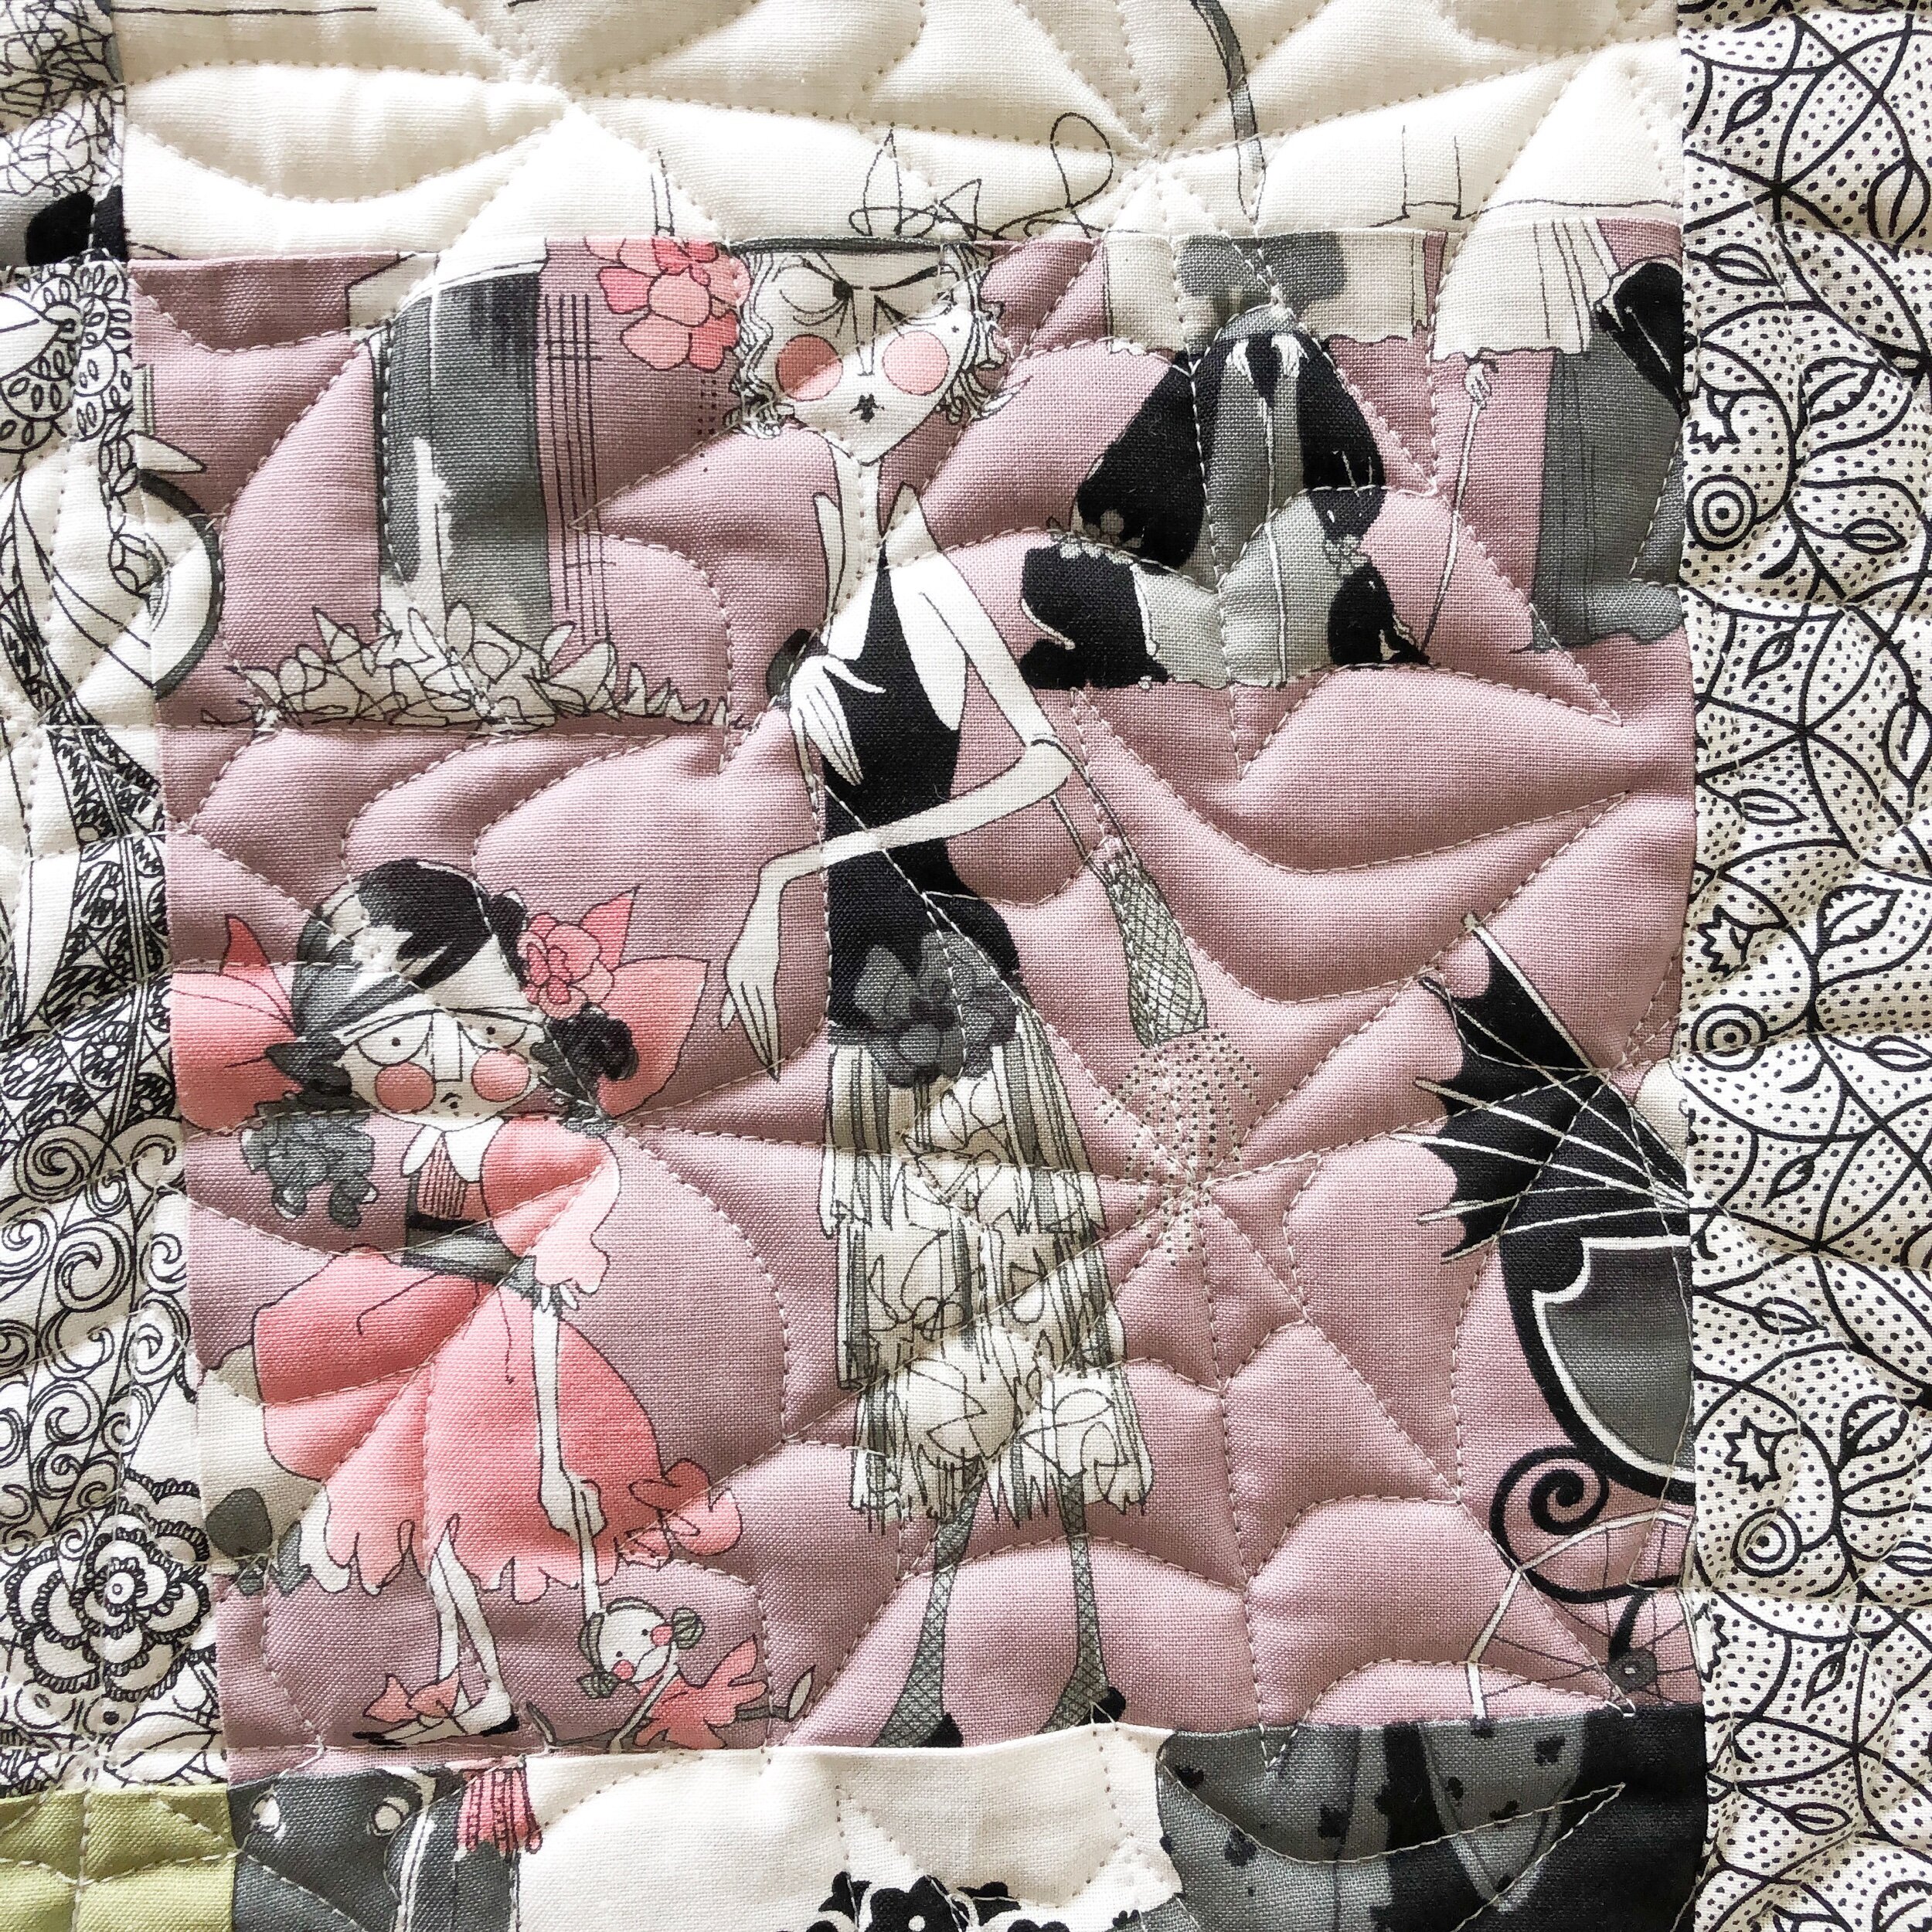
I used a cream Omni thread, and Hobbs wool batting.
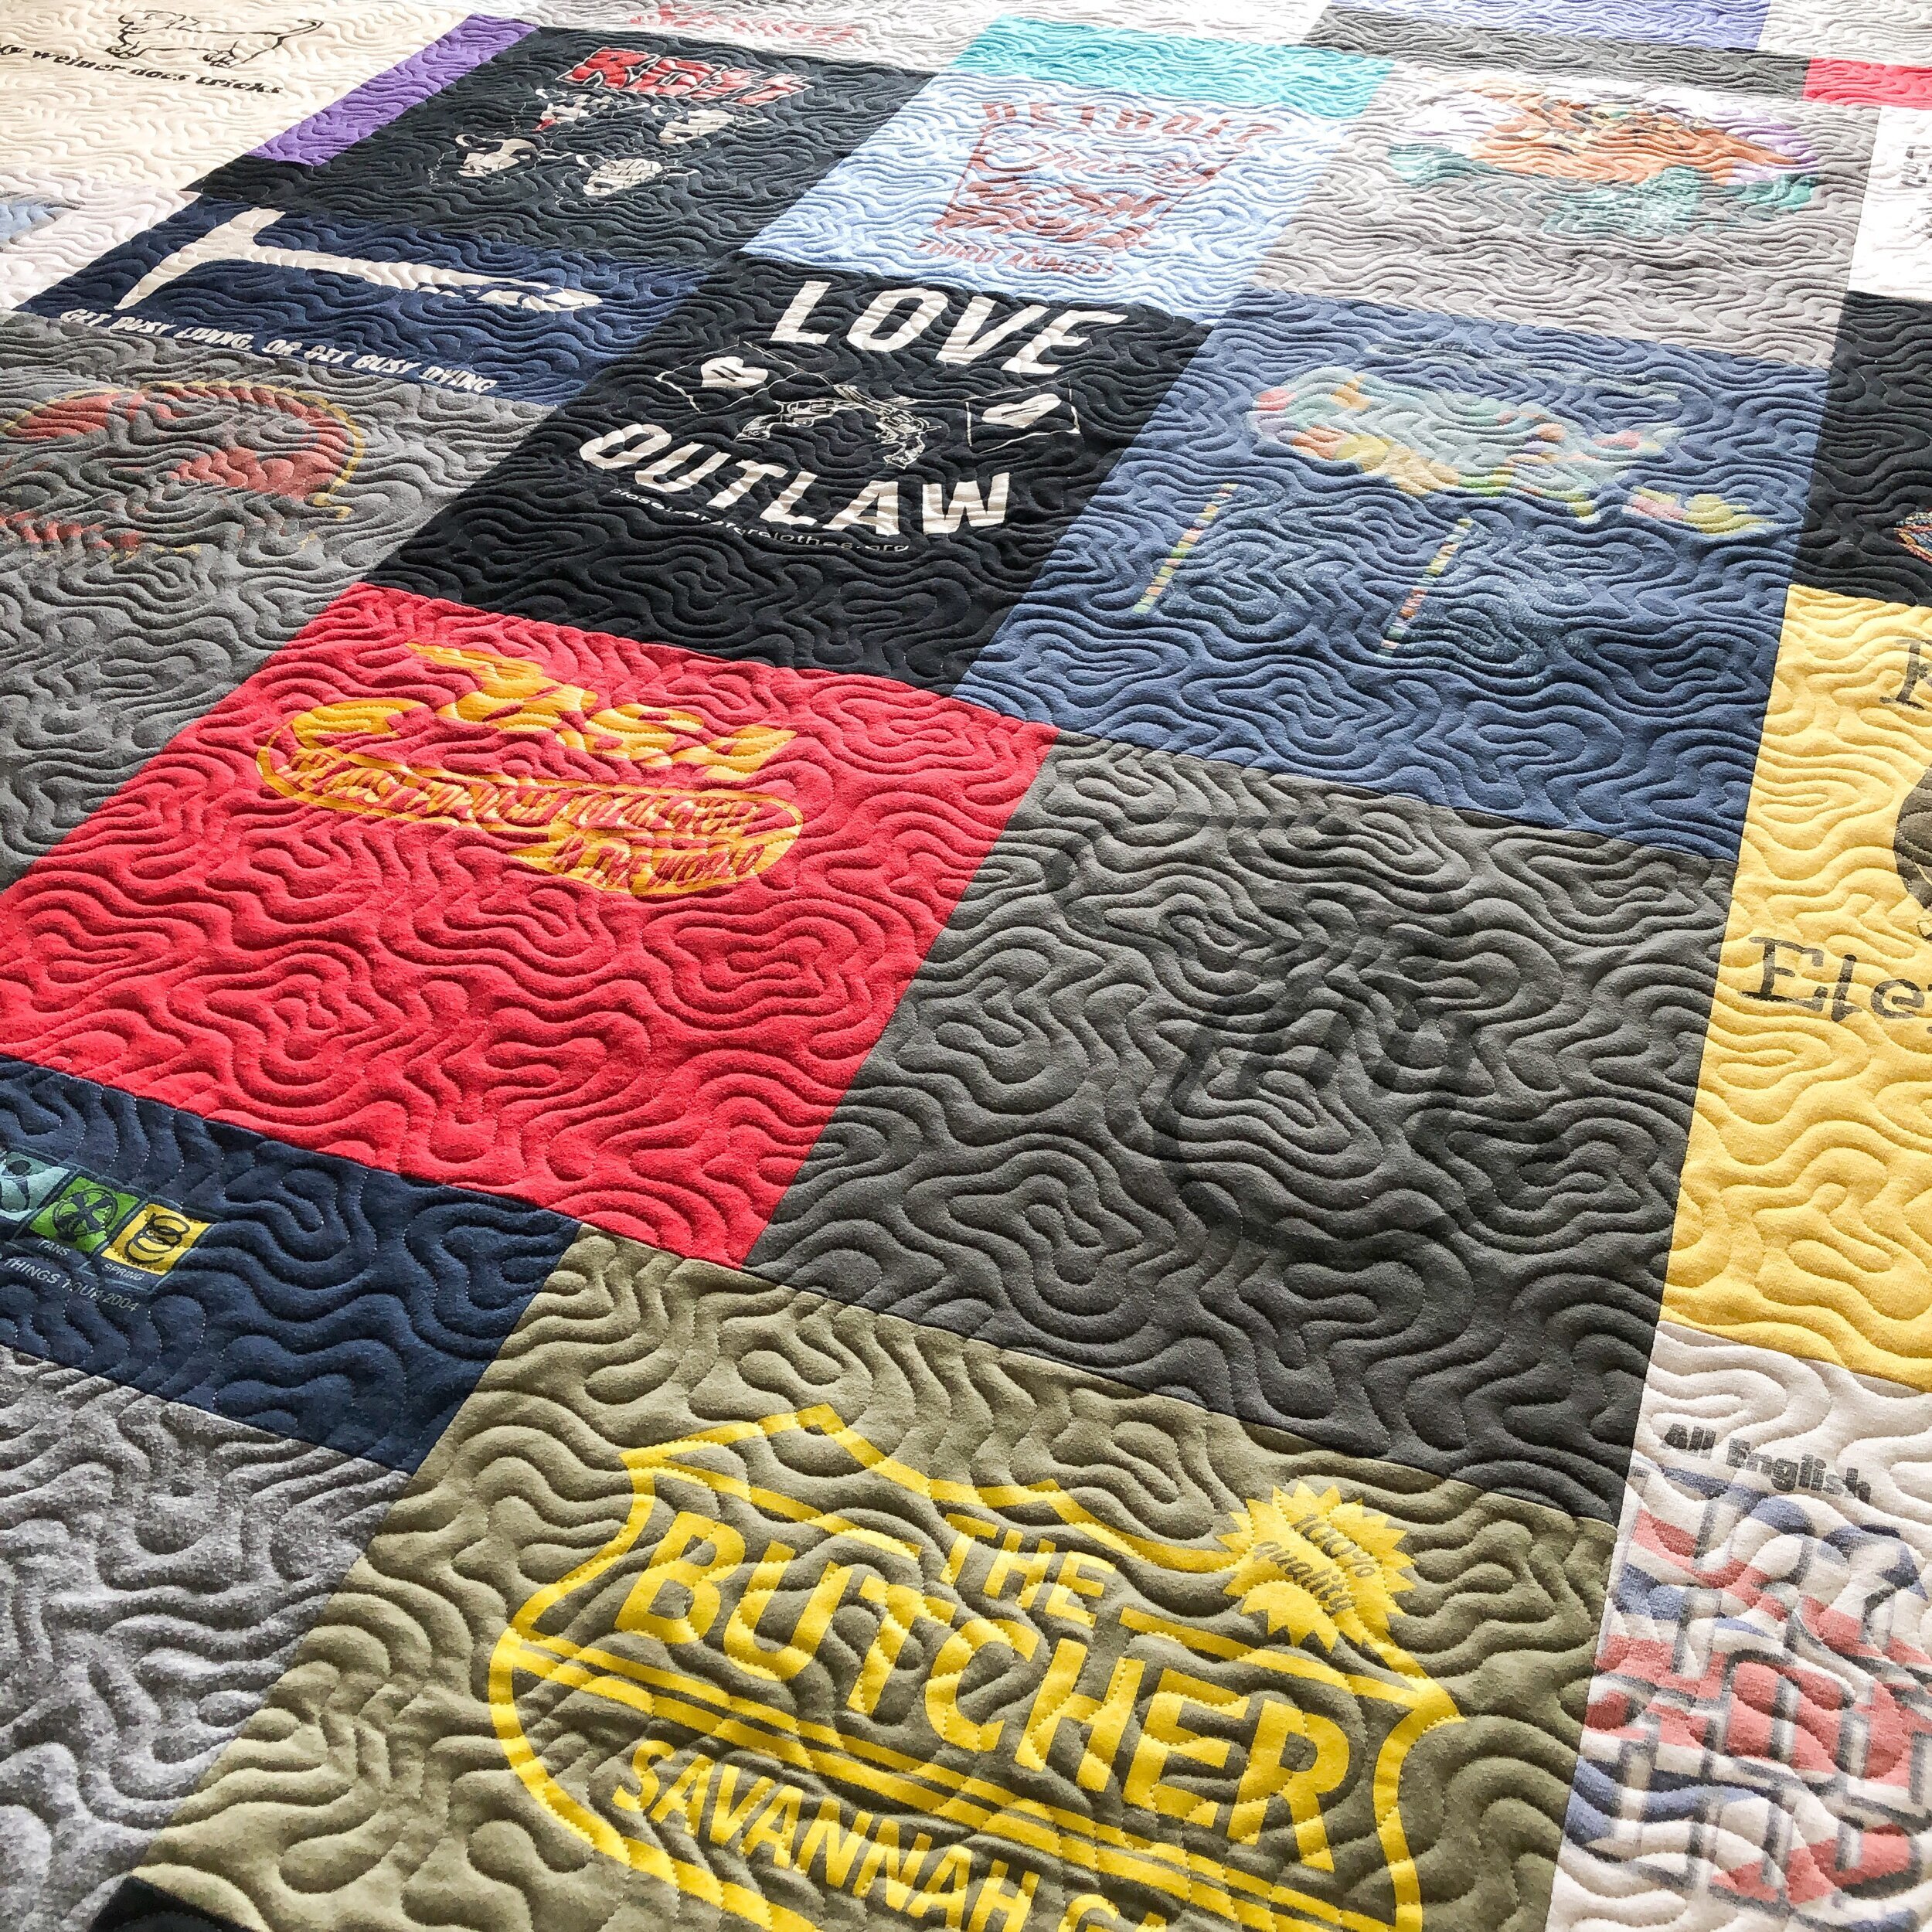
Next up…Colleen’s T-shirt quilt. I’m seriously impressed with how flat and straight this t-shirt quilt is!! Especially with the variety of sizes of shirts. It’s was super easy to quilt.
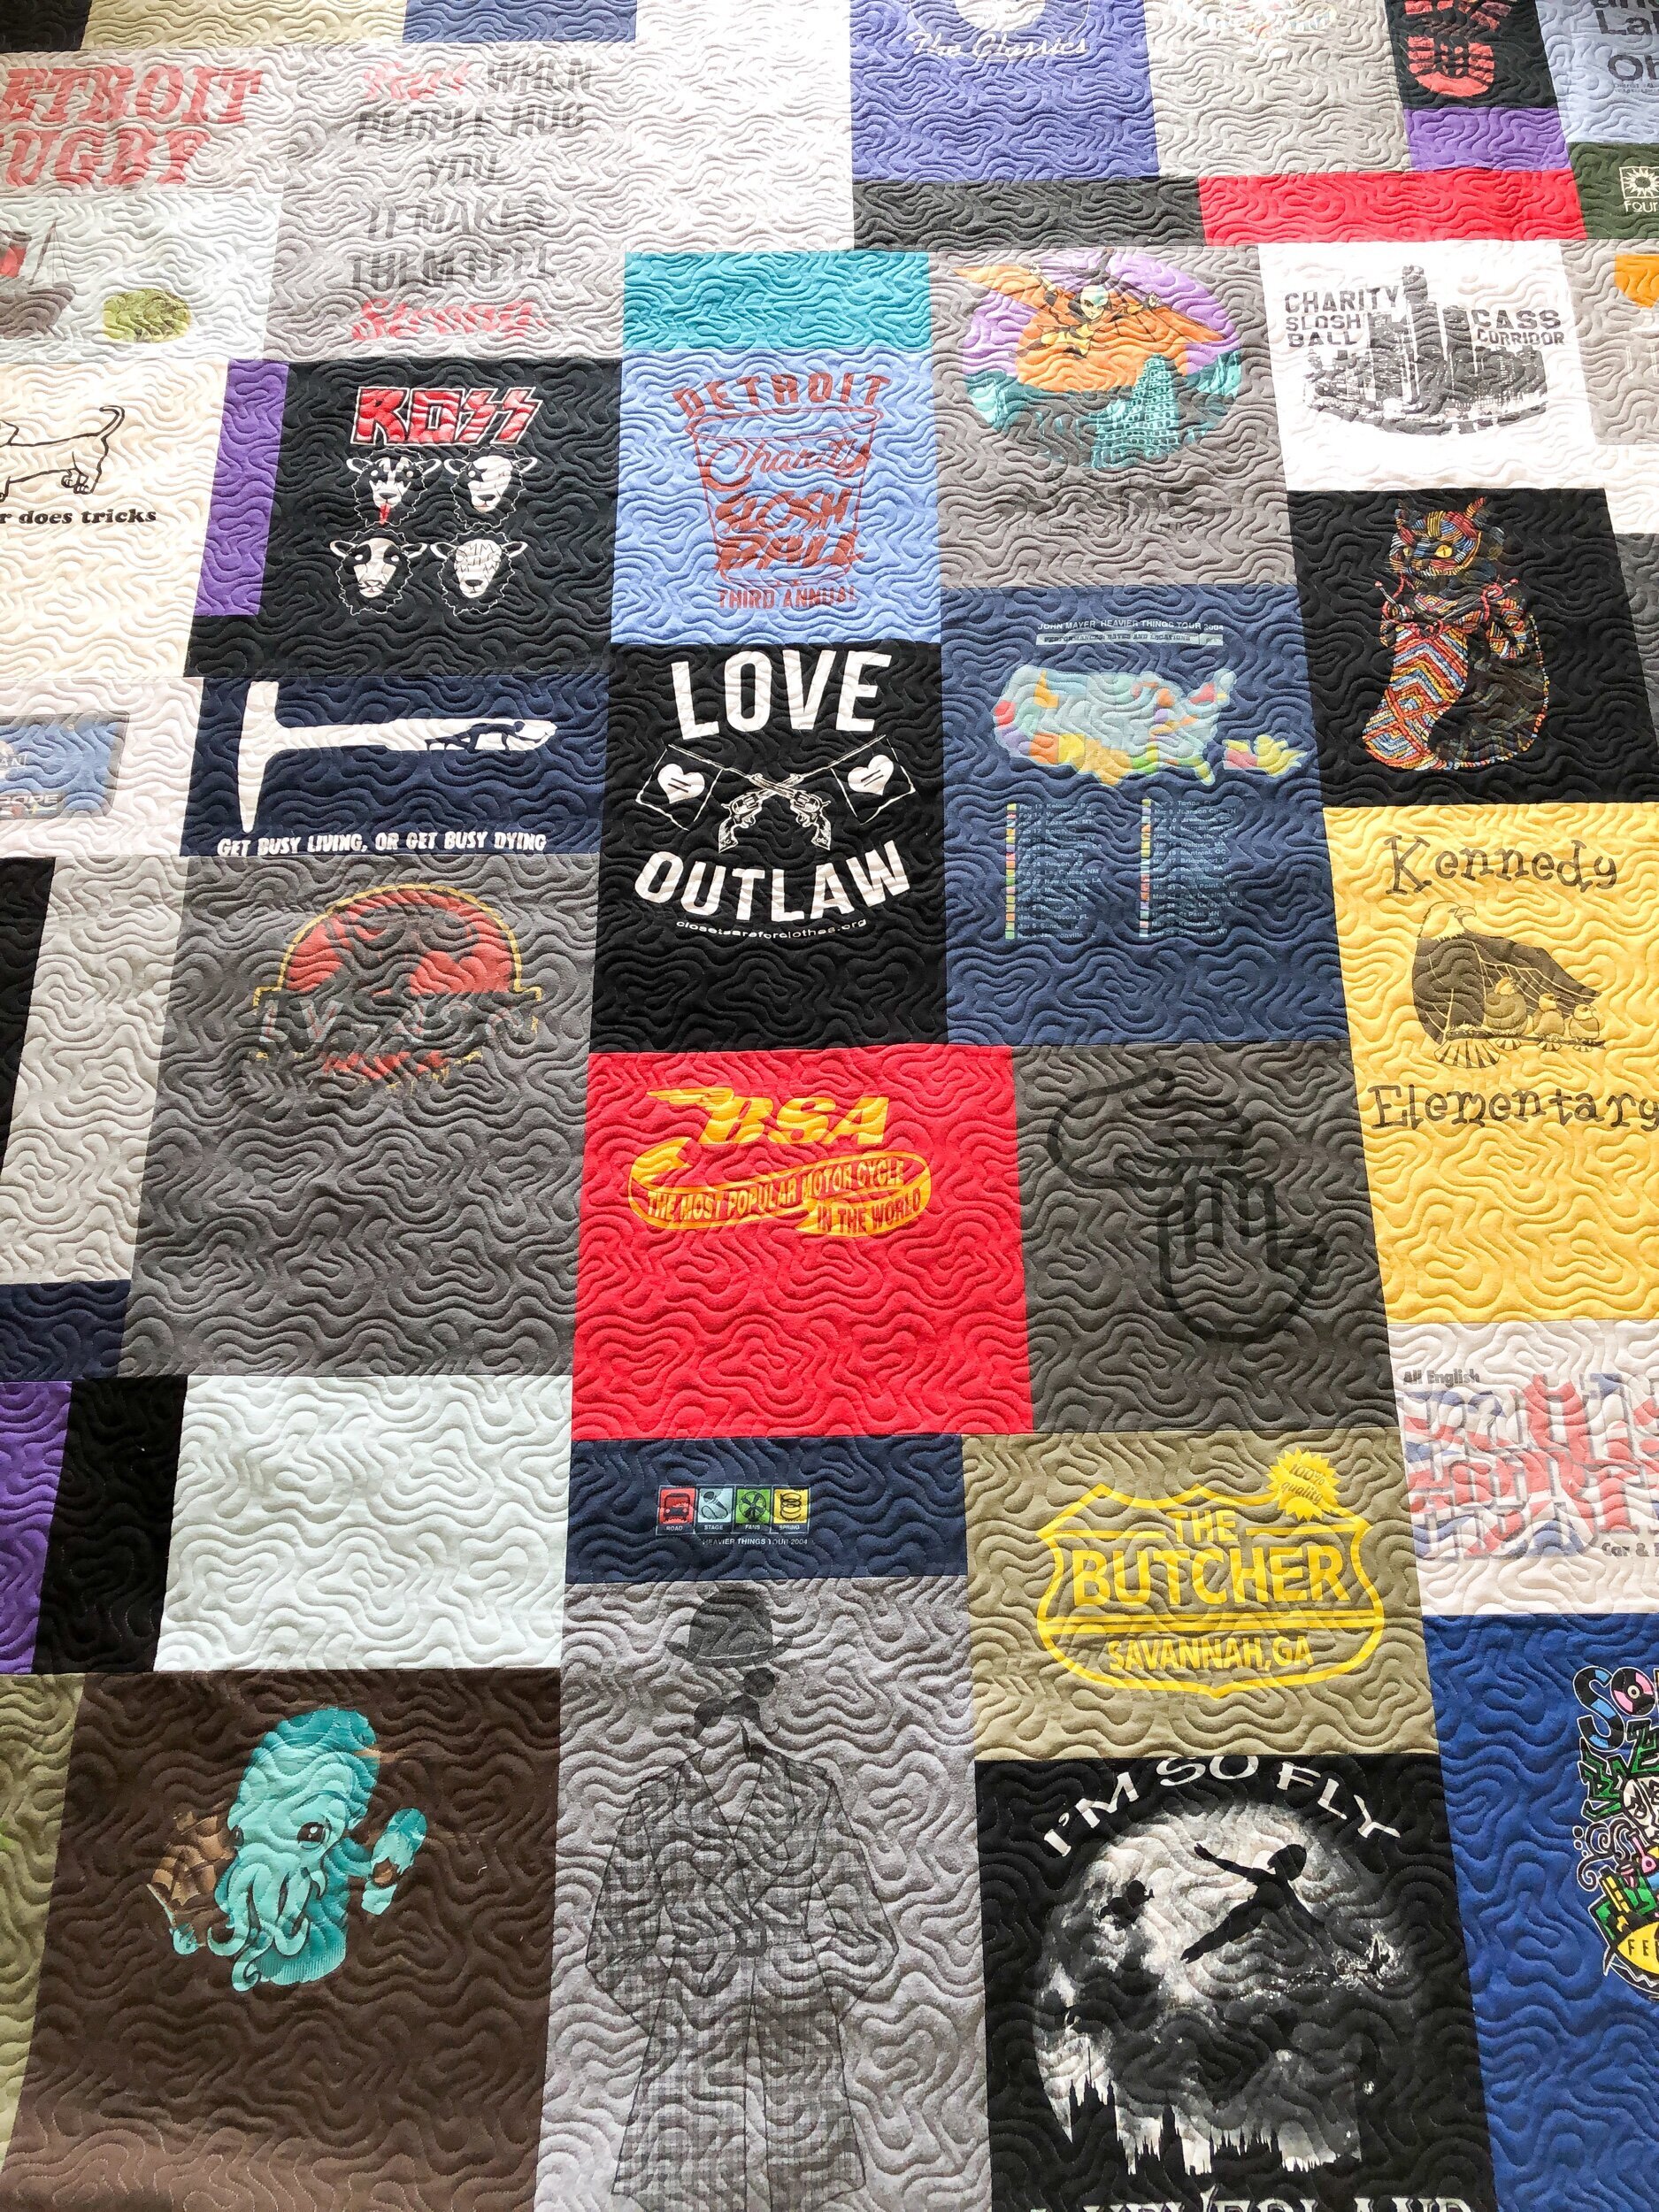
Colleen requested Malachite by Patricia Ritter, which is available at Urban Elementz. I love the quilting texture it gives to the quilt!

How fun is that knitting kitten!

I used a bamboo batting from Winline, and a Omni off white thread.
I hope you’re having a great weekend!! I’m headed to meet my new niece for the first time.
• Leisha
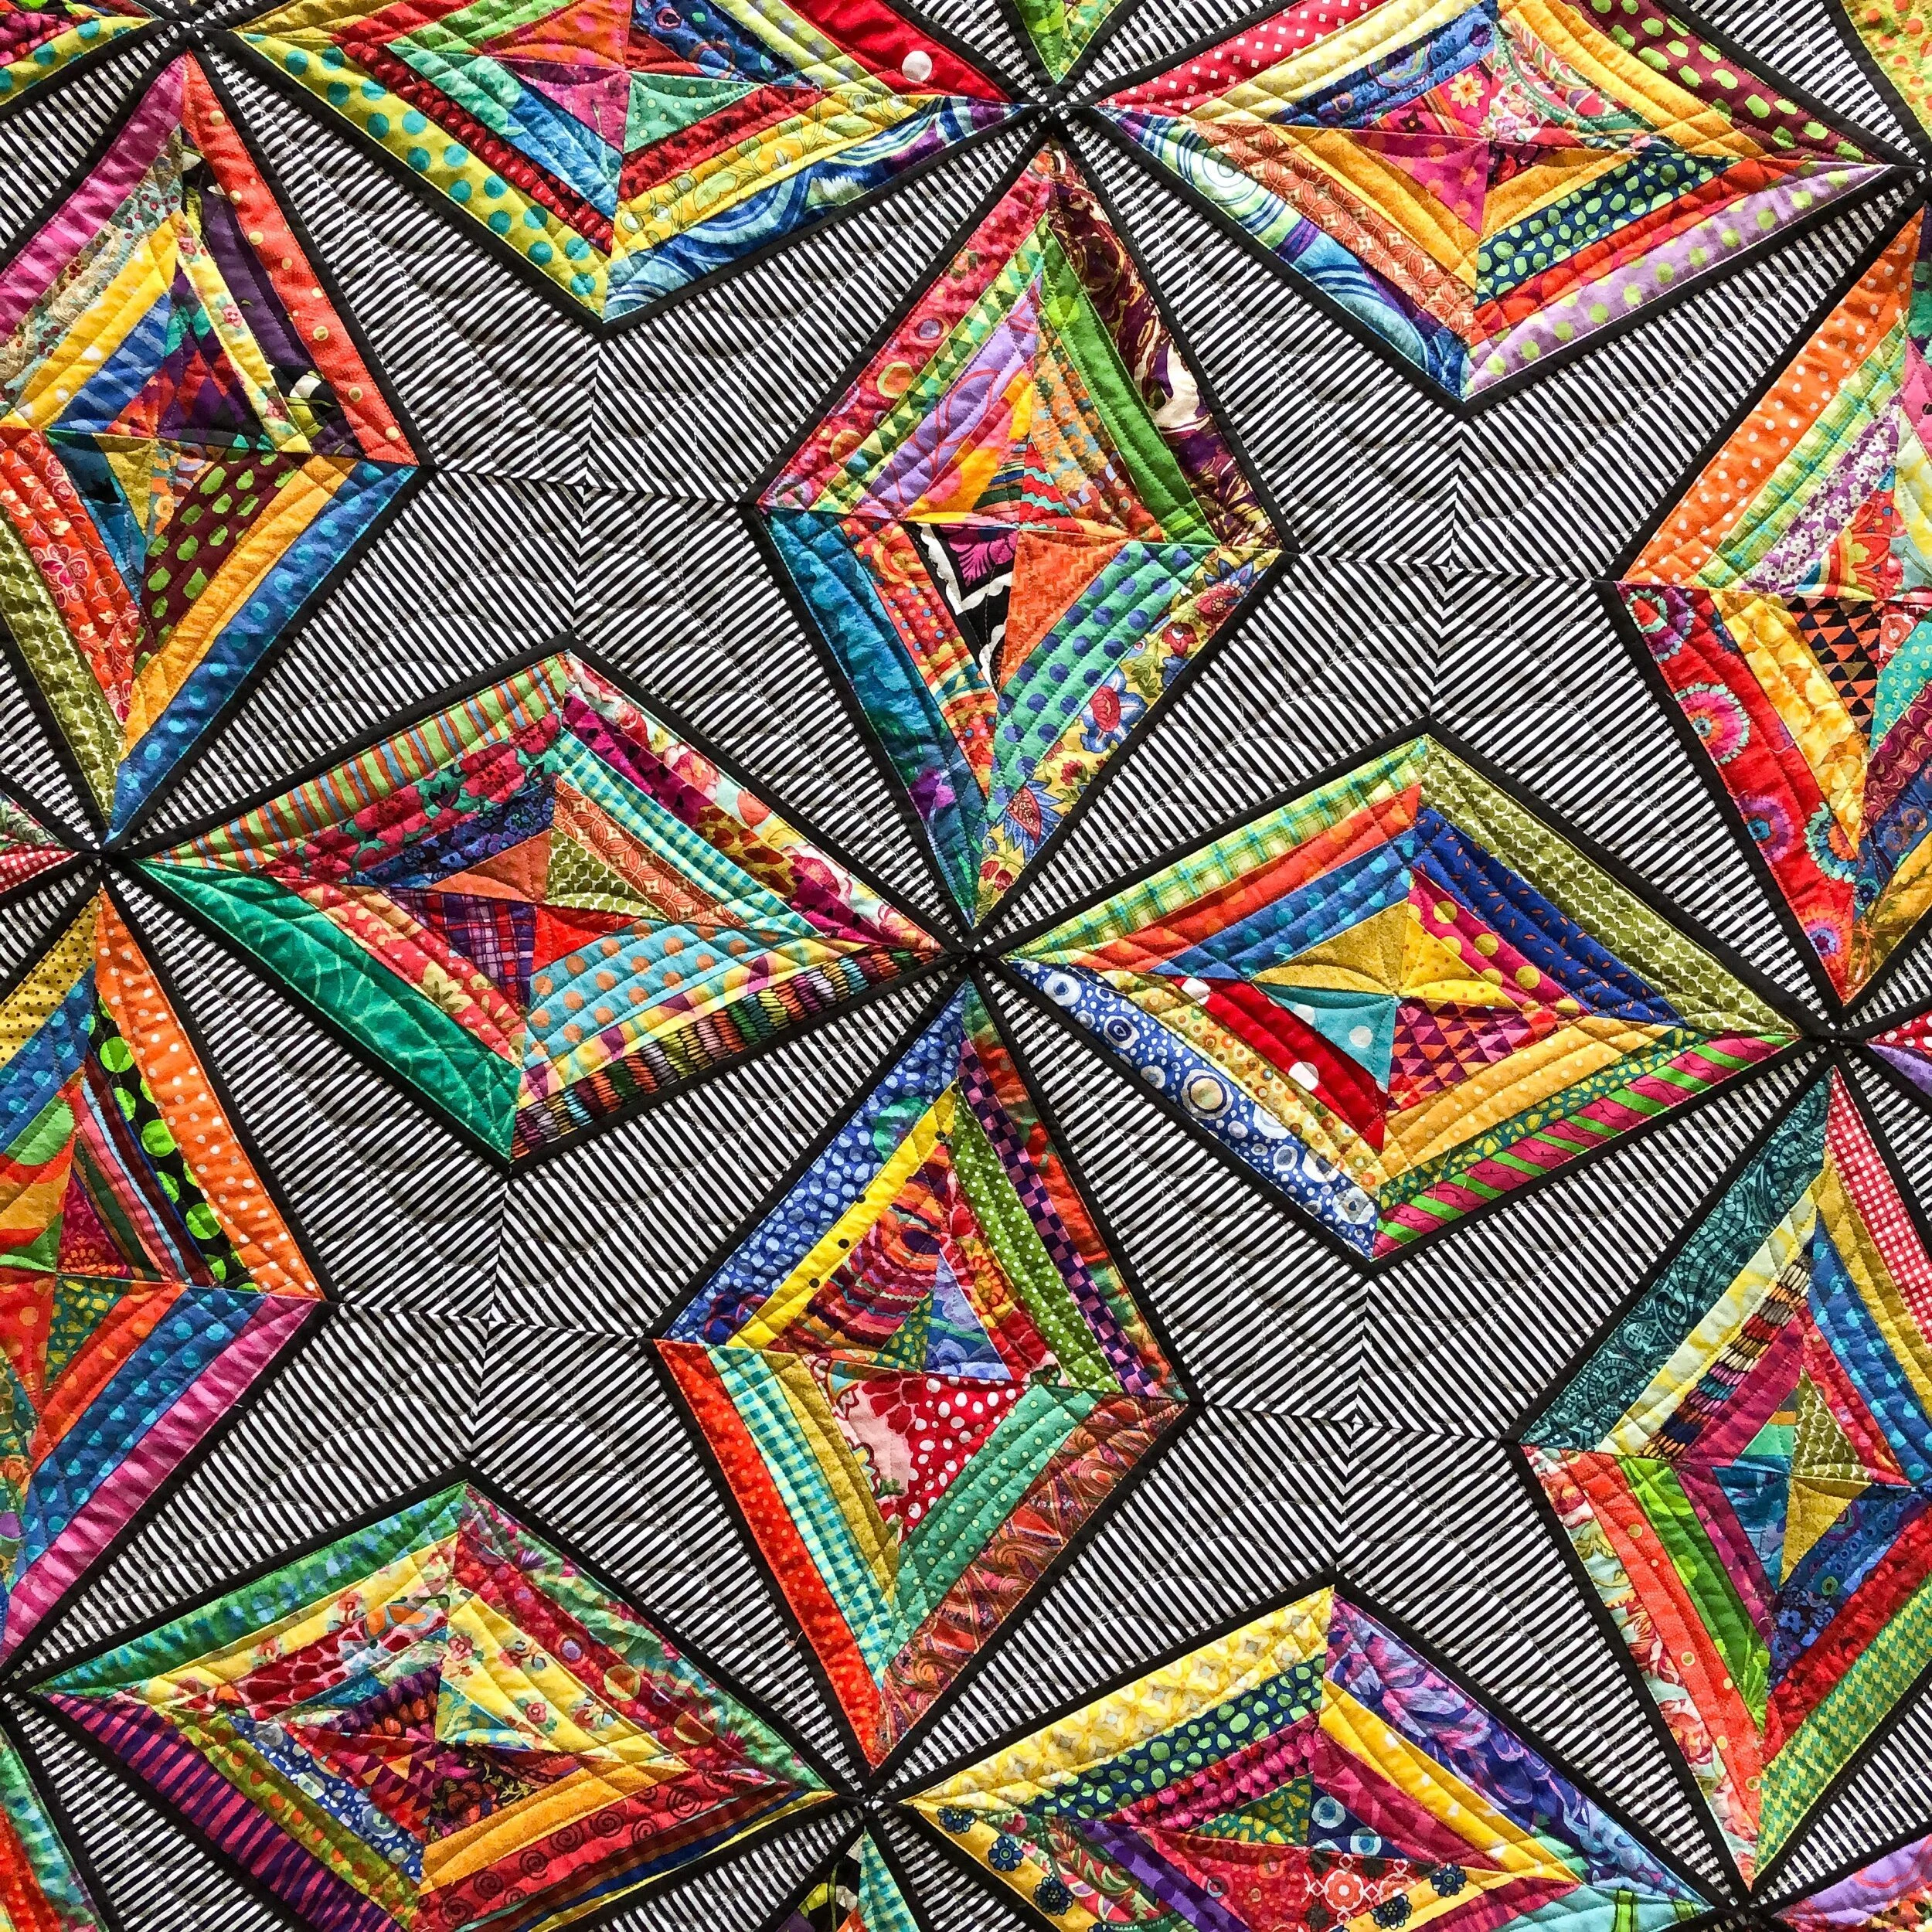
Loranne’s Scrappy Diamond Quilt
Hello there…
It’s been a few days since I shared a quilt. I’ve been having some issues with my email list, and I’m not sure that it will work again…I guess we’ll see. In the meantime I’m going to keep sharing quilts that I’ve quilted.

This incredible quilt was designed and made by Loranne!! She gets inspired and starts creating. She even made a template. There is no pattern.

Look at all of those vibrant colors!! Especially with the thin black trim and black/white stripe fabric. A great way to use your scraps up!

Loranne wanted feathers in the black/white stripe stars. I used the 16” Edge ruler from Linda at The Quilted Pineapple to quilt the spine in the feather, and to quilt in the ditch along the thin black fabric.
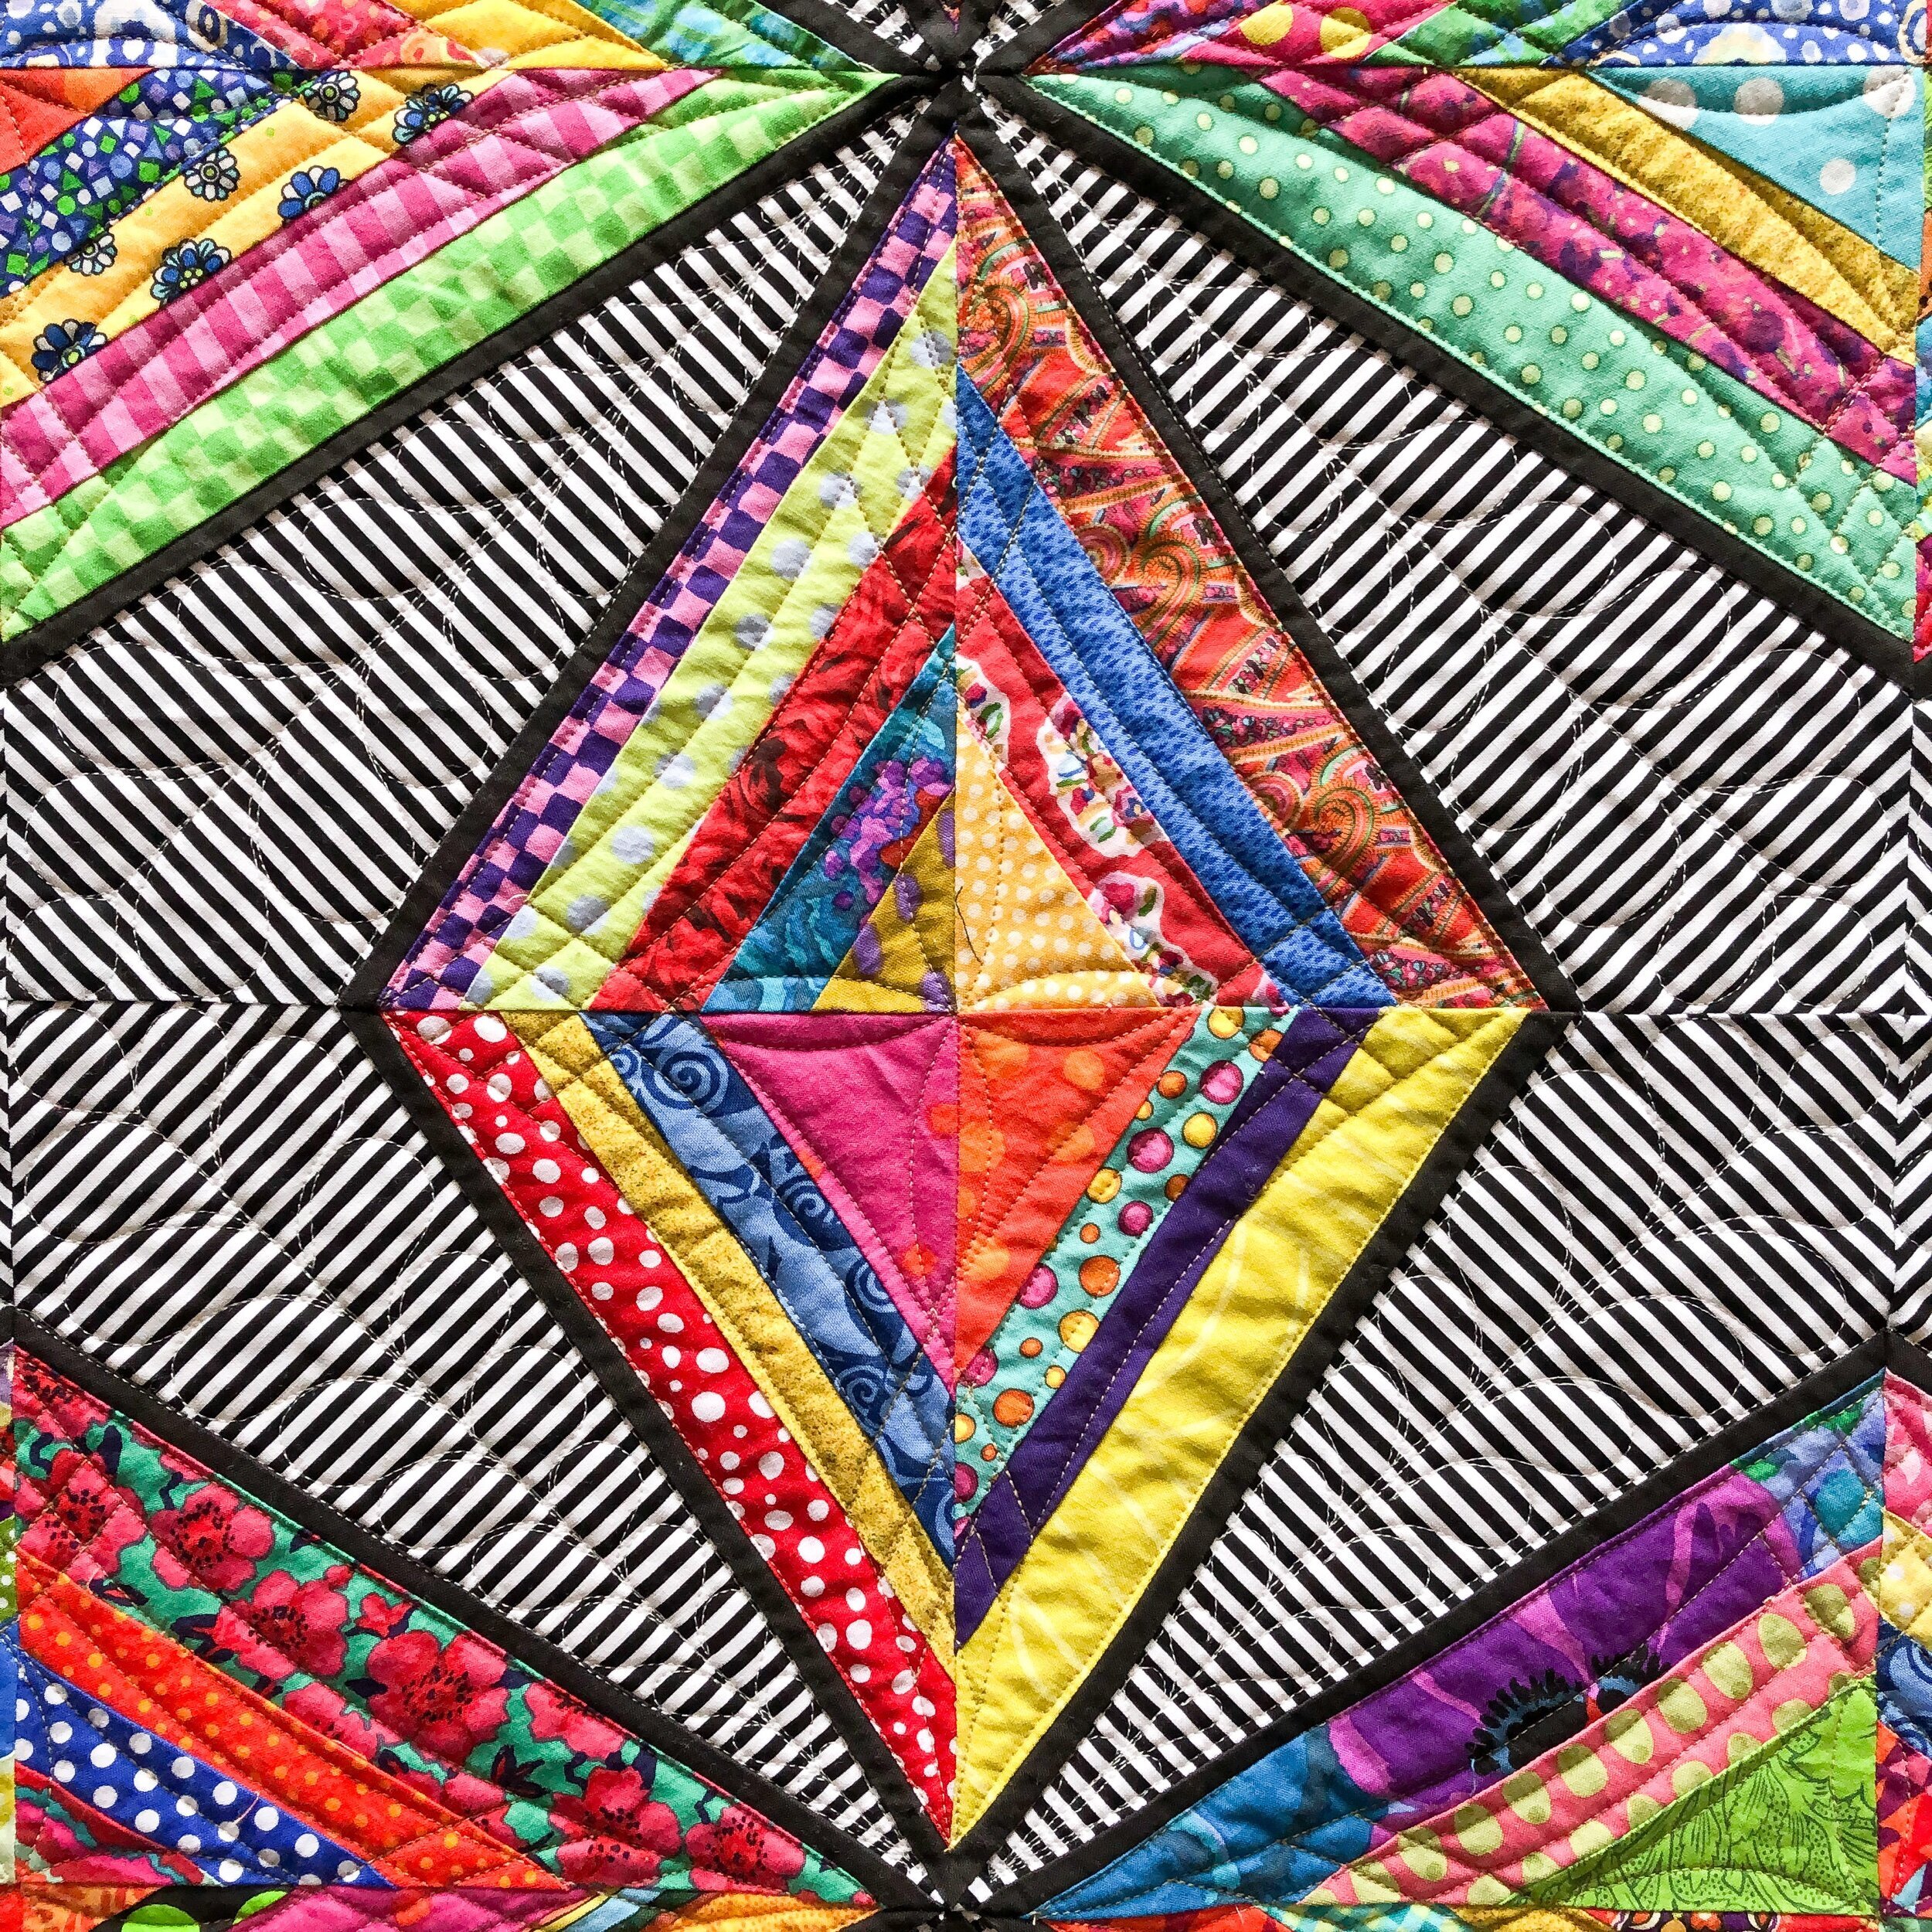
For the diamond blocks I used my 5” Circle2™ machine quilting circle ruler to quilt the center petals. My Circle2™ rulers are available in my shop. I also used Linda’s -20- curve ruler for the diamond curves…with a 1/2” space between each line.
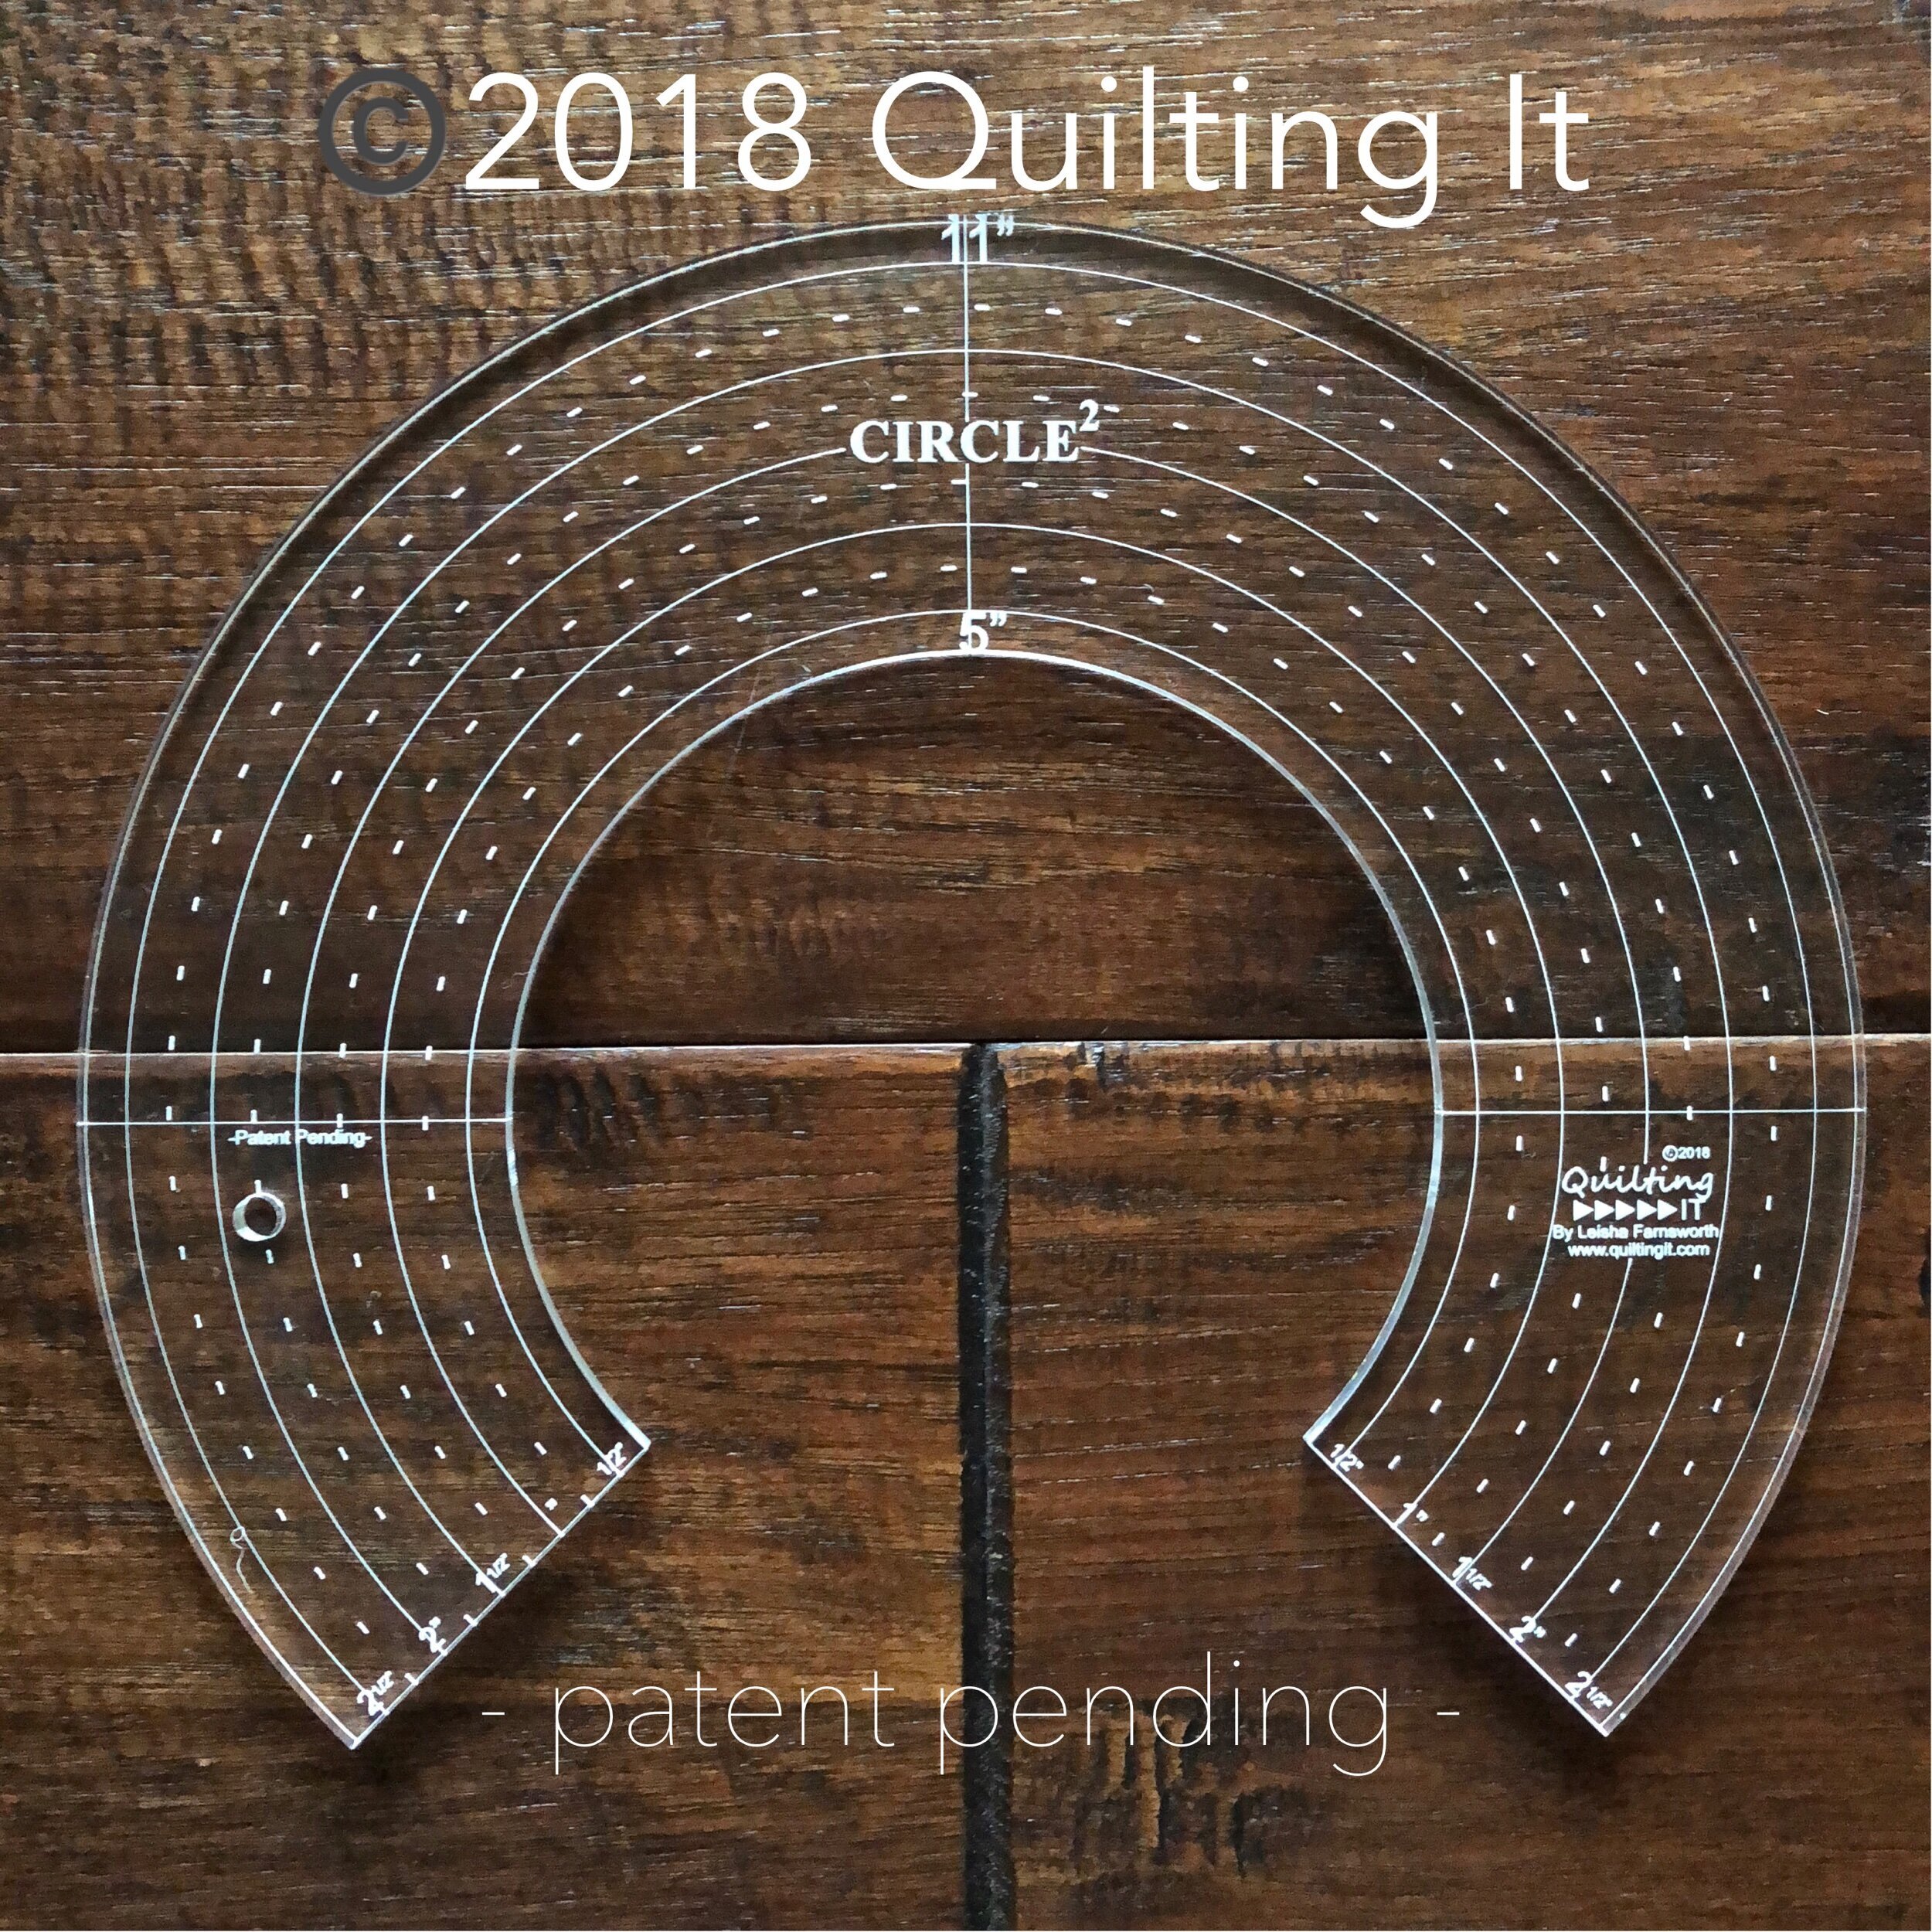
For more info on my Circle2™ rulers go here: https://www.quiltingit.com/blog/2018/10/10/introducing-my-circle2-longarm-circle-ruler-set
- Design Patent D875,574 -
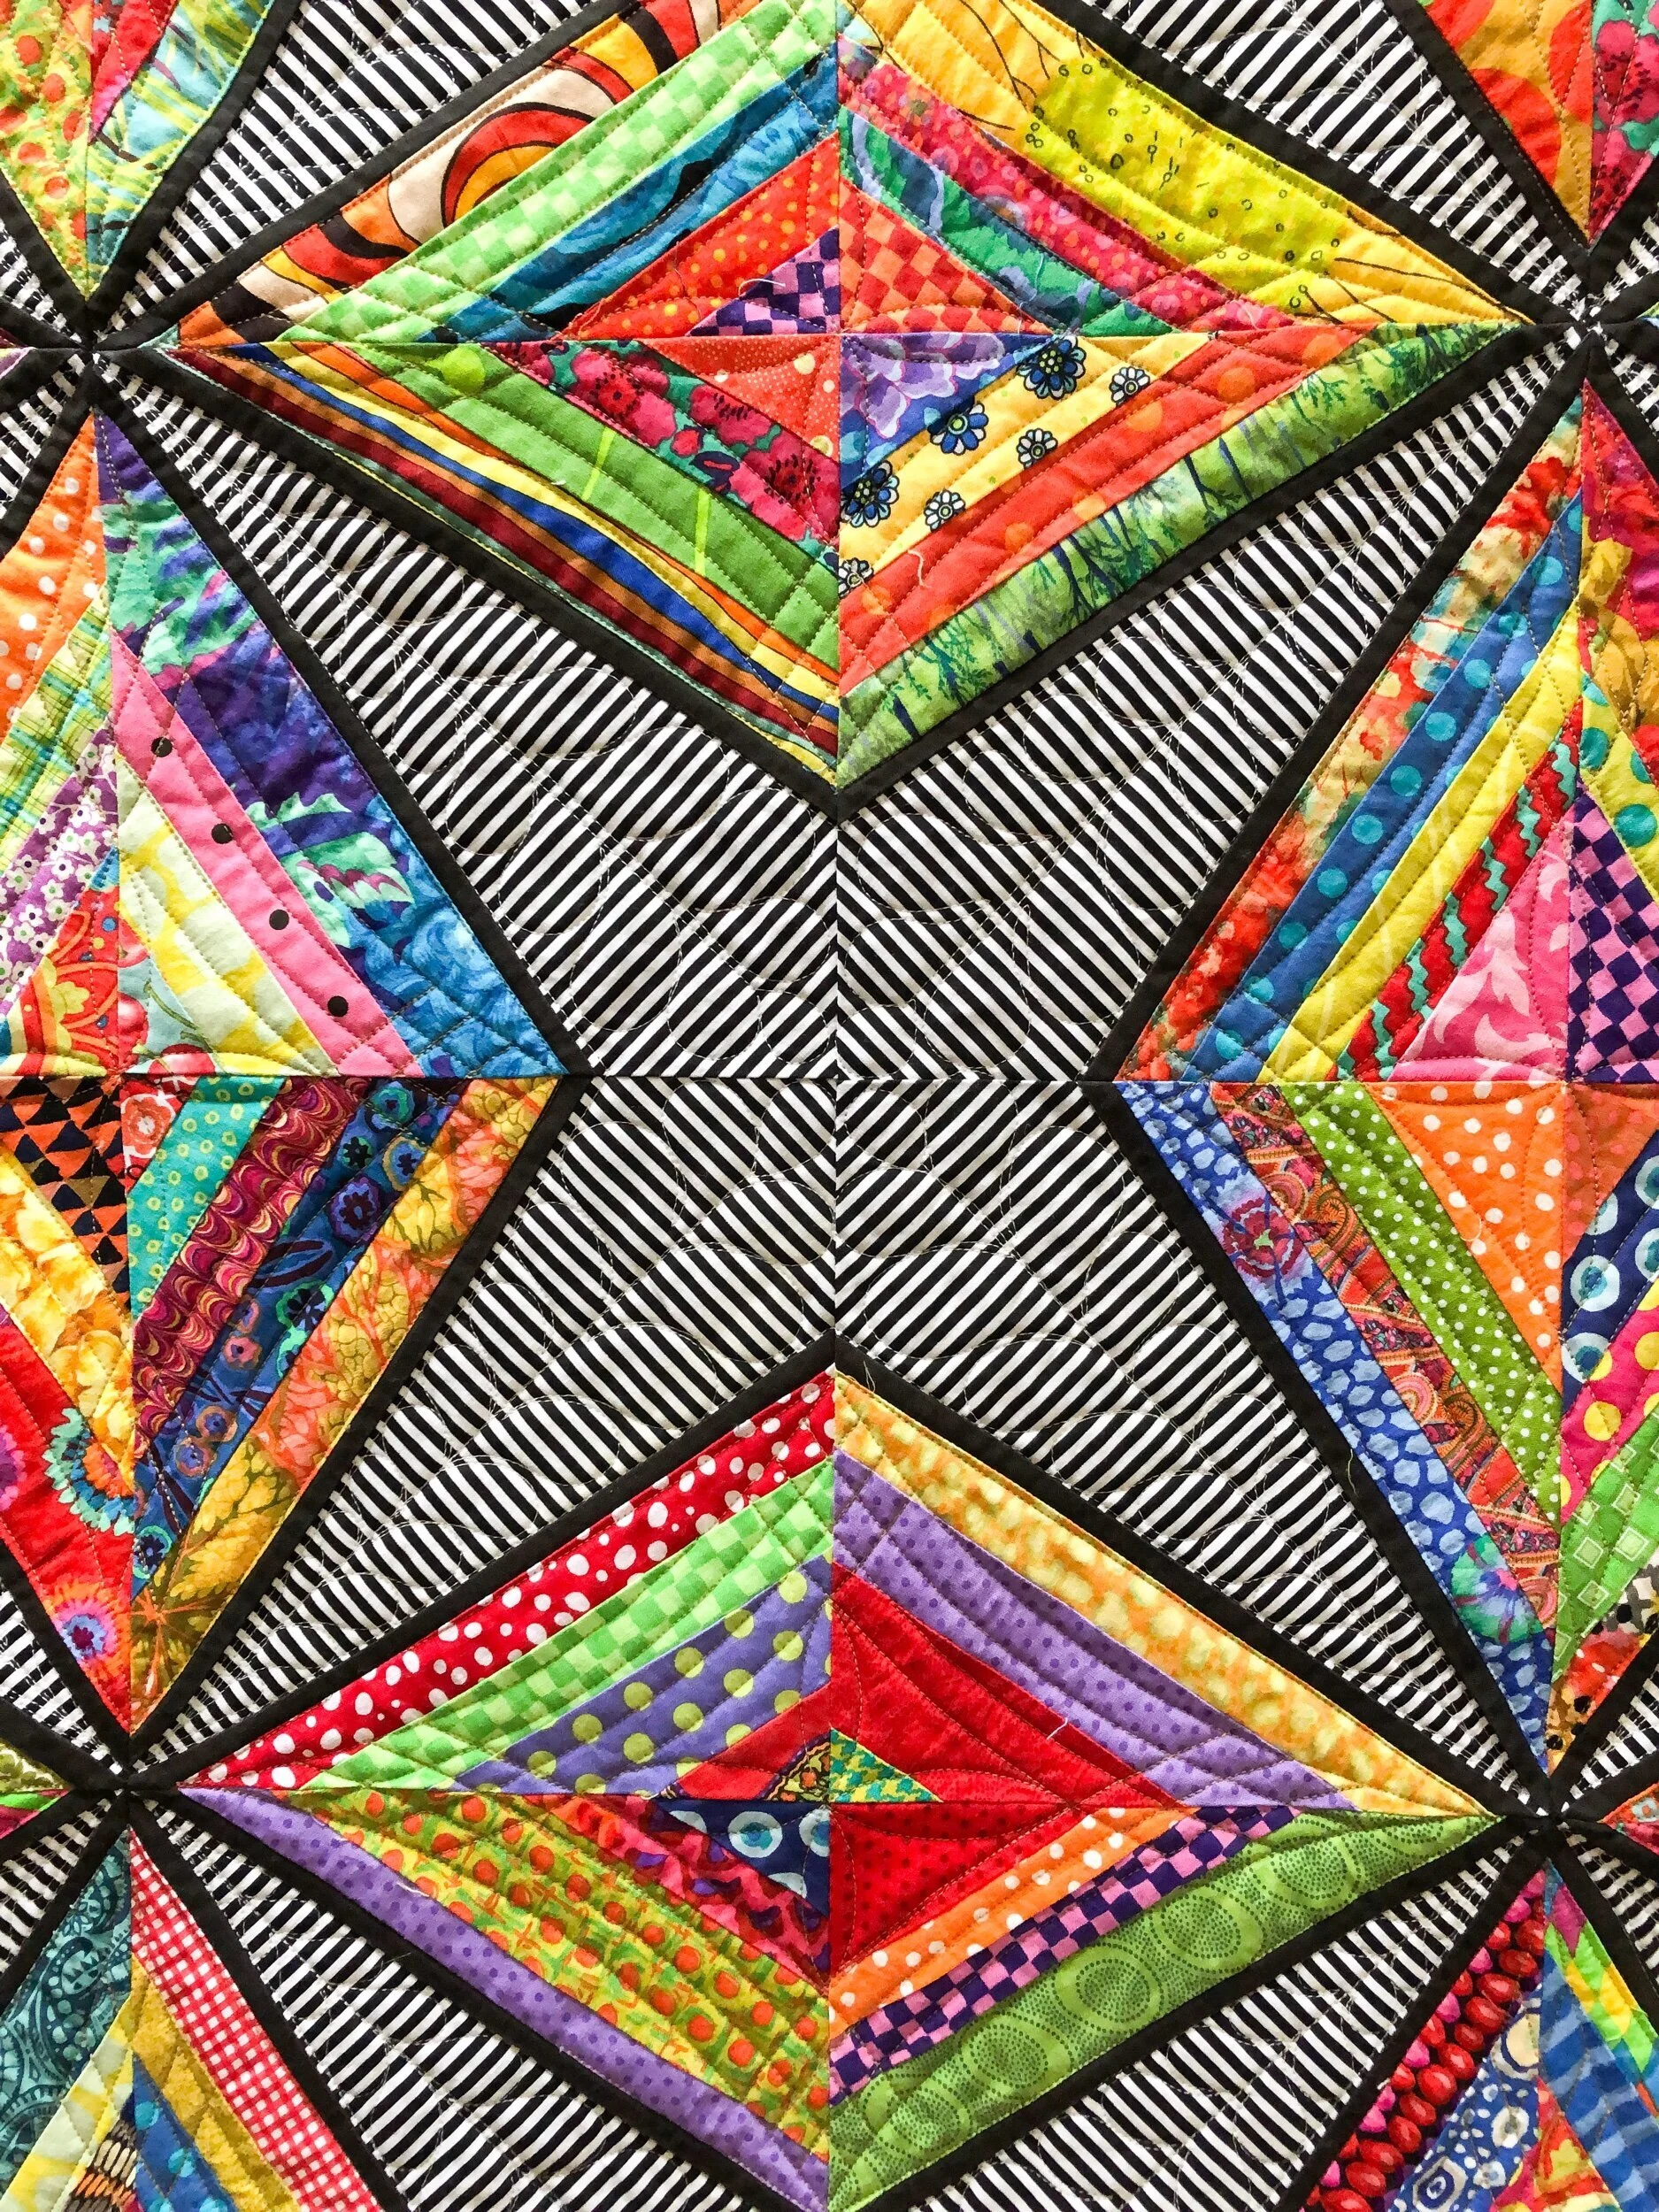
I used white thread in the white/black fabric and gold thread inside the diamonds. I used my favorite 8020 cotton poly blend batting from Winline.

And…then look at this backing! I just love it when backings showcase the quilting!! Lighter fabrics like this one, allow the quilting to be seen.

I love the details that quilting adds to a quilt!! Especially when it highlights the quilt blocks.

This is my Circle2™ ruler set!! Six rulers with two different sizes of circles per ruler…ranging in size from 2” up to 13”. They are available in clear and green 1/4” high quality acrylic, made in America.
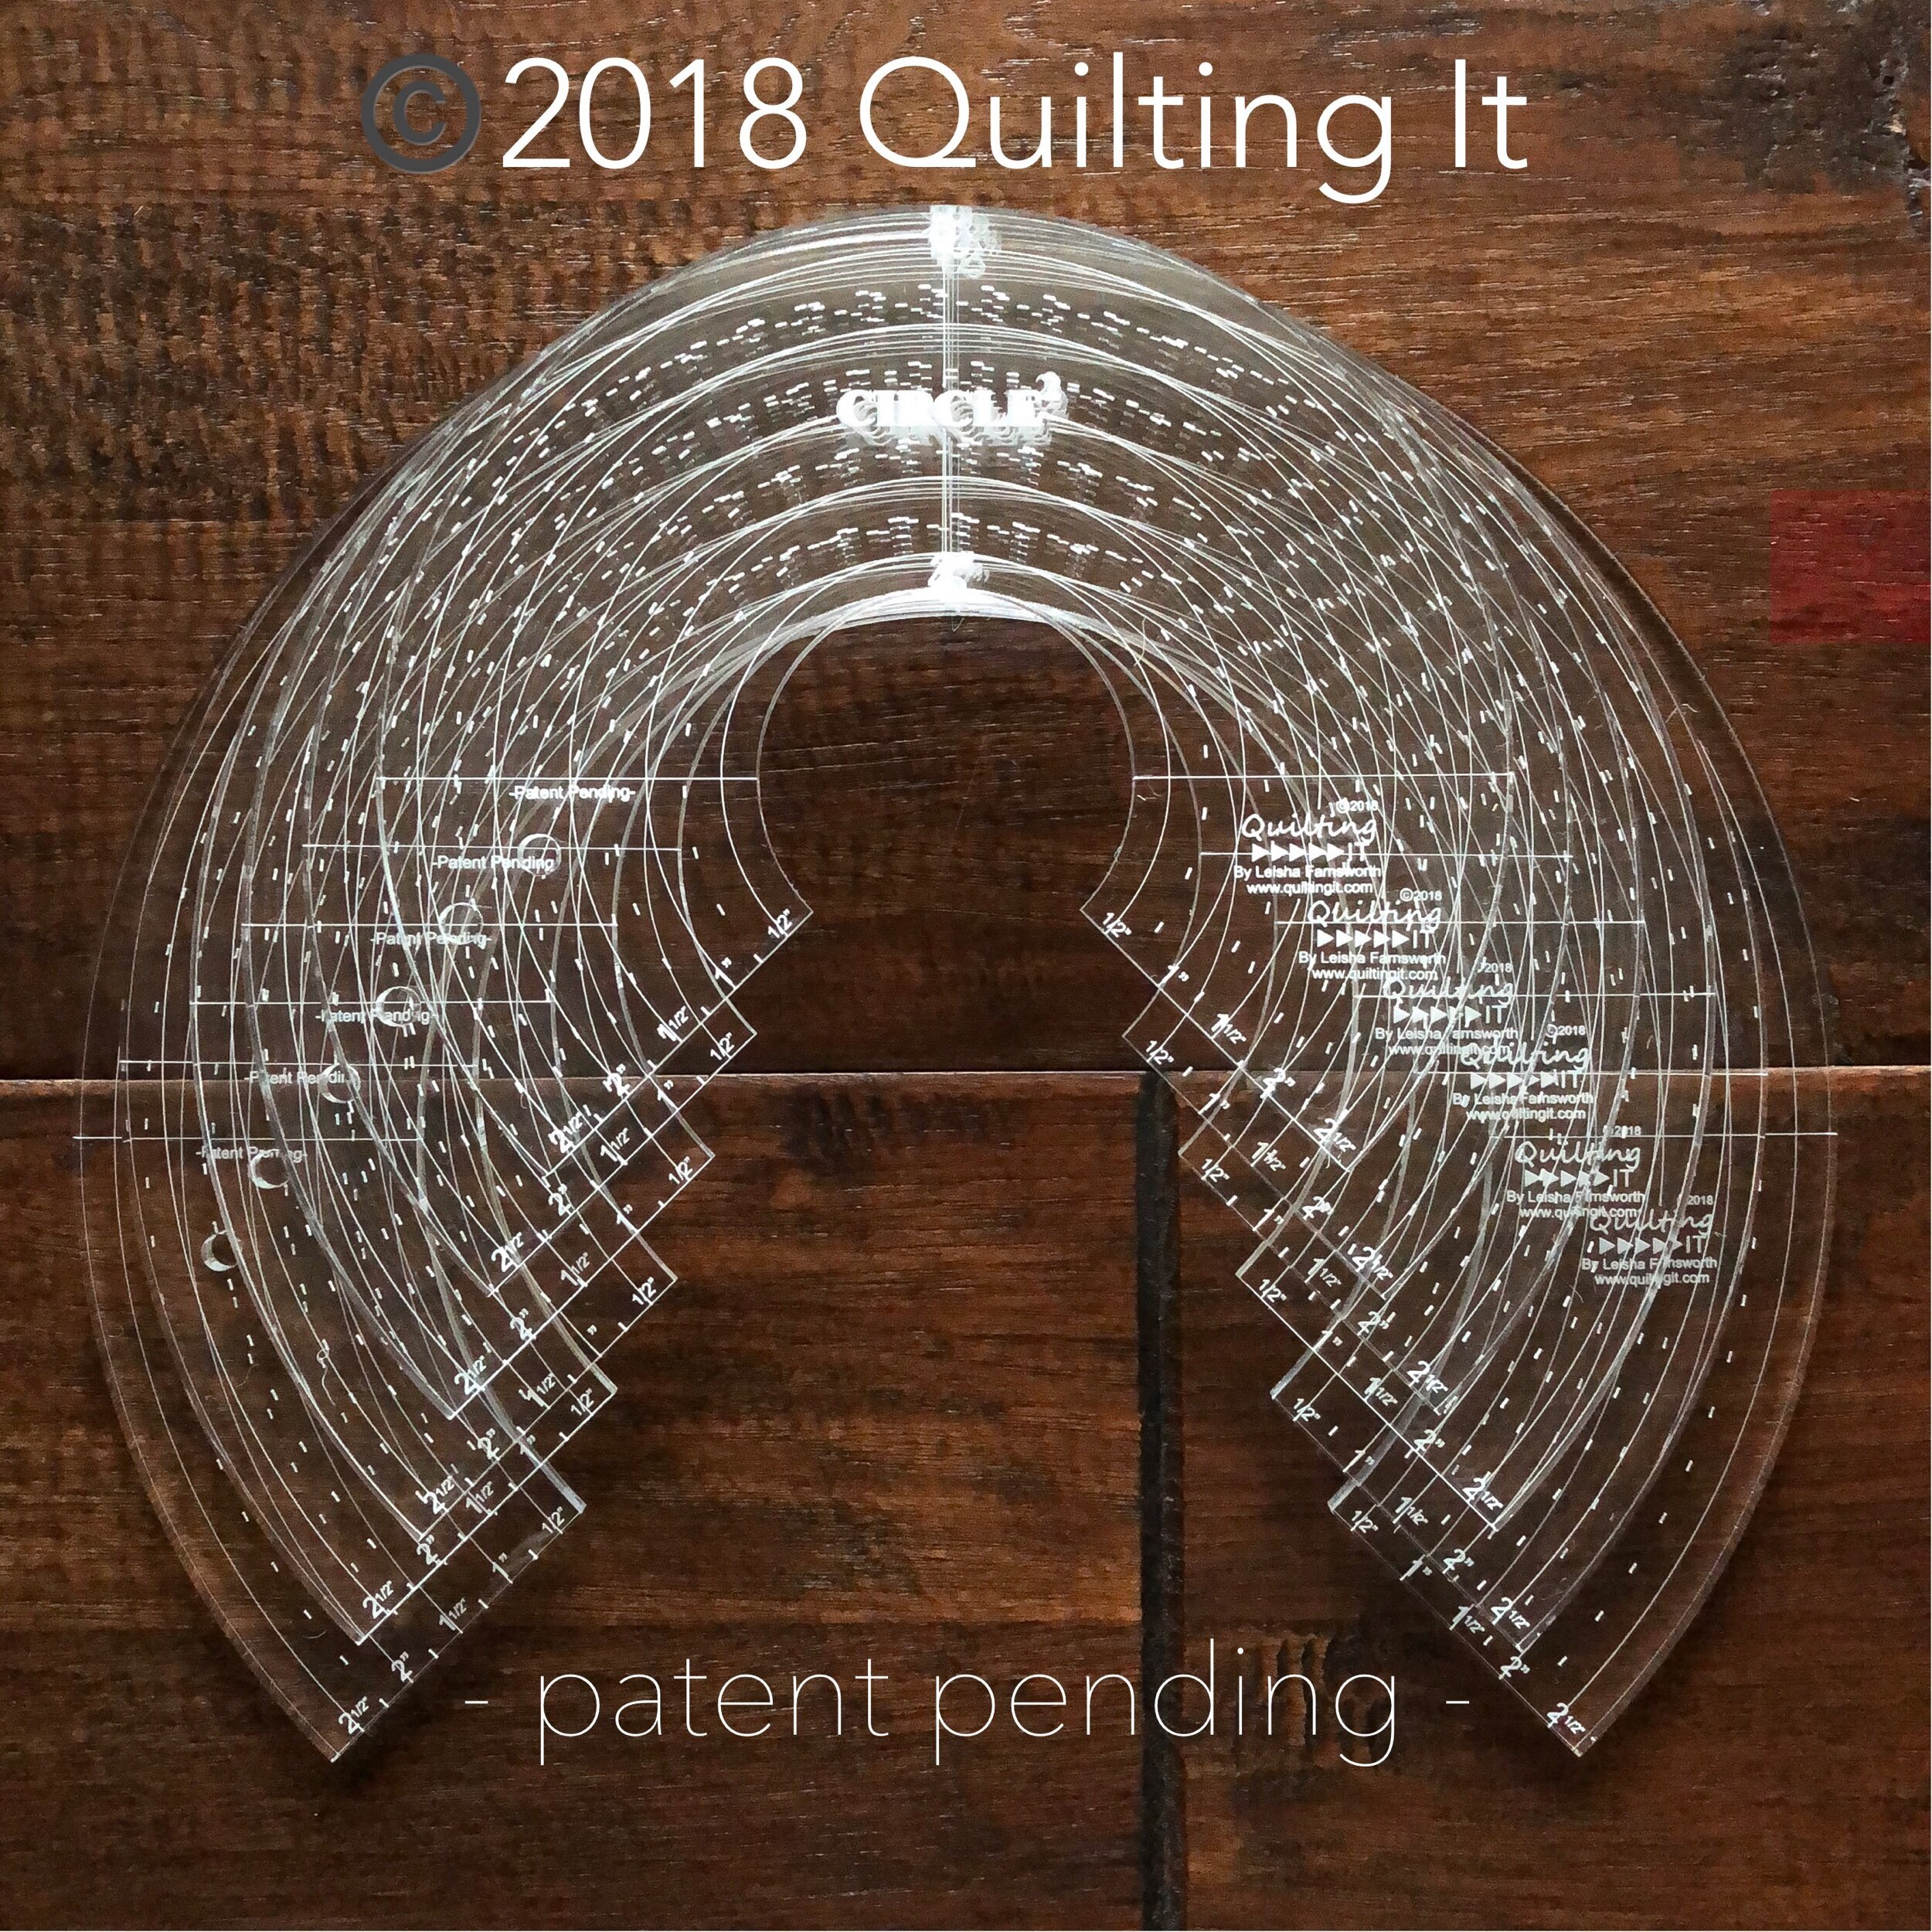
My design patent is… - Design Patent D875,574 -
Thank you for coming by!! Have a great almost weekend. • Leisha
Shelley’s Stripe Quilt
Hi there,
I hope that you had a great weekend!! I’ve had some errors with these blog posts sending. Hopefully, it will get fixed soon.
Shelley made this simple gray and white throw quilt!! It’s big and has 90” wide minky on the backing.
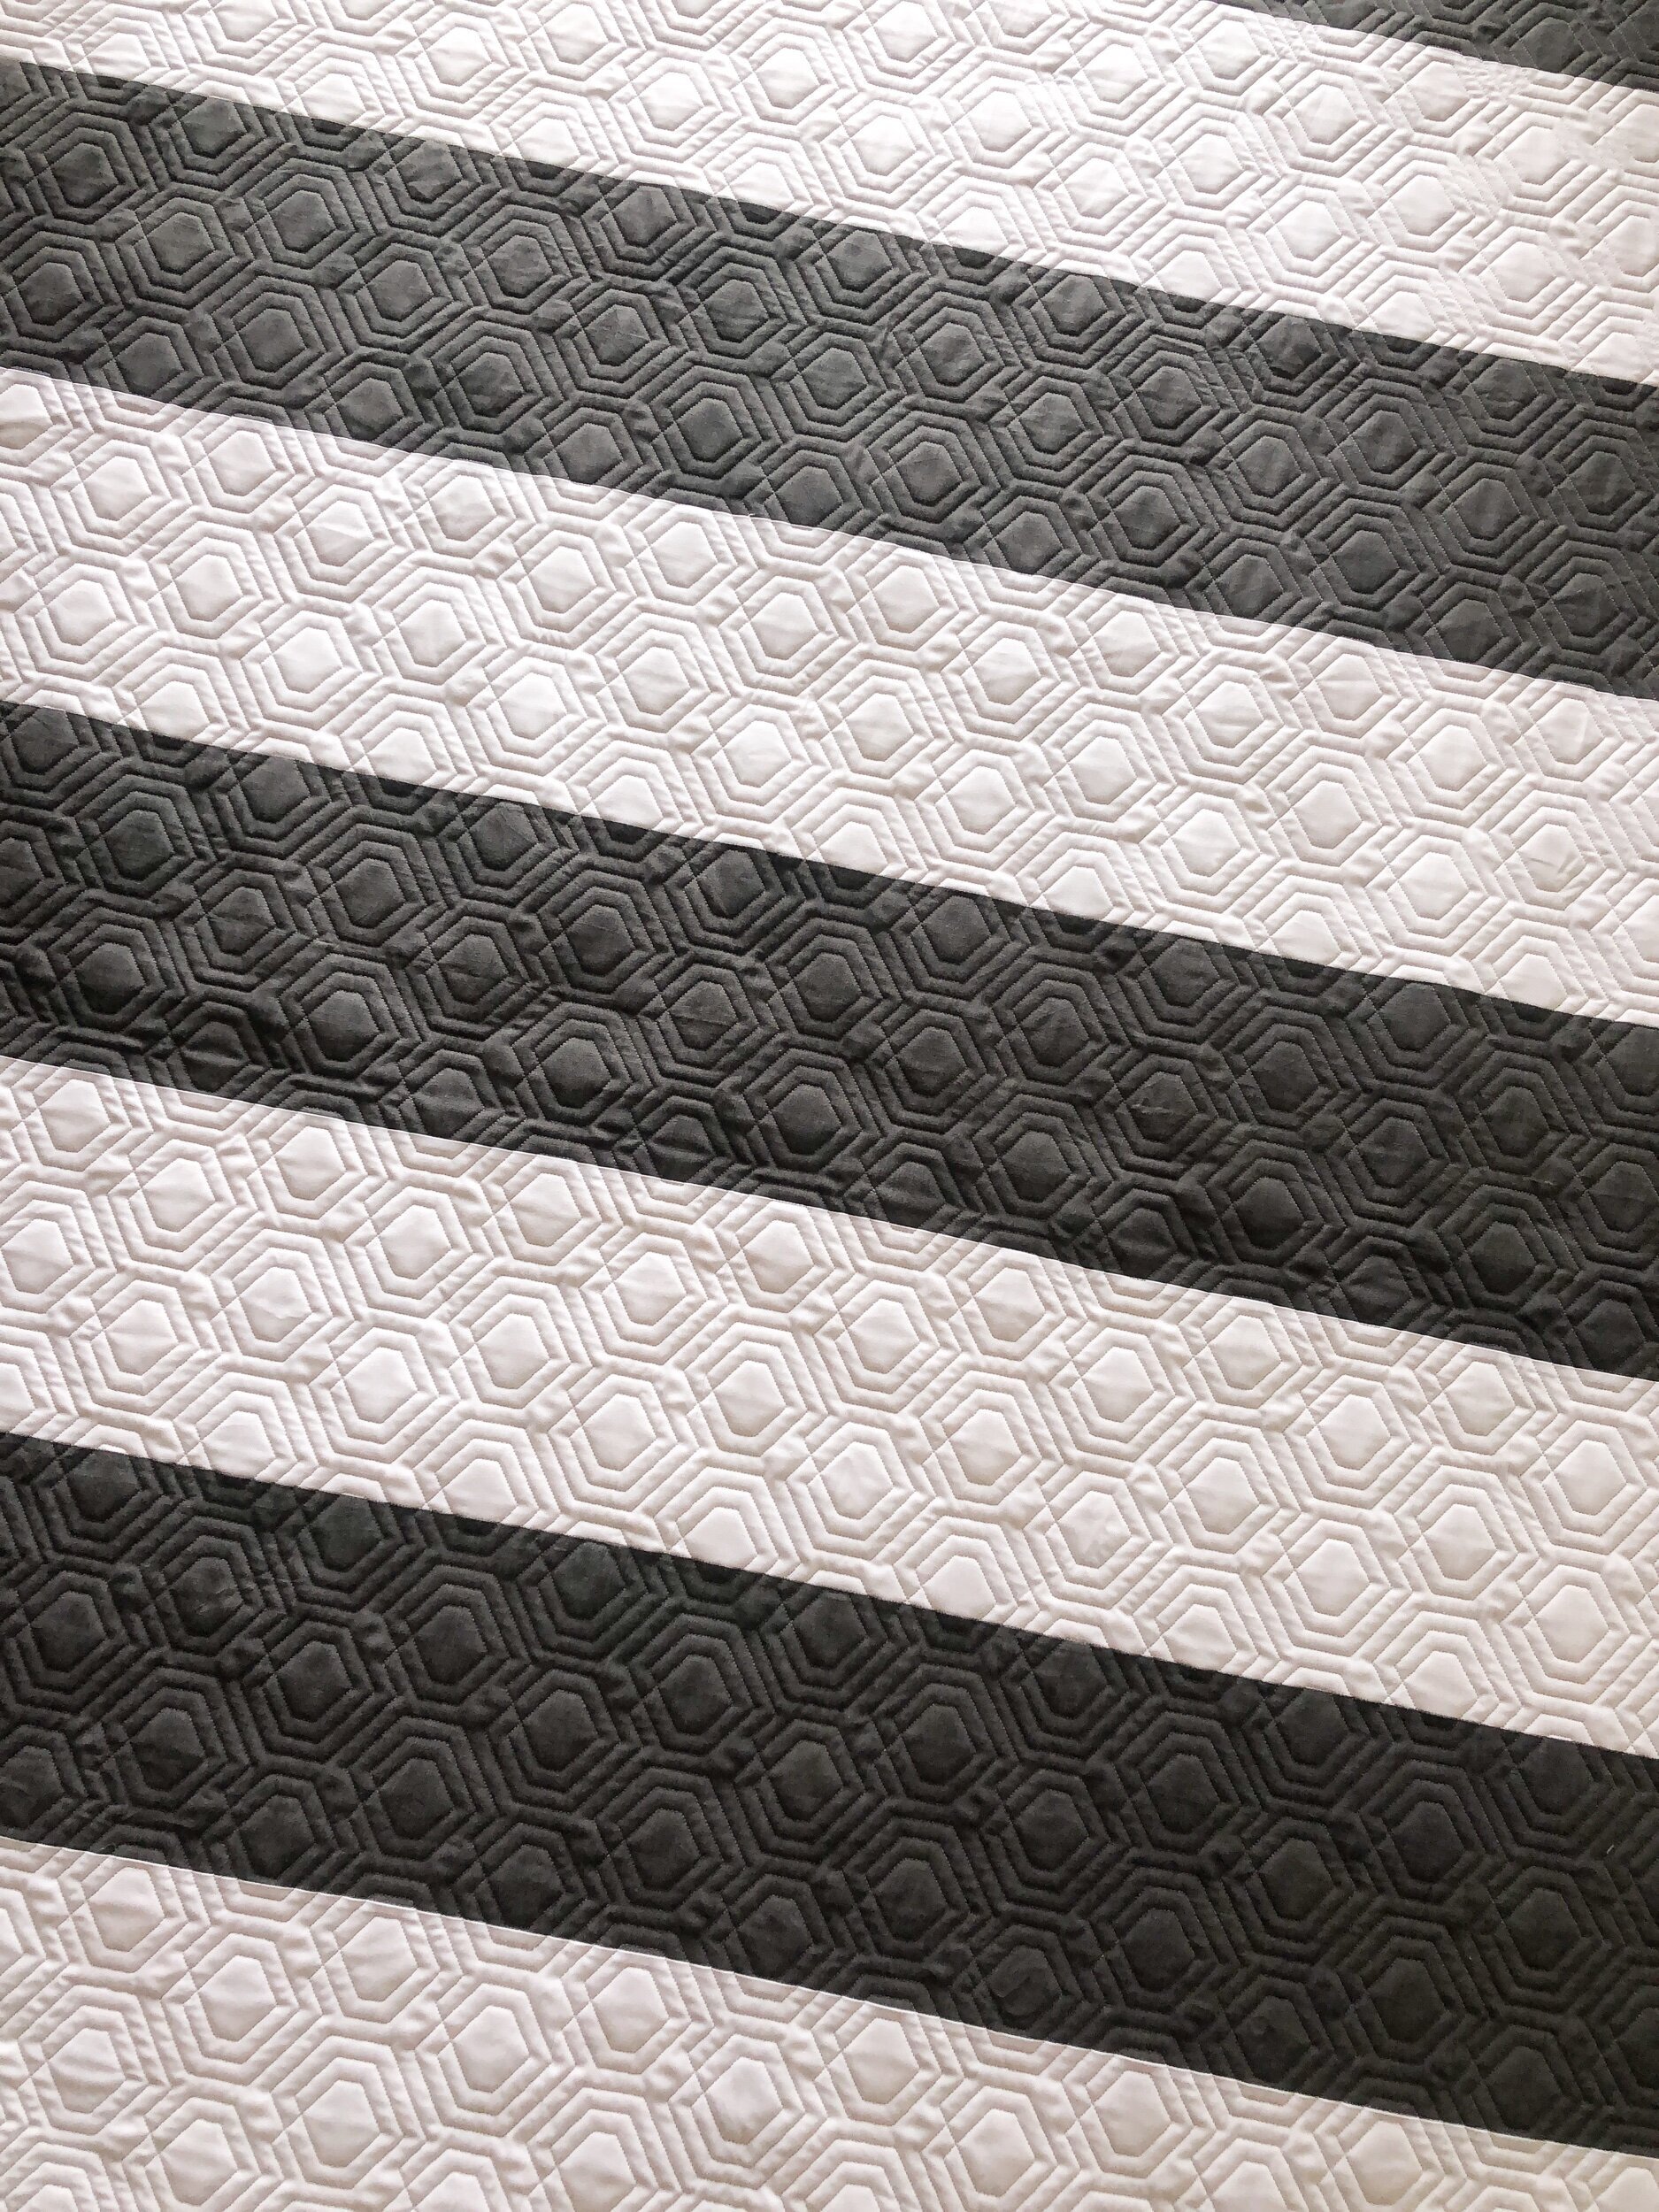
I used a natural white Omni thread from Superior Threads to quilt it, and 8020 cotton poly blend batting from Winline.
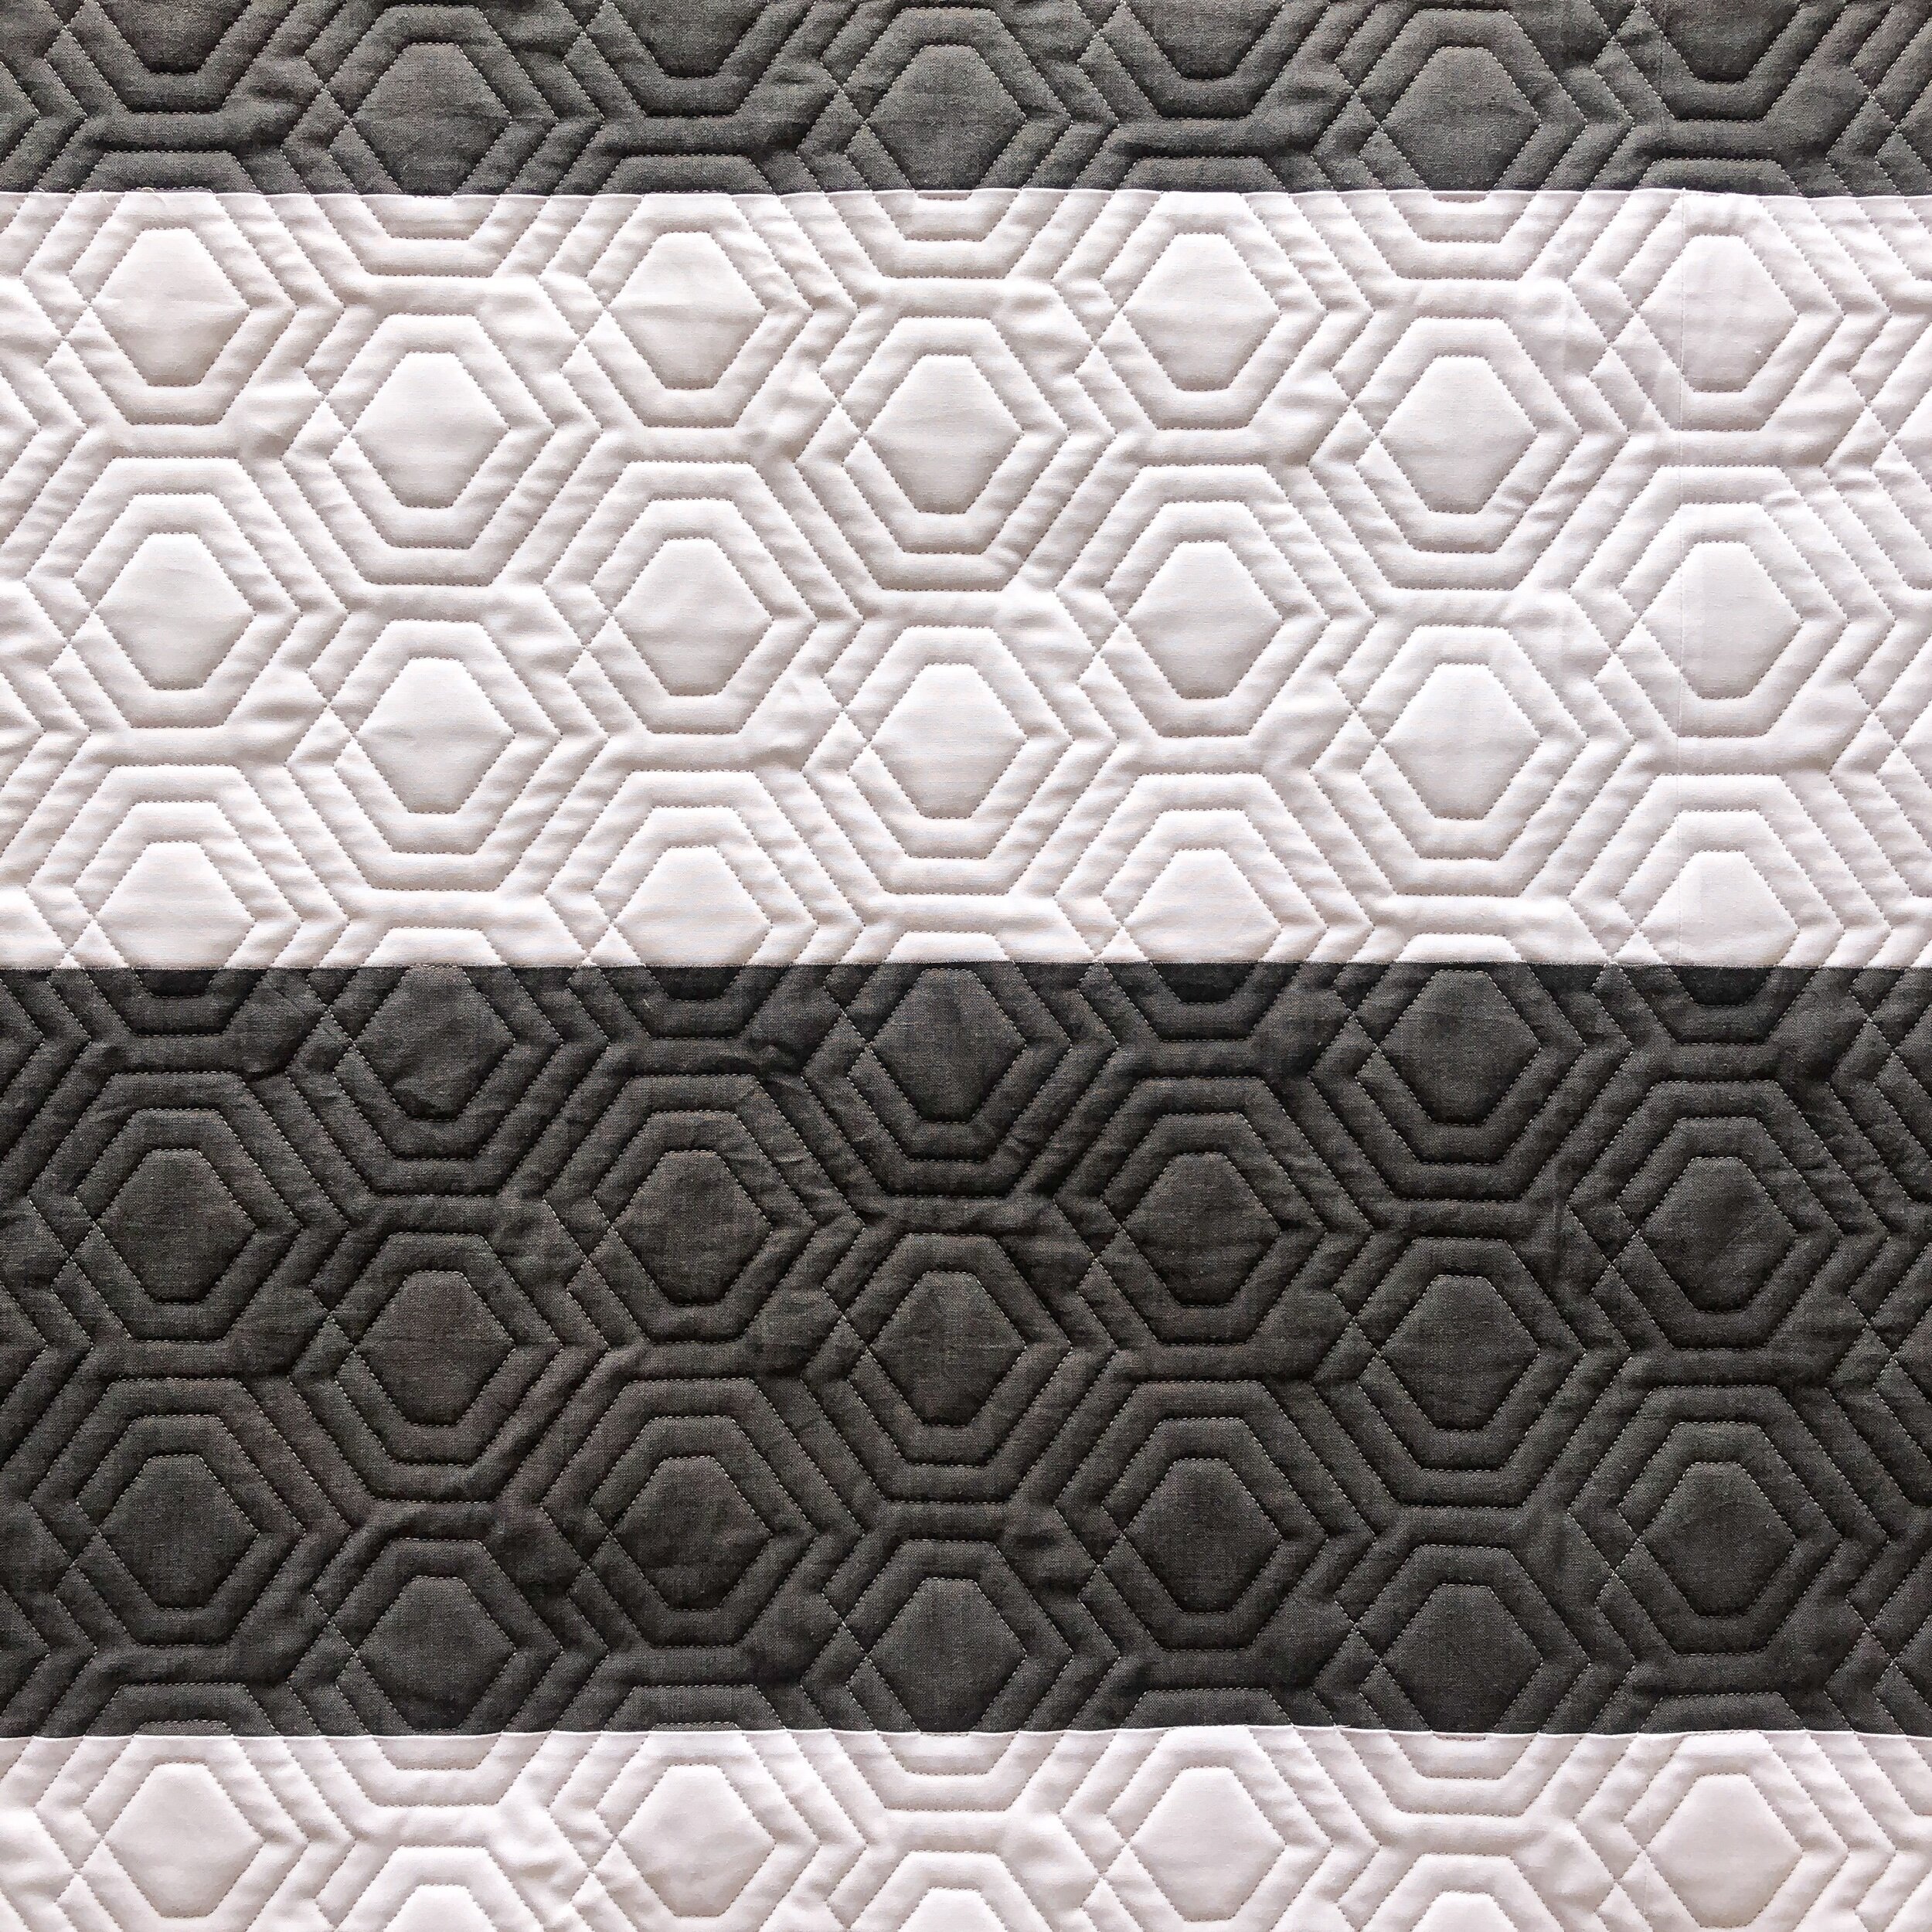
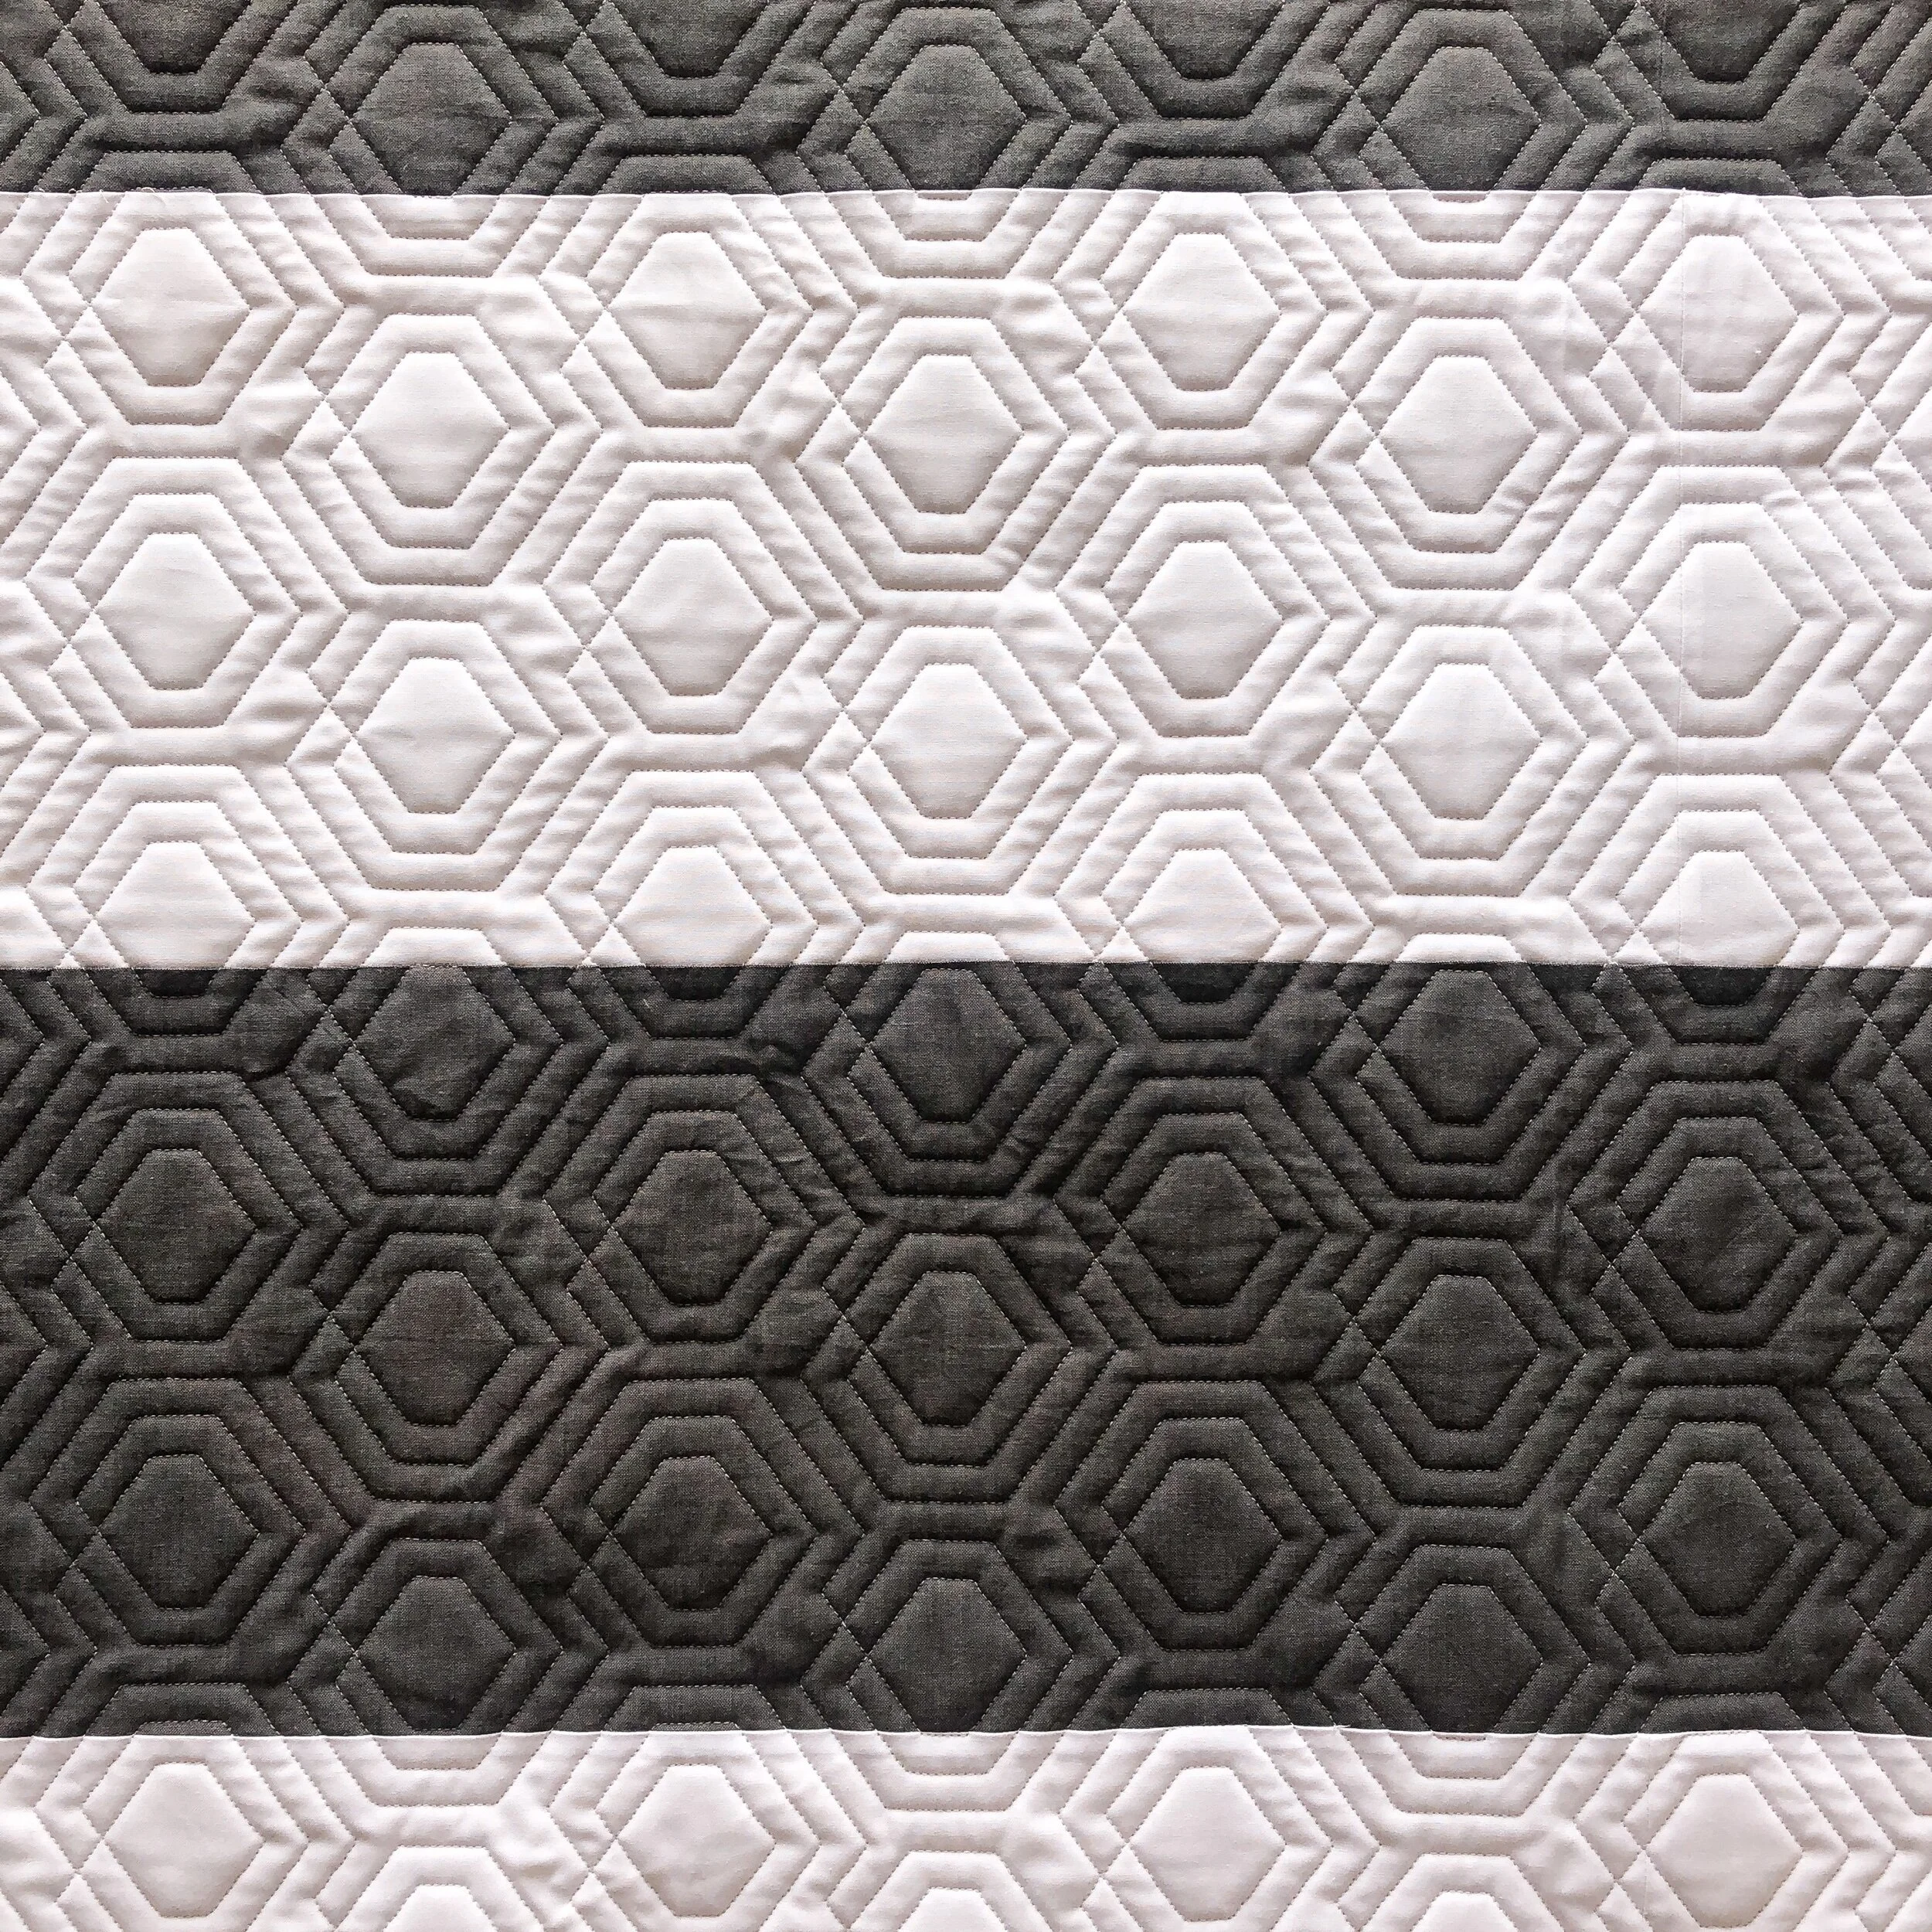
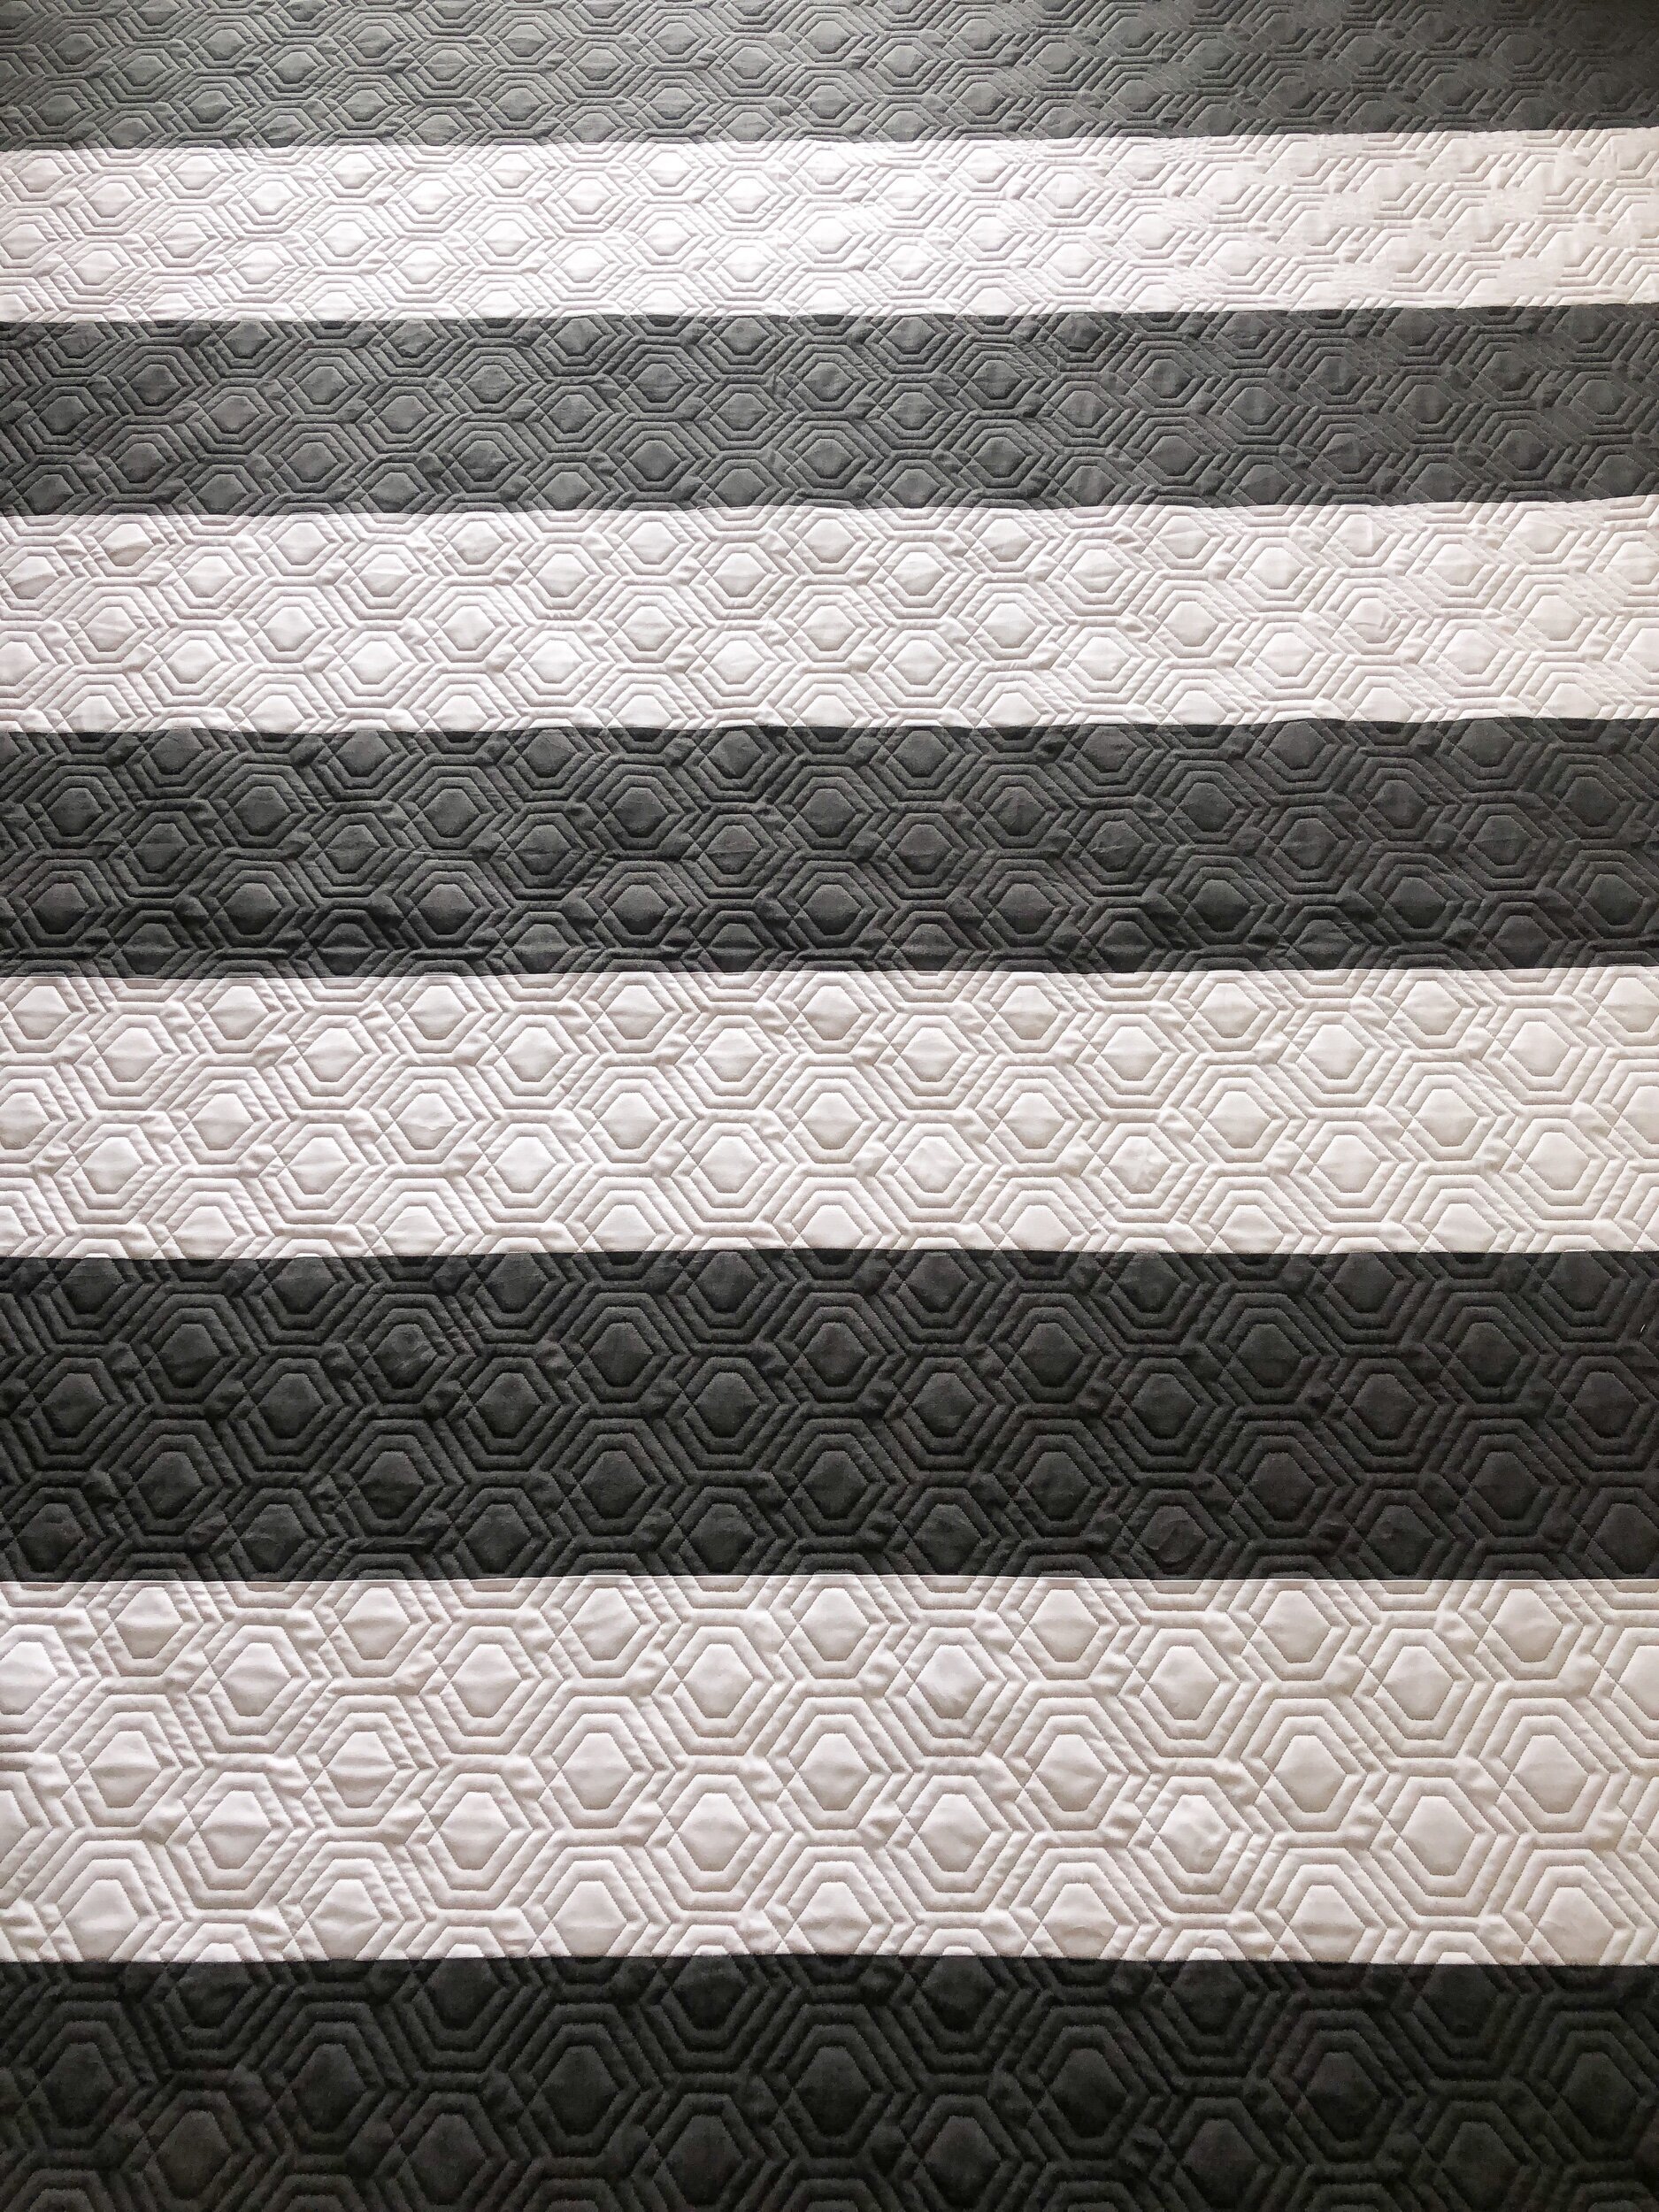
Shelley chose our Scottish Plaid Hexies design, which is available at Urban Elementz, designed by Patricia Ritter and I. I don’t think I’ve quilted this one quite yet. I love the texture from it!!! This is definitely one of those quilts, that’s all about the quilting texture.

I think the fabric stripes in this quilt are 7”ish. Easy peasy guys quilt.

I also love the Moda cross weave fabric, it adds some nice texture. My favorite online fabric shop carries them. Sisters and Quilters.

That texture is just sooo good!

This was a quick share…it’s fun to see how much a design can add to a quilt, especially simple quilts like this one.
Have a great week!! • Leisha
Liz and Pat’s Mini Quilts
Hello,
I hope your week is off to a great start!! Thank you for stopping by.
This post is a two for one…because Pat and Liz gave me one backing for their two mini quilts. Which works out great!! If they are about the same size, it definitely saves on time.

First off, Liz’s mini quilt is from Nancy Halverson’s book Better Not Pout and it’s called, Holly & Berries or Snowflake table topper.
I love the low volume fabrics in the background.

I used Sprigs of Holly by Patricia Ritter, which is available at Urban Elementz to quilt it.
I also used a light cream Omni thread for both, and my favorite 8020 cotton poly blend batting from Winline.

Pat’s mini quilt is a variation of the free Moda Love pattern.

I’ve made this quilt too…I made 4 blocks and sewed them together with some sashing in between, and it turned out a great throw size.
I used Rock 'n Roll Starz - Petite by Patricia Ritter to quilt it, which is available at Urban Elementz. It’s a fun fast design to stitch out.

Mini quilts really are so fun to make, and they definitely don’t take as long. Plus, then we can use some of our stash right?!?!?!!! I actually don’t have very much of a stash. I typically buy what I’m going to use for a project. I do have some yard cuts of Bonnie and Camille prints. Which have come in handy when I have a project I’m working on.
I’m trying to keep blogging quilts to get caught up! I’m hoping you’re enjoying seeing the variety of different quilts, and the quilting on them. Have a great day!! • Leisha
Sherry’s Prim Quilt
Hello…
I hope that you had a great week!! We are finishing up our week in Bear Lake Utah. It’s my favorite place to go for a little getaway.
Sherry made this amazing Prim quilt, as part of a sew along with Lori Holt. Made using Lori’s quilt pattern and fabrics.
I quilted this entire quilt free motion. Lines and curves with rulers, but the rest freehand.

I did ribbon candy quilting in all the sashing. Which I also added to the border rectangular blocks.
When I quilted the backgrounds in each of the blocks, I chose 3 designs one in each block…because there are 3 blocks per row. Then I alternated them from row to row. It helps the designs flow throughout the quilt.

I did my overlapping circles, circles with swirls in some of them, and a petal design.
I also did light custom quilting on the appliqué pieces, trying to just enhance the shape with quilting texture.

I used Linda from The Quilted Pineapple 8” and 16” Edge rulers to quilt all the straight lines. In the rectangular border blocks, I quilted ribbon candy in the first border, crisscross lines in the middle border, and 1/2” lines in the center strips. I then quilted arcs in the red squares with a petal coming from each of the corners. I also did the same thing in all of the gray squares in the sashing.
I love how these corner star blocks turned out!!! I used my 3” Circle2™ ruler to quilt the curves, as well as some of curves in the appliqué.
I just love all the quilting textures in this quilt. I used Winline’s 8020 cotton poly blend batting, and a cream Omni thread from Superior Threads.

This is my 3” Circle2™ ruler. It comes in a set of 6 in my shop. There are 12 sizes of circles ranging from 2”-13”. As you can see the 3” circle has a 9” outer circle, so there are two sizes of circles per ruler. It is such a versatile circle ruler set!! For more info on them head the this blog post. https://www.quiltingit.com/blog/2018/10/10/introducing-my-circle2-longarm-circle-ruler-set
Circle2™ Ruler set - Design Patent D875,574 -
Thank you for stopping by! • Leisha
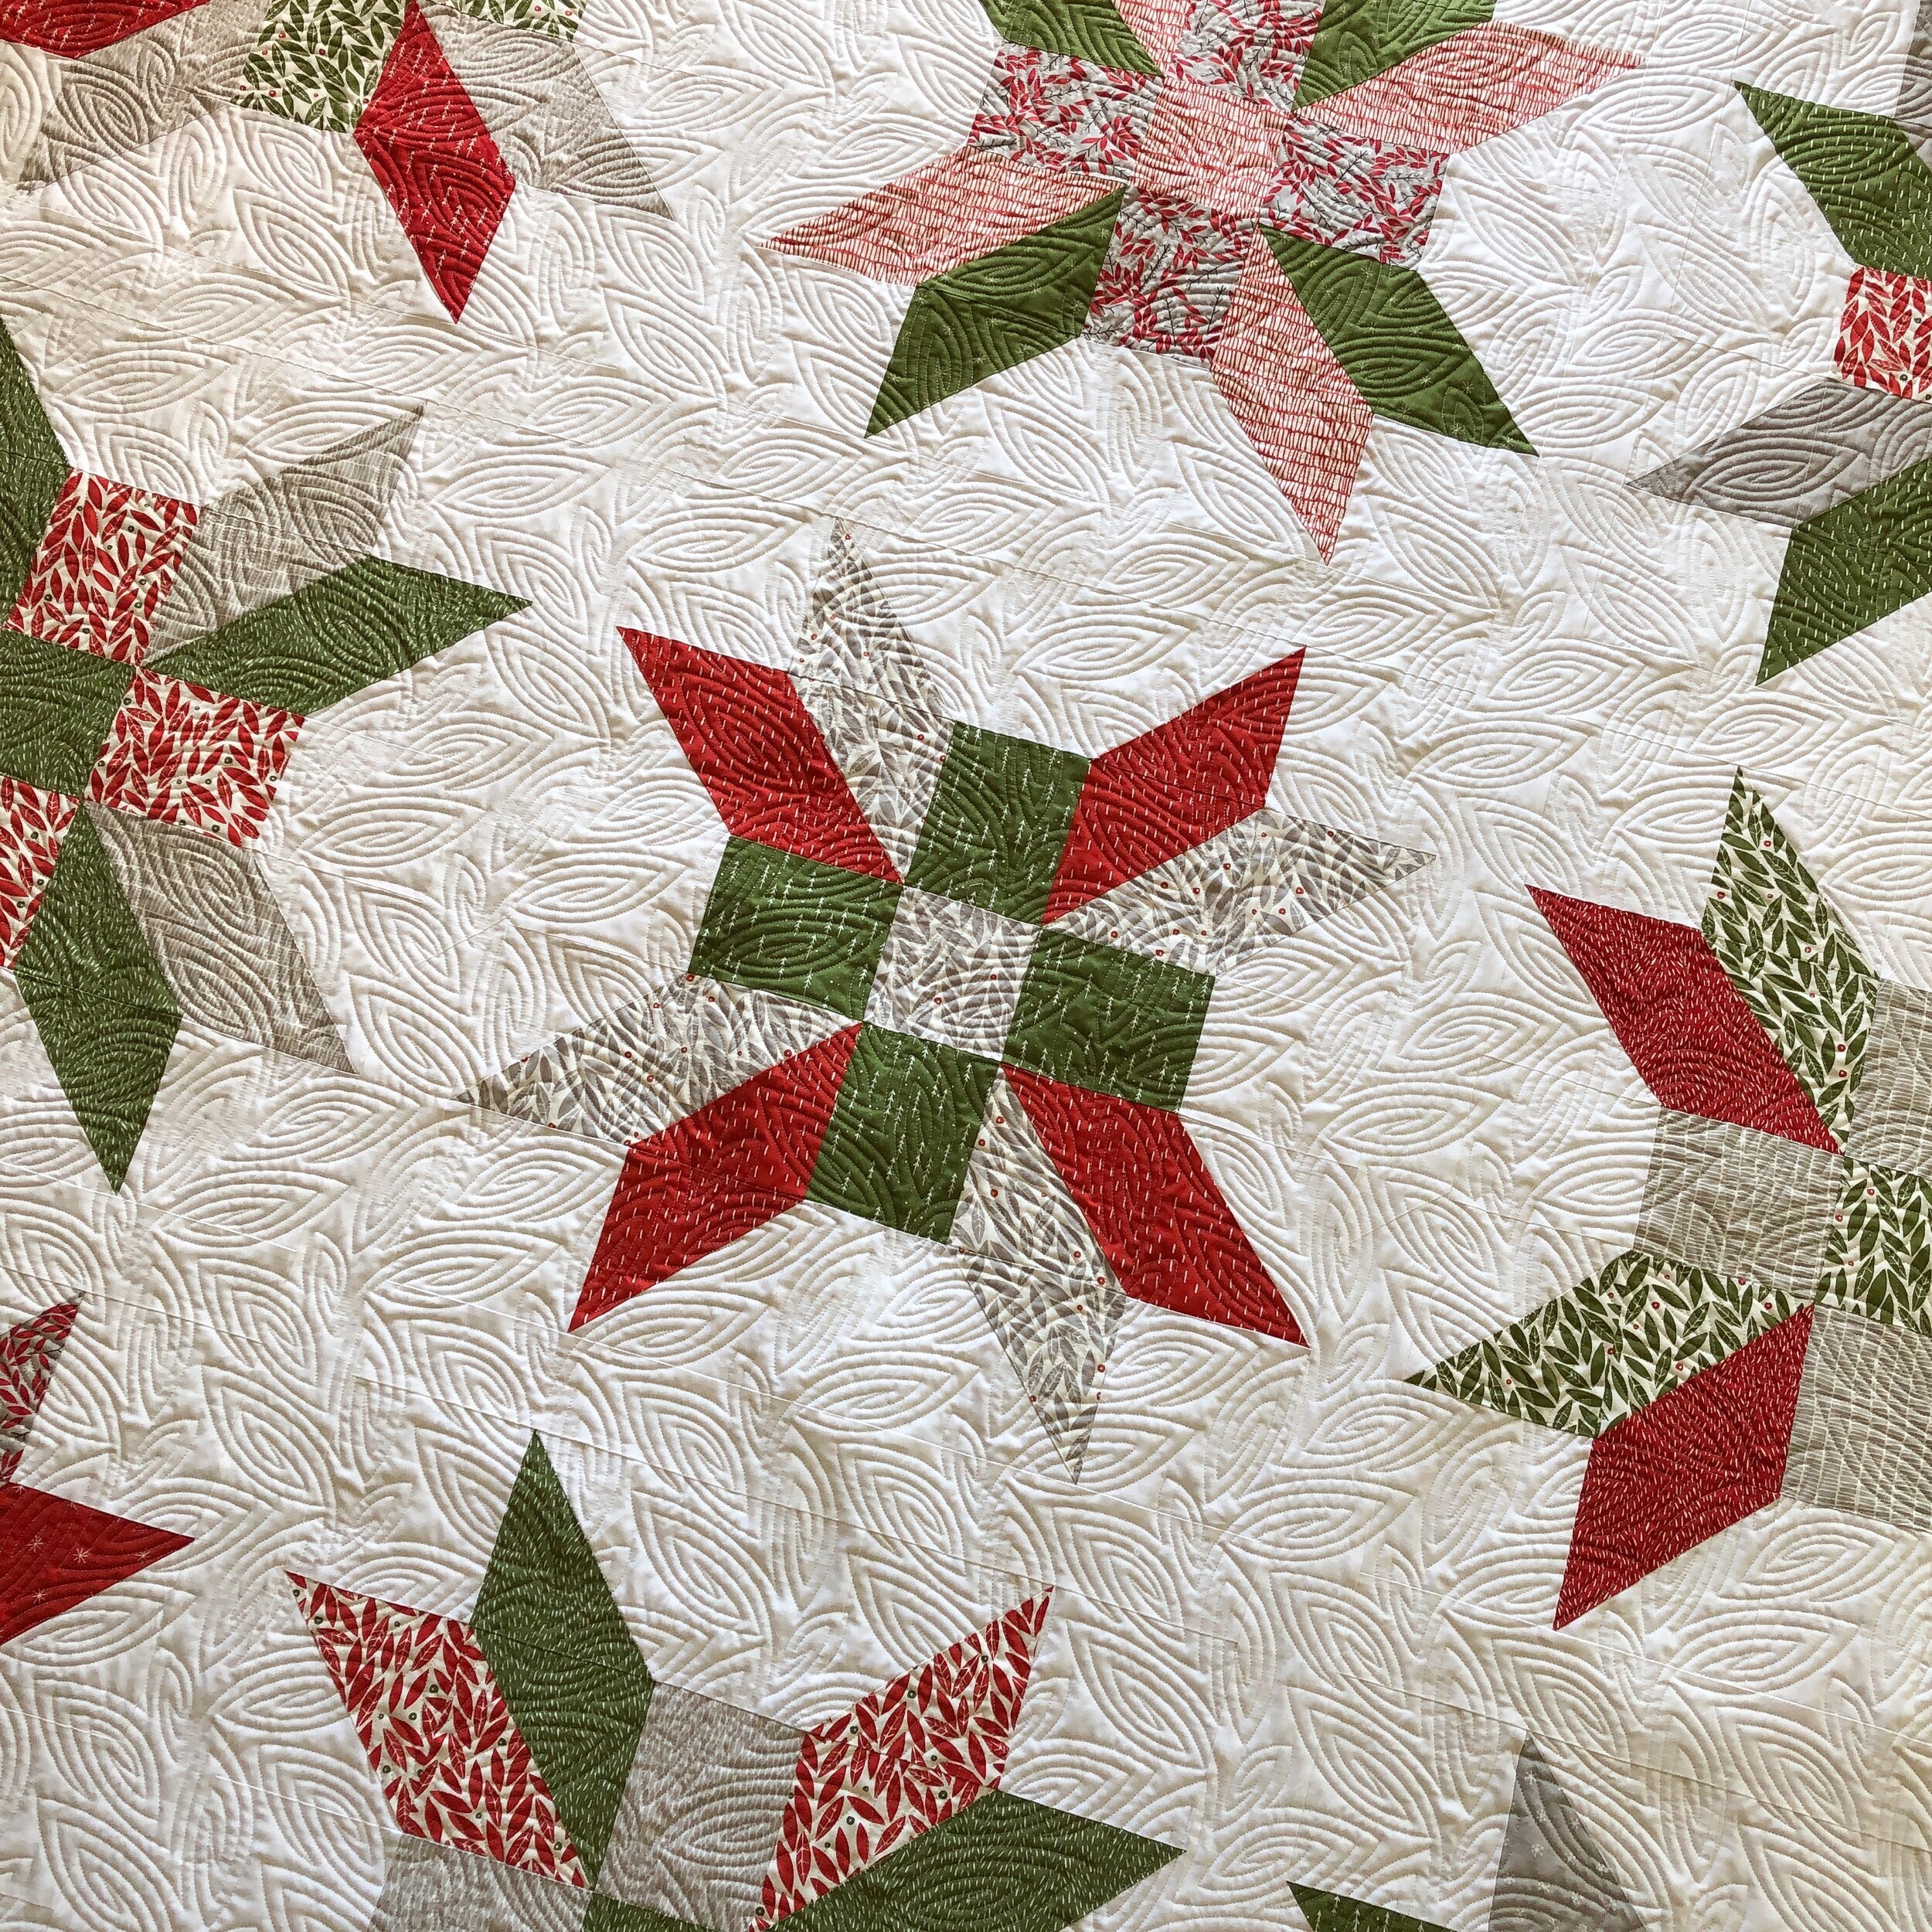
My Christmas Quilt
Hello…
I’m excited about this one…it’s mine!!! My mom and her sister have an online shop, called Sisters and Quilters...and when they got the first Christmas fabric line Merrily from Stacie Bloomfield at Gingiber, I knew I wanted a Christmas quilt to go with my deer pillow I made with the same fabric. The deer panel is from the Merrily line, and then a couple or so years later she released a line that paired beautifully with Merrily called Merriment. I took fabrics from both lines, and made this beautiful quilt. Stacie has animal panels that go with Merriment line as well, and my mom has some available in her shop… Merriment Animal Panel.

I made the Moda Modern Building Blocks quilt years ago, and decided to use one of the quilt blocks for this quilt, with a little change. I used block 4 which is 24” square and I didn’t add the little blue flying geese. I searched for the pattern and didn’t see it available anymore. If you don’t have the pattern, you’ll have to contact Moda.

When I was grouping the fat quarters I had, I tried to not only pair ones that look great together but also make sure I had a red, green, and gray fabric in each. I love how it turned out!!
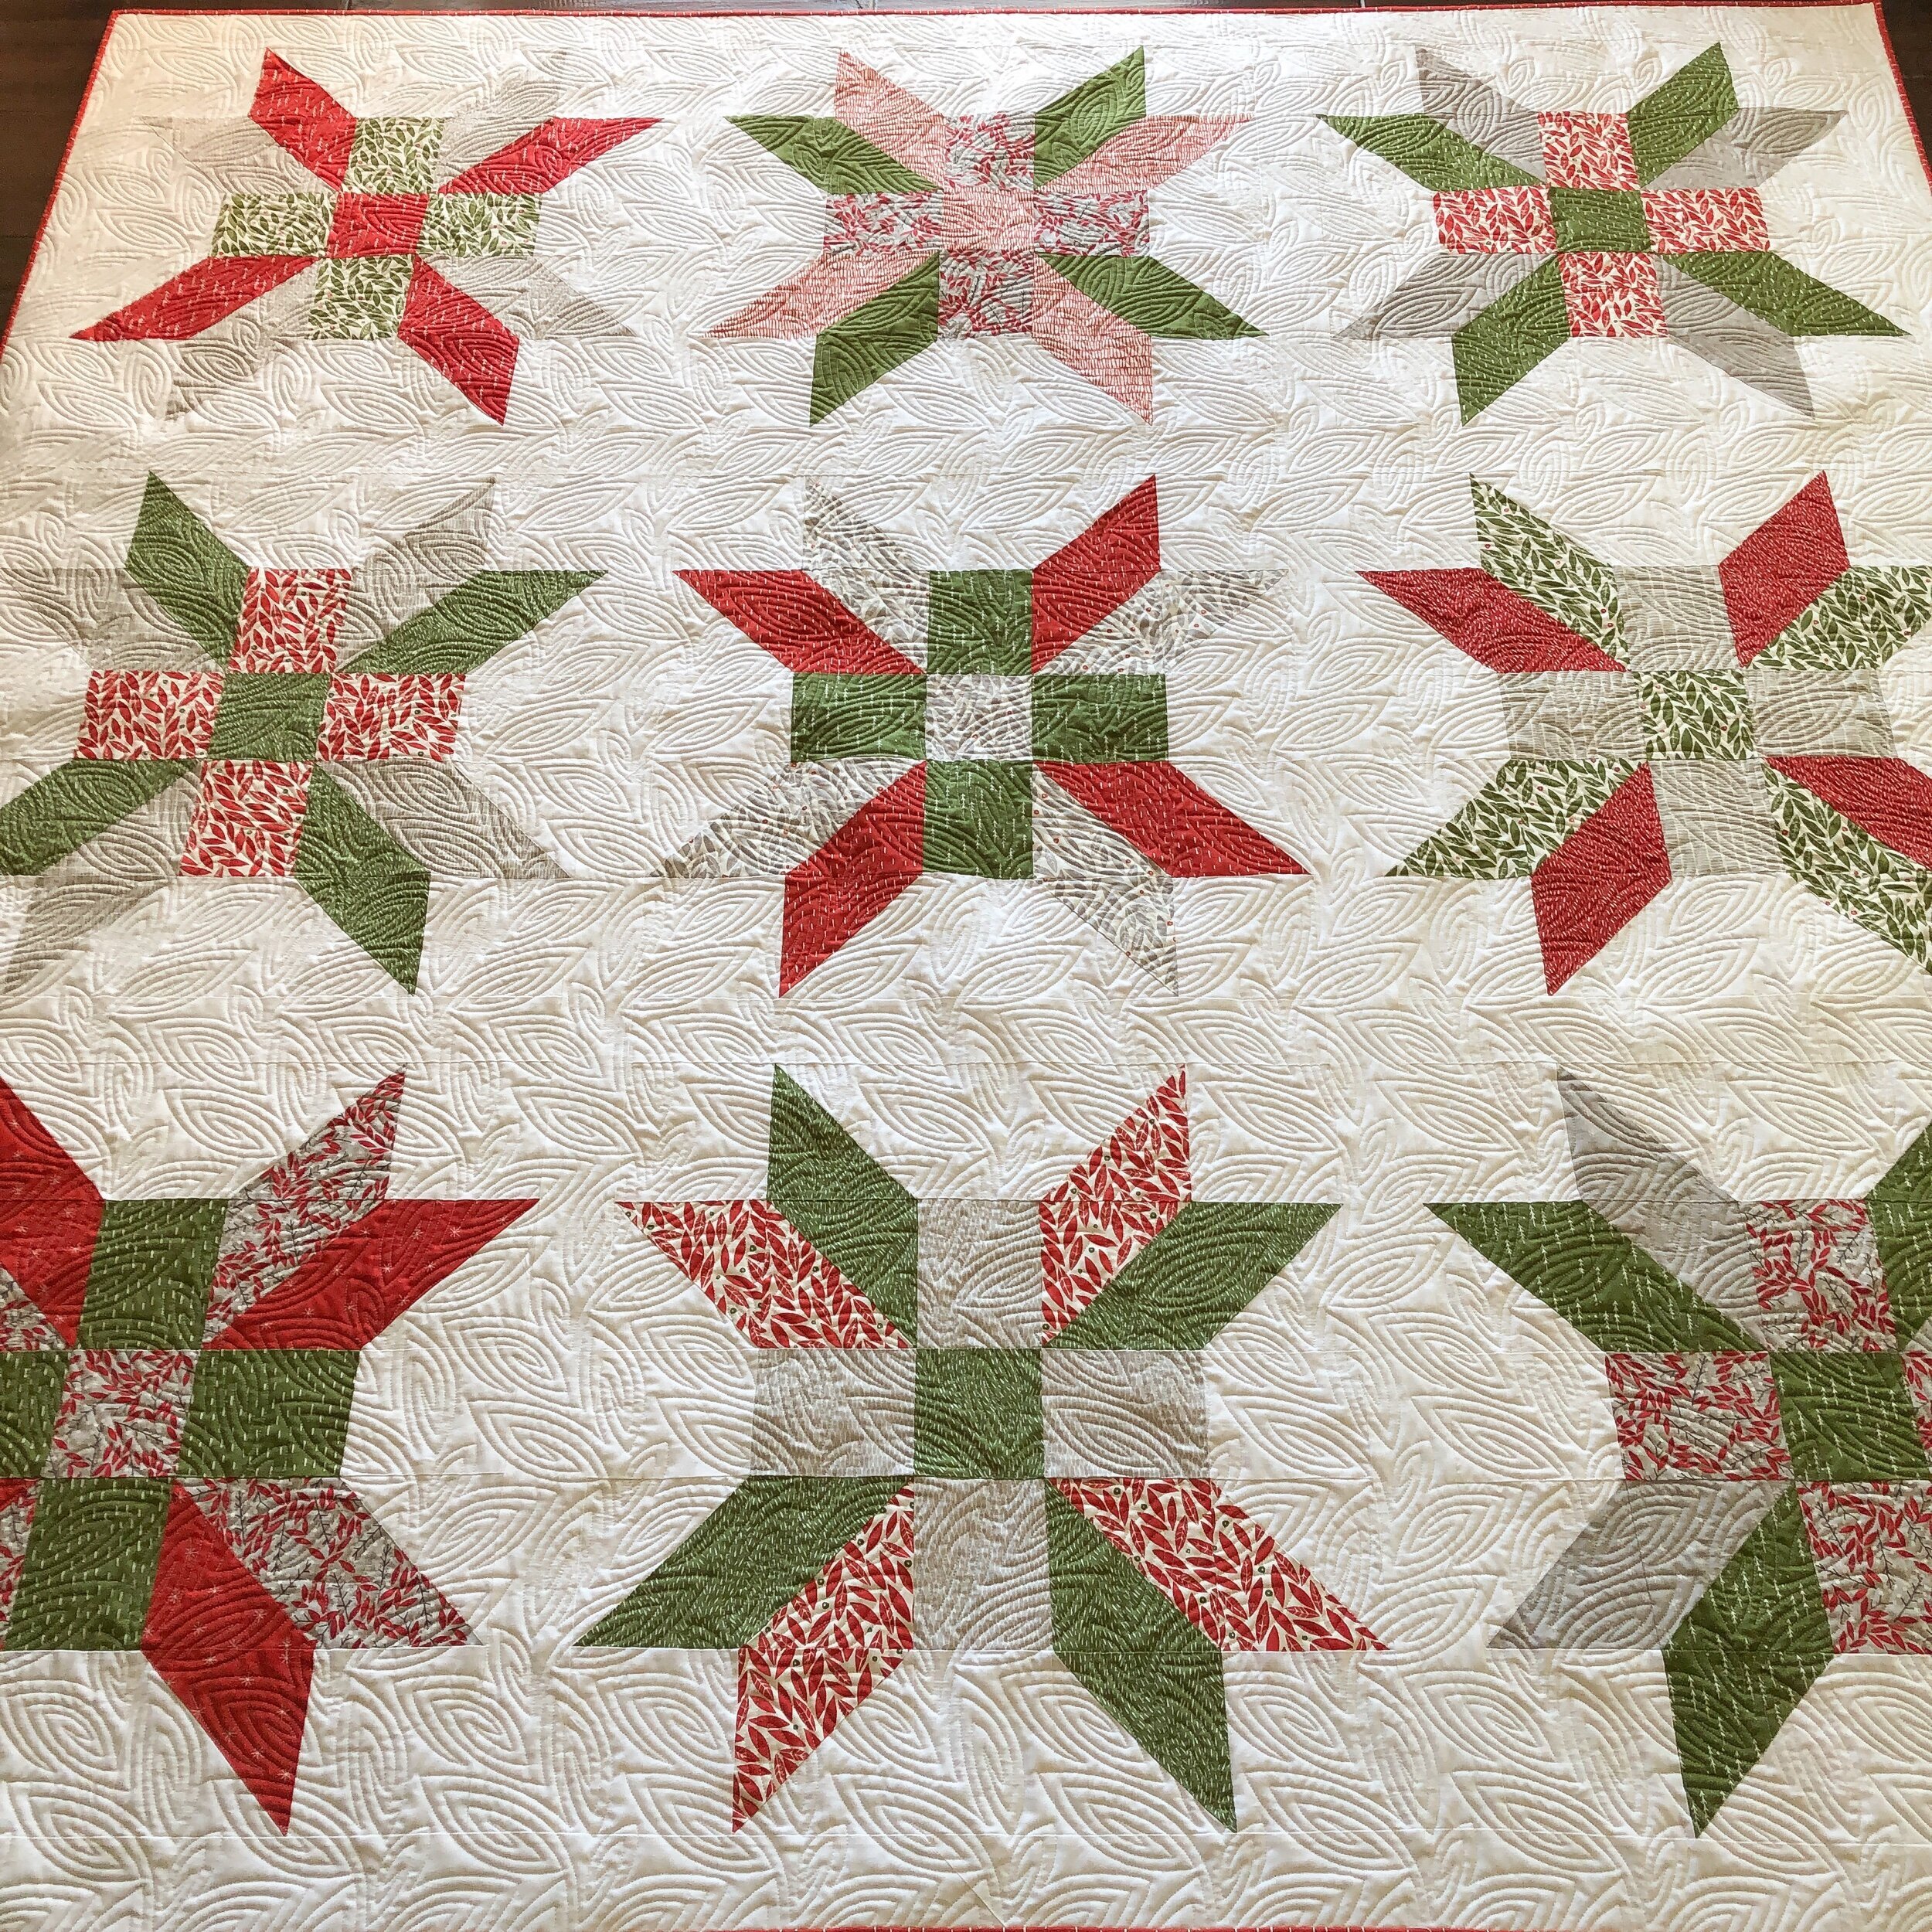
I used bamboo batting and Natural White Omni thread from Superior Threads.
I quilted this just before Christmas, so I didn’t quilt have it bound in time for Christmas. I’m excited to use it this year.

I quilted Patricia Ritter and my Birchwood©️ quilting design on the deer pillow I made, so I wanted the quilting to match. I initially chose this design because of the leaf fabric, I think it pairs nicely with it. Plus…that quilting texture is just amazing!! Birchwood is a cross between a leaf and wood grain…at least that was my intention when we designed it. Birchwood is available at Urban Elementz.

I also added a 2.5” (cut) sashing strip around the block. Which is why I didn’t add a border. I actually rarely add a border to my own quilts anymore.

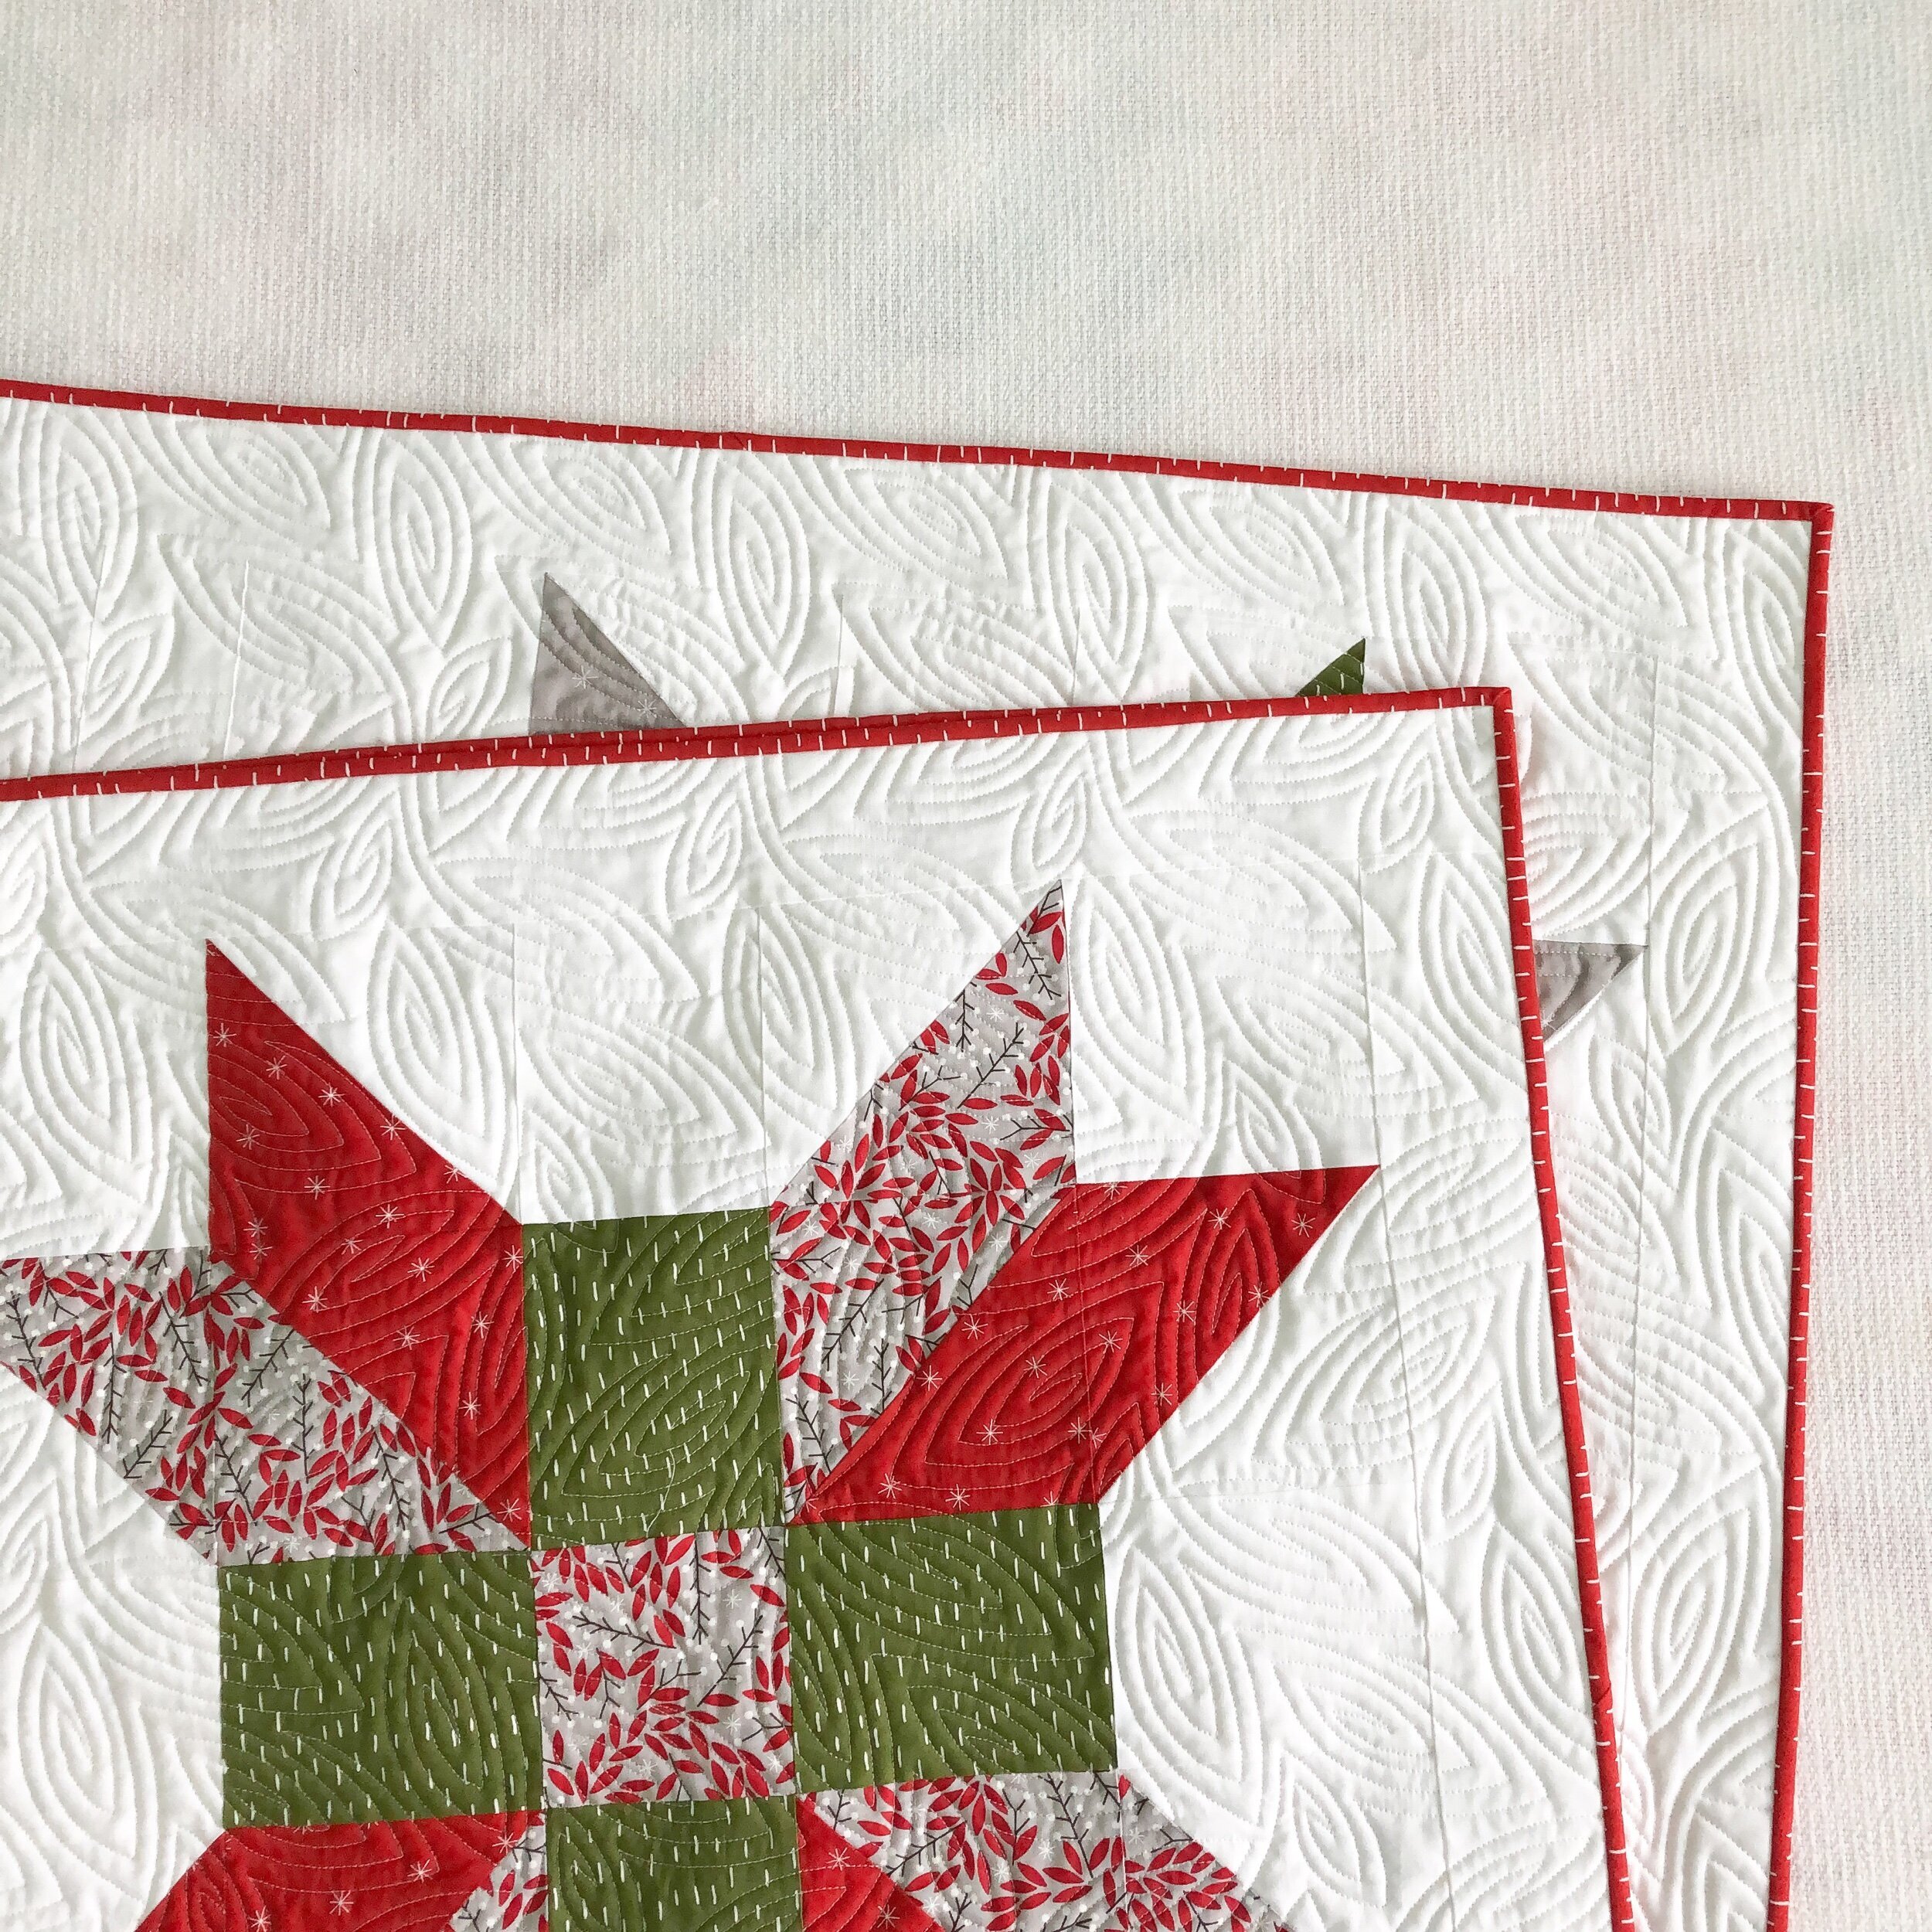
I did add a pop of red for the binding…..which I LOVE!! Are you a machine binder or a hand binder? I love hand binding my own quilts. It’s so wonderful to see what I’ve been working on coming to an end!! Below is a little look of the backing fabric I chose…the gray leaf with a red berry. Also my fun quilt tag, which I love adding to my quilts. I actually added them to all of my older quilts during Christmas break, which actually went pretty fast. I got them from https://customlabels4u.com they are great to work with.

I used a Moda Bella solid for the background fabric, that matches the fabrics well.

Here is another look at the pop of red…binding!
I just love the texture of this quilting with bamboo batting…it’s so so good!!

I carry bamboo, Hobbs wool, and 8020 cotton poly batting in my studio. Thanks for coming on by and letting me share all the details. Have a great day!! • Leisha
Elinor’s Quilt
Hi…I hope you’re all doing well.
A dear man in his 80’s who we go to church with, passed from cancer last fall…so some of the women we go to church with got together and made his sweet widow a small throw with some of his clothes.

They chose a minky backing, which made it extra cozy!

I chose my Squared©️ design for the quilting, which turned out great!! You’ll notice there are buttons and pockets. I trimmed…which is a cropping tool on the Gammill Statler, around those and quilted as close as I could without having issues.
When it comes to quilts made from clothing, I suggest keeping this uniform. Like here, they used his dress shirts, button down shirts, and pants. No t-shirts. If you’d like a t-shirt quilt…they are great too. I personally wouldn’t mix the two.
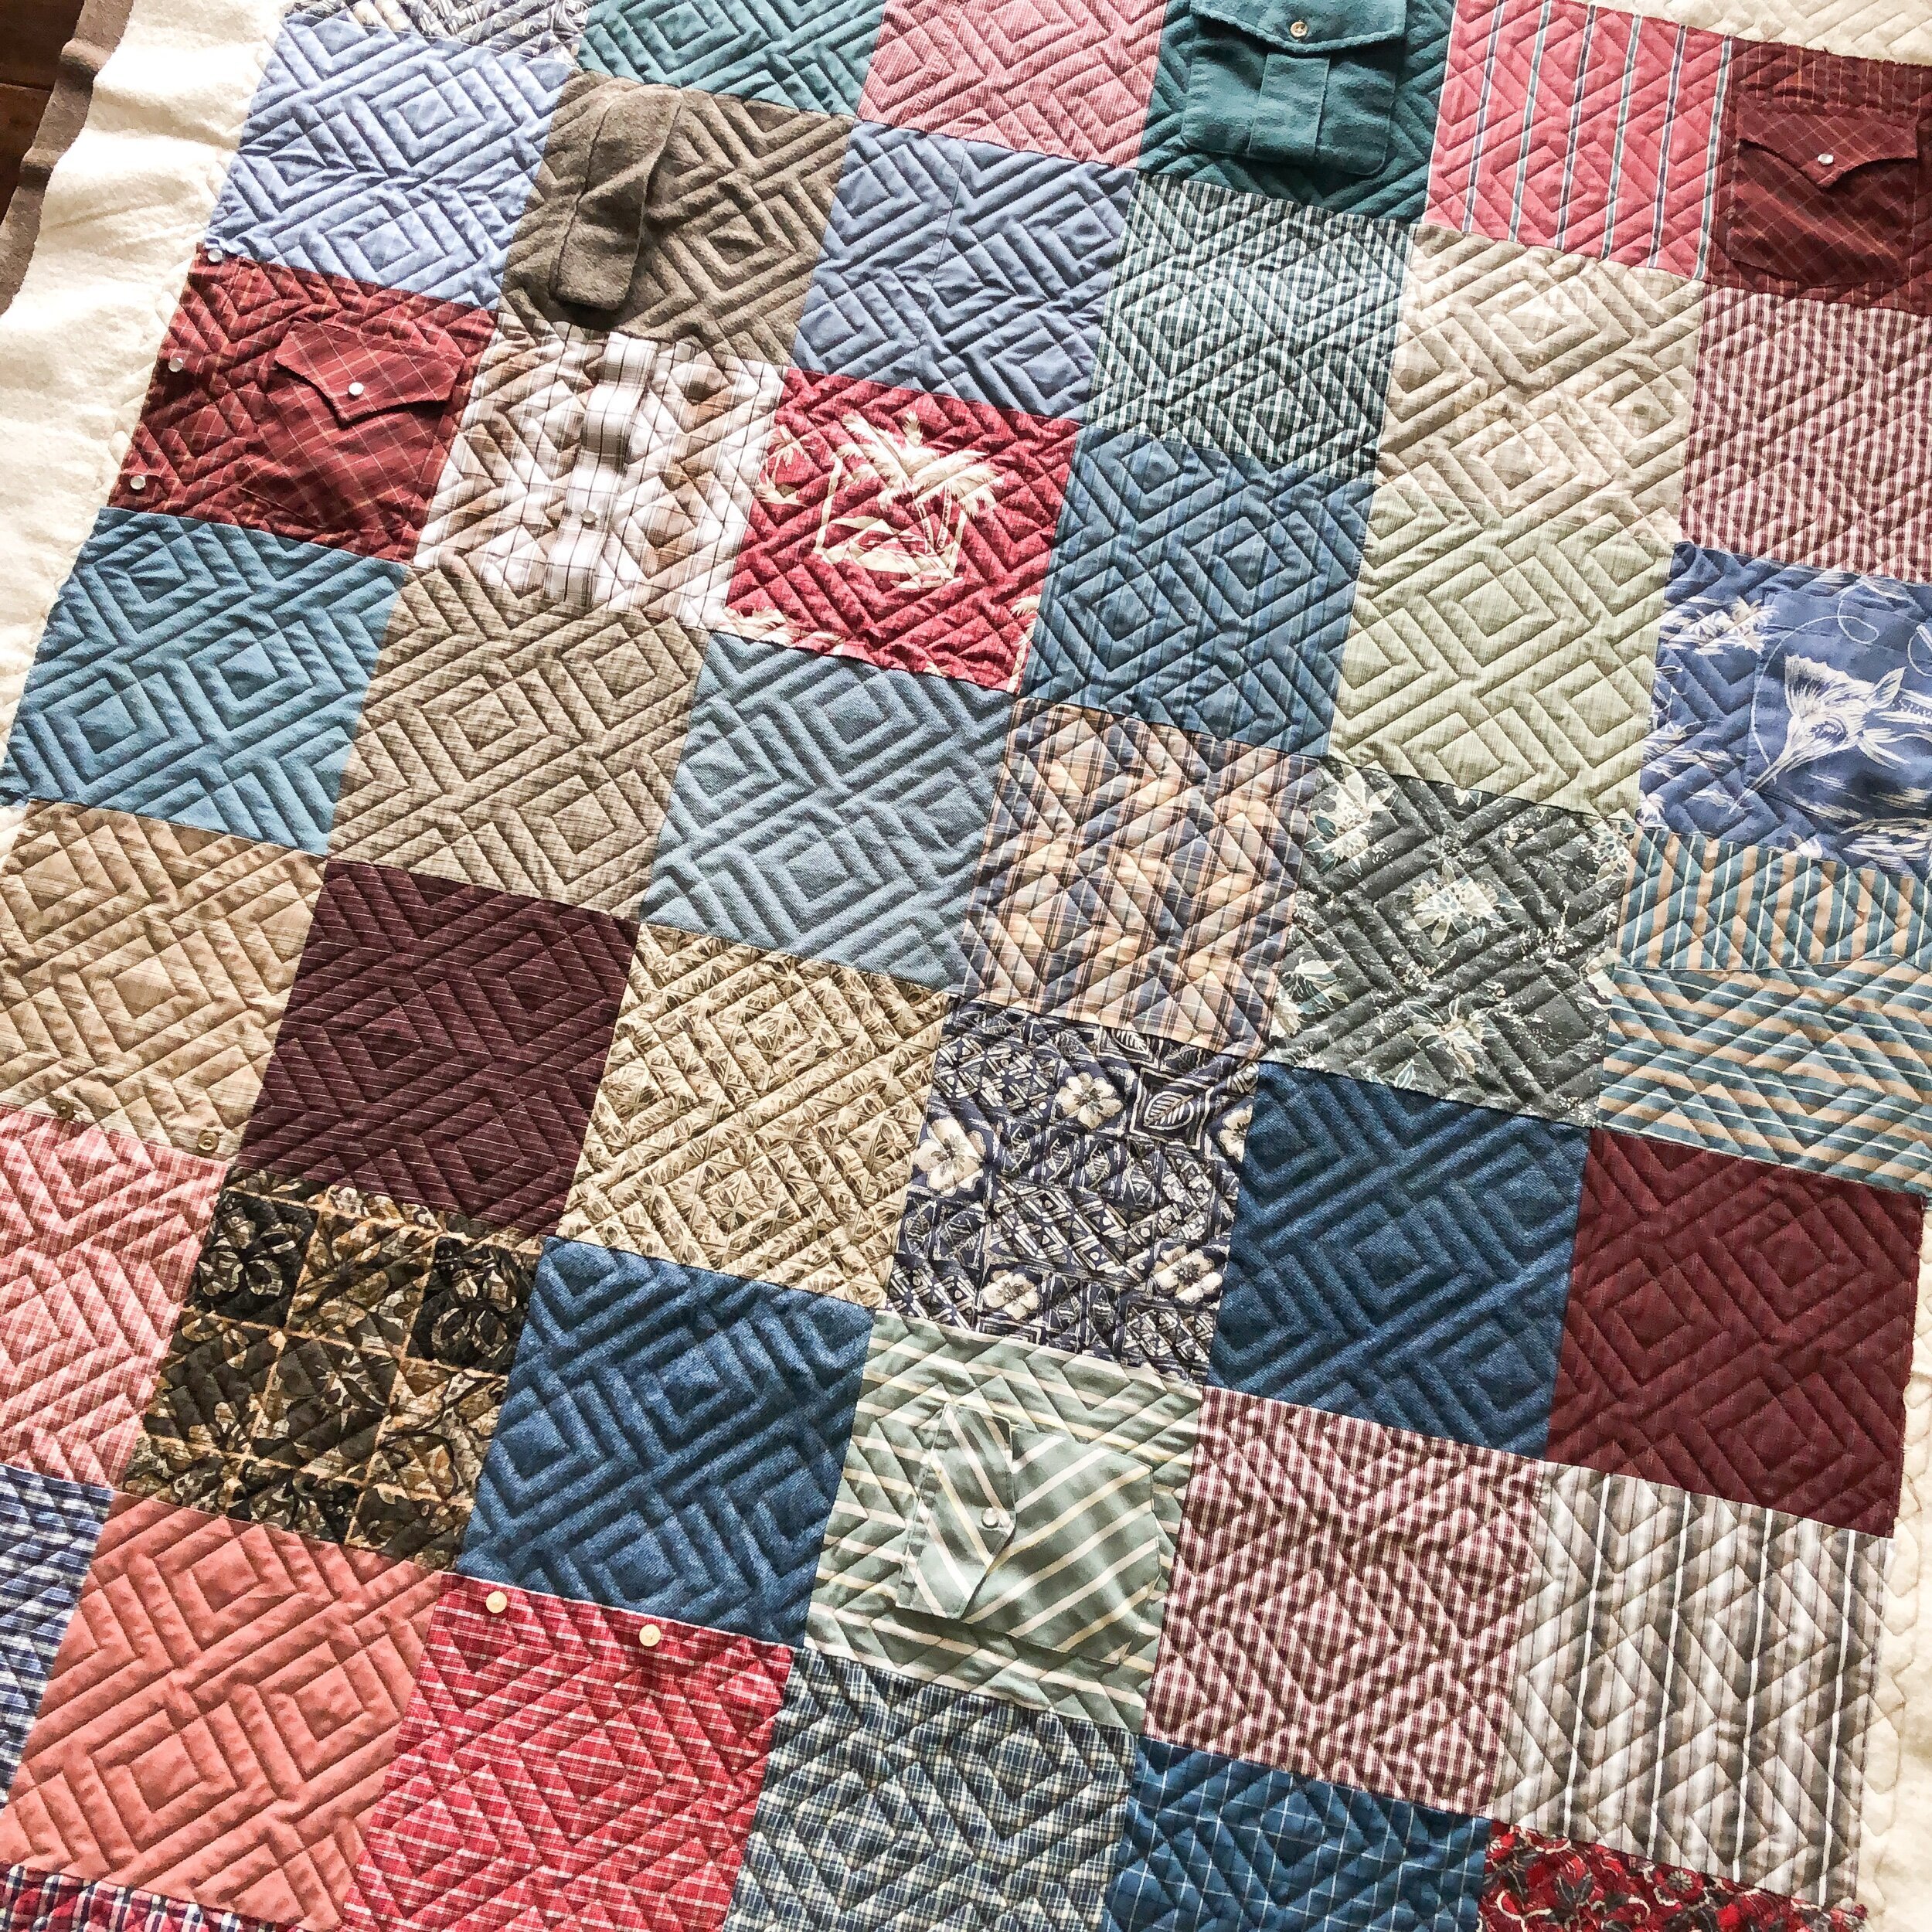
I also suggest backing the shirts or pants that stretch, with the same interfacing that I put on the back of t-shirts. Pellon’s Apparel Interfacing - Basics 931TD fusible midweight. It’s also great for the shirts that have been worn more and are thinner.
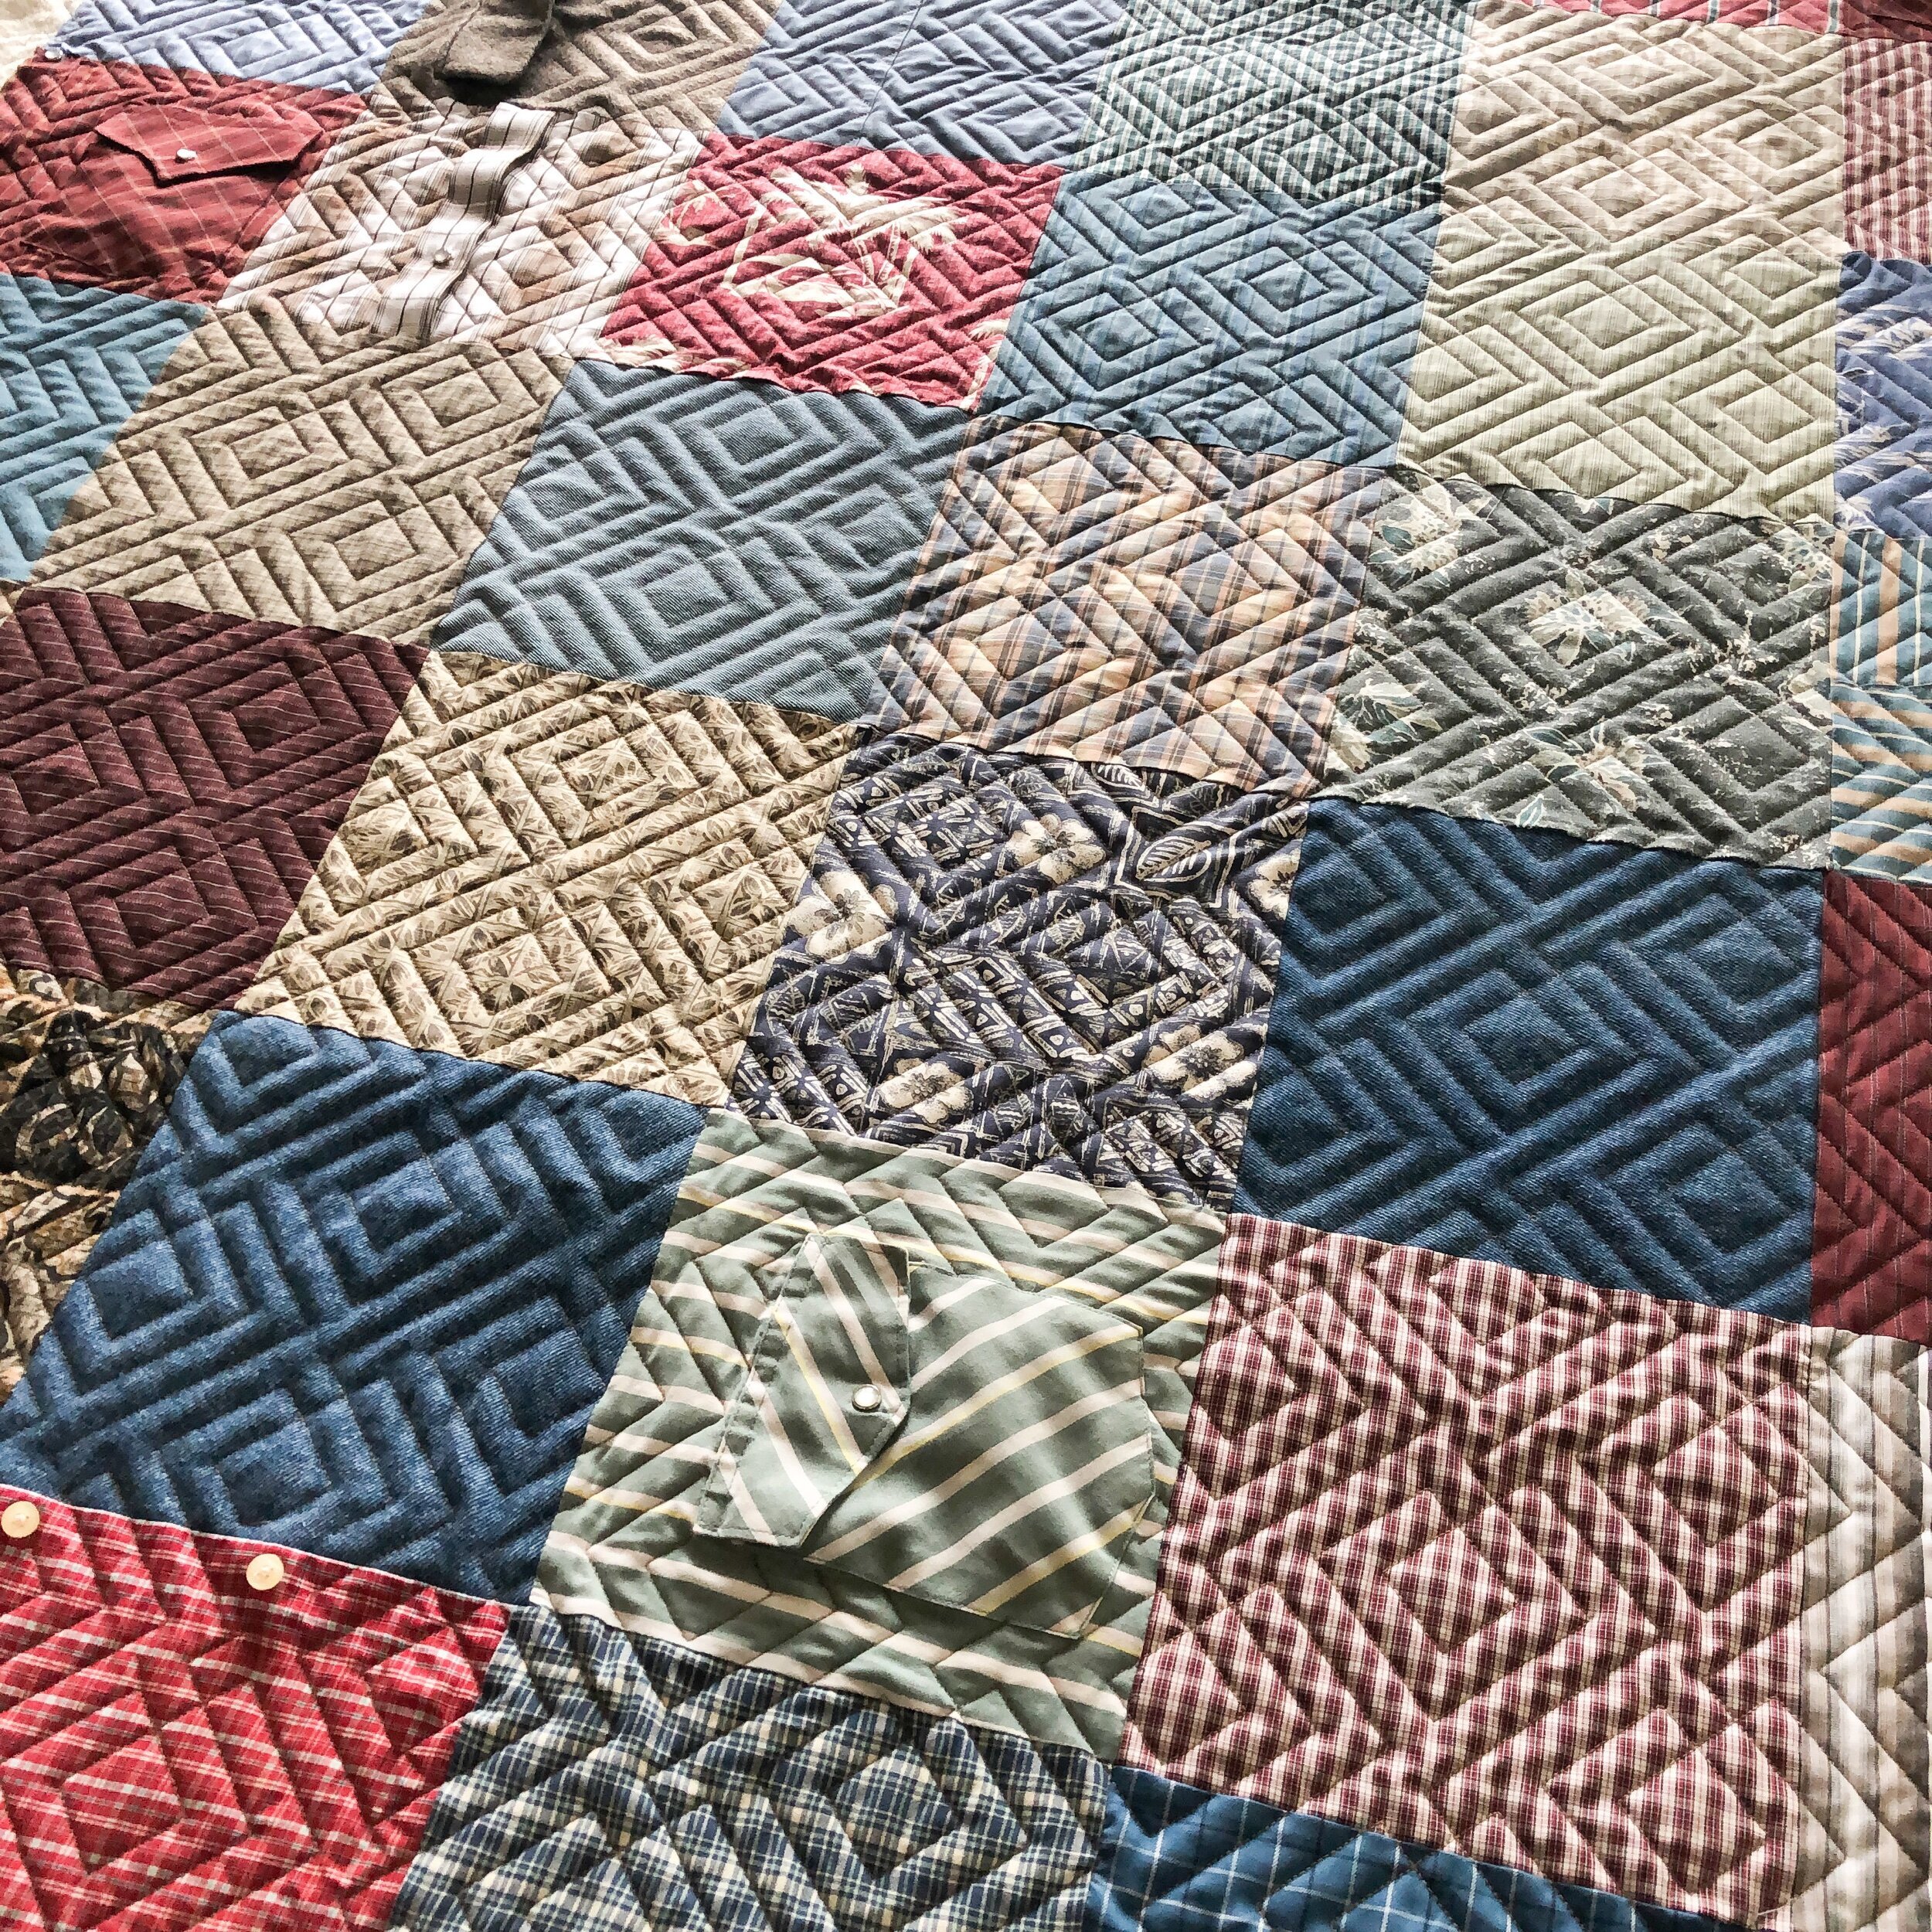
It’s also important to cut your squares the same size, and using a rotary cutter and ruler. It’s funny how many times I’ve seen blocks cut with scissors.

Hope you have some fun projects you’re working on!! Happy quilting!! • Leisha
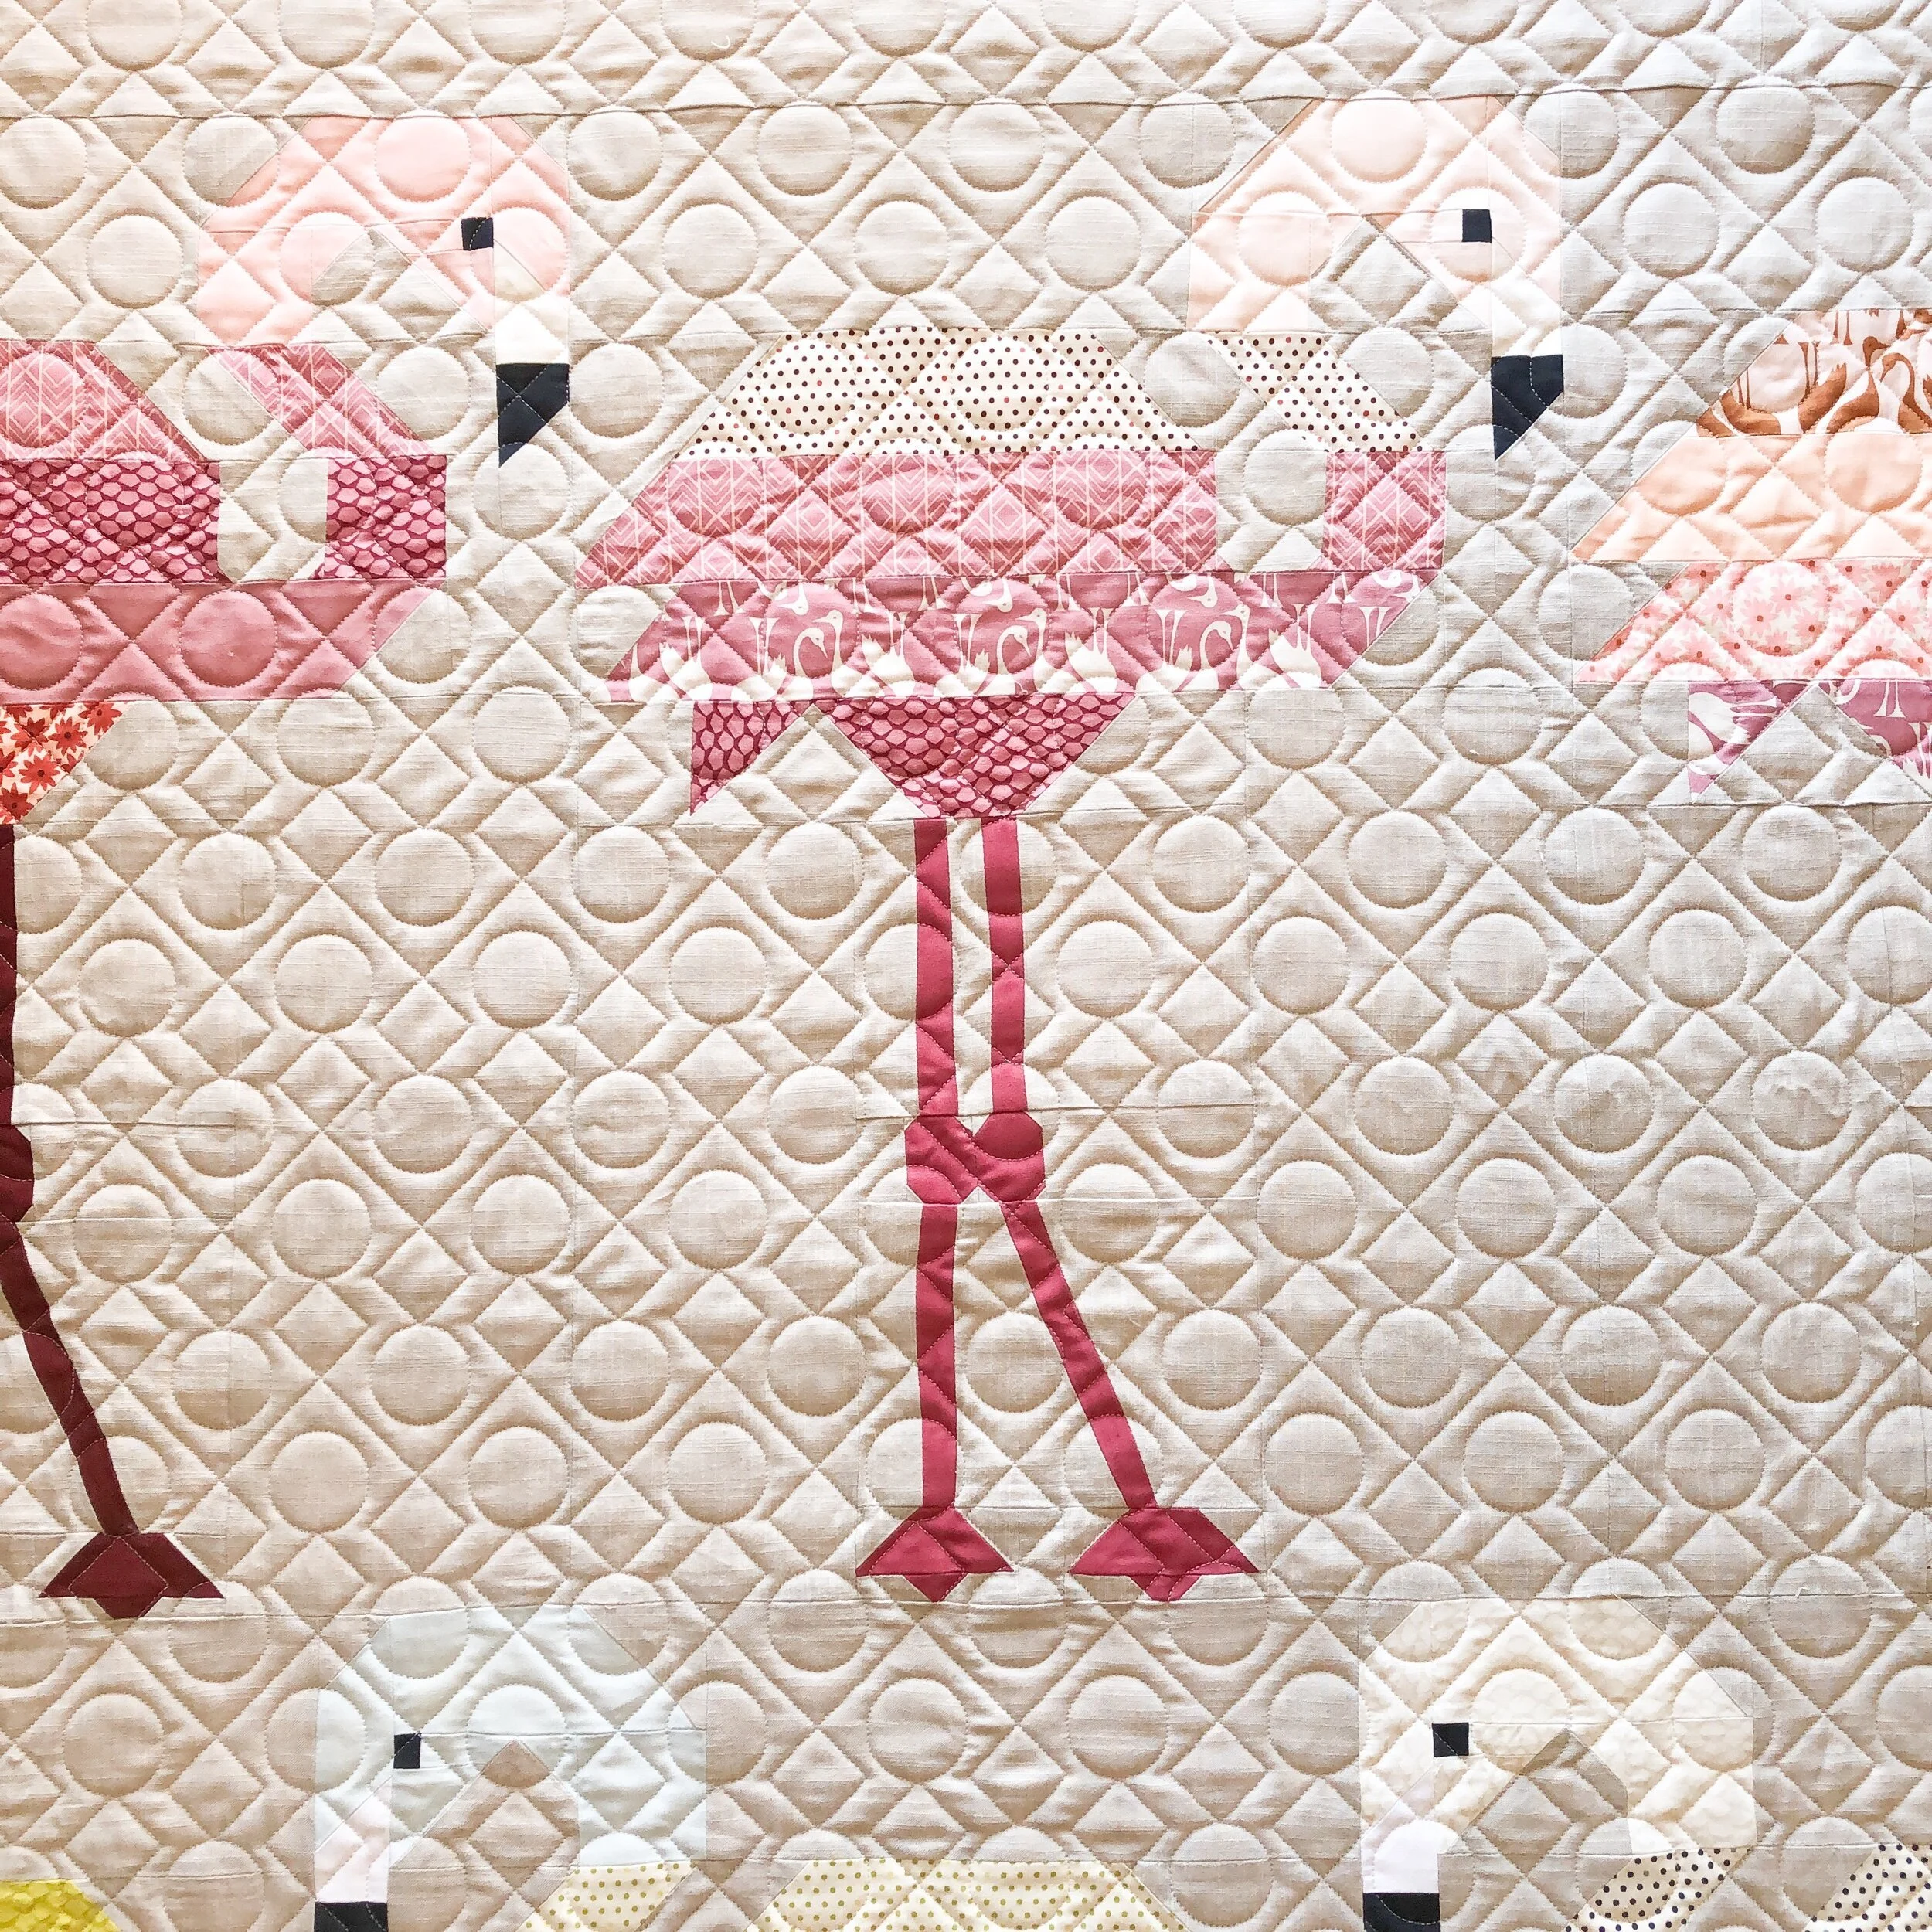
Shelley’s Flamingo Quilt + Weekly Design
Hi there,
oh my cuteness!! This quilt is one of my favorites. The soft fabric choices, mixed with the flamingos. So sweet!!

The pictures truly don’t do this quilt justice. Sorry they aren’t the best.

This quilt was made by Abby from Orange Peel Sews, for Shelley. The pattern is by Elizabeth Hartman and is called, Florence Flamingo.

I just love this simple quilting texture!!

I used a cream Omni thread from Superior Threads and my favorite 8020 cotton poly blend batting from Winline.

This one has light pink minky on the backing, and when I try and get pictures of it in this poor of lighting it looks so blah. So imagine that sweet pink minky with Hopscotch dancing across it. Hope you’re working on some fun projects! I have some fun sewing to do this week! • Leisha
Shelley’s Buffalo Plaid Quilt
Hello,
happy weekend!! This is one of the last quilts I quilted before Christmas…I’m slowly catching up. I’ll get there. I was planning to do a big blog post with all the quilts, like I’ve done before, however I had some requests to do them individually.

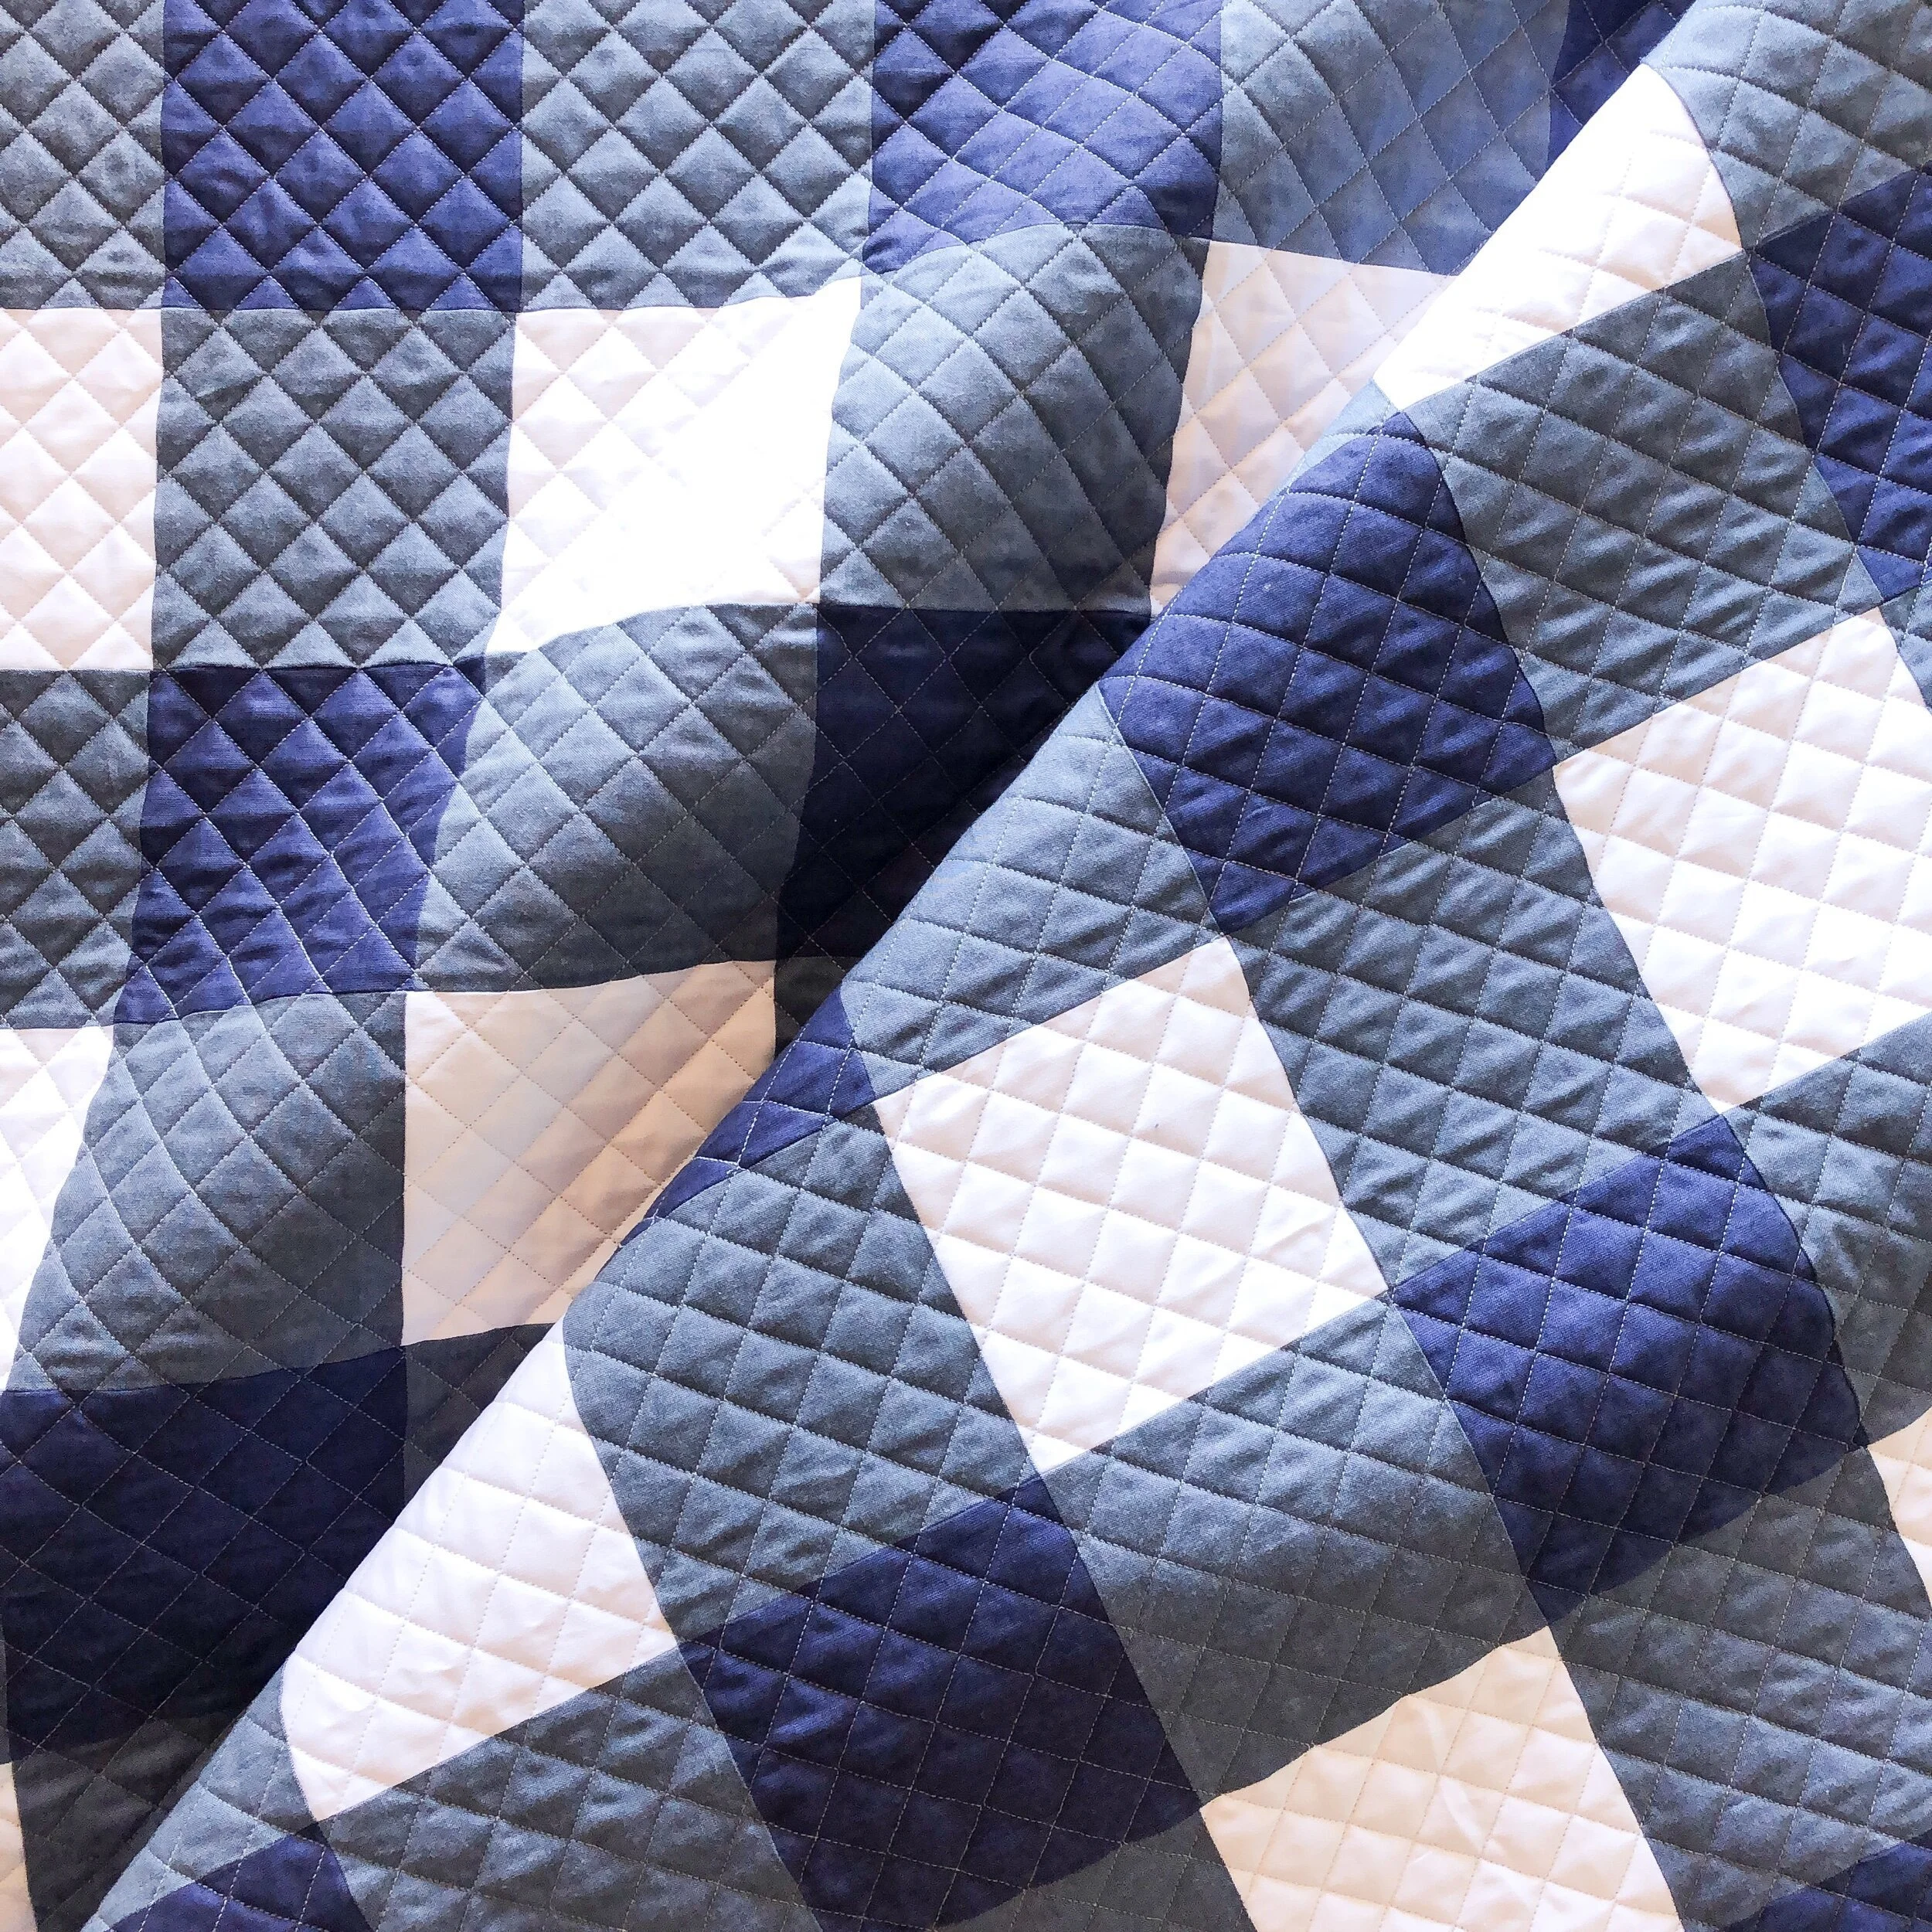
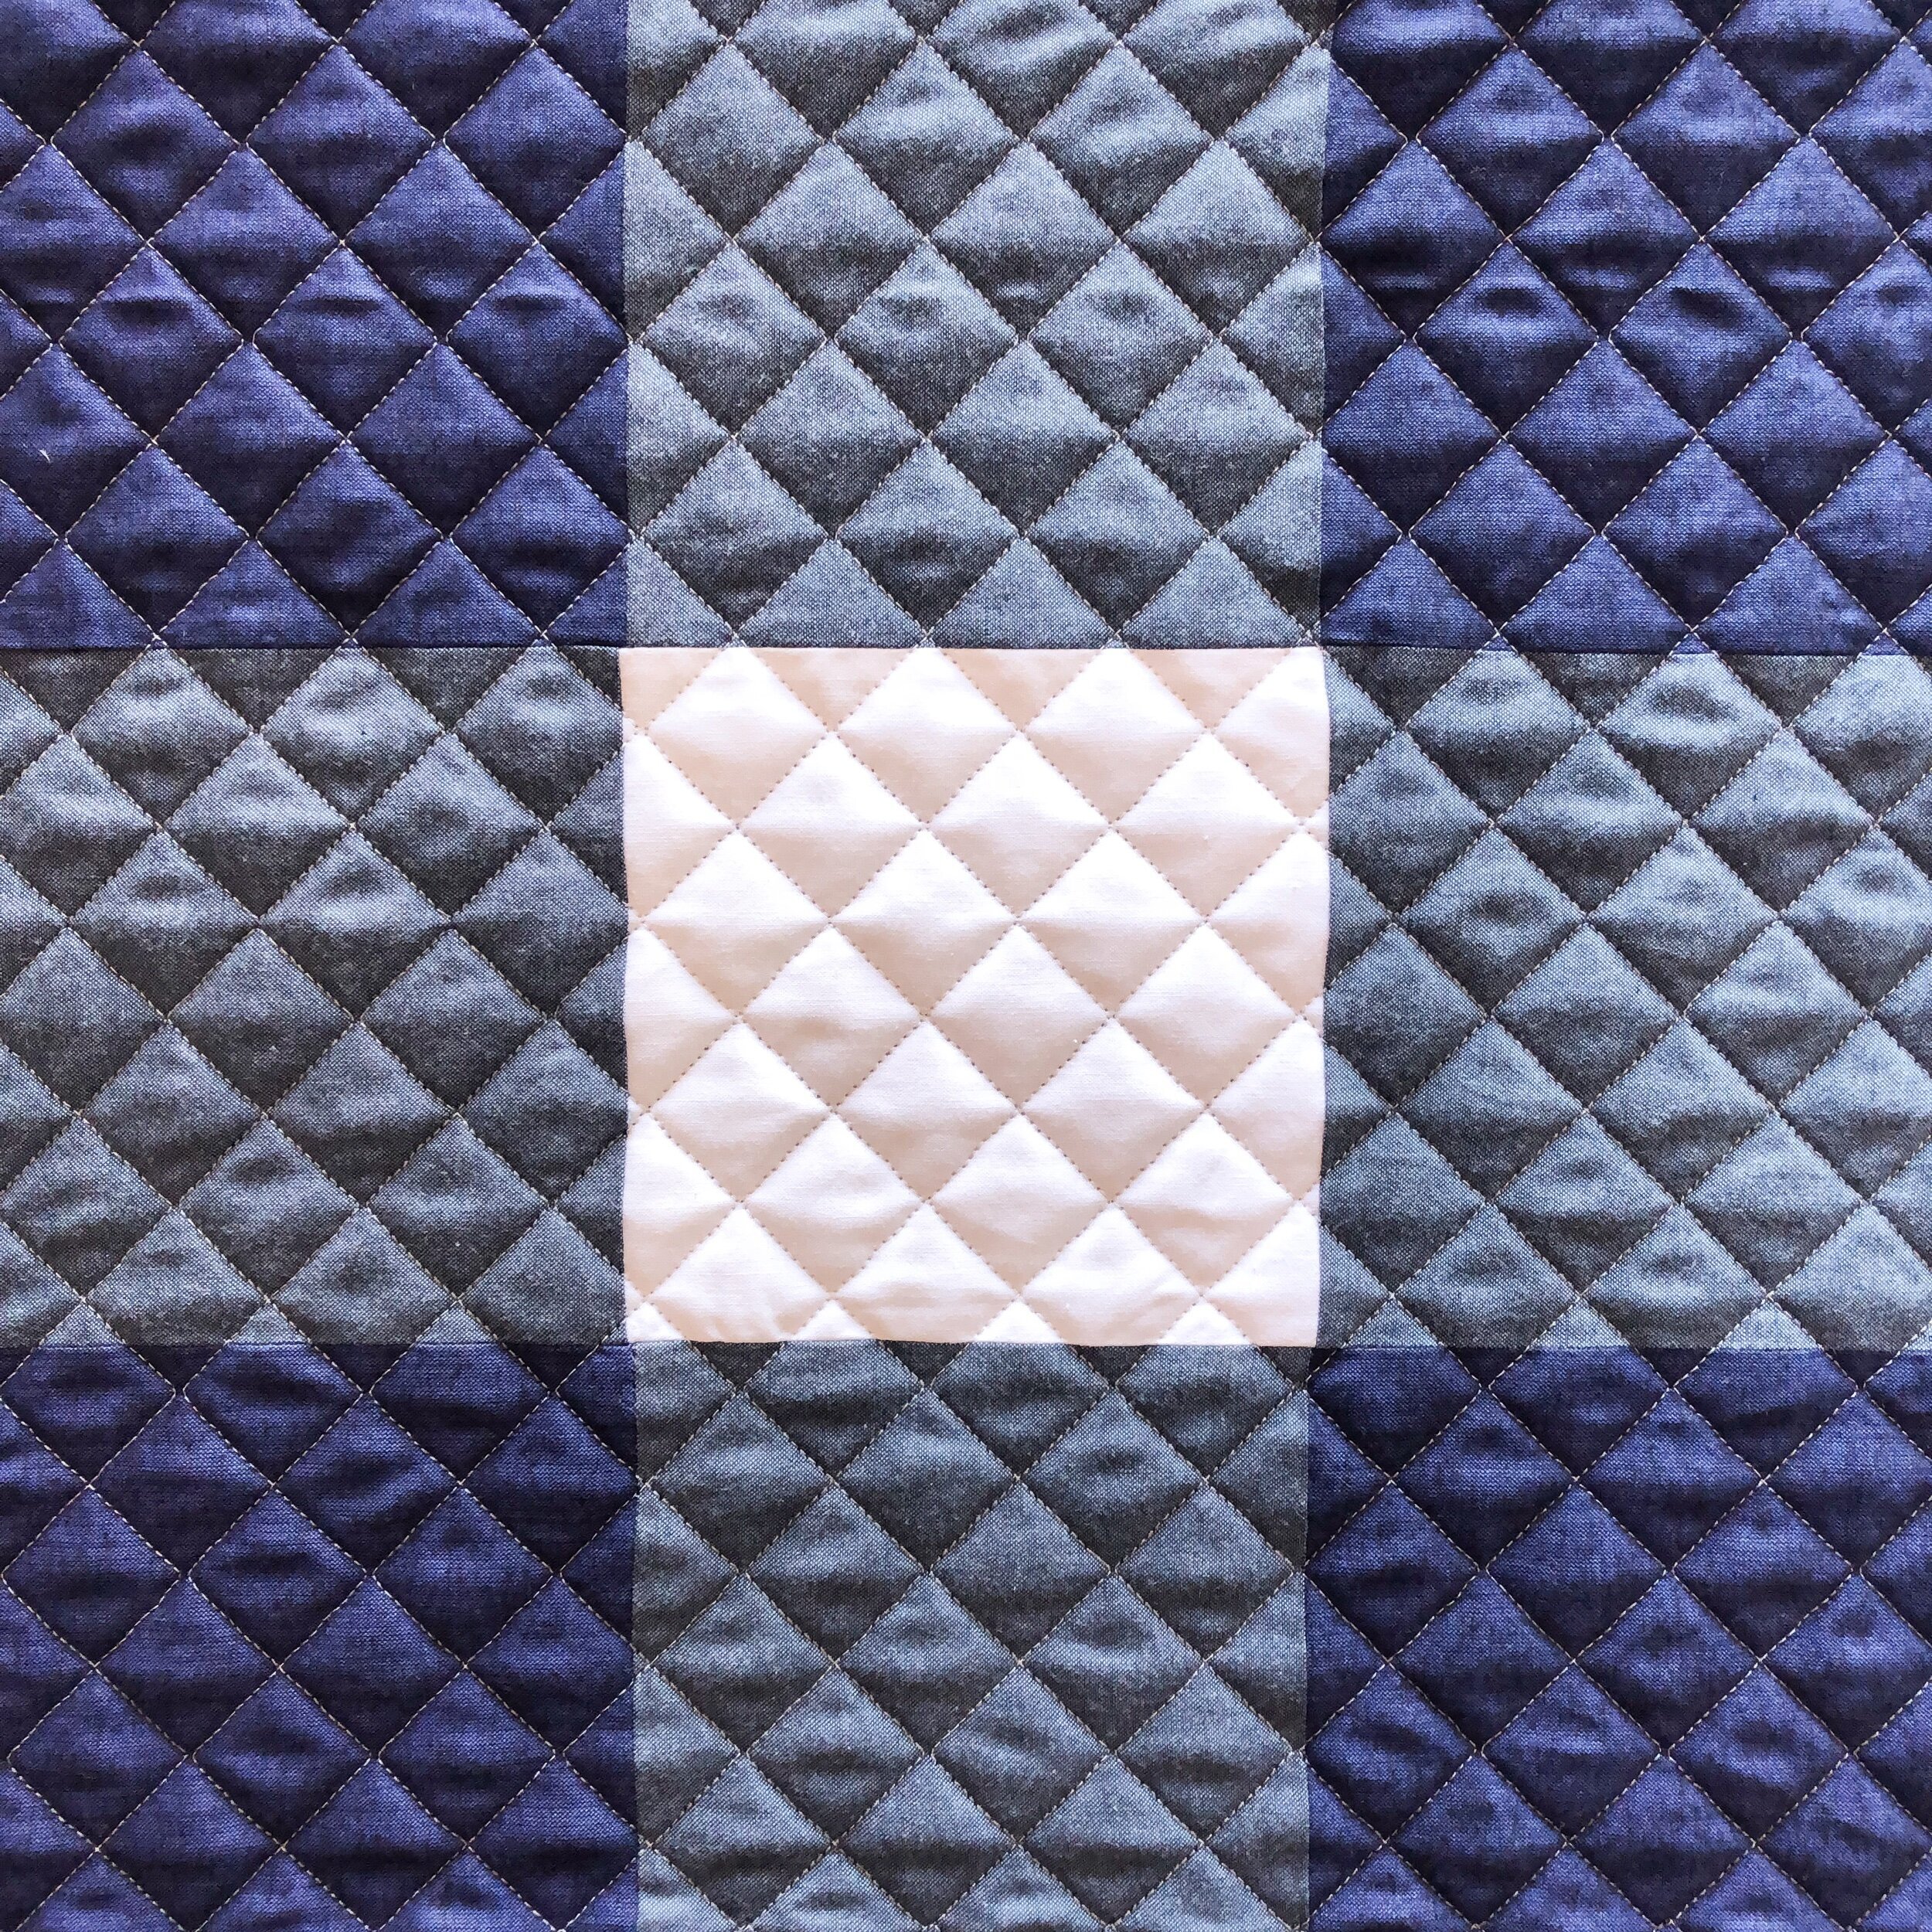
This quilt is a big one!! Made by Shelley. I’m guessing the squares are 6”. There is no official pattern for this one. The darkest fabric goes every other one with the lighter blue fabric, as well as the white fabric goes every other one with the lighter blue fabric. It’s an awesome easy guys quilt!

This one is extra cozy with minky on the backing. Minky makes the quilting pop!!
Shelley chose my On Point©️ design for the quilting. It can be difficult sometimes to line up this design because quilts shrink as they are quilted. I came across a brilliant solution!!! I used this method on another quilt I did recently and it work out beautifully. I recorded a bunch of videos and put them in my Instagram stories, to walk you through the process. If you click here: https://instagram.com/leishakaye it should take you to my profile and the click on the Crosshatch highlight bubble. Or let’s see maybe this link will work: https://www.instagram.com/s/aGlnaGxpZ2h0OjE3ODg2NDE1Nzk2MDA0Njg4?igshid=ooym1zedlbxf&story_media_id=2522927156319547382

I used my favorite 8020 cotton poly blend batting from Winline and Omni natural white thread from Superior Threads.

Here is a look at that minky backing. I didn’t have a lot of the navy minky pull through the white fabric, it helps to have the nap of the minky going down when you pin it onto the canvases. I will say however, when I quilt swirly designs it comes up more. It’s kind of out of our hands as quilters. So, I always leave it up to my clients. They know that if they choose a darker minky, that it’s possible for the fibers to pull up through the lighter fabrics in the quilt top.
Have you made a buffalo plaid quilt before? I have, and I love using Moda cross weave fabric for that middle color…it’s such a great color blend.
Thanks for stopping by!! Have a great weekend! • Leisha
Barbara’s Star Fall Quilt
Hello!!
Excited to share this quilt and quilting design with you!! I loved quilting this fun quilt last fall, made by Barbara.
The pattern is called Starfall Quilt by Ebony Love. I couldn’t find this pattern, so contact her on the link I provided and she can tell you where it is located.

I used a dark gray thread to quilt it, and my favorite 8020 cotton poly blend batting from Winline.
I used a quilting design by my friend Jess from Threaded Quilting, called Diamond Loops. It’s such a fun design!! Jess also has some other great designs as well.

I thought this design looked fantastic with all the triangular shapes.
Some close ups!!
The backing was gray minky. Solid minky shows the quilting so beautifully.

Another picture of the minky backing below. Do you have any questions about using minky for the backings of quilts?

Question…do you have to schedule your sewing time? So it actually happens. I have some planned for next week! Have a great weekend. • Leisha
Barbara’s Mini “Sugar” Quilt
Hello,
just dropping by to send you this fun table topper! Do you ever want to sew a project, but don’t want to do something big…make a mini quilt or table topper. Mini quilts are great to pin up on the wall, too! In fact I have one on my bedroom wall. …scroll down to the bottom to check it out!!
This fun mini quilt is actually one of the Frivol’s that Moda did a few or so years ago. This particular one is by Sweetwater, it’s called Sugar, and it’s their Cookie Exchange fabric.

I love these bright cherry fabrics!
When I choose I design to quilt on something, I try and find something that ties the quilt pattern and fabrics together…and also draw inspiration from the fabrics as well.

I chose Patricia Ritter and my Frost©️ design to quilt it…and I love the end result.

I used a cream Omni thread from Superior Threads, and a scrap of my favorite 8020 cotton poly blend batting.

Here is the mini quilt I have on my wall. Which would still be great on a table top as well!

I just got back from sunny Arizona last night. And…Today it’s snowing in Utah…which is why we escaped to some warmer weather. It was fun to get away with my mom and sisters!! I hope you’re having a great week! • Leisha
Beth’s Smitten Quilt
Beth used Tula Pink fabrics and fussy cut them, to get all the right fabrics in all the right spots.
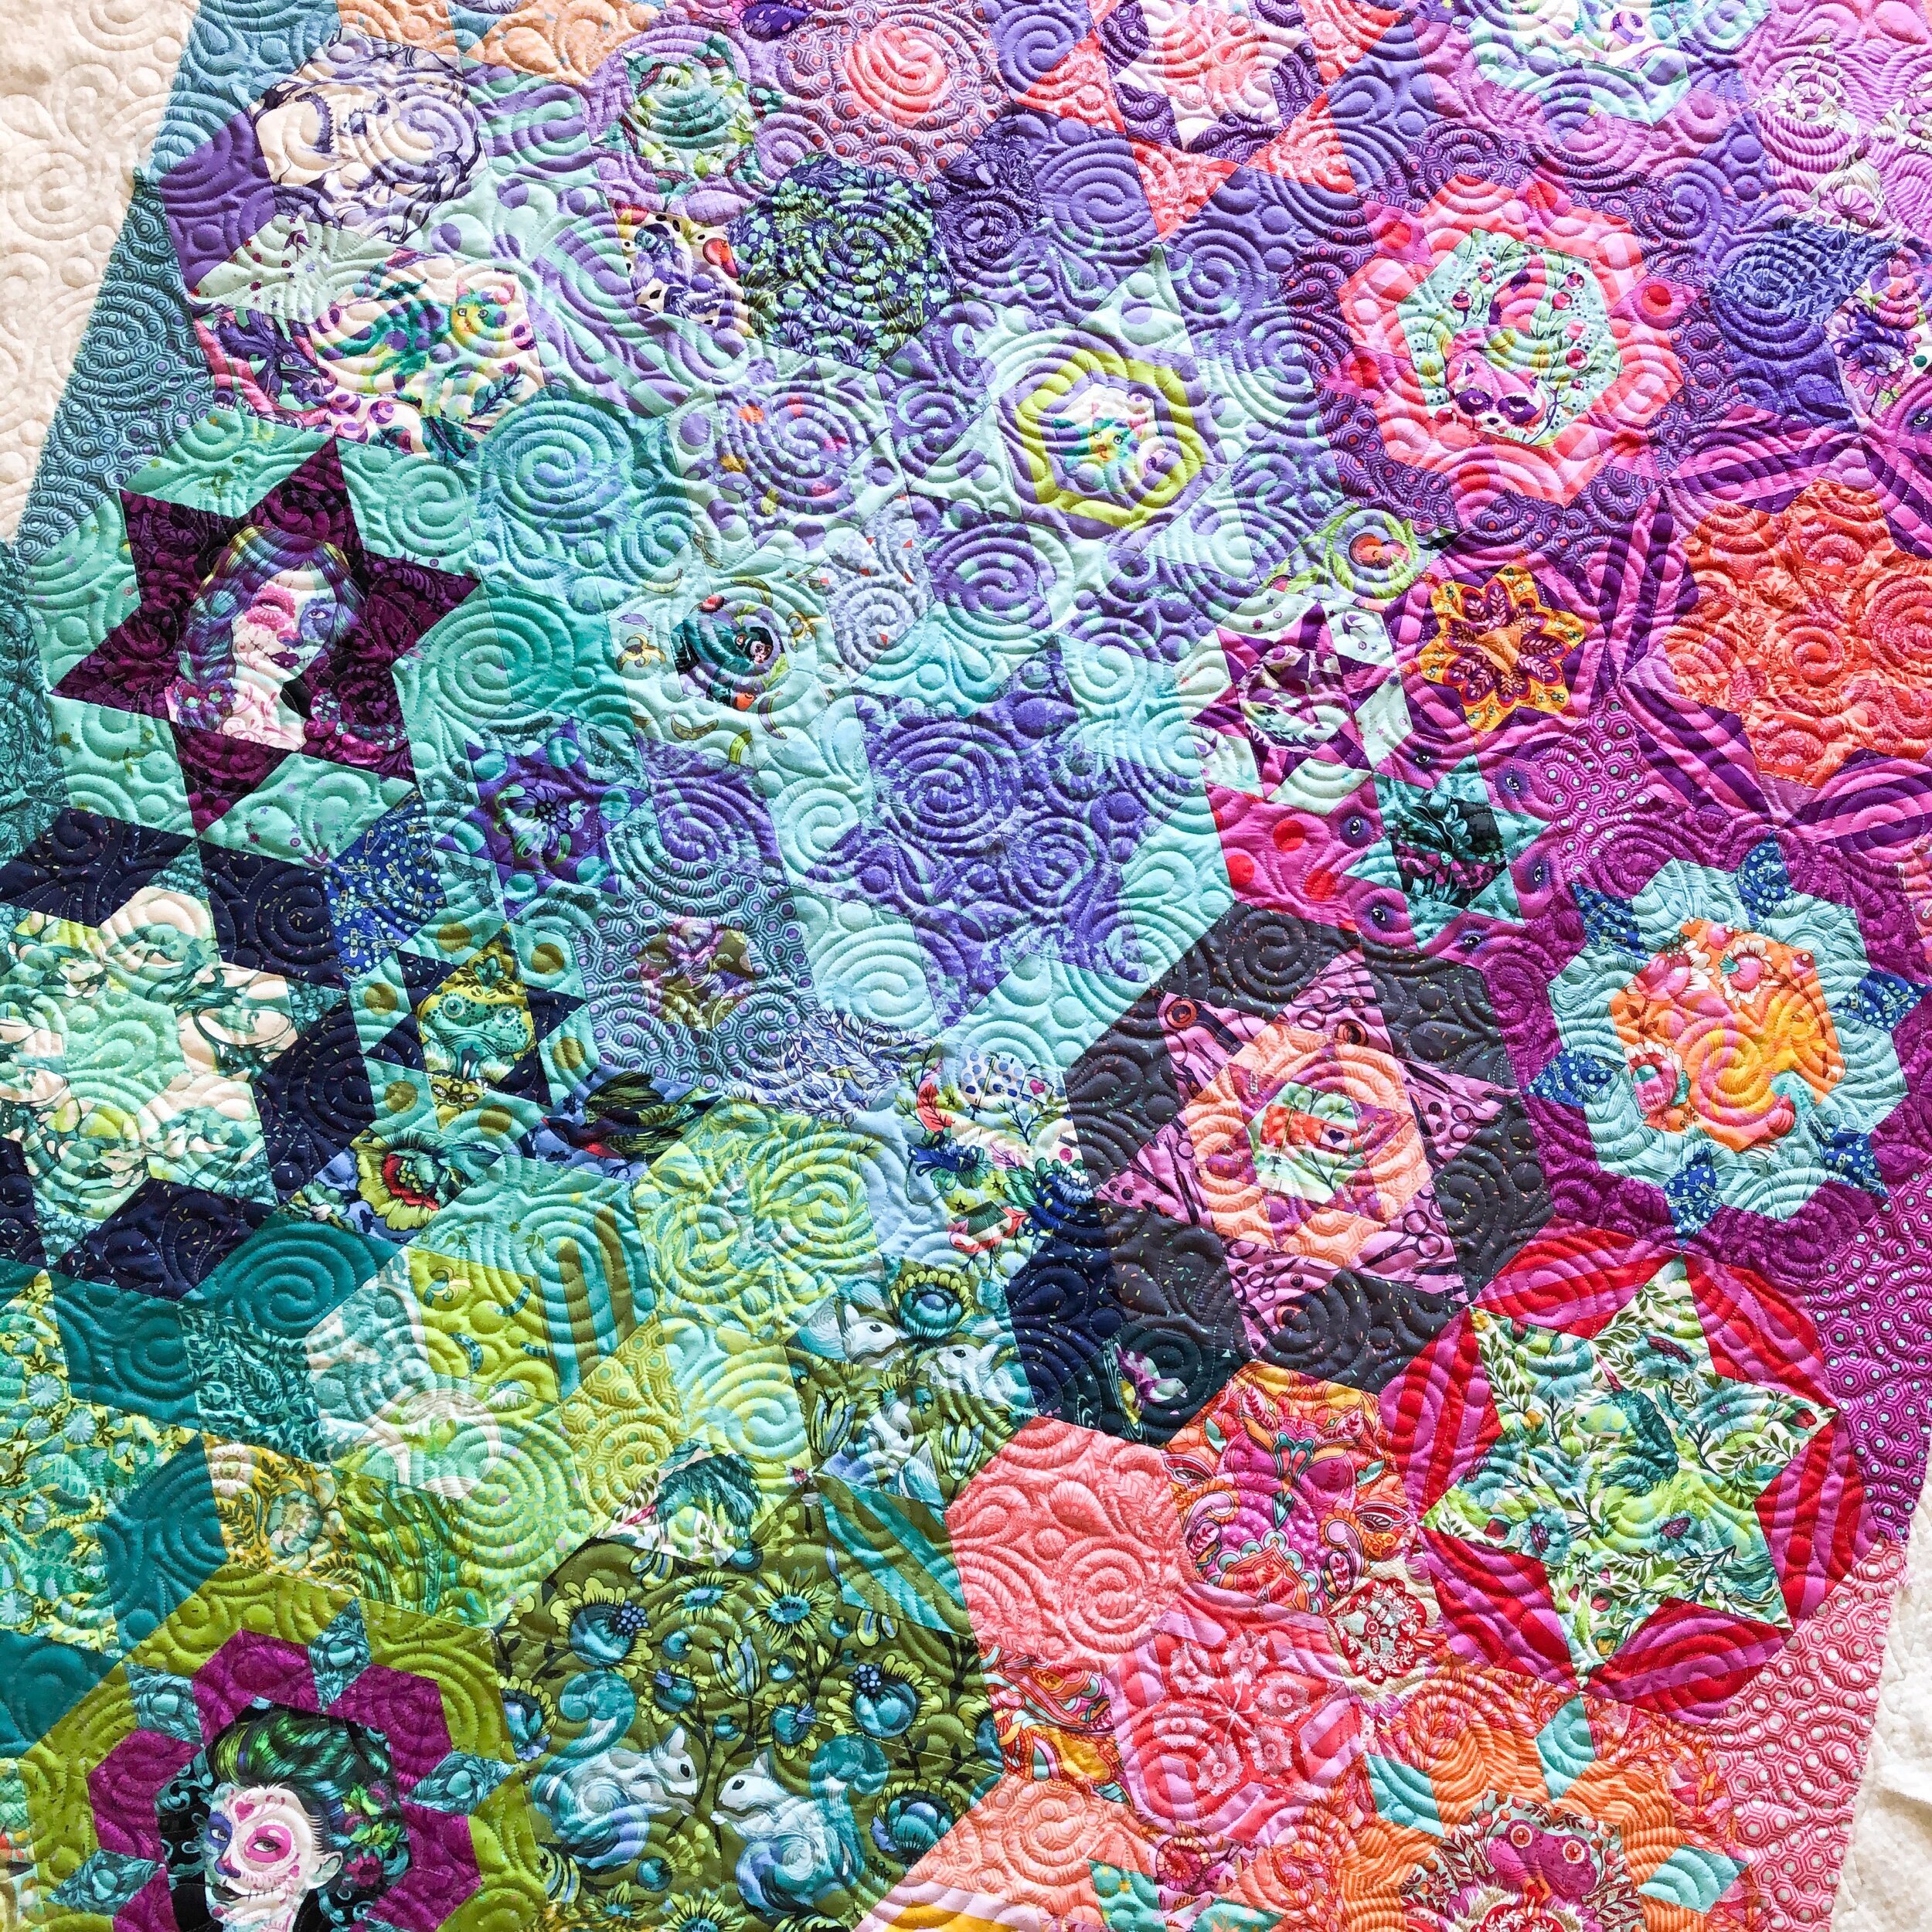
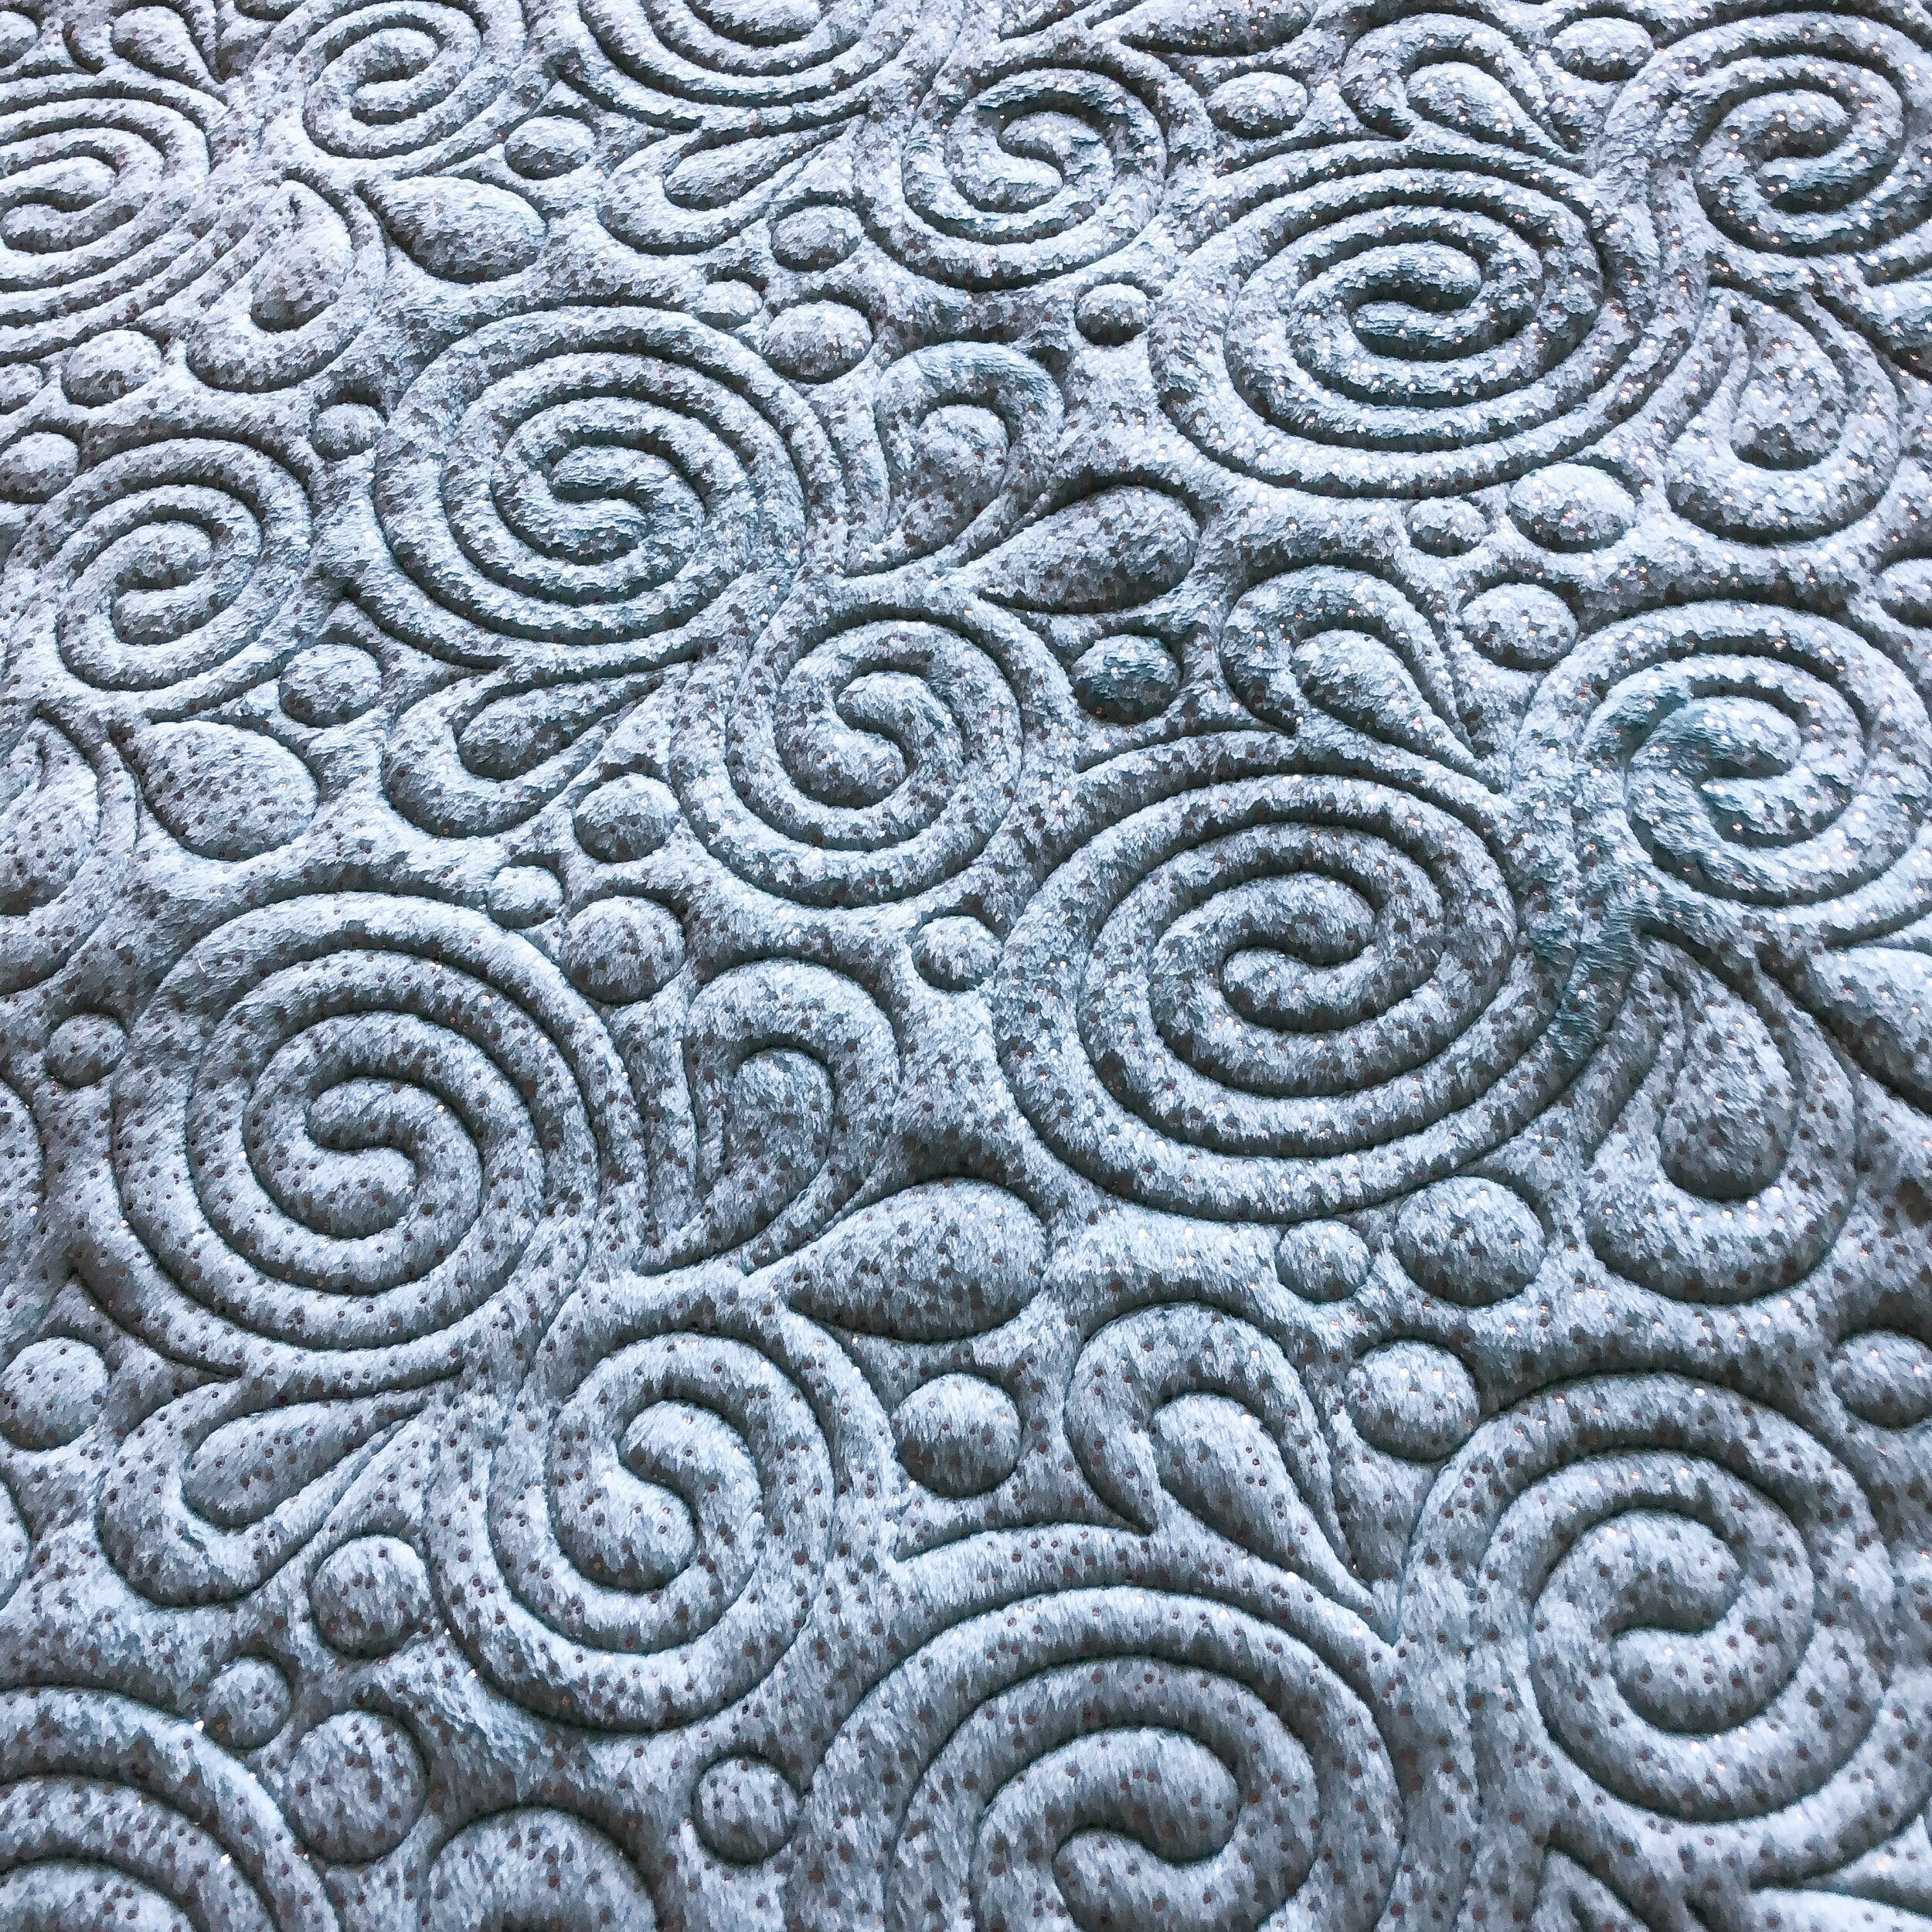
I used a batting that Beth provided, which I think was an 8020, and if I remember right a light aqua thread…because scroll down see the minky backing.
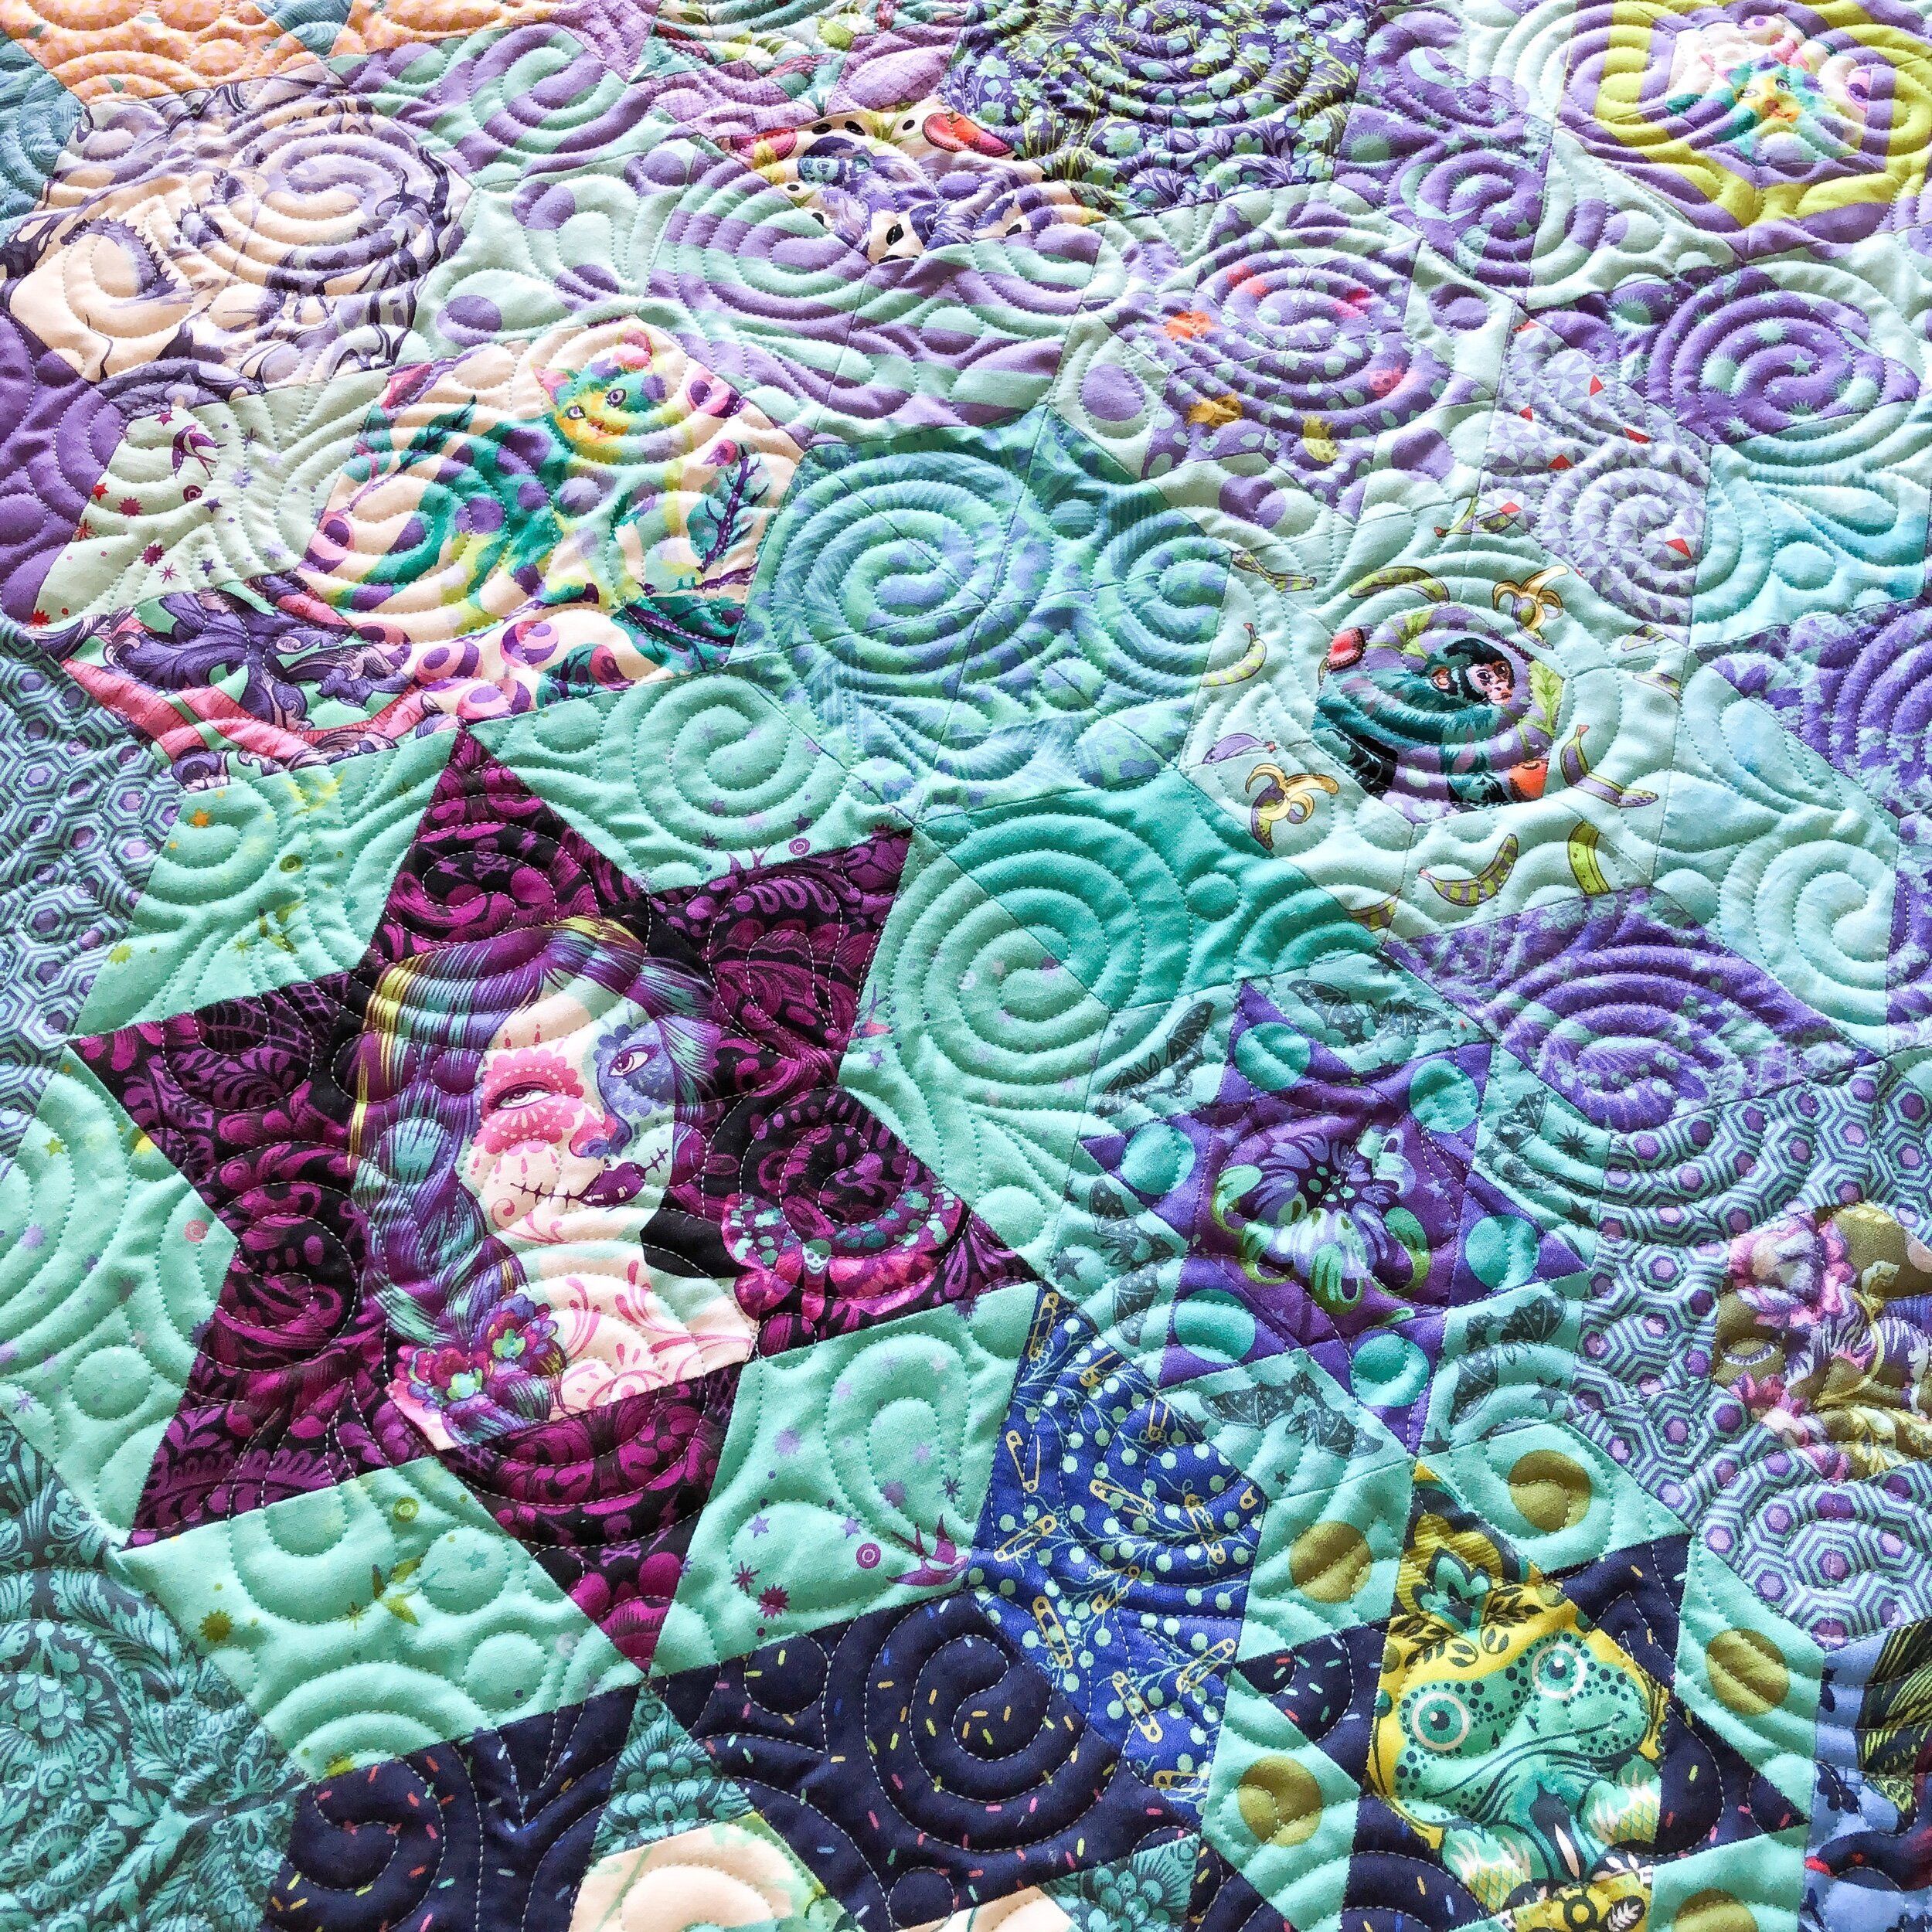
Beth chose Marmalade for the quilting, which is definitely a favorite!! Marmalade is available at Urban Elementz.

I never get tired of seeing this design on quilts!!!

Look at all the amazing details in the fabrics that Beth chose.

Of course this front and back picture is necessary!
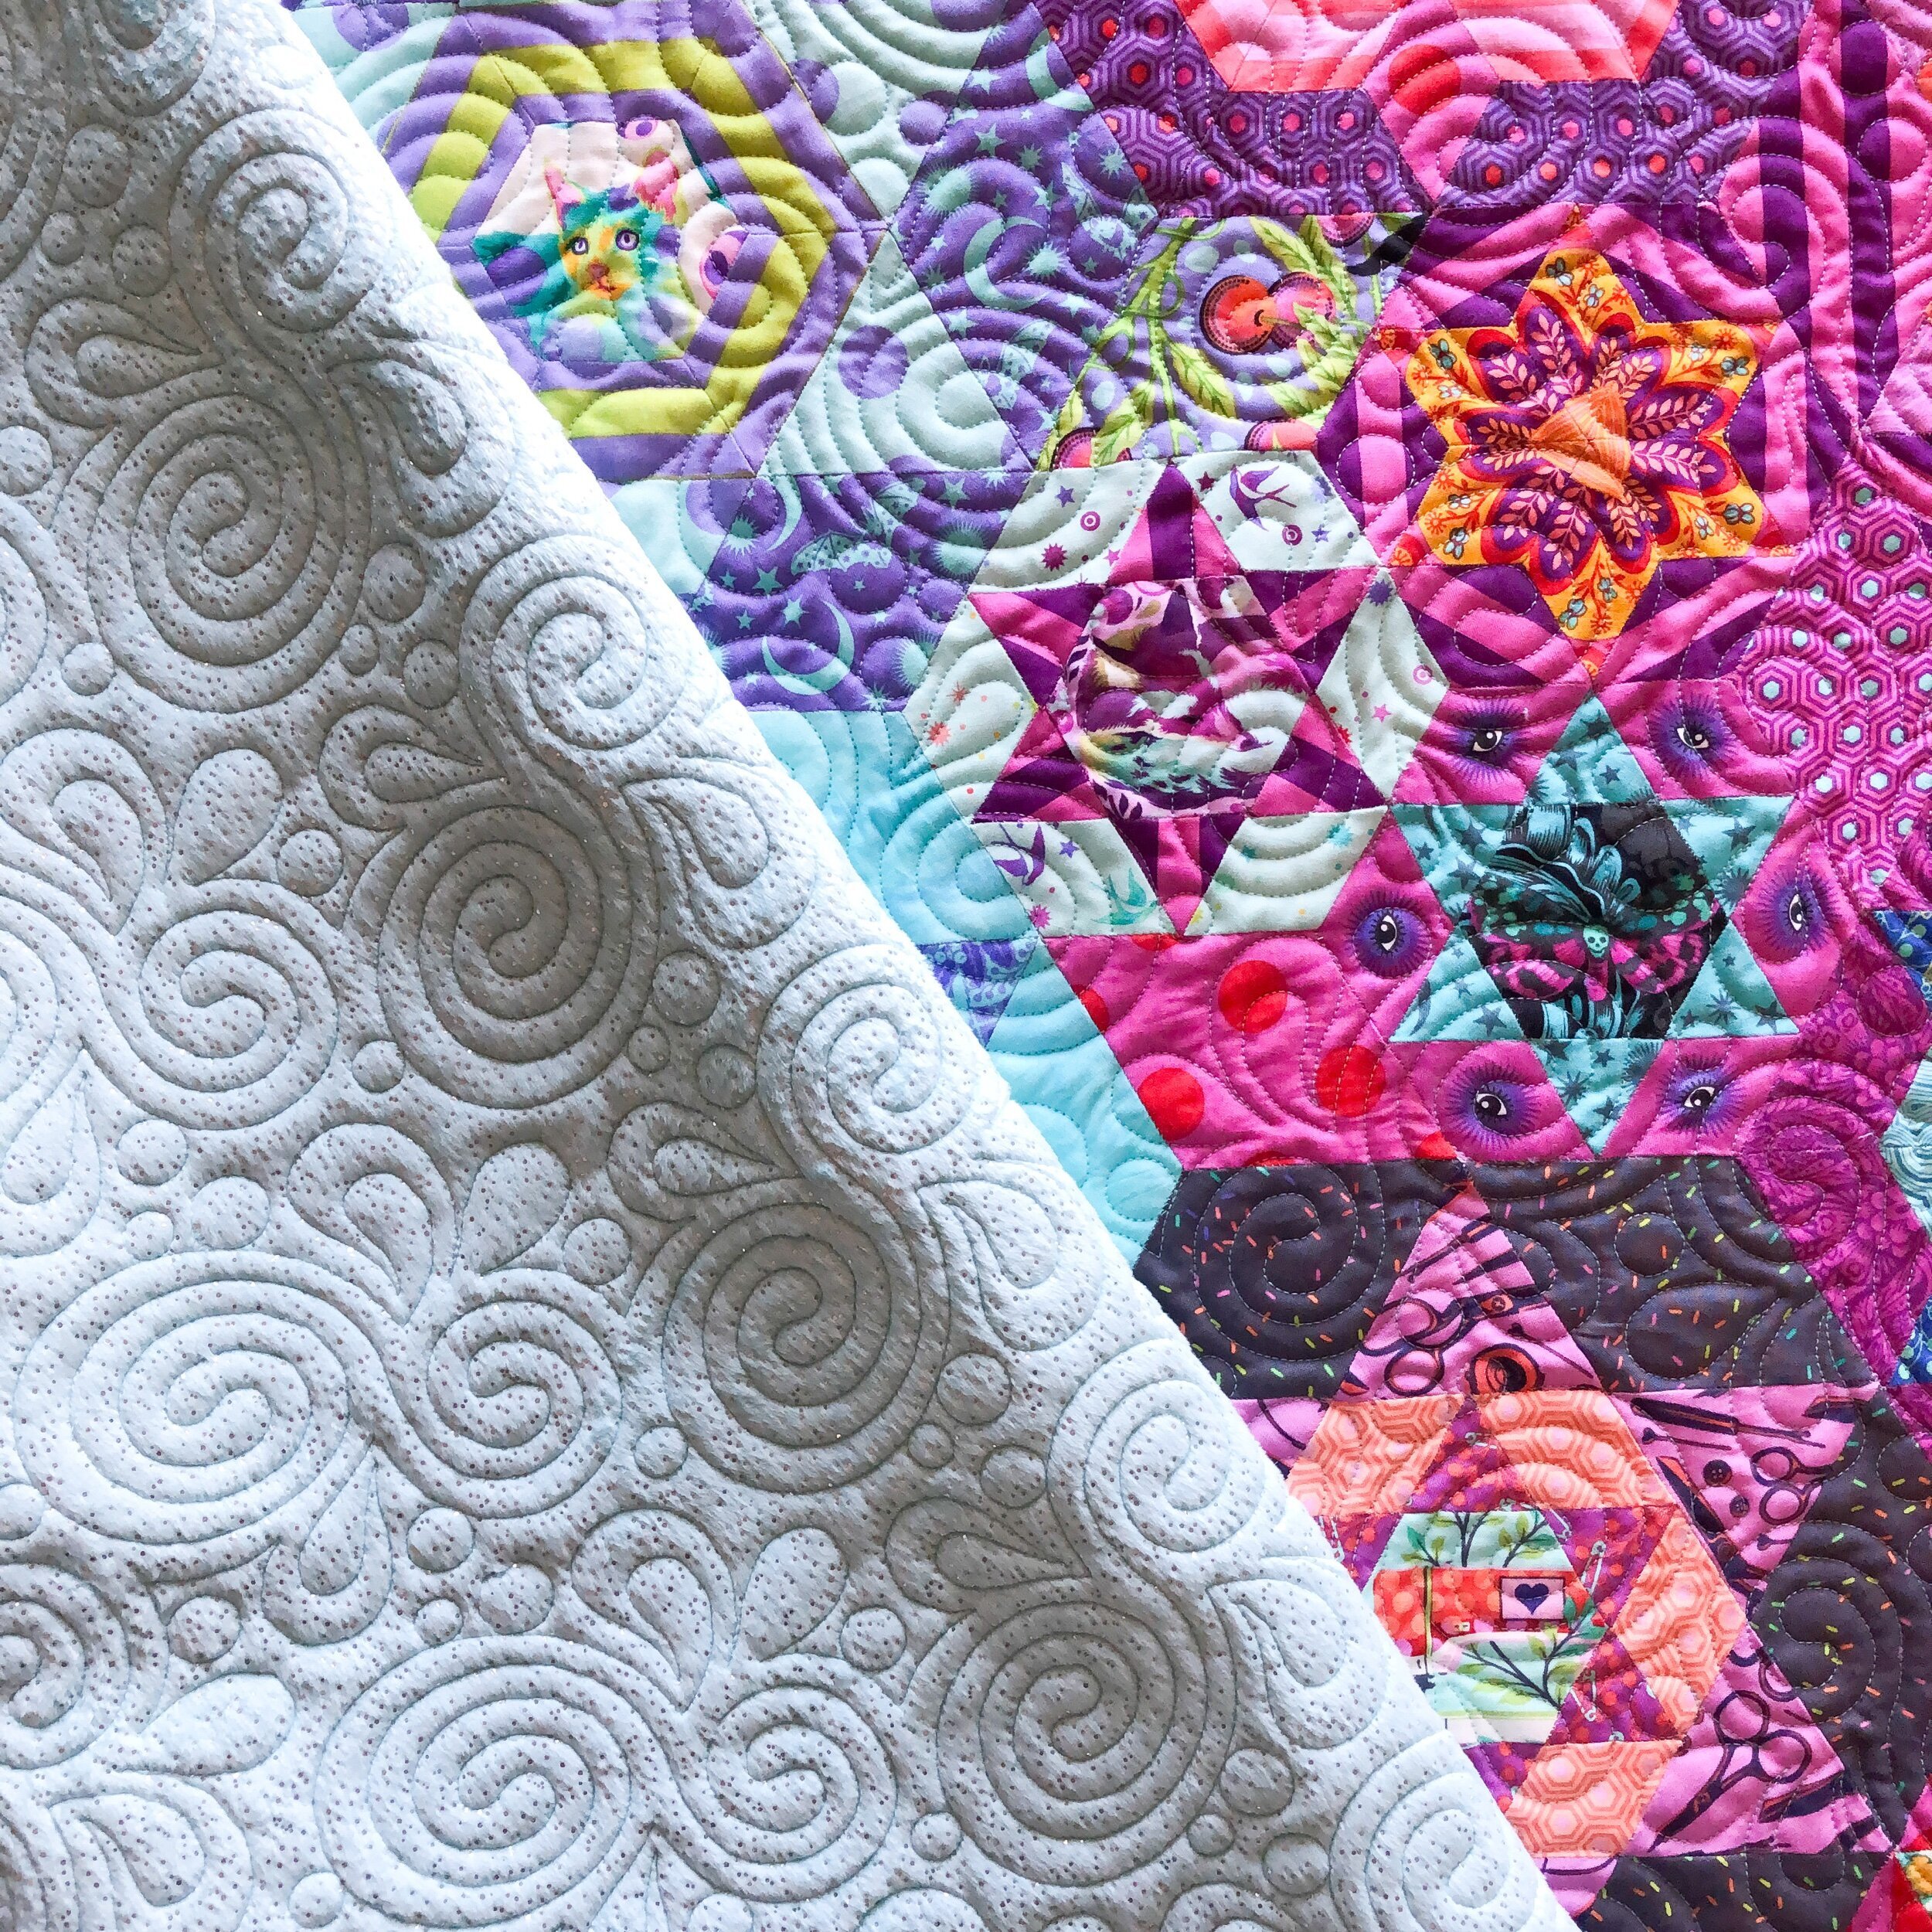
The fun thing about this minky, is the silver fleck in it. It adds some extra sparkle to this amazing Smitten quilt. I love the combination of pattern, fabrics, quilting, and backing!! Thanks Beth, for letting me quilt it for you.
Hope you have a great week!
• Leisha