
Laurie’s sunny quilt
Hello Friend!
I have a very cheerful quilt to share with you. My friend Laurie made it with one of her favorite colors…yellow!
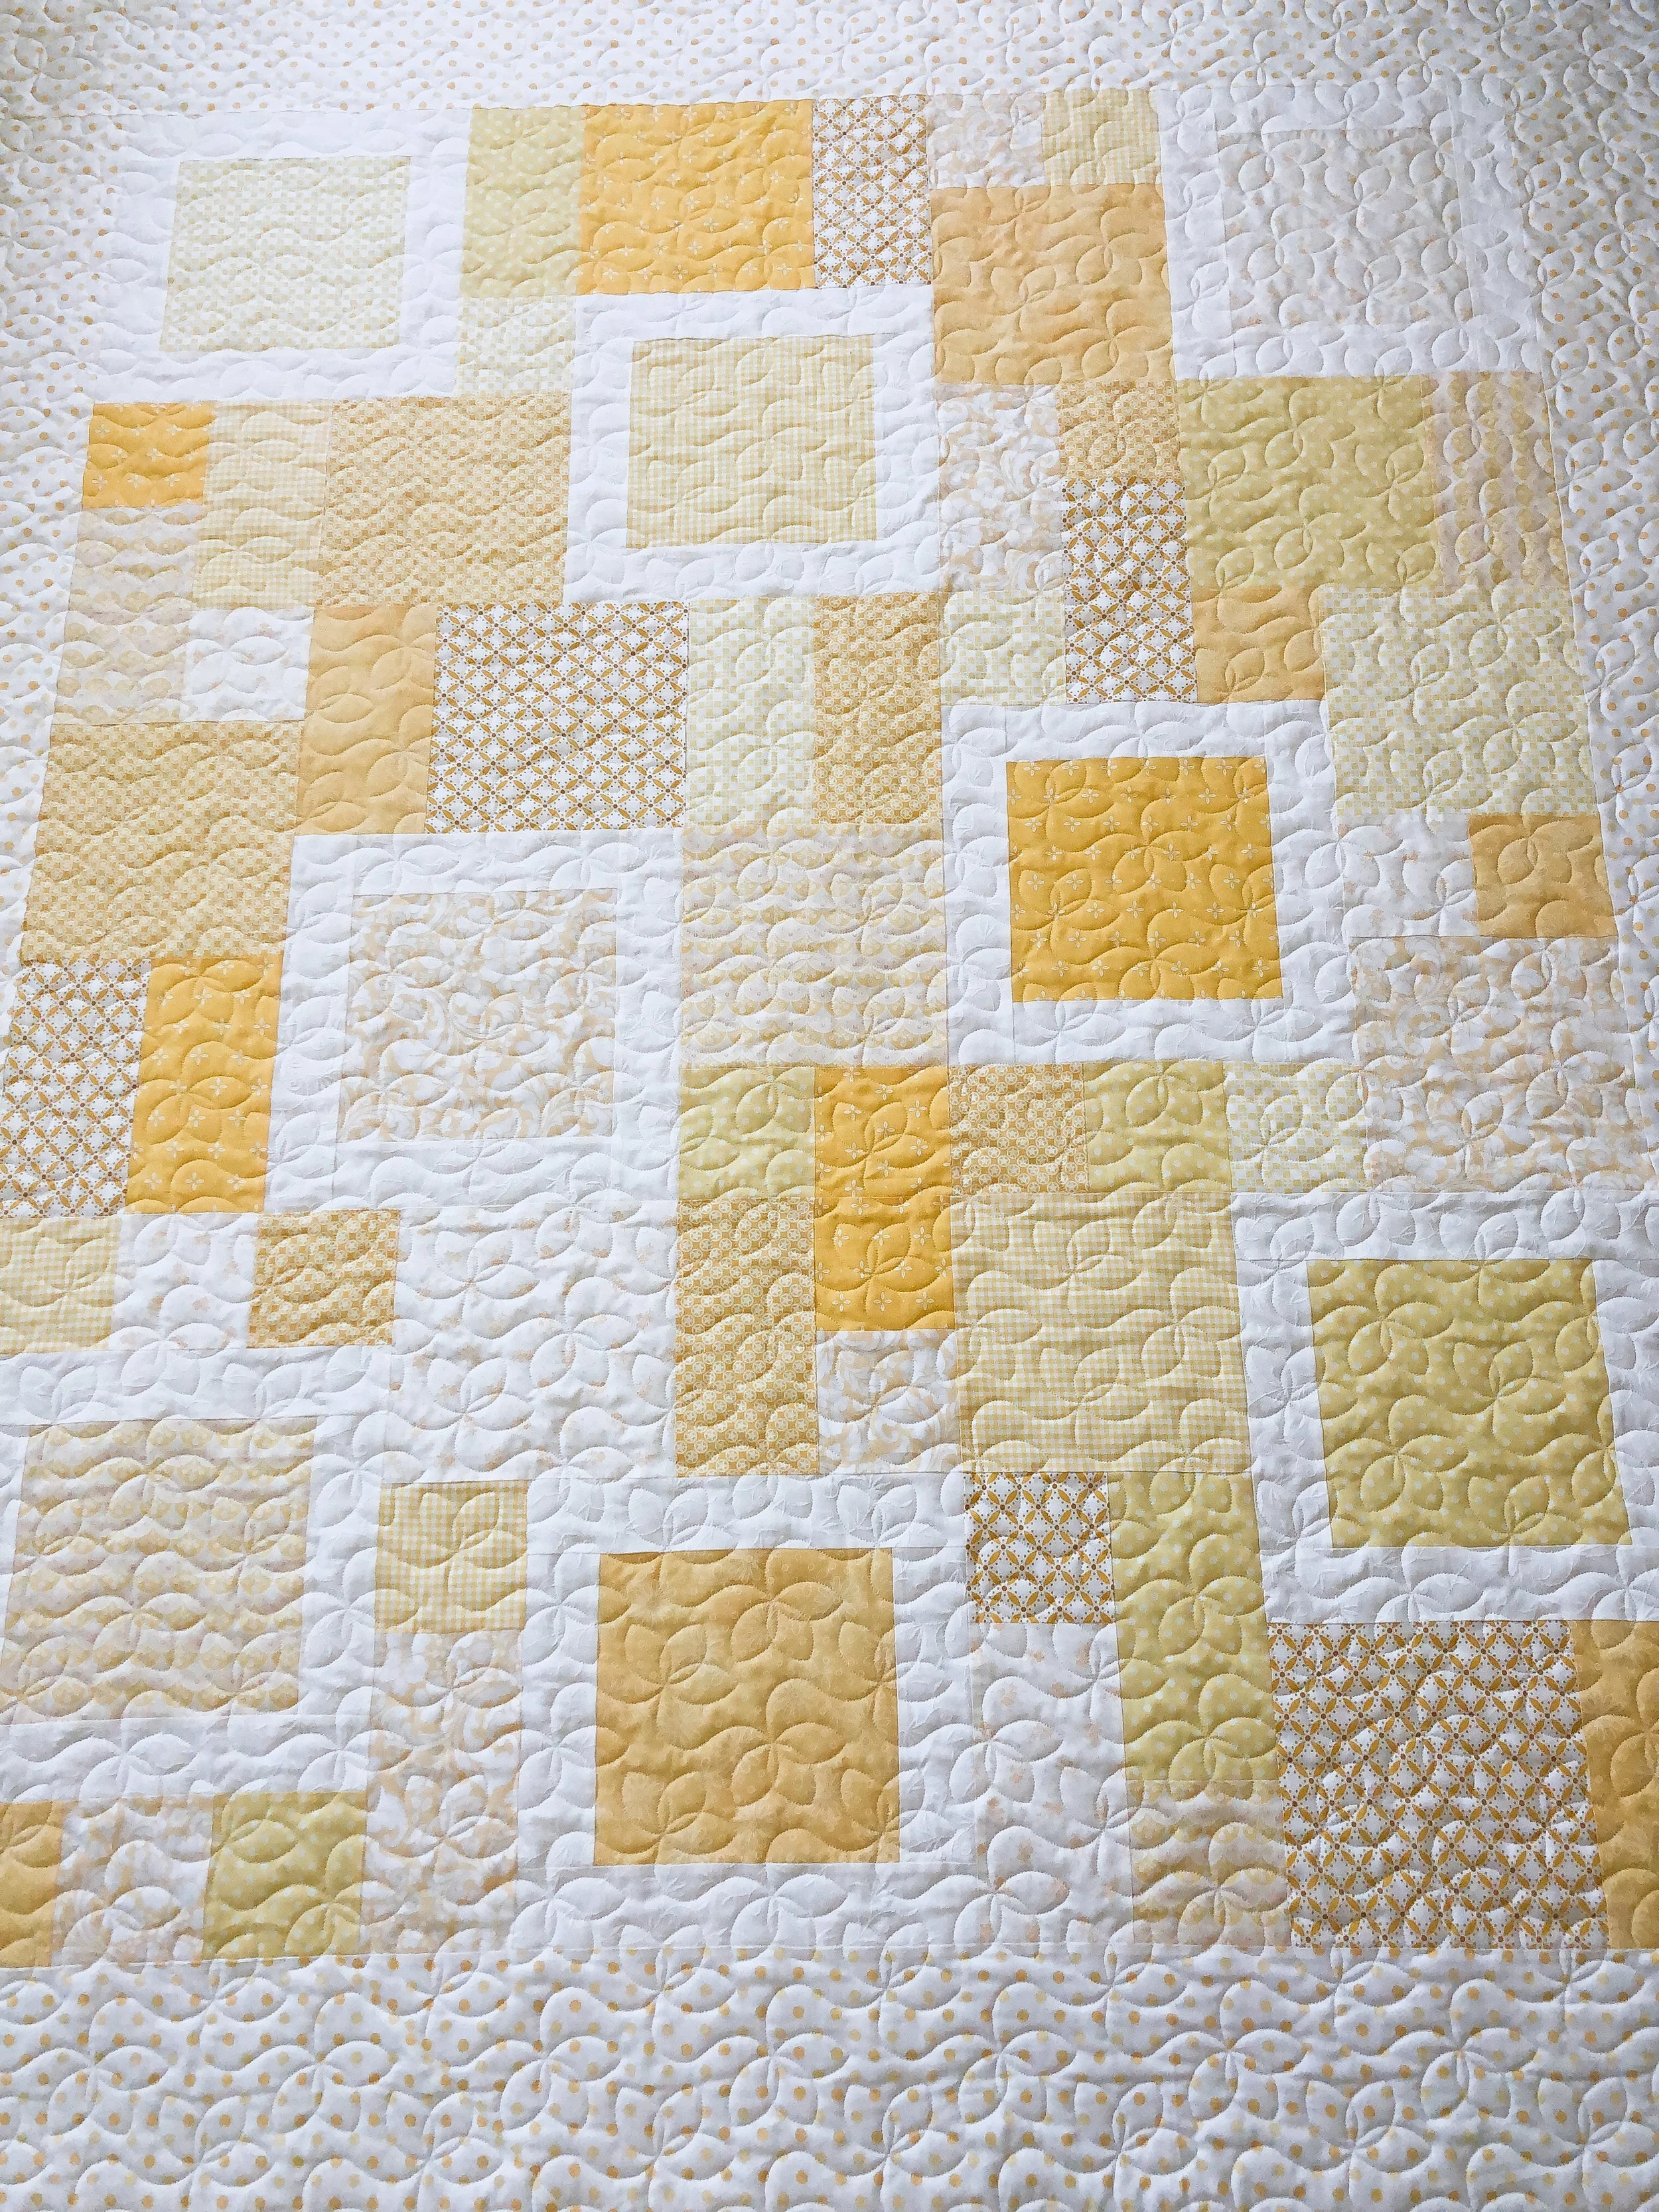
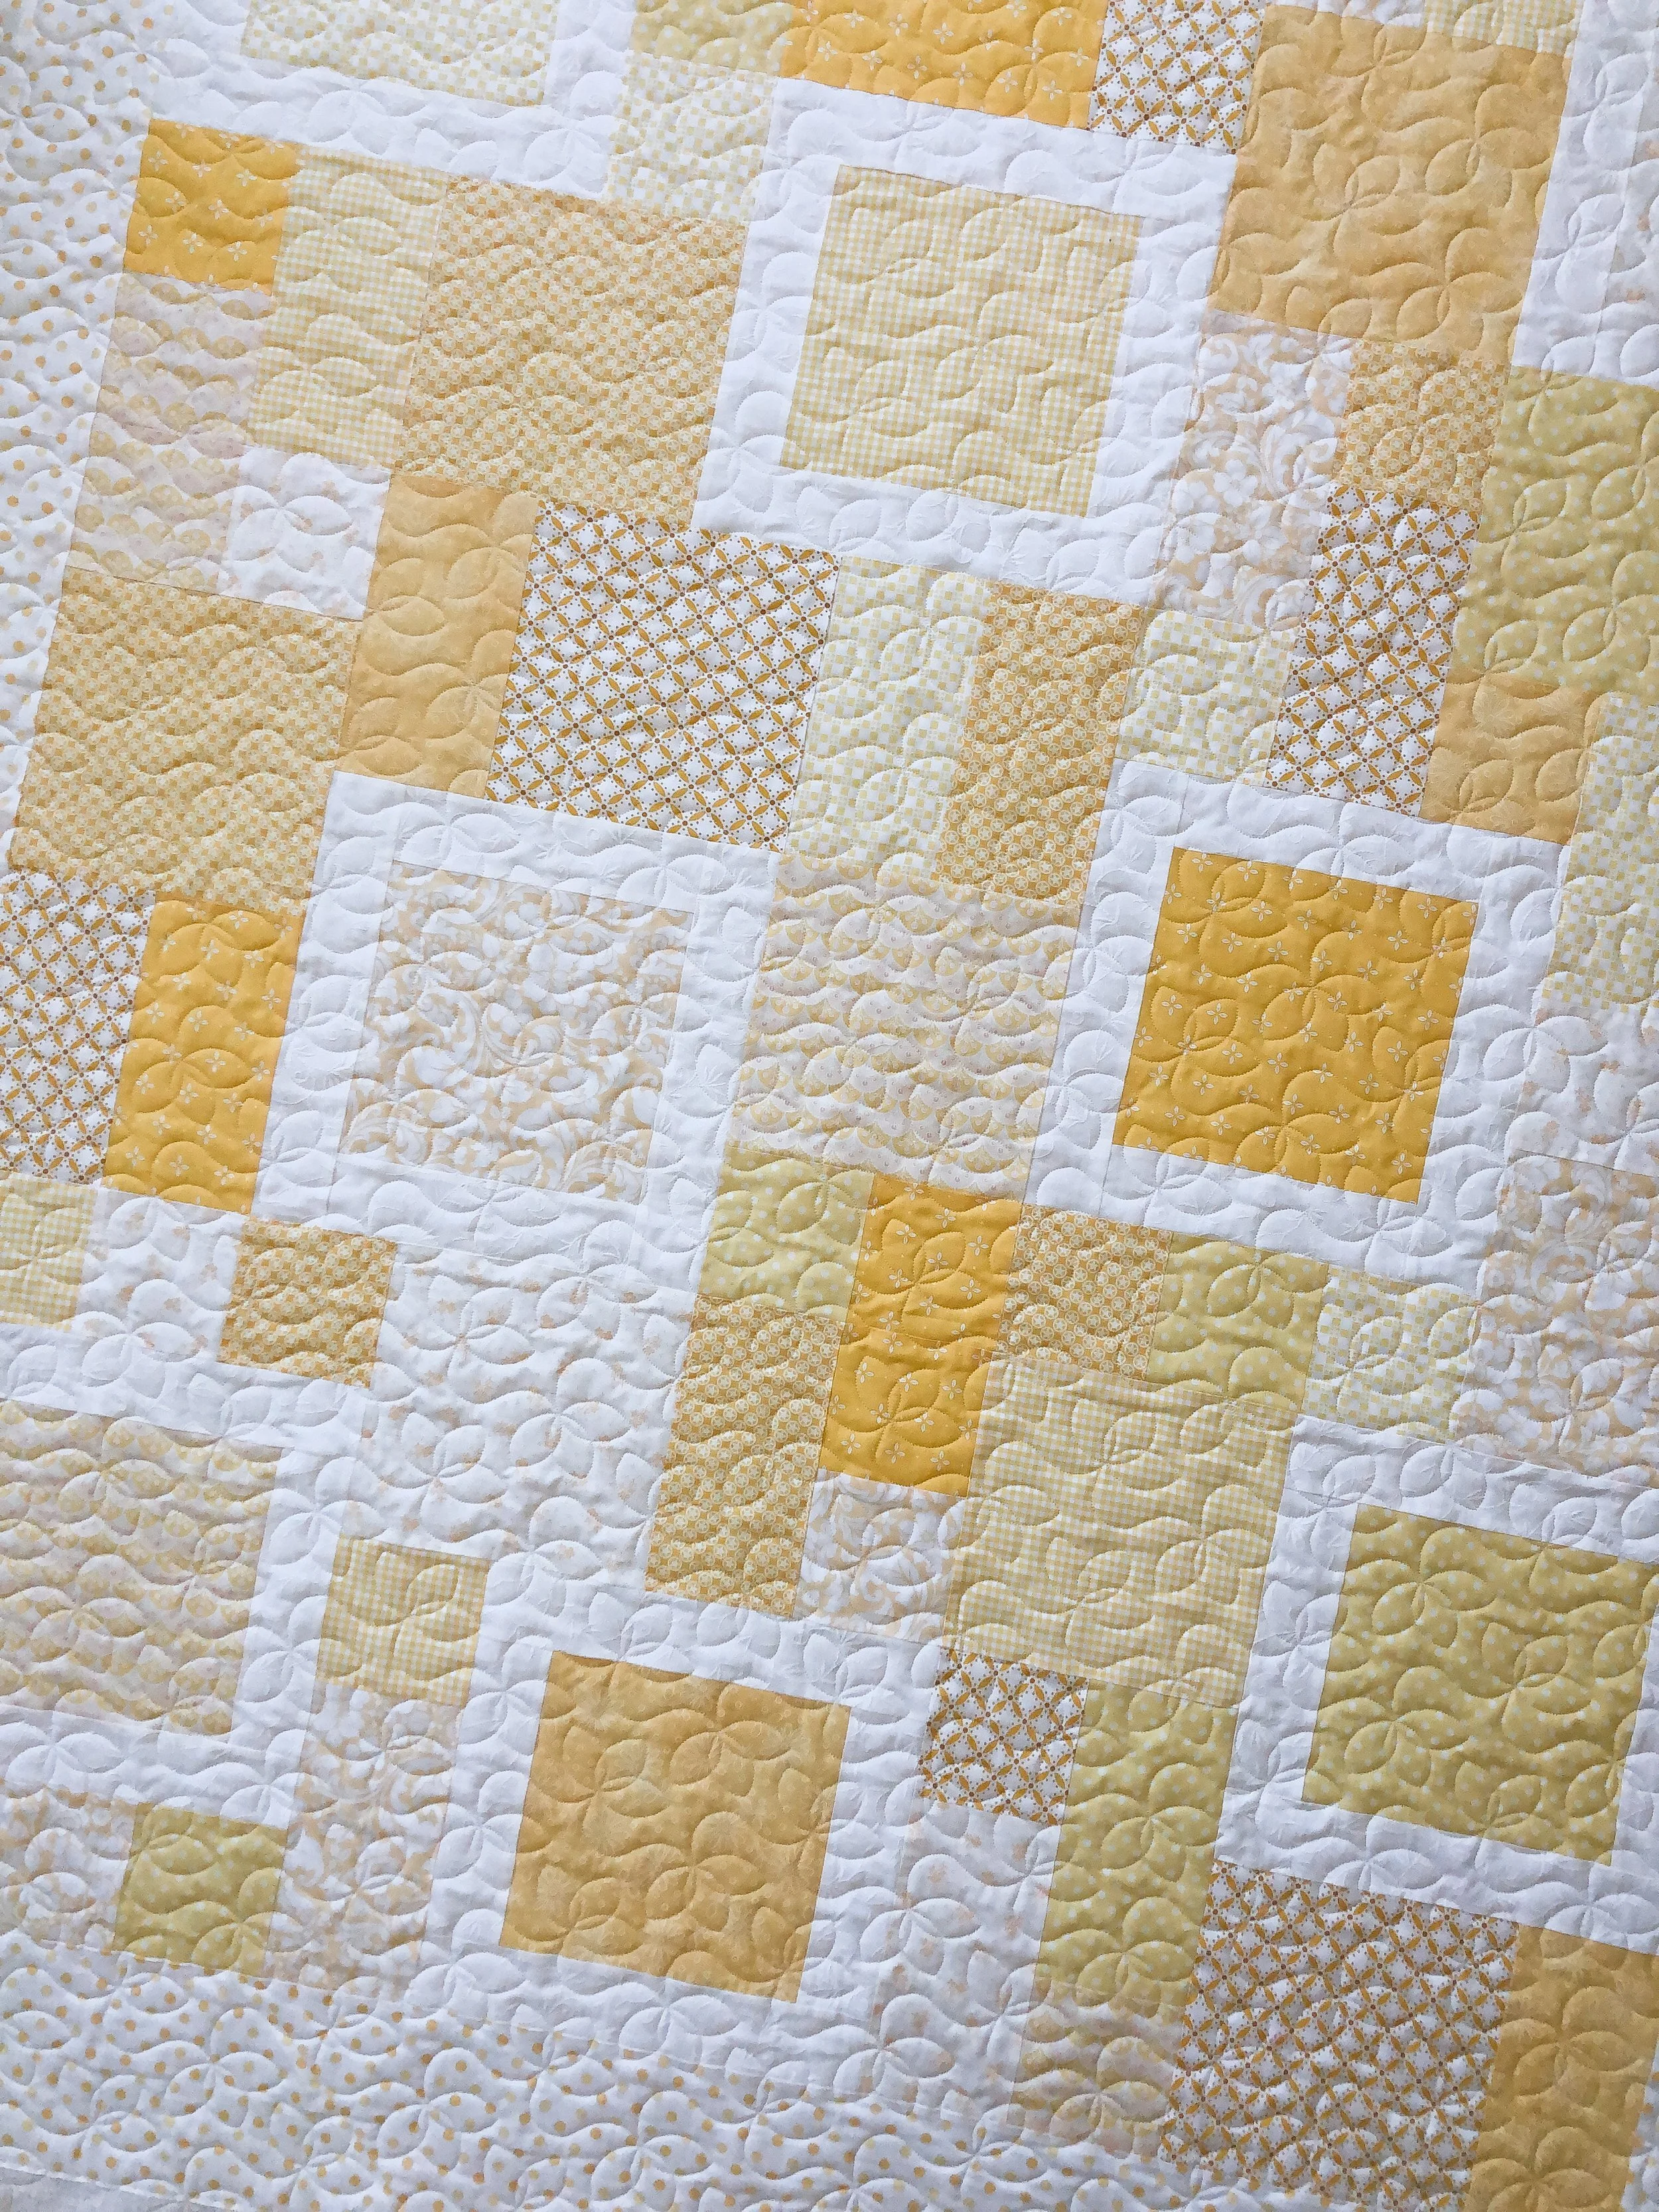
The pattern is called Perfect Ten by Swirly Girls. Such a fun pattern!!!
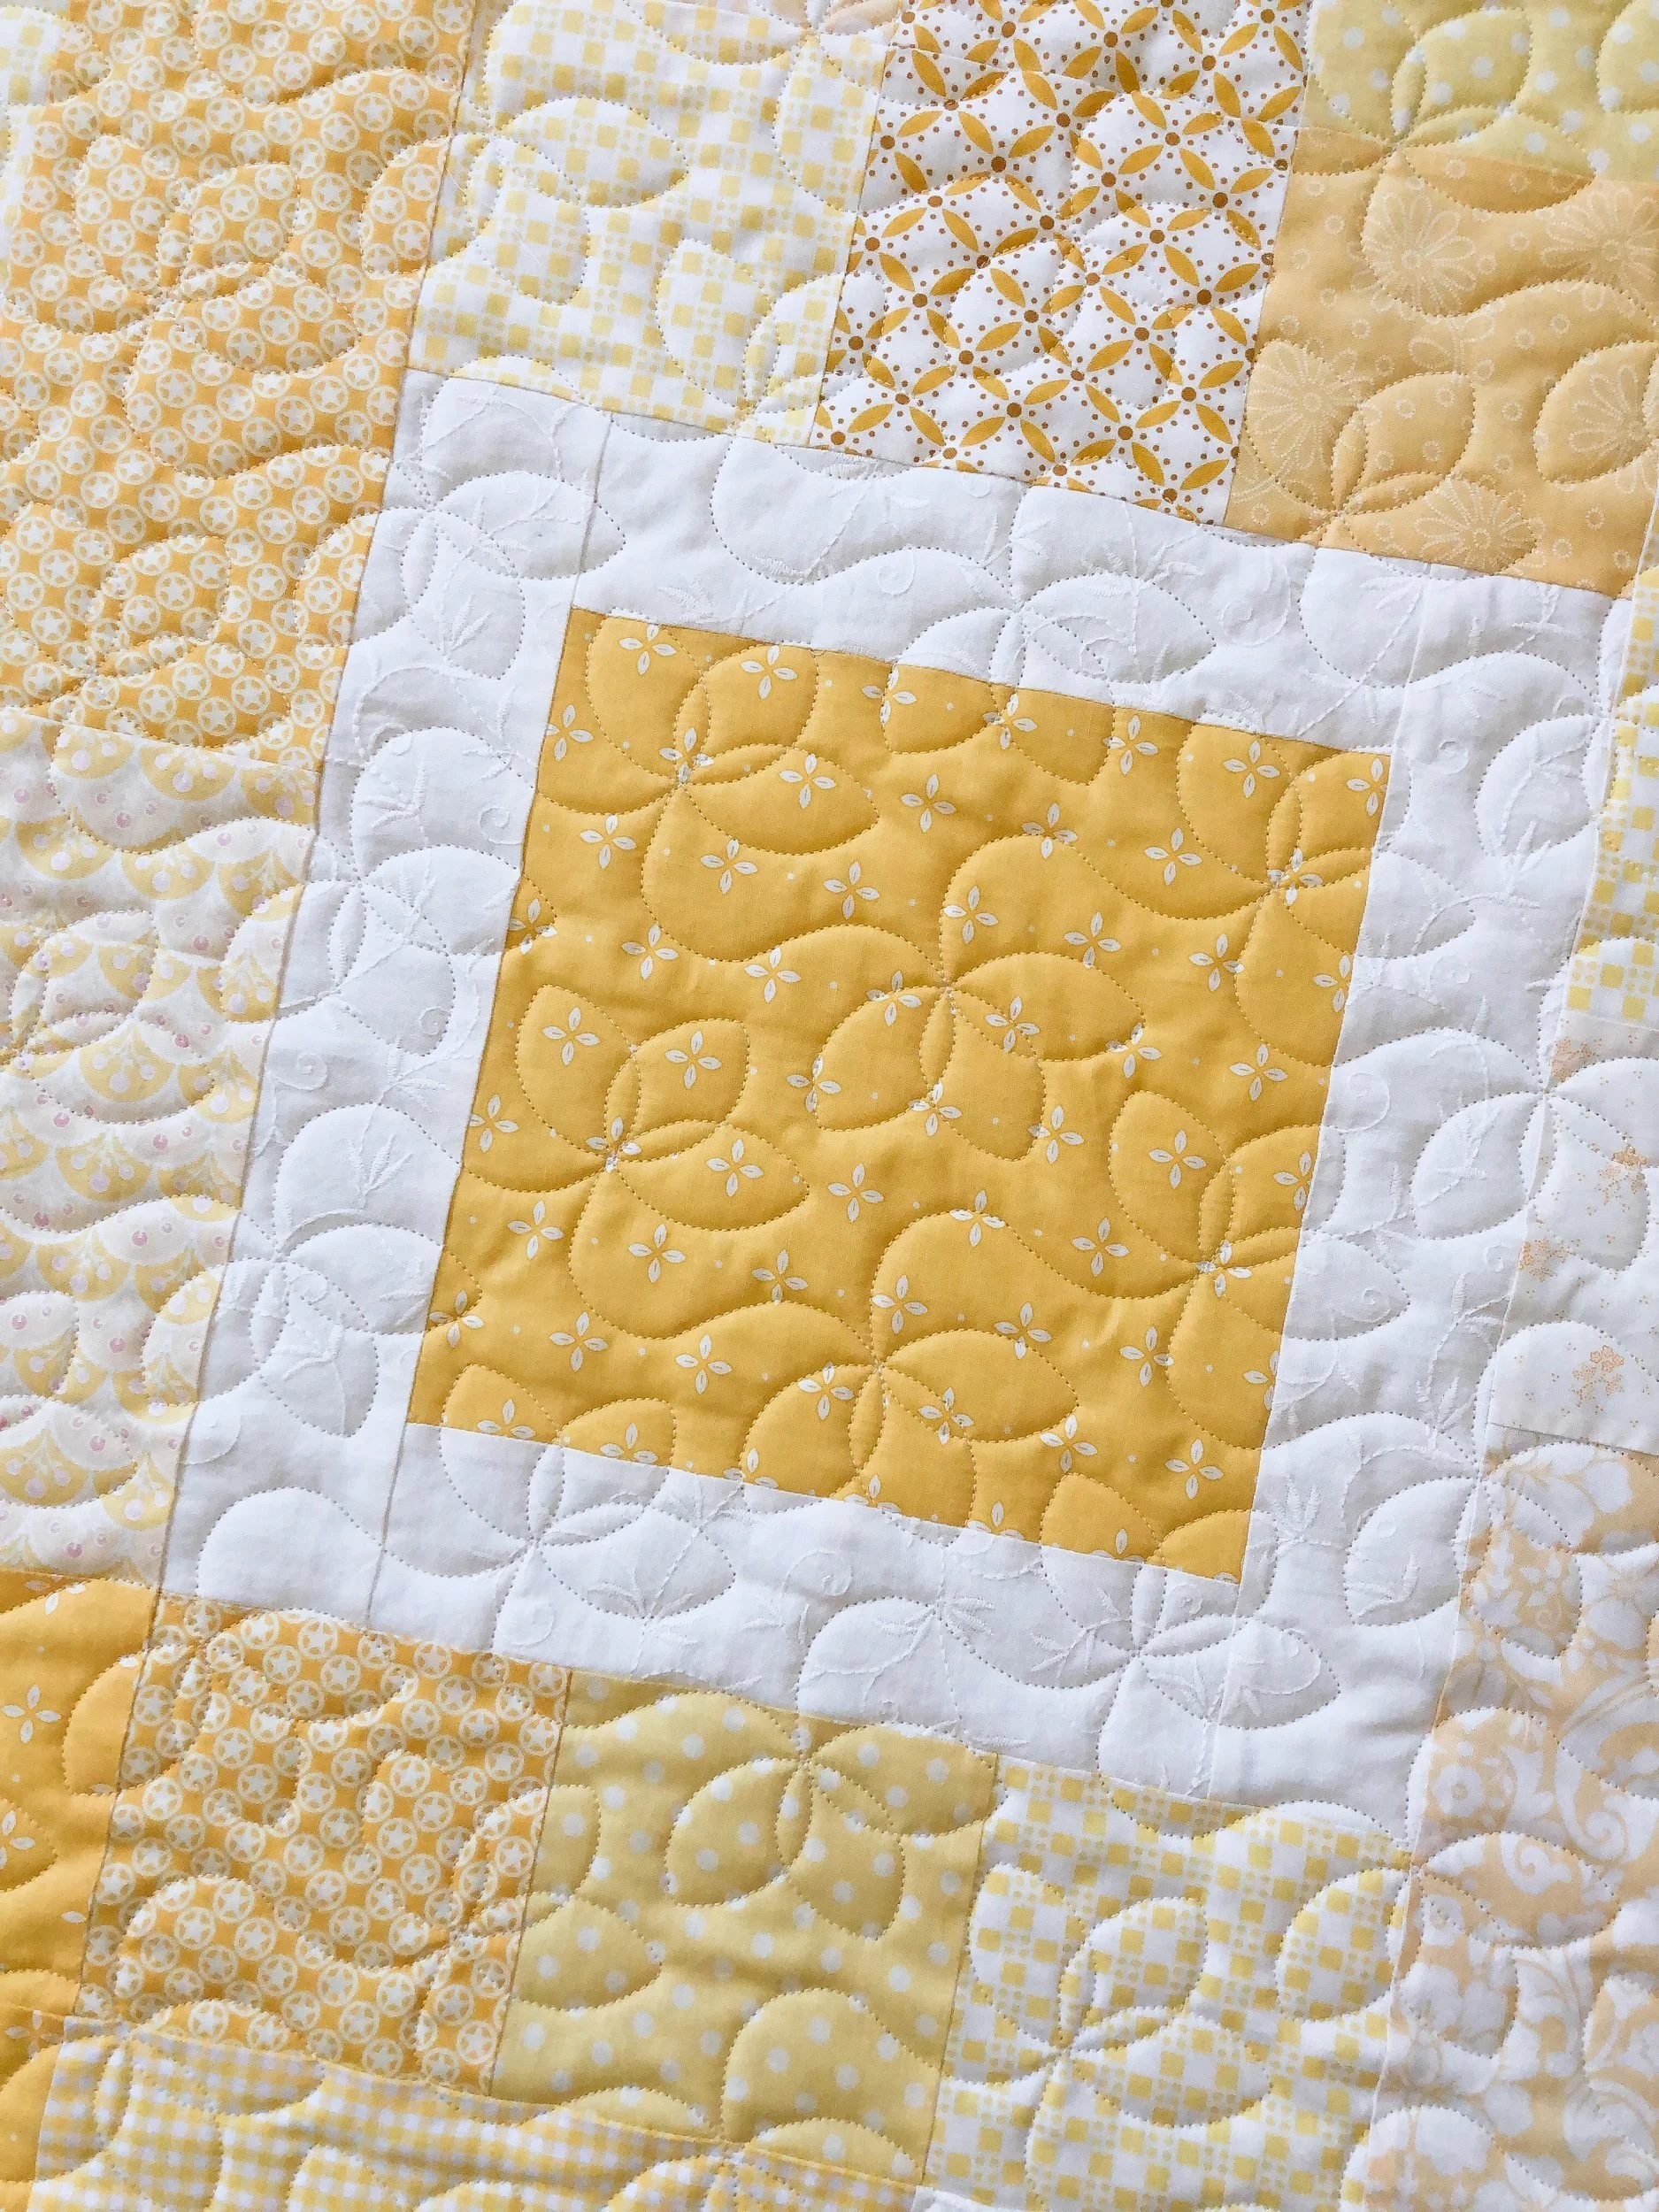
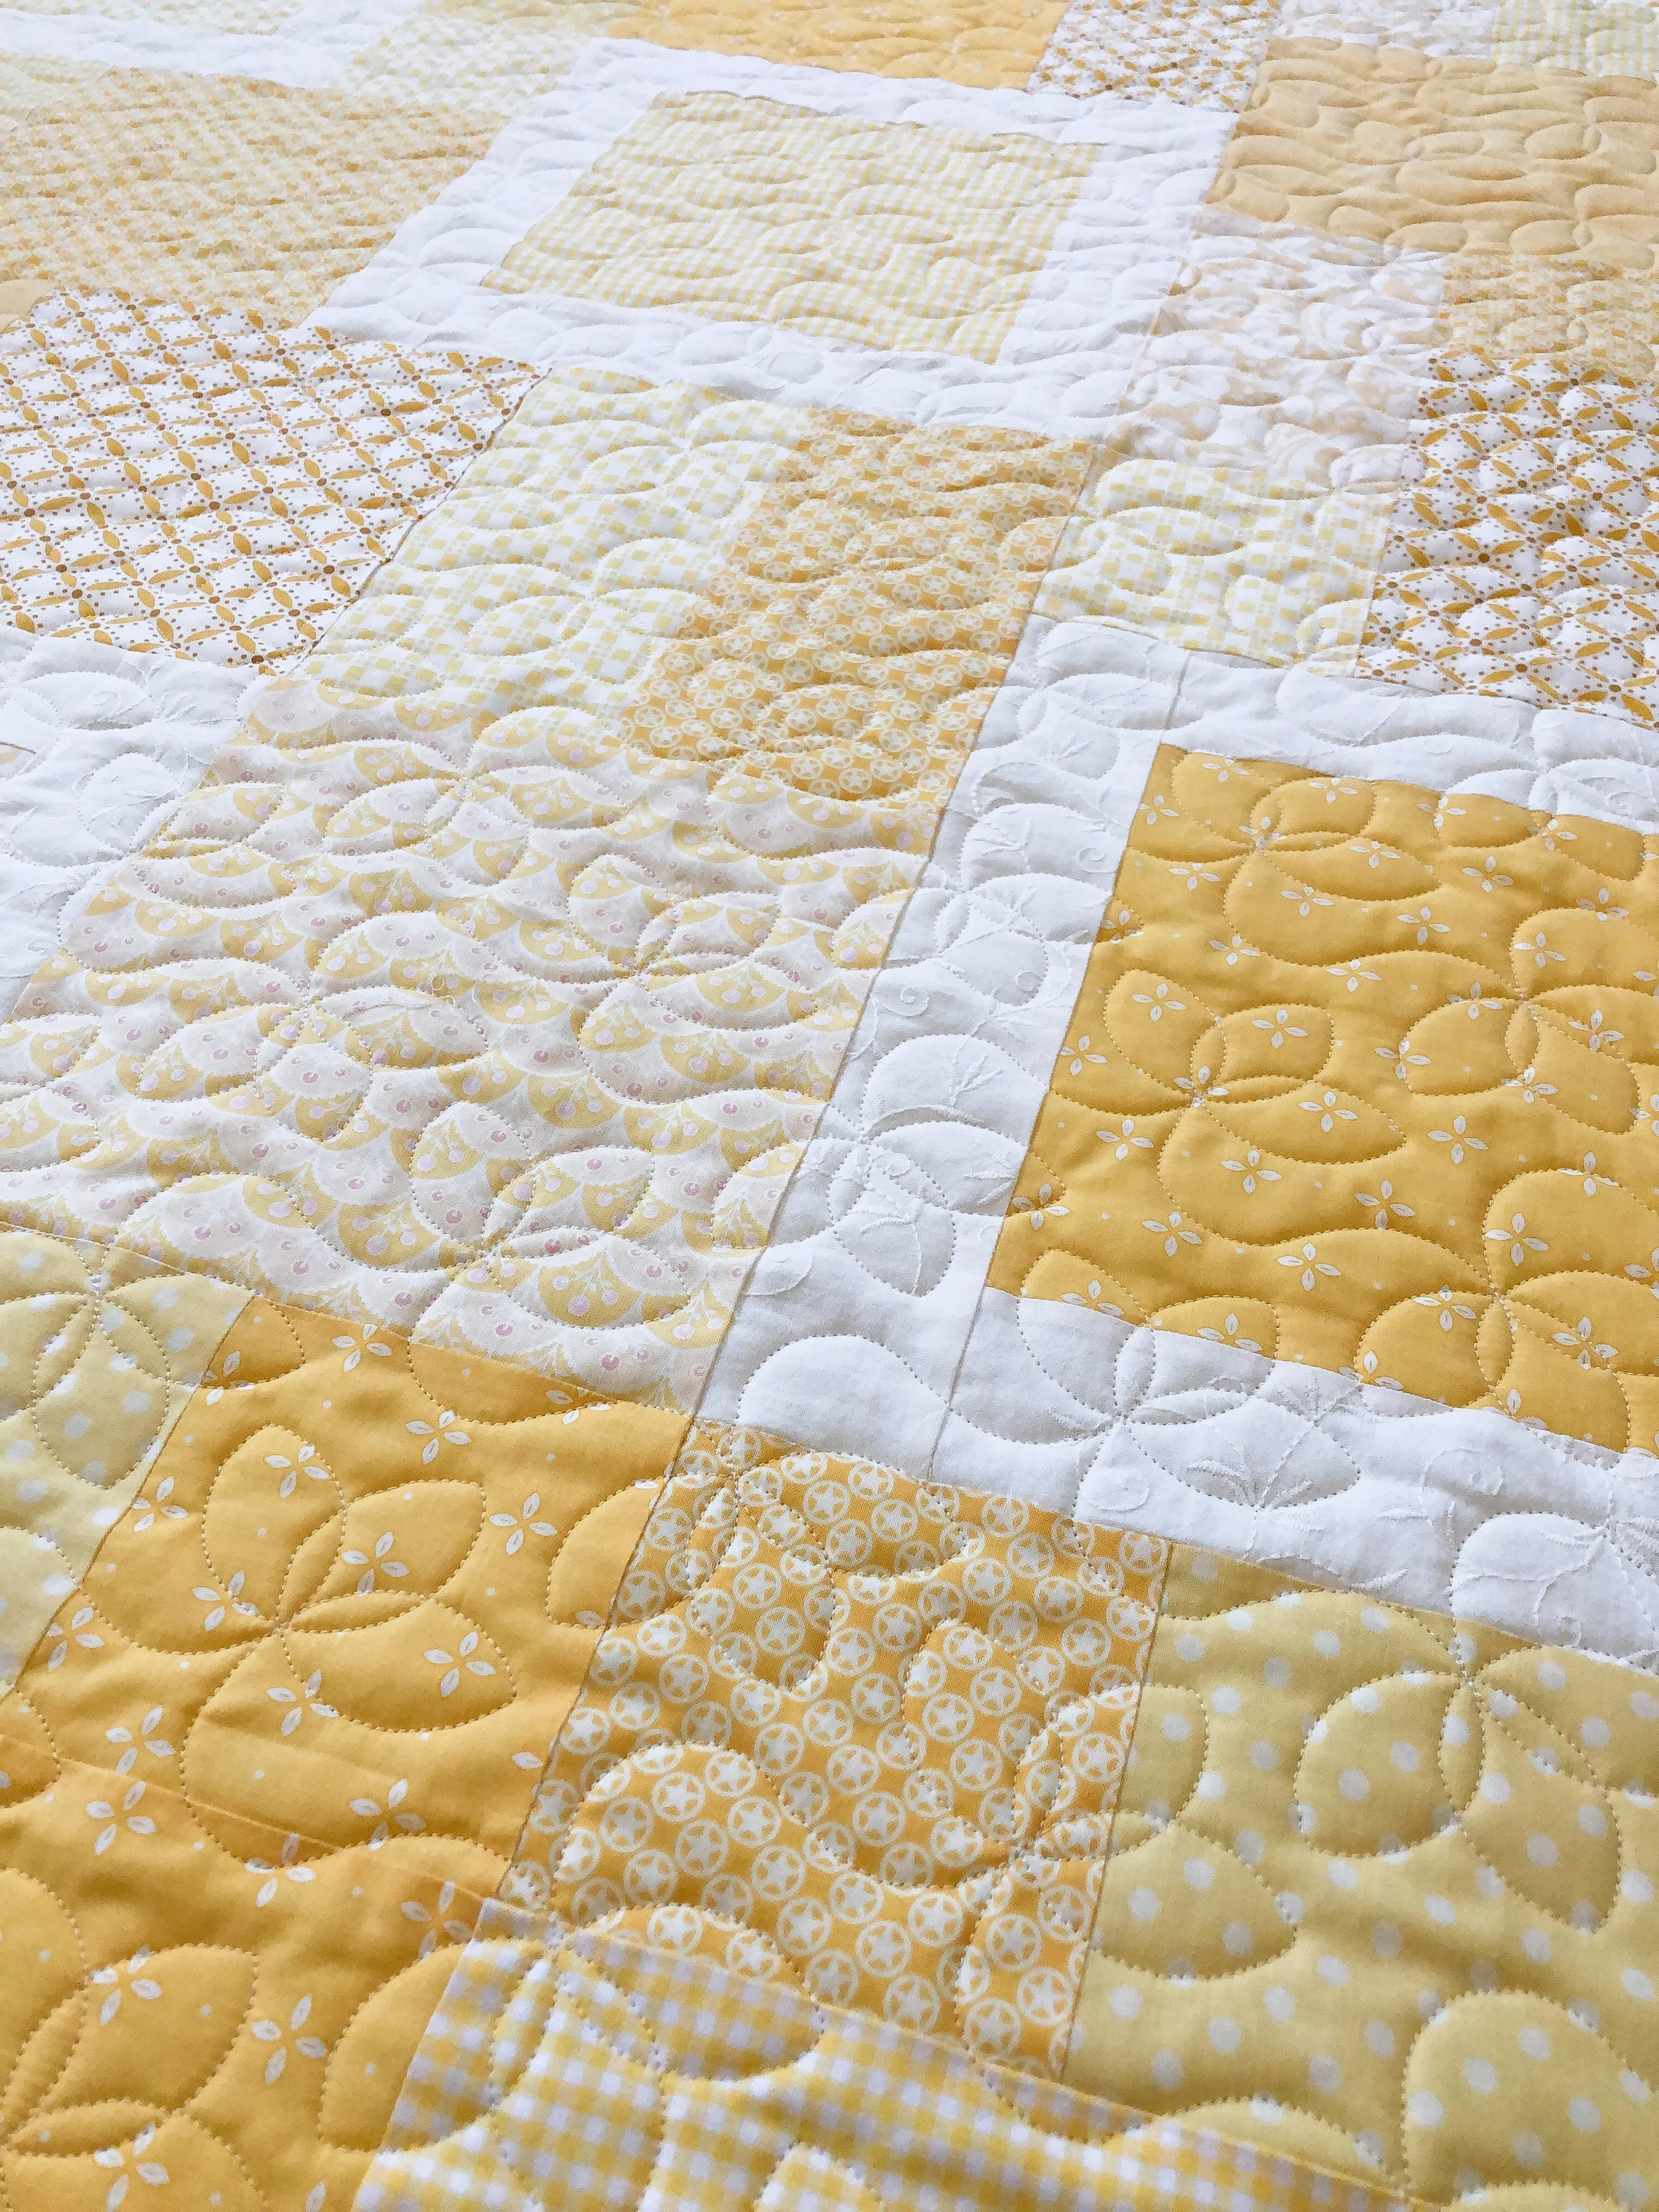
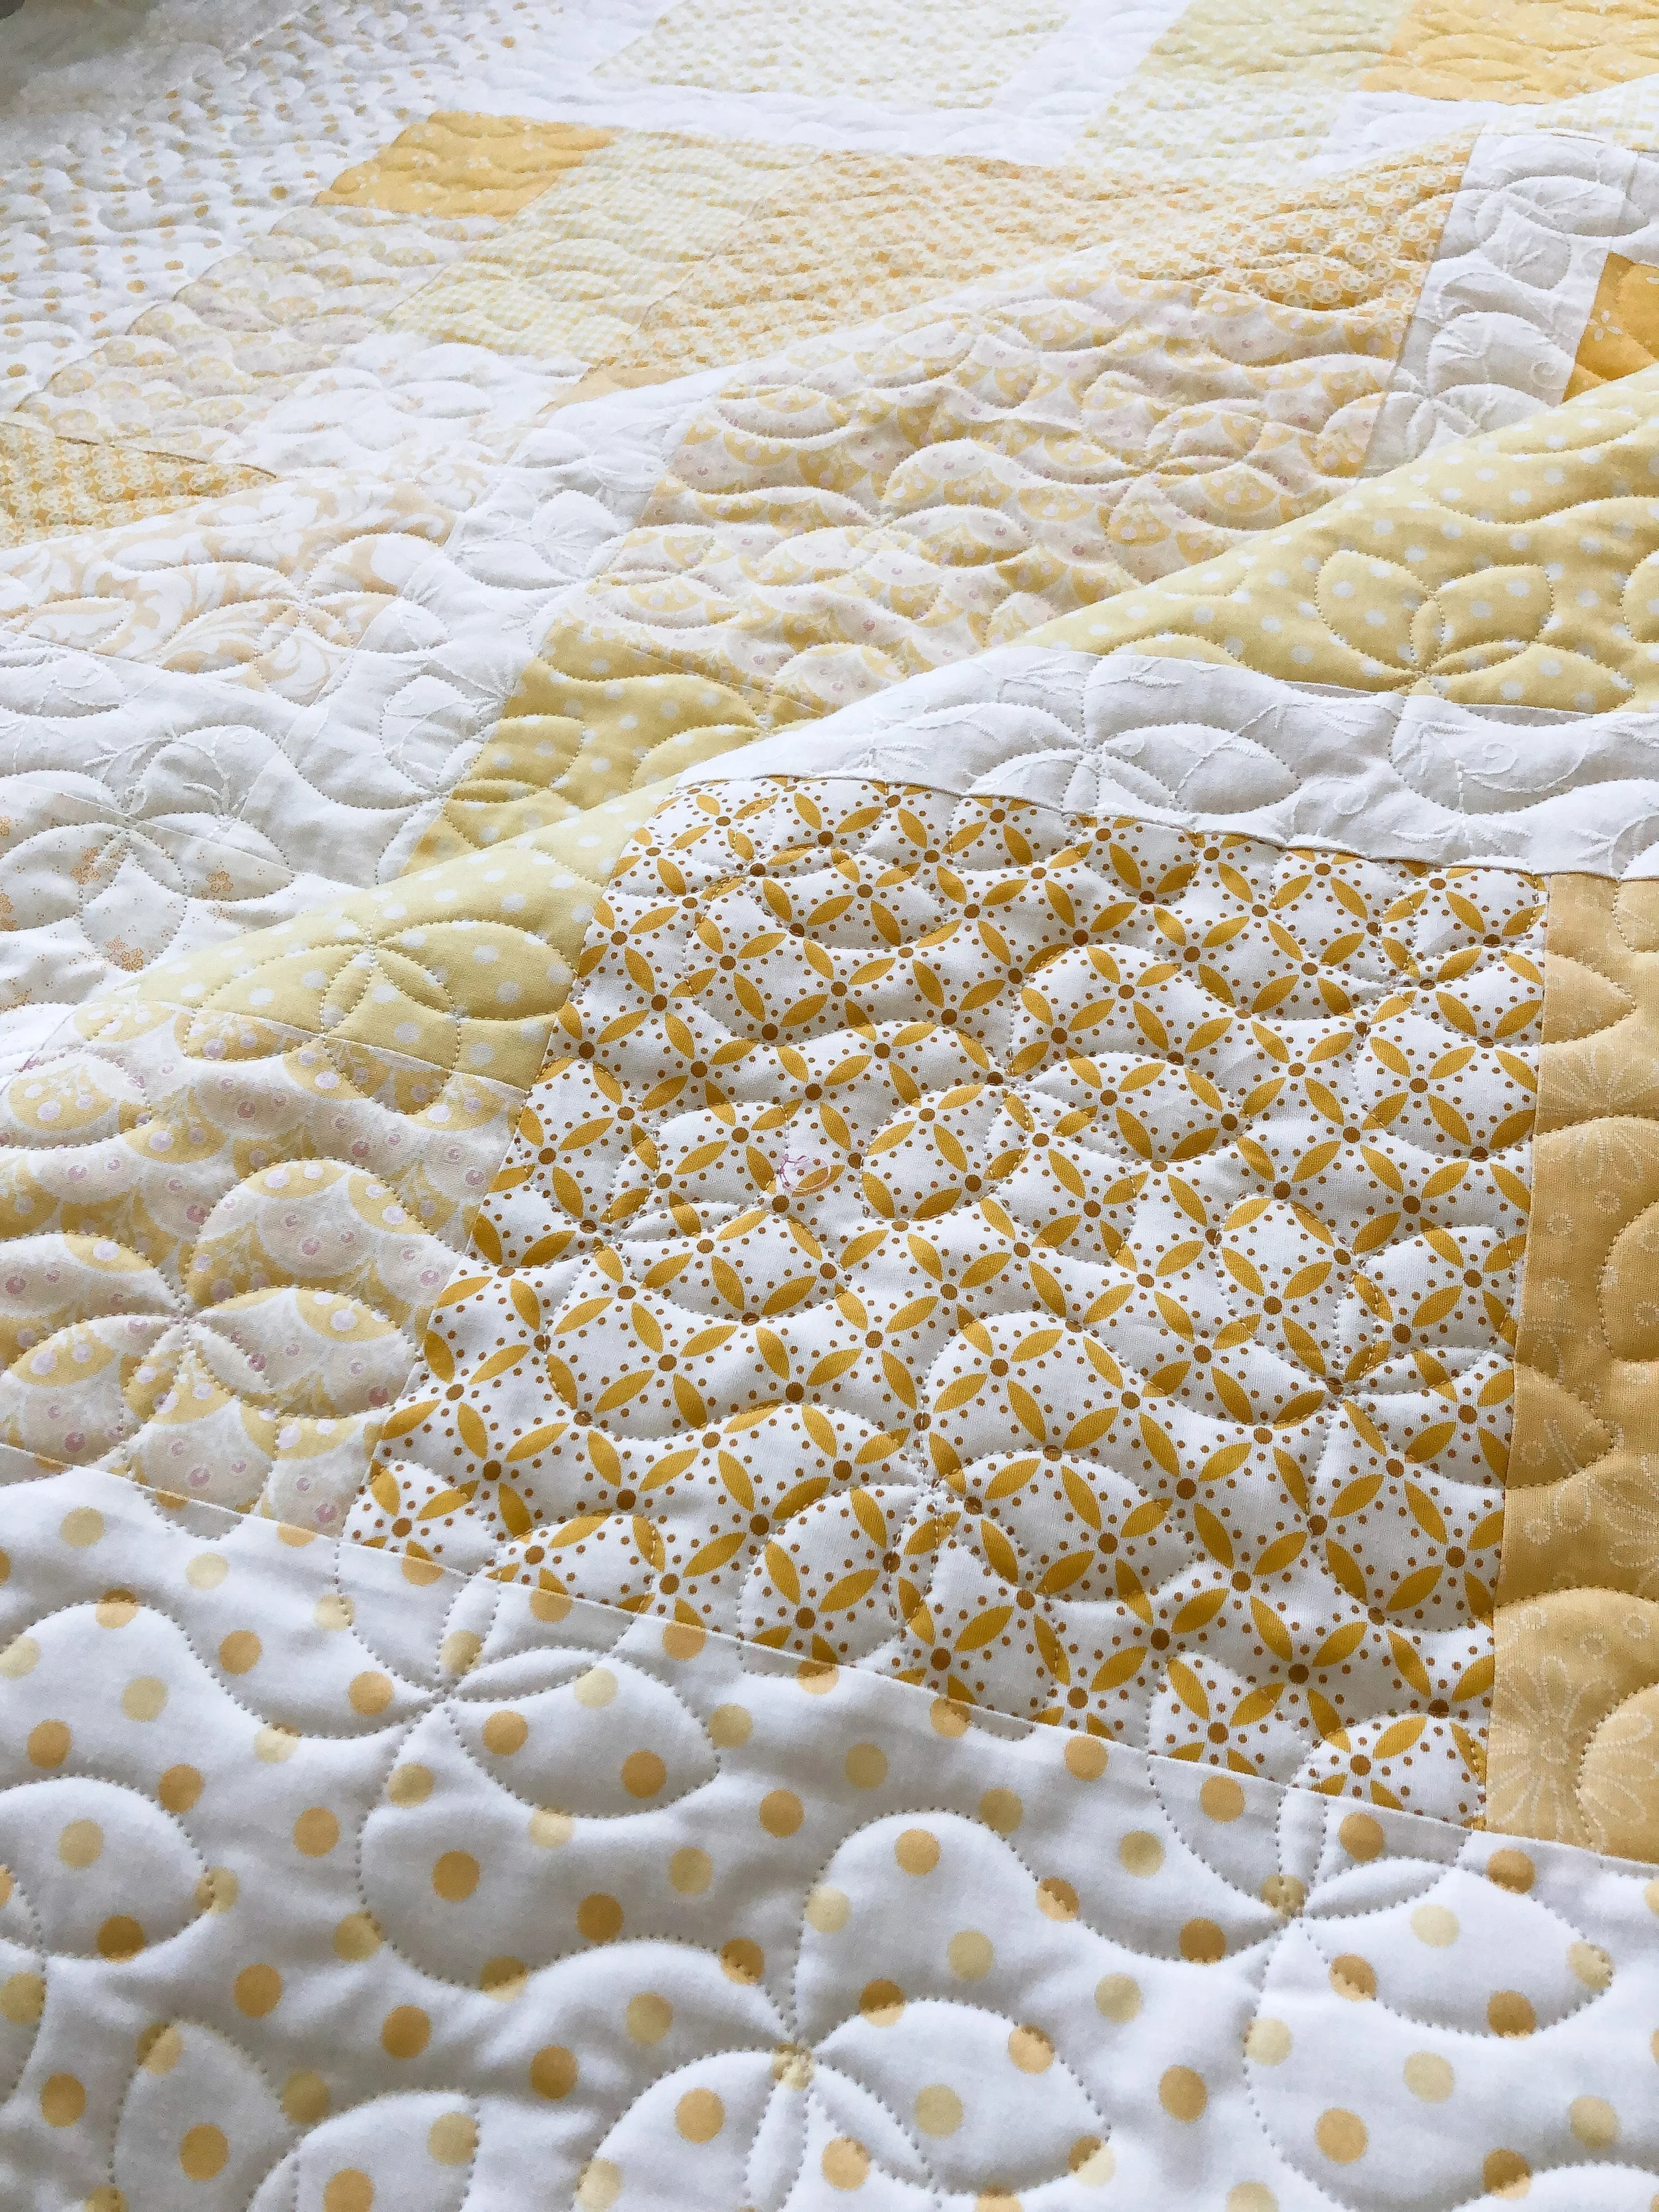
I used my new favorite Triplet panto, designed by my good friend Shelly’s mom from Ma Tante Quilting. It’s a beautiful stitch out and look at how cheerful it is. It’s the perfect texture for this quilt.

I used my favorite Natural White Omni thread from Superior Threads and 8020 cotton poly blend batting from Winline Textiles out of Ogden Utah.
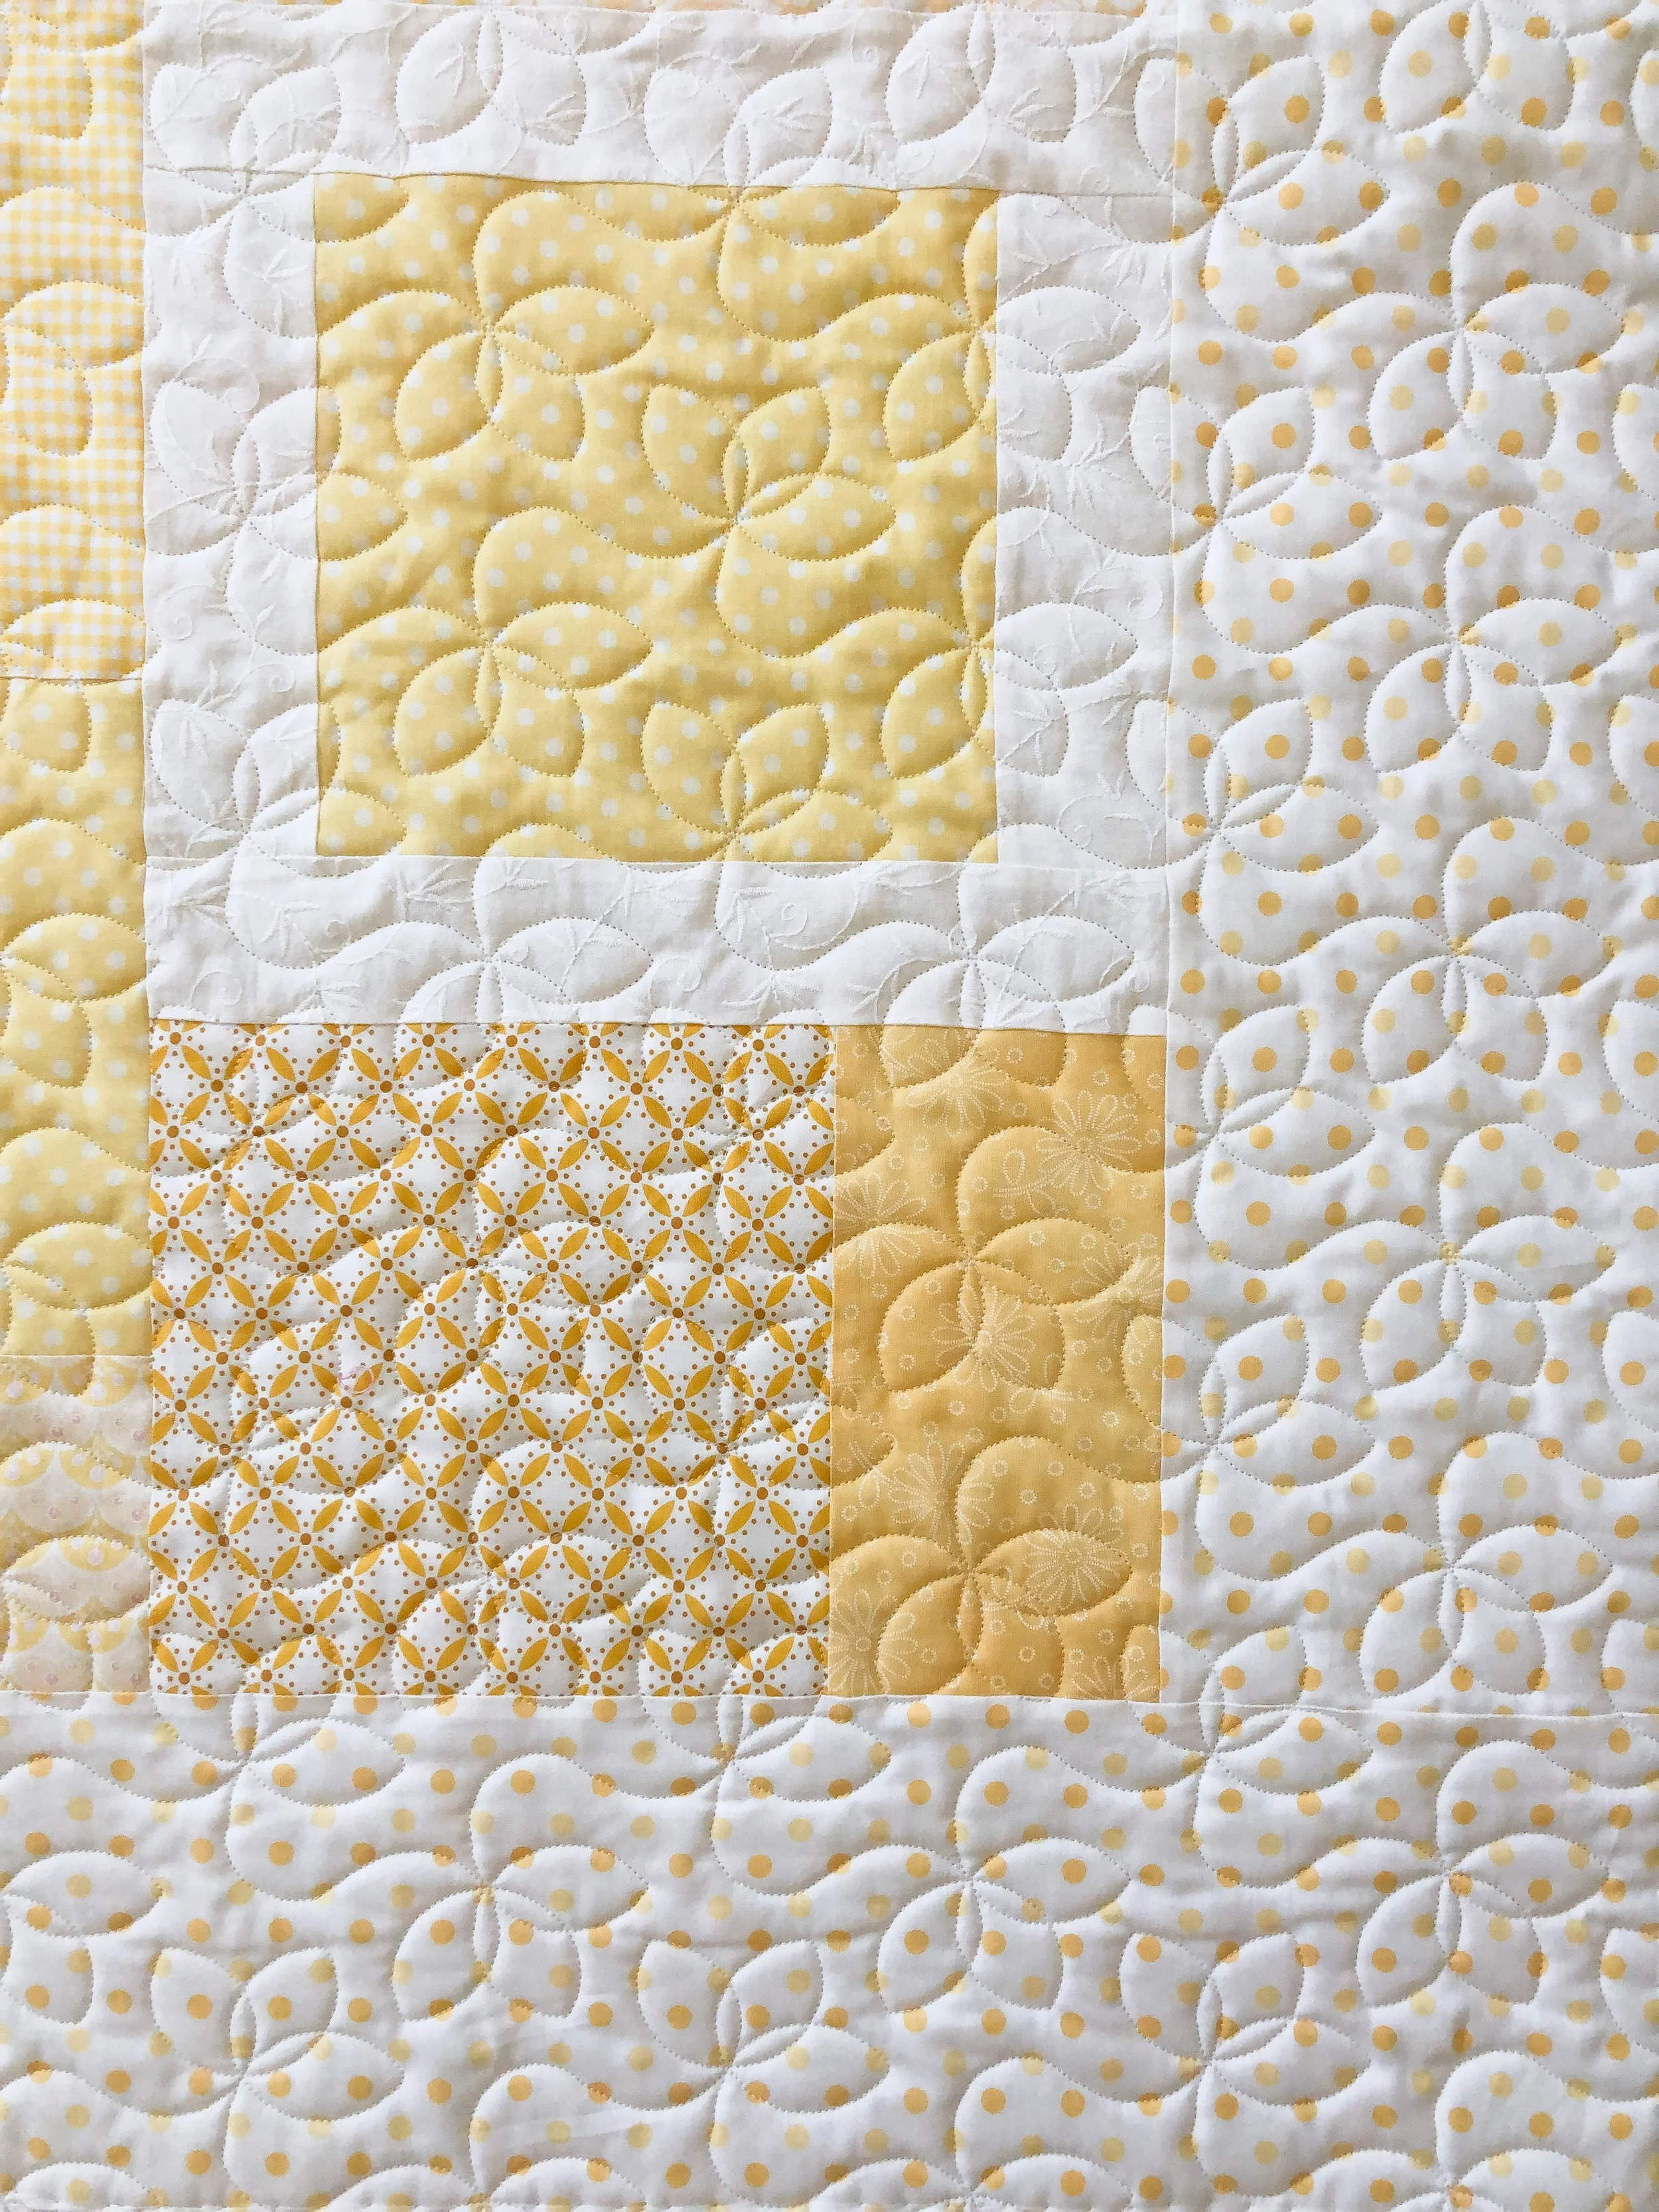
I love the mixture of prints that Laurie used. So soft and sweet.
One more look at the layers of that beautiful texture.
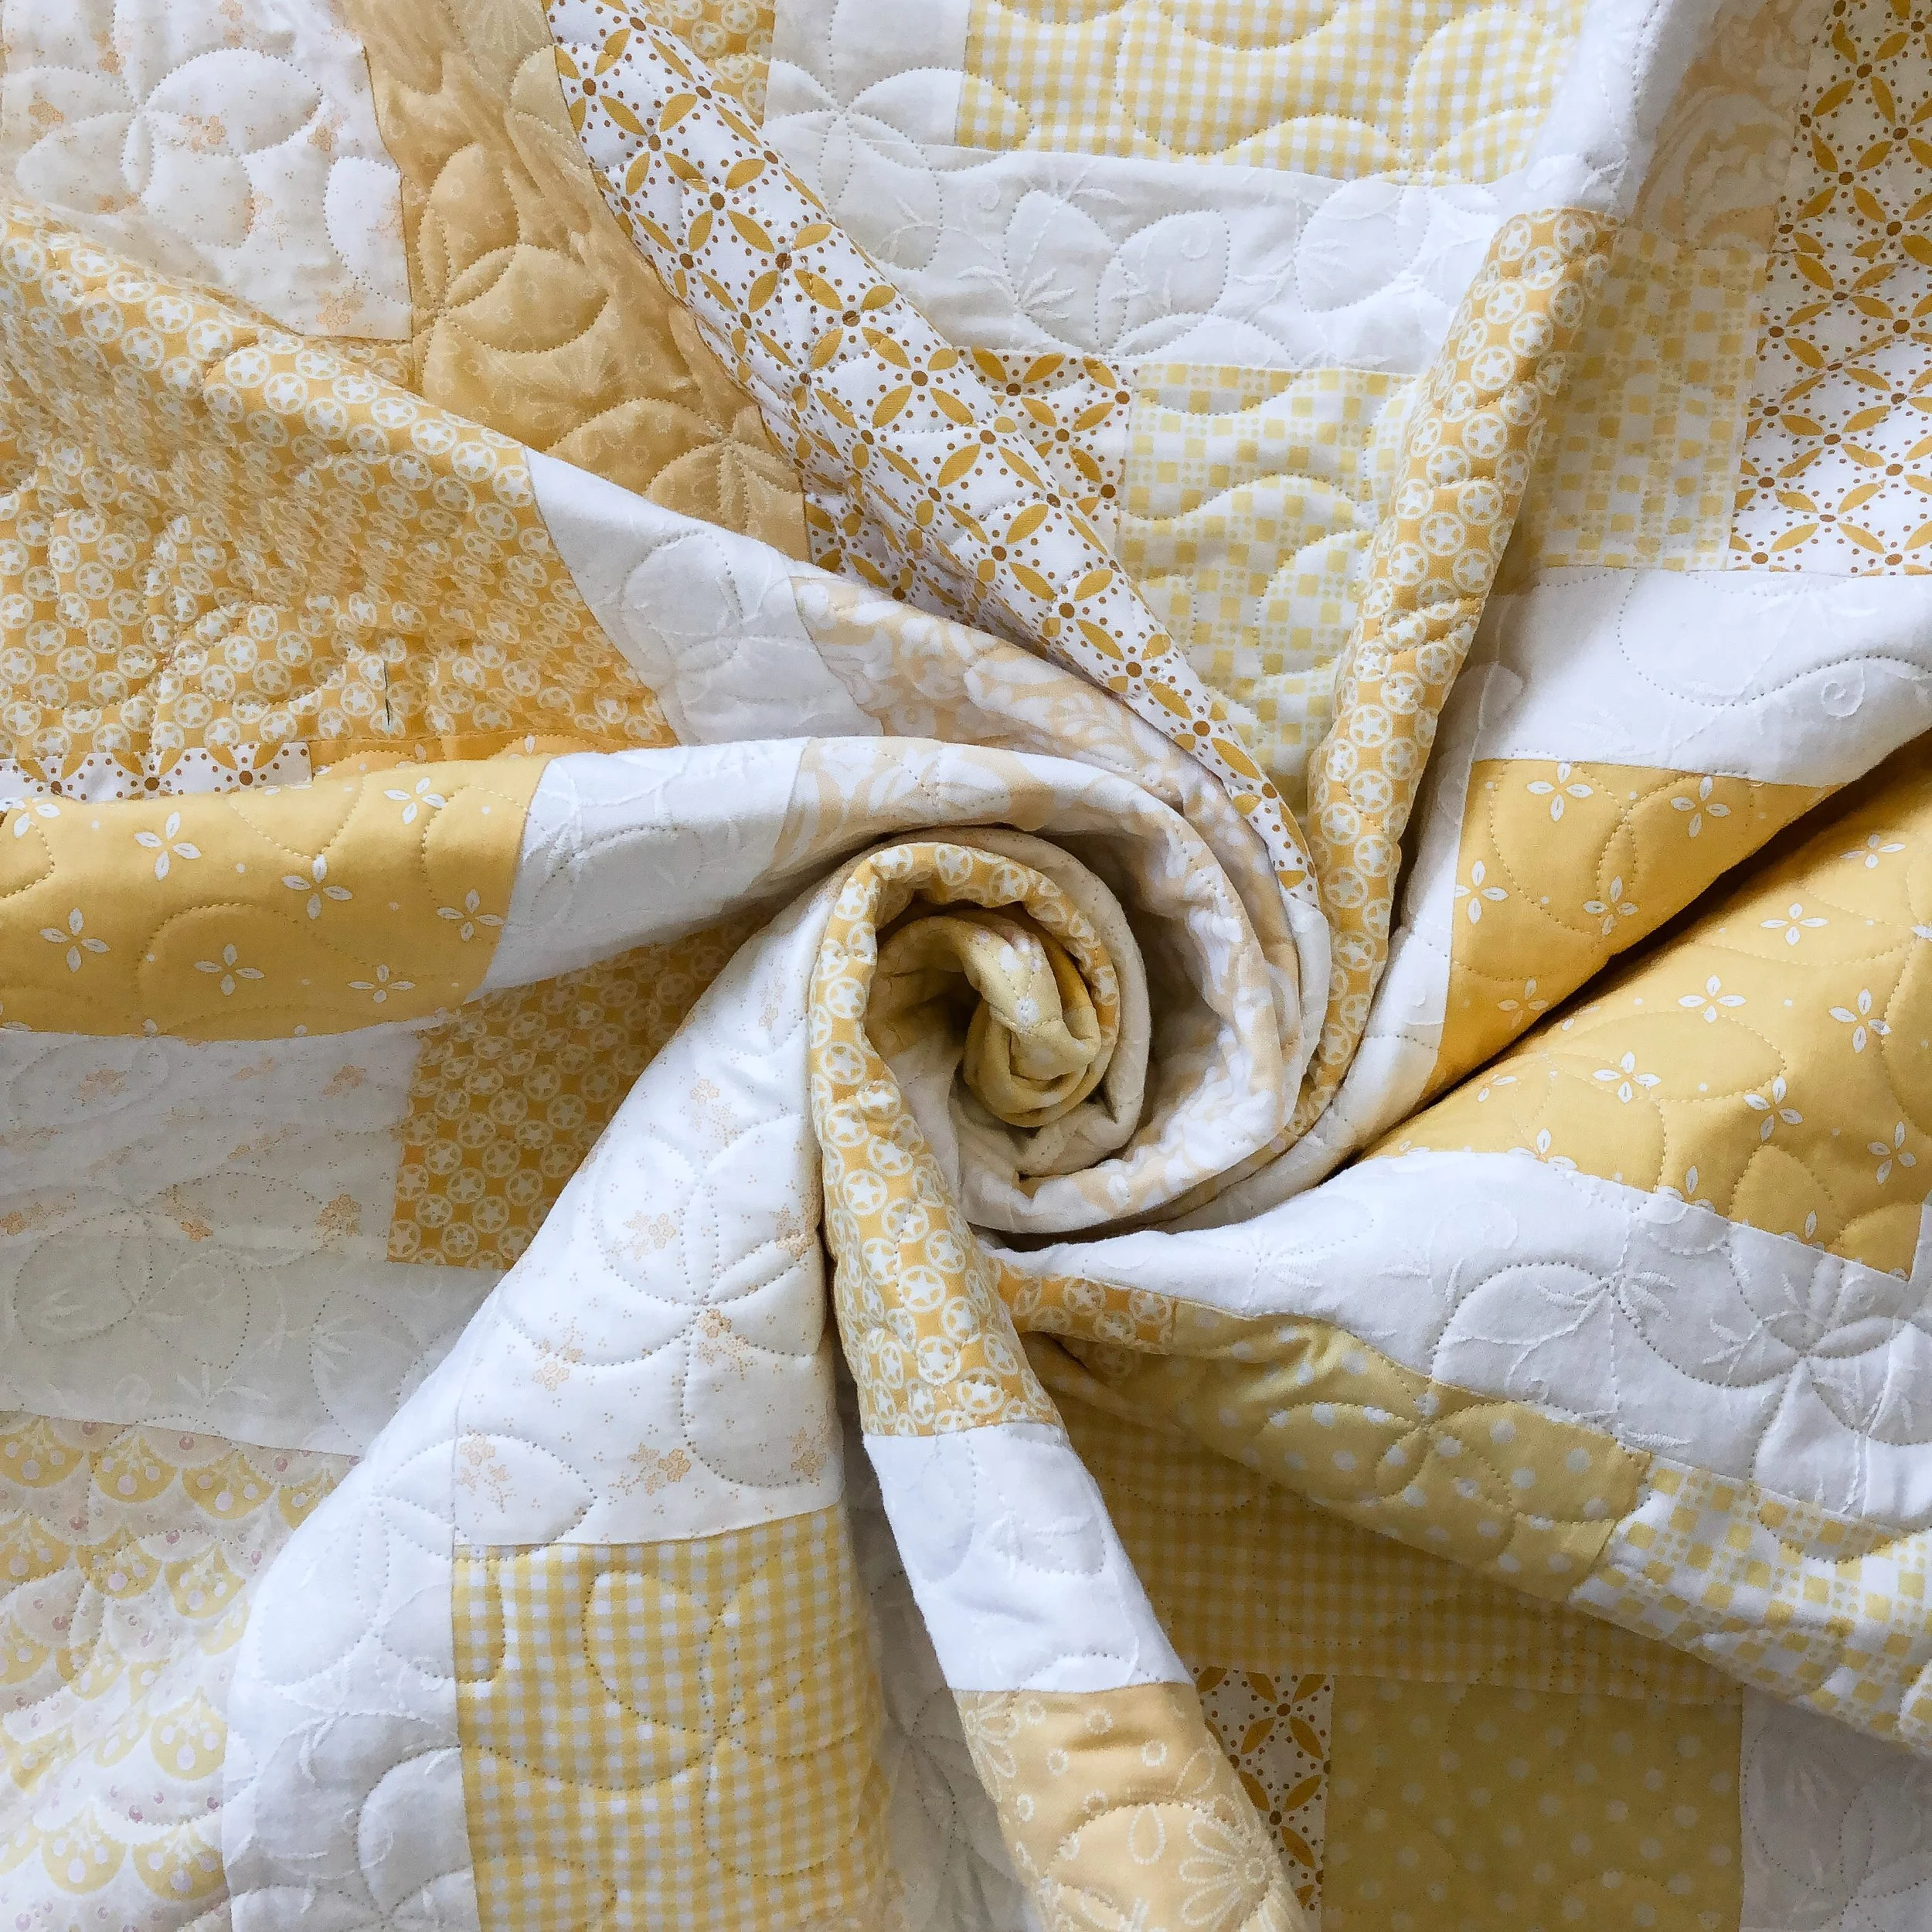
Finishing off with a quilt swirl.
If you’d like to have me quilt for you, please send me an email and I’ll add you to my list. quiltingit@gmail.com
Happy quilting! • Leisha


Ineke’s stunning Get Together quilt
Hello Friend,
I have a stunning quilt to share with you!! Amazing, right?!?! Look at all those incredible pieces. This isn’t a big quilt either.
Ineke made the center of the Get Together quilt, that was featured on the front cover on the April 2020 issue of the American Patchwork and Quilting magazine. She added borders to fit and wow, right?!?!! The designer is Diane Tomlinson.
I used a tan Omni thread from Superior Threads, and my favorite 8020 cotton poly blend fabric from Winline textiles.
Can you believe all those tiny pieces?!?! If I remember right, those flying geese were 1” wide. Wow!!

I used Aphrodite by Patricia Ritter at Urban Elementz. It’s such a beautiful feather with perfectly placed circles. Love the texture!!
I wish you could see all those pieces in person. My clients make the most beautiful quilts!!
Another close up.

The backing…all that gorgeous quilty texture.
Would you like to have something quilted? Send me an email and I’ll get you added to my list. Thanks for stopping by. Happy sewing… • Leisha

Laurie’s Spring Bunnies Topper
Winter is starting to come here in Utah. The mountains have snow, but thankfully it hadn’t stayed on the grass yet. Which means maybe it’s time to start working on a cheery spring topper, like this Spring Bunnies quilt that Laurie made. The pattern is part of a monthly topper kit that Riley Blake did. I actually found a few online shops that are offering it. The one linked above currently has 5 kits left. If they sell quick, do a google search and hopefully you’ll find others. If you’d like just the pattern, contact Riley Blake.
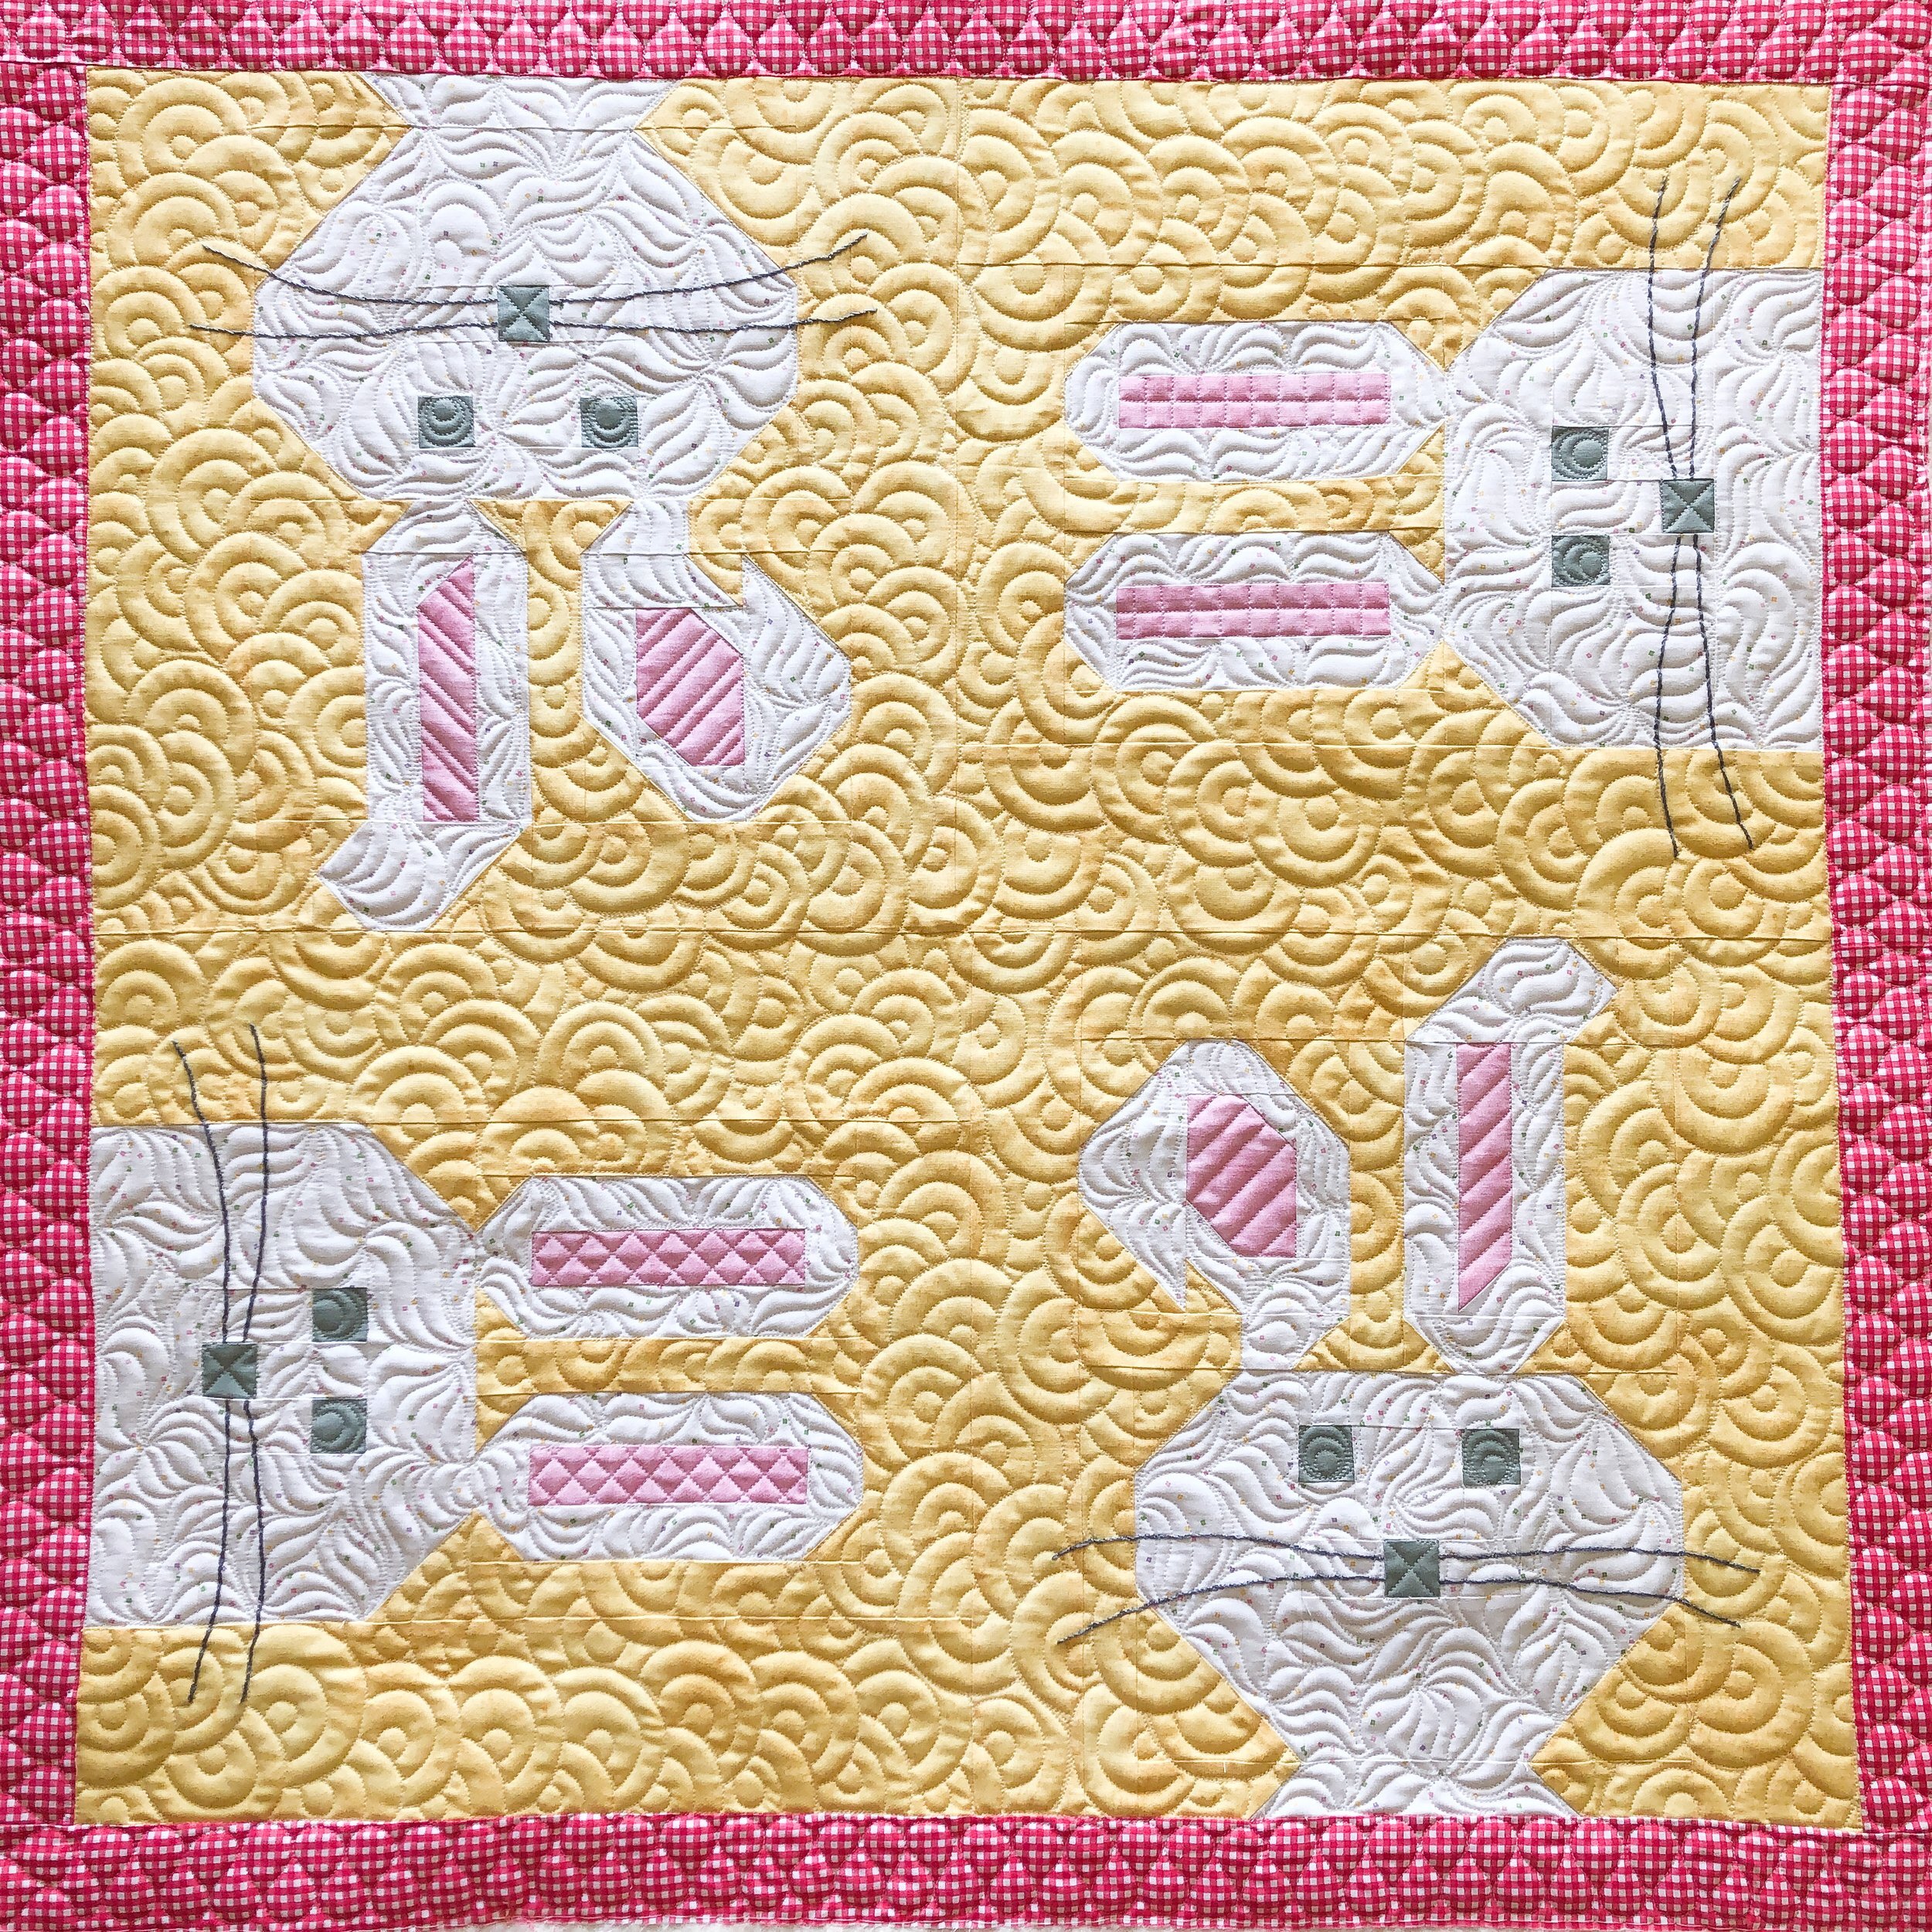
Isn’t it so cute?!?!?!!!!
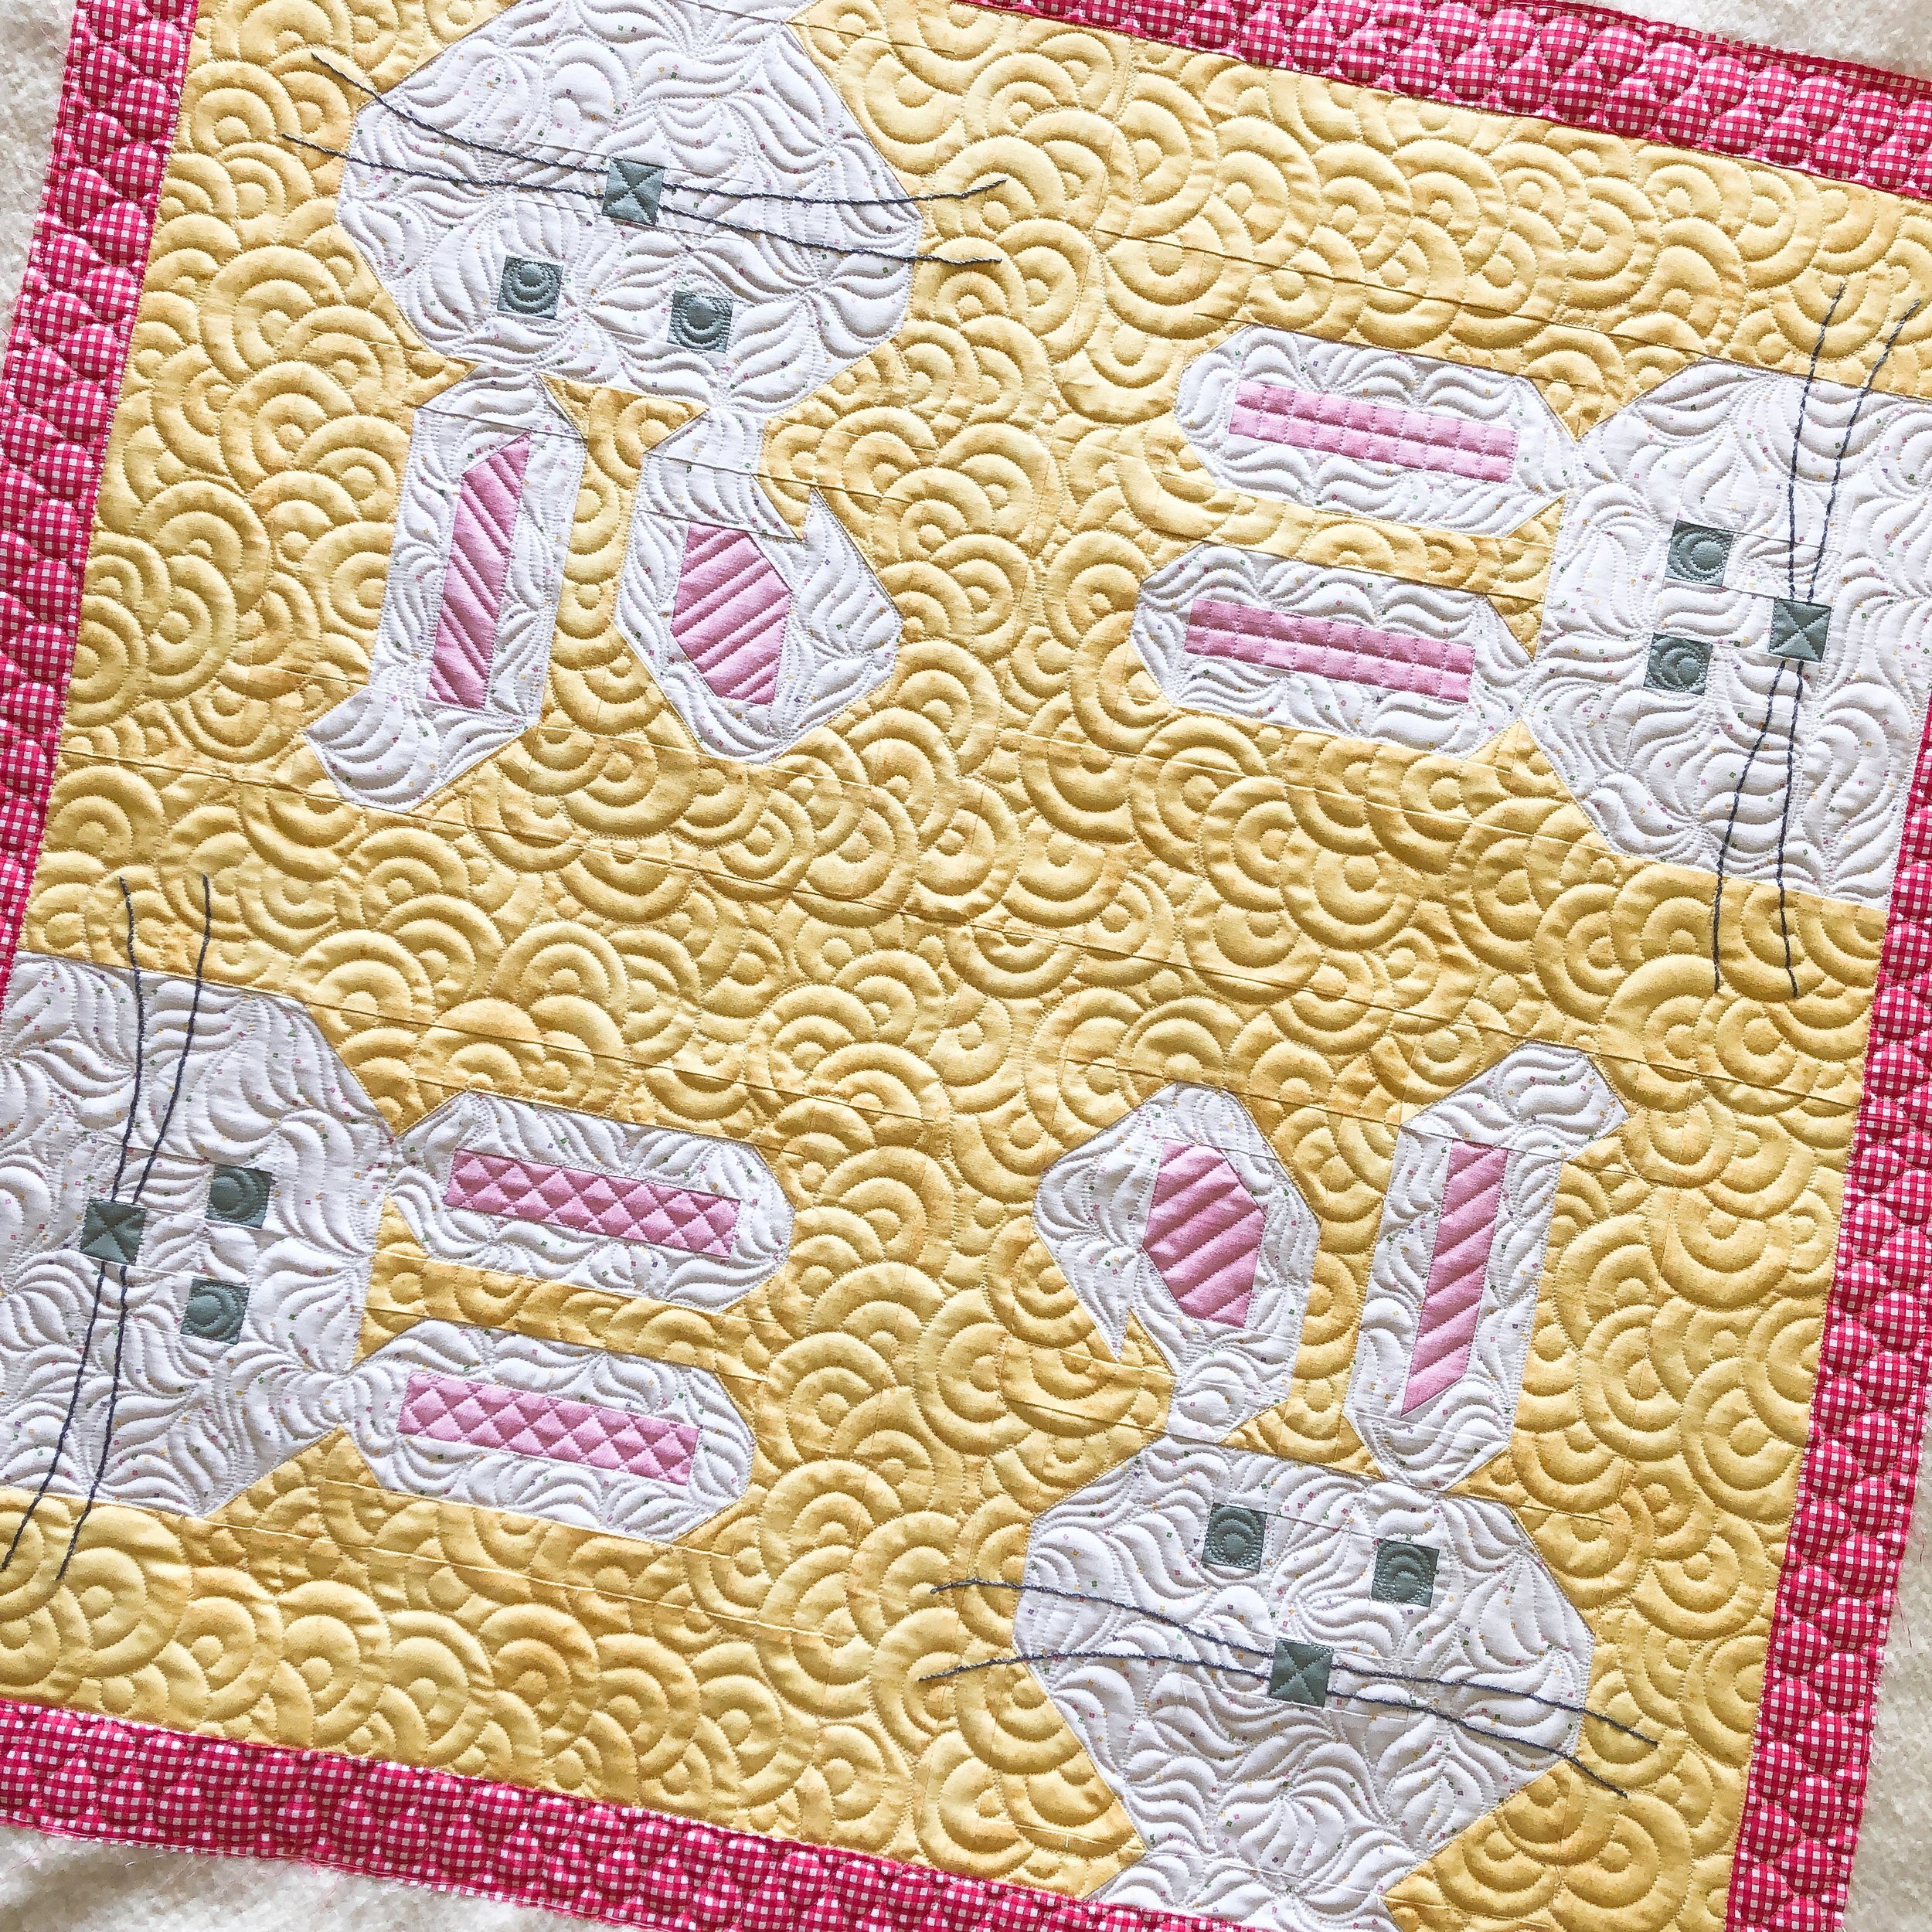
I quilted two of my super fun freehand designs Overlapping Circles and Grass, which are part of my Quilting It Freemotion video course. I take you through 10 different freemotion quilting designs, which will bring you from beginner to confident quilter. Check them out. You can either pick and choose which design you’d like to learn, or get the whole bundle. It’s self paced and so much fun!
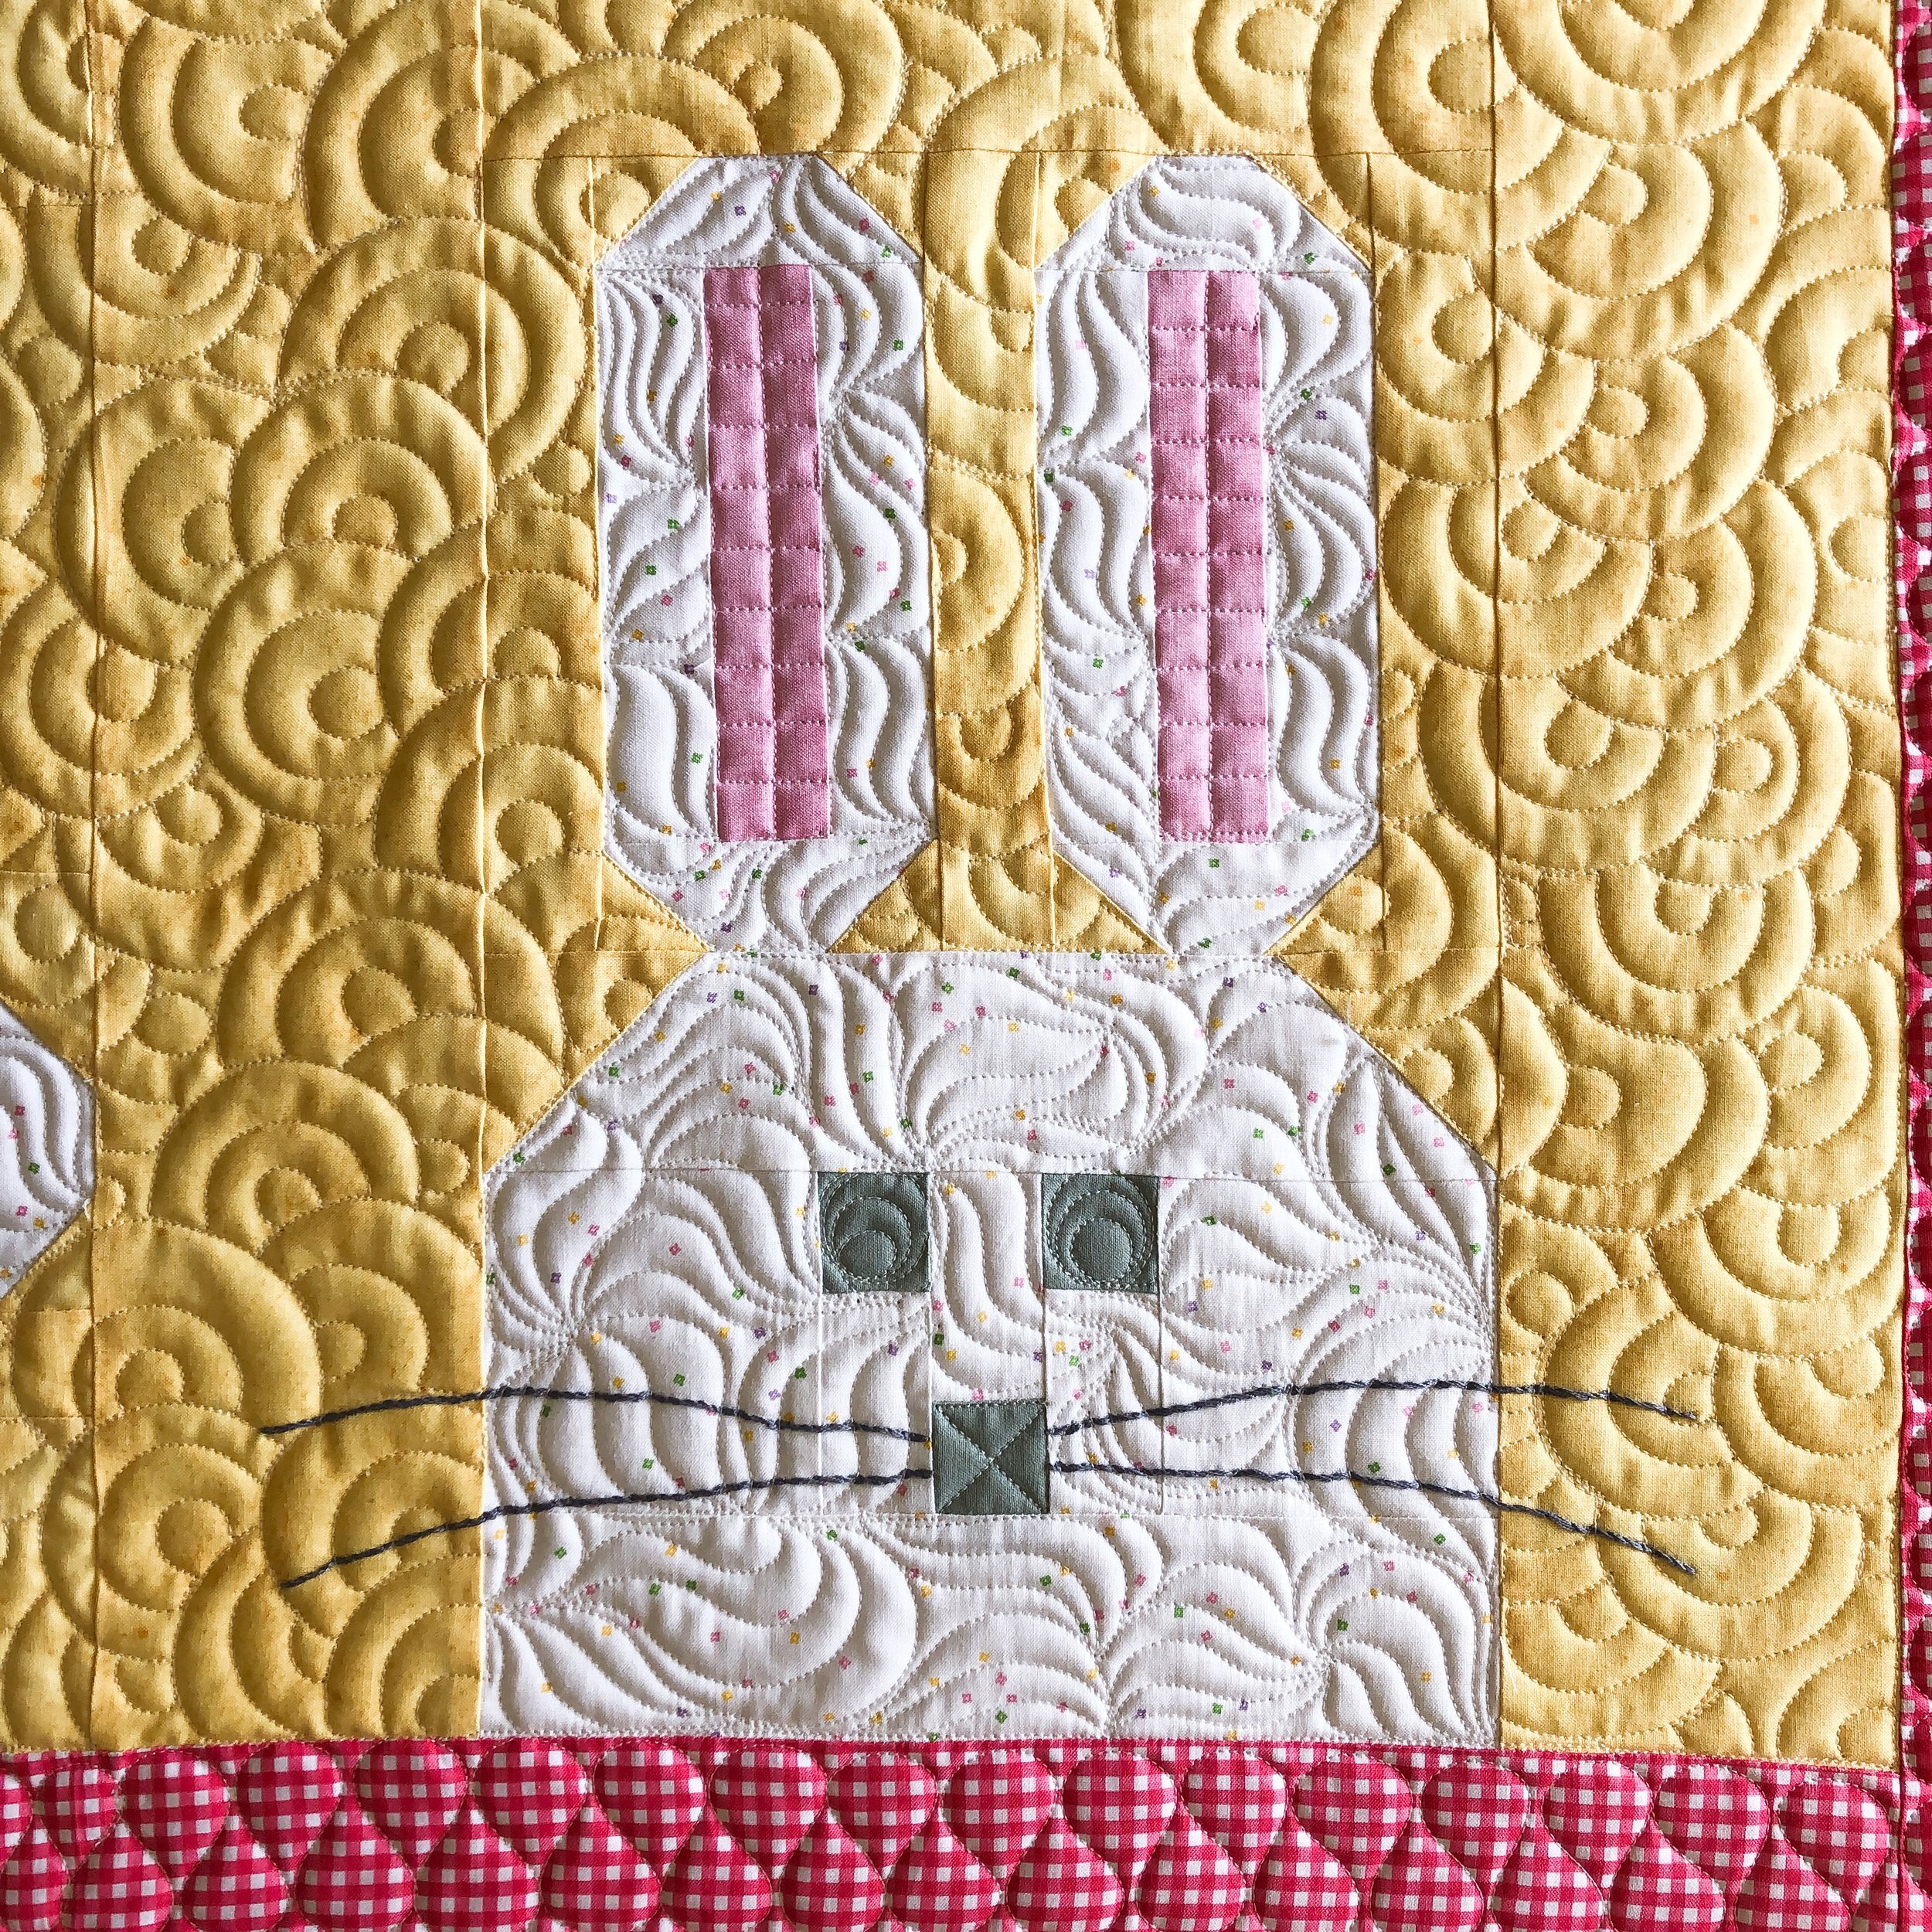
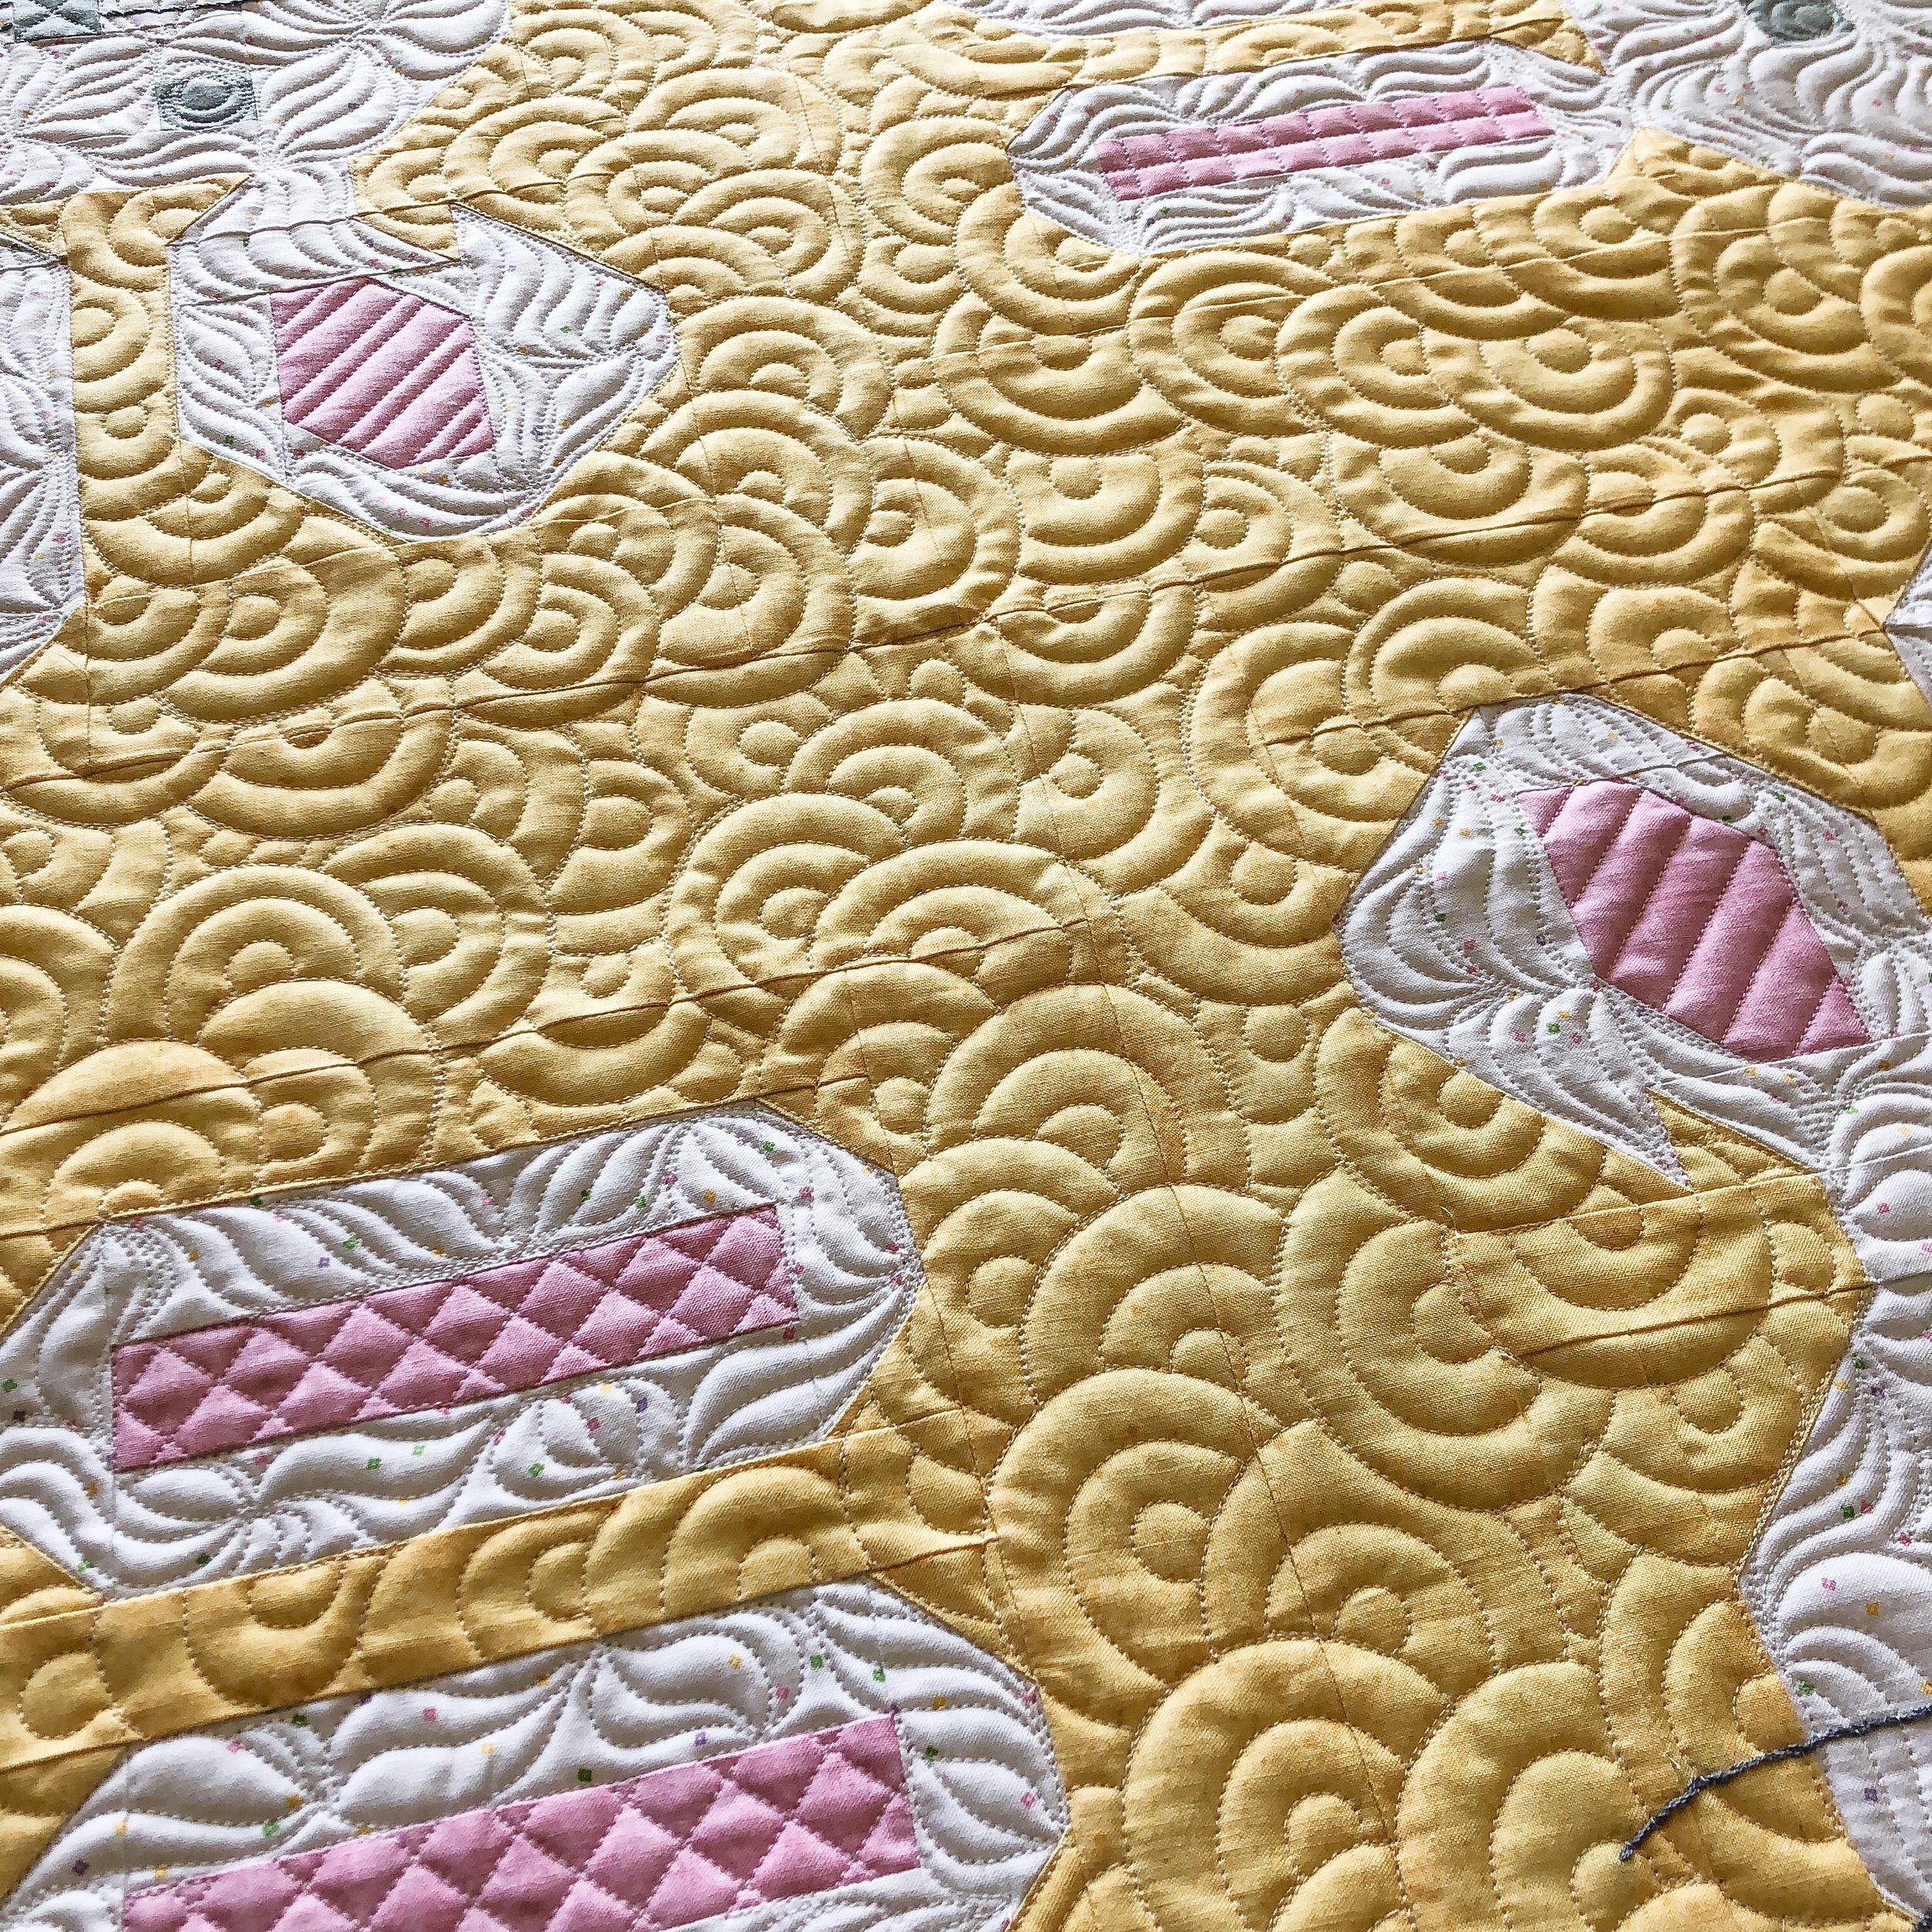
I added some fun lines in each of the ears and finished off the topper with some ribbon candy in the border.

I used my favorite Natural White Omni thread from Superior Threads and a scrap of 8020 cotton poly blend batting from Winline Textiles.

Aren’t those Overlapping Circles so fun!! One of my favorite textures.
Do you have something you’d like to have quilted? Email me at quiltingit@gmail.com and I’ll get you on my list. Happy quilting!! • Leisha
Kari’s Halloween Quilts
Hello…
I have a couple of quick quilts to share with you today!!!
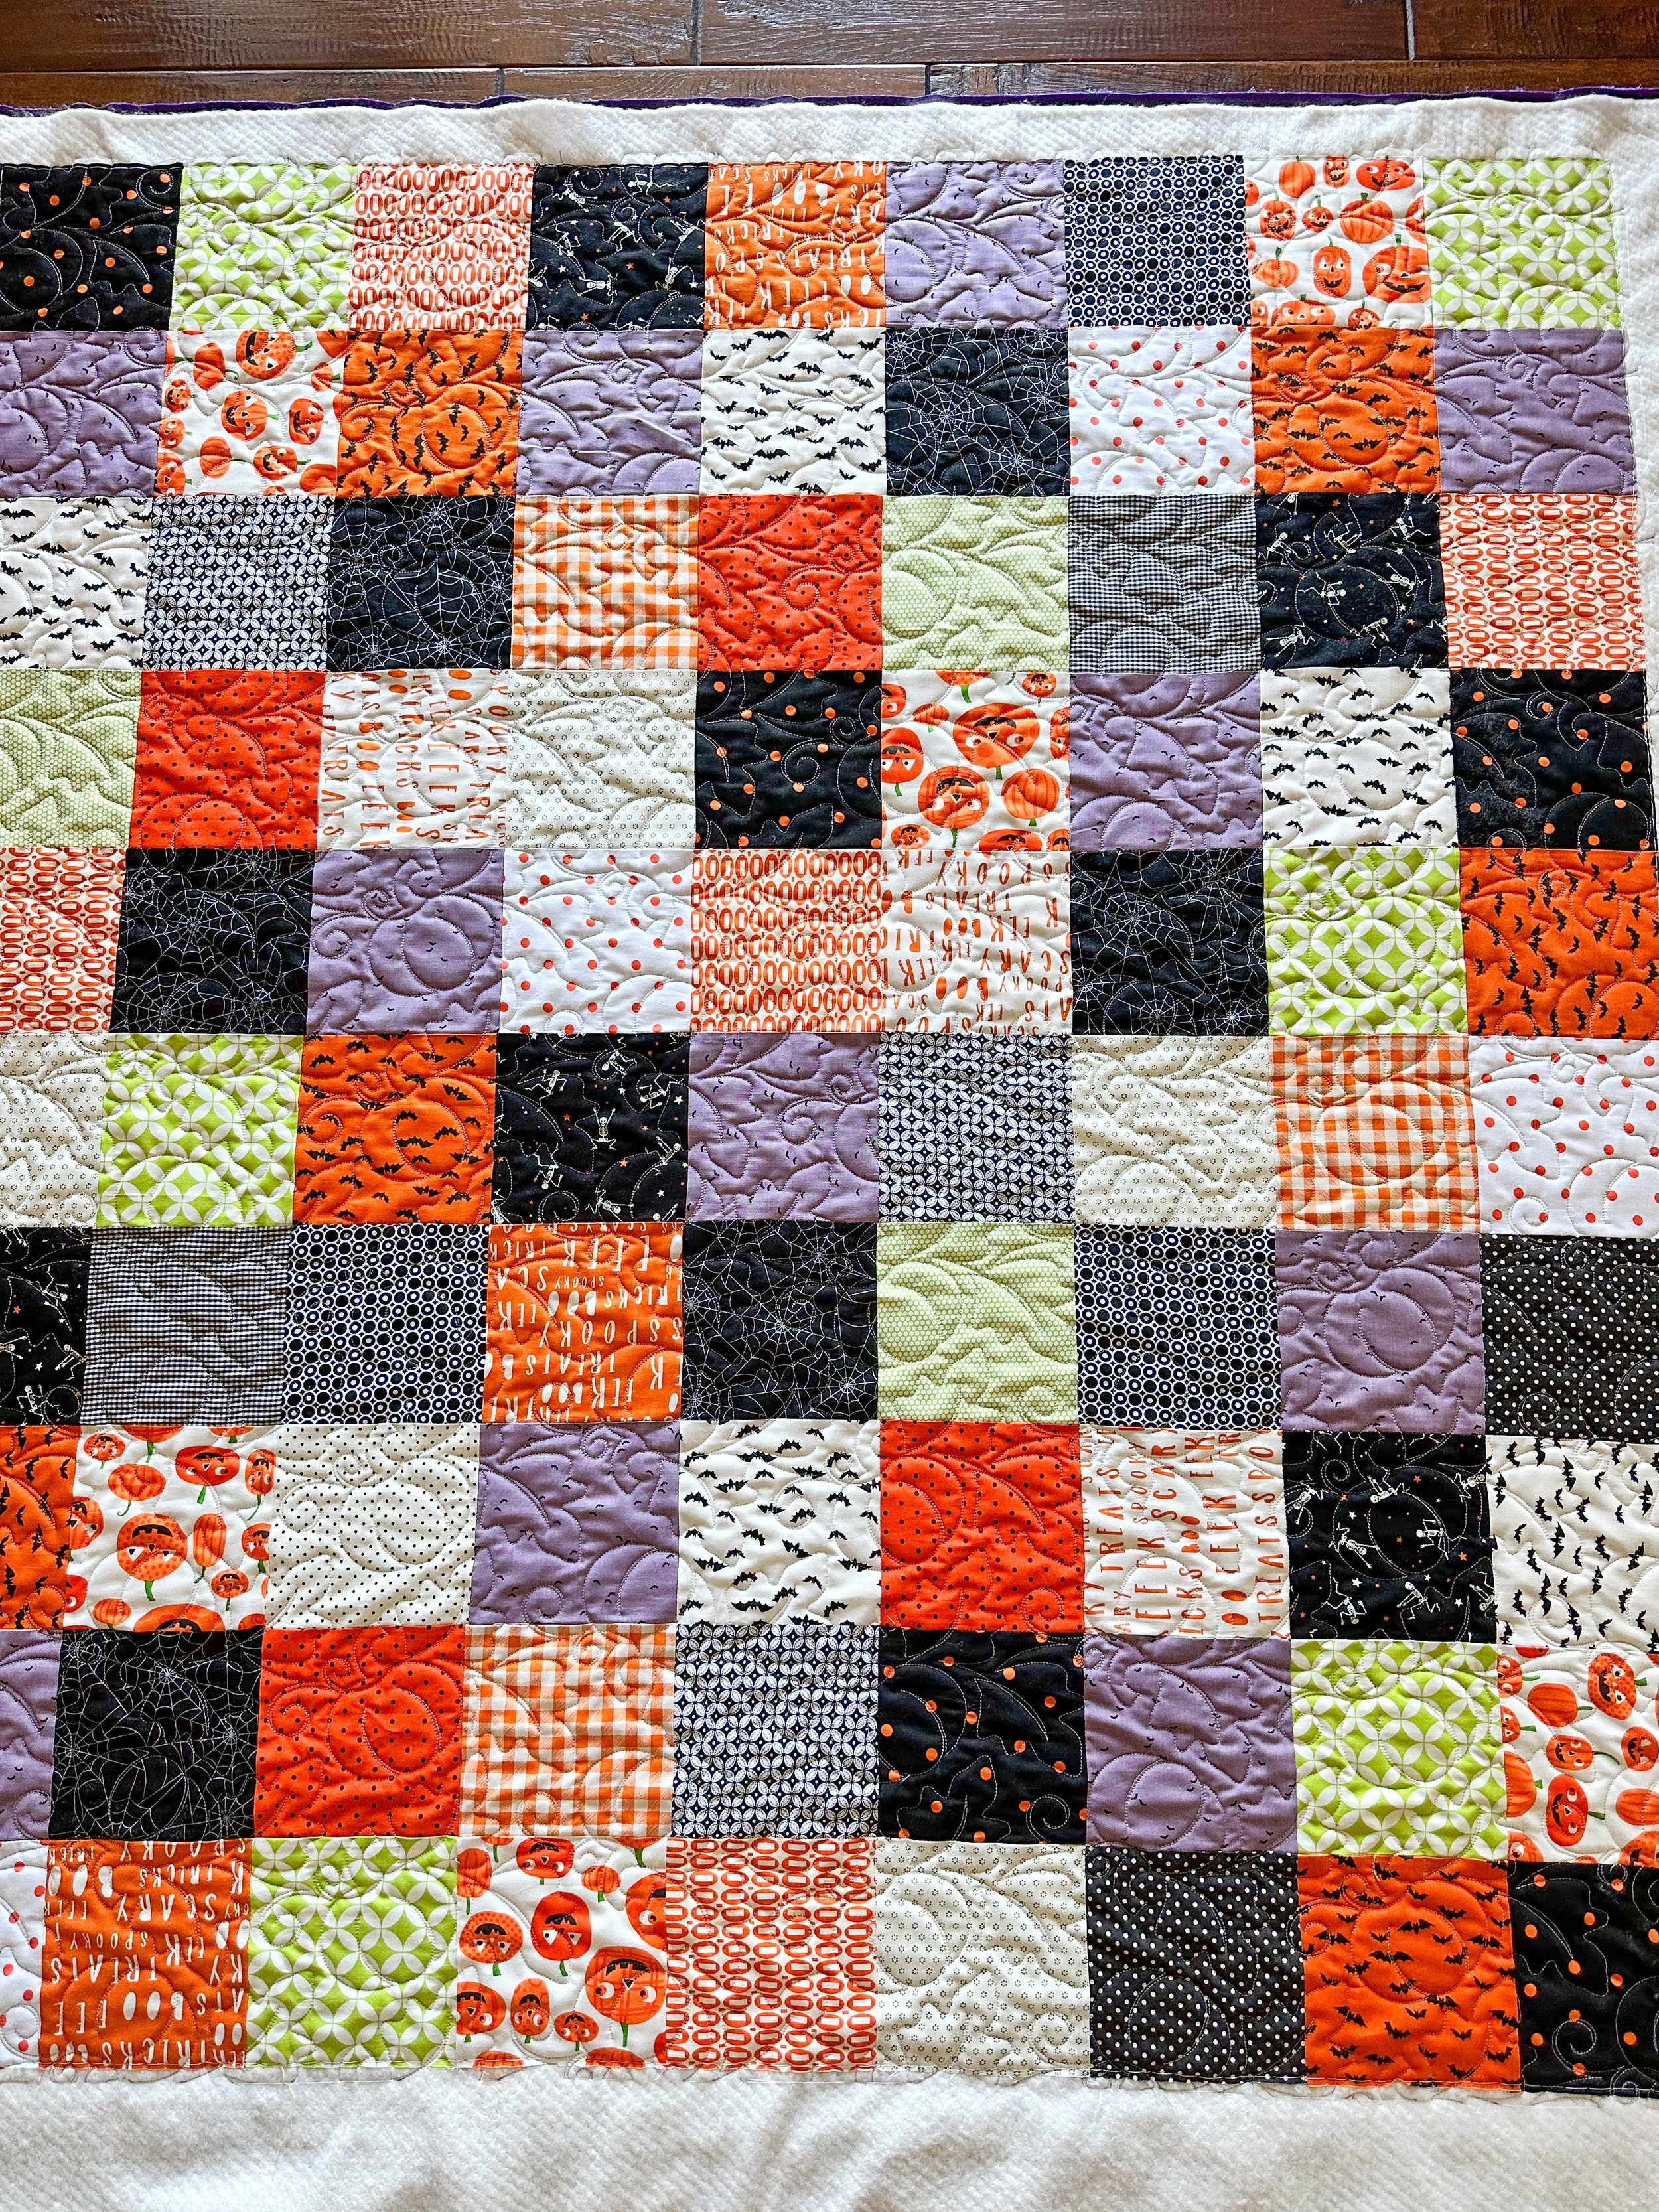
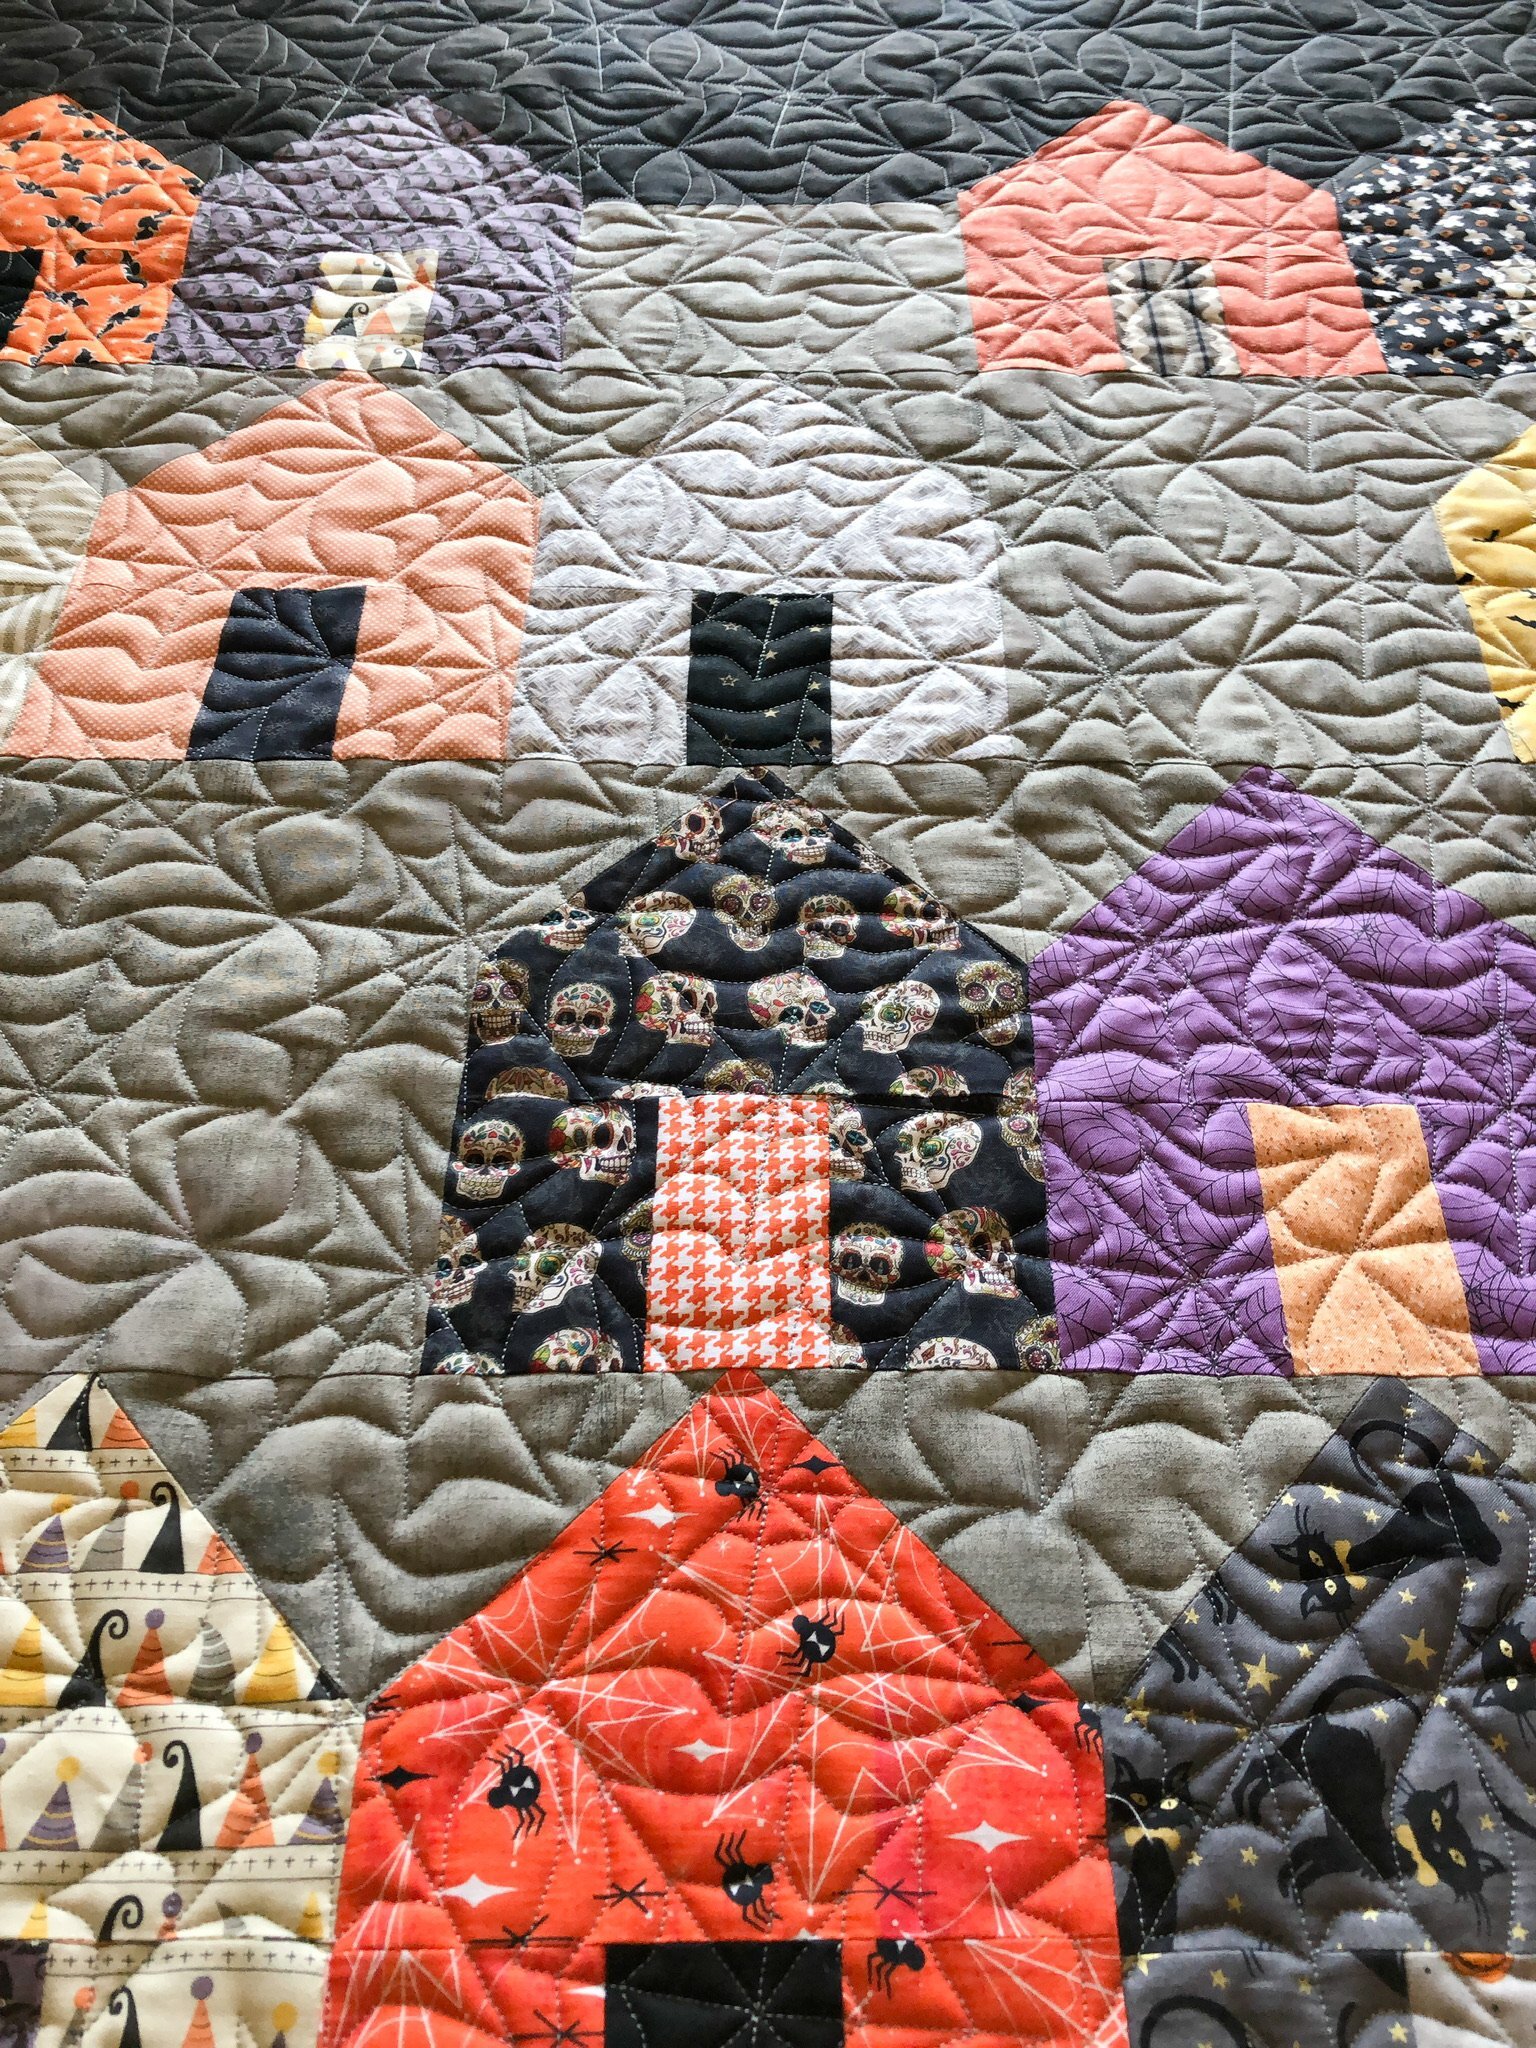
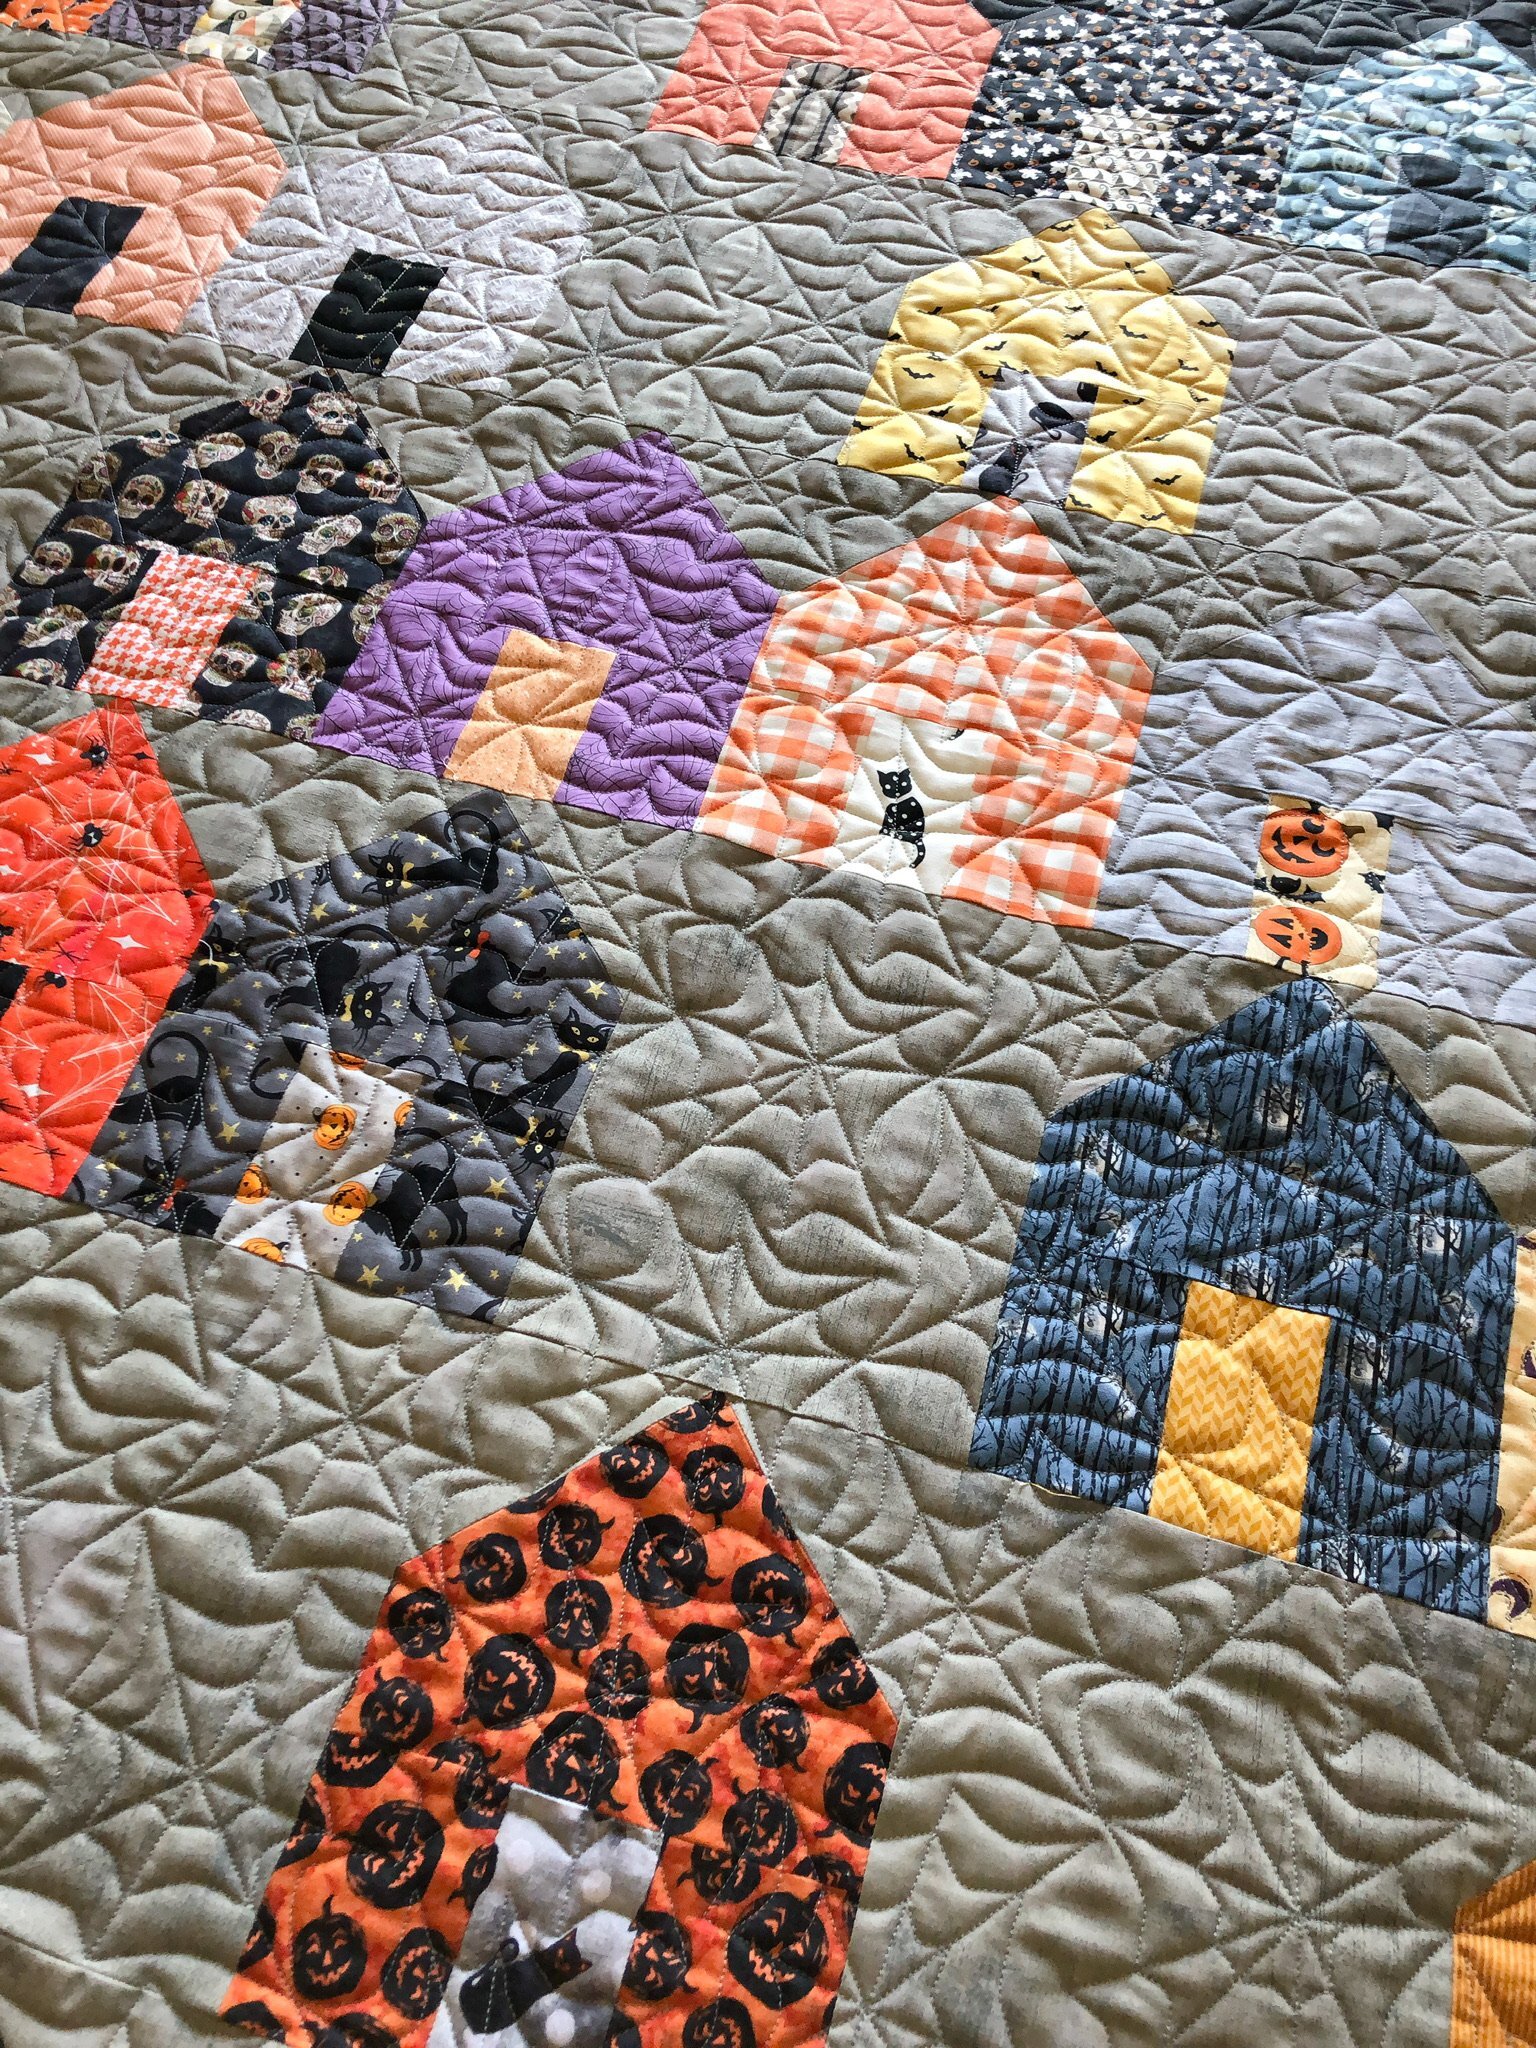
With Halloween right around the corner, Kari made these fun Halloween quilts for a couple of her grandkids, and she even got to hand deliver them on a recent trip to visit them. Fun grandma, and lucky grandkids!

I used Pumpkin Fest Petite by Patricia E. Ritter and Melonie J. Caldwell from Urban Elementz to quilt this fun patchwork quilt.
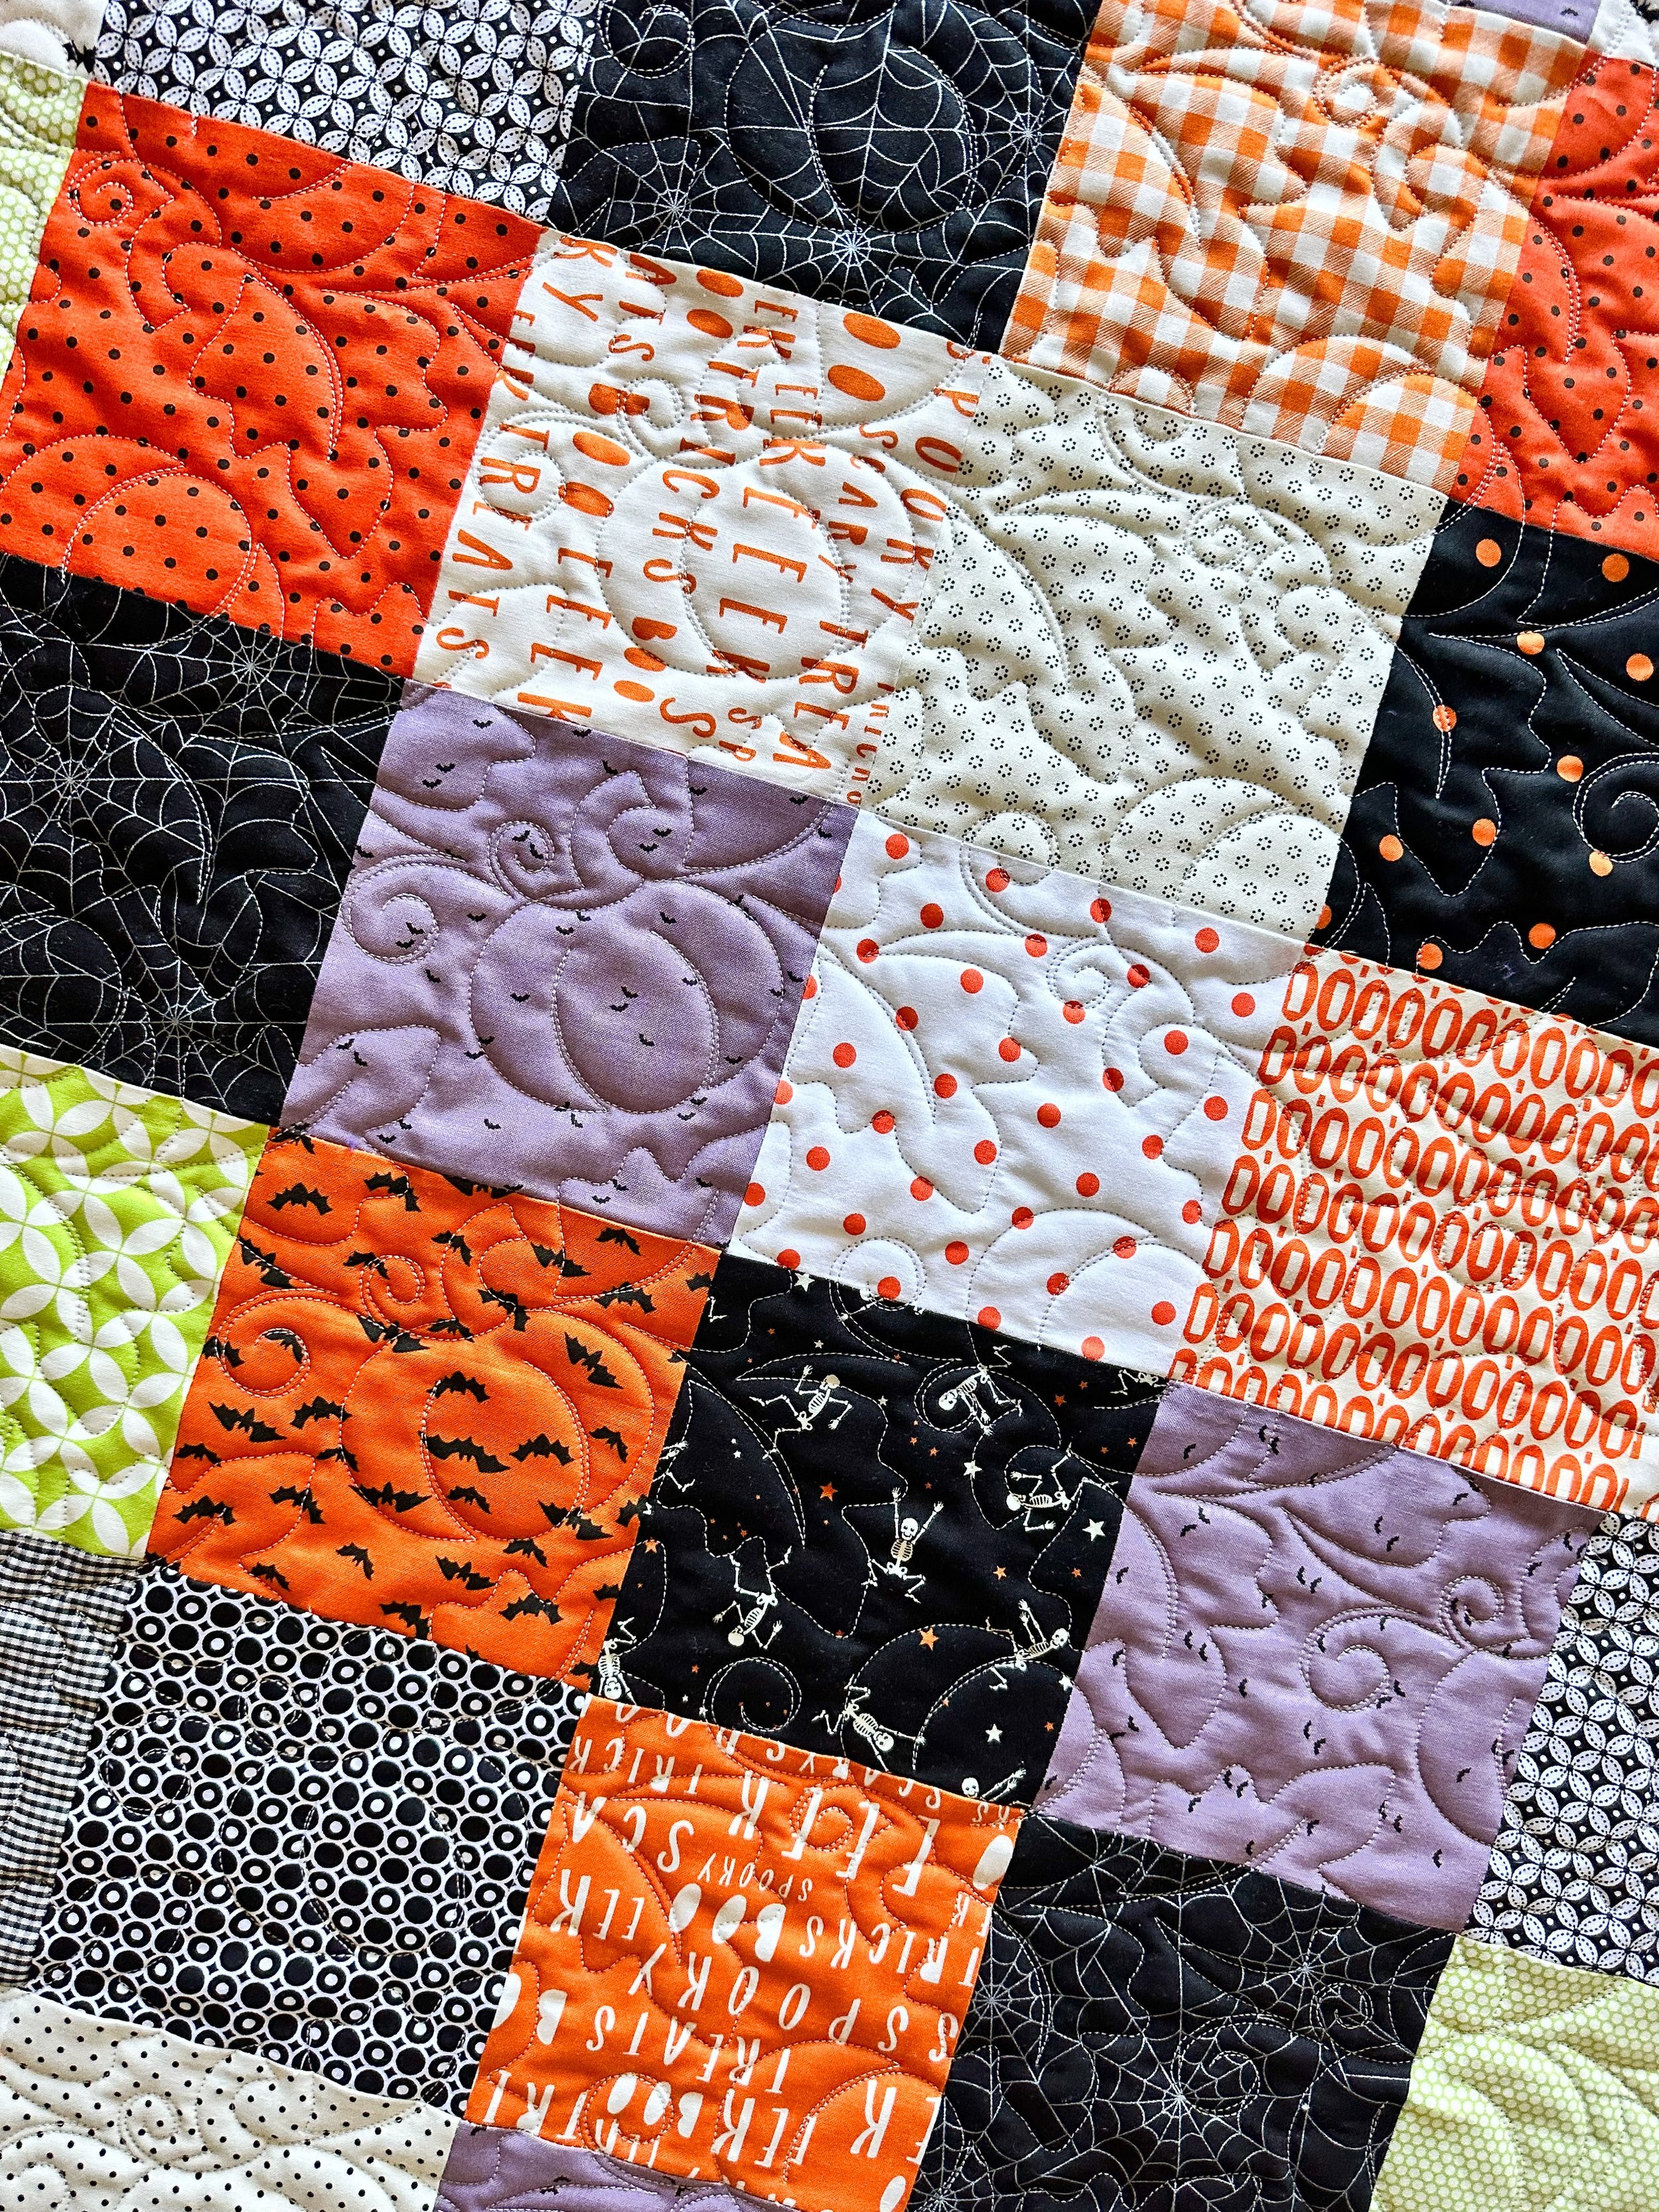
I used natural white Omni thread, and my favorite 8020 cotton poly blend batting from Winline Textiles.

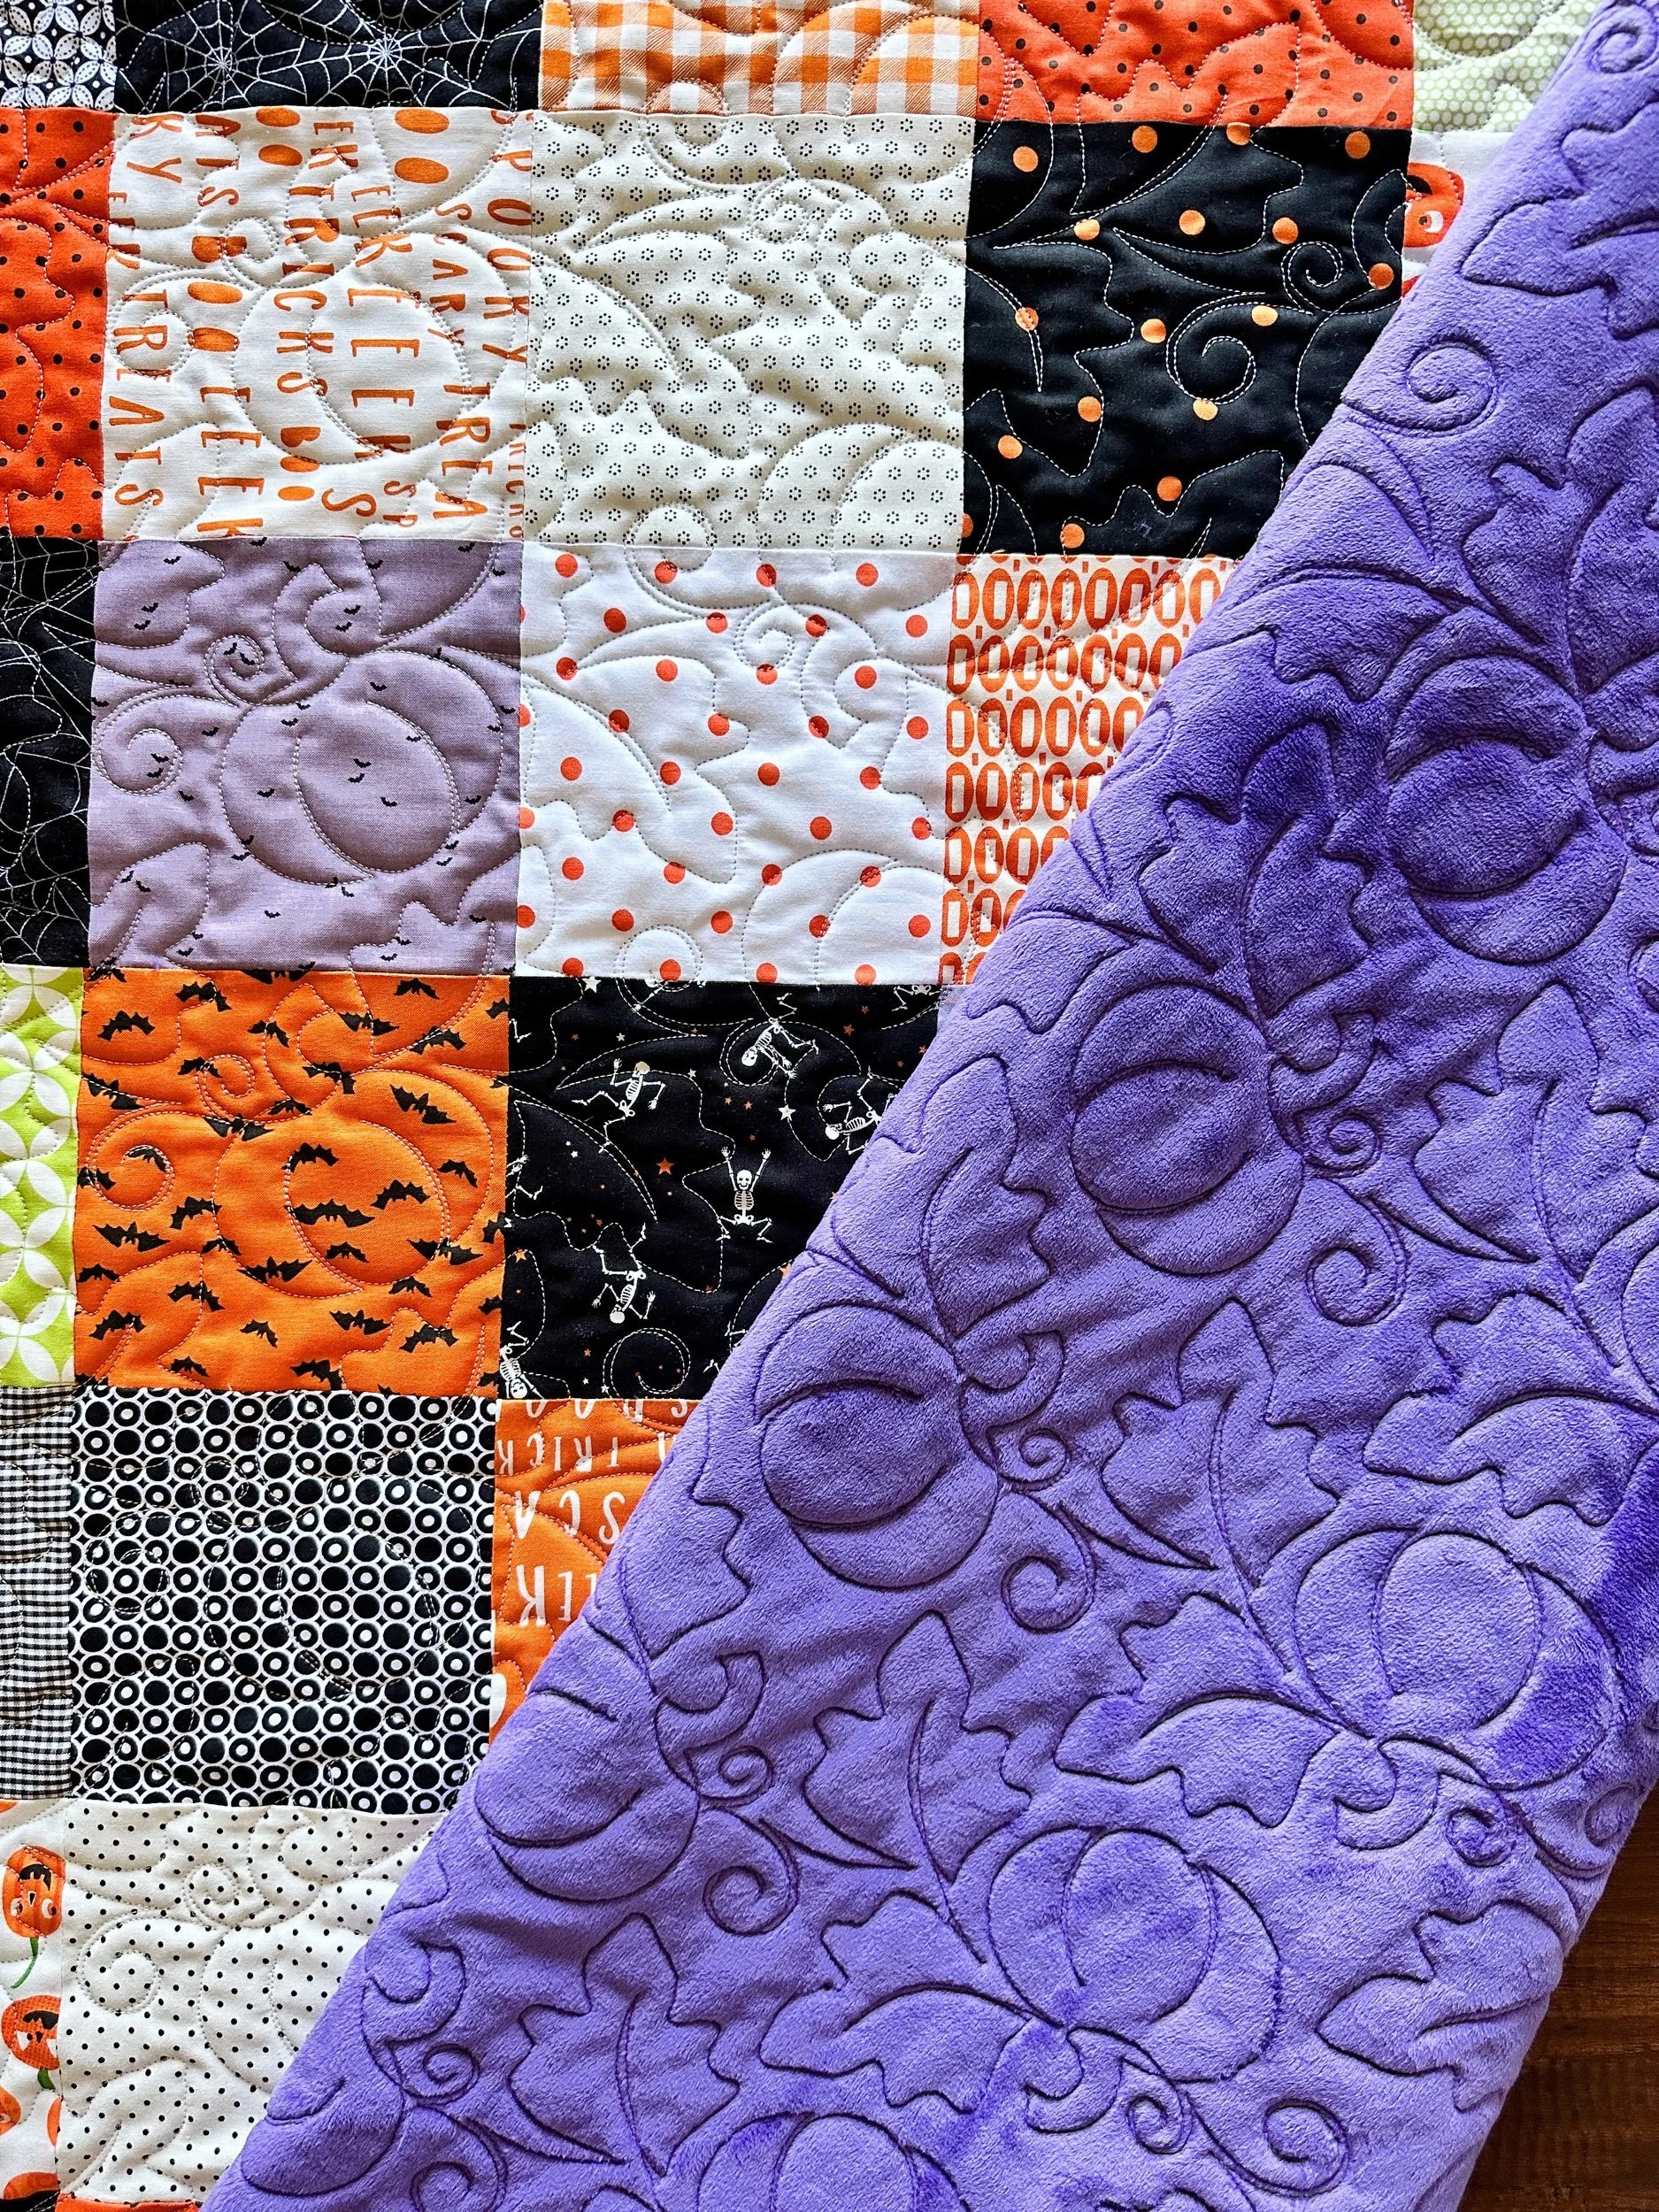
I’ve done many swirls with the front of a quilt, but never thought to do one with a quilt backing. But then again I didn’t have this fun purple textured minky before. Love!!!

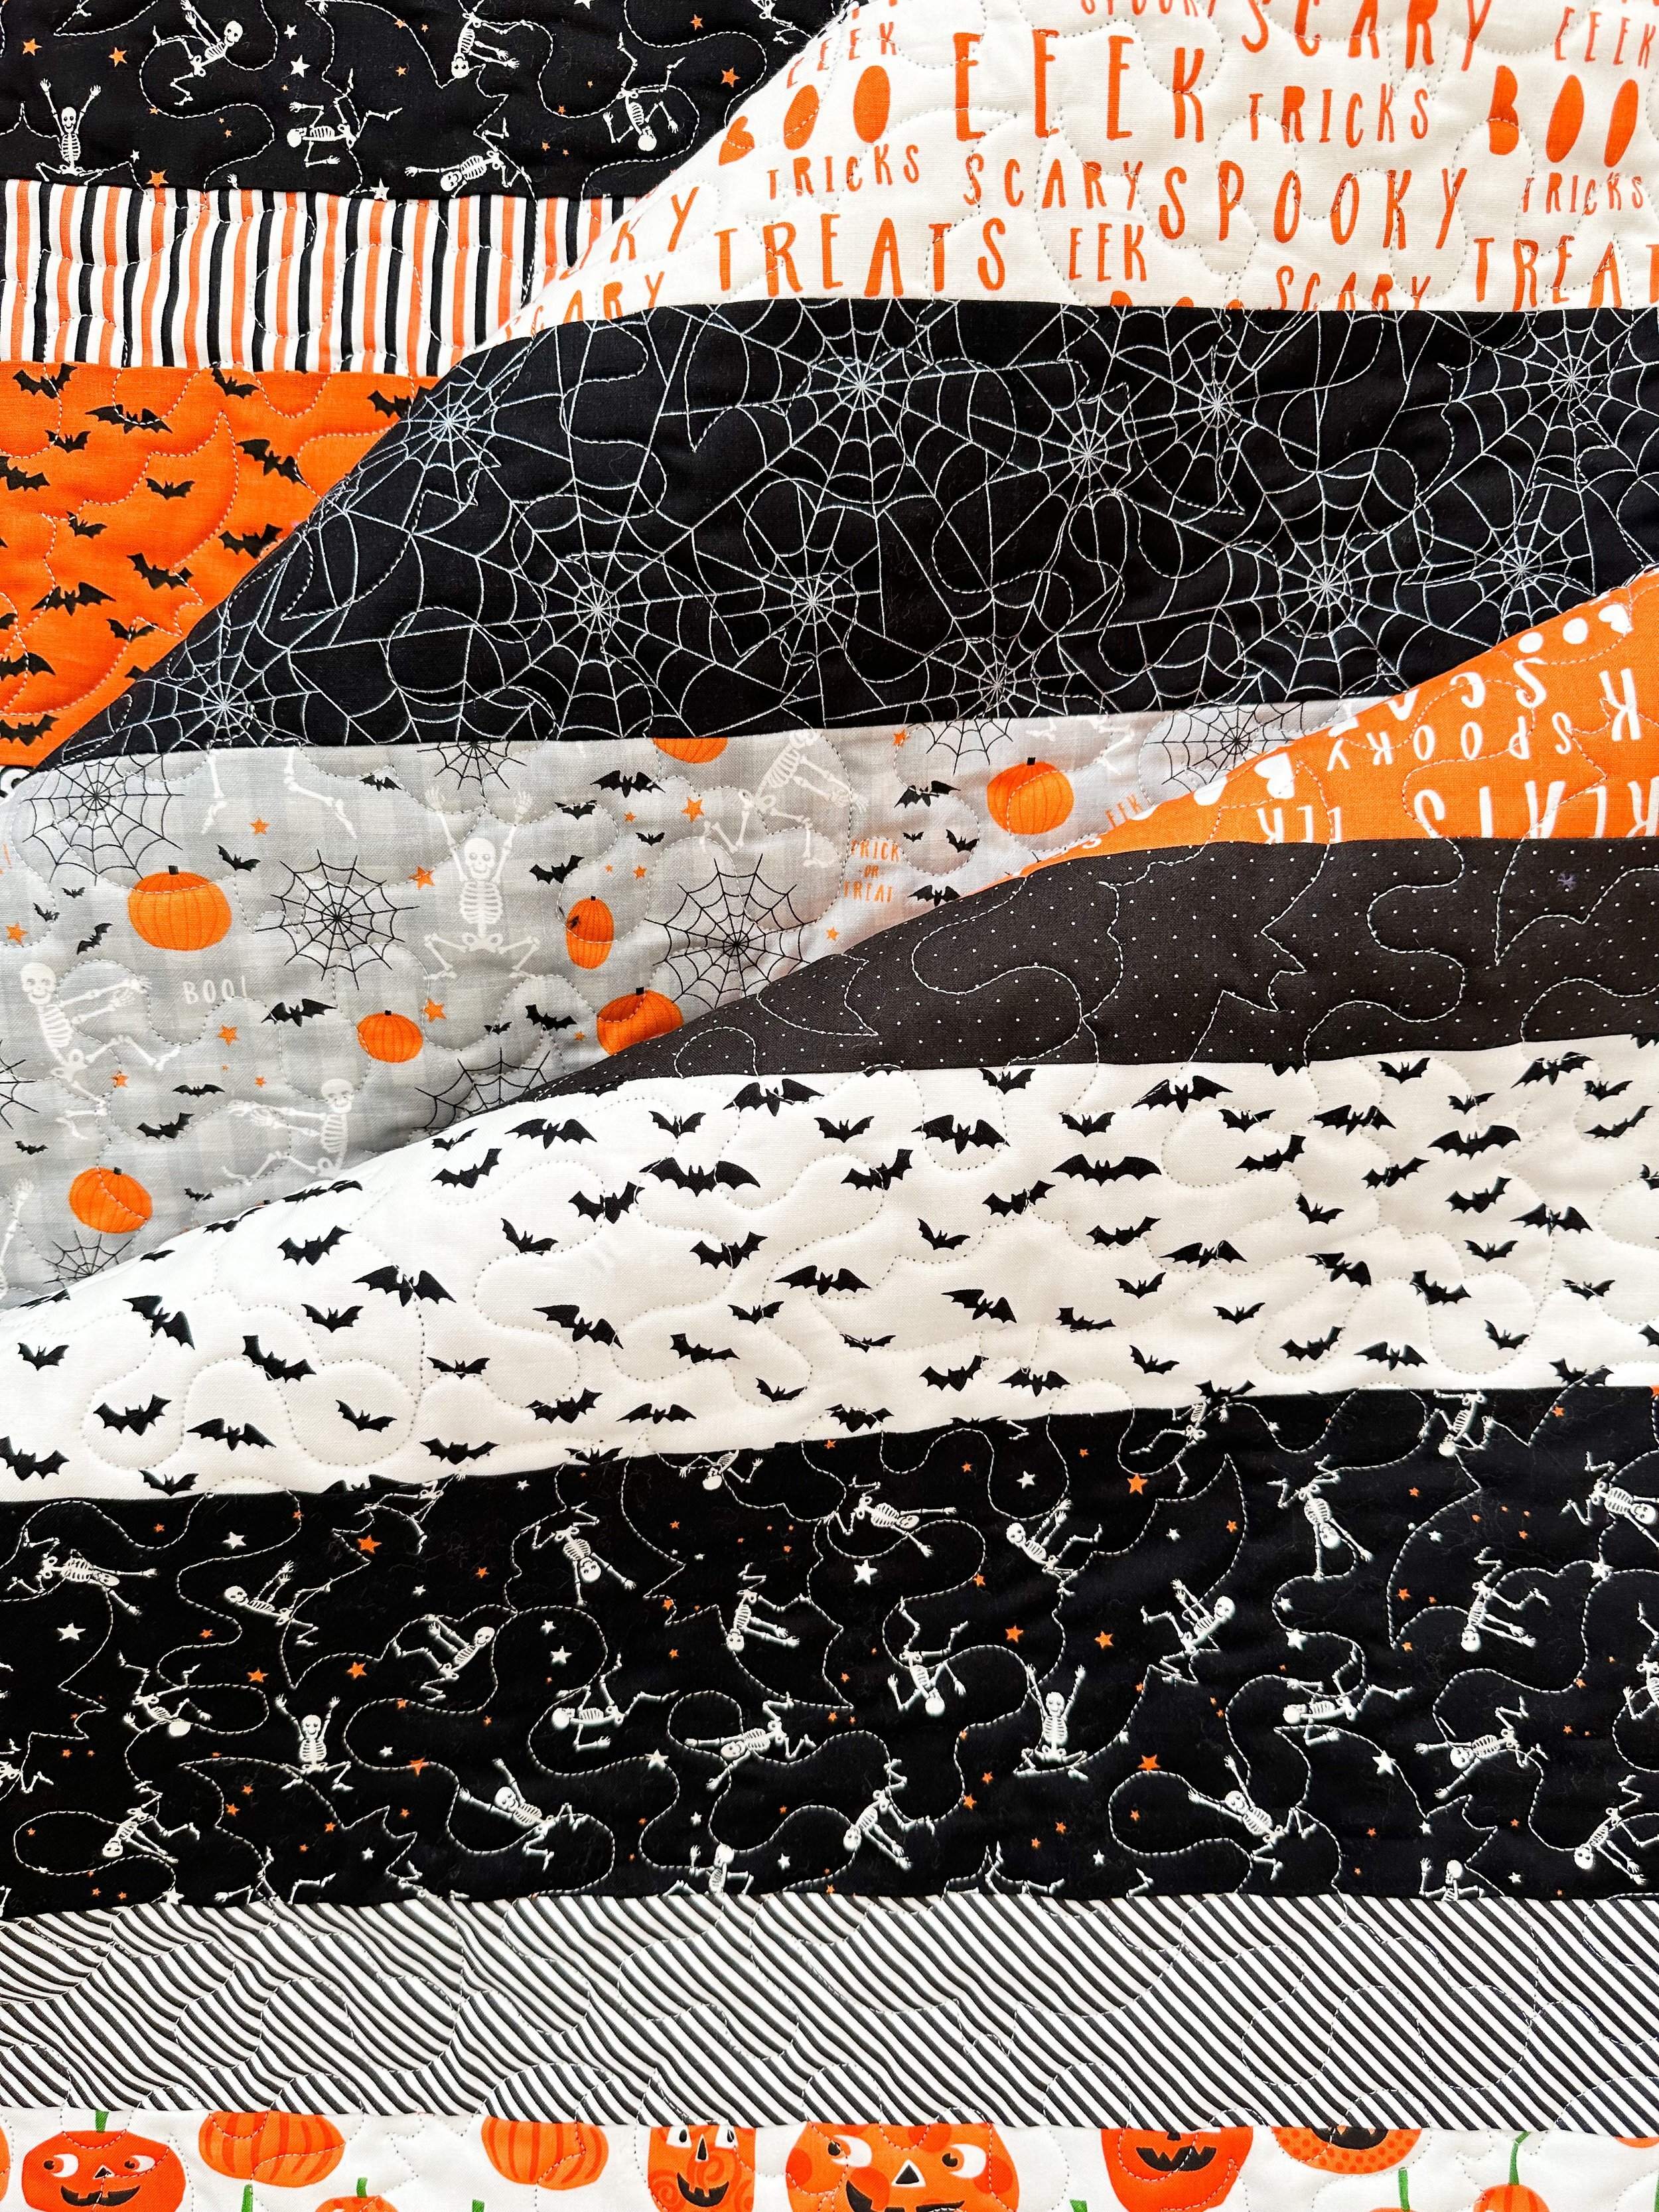
This simple strip quilt is the perfect size for any little kid!! And the fun Halloween fabrics make it even better.
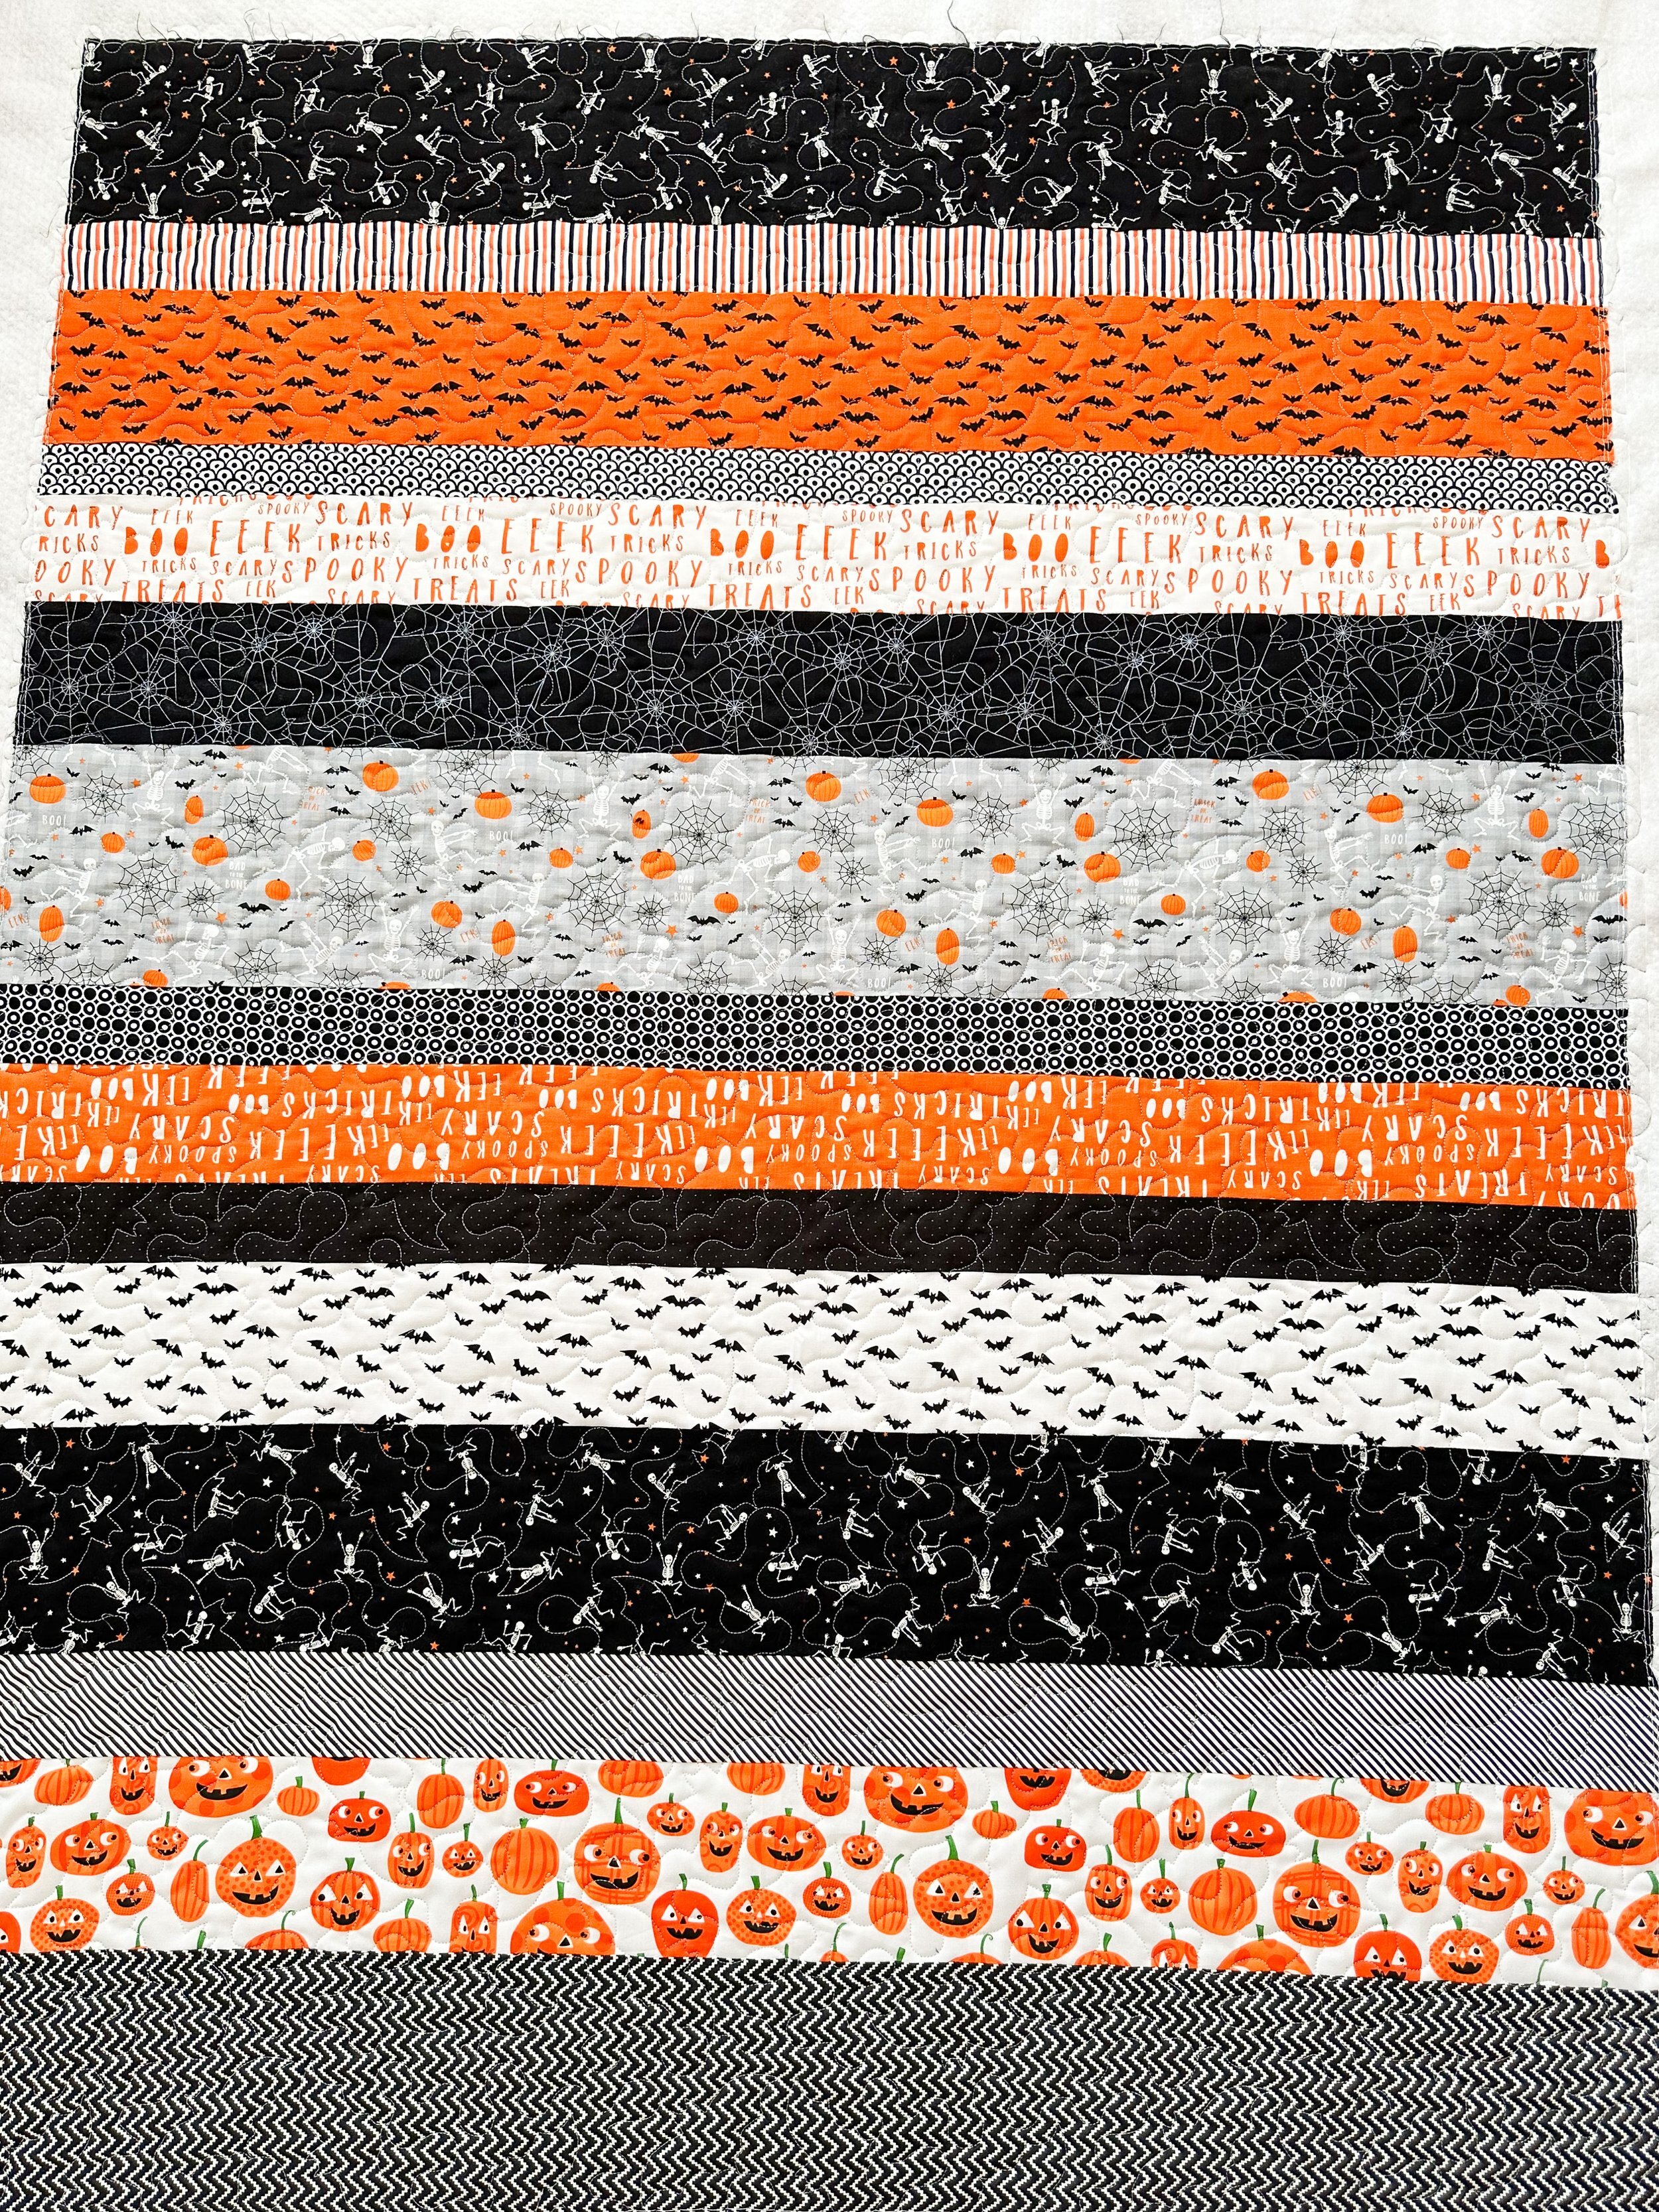
I used natural white Omni thread and the same 8020 cotton poly blend batting.
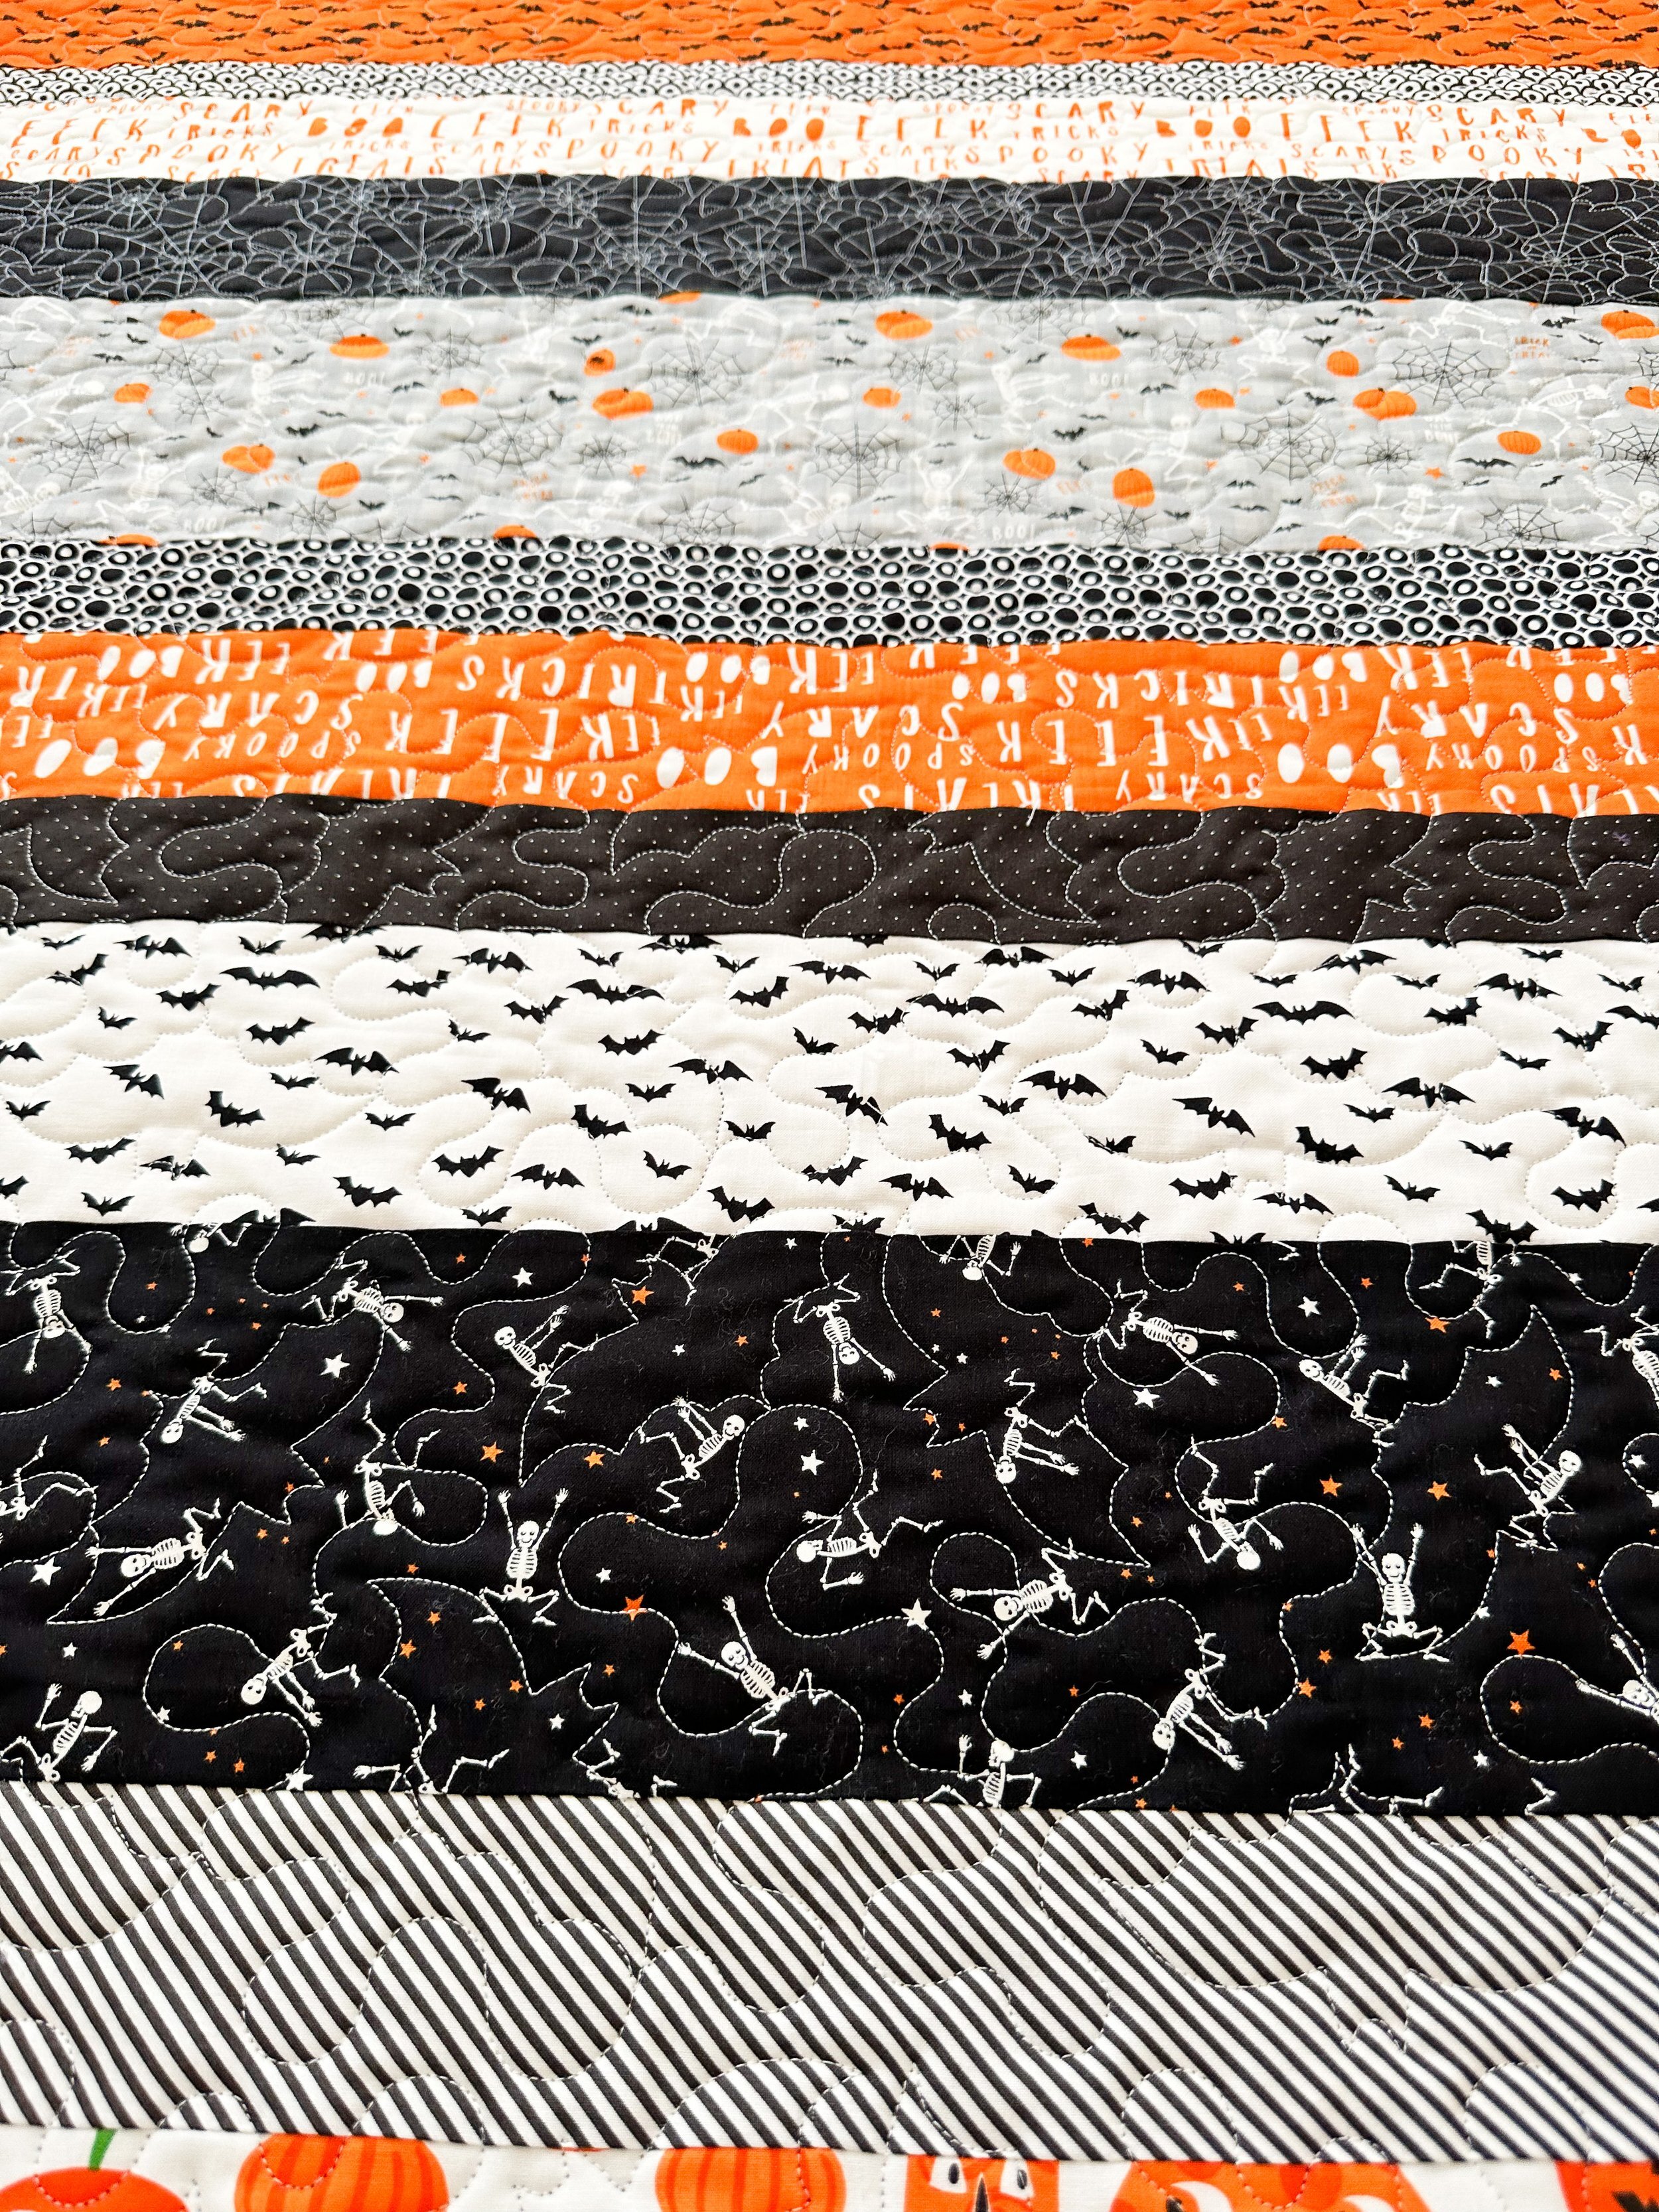
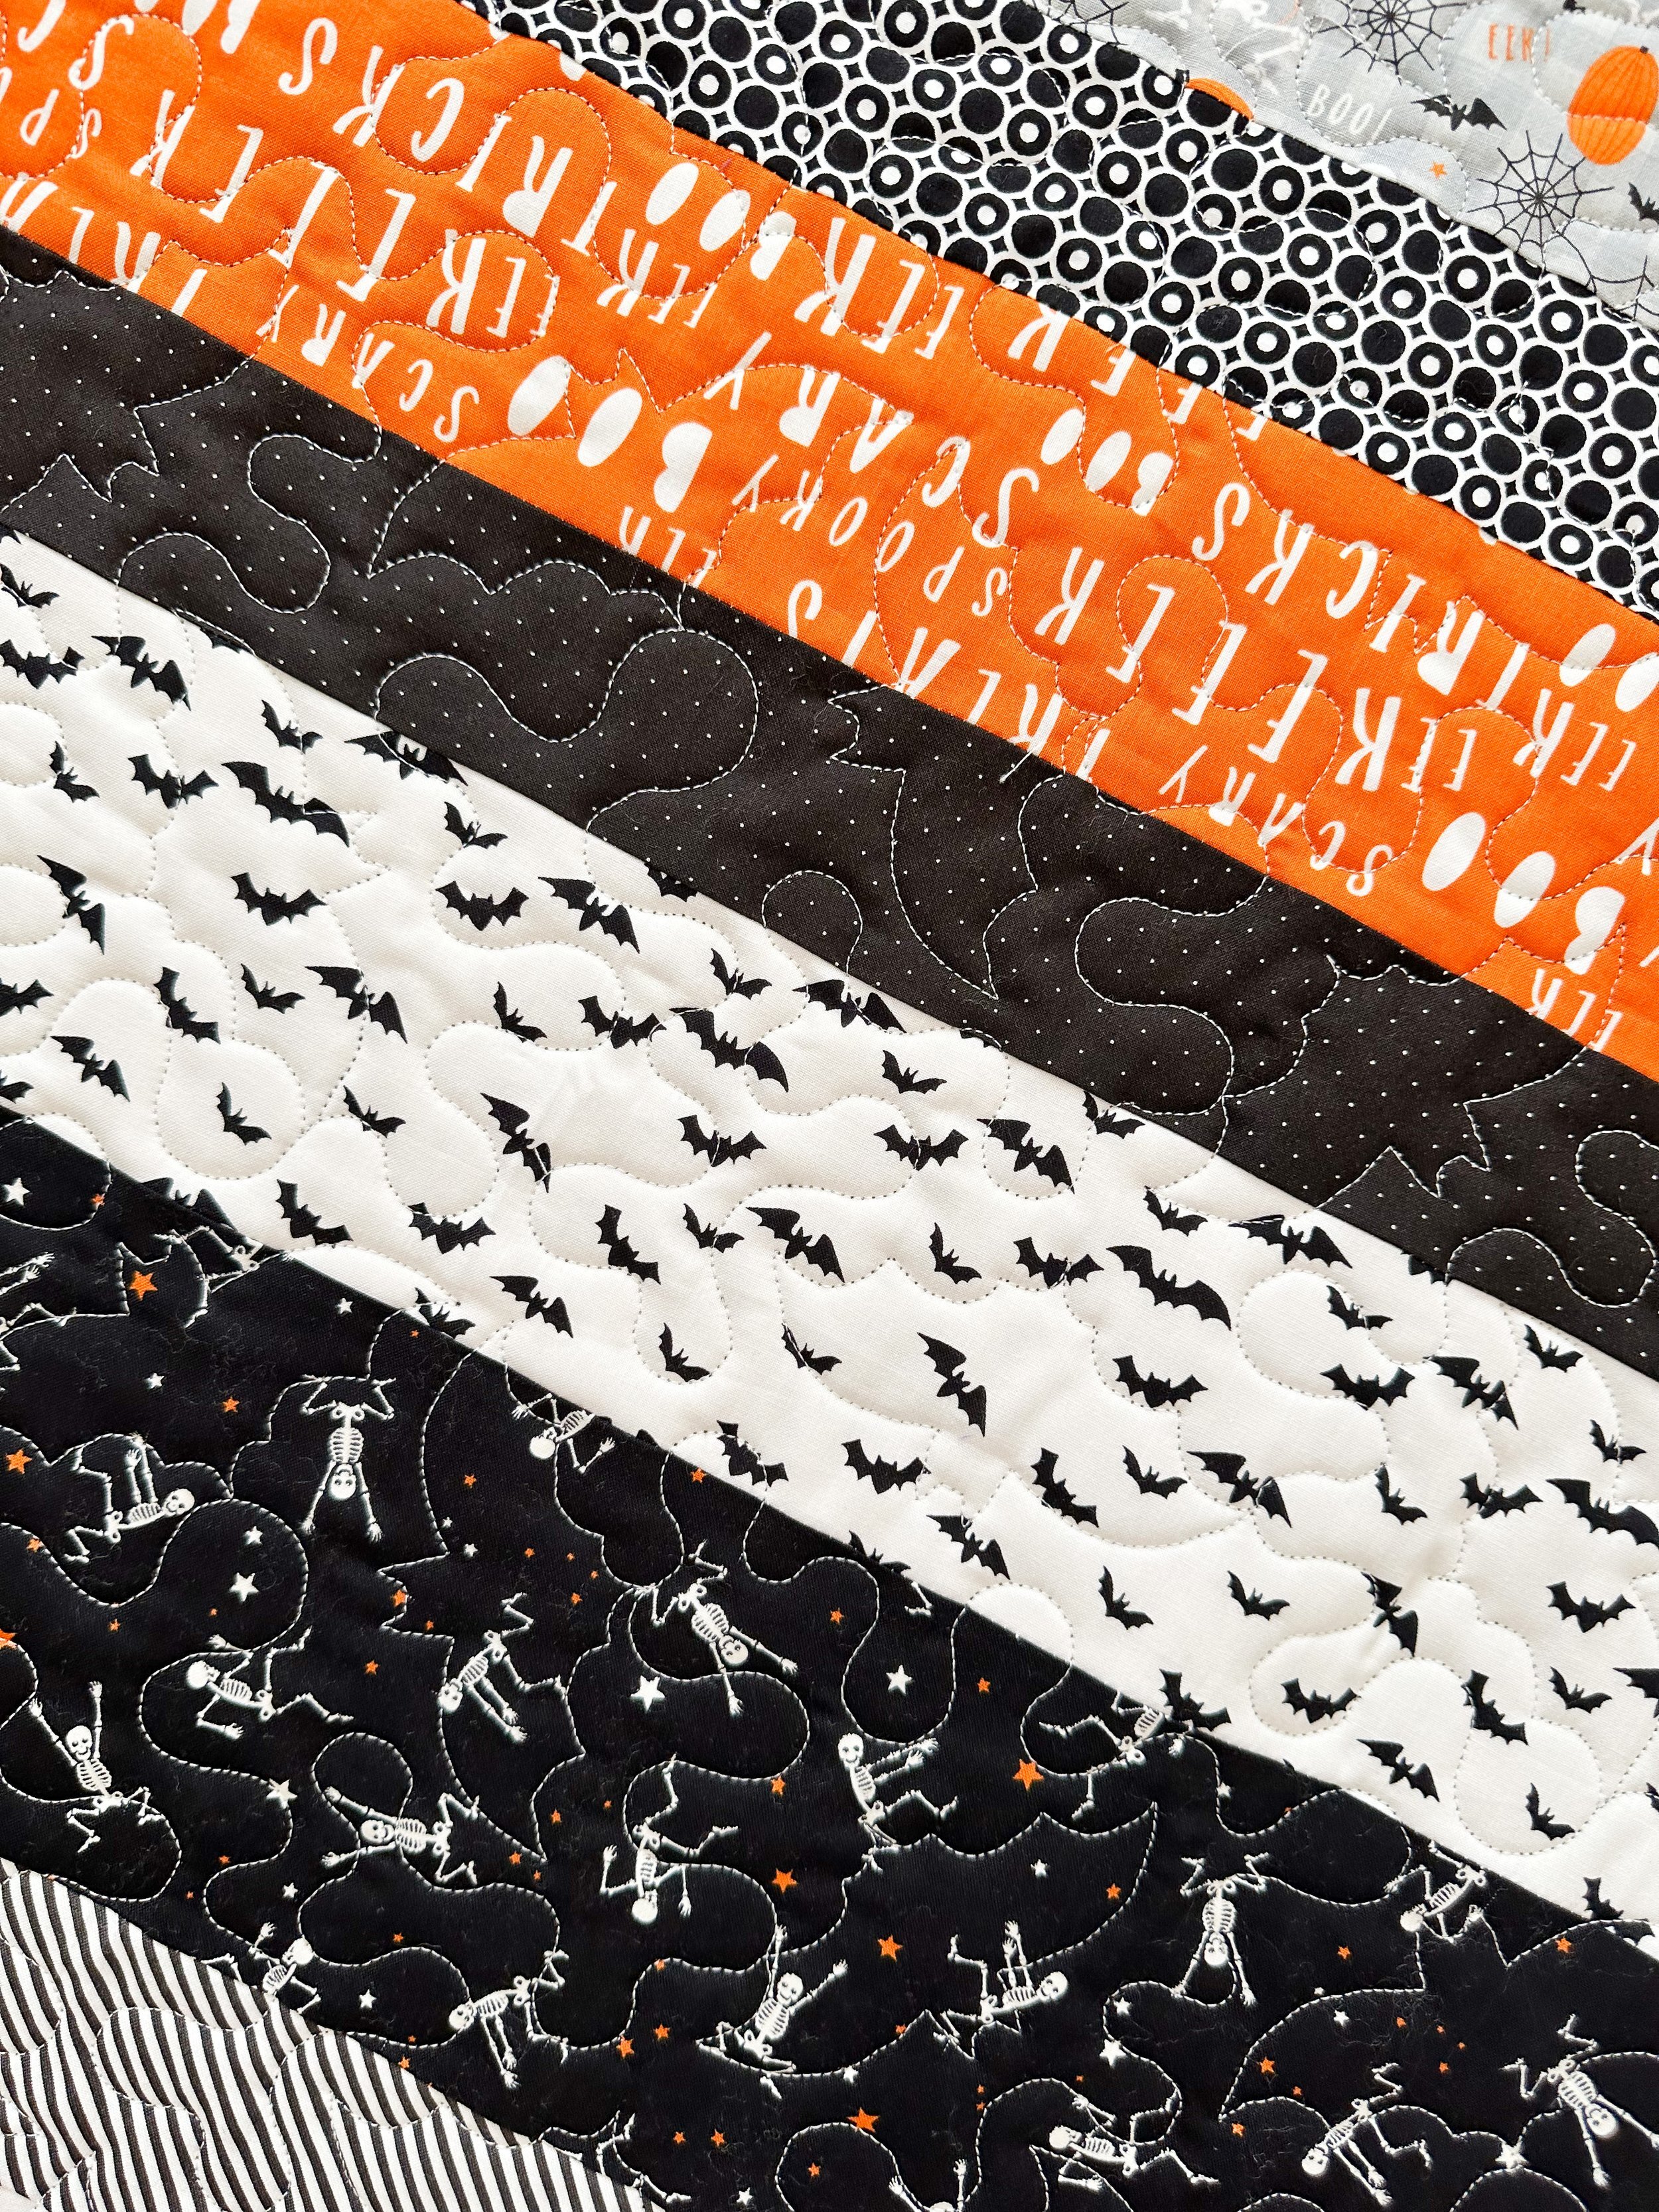
Kari requested bats, so I searched for a variety of different panto designs and she chose Batty Meander by Maureen Foster, which is available at Urban Elementz. It turned out so fun!!

I love the mix of Halloween fabrics!!
If you’re ever in need of a quick meaningful gift, simple quilts like these are a great option! Find some fun fabrics and let them shine with simple squares or strips.
If you’re looking to have some of your quilts quilted, send me an email and I’ll put you on my list. Look forward to working with you!! quiltingit@gmail.com
Happy quilting!! • Leisha
For our sweet Ruby
If you were following along on my instagram in the spring, my mom and I were making two of these quilts. One for our sweet little Ruby and Penny. Ruby was coming soon and Penny just celebrated her first birthday. So we decided to make them twinning quilts. We should get a picture with them both.
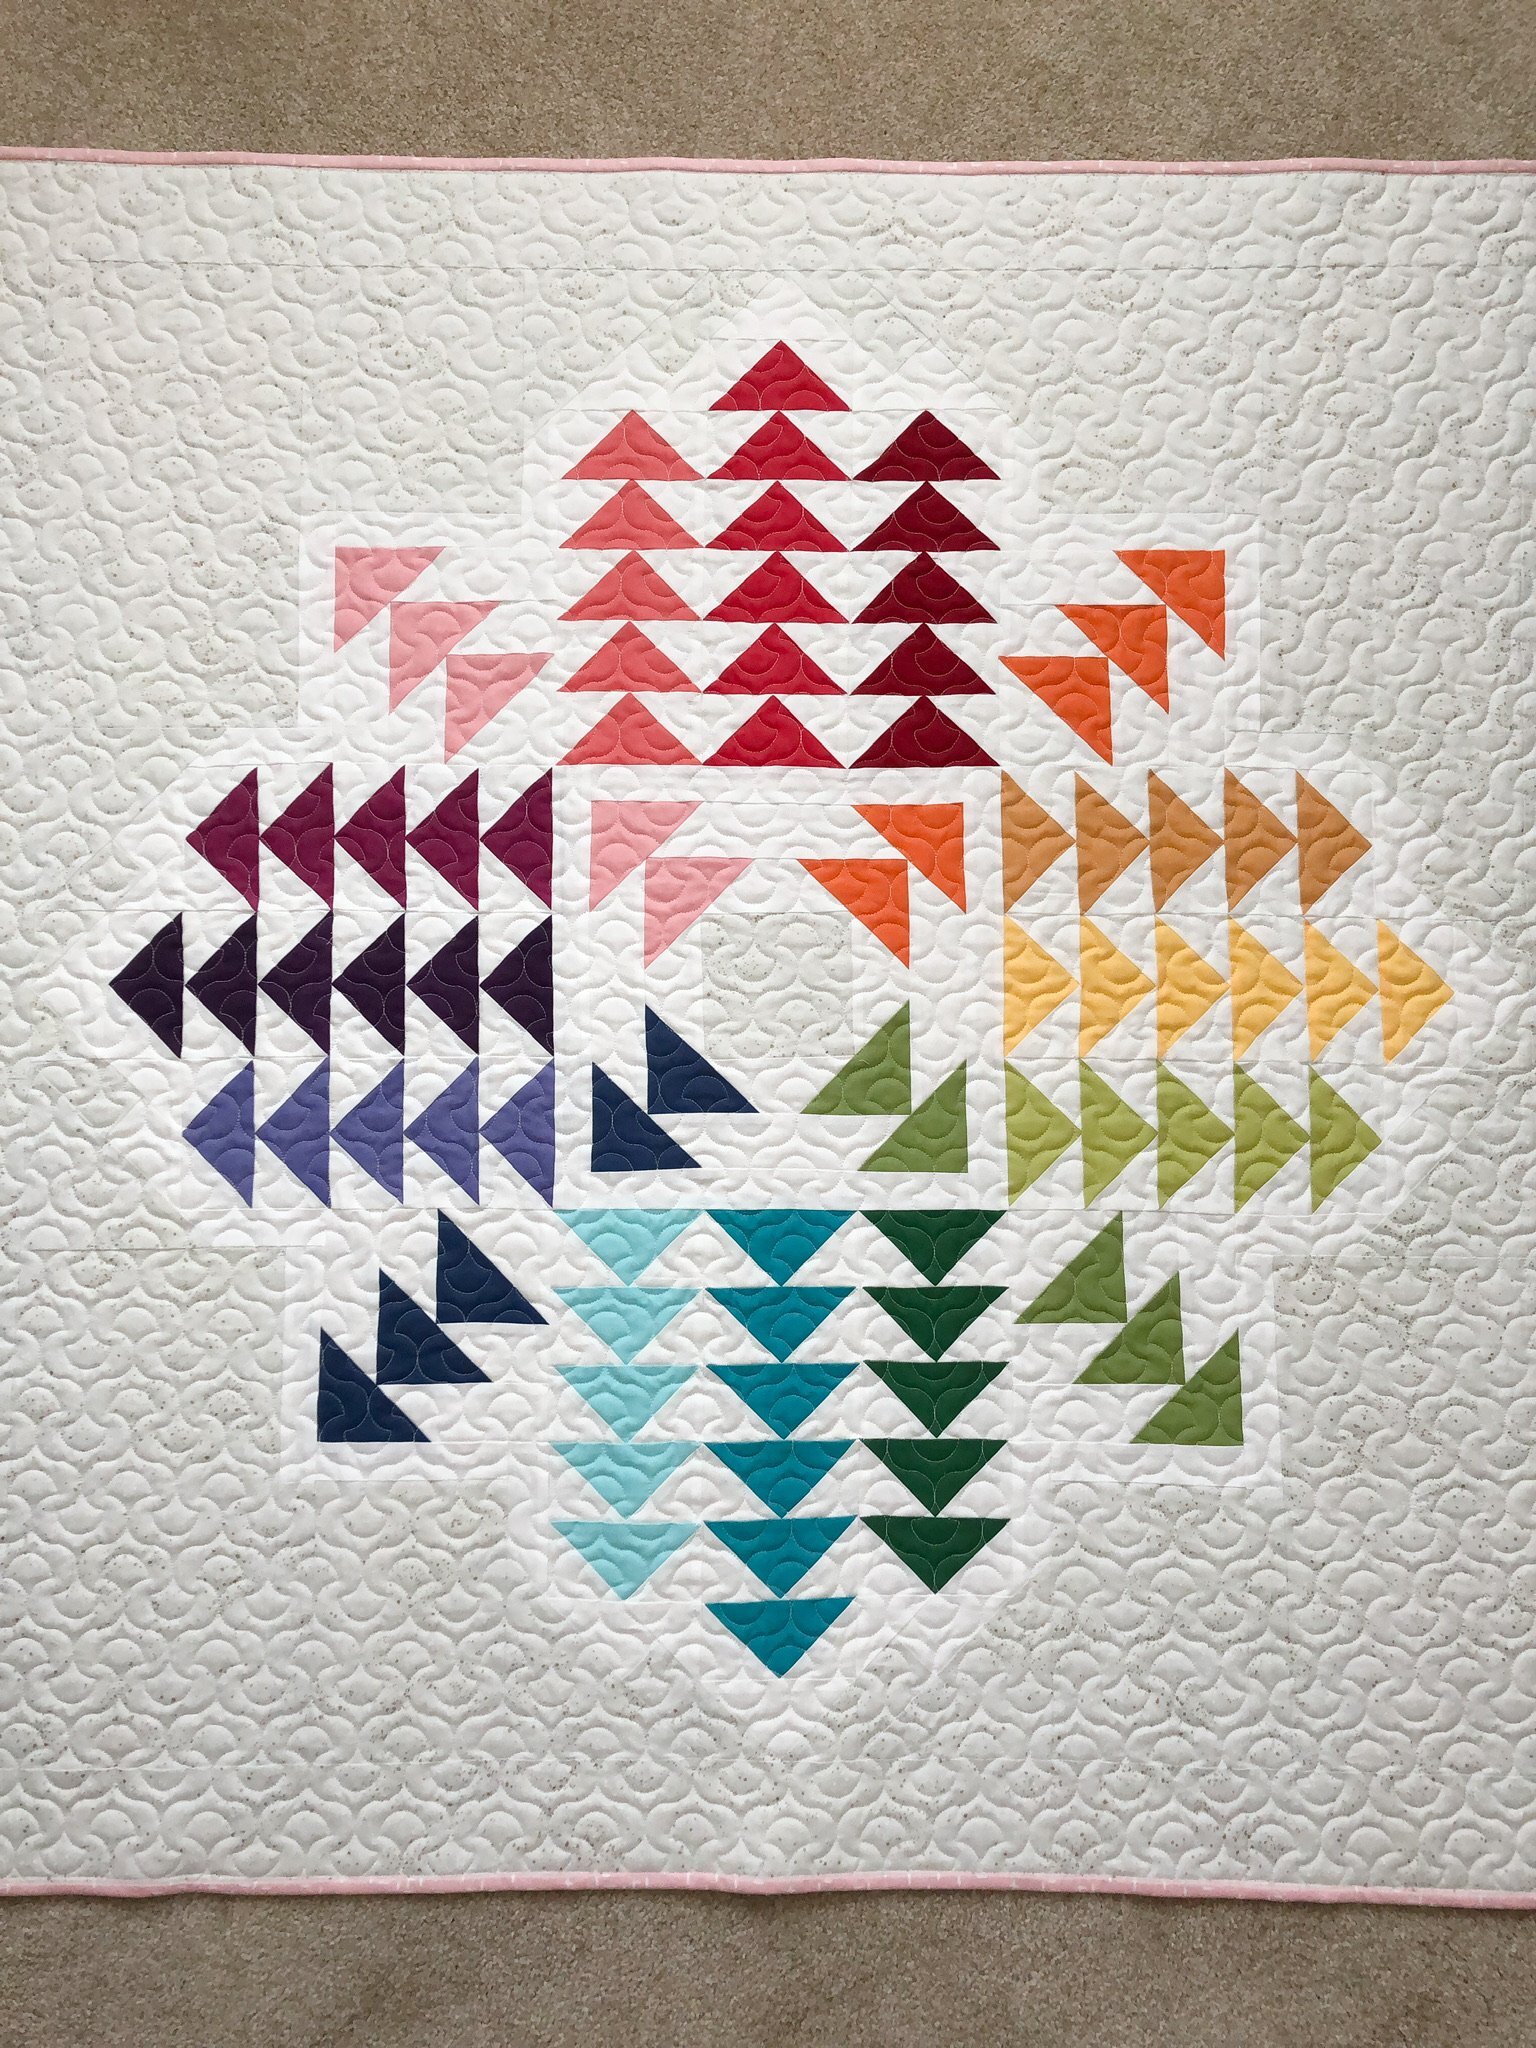
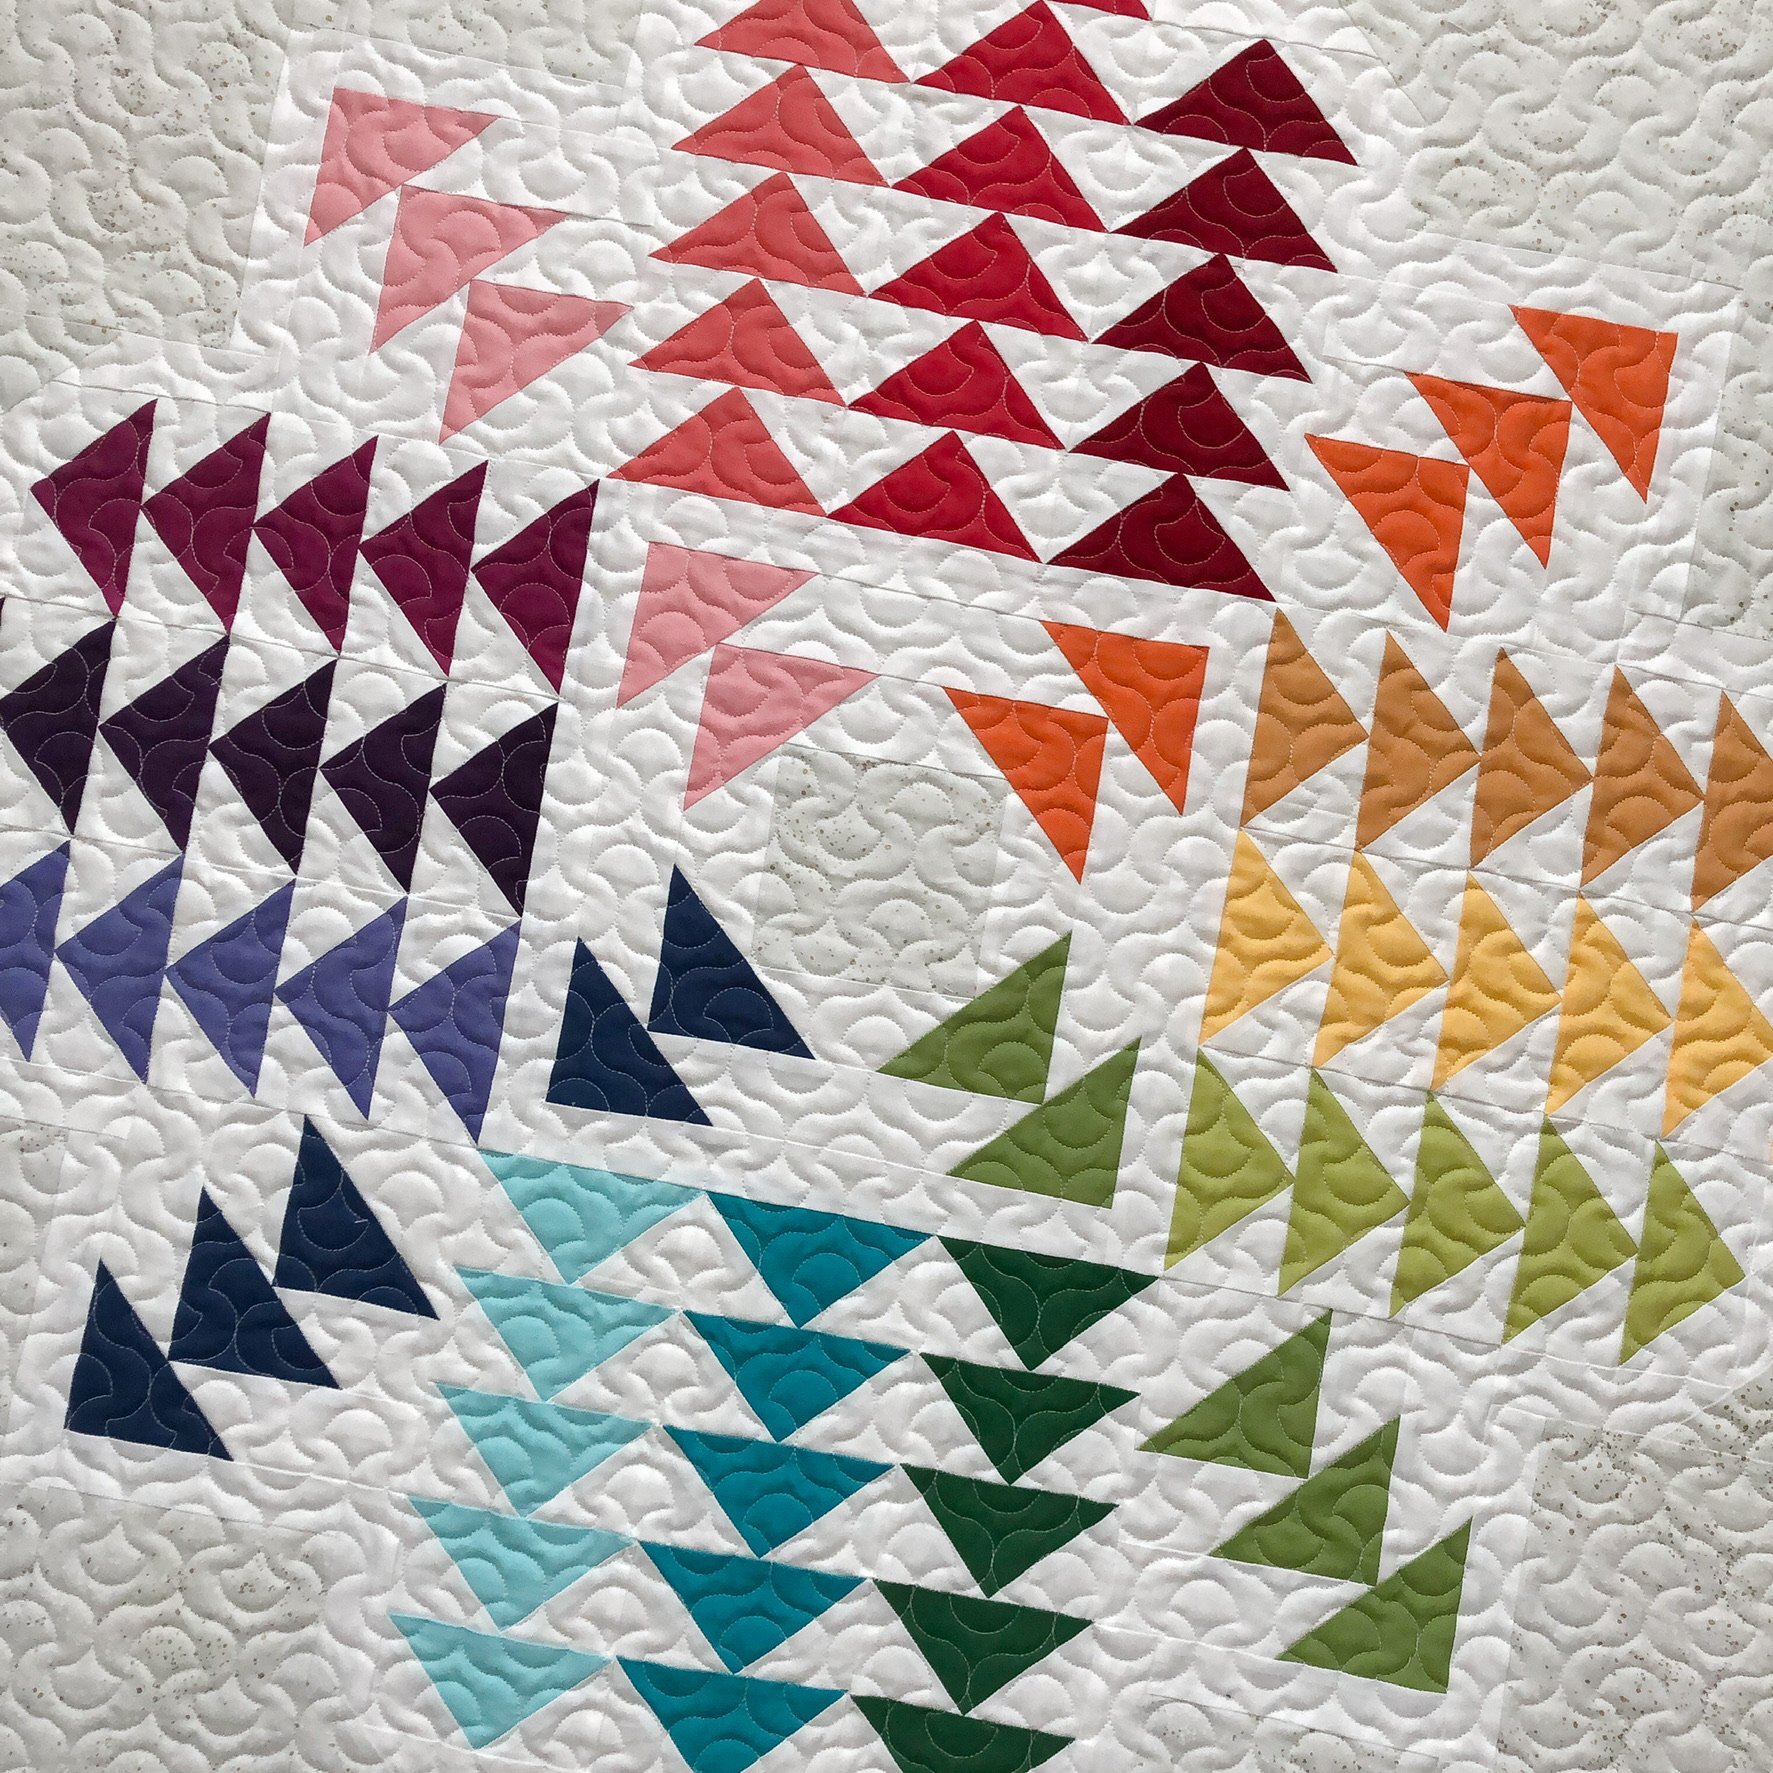
This beautiful pattern is by Elizabeth Hartman and it’s called Crystal Cluster, and my mom has two kits which includes the pattern and binding, in her shop. We used other solid fabrics available in her shop, so we didn’t have to use one of her kits. Go to https://www.etsy.com/shop/sistersandquilters/ And see what they have available.

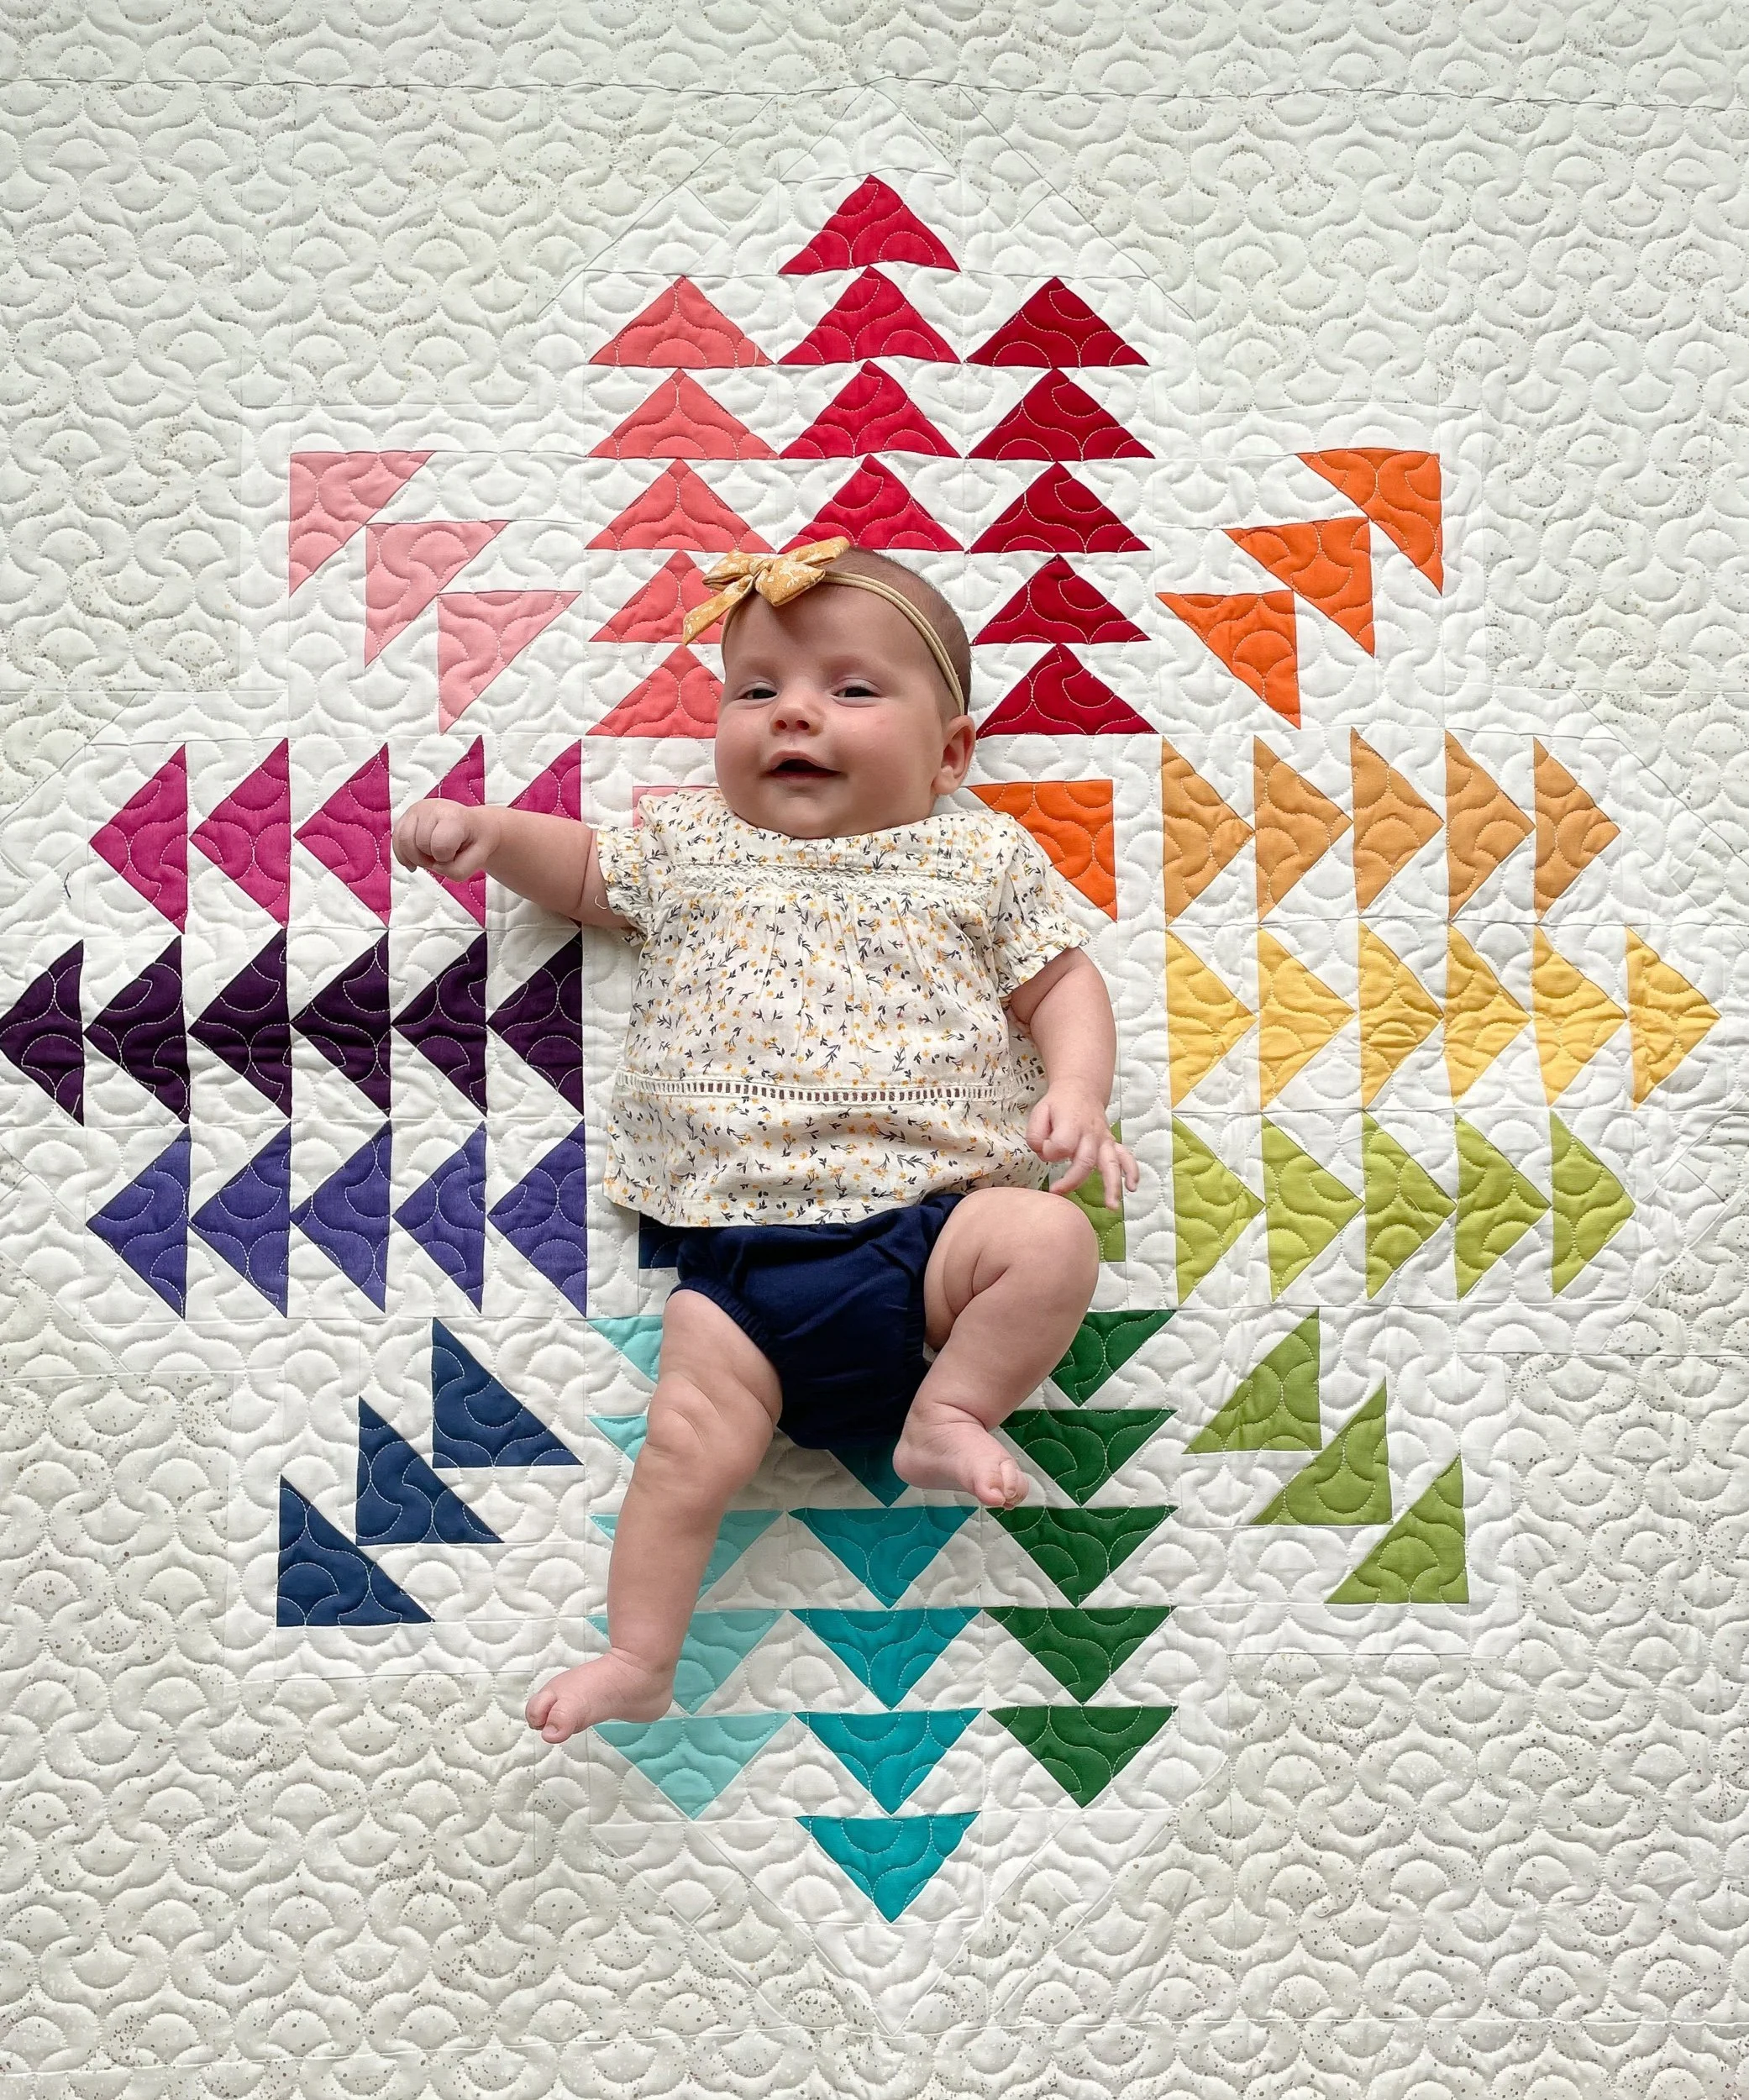
Here is miss Ruby, isn’t she absolutely adorable?!?!
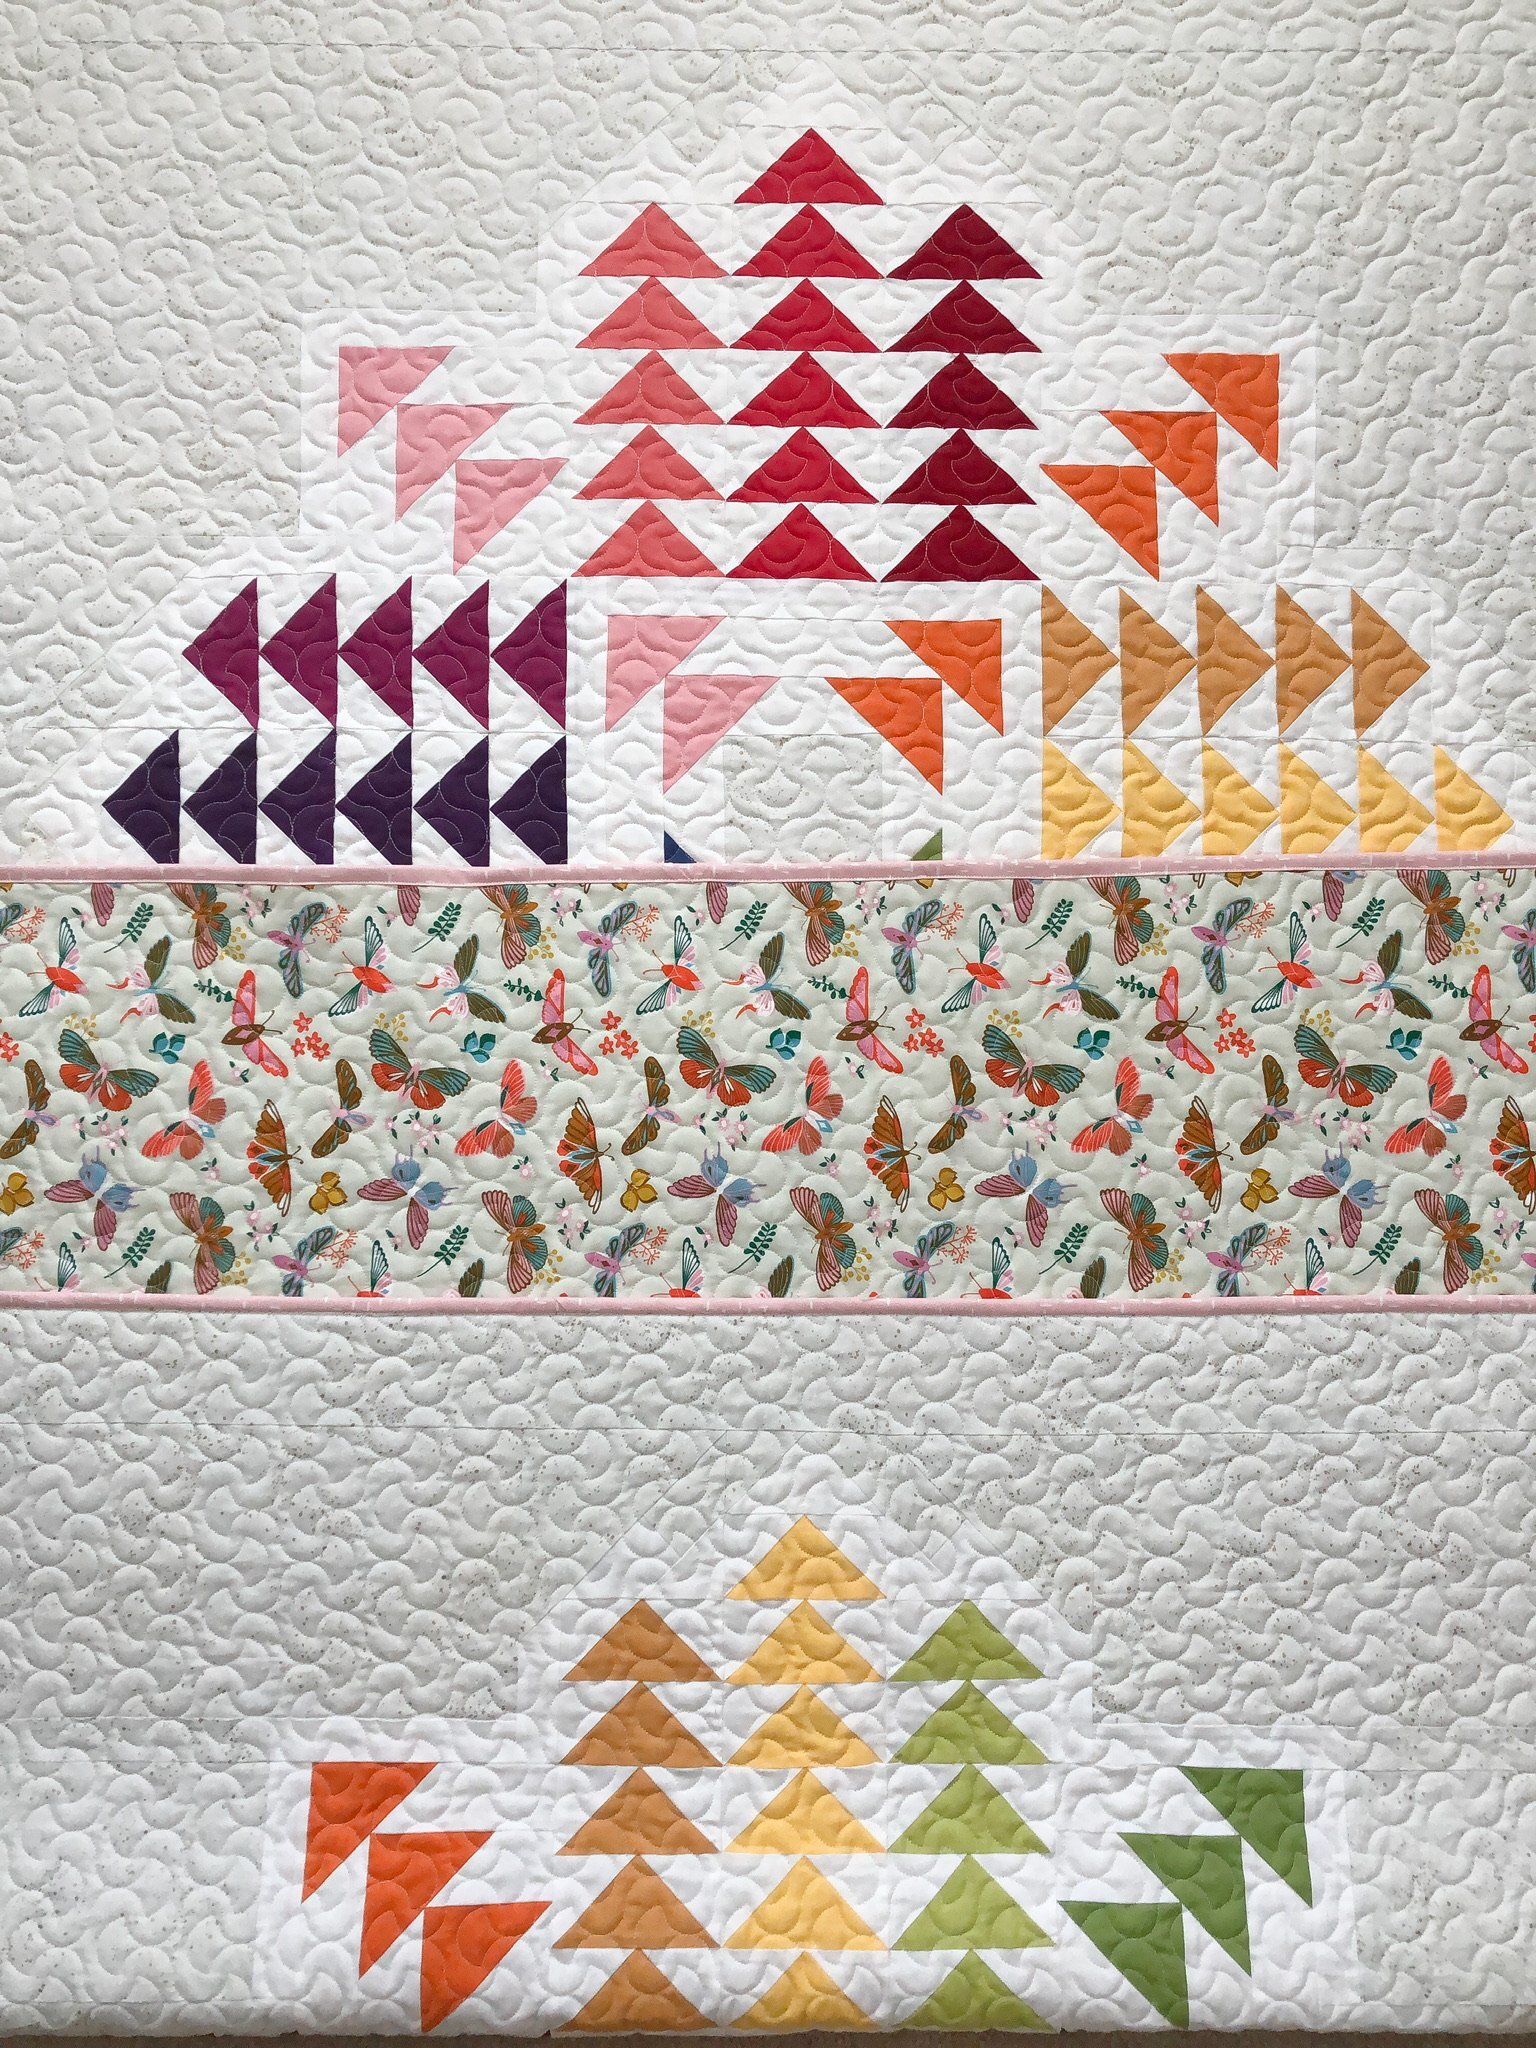
We actually didn’t have a few of the colors in solid, so we actually used some ombré fabrics and it turned out so fun!!!

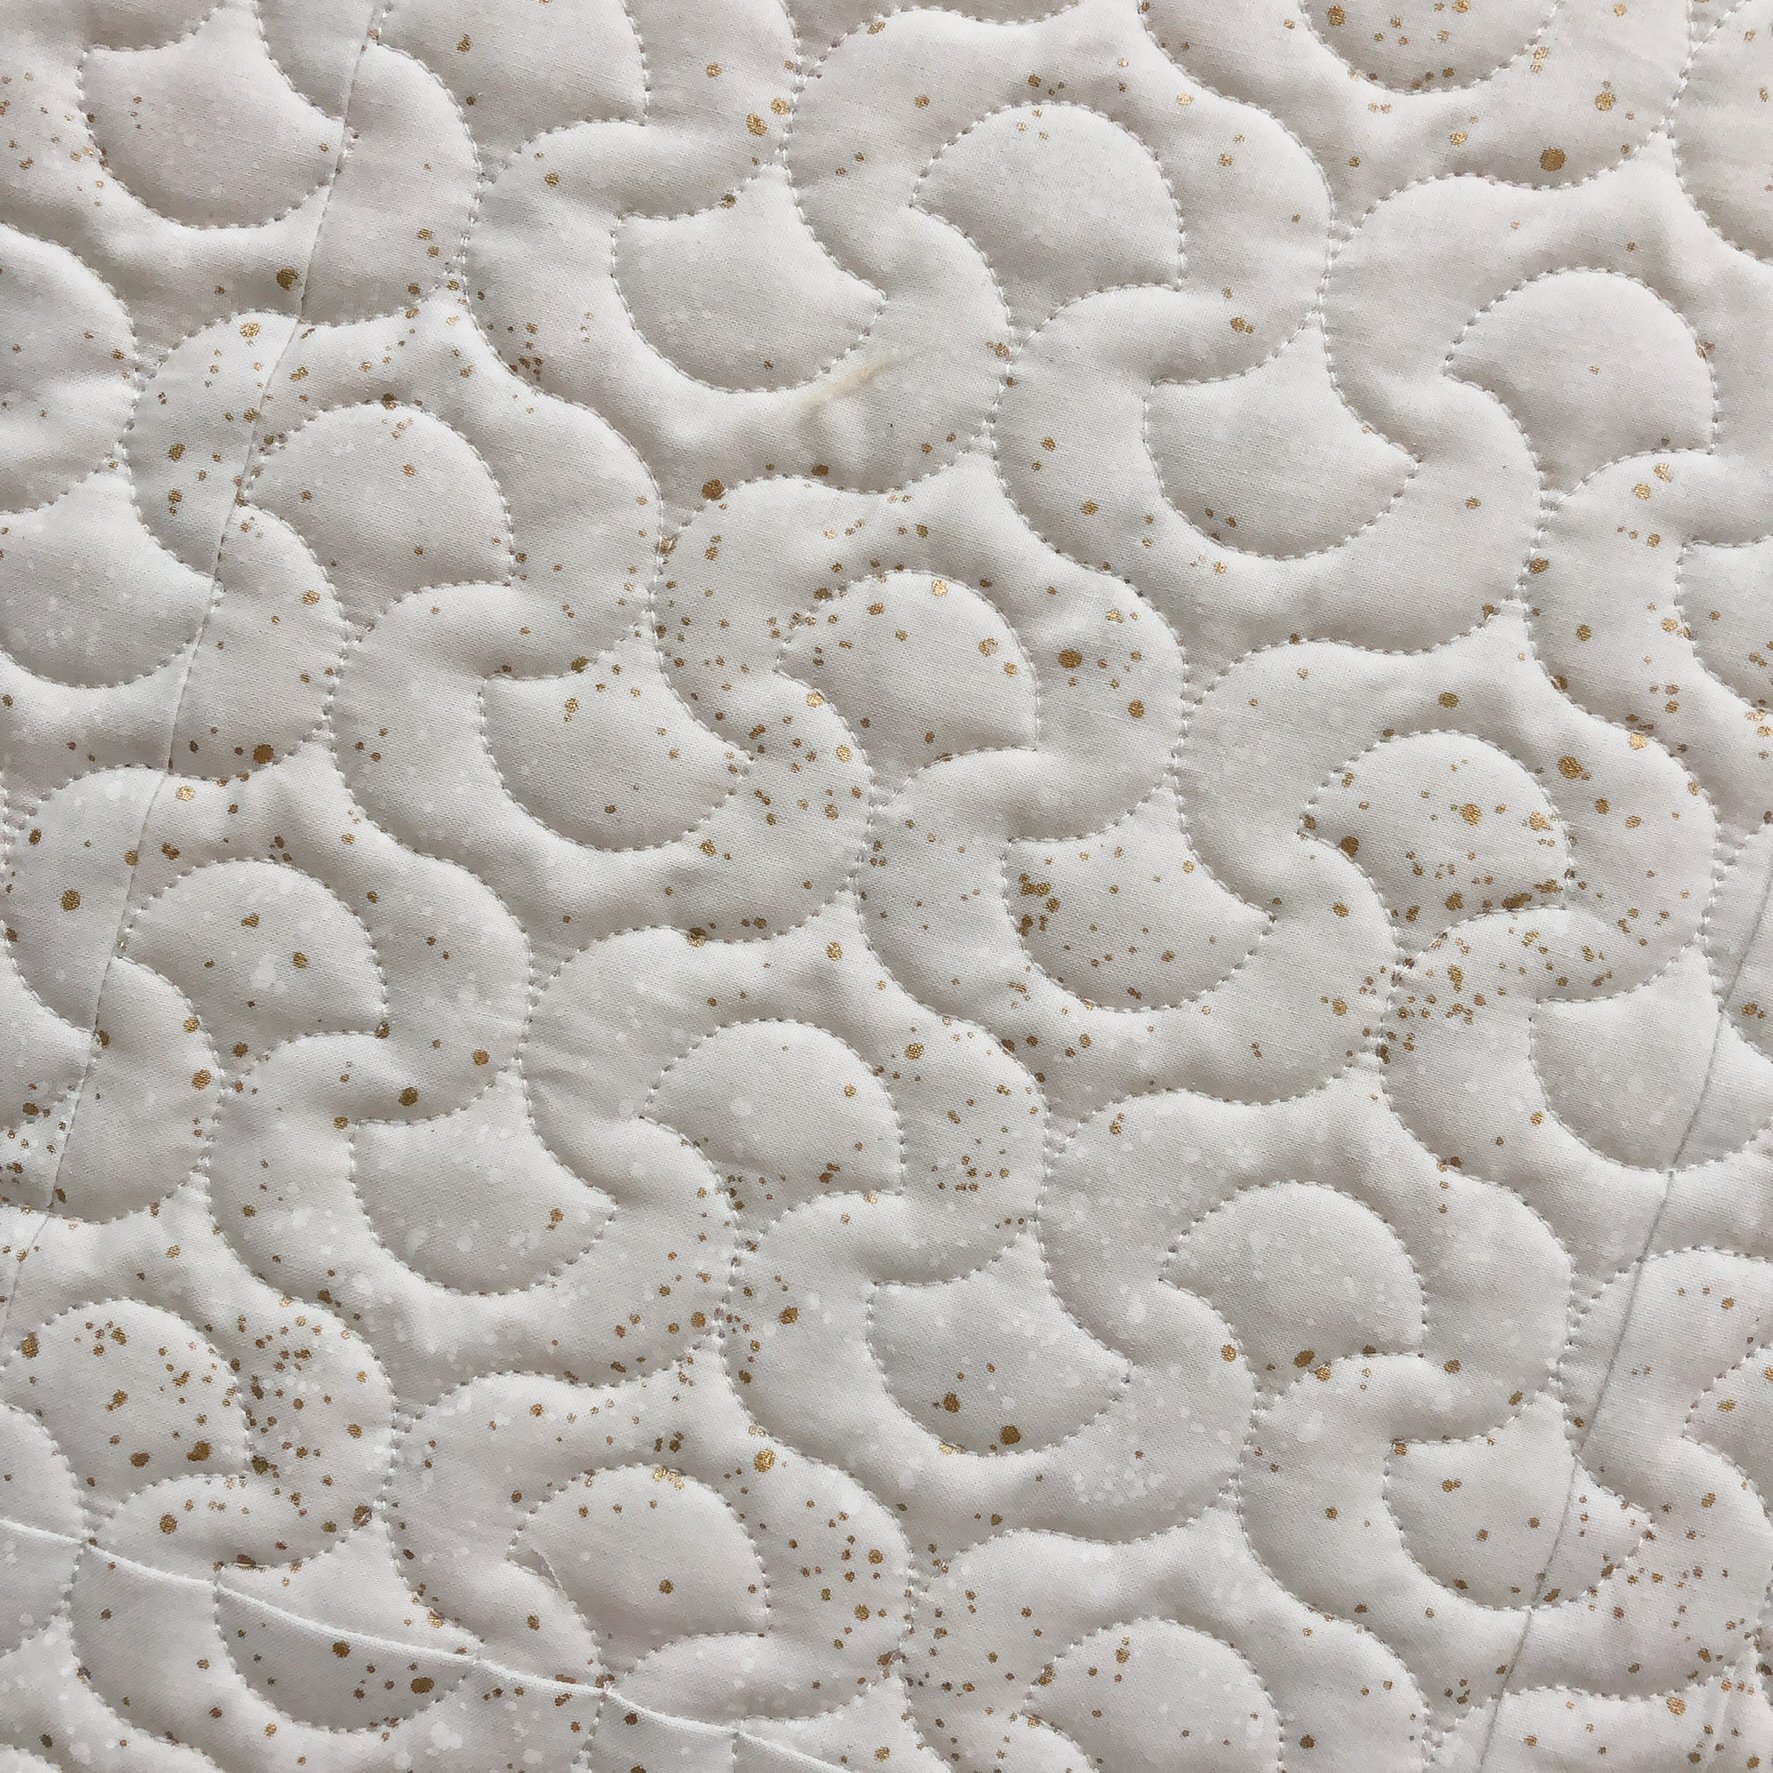
We used this fun speckled fabric from Ruby Star Society called Speckled from Rashida Coleman Hale for the background. I love the hint of sparkle from the gold flecks. My mom also has some in her shop.
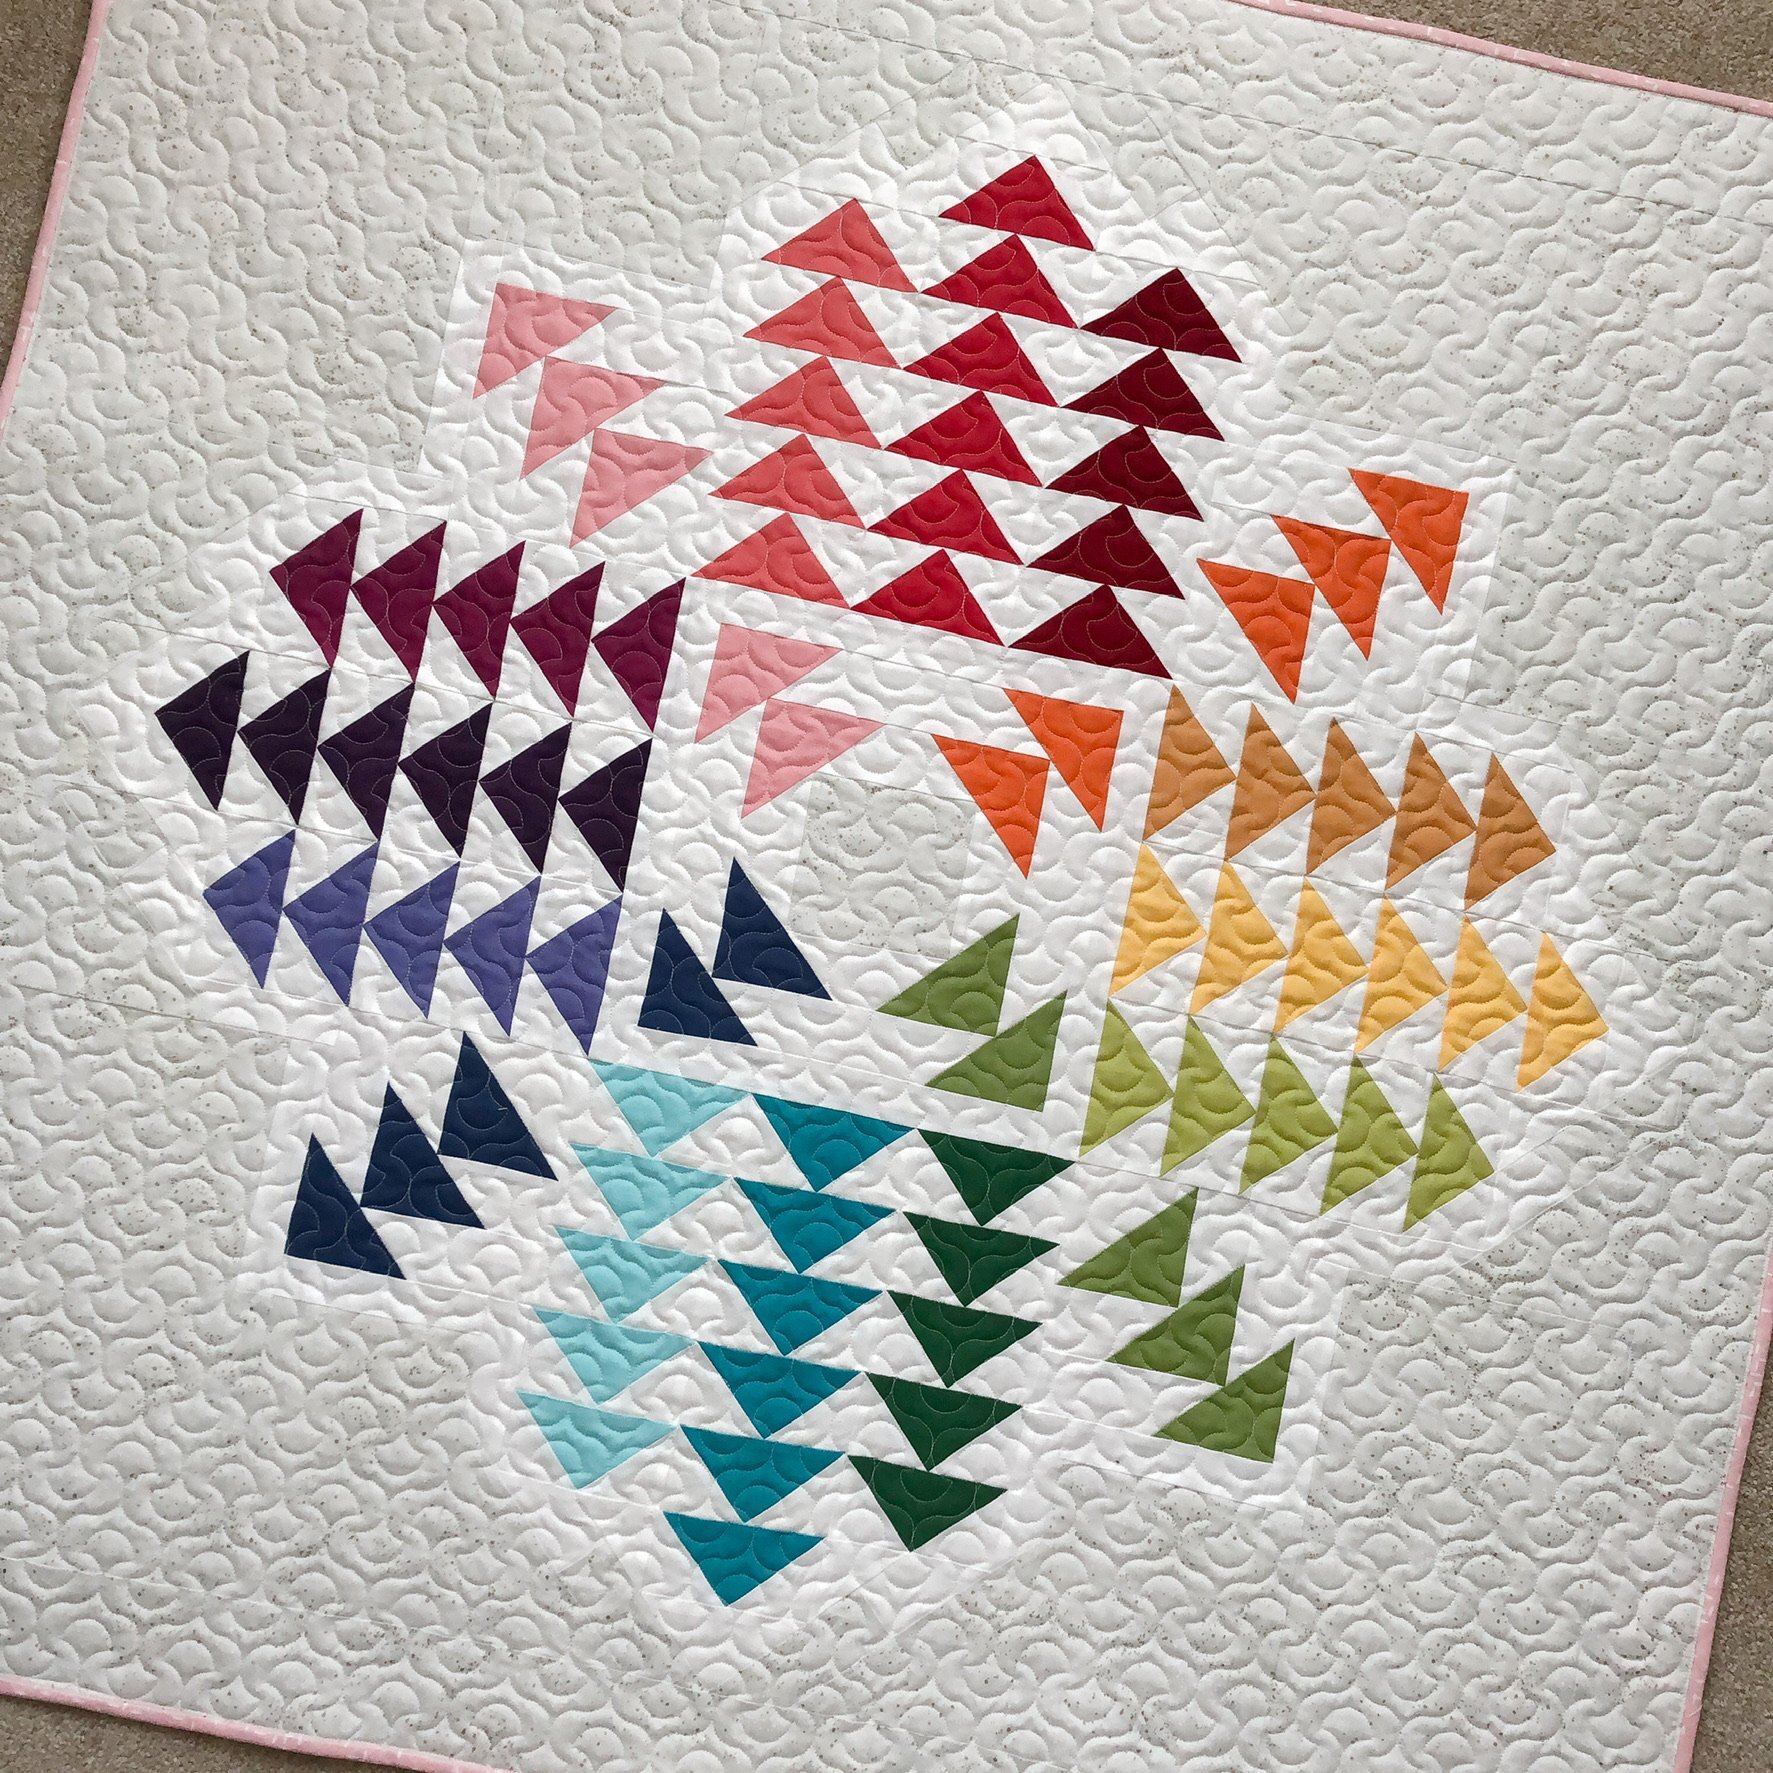
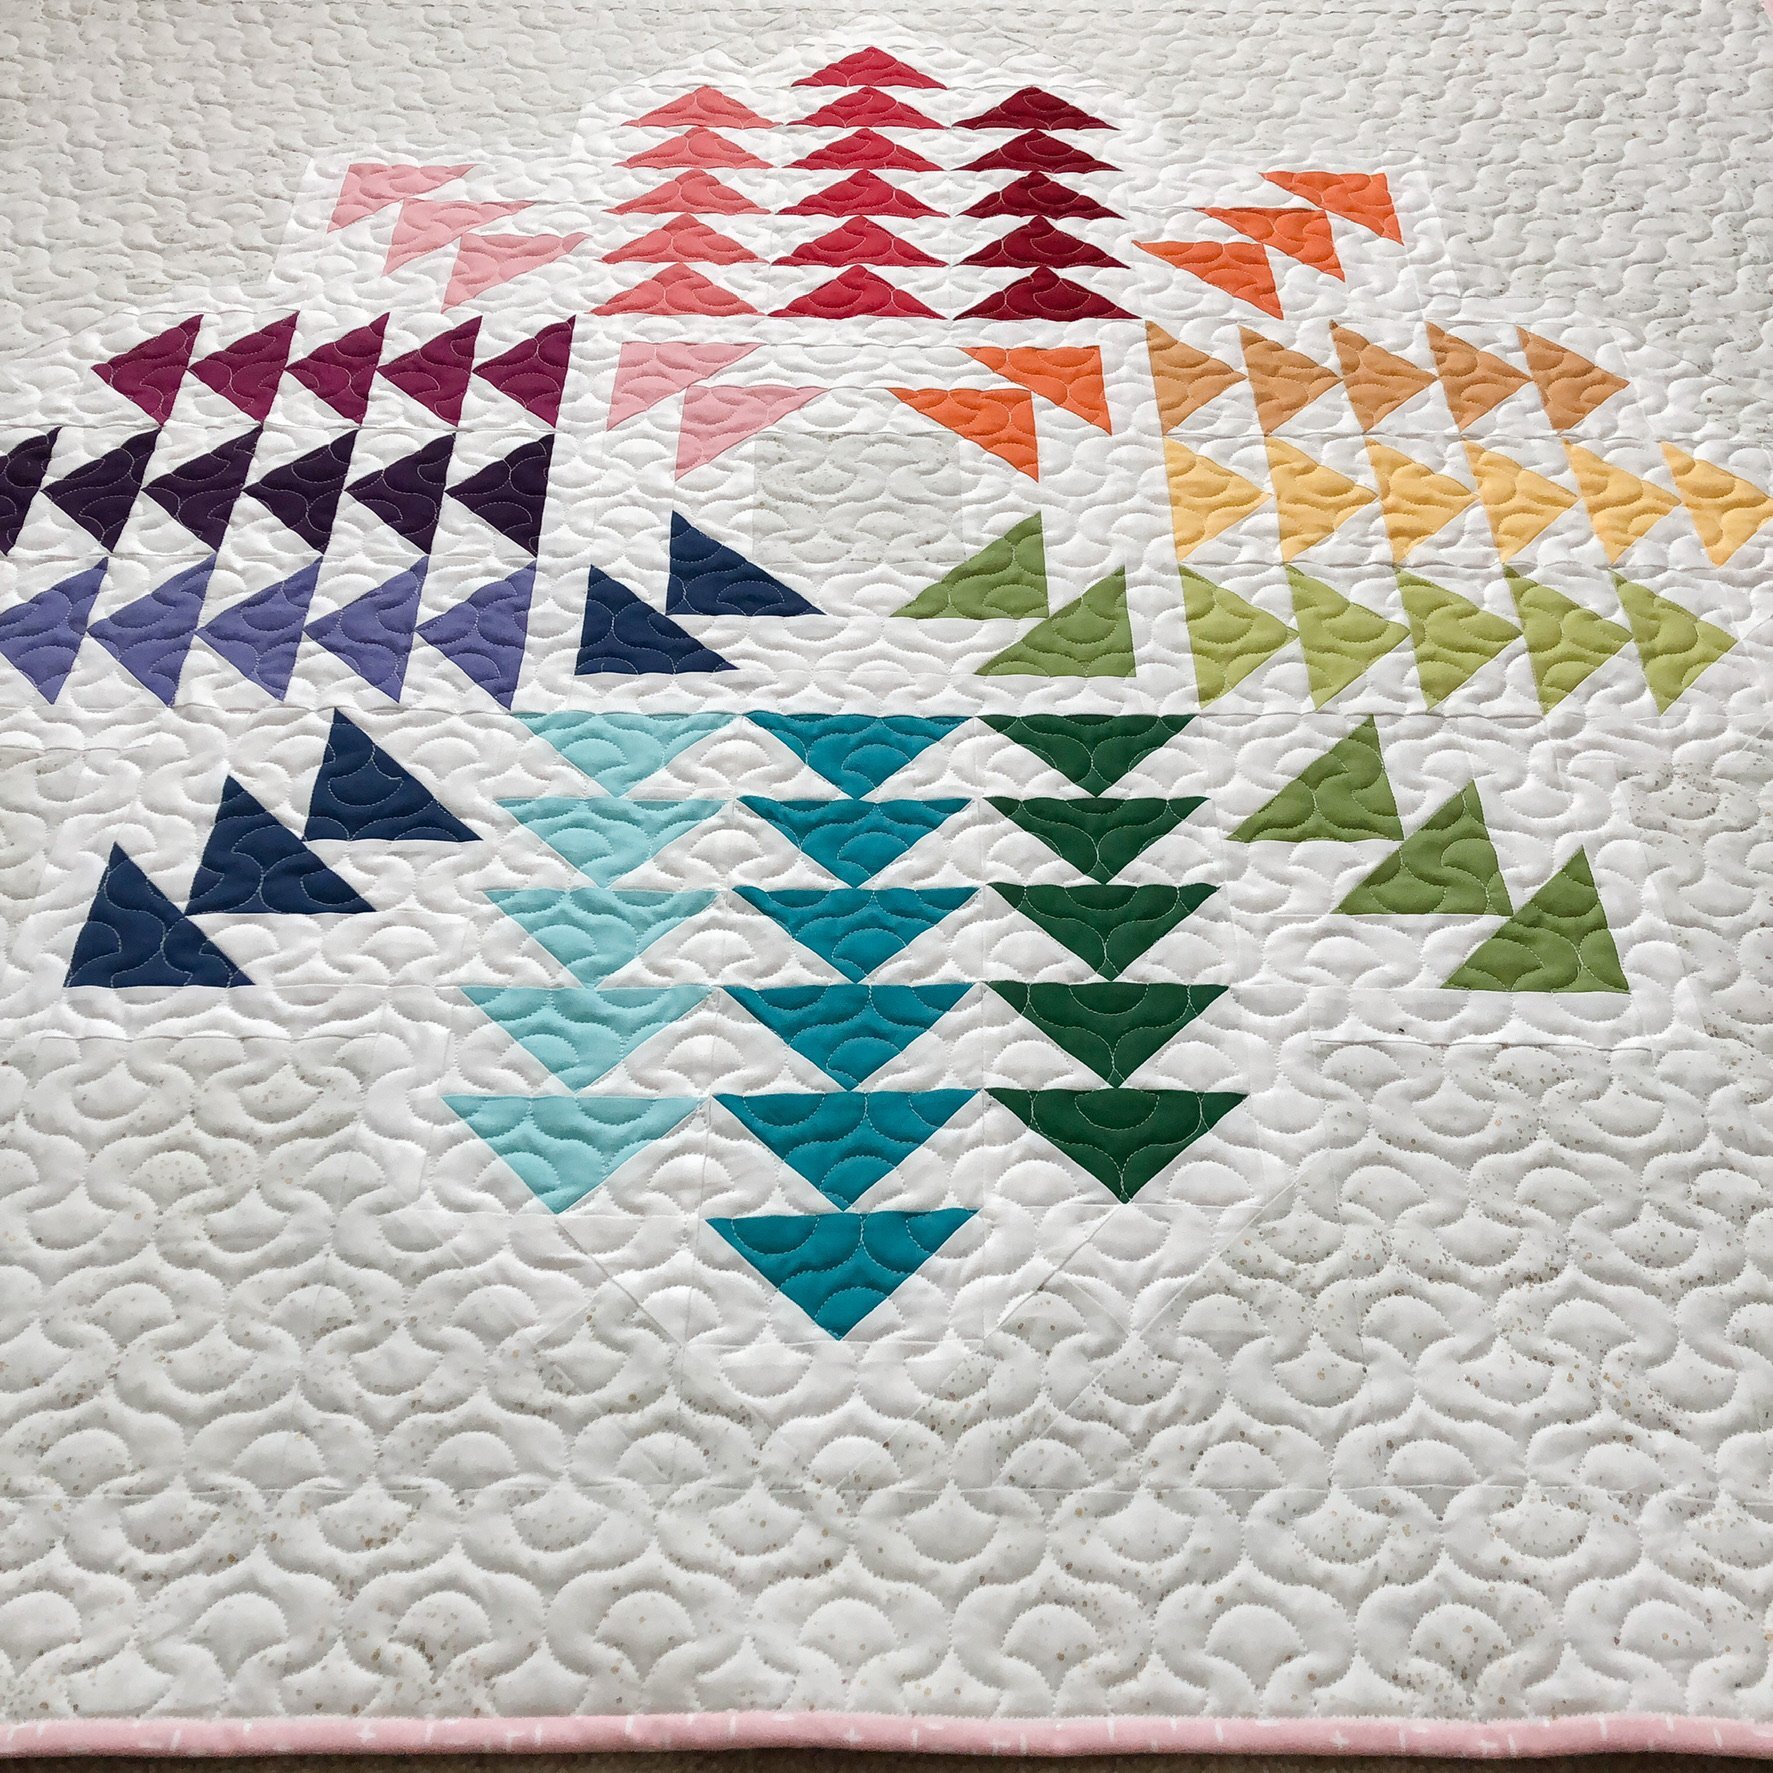
The colors are so fun to have rainbowed around…such a fun pattern! It looks complicated, but the pattern comes together in such a fun way.

I used my favorite Natural White Omni thread from Superior Thread and 8020 cotton poly blend batting from Winline Textiles.
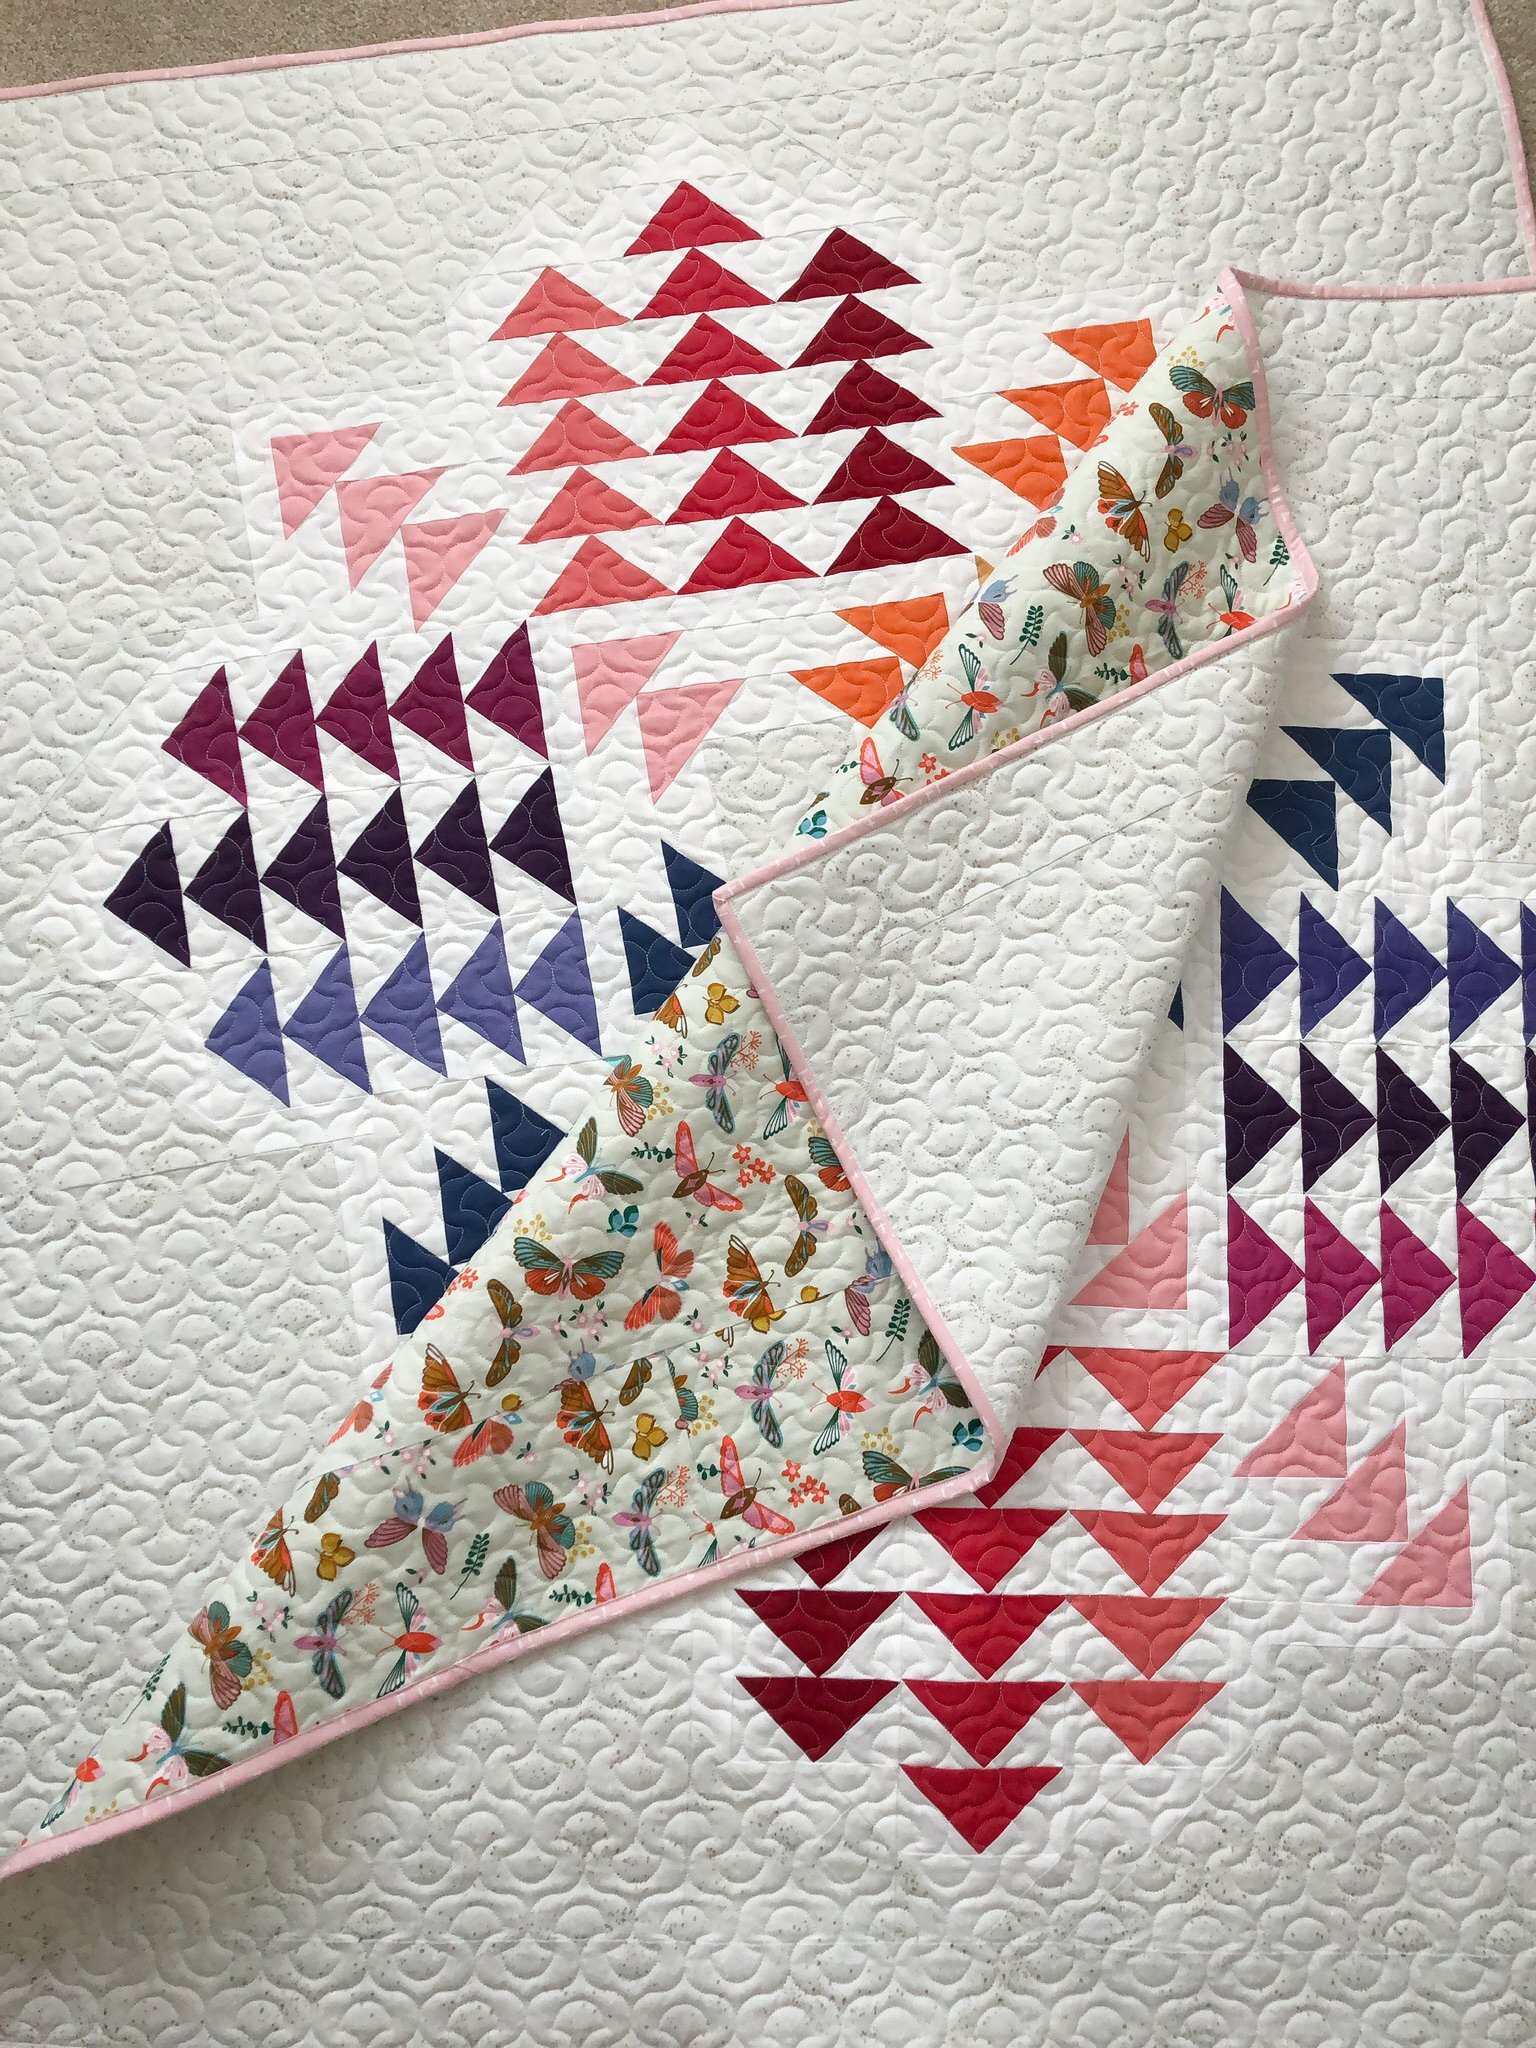
We decided on the fun butterfly fabric from Ruby Star Society’s Stay Gold line by Melody Miller, and a soft pink dashed fabric by Gingiber in her Words to Live By line…for the binding.

Another view!
It’s fun to have two to take a variety of pictures with…
Like this.
I hope you enjoyed all the pictures of this beautiful quilt, and that sweet Miss Ruby!
If you’re interested in having me quilt for you, send me an email and I’ll get you added to my calendar. quiltingit@gmail.com
Thanks for stopping by! • Leisha
Jennifer’s Suburbs Quilt
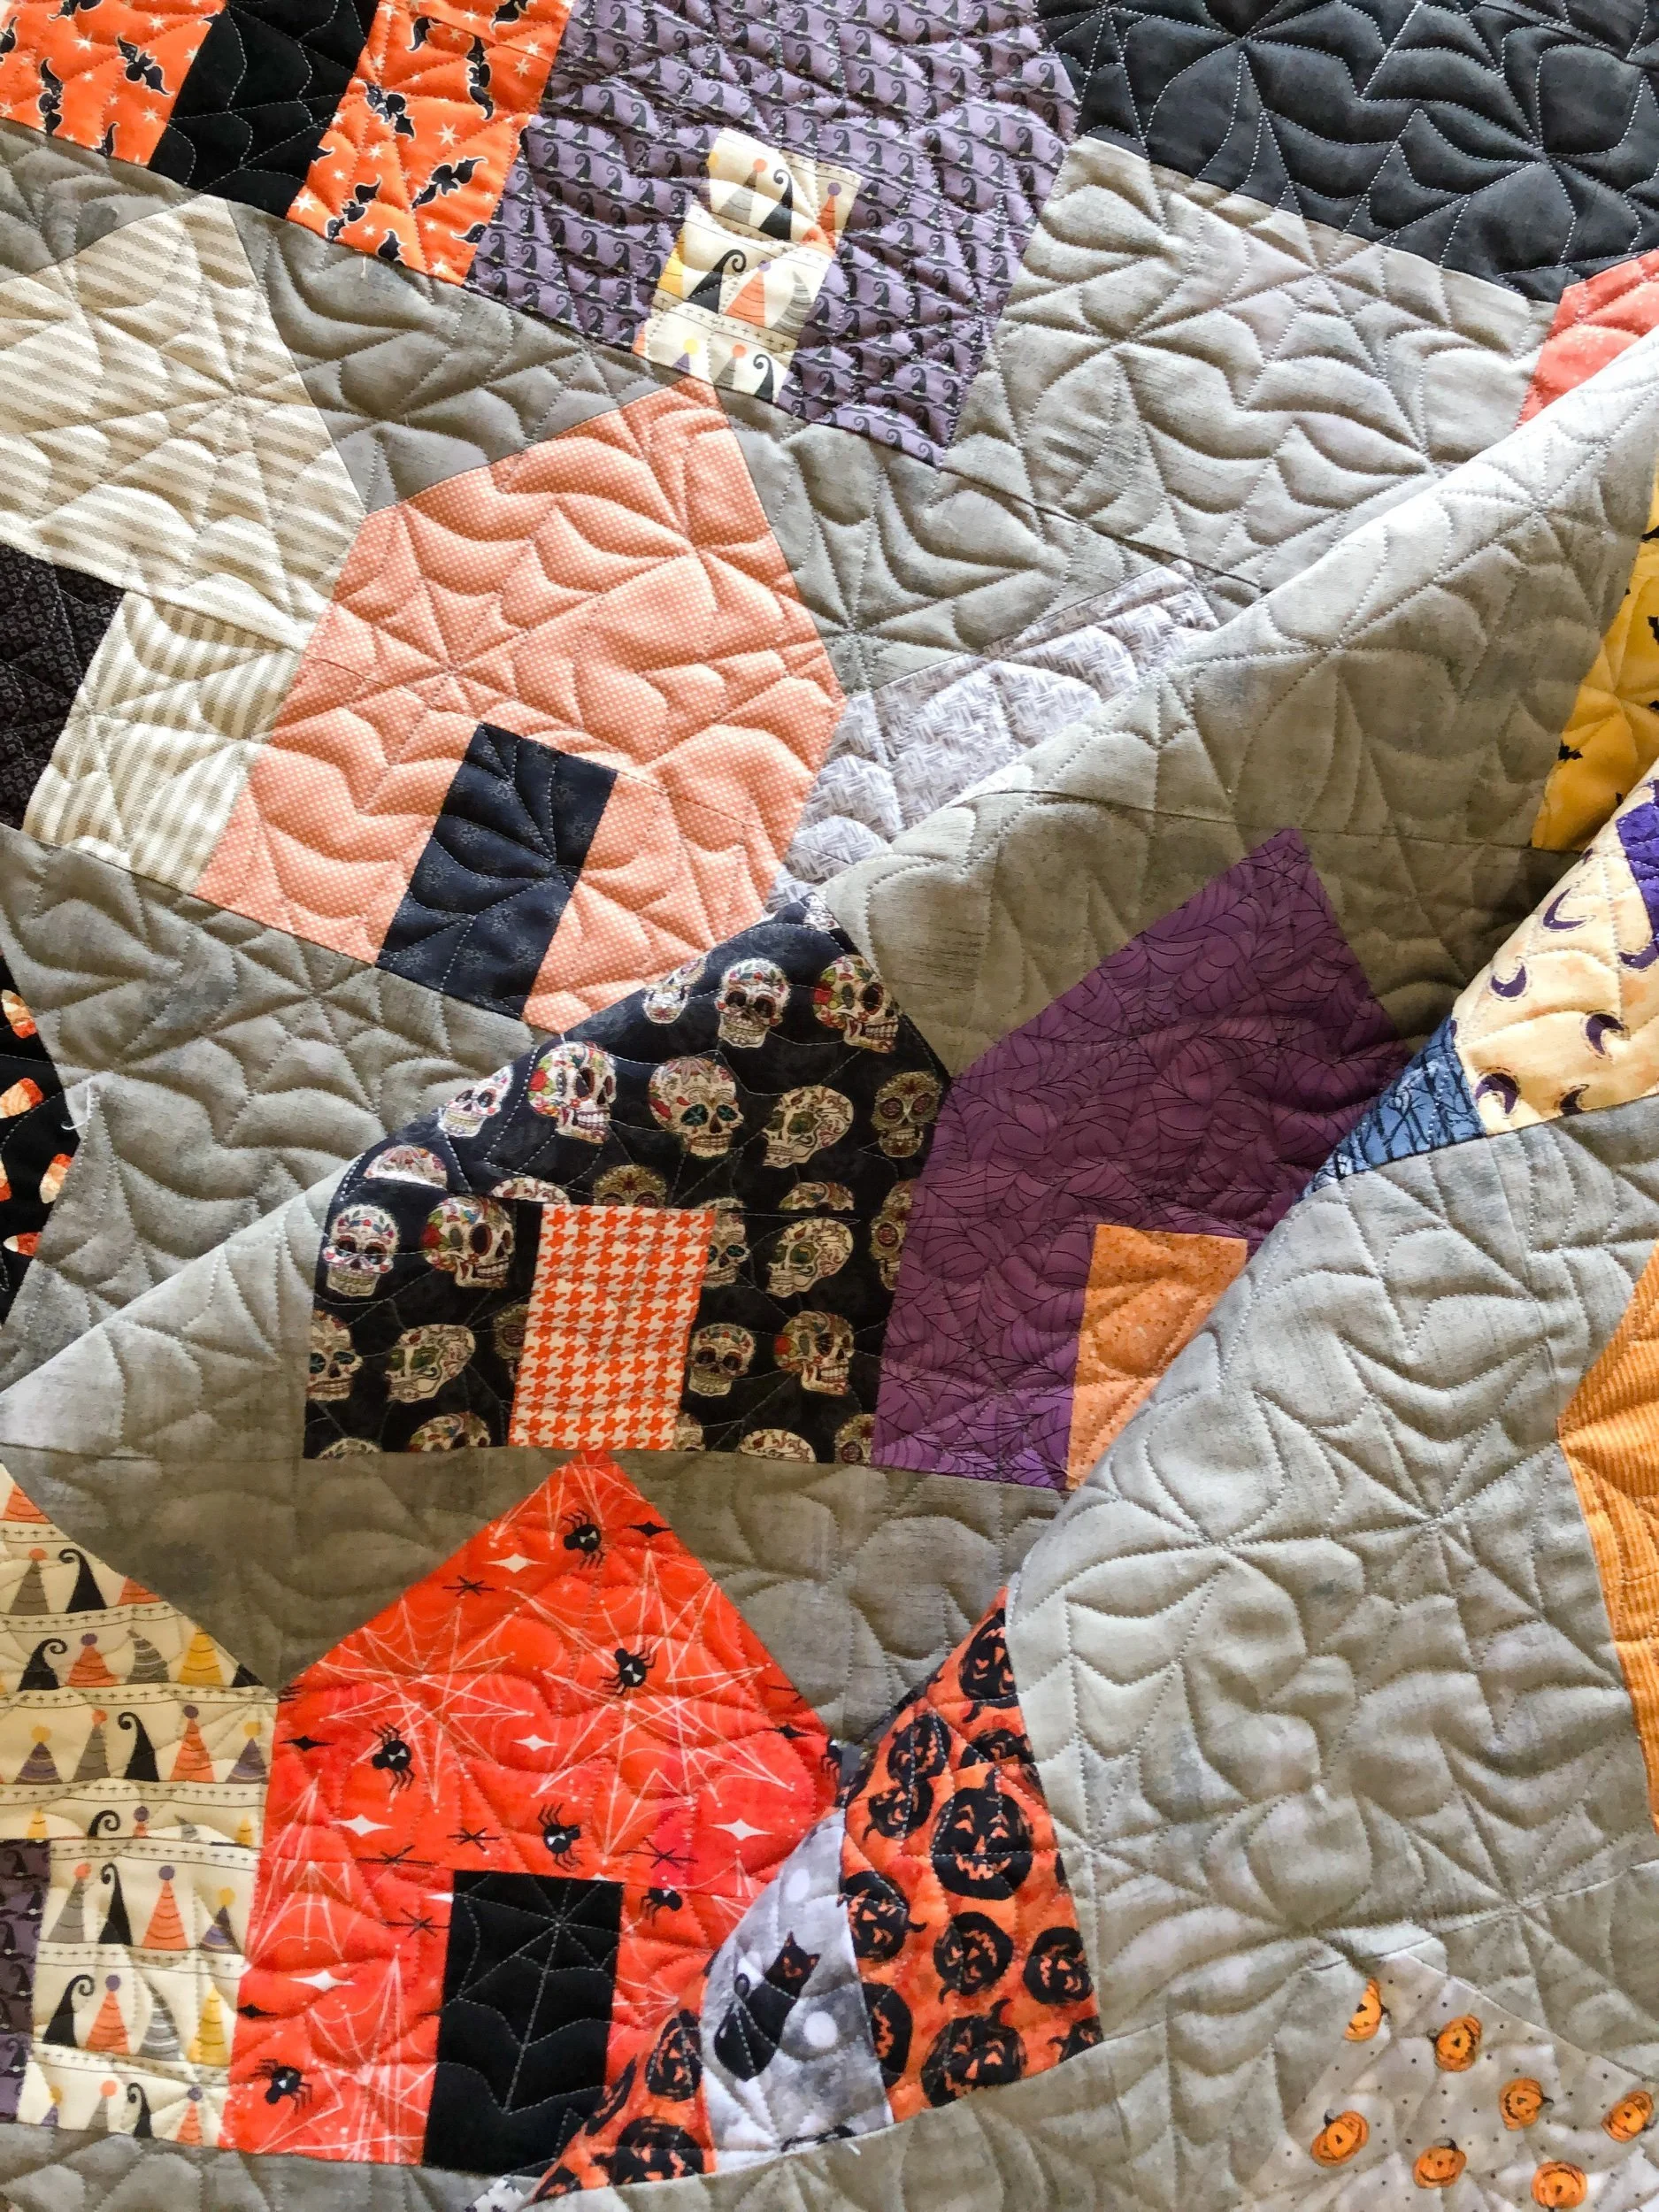
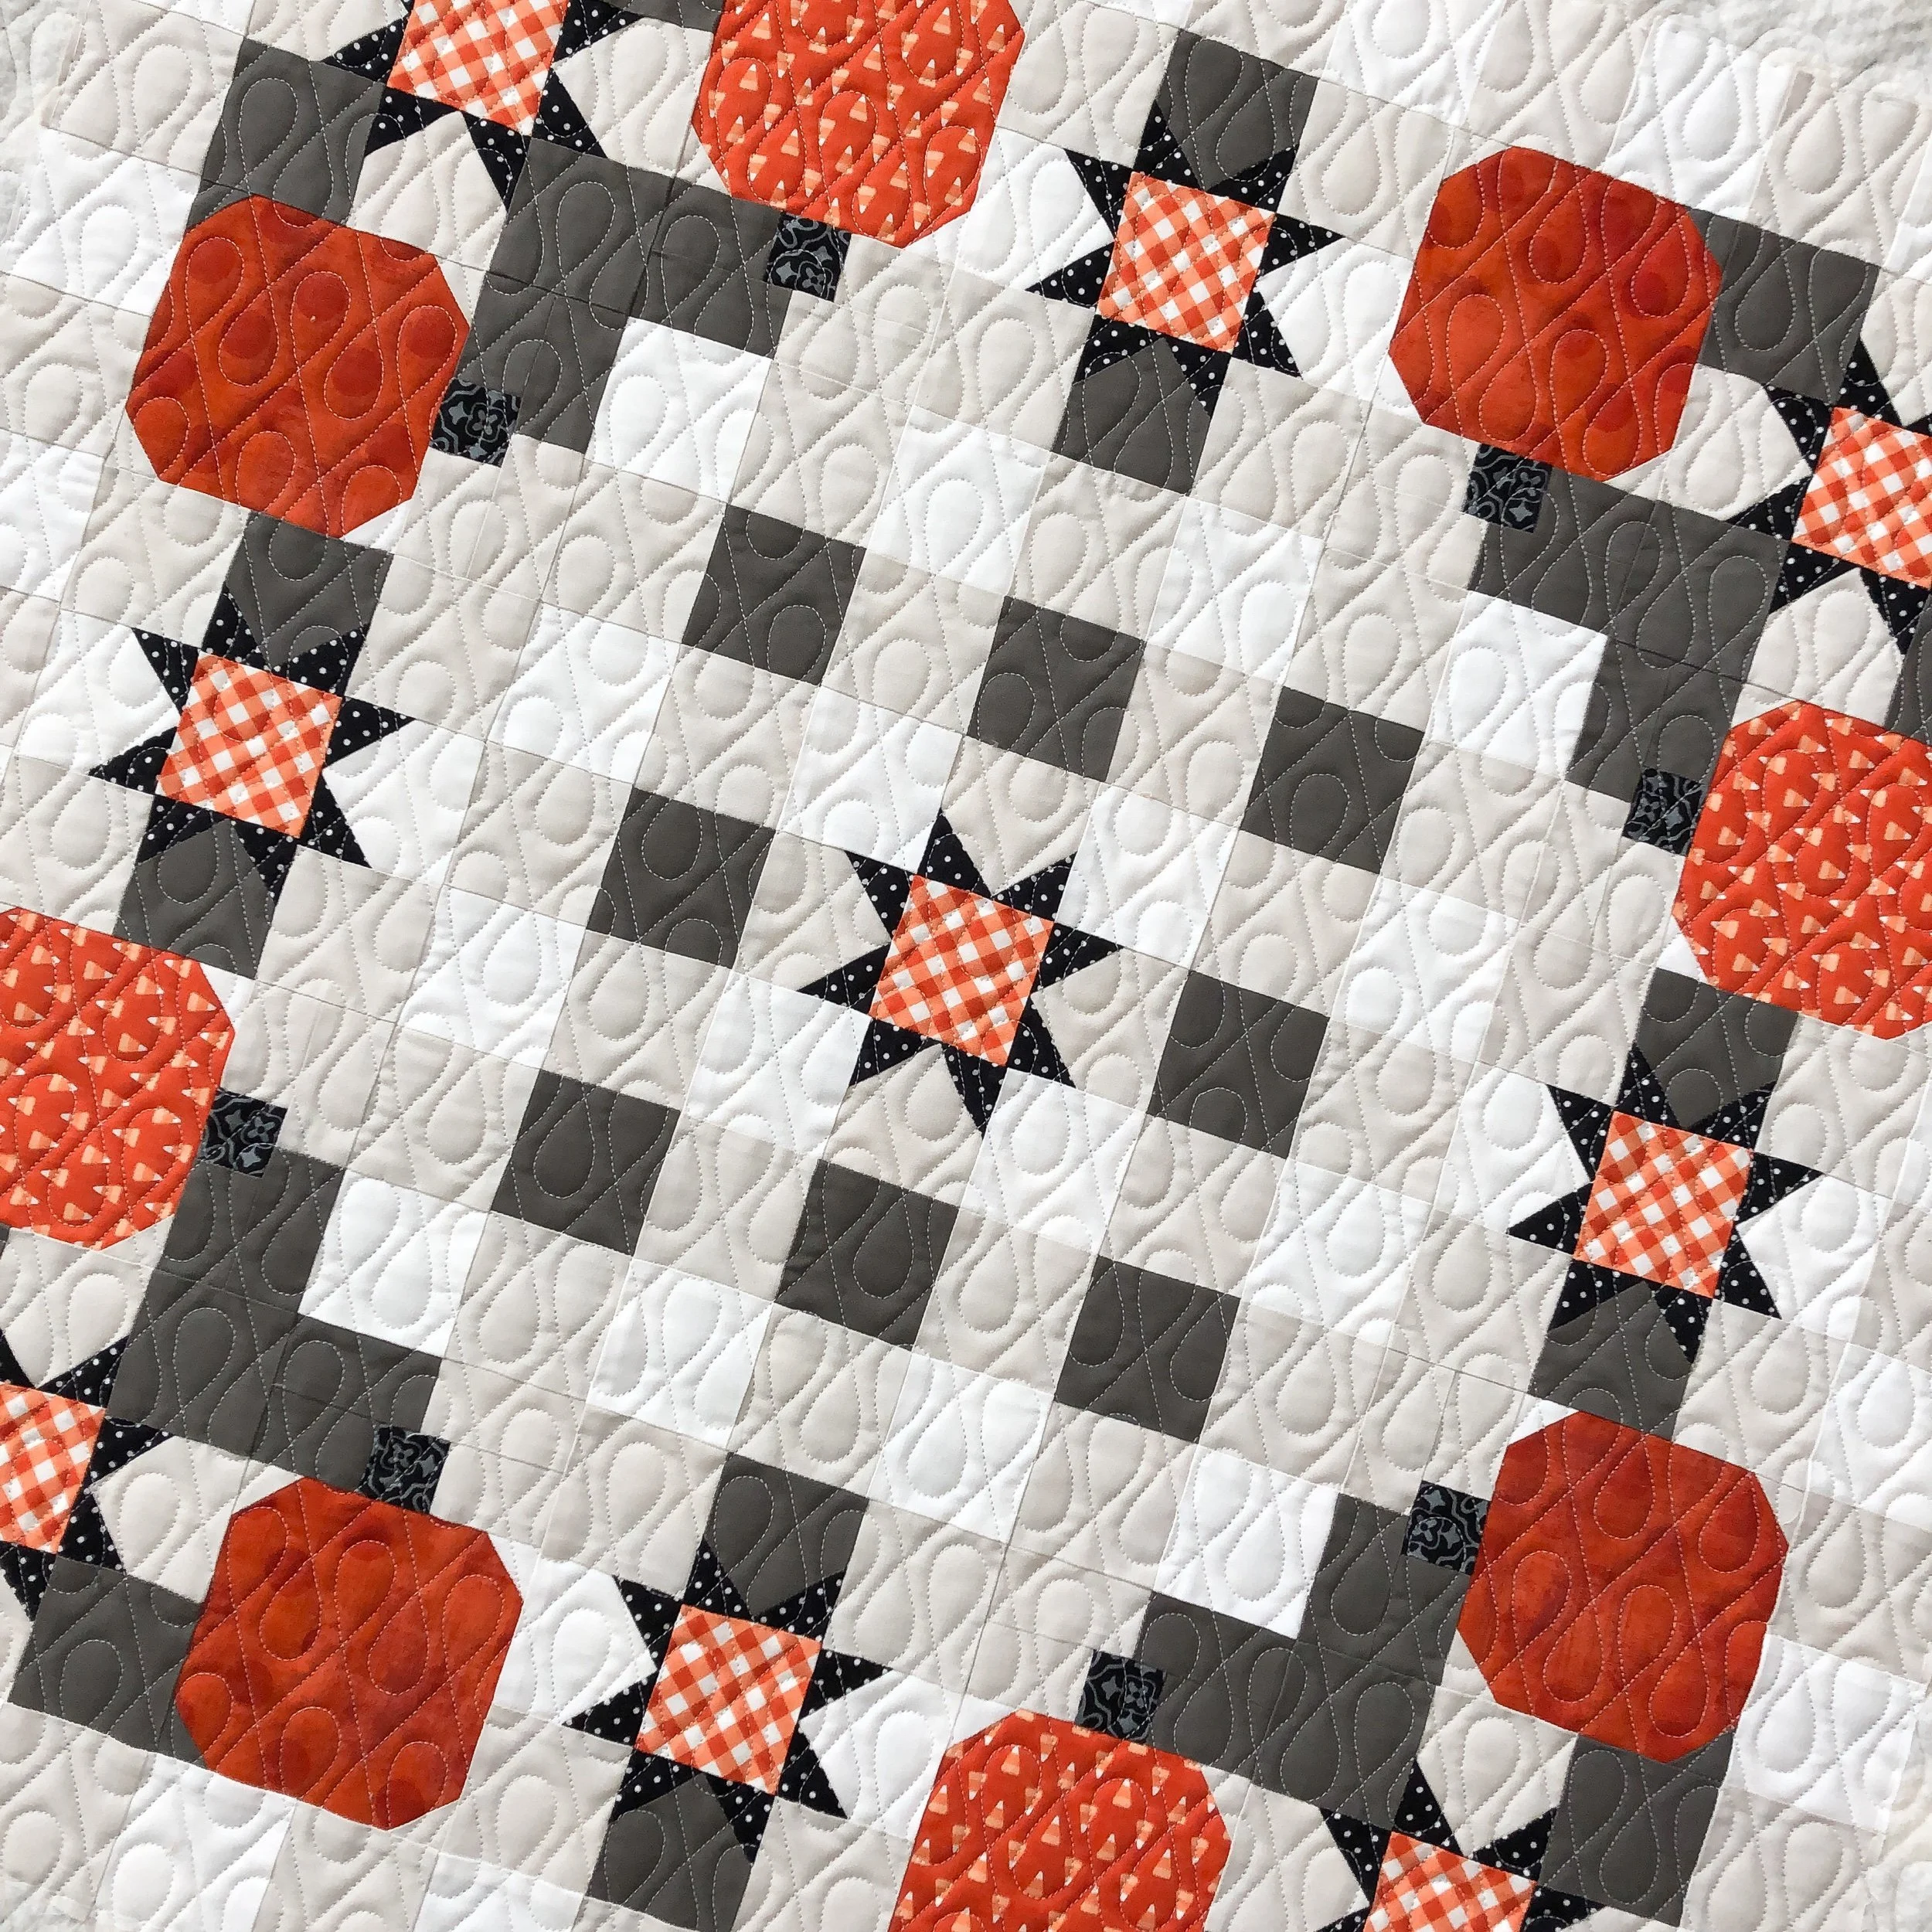
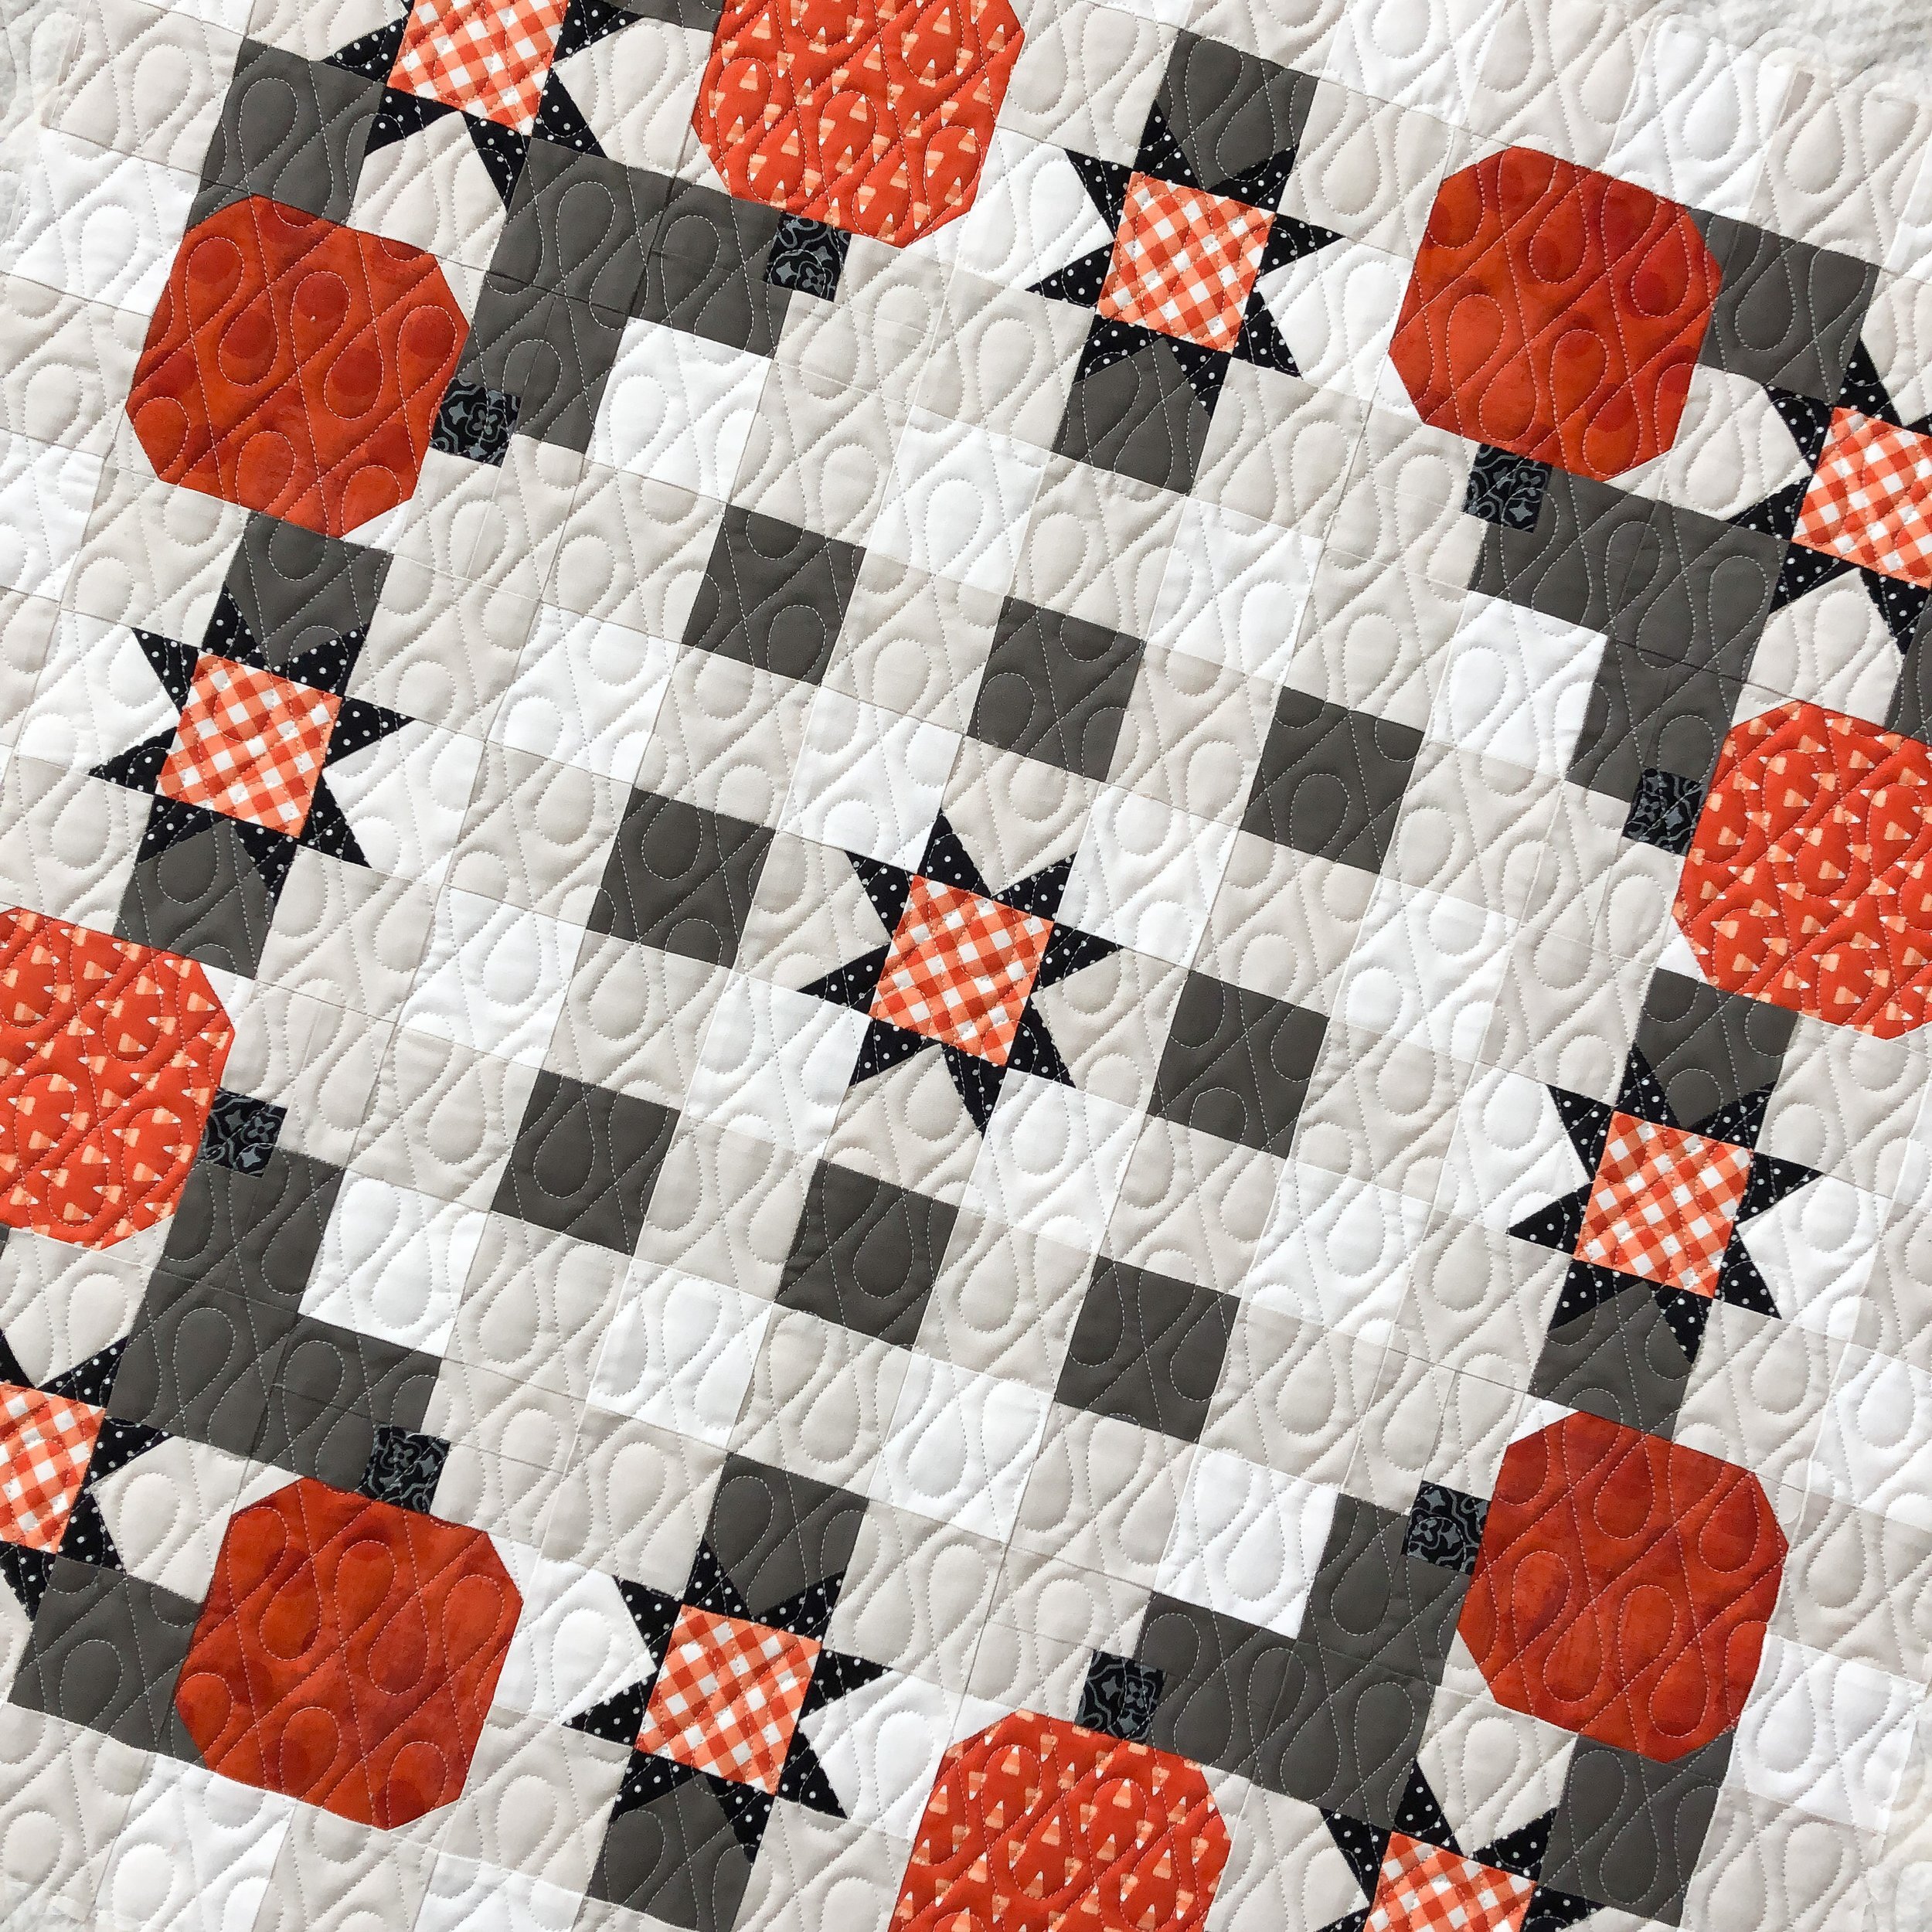
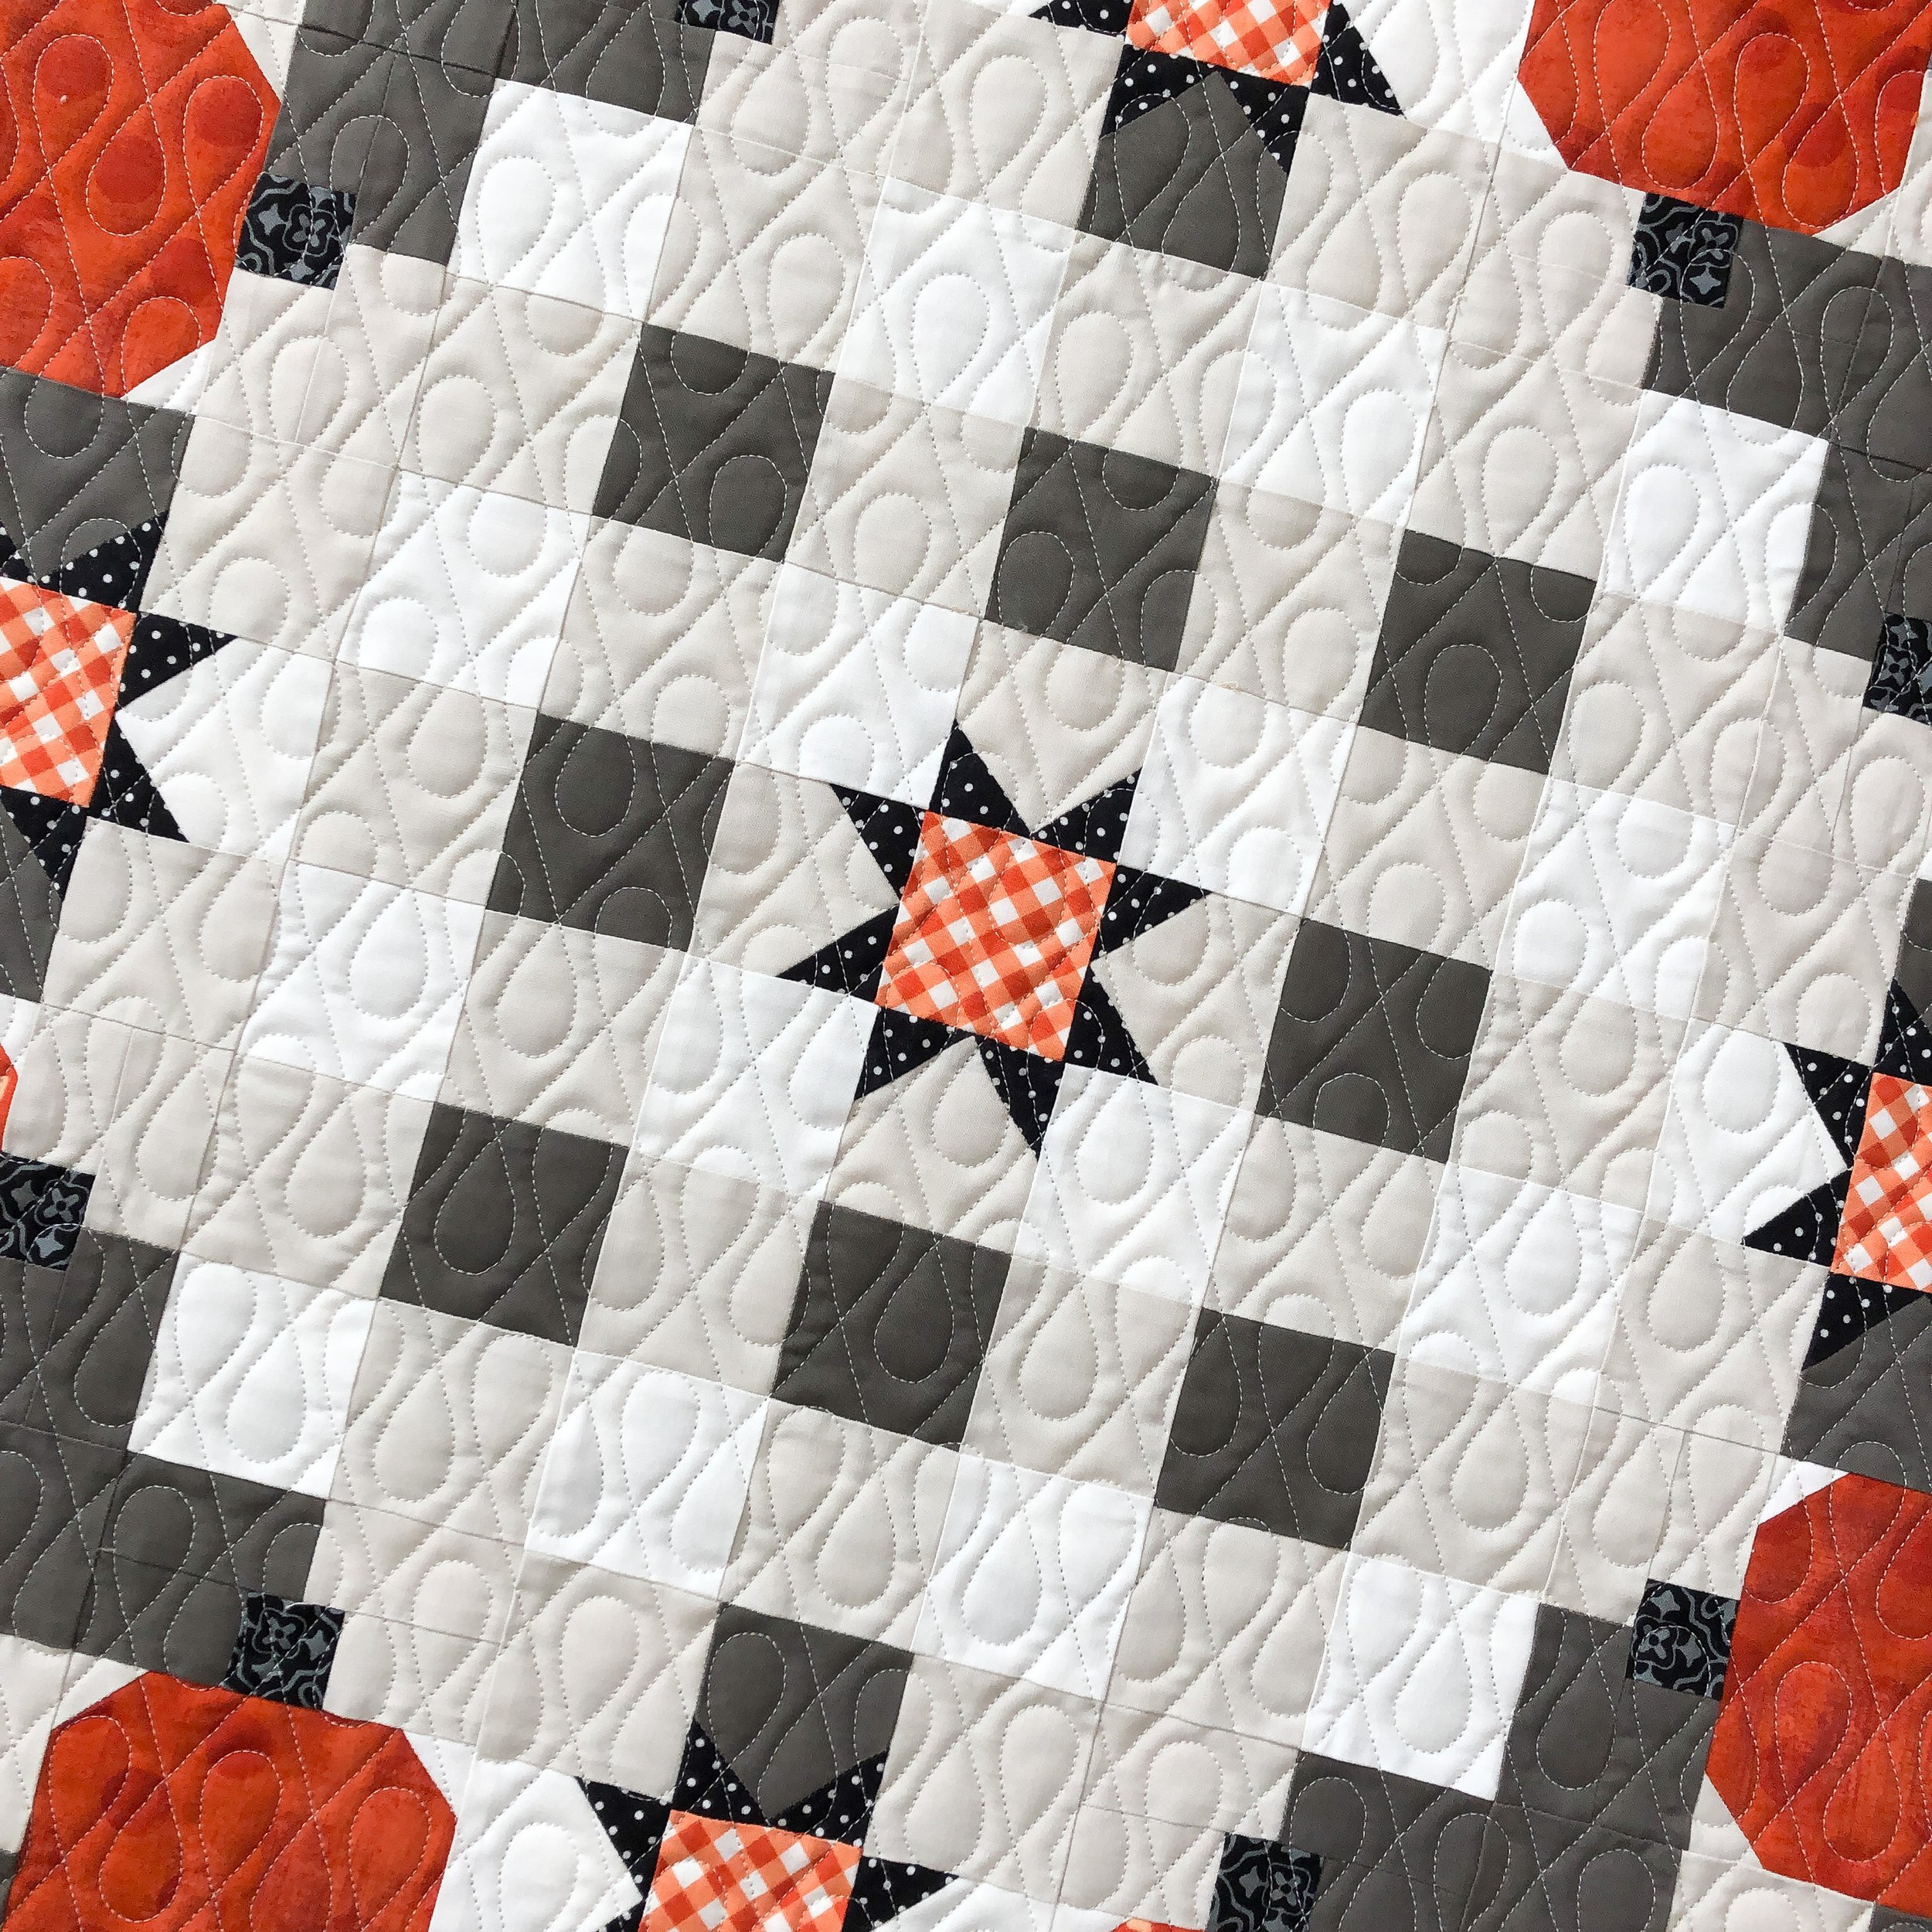
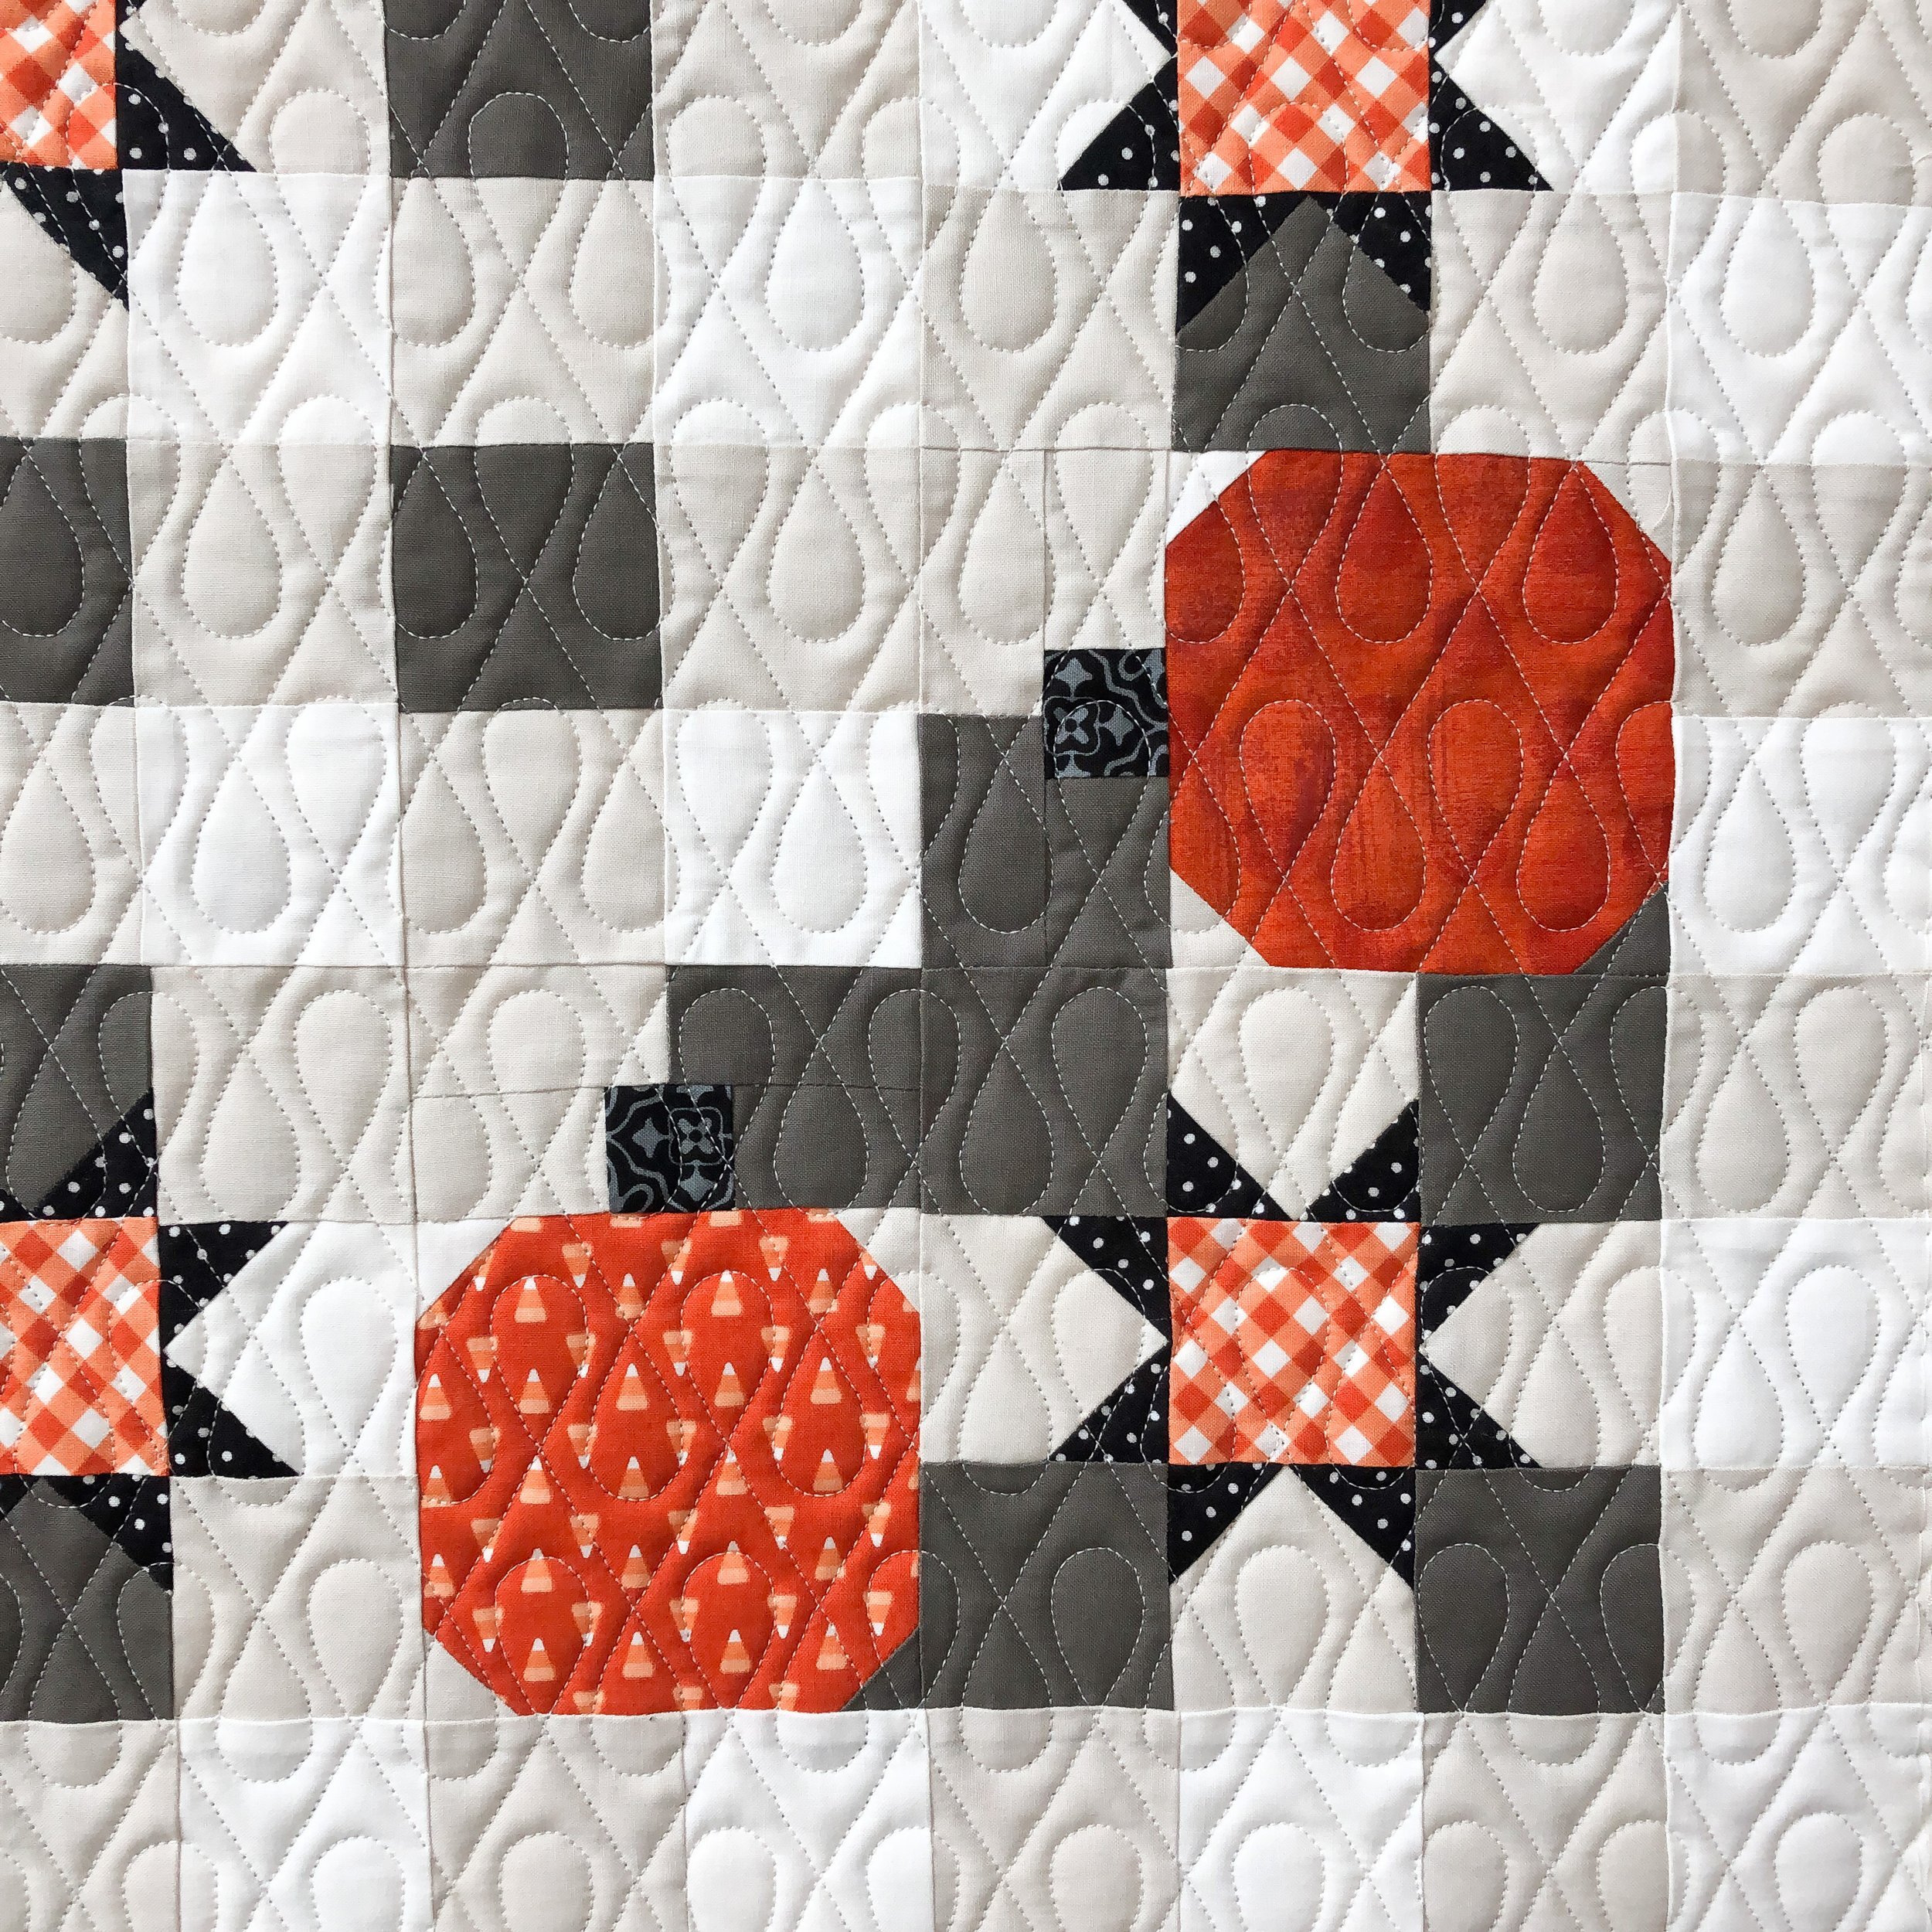
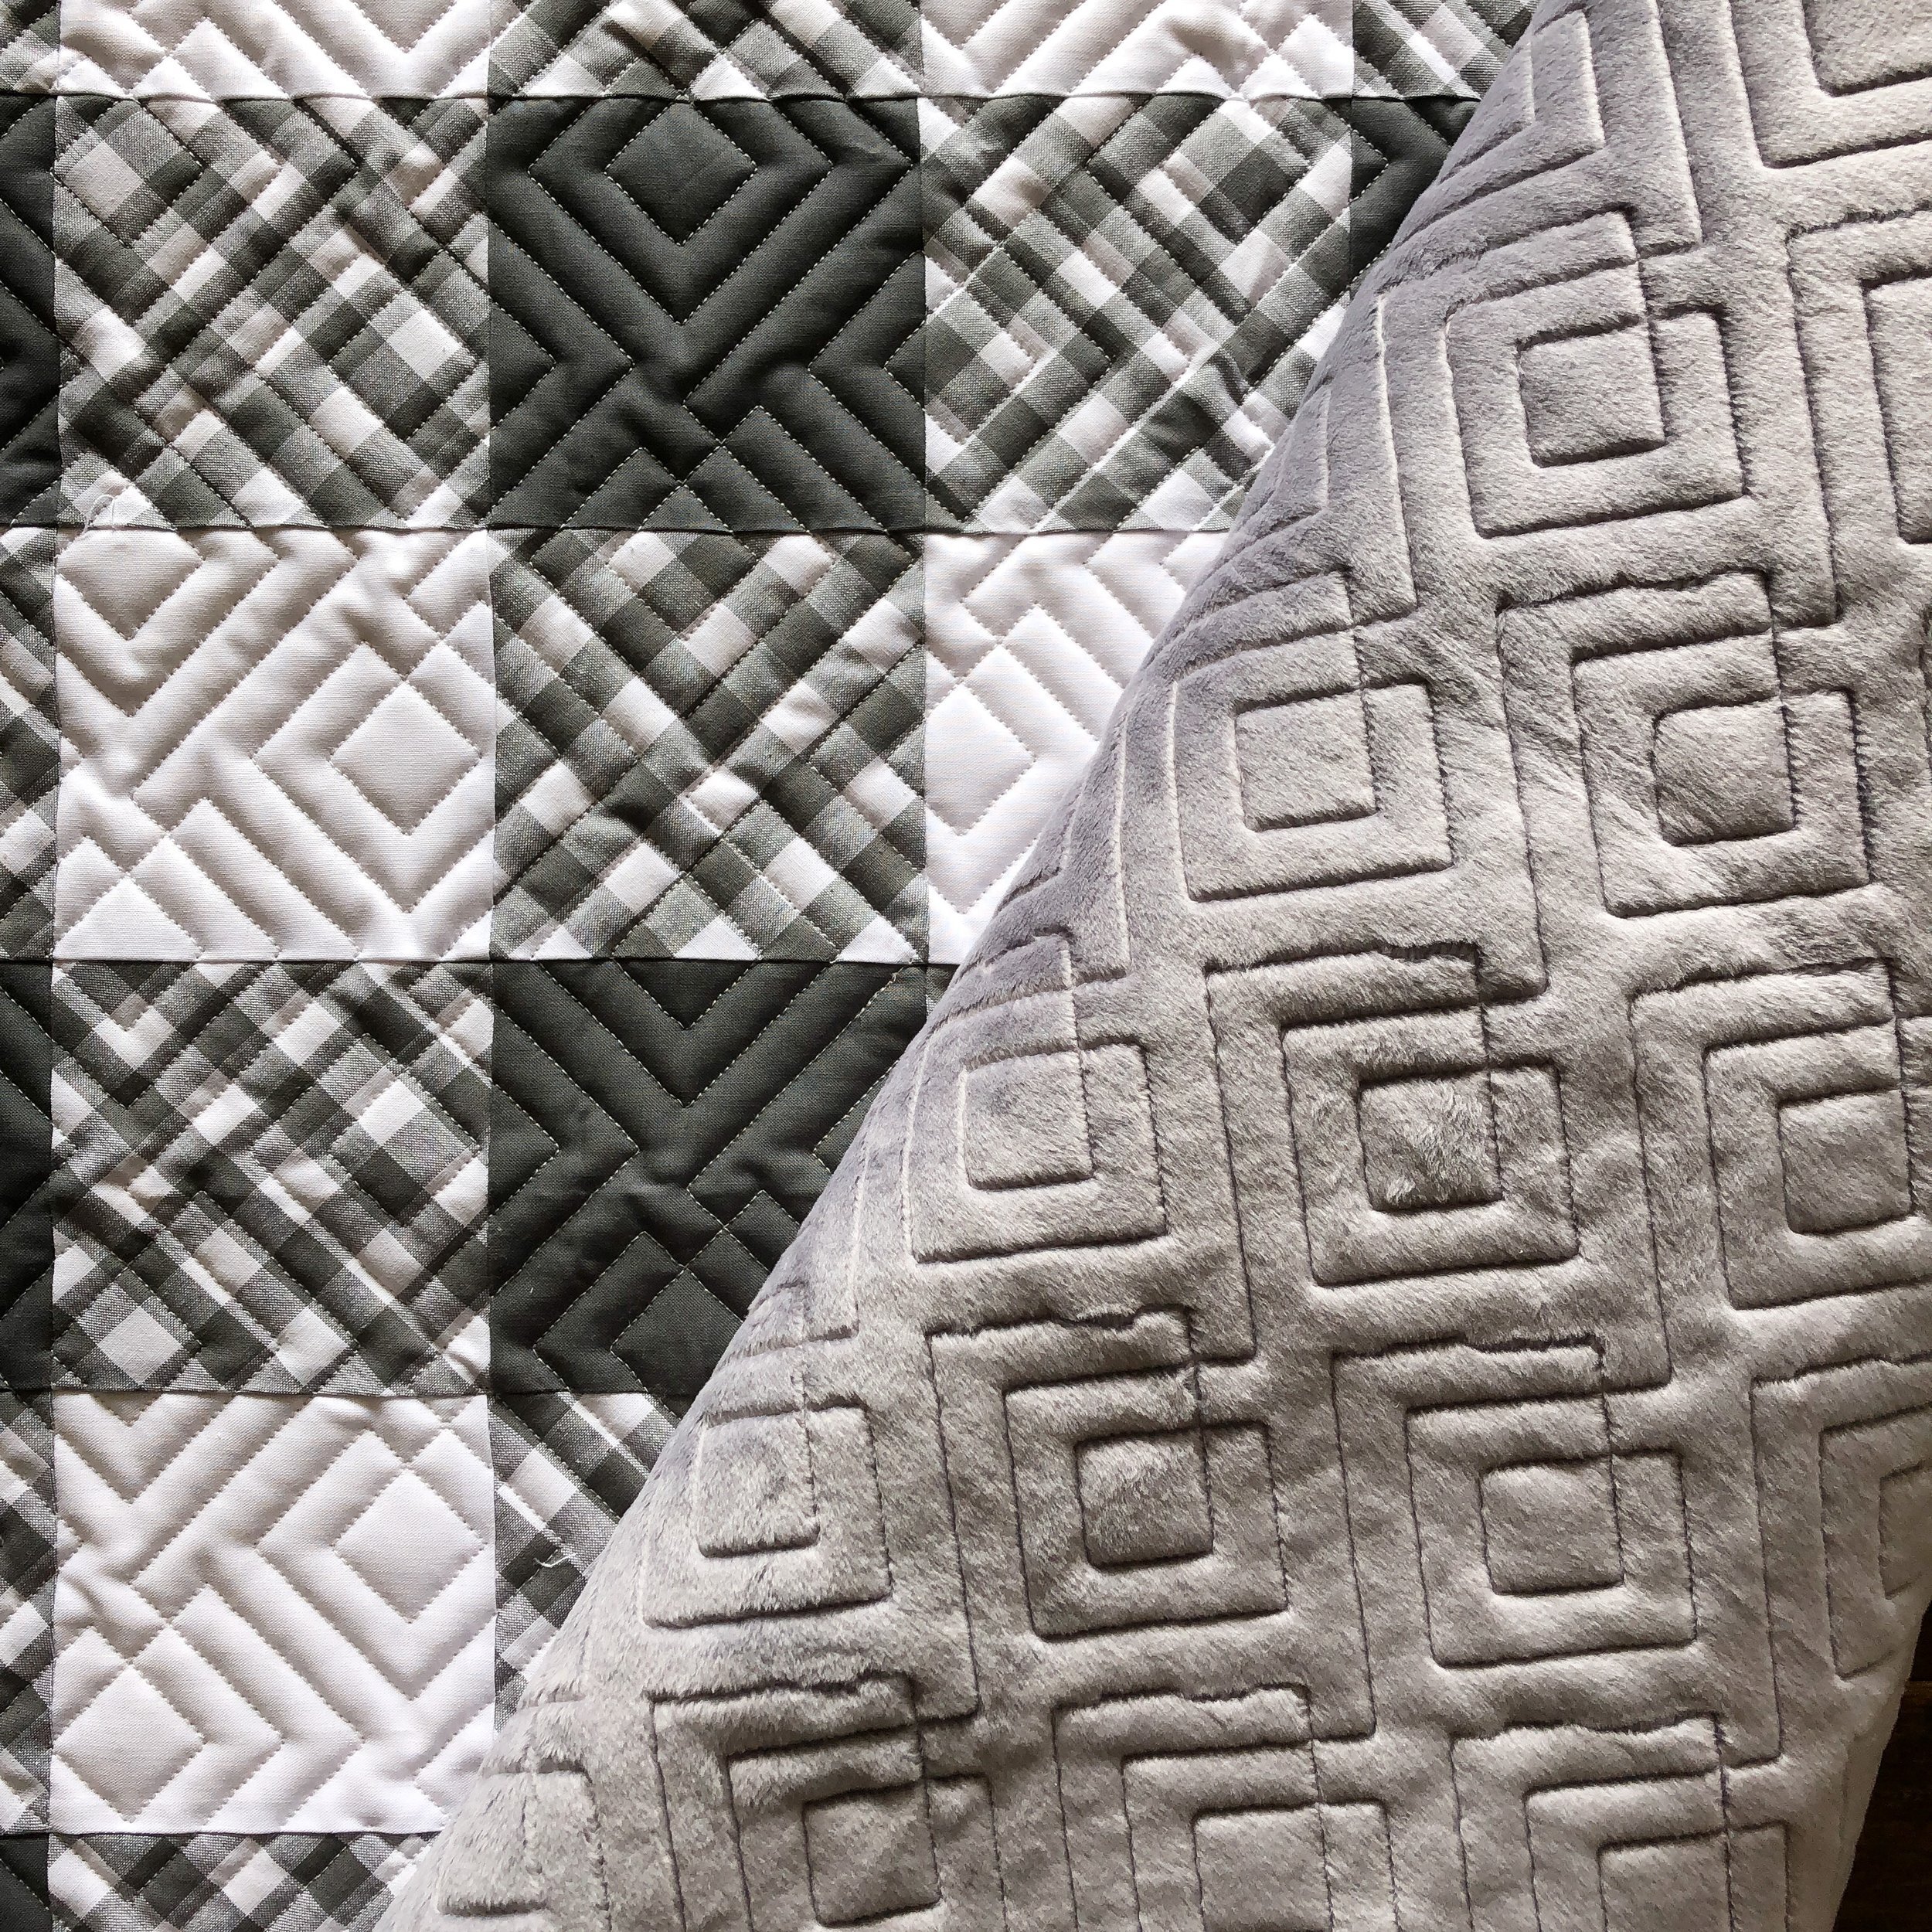
Okay, how fun is this adorable Halloween version of Cluck Cluck Sew’s Suburbs quilt pattern, that Jennifer made?! I love it!

I used a medium grey Omni thread from Superior Threads to quilt it, and my favorite 8020 cotton poly blend batting from Winline Textiles.
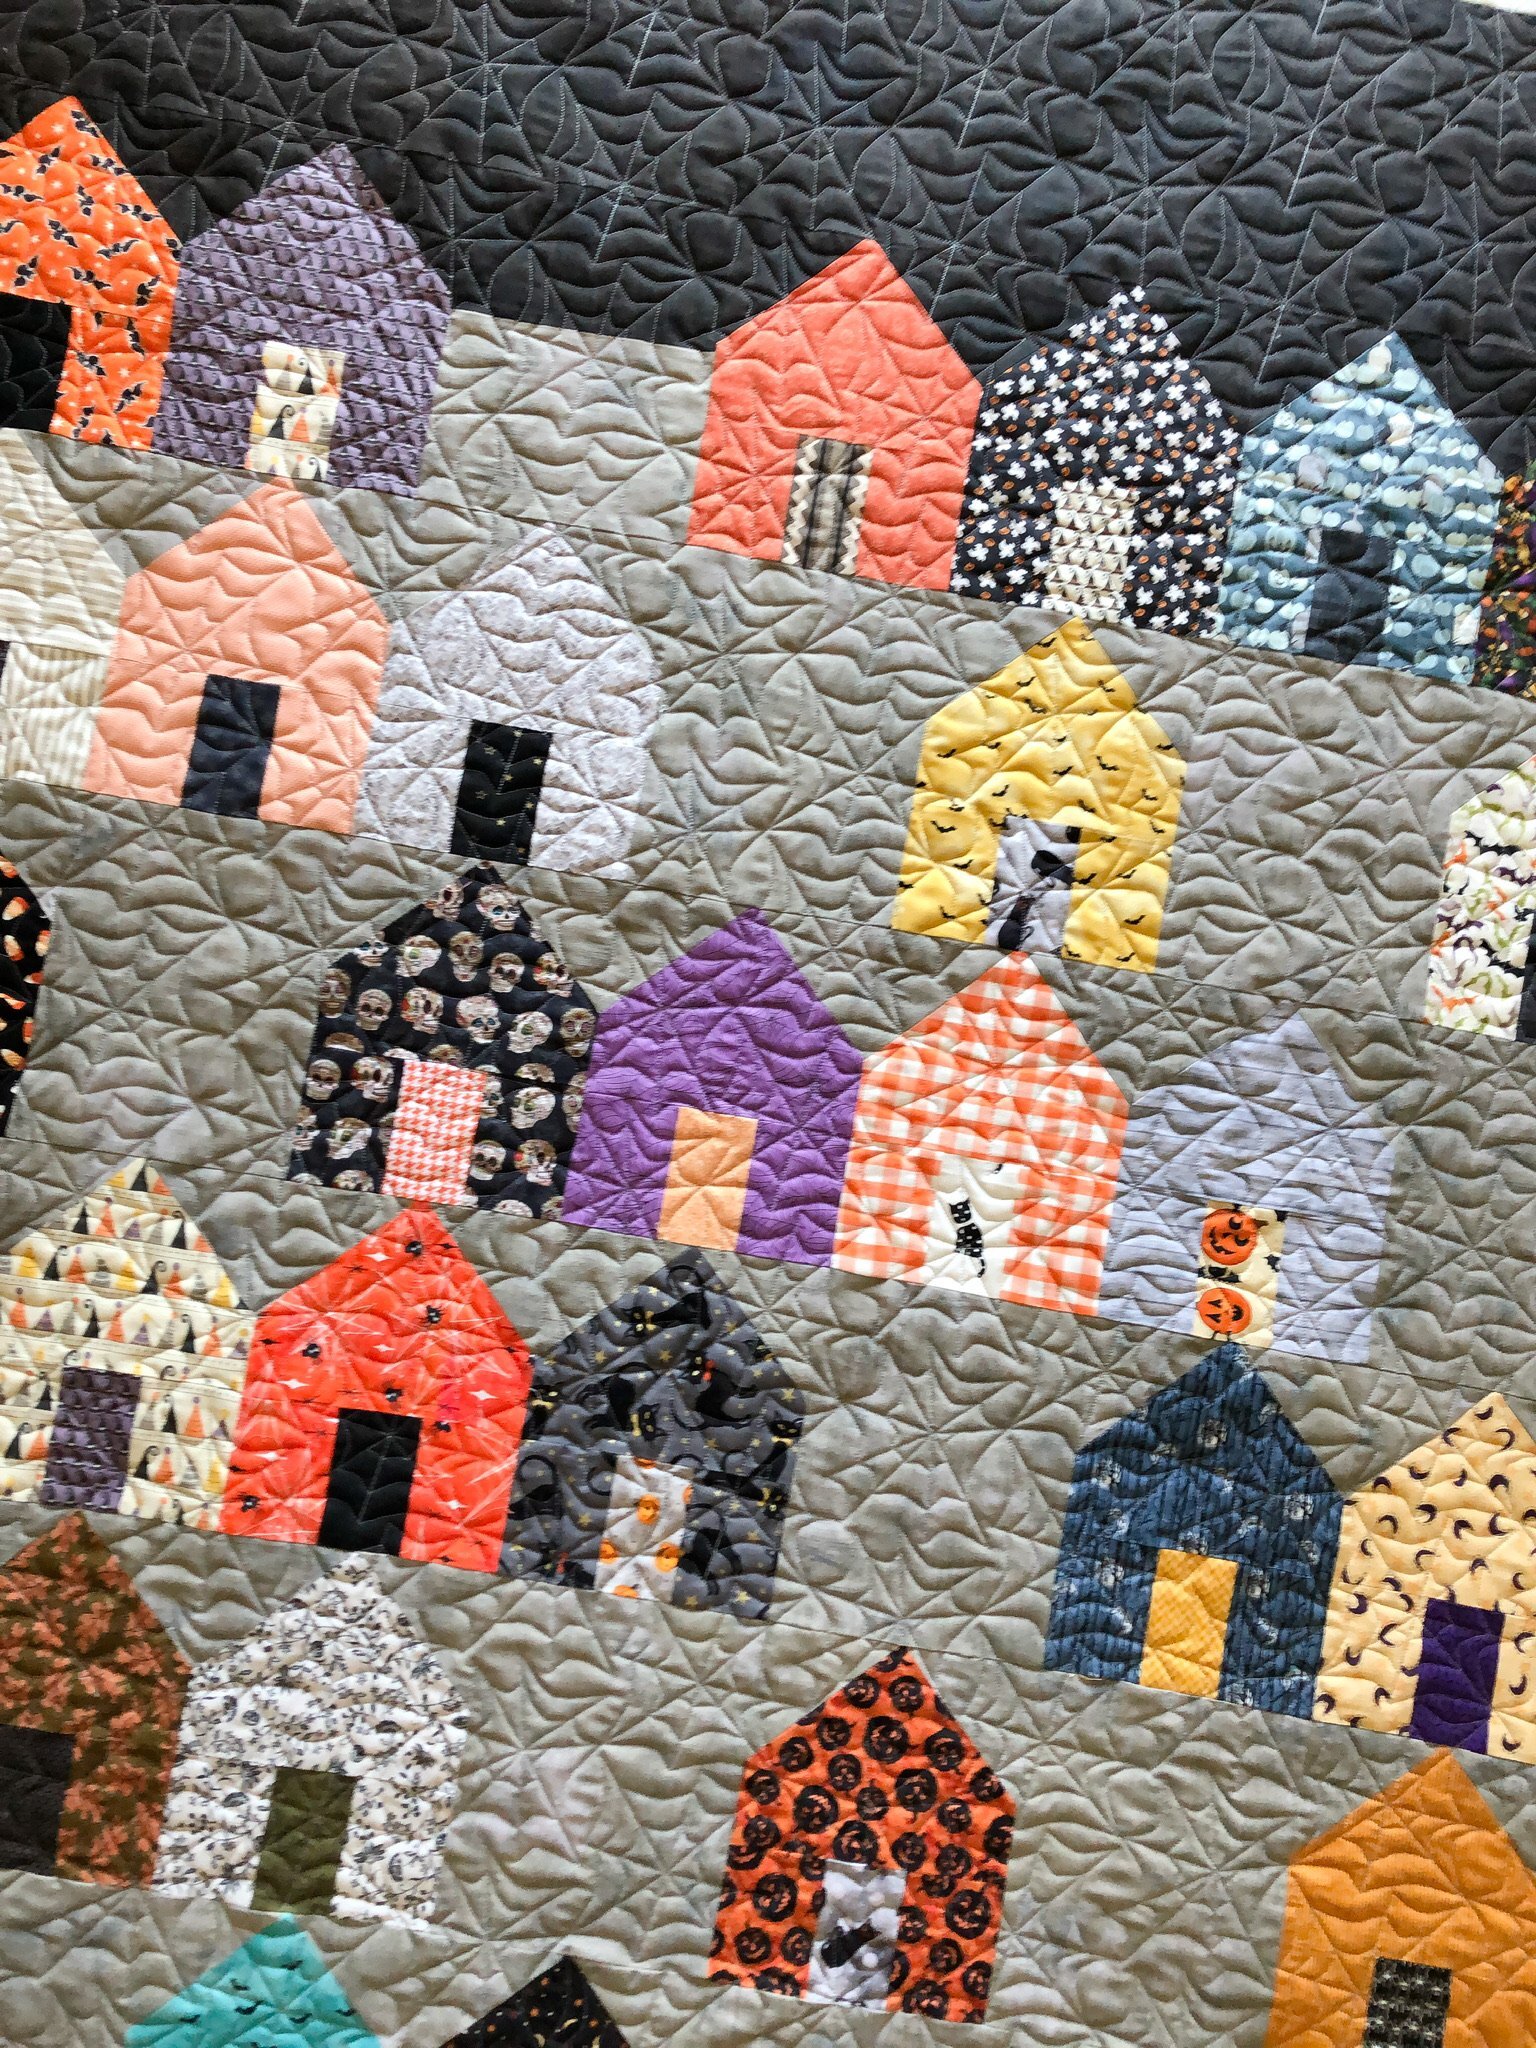
Jennifer asked for spider webs, so I quilted Haunted Web by Apricot Moon Designs, which is available at Urban Elementz.

Just in time to use for Halloween!!
Some close ups and look at all that fun texture!
Do you have a fun Halloween tradition? We do! My nieces and nephews get dressed up and we have a little party. There is always too many treats, and loads of fun!! I hope you have a wonderful Halloween.

Thanks for stopping by!
I would love to quilt for you!!! If you have a closet full of quilts ready to get quilted, send me an email and we can get those beauties done! My email is: quiltingit@gmail.com
Thank you, Leisha
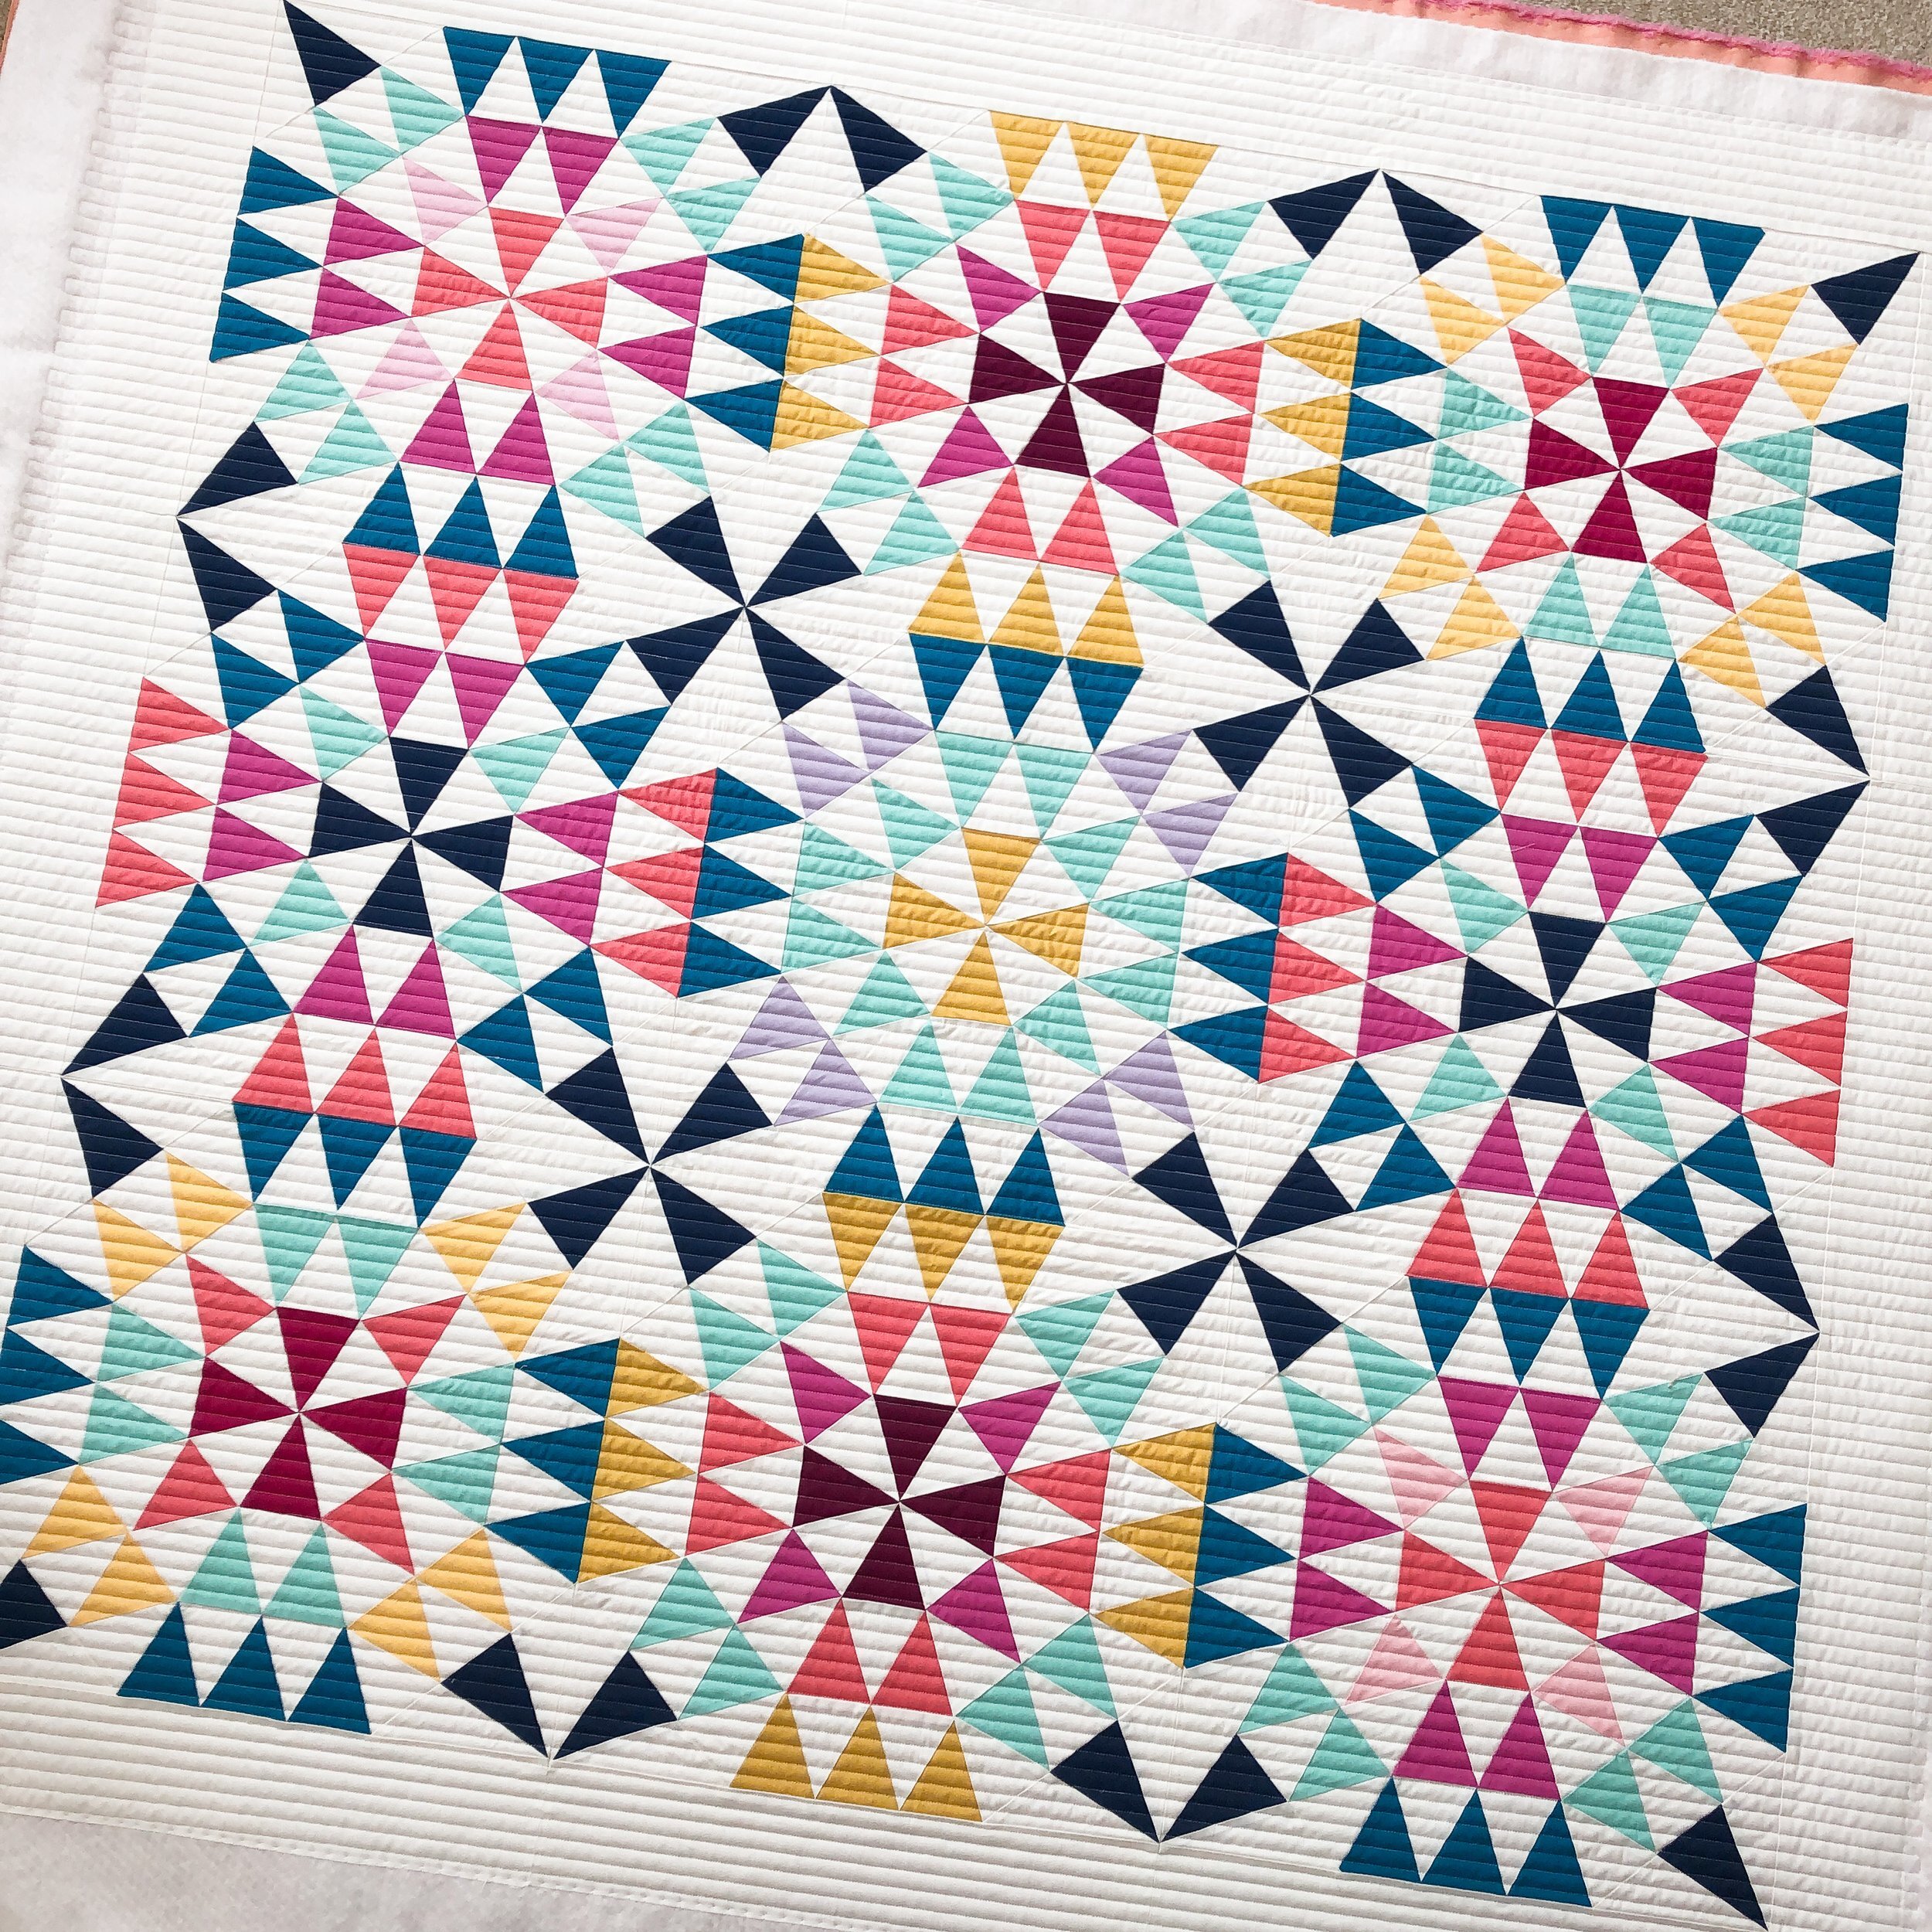
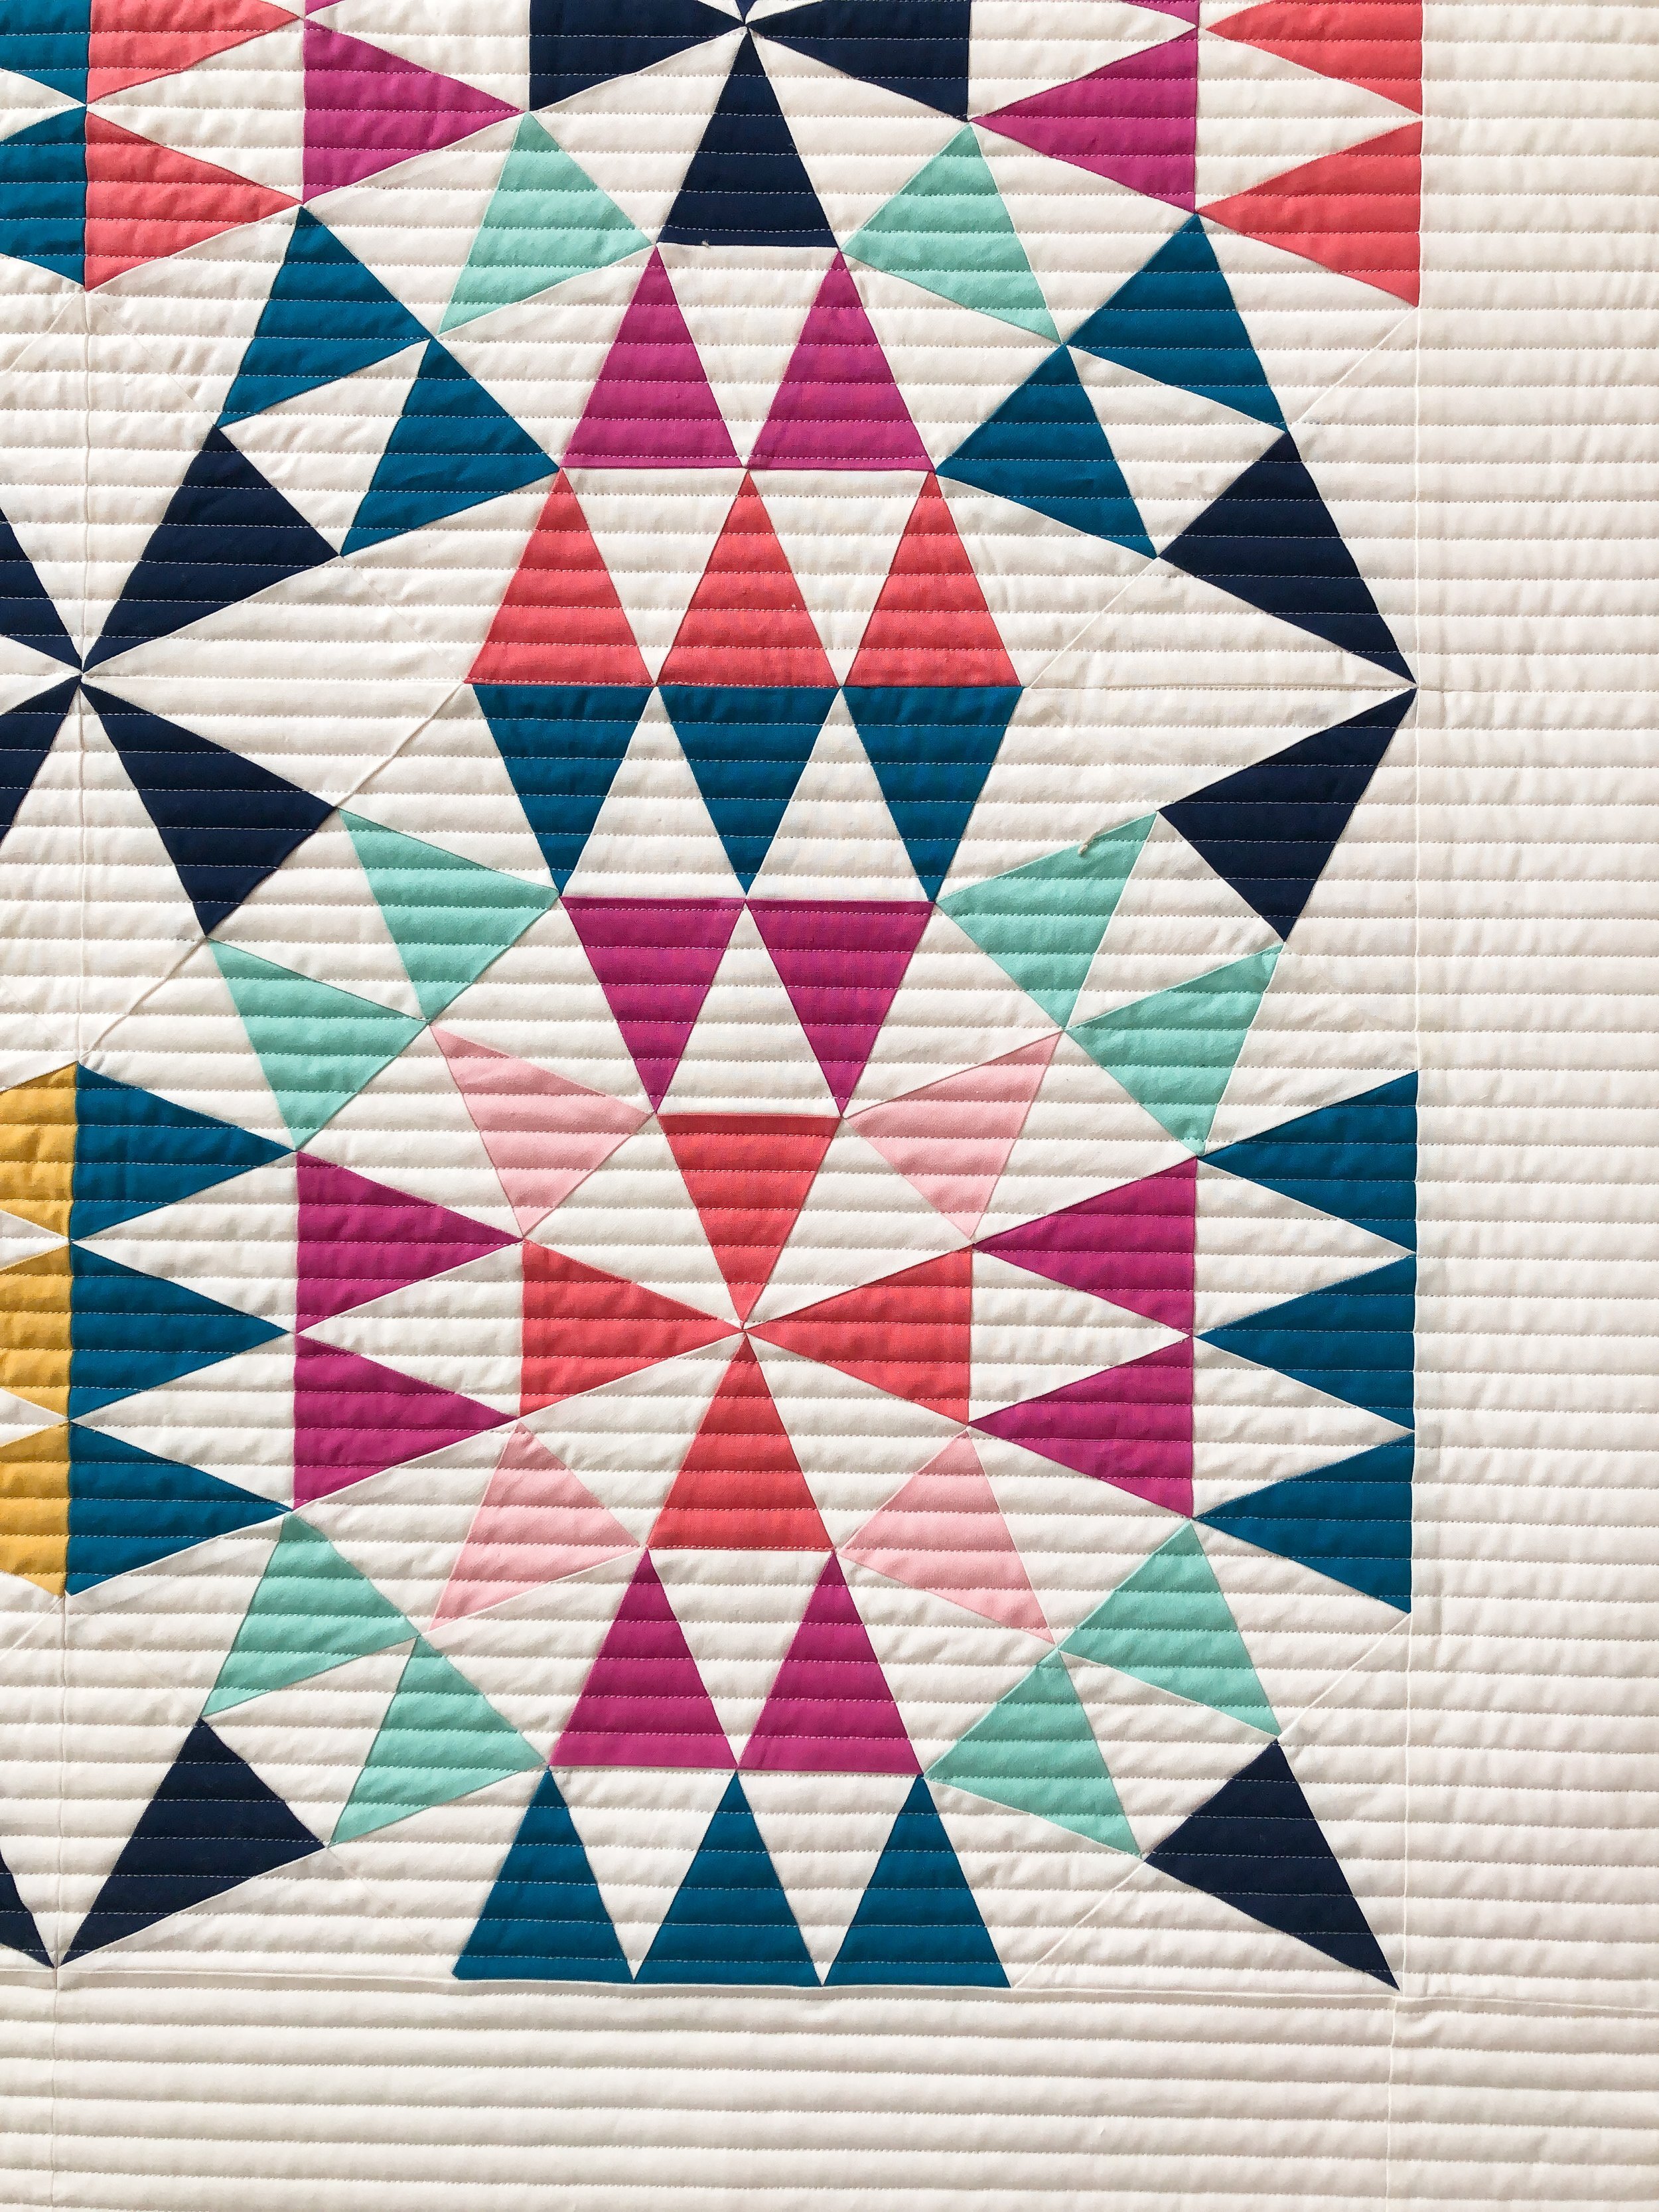
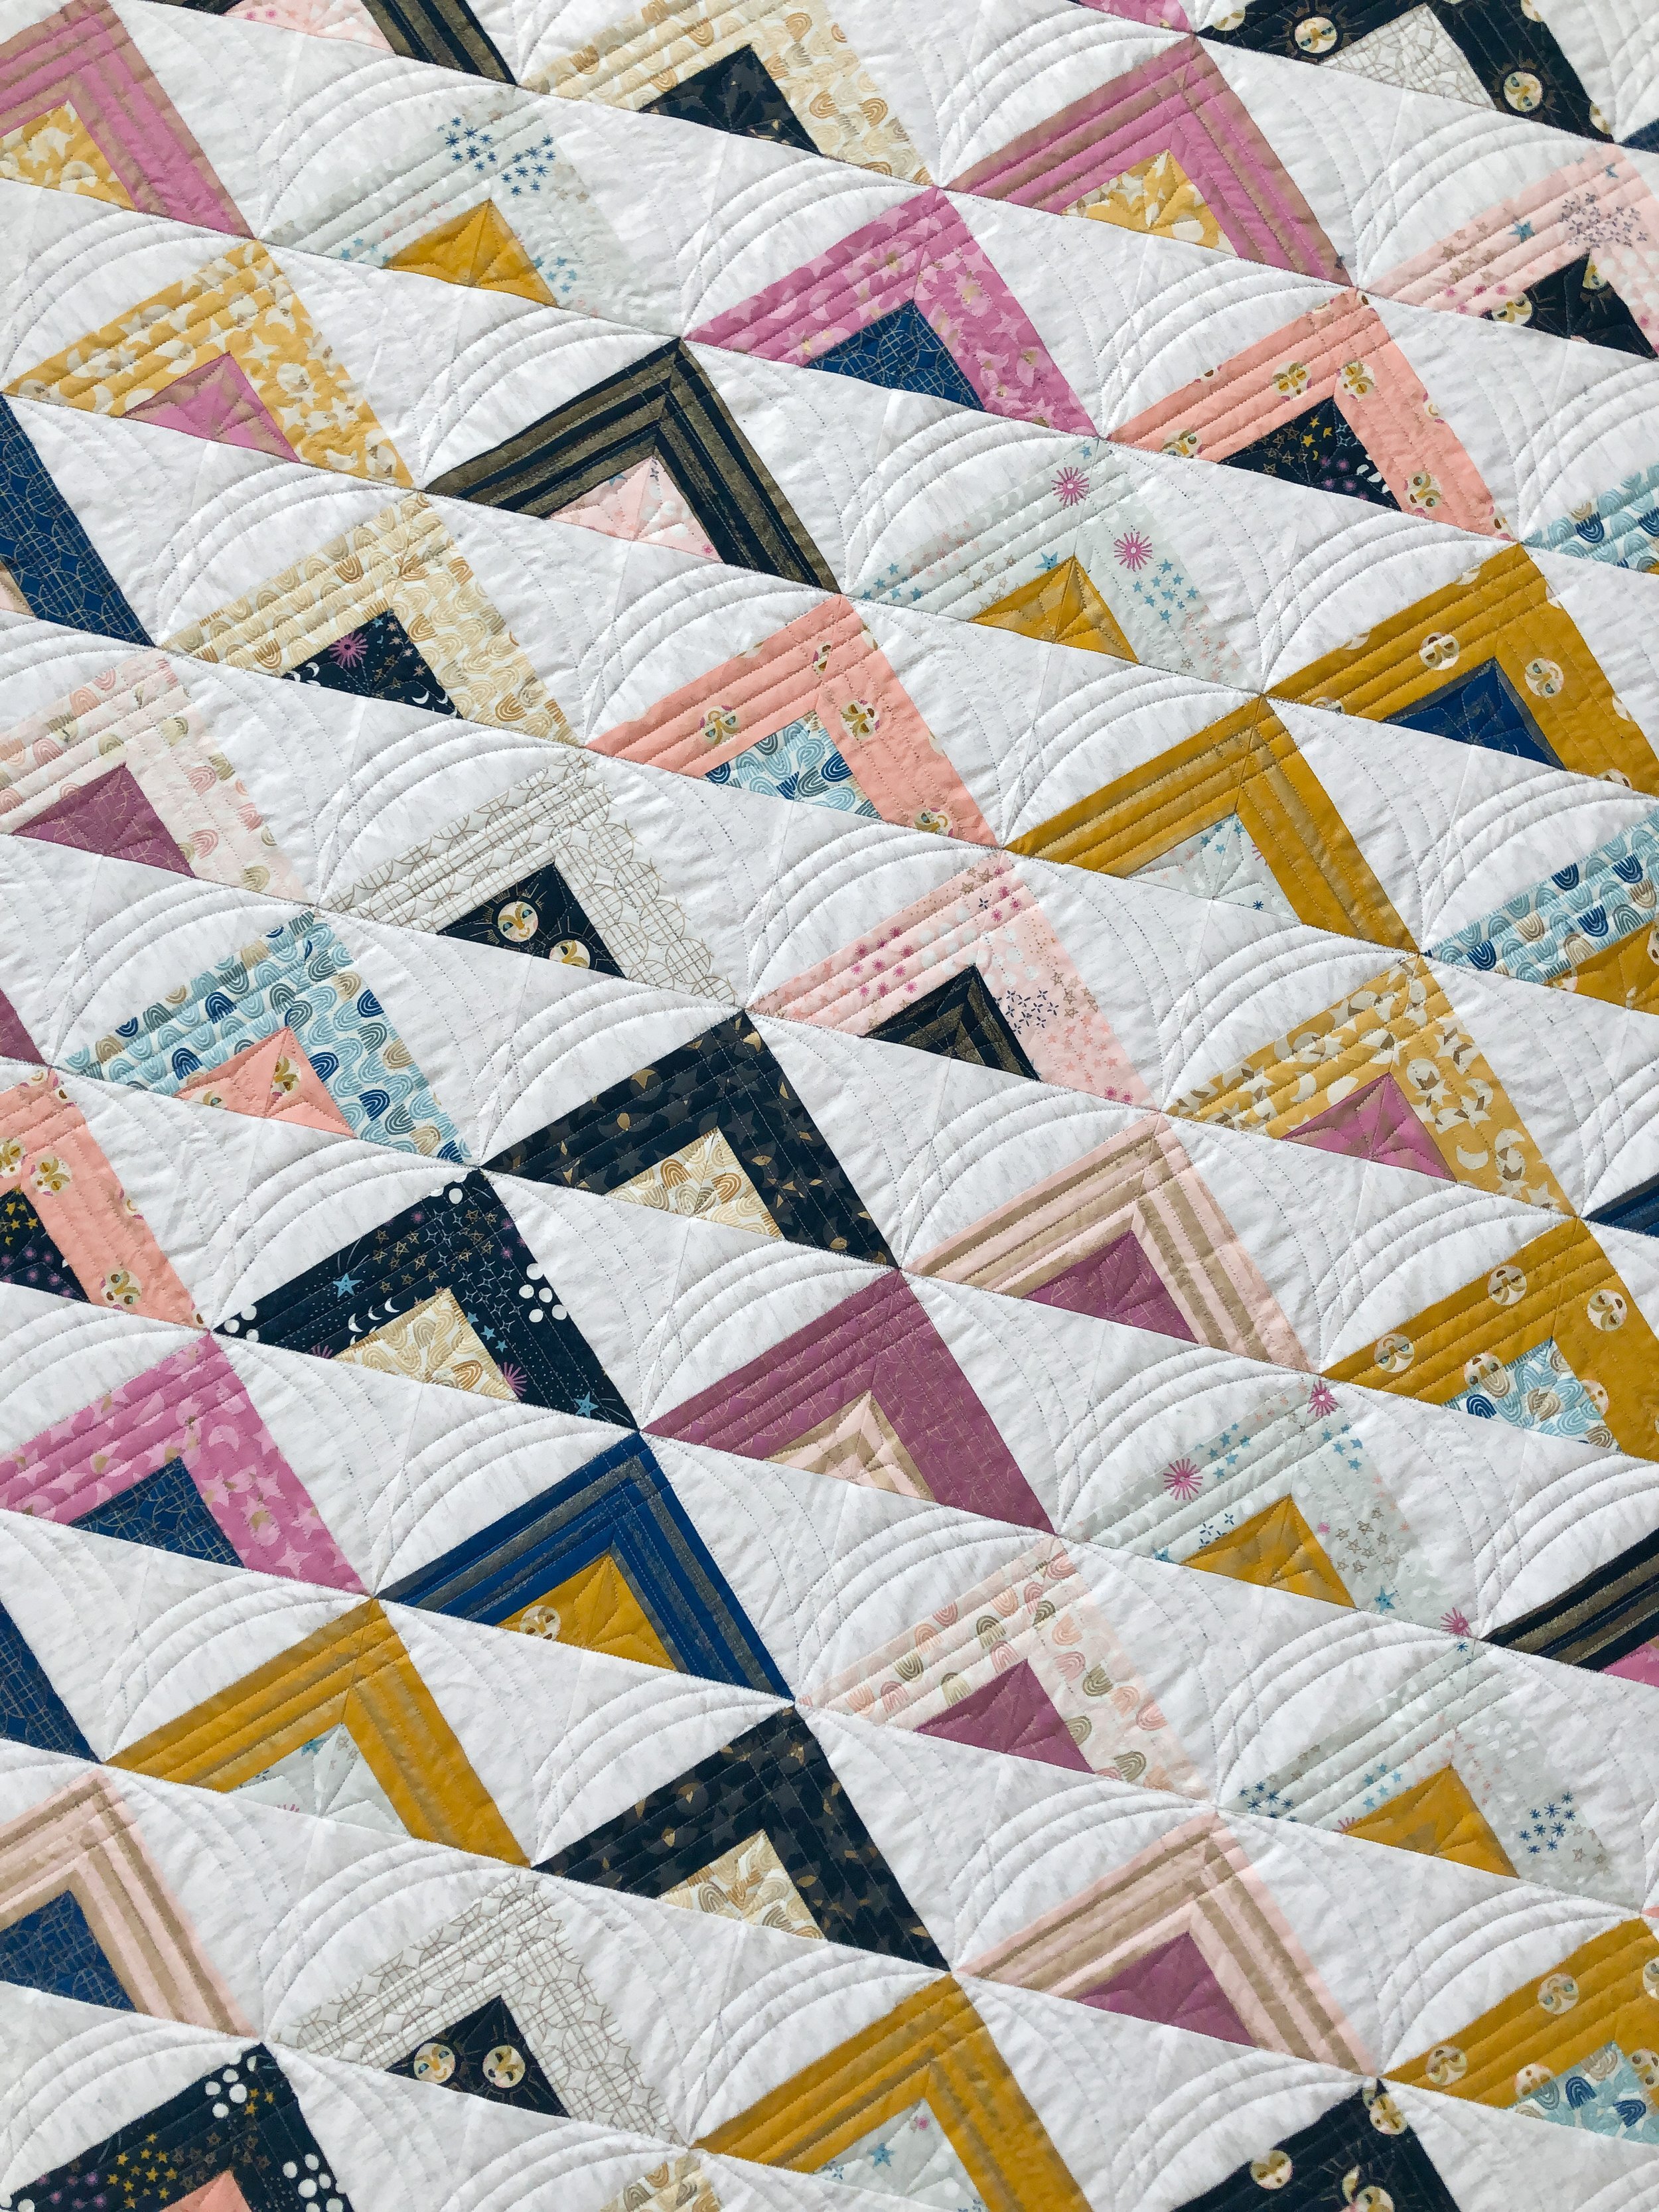
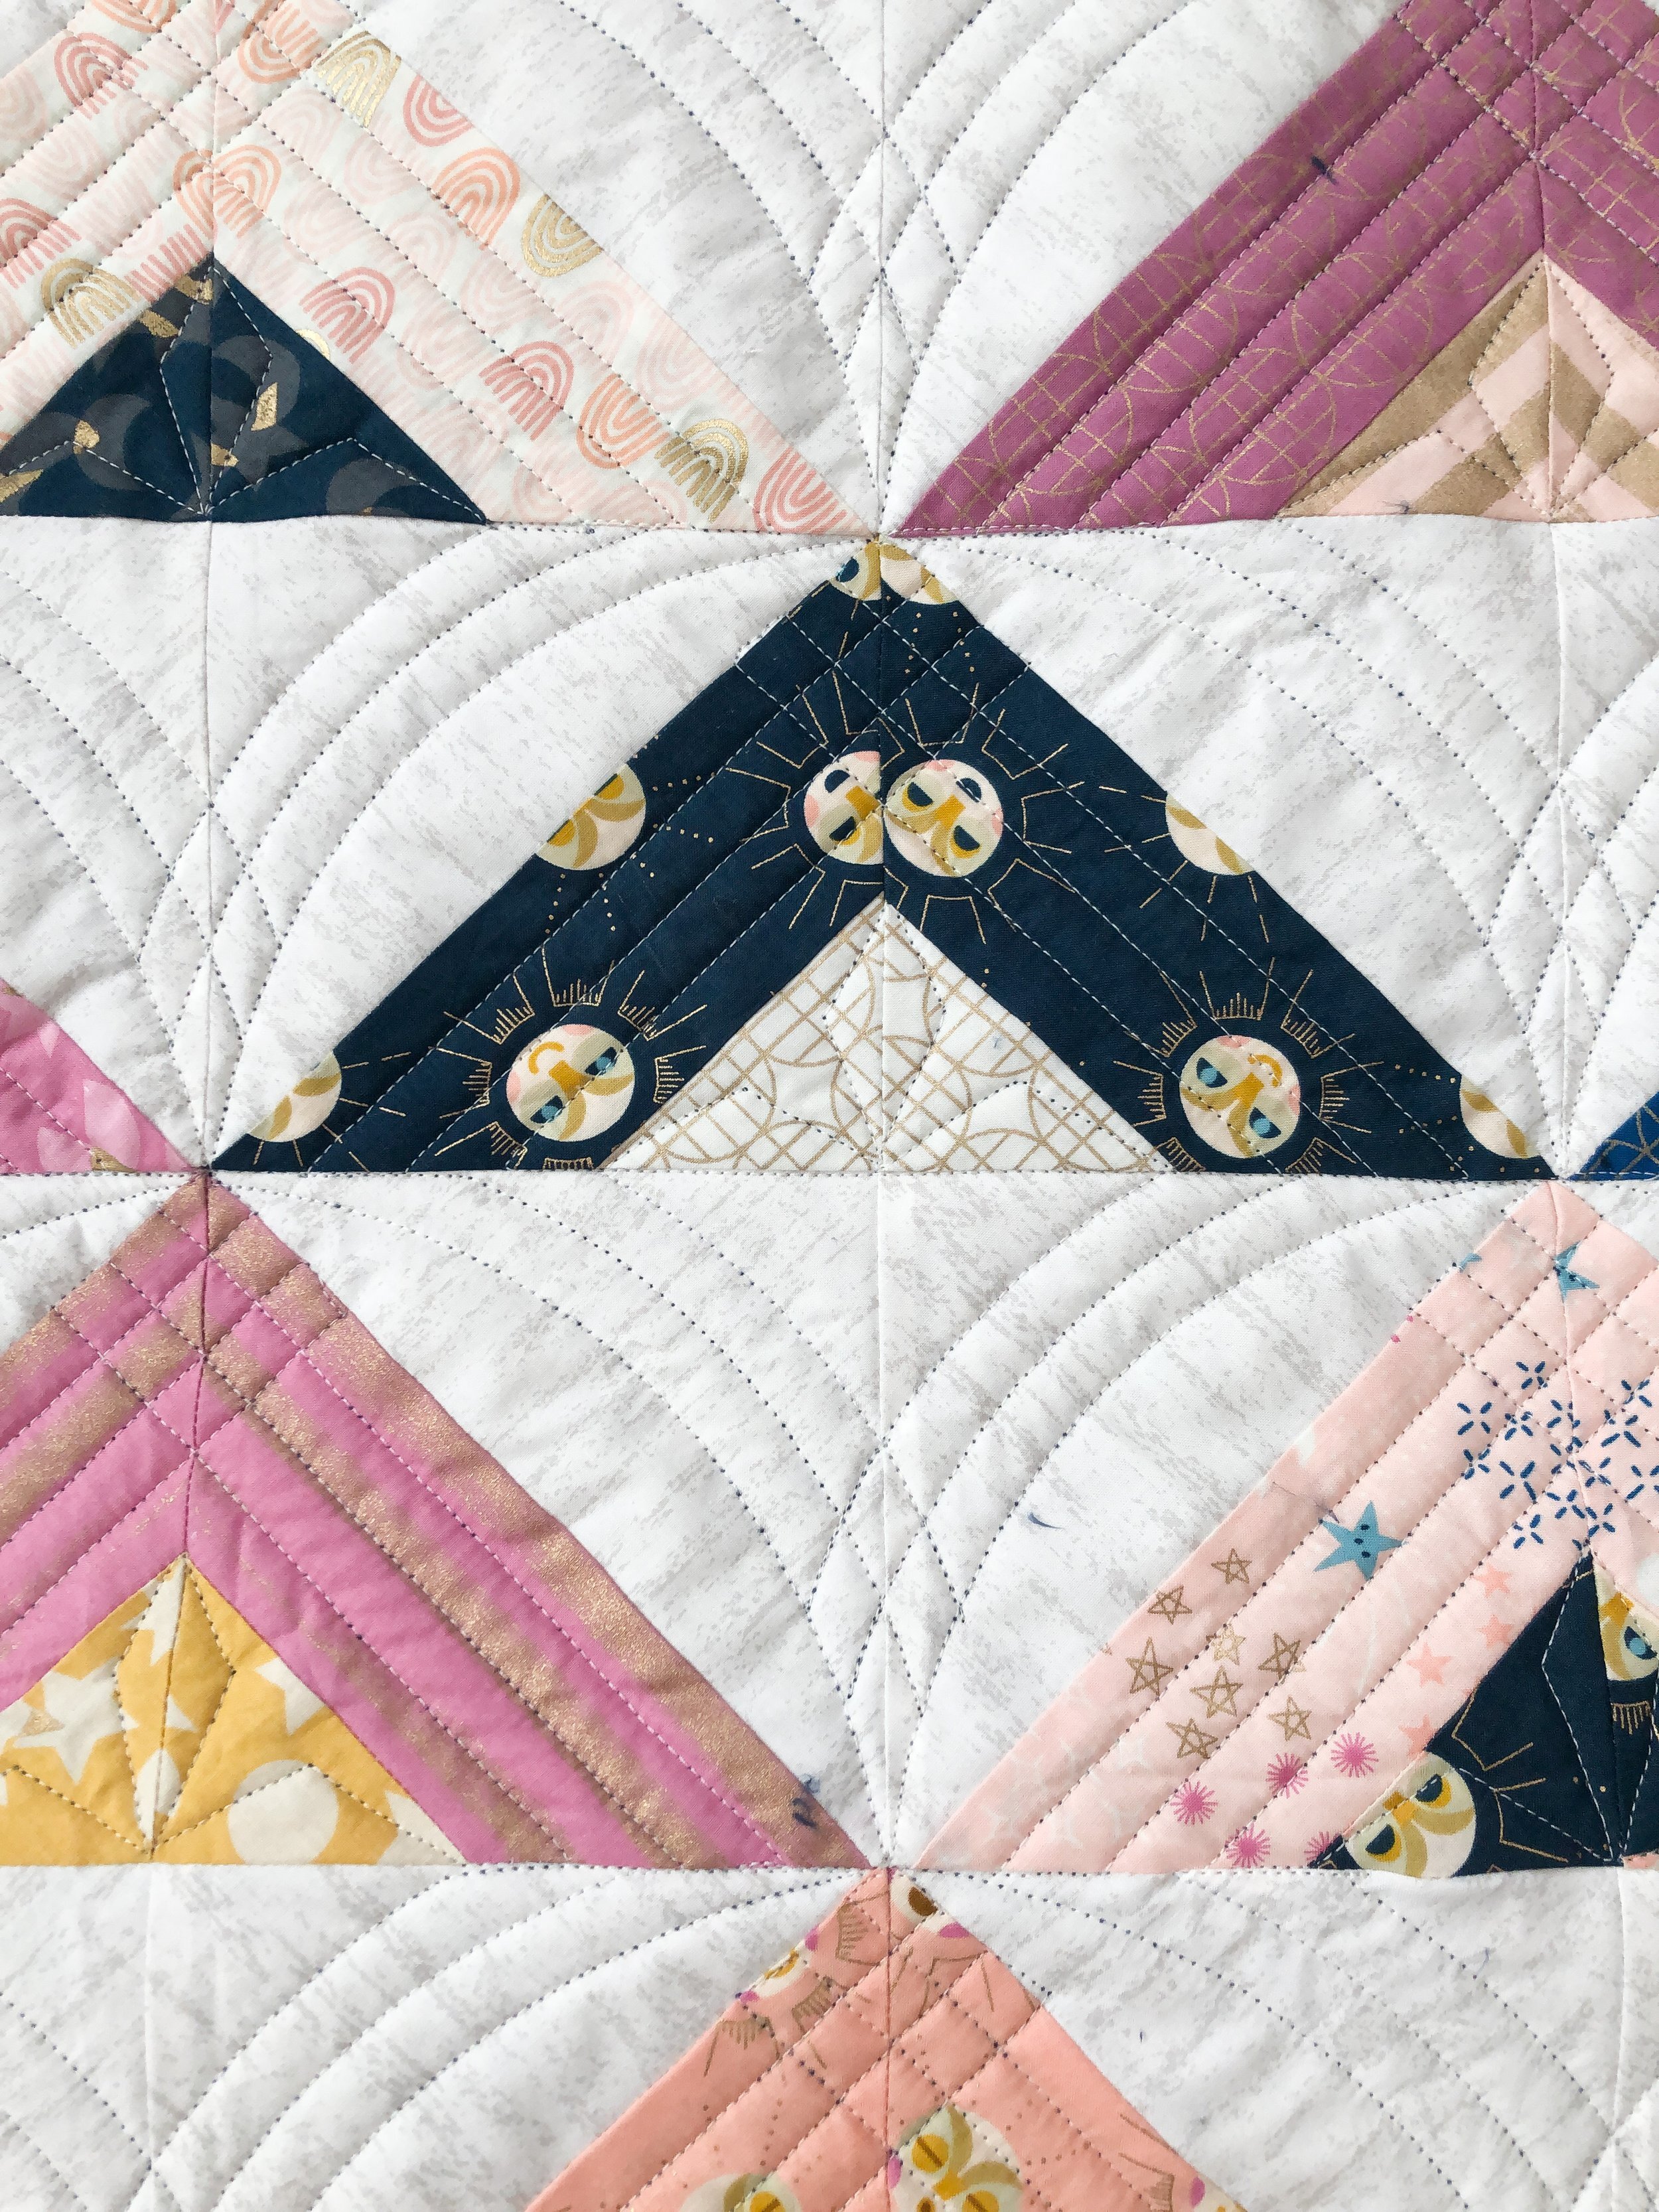
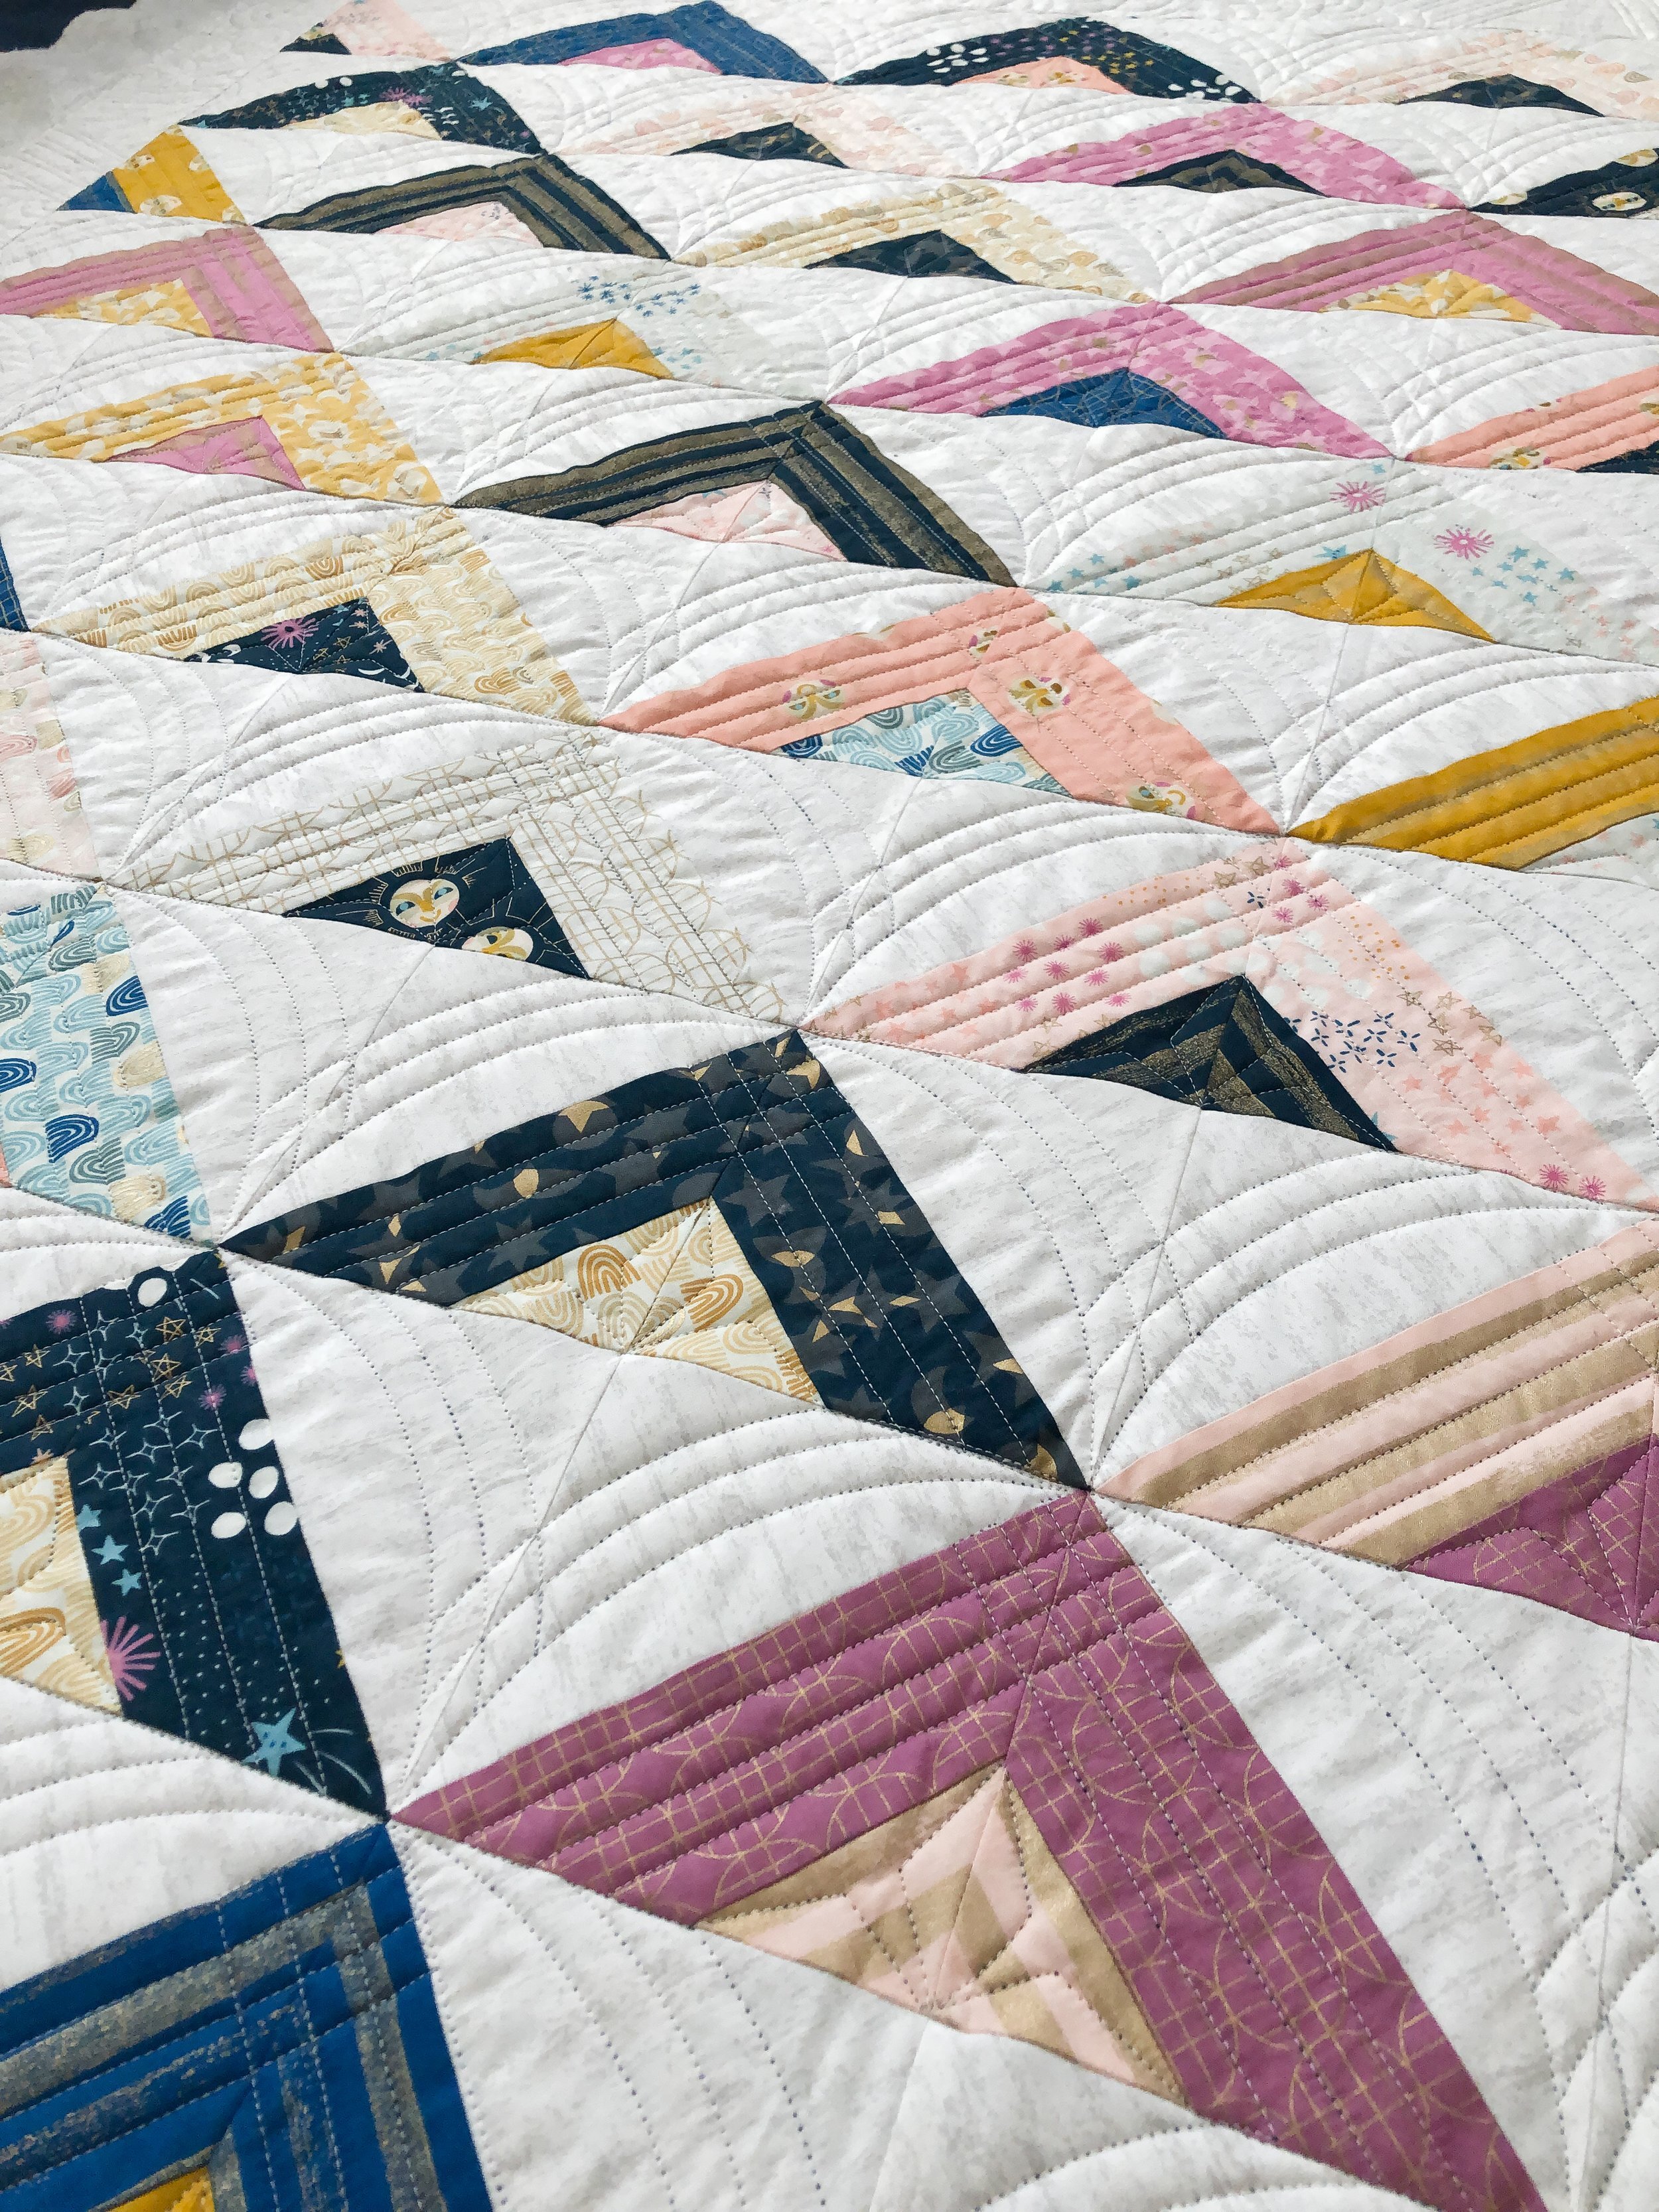
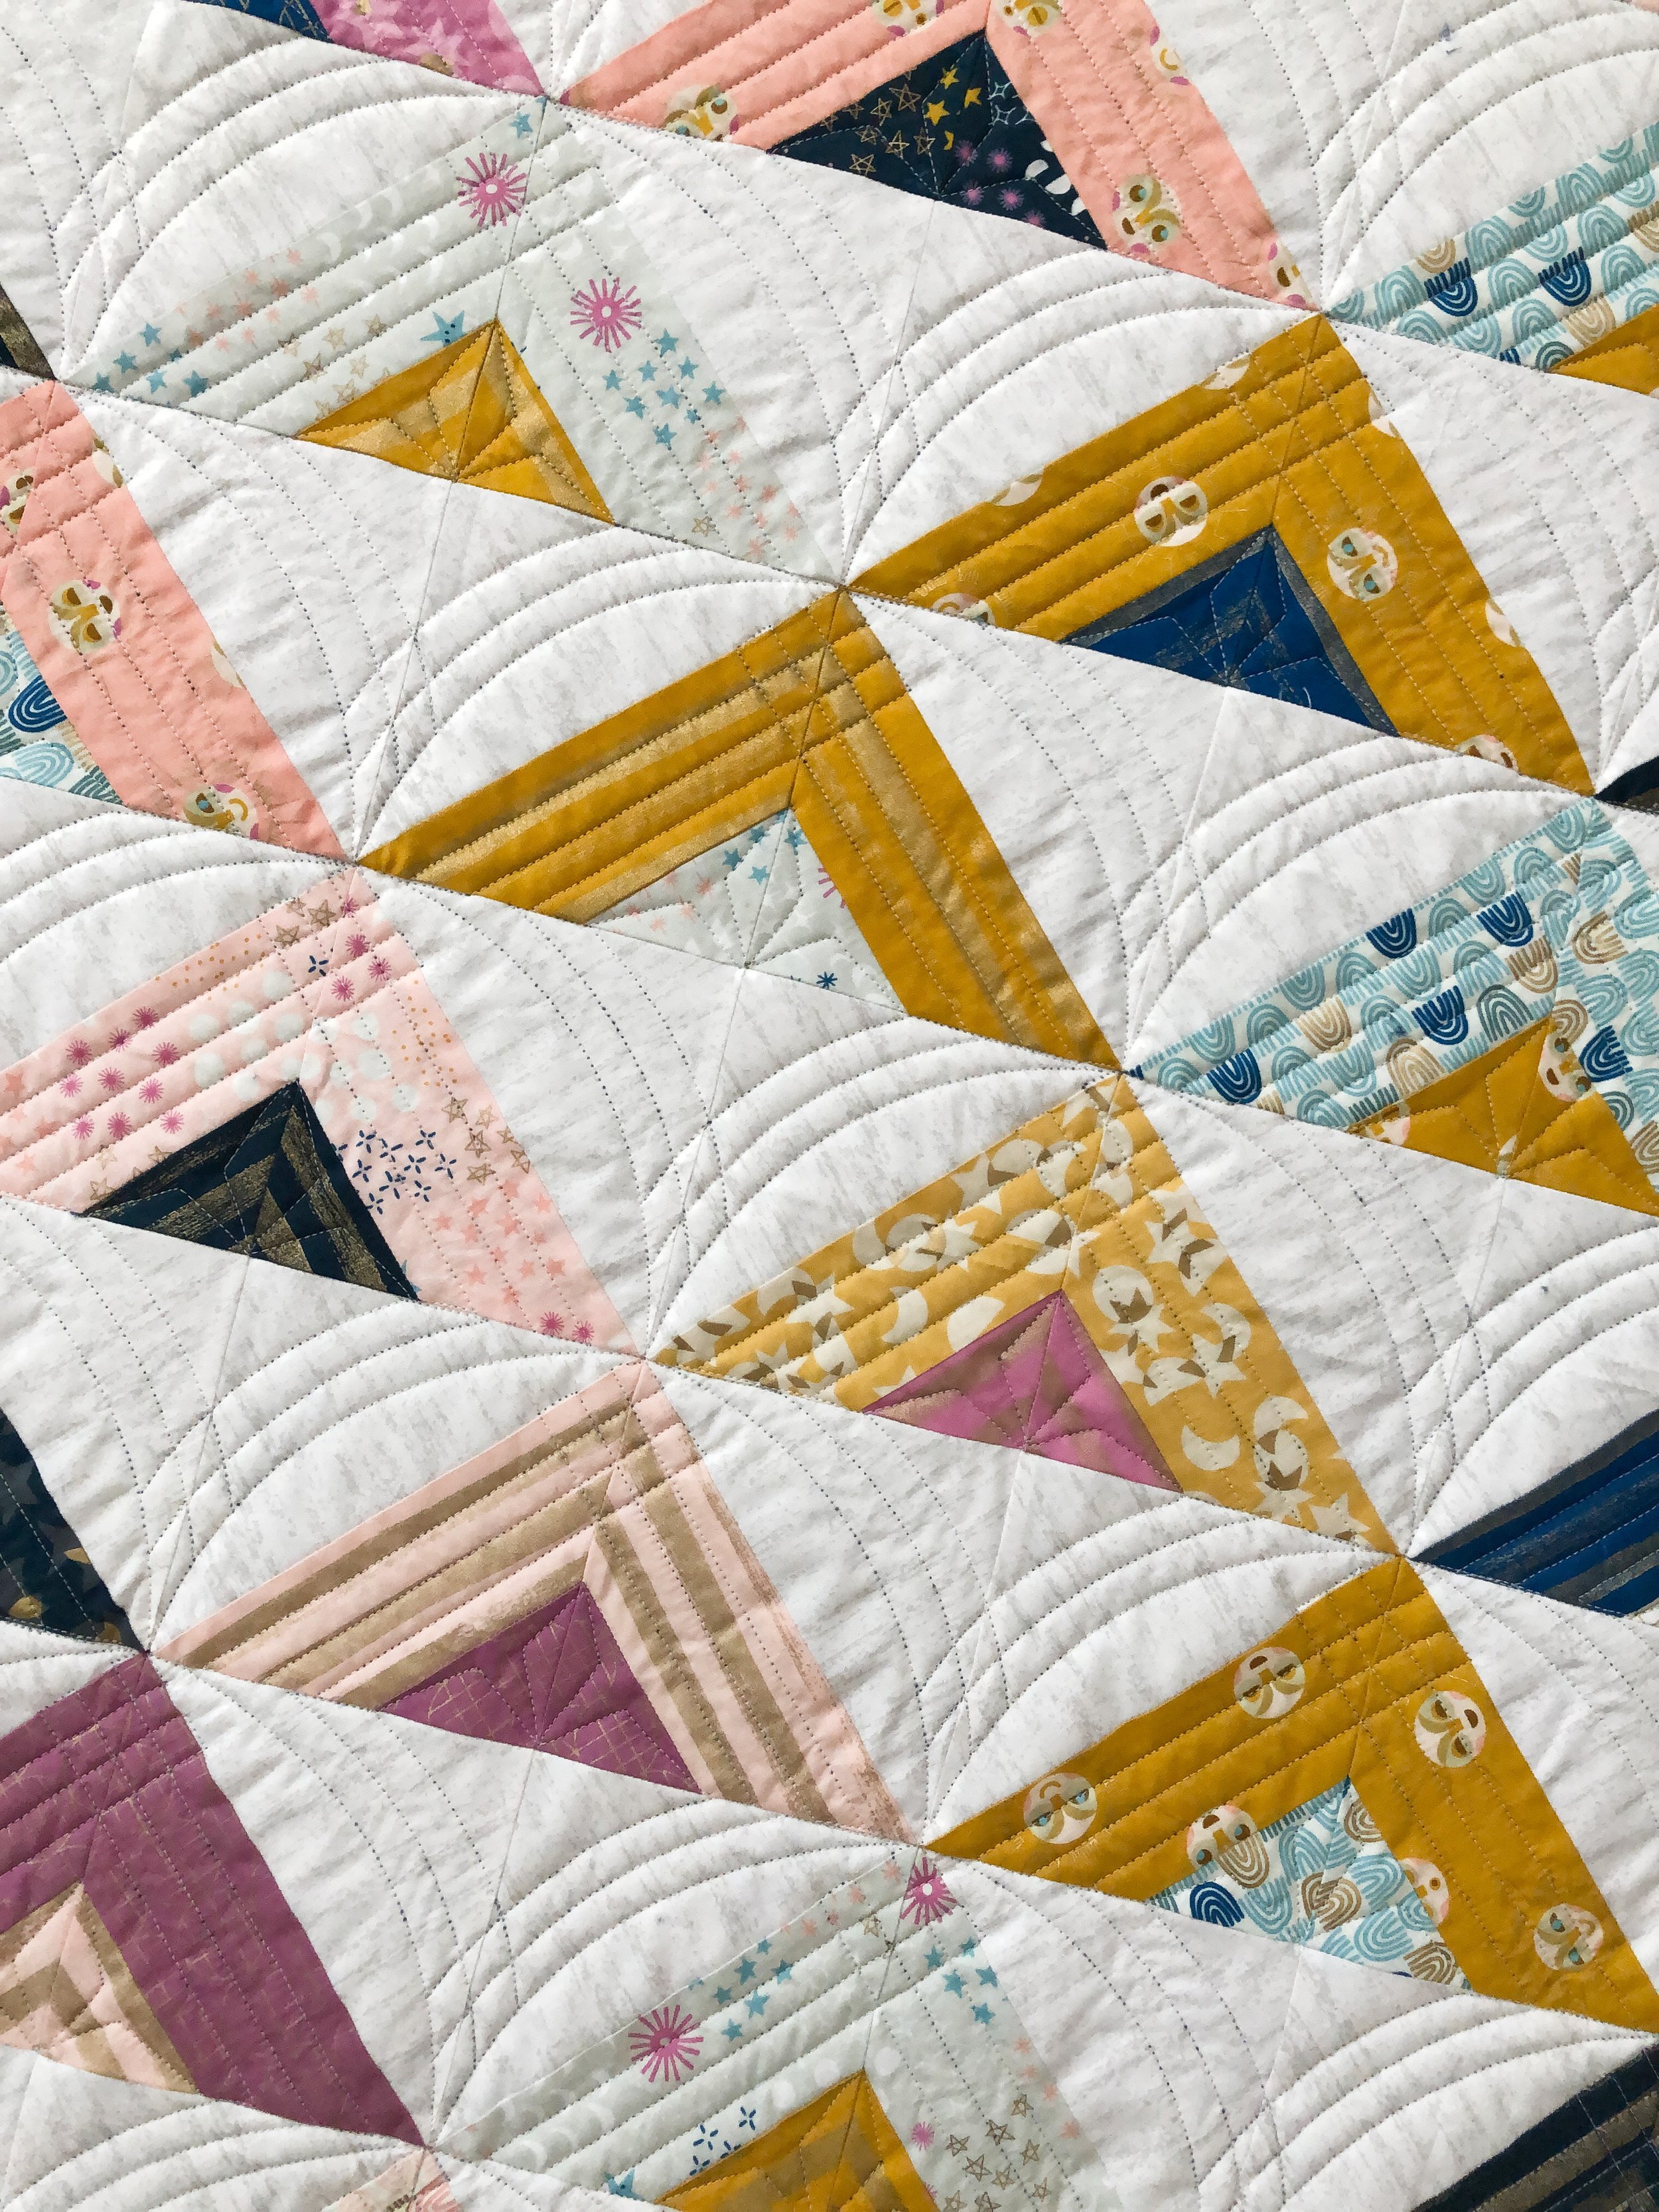
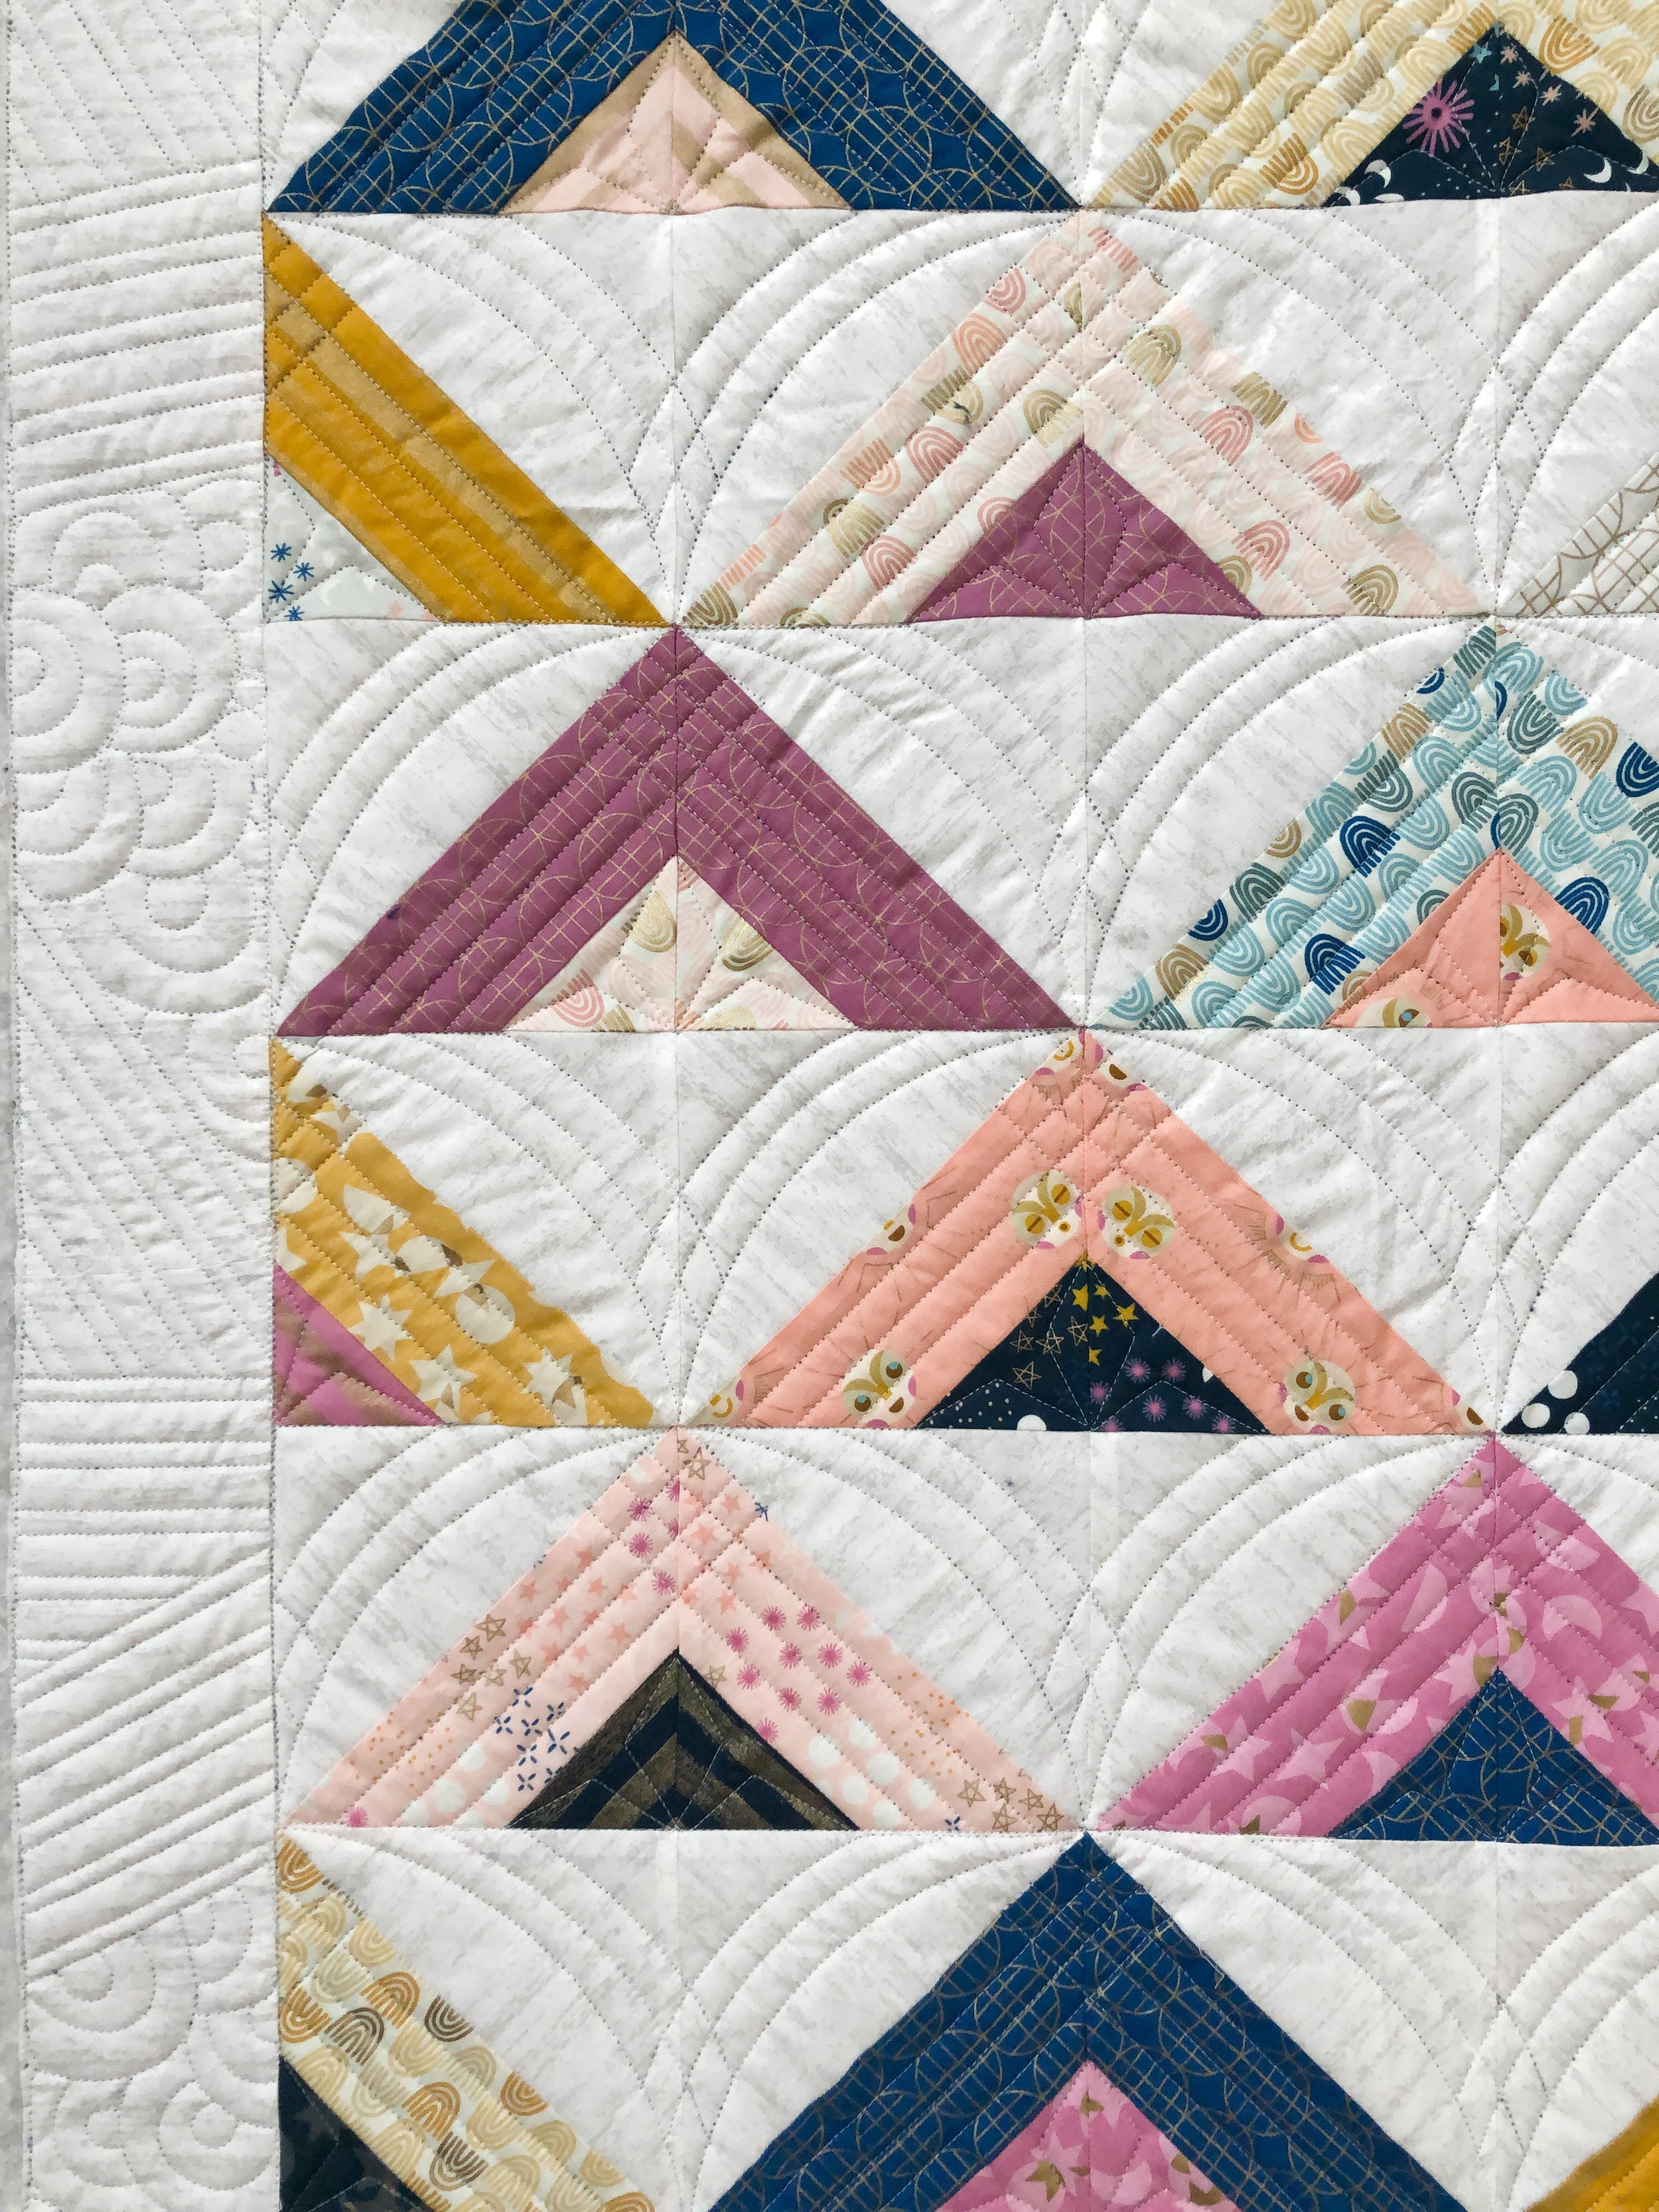
Cecili’s modern quilt
I have another fun modern quilt to share with you!!!

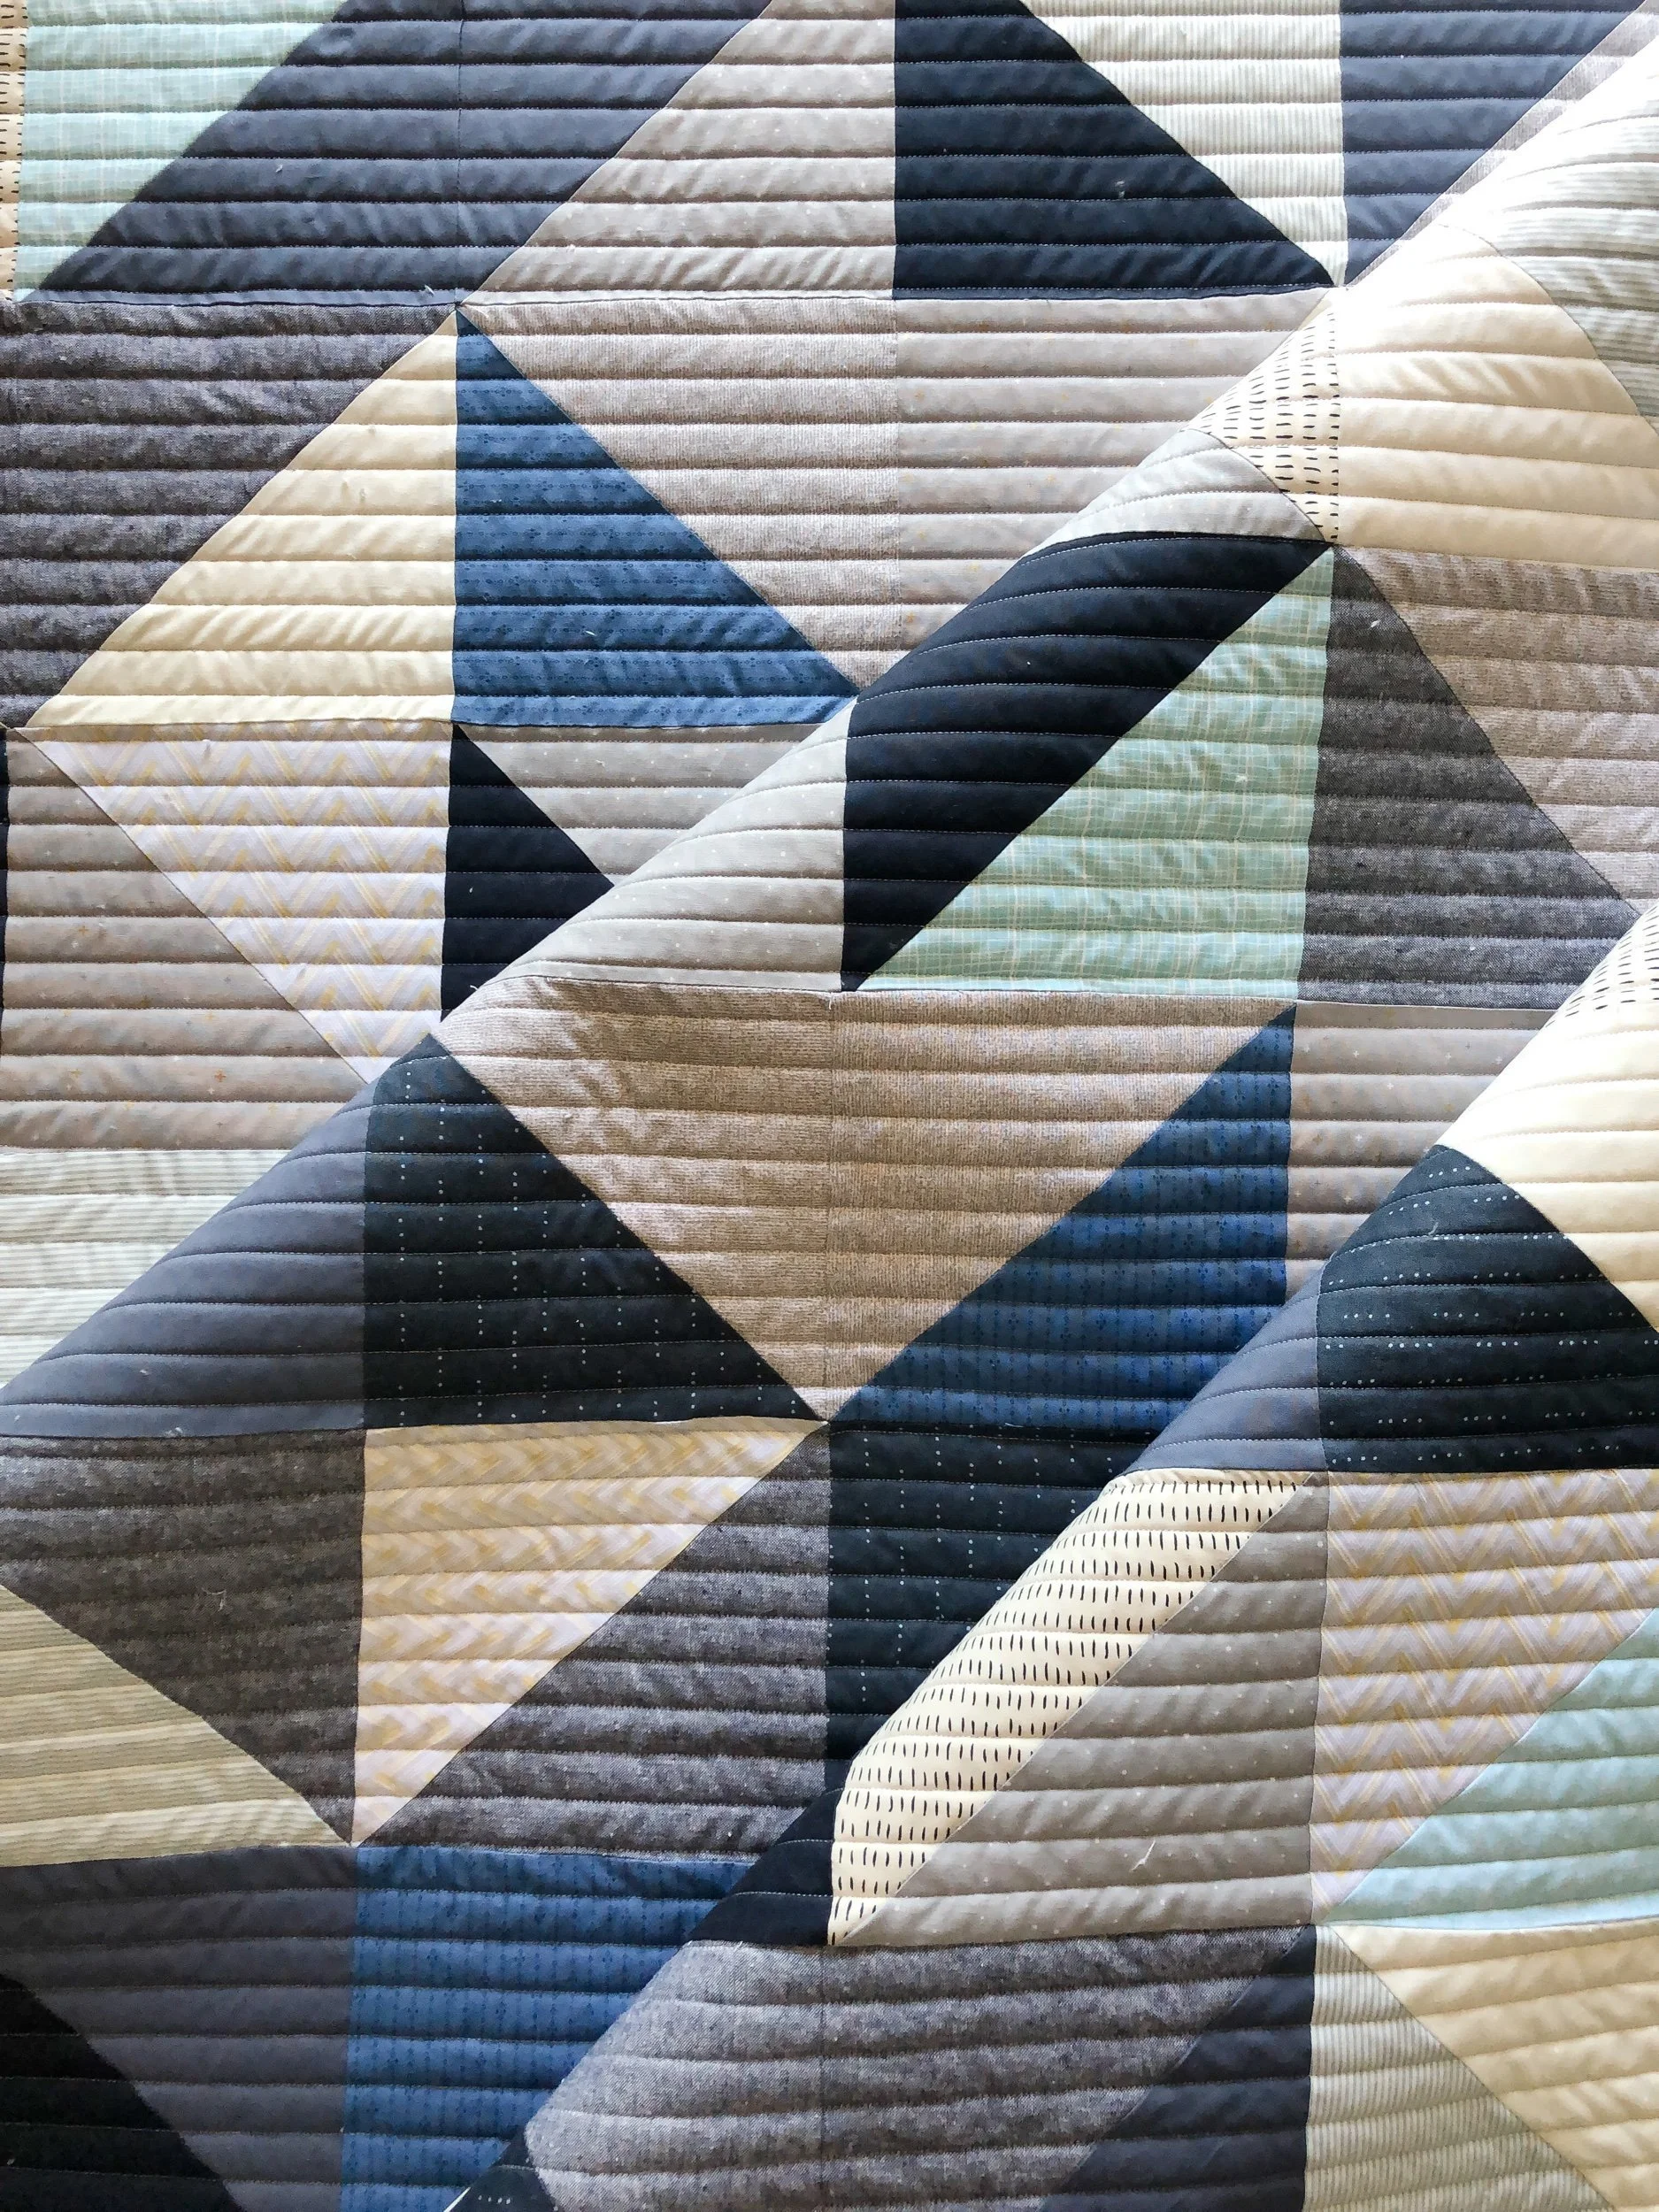
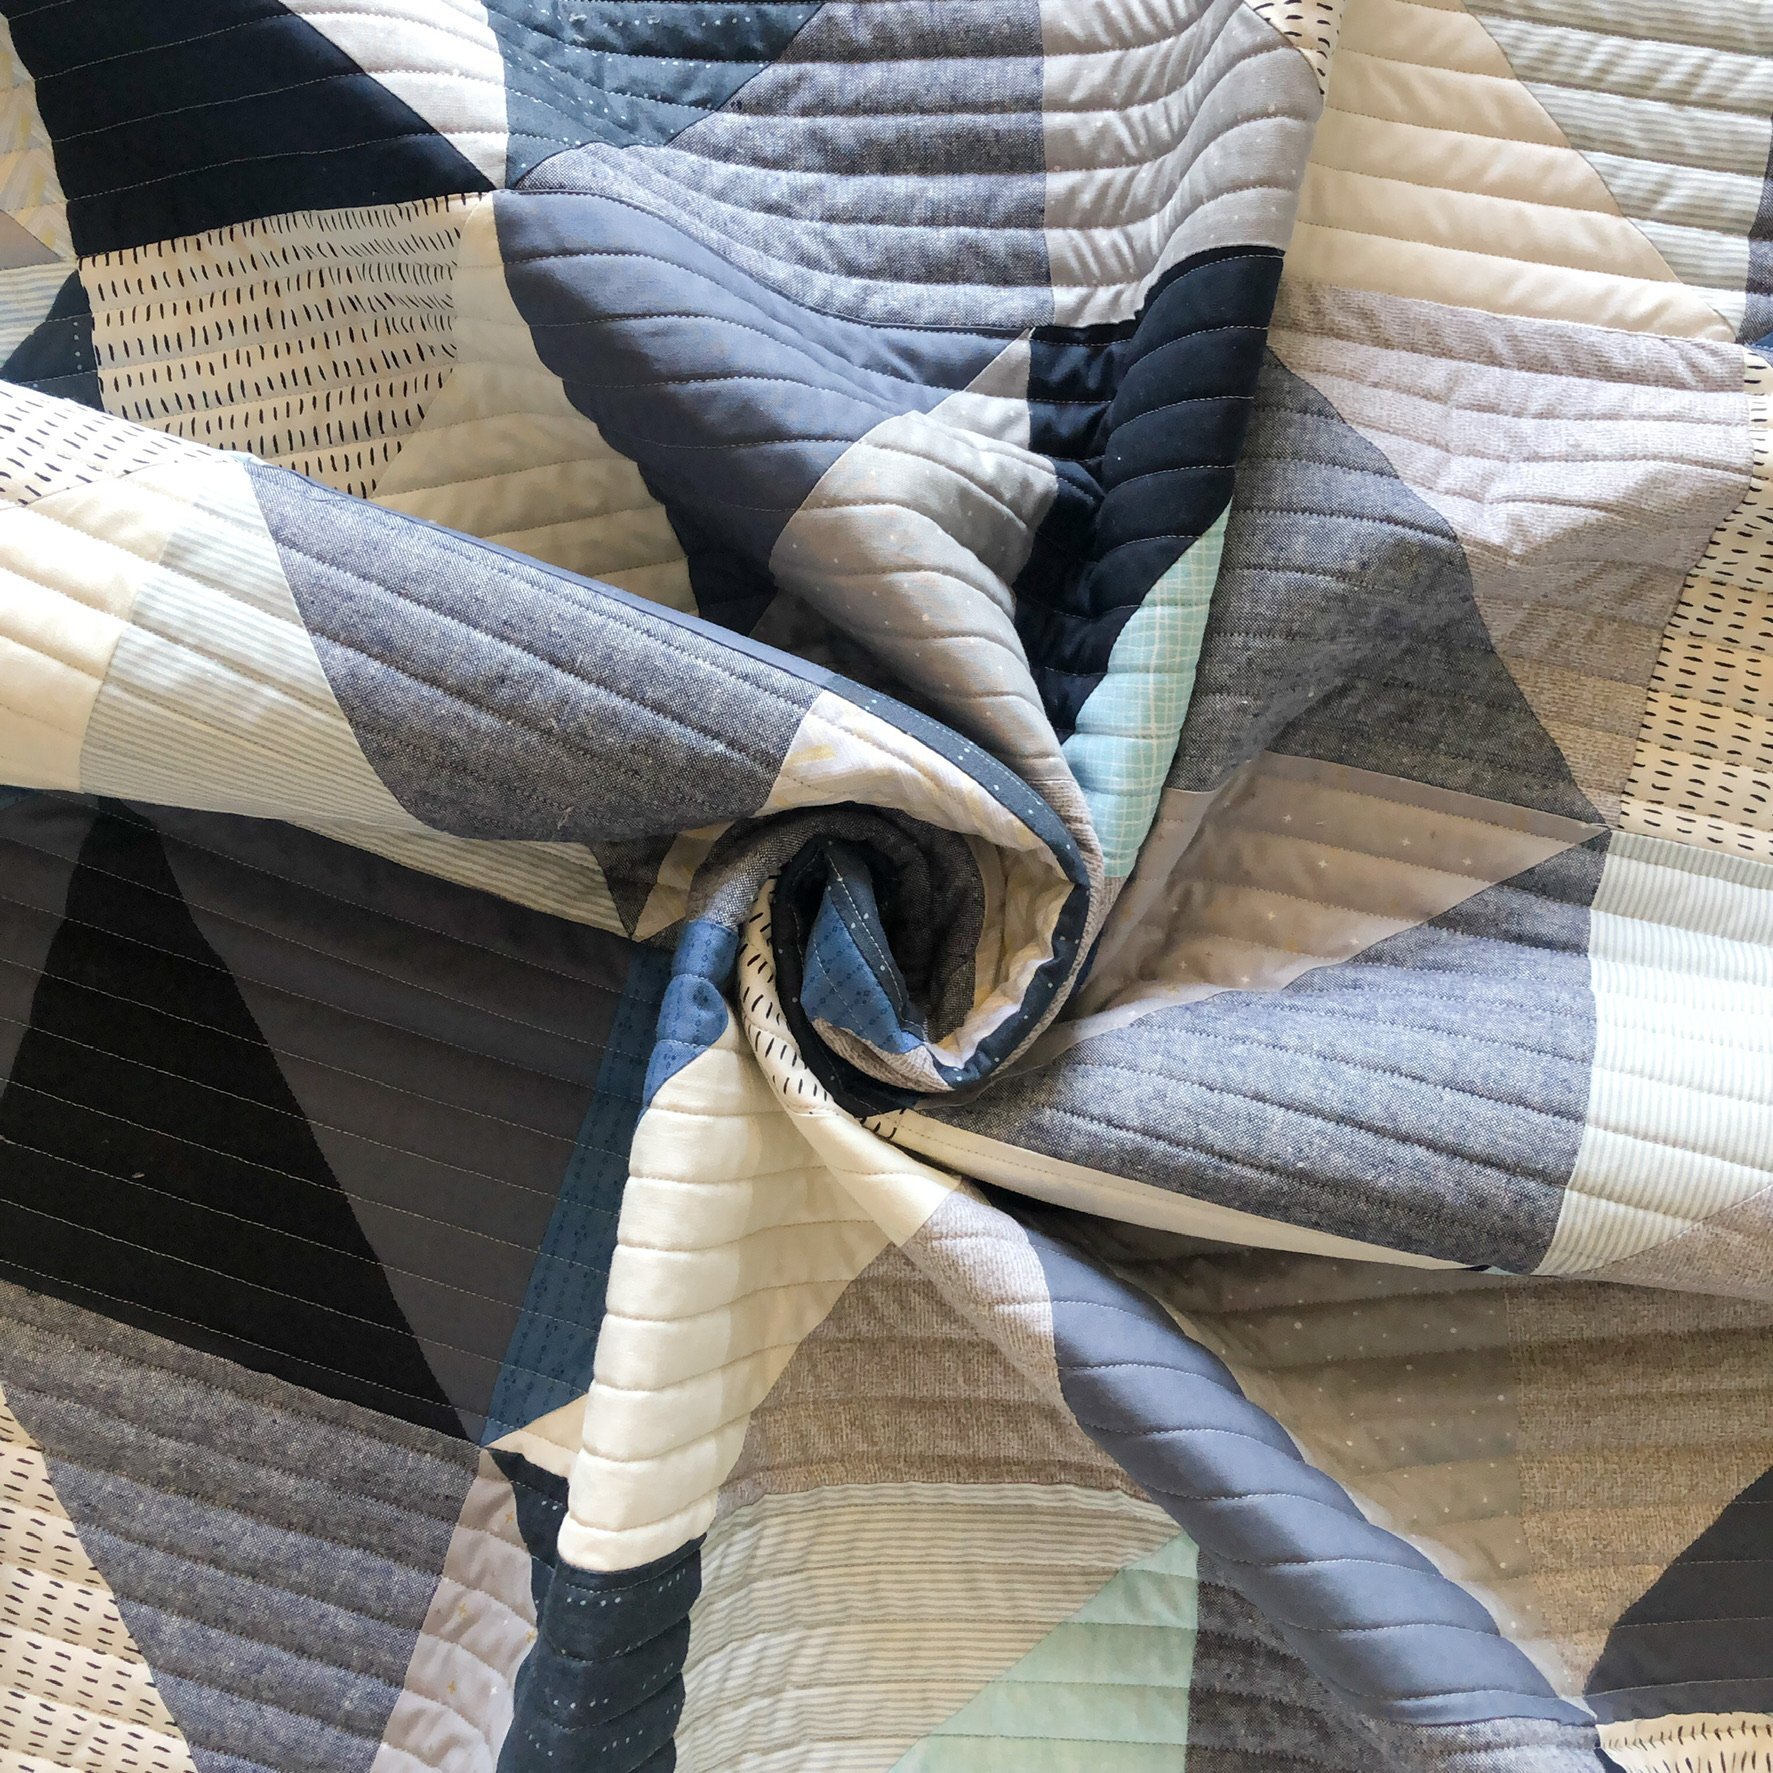
Cecili made this for her son to take to college with him, using a variety of neural and blue fabrics.

There is no pattern, she just made large half square triangles and laid them out in a pattern that she liked.

I used my Lined 3/4” to quilt it, which is available in my shop. There is mainly on the back of this quilt, so I think 3/4” is a great option to ensure the milky is still soft and cuddly.

I used a light gray Omni thread from Superior Threads, and 8020 cotton poly blend batting from Winline Textiles.
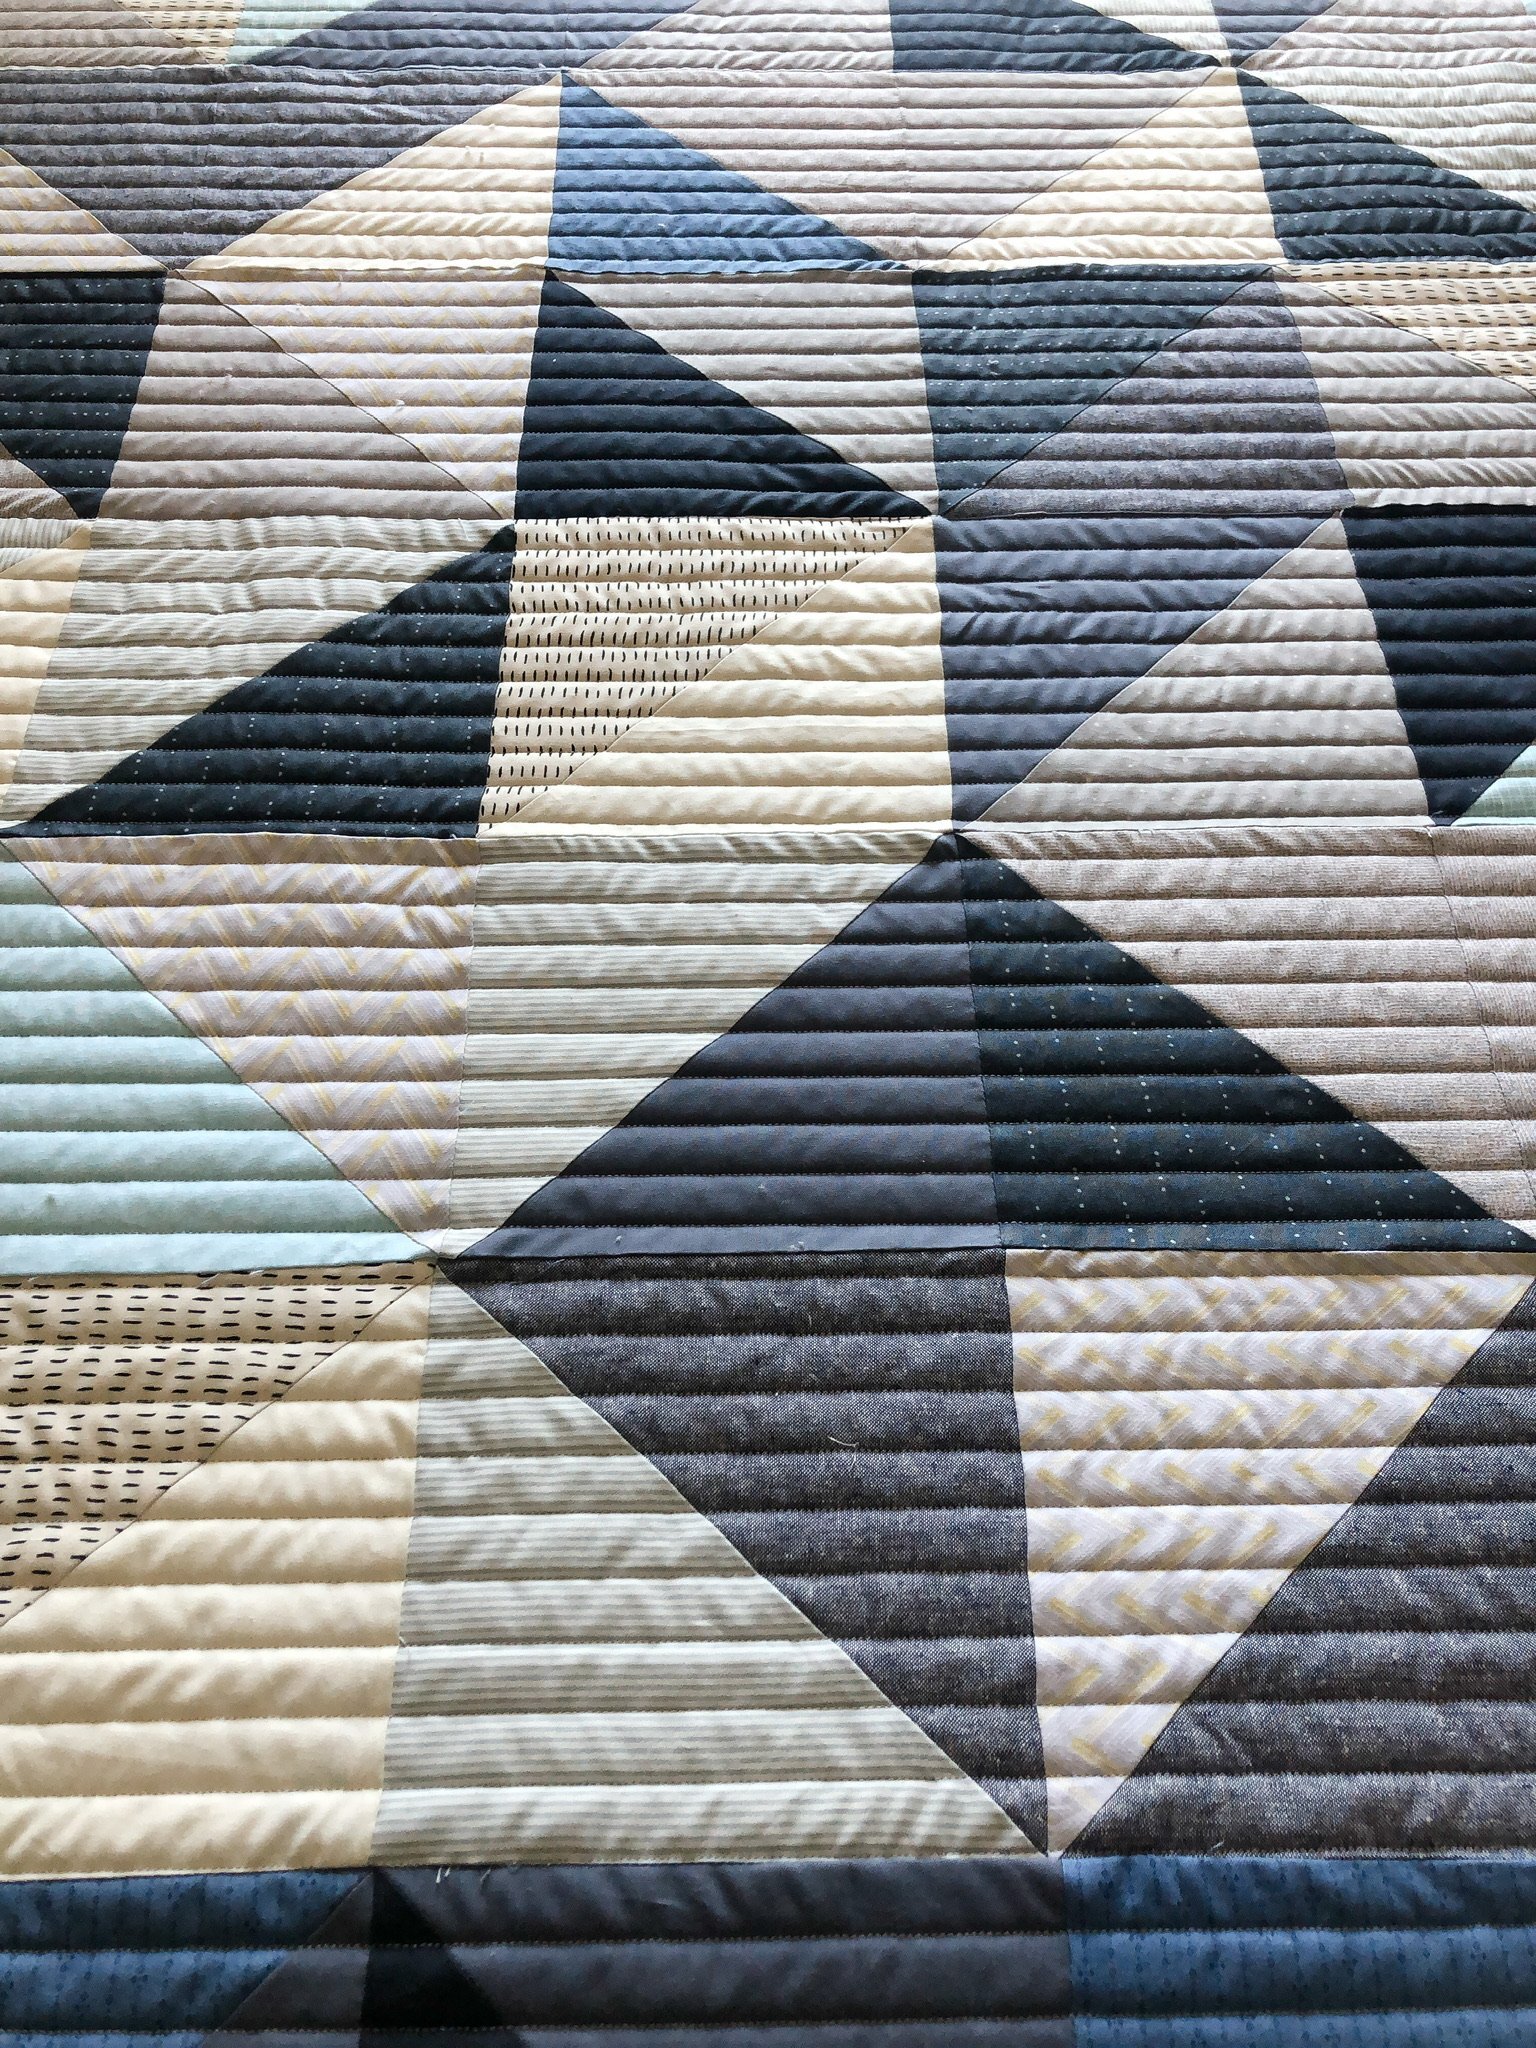
To help with thread breaks as it quilts back and forth, I turn the needle a little more to the right around 5:30 if you think of the eye of the position like a clock.

If you’d like for me to quilt for you, let me know! Email me at quiltingit@gmail.com • I’d love to quilt for you!
Thanks for stopping by!!
Lisa’s Nesting Quilt
Hi Friends,
I hope you’re each doing well! I have a beautiful quilt to share with you today…

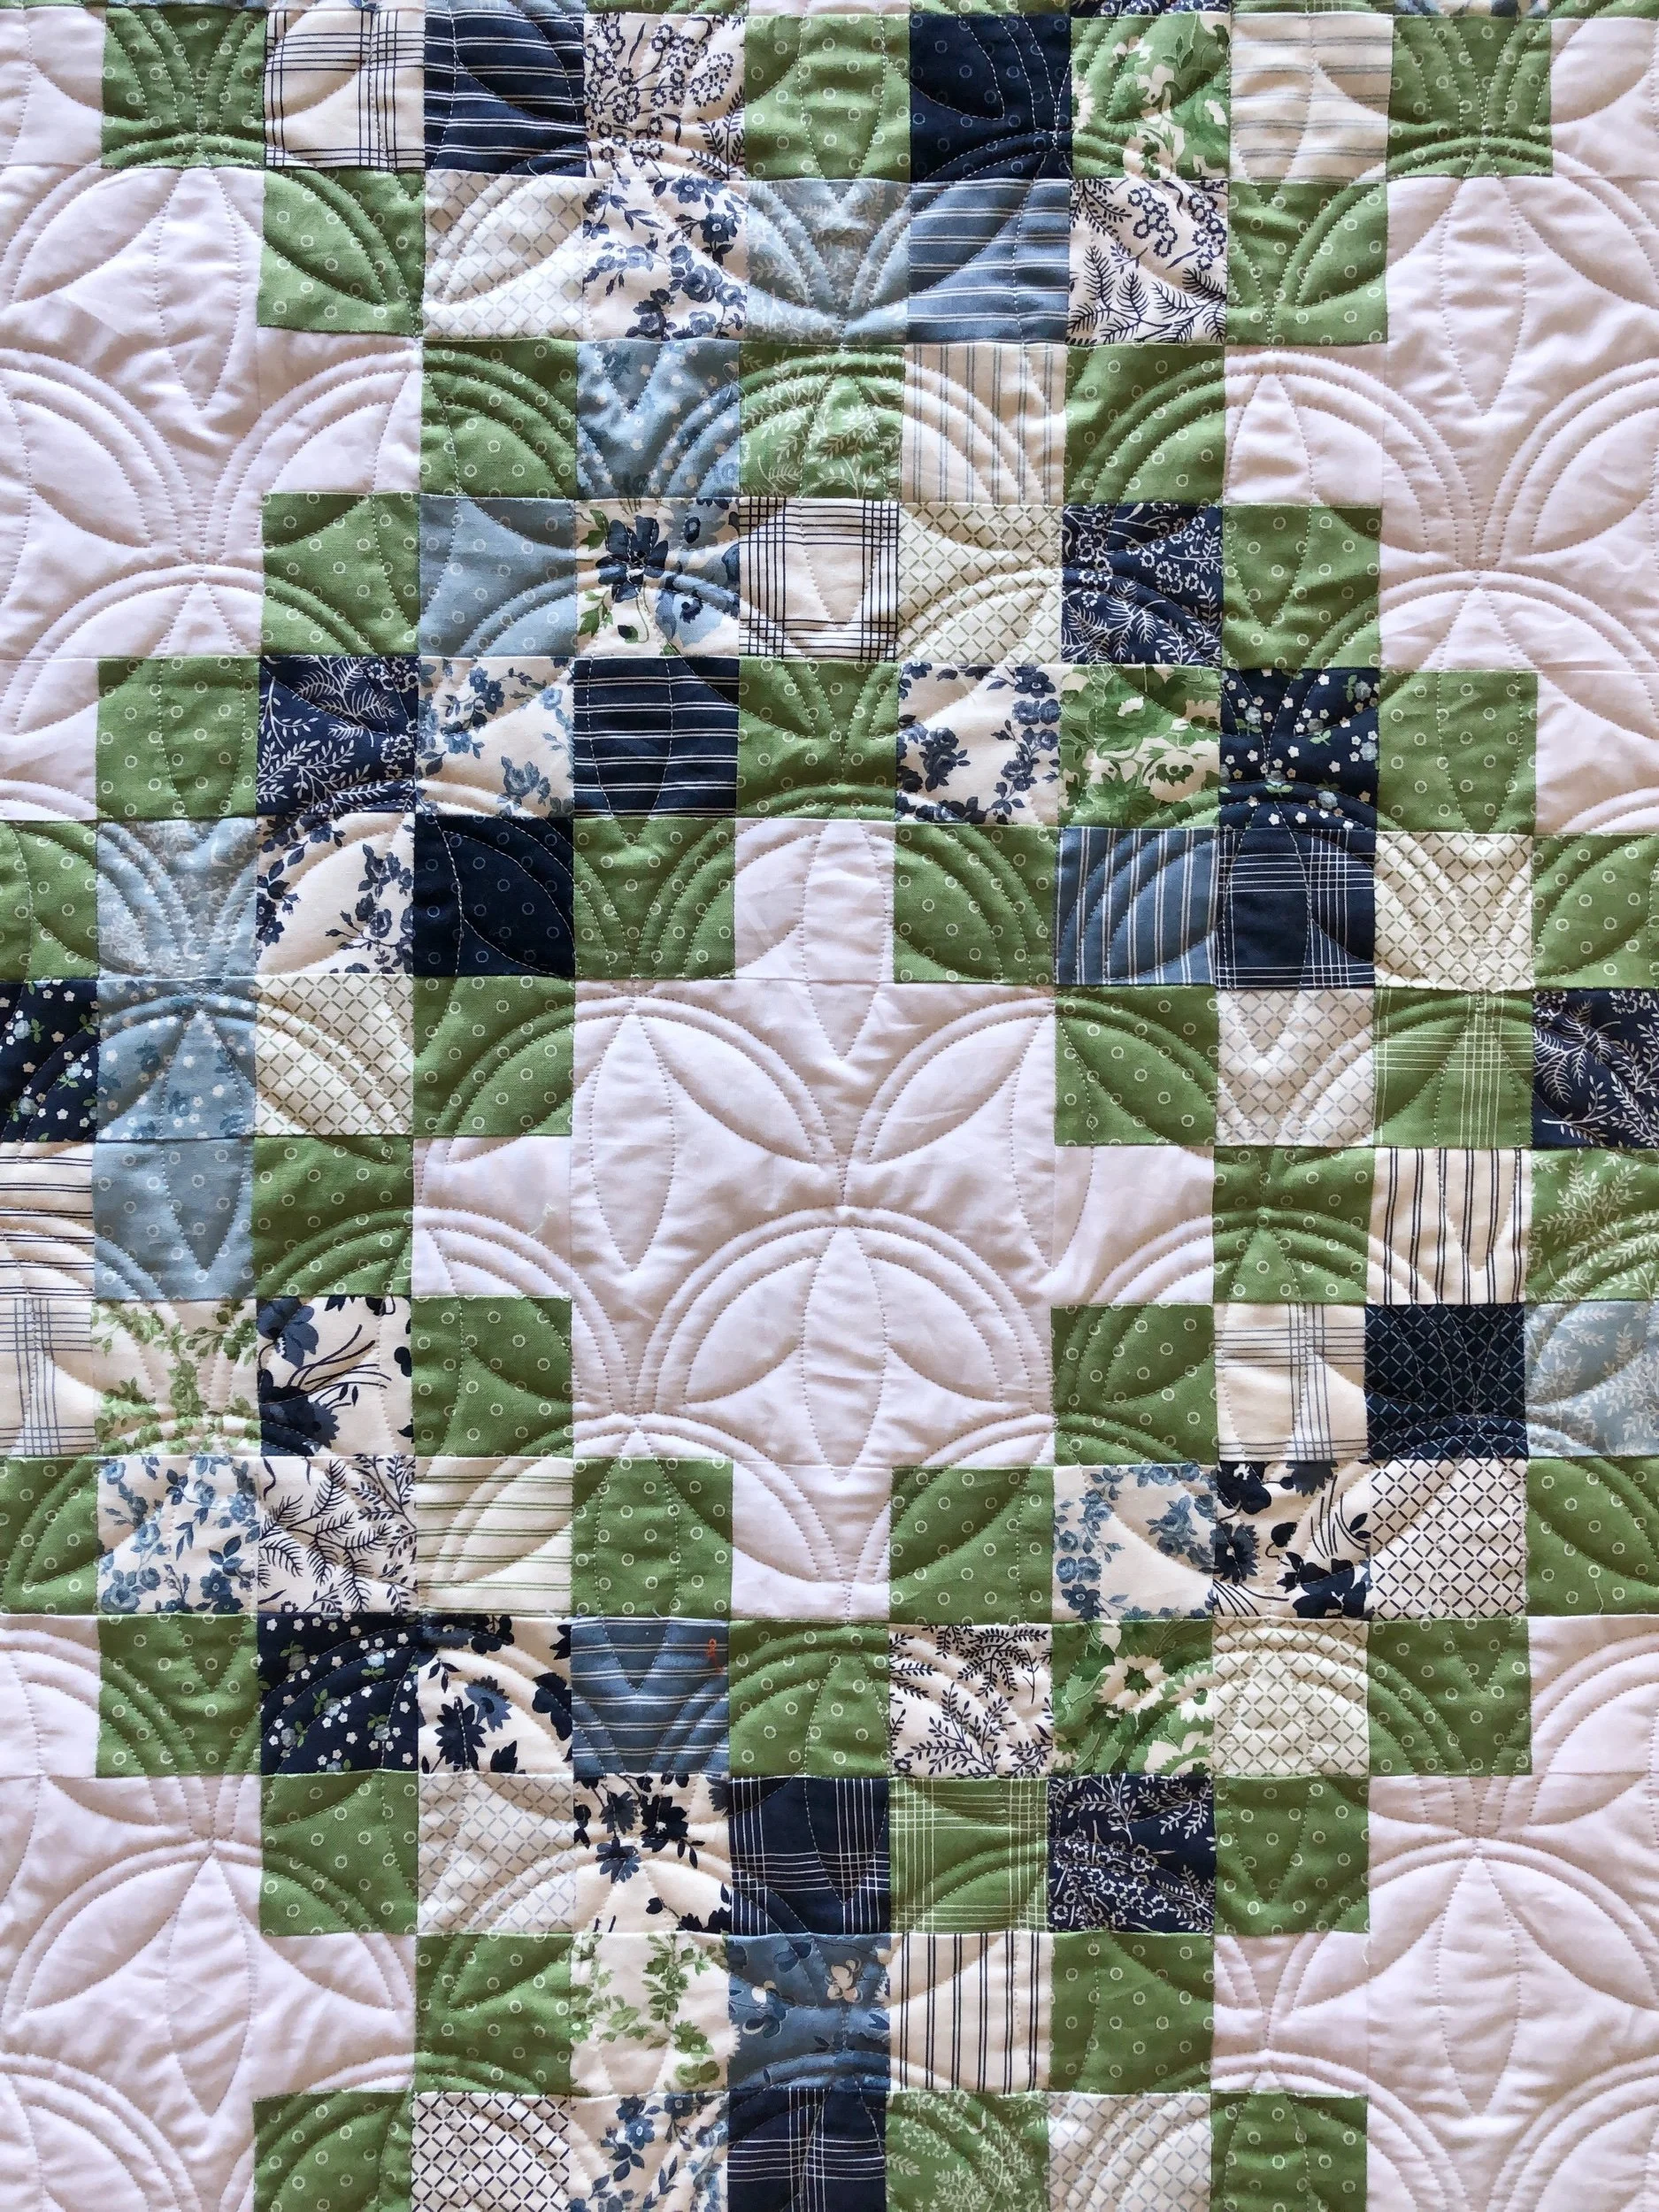
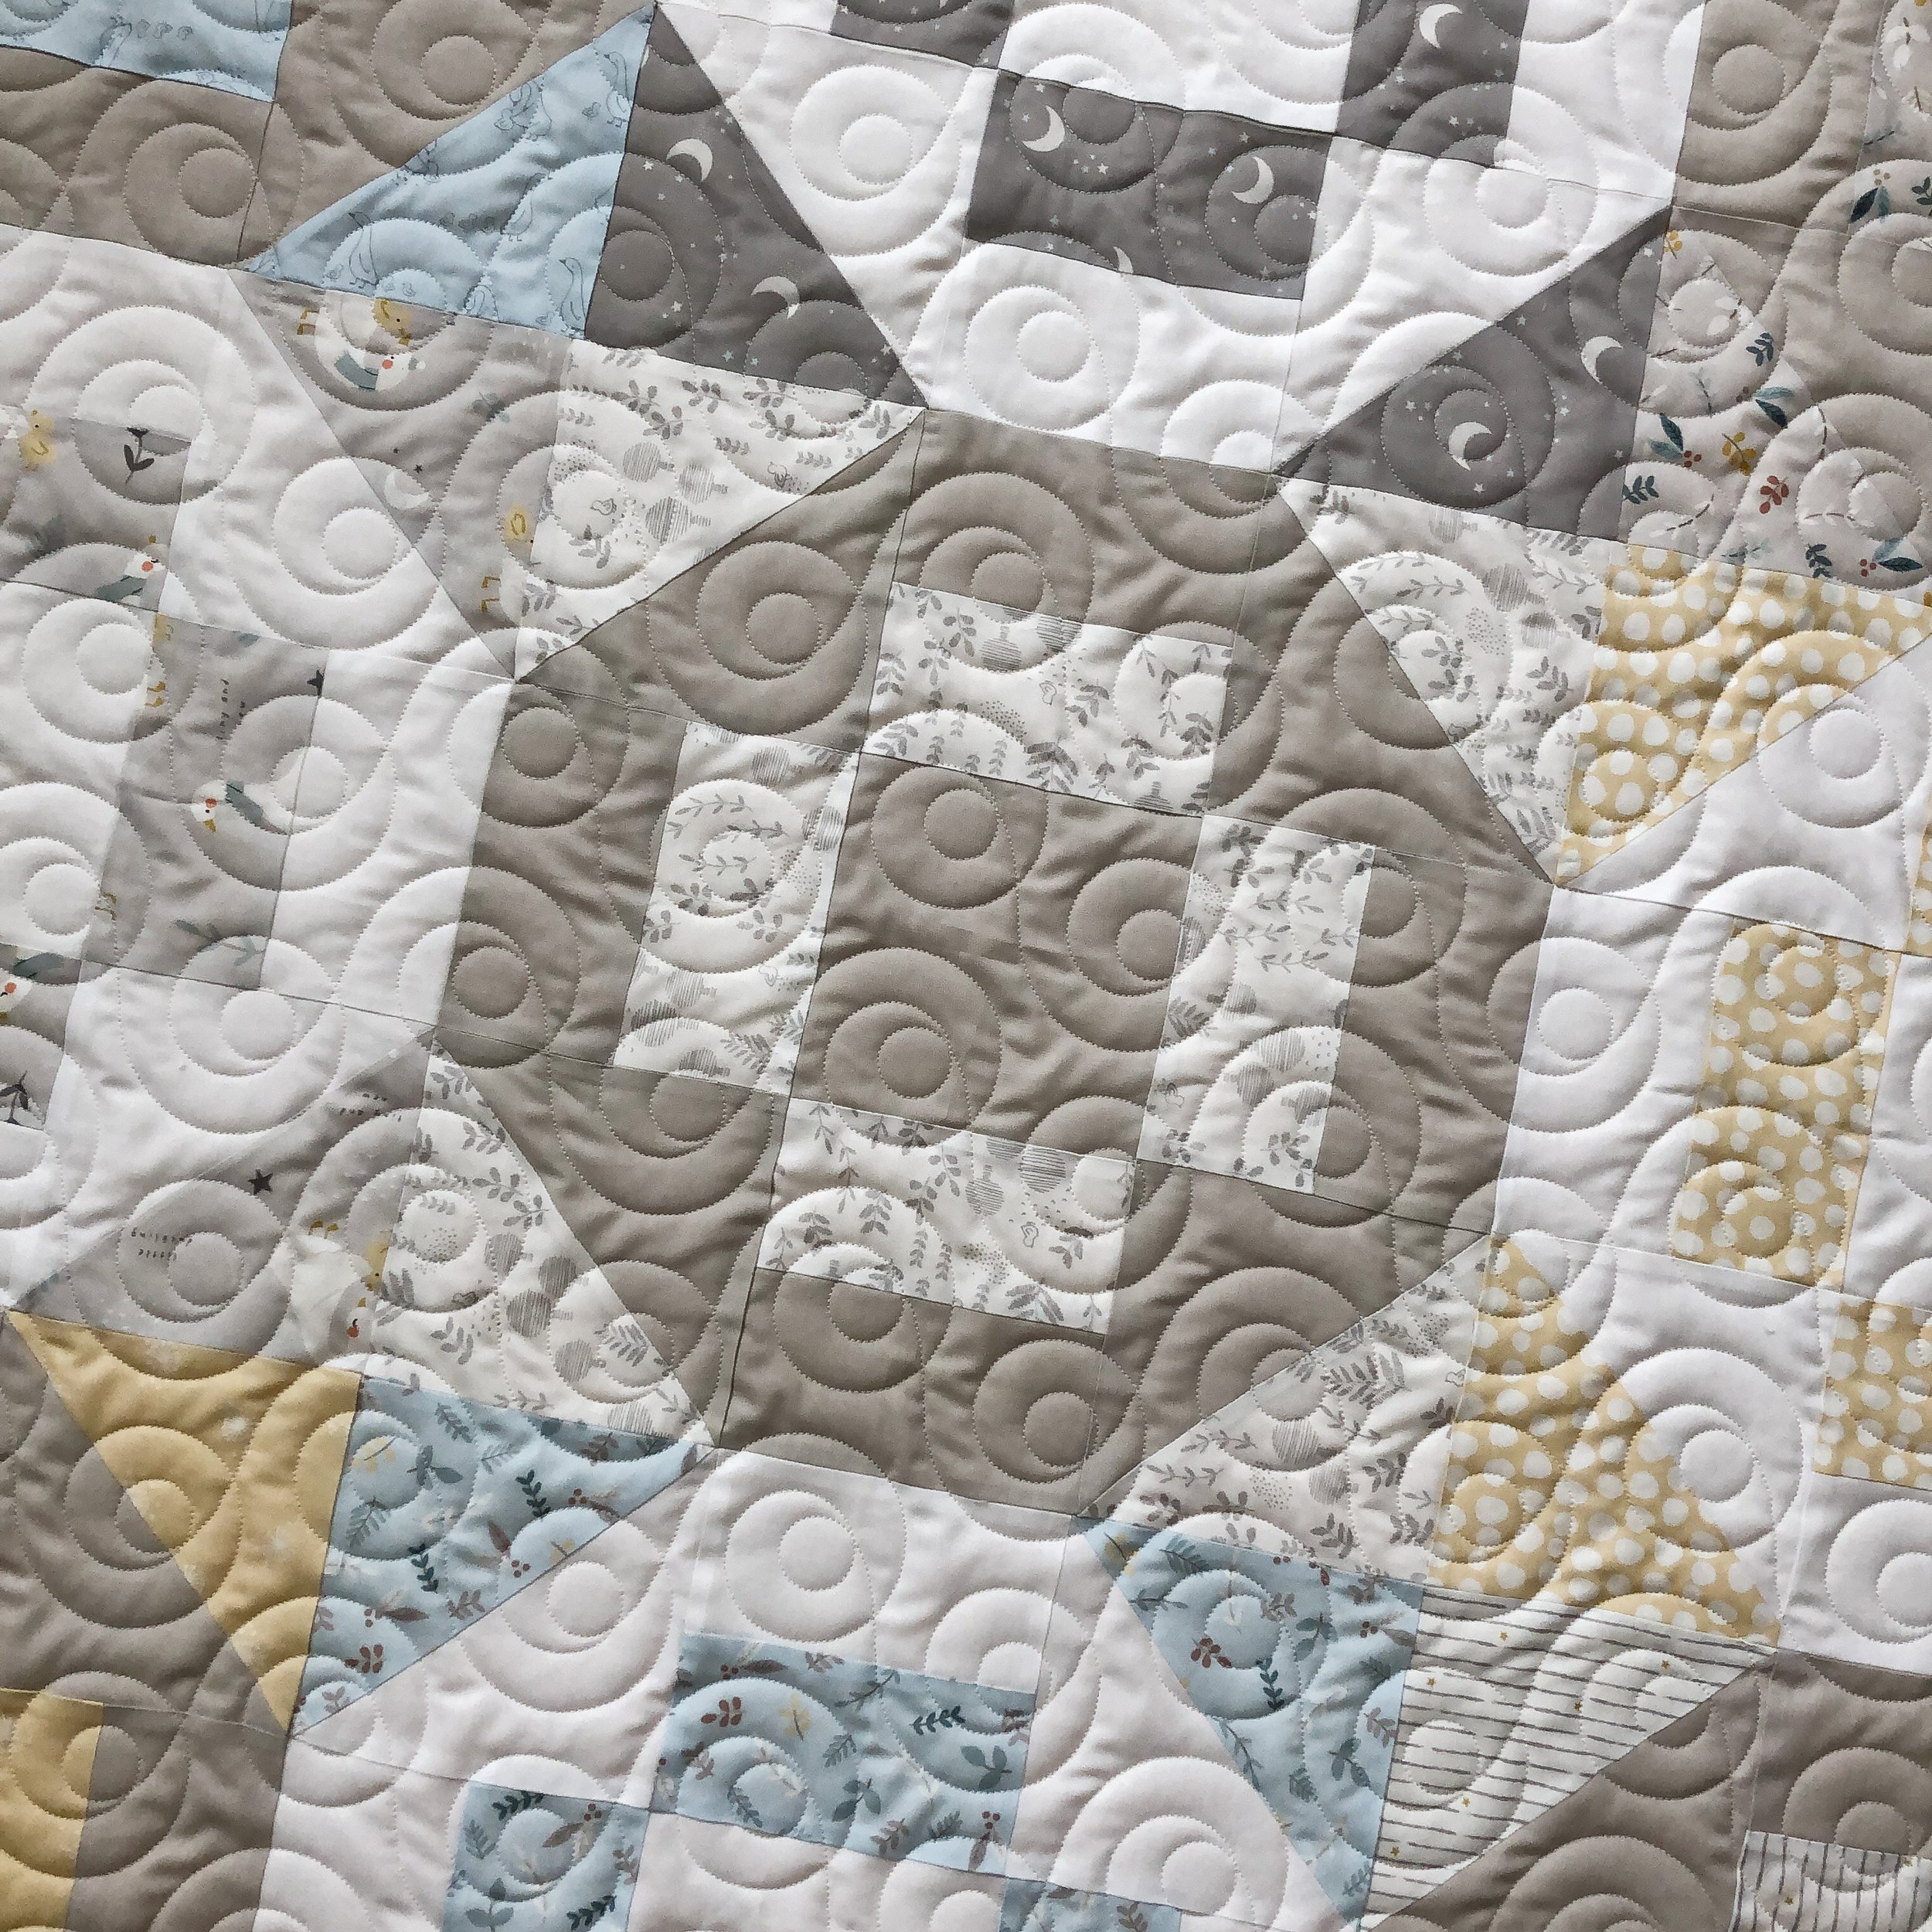
Lisa made this beautiful Nesting quilt for a friend, pattern and Nantucket Summer fabrics are by Camille from Thimble Blossoms.
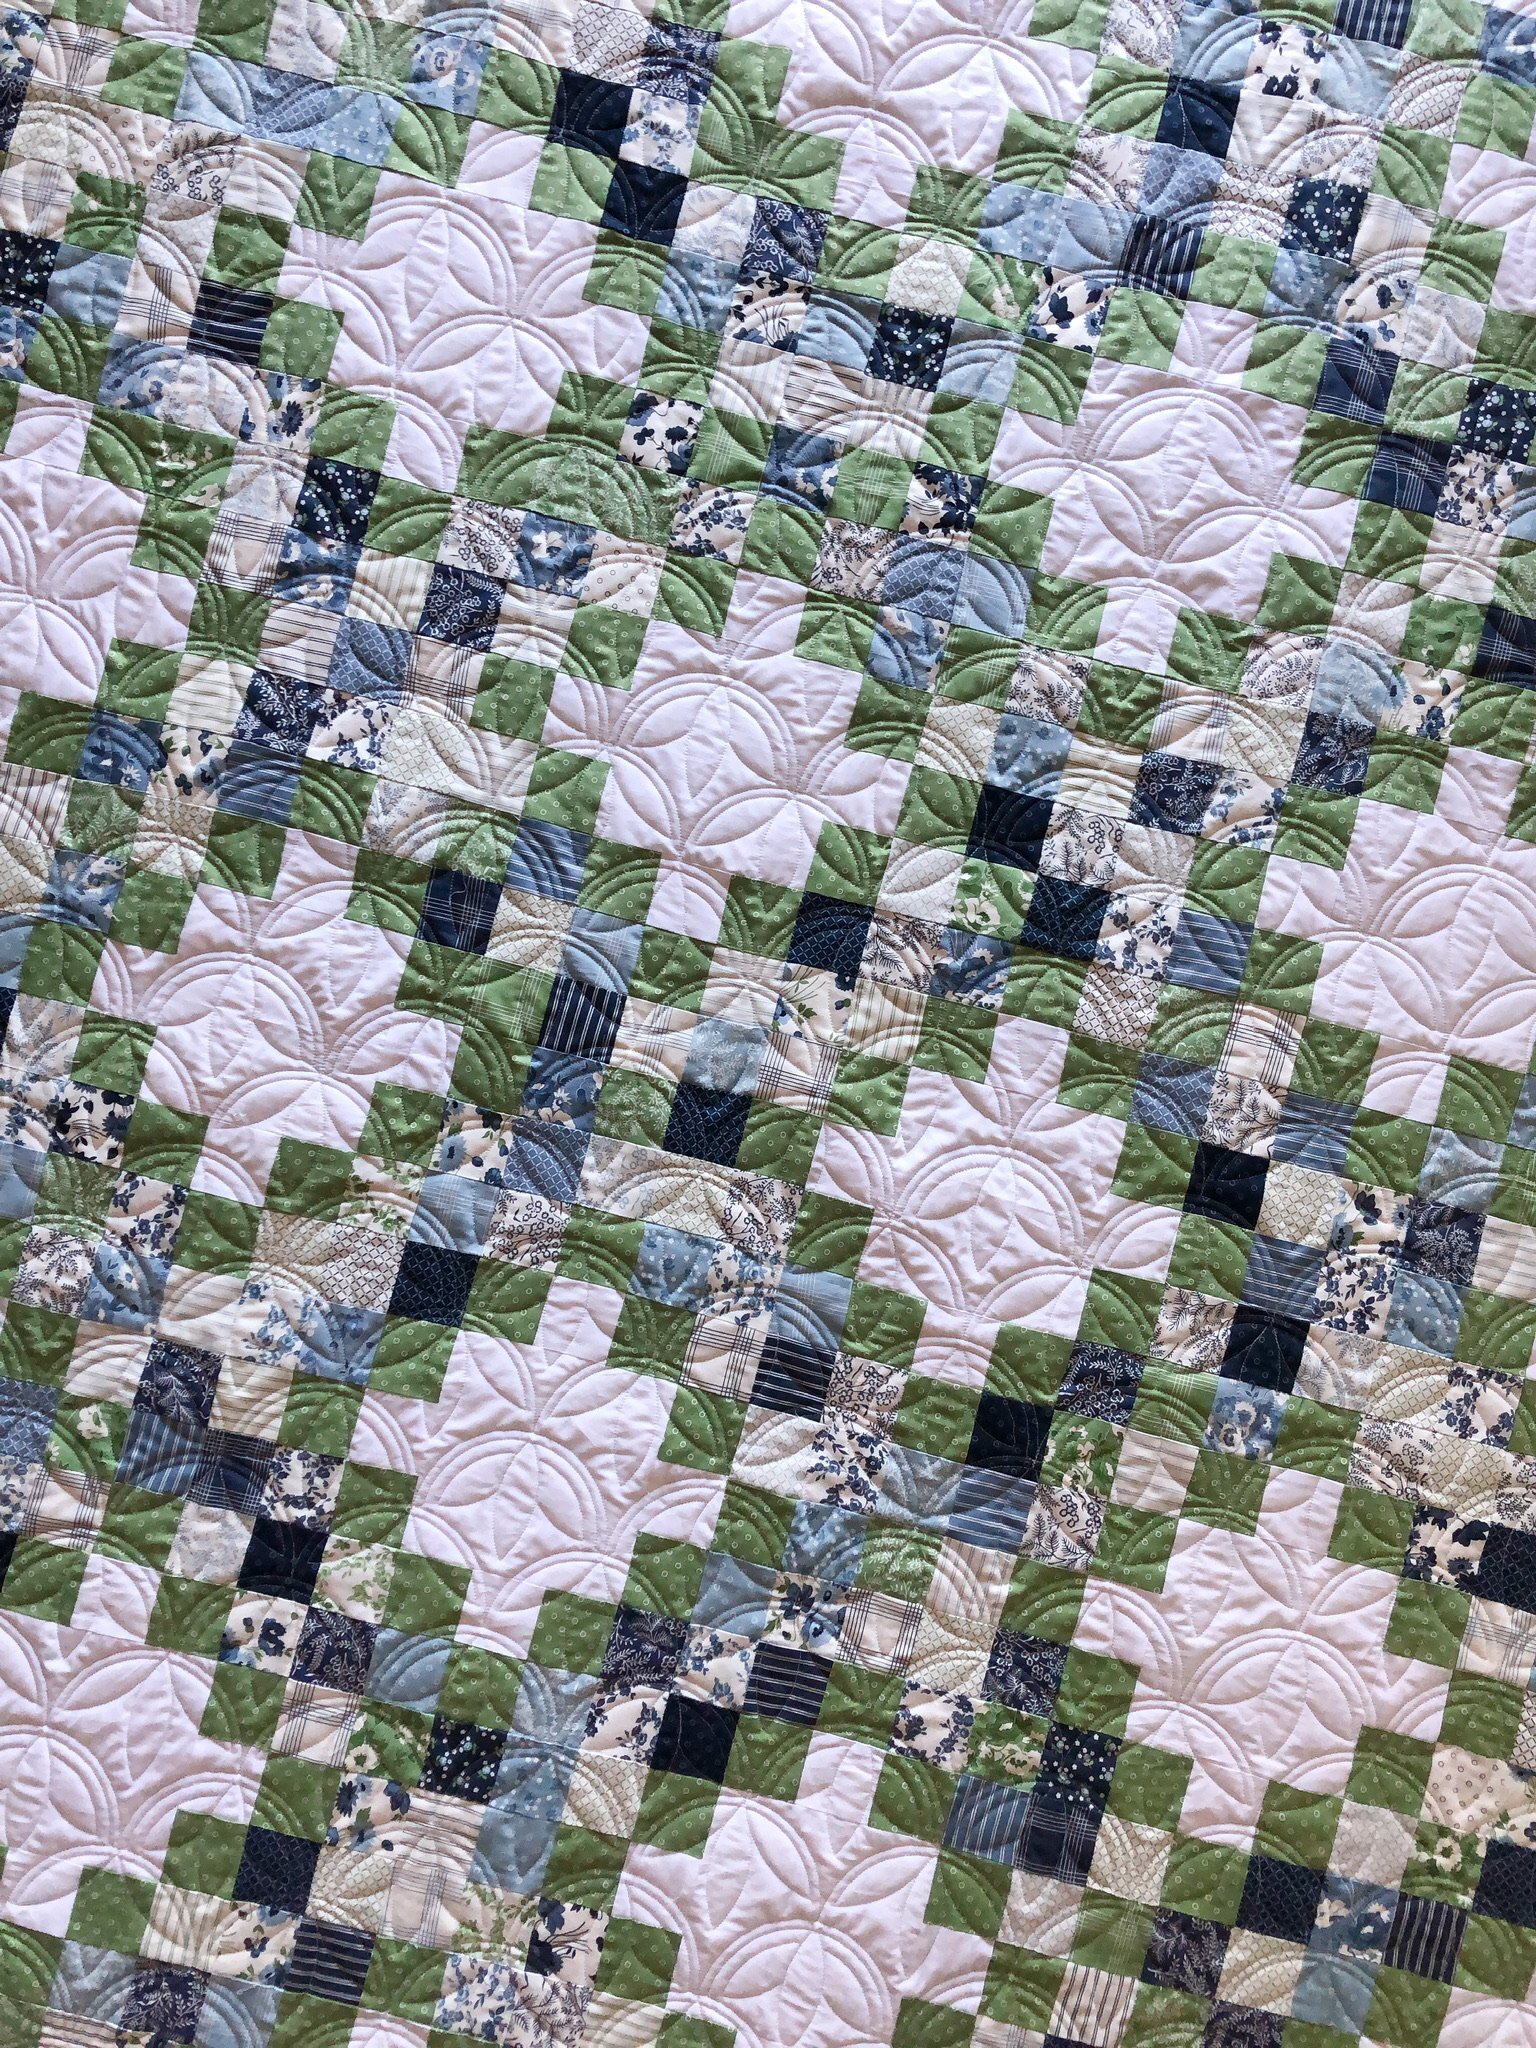
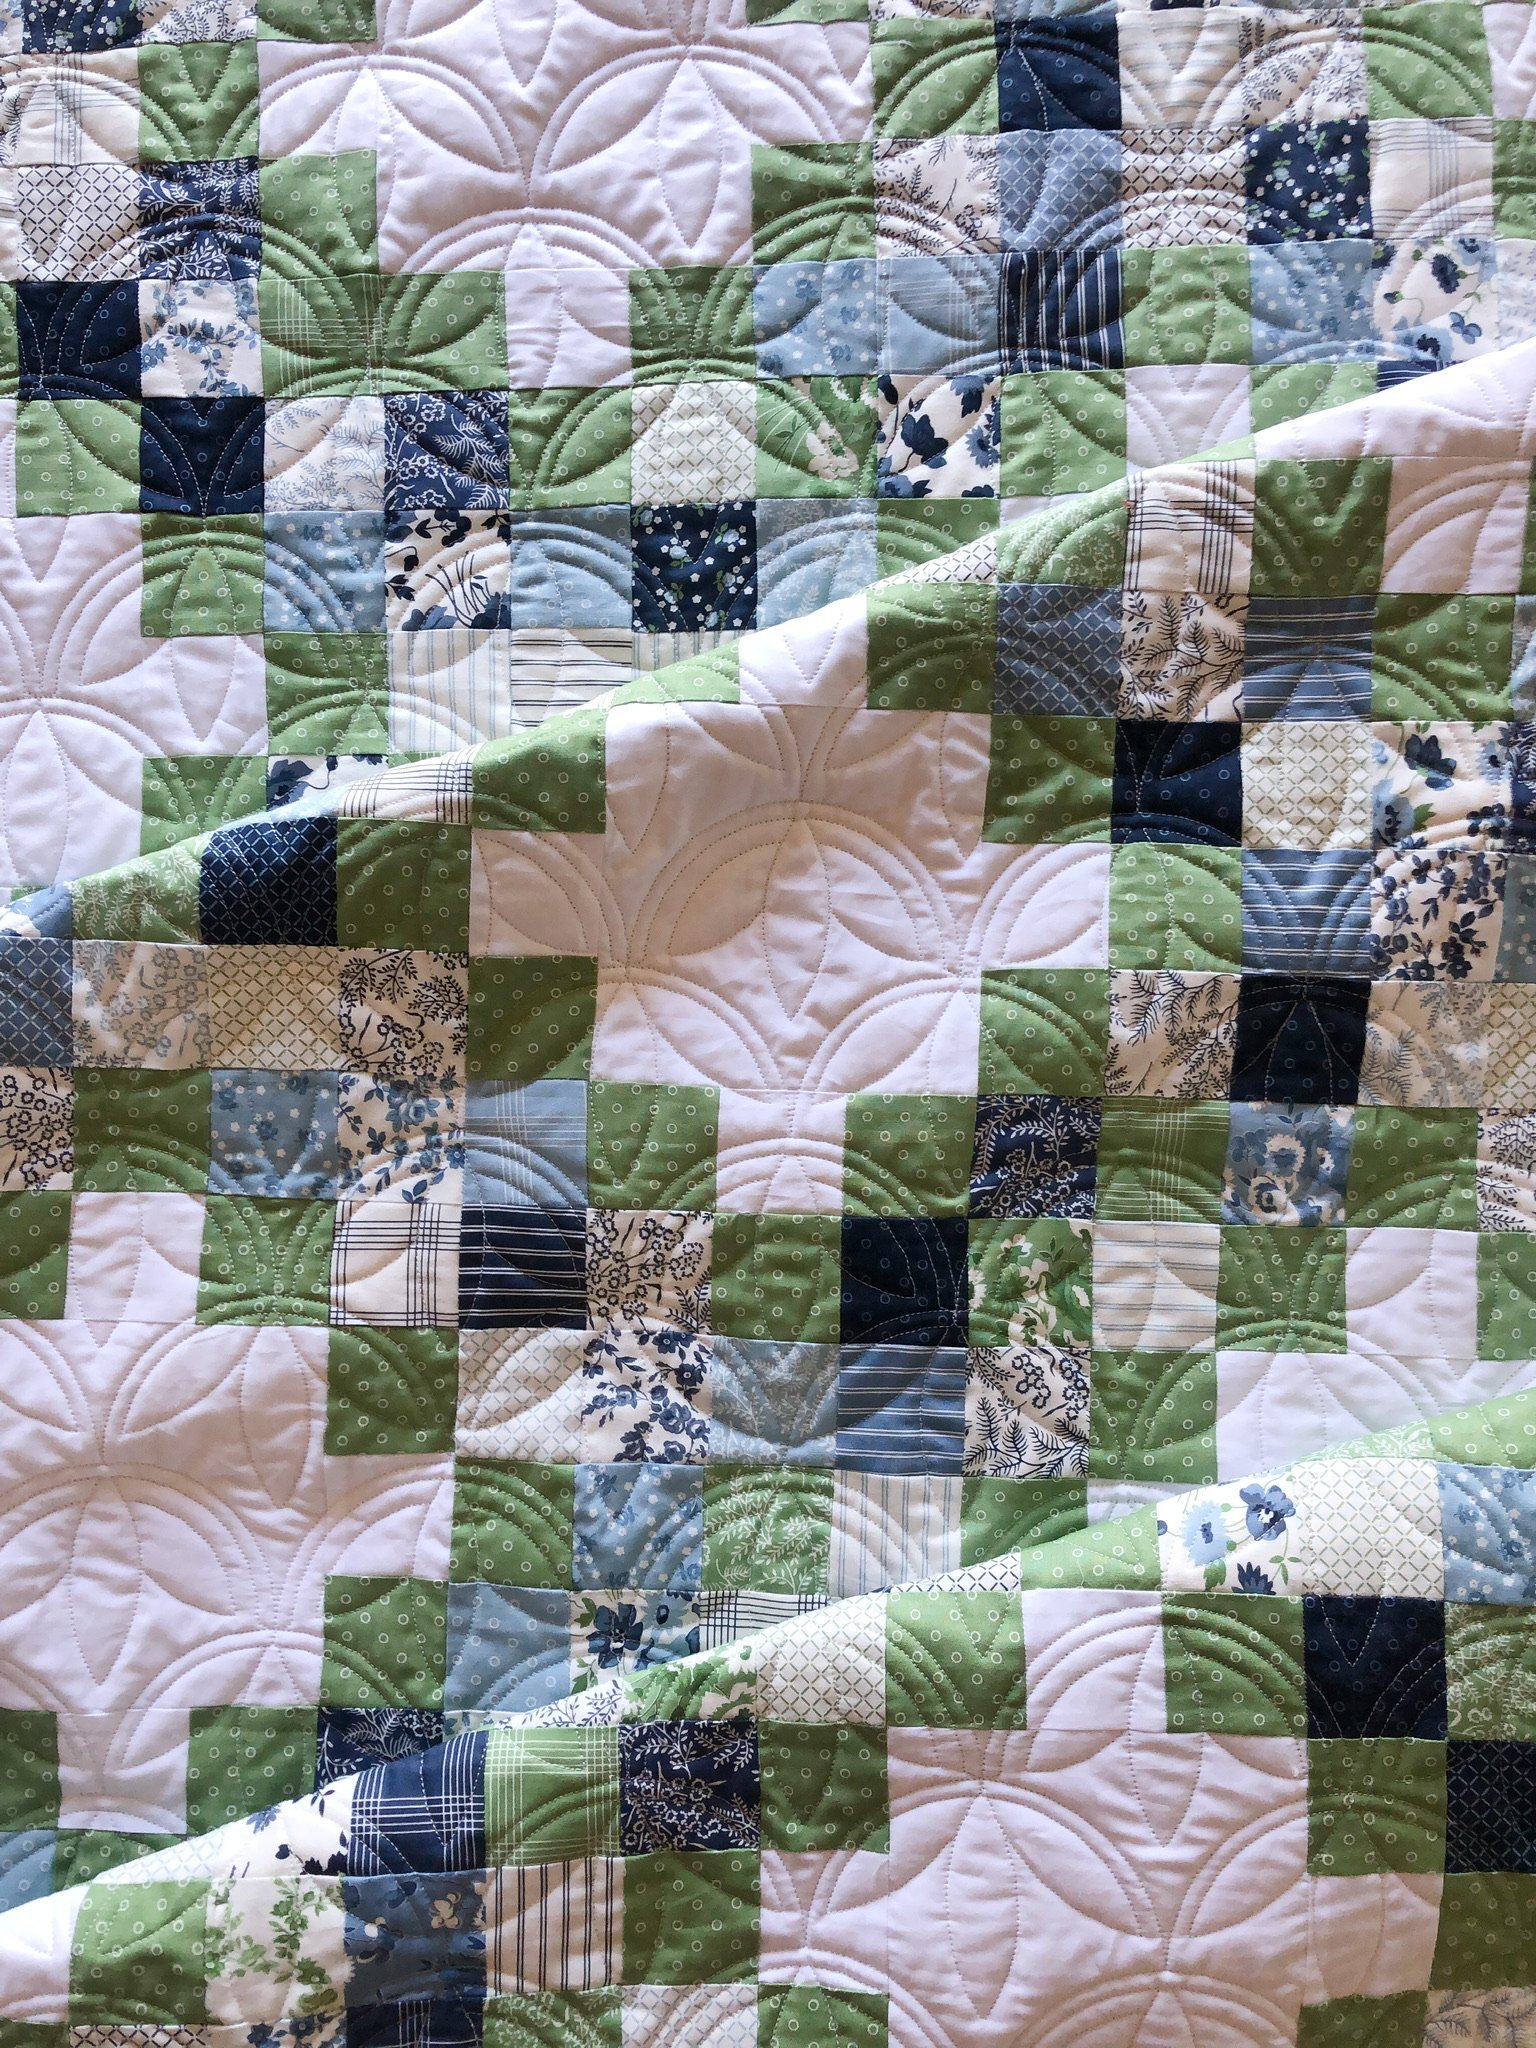
I sent them some quilting options, and they chose Cyclamen by Keryn Emmerson. It’s such a fun design, and quilted out beautifully.

I used my favorite natural white Omni thread from Superior Threads, and 8020 cotton poly blend batting.

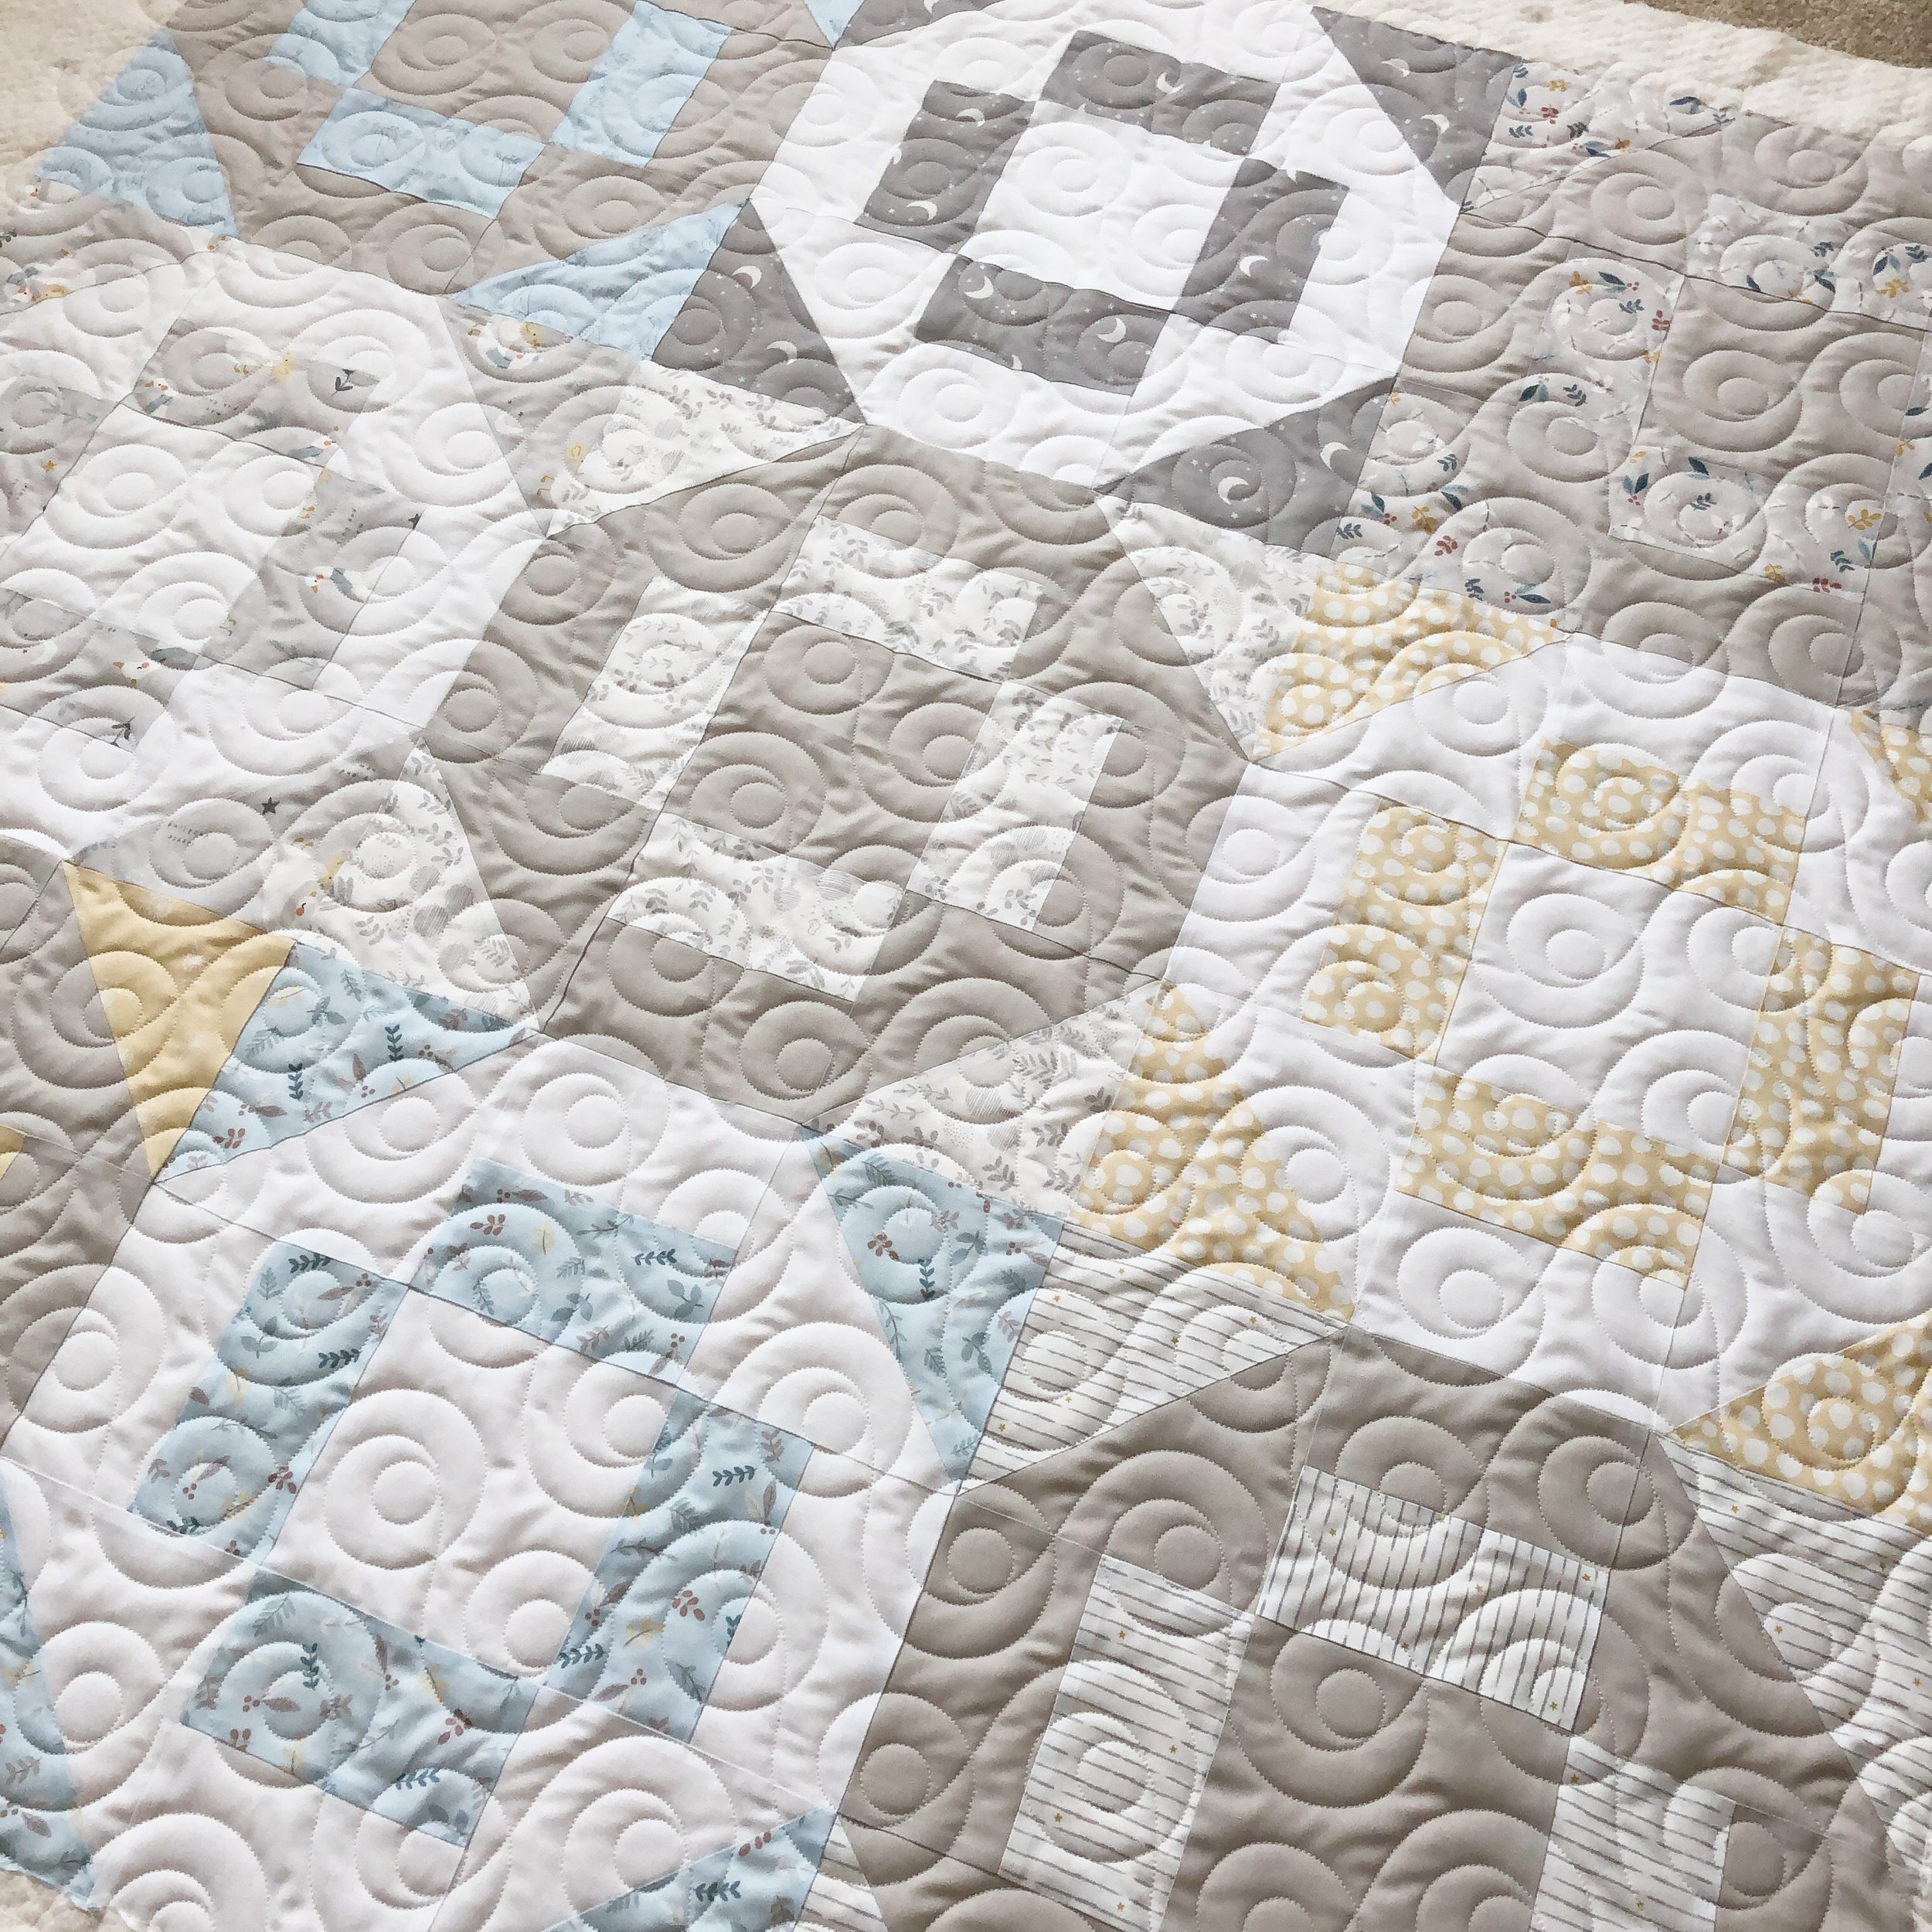
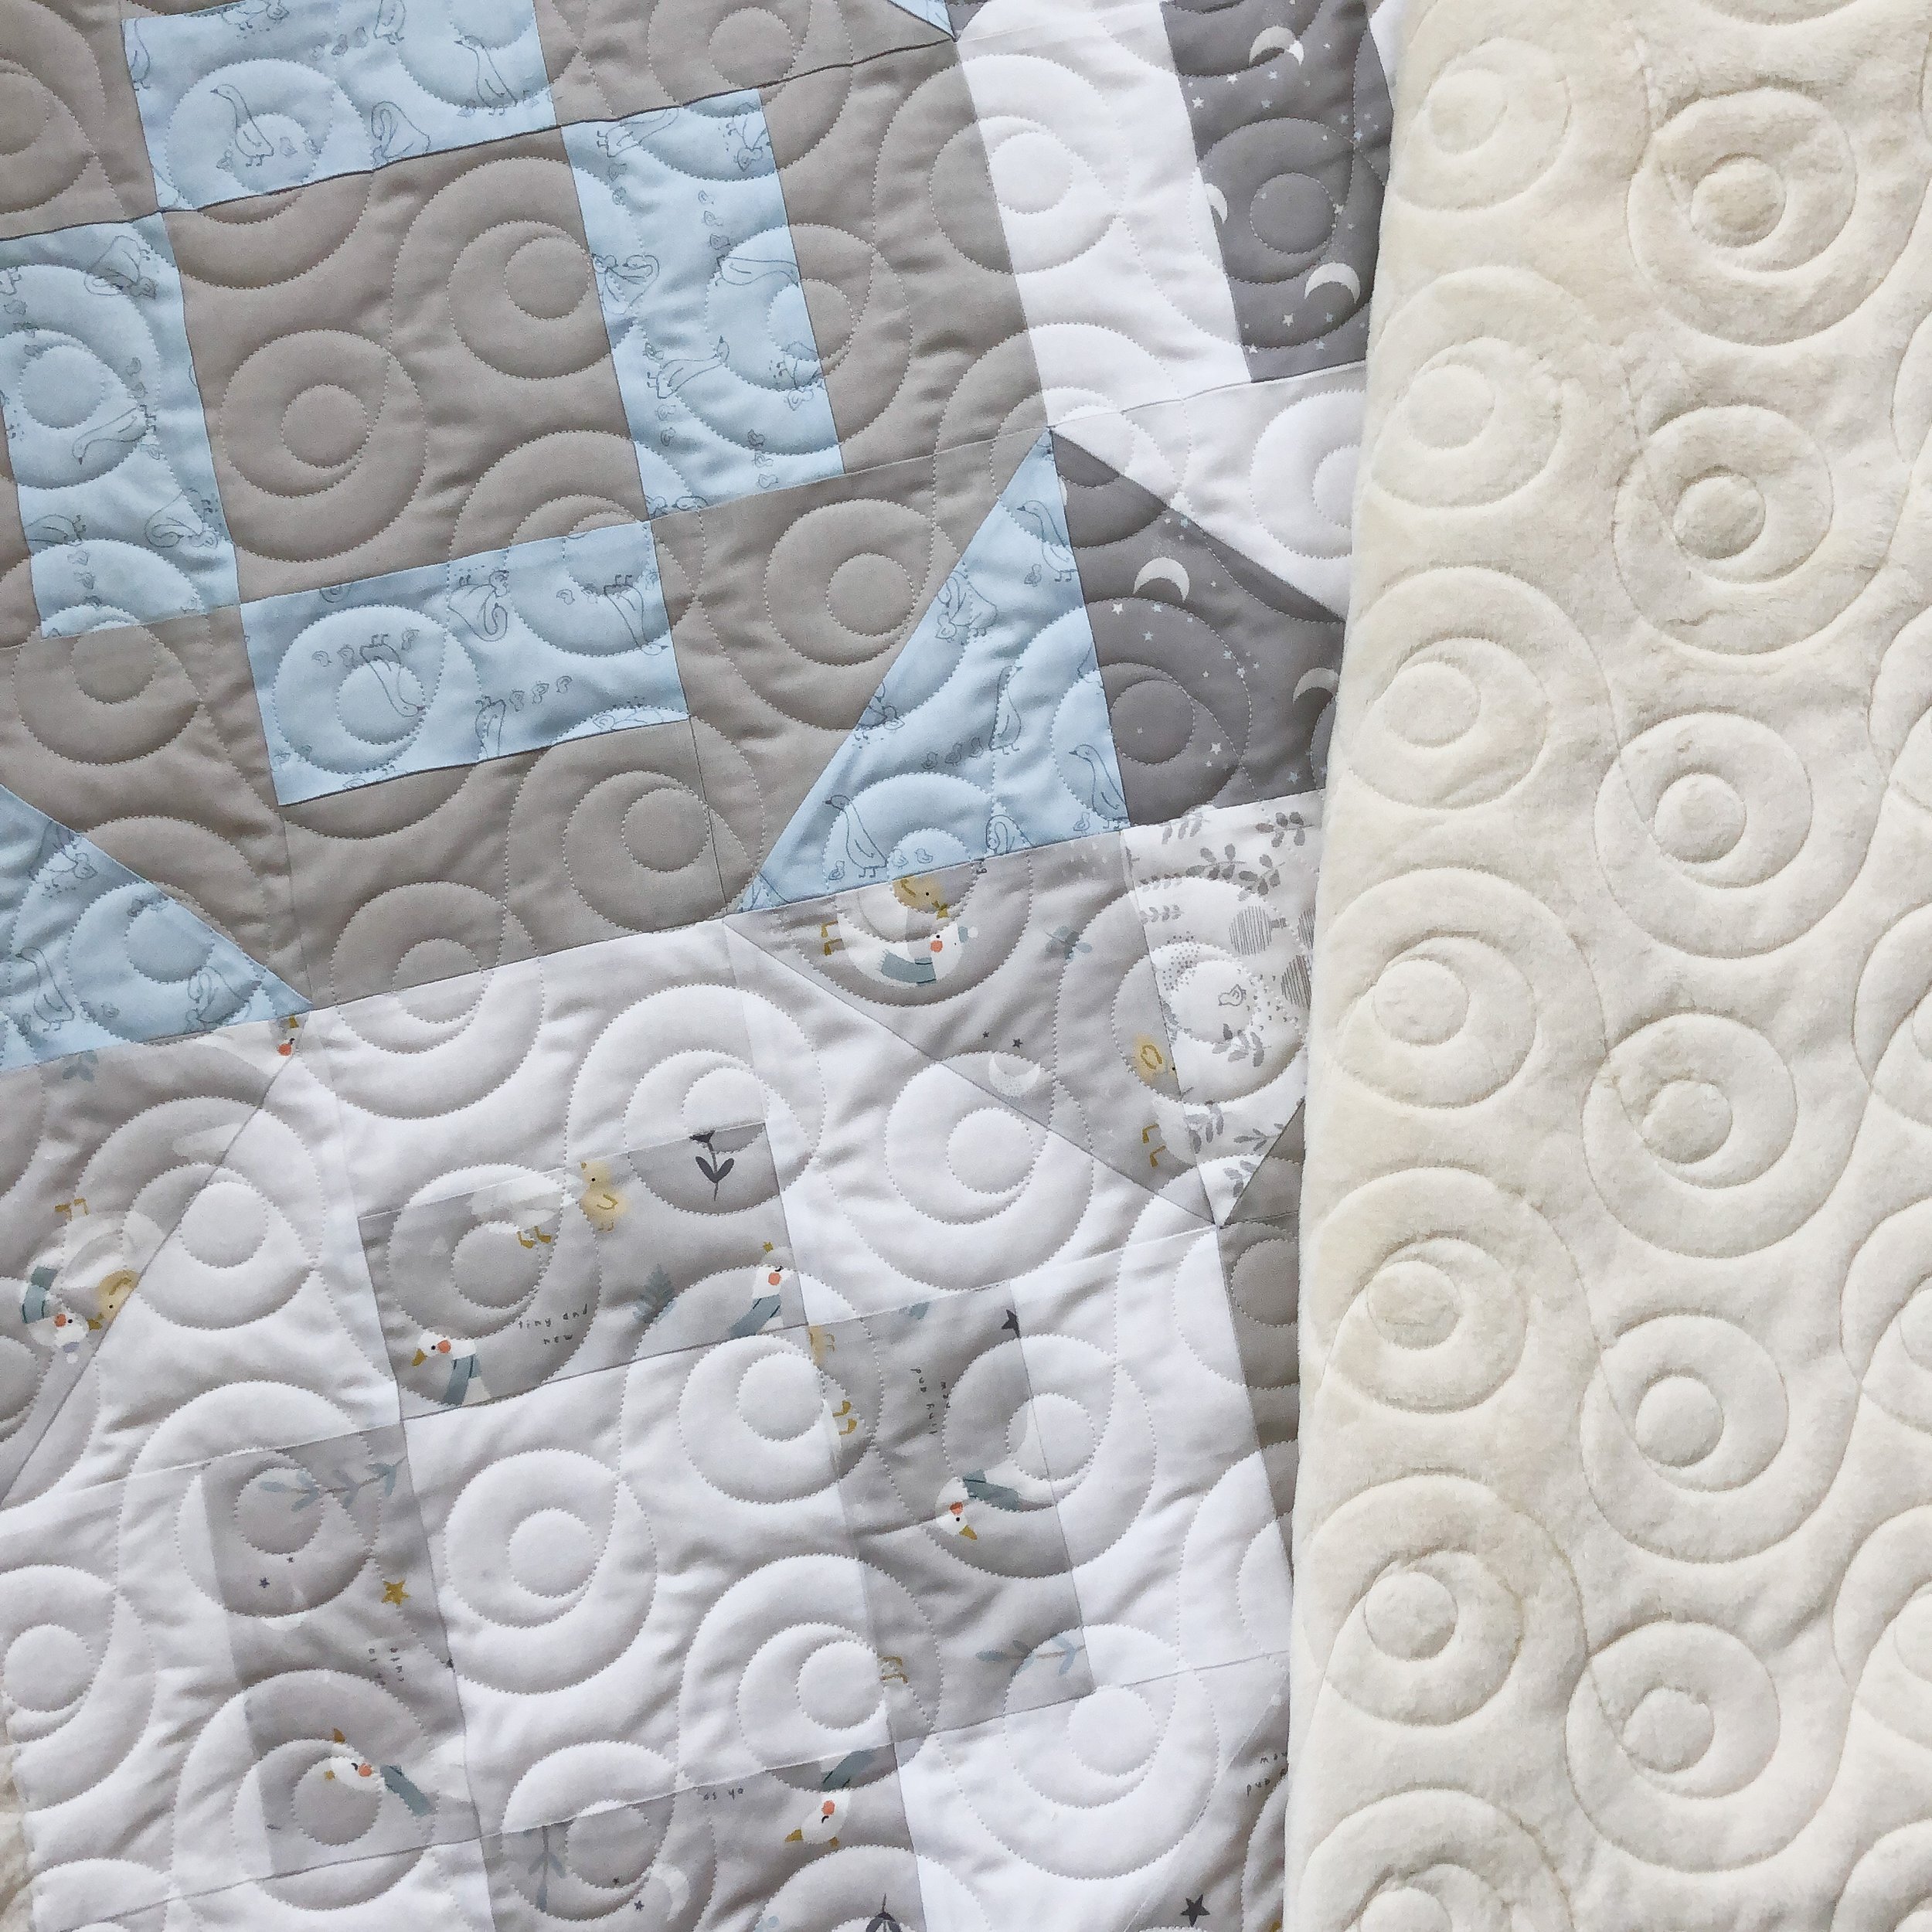
That quilty texture is so beautiful!!!

Another close up!

I love the scrappy look of this quilt!
If you’re interested in having me quilt for you check out my Longarm Services page and send me an email to get added to my list.
Thanks for stopping by!
New Quilting Designs!
Hi Friends!!!
So excited to share my newest machine quilting pantos! A panto or pantograph is a quilting design used by Longarm Quilters to quilt your quilts. I’ve been co-designing pantos for 8.5 years, and my own designs for 4 years. It’s so fun to see something I digitize on your quilt or one of mine.
I haven’t blogged new designs in awhile, so be sure to look through my shop to see some of the designs you may have missed.
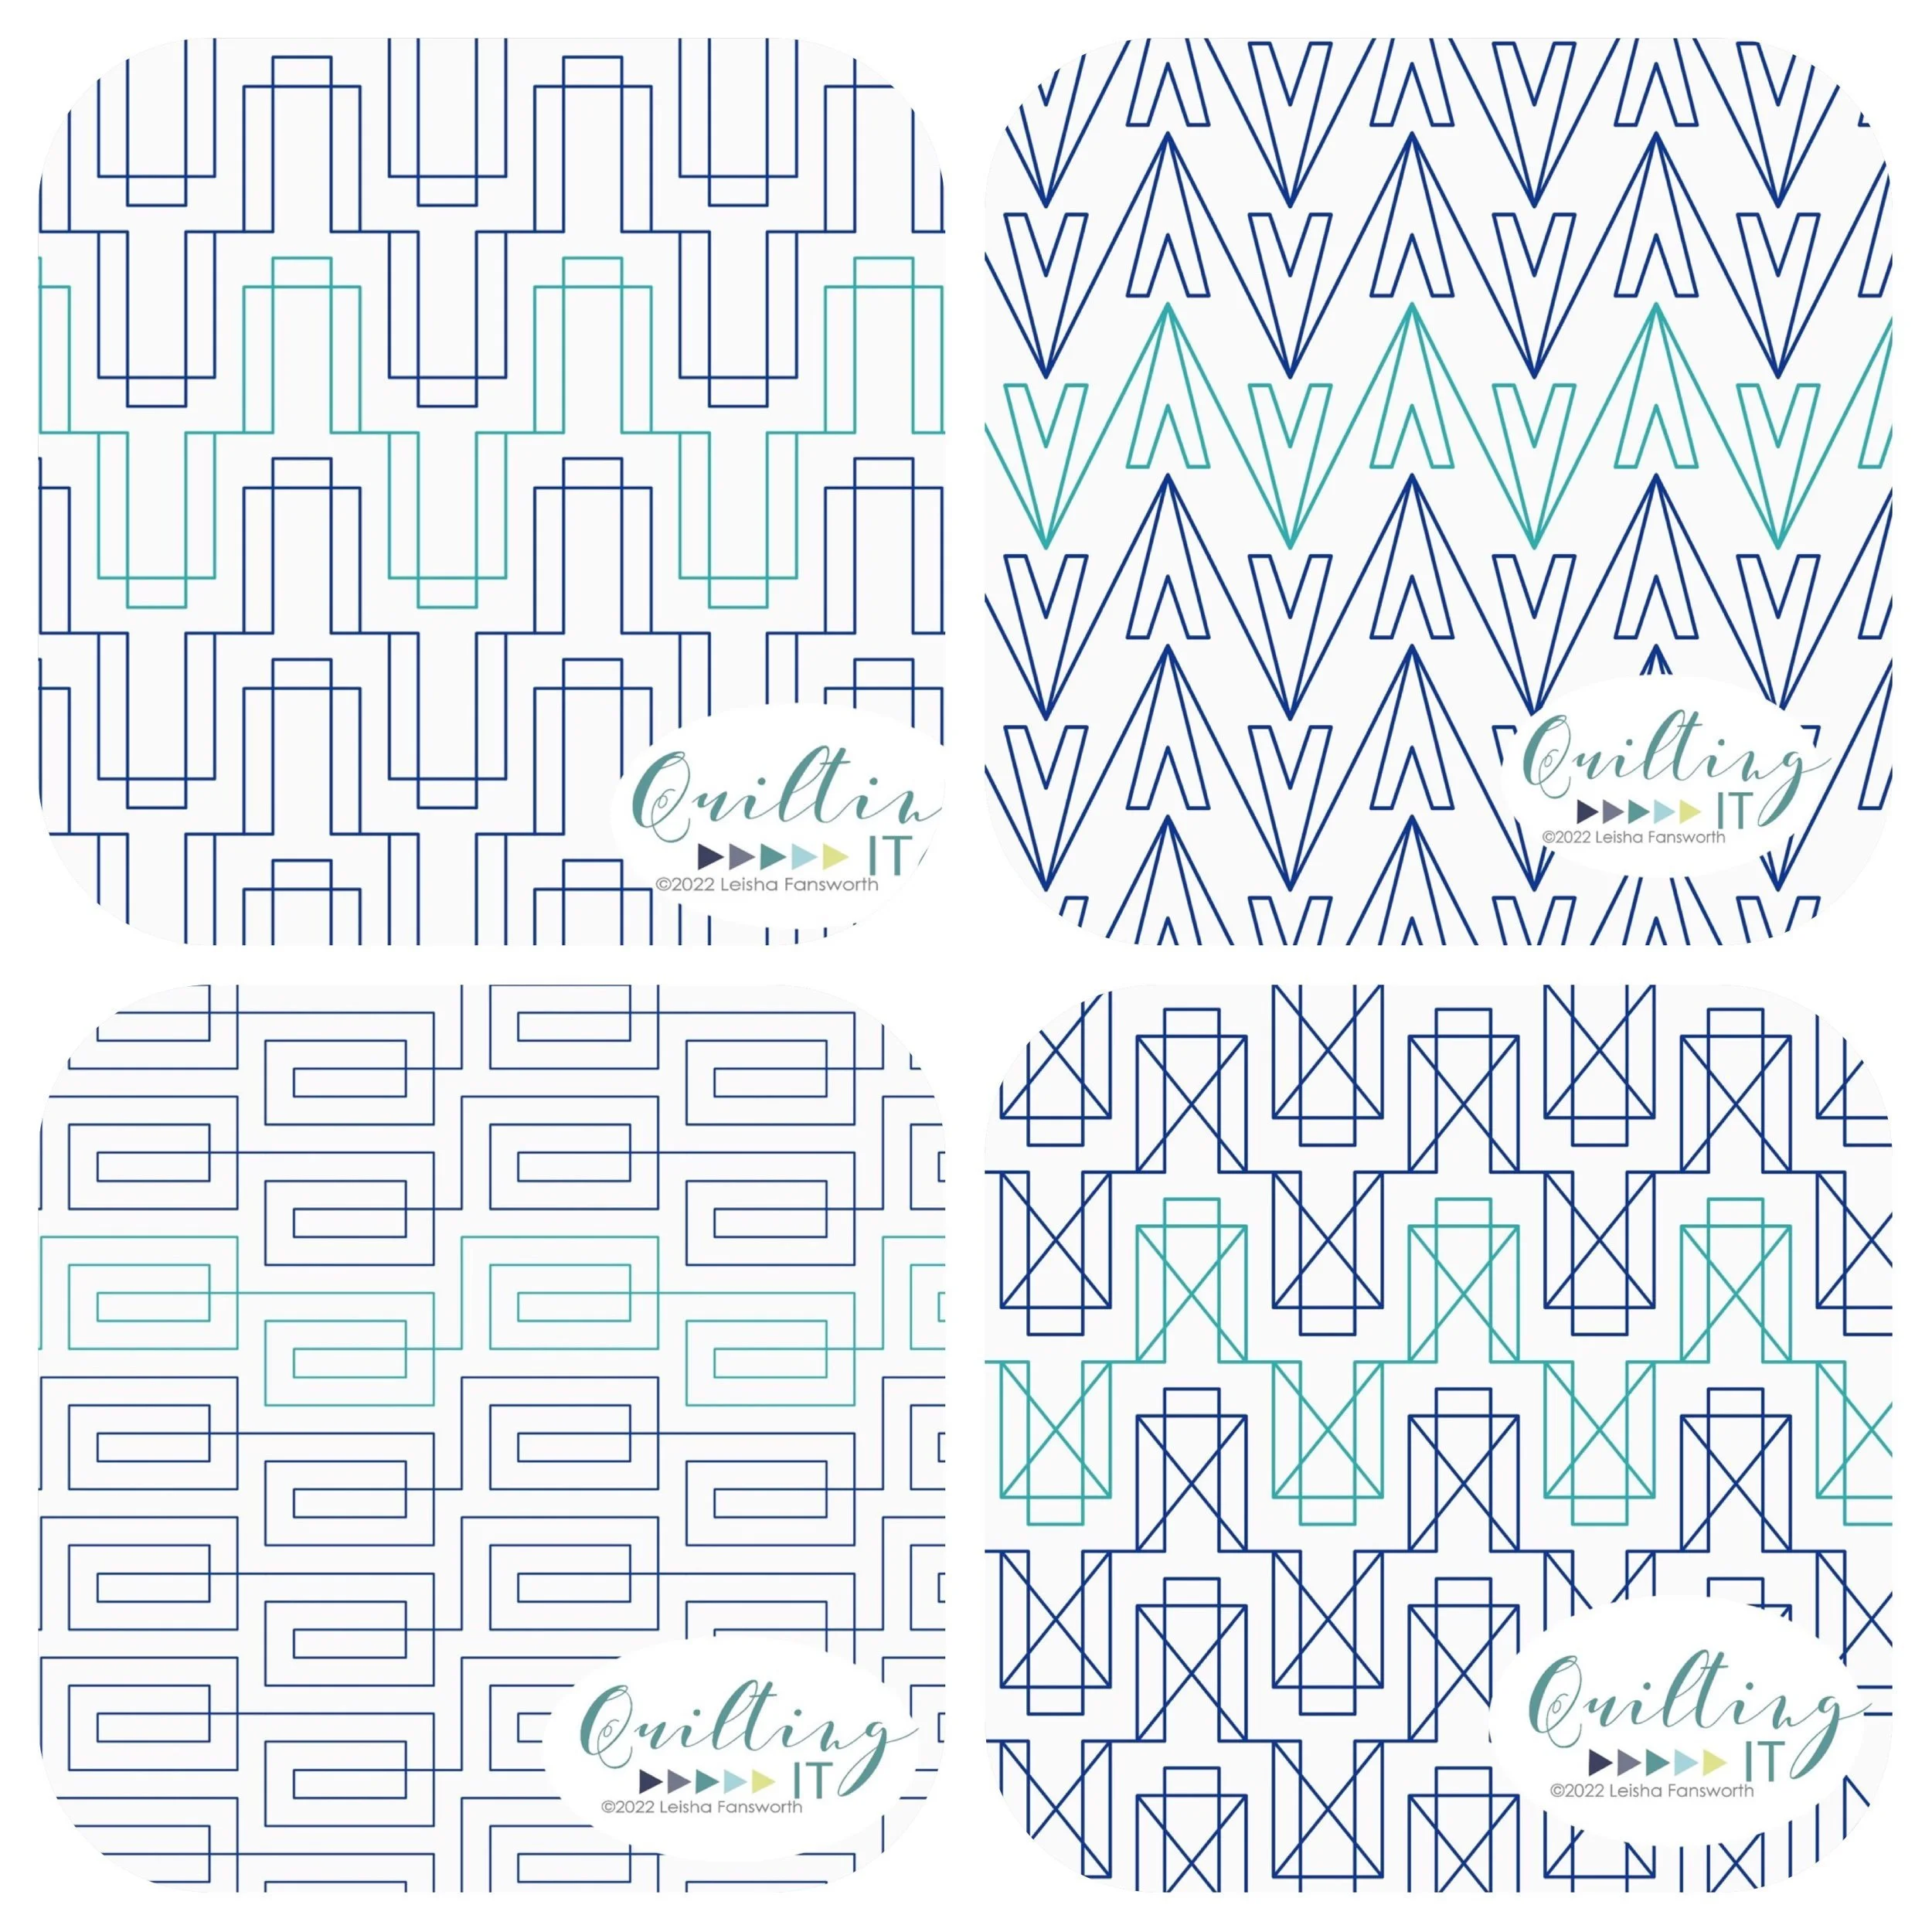
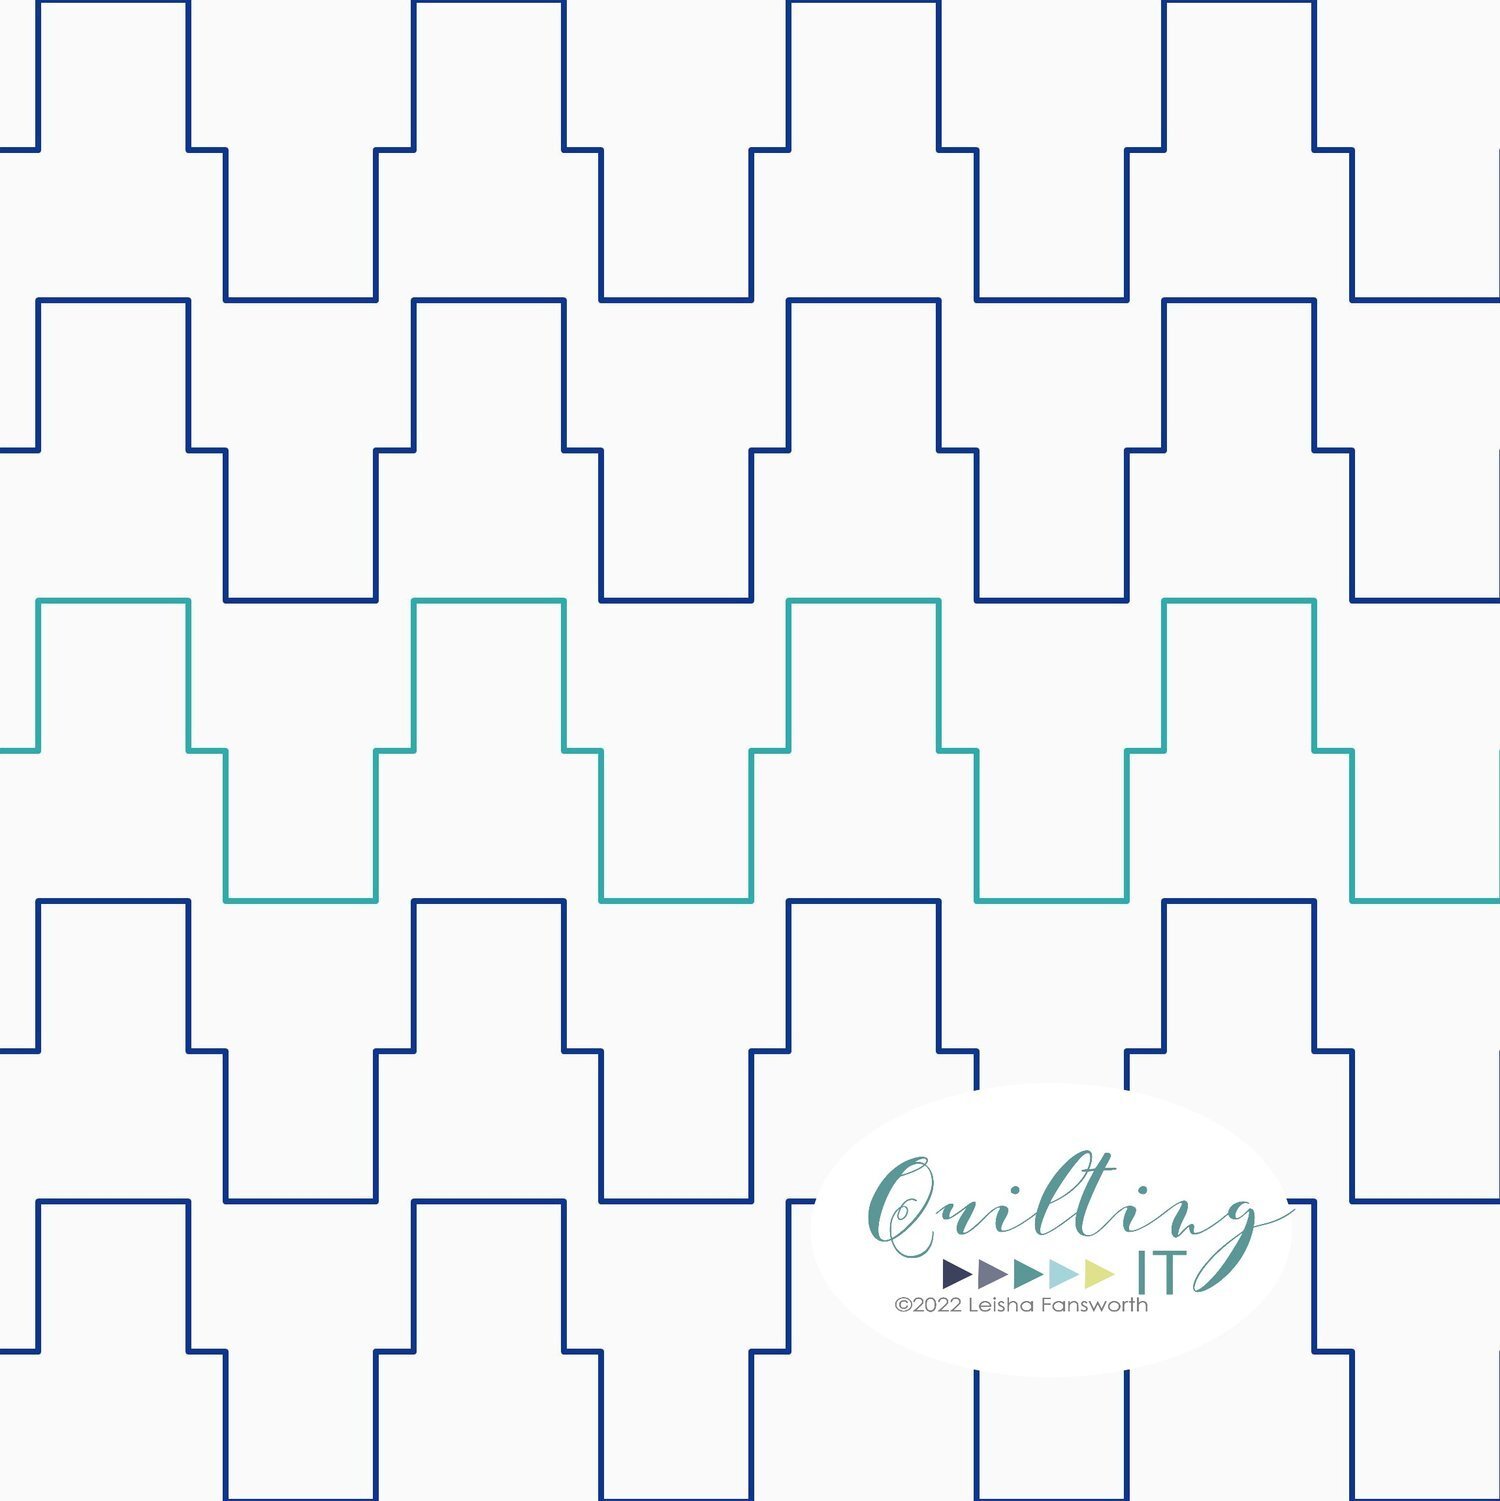
Now…introducing… (names linked to design below each image.)

Tangled©️

Corridor©️
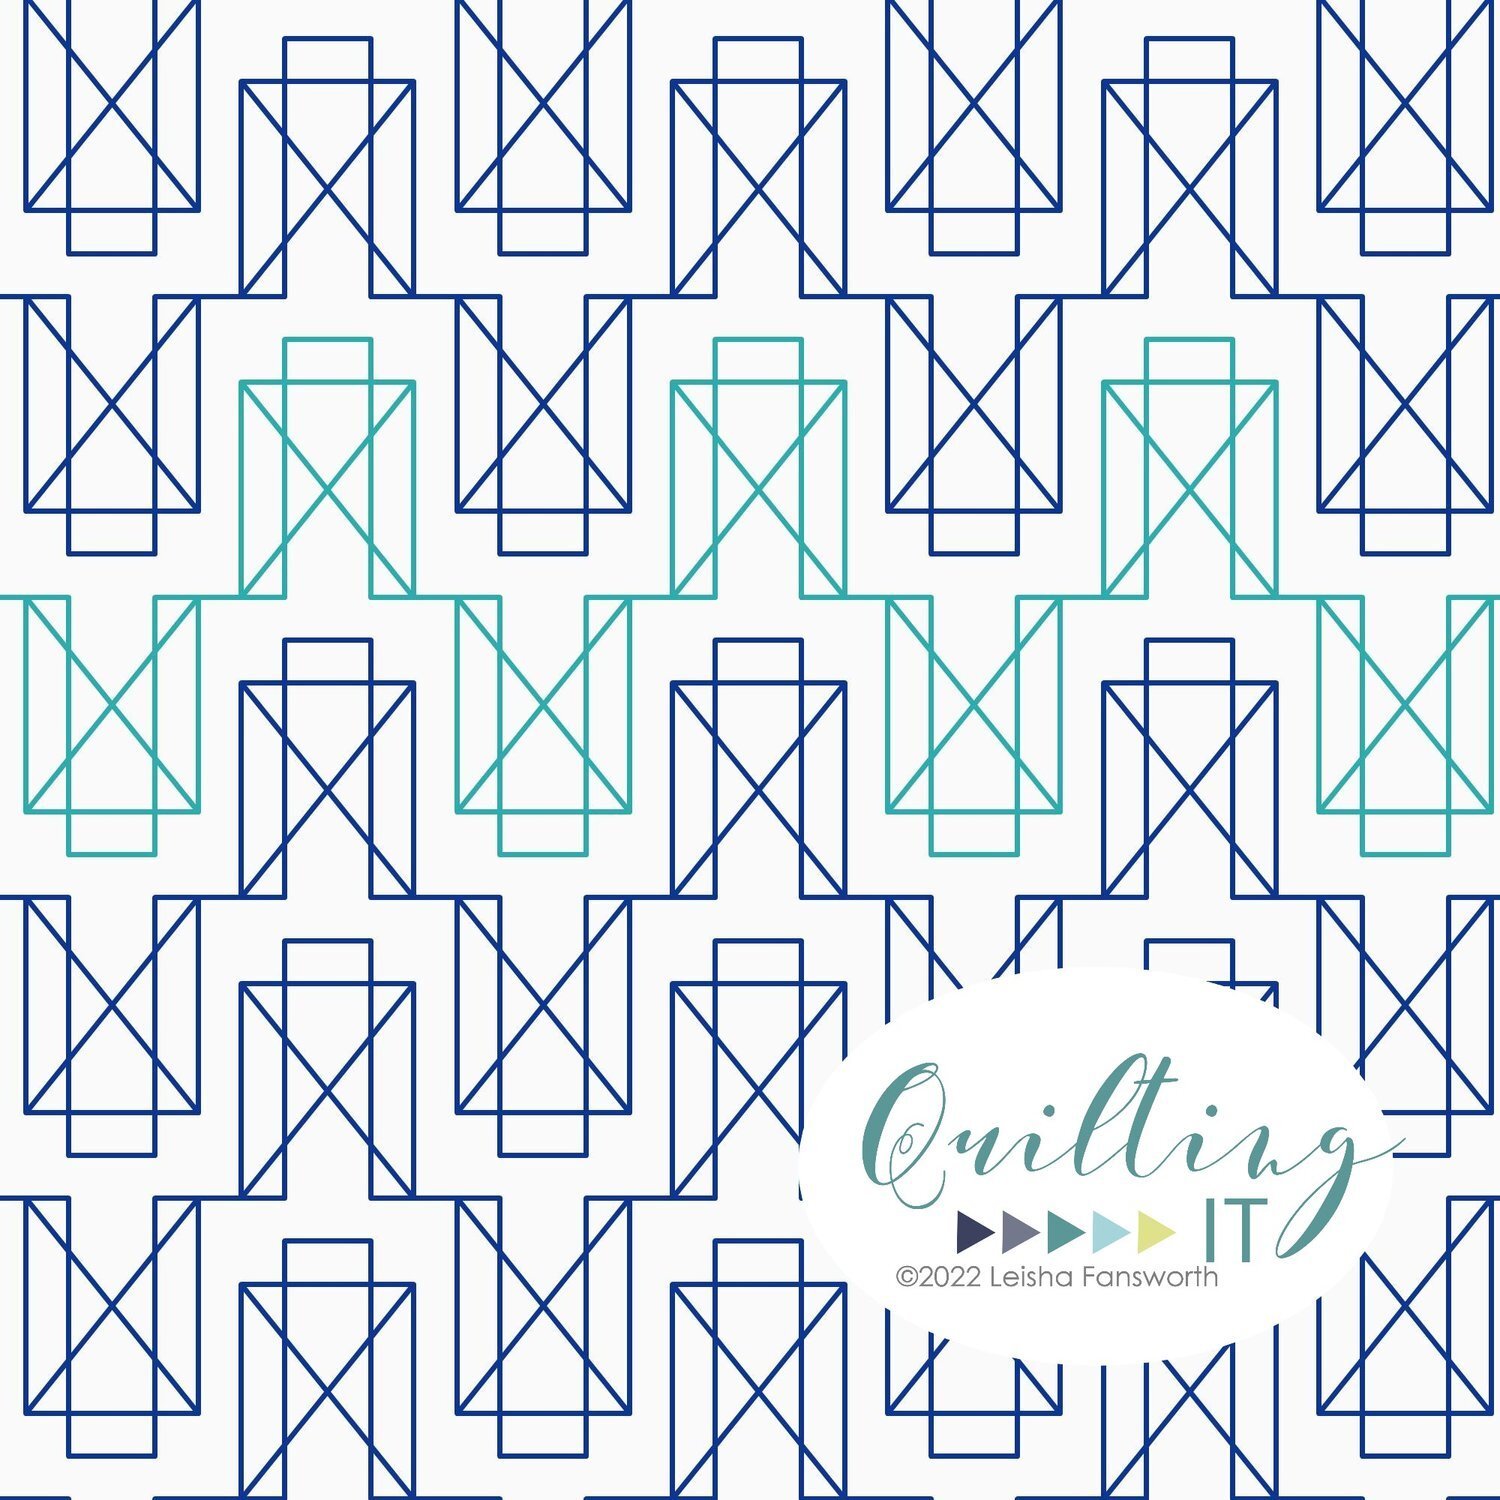
Landmark©️

Vista©️

Tribe©️

Pixie©️
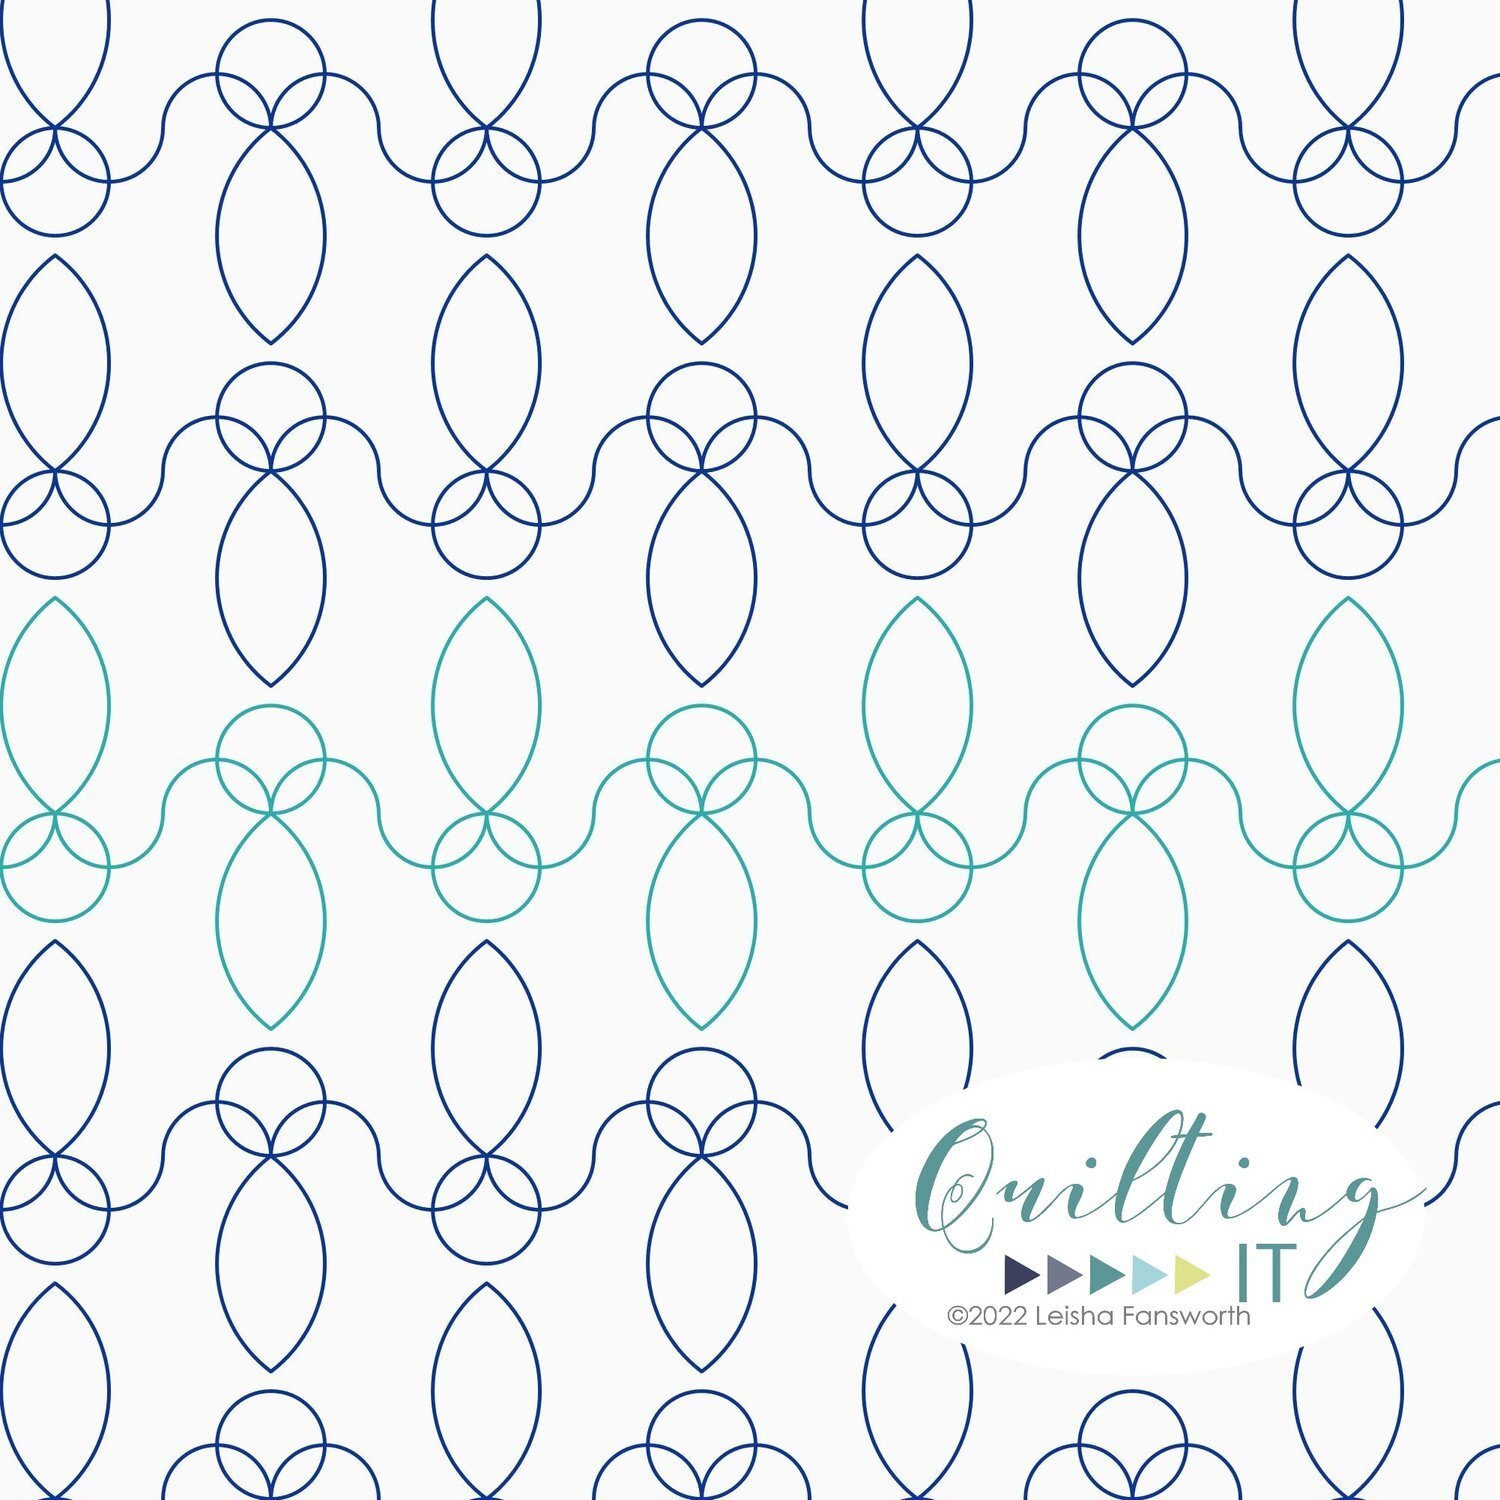
Holland©️

Thanks for supporting my little shop!! It’s such a joy for me to create designs for you to use. If you use one of my designs on a quilt, tag me on Instagram. I’d love to share! @leishakaye
Happy quilting! • leisha
Kristan’s Wooded Whimsy Quilt
Hello Friends,
I have a fun quilt to share with you today!! Christmas will be here before to know it, and if you’re looking for a fun project, this could be it!!!

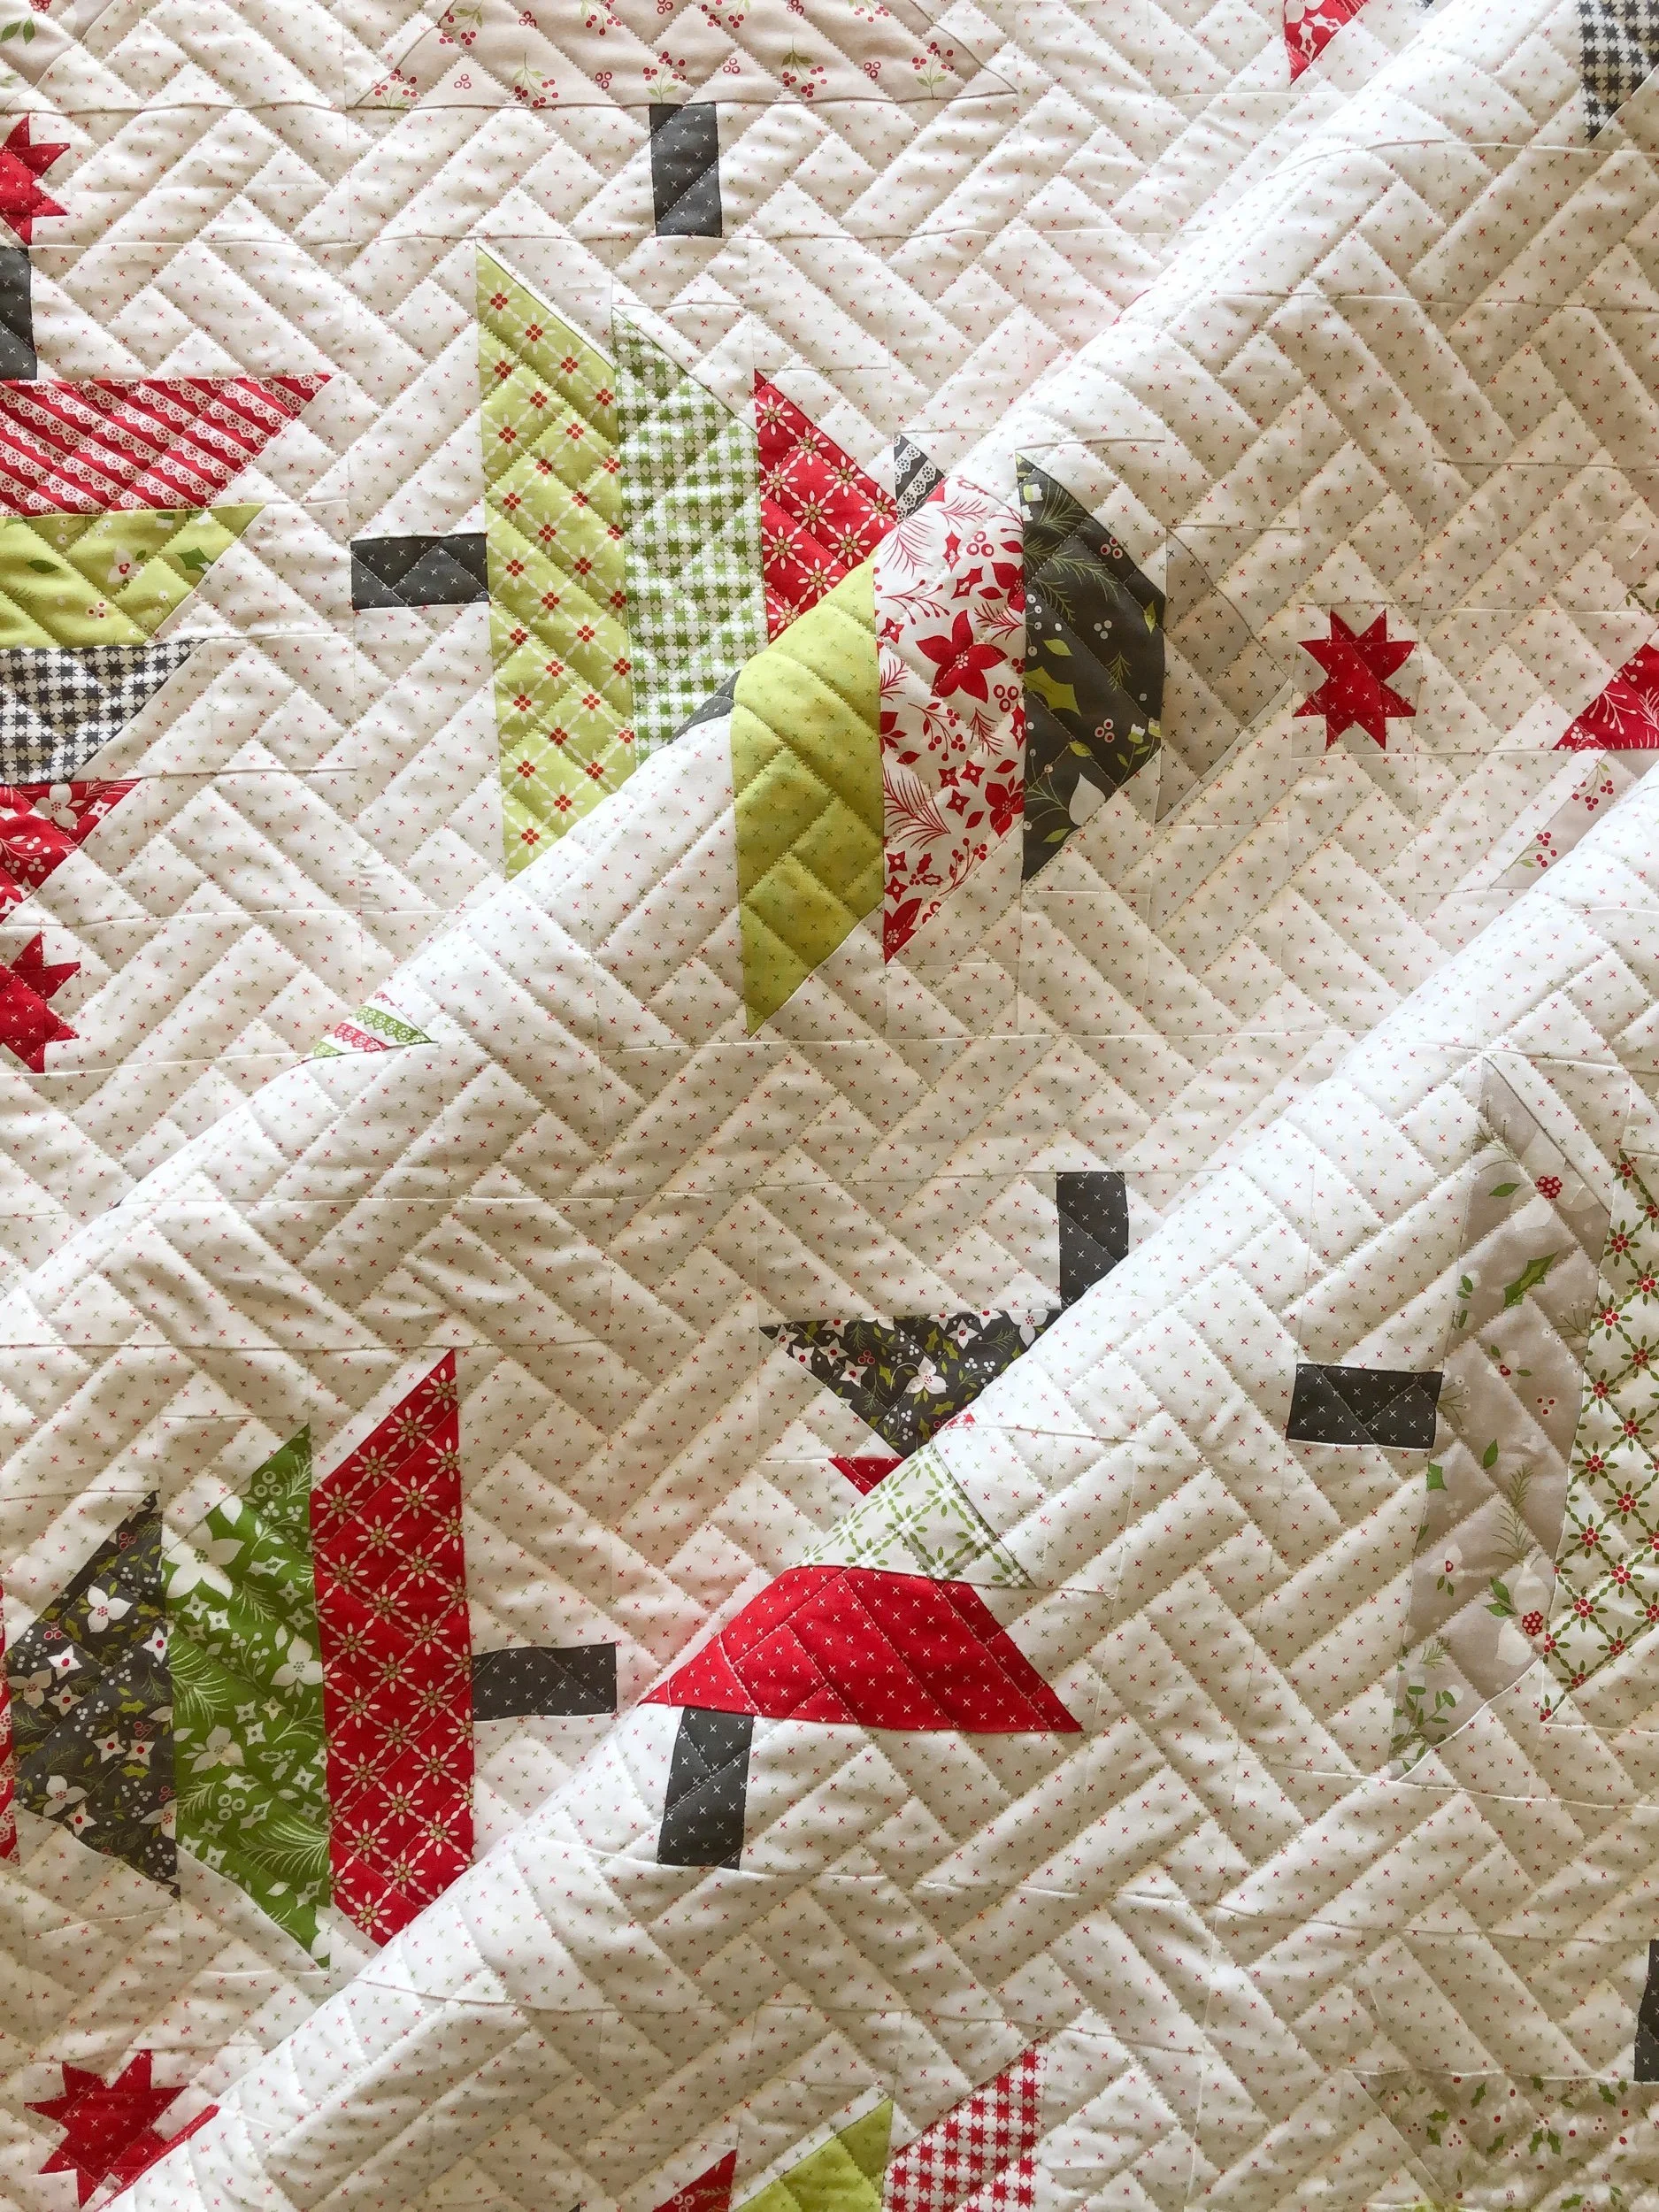
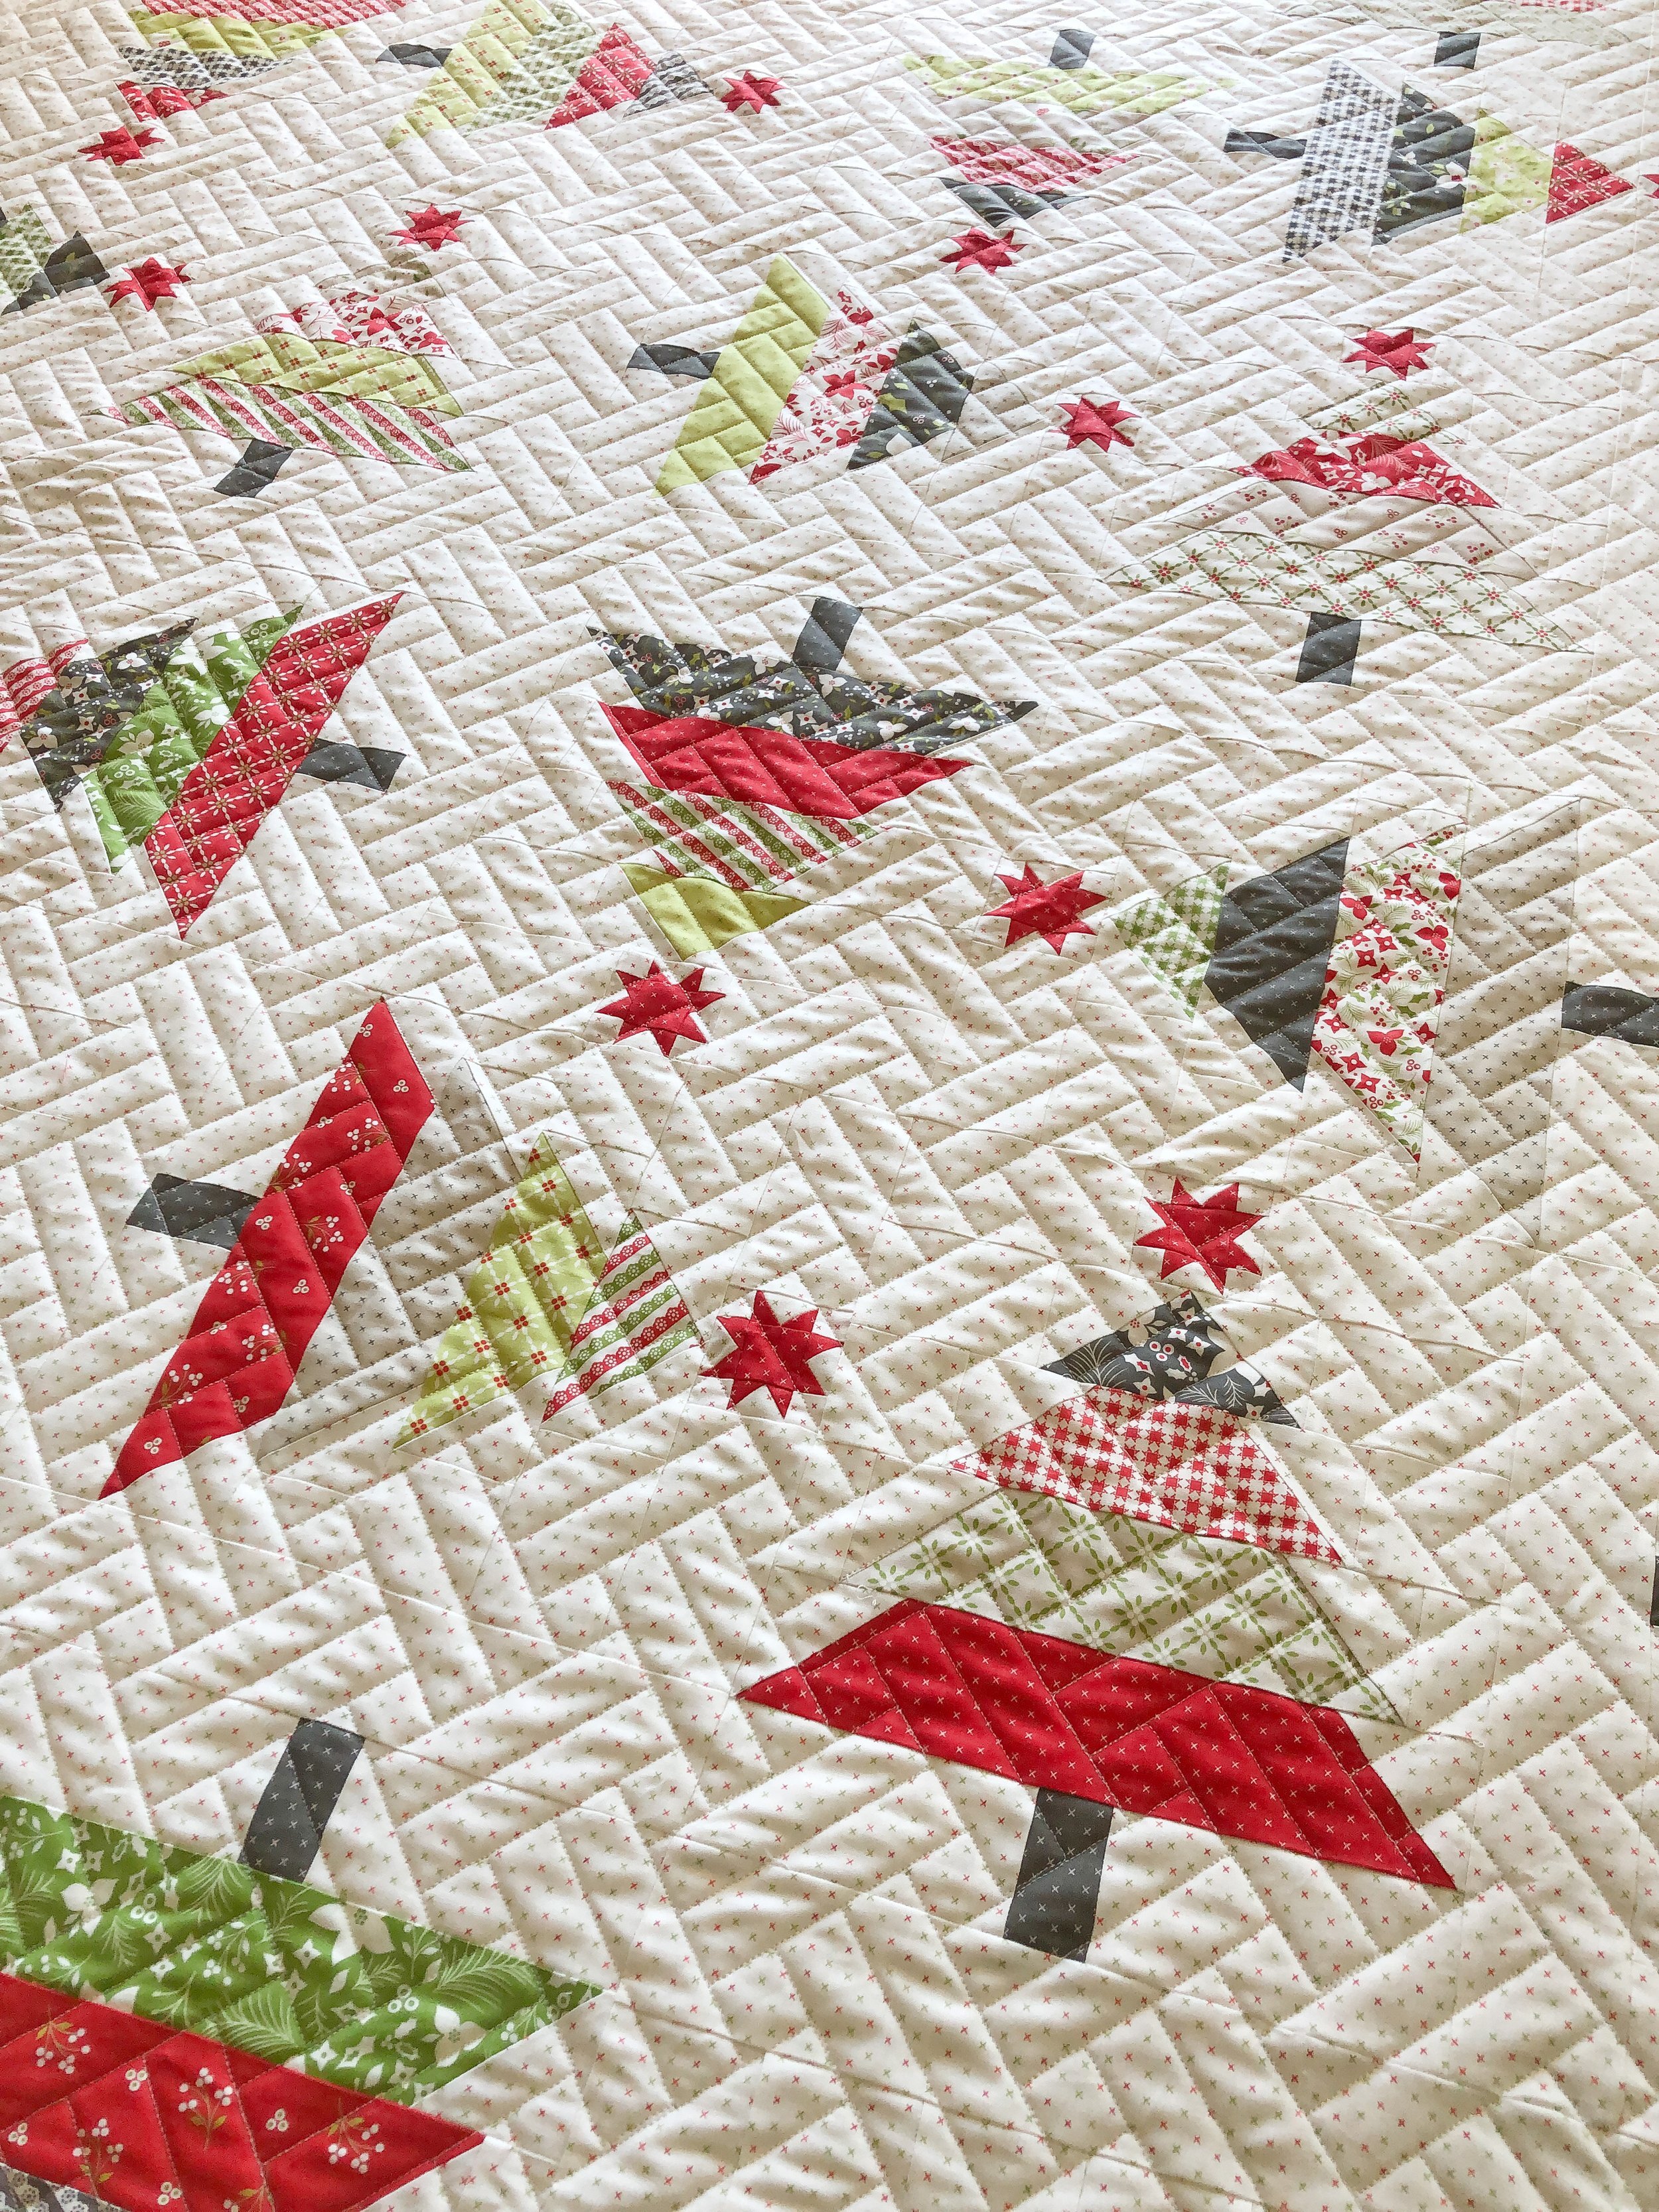
Kristan made this darling quilt!!! The pattern is Wooded Whimsy by Corey Yoder using her Holliberry fabric collection.

I used my two favorites…Natural White Omni thread from Superior Threads, and 8020 cotton poly blend batting by Winline Textiles out of Ogden Utah.

A close up on one of the trees…so cute!

That texture is one of my favorites!!!
What fun family traditions do you have around the holidays? For us, it’s always about family time and big meals.

Thanks for stopping by!! My quilting schedule still has lots of spots in November and December. Email me if you’d like to get added to my list. quiltingit@gmail.com
Happy quilting!! • leisha
Laurie’s Buffalo Check Table Topper • Fall
Hello Friend!
Happy fall to you…unless it spring where you are, then happy spring. I have a handful of quilts to share, and this one just couldn’t wait any longer. How cute, right?!?!

Made by my good friend, Laurie, this Buffalo Check Table Topper by Carried Away Quilting is one of two patterns you get in this pattern. The other is a Christmas version. It’s such a fun design!
Look how sweet that pumpkin is!

I used Wishbone by my friend Jess from The Longarm League to quilt it, and I absolutely love the quilting!! It’s actually what the designer had quilted on her table topper.
I used my favorite Natural White Omni thread from Superior Threads and cotton poly blend batting from Winline Textiles.
Do you have any quick projects that you’d like to get quilted before the holidays? Send me an email, and I’ll get you on my schedule. quiltingit@gmail.com

All that quilty texture is just soooo good!!

Thanks for stopping by! Have a great weekend and I hope that you find some time to sew. - leisha
Julie’s Swoon Quilt
Hi there,
Today I have a fun Swoon quilt to share with you!! Julie said she made this years ago, and recently when Camille from Thimble Blossoms had her Summer Swoon Along…a sew along that she did this summer…Julie came across my website or social media, and asked me to quilt it for her.
Julie requested Patricia Ritter and my Villa panto design, and I think it turned out fun with all the floral prints. Villa is a sweet meandering leaf that dances across the quilt. We also have Villa in Bloom, if you’re looking for flowers and leaves. Both are available at Urban Elementz.
I used my favorite 8020 cotton poly blend batting, and Natural White Omni thread from Superior Threads.

Villa is great for those quilts that you want looser quilting, but it still fills up the space nicely.

I look at her fun scrappy border.
I need to get sewing my Swoon quilt, that I started during the sew along. I got two blocks sewn, and all the blocks cut out…I just need to make the time to sew.
Thanks for stopping by! I hope you enjoy seeing edge to edge designs on quilts, as much as the custom quilting. I think it’s a great way to visualize a variety of different designs quilted out on quilts. As a panto designer, I love seeing designs on actual quilts…especially when it’s one of my own.
If you’re looking to get a quilt…or two…or three…quilted, let me know. You can email me at quiltingit@gmail.com
I look forward to working with you!!
Have a great weekend, let’s hope we can both get some sewing in! -leisha
Caroline’s Baby Buffalo Plaid Quilt
Hi Friends,
I hope your week has been a good one!! I’m excited for the weekend. I have a quick share with you today…
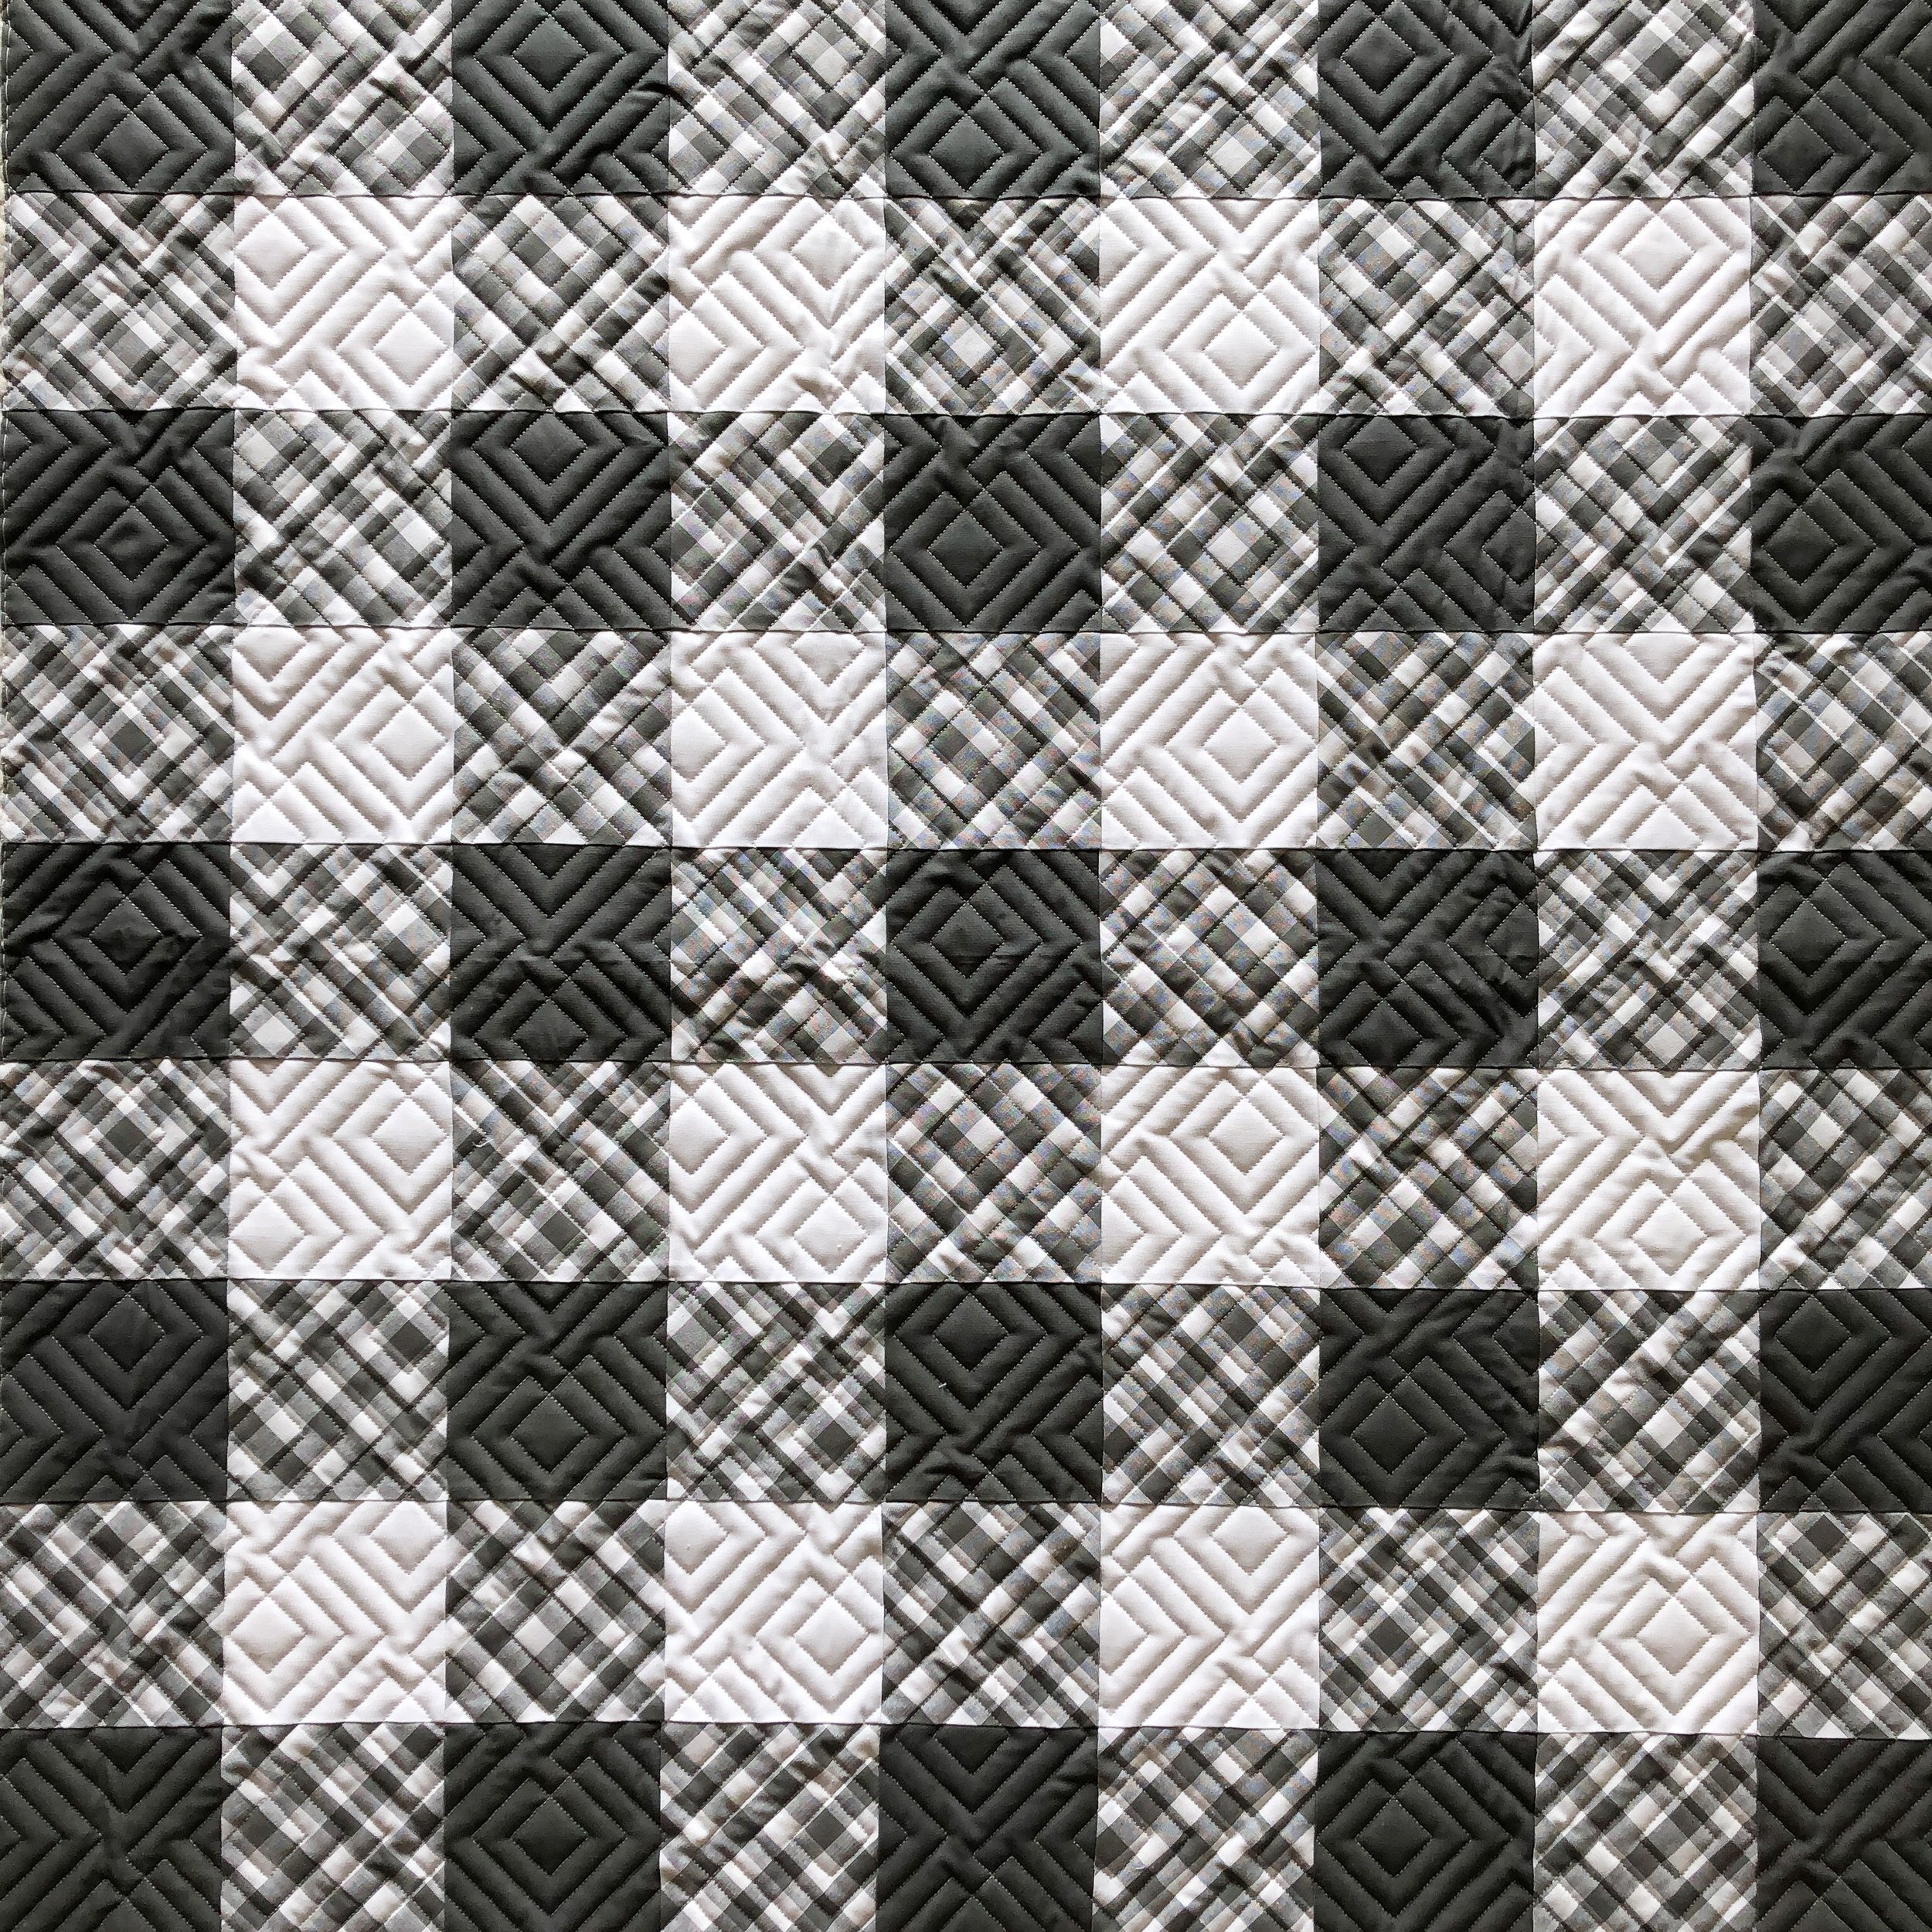
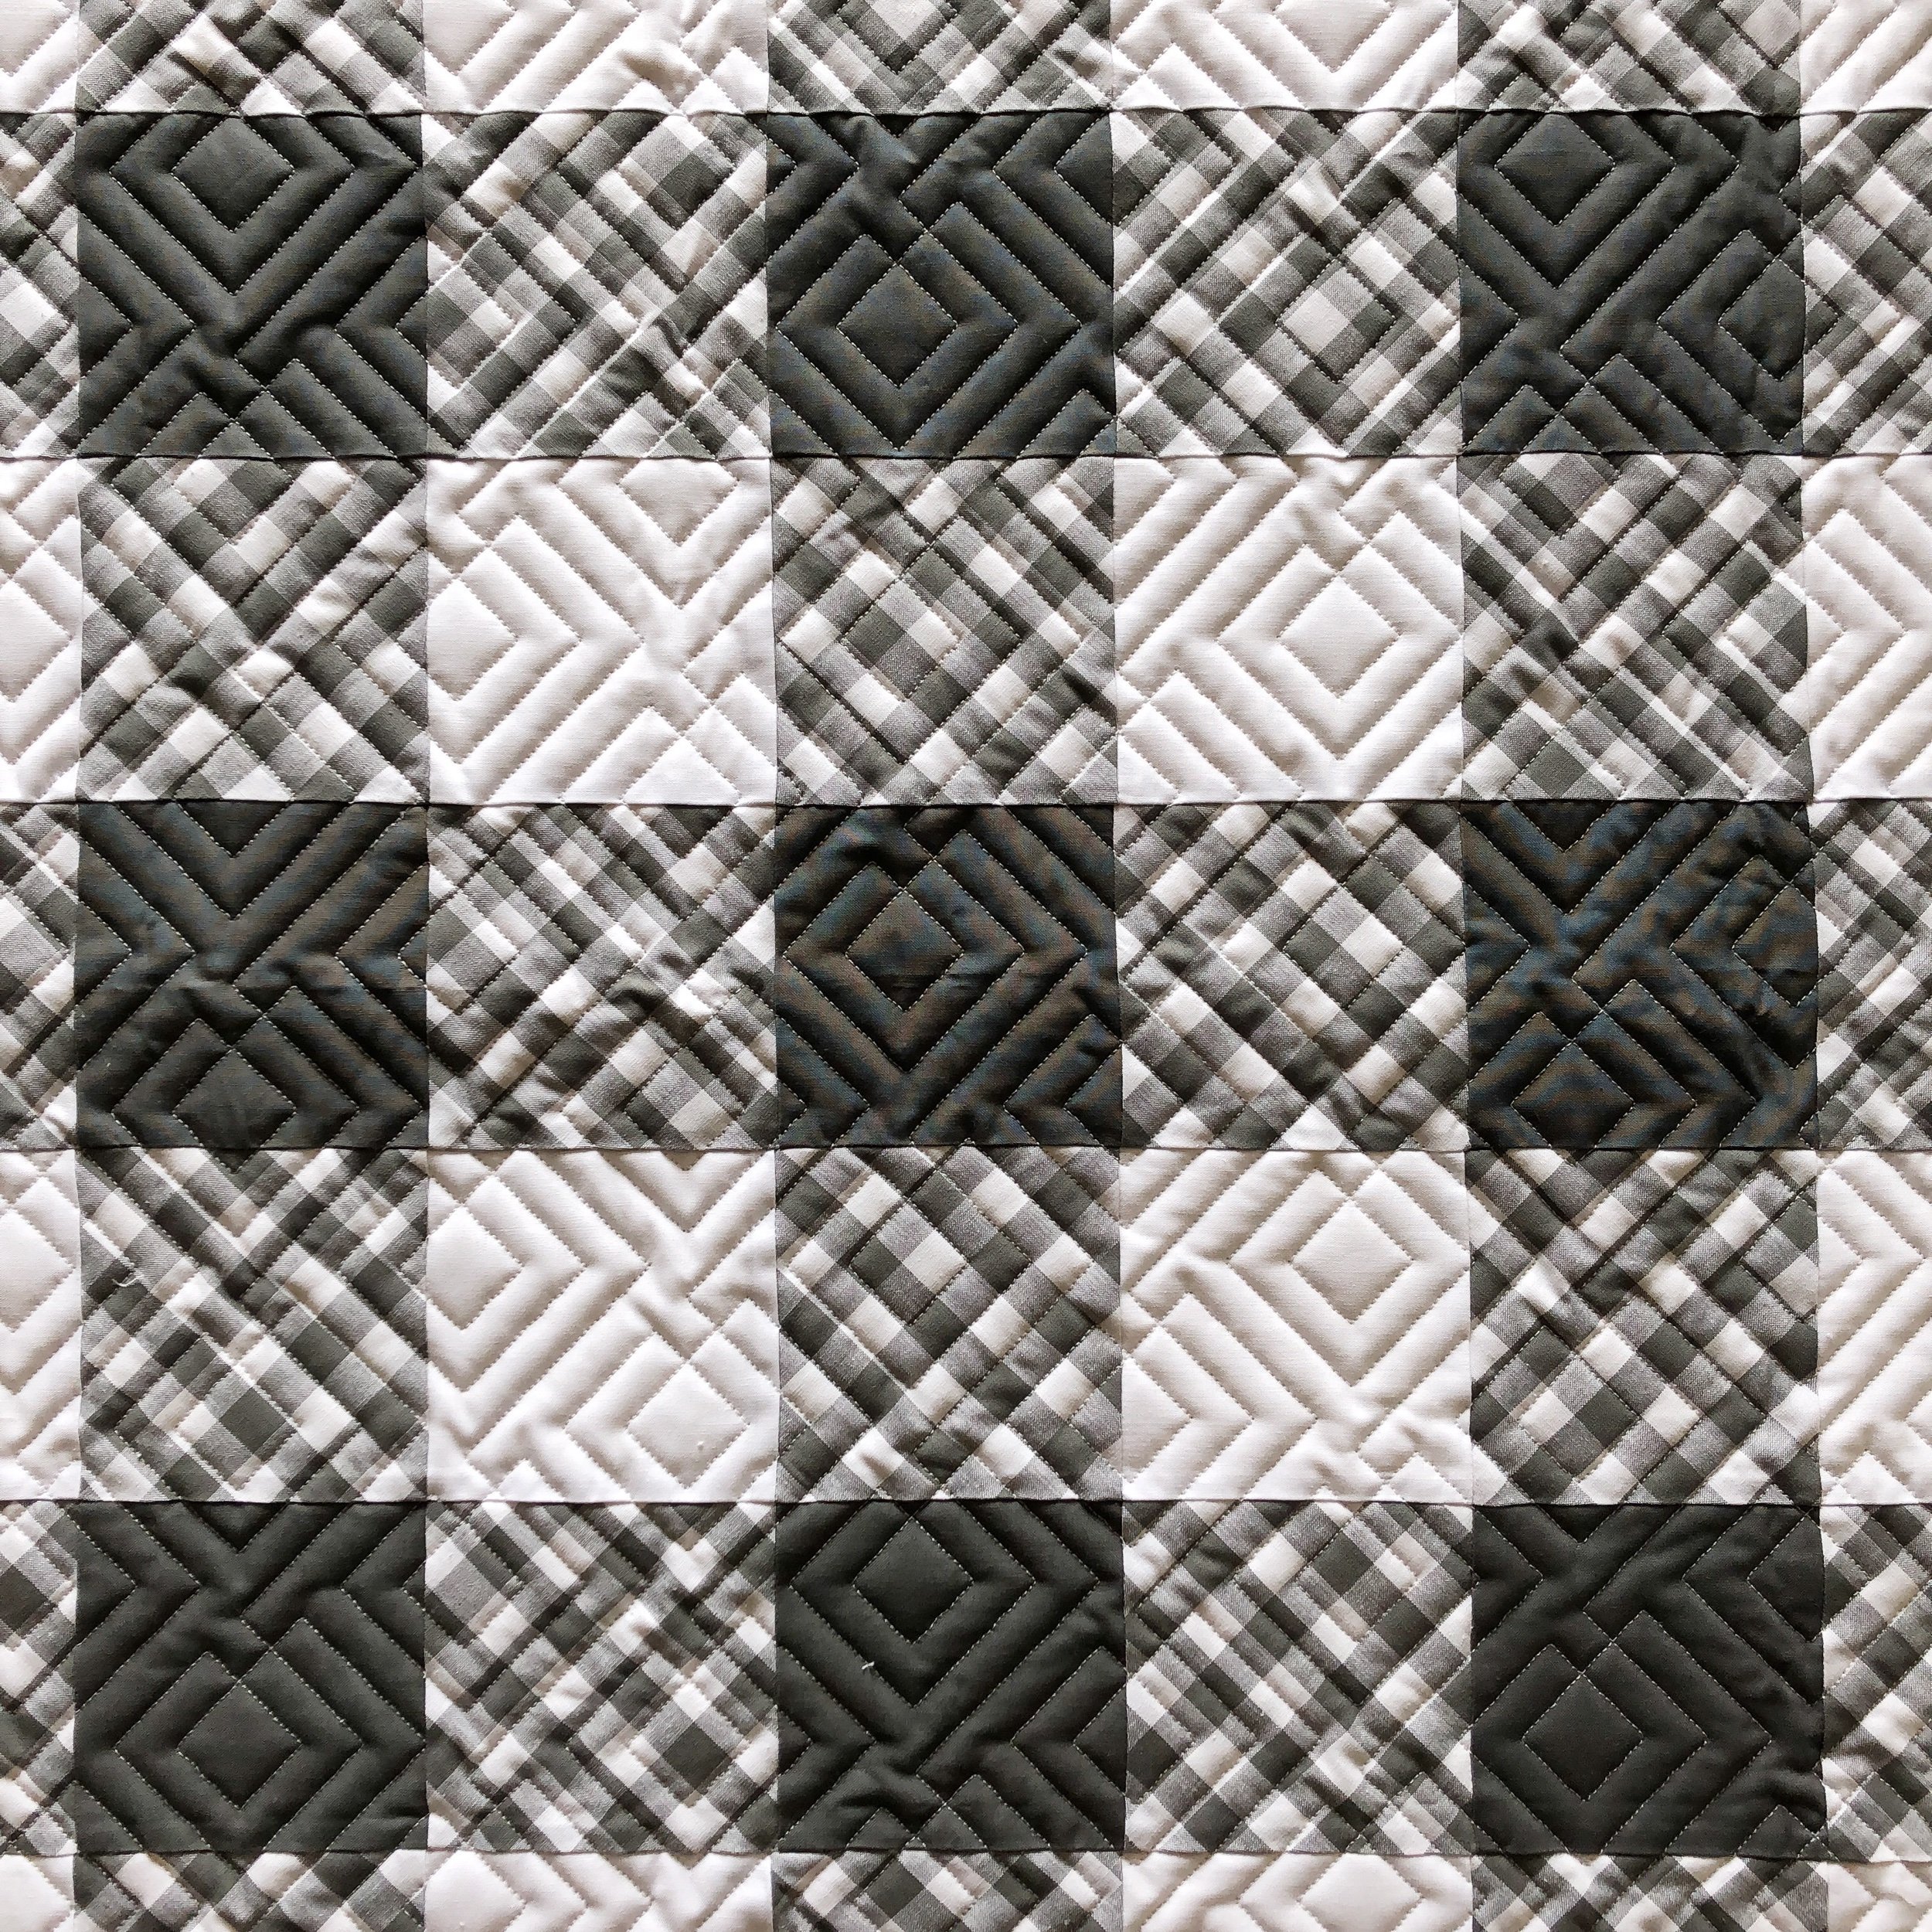
If you’re ever looking for a quick and masculine baby quilt to make for the new mom in your life, a Buffalo Plaid quilt is a great option. I’ve did one for two of my nephews when they were babies, and they’ve been a hit! The key is finding that fabric for the middle color. I love what Caroline did on this one. I think she cut her squares around 3.5”, if I remember right.
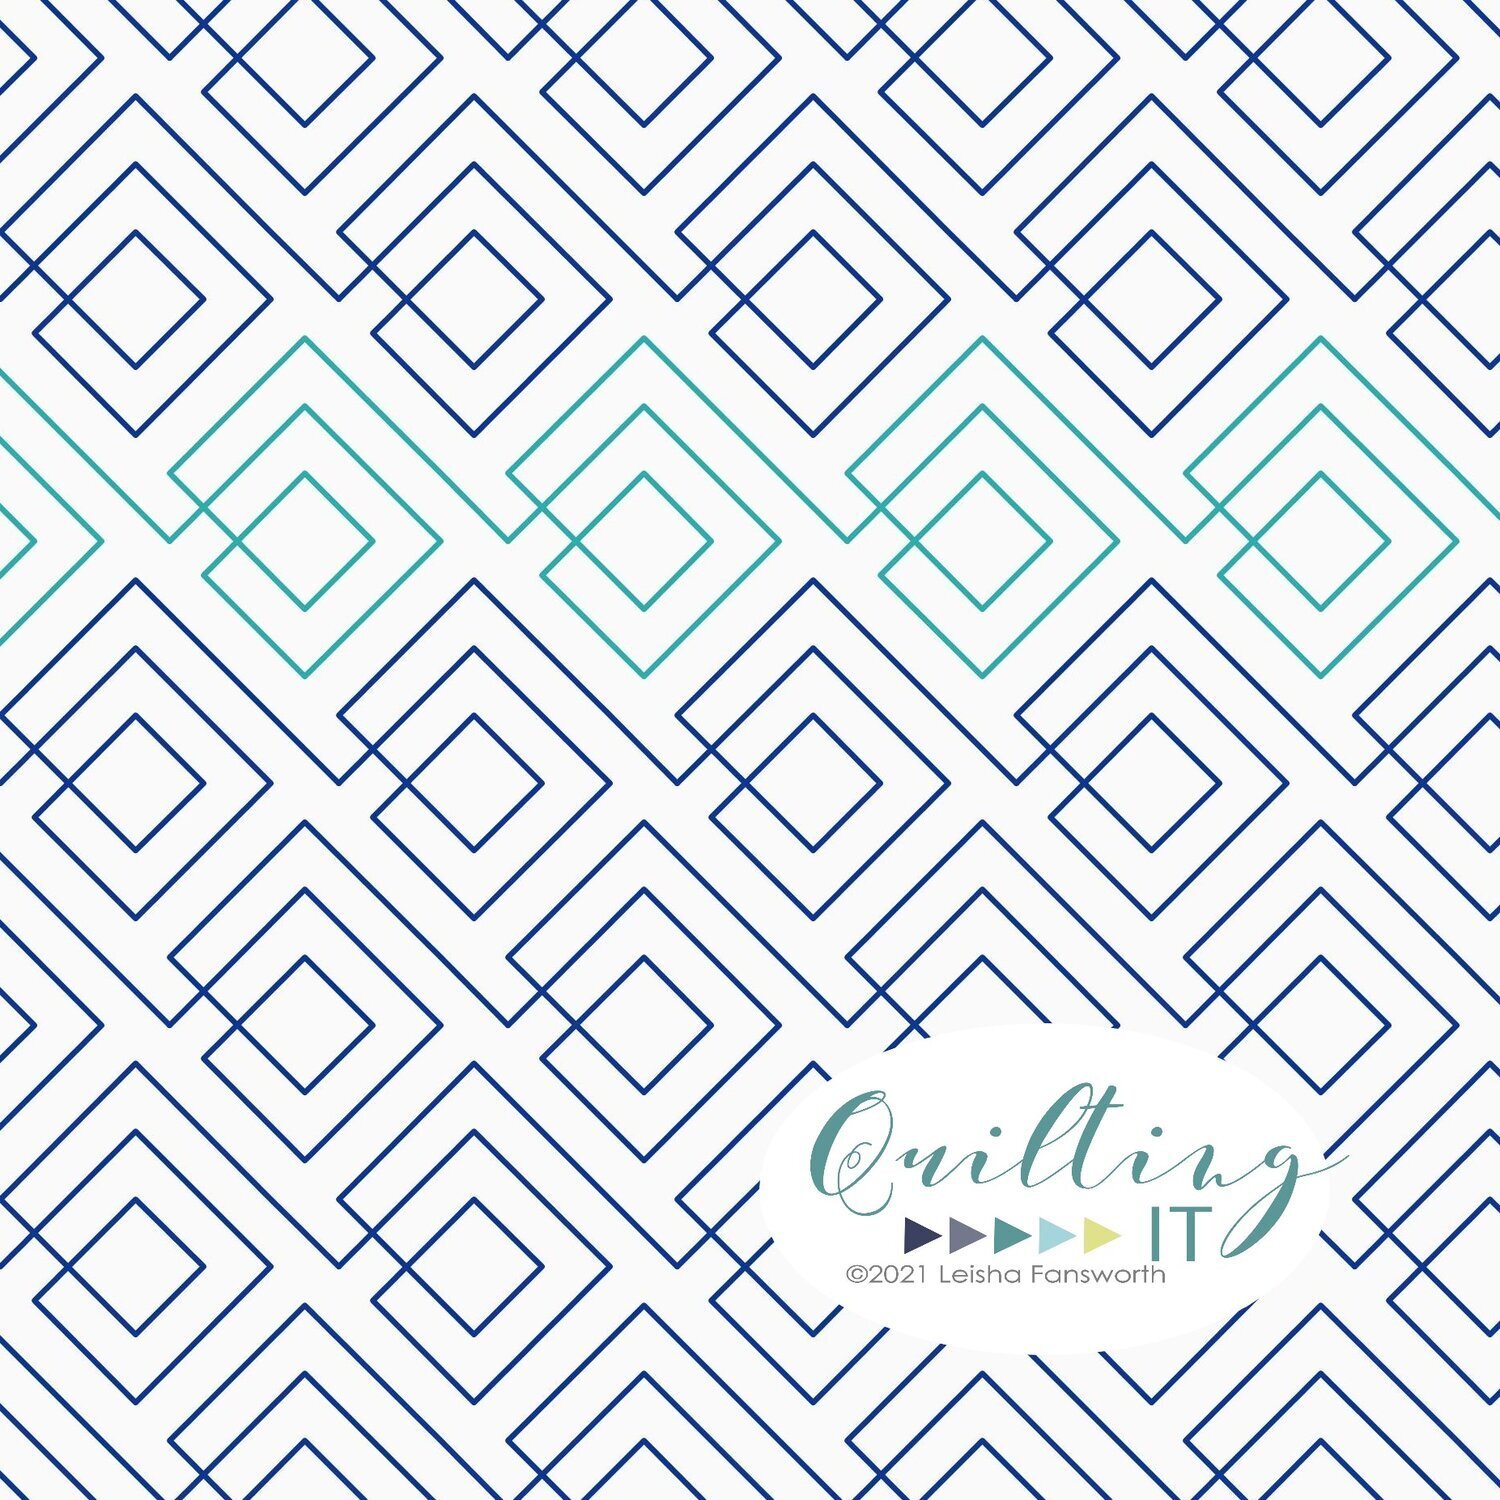
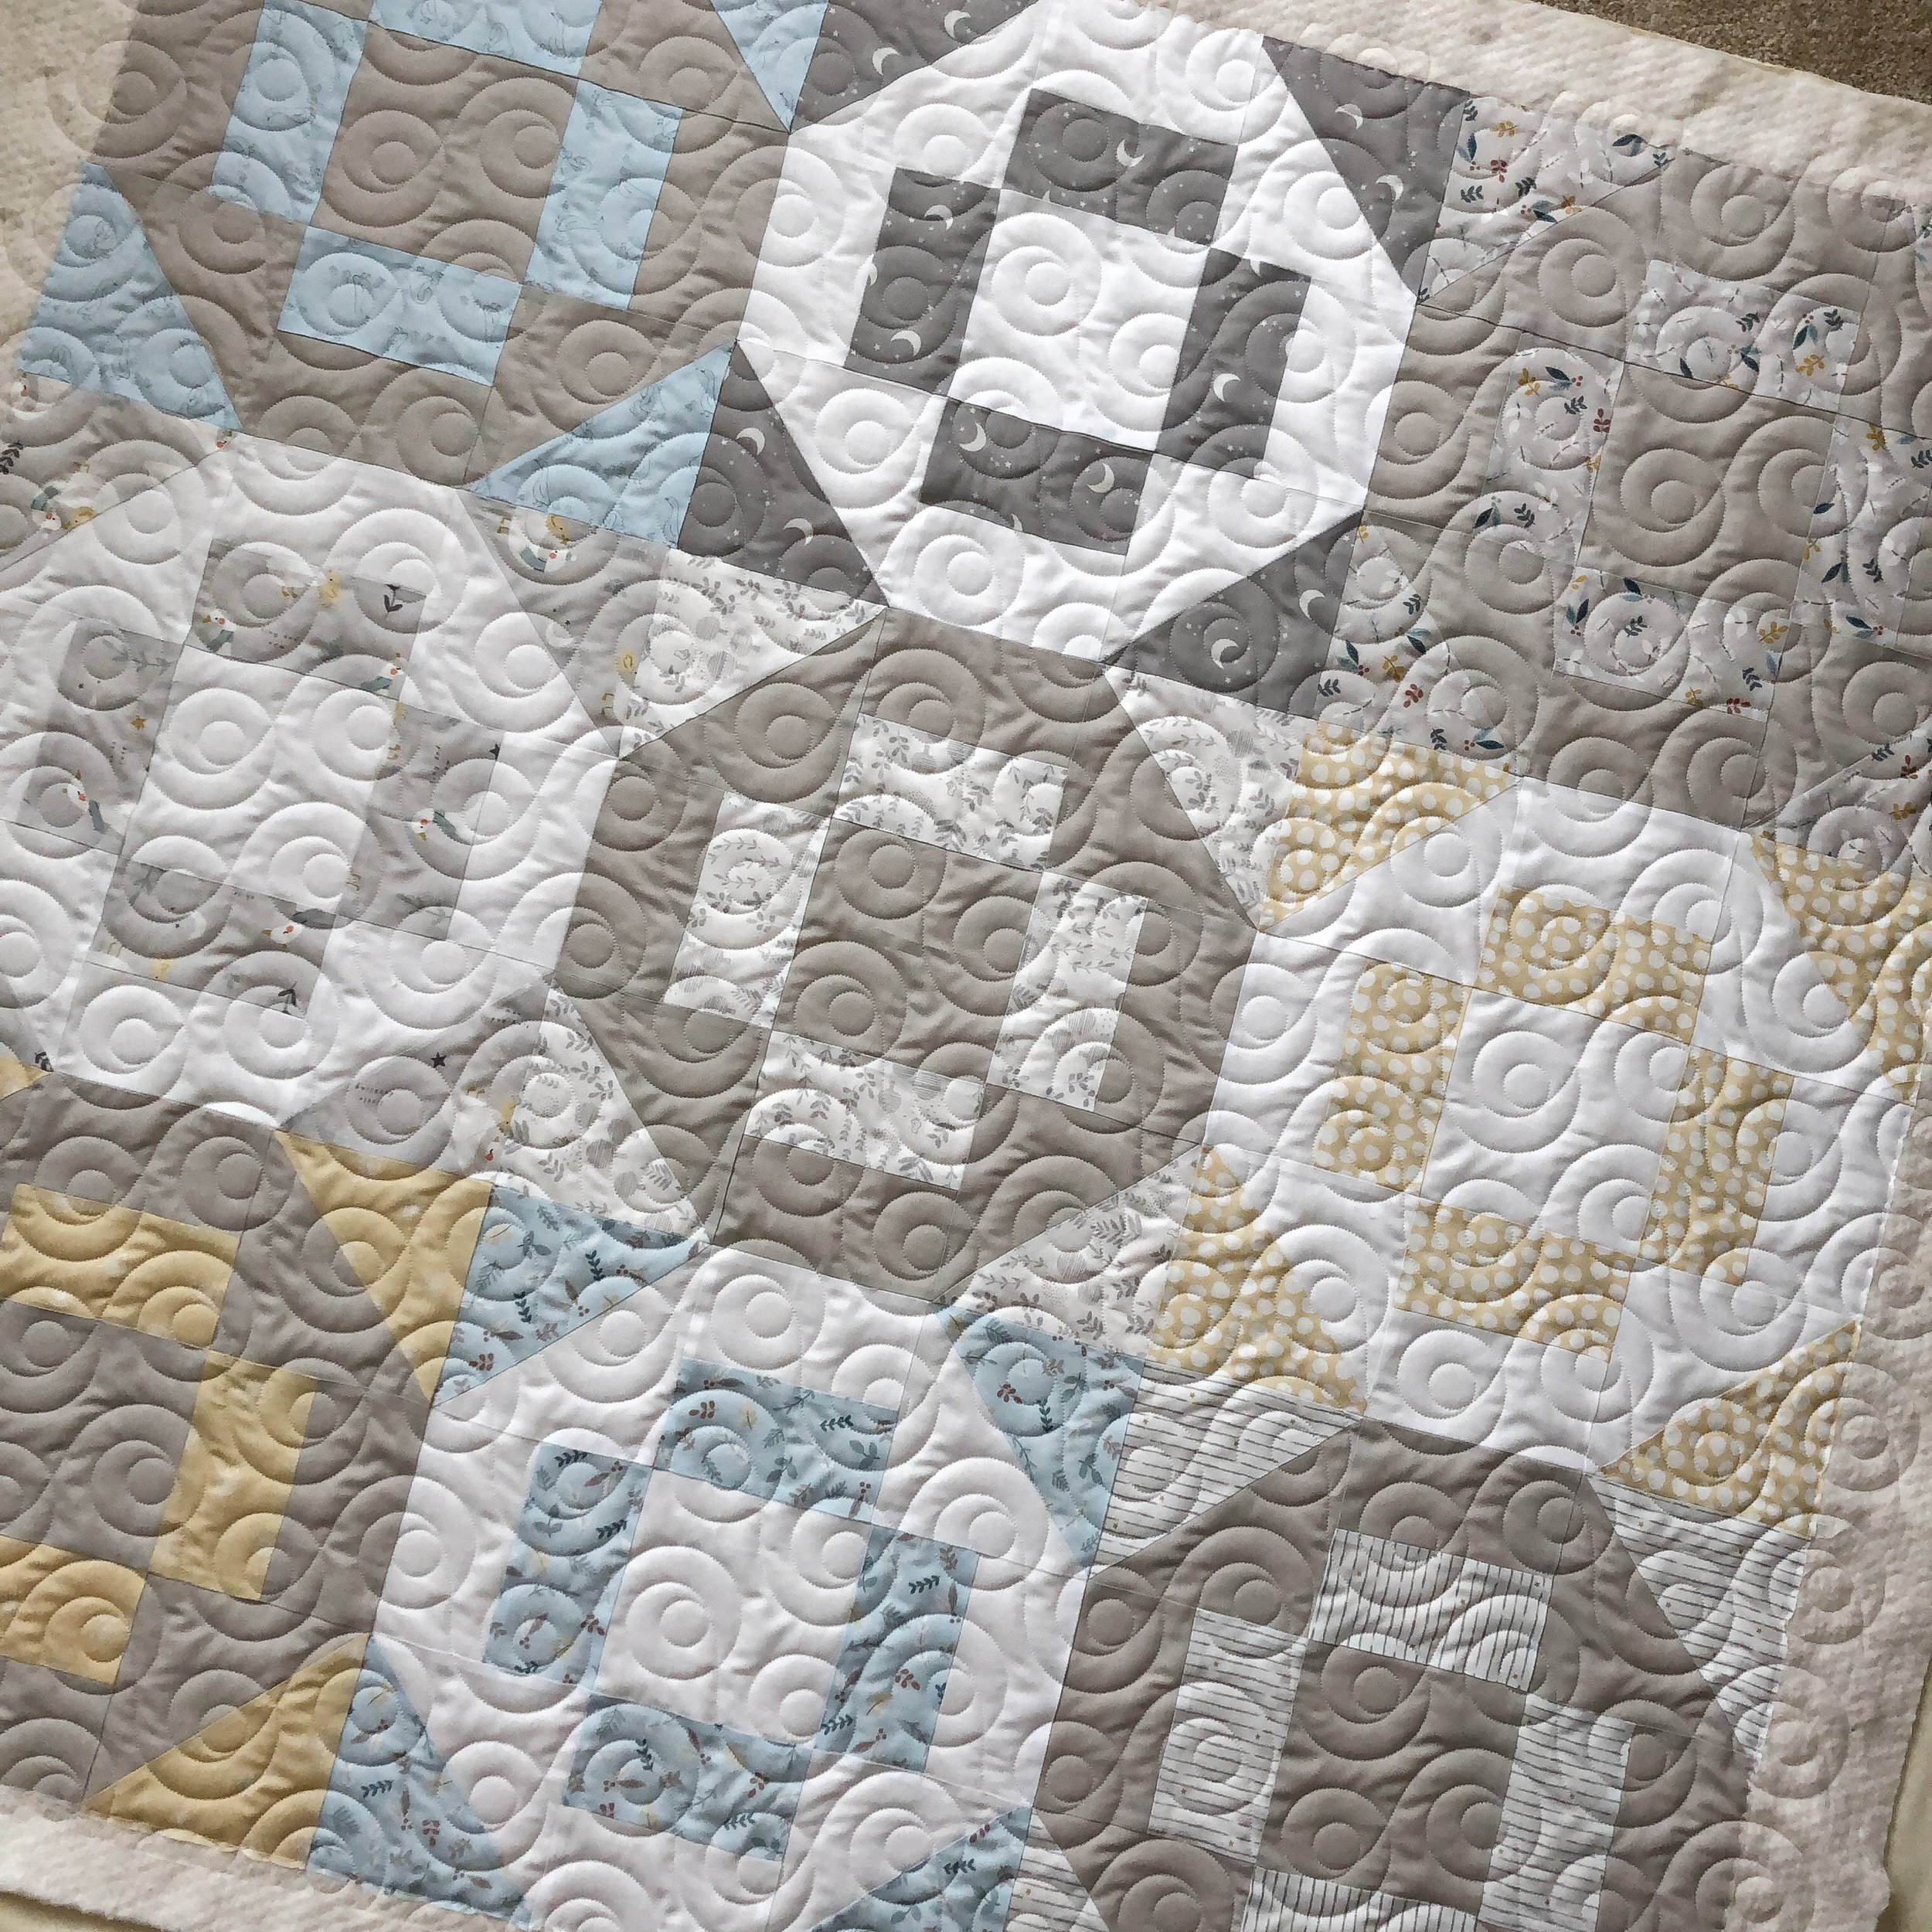
I chose my Squared design for the quilting, and I think it turned out great!! I love how the quilting design is at a different angle than the squares in the quilt. Squared is such a versatile design!! If you haven’t used it yet, you should. It’s definitely a go to design for me, and works beautifully on a variety of different quilts. It’s available in my shop.
I used my favorite batting 8020 from Winline Textiles and my go to Natural White Omni thread from Superior Threads.

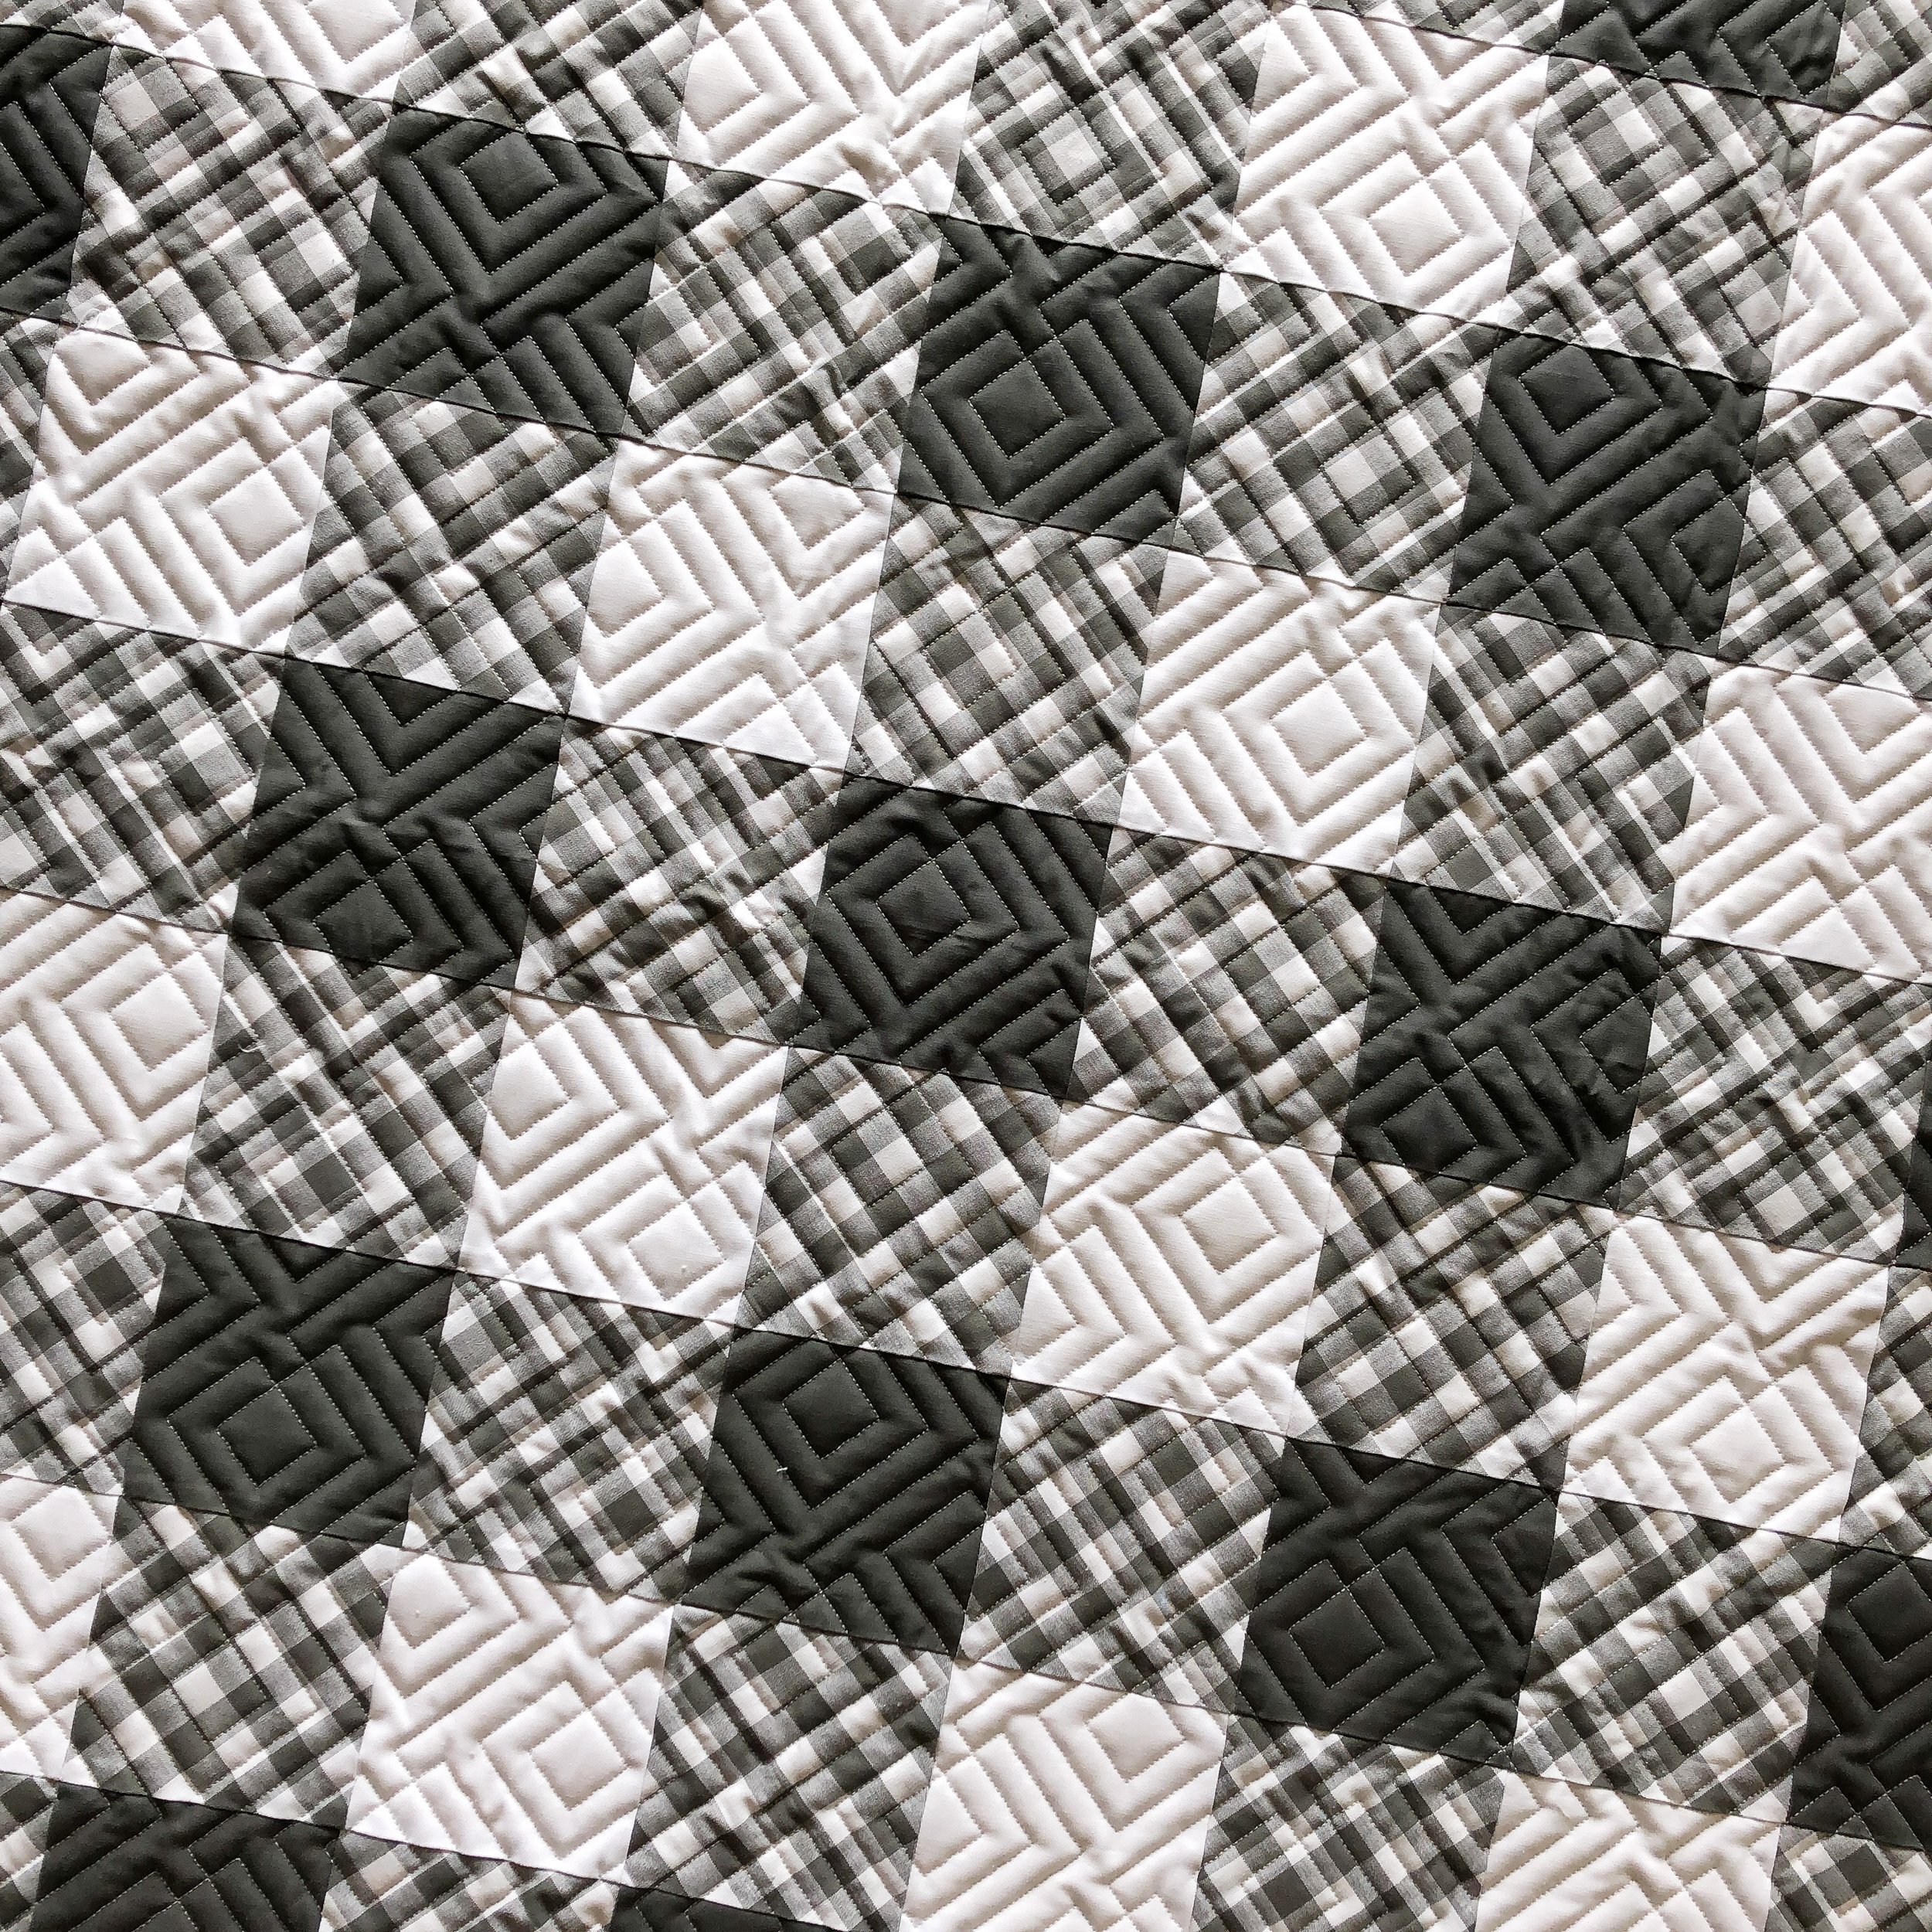
Can you see why I love this design on squares…that texture!!!

Another close up…

And, it was backed with minky so it’s definitely a cozy quilt!!
Thanks for stopping by!! I hope you have some fun sewing plans this weekend. Happy quilting! • Leisha
If you’re interested in sending me a quilt, send me an email and I’ll get you on my list. quiltingit@gmail.com
Denise’s “Bat Moon Rising” Quilt
Hi there,
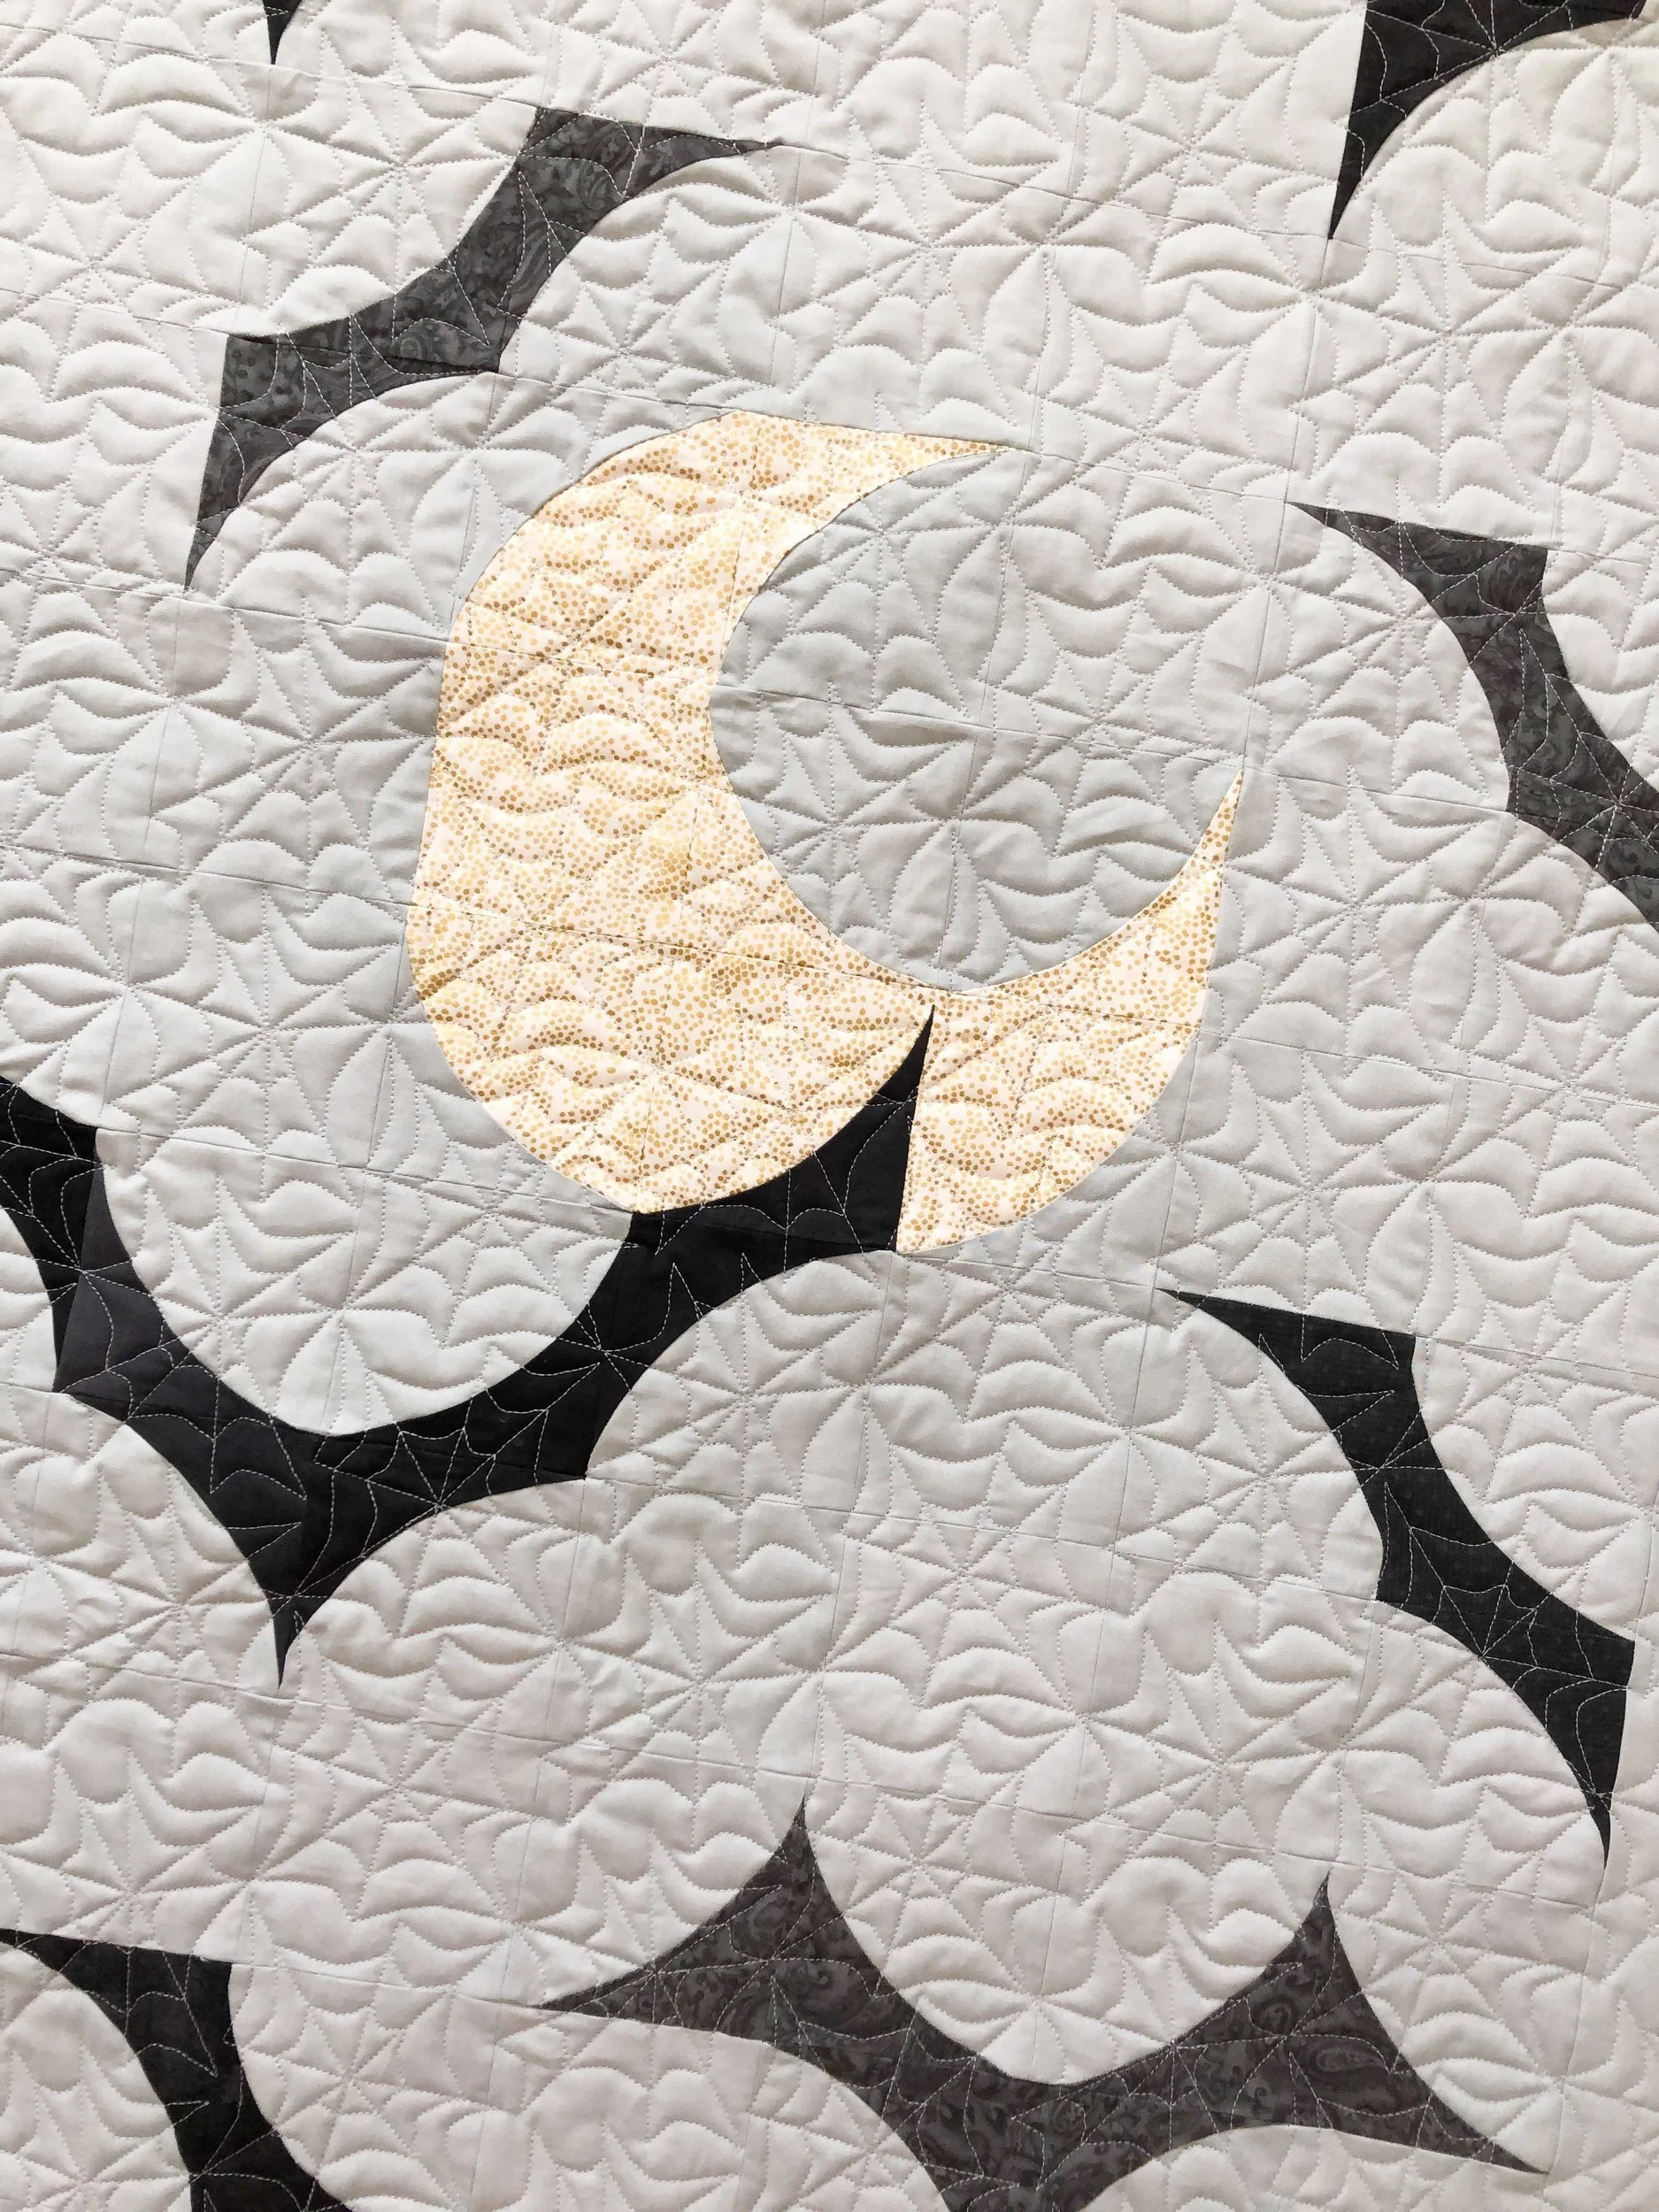
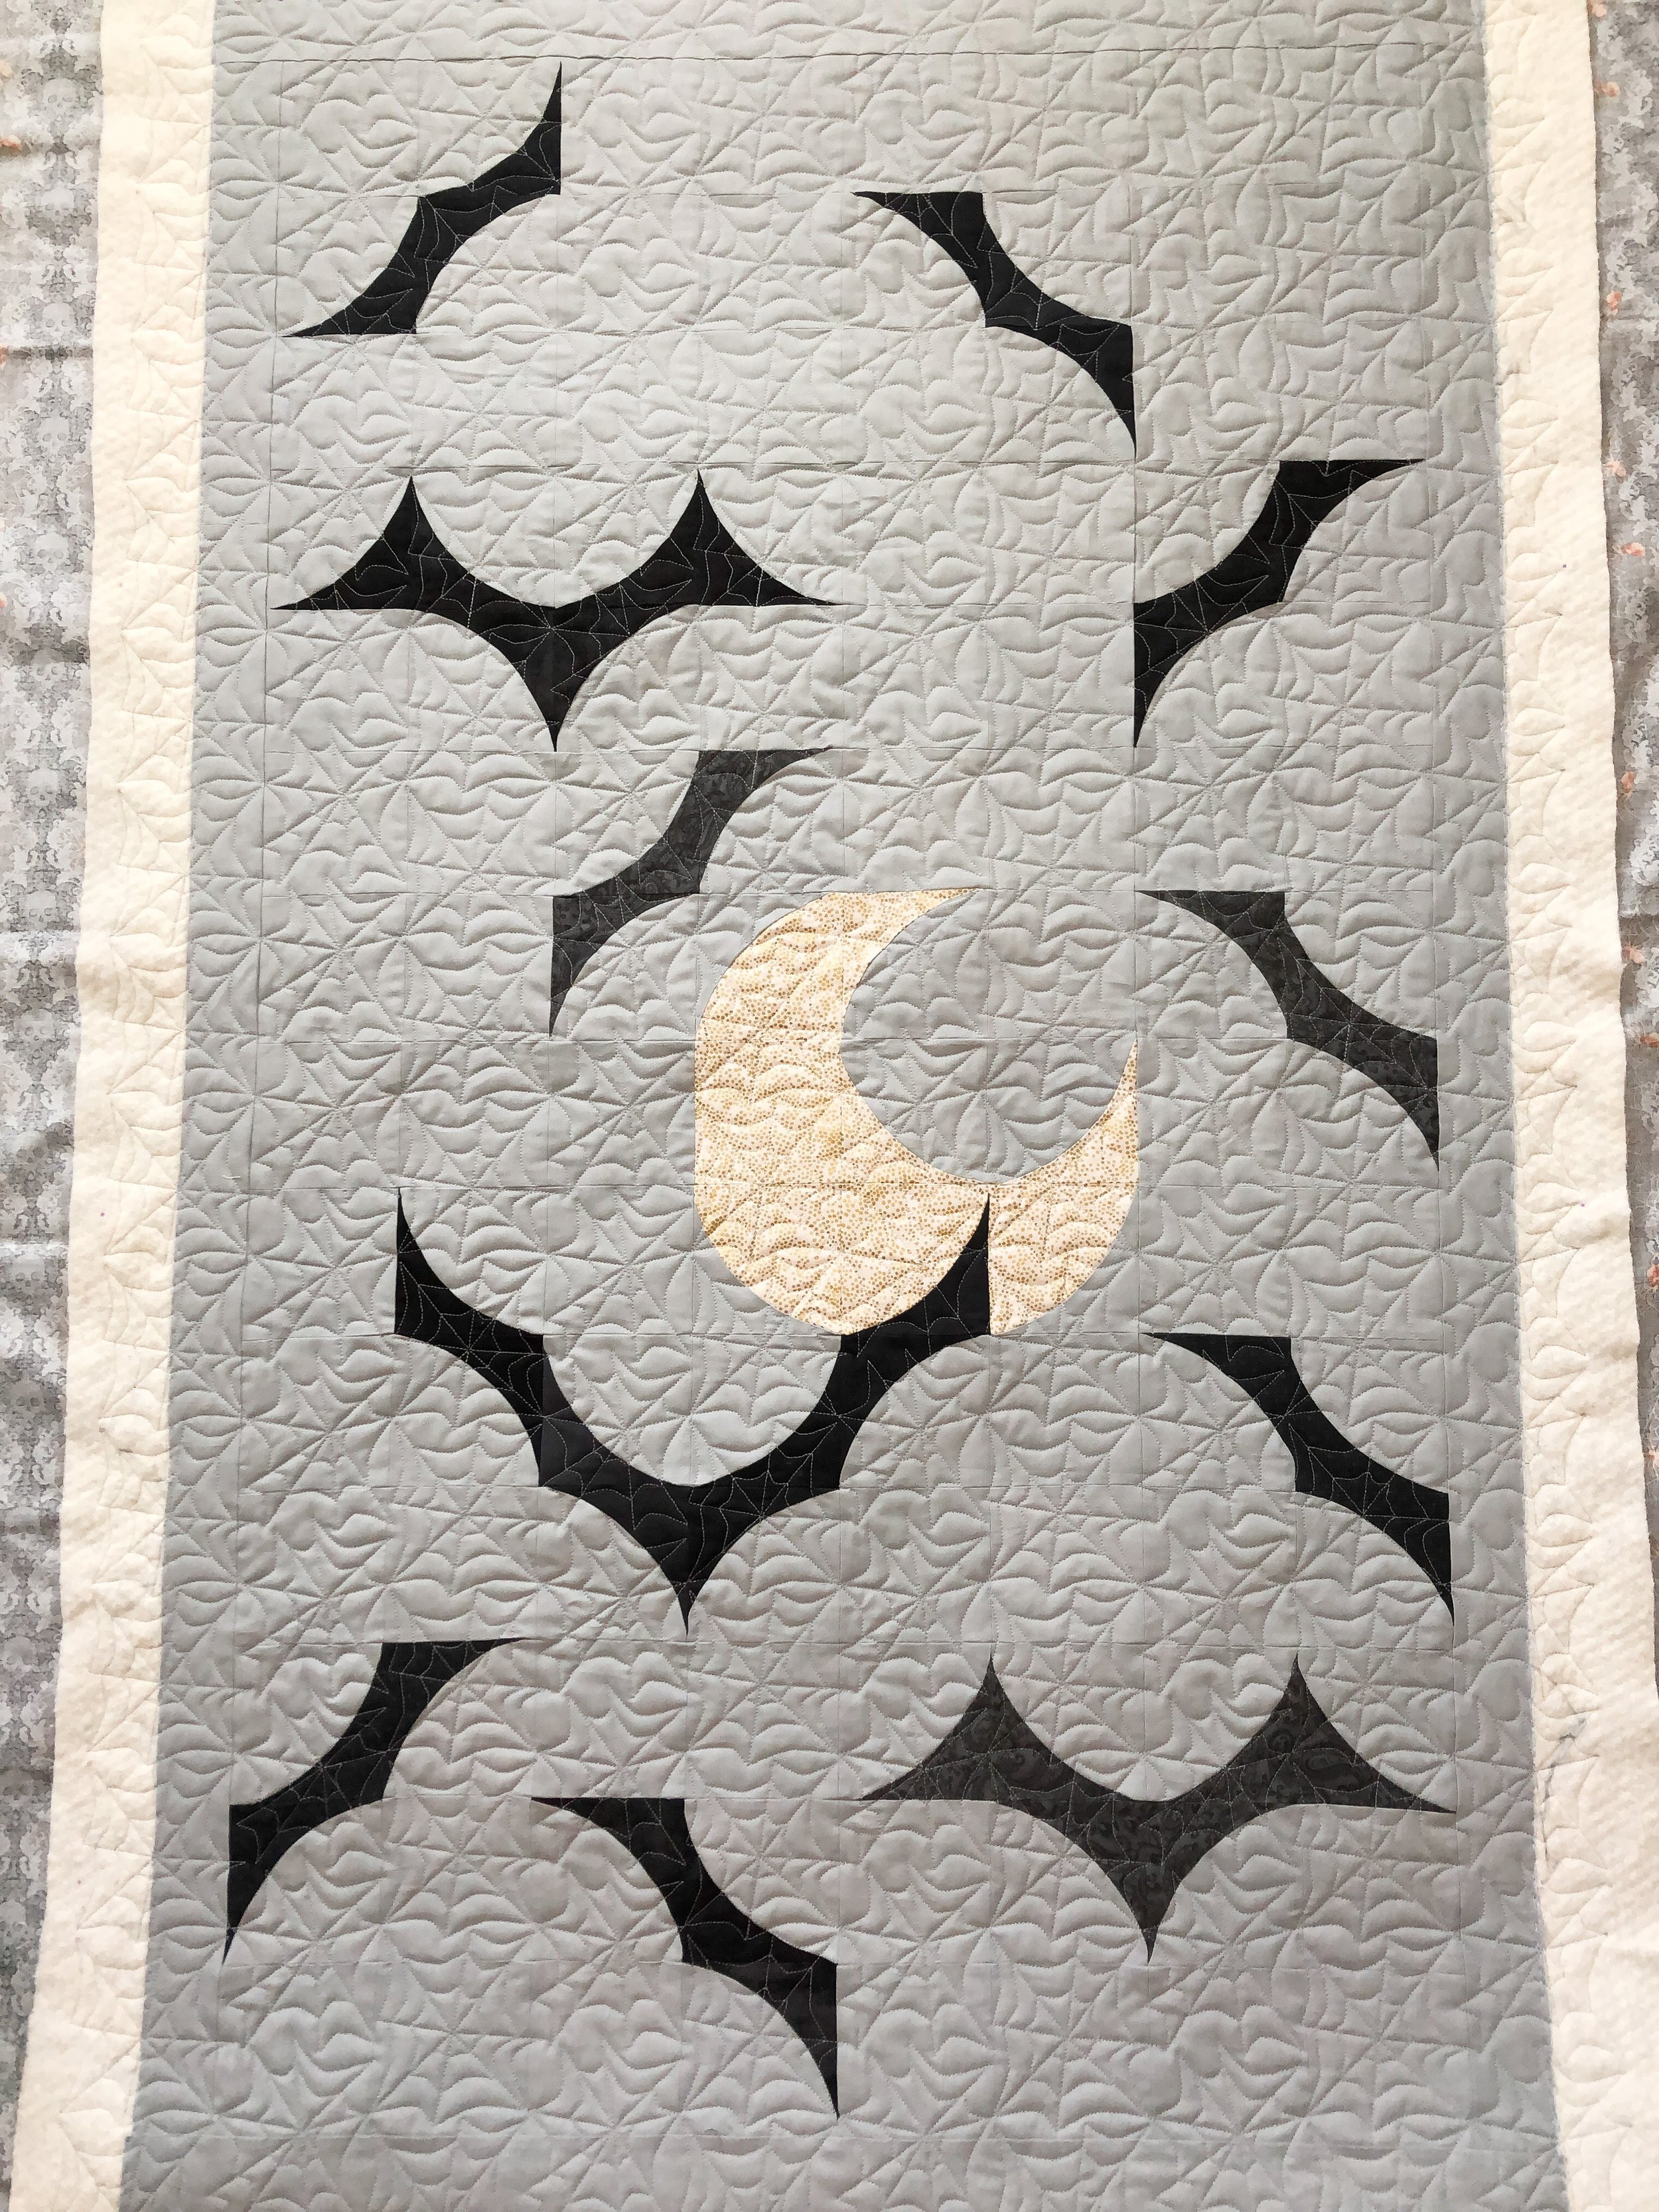
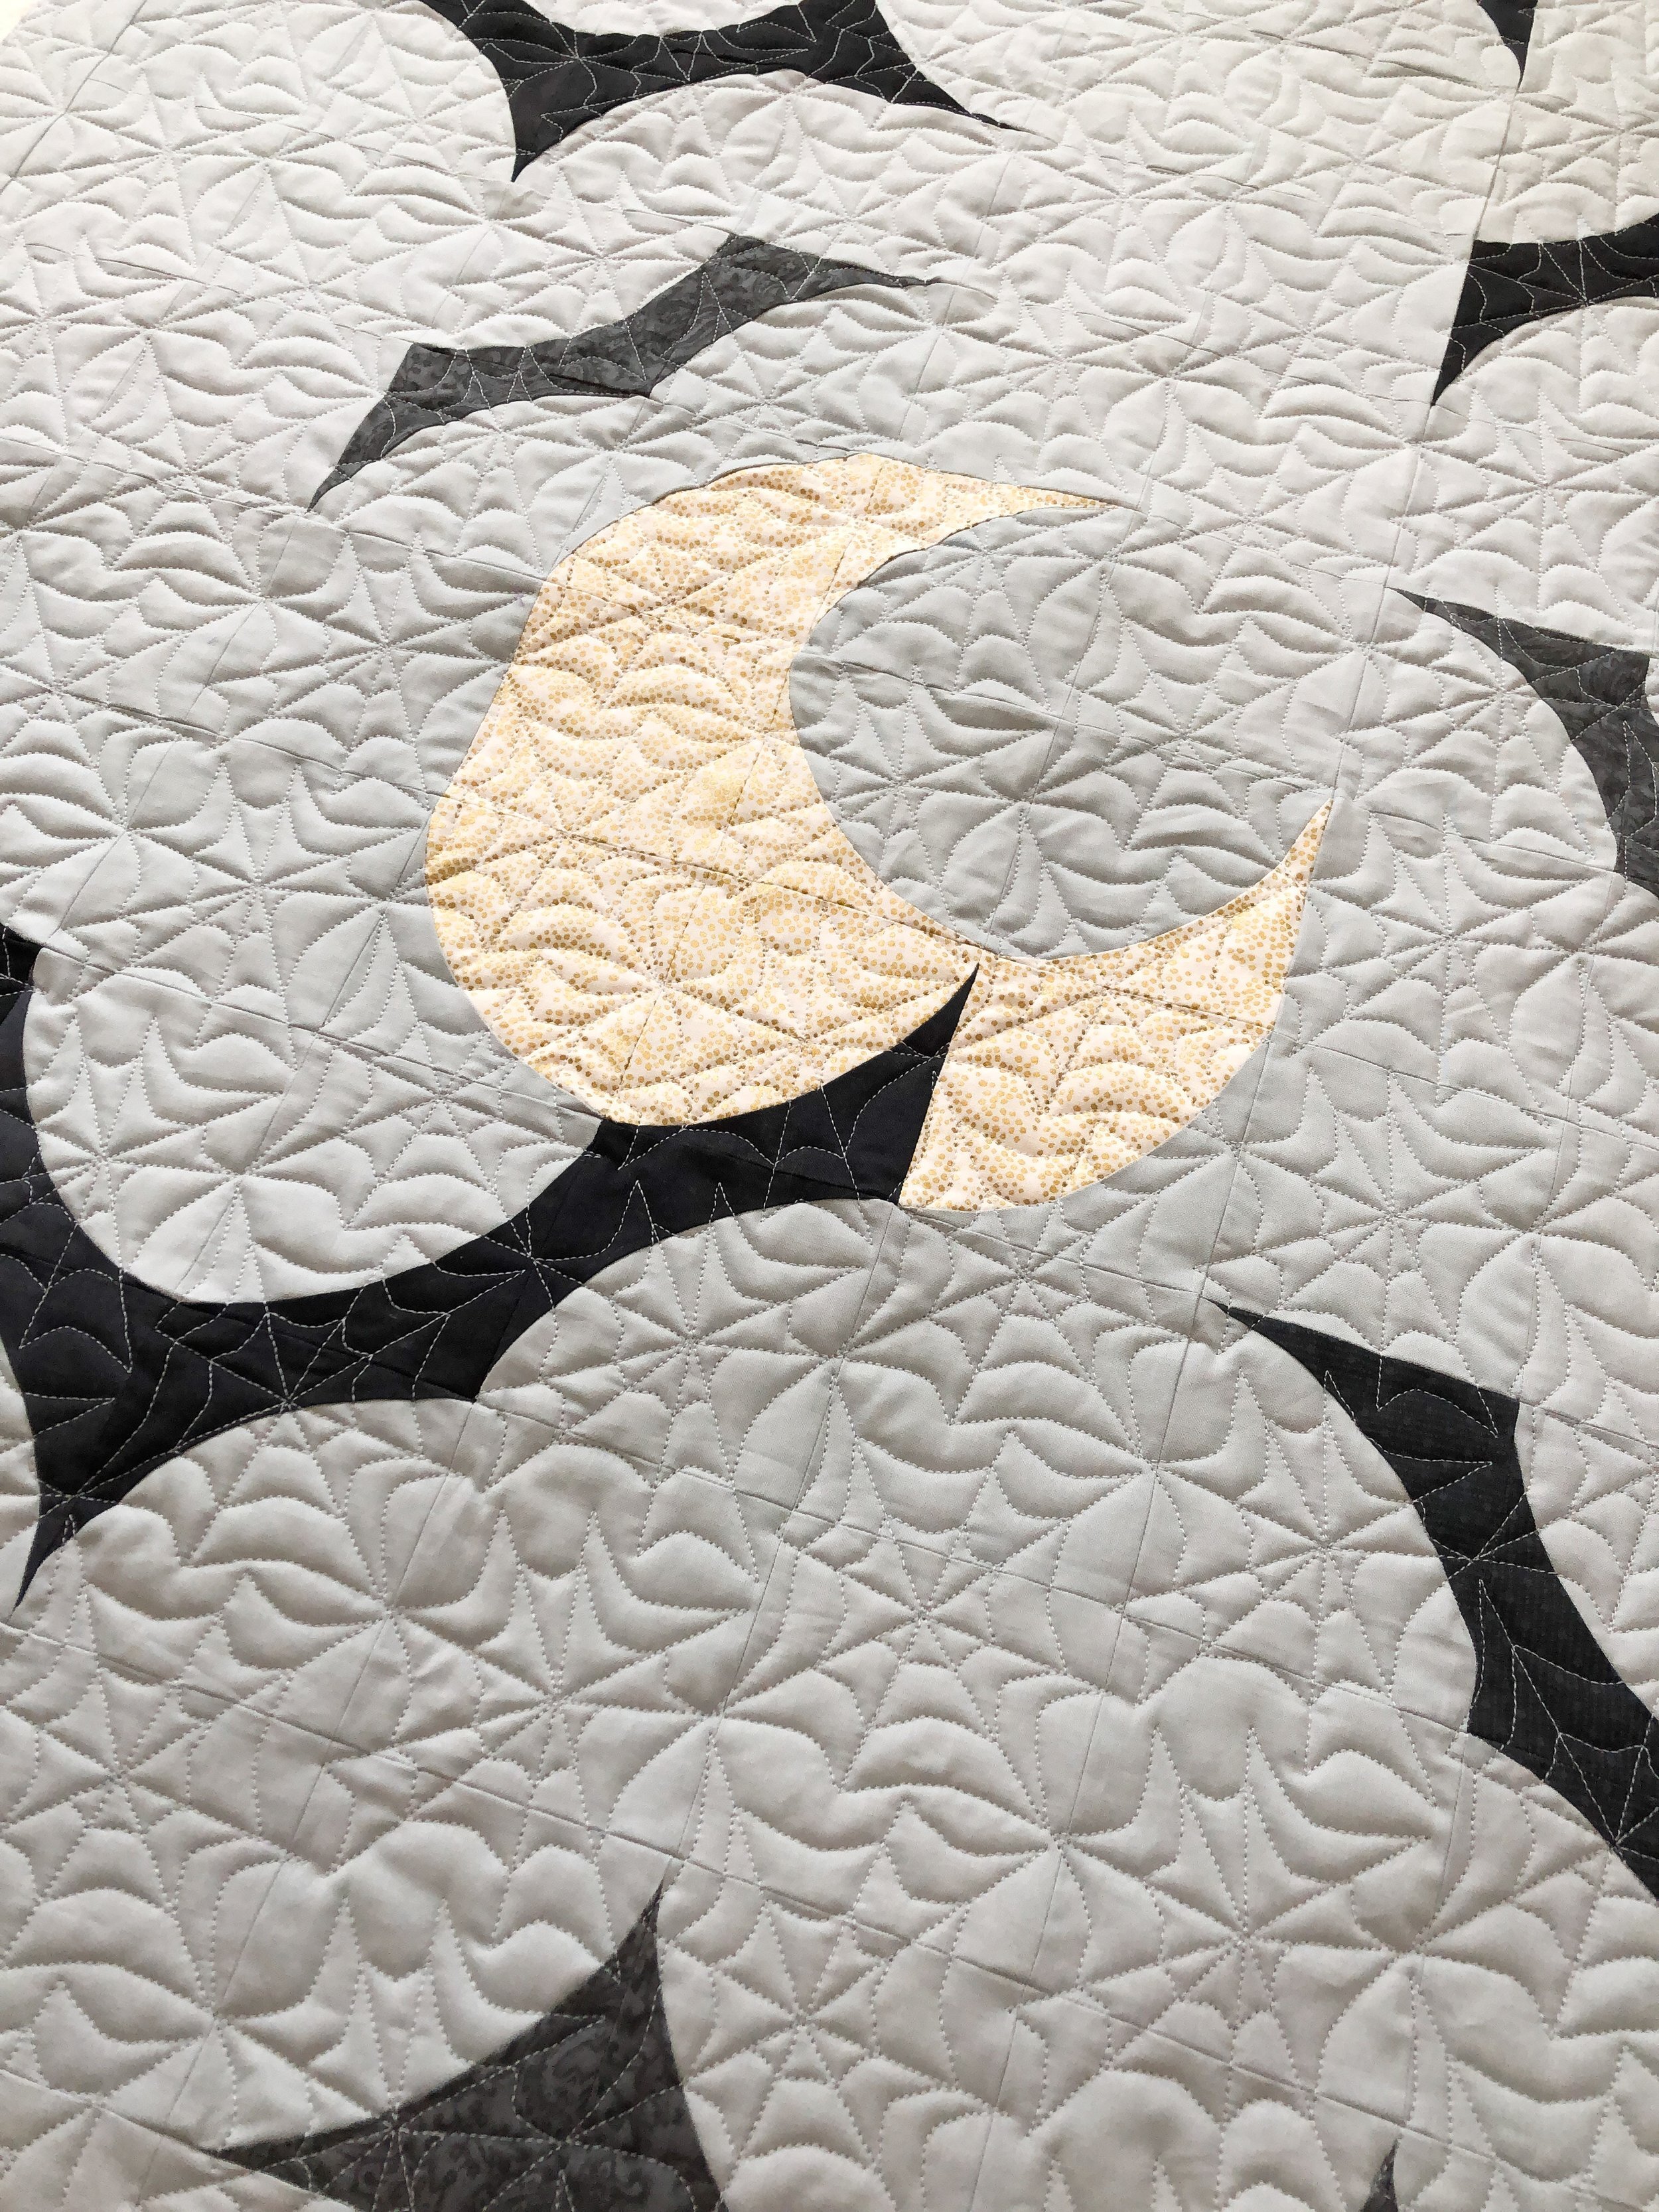
With Halloween just around the corner, are you looking for a fun project? This fun wall hanging quilt was made by Denise. It’s called Bat Moon Rising and is in the Mini Wonderful Curves book by the Sew Kind of Wonderful sisters Jenny, Helen, and Sherilyn. If you have made one of their patterns with one of their curve rulers, you should!! They’ve made curves fun and approachable.
Denise wanted some spider webs, which I thought is a perfect idea. I quilted Haunted Web by Apricot Moon Designs, which is available at Urban Elementz.

I used a light grey Omni thread from Superior Threads, and my favorite 8020 cotton poly blend batting from Winline Textiles.

I love the curves in the bats, simple and modern, yet a sophisticated take on Halloween.
Thanks for stopping by for this quick look at some simple Edge to Edge quilting. There are so many incredible options when it comes to computerized quilting, which I can’t achieve when freemotion or freehand quilting. Next time you think your quilt needs custom quilting, be open to edge to edge quilting, it could be just what your quilt needs.
I would love to quilt for you!! I have several openings still before Christmas. Email me at quiltingit@gmail.com and I’ll get you on my schedule. Thank you!! Happy quilting… - leisha
Julie’s Wagon Wheel Quilt
Hi Friends,
I’m excited to share with you this fabulous quilt that Julie made. I was hoping to blog the details and share it a few weeks ago, but life has been busy. I shared some progress pictures of the first section on my Instagram, but not much more.
The pattern is called Wagon Wheel and is shared on the Quilting Daily website. Julie did a beautiful job. When I first looked at it, I was hoping that she would choose custom…and yay!!! She did!

I used a tan Omni thread from Superior Threads to match the outside border. Which Julie suggested, and I thought it was a perfect choice. I also used my favorite 8020 cotton poly blend batting from Winline Textiles.

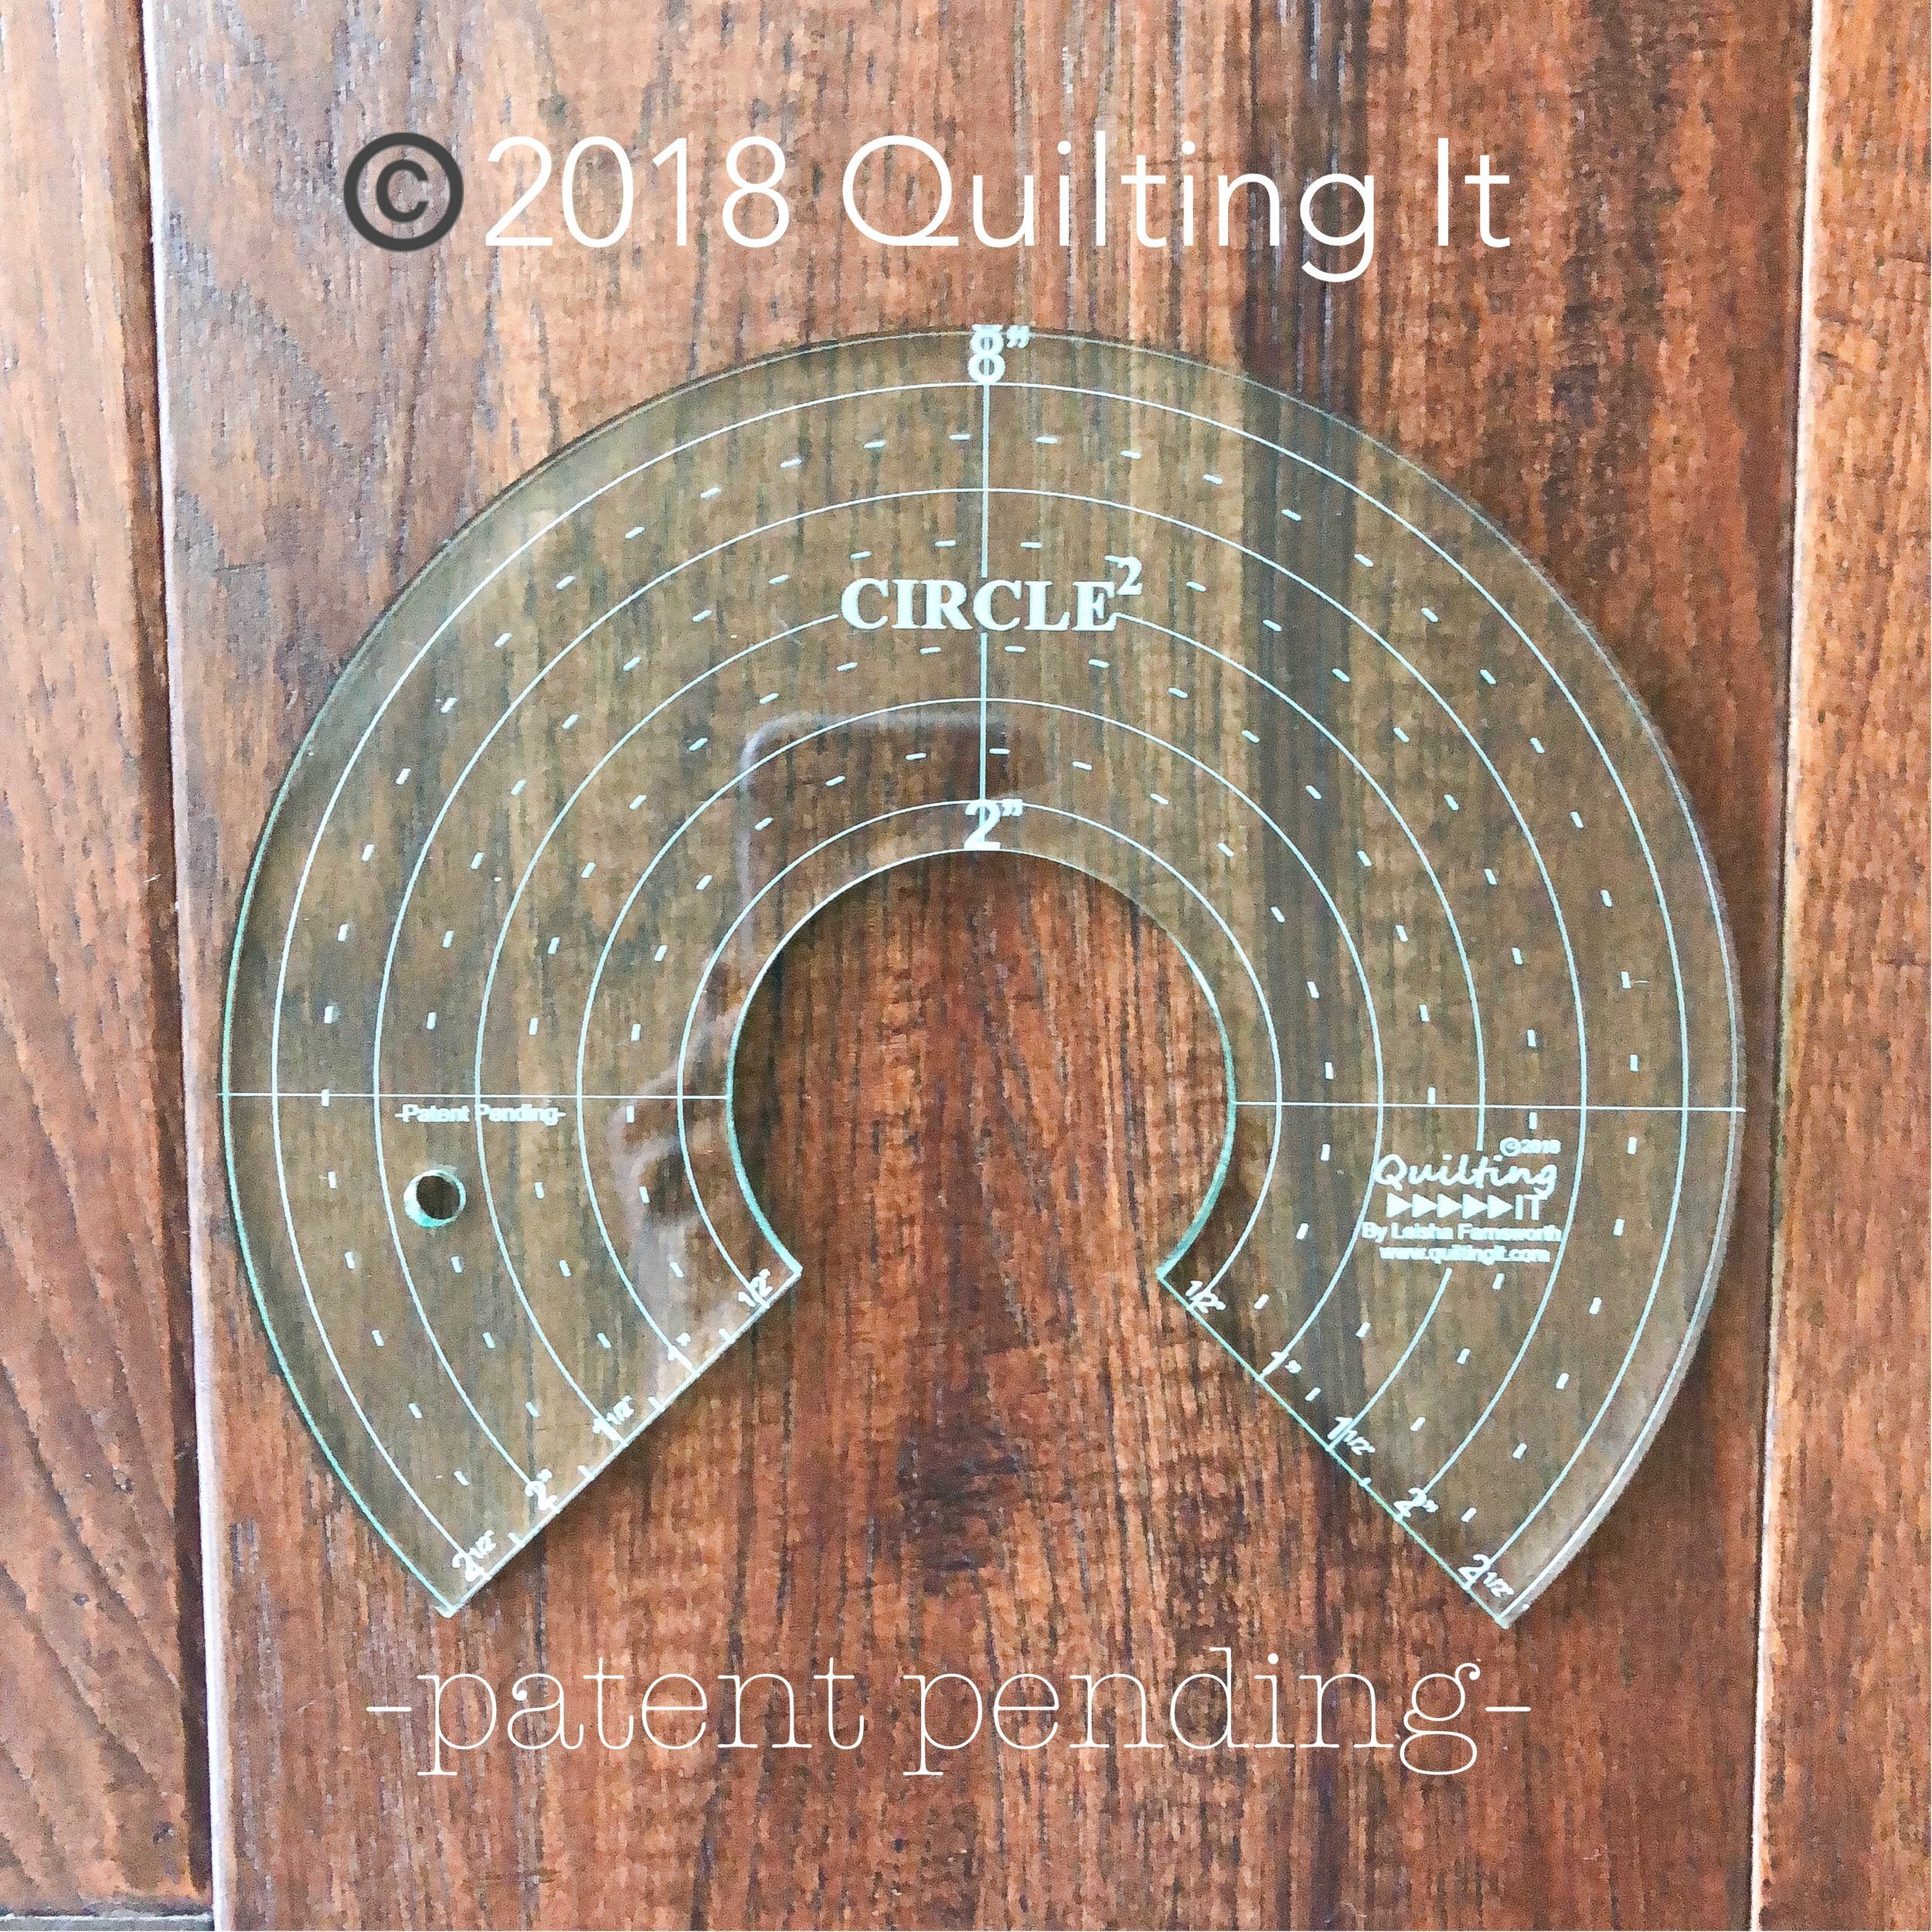
Everything but the pebbles is done with a ruler. I ended up using 6 different rulers. I used my 3”, 4”, 5”, and 11” Circle2 machine quilting circle rulers for all of the curves, except for the curve in the wheel itself. I used Linda from The Quilted Pineapple’s -15- curve and I also used her edge ruler. I love all of the curves together. I had so much fun custom quilting this one. Rulers give me so many options, I love it!!
I used my 4” Circle2 ruler to quilt the circle and petals in the motif pictured below. The circles I quilted freehand.

I used my 3” Circle2 ruler and Linda’s Edge ruler to quilt the lines orange peel in the squares. It’s easy to quilt, and creates such a beautiful design. I used my 11” Circle2 ruler to quilt the curves in the tan outside border. I love that design too, it frames blocks or quilts beautifully.
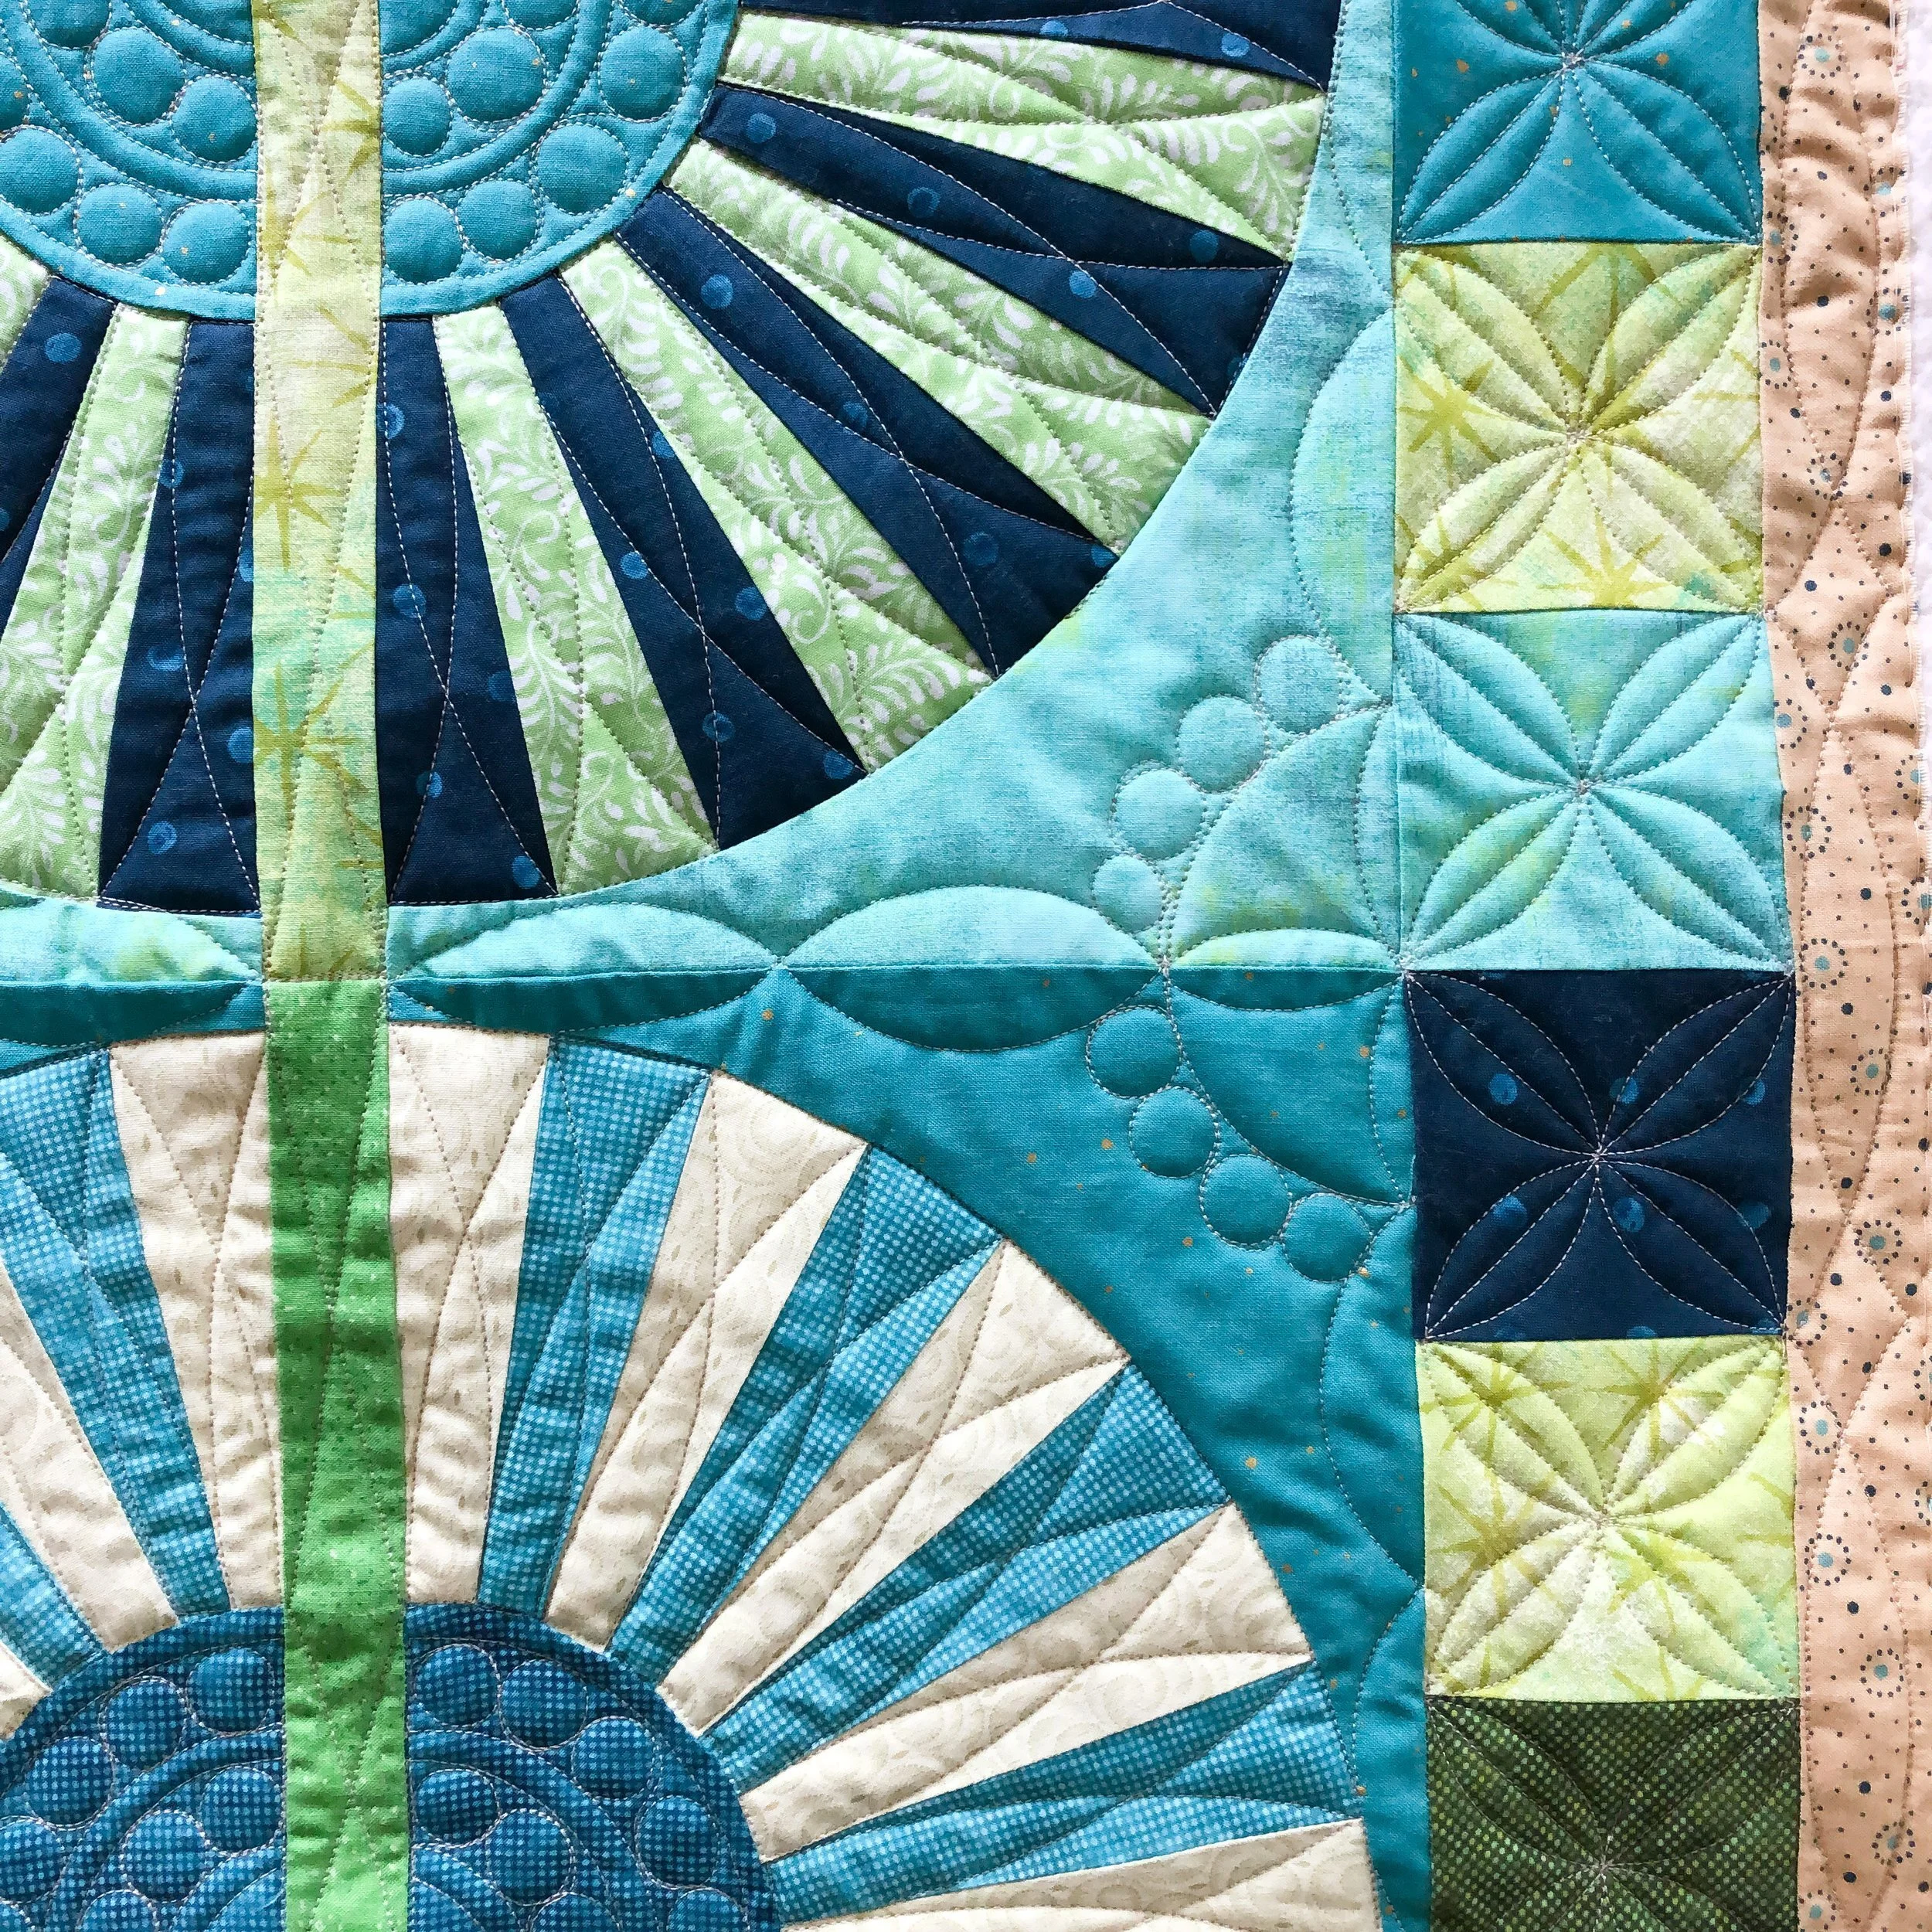
Here you can see the center of the quilt, which allows you to see the four full motifs in the background. I quilted the same background motif along the edges and in the four corners. Which continues the overall design.
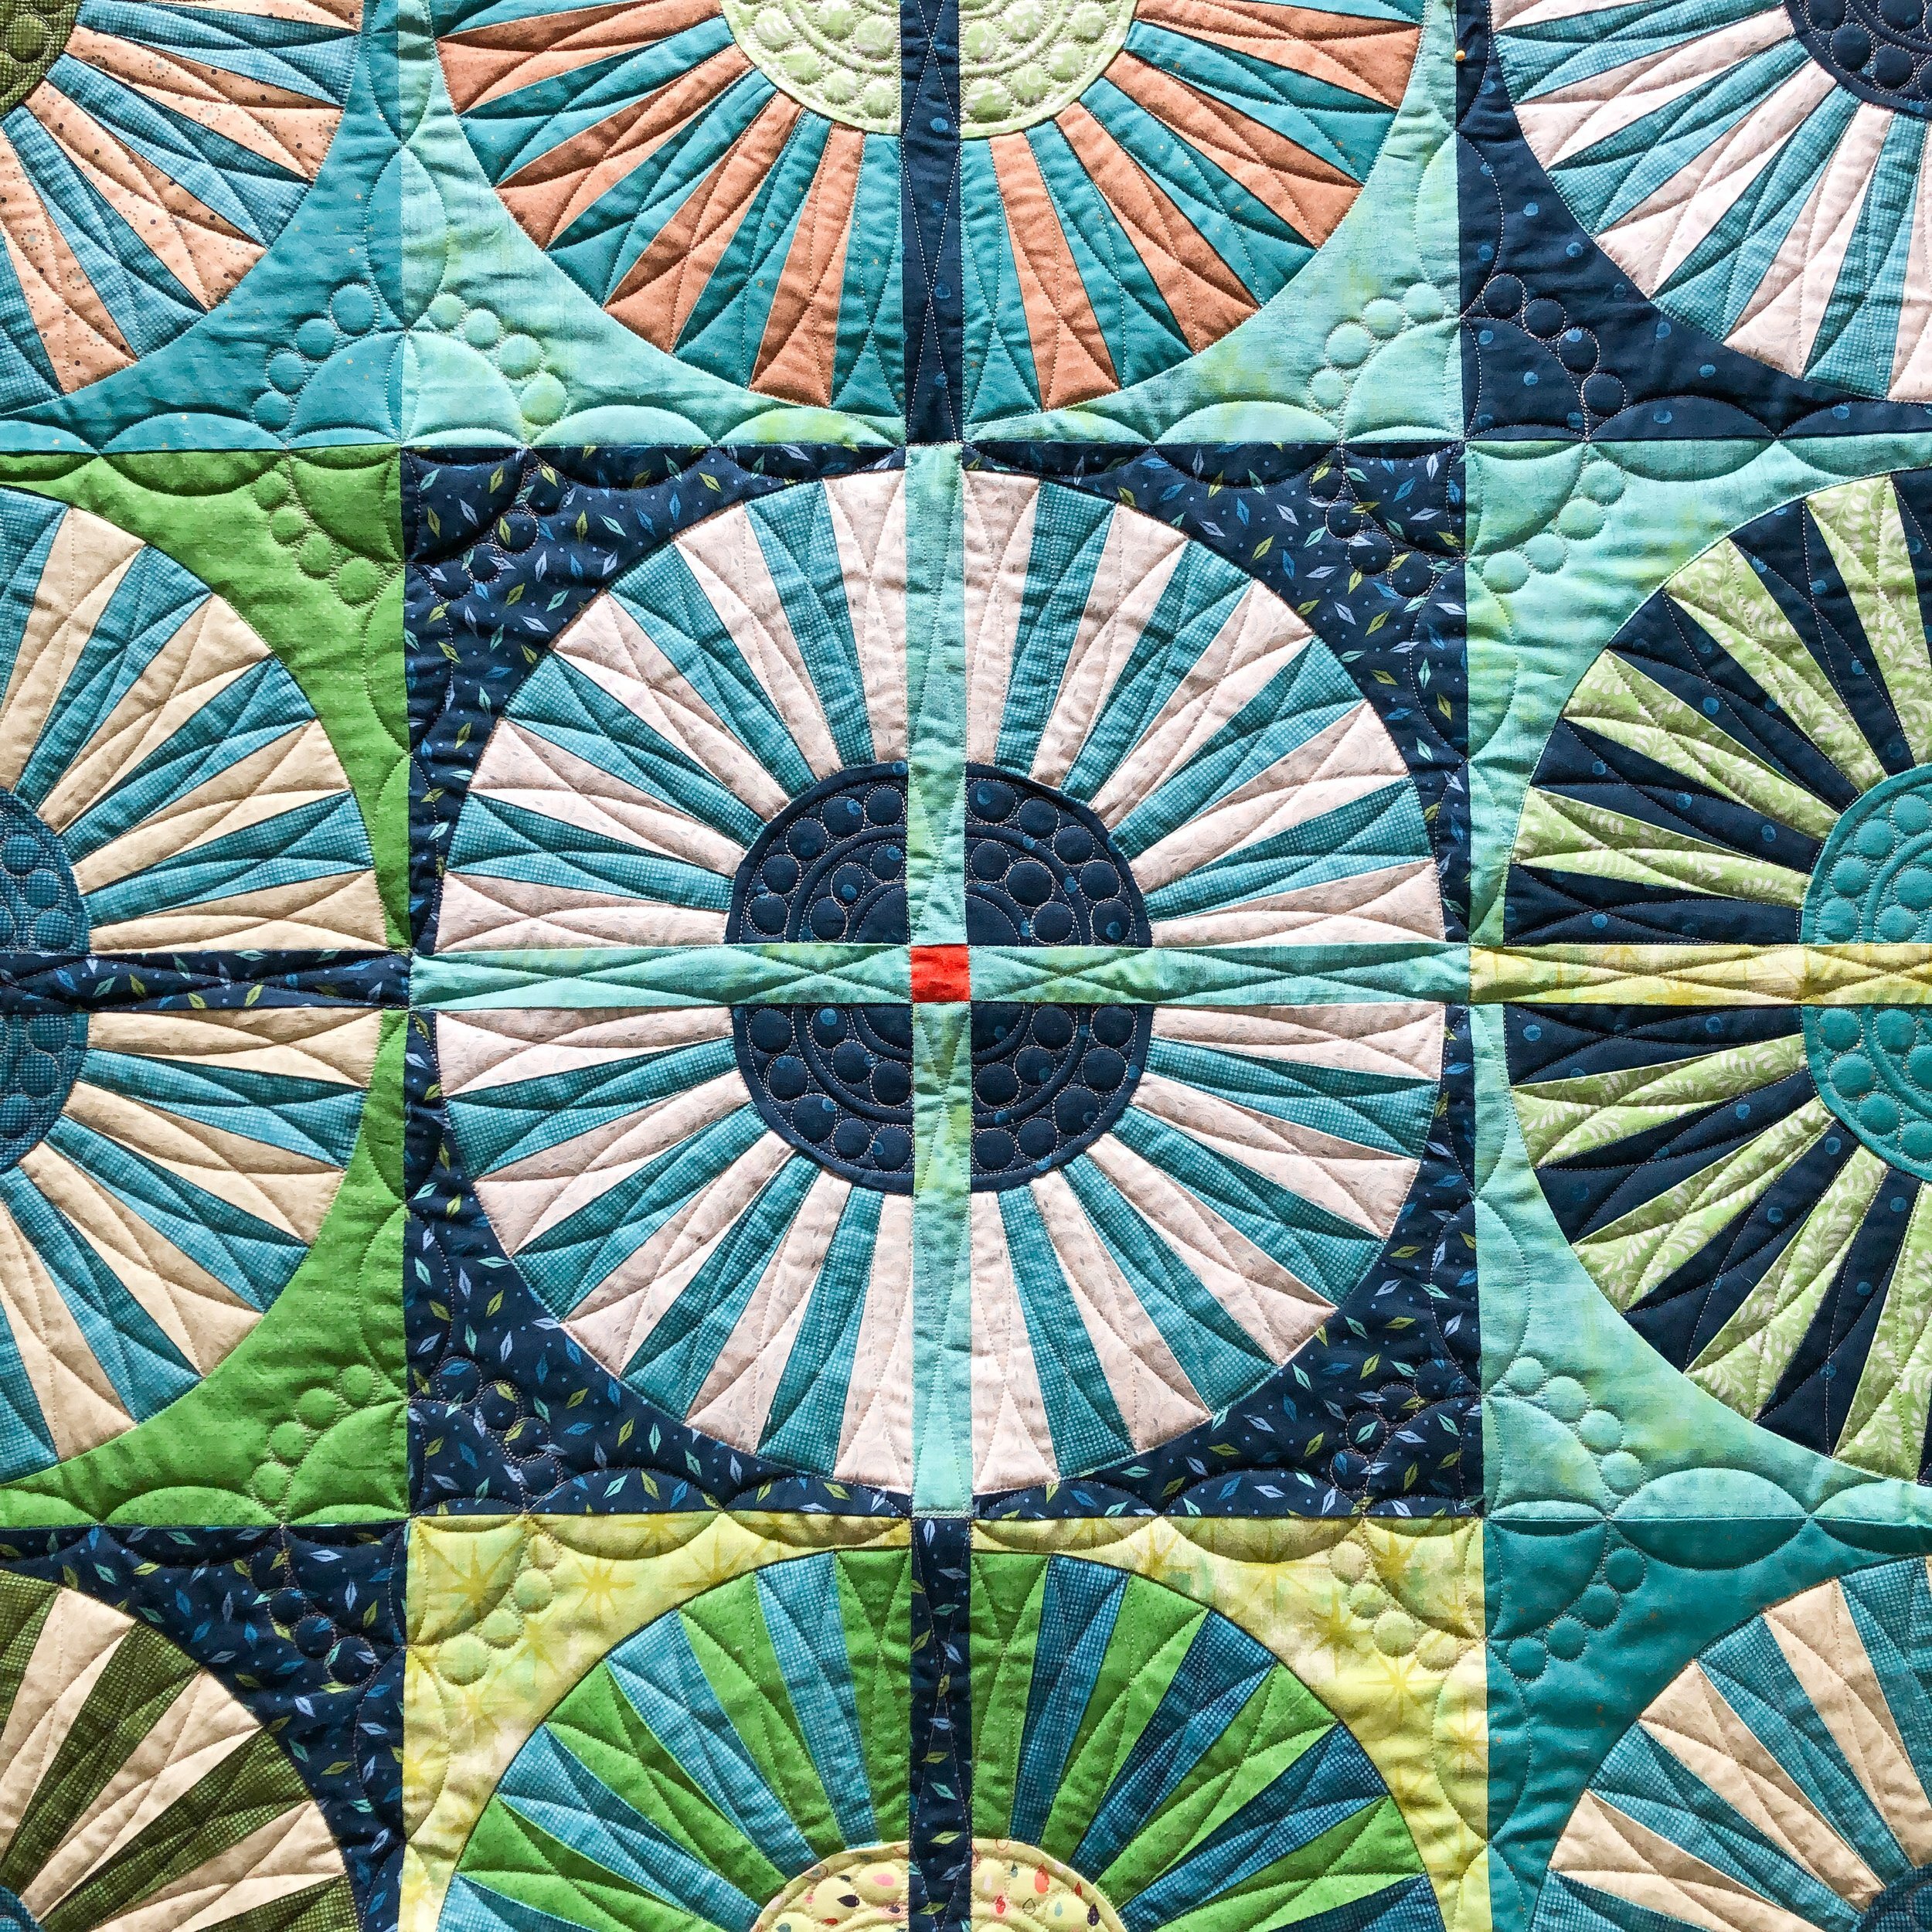
I love all the textures quilting adds to a quilt…especially custom quilting.

Here is a look at my 5”/11” Circle2 ruler, the 3” and 4” are similar. The 3” is paired with the 9”, and the 4” is with the 10”. The great thing about this circle ruler set…well there are many great things…you get two sizes of circles per ruler. There are six rulers and they start at 2” and got up to 13”.
- Design Patent D875,574 -


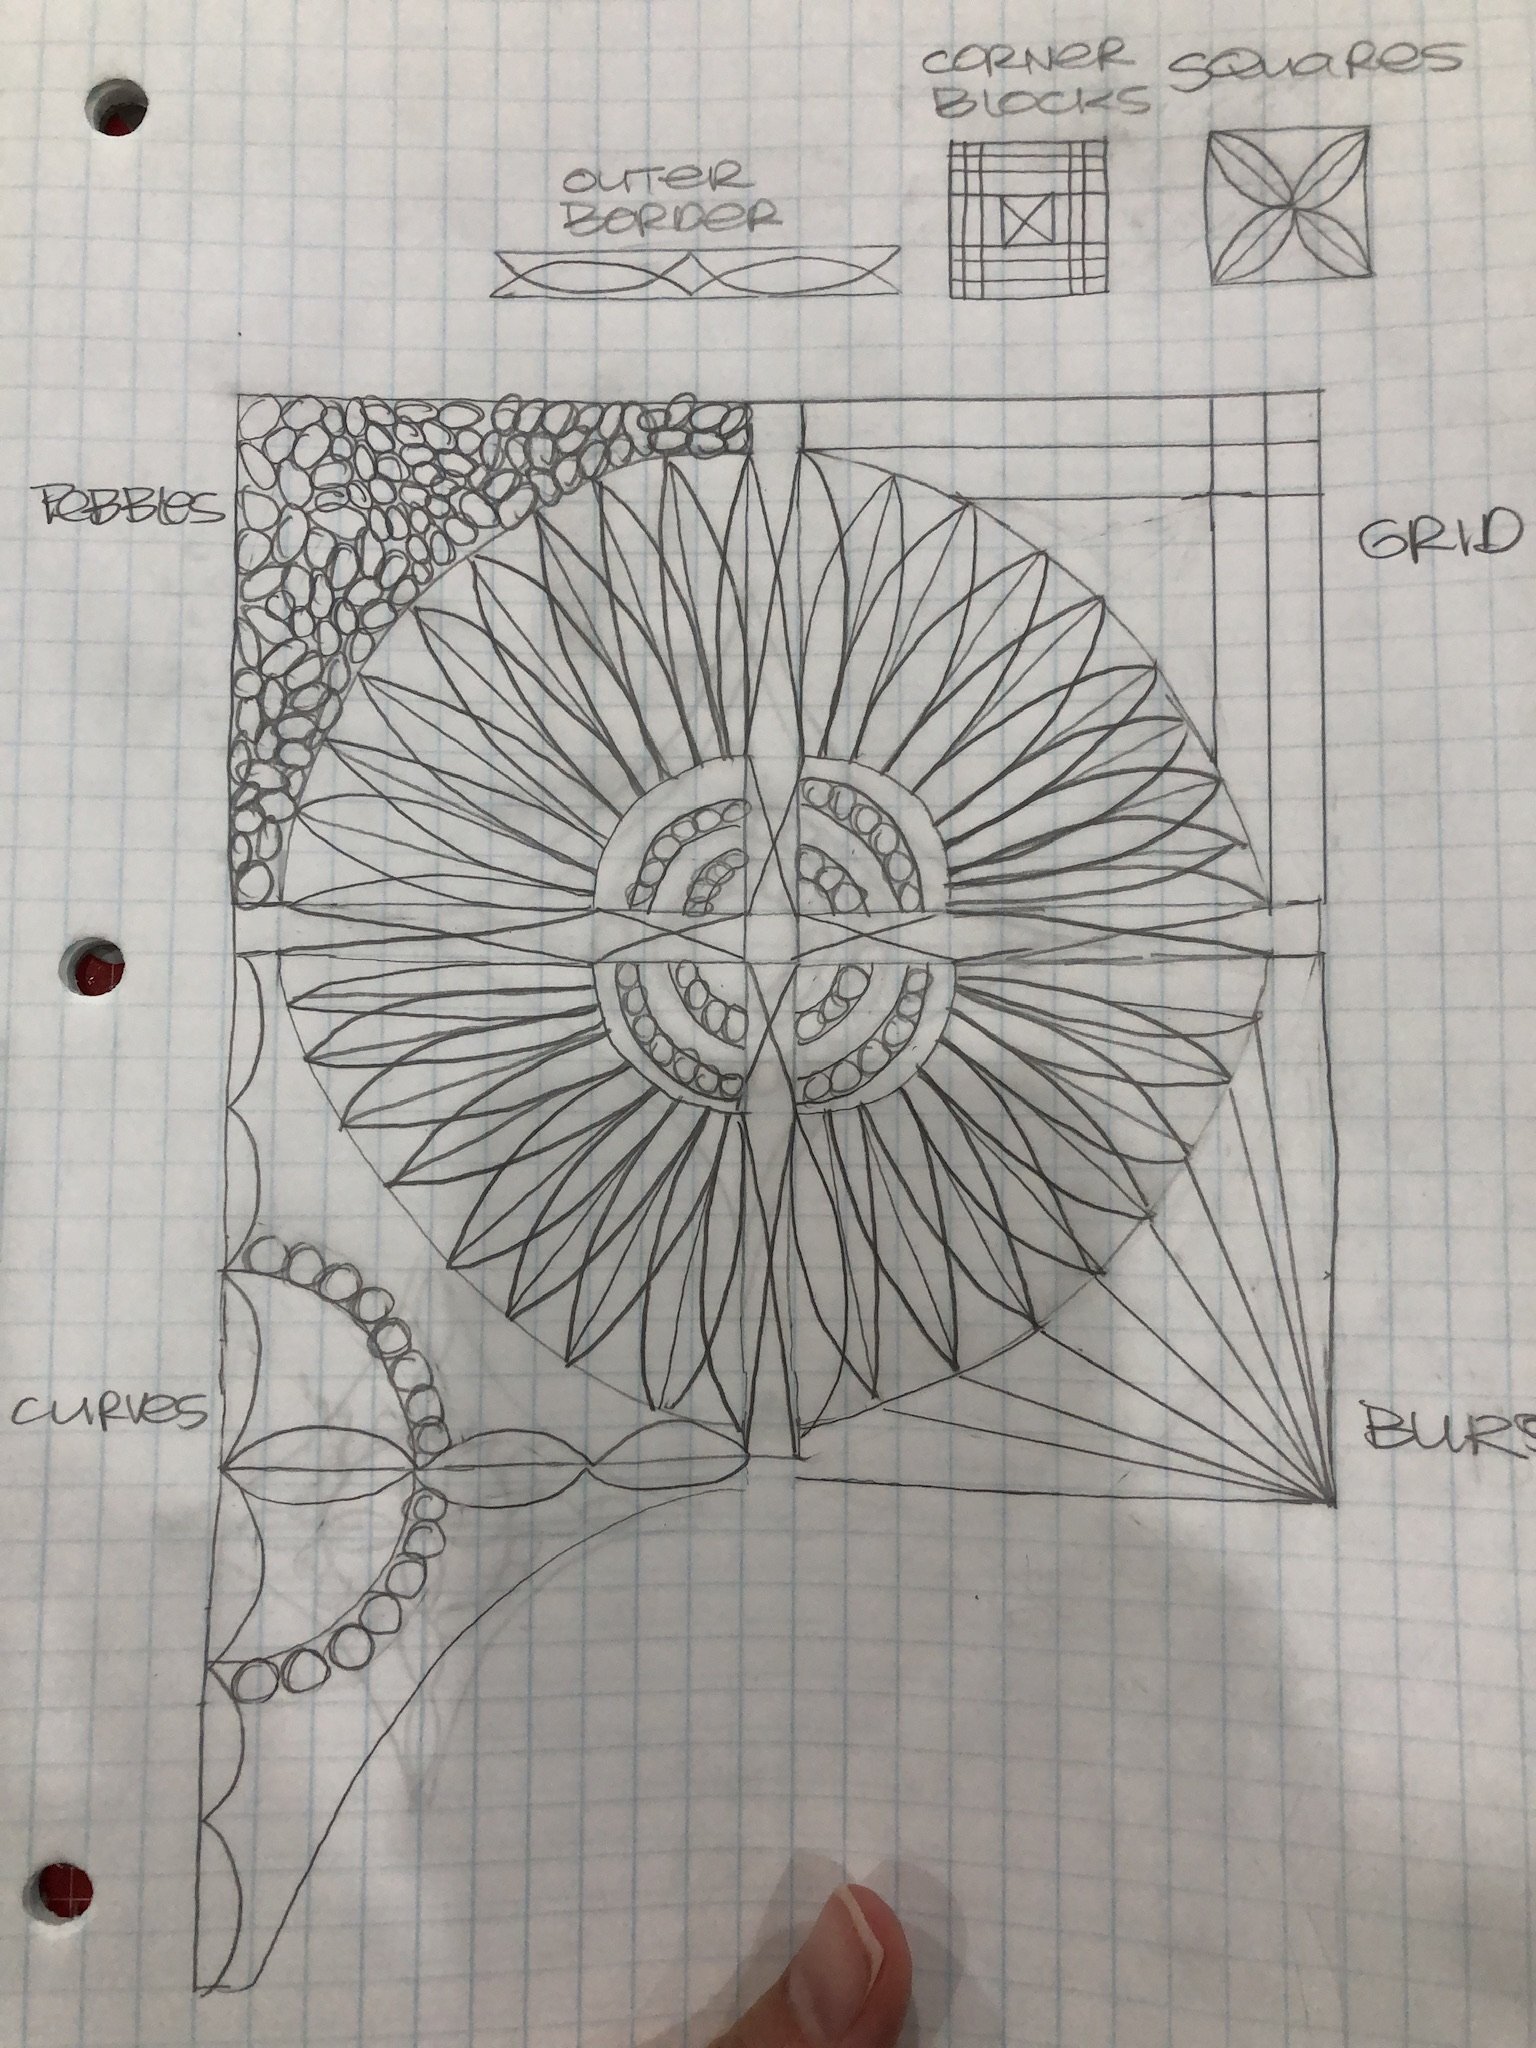
Here is a look at my drawing that I sent to Julie. I let her pick the background, and I’m glad she picked that bottom left one, it turned out great!!!
Thanks for stopping by!! I have lots of quilts to share with you…stay tuned. I also have two giveaways coming up in October. Please watch for those on my Instagram.
I still have lots of edge to edge and some custom quilting spots available before Christmas. Send me an email at quiltingit@gmail.com and I’ll add you to my calendar. Happy quilting!! -leisha

Sandy’s Hugs and Kisses baby quilt (free pattern)
Hi Friends,
Hope you’re having a great end to summer!! I have a quick baby quilt to share with you today. So sweet, huh?!?!

Sandy made this for a new baby in her family. The pattern is FREE…it’s by Sharon Holland and it’s called Hugs and Kisses. Sharon actually has quite a few free projects on her website.
I used my favorite natural white Omni thread from Superior Threads, and Winline’s 8020 cotton poly blend batting.
To soften up all the hard lines, I used Mod Dotz by Patricia Ritter from Urban Elementz to quilt it. I love how this design dances up and down across the quilt.
This quilt is perfect size for tummy time!

To make it even cozier, the backing is minky.
Thank you for stopping by for a quick look at Sandy’s baby quilt.
Do you have some quilts that you’d like to have quilted? I quilt edge to edge or custom. For more info on my pricing check out my Longarm Quilting Services page. Contact me to get added to my list. quiltingit@gmail.com
Thank you, happy sewing! Leisha
Linda’s Small World Quilt
Hi Friends,
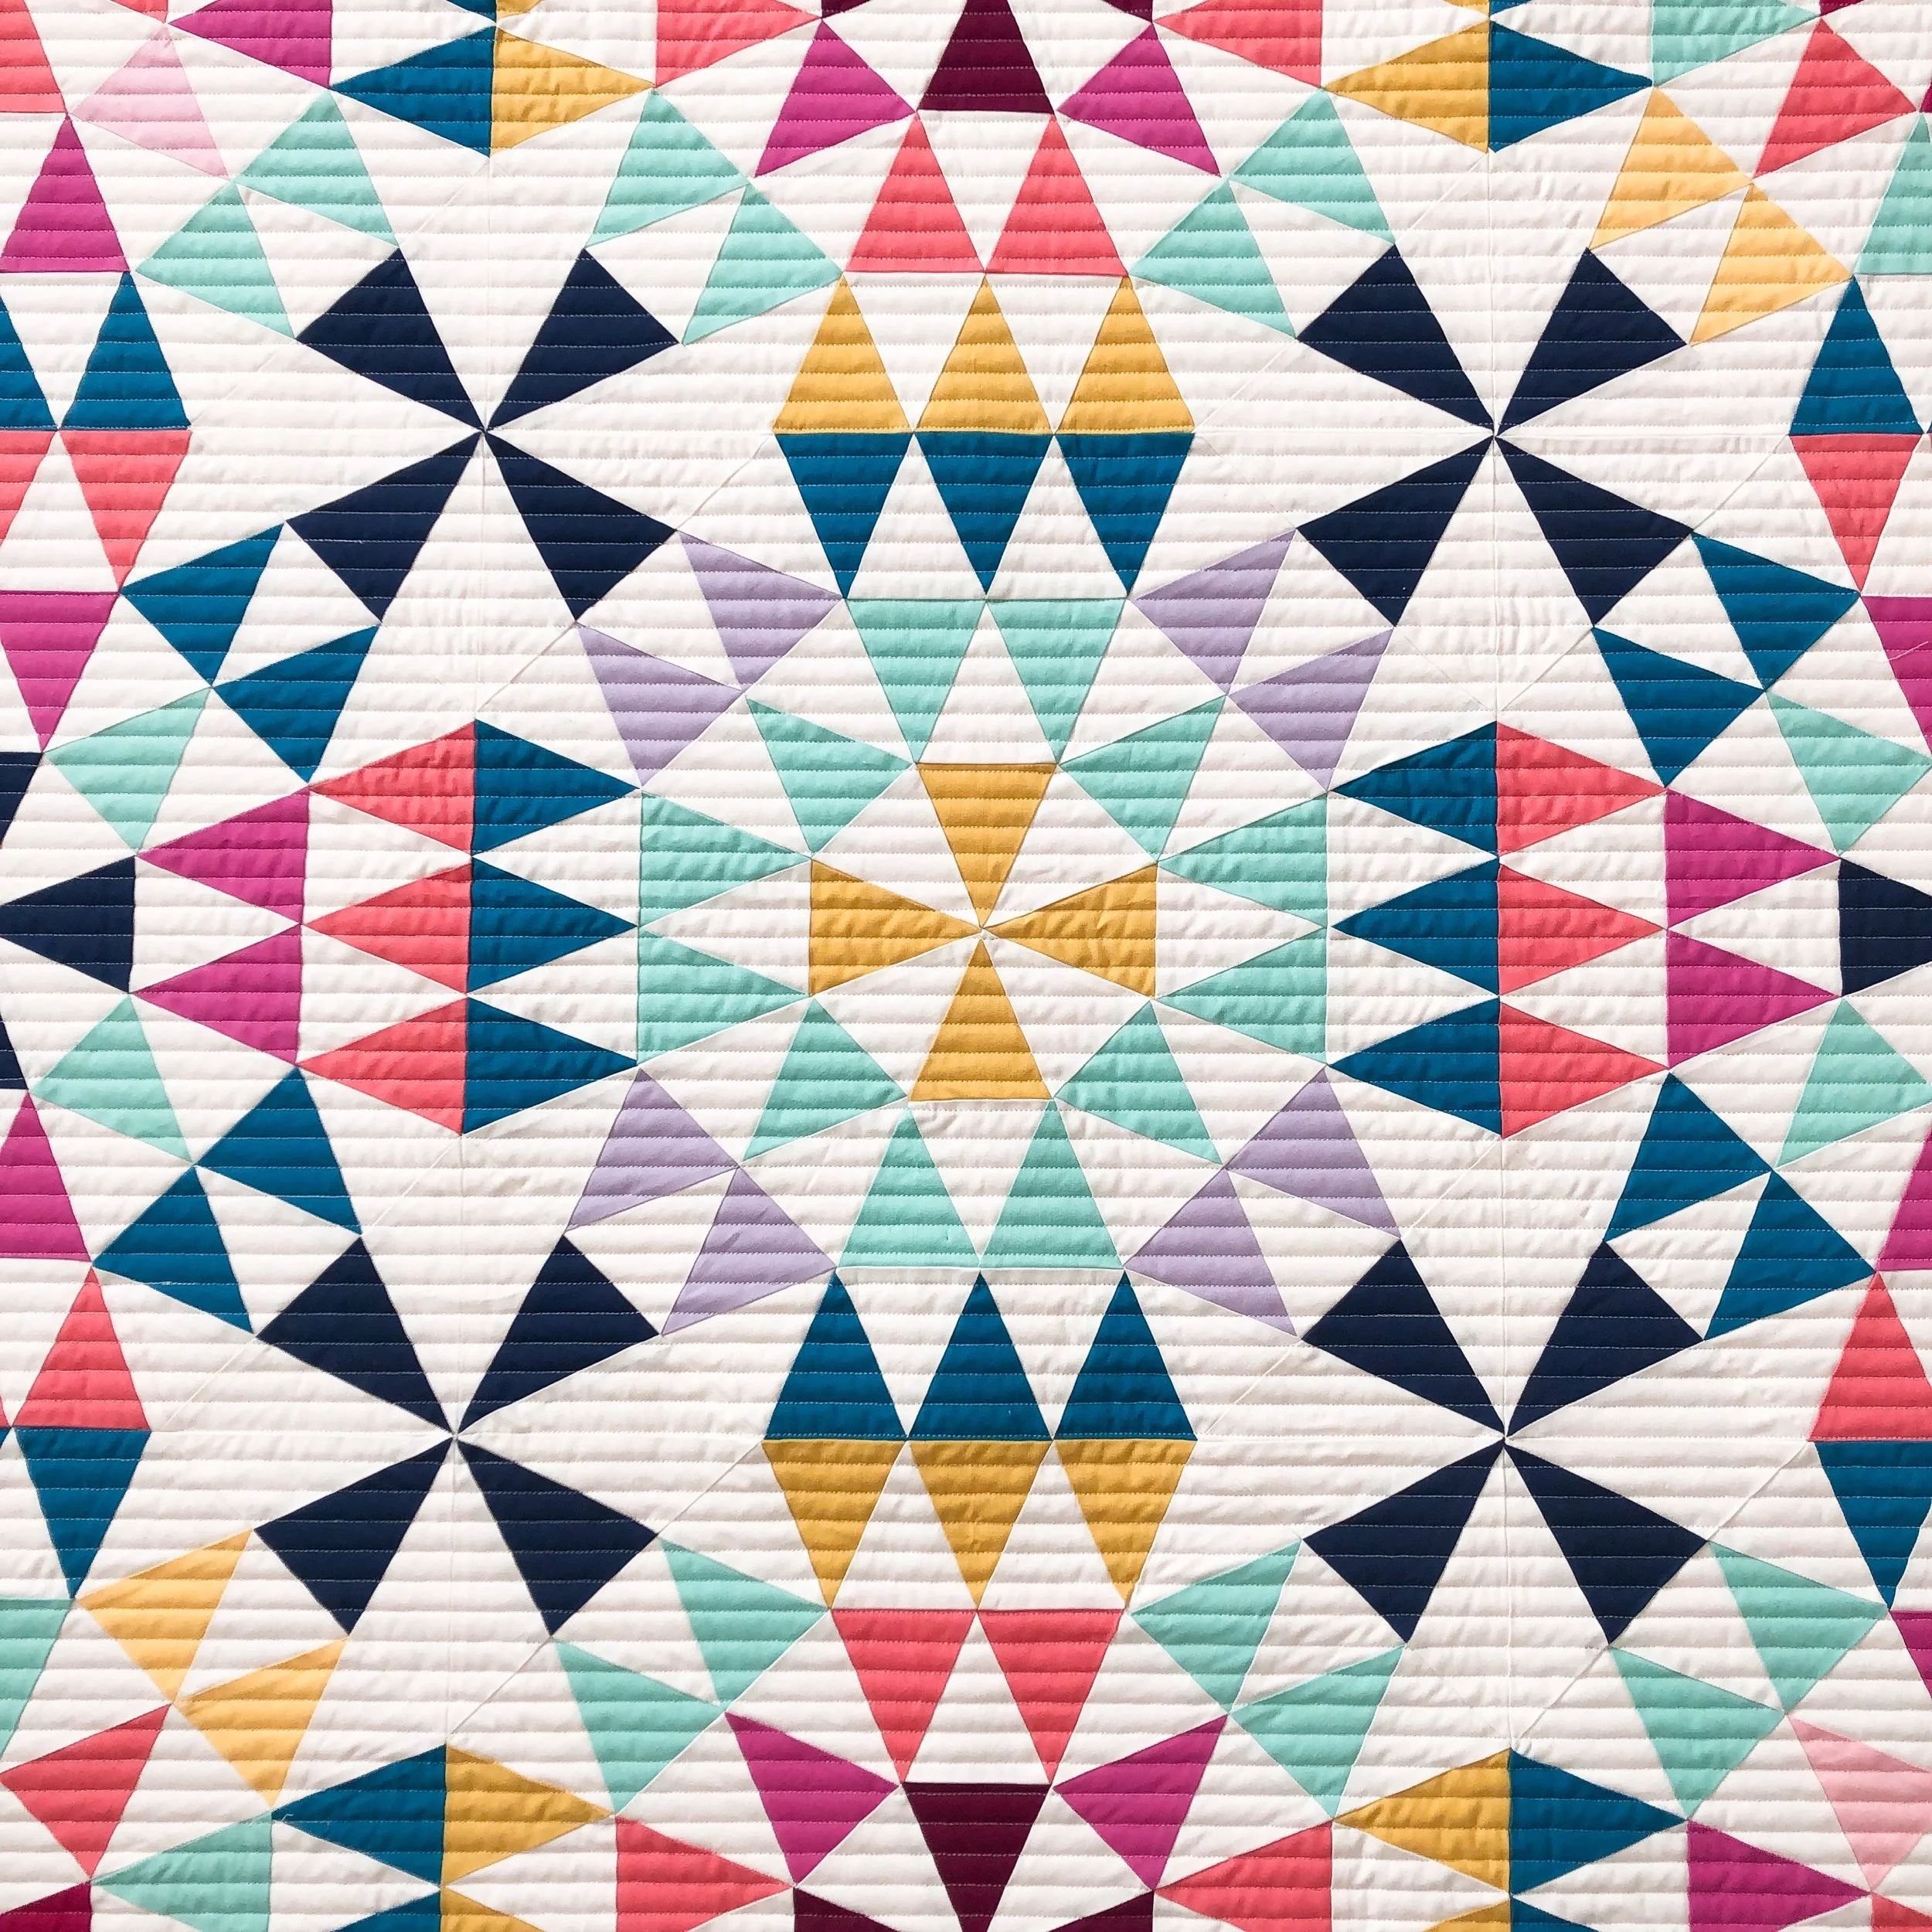
Check out this amazing Small World quilt that my client Linda made in one of Tara Faughnan’s classes. The pattern came in the class, I can’t find it anywhere else. Linda shipped her quilt to me from the east coast, did you know that I accept mail in quilts for longarm quilting? I do!

Seriously fabulous quilt!!! All her points and the beautiful Bella Solids that she used. So so beautiful!
Linda wanted matchstick quilting at 1/2” apart, so I used my Lined 1/2” design to quilt it. Yes, it quilts back and forth. If you’re a longarm quilter and you struggle with quilting lines like these back and forth, turn your needle a little further to the right. It helps there be minimal breaks for me. For those who don’t quilt, a longarm struggles quilting from right to left without having lots of thread breaks. To help with that I turn my needle to about 5:30, if not a touch more, and it doesn’t the trick. Sometimes different threads can help. It just happens. It’s worth the extra effort when this is the result. I have my Lined design available in 1/4”, 3/4”, 1” and a bundle of all four, as well. They are available in my shop.

I used my favorite go to white thread from Superior Threads, Natural White Omni. I also used a lovely 4 oz bamboo batting from Winline Textiles out of Ogden Utah. I also carry a 6 oz bamboo batting, which I loved putting in my Perfect Picnic Quilt recently.

I think lines are perfect for a quilt like this!! It’s fresh and modern. Love it!!

Can we just pause and look and all of those beautiful points?! Linda added a border to it as well.
Close up on the quilty texture.

And finishing off with a quilt swirl.

Not every quilt needs complex quilting, simple can be pretty perfect, too. Thanks for stopping by, and happy quilting! - leisha
PS…I’d love to quilt for you. Contact me or email me at quiltingit@gmail.com • I look forward to quilting for you!
Ice Dyeing Fabric
Have you ever Ice Dyed before? I haven’t until recently. My good friend Christy has done it several times, and she agreed to have Gale, Holly, and I over for an Ice Dyeing party! Lucky us!
I love these ladies!! They along with Molly, are in my local longarm quilting accountability group. It’s been great to spend time with them and talk about longarm quilting in our local community. We missed Molly this time, she was out of town.
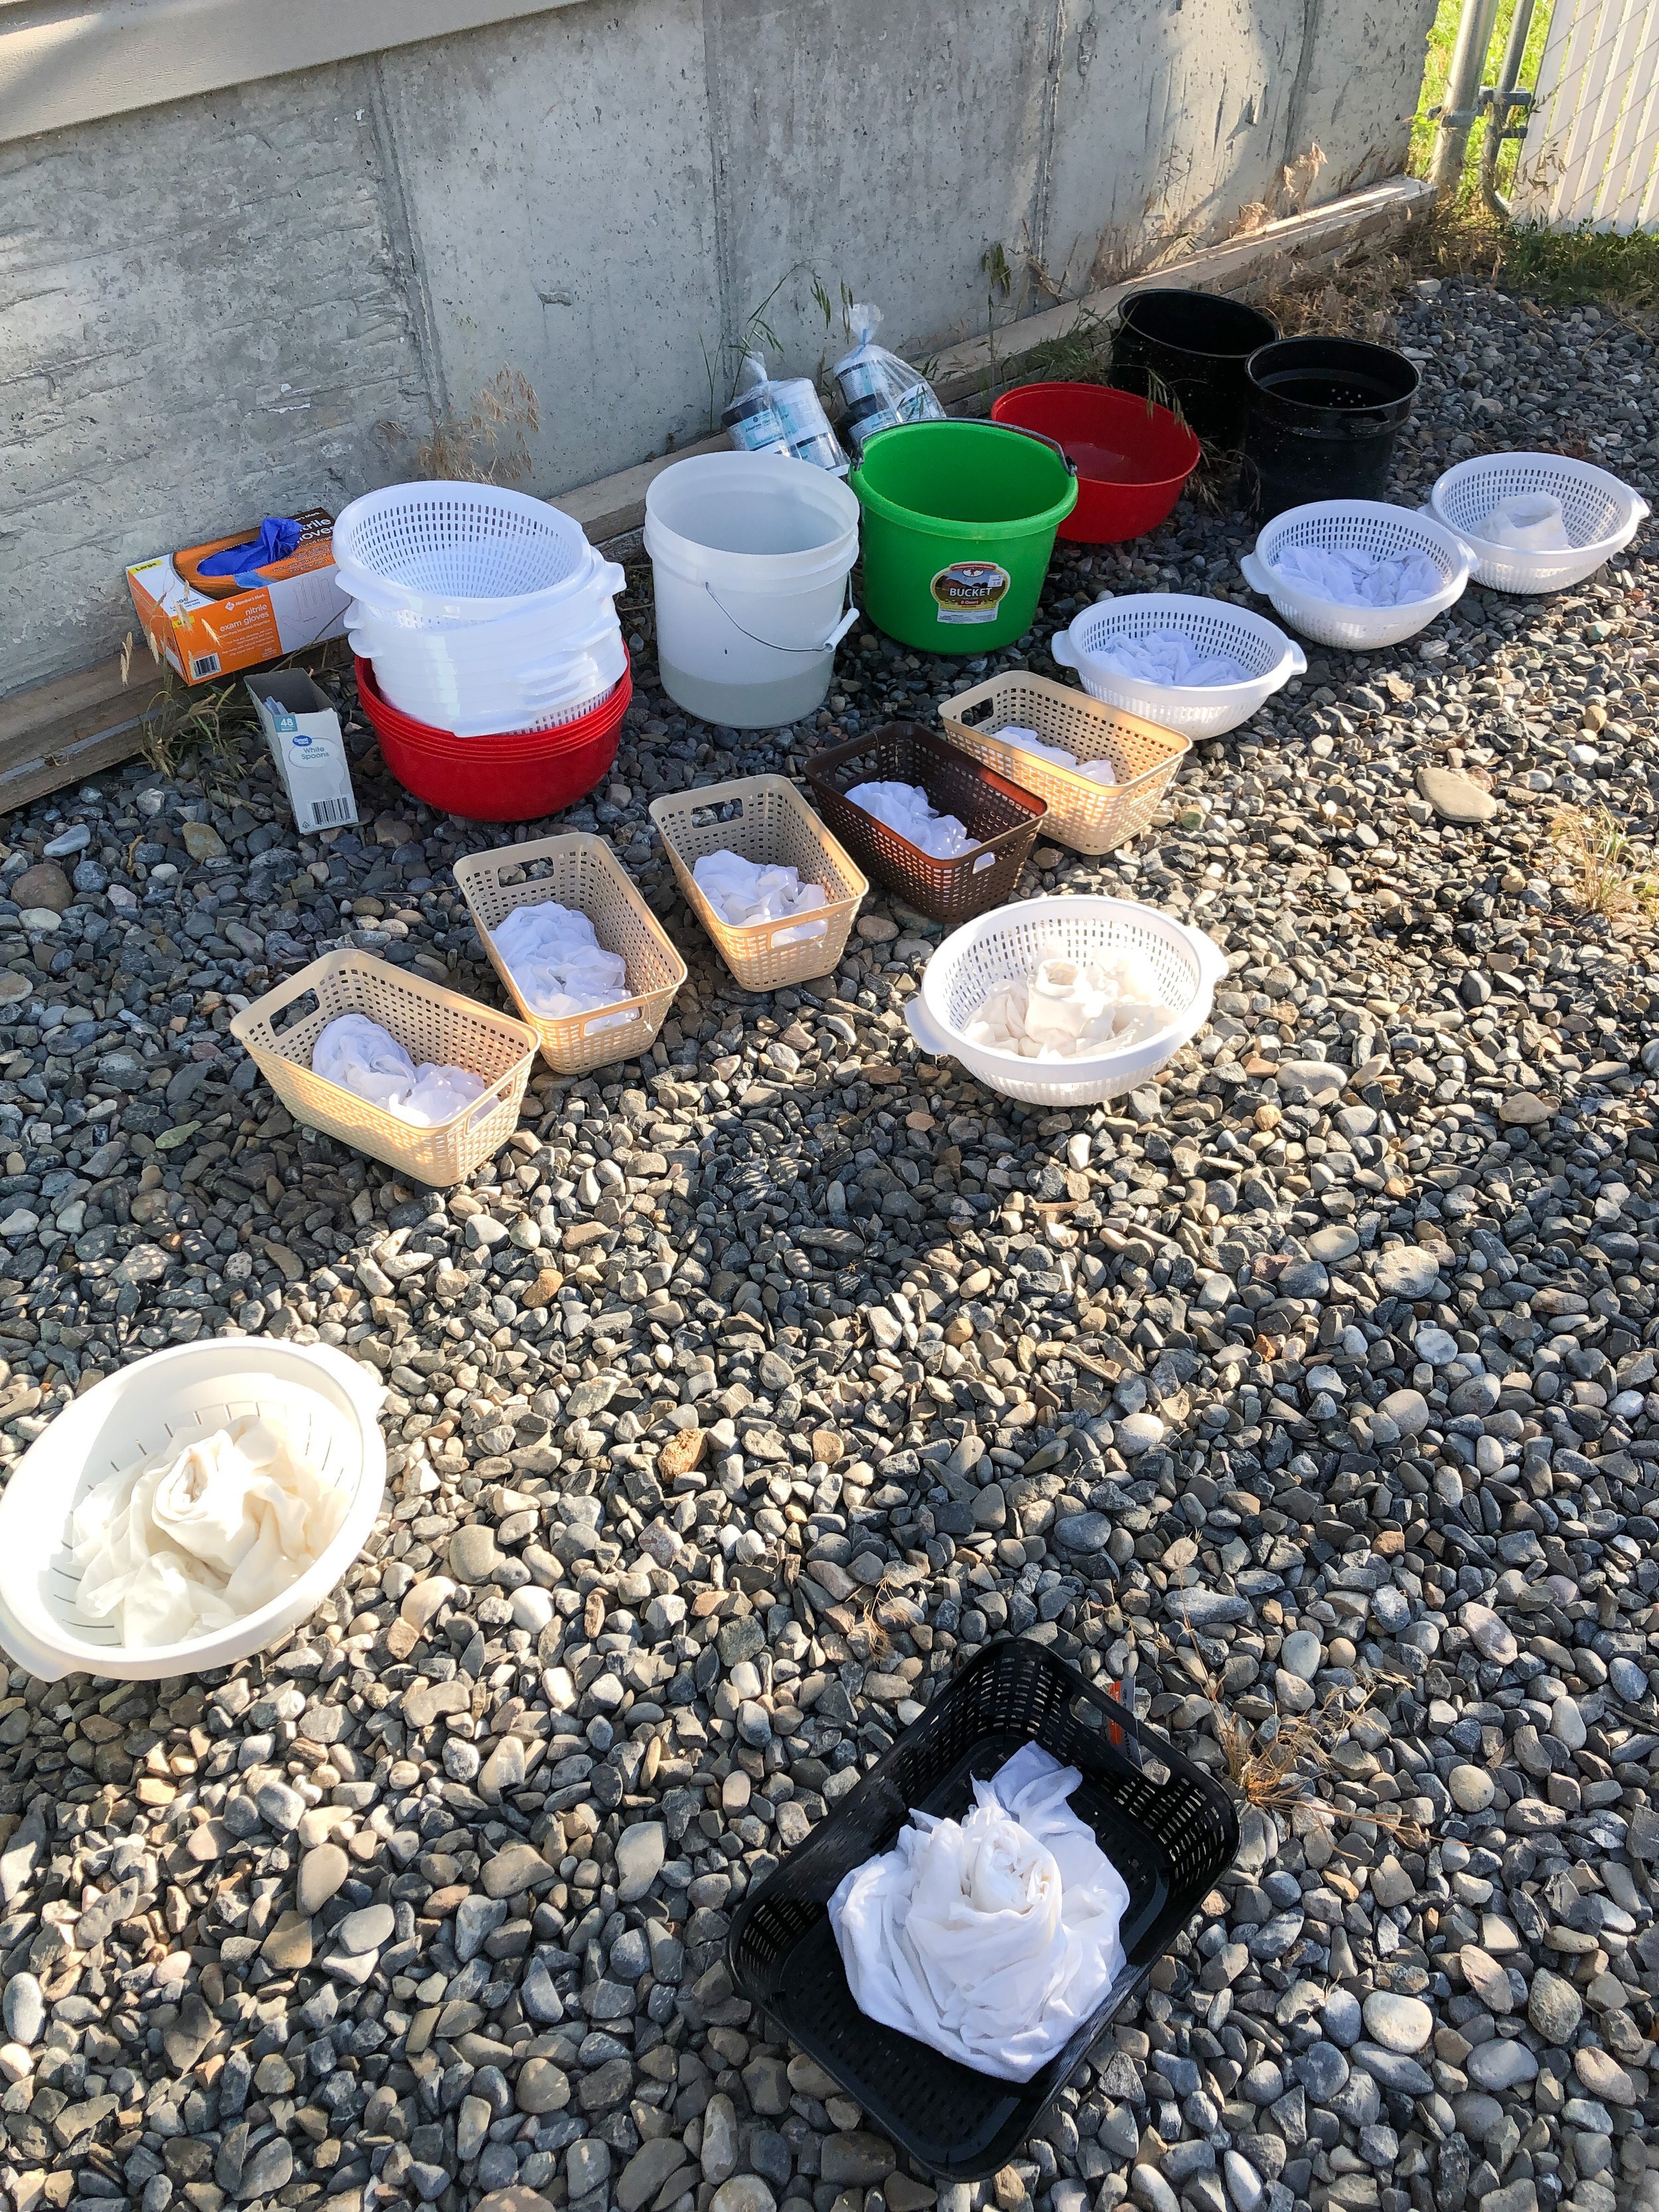
Christy told us to bring a 45” cut of PFD fabric, which means Prepared For Dyeing or a 100% cotton t-shirt. Our local quilt shop was out of the fabric, so Gale brought me a piece. She’s a gem! Christy also asked us to bring a strainer or container with holes in it, for the water to drain out when the ice melts. I found the black rectangular container at the dollar store. We also each brought a bag of ice. Christy had the dyes, soda ash, and synthrapol on hand.
When we got there Christy had a bucket with Soda Ash in it to soak our fabric in for 15 minutes. She used one cup of Soda Ash to a gallon of water. Note: don’t throw out your Soda Ash/water mixture. You can use it again. I’ve never used or even heard of Soda Ash, but apparently it’s a great thing to use when you wash dark clothes for the first time. Holly said she washed her son’s black baseball pants in soda ash when he first got them, and they maintained their color throughout the season. Awesome stuff!!
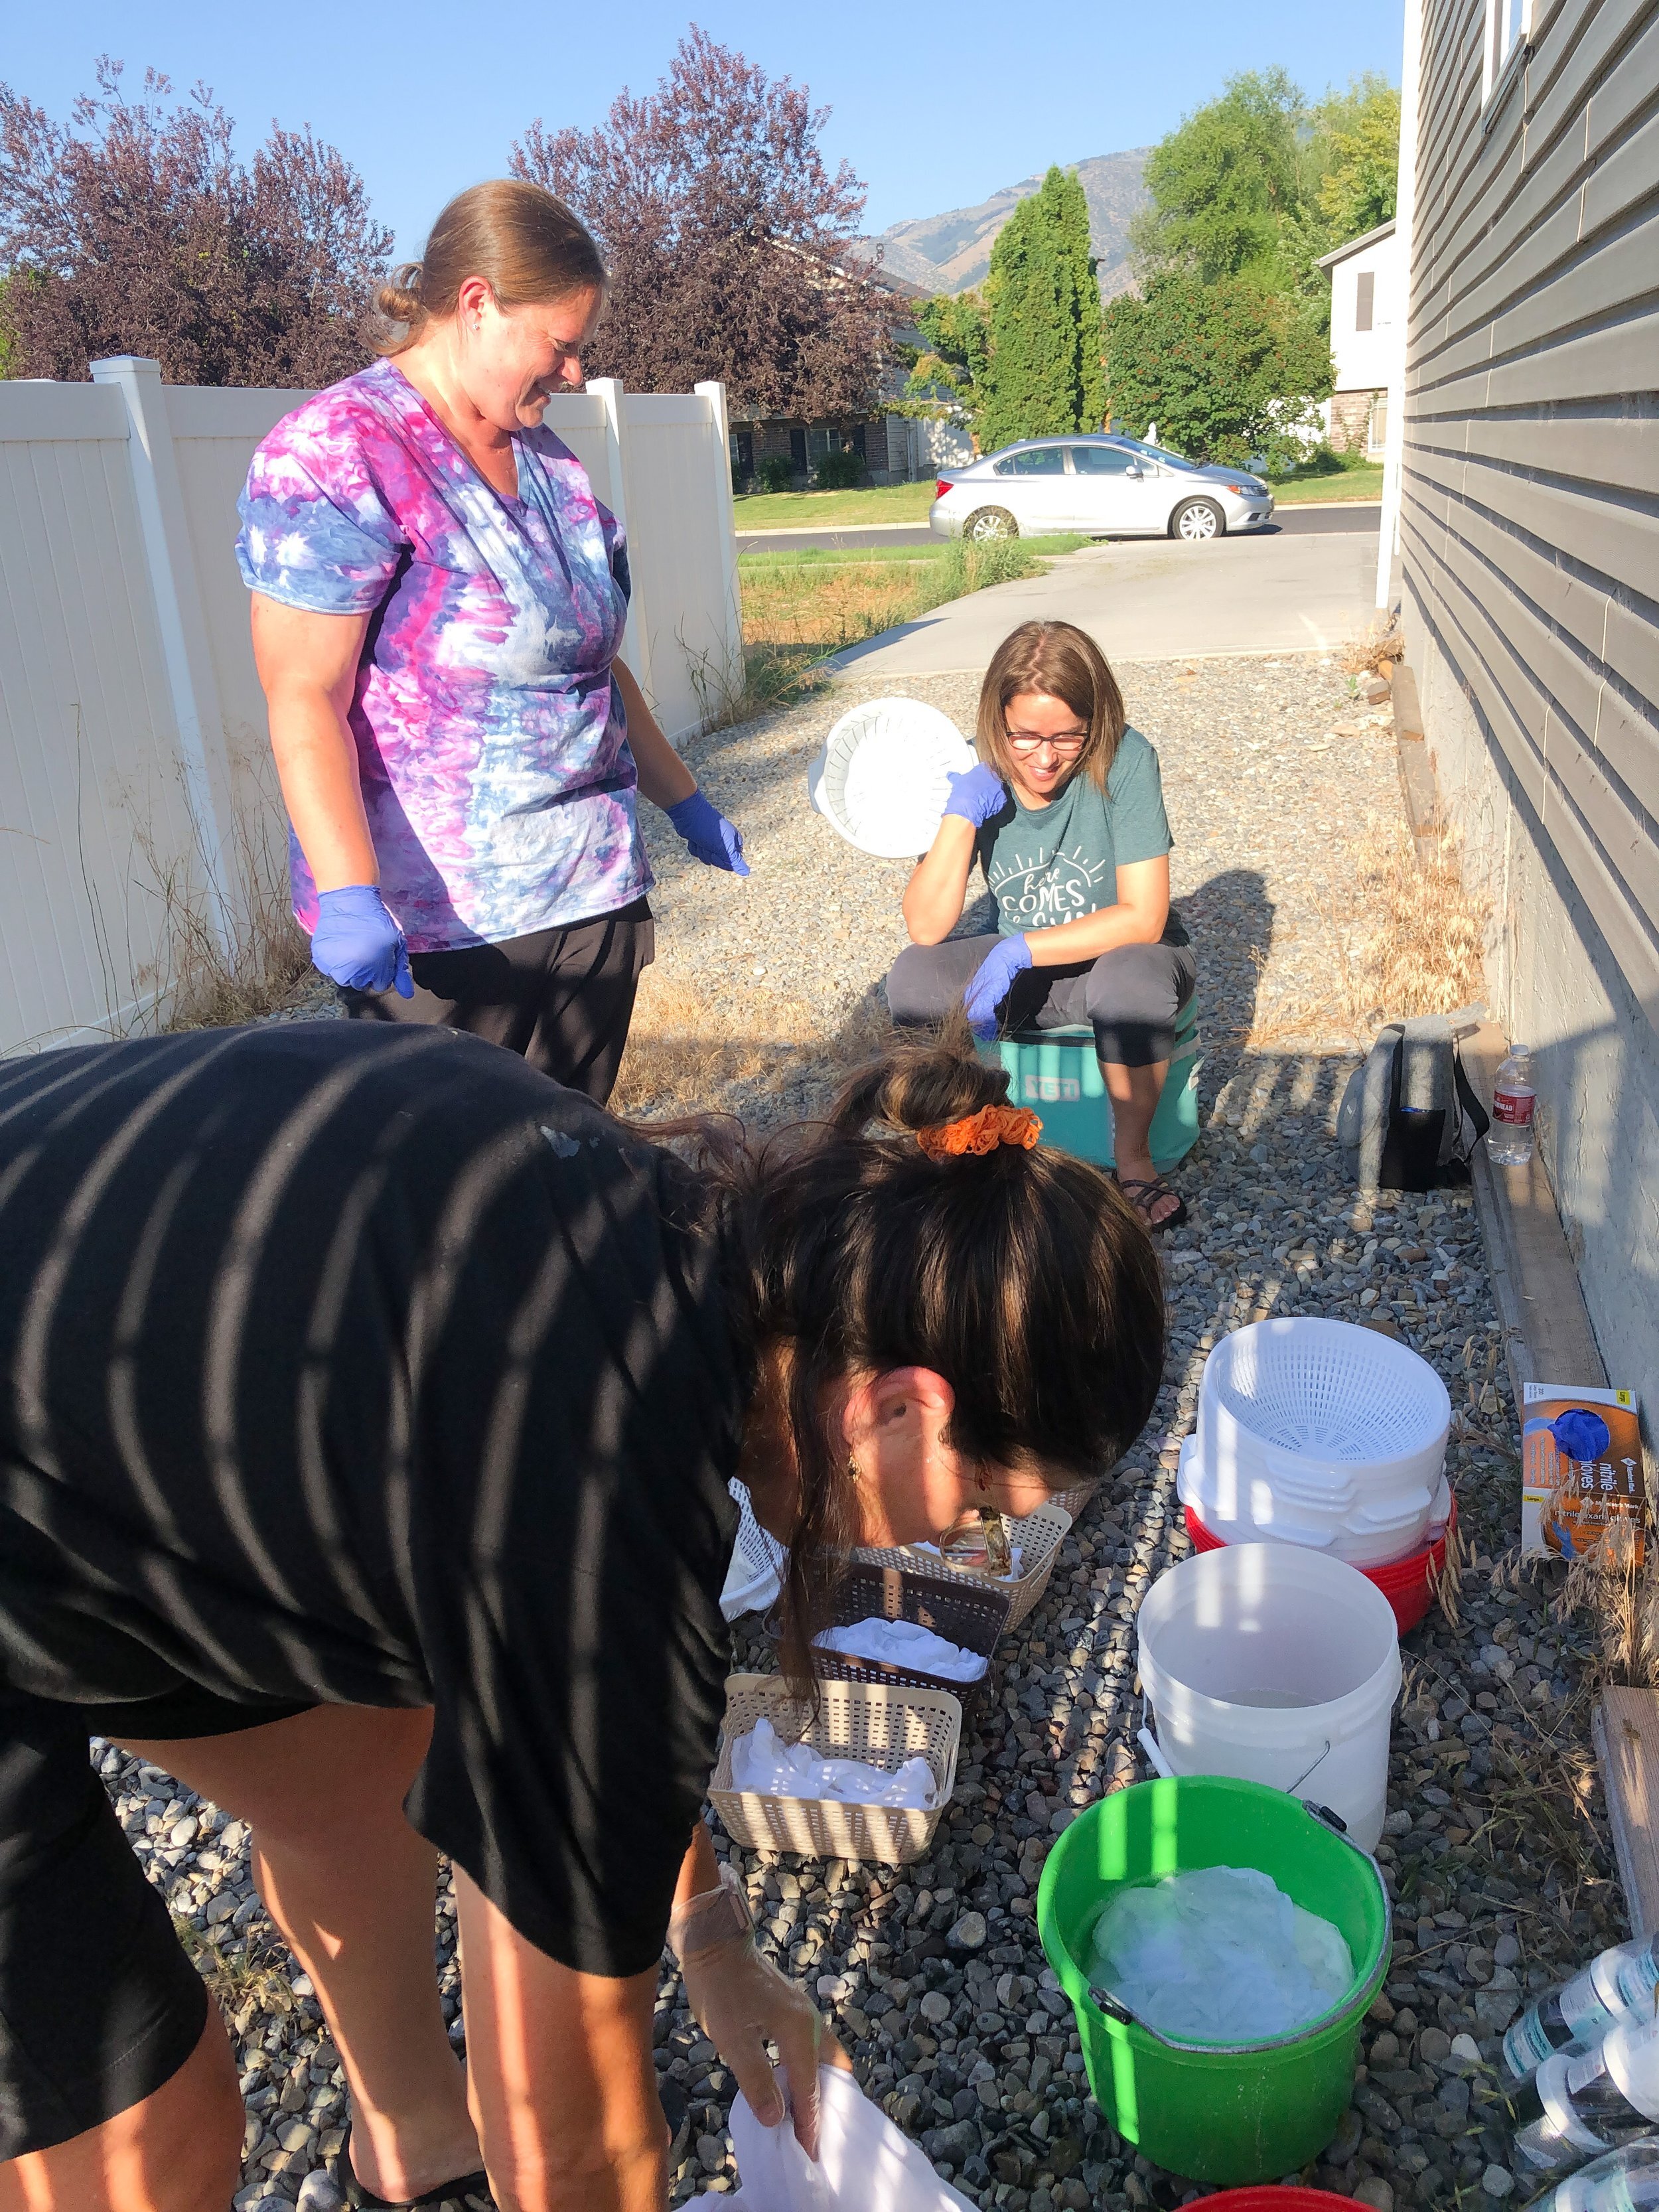
This is Gale, Christy, and Holly…putting their fabric and shirts in the containers getting ready for the ice.
After soaking the fabric in Soda Ash, we folded up the fabric in half and then half again so it is square. Then we folded it on a diagonal, similar to the shape of a paper airplane before you open it back up. Then we loosely rolled it from the point to the edge, which is like rolling a croissant. Then as you can see in the picture below we opened up the end a little and laid it in our containers. Christy helped me with mine. The fabrics or shirts need to be looser than you think, so they can accept the dye. For other ways to fold the fabric or shirts, google it or experiment.
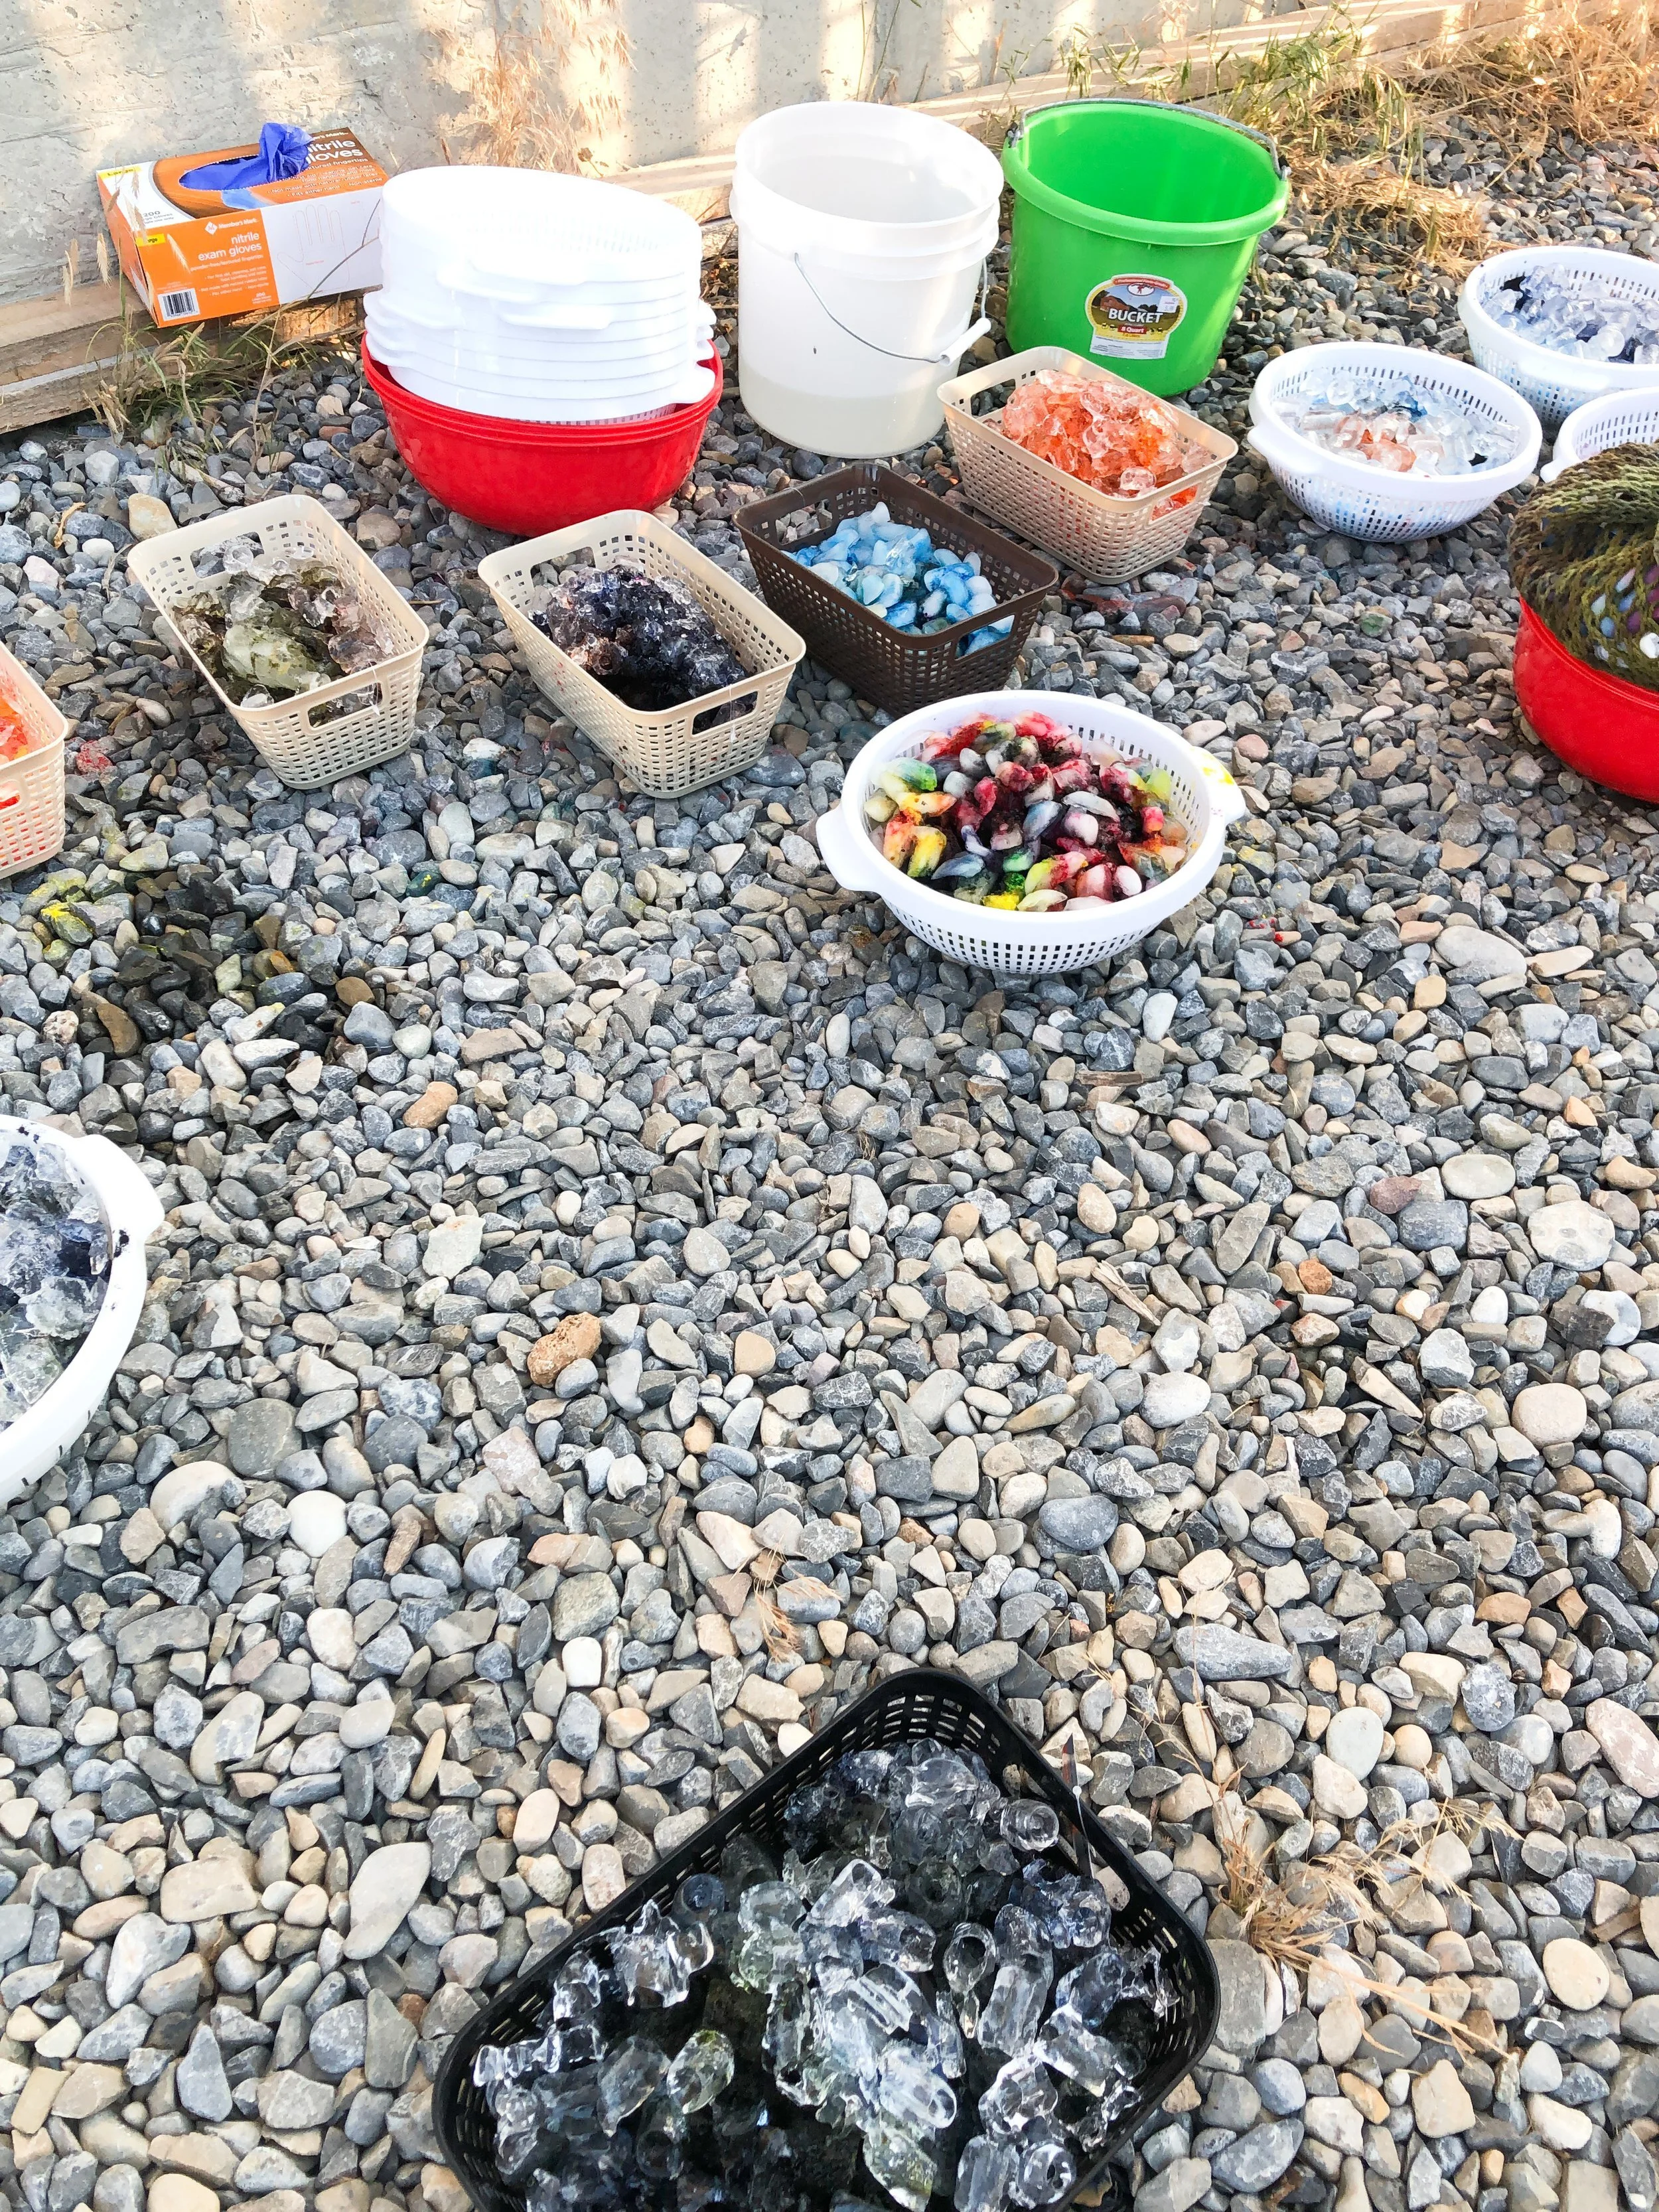
The next step is to completely cover it in ice, as you can see my container below. Yes, before dyeing you put the ice on.
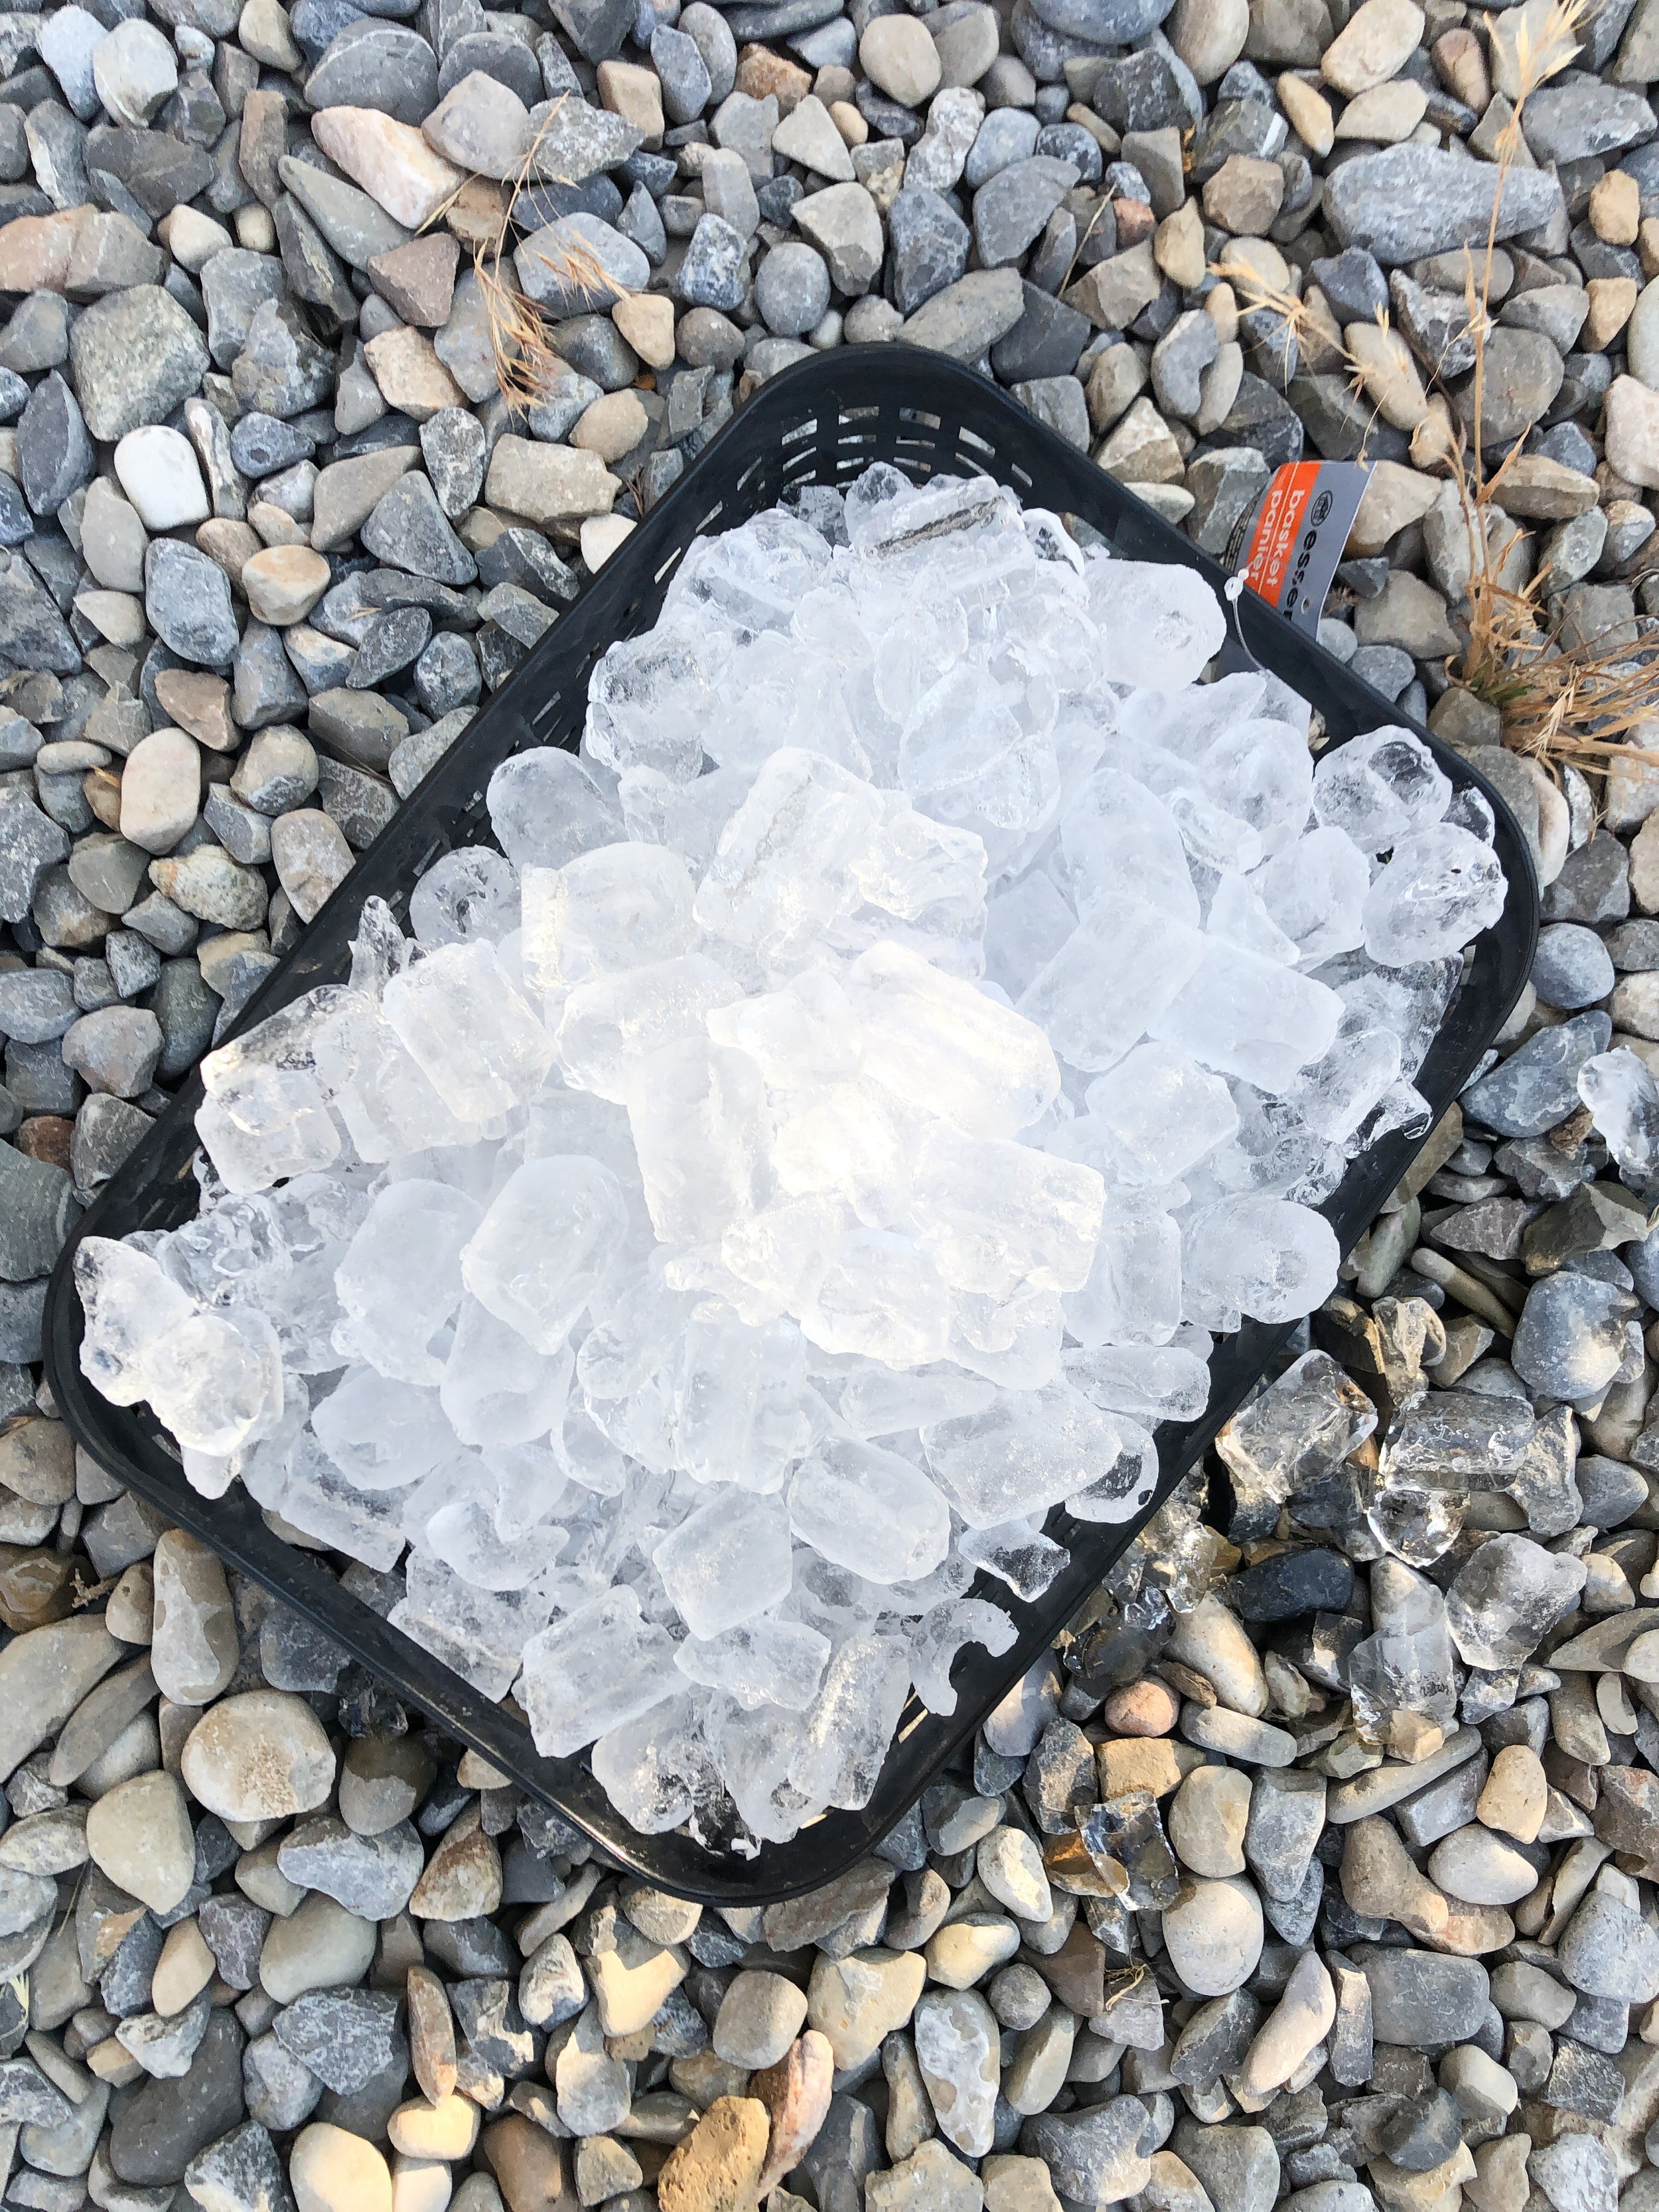
All iced and ready to go!

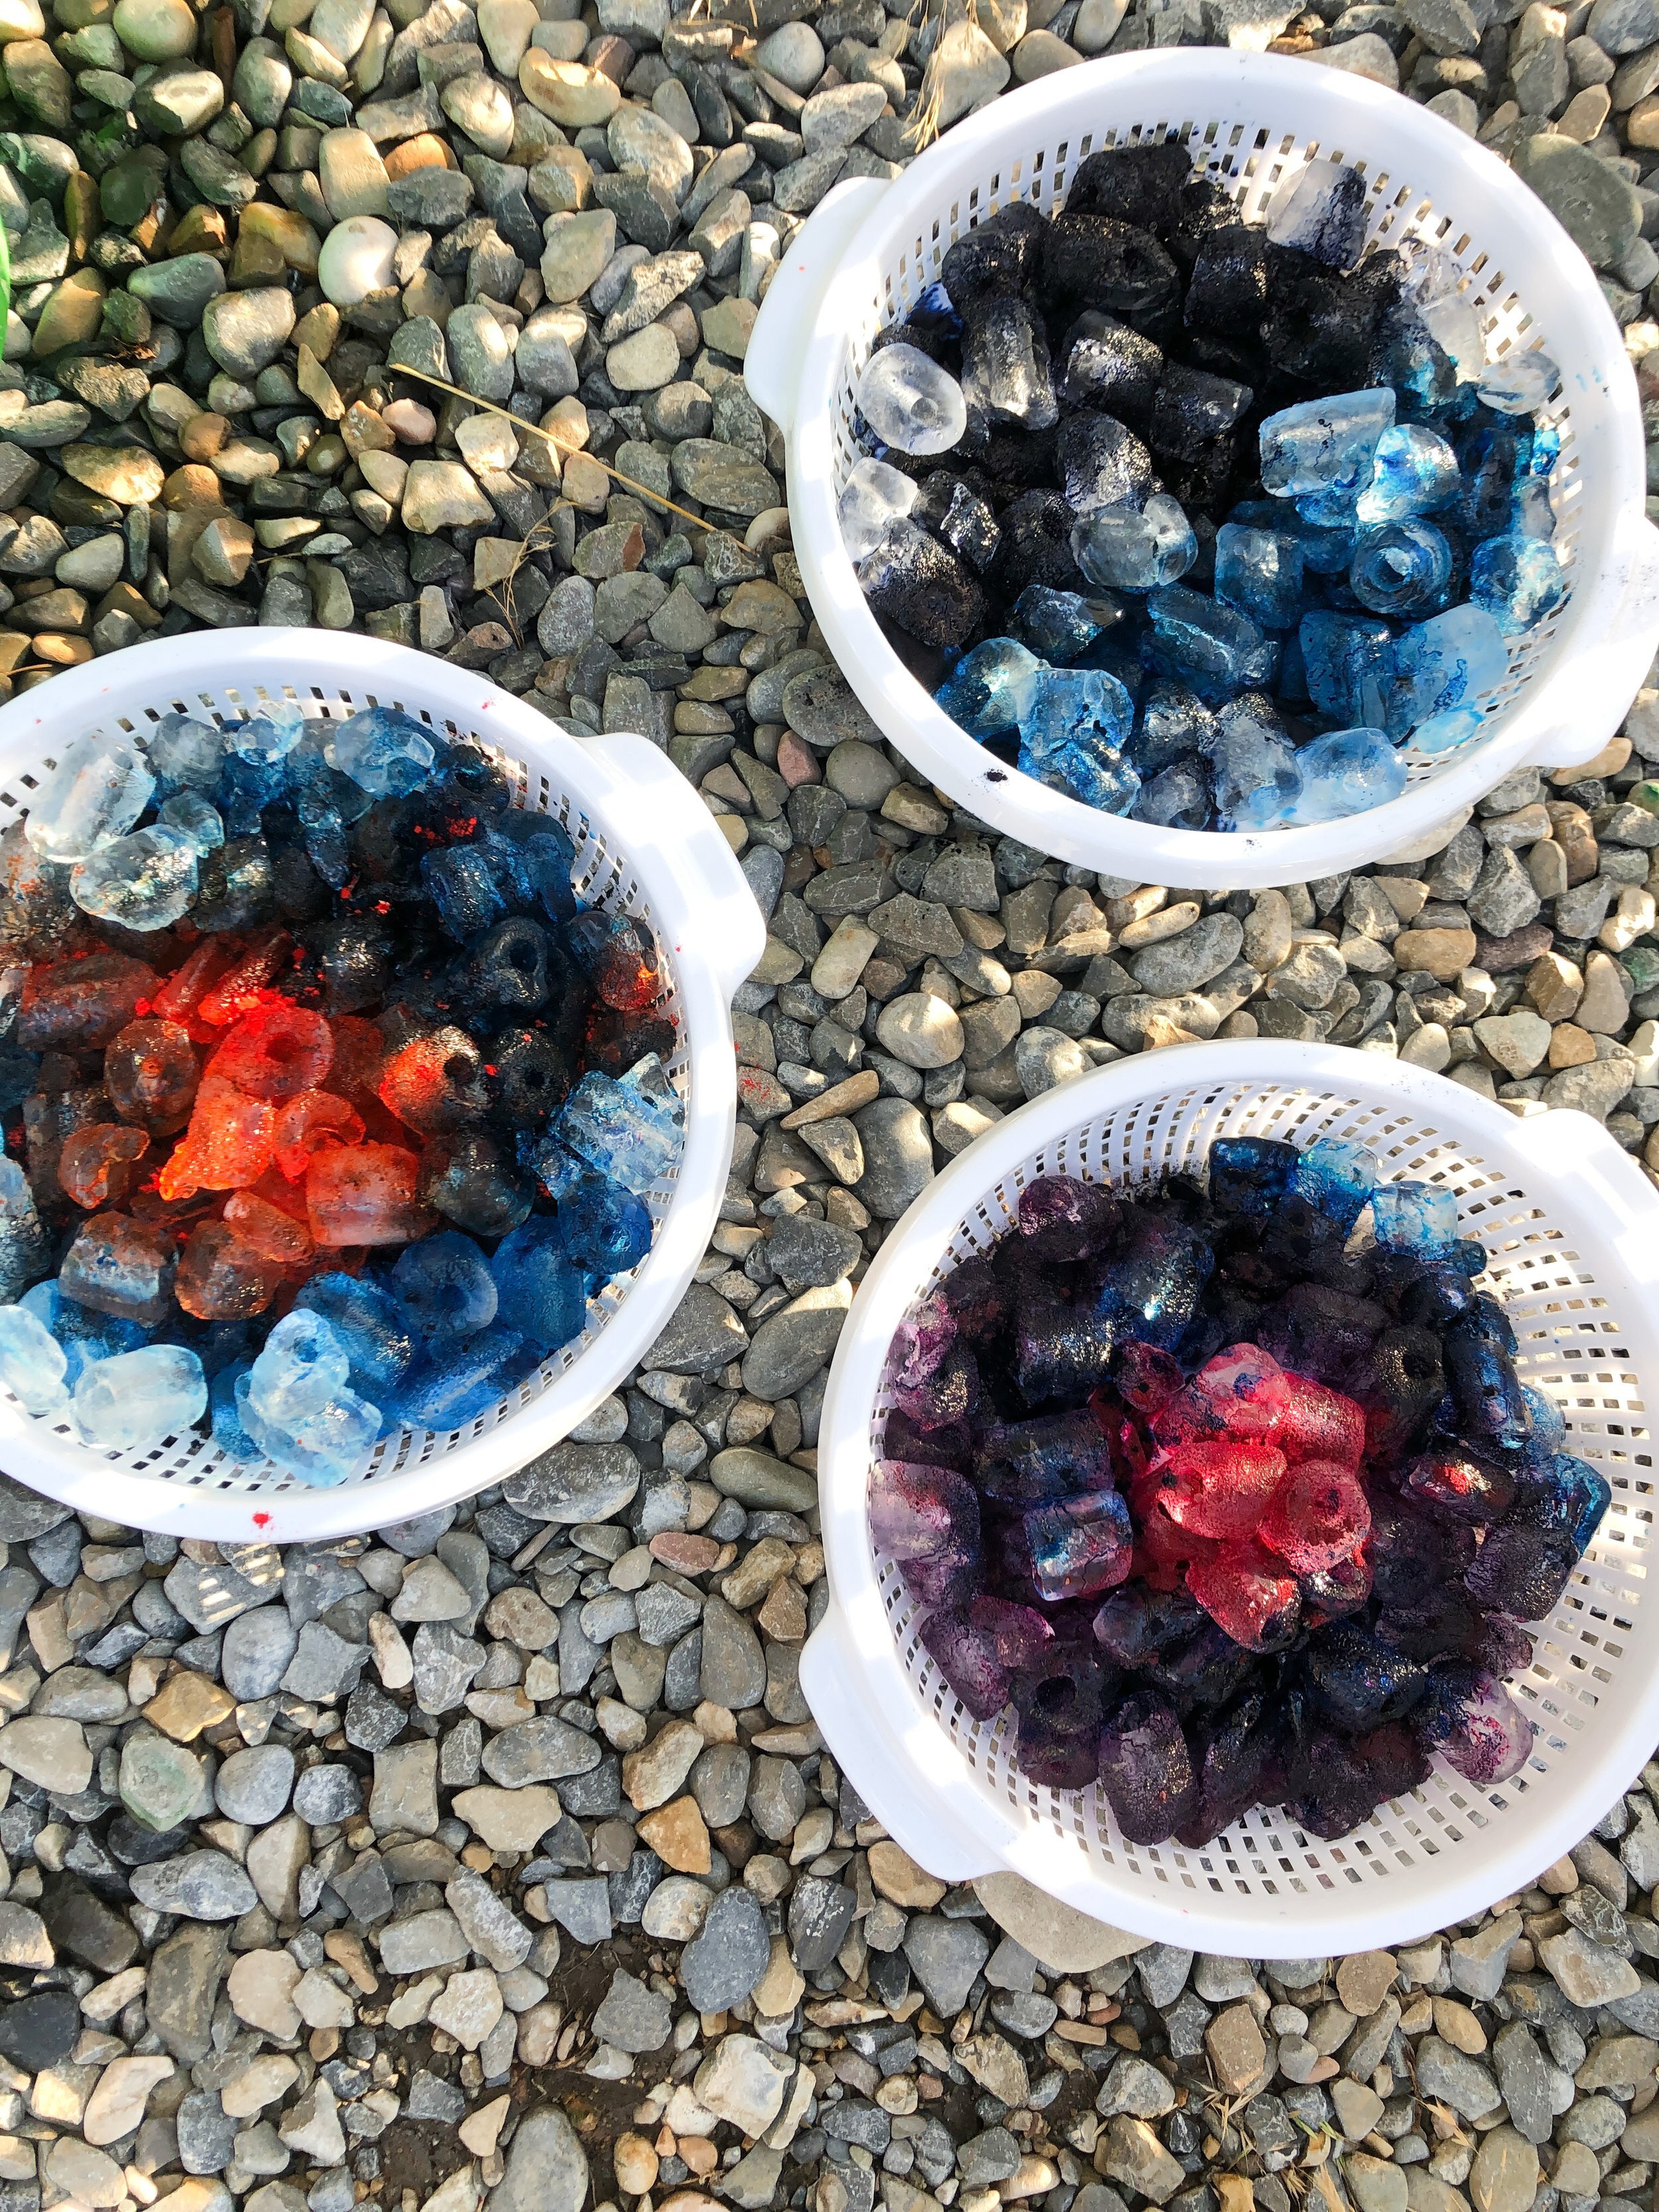
These are the powdered dye that Christy loves to use, a little goes a long ways.

The colors are so beautiful! We used plastic spoons and made sure to wear gloves.

Here is Gale doing one of her shirts or her fabric.

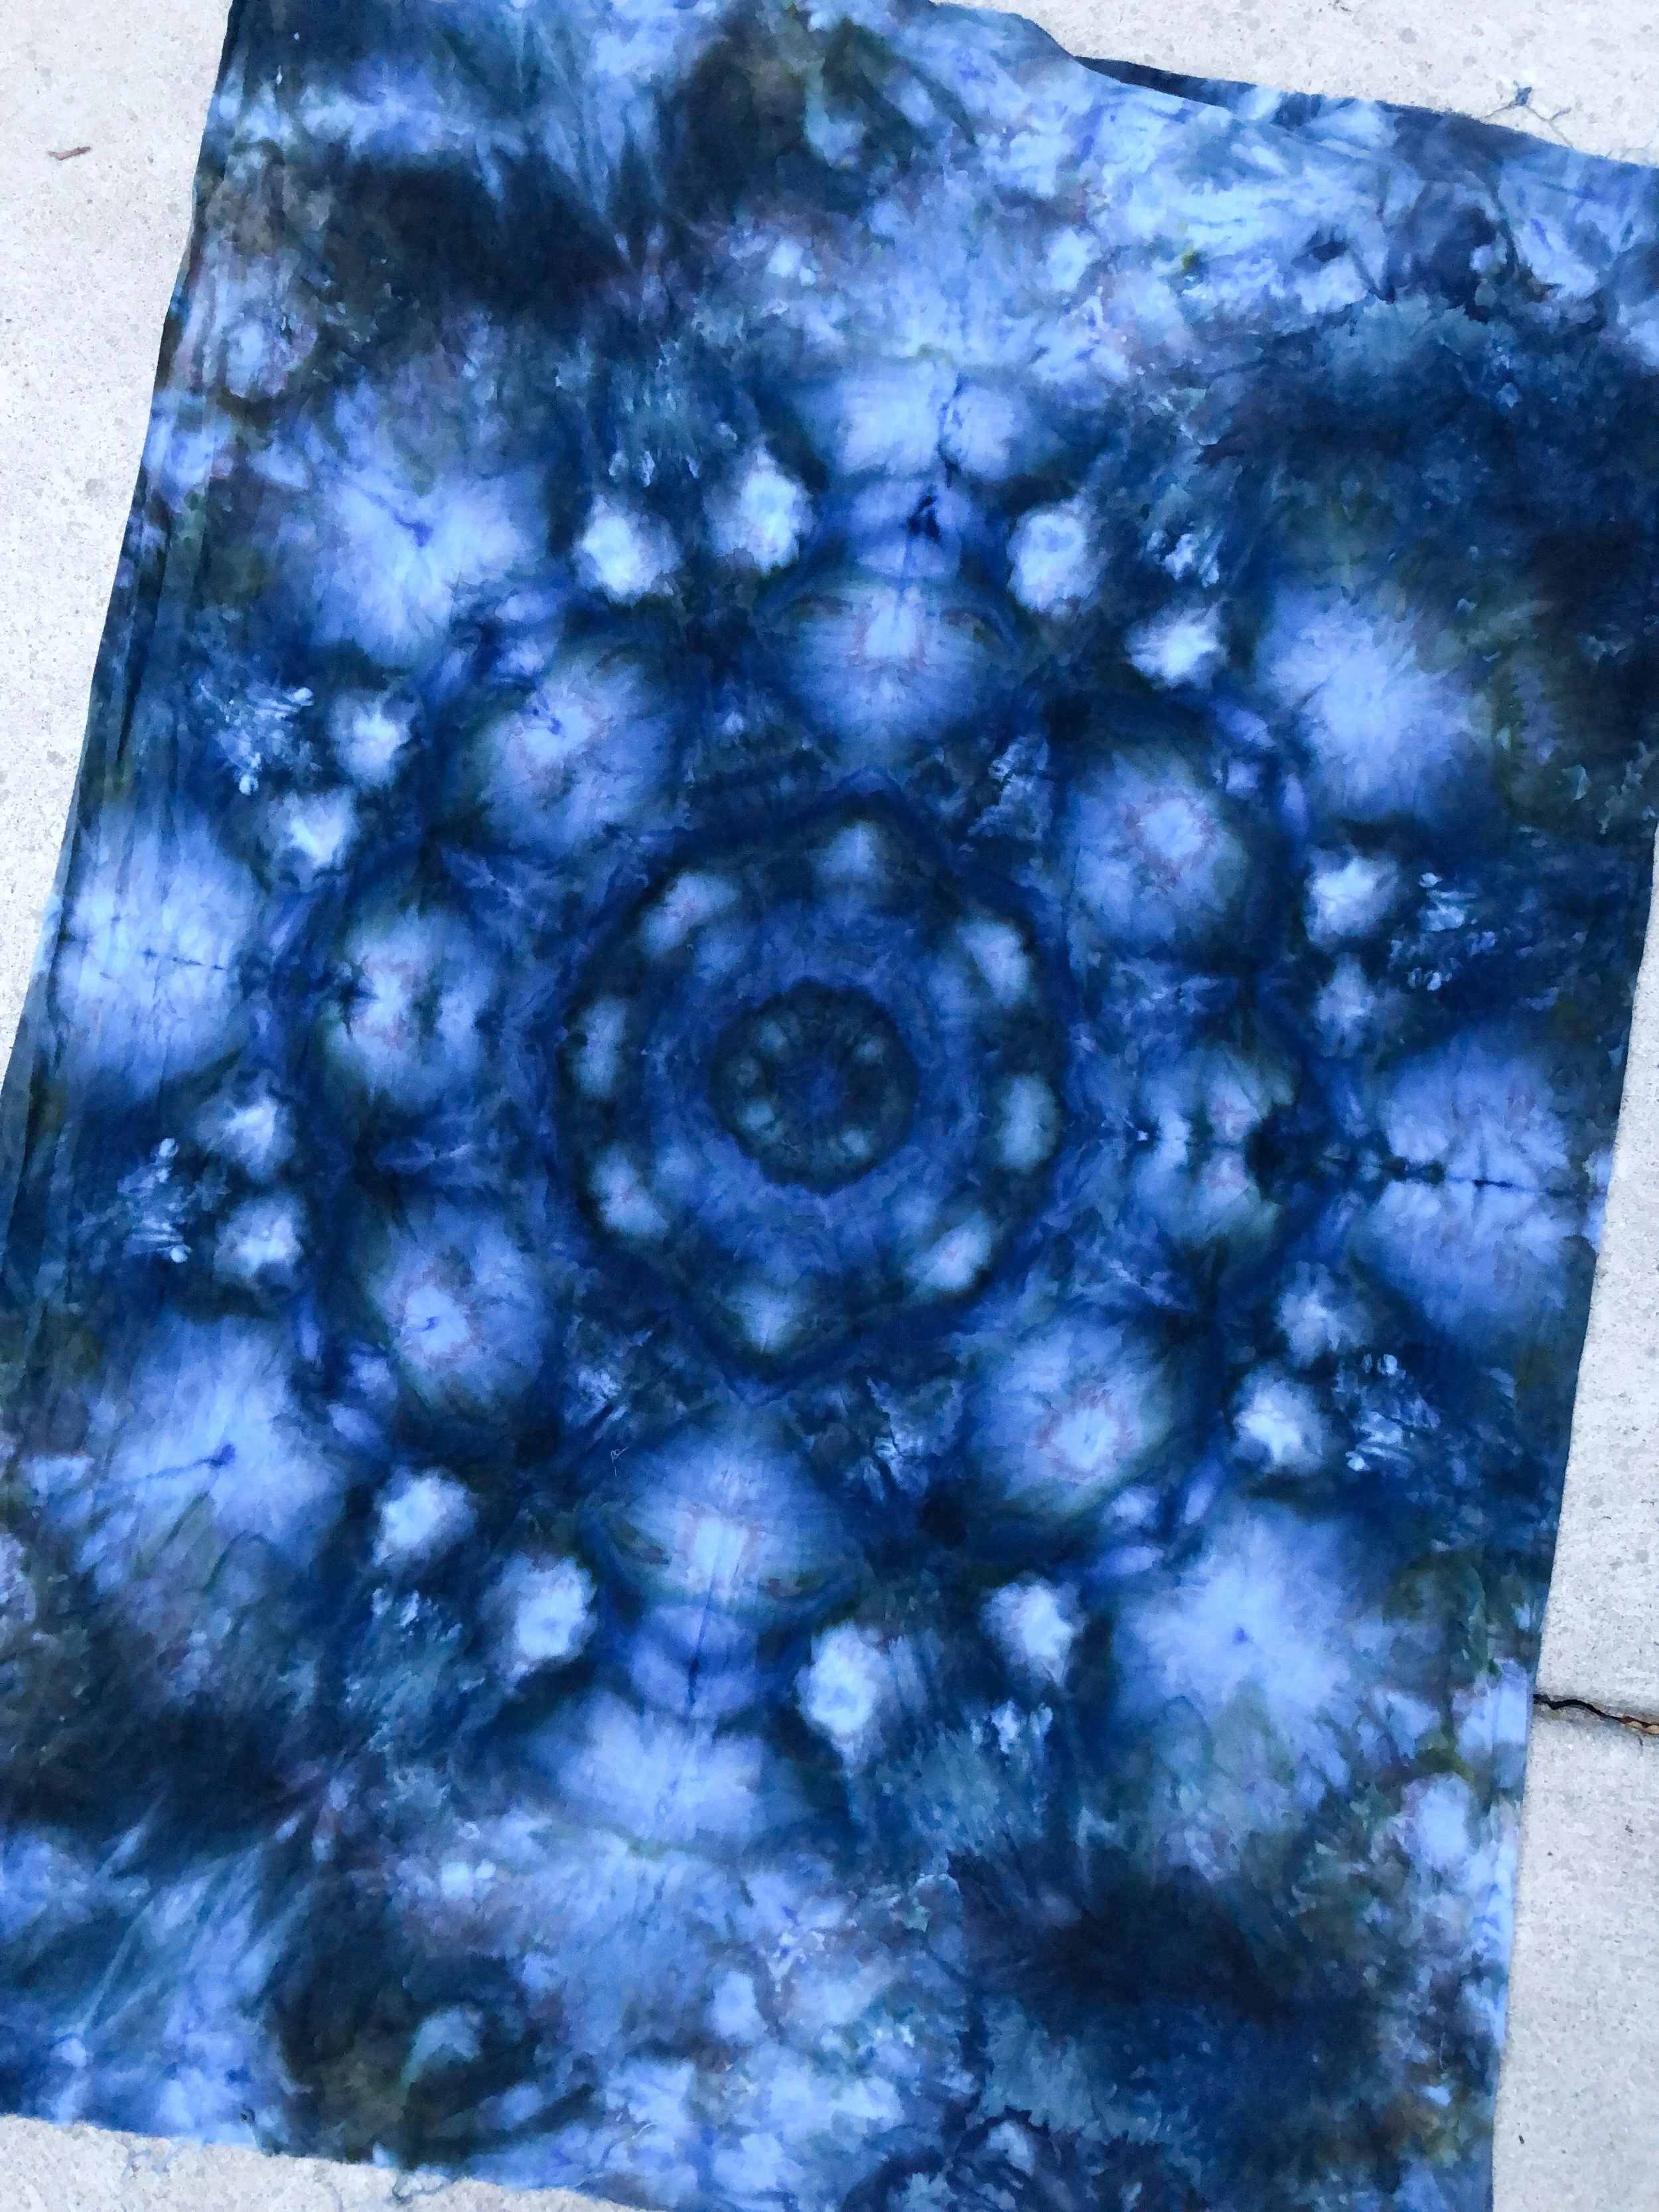
Below is my container. I put an olive green and navy color on mine. I should have gone lighter on the navy, to see more of the green.

Here are a few of Gale’s.
Then it’s time to wait…and wait. We actually visited for an hour or so after we were done and then took them home with us. I put my container in two garbage bags and then used a red bowl underneath the bags to get mine home without getting dye in my car. I’m glad I had the bowl. The garbage bags ended up ripping. Christy had a perfect spot on the side of her house to do this. Be mindful of where you let your container sit to melt and dry. You don’t want animals or kids to get to it, and you don’t want it on cement. When I brought mine home, I put it on the grass to let the ice continue to melt. I also covered the top with a plastic bag to keep out any animals. We let them sit for 24 hours before rinsing. If you’d like to add more ice after the first ice has melted you can, it can help distribute the dyes even more.
I didn’t get a picture of it when the ice completely melted, sorry!! Next up, put gloves back on and now it’s time to rinse out the dye until you don’t see any more dye. Laid mine out on the grass and rinsed it with the hose, trying not to splatter and get it on me. Christy has a utility sink in her laundry room that she rinses hers out in, and she showed us that the dyes don’t stain her sink. It’s up to you.
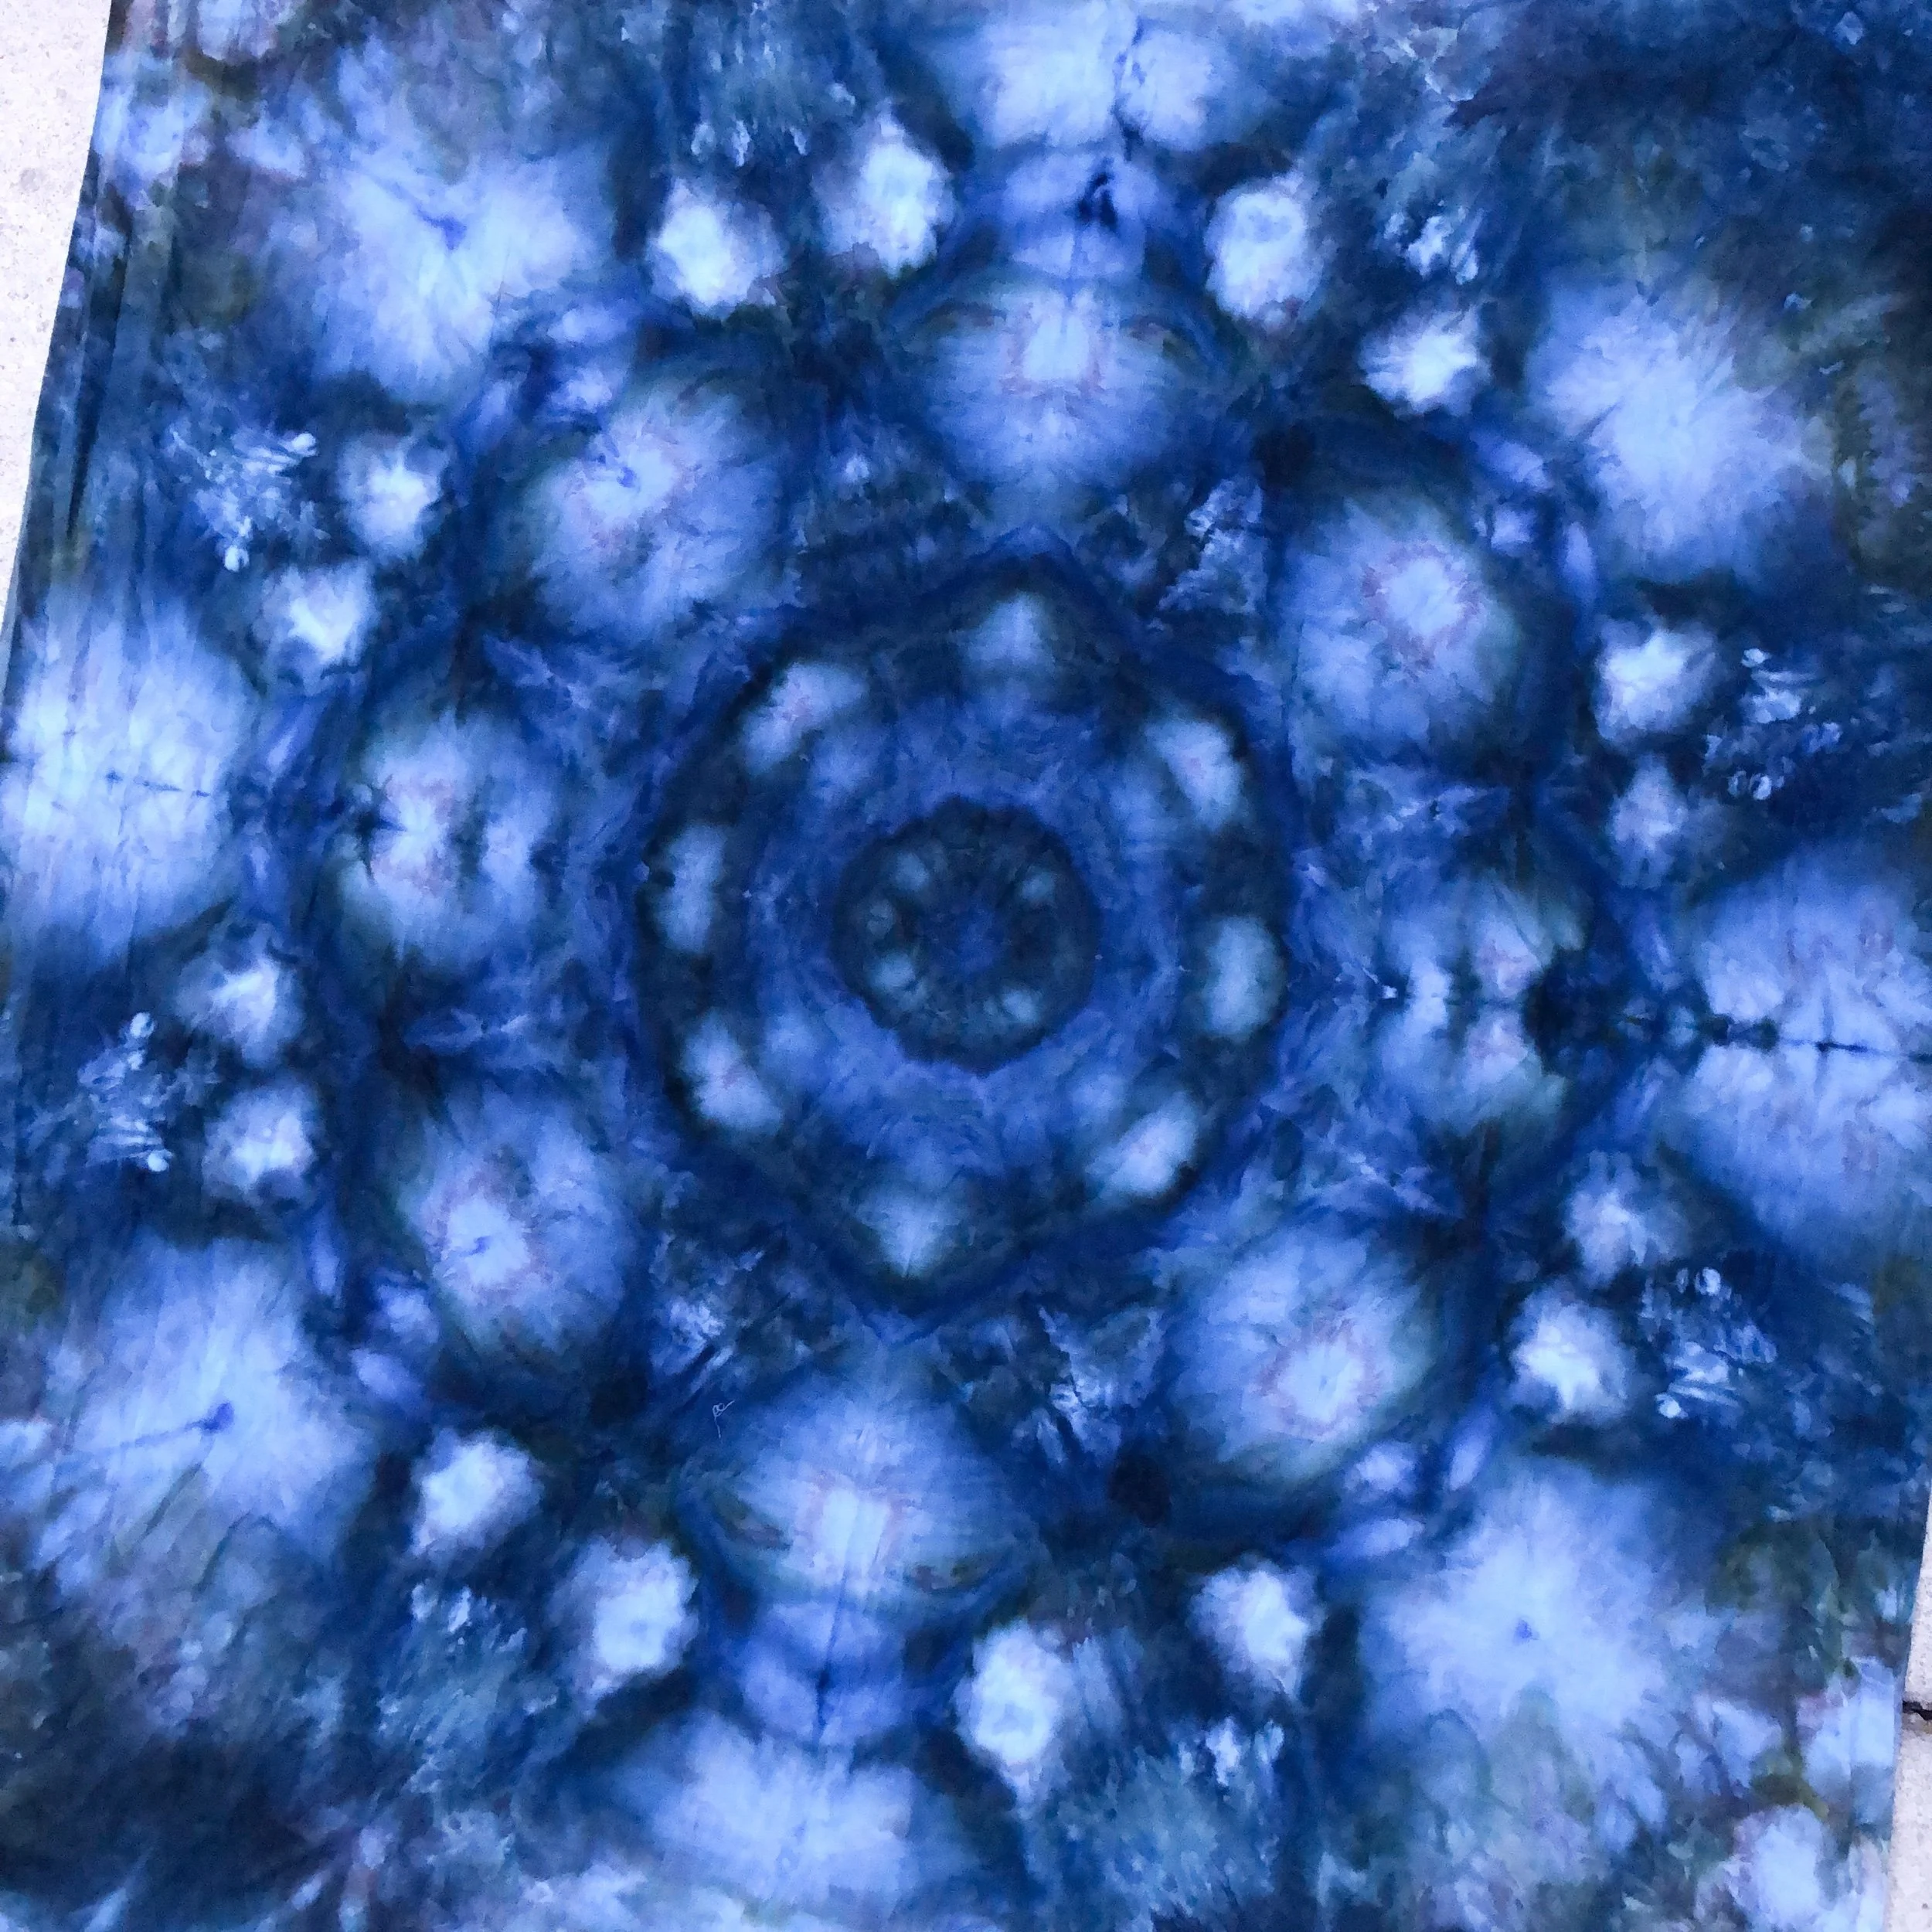
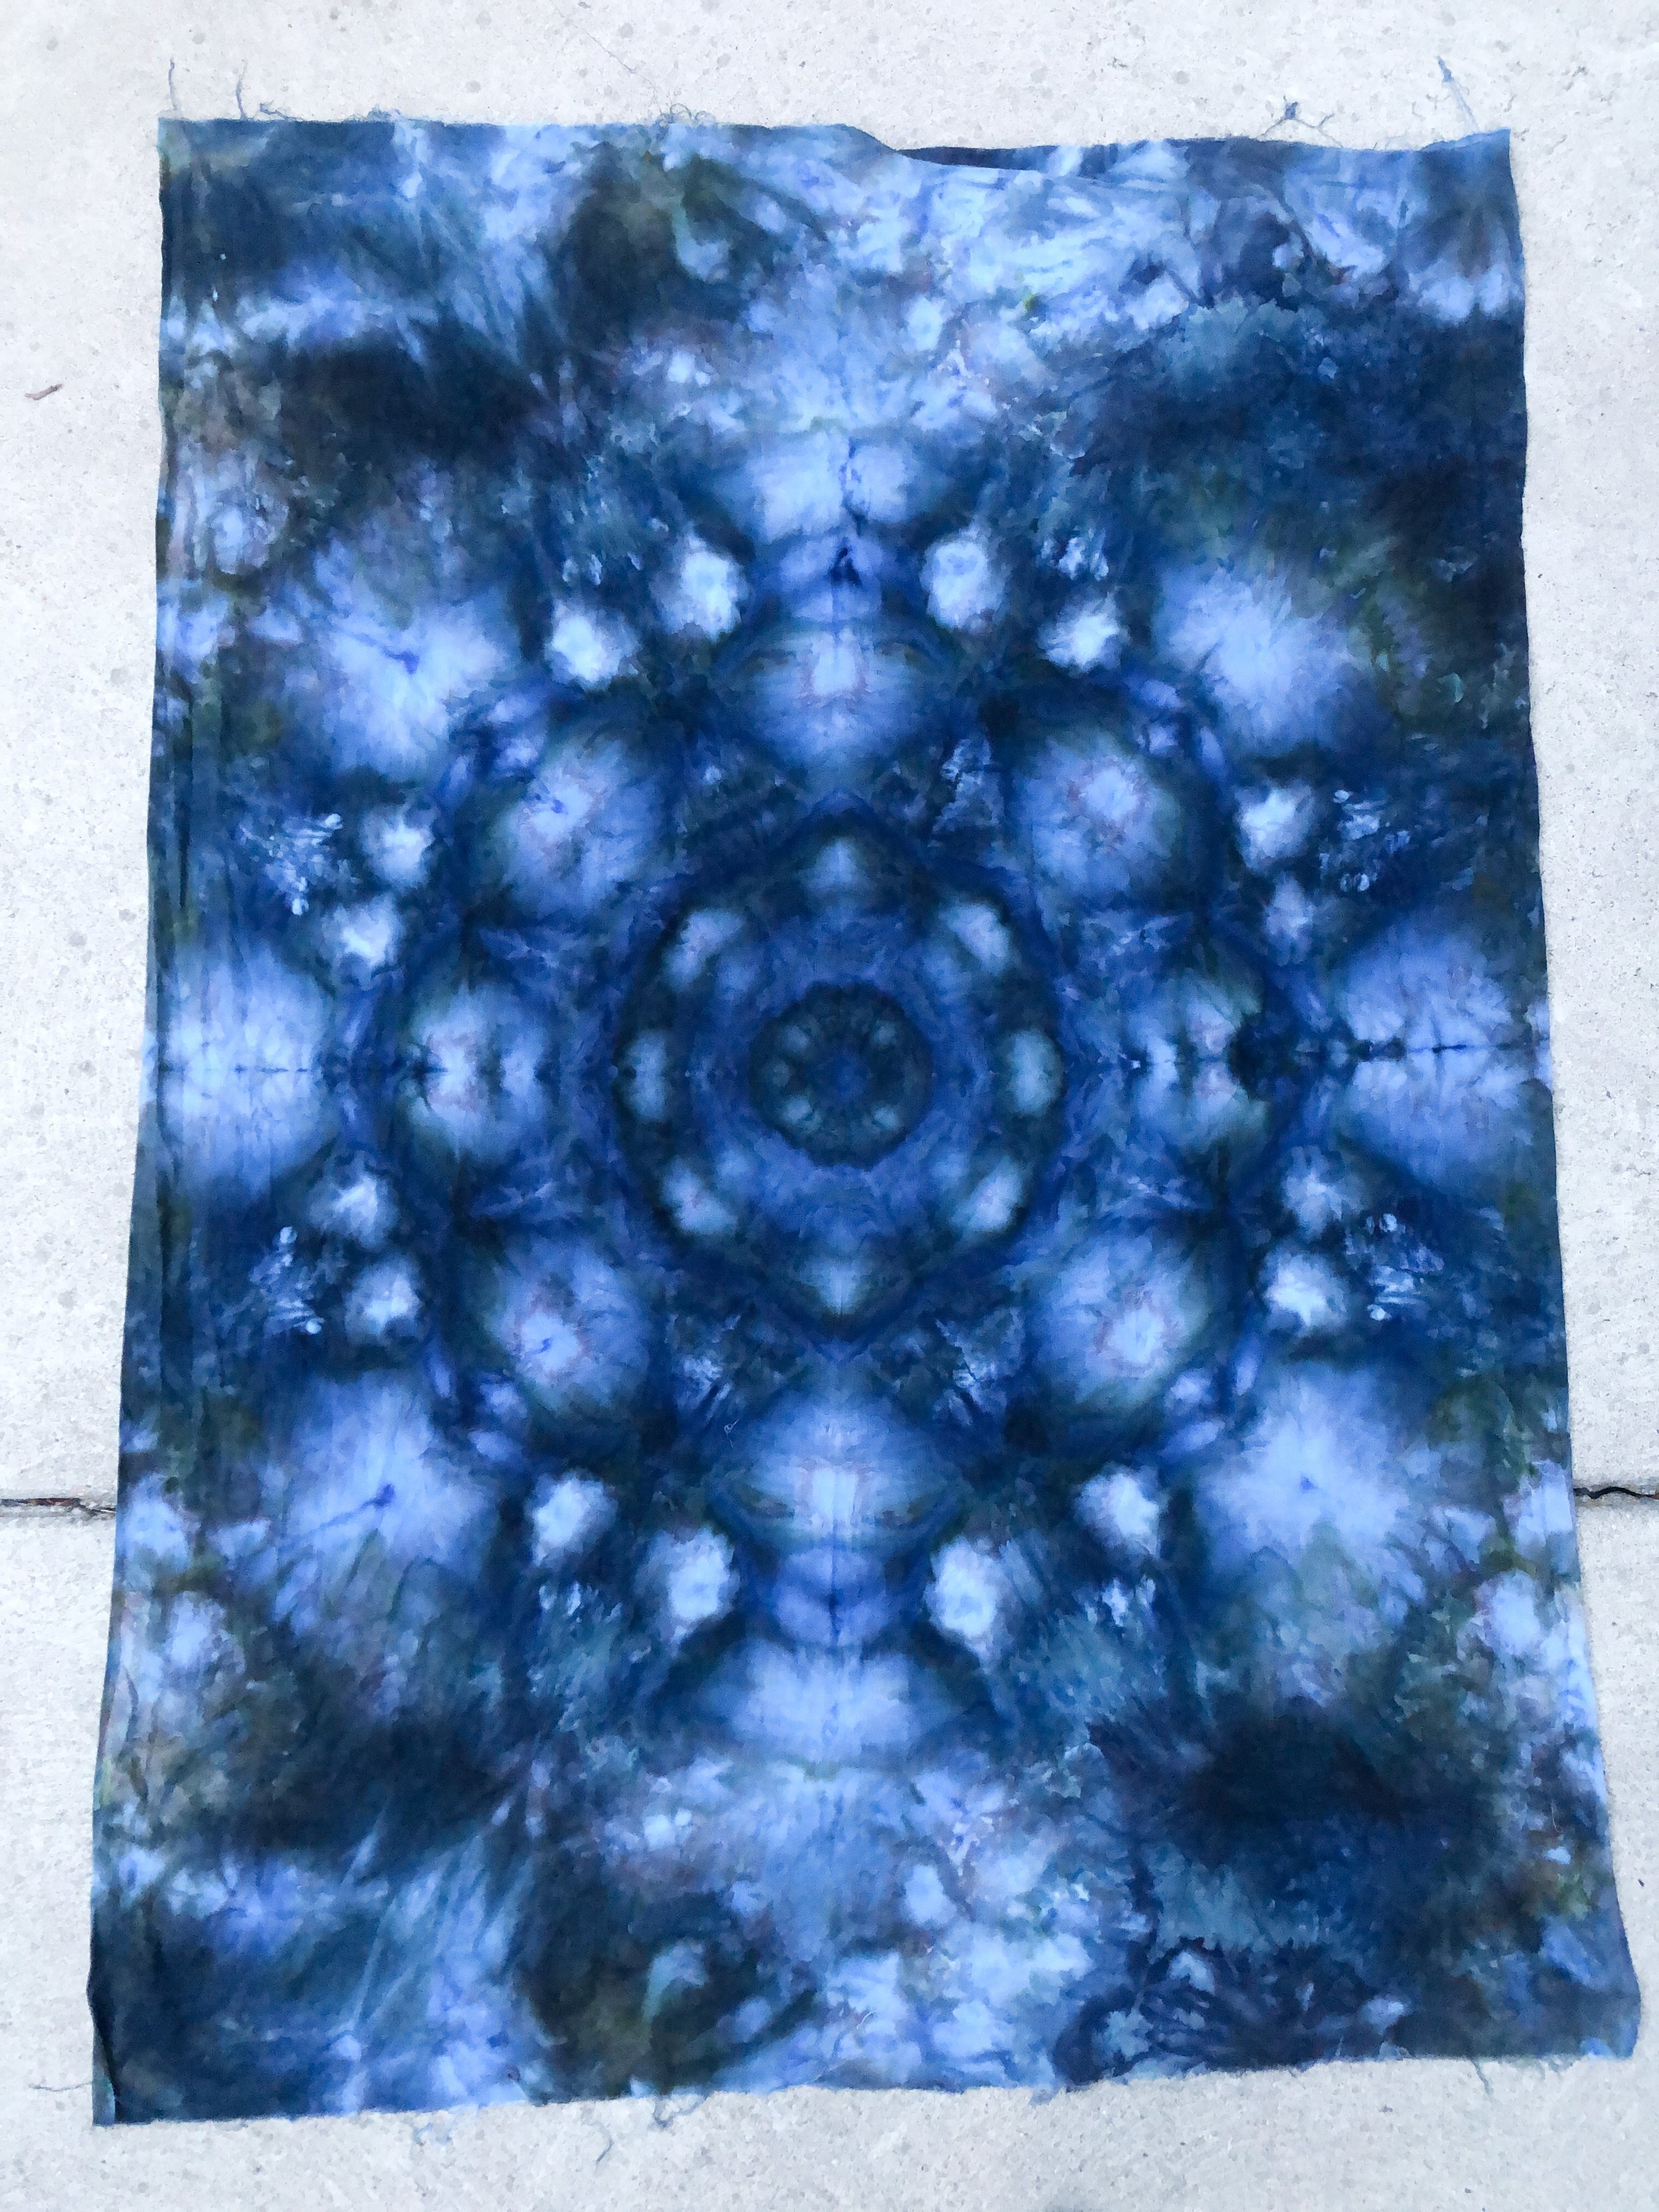
Here is my fabric! It’s fun to see the mandala in the middle of each of these. You can see touches of green a little bit, unfortunately I used too much navy.
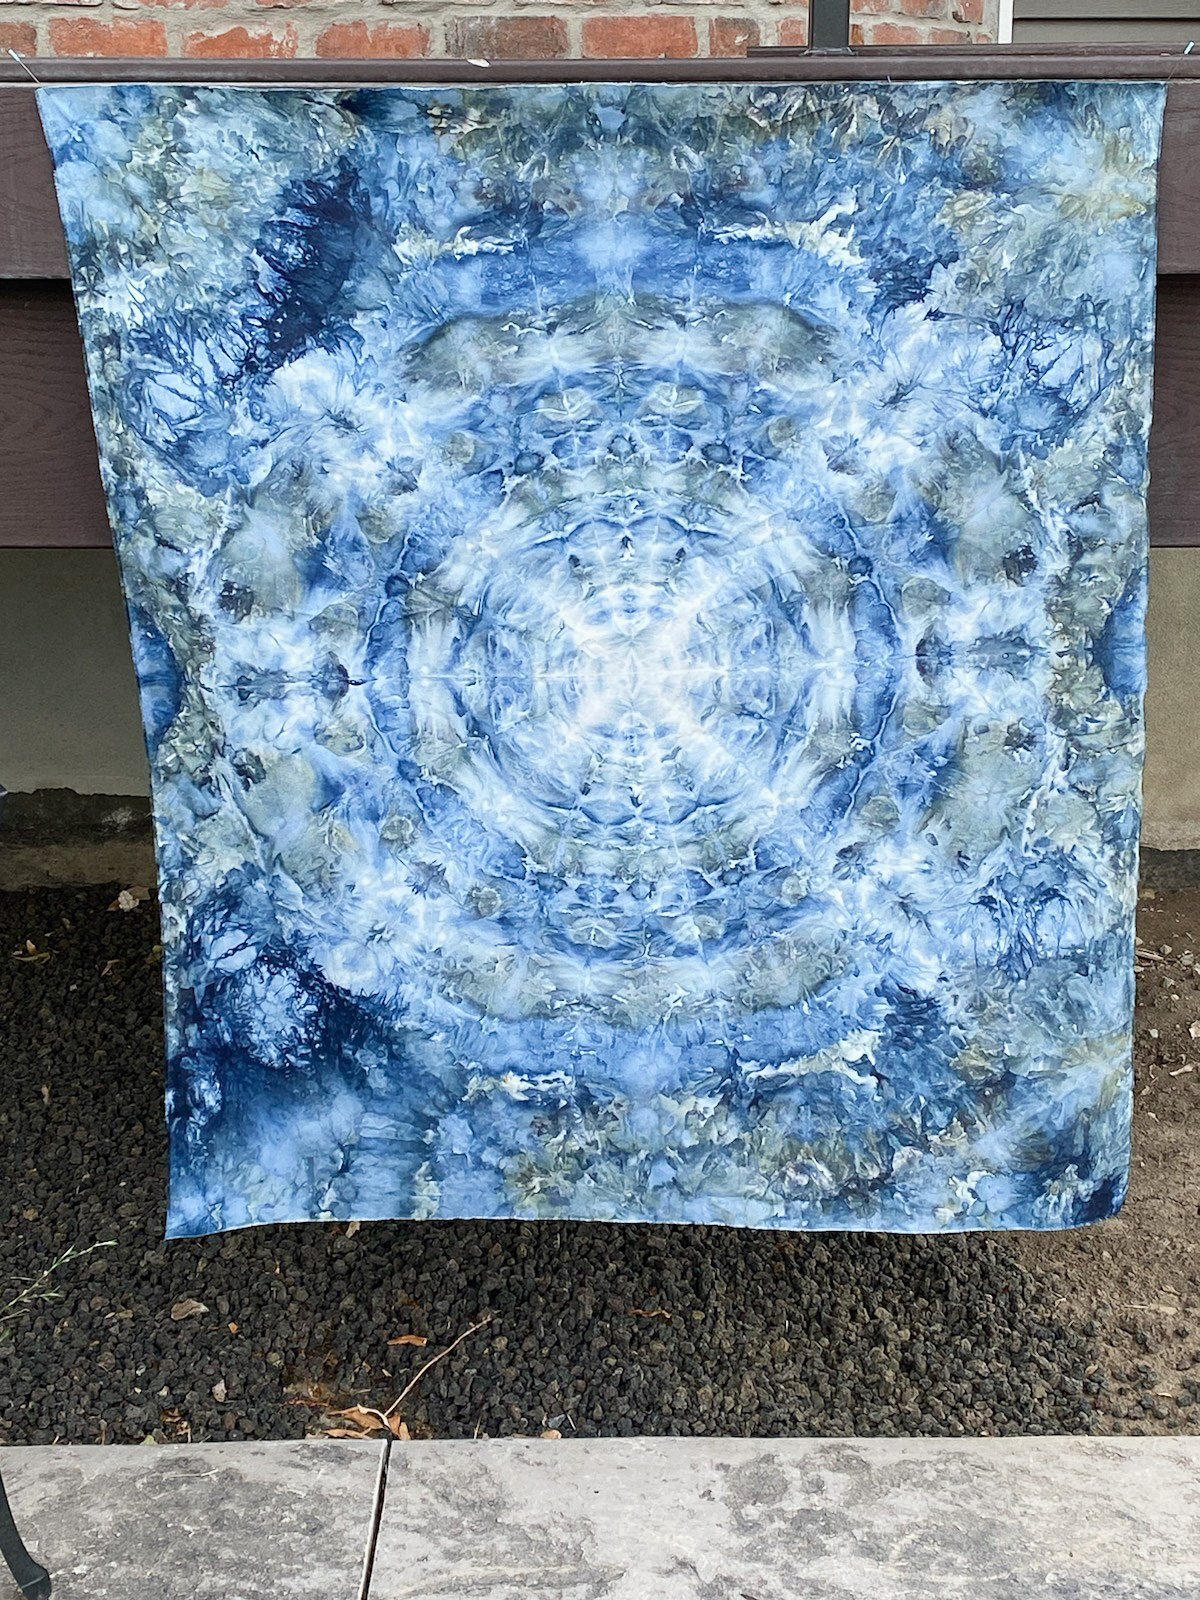
Below is Holly’s. Amazing huh?!?! She folded hers the same way…in fact we all did. Holly just sprinkled her dyes differently than I did and added more of the green.
Below is Gale’s. It’s so beautiful with all of the deep colors. I love her mandala. I believe she used the red, purple, and aqua.

Below is Christy’s. Incredible!!! She’s so good at distributing the dyes and using the best color combos. Her Mandala is so detailed, I’m amazed.

After you rinse out your fabric or shirt, put it in the washer with a tablespoon of Synthrapol. Then dry it. The heat in your dryer helps set the dyes.

As we were checking out one another fabric, one of them pointed out it looks like I have cats in my mandala. Can you see it? While I haven’t done anything with my fabric yet, this is what Christy did with another one she previously dyed. Isn’t it beautiful?!!!!
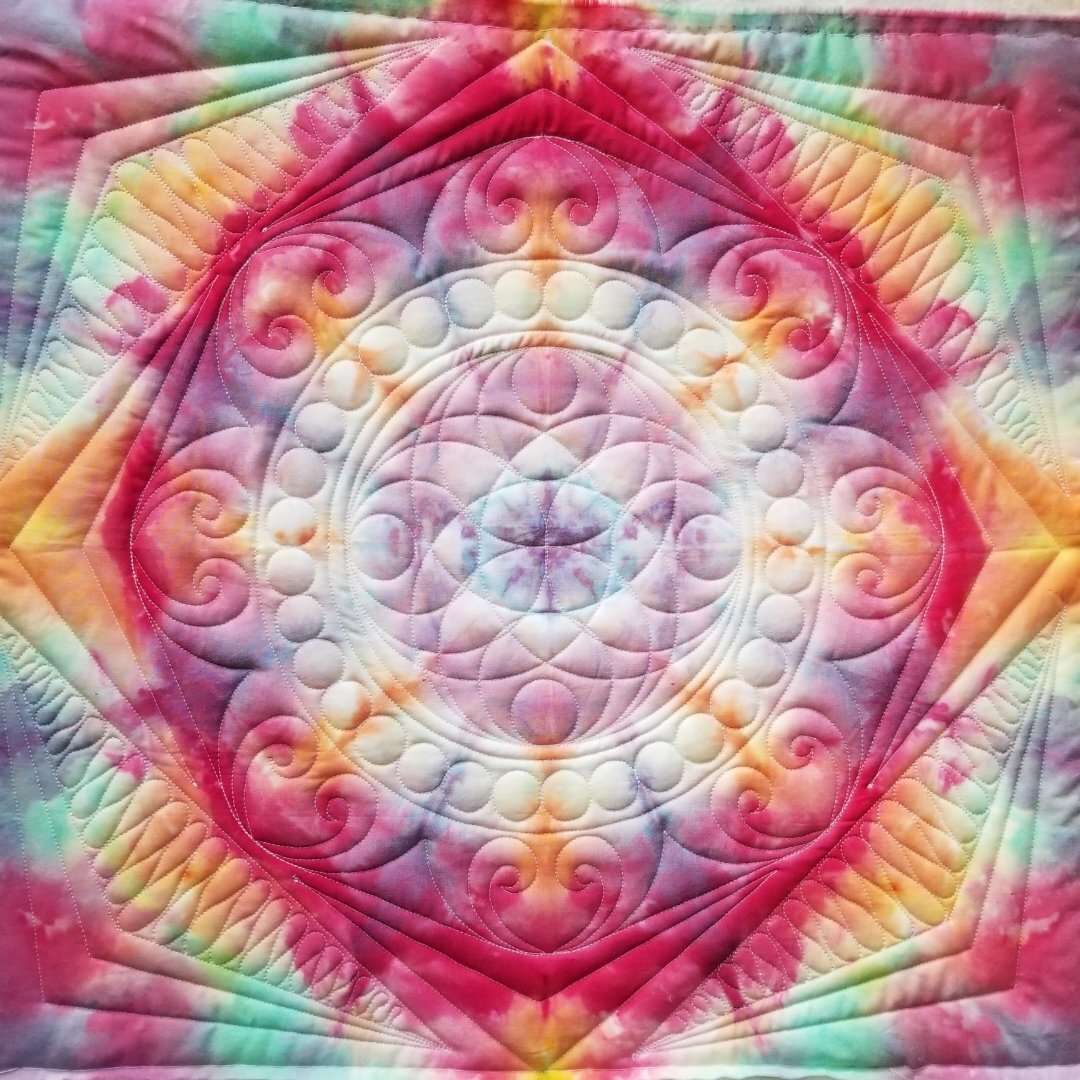
It would be fun to dye a bigger piece and make a throw quilt, quilting it with a funky texture.
Does this make you want to ice dye some fabric?
I’m no expert, if you’re interested in more info google it and check out what tutorials may be available. This was such a fun thing to do for our August meeting. This is why you need awesome friends in your life who teach you new things.
Thanks for stopping by!! Happy quilting, friends! Leisha
PS…I’d love to quilt for you. Contact me or email me at quiltingit@gmail.com • check out my Longarm Quilting Services page, to see more info and to print the Quilting Request Form to send with your quilt. I look forward to working with you!

Lisa’s On Point Quilt
Hi Friends,
Happy Friday!!! I’m back from visiting my sister, and ready to share some more quilts with you!
This was a fun one to custom quilt! Lisa was one of my first mail in clients, and it’s been so much fun to see the quilts that she’s made over the years. This one is called On Point by Cozy Quilt Designs. It was a Craftsy pattern. I can’t find it in their shop. If your interested in the pattern, contact them on their website.

Lisa wanted it quilted custom, and I think it turned out so fun. It has a clamshell like look to it. I went light on the custom quilting, except for the border, because she sent minky for the backing. I think too much quilting can make the minky more stuff instead of the soft and cozy we all love.
I love the fabrics, especially the off white grunge background.

I used my favorite natural white Omni thread from Superior Threads, and my go to 8020 cotton poly blend batting from Winline Textiles out of Ogden Utah.
Lisa’s quilt looks sooo soft and cuddly.
I used my favorite Edge ruler from Linda at The Quilted Pineapple for the 1/2” lines in the strips and the Diamond motif inside the centers of the blocks.
I decided to do something fun in the borders, some of my Overlapping Lines but with pinstripes instead of just lines. With some Overlapping Circles to break up all the hard lines. If you’d like to learn how to freemotion quilt either of those designs, head on over to my shop and check out the Quilting It Freemotion course that I have available.
A little quilty swirl is always so fun.

Another look at all that beautiful quilty texture.

I’d love to quilt for you!! Contact me or send me an email at quiltingit@gmail.com
Check out my Longarm Quilting Services page for more info, and please print and fill out my Quilting Request form to send with your quilt.
Thank you for stopping by!! Happy quilting. Leisha

Kim Diehl’s “Hope and Harmony” Quilt
Hello Friends,
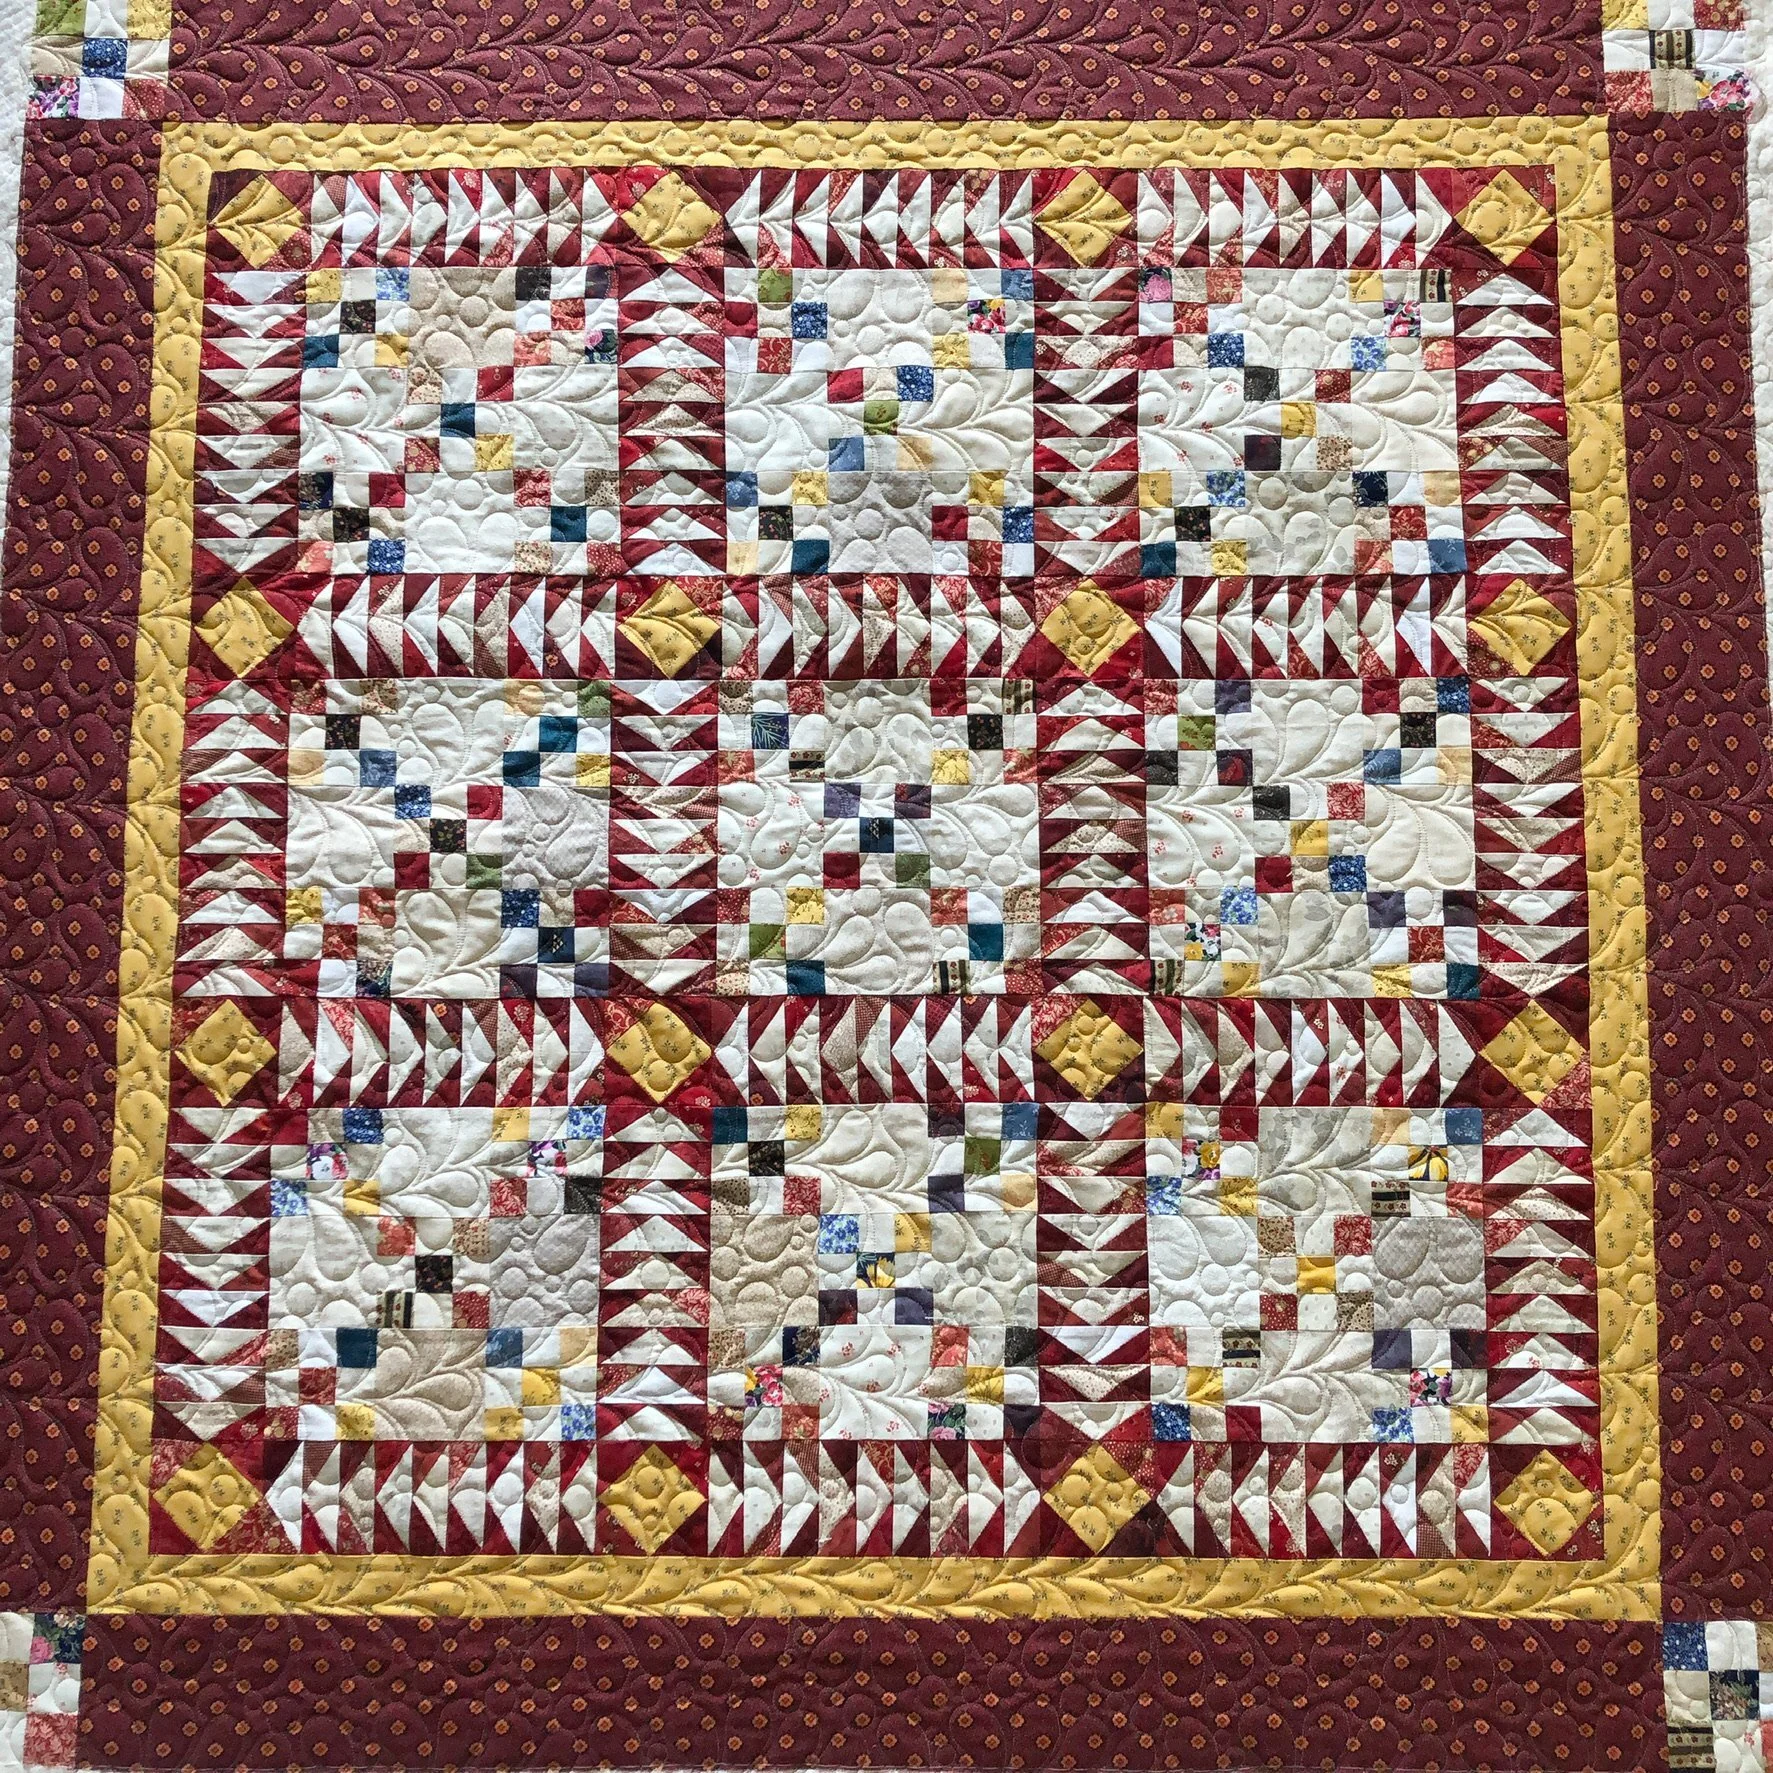
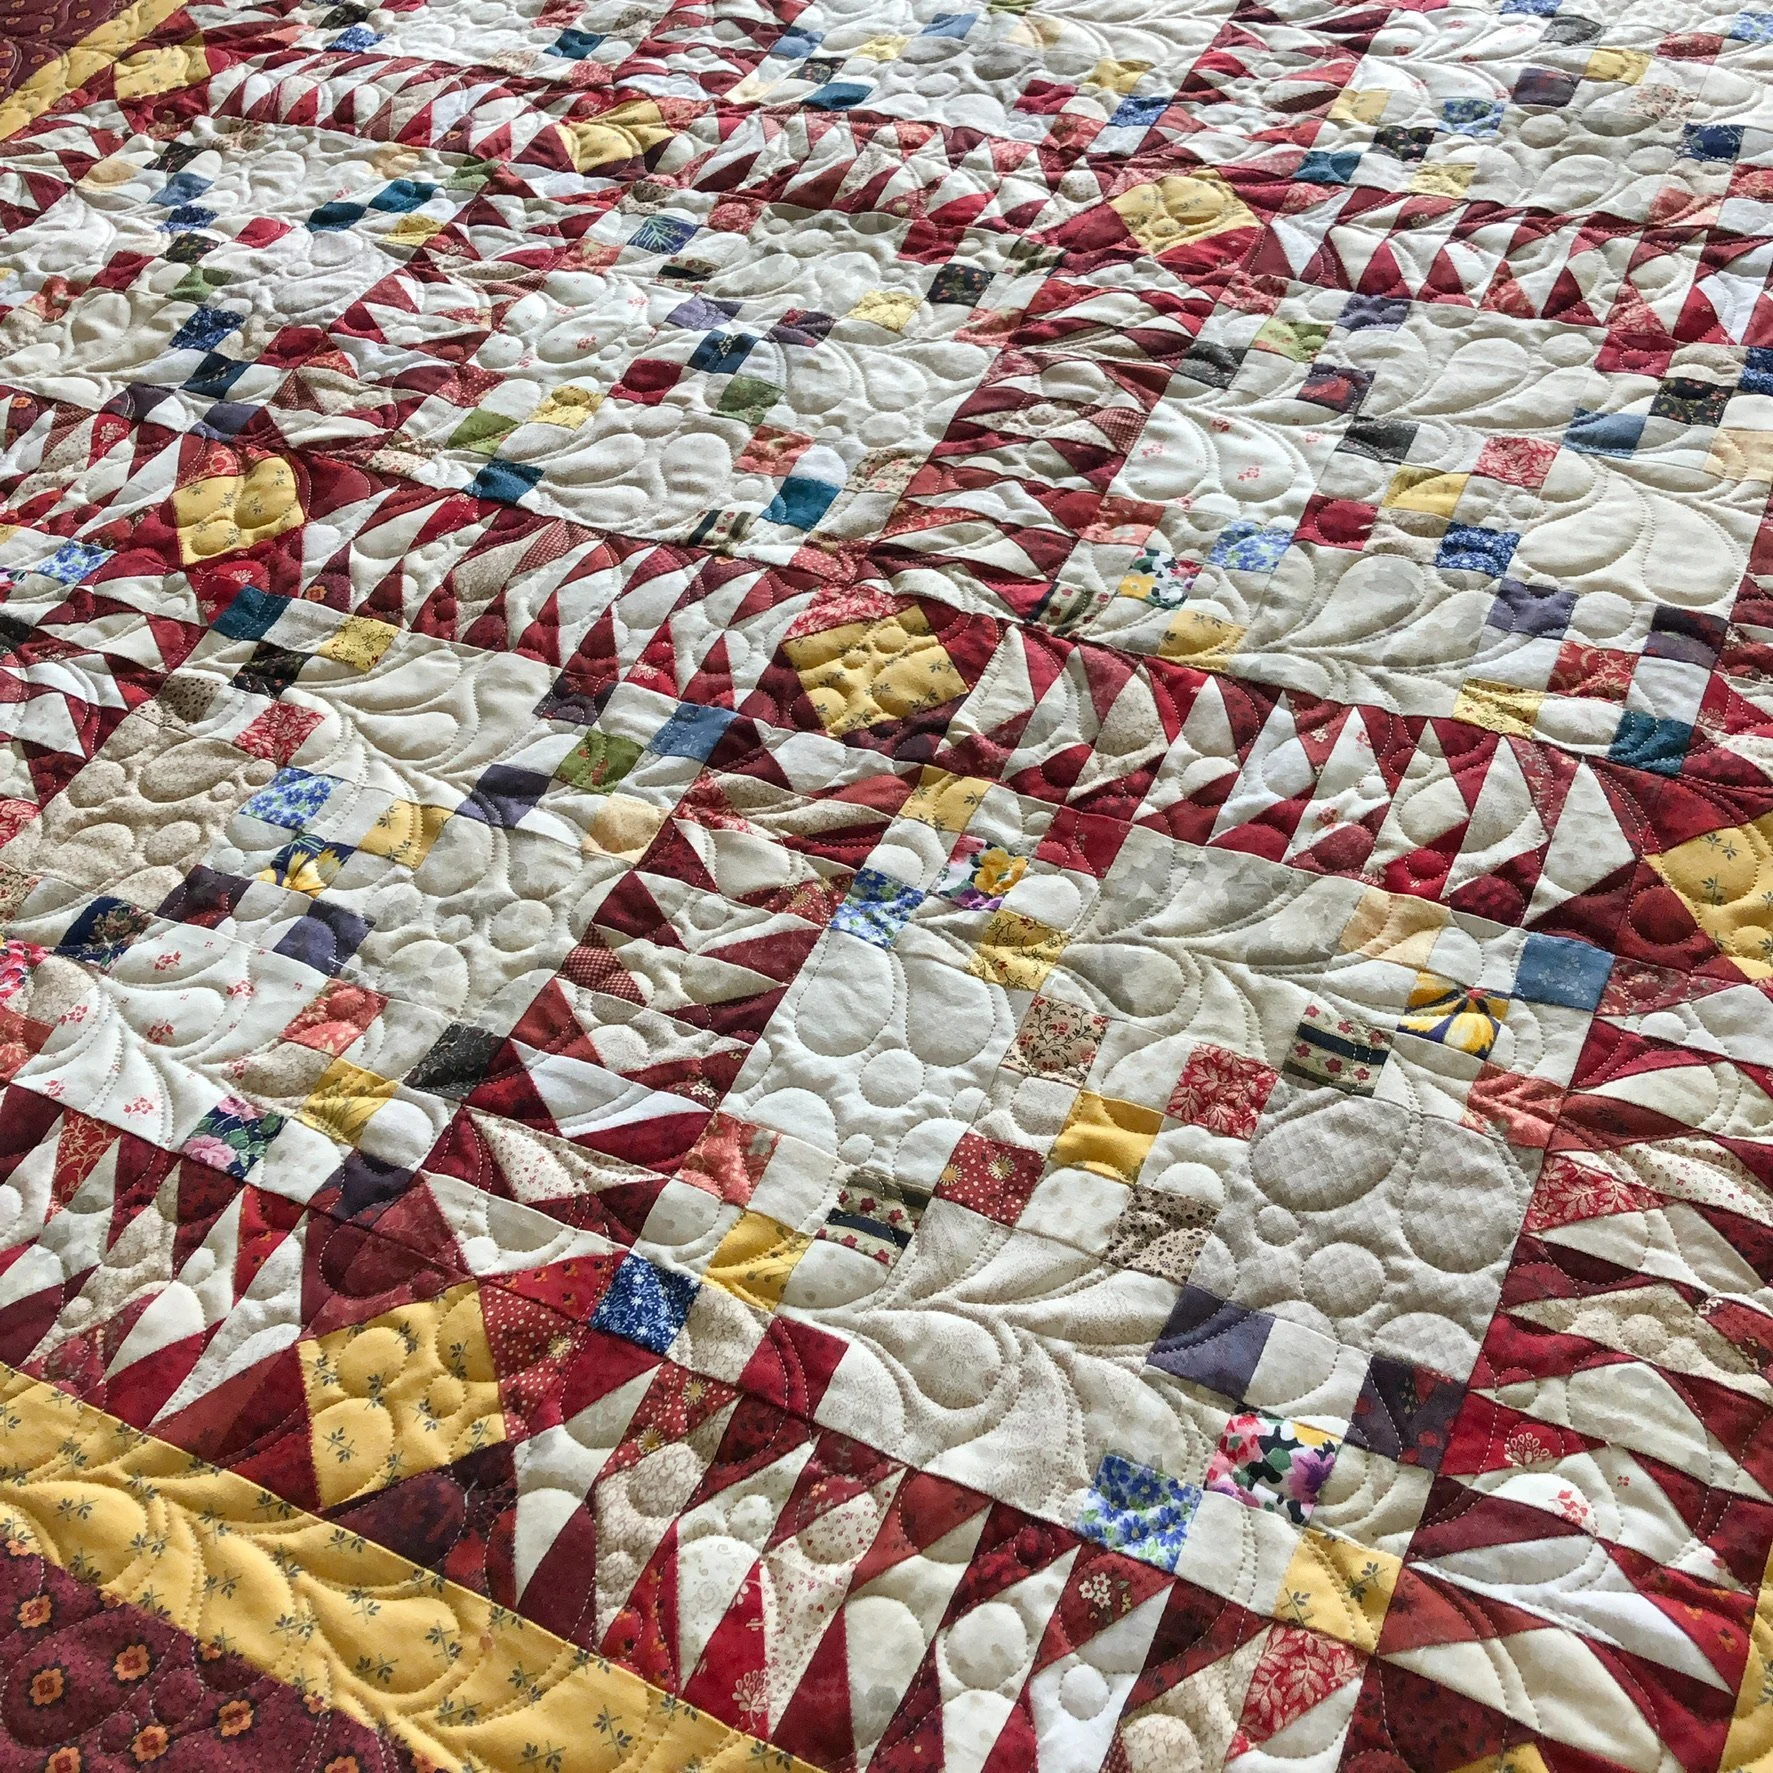
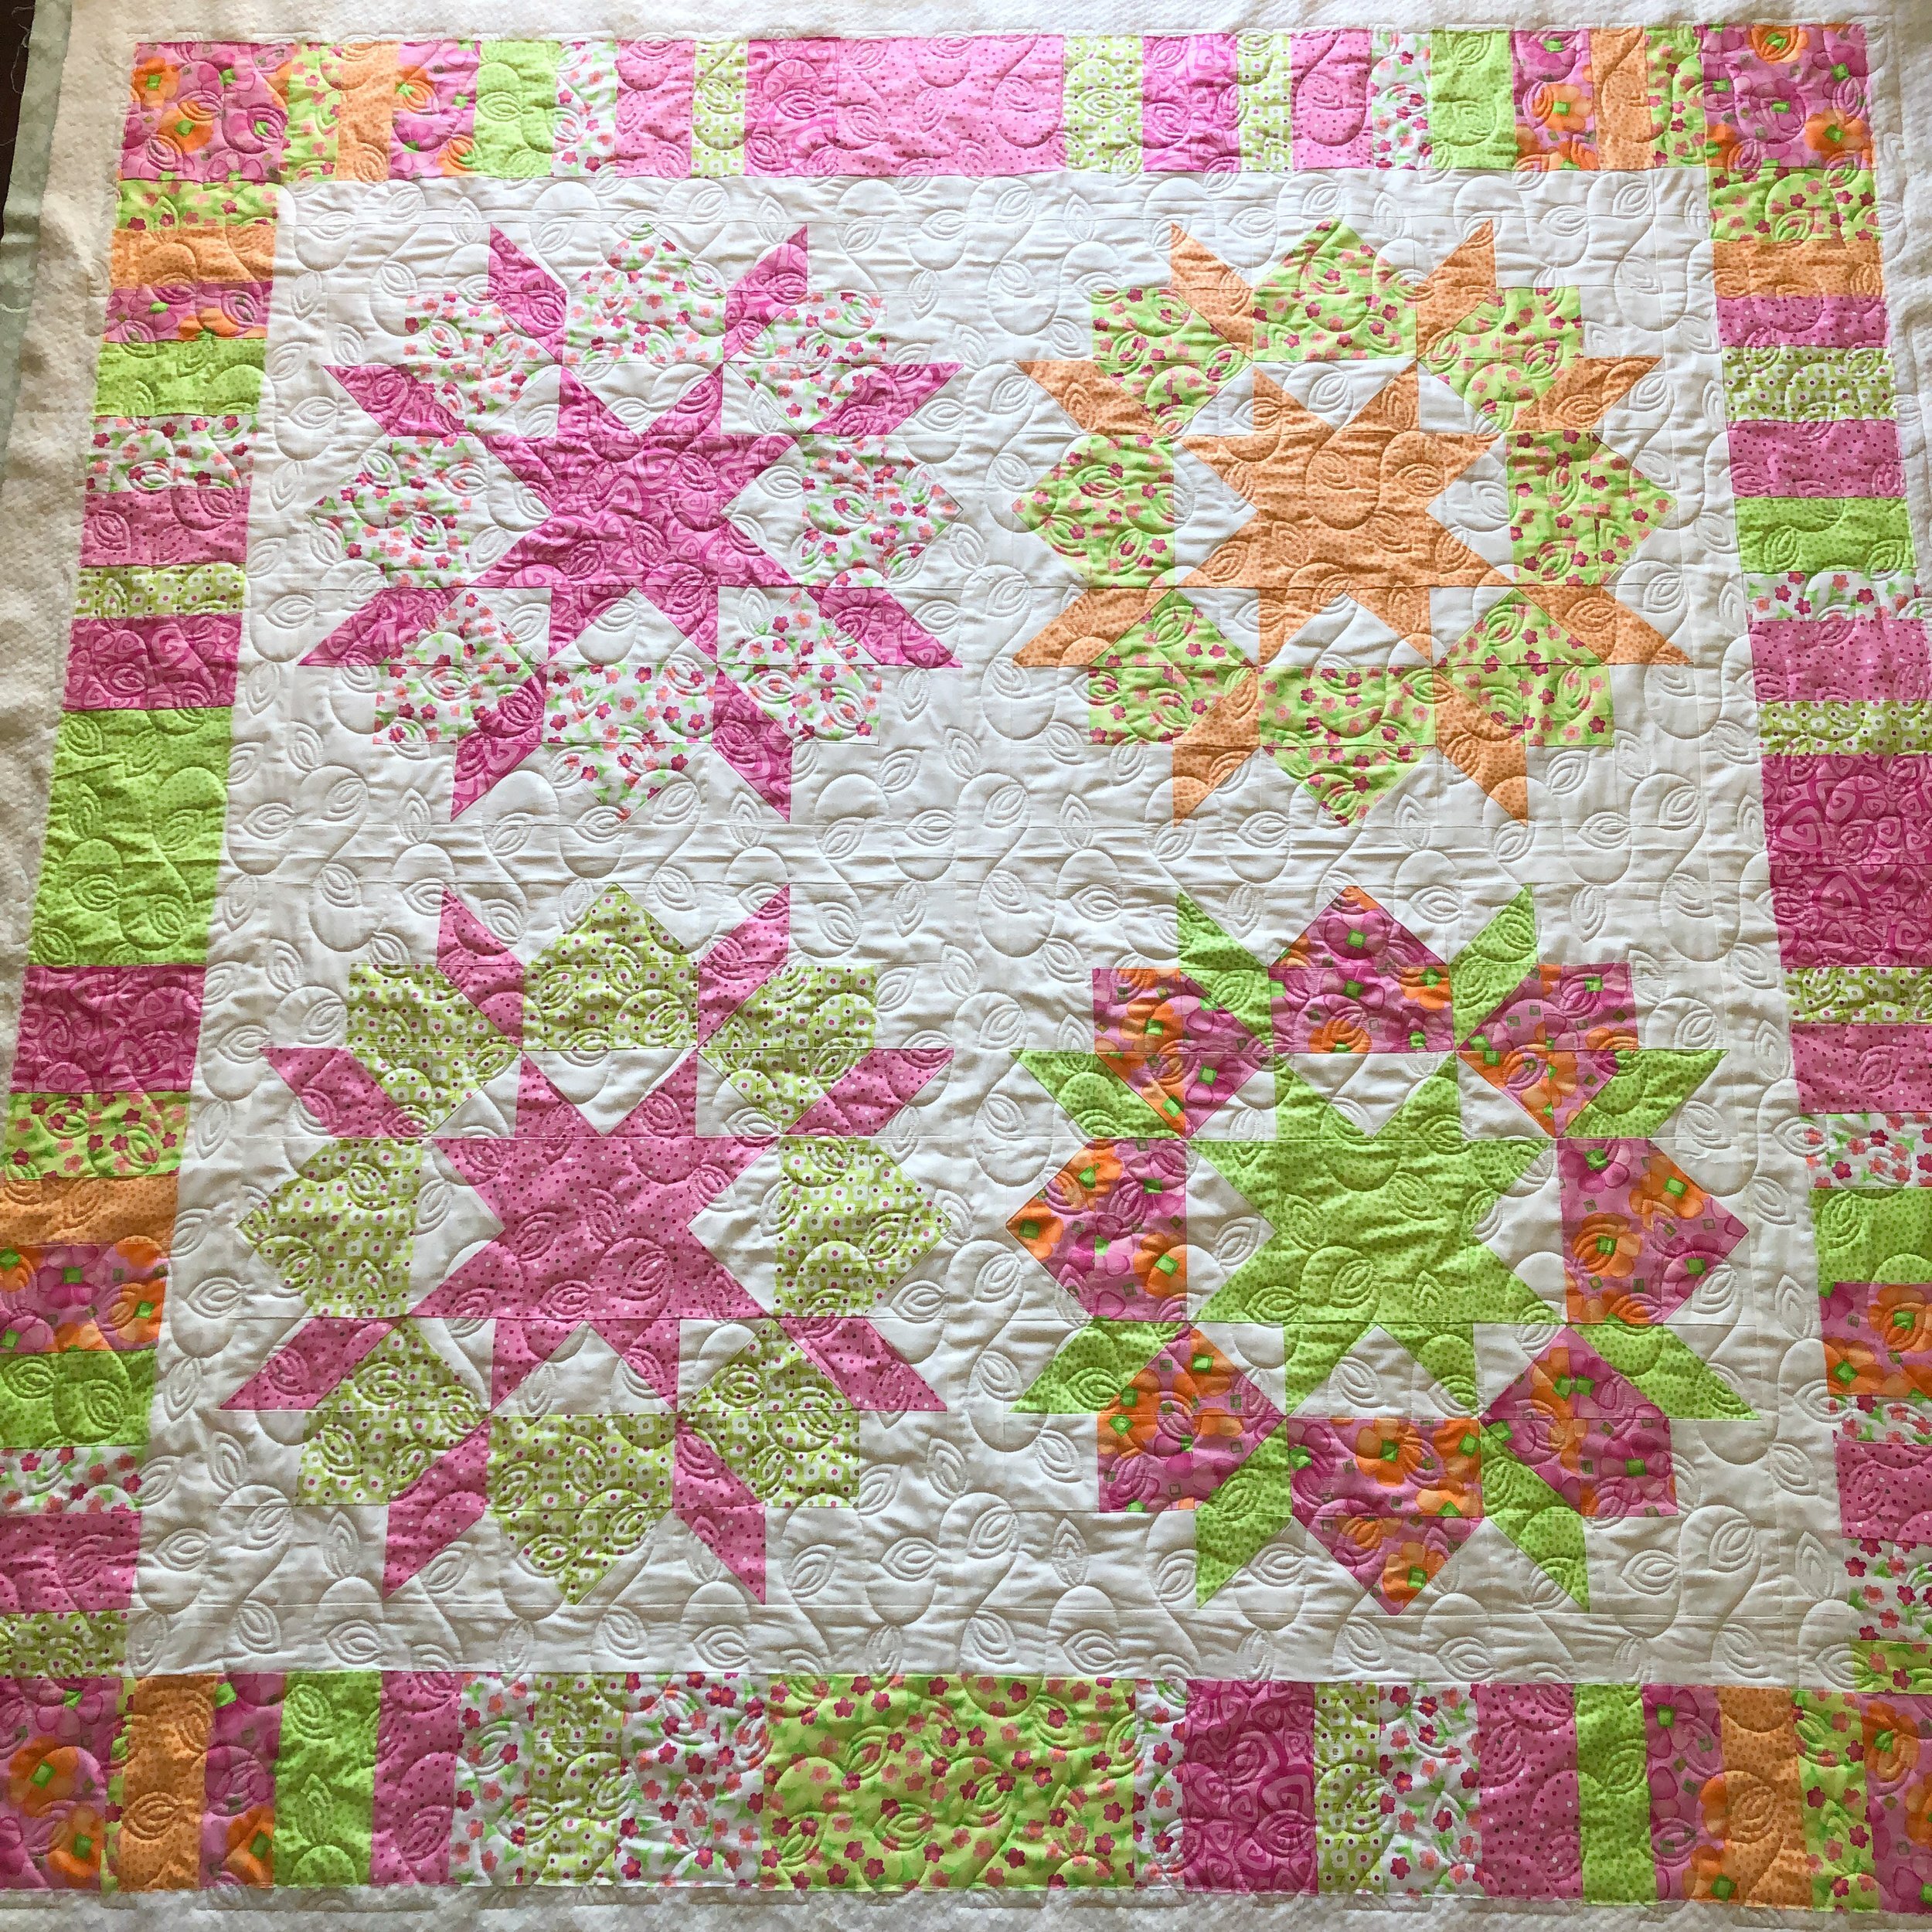
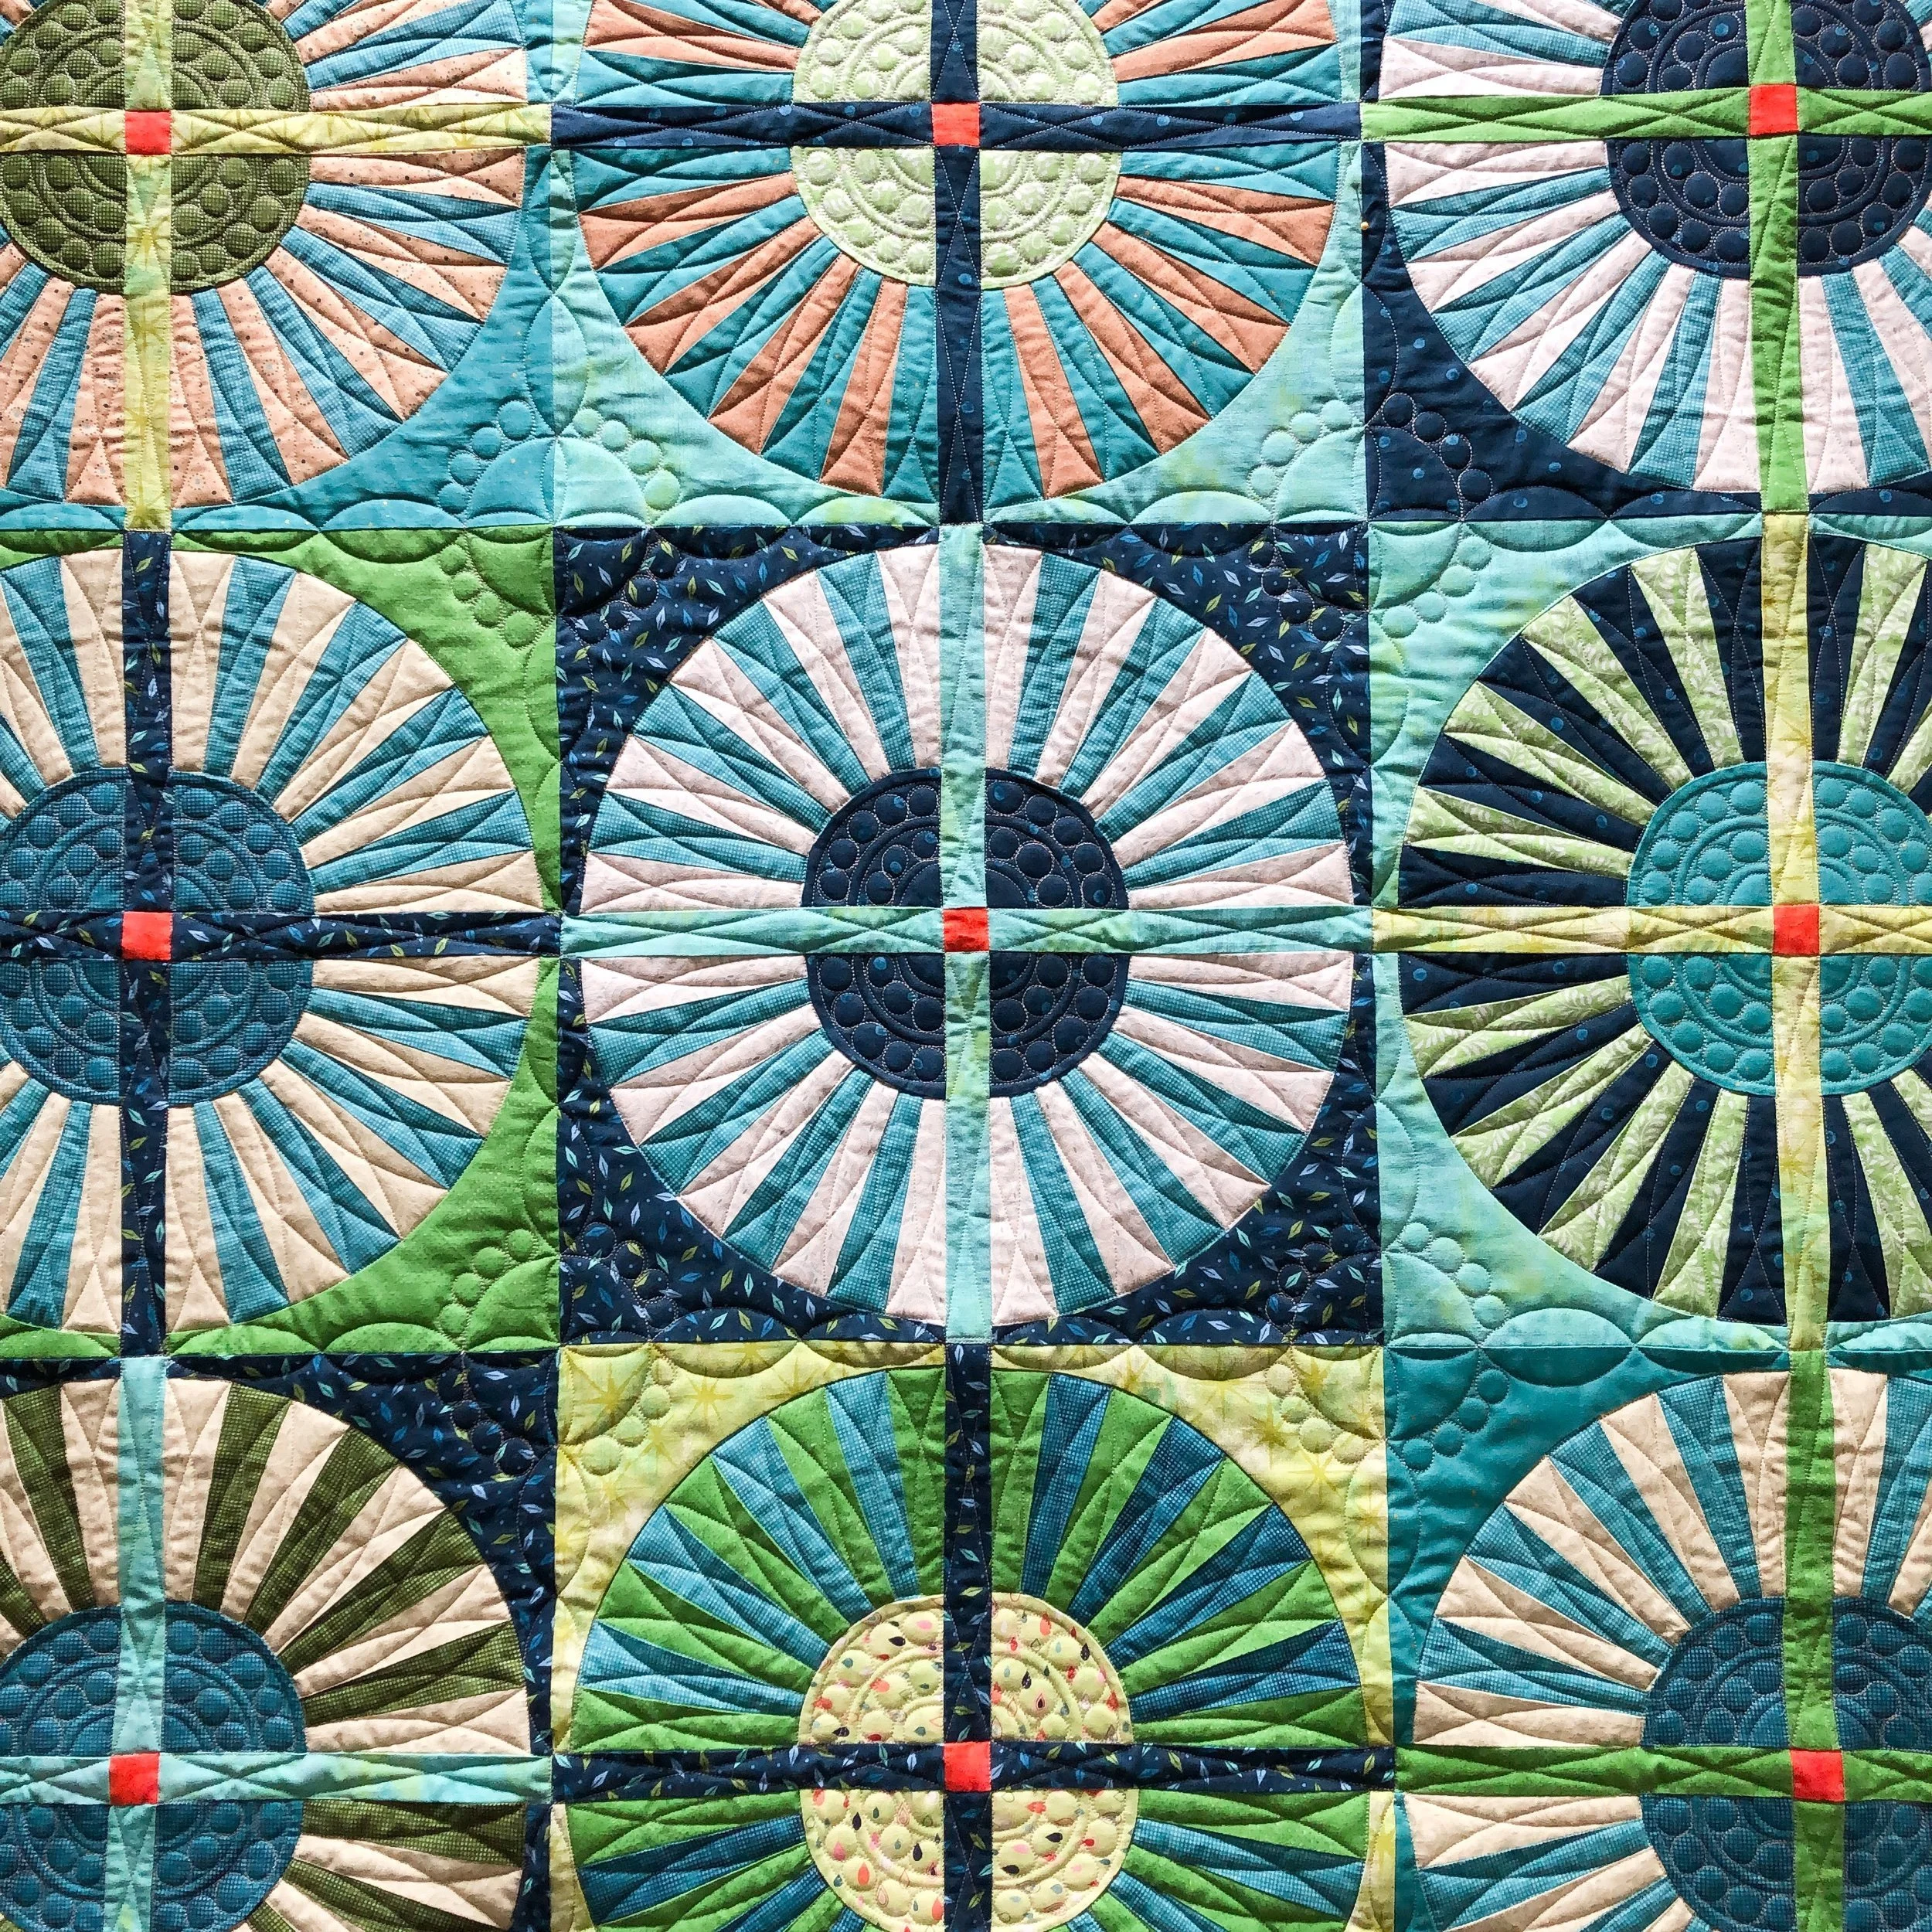
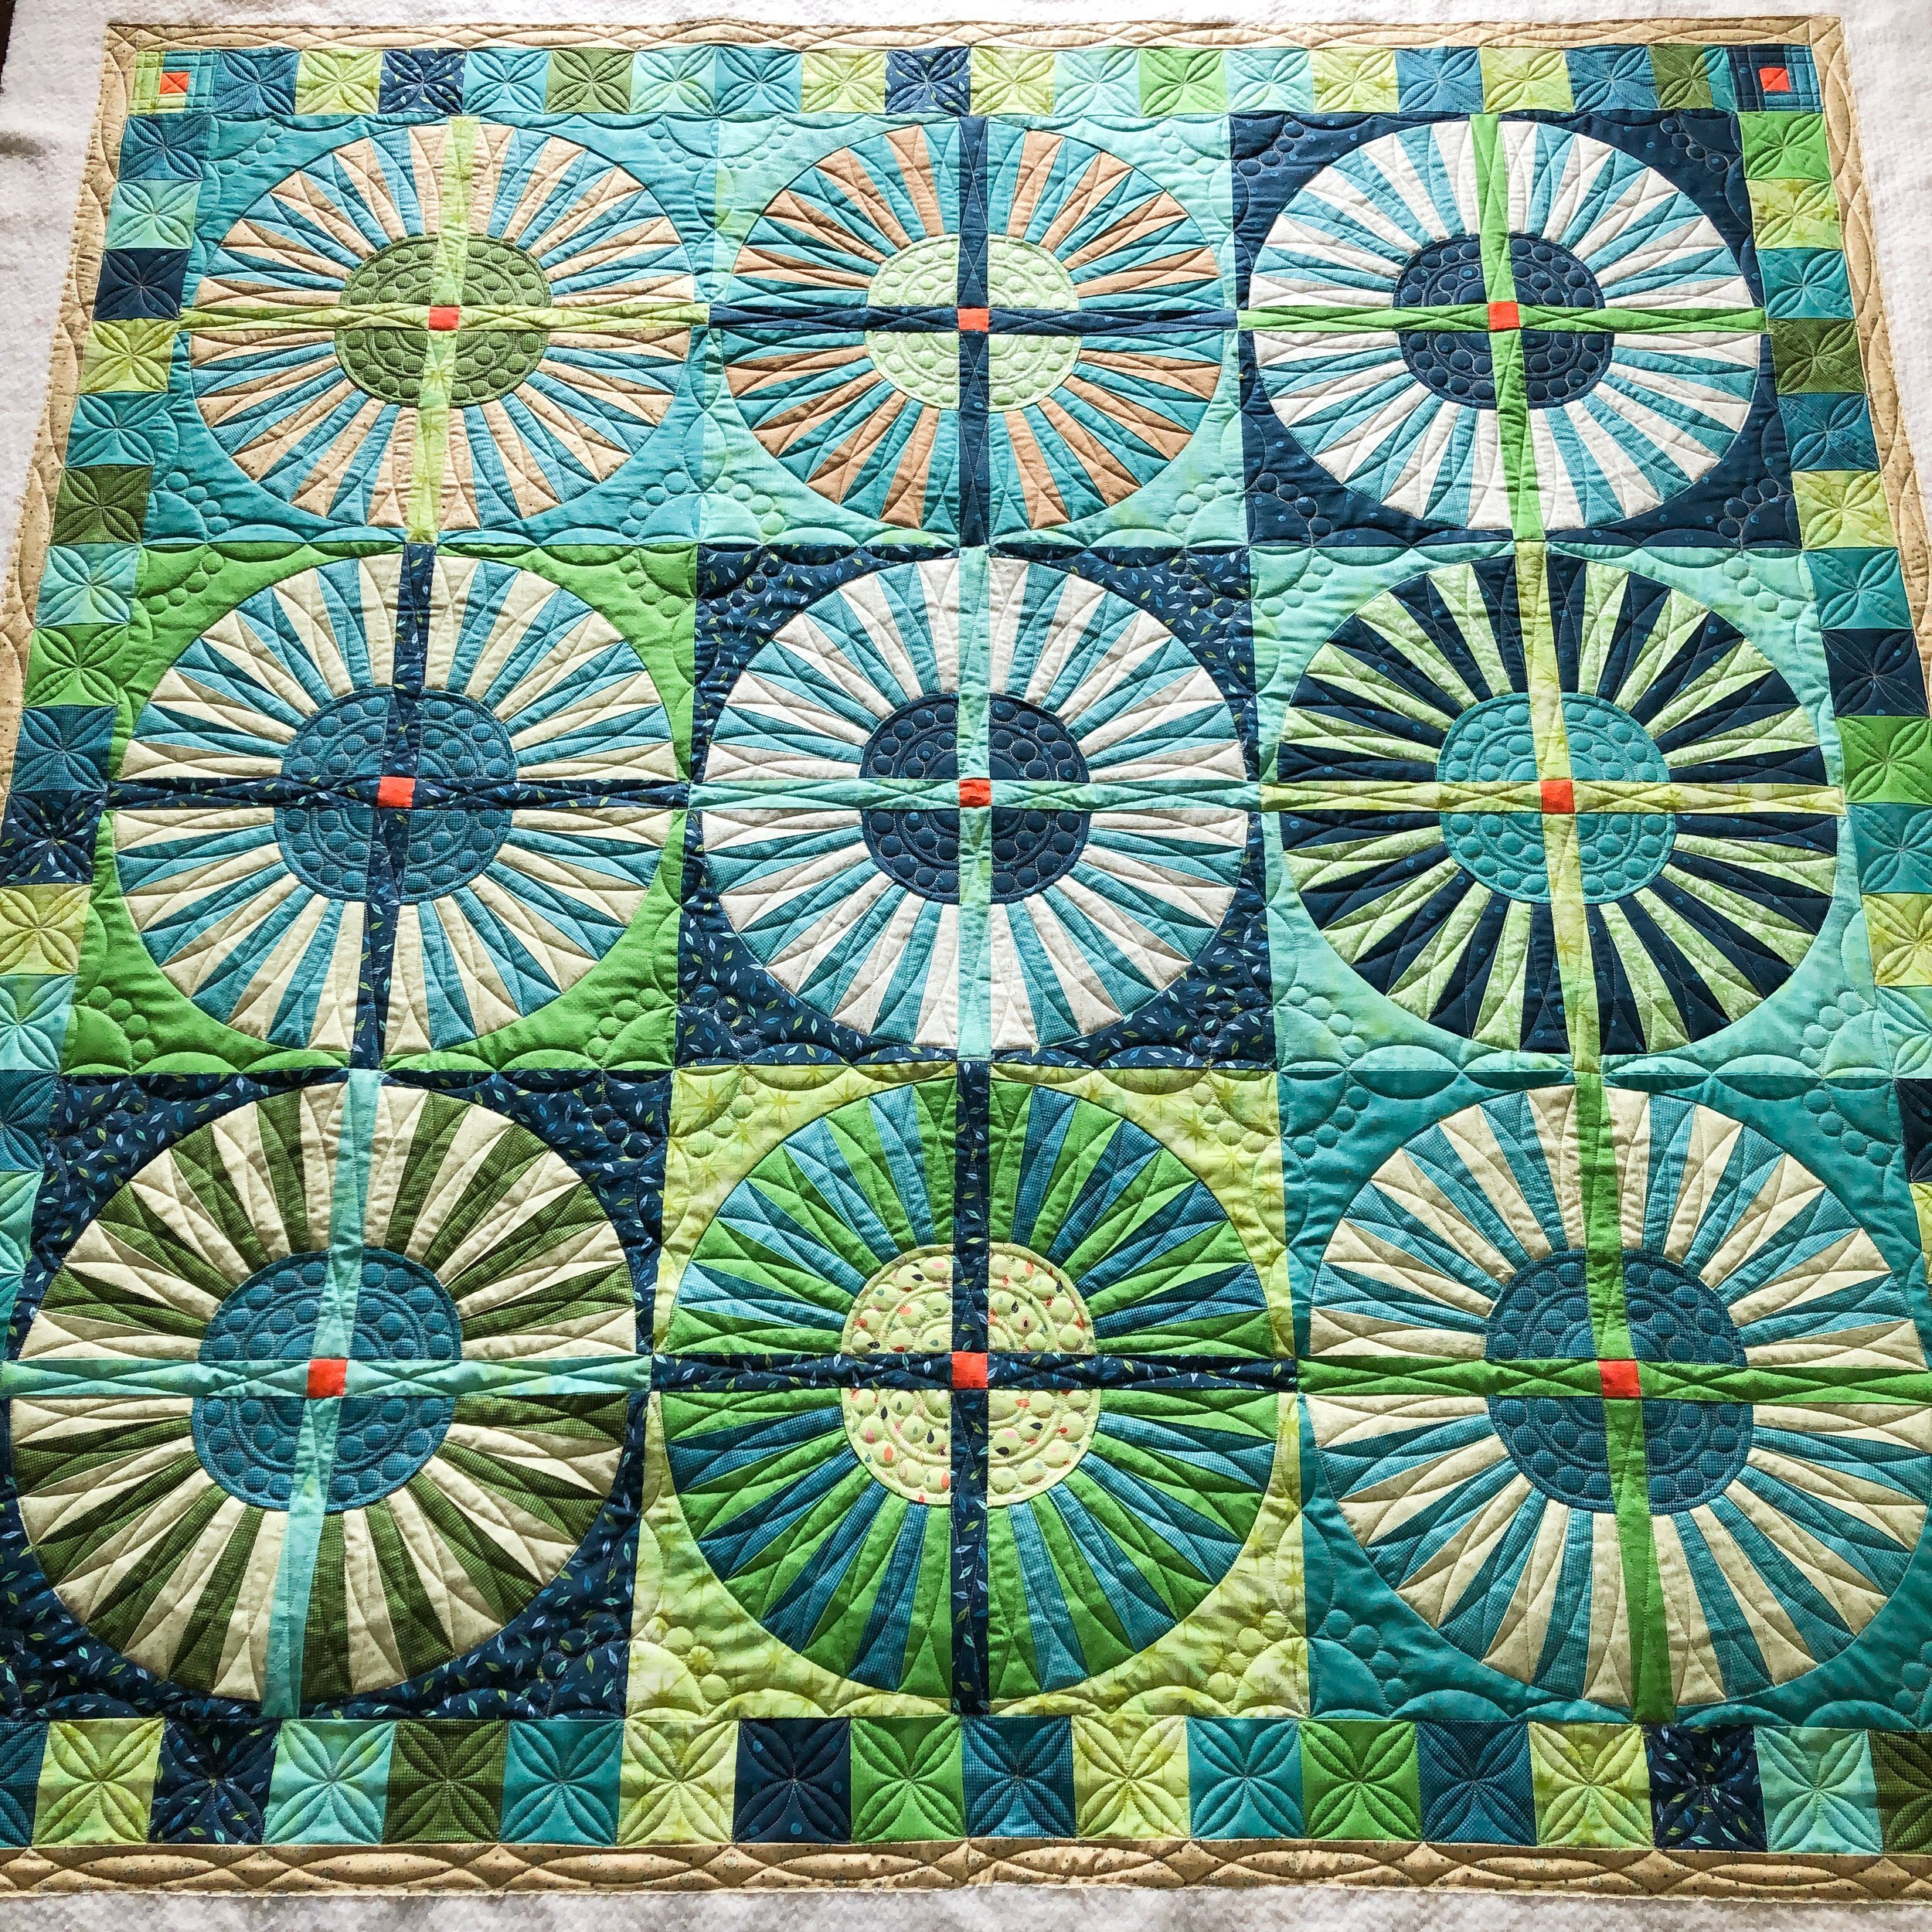
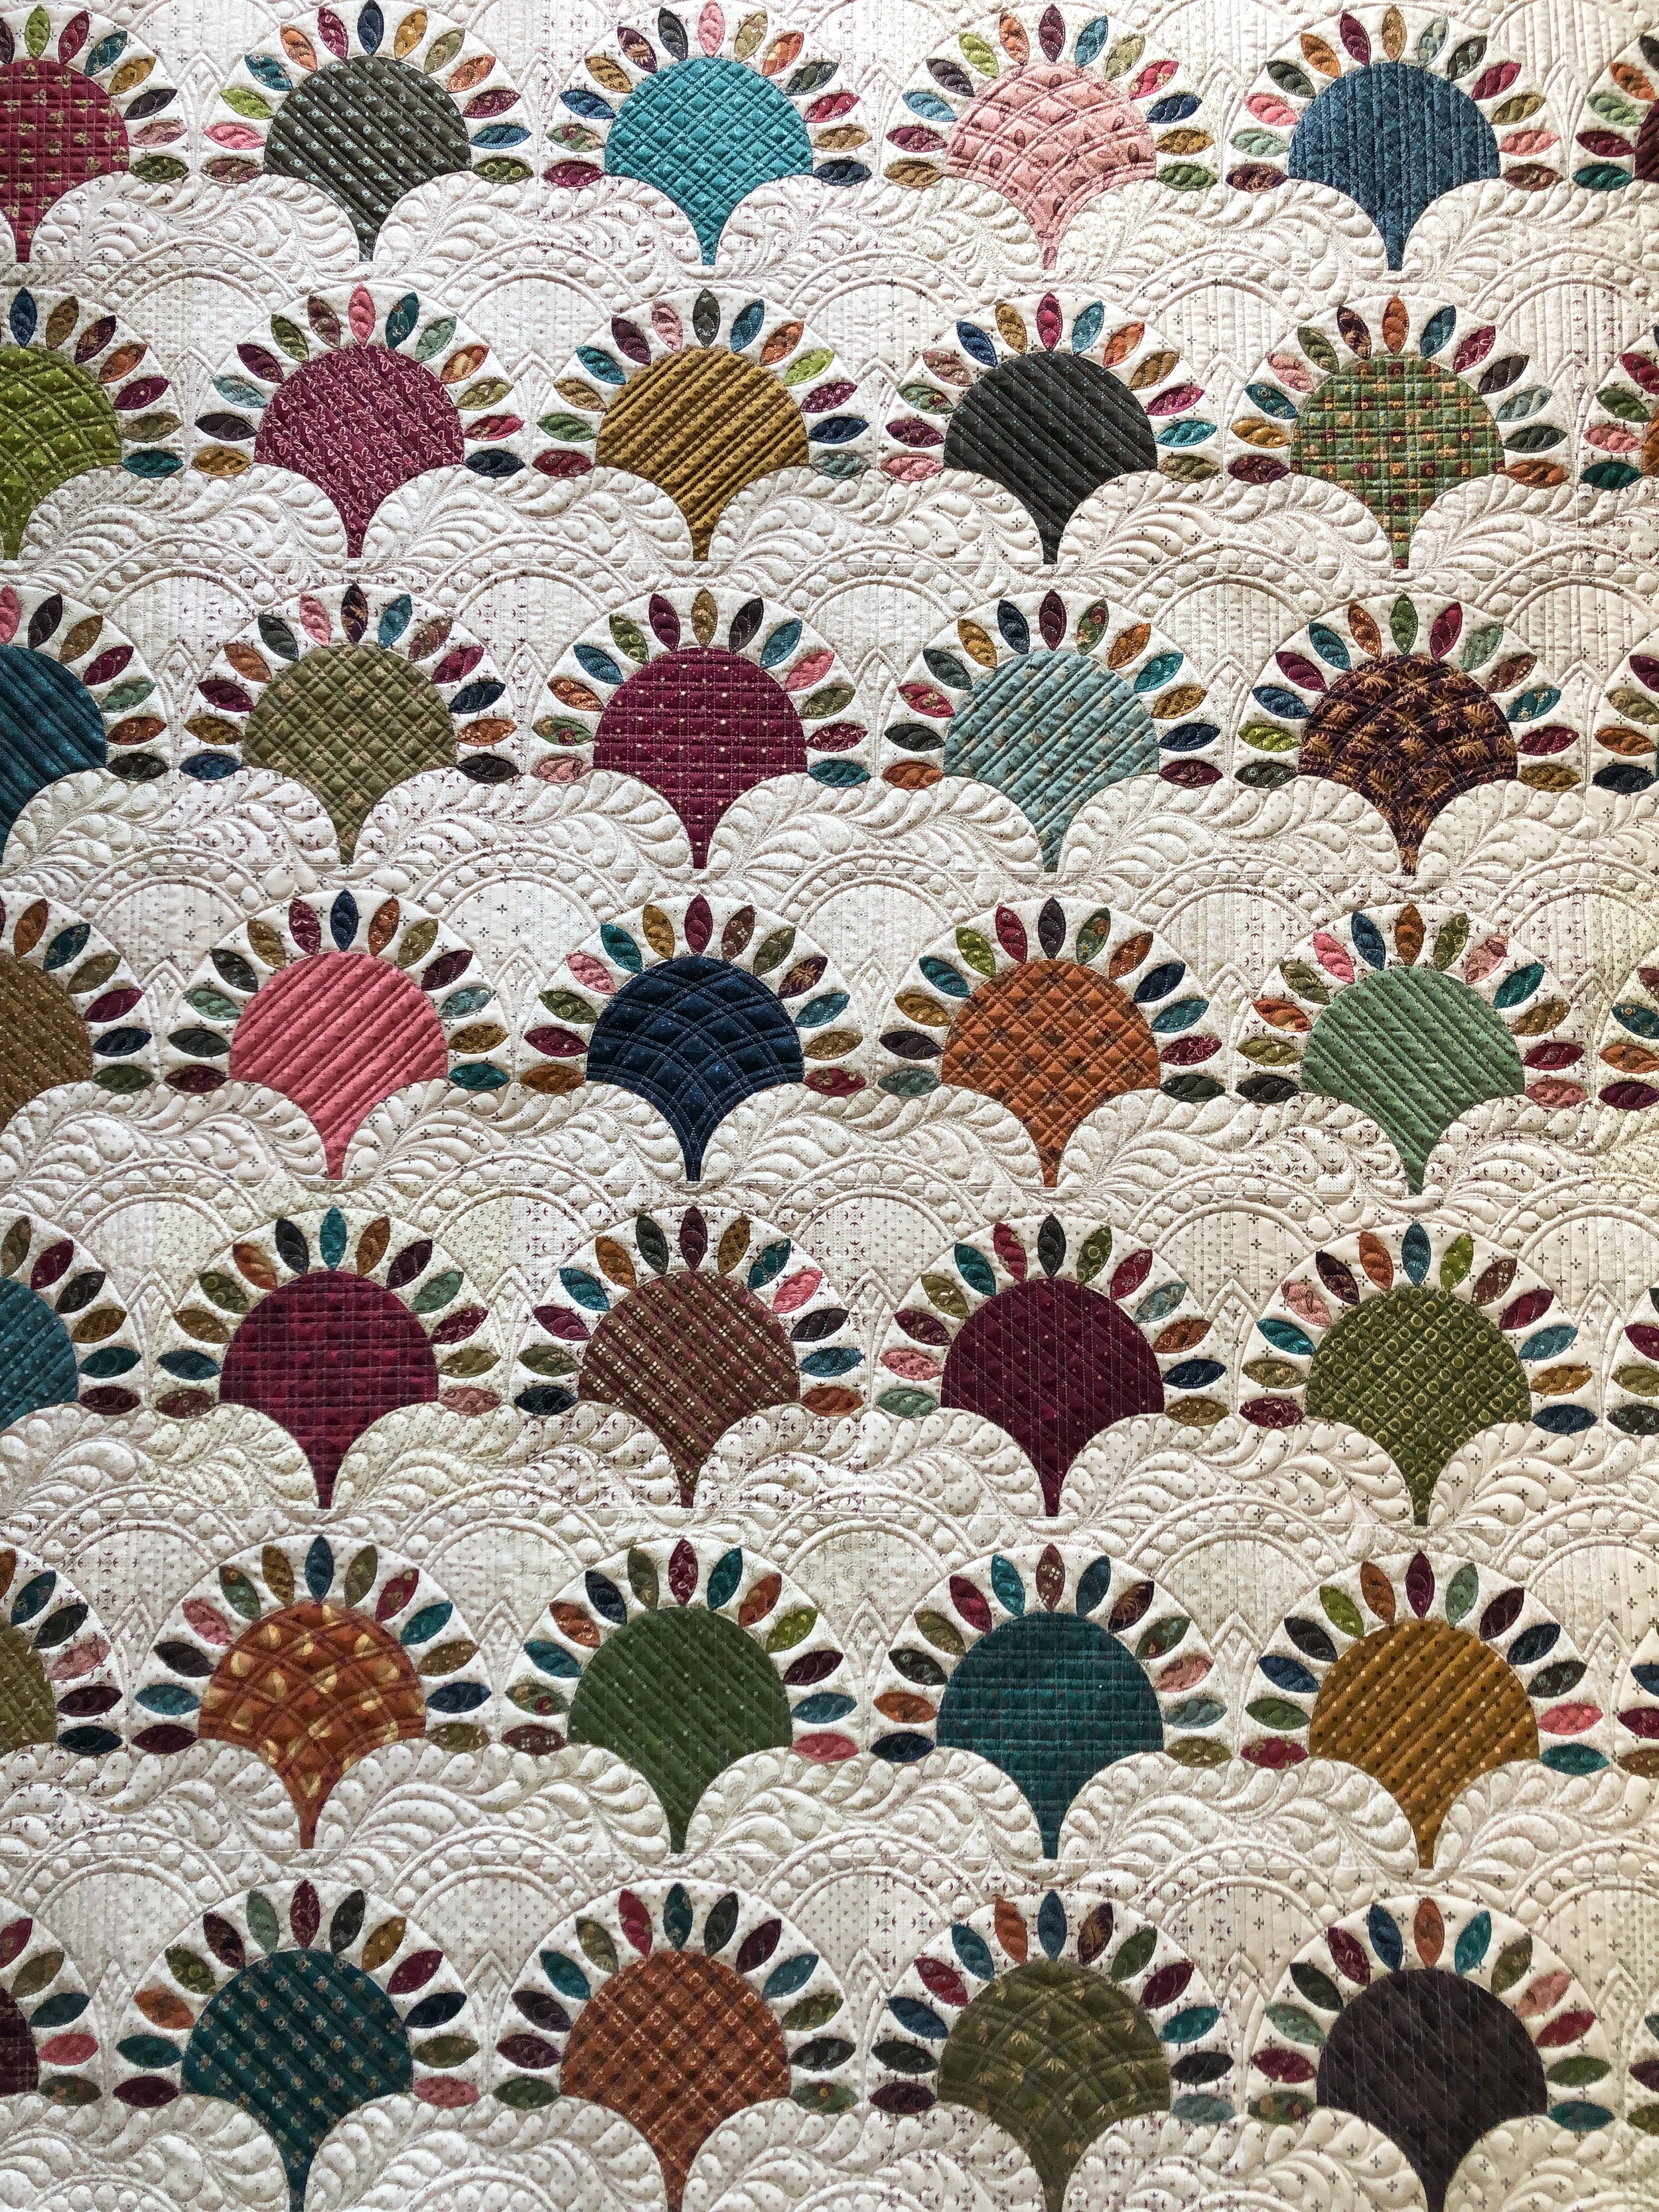
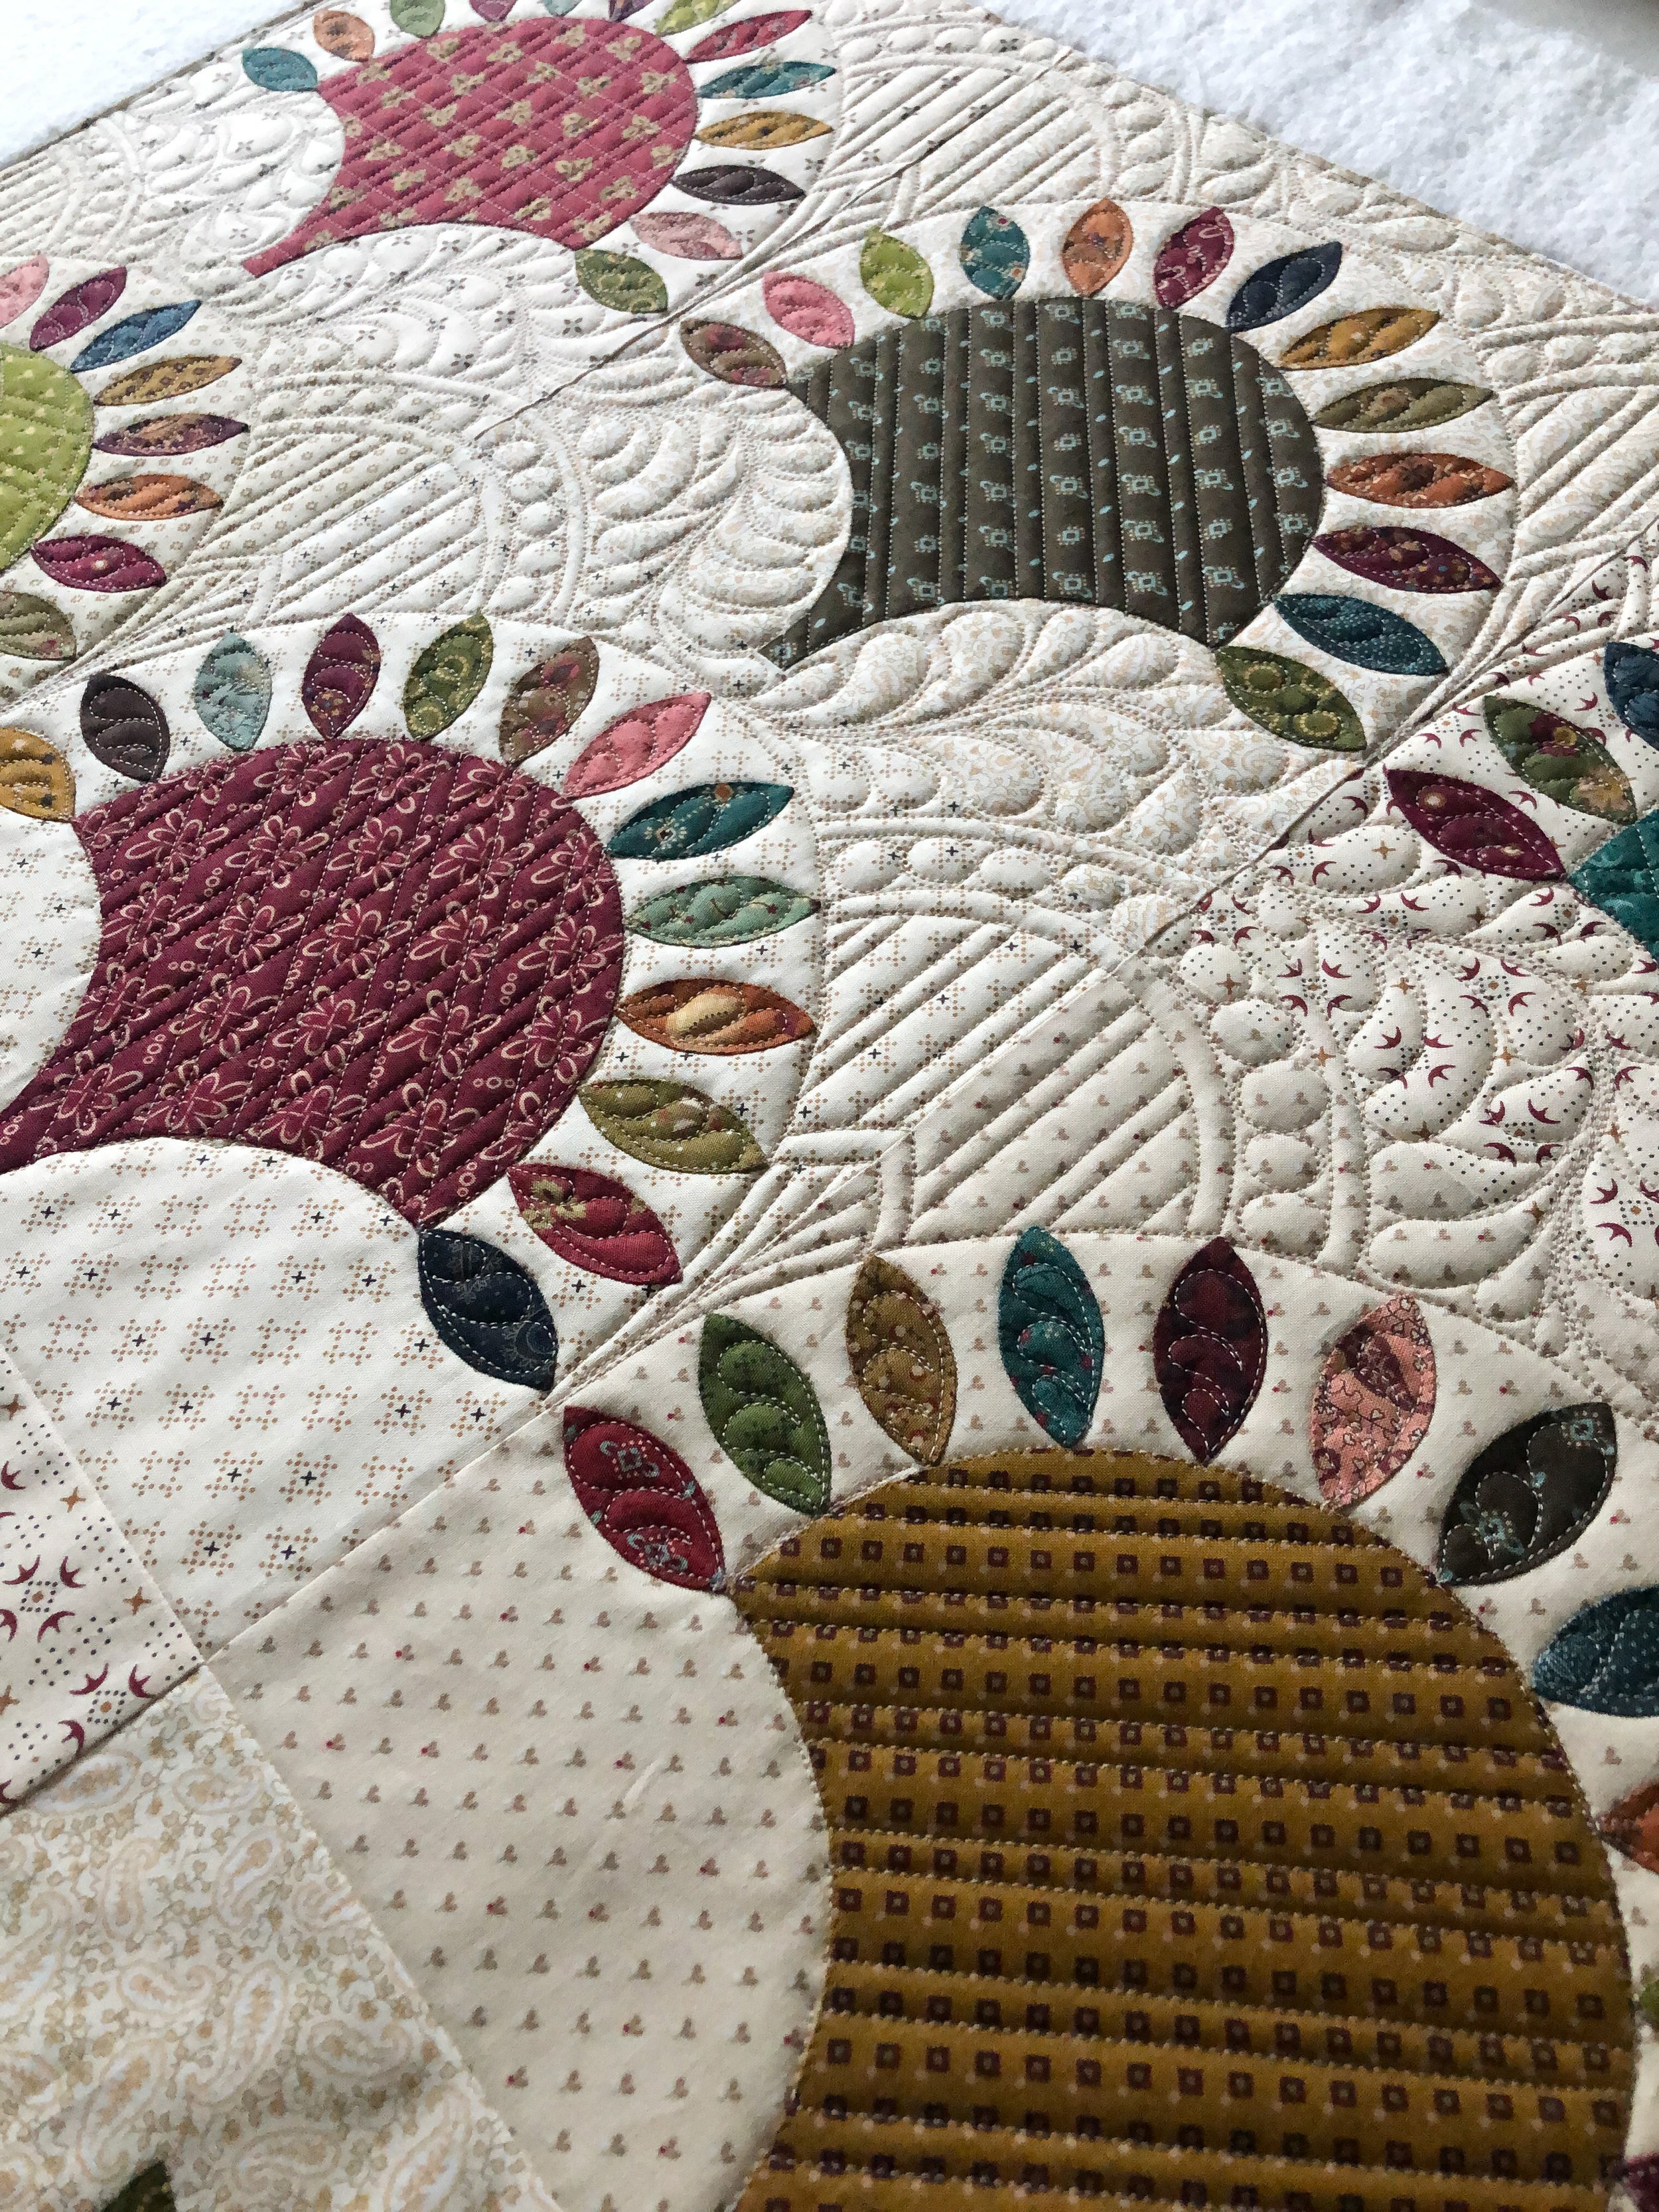
I am beyond thrilled to finally share with you a quilt that I custom quilted back in March!! I had posted on Instagram that I was almost caught up with longarm quilting, and Kim Diehl reached out to me asking if I would be available to custom quilt a quilt for her new Simple Double-Dipped Quilts book. I was absolutely thrilled to quilt for Kim! Her book is set to release the first week of October, and is available now for preorder on Amazon and it will be available soon at Shop Martingale with Kim’s other books. Kim has several gorgeous quilts in her book, this one is called Hope and Harmony. I wish you could all see it in person, its so beautiful.

Photo is courtesy of Kim Diehl
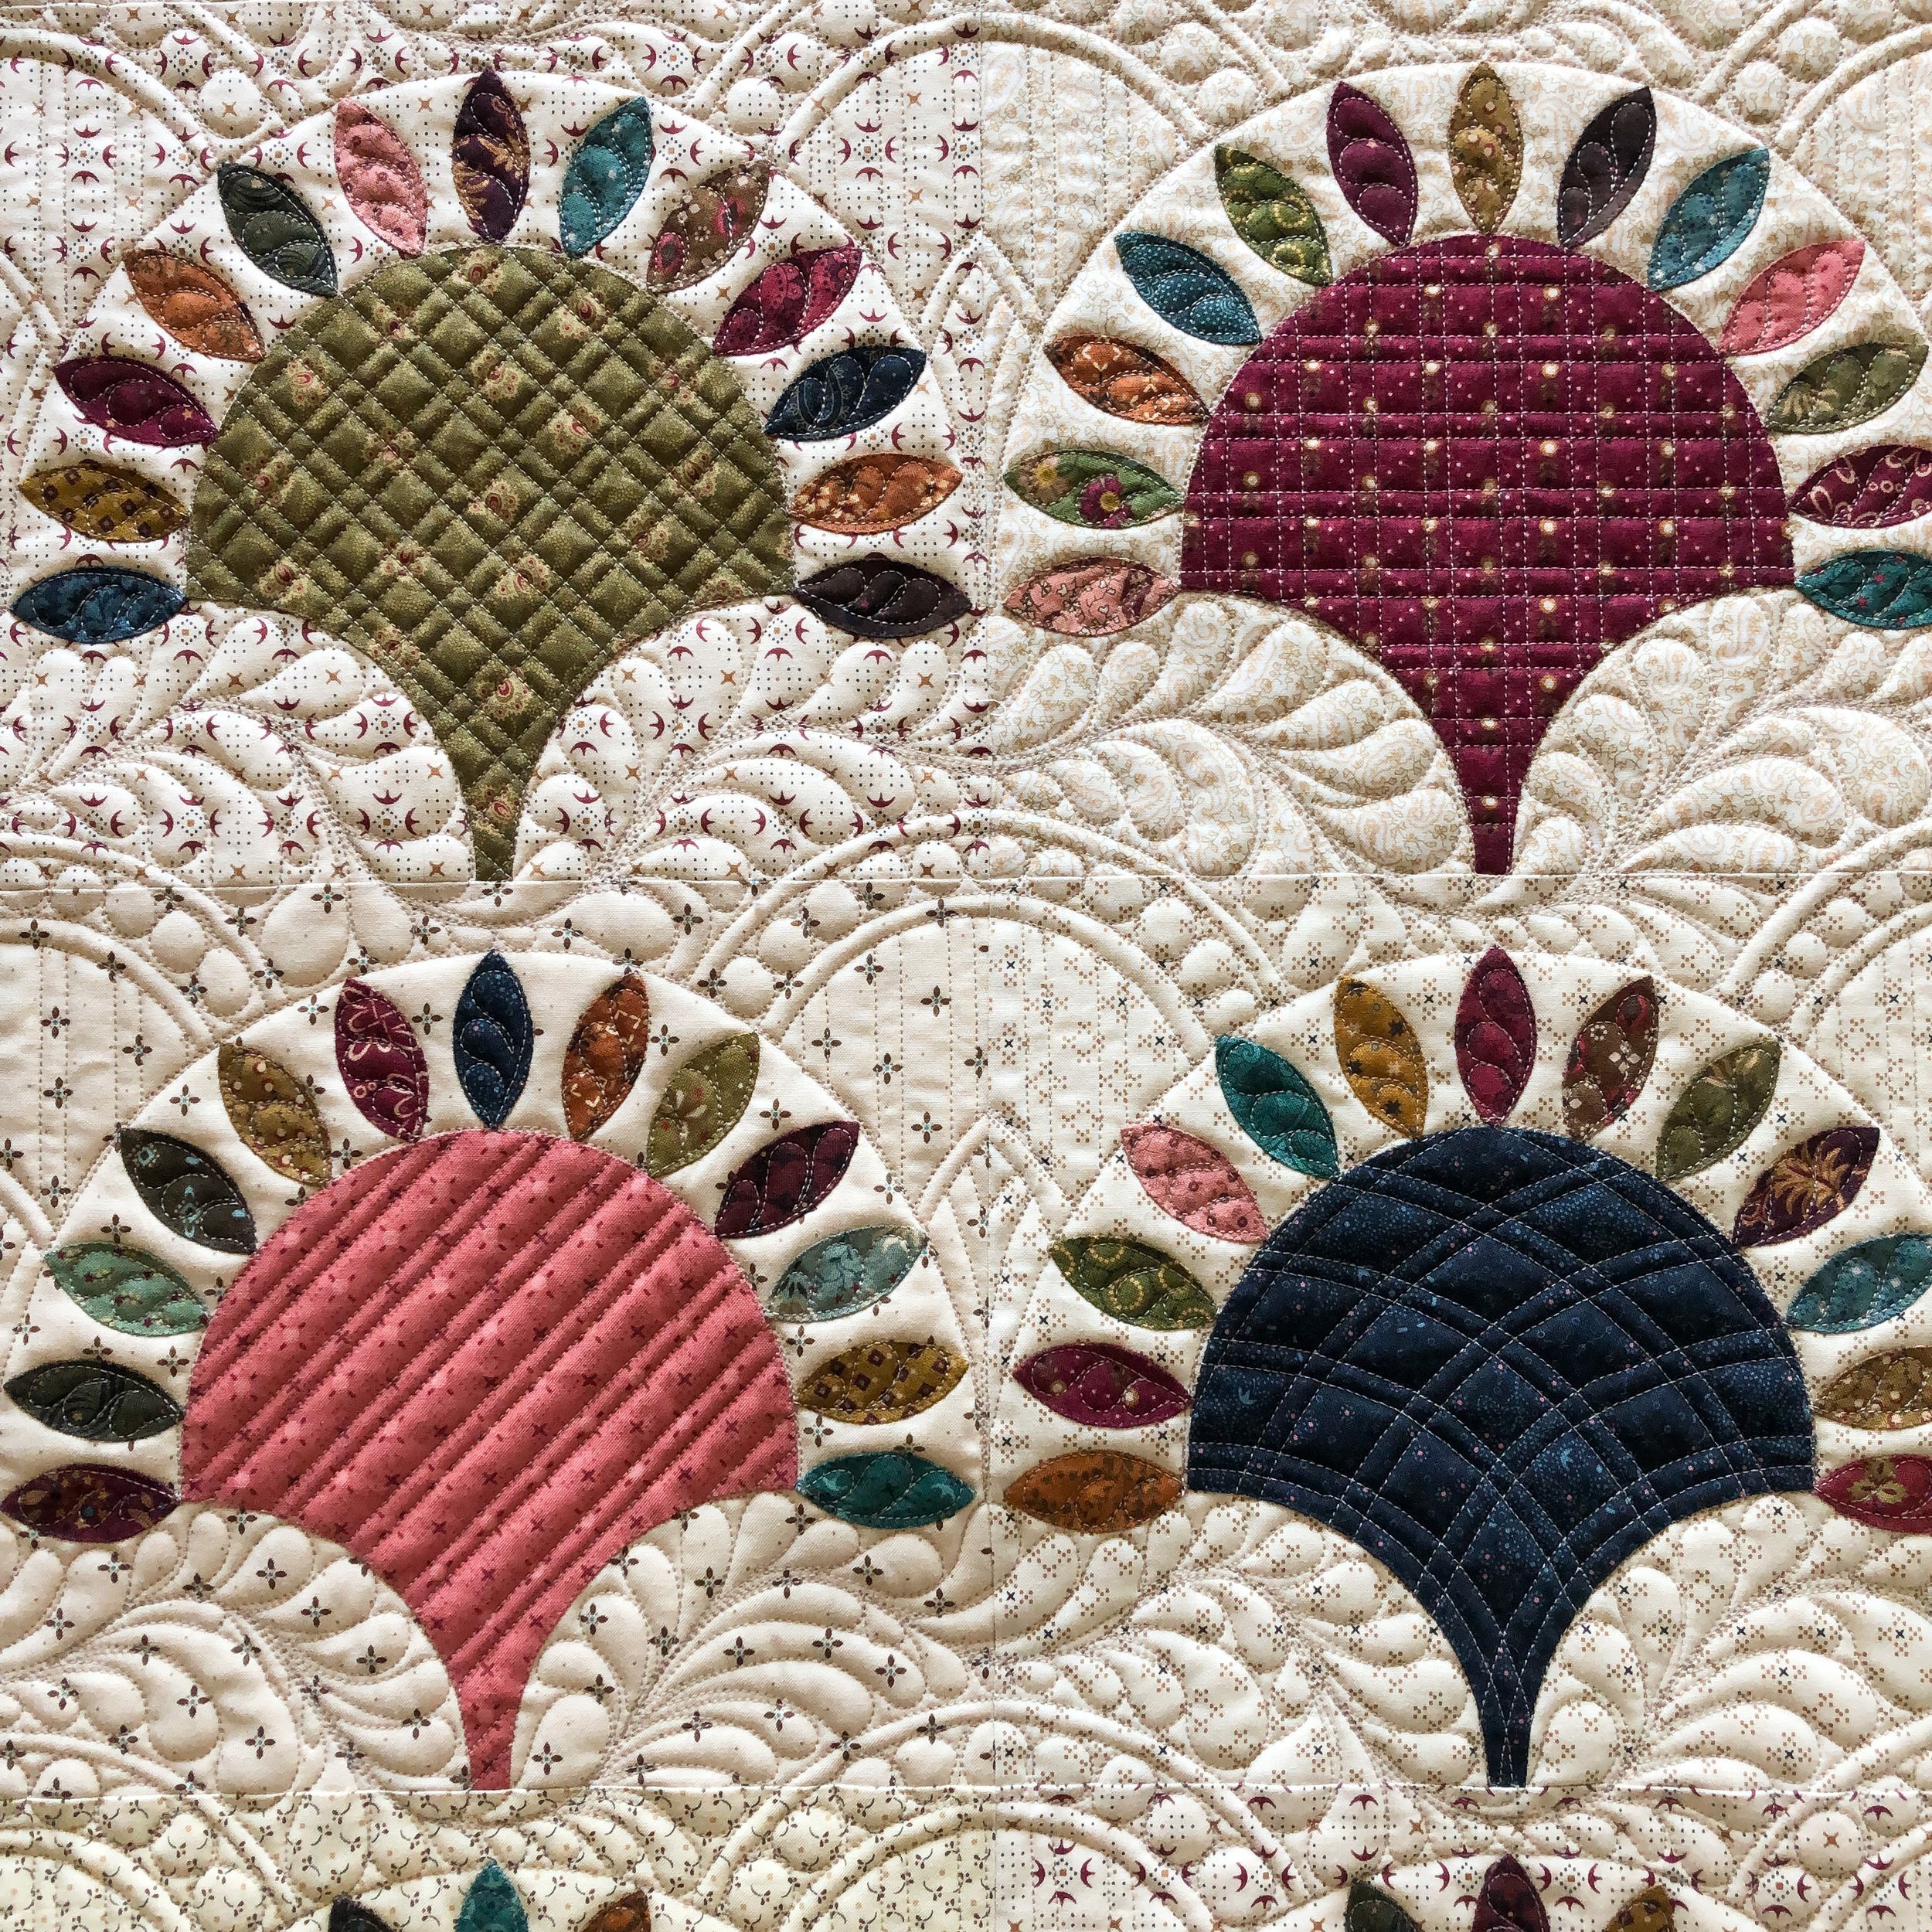
When I first started making quilts years ago, I became familiar with Kim’s beautiful timeless fabrics. The great thing about a scrappy quilt like this, you can pair a variety of Kim’s fabrics from over the years together and they harmonize so beautifully. Kim had sent me a picture of the quilt when she was done piecing it, and I was amazed, then I saw it in person and I was in awe! All of those petals!!
Kim sent me a few ideas she had for the custom quilting, and then left it up to me. She wanted to be sure that I was able to use some creativity of my own, which is what I love! It helps me to know when one of my clients has a vision of what they are wanting for the quilting, even better when they still allow me some creative liberty as well. Its such a fun process. If one of my clients isn’t quite sure what they want, first they typically specify if they want freemotion custom or edge to edge, and we go from there. I will suggest some designs or draw something out, which is a great way to collaborate on a quilt. It was such a joy to work with Kim, and I look forward to quilting for her again.
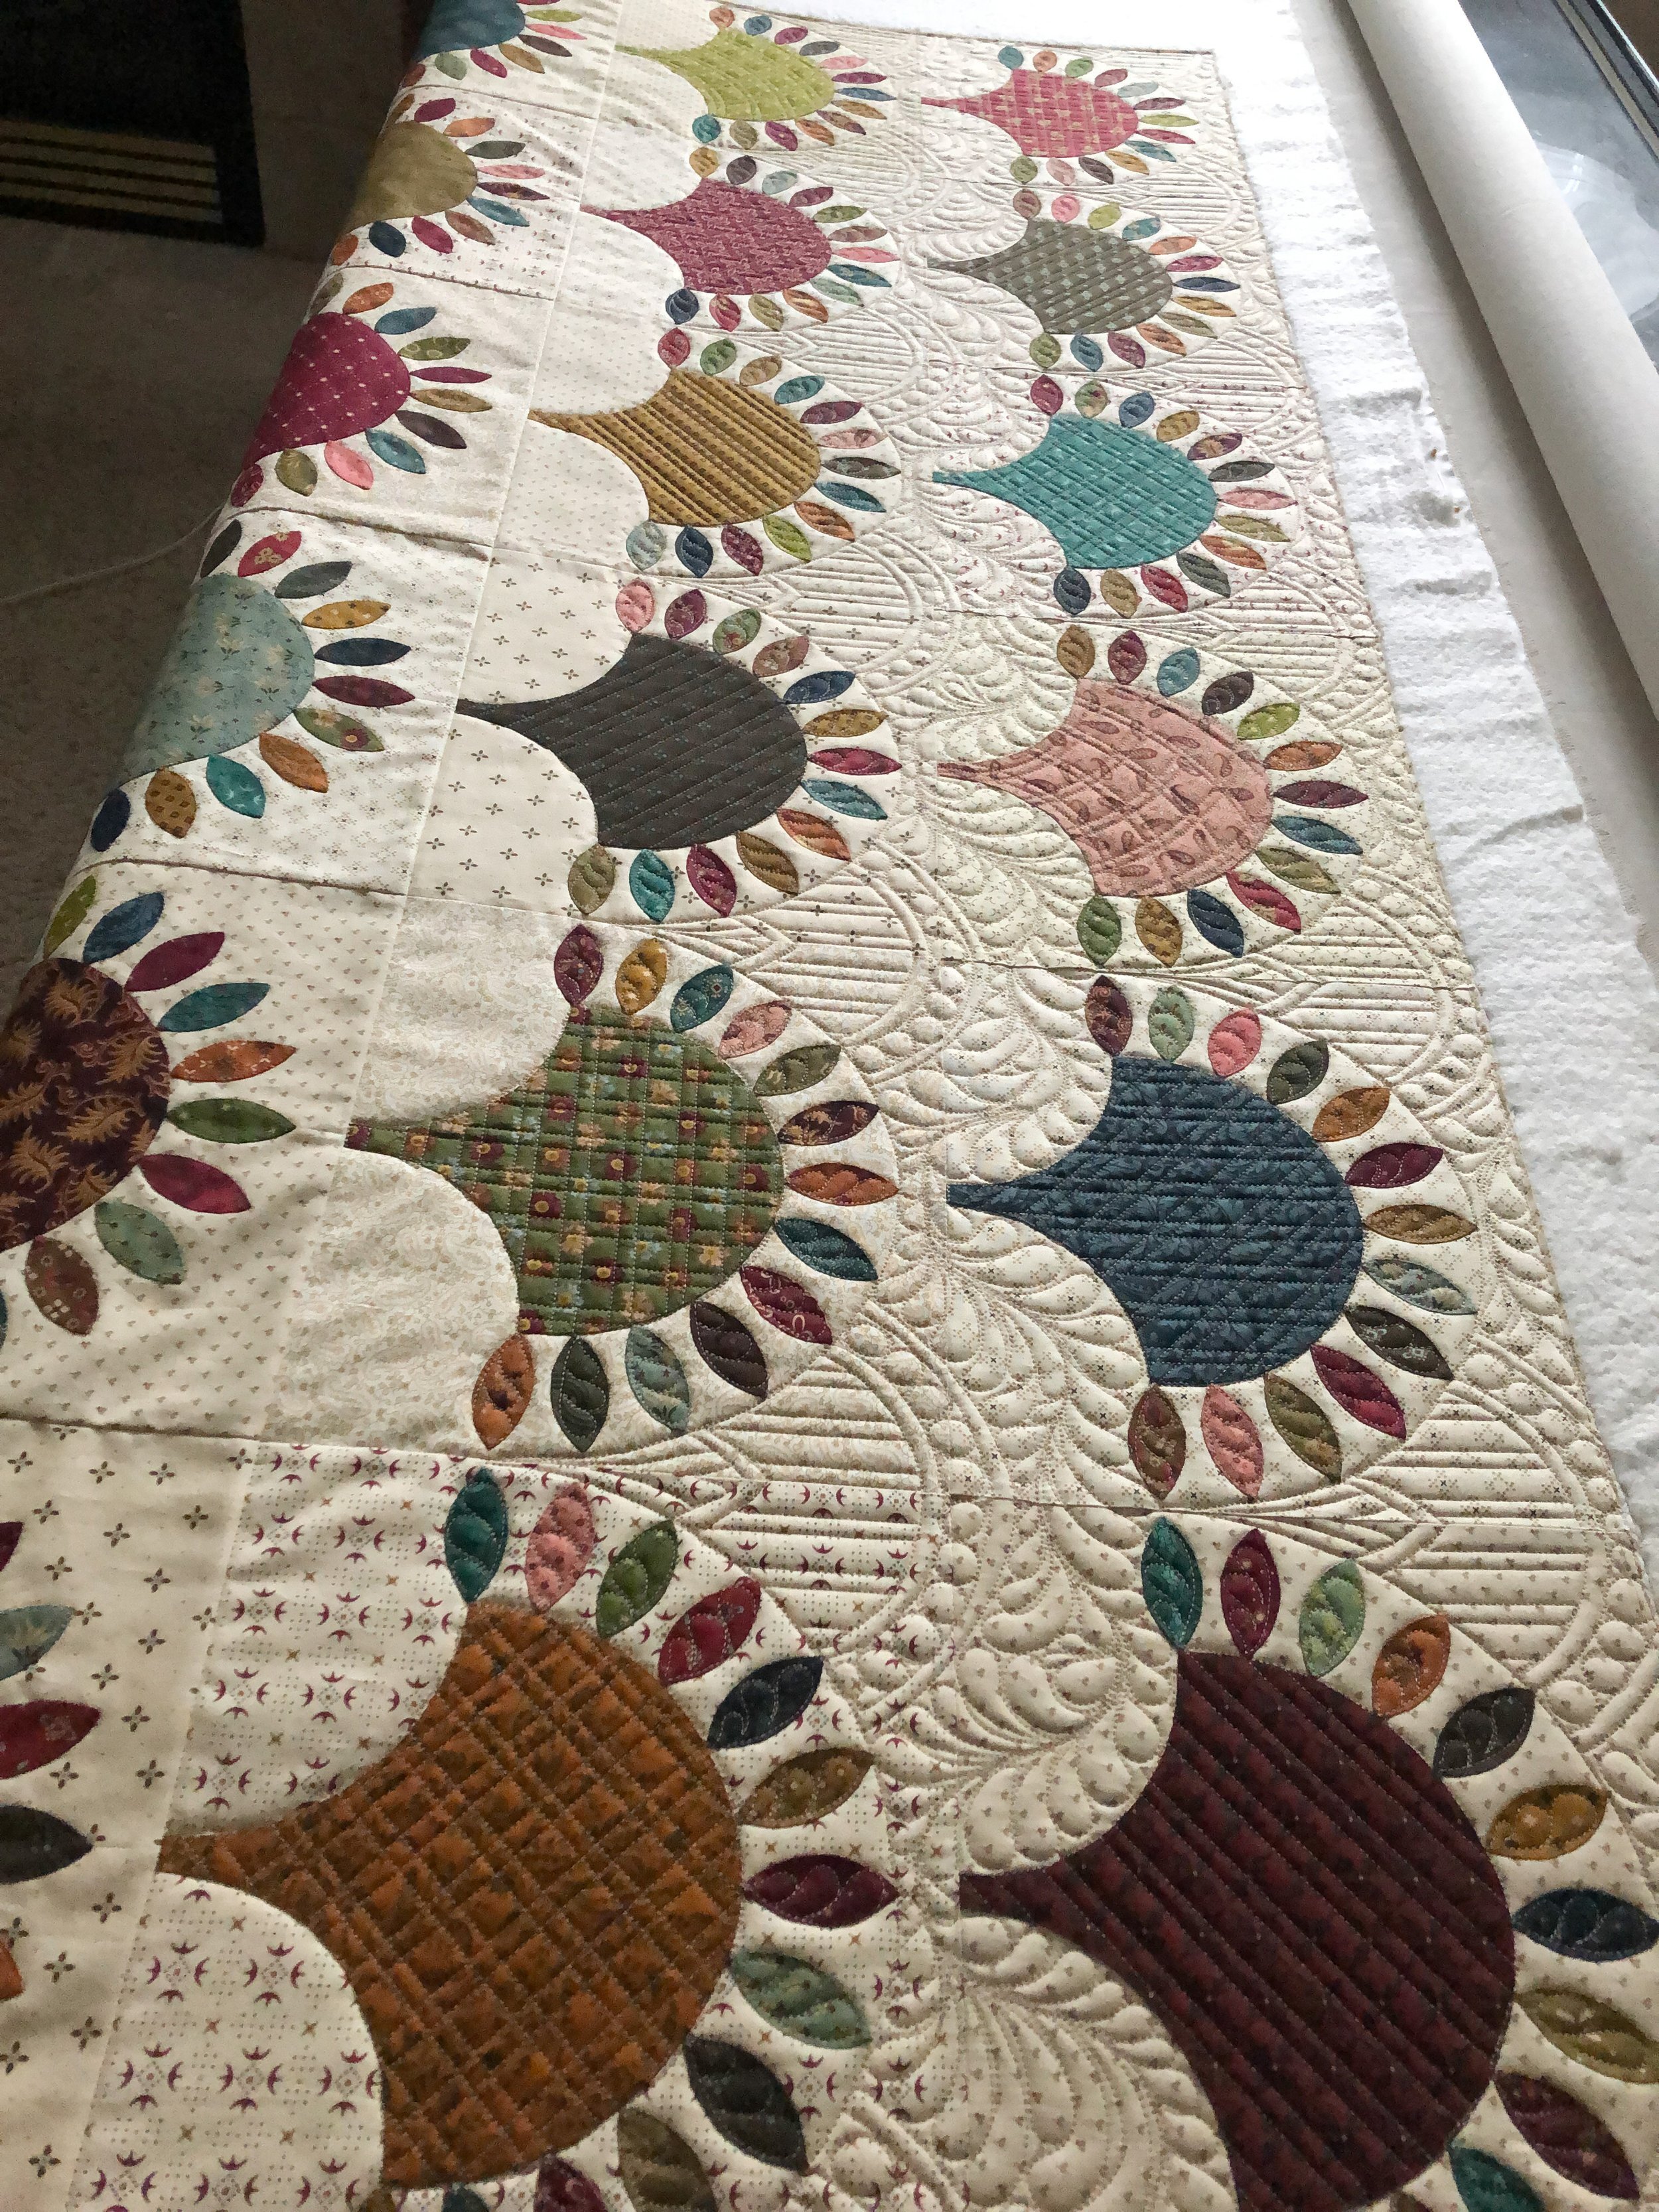
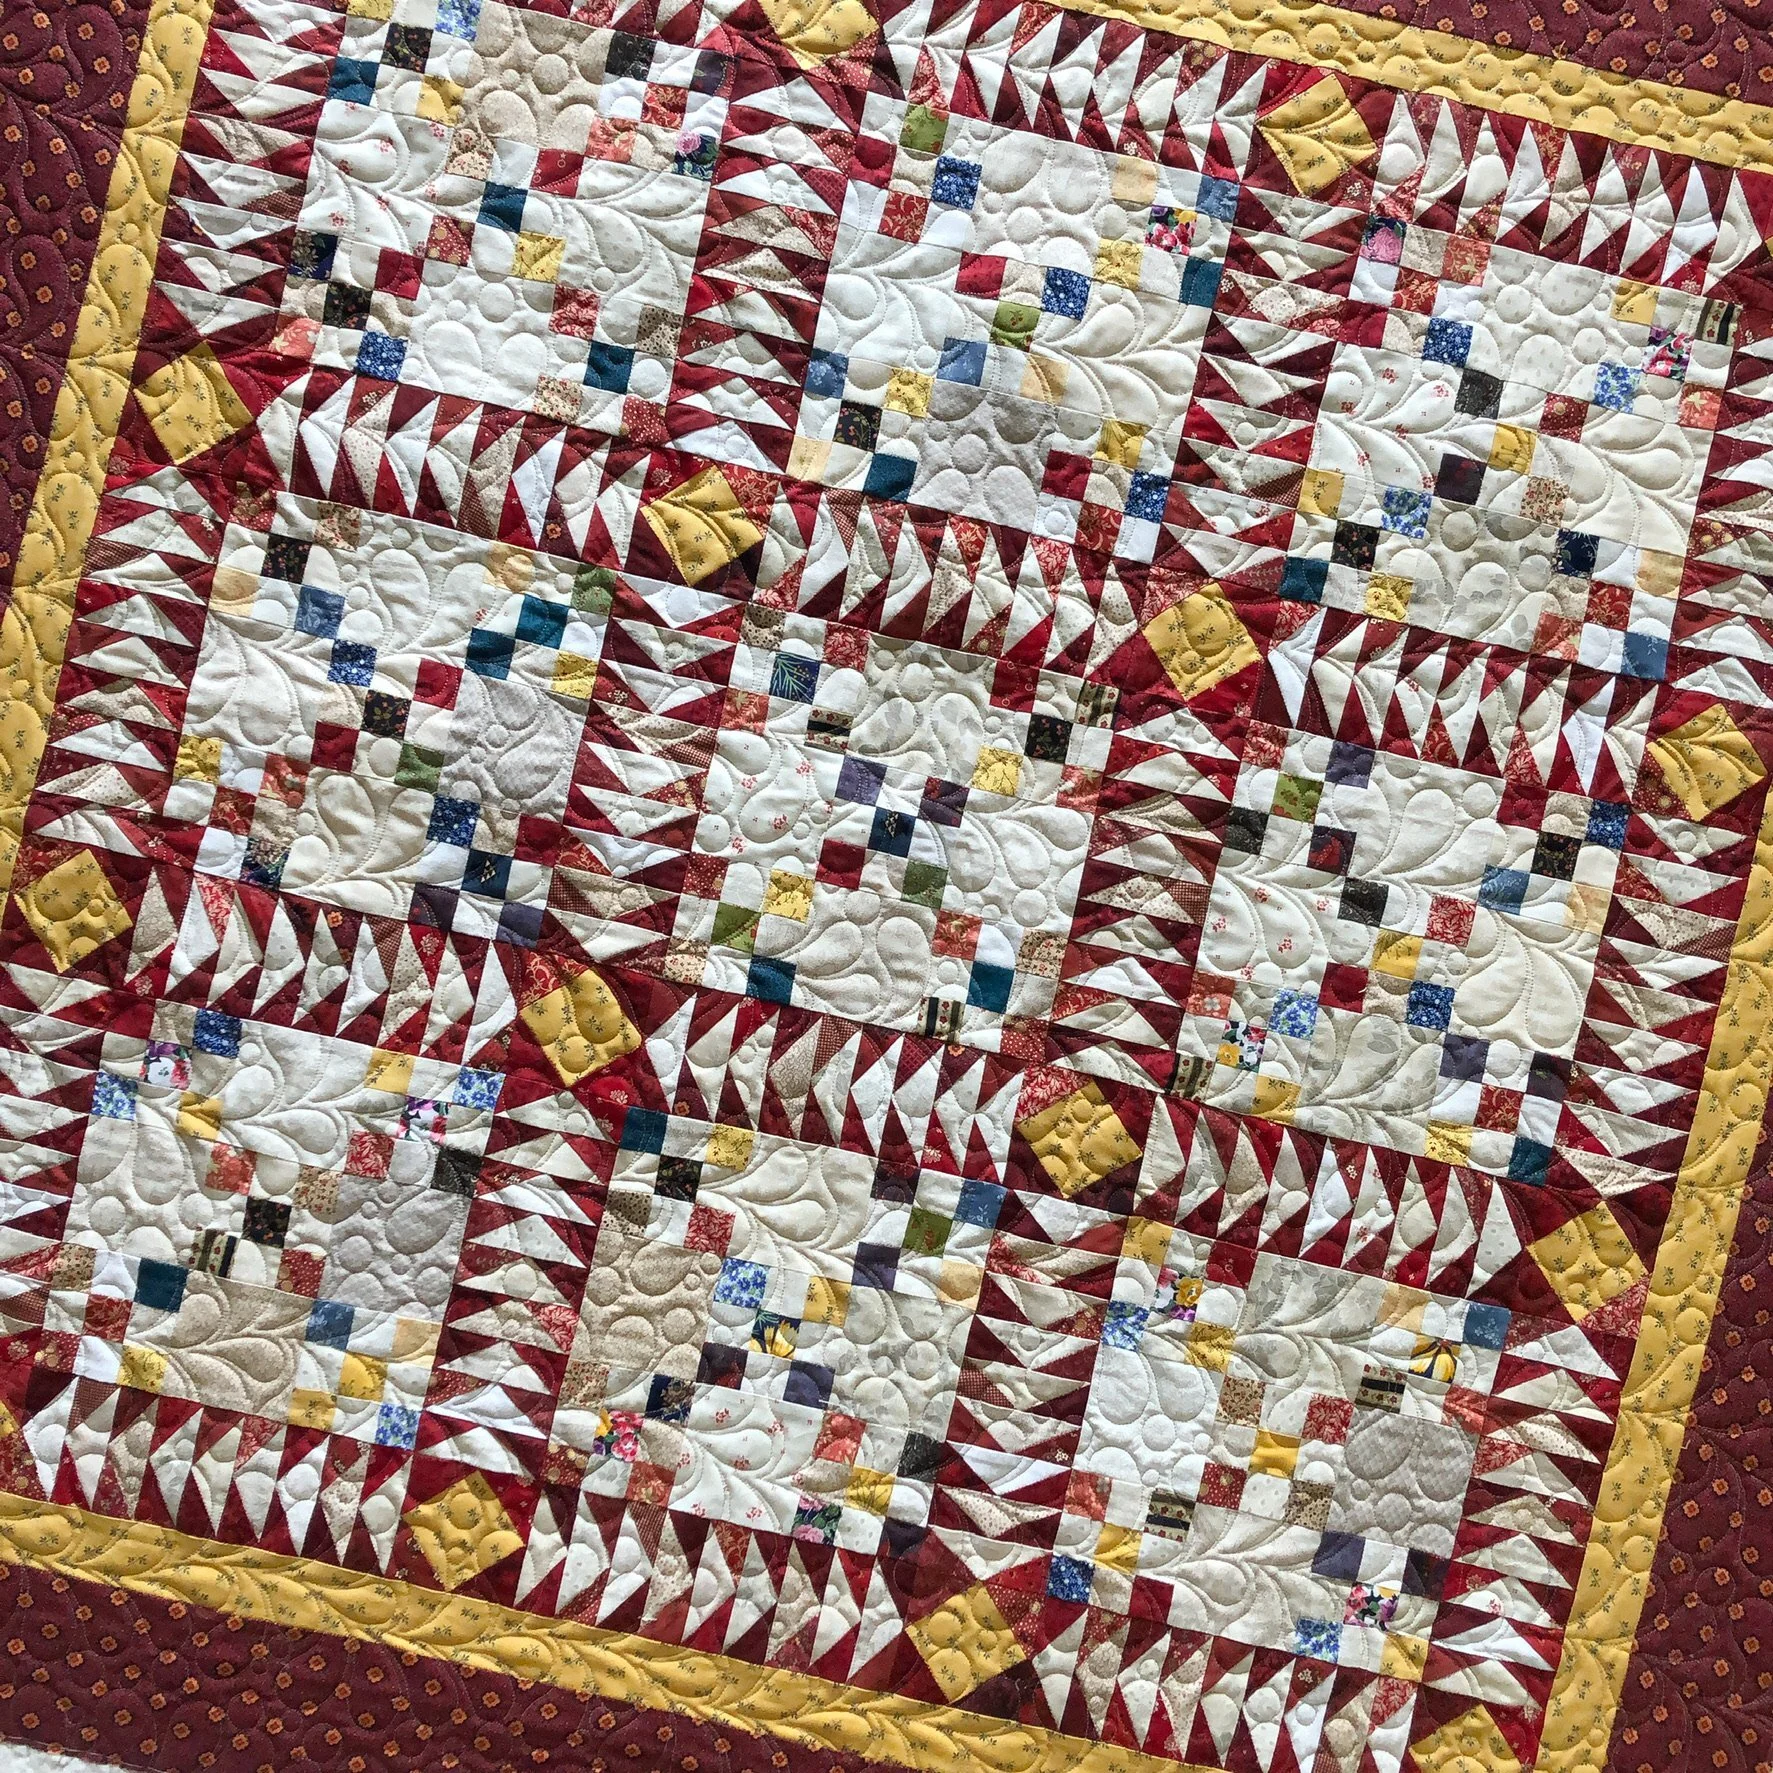
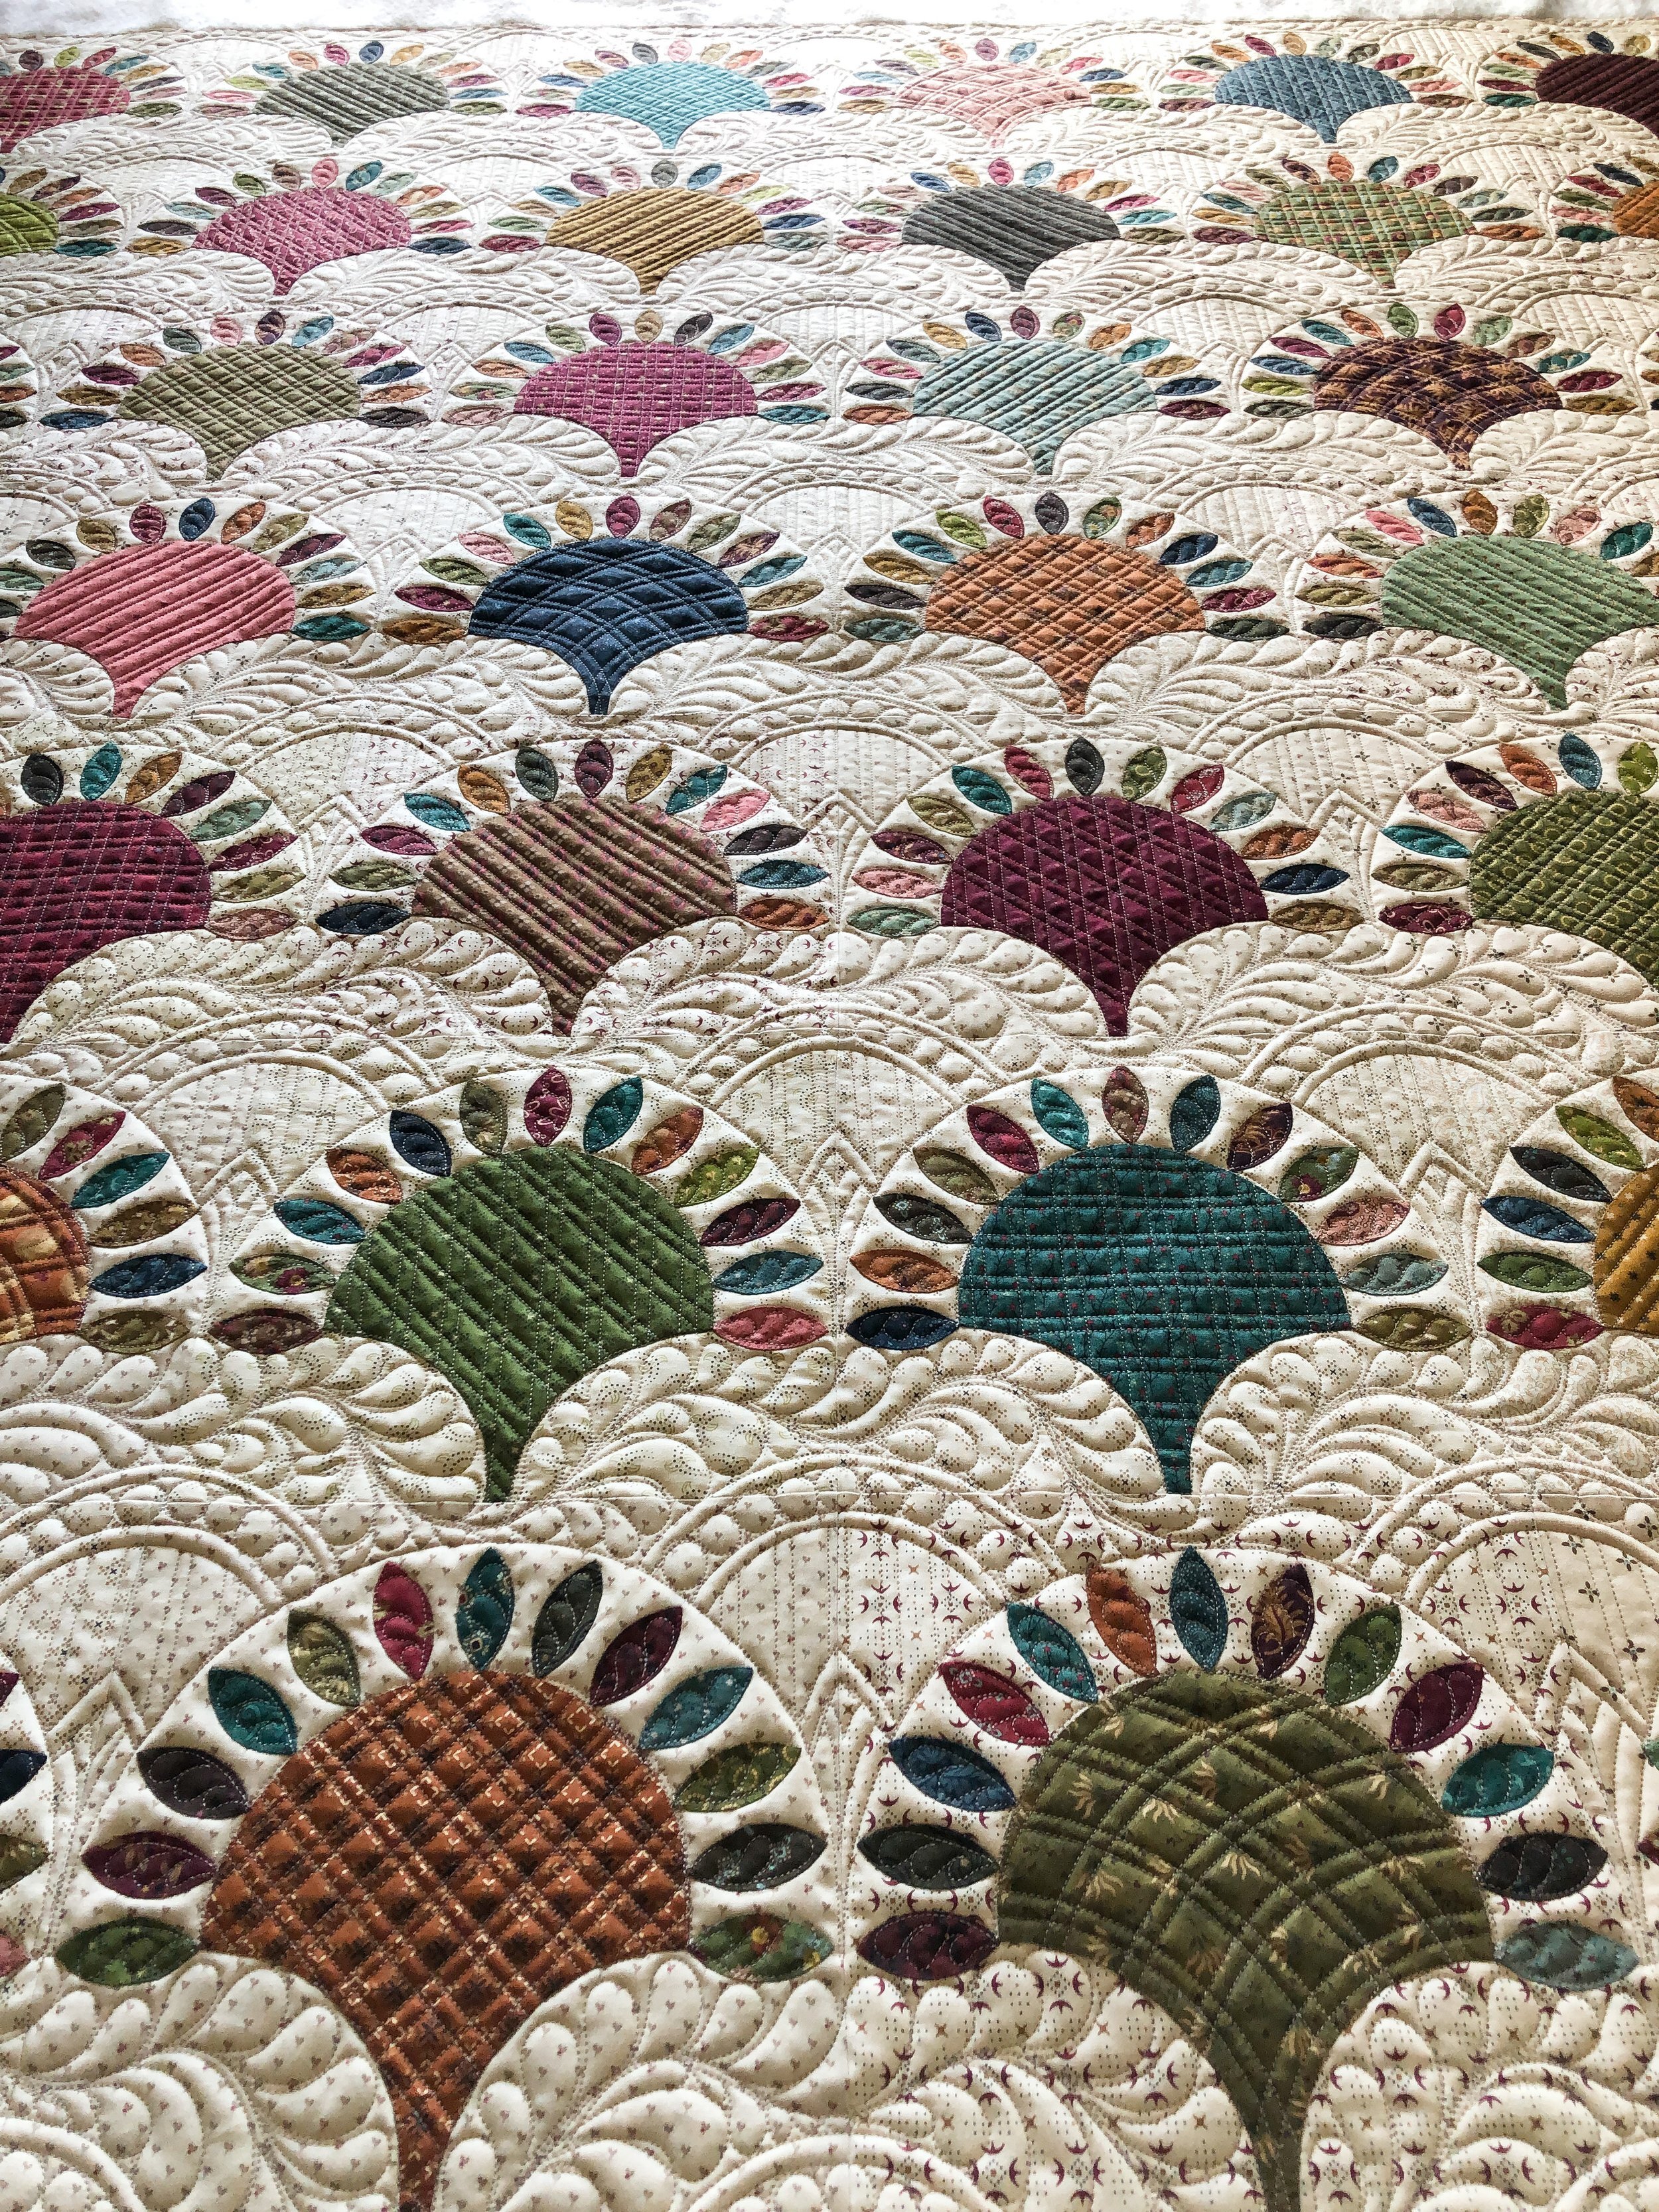
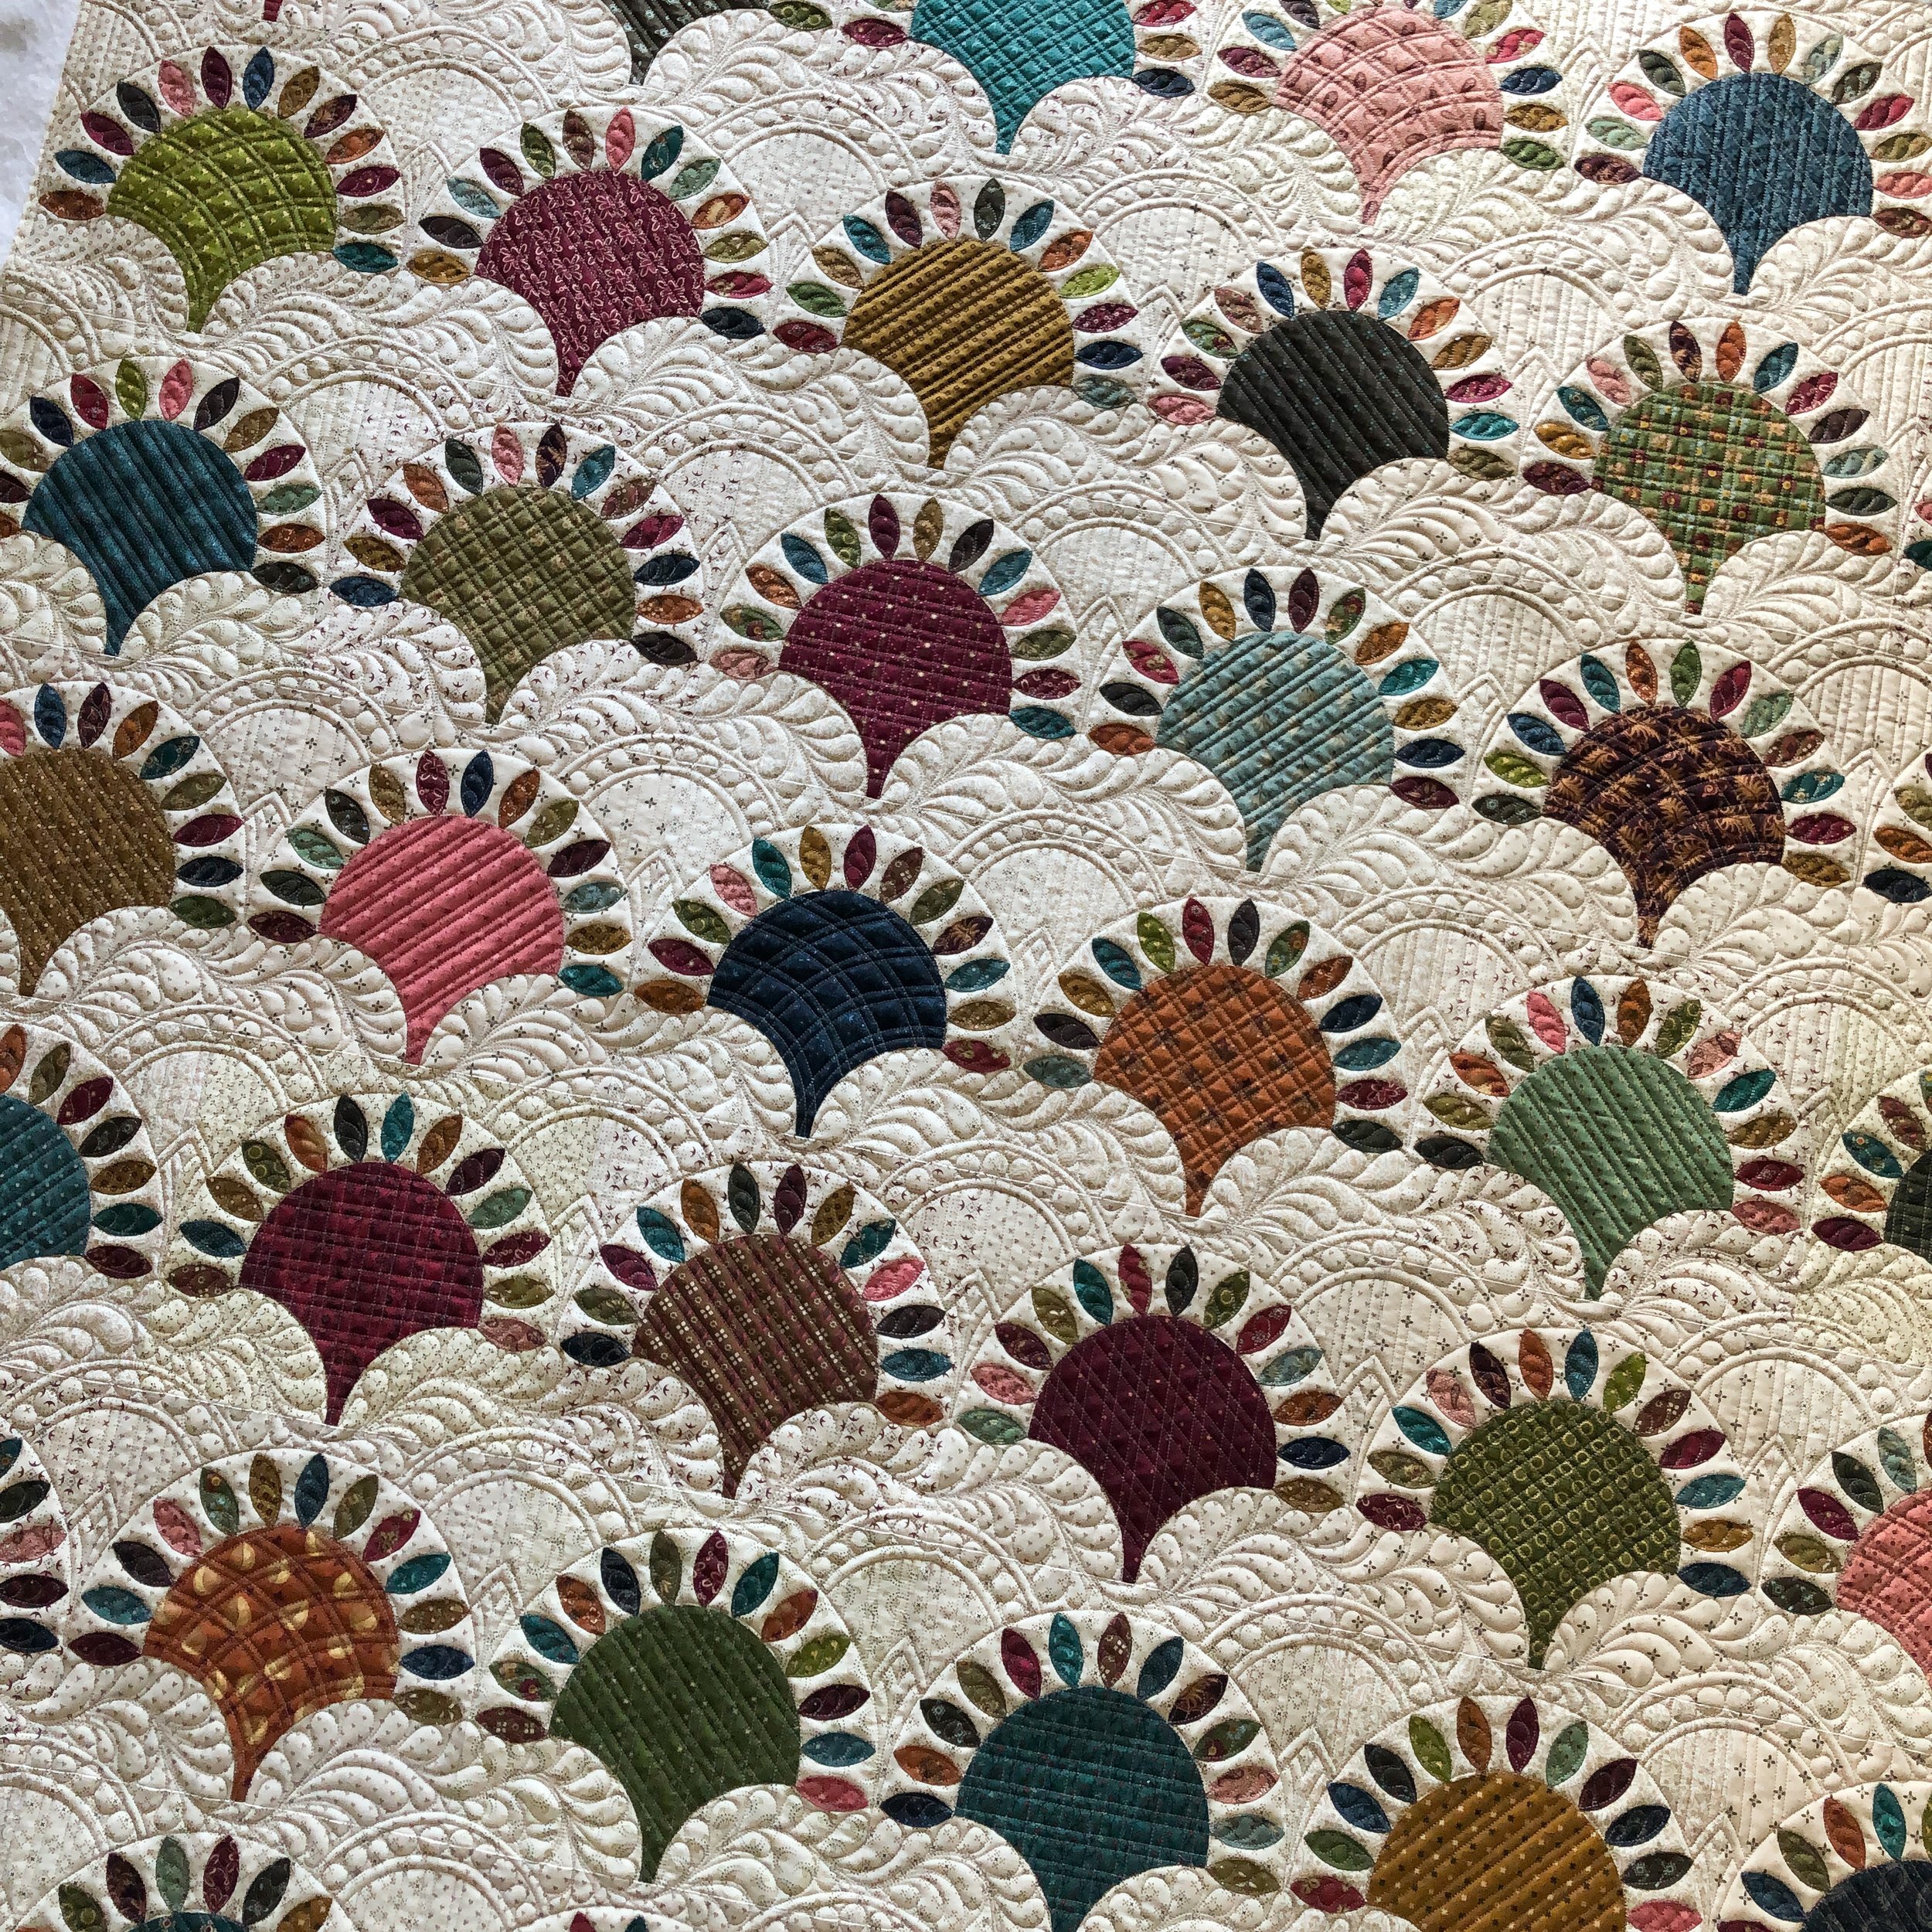
Here are a couple of pictures of the quilt when I finished quilting the first section. Kim wanted some variety in the clamshells, which I think is great! I quilted a different design inside each clamshell across the first row. Then on the proceeding rows I mixed up those designs, so that each row and column had the design once. The only row that was repeated was the very last row. It’s a great way to make your eye travel throughout the quilt.
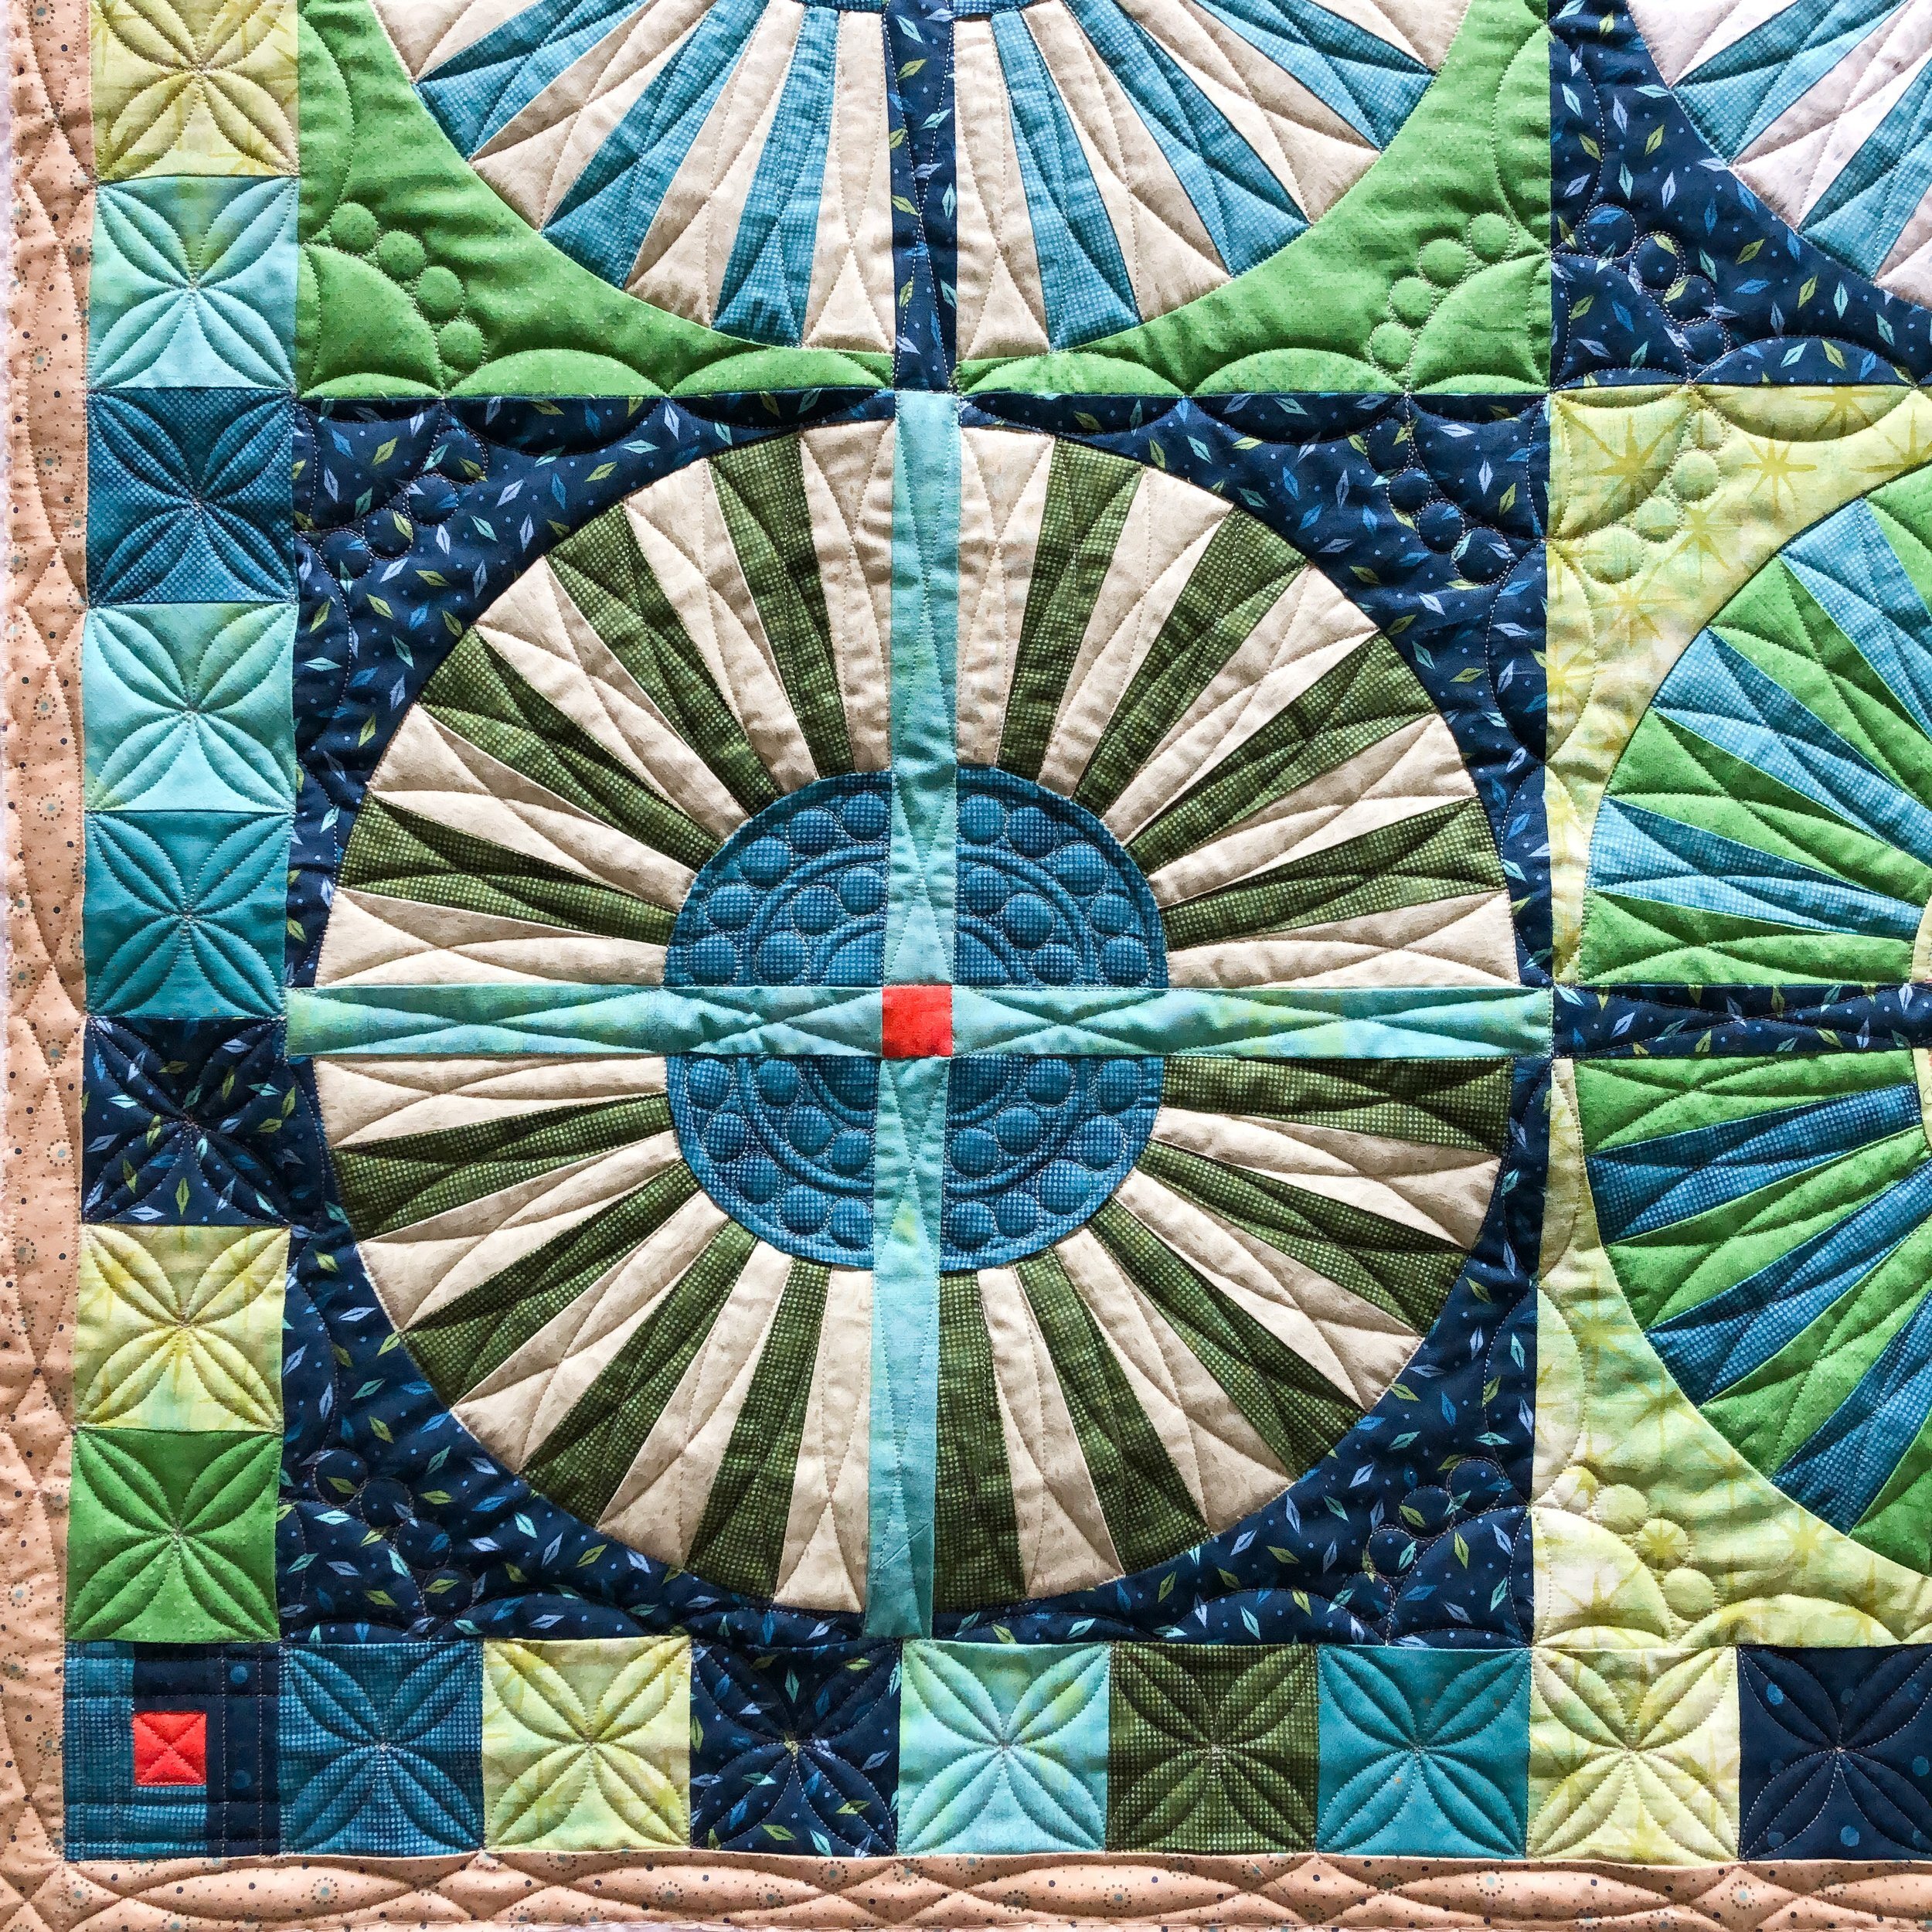
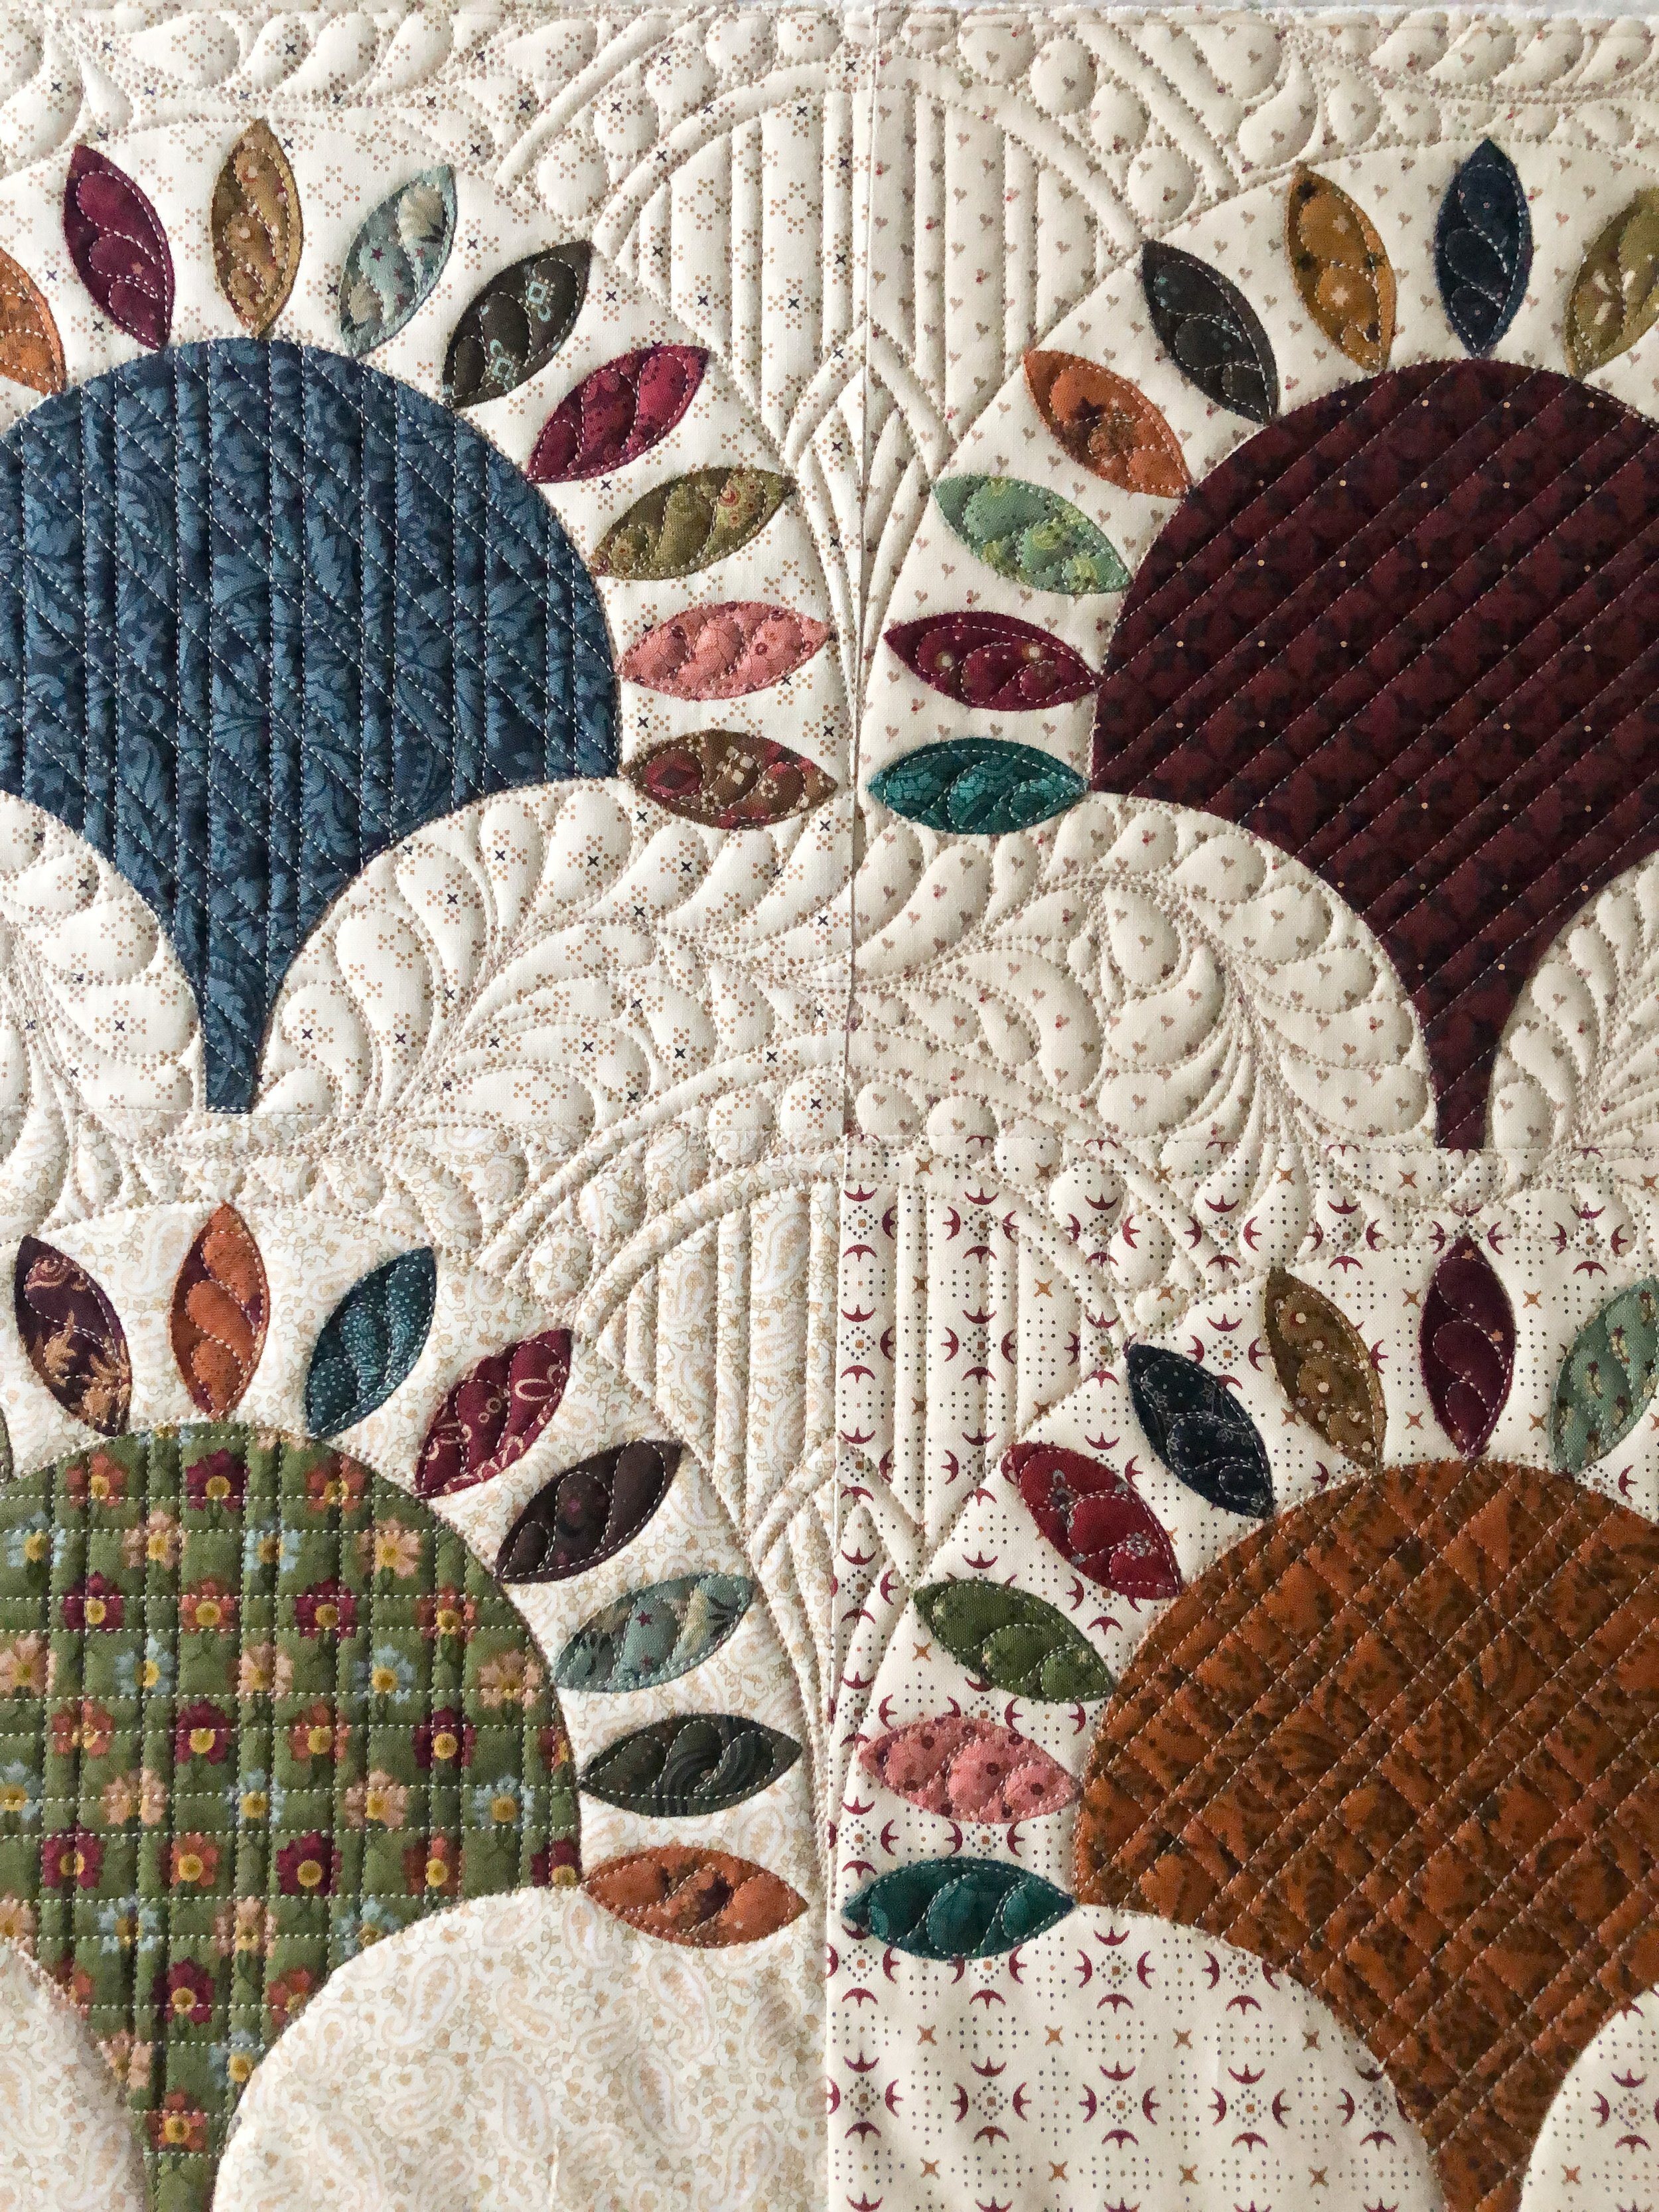
I love using my Circle2 machine quilting circle rulers when I freemotion quilt. I used my 10” and my 5” rulers to create all those beautiful curves. If you notice the curve that I quilted on the outside tips of the 13 petals on each block, I used my 10” Circle2 ruler. By quilting that curve, it helped create a boundary for all of the designs that are between the next block and it enhances the overall clamshell look. I also used the 10” ruler for the curved plaid in some of the clamshells, which I have pictured below.

I created my Circle2 machine quilting circle rulers back in 2018 because I couldn’t find anything like them on the market. They come in a set of 6, and the circles range in size from 2” up to 13”. As you can see in the pictures above and below, there are two sizes of circles per ruler. I took into consideration the 1/4” hopping foot, which means when you quilt out a 5” circle using my 5” Circle2 you’ll get a 5” circle, not a 5.5” circle that you’d get using the other rulers that are available on the market. I also love having only six rulers, instead of the twelve that I had before. The 3/4ths of a circle design makes it easier to handle the ruler as you freemotion quilt. My Circle2 rulers are made in America from high quality 1/4” acrylic, and can be used on a longarm or a domestic machine (if you have the correct quilting foot for it.) The rulers come in clear or green, and are available in my shop.
- Design Patent D875,574 -

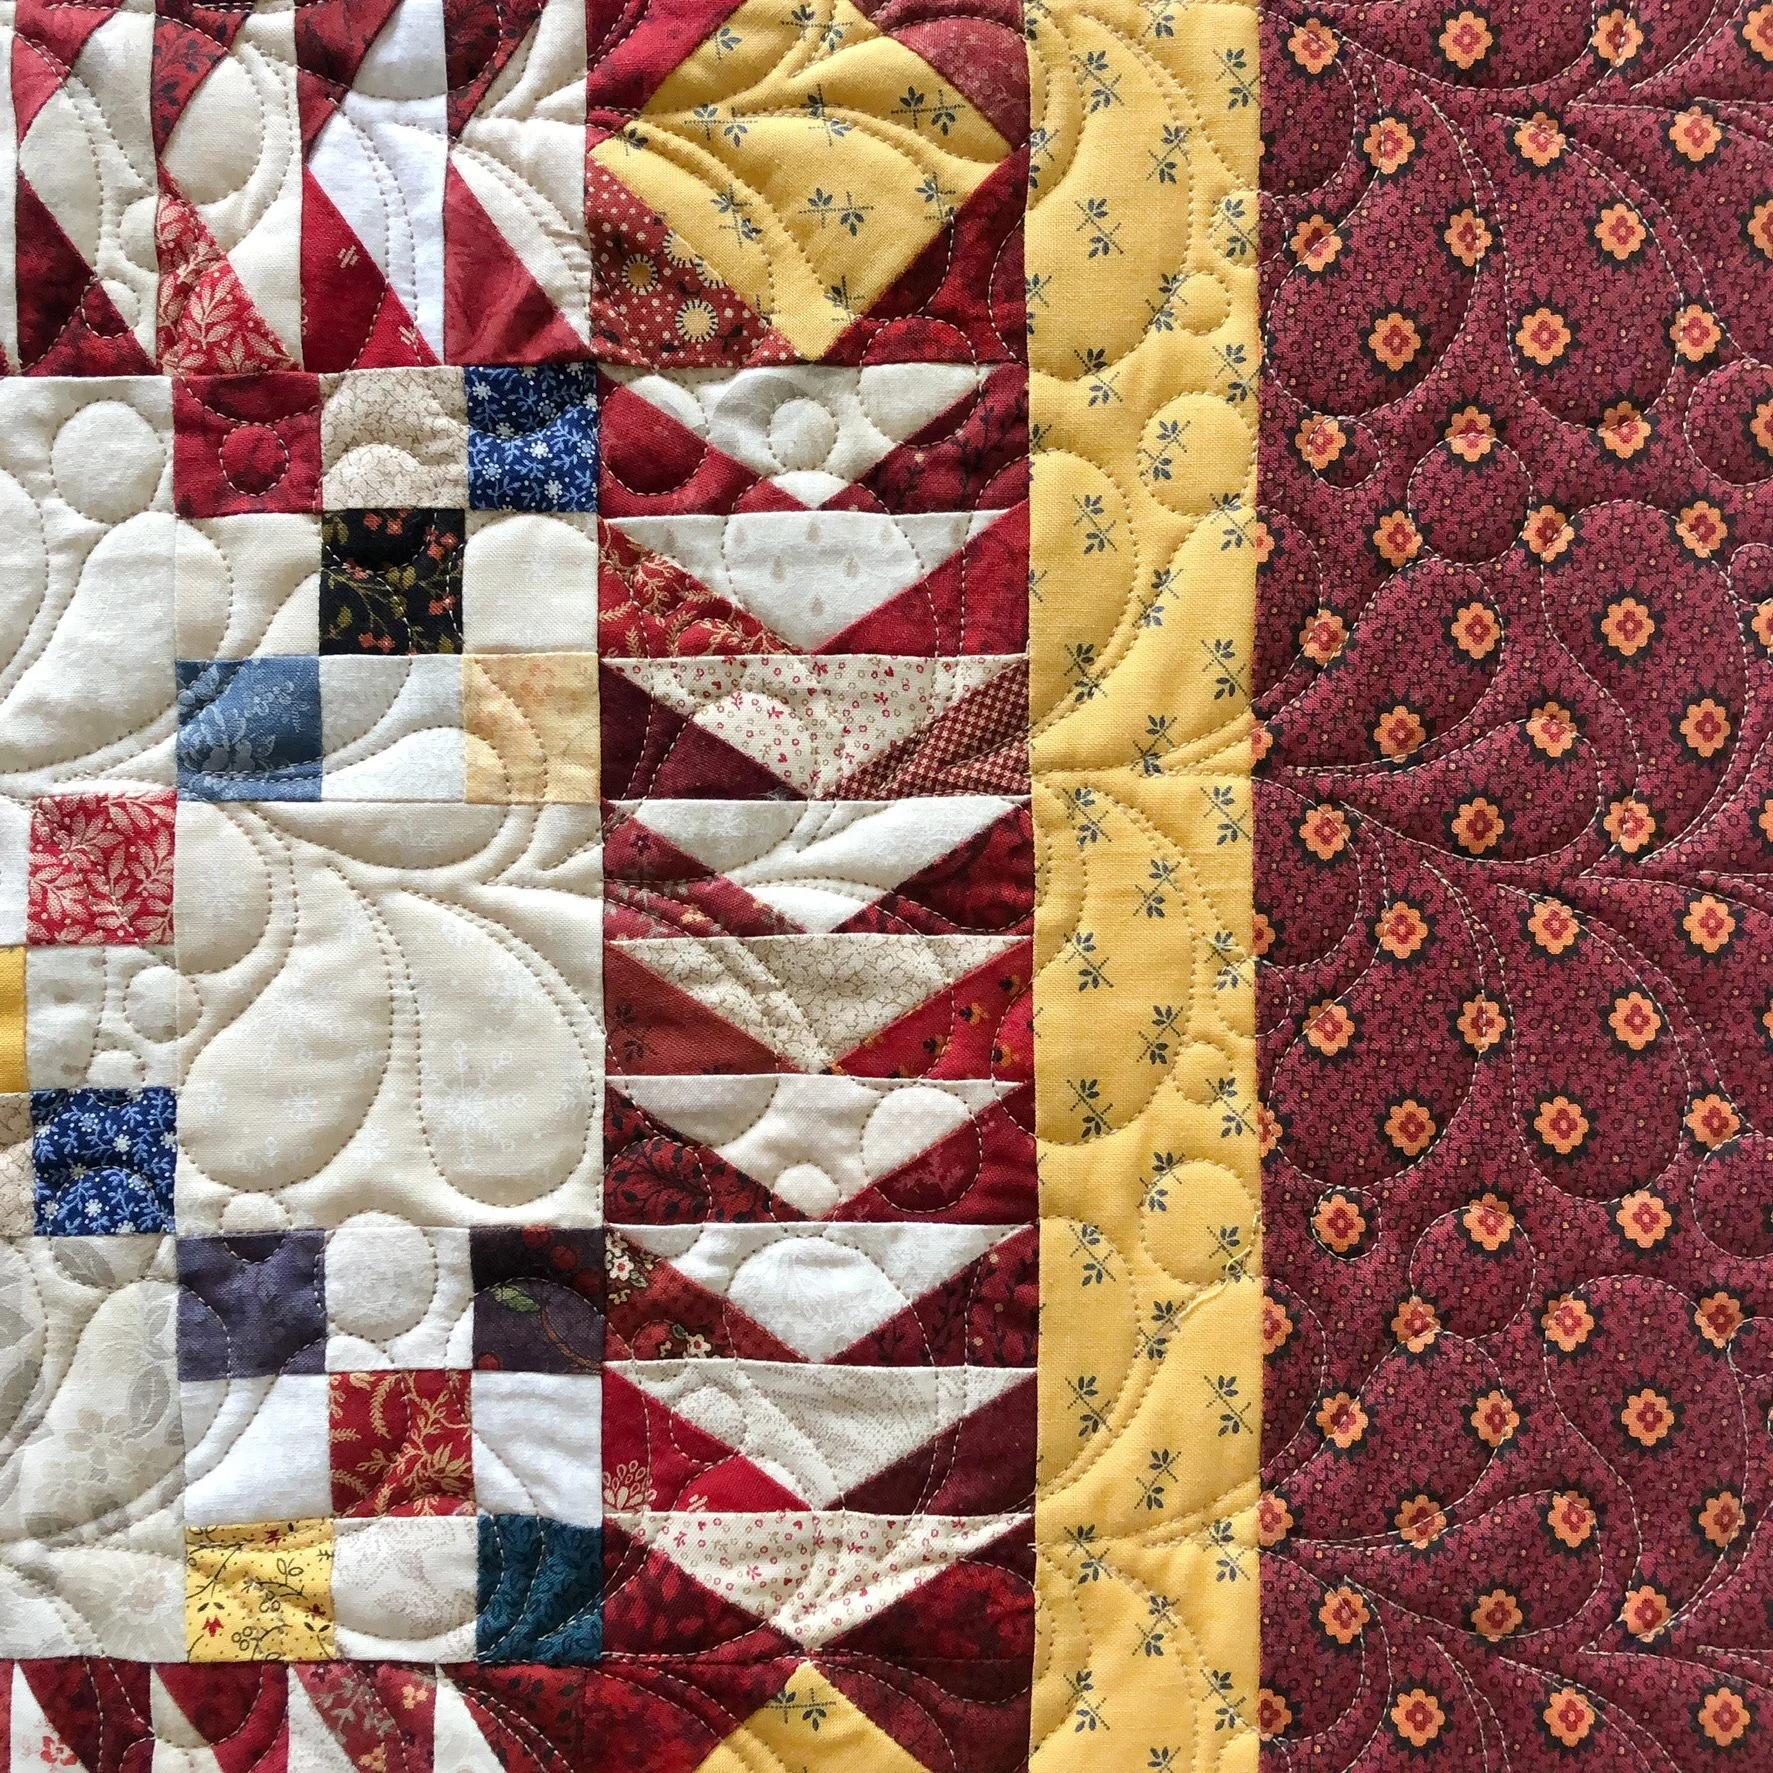
I used the 5” Circle2 ruler for the curves that arc on top between the two clamshells. I loved creating that secondary design. I used the handy lines on the rulers for the spacing and the filled in with pebbles or other curves. All of the lines were quilted using an Edge ruler from Linda at The Quilted Pineapple. Her straight rulers are my absolute favorite!!
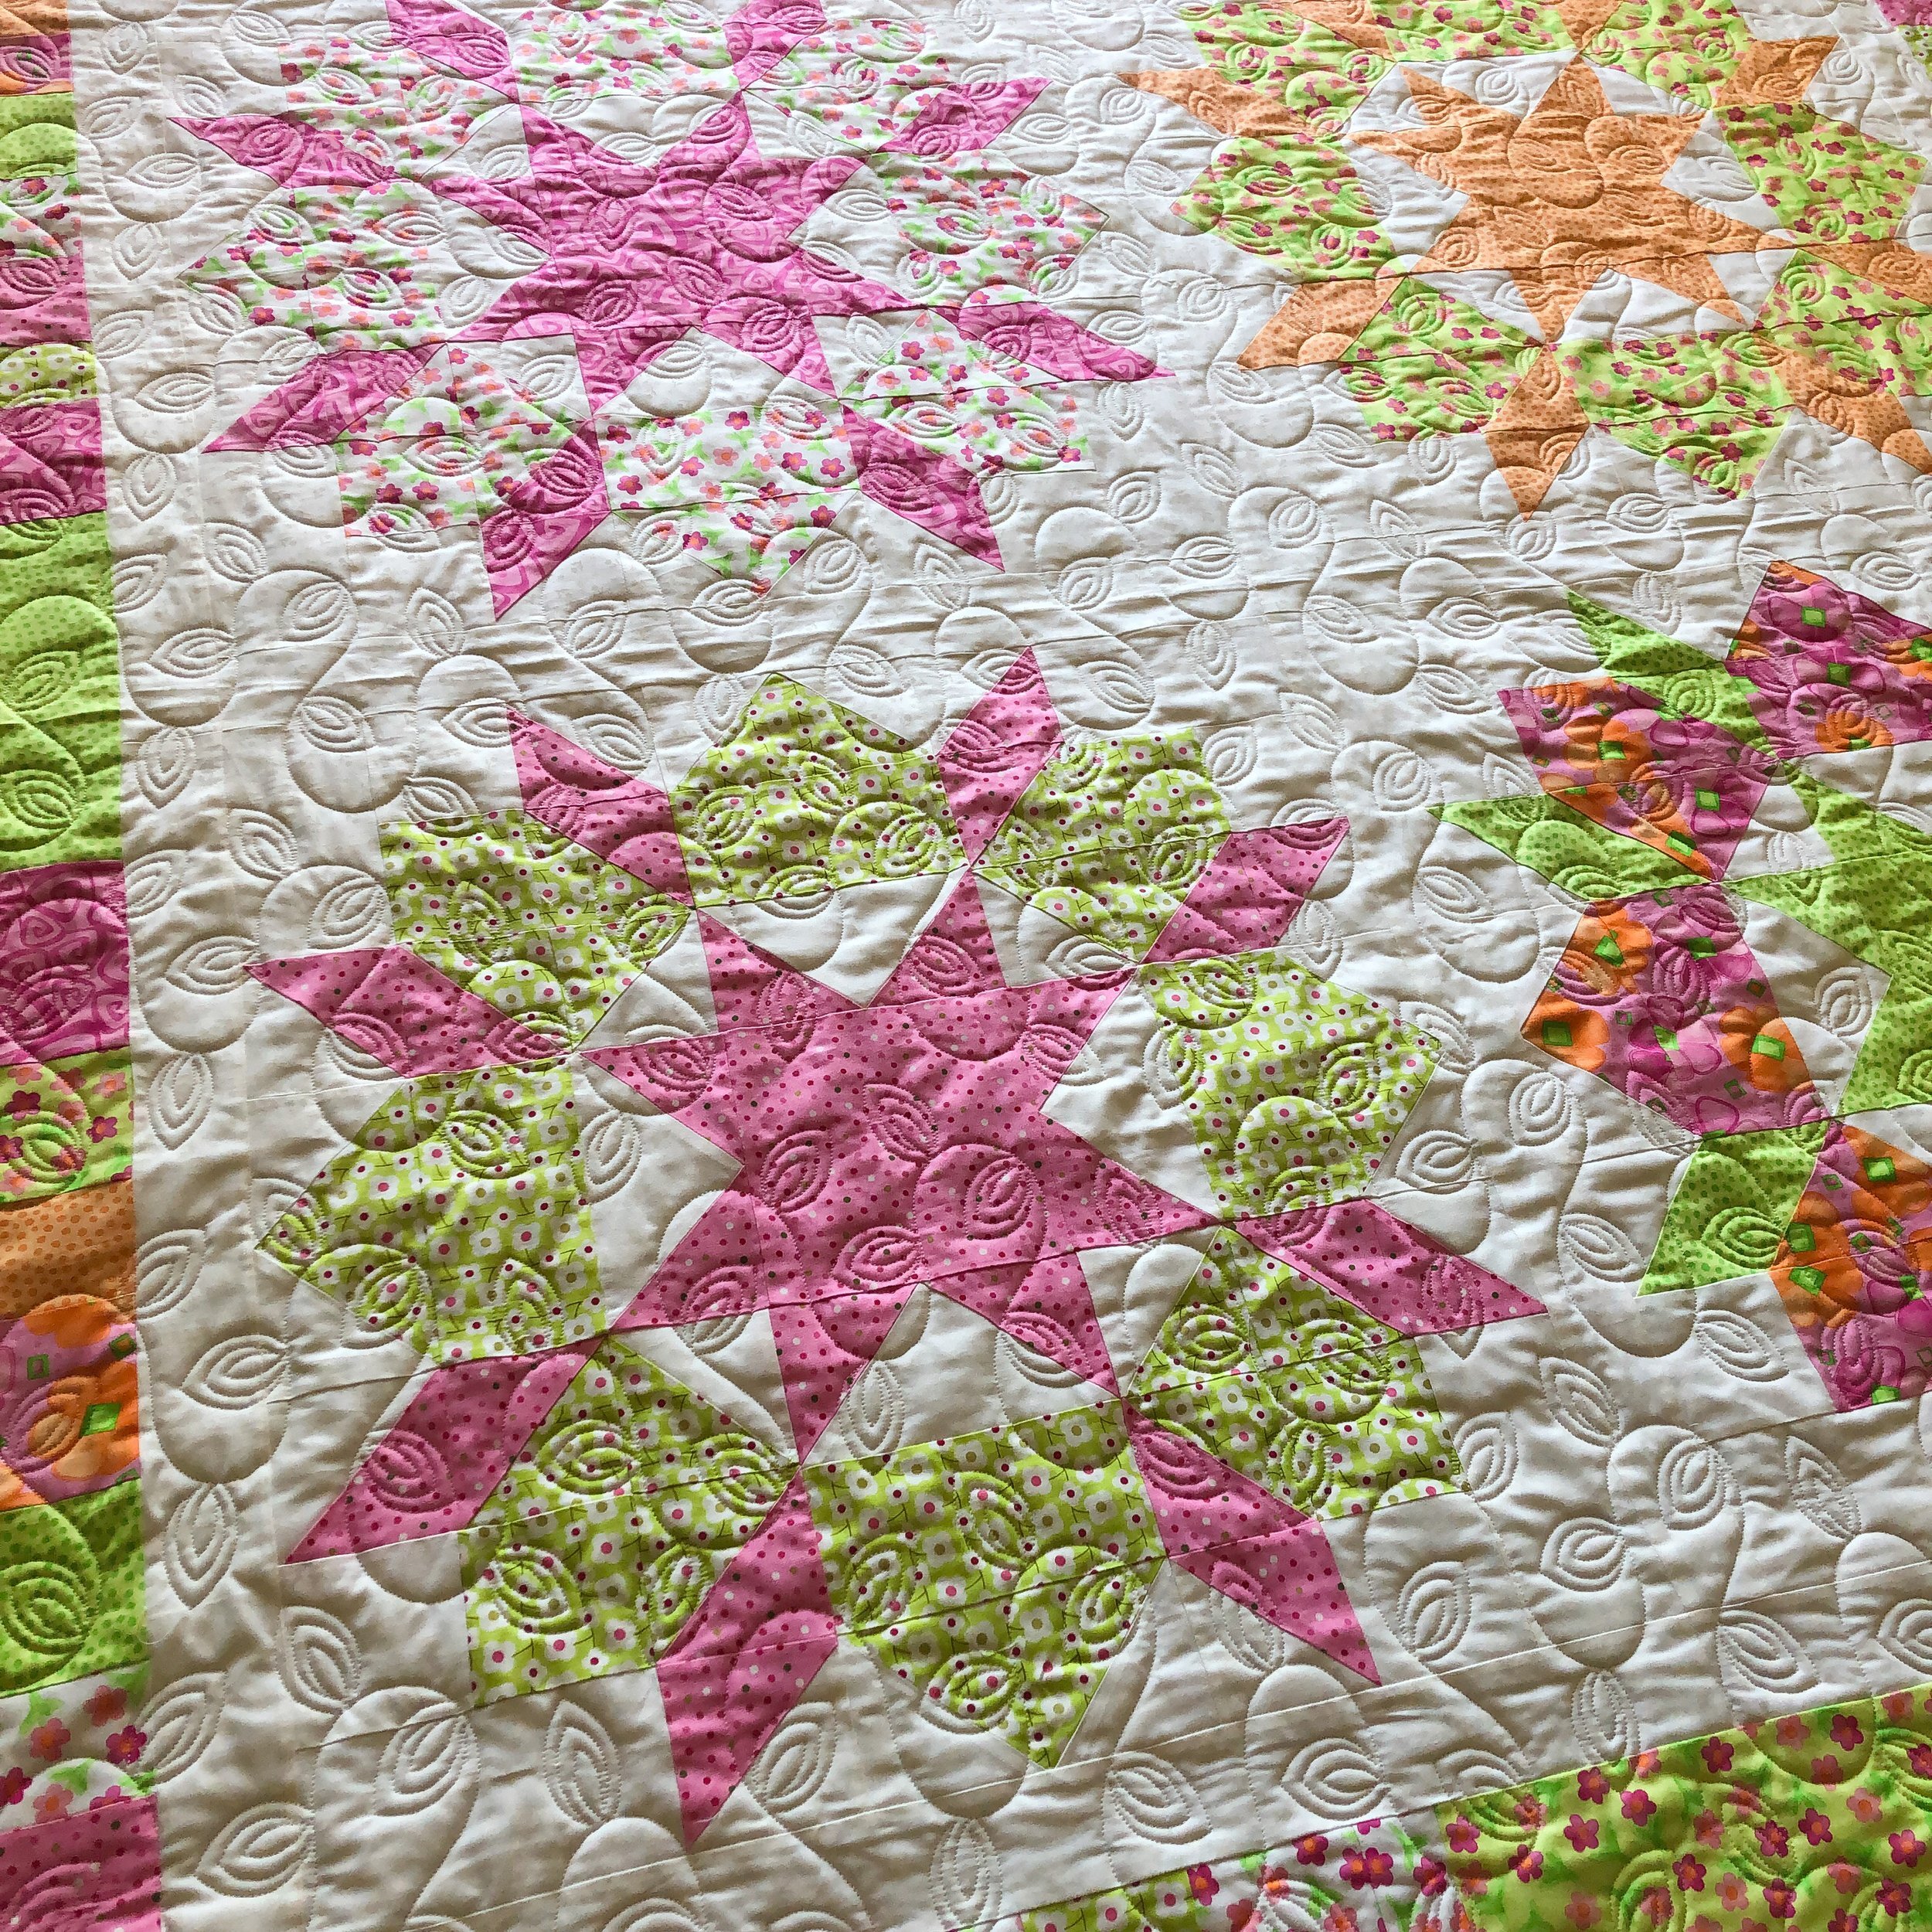
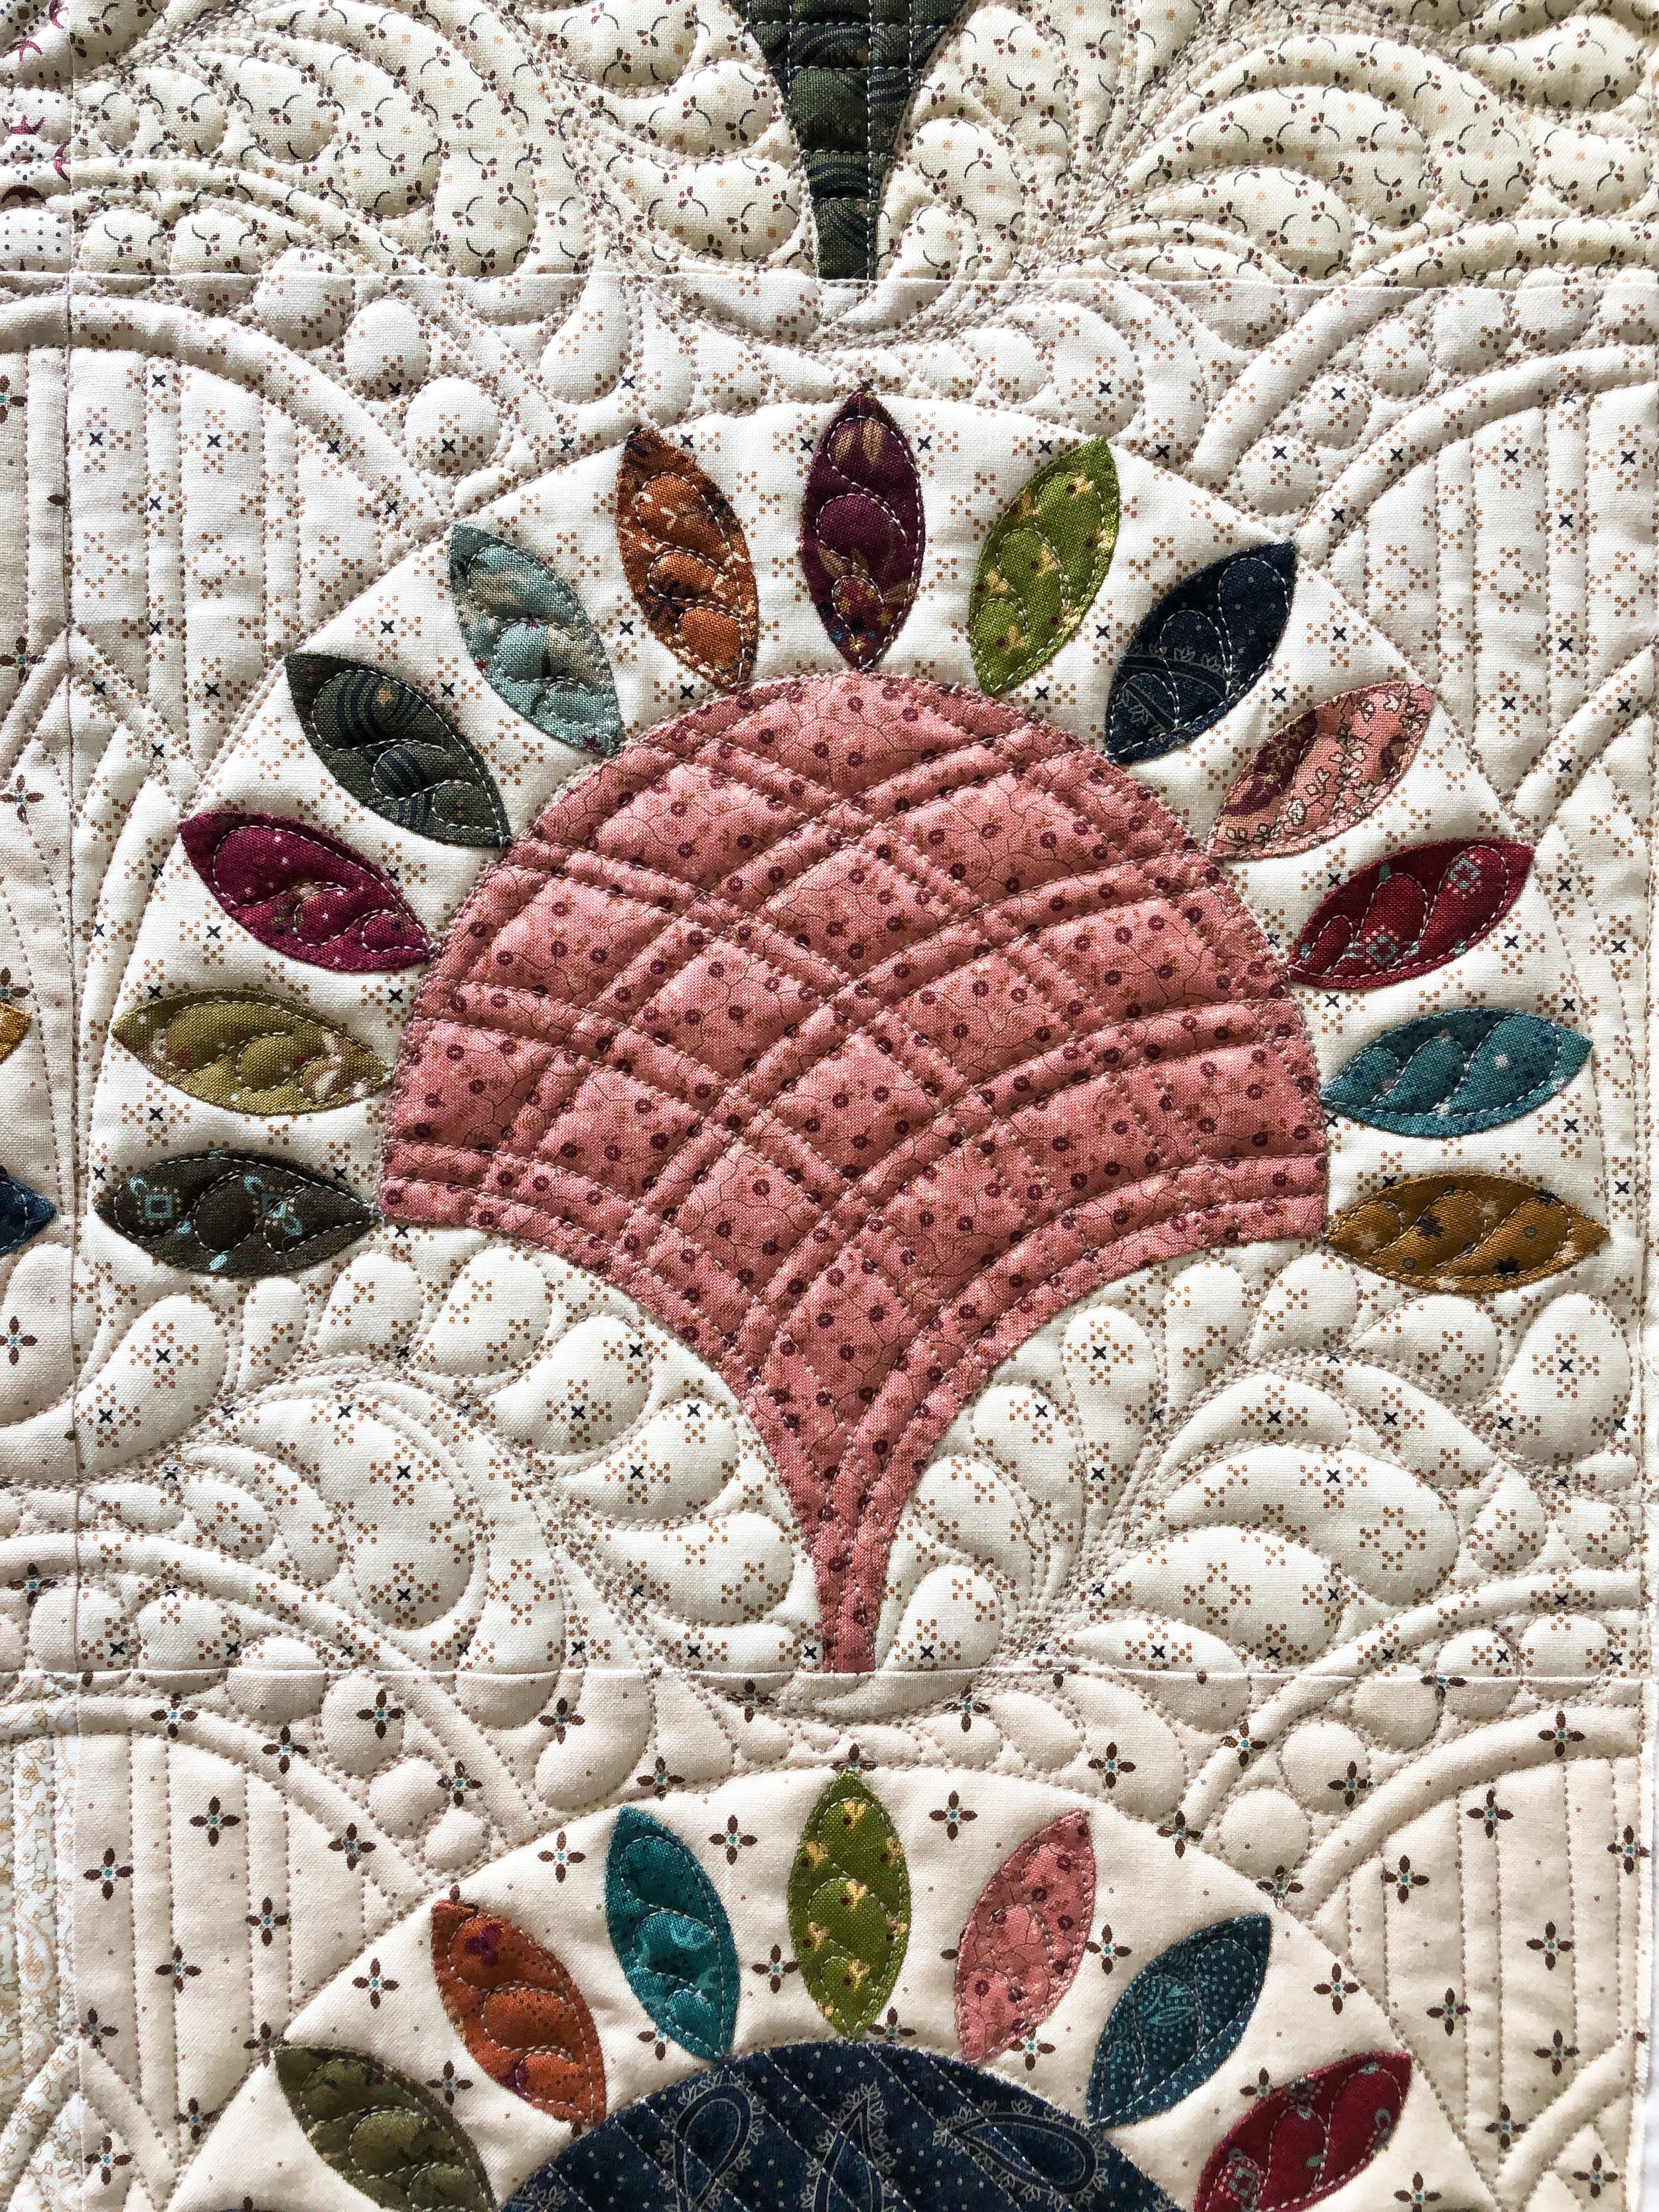
Can you see the curved plaid in the rose colored clamshell below? That is how I used the 10” Circle2 ruler inside the clamshells. Also while you can see a closeup, I wanted to point out the simple feathers inside of the petals. They all start facing up on the bottom right side and end face down on the bottom left side. Those feathers also tie in the feathers below each clamshell block. You will also noticed that I didn’t quilt anything around each petal. Sometimes quilts need parts left unquilted so the quilting can breathe, which enhances parts of the quilt block. Too much quilting, can be too much. Of course this is my personal opinion. I also don’t quilt in the ditch around everything, either. I don’t think that it is necessary. You may disagree, and that is totally fine. My goal with custom quilting is to create a cohesive design that looks beautiful with the quilt pattern. This is definitely one of my all time favorites!

After figuring out the first section, then I just repeated my quilty plan throughout the rest of the quilt.

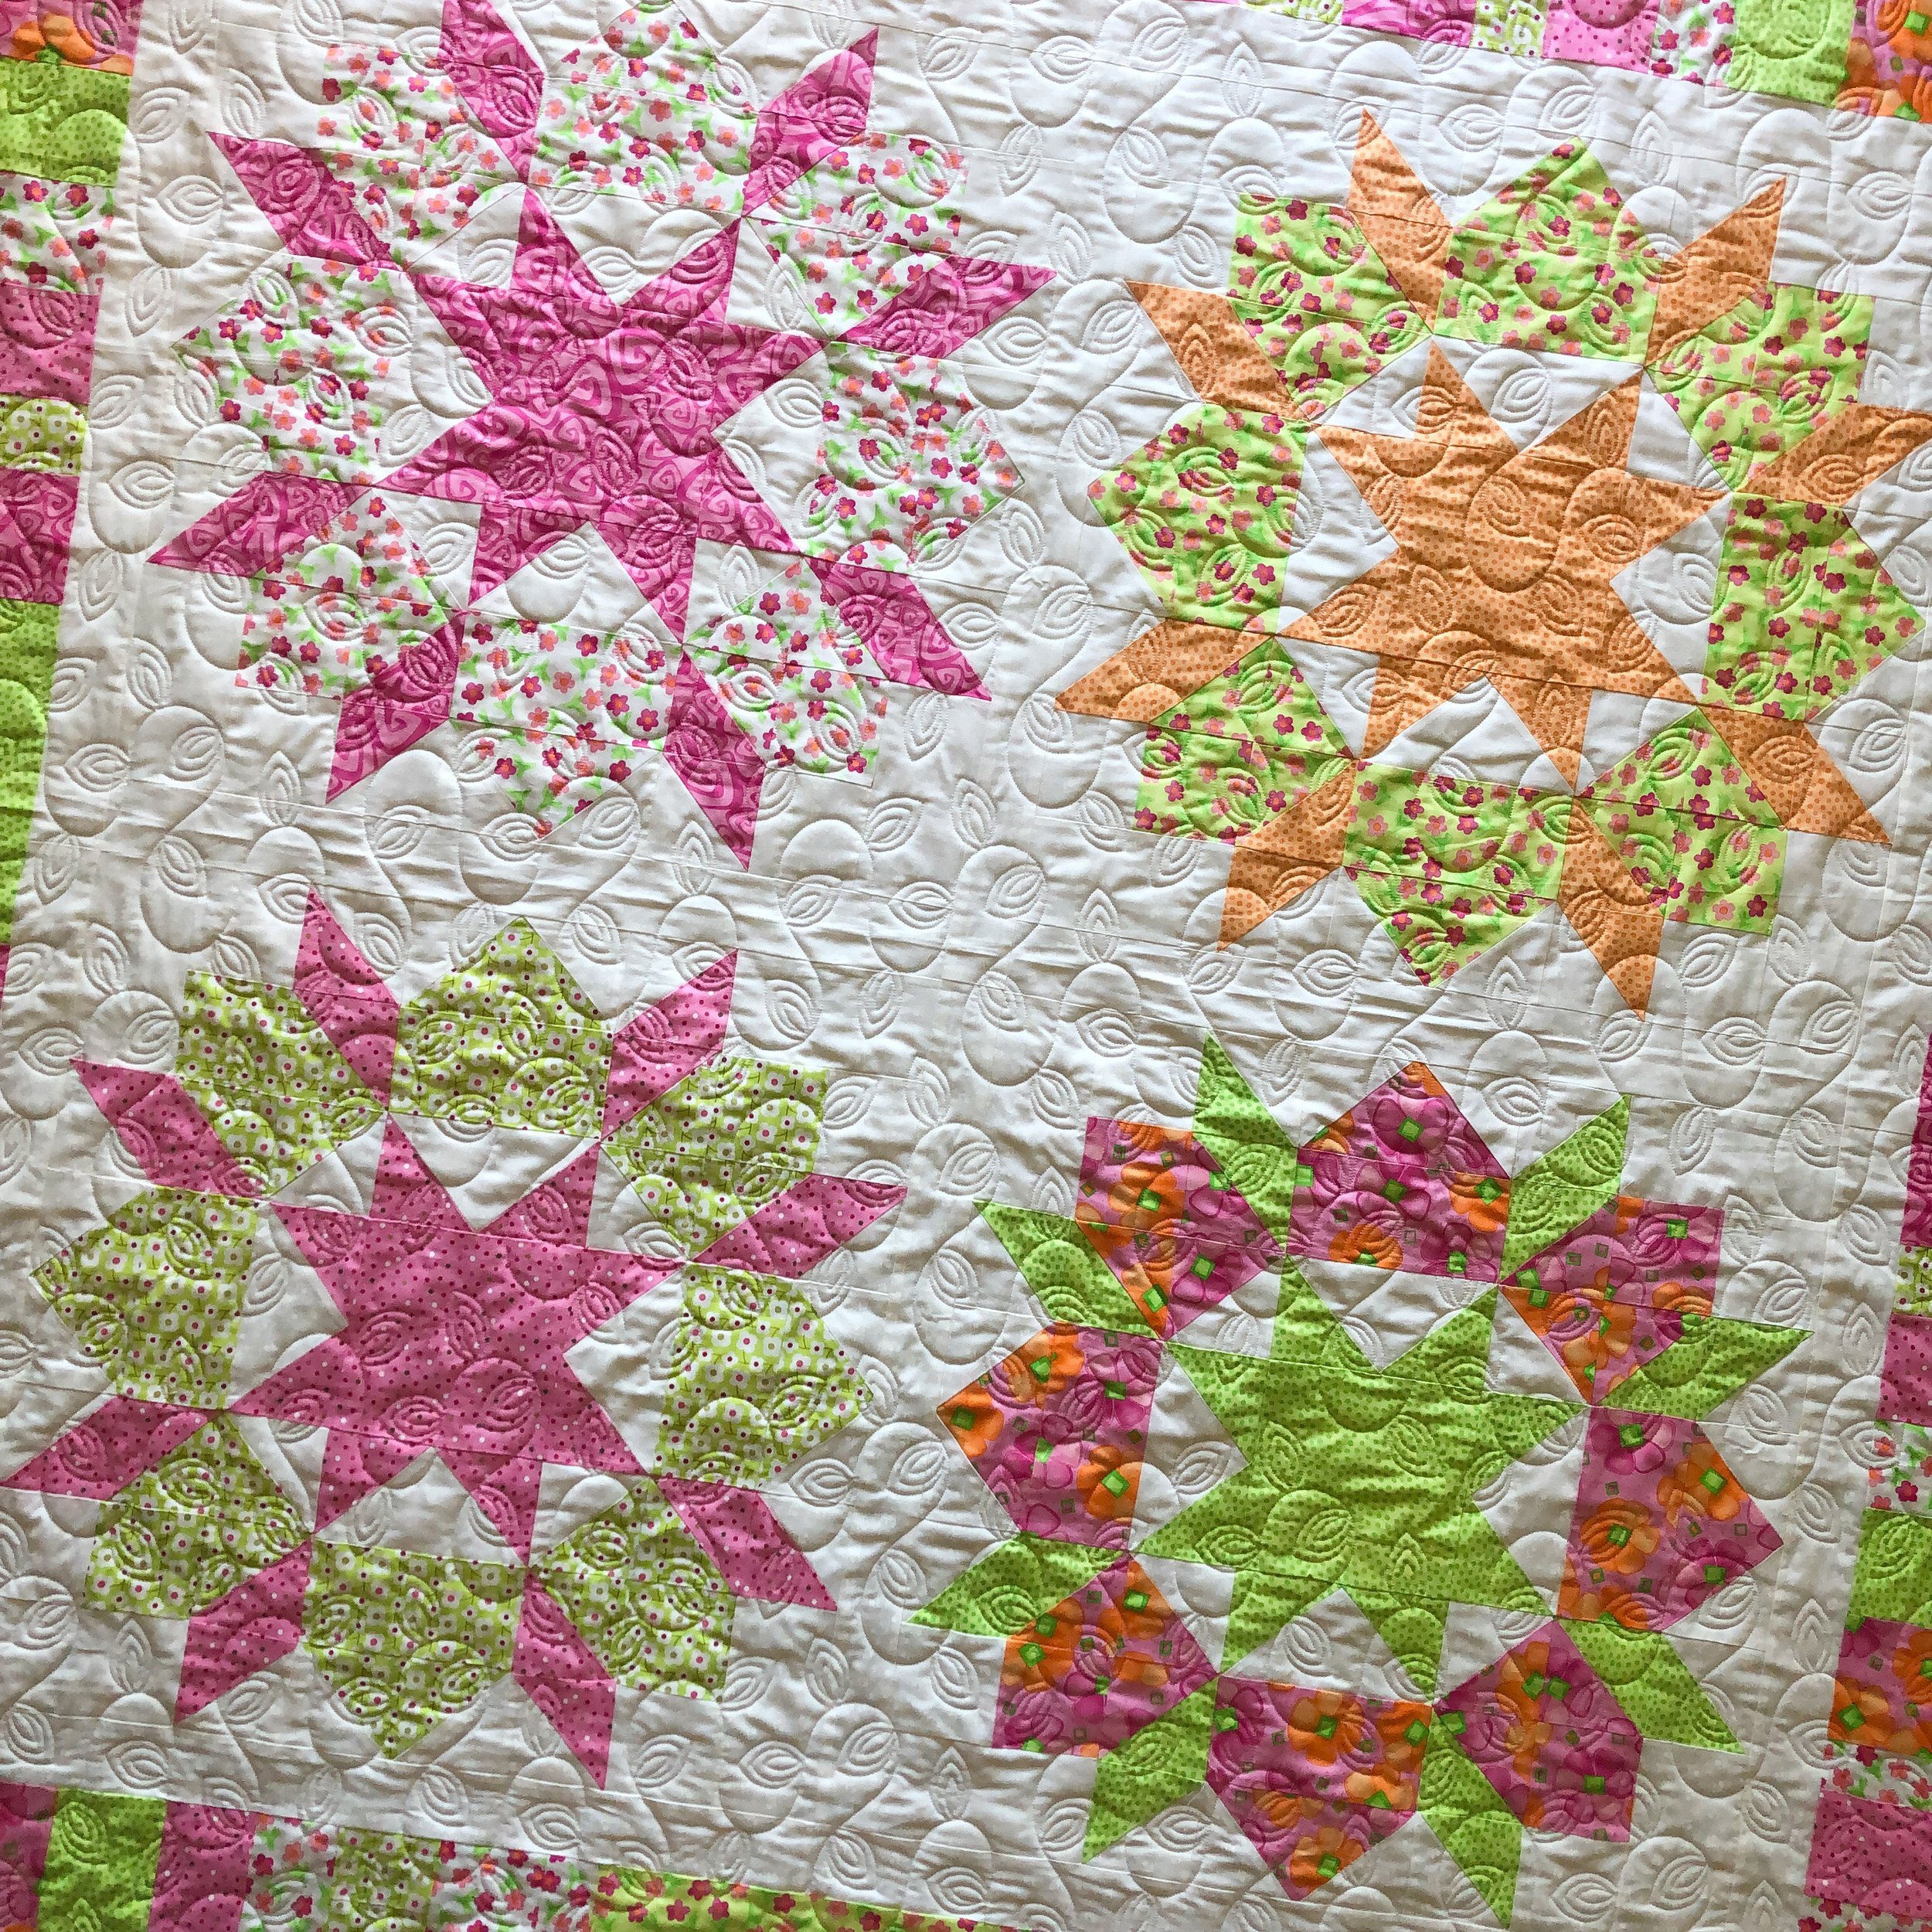
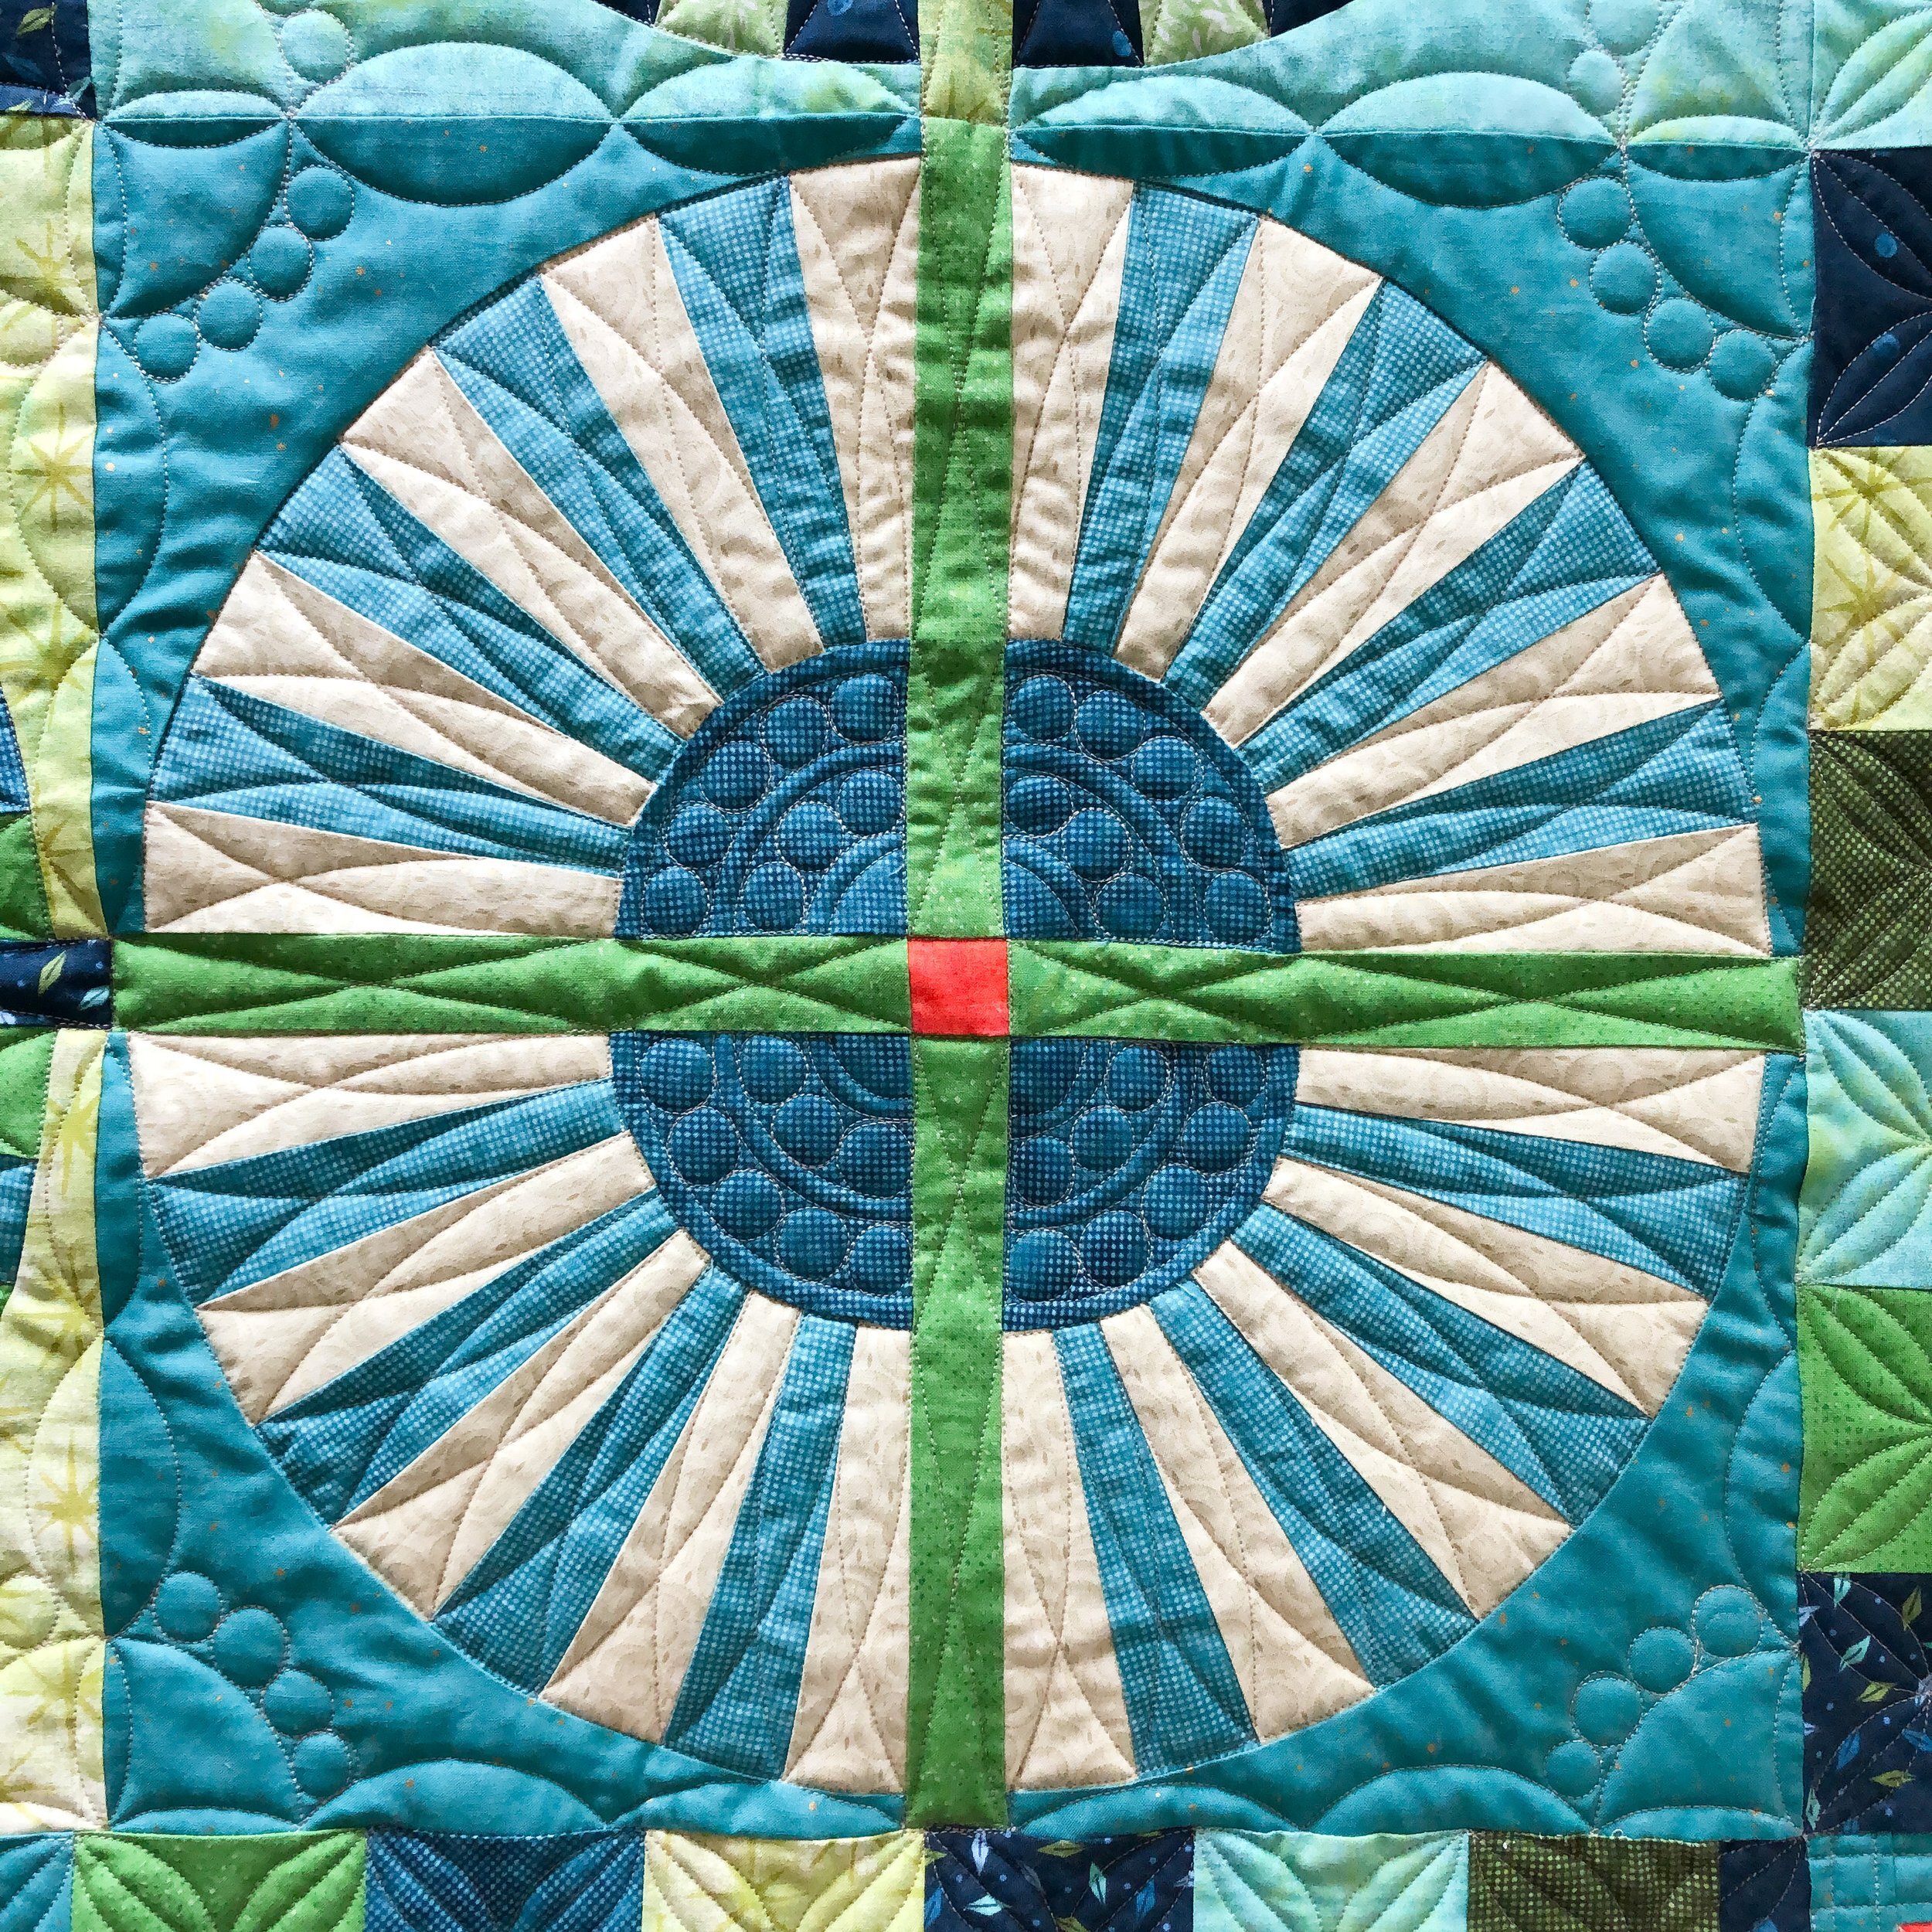
Can you see all the beautiful textures?!?!?!

Here is another glimpse of all of the quilty goodness.
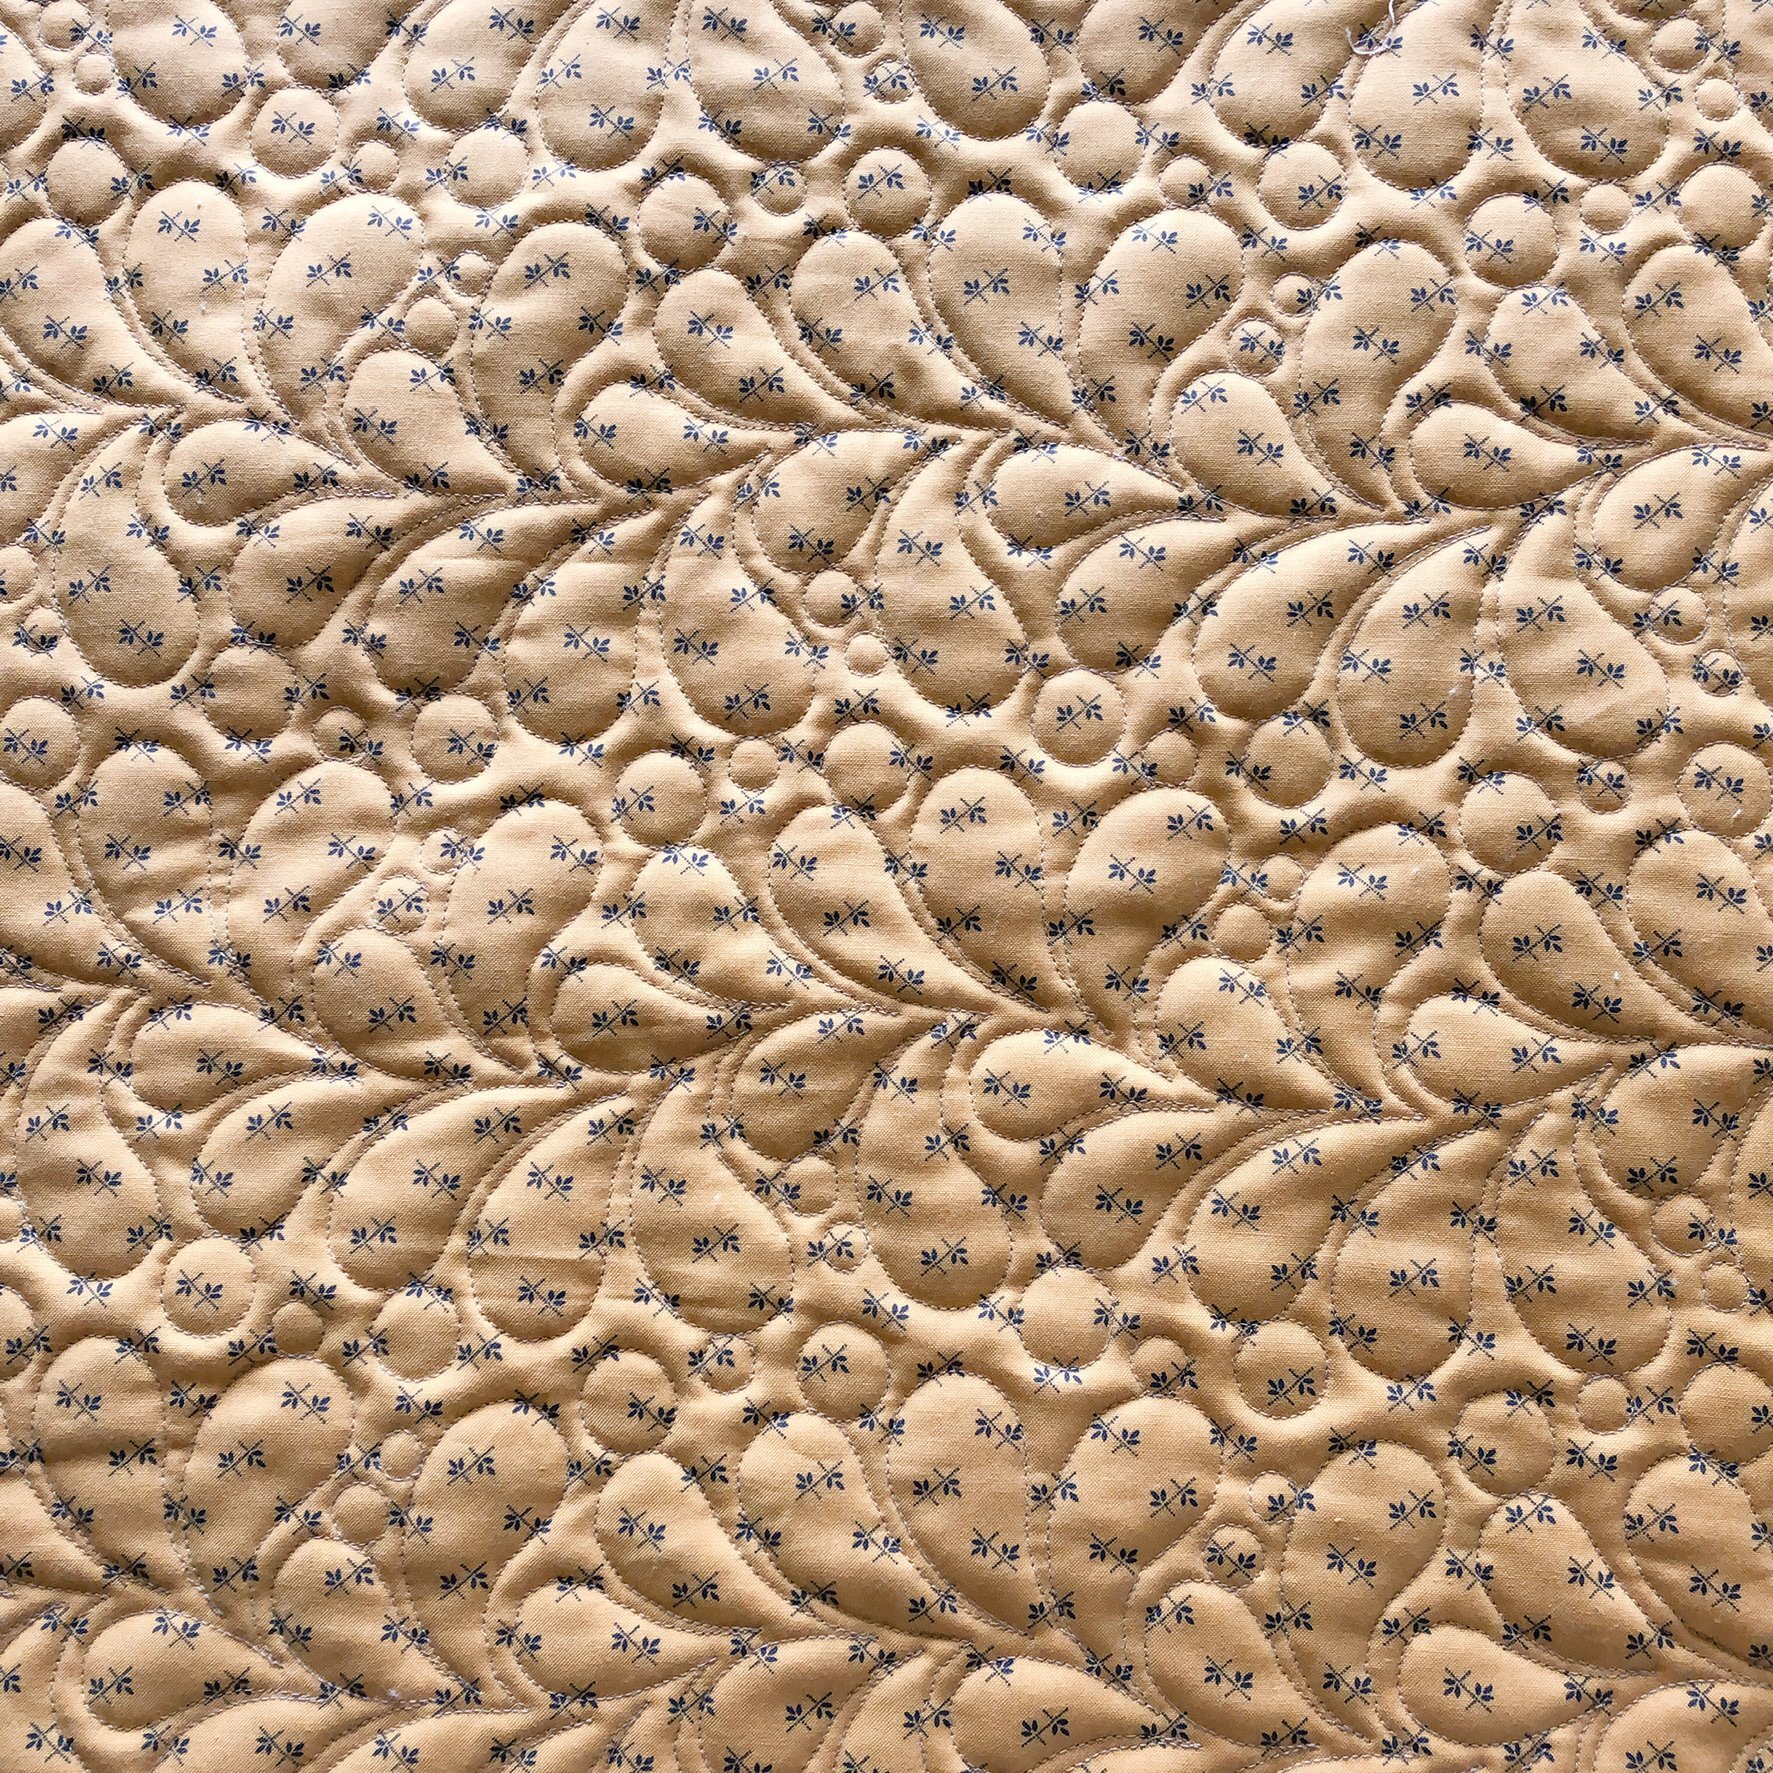
I used my favorite 8020 cotton/poly blend batting from Winline Textiles out of Ogden Utah, and an Omni tan thread #3008 called Sesame Seeds from Superior Threads which I used on the entire quilt. Kim actually requested the thread color to match the darker color in her cream on cream background fabric. By doing this it helps the quilting to stand out a little more, instead of blend in so much it’s not even noticeable. After 17+ years of longarm quilting, I’m still learning new things. I love it!
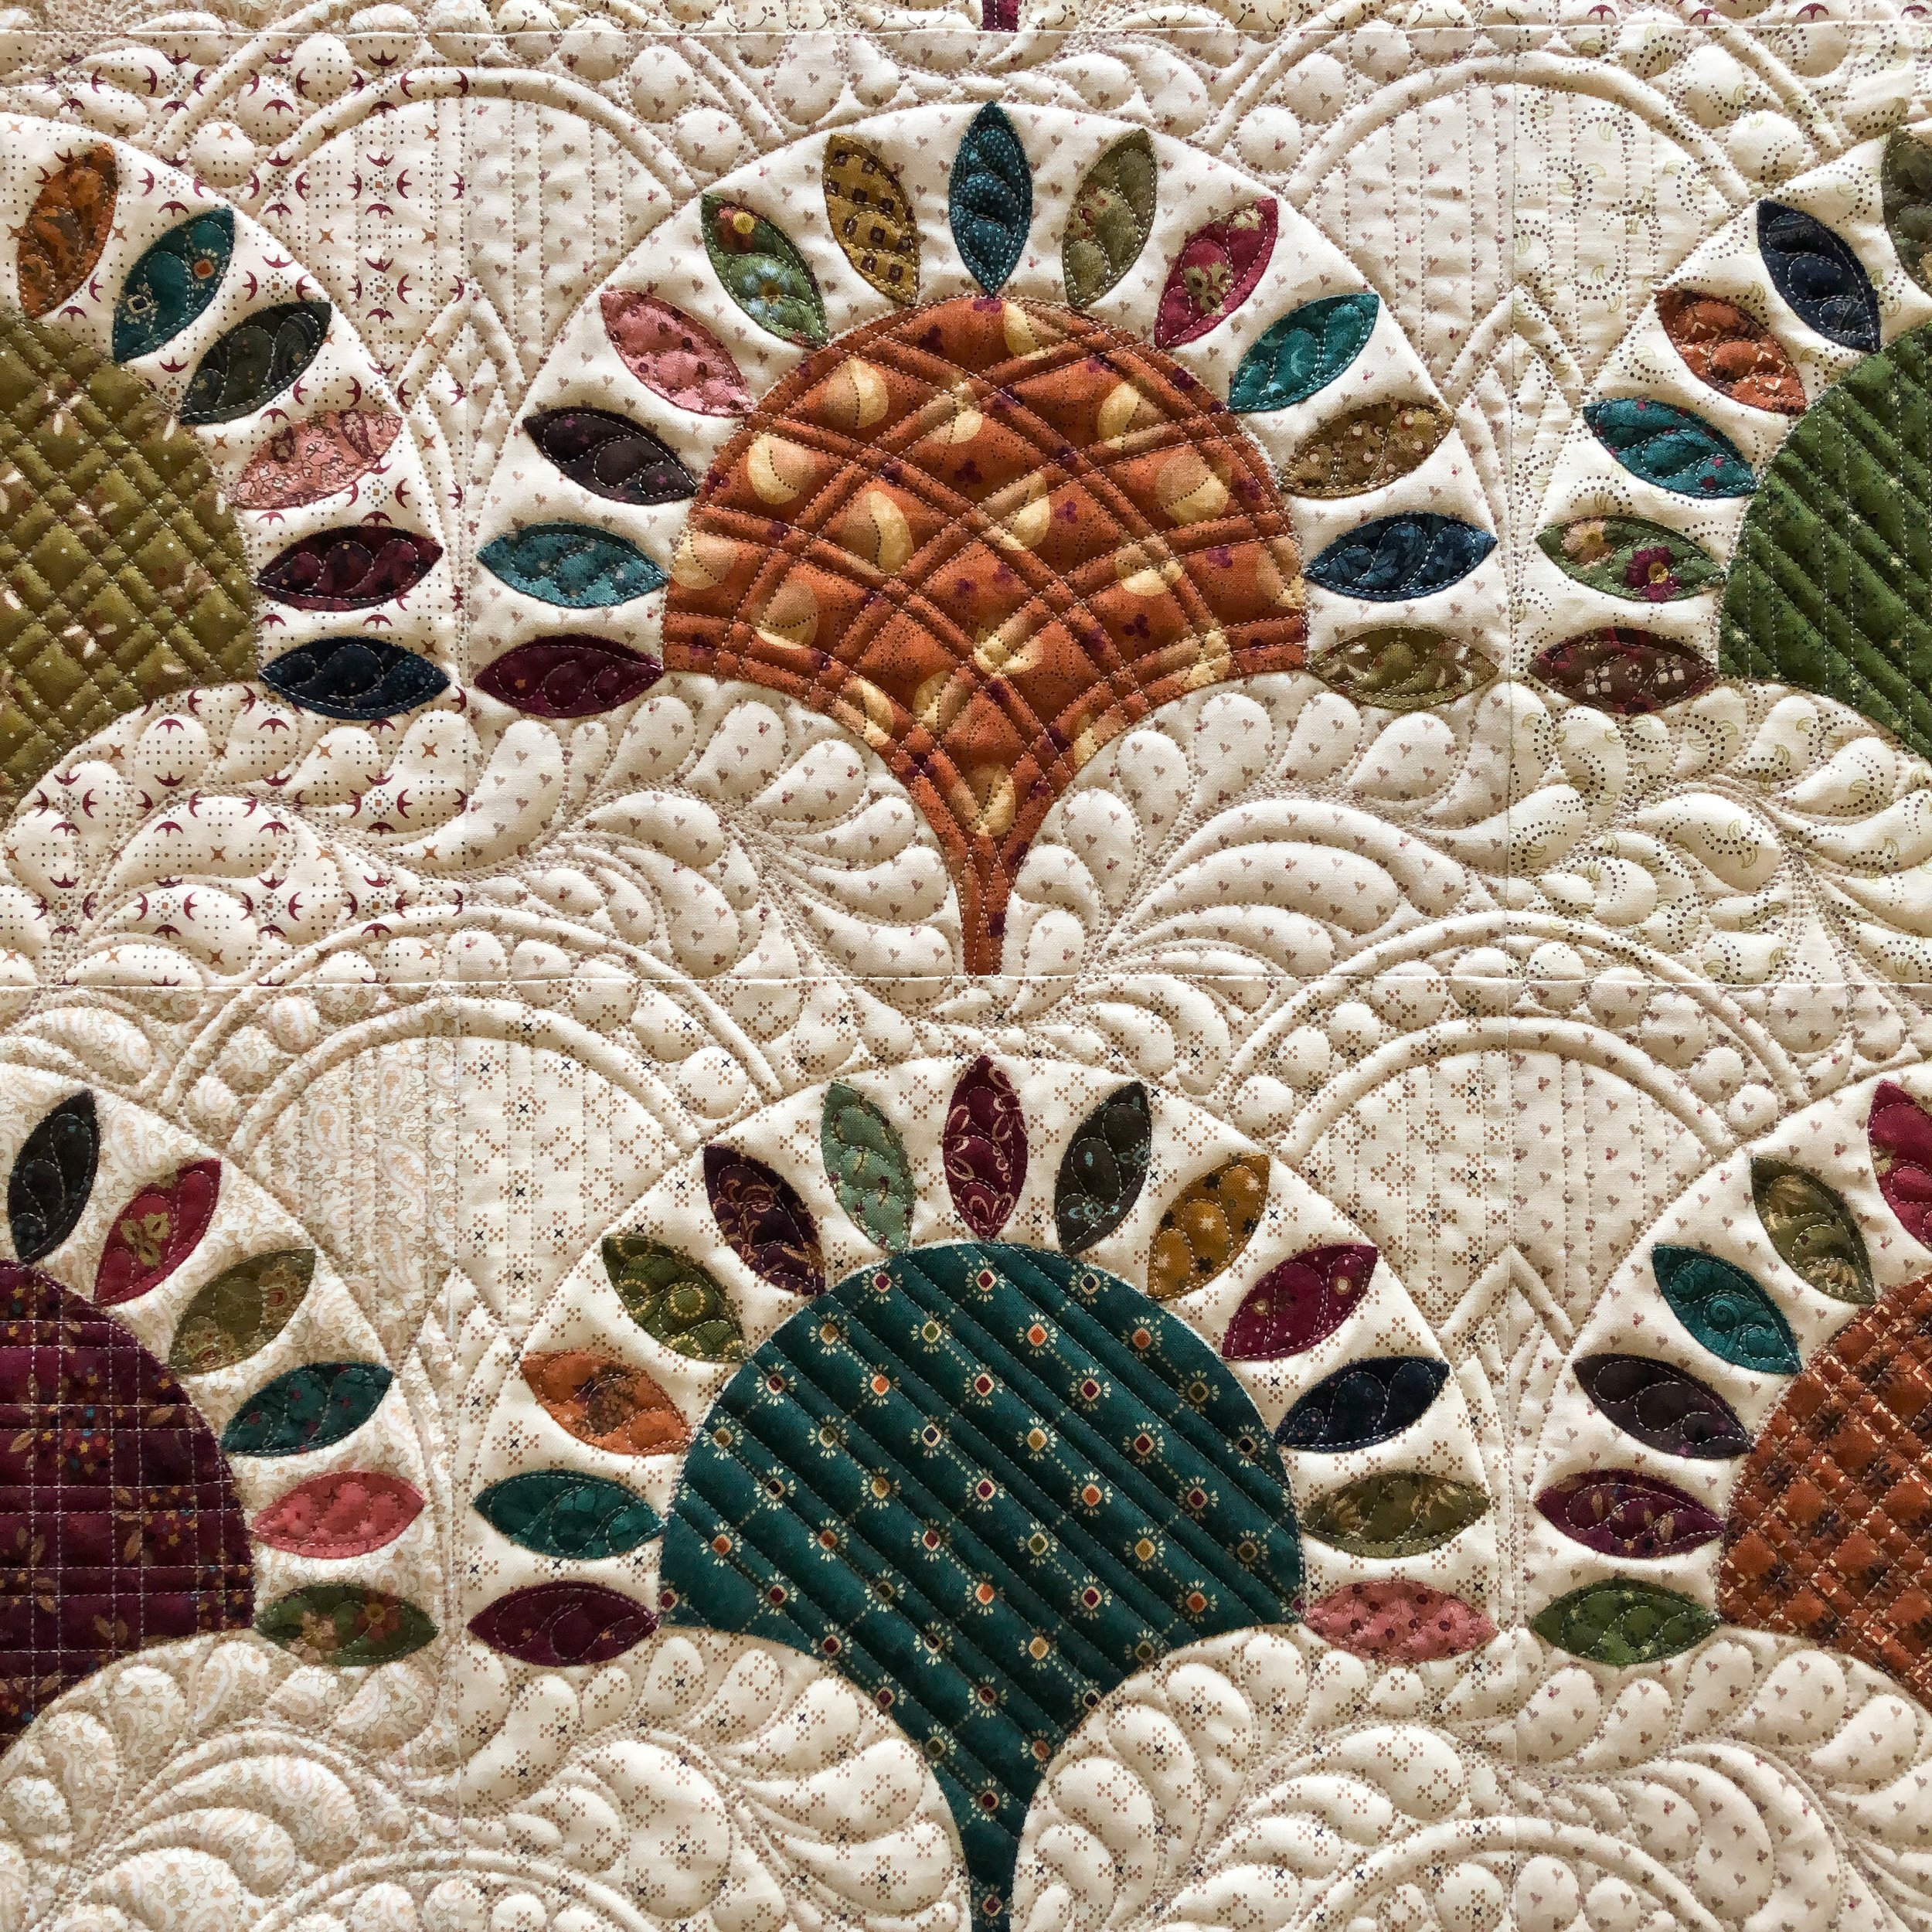
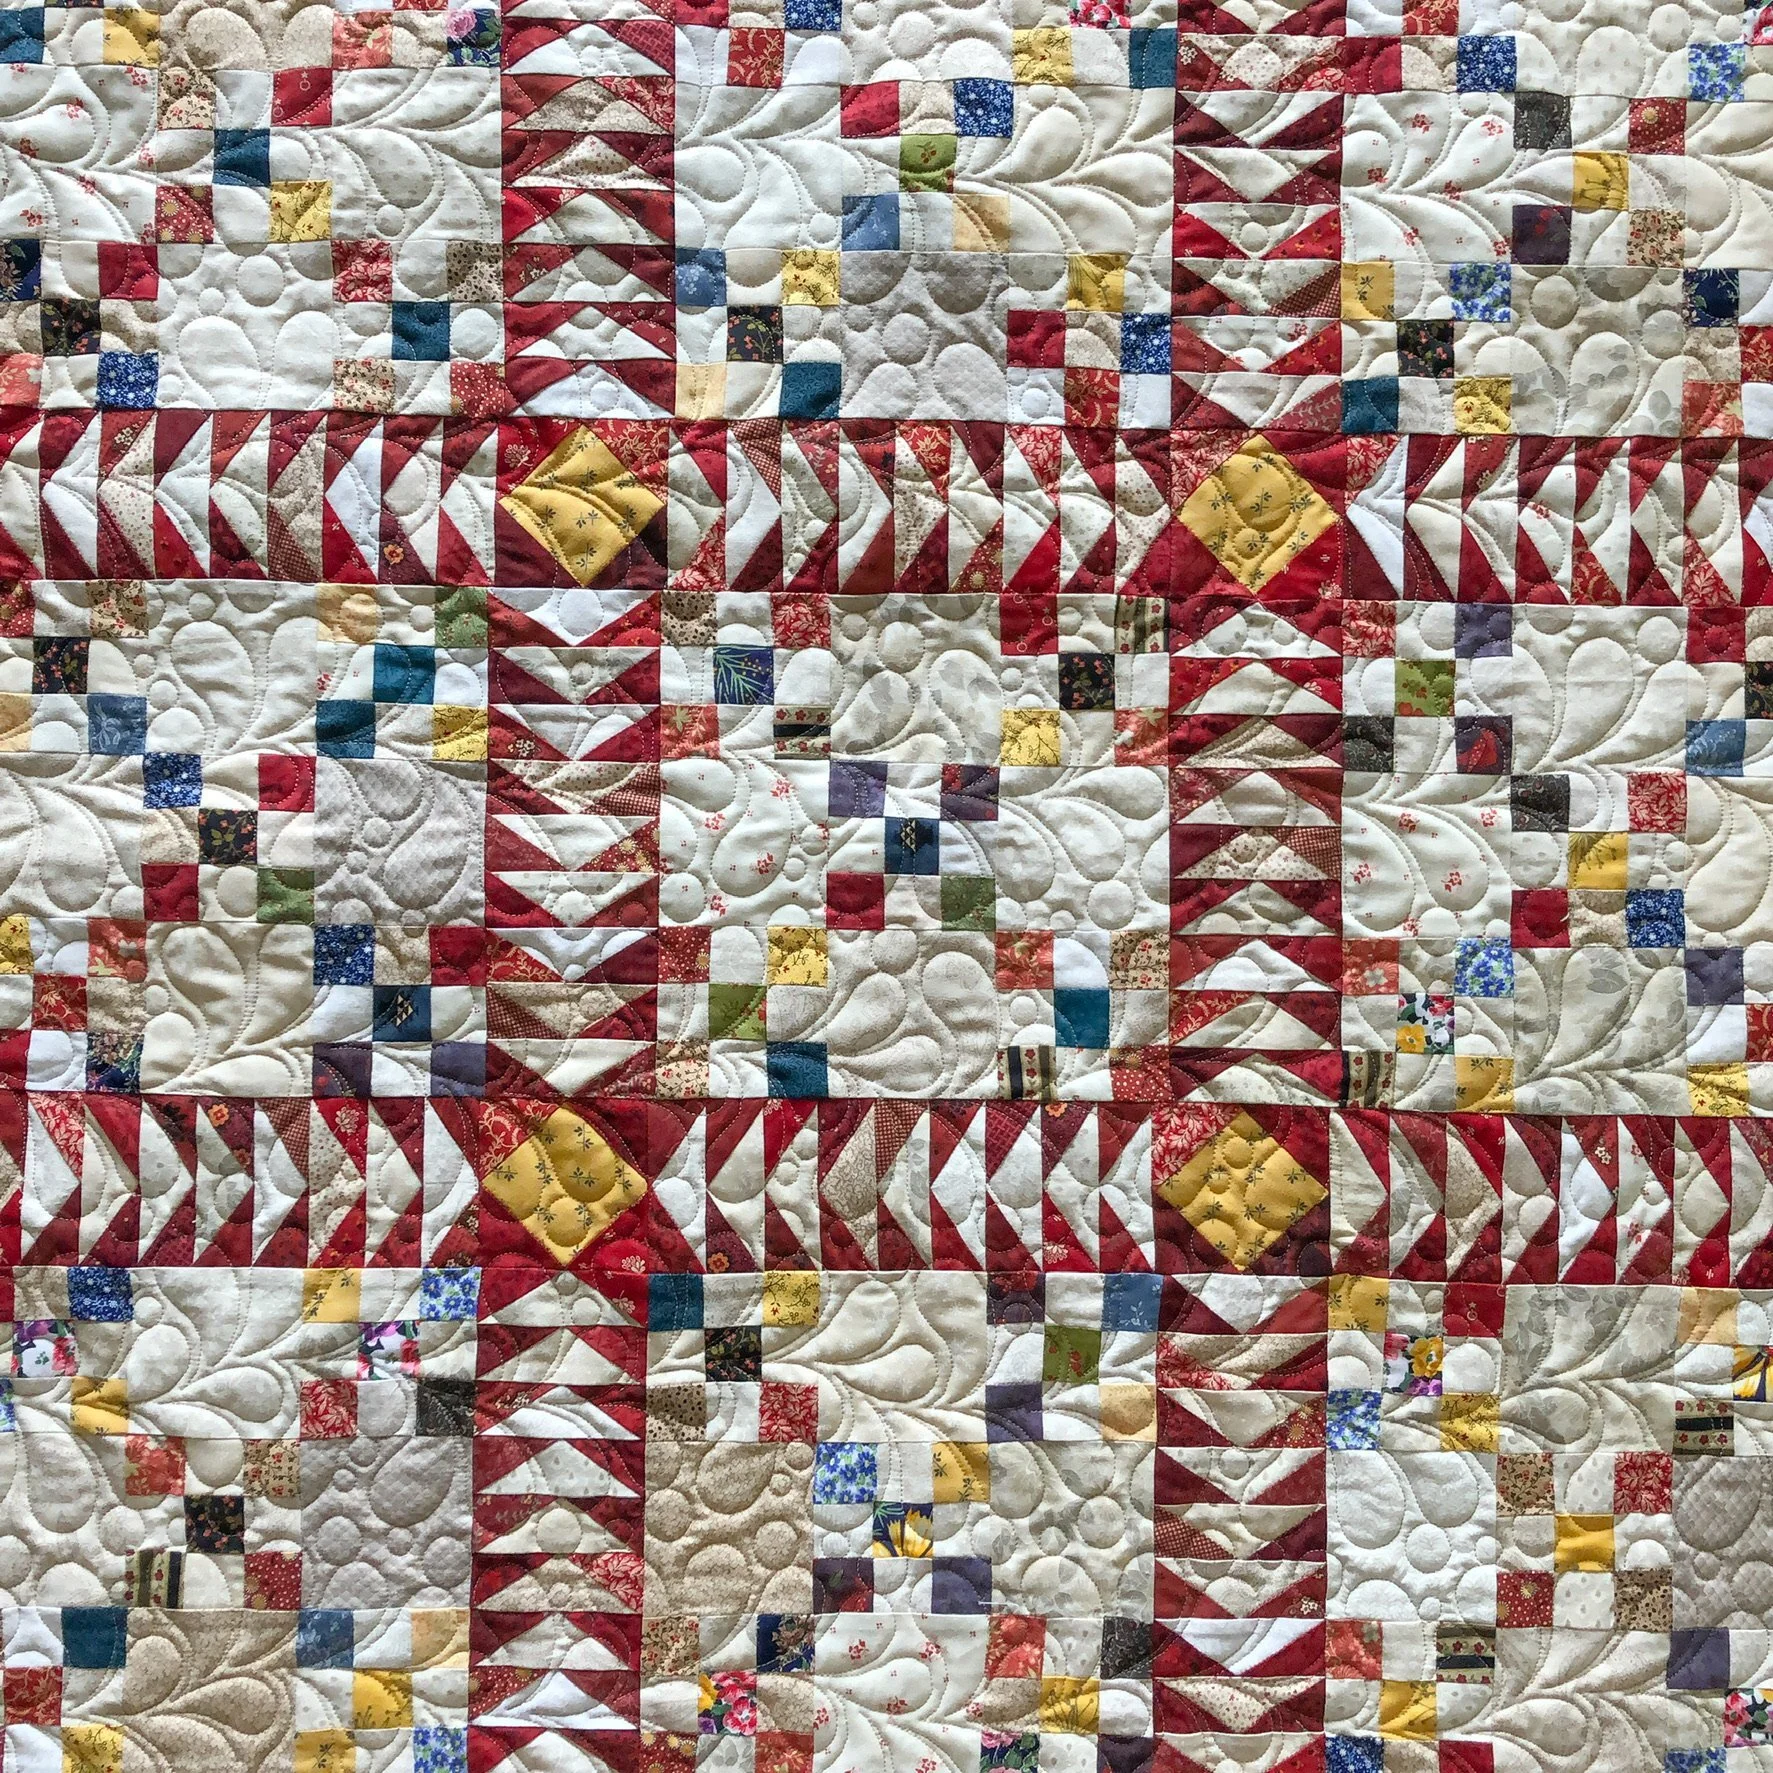
Here are some more closeups of the quilting in the clamshells. Angled lines, plaids, pinstripes, and I love how beautifully they are play together. I love mixing curves, lines, some freehand designs…and this is the result! I love what I do.
Another closeup.
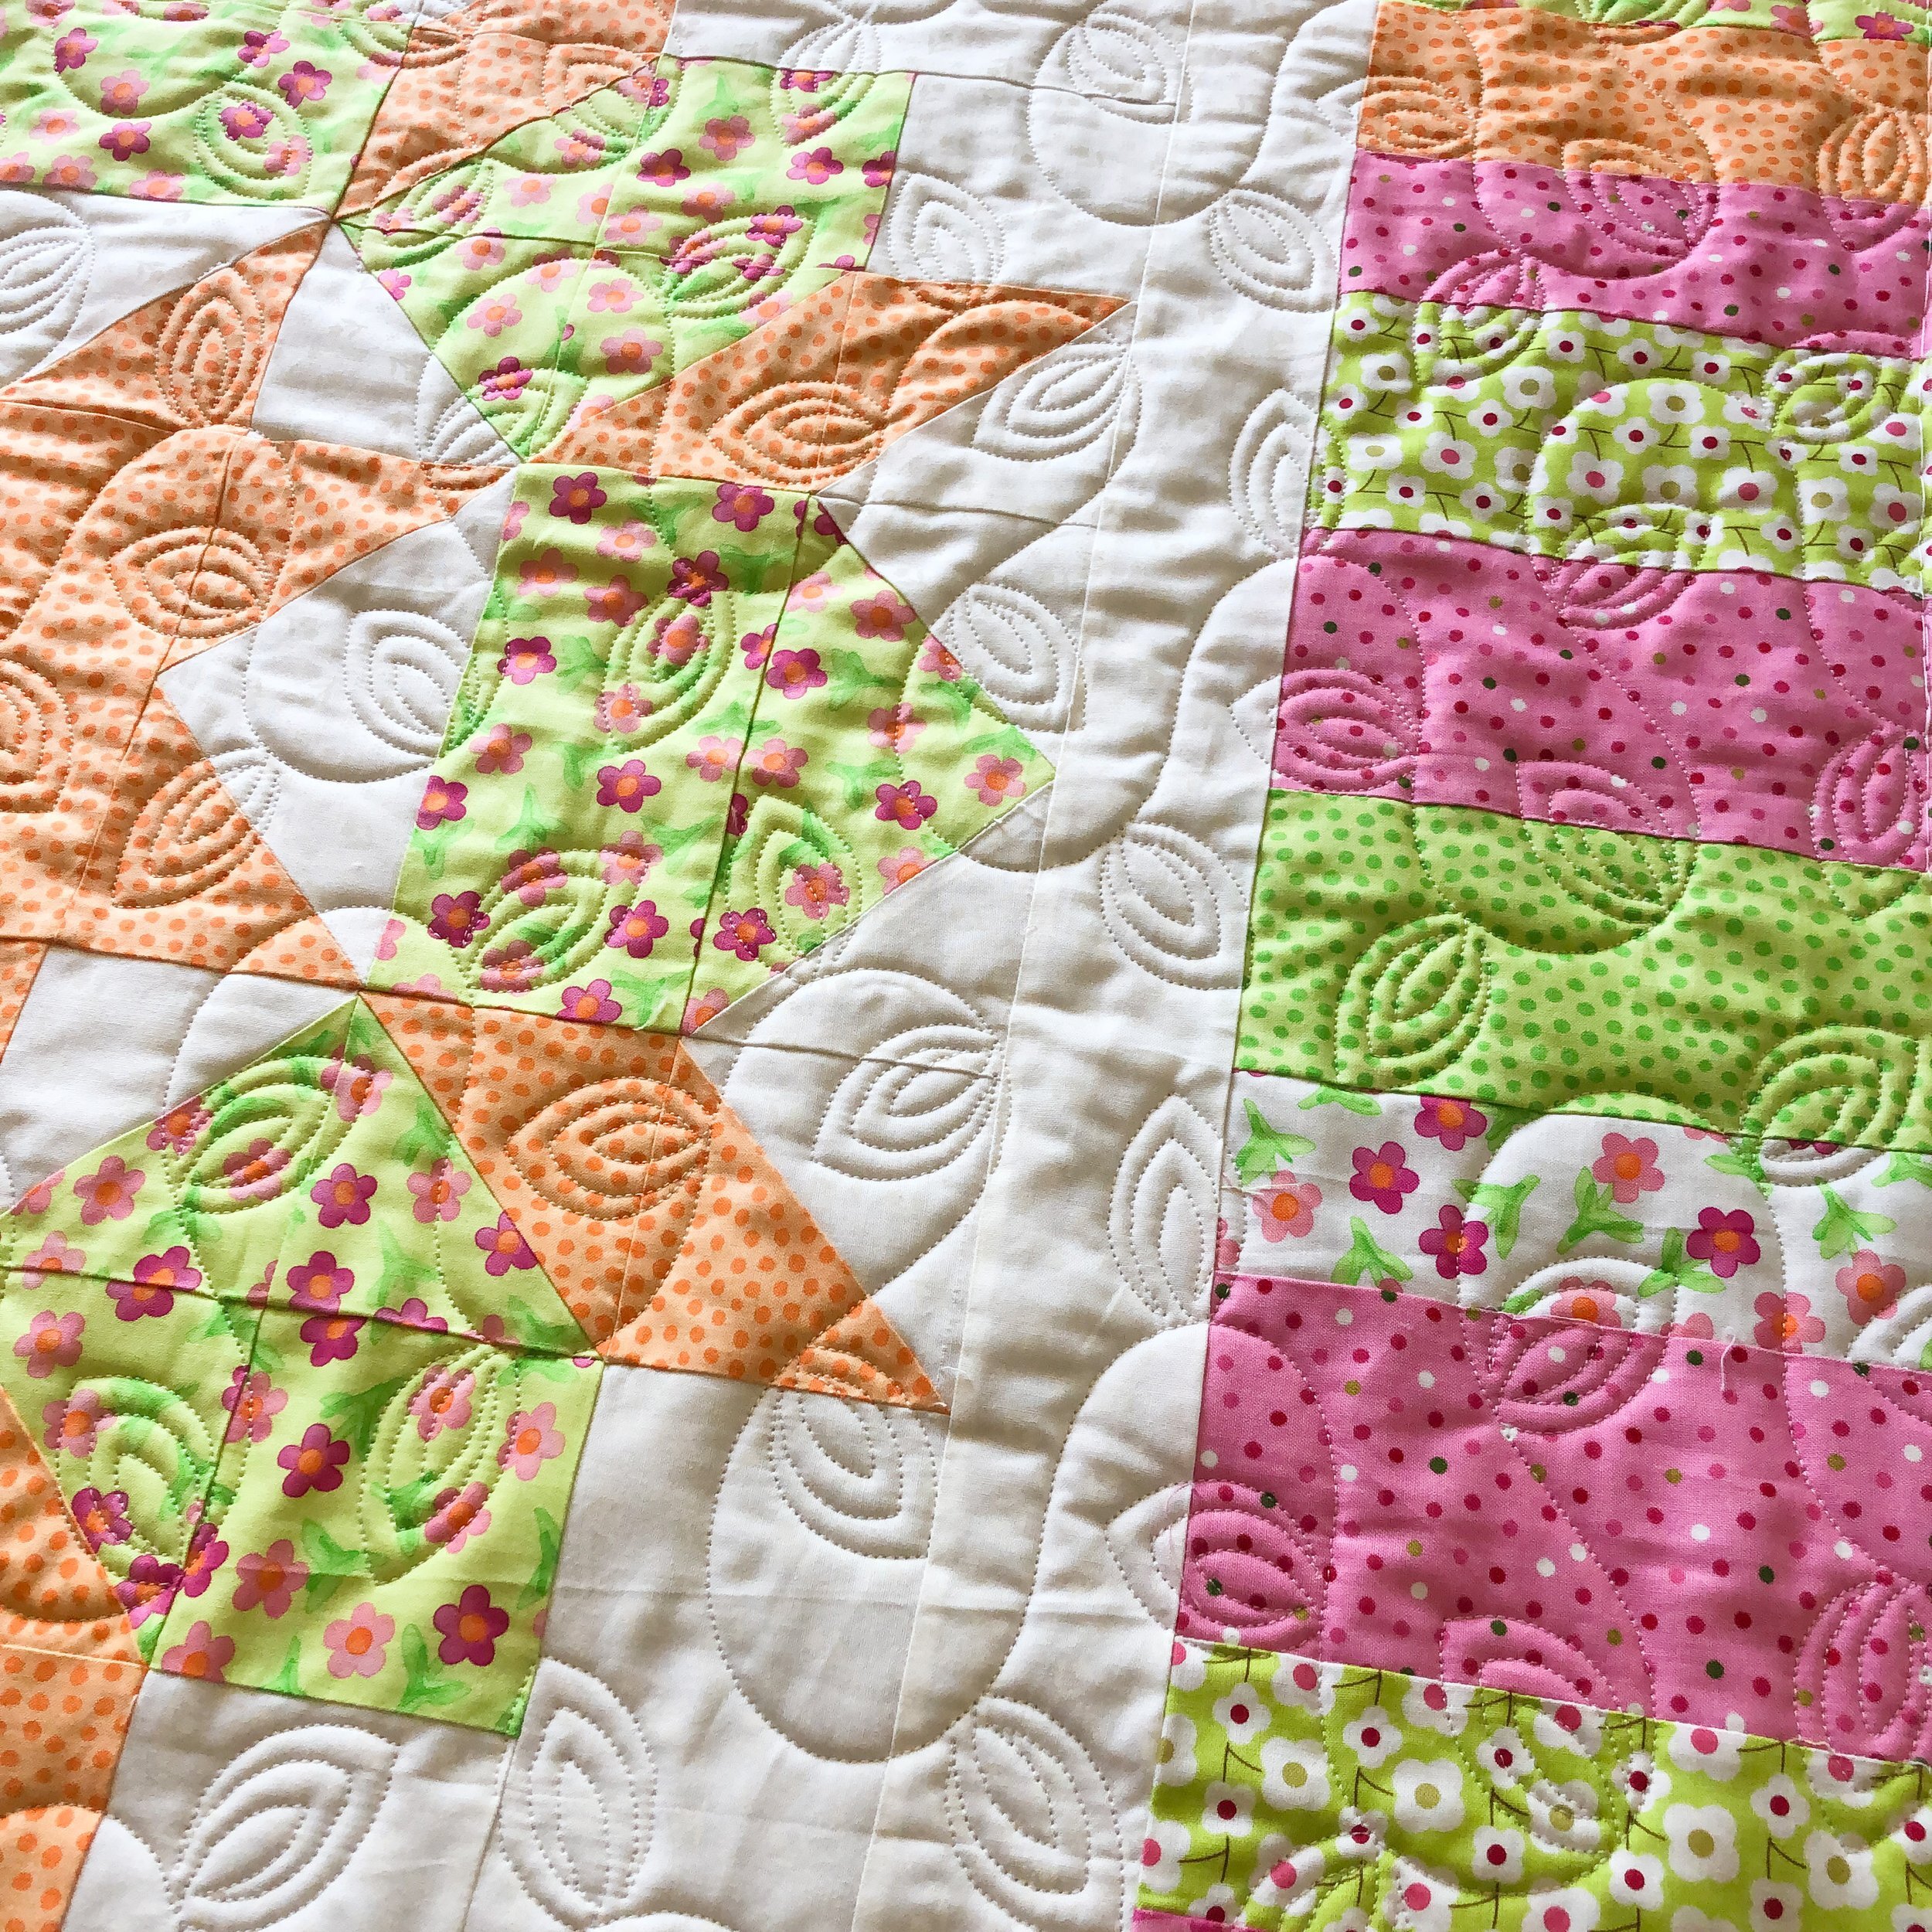
The diamond plaid design, pictured below, in the clamshell is an easy one to create. I typically start with vertical pinstripes with a 1/2” space between the pinstripes, and then I do the same kind of thing working from the bottom left and going to the top right at a 45 degree angle. I love love love how sharp that design looks.
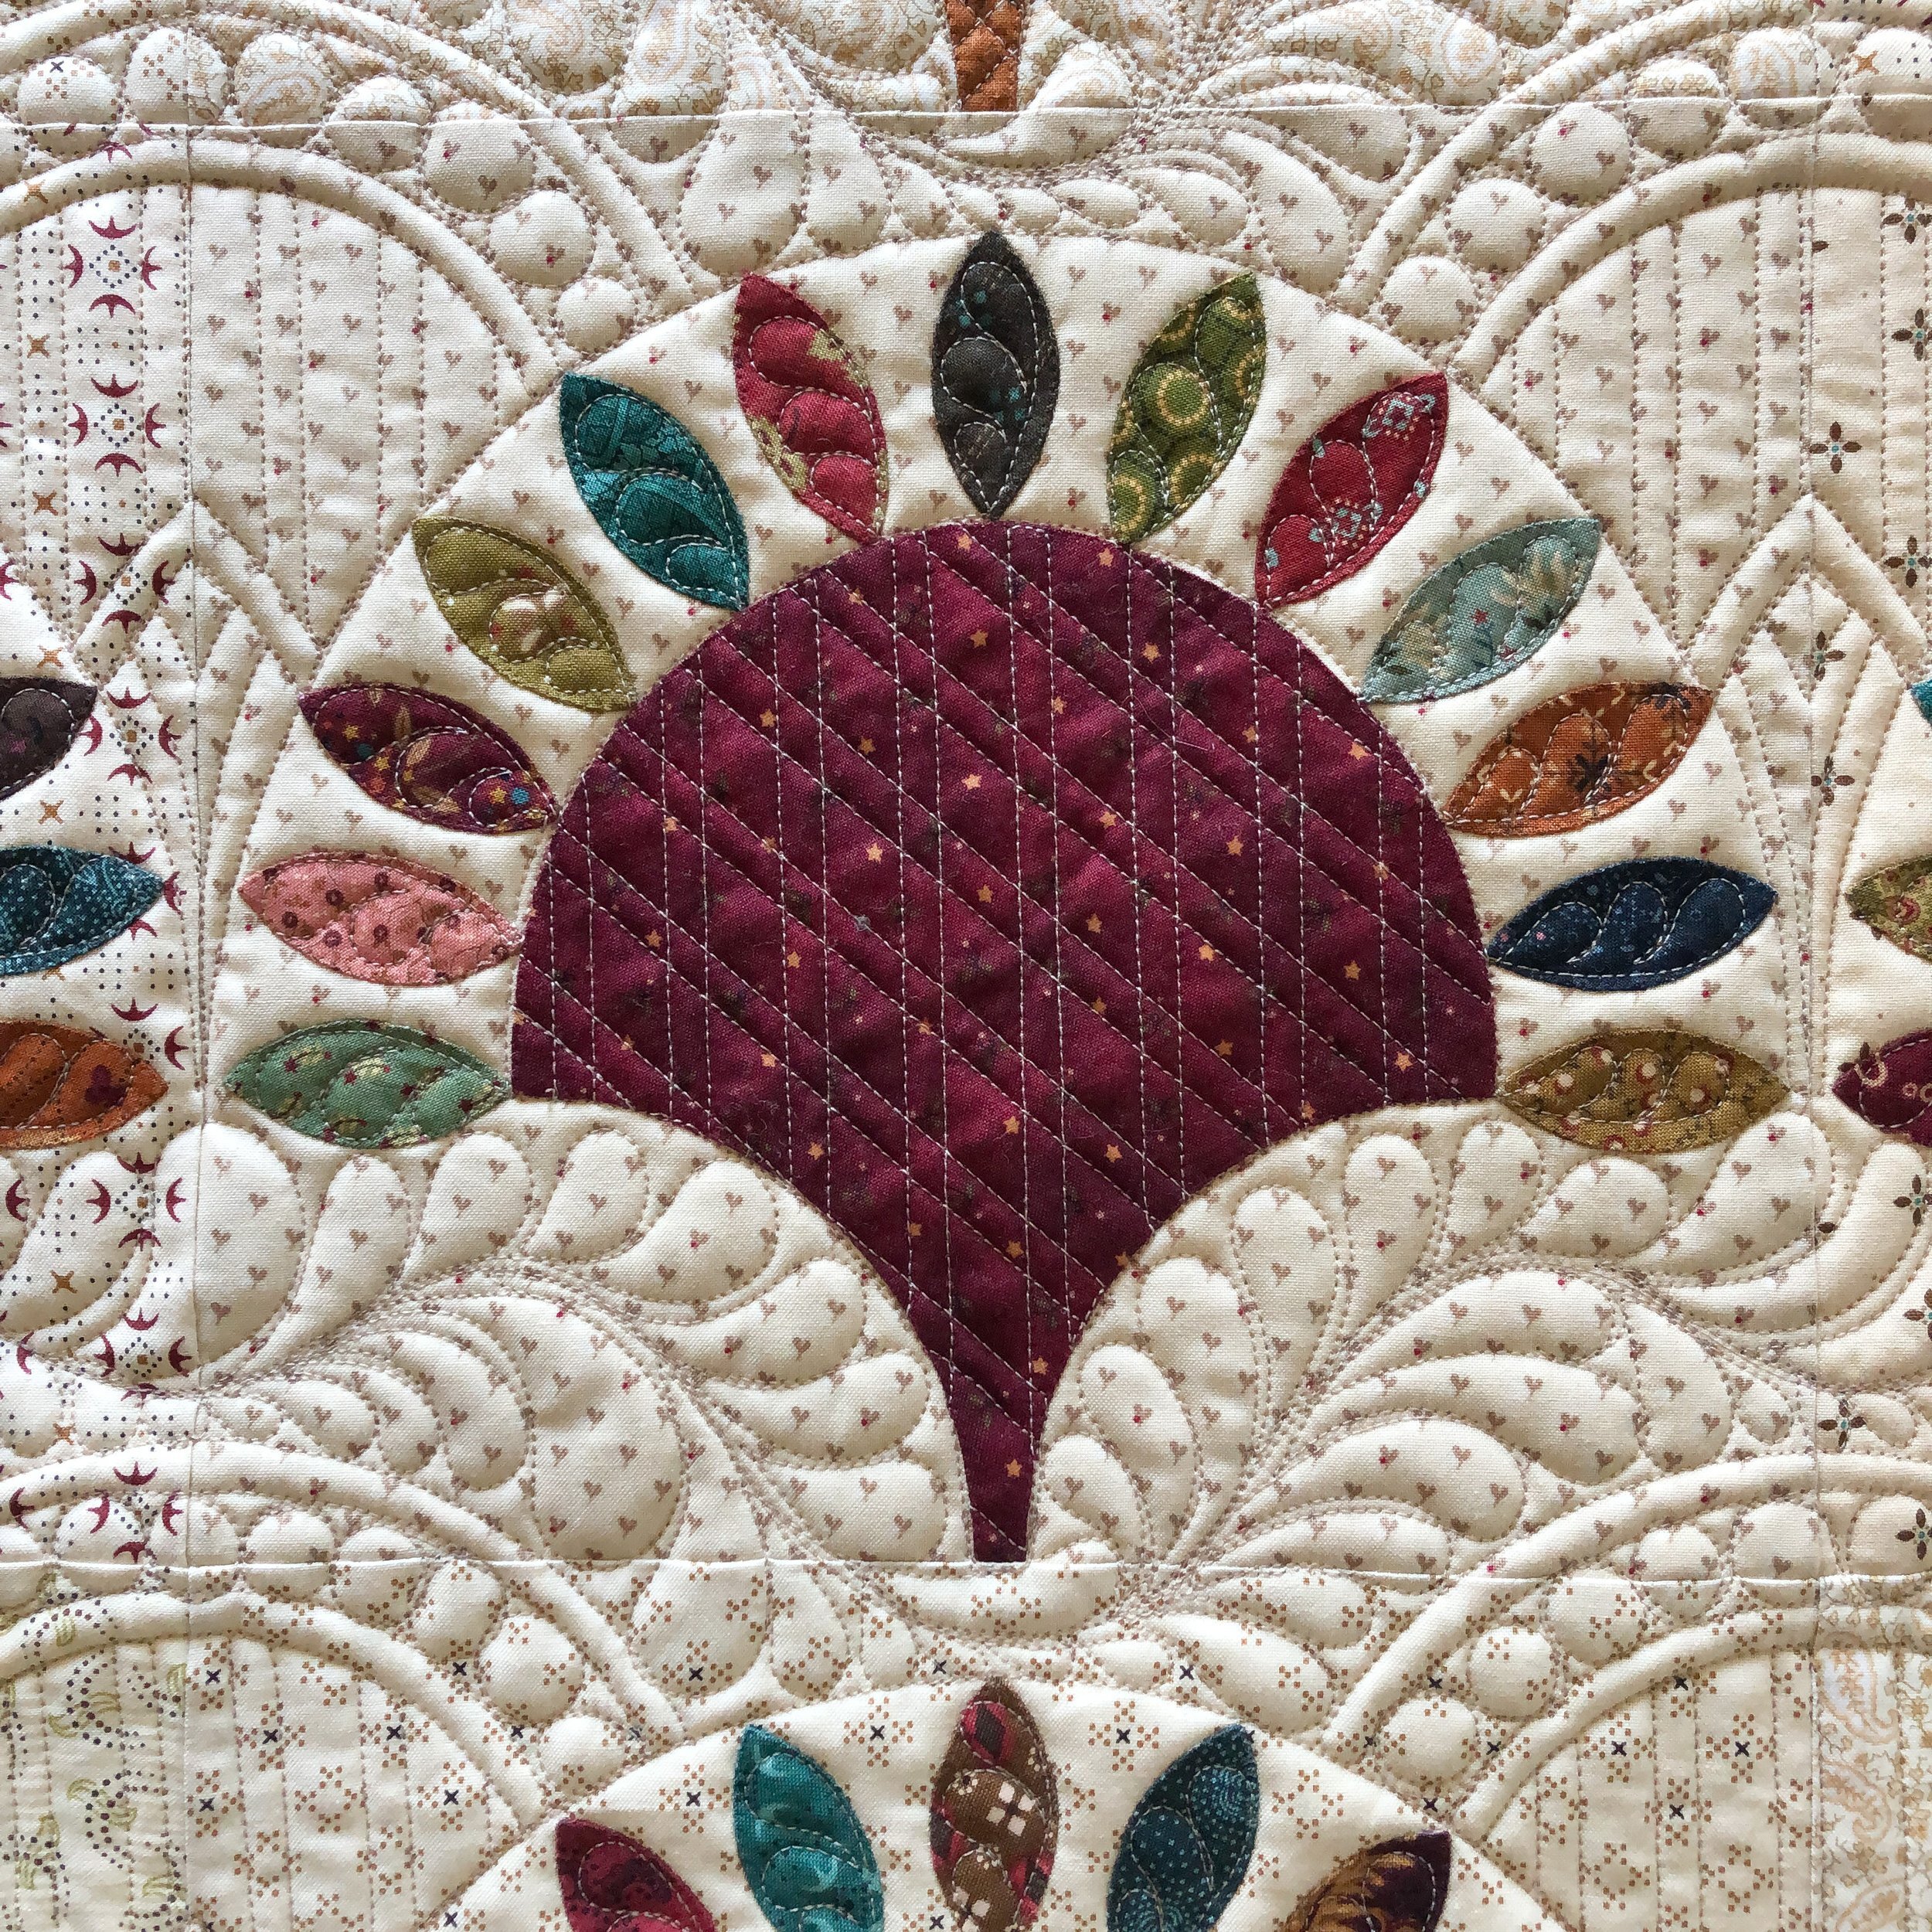
For the background design pictured below, I started by quilting the first curve that is located right below the pebbles, which if you notice is starting at the tip of one of the petals and going to the tip of another petal, the 5th petals on each side. I then quilted the next line 3/4” above using the 1/2” mark on my 5” Circle2 ruler, which then gave me a boundary for the freehand pebbles. I then quilted the 1/4” curve above and below those “boundary” curves, to add some more detail to the overall design. When you’re looking to enhance a shape, adding that extra 1/4” line adds so much! Try it when you’re custom quilting sometime. Then I headed down into the tip between the clamshells to create the curved V. I used the 3rd petal on each side to start the curve, echoed it 1/4” above and then added the V. After that I filled in with the pinstripes. Last but certainly not least, the feathers. I quilted the stem from left to right, then quilted the feathers on both sides of the stem as I worked my way back to the left…which is definitely efficient but also fun! My biggest tip when custom quilting a variety of designs in the same area, first create some “boundaries” then fill in…create some more and fill in some more, until you get your desired result. Then, of course have fun with it. When I’m quilting such a detailed quilt, I actually enjoy listening to music. It makes it go by faster some how, or I just get into a really great groove. Haha! Pun intended.
Do you have any questions??? Comment below and ask away!

One of my favorite parts about custom quilting a quilt is pulling it off of the machine, and seeing the overall look. It’s incredible for me to see it all together, and its so rewarding.
I hope that you loved the more detailed look into the quilting process for me. Its fun to share!

What is your favorite element of the quilt? And, the quilting? Comment below, Kim and I would love to know.

Layers of quilty goodness…

And, of course a glimpse at the backing. Seeing all of that stitching makes my heart so happy!

I am going to do an exciting giveaway with Kim when her book is released in October!! Make sure you’re following me on my instagram, so you don’t miss out. Happy quilting… Take care, - Leisha